
Sticky Fingers & Happy Hearts: Let’s Make Honey Glazed Chicken Legs!
Hey there, kitchen friend! Olivia here, apron dusted with flour (and probably a smudge of honey), ready to share a recipe that’ll make your taste buds dance and your kitchen smell like pure, golden comfort. If you’ve ever craved that magical combo of sweet, savory, and fall-off-the-bone tender, you’re in for a treat. These Honey Glazed Chicken Legs are my weeknight superheroes—minimal effort, maximum flavor fireworks. Imagine juicy chicken legs bathed in a glossy, sticky-sweet glaze whispering with garlic, ginger, and that deep umami hug from soy sauce. It’s the kind of dish that makes everyone hover near the oven, forks at the ready. Whether you’re cooking for your rowdy crew or just treating yourself, this recipe is your ticket to feeling like a kitchen rockstar. No fancy skills needed—just a bowl, a baking dish, and a whole lot of delicious anticipation. Let’s turn simple ingredients into pure, sticky magic!
The Night the Honey Glaze Saved Dinner (and My Sanity)
Picture this: It’s a chilly autumn Friday. My best friends are arriving in 45 minutes for our monthly potluck, and my planned main dish… well, let’s just say it met an unfortunate demise with the kitchen floor. Panic mode? Absolutely. Then I spotted a pack of chicken legs hiding in the fridge and my trusty honey bear. Desperation birthed inspiration! I whisked together honey, soy sauce, garlic and ginger powder (no time for fresh!), a sprinkle of cornstarch, and drowned those legs in it. Into the oven they went. The smell? Heavenly. The result? Pure, sticky, caramelized perfection. My friends raved, demanded the recipe, and declared it “Olivia’s Famous Save-the-Day Chicken.” That messy, chaotic night cemented this dish as my go-to for flavor, ease, and guaranteed smiles. It reminds me that sometimes the best memories (and meals!) come from happy accidents.
Your Flavor Toolkit: What You’ll Need
- 6 chicken legs (drumsticks): Bone-in, skin-on is KEY for maximum juiciness and that glorious crispy skin that soaks up the glaze. Chef’s Insight: Drumsticks are forgiving and budget-friendly! Swap for thighs if you prefer.
- 1/4 cup honey: The sticky star! It caramelizes beautifully. Sub Tip: Pure maple syrup works for a slightly different sweetness. Avoid artificial syrups—they won’t caramelize right.
- 1/4 cup soy sauce: Our salty, umami powerhouse. Sub Tip: Use tamari for gluten-free, or coconut aminos for a soy-free, slightly sweeter option.
- 1 tsp garlic powder: Convenient, consistent flavor. Chef’s Insight: Fresh garlic (2-3 cloves, minced) is amazing, but powder ensures no burnt bits during baking.
- 1/2 tsp ginger powder: Adds that warm, zippy backbone. Sub Tip: Swap in 1 tbsp freshly grated ginger for a brighter punch!
- 1 tsp cornstarch: The secret weapon for a thick, luscious glaze (not a runny sauce!). Sub Tip: Arrowroot powder works equally well.
- Salt & pepper to taste: Start with 1/4 tsp salt (soy sauce is salty!) and a good crack of black pepper. Adjust after marinating.
Why this combo rocks: Honey + Soy is a classic duo. Garlic and ginger add depth, while cornstarch transforms the marinade into that dreamy, clingy glaze we crave. Simple magic!
Let’s Get Glazing: Your Foolproof Steps
1. Whisk Up the Golden Elixir: Grab a medium bowl (big enough to fit the chicken!). Whisk together the honey, soy sauce, garlic powder, ginger powder, cornstarch, salt, and pepper. Whisk like you mean it until it’s smooth and the cornstarch is completely dissolved – no lumps allowed! Chef Hack: If your honey is stiff, warm the bowl slightly or pop it in the microwave for 10 seconds to make whisking easier.
2. Marinate & Mingle: Add the chicken legs to the bowl. Use your hands or tongs to toss and massage every nook and cranny, ensuring they’re fully coated in that gorgeous glaze. Cover the bowl tightly. Chef’s Crucial Tip: Let them hang out in the fridge for at least 30 minutes. Want next-level flavor? Do it overnight! The longer they bathe, the deeper the flavor penetrates.
3. Preheat & Prep: Preheat your oven to 375°F (190°C). While it heats, line a baking dish (large enough to hold the legs in a single layer!) with foil. Trust me, this makes cleanup a breeze. Chef Insight: A light spray of oil on the foil prevents *any* potential sticking, even with all that glaze.
4. Bake to Sticky Perfection: Arrange the chicken legs in your prepared dish. Pour every last drop of that marinade over them – this is liquid gold! Slide it into the preheated oven, uncovered. Bake for 40-45 minutes. Chef’s Magic Move: Baste the legs generously with the pan juices at the 20-minute and 35-minute marks. This builds layers of flavor and that incredible gloss.
5. The Grand Finale (Broil!): Once the chicken is cooked through (internal temp 165°F/74°C – use a thermometer!) and the glaze is bubbling and thickened, crank the oven to BROIL (High, if you have options). Watch CLOSELY! Broil for 2-3 minutes just until the tops get beautifully caramelized and slightly charred in spots. Chef Warning: Broiling is fast! Don’t walk away, or you might have *too* much char. Pull them out when they look irresistible.
6. Rest & Resist: Let the chicken legs rest in the pan for 5 minutes. This lets the juices redistribute, making them even more succulent. Chef’s Confession: This is the hardest part – resisting the urge to dive in immediately!
Plating Up the Happiness
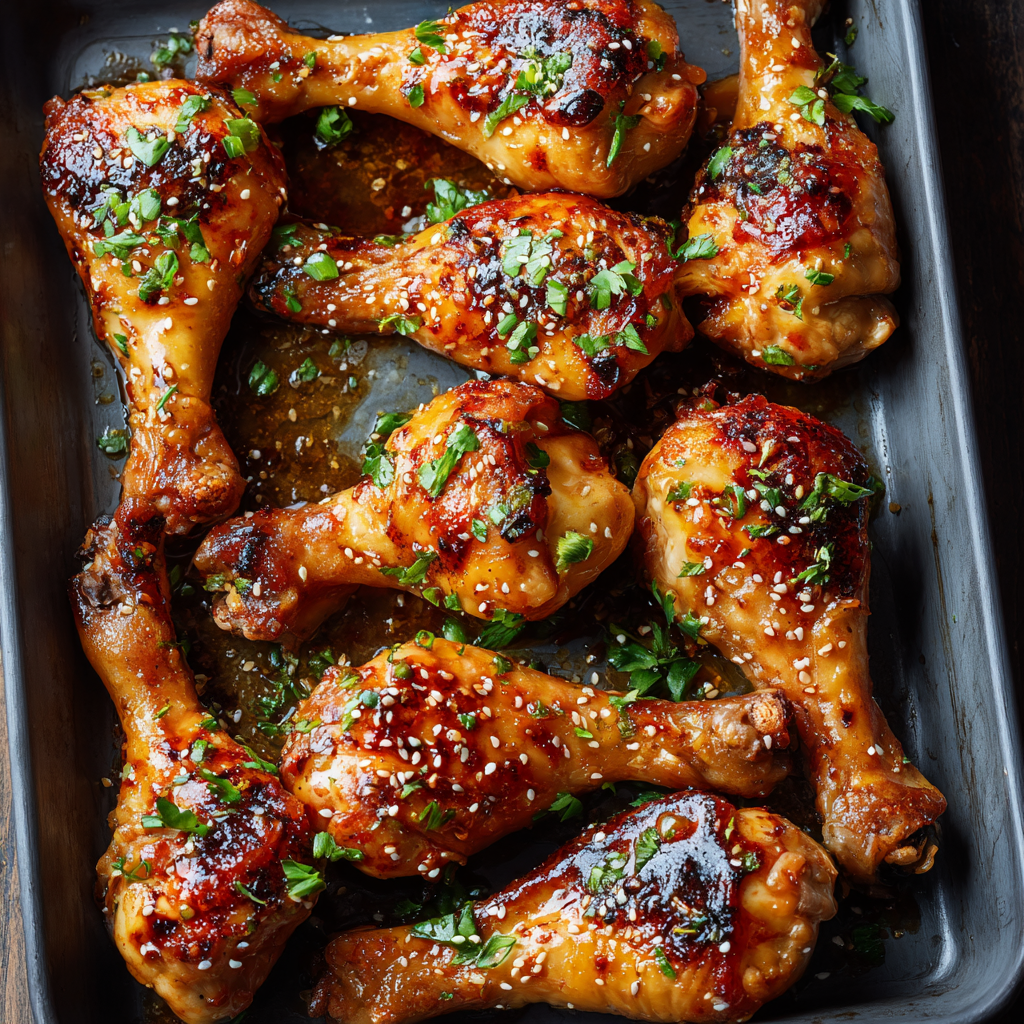
Pile those gorgeous, sticky legs high on a warm platter! Spoon any remaining pan glaze generously over the top. For a pop of color and freshness, scatter over some thinly sliced green onions or a sprinkle of toasted sesame seeds. This dish screams comfort, so pair it with simple sides that soak up the sauce: fluffy steamed rice, creamy mashed potatoes, or roasted sweet potatoes are perfect. A bright, crunchy side salad with a ginger-sesame dressing cuts through the richness beautifully. Don’t forget napkins – the sticky fingers are part of the fun!
Mix It Up! Flavorful Twists
This recipe is your canvas! Get creative:
- Spicy Kick: Add 1/2 tsp red pepper flakes or 1 tbsp sriracha to the marinade. Sweet heat is addictive!
- Citrus Zing: Whisk in 1 tbsp fresh orange or lime juice + 1 tsp zest with the marinade. Brightens everything up.
- Herb Garden: Stir 1 tbsp finely chopped fresh rosemary or thyme into the glaze before marinating.
- BBQ Fusion: Replace 1 tbsp honey with 1 tbsp of your favorite BBQ sauce for a smoky twist.
- Veggie Power (Vegan Option): Use firm tofu blocks or cauliflower florets! Marinate as directed, reduce baking time to 25-30 mins (or until tofu is golden/cauliflower tender). Use tamari/coconut aminos and maple syrup.
Olivia’s Extra Nuggets of Wisdom
This recipe truly evolved from that chaotic potluck night! I initially just threw things together, but over time, I learned the cornstarch trick was essential for that clingy glaze (not a pool of sauce!), and the broiler step? Total game-changer for that restaurant-quality finish. One hilarious fail early on: I used a glass dish without foil AND forgot the cornstarch. Cleaning that baked-on, runny mess was… an adventure. Lesson learned! Now, I always use foil and double-check the cornstarch. It’s become my ultimate “impress-with-minimal-stress” dish. The beauty is in its simplicity – the ingredients are pantry staples, but the result feels special. Don’t be afraid to play with the flavors and make it yours!
Your Honey Glazed Chicken Questions, Answered!
Q1: Can I use boneless, skinless chicken breasts instead?
A: You *can*, but proceed with caution! Breasts dry out faster. Reduce baking time to 25-30 minutes and check the internal temp (165°F/74°C) early. They won’t be as juicy or caramelized as legs/thighs, but the flavor will still be good. I highly recommend sticking with bone-in, skin-on thighs or legs for best results!
Q2: My glaze didn’t thicken up! What happened?
A: Don’t panic! This usually means: 1) The cornstarch wasn’t fully dissolved in the cold marinade (whisk vigorously!). 2) The dish was overcrowded, steaming the chicken instead of baking. 3) The oven temp was too low – use an oven thermometer to check accuracy. Fix: If it’s runny after baking, carefully pour the pan juices into a small saucepan. Mix 1 tsp cornstarch with 1 tbsp cold water, whisk into the juices, and simmer for 1-2 minutes until thickened. Pour back over chicken.
Q3: Can I prep this ahead of time?
A: Absolutely! This is a meal prep dream. Marinate the chicken in the glaze in a sealed container or bag for up to 24 hours in the fridge. When ready, just pop them in the baking dish and bake! You can also bake them fully, let cool, and store covered in the fridge for 3-4 days. Reheat gently in a 350°F (175°C) oven until warmed through.
Q4: Is it safe to use the marinade that touched raw chicken as the sauce?
A: YES, because we bake it! The marinade gets boiled in the oven (reaching well above 165°F/74°C) while cooking the chicken, making it perfectly safe and delicious to use/serve.
HONEY GLAZED CHICKEN LEGS
- Total Time: about 1 hour (or longer if marinating overnight)
Description
Hey kitchen friend! Olivia here, apron dusted with flour (and probably honey too). If you’re craving juicy, tender chicken legs coated in a sticky, sweet-savory glaze bursting with garlic, ginger, and umami, this recipe is for you. Minimal effort, maximum flavor, and all the cozy vibes you want on a weeknight. Let’s make some magic!
Ingredients
-
6 chicken legs (drumsticks), bone-in, skin-on
-
1/4 cup honey
-
1/4 cup soy sauce (or tamari/coconut aminos)
-
1 tsp garlic powder (or 2–3 cloves fresh garlic, minced)
-
1/2 tsp ginger powder (or 1 tbsp fresh grated ginger)
-
1 tsp cornstarch (or arrowroot powder)
-
1/4 tsp salt (adjust for soy sauce saltiness)
-
Freshly ground black pepper, to taste
-
Optional garnish: sliced green onions, toasted sesame seeds
Instructions
-
Whisk your glaze: In a medium bowl, combine honey, soy sauce, garlic powder, ginger powder, cornstarch, salt, and pepper. Whisk well until smooth and cornstarch fully dissolved. Tip: Warm the honey slightly if needed for easier mixing.
-
Marinate: Add chicken legs and toss to coat fully. Cover and refrigerate for at least 30 minutes (overnight for deeper flavor).
-
Prep the oven & pan: Preheat oven to 375°F (190°C). Line a baking dish with foil and lightly spray with oil.
-
Bake: Arrange legs in a single layer, pour marinade over them. Bake uncovered for 40-45 minutes, basting with pan juices at 20 and 35 minutes.
-
Broil finish: Increase oven to BROIL. Broil 2-3 minutes until caramelized and slightly charred. Watch carefully!
-
Rest: Let chicken rest 5 minutes in pan before serving.
Notes
-
Cornstarch is key for that thick, clingy glaze—not just a runny sauce.
-
Broiling caramelizes and adds texture—don’t skip!
-
Marinate longer for deeper flavor and tenderness.
-
Use skin-on chicken for juiciness and crispiness.
-
Can prep ahead: Marinate up to 24 hours; fully cooked legs keep 3-4 days refrigerated.
-
Safety note: The marinade cooks thoroughly during baking, safe to serve as sauce.
- Prep Time: 10 minutes active + 30 minutes to overnight rest
- Cook Time: 40-45 minutes
Nutrition
- Calories: 295 cal Per Serving 2 legs
- Fat: 16g
- Carbohydrates: 15g
- Protein: 22g
Nutritional Info (Per Serving – Approximate, 2 legs per serving)
Calories: ~295 | Protein: 22g | Carbohydrates: 15g | Fat: 16g
Note: This is an estimate. Values can vary based on specific ingredients used (e.g., type of soy sauce, exact honey amount, chicken size).
Final Thoughts: More Than Just a Recipe
These honey glazed chicken legs represent everything great home cooking should be—approachable yet impressive, simple but deeply flavorful, messy but memorable. What starts as a few basic ingredients transforms through the alchemy of heat and time into something greater than the sum of its parts.
The true beauty of this recipe lies in its versatility. It’s equally at home on a weeknight dinner table as it is at a summer barbecue or holiday spread. It welcomes experimentation but remains foolproof for beginners. It satisfies kids and gourmands alike. Most importantly, it creates those intangible moments of connection—whether it’s friends fighting over the last piece or a quiet evening savoring each sticky bite.
So embrace the mess, lick your fingers proudly, and know that sometimes the simplest recipes create the richest experiences. After all, food isn’t just fuel—it’s love, chemistry, and shared humanity, all glazed together in one perfect bite.


