
Your New Favorite Sip: Homemade Cranberry Juice That’s Pure Magic
Hey there, friend! Come on in, pull up a stool, and let’s talk about one of life’s simple, sparkling pleasures: a tall, ice-cold glass of homemade cranberry juice. Now, I know what you might be thinking. “Olivia, making juice from scratch? And *canning* it? That sounds… intense.” But I’m here to let you in on a delicious little secret: it’s one of the easiest, most satisfying projects you can do in your kitchen.
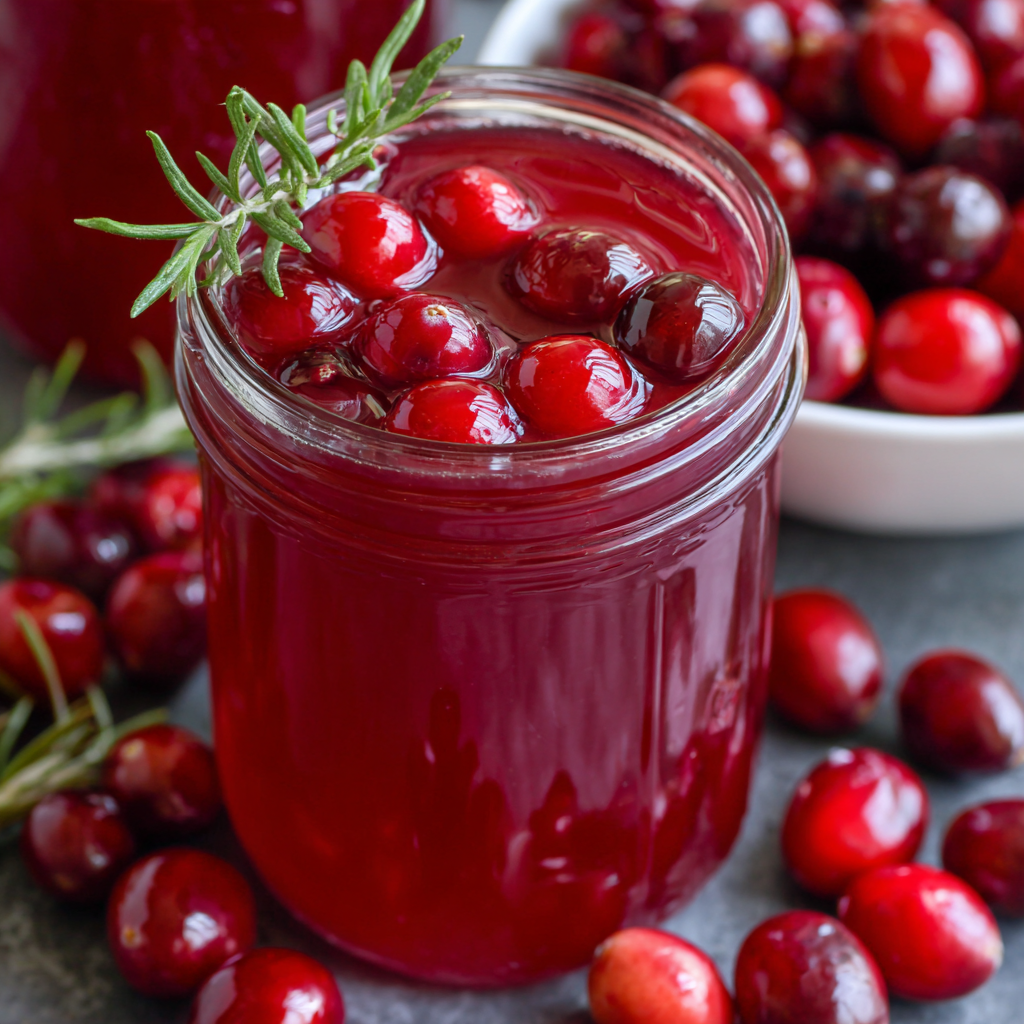
Forget the overly sweet, sometimes strangely metallic-tasting stuff from the store. What we’re making today is the real deal. It’s vibrantly tart, bursting with that pure, ruby-red cranberry essence, and sweetened just the way *you* like it. It’s the kind of juice that makes you feel like a kitchen wizard with minimal effort. With just three simple ingredients, a big pot, and a little bit of cozy kitchen time, you can fill your pantry with jars of sunshine (or, well, winter cheer) that are perfect for sipping year-round.
Whether you’re stirring it into a festive cocktail, mixing up a morning spritzer, or simply pouring it over ice after a long day, this homemade cranberry juice is a celebration in a glass. It’s your new secret weapon for feeling fancy, healthy, and incredibly resourceful. So, tie on that apron (messy or not!), and let’s transform these humble little berries into something truly unforgettable. Trust me, your future self, reaching for a jar of this sunshine on a dreary afternoon, will thank you profusely.
A Tart Tradition: My Love Affair with Cranberries
My obsession with this recipe started in my grandma’s kitchen, a place that always smelled of cinnamon, yeast, and unconditional love. Every November, like clockwork, she’d pull out her biggest stockpot and a giant bag of cranberries. The sound of them rattling into the pot was the official starter pistol for the holiday season in my mind. I’d sit at her kitchen table, doing my homework, while the berries would pop and simmer, filling the entire house with a tart, fruity perfume that was the complete opposite of the cloying, store-bought cranberry sauce we’d also have on the table.
She’d always give me the first taste from a little spoon, watching my face pucker and then break into a grin. “See, Livvy?” she’d say. “That’s the *real* taste. Not too sweet, just honest.” She’d pour the deep crimson liquid into old mason jars, and they’d line her pantry like jewels. That juice wasn’t just a drink; it was a promise of family gatherings, of cozy evenings, of a tradition that was both practical and deeply sentimental. Making this juice now, in my own kitchen, is my way of keeping that warm, tart, and wonderfully honest spirit alive. It’s a little bit of her magic, and I’m so excited to share it with you.
Gather Your Goodies: Just 3 Simple Ingredients
Here’s the beautiful part! You only need a handful of simple ingredients to create something spectacular. This is where you get to be the boss and make it perfectly suited to your taste buds.
- 4 cups fresh or frozen cranberries: This is our star! Don’t stress if you can’t find fresh—high-quality frozen cranberries work beautifully and are available year-round. Chef’s Insight: Give them a quick rinse to wash off any debris. No need to thaw if they’re frozen!
- 4 cups water: Good, clean water is the base of our juice. It’s the blank canvas that allows the cranberry flavor to truly shine.
- ½ to 1 cup sugar (optional and adjustable to taste): This is where the magic of customization happens. Cranberries are naturally very tart, so a little sweetness balances them out. Start with ½ cup—you can always add more, but you can’t take it out! Substitution Tip: You can easily swap in honey, maple syrup, or even a sugar-free alternative like monk fruit sweetener. Just remember that liquid sweeteners might slightly alter the final clarity of the juice, but the flavor will still be fantastic!
Let’s Get Brewing: Your Step-by-Step Guide to Perfect Juice
Ready to see the magic happen? Follow these steps, and you’ll be a canning pro in no time. I’ve sprinkled in my favorite tips and hacks to make the process smooth and fun.
- The Big Simmer: In a large, non-reactive pot (like stainless steel or enameled cast iron), combine your rinsed cranberries and 4 cups of water. Bring this to a rolling boil over medium-high heat. Once it’s bubbling away, reduce the heat to a gentle simmer. Let it cook for about 10-15 minutes. You’ll know it’s ready when you hear the berries pop and soften, turning the water a gorgeous, deep magenta. Chef’s Hack: Don’t stir too vigorously! We want the berries to break down naturally without turning the juice cloudy from crushed seeds.
- The Great Strain: This is the most satisfying step! Place a fine-mesh strainer over a large bowl or another clean pot. If you want crystal-clear juice, line the strainer with a double layer of cheesecloth or a nut milk bag. Carefully pour the berry mixture into the strainer. Now, walk away for 10-15 minutes and let gravity do most of the work. Chef’s Tip: For the richest flavor, once the mixture has cooled slightly, you can gently press on the solids with the back of a spoon to extract every last bit of juice. But don’t press too hard, or you’ll force pulp through!
- Sweeten the Deal: Pour your beautiful, strained juice back into the clean pot. Now, it’s tasting time! Start with ½ cup of your chosen sweetener and stir it in over low heat until it’s fully dissolved. Taste it. Does it make your taste buds sing? If you want it a touch sweeter, add a little more, about a quarter cup at a time, until it’s perfect for you. Remember, you can always add, but you can’t subtract!
- Jarring Time (The Canning Part!): While your juice is heating, make sure your canning jars, lids, and rings are sterilized and hot. I just run mine through the dishwasher on a hot cycle or simmer them in a pot of water. Using a ladle and a canning funnel (a lifesaver for avoiding sticky messes!), carefully pour the hot juice into the hot jars, leaving a ½-inch of space at the top (this is called “headspace”). Wipe the rims of the jars with a clean, damp cloth to ensure a perfect seal. Place the lids on top and screw on the bands until they are “fingertip tight”—meaning just snug, not Hercules-tight.
- The Water Bath: Carefully lower the filled jars into your boiling water bath canner. Make sure the water covers the jars by at least an inch. Bring the water back to a full, rolling boil and set your timer for 15 minutes. The bubbling water is what creates the vacuum seal that preserves your juice!
- The Patience Test: After 15 minutes, turn off the heat and carefully remove the jars from the canner. Place them on a towel-lined countertop, giving them a few inches of space. Now, walk away. I know it’s hard, but you must let them cool completely, undisturbed, for 12-24 hours. As they cool, you’ll be rewarded with the most satisfying little “pop” sound—that’s the sound of a successful seal!
How to Serve Your Homemade Masterpiece
Okay, the jars are sealed, and you’re beaming with pride. Now what? The fun begins! For the ultimate experience, serve your juice well-chilled over a tall glass of ice. I love adding a slice of orange or a spring of fresh mint for a little flair. It’s also incredible as a mixer—think vodka cranberries, a splash in champagne for a kir royale, or stirred into a seltzer for a healthy, refreshing spritzer. Don’t forget, this vibrant juice is also a fantastic base for homemade jelly, marinades for chicken or pork, or even drizzled over vanilla ice cream for a sweet-tart kick!
Get Creative! Fun Flavor Twists & Swaps
Once you’ve mastered the classic, why not play with it? This recipe is a wonderful canvas for your creativity.
- Spiced Cranberry: Add 2 cinnamon sticks, 4 whole cloves, and a few slices of fresh ginger to the pot with the berries for a warming, mulled flavor.
- Citrus Zing: Stir in the zest of one orange or one lemon after straining for a bright, sunny twist.
- Herbal Elegance: Add a few sprigs of fresh rosemary or thyme to the simmering berries for a surprisingly sophisticated and aromatic juice.
- Sugar-Free Version: Simply omit the sugar! The pure, tart juice is fantastic, or use your favorite sugar-free sweetener to taste after straining.
- Cran-Apple Bliss: Replace 2 cups of water with 2 cups of pure, unsweetened apple juice for a naturally sweeter, family-friendly version.
From My Kitchen to Yours: A Few Parting Thoughts
This recipe has evolved so much since my first nervous attempt years ago. I remember being so intimidated by the water bath canner that I almost didn’t try it. My first batch was so tart it made my husband’s eyes water—I’d completely skipped the sugar, thinking it would be “healthier.” We’ve found our perfect sweet spot now, right around ¾ of a cup, but the beauty is that yours might be different!
And a funny story: I once got so excited hearing the “pops” of the seals that I didn’t realize one jar hadn’t sealed. I found it the next morning, and instead of being disappointed, I just stuck it in the fridge and we enjoyed it that week. It was a great reminder that even an “imperfect” batch is still a delicious success. Don’t let perfectionism hold you back. This process is meant to be joyful, a little messy, and 100% rewarding. Every time I hear that pop, I still do a little happy dance in my kitchen. I hope you will, too.
Your Questions, Answered!
I’ve gotten so many wonderful questions about this recipe over the years. Here are answers to the most common ones to help you feel confident.
Q: My juice came out cloudy. What did I do wrong?
A: Absolutely nothing! Cloudy juice is still delicious and perfectly safe. It usually just means a little more pulp and sediment made it through the strainer, often from pressing too hard on the berry solids. To avoid it next time, try using a cheesecloth and let gravity do most of the work without pressing. But please, don’t stress about it—it tastes the same!
Q: Can I make this without canning it?
A: You sure can! This recipe is fantastic as a fresh juice. Just follow all the steps up to the jarring phase. Once your sweetened juice has cooled, pour it into a clean pitcher or bottle and store it in the fridge. It will stay fresh and delicious for up to two weeks.
Q: One of my jars didn’t seal. Can I save it?
A> This happens to the best of us! First, check that the rim wasn’t nicked and the lid wasn’t defective. As long as the jar was processed correctly, the contents are still sterile. You have two options: 1) You can reprocess it with a new, sterilized lid within 24 hours, or 2) Simply pop that jar in the fridge and enjoy it within the next couple of weeks. Think of it as your reward for a job well done!
Q: The juice is too tart/too sweet for me. Help!
A> No problem! If it’s too tart, you can gently reheat the juice (if it’s not canned yet) and stir in more sweetener until it’s just right. If it’s too sweet, you can dilute it with a bit of water or even a splash of fresh lemon juice to balance it out. It’s all about making it perfect for YOUR palate.
Homemade Cranberry Juice : Easy 3-Ingredient Canning Recipe
Description
Say goodbye to store-bought cranberry juice and hello to pure, homemade bliss! This Homemade Cranberry Juice is ruby-red, refreshingly tart, and just sweet enough to make your taste buds dance. Made with only three simple ingredients, it’s fresh, vibrant, and bursting with real cranberry flavor—no additives, no mystery ingredients, just nature at its best. Whether you sip it over ice, mix it into cocktails, or bottle it for the holidays, this recipe turns humble berries into something truly special.
Ingredients
-
4 cups fresh or frozen cranberries (no need to thaw)
-
4 cups water
-
½ to 1 cup sugar, to taste (or honey, maple syrup, or monk fruit for alternatives)
Instructions
-
Simmer: Combine cranberries and water in a large, non-reactive pot. Bring to a boil, then reduce heat and simmer 10–15 minutes until berries pop and soften.
-
Strain: Pour through a fine-mesh strainer or cheesecloth into a bowl. Let drain naturally for 10–15 minutes. For clear juice, avoid pressing too hard on the solids.
-
Sweeten: Return juice to the pot. Stir in ½ cup sugar and heat on low until dissolved. Taste and adjust sweetness as desired.
-
Optional – Canning: Pour hot juice into sterilized jars, leaving ½-inch headspace. Seal and process in a boiling water bath for 15 minutes. Let cool completely.
Notes
-
Spiced Cranberry: Add cinnamon sticks, cloves, or ginger for a cozy twist.
-
Citrus Boost: Stir in orange zest after straining for a sunny flavor.
-
Cran-Apple Bliss: Replace half the water with apple juice for natural sweetness.
Nutrition
- Calories: 50cal Per Serving
- Sugar: 4g
- Carbohydrates: 13g
A Little Nourishment Note
(Per 8 oz serving, based on an unsweetened version)
- Calories: 50
- Carbohydrates: 13 g
- Sugars: 4 g (all natural from the berries!)
- Vitamin C: 25% of your Daily Value (Hello, immunity boost!)
- Fiber: 1 g
Remember, if you add sweetener, the calorie and sugar count will increase. But you’re in control!
Prep Time: 10 minutes | Cook Time: 20 minutes | Canning Time: 15 minutes | Total Time: 45 minutes | Yield: About 4 cups of pure, homemade joy.
There you have it! Your complete guide to making stunning, simple, and sensational homemade cranberry juice. I am so incredibly proud of you for taking on this project. Now, go forth, create, and fill your pantry with a little bit of magic. Happy canning!
With love and a full jar,
Olivia
Save This Recipe for Later!
Final Thoughts: Your Sip of Sunshine, Preserved
And just like that, you’ve done it. You’ve transformed a bag of humble, tart berries into jars of pure, ruby-red magic. You’ve created something real, something vibrant, and something that connects you to a tradition of kitchen wisdom that feels both timeless and wonderfully personal.
This cranberry juice is more than just a drink; it’s a promise to your future self. It’s the promise of a bright, refreshing sip in the middle of a sweltering summer day, a taste of cozy nostalgia on a dark winter evening, and the secret ingredient that will make your next gathering feel a little more special. It’s the satisfying pop of a seal that says, “I made this,” a sound that never, ever gets old.
Don’t be surprised if this simple act of creating—of simmering, straining, and sealing—becomes a ritual you look forward to. It’s a small pocket of purposeful, joyful work in a busy world, with a delicious reward that lasts for months.
So, stand back and admire those jewel-toned jars lining your pantry. You haven’t just made juice; you’ve bottled sunshine, captured cheer, and created your very own stash of liquid happiness. Here’s to the many joyful sips to come!


