
Homemade Calzones – Easy Pizza Pockets with Cheese and Toppings
Your New Favorite Kitchen Project: The Joy of Homemade Calzones
Hey there, friend! Come on in, wipe your feet on the mat, and get ready to fill your kitchen with the most incredible smell. I’m talking about the warm, yeasty, herby, cheesy aroma of homemade calzones baking to golden perfection. If the thought of cracking open a crispy crust to reveal a river of molten cheese and savory fillings makes your heart do a little happy dance, you are absolutely in the right place today.
Calzones are, in my very humble (but passionate) opinion, one of the most underrated heroes of the comfort food world. They’re like pizza’s sophisticated, portable cousin who shows up to the party with all the flavor packed neatly inside. No fuss, no mess on the plate, just pure, handheld delight. And the best part? Making them from scratch is way easier than you think. Forget anything you’ve heard about dough being finicky—we’re keeping it simple, joyful, and utterly delicious.
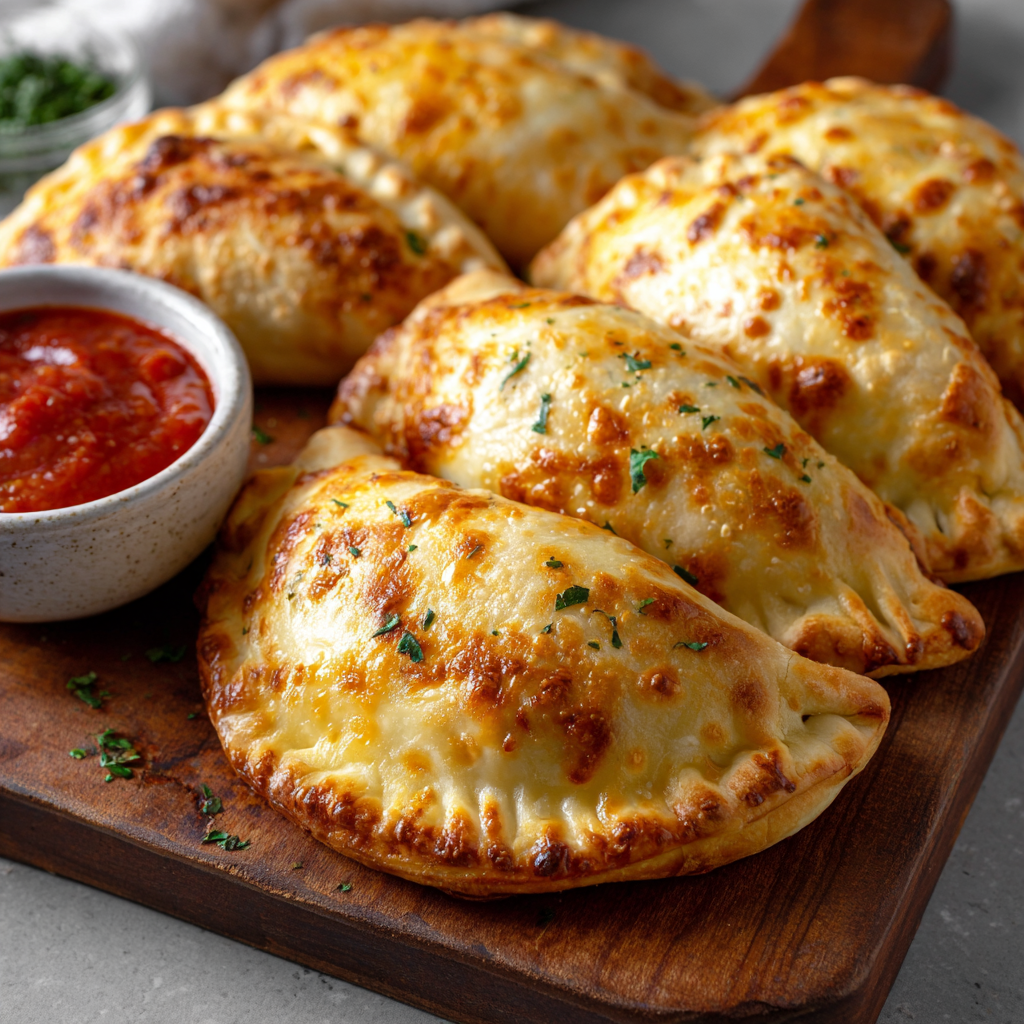
I want you to imagine pulling a batch of these beauties out of the oven. The crust is a deep, burnished gold, shimmering from a quick egg wash. You can hear it crackle softly as it starts to cool. You break one open, and steam billows out, carrying the scent of garlic, roasted tomatoes, and three kinds of cheese. This isn’t just dinner; it’s an experience. It’s a conversation starter, a family activity, and the ultimate “I-made-this!” victory. So, tie on your favorite apron, clear some counter space, and let’s turn simple ingredients into something unforgettable together.
My First Calzone Fiasco (And Why I Keed Going)
My love affair with calzones didn’t start with a flawless masterpiece. Oh no. It started in my first tiny apartment kitchen, with a tragically small oven and more ambition than common sense. I was determined to impress my new roommate with my “culinary skills,” which at that point extended to boxed mac and cheese and surprisingly good toast. I decided a giant, stuffed calzone was the way to go. One giant calzone for two people. What could go wrong?
I piled in what felt like a responsible amount of filling: ricotta, mozzarella, pepperoni, sausage, mushrooms, extra cheese for good measure… you get the picture. I wrestled the dough over this mountain of toppings, barely getting it to seal. It went into the oven looking like a pregnant football. About ten minutes later, we heard a loud *POP* followed by a sizzle. My masterpiece had exploded! Cheese and sausage were lava-flowing all over the oven floor. We spent the next hour scraping and laughing until we cried. We still ate the salvaged bits, and they were delicious—a messy, cheesy phoenix risen from the ashes of my ego. That disaster taught me the golden rules: don’t overstuff, seal tightly, and always, always make individual portions. Every calzone I make now is a little nod to that hilarious beginning, a reminder that the best cooking stories often come from the happy accidents.
Gathering Your Flavor Toolkit: Ingredients & Insights
Here’s everything you’ll need to create calzone magic. I’ve added my little notes next to each one because knowledge is power (and flavor)!
For the Dough (The Foundation of Flavor):
- 2 ¼ tsp active dry yeast: This is our little engine that could! It’s what makes our dough rise and become airy and tender. Make sure your yeast is fresh. If it doesn’t foam up in the warm water, it’s retired and needs replacing.
- 1 cup warm water (around 105-115°F): Think baby bottle warm, not hot. Too hot and you’ll send the yeast to an early grave; too cold and it won’t wake up. A quick tip: if it feels comfortably warm on your wrist, it’s perfect.
- 1 tsp sugar: The yeast’s favorite snack. This tiny bit of food gets the party started and helps the dough develop flavor.
- 2 ½ cups all-purpose flour, plus more for dusting: Our workhorse flour. I like to reserve ½ a cup to add as I knead, as humidity can affect how much you need. Chef’s Insight: For a slightly more rustic, chewy crust, swap ½ cup of the all-purpose for bread flour.
- 1 tsp salt: Crucial for flavor. Always mix this in with the flour, not directly on top of the yeast water, as salt can slow yeast down.
- 1 tbsp olive oil: This adds richness, helps keep the dough supple, and gives the crust a lovely tenderness. A good glug!
For the Filling (The Heart of the Matter):
- 1 cup whole-milk ricotta cheese: The creamy soul of our filling. Whole-milk ricotta has the best flavor and texture. For extra smoothness, give it a quick whip with a fork before mixing.
- 1 ½ cups shredded low-moisture mozzarella: The champion of the melt. Pre-shredded is fine in a pinch, but block mozzarella you shred yourself melts creamier and doesn’t have anti-caking agents.
- ½ cup grated Parmesan cheese: Our flavor bomb! It adds a salty, nutty punch that ricotta and mozzarella alone don’t have. Freshly grated is a game-changer here.
- ½ cup of your favorite toppings (pepperoni, cooked sausage, sautéed mushrooms, spinach, etc.): The “choose your own adventure” section! Key Tip: Keep add-ins cooked and dry. Sauté veggies to release water, and blot wet ingredients. Soggy fillings = sad, leaky calzones.
- ½ tsp Italian seasoning: A little herbal hug. Feel free to use a mix of dried oregano, basil, and a pinch of red pepper flakes if you have them.
- 1 egg + 1 tbsp water (for egg wash): The secret to that gorgeous, glossy, golden-brown finish. A simple milk brush works, but egg wash gives you that professional bakery shine.
Let’s Get Our Hands Dirty: Step-by-Step Calzone Magic
Ready? Let’s transform these ingredients. I’m right here with you, talking you through every fold and crimp.
- Wake Up the Yeast: In a large bowl, combine your warm water, sugar, and yeast. Give it a gentle stir and walk away for 5-10 minutes. You’re looking for a frothy, creamy layer on top—that’s your sign the yeast is alive and happy! No foam? Start over with new yeast.
- Make the Dough: To the yeasty water, add 2 cups of flour, the salt, and the olive oil. Stir with a wooden spoon or sturdy spatula until a shaggy dough forms. Now, turn it out onto a lightly floured surface. Start kneading! Use the heels of your hands to push the dough away, then fold it back over itself. Add the remaining ½ cup of flour a little at a time as you knead to prevent sticking. You’ll knead for about 5-7 minutes, until the dough is smooth, elastic, and springs back when you poke it. Chef’s Hack: Set a timer! It’s easy to under-knead. Good dough should feel like a soft, smooth pillow.
- The First Rise (Let it Nap!): Place your lovely dough ball in a lightly oiled bowl, turning it once to coat. Cover the bowl with a damp kitchen towel or plastic wrap and let it rest in a warm, draft-free spot. I like to pop it in my (off) oven with the light on. Let it rise for about 1 hour, or until doubled in size. This is when flavor develops!
- Prep and Preheat: While the dough rises, make your filling. Simply mix the ricotta, mozzarella, Parmesan, Italian seasoning, and your chosen toppings in a bowl. Cover and refrigerate. Also, line a large baking sheet with parchment paper and preheat your oven to a hot 425°F (220°C). Hot oven = crispy crust!
- Shape and Fill: Punch down the risen dough (so satisfying!) and turn it out onto your floured surface. Divide it into 4-6 equal pieces, depending on how big you want your calzones. Roll each piece into a circle about ¼-inch thick. Don’t stress about perfect circles—rustic is charming! Spoon a generous amount of filling onto ONE HALF of each circle, leaving a 1-inch border all around. Resist the urge to overfill! This is the lesson from my explosion story.
- Seal the Deal: Fold the bare half of the dough over the filling to create a half-moon shape. Now, crimp the edges! You can press with a fork for a classic look, or fold and pinch the dough with your fingers for a braided effect. The goal is a tight seal so your cheese stays put. Transfer each calzone to your prepared baking sheet.
- Bake to Golden Perfection: Whisk your egg with a tablespoon of water and gently brush it over the top of each calzone. This is what gives you that beautiful color. Then, take a sharp paring knife and cut 2-3 small slits in the top of each one. These are steam vents—they let the hot air escape so your calzones don’t puff up like balloons (or explode!). Bake for 15-18 minutes, rotating the sheet halfway through, until they are deeply golden brown and sound hollow when tapped.
- The Hardest Step—Rest! Pull them from the oven and let them cool on the sheet for at least 5-10 minutes. I know, the smell is torture! But this rest allows the filling to set slightly, so when you cut in, it’s gloriously oozy, not lava-hot and runny.
Plating Up Your Masterpiece
Presentation is part of the fun! I love serving these on a big wooden board or platter for a family-style feast. A simple side salad with a sharp vinaigrette cuts through the richness perfectly. For dipping, don’t forget little bowls of warm marinara sauce and maybe some garlic butter or ranch for the true experience. They’re messy, joyful, and meant to be eaten with your hands—so put out plenty of napkins and dig in!
Make It Your Own: Creative Twists & Swaps
The beauty of a calzone is its versatility. Here are a few ways to play:
- The Veggie Lover: Swap the meat for roasted bell peppers, artichoke hearts, sautéed spinach (squeezed dry!), and kalamata olives. Add a sprinkle of feta for tang.
- Breakfast Calzone: Fill with scrambled eggs, cooked bacon or sausage, cheddar cheese, and a little chopped green onion. Perfect for brunch!
- White Pizza Pocket: Skip the tomato sauce in the mix. Use ricotta, mozzarella, lots of minced garlic, fresh rosemary, and sautéed pancetta.
- Dairy-Free Delight: Use a vegan mozzarella shred and a firm tofu ricotta. Load up with grilled veggies and vegan pepperoni.
- Everything Bagel Twist: Brush with egg wash and sprinkle the tops with everything bagel seasoning before baking for an incredible savory crunch.
Olivia’s Kitchen Notes
This recipe has been my trusty friend for years, evolving from that explosive first attempt. I’ve learned that letting the dough rest for a few minutes after rolling makes it easier to shape without springing back. Sometimes, on busy days, I’ll use a high-quality store-bought pizza dough—no shame in that game! The real magic is in the assembly and the love you put in. I often get my family involved: one person rolls, one fills, one crimps. It turns dinner prep into a memory. And a final confession? I always make a double batch. They freeze like a dream before baking (just add a few extra minutes from frozen), guaranteeing a fantastic homemade meal on even the craziest of weeknights.
Your Questions, Answered!
Q: My dough is too sticky to handle! What did I do wrong?
A: Don’t panic! This usually means it needs a bit more flour. The dough should be tacky but not stick to your clean hands. Sprinkle your surface and hands with a little extra flour and knead it in until the dough becomes smooth and manageable. Humidity plays a big role, so flour amounts can vary slightly.
Q: Can I make these ahead of time?
A> Absolutely! You have two great options: 1) Assemble the calzones, place them on a parchment-lined sheet, and freeze solid. Then transfer to a freezer bag. Bake from frozen, adding 5-10 minutes to the bake time. 2) Let the baked calzones cool completely, then freeze. Reheat in a 350°F oven until warm throughout.
Q: My calzone leaked cheese everywhere in the oven. Help!
A> This is the classic overfill/under-seal combo. Next time, ensure you leave that 1-inch border, use less filling than you think you need, and really press hard when crimping. The fork method can create a very secure seal. Also, those steam vents are crucial—they release pressure from the inside.
Q: What’s the best substitute for ricotta?
A> Whole milk cottage cheese, blended until smooth, works in a pinch. For a richer taste, you can use a well-drained mascarpone mixed with a little mozzarella. The texture will be different, but still delicious!

Homemade Calzones : Golden, Cheesy, and Stuffed with Flavor
Description
These homemade calzones are the perfect mix of soft, golden dough and gooey, cheesy filling. They’re easier to make than they look, super customizable, and bake up into delicious handheld pizza pockets. Ideal for dinner, parties, meal prep, or a fun kitchen project.
Ingredients
For the Dough
-
2 ¼ tsp active dry yeast
-
1 cup warm water (105–115°F / 40–46°C)
-
1 tsp sugar
-
2 ½ cups all-purpose flour (plus extra for kneading)
-
1 tsp salt
-
1 tbsp olive oil
For the Filling
-
1 cup whole-milk ricotta
-
1 ½ cups shredded mozzarella
-
½ cup grated Parmesan
-
½ cup toppings (pepperoni, cooked sausage, sautéed mushrooms, spinach, etc.)
-
½ tsp Italian seasoning
For Finishing
-
1 egg + 1 tbsp water (egg wash)
-
Optional: marinara for dipping
Instructions
Mix warm water, sugar, and yeast in a bowl. Let sit for 5–10 minutes until foamy.
Add flour, salt, and olive oil. Mix until a shaggy dough forms.
Transfer to a floured surface and knead 5–7 minutes until smooth and elastic.
Place dough in a lightly oiled bowl. Cover and let rise 1 hour, or until doubled.
In a bowl, mix ricotta, mozzarella, Parmesan, toppings, and Italian seasoning.
Punch down dough and divide into 6 pieces.
Roll each into a ¼-inch thick circle.
Add filling to one half, leaving a 1-inch border.
Fold dough over into a half-moon.
Crimp edges with a fork or pinch to seal well.
Cut 2–3 small slits on top to release steam.
Brush with egg wash.
Bake at 425°F (220°C) for 15–18 minutes, until golden and crisp.
Let cool 5 minutes before eating.
Serve with warm marinara for dipping.
Notes
-
Don’t overfill — too much filling causes leaks.
-
Dry ingredients well (spinach, mushrooms, etc.).
-
If your dough is sticky, add flour a tablespoon at a time.
-
For crispier bottoms, bake on a preheated baking stone or upside-down sheet pan.
-
Use block mozzarella for best melt.
Nutritional Information (Per Calzone, recipe makes 6)
Calories: ~400 | Protein: 20g | Carbohydrates: 38g | Fat: 20g | Saturated Fat: 9g | Cholesterol: 75mg | Sodium: 850mg | Fiber: 2g | Sugar: 2g
Note: This is an estimate and can vary significantly based on your specific ingredients, fillings, and portion sizes.
Final Thoughts
There you have it—your guide to creating simple, spectacular homemade calzones. What started as a kitchen disaster in a tiny apartment has turned into one of my most cherished recipes to share, and I hope it becomes one of yours too.
Remember, cooking isn’t about perfection. It’s about the flour on your hands, the smell in your kitchen, and the people around your table. Whether your first attempt is picture-perfect or a beautifully messy learning experience (like mine!), what matters is the joy in the process. That moment you break open a golden crust to reveal a pocket of steaming, cheesy goodness? That’s a little piece of homemade happiness.
So, don’t wait for a special occasion. Clear a Saturday afternoon, put on some music, and make a batch. Freeze a few for a rainy day. Share them with neighbors or savor one all to yourself. This recipe is a canvas—respect the basics, but don’t be afraid to make it your own.
From my kitchen to yours, happy folding, baking, and feasting. May your calzones be crispy, your cheese be melty, and your home be full of the wonderful chaos of creating something delicious.
With love and a full oven,


