
Welcome to the Weekend, Any Day of the Week: Hibachi Shrimp at Home!
Hey there, friend! Come on in, grab an apron, and let’s get something sizzling. Have you ever had one of those nights where you’re craving the fun, flavorful chaos of a hibachi grill but the thought of packing up the family, waiting for a table, and navigating a parking lot makes you want to just… order a sad, lukewarm pizza instead? Yeah, I’ve been there more times than I’d like to admit. There’s something magical about that theatrical cooking, the savory steam hitting your face, and that first bite of shrimp straight off the hot plate.
But what if I told you that you can capture every single bit of that magic right in your own kitchen, in about the time it takes to scroll through a delivery app? No fancy teppanyaki grill required, I promise. Just you, a trusty skillet, and a handful of simple ingredients that pack a universe of flavor.
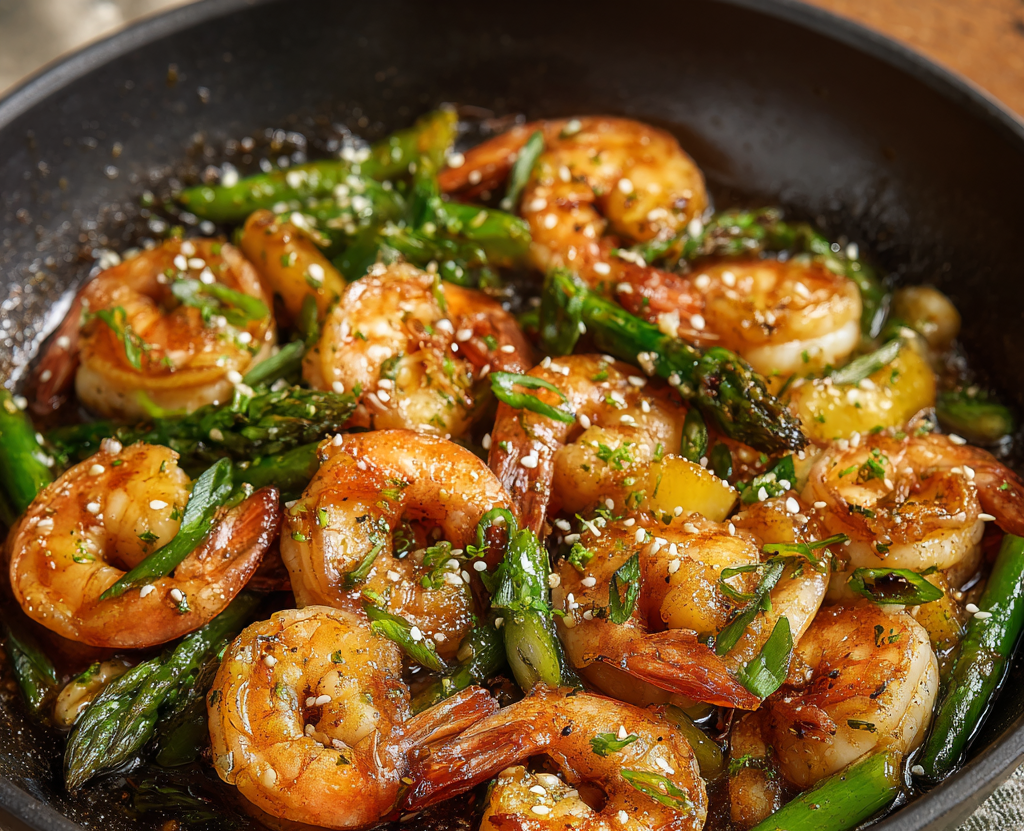
This isn’t just another shrimp recipe. This is your 20-minute passport to a seriously delicious, feel-good dinner that’s faster, healthier, and honestly, more fun than waiting for a driver. We’re talking plump, juicy shrimp seared in a blistering hot pan, then swirled in a glossy, buttery garlic-soy glaze that’s so good, you’ll want to drink it with a spoon. It’s high-protein, low-fuss, and absolutely bursting with that iconic “hibachi” taste. So, let’s turn up the heat, create a little (controlled) kitchen drama, and make a meal that’s better than takeout. Trust me, your skillet is about to become the hottest table in town.
The Night We Brought the Hibachi Home
My love for this dish started on a rainy Tuesday that felt like it would never end. My husband and I had planned to go out for hibachi to celebrate a small win—a freelance project had finally wrapped up!—but the weather had other plans. Sheets of rain, thunder, the whole works. We stood at the window, stared at our cancelled reservation, and felt that specific brand of deflated disappointment.
But then, I had a “kitchen sink” moment. I peered into the fridge, saw some shrimp thawing, and thought, “How hard can it be?” I remember the sizzle when those shrimp hit the hot butter and oil was louder than the thunder outside. The smell of garlic and sesame oil that filled our tiny apartment was instant mood therapy. We ate it straight from the pan, perched on stools at the kitchen island, laughing at how something so simple could turn a grumpy, washed-out night into a spontaneous, memorable dinner party for two. That’s the power of a great recipe—it’s not just food, it’s a mood-lifter, a memory-maker. Now, every time I make it, it tastes like victory (and a little bit like that rainy Tuesday triumph).
Gathering Your Flavor Arsenal
Here’s the beautiful part: the ingredient list is short, sweet, and probably already in your pantry. This is where quality really shines, so let’s break it down.
- 1 lb raw shrimp, peeled and deveined – The star! I prefer large (21/25 or 26/30 count) for a meatier bite. Chef Insight: Keep those tails on or off—your call. Tails look pretty and make fun handles, but off is easier for eating. For the best texture, pat them bone-dry with paper towels before cooking. This is the secret to a perfect sear, not a steam!
- 1 tablespoon butter + 1 tablespoon olive oil – Our dynamic frying duo. The butter gives incredible, rich flavor and helps create that gorgeous sauce, while the olive oil has a higher smoke point to prevent the butter from burning. Sub Tip: Use all olive oil if you prefer, or swap the butter for ghee for a nuttier, burn-resistant option.
- 2 garlic cloves, minced – Non-negotiable for that aromatic punch. Please, for the love of flavor, use fresh garlic here! The jarred stuff just won’t give you the same bright, potent kick.
- 2 tablespoons soy sauce – The salty, umami backbone. Sub Tip: Easily use tamari for a gluten-free version, or coconut aminos for a slightly sweeter, soy-free alternative. They all work like a charm.
- 1 tablespoon lemon juice – The bright spark! This little bit of acid cuts through the richness and makes all the flavors pop. Freshly squeezed is ideal, but bottled works in a pinch.
- 1 teaspoon sesame oil – This is your flavor bomb. That deep, toasty, unmistakably “Asian” aroma comes from here. Use it as a finishing oil, not a cooking oil, for maximum impact. Don’t skip it!
- Salt and pepper to taste – We season the shrimp directly. Keep in mind your soy sauce is salty, so go easy with the salt shaker at first.
- Optional garnishes: sesame seeds, chopped parsley or green onion – This is the confetti! A sprinkle of white sesame seeds adds texture, and a flourish of green onion or parsley gives a fresh, colorful finish. Highly recommended for that “chef’s kiss” presentation.
Let’s Get Cooking: Your Step-by-Step Roadmap to Flavor Town
Ready? This moves fast, so have everything measured and within arm’s reach. We call this mise en place (everything in its place), and it’s the key to stress-free, quick-cooking success!
- Prep is Everything: First, ensure your shrimp are peeled, deveined, and thoroughly patted dry with paper towels. This is the most important step for getting a beautiful golden sear instead of a pale, watery simmer. Mince your garlic, juice your lemon, and have your sauces measured and ready to go. Cooking is so much more fun when you’re not frantically digging in the fridge mid-sizzle!
- Heat the Pan, Properly: Place a large skillet (stainless steel or cast iron works best for high heat) over medium-high heat and let it get genuinely hot for a minute. Add the olive oil and butter. The butter will foam up—that’s good! You want that pan hot enough so the shrimp sizzle the second they touch the surface. Chef Hack: To test if the pan is ready, flick a tiny drop of water into it. If it dances and evaporates instantly, you’re good to go!
- Sear the Shrimp: Add the shrimp in a single, beautiful layer. Don’t crowd the pan! If you pile them on top of each other, they’ll steam. We want sear. Give them a sprinkle of salt and pepper, then let them cook, undisturbed, for 1-2 minutes. You’ll see the edges turn pink and opaque. Peek underneath; when they have nice golden color, flip each one. Cook for just 1 more minute on the other side. They cook lightning fast! Remember, shrimp are done when they form a loose “C” shape. An “O” shape means they’re overcooked and getting rubbery.
- Create the Magic Sauce: Push the shrimp to the side of the pan or temporarily remove them to a plate if your pan is small. Add the minced garlic to the center and let it sizzle for just 15-20 seconds until fragrant—don’t let it burn! Now, pour in the soy sauce and lemon juice. It will bubble and steam up gloriously! This is the moment. Add the shrimp back in if you removed them, and drizzle that precious sesame oil over everything.
- The Grand Toss & Finish: Toss everything together vigorously for about 30 seconds to 1 minute. The sauce will reduce slightly, coating each shrimp in a sticky, glossy, irresistible glaze. As soon as the sauce clings to the shrimp, remove the pan from the heat. Overcooking now can make the shrimp tough. You’ve done it!
Plating Up Your Masterpiece
I’m a firm believer that we eat with our eyes first! For a classic hibachi-style plate, scoop a fluffy bed of steamed white or brown rice onto a warm plate or bowl. Arrange your glazed shrimp artfully over the top. Drizzle every last bit of that incredible garlic-soy butter sauce from the pan over everything—that’s liquid gold! Finish with a generous sprinkle of sesame seeds and a vibrant handful of chopped green onion. For a complete meal, add a side of simple steamed broccoli, zucchini, or a crisp Asian-inspired cabbage slaw. Serve immediately while everything is hot and sizzling with flavor!
Make It Your Own: Delicious Twists & Swaps
The beauty of this framework is how easily it adapts! Here are a few of my favorite ways to play:
- Spicy Yum Yum Style: Add 1-2 tablespoons of mayonnaise and 1 tablespoon of sriracha or chili-garlic sauce to the glaze at the end for a creamy, spicy, restaurant-style “yum yum” sauce coating.
- Ginger-Garlic Boost: Add 1 teaspoon of freshly grated ginger to the pan with the garlic for an extra layer of zingy warmth.
- Vegetable Hibachi Feast: Add 1 cup of sliced mushrooms, onions, and zucchini to the pan after searing the shrimp (you may need a touch more oil). Sauté until tender-crisp, then proceed with the sauce. Now it’s a full meal in one pan!
- Pineapple Sweet & Savory: Toss in ½ cup of fresh pineapple chunks when you add the sauce. The caramelized sweetness with the savory glaze is out of this world.
- Protein Swap: This method works brilliantly with thinly sliced chicken breast, scallops, or even firm tofu cubes. Just adjust the cooking time accordingly.
A Few Notes from My Kitchen to Yours
This recipe has become my ultimate weeknight lifeline, and it’s evolved in funny ways. I once, in a sleepy morning haze, accidentally used vanilla extract instead of sesame oil. Let me save you that trauma: they are NOT interchangeable! Another time, I was teaching my niece to cook and we doubled the garlic (because, why not?) and added a pinch of red pepper flakes—it was a revelation! So don’t be afraid to tweak it to your taste.
The biggest lesson? Don’t skimp on the heat. A hot pan is non-negotiable for that authentic “hibachi” char and texture. And that sauce in the bottom of the pan? I’ve been known to drag extra rice through it long after the shrimp are gone. No judgment here. This recipe is forgiving, fast, and built for real life. I hope it finds a spot in your regular rotation and creates some delicious memories of your own!
Your Questions, Answered!
Q: My shrimp turned out watery and didn’t brown. What went wrong?
A: This almost always comes down to moisture! Make absolutely sure you pat the raw shrimp completely dry with paper towels. Also, ensure your pan is fully preheated before adding them, and don’t overcrowd the skillet. Give them space to sear, not steam.
Q: Can I make this ahead of time?
A> Shrimp are best served immediately, but you can do the prep ahead! Have your shrimp dried and seasoned in a bowl in the fridge, and your sauce ingredients mixed in a small container. When you’re ready to eat, it’s a 5-minute cook time. Reheating cooked shrimp can make them rubbery.
Q: Is there a way to make this less salty?
A> Absolutely! Use a reduced-sodium soy sauce or tamari. You can also balance the saltiness by adding a tiny drizzle of honey (½ teaspoon) or a splash of orange juice to the sauce for a touch of sweetness.
Q: Can I use frozen shrimp?
A> Of course! Just thaw them completely overnight in the fridge or under cold running water. The key, say it with me, is to pat them extremely dry after thawing.
Hibachi Shrimp : Quick, Flavor-Packed, and Better Than Takeout
Description
Juicy shrimp are seared in a hot pan, then tossed in a glossy garlic-soy butter sauce finished with lemon and toasted sesame oil. It’s fast, high-protein, and incredibly satisfying—the kind of dinner that turns an ordinary night into something special.
Ingredients
-
1 lb large raw shrimp (21/25 or 26/30 count), peeled and deveined
-
Salt and black pepper, to taste
-
1 tbsp butter
-
1 tbsp olive oil
-
2 garlic cloves, minced
-
2 tbsp soy sauce (or tamari for gluten-free)
-
1 tbsp lemon juice
-
1 tsp sesame oil
Optional Garnishes
-
Sesame seeds
-
Chopped green onion or parsley
Instructions
-
Prep the Shrimp
Pat shrimp completely dry with paper towels. Season lightly with salt and pepper. -
Heat the Skillet
Place a large skillet over medium-high heat. Add olive oil and butter and allow the pan to get very hot. -
Sear the Shrimp
Add shrimp in a single layer. Cook undisturbed for 1–2 minutes until edges turn pink and bottoms are lightly golden. Flip and cook 1 more minute. -
Build the Sauce
Push shrimp aside. Add garlic to the center of the pan and sauté for 15–20 seconds until fragrant.
Pour in soy sauce and lemon juice. Add shrimp back if removed. -
Finish
Drizzle in sesame oil and toss everything together for 30–60 seconds, just until shrimp are coated and glossy. Remove from heat immediately.
Notes
-
Dry shrimp = good sear (don’t skip this step)
-
Don’t overcrowd the pan—cook in batches if needed
-
Sesame oil is a finishing oil, not a cooking oil
-
Shrimp cook fast—remove as soon as they form a loose
Nutritional Information*
*This is an estimate for 1 of 4 servings, using the base recipe without rice or extra sides.
Calories: 220 | Protein: 28g | Fat: 11g | Carbohydrates: 3g | Fiber: 0g | Sugar: 1g
Final Thoughts
And there you have it—a restaurant-worthy hibachi experience, no reservation required. This recipe is proof that a little heat, a handful of simple ingredients, and a willingness to embrace some kitchen sizzle can transform any ordinary evening into something special. It’s more than just shrimp in a pan; it’s a reminder that joy often lives in the small, savory moments we create for ourselves.
Whether you’re cooking for a crowd, making a quick solo dinner, or turning a rainy Tuesday into a celebration, this dish meets you where you are. It’s adaptable, forgiving, and consistently delicious—the kind of recipe that earns a permanent spot in your repertoire. So the next time that hibachi craving hits, don’t dread the logistics. Just grab your skillet, crank up the heat, and let the aroma of garlic, soy, and seared shrimp work its magic.


