Your New Favorite Holiday Tradition: Frosted Christmas Brownies
Hello, my friend, and welcome to the coziest corner of the kitchen! Can you smell that? It’s the rich, intoxicating scent of chocolate brownies baking in the oven, mingling with the crisp winter air and the general buzz of holiday excitement. There’s something truly magical about this time of year, and for me, a huge part of that magic happens right here, over a mixing bowl and a warm baking sheet.
If you’ve ever felt a little intimidated by elaborate holiday desserts (looking at you, perfectly piped gingerbread houses), I’m here to let you in on a little secret: the most show-stopping, crowd-pleasing treats are often the simplest ones, dressed up with a whole lot of love. And that’s exactly what these Frosted Christmas Brownies are all about. We’re taking the humble, deeply beloved brownie—fudgy, rich, and impossibly chocolatey—and turning it into a full-blown holiday masterpiece.
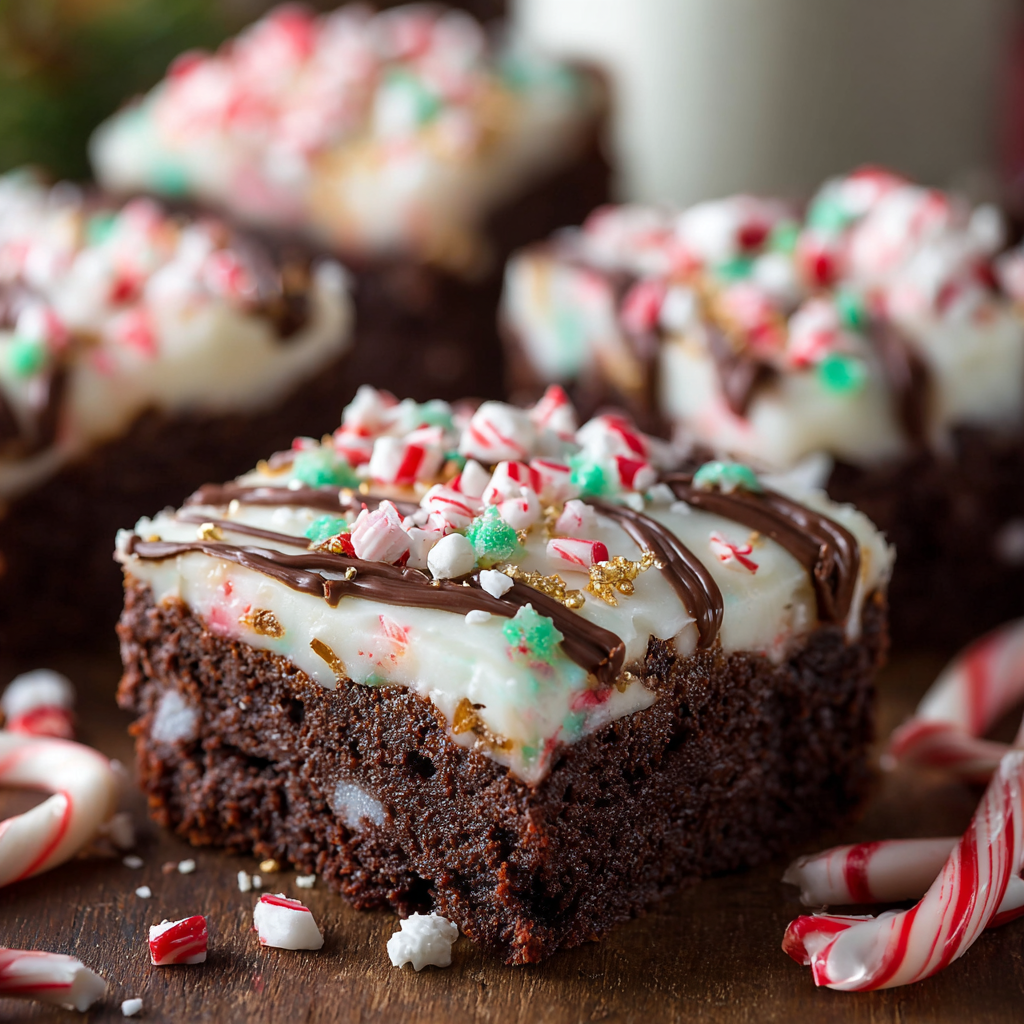
Imagine a tray filled with these gorgeous little squares: swirls of vibrant red and green frosting, a dusting of crunchy candy cane, a drizzle of dark chocolate, and a sprinkle of edible gold stars that twinkle under the Christmas tree lights. They’re perfect for cookie exchanges, the star of your holiday party dessert table, or the ultimate treat for a cozy Christmas movie night with your favorite people. The best part? You don’t need to be a professional pastry chef to create them. You just need a joyful heart and a willingness to get a little messy. So, tie on your favorite apron, preheat that oven, and let’s make some holiday magic together!
A Sweet Slice of Christmas Chaos
My love for these brownies started not with a perfect, Pinterest-worthy moment, but with a beautiful, flour-dusted disaster. I was about ten years old, “helping” my mom prepare for our massive family Christmas Eve gathering. Our kitchen was a whirlwind of activity—cookies cooling, ham glazing, and my mom’s famous potatoes boiling over. In the midst of the chaos, she handed me a box of brownie mix, a bowl, and a whisk. It was my first solo baking mission.
I remember the intense focus, the pride of cracking eggs without getting shell in the batter, and the sheer thrill of scraping every last bit of that glossy, chocolate batter into the pan. But when they came out of the oven, my heart sank. I’d over-mixed them, and they were a bit… cakey. My mom, seeing my disappointment, didn’t bat an eye. She whipped up a simple powdered sugar glaze, tinted it green with a few drops of food coloring, and let me go wild with the sprinkles. Those slightly-too-cakey, wildly over-decorated brownies were the first thing to disappear from the dessert table that night. It wasn’t about perfection; it was about the joy we baked into them. That’s the spirit I bring to this recipe every single time.
Gathering Your Holiday Baking Squad
Here’s everything you’ll need to create a double batch of these festive treats. A double batch is non-negotiable—trust me, you’ll want plenty to share (and a few to sneak for yourself!). I’ve included all my favorite tips and swaps so you can bake with confidence.
- 4 boxes of your favorite brownie mix (plus the ingredients listed on the box) – This is our fantastic shortcut! I always opt for a “fudgy” style mix. Chef’s Insight: Using the box mix means we can focus our energy on the fun, decorative part. If you’re a from-scratch purist, you can absolutely use two batches of your best homemade brownie recipe—just make sure it’s one that bakes well in a 9×13 pan.
- 3-6 jars of white vanilla frosting – The amount depends on how luxuriously thick you like your frosting. I usually land around 4-5 jars for a generous swirl on each brownie. Substitution Tip: For a less sweet option, try a cream cheese frosting, or make your own simple buttercream with powdered sugar, butter, and a splash of milk.
- Edible gel food coloring in Red and Green – Chef’s Hack: I swear by gel food coloring over liquid. It gives you those vibrant, festive colors without thinning out your frosting or altering the taste. A little dot of blue gel can help deepen your green to a beautiful forest shade.
- Edible Gold Stars and White Pearl Sprinkles – These are the “fa-la-la” on top! They add that magical, festive sparkle. You can find them in the baking aisle or online.
- 1/2 cup of crushed Candy Canes (our optional, but highly recommended, twist!) – Flavor Insight: The peppermint crunch paired with the rich chocolate is a classic holiday duo that simply can’t be beat.
- 1/2 cup of Mini Chocolate Chips or Melted Chocolate for drizzling – Because more chocolate is always a good idea. This adds another layer of texture and visual appeal.
- Icing Bags & Frosting Tips (I recommend a large star tip like the 1M or a round tip) – Don’t let this intimidate you! Piping is easier than it looks, and it instantly makes your treats look professional. If you don’t have tips, you can just snip the corner off a Ziploc bag.
Let’s Create Some Magic: Step-by-Step
Okay, team! This is where the fun begins. I’ll walk you through every step, sharing all my favorite kitchen hacks to ensure your brownies are not only beautiful but absolutely delicious.
- Bake the Brownies to Perfection. First, preheat your oven according to your box mix or recipe directions. Grease or line two 9×13-inch baking pans with parchment paper—this makes cleanup and removal a dream. Prepare your brownie batter according to the package directions. Chef’s Pro-Tip: For an even fudgier texture, I often under-bake my brownies by just a minute or two. The toothpick should have a few moist crumbs attached, not come out completely clean. Divide the batter evenly between your two prepared pans and bake. Once they’re done, let them cool completely in the pans on a wire rack. I know it’s tempting, but do not frost warm brownies! The frosting will melt into a puddle (a delicious puddle, but not what we’re going for).
- Cut and Shape Your Canvas. Once the brownies are completely cool, it’s time to get creative with your shapes! Using a sharp knife, slice them into squares or rectangles. For a fun “Christmas tree” effect, cut some of them into triangles. Kitchen Hack: Wiping your knife clean with a hot, damp cloth between cuts gives you super clean, crumb-free edges. Place all your brownie pieces on a large baking sheet or cutting board lined with parchment paper. This creates a stable, movable decorating station.
- Prepare Your Festive Frosting Palette. Scoop your white frosting into separate medium-sized bowls. I usually do one bowl for white, one for red, and one for green. Now, add your gel food coloring, a little at a time, and stir until you reach your desired vibrancy. Color Tip: Red can sometimes take a bit more coloring to get a true, deep red instead of a pink. Be patient and keep adding until you’re happy!
- The Main Event: Decorating! Fit your piping bags with your chosen tips—I adore the 1M star tip for big, beautiful swirls. Fill each bag with a different color of frosting. Now, let your inner artist out! Pipe swirls, zig-zags, stripes, or little Christmas trees on top of each brownie. Don’t overthink it! The variation is part of the charm. Alternate colors as you go for a wonderfully festive, mixed tray.
- Add the Holiday Sparkle. Before the frosting sets, it’s time for the final flourishes! Sprinkle on your edible gold stars and white pearls for a touch of elegance. For a peppermint crunch, generously sprinkle the crushed candy canes over some of the brownies. Then, melt your chocolate chips (or melting wafers) in the microwave in 30-second bursts, and using a fork or a small bag with the tip snipped off, drizzle it back and forth over your creations.
- Serve and Store with Style. Let your finished brownies sit for 15-20 minutes to allow the frosting to set slightly. This makes them much easier to stack and serve. Arrange them on a beautiful platter and watch them disappear! Store any leftovers (a rare occurrence in my house) in a single layer in an airtight container at room temperature for up to 3 days.
Sharing the Sweetness: How to Serve
Presentation is part of the fun! I love using a tiered dessert stand to create a real “wow” factor. Layer these frosted Christmas brownies with other holiday cookies for a stunning variety. For a cozy family gathering, simply pile them high on a rustic wooden board or a favorite holiday plate. They pair wonderfully with a mug of rich hot chocolate, a glass of cold milk, or a festive peppermint latte. The most important ingredient? Sharing them with people you love.
Mix It Up! Festive Flavor Twists
Feel like playing? Here are a few delicious ways to customize your brownies:
- Peppermint Patty: Add 1 tsp of peppermint extract to your white frosting before dividing and coloring. It’s a burst of cool, minty freshness.
- Gingerbread Spice: Stir 1 tsp of ground ginger, 1/2 tsp of cinnamon, and a pinch of cloves into your brownie batter before baking for a warm, spiced flavor.
- “Snow-Capped” Dark Chocolate: Skip the food coloring and use only white frosting. Top with a flaky sea salt and a dark chocolate drizzle for a sophisticated, less-sweet option.
- Gluten-Free & Dairy-Free Friendly: Use a certified gluten-free brownie mix and a vegan frosting. Most sprinkles are naturally gluten-free, but always check the labels!
From My Kitchen to Yours: A Few Final Thoughts
This recipe has evolved so much since that first cakey batch in my mom’s kitchen. One year, in a frenzy, I accidentally used mint chocolate chip ice cream topping instead of chocolate syrup in the batter. It was a happy accident that my cousins still talk about! The point is, don’t be afraid to make it your own. The real recipe is the laughter, the slightly messy kitchen, and the joy of creating something with your own two hands. These brownies have become a staple in our home, and my favorite part is now watching my own kids lean over the counter, their little tongues stuck out in concentration as they pipe on their own wild, wonderful frosting designs. However they turn out, they will be perfect.
Your Brownie Questions, Answered!
I’ve gotten so many wonderful questions about these brownies over the years. Here are the answers to the most common ones!
Q: My frosting is too runny and won’t hold a shape! What did I do wrong?
A: This usually happens if the brownies are even slightly warm, or if you’re using a liquid food coloring. To fix it, pop your opened jars of frosting into the fridge for 20-30 minutes to firm up. If you’ve already tinted it and it’s runny, you can try stirring in a little extra powdered sugar to thicken it. For next time, definitely switch to gel food coloring!
Q: Can I make these ahead of time?
A: Absolutely! You can bake and cool the brownies up to two days in advance. Wrap the pans tightly in plastic wrap and store them at room temperature. I recommend frosting them the day you plan to serve them for the freshest look and texture.
Q: Help! I don’t have piping bags or tips. Any alternatives?
A> No problem at all! A simple Ziploc bag is a fantastic stand-in. Just spoon your frosting into the bag, push it down into one corner, and snip a small piece of the corner off. You can make simple dots, zig-zags, or just spread the frosting on with a knife or offset spatula for a smooth, modern look. It will still be delicious and festive!
Q: My red frosting looks pink. How do I get a deep, true red?
A> This is the most common food coloring struggle! Red requires a surprising amount of color to deepen. Be brave and keep adding that gel color, a little at a time, until it shifts from pink to red. Using a “No-Taste” red gel can also help, as it’s formulated to prevent any bitter aftertaste from the large amount of dye needed.

Frosted Christmas Brownies
Description
Frosted Christmas Brownies
Fudgy, chocolatey brownies dressed in vibrant holiday frosting, candy cane crunch, and sparkly sprinkles!
Perfect for parties, cookie exchanges, or a cozy Christmas movie night.
Ingredients
-
4 boxes brownie mix (plus ingredients listed on box) – fudgy style recommended
-
3–6 jars white vanilla frosting (depending on how thickly you frost)
-
Red & green gel food coloring
-
Edible gold stars & white pearl sprinkles
-
½ cup crushed candy canes (optional)
-
½ cup mini chocolate chips or melted chocolate for drizzling
-
Icing bags & piping tips (1M star tip recommended, or Ziploc bag)
Instructions
-
Bake Brownies: Preheat oven as directed. Line two 9×13 pans with parchment. Prepare batter and divide evenly. Bake, then cool completely.
Tip: For fudgier brownies, under-bake by 1–2 min; toothpick should have moist crumbs. -
Cut Brownies: Slice into squares, rectangles, or triangles. Wipe knife with a hot damp cloth between cuts for clean edges. Arrange on a baking sheet lined with parchment.
-
Prepare Frosting: Divide white frosting into separate bowls. Tint with gel food coloring to red, green, and leave some white.
-
Decorate: Fill piping bags with frosting. Pipe swirls, zig-zags, stripes, or Christmas tree shapes. Alternate colors for a festive look.
-
Add Sparkle & Crunch: Sprinkle gold stars, pearls, and crushed candy canes. Drizzle melted chocolate over brownies if desired.
-
Set & Serve: Let frosting sit 15–20 min to firm. Arrange on a platter or dessert stand. Store leftovers in a single layer, airtight, at room temperature up to 3 days.
Notes
-
Frosting Too Runny? Chill jars 20–30 min or stir in more powdered sugar.
-
No Piping Bags? Use a Ziploc bag with a corner snipped off.
-
Red Looks Pink? Keep adding gel coloring gradually; “No-Taste” red gel works best.
-
Flavor Twists:
-
Peppermint extract in frosting for a minty kick
-
Gingerbread spices in brownie batter
-
White frosting + dark chocolate drizzle + flaky sea salt for a “snow-capped” look
-
-
Diet-Friendly: Use gluten-free brownie mix and vegan frosting.
Nutritional Information*
*Please note: This is an approximate estimate based on the ingredients listed and will vary depending on your specific brands and customizations.
Per Brownie (approx.): 180-220 calories | 8g fat | 28g carbs | 2g protein
Final Thoughts: Your New Holiday Masterpiece
And just like that, you’ve done it! You’ve taken a simple, beloved treat and transformed it into a tray of pure, unadulterated holiday joy. These Frosted Christmas Brownies are more than just a dessert; they’re a celebration in every bite. They’re proof that you don’t need a complicated recipe to create something truly magical—just a little bit of chocolate, a lot of sprinkles, and a heart full of holiday spirit.
I hope this recipe becomes a beacon of fun in what can sometimes be a stressful season. I hope it encourages you to embrace the beautiful, imperfect, and deliciously messy side of holiday baking. Let this be your reminder that the most cherished traditions often start with a simple, sweet moment in the kitchen.
So, the next time you feel the pressure to create the “perfect” holiday, remember this: perfection is overrated. Joy is what bakes in your oven, swirls on your frosting, and sparkles in the eyes of those you share it with.
Now, you’re officially ready to spread the sweetness. Your new favorite holiday tradition is waiting.