
Your New Secret Weapon for Unforgettable Pies
Hey there, friend! Come on in, pull up a stool. Can you smell that? It’s the warm, toasty, and unmistakably comforting scent of something baking in the oven. For me, that smell is pure happiness. It’s the promise of a shared meal, of laughter around the table, and of a recipe made with love. And today, we’re talking about the very foundation of so many of those cherished dishes: the pie crust.
Now, I know what you might be thinking. “Olivia, pie crust is tricky! It’s either tough, or it shrinks, or it’s just… blah.” I hear you. I’ve been there, standing over a crumbly mess, wondering where it all went wrong. But what if I told you there’s a way to a crust that’s not only incredibly flaky and buttery but also packed with a subtle, tangy depth of flavor that will have everyone asking, “What is your secret?”
Well, my secret is sitting in a jar in your fridge right now. That’s right—we’re giving that sourdough discard a glorious purpose beyond pancakes. This Flaky Sourdough Pie Crust is a game-changer. It’s my go-to for everything from a summery peach pie to a hearty chicken pot pie. It bakes up golden, shatters into a million buttery layers, and has that little something-something that makes it truly unforgettable. So, tie on your favorite apron (the messy one with all the stains tells the best stories), and let’s make some magic.
The Accidental Discovery That Changed My Pie Game Forever
This recipe was born, like so many of my favorites, from a happy little kitchen accident. It was a chilly autumn afternoon, and I was in a serious baking frenzy. I had a bubbling pot of apple butter on the stove, a jar of sourdough discard begging to be used, and a serious craving for a classic apple pie. But as I reached for the ingredients, I realized I was a bit short on my usual fat for the crust. In a moment of “what’s the worst that could happen?” inspiration, I decided to bolster the dough with my sourdough starter.
I held my breath as I rolled it out, expecting a tough, dense disaster. But what emerged from the oven was nothing short of a revelation. The crust was a deep, golden brown, with flakes so delicate they practically floated onto the plate. The flavor? Absolute perfection. The rich butteriness was still the star, but it was backed by this subtle, tangy note that cut through the sweetness of the apples in the most beautiful way. It was complex, it was rustic, and it was, without a doubt, the best pie crust I had ever made. That “mistake” is now a cherished family recipe, and it’s the one I’m most excited to share with you today.
Gathering Your Pie-Making Posse
Here’s the beautiful part: you only need a handful of simple ingredients to create this masterpiece. The magic is in how we bring them together. Let’s break it down.
- 2½ cups All-Purpose Flour: This is our trusty foundation. It has just the right amount of protein to give the crust structure without making it tough. For a slightly more tender crust, you can swap in ½ cup of cake flour, but all-purpose works beautifully.
- 1 tsp Salt: Don’t you dare skip this! Salt is the flavor enhancer that makes the buttery, tangy notes really sing. It’s the secret handshake that tells all the other ingredients to be their best selves.
- 1 tbsp Sugar (optional): I almost always add this, even for savory pies! A tiny bit of sugar encourages beautiful browning and adds a whisper of sweetness that complements the sourdough tang. For a savory pie, you can leave it out with no issues.
- 1 cup (2 sticks) Cold Unsalted Butter: This is non-negotiable. Cold. Cold. Cold. I pop my butter in the freezer for 15 minutes before I start. Why? Those solid bits of butter will steam as they bake, creating the magical, flaky pockets we’re after. Using unsalted lets you control the seasoning perfectly.
- ½ cup Sourdough Discard (unfed, room temp): Our star player! Using discard at room temp makes it easier to incorporate without overworking the dough. It adds a lovely tang and, thanks to its acidity, tenderizes the gluten just a bit. This is your “waste-not, want-not” superpower.
- 3–6 tbsp Ice Water: The variable hero. We add just enough to bring the dough together. The ice-cold temperature is crucial to keeping our butter nice and firm. I like to keep a glass of water with a few ice cubes in it nearby so I can measure out truly frigid water.
Let’s Create Some Flaky, Buttery Magic: A Step-by-Step Guide
Ready to get your hands dirty? This process is as much about feel as it is about following a recipe. Don’t be afraid—you’ve got this!
Step 1: The Dry Team Assemble!
In a large, wide bowl, whisk together your flour, salt, and (if using) sugar. A good whisking here ensures everything is evenly distributed, so you don’t get a salty bite in one corner of your pie. Chef’s Hack: I sometimes add a tablespoon of vodka or vinegar to the ice water. The alcohol (which evaporates) or acid inhibits gluten development, leading to an even more tender crust!
Step 2: The Butter Ballet
Scatter your very cold, cubed butter over the flour mixture. Now, using a pastry cutter, two forks, or (my favorite method) your fingertips, start working the butter into the flour. You’re not looking for a fine sand; you want a shaggy mixture with pea-sized and even a few walnut-sized pieces of butter remaining. These uneven chunks are your ticket to flakiness! Pro-Tip: Work quickly so the heat from your hands doesn’t melt the butter. If the butter starts to feel soft, pop the whole bowl in the fridge for 5 minutes.
Step 3: Introduce the Sourdough Star
Dollop the room-temperature sourdough discard over the flour-butter mixture. Use a fork or your hands to gently mix it in. It will be clumpy and look a bit like cottage cheese—this is perfect! The dough will still be very dry at this point.
Step 4: The Ice Water Drizzle
Now, start adding your ice water, one tablespoon at a time. After each addition, use a fork to gently toss the mixture. Stop adding water when the dough holds together when you pinch a handful. You might not need all 6 tablespoons, or you might need a splash more. The goal is a dough that is hydrated but not wet. Chef’s Insight: It’s better to err on the side of slightly too dry than too wet. You can always add more water, but you can’t take it out!
Step 5: The Chill Pill (This is Crucial!)
Turn the shaggy dough out onto a lightly floured surface and gently press it together into a ball. Divide it in half and shape each half into a 1-inch thick disc. Wrap each disc tightly in plastic wrap. Now, the hardest part: walk away. The dough must chill in the fridge for at least 1 hour, but ideally overnight. This allows the gluten to relax (preventing a tough, shrinking crust) and re-firms the butter, ensuring maximum flakiness.
Step 6: Roll With It
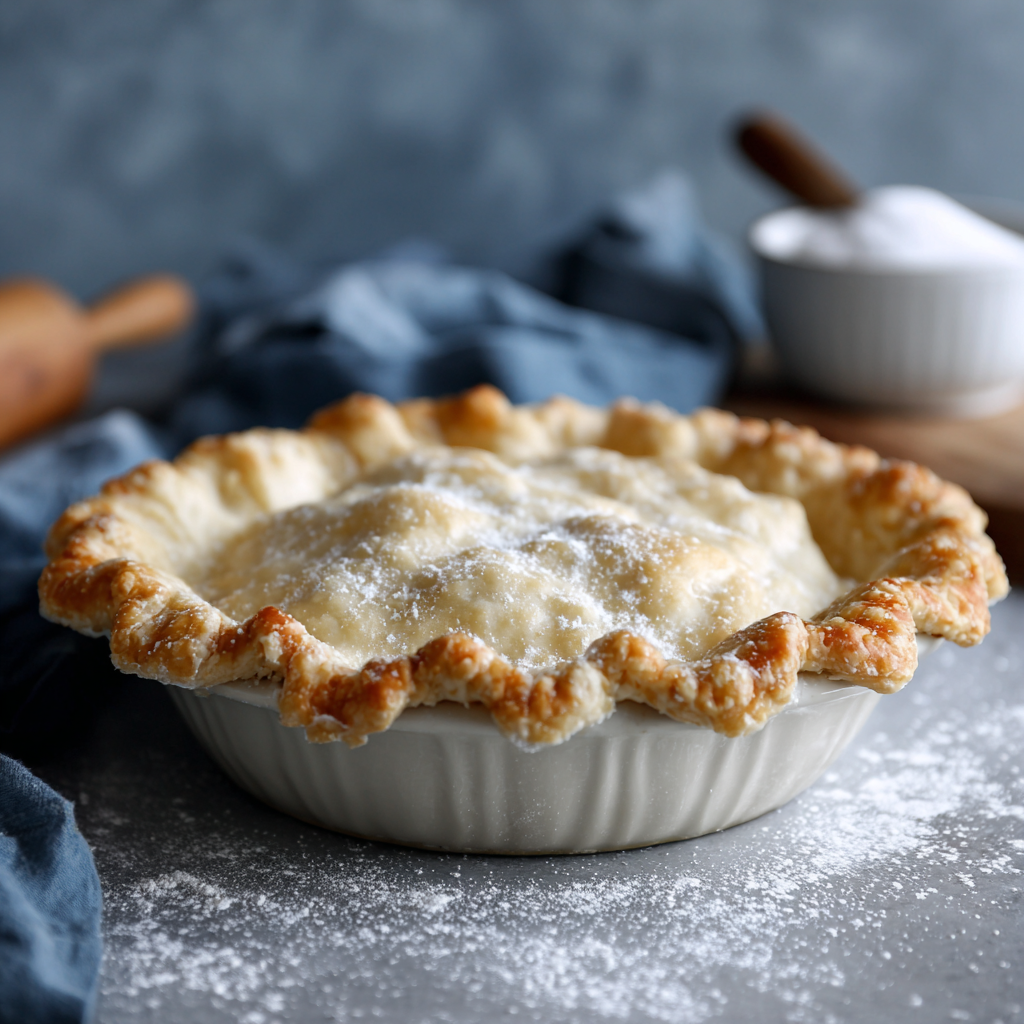
When you’re ready to bake, take one disc out of the fridge and let it sit for 5-10 minutes to become just pliable enough to roll. On a floured surface, roll from the center outward, turning the dough a quarter turn after every few rolls to maintain an even circle. Roll it to about ⅛-inch thickness and about 2 inches wider than your pie plate. Gently transfer it to your plate, trim and crimp the edges, and follow your pie recipe’s baking instructions!
Sharing the Love: How to Serve Your Masterpiece
How you serve this glorious crust depends entirely on what’s inside! For a stunning fruit pie, let it cool almost completely on a wire rack so the filling can set. I love serving a warm slice with a scoop of vanilla bean ice cream that slowly melts into the flaky layers. For a savory pot pie, serve it straight from the oven, steaming and fragrant, into shallow bowls. It’s the ultimate comfort food. No matter what, present it with pride on a beautiful platter—you’ve just made something truly special from scratch.
Make It Your Own: Endless Delicious Twists
The beauty of this crust is its versatility. Here are a few ways to play with the formula:
- Herb-Infused Savory Crust: Add 2 tablespoons of freshly chopped herbs (like thyme, rosemary, or chives) to the dry ingredients. Perfect for chicken pot pie or a quiche Lorraine.
- Cheesy Delight: Mix in ½ cup of finely grated sharp cheddar or Parmesan cheese for an extra layer of savory flavor.
- Whole Wheat & Honey: Substitute 1 cup of all-purpose flour with whole wheat flour and replace the sugar with a tablespoon of honey. It adds a wonderful, nutty depth.
- Sweet & Spicy: For an apple or pumpkin pie, add a teaspoon of cinnamon and a pinch of nutmeg to the flour mixture.
- Vegan-Friendly Version: Swap the butter for very cold, high-quality vegan butter sticks. The results are surprisingly flaky and delicious!
From My Kitchen to Yours: A Few Parting Thoughts
This recipe has become such a staple in my kitchen that I almost can’t imagine making pie without it. I’ve learned to always keep a disc or two in the freezer (wrapped in plastic and then foil) for spontaneous pie emergencies, which, in my house, are a very real thing. Over time, I’ve gotten less precious about the rolling pin; a lopsided, hand-crimped edge has so much more charm and character than a perfect one. It shows this was made by a human, with love, not a machine. The funniest part? My family now refers to my “regular” pie crust as the “lesser crust,” which I suppose is the highest compliment a recipe can get. Don’t be afraid to make it yours!
Your Pie Crust Questions, Answered!
Let’s tackle some common questions to make sure your pie-making journey is smooth sailing.
Q: My dough is too crumbly and won’t come together. What did I do wrong?
A: This is super common! It just means your dough is a little thirsty. Don’t panic. Add more ice water, one teaspoon at a time, gently mixing after each addition until the dough just holds together when pressed. Remember, it’s better to be slightly under-hydrated than over!
Q: Why did my crust shrink so much in the oven?
A: Shrinking is almost always a sign that the gluten was overworked and/or the dough didn’t chill long enough. When you mix and roll, be gentle. And that chill time is non-negotiable—it allows the gluten to relax. For a guaranteed non-shrink crust, you can also “blind bake” it with pie weights until it’s partially set.
Q: Can I taste the sourdough flavor strongly?
A: The sourdough adds a subtle, tangy complexity rather than a strong, sour “sourdough bread” flavor. It beautifully complements both sweet and savory fillings. If your discard is very, very old and acidic, the tang might be more pronounced, but it’s usually a delightful background note.
Q: My bottom crust got soggy. How can I prevent that?
A: The enemy of a crisp bottom crust is a wet filling. For fruit pies, toss your fruit with the sugar and spices and let it macerate for 30 minutes, then drain off the excess liquid before filling. You can also brush the bottom crust with a thin layer of beaten egg white before adding the filling—this creates a barrier. Baking your pie on a preheated baking sheet also helps blast heat into the bottom crust.
Flaky Sourdough Pie Crust : Buttery, Tangy & Perfect Every Time
Description
Flaky Sourdough Pie Crust
Prep Time: 20 minutes
Chill Time: 1–12 hours
Total Time: 1 hour 20 minutes (or overnight)
Ingredients
-
2½ cups all-purpose flour (or 2 cups AP + ½ cup cake flour for extra tenderness)
-
1 tsp salt
-
1 tbsp sugar (optional, for browning and subtle sweetness)
-
1 cup (2 sticks) cold unsalted butter, cubed
-
½ cup sourdough discard (unfed, room temp)
-
3–6 tbsp ice water
Optional Twists:
-
Herb-Infused: add 2 tbsp chopped fresh herbs (thyme, rosemary, chives)
-
Cheesy: add ½ cup finely grated cheddar or Parmesan
-
Whole Wheat: replace 1 cup flour with whole wheat; swap sugar for 1 tbsp honey
-
Sweet & Spicy: add 1 tsp cinnamon + pinch nutmeg
-
Vegan: use high-quality vegan butter
Instructions
-
Mix Dry Ingredients:
In a large bowl, whisk together flour, salt, and sugar (if using). -
Cut in Butter:
Add cold butter cubes. Using a pastry cutter, two forks, or fingertips, work butter into flour until mixture is shaggy with pea- and walnut-sized pieces. -
Add Sourdough:
Dollop the sourdough discard and gently mix. Dough will be clumpy—this is perfect. -
Add Ice Water:
Gradually add ice water 1 tbsp at a time, mixing gently until dough just holds together. Stop before it’s wet—dough should be hydrated but firm. -
Chill Dough:
Form dough into two discs, wrap in plastic, and refrigerate at least 1 hour (or overnight) to relax gluten and firm butter. -
Roll Out:
On a floured surface, roll one disc to ⅛-inch thickness, about 2 inches wider than pie plate. Transfer, trim, and crimp edges. Follow your pie recipe’s baking instructions.
Notes
-
Crumbly dough? Add water, 1 tsp at a time.
-
Shrinking crust? Chill dough and avoid overworking. Blind bake with weights for extra security.
-
Soggy bottom? Drain wet fillings, brush crust with egg white, and bake on a preheated sheet.
-
Sourdough flavor? Subtle tang complements both sweet and savory pies.
Nutrition
- Calories: 180 cal Per Serving
- Fat: 12g
- Carbohydrates: 16g
- Protein: 2g
Nutritional Information (Approximate)
Please note: This is an estimate for one slice (based on 12 slices per 9-inch pie crust, filling not included).
- Calories: ~180
- Total Fat: 12g
- Carbohydrates: 16g
- Protein: 2g
Final Thoughts: More Than Just a Crust
So, there you have it—the not-so-secret secret to a pie crust that’s anything but ordinary. This isn’t just a recipe; it’s an invitation to slow down, to get your hands a little dusty with flour, and to transform simple, humble ingredients into the foundation of something truly memorable.
By giving your sourdough discard a new purpose, you’re not just reducing waste; you’re adding a layer of depth and history to your baking. This crust is a testament to the magic that happens when we embrace a little happy accident and make it our own. It’s forgiving, it’s flavorful, and it promises a result that will make you feel like a true pastry artist.
Don’t let the fear of a “perfect” pie hold you back. A flaky, buttery, slightly tangy crust with a lovingly imperfect crimp is infinitely better than any flawless, store-bought alternative. It’s made with your own two hands, and that’s what makes it special.
So, go on. Dig out that jar of discard, freeze your butter, and take the plunge. Your next pie—whether it’s filled with summer berries, spiced apples, or a savory chicken stew—is waiting to become unforgettable.
Happy baking!
—Olivia


