
Envelope Hand Pies: A Sweet Note Wrapped in Flaky Pastry
Hey there, friend! Pull up a chair and grab a cup of coffee. Do you remember the magic of a handwritten note? That little thrill of finding a sealed envelope with your name on it, the promise of a secret or a sweet sentiment tucked inside? I’ve always believed food can hold that same kind of magic. A meal can be a love letter, a dessert a whispered secret. And that’s exactly the feeling I wanted to capture with these utterly charming Envelope Hand Pies.
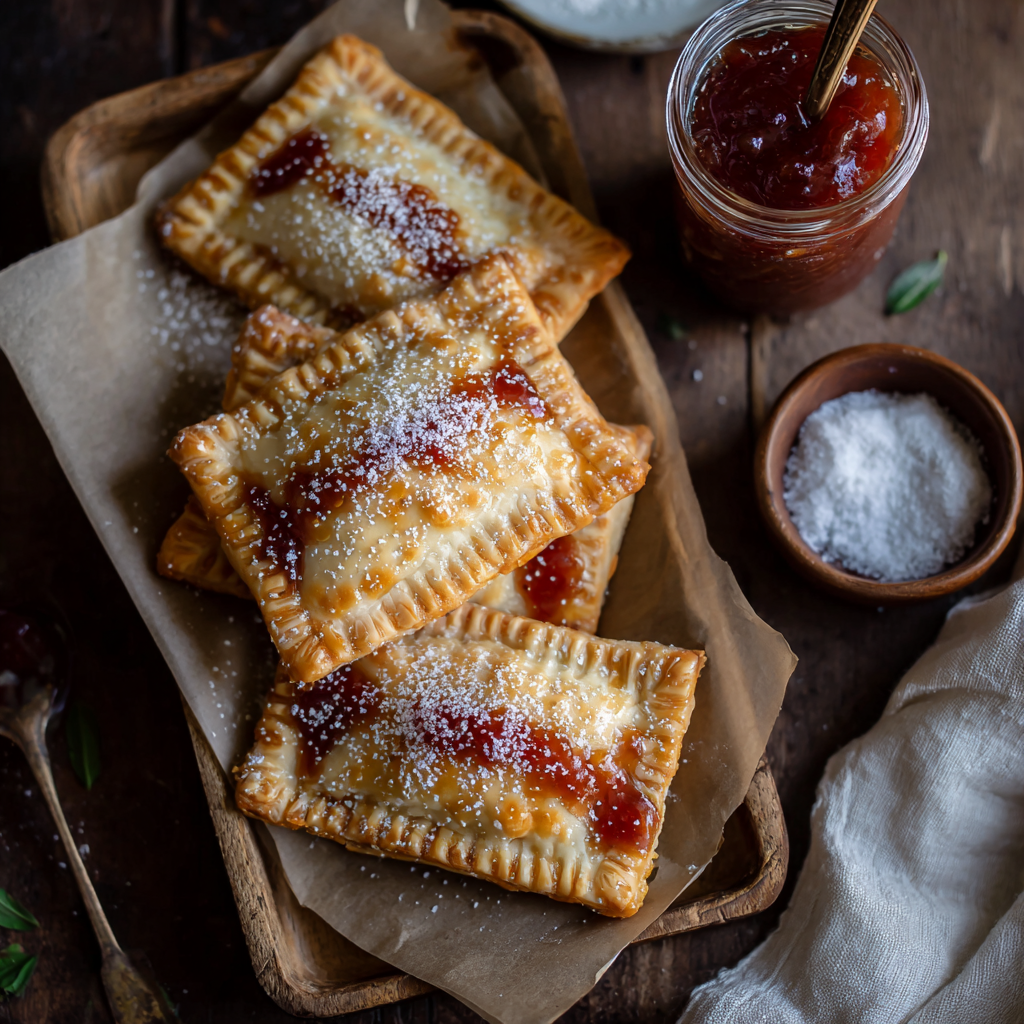
Imagine this: golden, impossibly flaky pastry, folded with intention into the shape of a tiny envelope. Inside, a hidden pocket of warm, gooey fruit jam – a sweet surprise waiting to be discovered. They’re whimsical, they’re personal, and they taste like a hug feels. Whether you’re looking for the perfect treat for Valentine’s Day, a bridal shower, a heartfelt “thinking of you” gift, or just a way to make a Tuesday afternoon feel special, these little pastry packets are your answer.
The best part? You don’t need to be a pastry chef to pull these off. We’re keeping it simple, joyful, and totally approachable. We’ll talk shortcuts (hello, store-bought puff pastry, you beautiful timesaver), fun flavor twists, and the little folding technique that makes everyone say, “How did you *do* that?” So, tie on your favorite apron – the one with the stains that tell their own delicious stories – and let’s bake a batch of edible love letters together.
The Recipe That Started with a Scrap of Paper
This recipe always takes me back to my grandma’s sun-drenched kitchen table. She wasn’t one for elaborate desserts, but she was a wizard with pie dough scraps. After making a big apple pie, she’d never let a single bit of that flaky goodness go to waste. She’d gather us grandkids, roll out the leftover dough, and let us spoon little dollops of her homemade raspberry jam right in the center.
But she didn’t just fold them over into plain old turnovers. With a few precise folds and a twinkle in her eye, she’d transform them into these little sealed packages. “These are special delivery,” she’d say, placing one on my napkin. “For my favorite mail carrier.” To my six-year-old self, it was pure enchantment. It felt less like eating a snack and more like unveiling a delicious secret meant just for me. That’s the spirit I want to bring to your kitchen today – that sense of playful, personal magic. Every fold is a memory in the making.
Your Simple Toolkit for Sweet Magic
Here’s everything you need to gather. I’ve added my little chef insights and swaps so you can bake with confidence!
- 1 sheet puff pastry or homemade pie dough: This is our canvas! Chef’s Insight: I often use all-butter puff pastry from the freezer section – it’s a fantastic shortcut that bakes up incredibly flaky and golden. If you’re a pie-dough purist, your favorite homemade recipe works beautifully! Just make sure it’s chilled.
- ½ cup fruit preserves (strawberry, raspberry, or cherry work great): The heart of our message! Pro Tip: Thicker preserves or jam work better than super-runny jelly, which can leak. If your jam is a bit loose, simmer it in a small pan for 5 minutes to thicken it up and concentrate the flavor. Apricot, fig, or even a lemon curd are stunning alternatives!
- 1 egg (for egg wash): Our edible glue and golden shine maker. Why it matters: The egg wash is what gives the pastry that gorgeous, glossy, professional-looking finish and helps the layers puff. For a dairy-free version, you can use just a bit of plant-based milk or cream.
- 1 tbsp water: To lightly thin the egg for a perfect, brushable wash.
- Optional: powdered sugar or glaze for topping: The finishing flourish! A snowy dusting of powdered sugar feels elegant, while a simple powdered sugar and milk glaze adds a touch of extra sweetness and shine.
Let’s Fold Some Sweetness: Step-by-Step
Follow these steps, and you’ll have a tray of gorgeous envelopes ready for the oven in no time. I’ve tucked my favorite kitchen hacks right in with the instructions.
Step 1: Preheat & Prep
Preheat your oven to 375°F (190°C). Line a baking sheet with parchment paper. This isn’t just busywork! Preheating is non-negotiable for getting that instant puff on your pastry. The parchment paper is your insurance policy against sticky bottoms and makes cleanup a dream. Go ahead and get your egg wash ready, too – crack that egg into a small bowl, add the tablespoon of water, and whisk it with a fork until it’s smooth and uniform. Set it aside.
Step 2: Roll & Cut Your Canvas
Roll out your pastry sheet on a lightly floured surface to smooth any folds, then cut into rectangles (about 4×5 inches). If using puff pastry, I like to let it thaw just enough to be pliable but still cold. A pizza cutter is your best friend here for clean, sharp lines! Don’t stress about perfection. Slightly irregular rectangles have homemade charm. Pro-tip: Gather any scraps, re-roll them gently, and you can get one or two extra envelopes – no waste!
Step 3: The Sweet Center
Spoon a small amount of jam (about 1 heaping teaspoon) into the center of each rectangle. Here’s the key: LESS IS MORE. It’s so tempting to overfill, but trust me, a modest spoonful in the dead center will keep your filling securely locked inside during baking. Imagine you’re sealing a real letter – you wouldn’t stuff the envelope so full it bursts, right? Same delicious principle.
Step 4: The Magical Fold
To fold: bring the bottom third up over the filling. Fold both side corners in to meet at the center, forming a point. Finally, fold the top corner down like you’re sealing an envelope. Press gently to secure. Okay, let’s visualize it. You’re looking at your rectangle. Fold the bottom edge up, covering your jam blob. Now, take the left and right sides of this new “flap” and fold them inward, like you’re bringing two sides of a jacket together. They should meet in a point at the center. Lastly, take the remaining top point and fold it down over everything, tucking it in neatly. Give the top a gentle but firm press to seal the deal. It’s like giving your pastry a little hug!
Step 5: The Golden Glaze
Place your folded envelopes on the prepared baking sheet. Brush the tops generously with your egg wash. This step is what gives you that beautiful, bronzed, bakery-worthy look. Use a gentle touch so you don’t flatten the layers, but make sure you cover all the exposed pastry. The egg wash also acts as the “glue” that helps the final fold stay put.
Step 6: Bake to Golden Perfection
Bake for 15–18 minutes or until the pastries are deeply golden brown and puffed. Ovens vary, so start checking at 15 minutes. You’re looking for a rich, amber color and a visibly flaky, puffed texture. Don’t underbake – that golden color equals flavor! If some envelopes are browning faster than others, just rotate your tray halfway through.
Step 7: The Final Flourish
Let the hand pies cool on the sheet for at least 10 minutes. Then, dust with powdered sugar or drizzle with glaze, if desired. I know it’s hard, but this cooling time is crucial. The filling is literal molten lava straight out of the oven! Letting them settle also helps the structure firm up. Then, have fun with the finish – a drift of powdered sugar through a fine-mesh sieve looks like a winter wonderland.
Serving Your Edible Letters with Style
Presentation is half the fun! Pile these hand pies on a rustic wooden board or a pretty vintage plate. For a special touch, place each one on a small, folded square of parchment paper – it leans right into the “letter” theme! They’re fantastic warm with a scoop of vanilla ice cream melting over the top, or at room temperature alongside a mid-afternoon coffee. To gift them, stack a few in a cellophane bag tied with baker’s twine, or nestle them into a small gift box lined with a linen napkin.
Make It Your Own: Delicious Twists & Swaps
The envelope is just the beginning! Here are a few ways to customize your message:
- Savory Surprise: Swap the jam for a tablespoon of herbed goat cheese, a slice of prosciutto, and a dollop of fig jam. A whole new world of appetizers!
- Nutty Chocolate Note: Fill with a mix of chopped dark chocolate and toasted hazelnuts or almonds. The chocolate will melt into a decadent pocket.
- Seasonal Fruit: In summer, use finely diced peaches or cherries tossed with a teaspoon of flour and sugar. In fall, try spiced apple butter.
- Gluten-Free: Use your favorite gluten-free pie dough or puff pastry sheet. The folding method works exactly the same.
- Vegan-Friendly: Use plant-based puff pastry, a jam without gelatin, and brush with almond milk or a maple syrup wash instead of egg.
From My Kitchen to Yours: Chef’s Notes
This recipe has evolved from my grandma’s scrap-dough experiment to my go-to for last-minute, high-impact treats. I’ve learned a few things along the way! First, don’t be afraid to get the kids involved – they are master envelope-folders and love personalizing their own. Second, these freeze like a dream. Assemble them, freeze unbaked on a tray, then transfer to a bag. Bake straight from frozen, adding 3-5 extra minutes. It’s like having sweet, homemade secrets on standby.
One of my favorite kitchen memories is making these for a friend who was moving away. I folded little notes on parchment paper with inside jokes and slipped them under the pies on the plate. The food fed our bellies, but the gesture – and the laughter reading those notes – fed our hearts. That’s the real recipe right there.
Your Questions, Answered
My jam leaked everywhere! What did I do wrong?
This is the most common hiccup, and it usually comes down to two things: overfilling or under-sealing. Remember, just a teaspoon of jam! Also, make sure you’re pressing that final fold down firmly. If your jam is very runny, try the reduction trick mentioned in the ingredients. A little leak is okay – it adds “homemade character.” But controlling the filling is key for tidy envelopes.
Can I make these ahead of time?
Absolutely! You have two great options. 1) Assemble the envelopes, place them on your parchment-lined sheet, and refrigerate, uncovered, for up to 4 hours before baking. 2) For longer storage, freeze them unbaked as described in the Chef’s Notes. Bake from frozen. I don’t recommend baking them fully and then reheating, as the pastry can lose its perfect texture.
My pastry didn’t puff up very much. Why?
Puff pastry needs to be COLD to puff properly. If your dough got too warm while you were working with it, the butter layers melt into the dough before hitting the oven. Work quickly and if the dough feels soft, pop the whole baking sheet into the fridge for 10 minutes before baking. Also, ensure your oven is fully preheated – that blast of heat is crucial.
What’s the best way to seal the edges if they won’t stick?
If you’re working in a very dry kitchen or your dough seems a bit dry, you can use a little “pastry glue.” Just dip your fingertip in water and run it along the edges where you’ll make your folds before pressing. This helps create a seal, especially with homemade dough.
Nutritional Information (Per Hand Pie, Approximate)
Prep Time: 15 minutes | Bake Time: 18 minutes | Yields: 6-8 hand pies
Calories: ~210 | Sugar: ~10g
Note: These are estimates based on standard ingredients. Values will vary with specific brands and customizations.
Final Thoughts
These Envelope Hand Pies are more than just a recipe—they’re a moment of connection. In a world that moves quickly, they invite us to slow down, to fold intention into pastry, and to share something made by hand. Whether you’re baking for someone you love or simply treating yourself, each golden, flaky packet carries the timeless charm of a personal note.
So the next time you want to say “I’m thinking of you,” “Congratulations,” or even “Let’s make today sweet,” skip the text. Send an edible letter instead. Because some messages are just too important not to taste.
Happy baking, friend. May your kitchen be filled with warmth, your pastry stay flaky, and your heart as full as your baking sheet.


