
Your New Favorite Kitchen Escape: Easy, No-Bake Energy Bliss
Hey there, friend! Come on in, pull up a stool, and let’s talk about one of life’s greatest little pleasures: a snack that feels like a treat but fuels you like a champion. You know those days when the 3 PM slump hits, your energy tanks, and the siren song of the vending machine starts calling? Or when you’re rushing out the door and need something substantial to grab? I’ve been there more times than I can count, usually with a flour-dusted apron and a dozen other things bubbling on the stove.
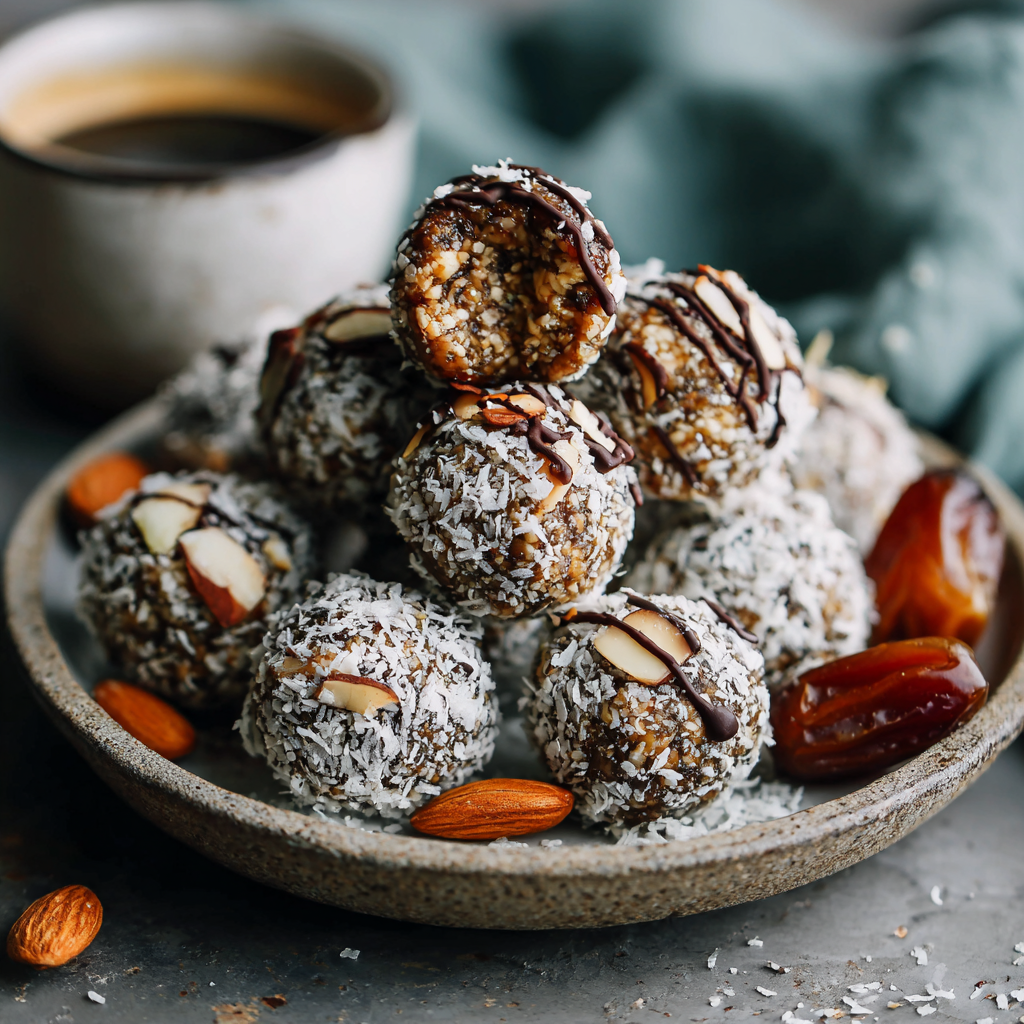
That’s exactly why I’m so head-over-heels for these Easy Date Protein Balls. We’re whipping up a double batch today because, trust me, you’ll want them around. They’re the ultimate no-bake hero—no oven required, just a food processor and a few minutes of your time. They’re chewy, rich, and perfectly sweet, all thanks to nature’s candy: glorious medjool dates. We’re packing them with clean, plant-based protein and healthy fats to keep you satisfied, and I’ve got some super fun twists to make them your own.
This isn’t just a recipe; it’s your secret weapon for busy weeks. It’s for the lunchbox packers, the on-the-go hustlers, the midnight snack seekers, and everyone who believes that healthy eating should be a joy, not a chore. So, let’s get our hands a little sticky and make something wonderful together!
A Kitchen Rescue Mission & The Birth of a Go-To Snack
I have to confess, my love affair with these little power balls started out of sheer desperation. It was a few years ago, right in the middle of testing recipes for a big family potluck. I had grand plans for an elaborate layered dessert, but my timeline was a mess, and my kitchen looked like a tornado had swept through a bakery. I was hangry, the clock was ticking, and I needed a solution—fast.
I stared into my pantry, and my eyes landed on a nearly forgotten container of medjool dates and a bag of almonds. In a moment of “what do I have to lose?” inspiration, I threw them into my food processor with some cocoa and coconut. A few pulses later, I rolled the sticky, fragrant mixture into little truffle-like balls, dusted them with coconut, and crossed my fingers. I brought them to the potluck, a last-minute addition, tucked humbly beside the show-stopping pies and cakes. You know what happened? They were the first thing to disappear! My cousin’s kids were sneaking them, my aunts were asking for the recipe, and I just stood there, laughing. It was a beautiful reminder that the best recipes aren’t always the most complicated ones. They’re the ones made with what you have, shared with people you love, and born from a little bit of happy chaos.
Gathering Your Power-Packed Ingredients
Here’s the beautiful part: you likely have most of these ingredients in your pantry right now. We’re making a double batch because one is never enough! This yields about 24 perfect, bite-sized balls of energy.
- 1 1/2 cups Raw Almonds: This is our base, providing a lovely crunch, healthy fats, and a dose of protein. They create the “flour” for our dough. Chef’s Insight: If you have a nut allergy, raw sunflower seeds or oats work wonderfully as a substitute!
- 1 cup Medjool Dates (pitted): The star of the show! Medjool dates are naturally soft, caramel-like, and incredibly sweet. They’re what binds everything together without any refined sugar. Pro Tip: If your dates are a little dry, soak them in warm water for 10 minutes, then drain thoroughly before using. This brings them back to life!
- 2/3 cup Desiccated Coconut (plus extra for rolling): Desiccated coconut is finely shredded and unsweetened, giving a subtle tropical flavor and great texture. The extra for rolling gives that classic, snow-dusted look we all love.
- 2 teaspoons Vanilla Extract: A must for depth of flavor! It rounds out the sweetness and adds a warm, cozy aroma. For a real treat, try using vanilla bean paste.
- 4 tablespoons Cacao Powder: I prefer cacao for its robust, slightly fruity chocolate flavor and higher antioxidant content, but good old unsweetened cocoa powder works just as well here.
- Pinch of Sea Salt: Never, ever skip the salt! It’s the magic ingredient that makes all the other flavors pop and balances the sweetness perfectly.
- 2 tablespoons Vanilla Protein Powder (optional): This is our bonus protein boost. It’s totally optional, but if you’re making these for a post-workout snack, it’s a game-changer. Use your favorite plant-based or whey protein.
Let’s Make Some Magic: Your Step-by-Step Guide
Ready? This is where the fun begins. It’s a simple process, but a few little tricks make all the difference. Get your food processor out—let’s do this!
- Pulse Those Almonds: Toss your raw almonds into the bowl of your food processor. Pulse them until they form a fine, sandy meal. You want them ground down, but be careful not to over-process them into almond butter! We’re looking for a texture similar to coarse sand. Little Chef Hack: Scrape down the sides of the bowl once halfway through to ensure everything gets evenly ground.
- The Grand Addition: Now, add the rest of your team players: the pitted dates, desiccated coconut, vanilla extract, cacao powder, that all-important pinch of sea salt, and the protein powder (if using).
- Blend to Perfect Harmony: Secure the lid and start blending! At first, it will look crumbly and dry, but keep the faith. Blend until the mixture starts clumping together and forms a ball around the blade. This usually takes about a minute or two. Chef’s Test: Stop the processor and pinch a bit of the mixture between your fingers. If it holds together firmly, you’re golden! If it’s still too crumbly, add a teaspoon of water or maple syrup and blend for another 15 seconds.
- The Roll-Up: Time to get your hands involved! Scoop out about a tablespoon of the mixture. I love using a small cookie scoop for perfectly uniform balls, but a regular spoon works just fine. Roll it firmly between your palms until you have a smooth, one-inch ball. Don’t be shy—a good, firm press helps them hold their shape. Fun Fact: This is a fantastic little task to delegate to kiddos who love to help in the kitchen!
- The Finishing Touch (Optional, but so pretty!): Spread your extra desiccated coconut on a small plate. Gently roll each ball in the coconut until it’s lightly coated. This not only looks gorgeous but adds a little extra texture.
- The Chill Factor: Place all your beautiful protein balls on a parchment-lined baking sheet or plate and pop them in the fridge for at least 10-15 minutes. This quick chill helps them firm up and makes them even more delicious. And that’s it! You’re done!
How to Serve & Savor Your Creation
Okay, the hard part is over (not that it was hard!). Now, how to enjoy these little gems? I love storing them in a gorgeous glass jar right on my kitchen counter—it’s a edible decoration! They’re perfect as a grab-and-go breakfast with a piece of fruit, a pre-workout boost, or a post-dinner sweet bite that won’t weigh you down. Pack a few in a small container for a healthy desk snack, or arrange them on a platter for guests—they always disappear fast. They pair wonderfully with a cup of coffee in the morning or a glass of almond milk before bed.
Get Creative! 5 Flavor Twists to Try
The basic recipe is a blank canvas for your culinary artistry! Here are a few of my favorite ways to mix it up:
- The Superfood Boost: Add 1 tablespoon of chia seeds or hemp seeds along with the dry ingredients for an extra hit of fiber, protein, and omega-3s.
- The Spiced Chai: Swap the cacao powder for 1/2 teaspoon of cinnamon, a pinch of nutmeg, and a tiny pinch of cardamom. It tastes like a cozy hug in a ball!
- The Citrus Zing: Add the zest of one orange to the food processor. The bright, sunny flavor cuts through the richness of the dates and chocolate beautifully.
- The Chocolate Dipped Dream: Melt 1/2 cup of dark chocolate chips with a teaspoon of coconut oil. Dip half of each chilled ball in the chocolate and let them set on parchment paper. Pure elegance.
- The Cookie Dough Vibe: Omit the cacao powder and add a handful of mini dark chocolate chips after pulsing for that classic, irresistible cookie dough flavor.
Olivia’s Chef Notes & Kitchen Confessions
This recipe has truly evolved with me over the years. It’s the one I’ve shared with more friends than any other. I remember once, in a fit of “more is more” enthusiasm, I added a full tablespoon of espresso powder. Let’s just say they were… intensely energetic! My husband took one bite and his eyes went wide. We now call that version the “Eye-Opener” ball and use a much more reasonable 1/2 teaspoon.
The beauty of this recipe is its flexibility. Don’t be afraid to play. I’ve used cashews instead of almonds, added a spoonful of almond butter for extra creaminess, and even rolled them in crushed pistachios for a pop of color. Treat it as your kitchen playground. The only real rule is to make sure your mixture is sticky enough to hold together. Everything else is a delicious suggestion. These balls have been with me through busy blog days, road trips, and countless “what’s for a snack?” moments. I hope they become a trusted friend in your kitchen, too.
Your Questions, Answered!
I’ve gotten so many wonderful questions about this recipe over time. Here are the most common ones to help you out!
Q: My mixture is too dry and crumbly! It won’t stick together. What did I do wrong?
A: Don’t worry, this is the #1 question! The culprit is usually the dates. If they were a bit old or dry, they won’t provide enough moisture. The fix is easy: add a teaspoon of a neutral oil (like coconut or avocado) or a liquid sweetener (maple syrup, agave) at a time, and pulse until it comes together. A tiny splash of water or plant-based milk can also work wonders.
Q: Can I make these without a food processor?
A: You can, but it takes a bit more muscle! If you have a high-powered blender, that can work, but you’ll need to stop and scrape down the sides frequently. Without any appliance, you’d need to very finely chop the almonds by hand (or use pre-ground almond flour) and mash the dates into a paste with a fork before mixing everything together in a bowl. It’s a great arm workout!
Q: How long do these protein balls last, and how should I store them?
A: They are best stored in an airtight container in the refrigerator for up to 2 weeks. They also freeze beautifully for up to 3 months! I often make a double-double batch and freeze half. Just let them thaw in the fridge overnight or for a few hours on the counter.
Q: My protein balls turned out too soft. What happened?
A> This usually happens if the dates were very fresh and super moist, or if a little too much liquid was added. Don’t fret! The fridge is your best friend here. A longer chilling time—a few hours or overnight—will firm them up perfectly. You can also try adding another tablespoon of almond meal or protein powder to the mixture to absorb the extra moisture.

Easy Date Protein Balls : No-Bake, Double Batch with Superfood Twists
Description
Meet your new kitchen lifesaver—Easy Date Protein Balls! These little bites are chewy, chocolatey, and perfectly sweet thanks to nature’s candy: medjool dates. Packed with almonds, cacao, and a touch of coconut, they’re the ultimate fuel for busy days, workouts, or midnight cravings. No oven, no fuss—just five minutes, a food processor, and pure snacking joy. They’re proof that healthy eating can be both nourishing and indulgent.
Ingredients
-
1½ cups raw almonds (or sunflower seeds for nut-free)
-
1 cup medjool dates, pitted (soak 10 min if dry)
-
⅔ cup desiccated coconut + extra for rolling
-
4 tbsp cacao or unsweetened cocoa powder
-
2 tsp vanilla extract
-
Pinch of sea salt
-
2 tbsp vanilla protein powder (optional)
Instructions
-
Grind Almonds: Add almonds to a food processor and pulse into a coarse meal.
-
Add Everything Else: Toss in dates, coconut, cacao, vanilla, salt, and protein powder.
-
Blend: Process until the mixture clumps together. If too dry, add 1 tsp of water or maple syrup.
-
Roll: Scoop 1 tbsp of mixture, roll firmly into balls, and coat in extra coconut.
-
Chill: Refrigerate 10–15 minutes to firm up.
Notes
-
Too crumbly? Add a touch of oil or maple syrup.
-
Too sticky? Add a spoonful of oats or protein powder.
-
Store airtight in the fridge for up to 2 weeks, or freeze for 3 months.
Flavor Twists: Try the Citrus Zing with orange zest, Spiced Chai with cinnamon and nutmeg, or go bold with Chocolate-Dipped Dreams.
Nutrition
- Calories: 100 cal Per 24 balls
- Fat: 6g
- Carbohydrates: 8g
- Protein: 4g
Quick Nutrition Breakdown
While I’m all about the joy of eating, it’s nice to know what’s fueling your body! This is a general estimate per ball (without additional superfood twists).
Est. per ball: 90–110 calories | 6g fat | 8g carbs | 3–4g protein
Final Thoughts: Your Snack-Time Game, Changed.
And there you have it! What started as a kitchen rescue mission has (hopefully) become your new secret weapon for delicious, no-fuss energy. These little balls are more than just a recipe; they’re a reminder that the most joyful and nourishing foods don’t need to be complicated.
You’ve now got the power to whip up a batch of healthy, homemade snacks in minutes, customizing them to your heart’s content with whatever flavors make you smile. They’re proof that a little bit of preparation can transform your entire week, saving you from the siren song of less-than-ideal options when hunger strikes.
So, here’s to having a jar of bliss waiting for you in the fridge. Here’s to satisfying snacks, happy energy, and the simple joy of creating something wonderful with your own two hands.


