
How to Make a Beginner Sourdough Starter from Scratch
Hey there, friend! Come on in, pull up a stool. Can you smell that? That incredible, tangy, warm, and slightly mysterious aroma that fills a kitchen when bread is baking? That’s the smell of magic happening. And I’m not just talking about any bread—I’m talking about sourdough. The king of breads, the queen of crusty loaves, the heart and soul of a thousand-year-old tradition that you are about to bring into your own home.
If you’ve ever felt a little intimidated by the idea of making your own sourdough starter, let me stop you right there. I see you, thinking it’s too scientific, too fussy, or that you need to be a certified baker to pull it off. I’m here to tell you, with a warm heart and a flour-dusted apron, that nothing could be further from the truth. Making a sourdough starter is one of the most simple, forgiving, and profoundly rewarding projects you can do in your kitchen. It’s less about rigid rules and more about cultivating a living, breathing friend. Yes, a friend! One that just happens to help you create the most incredible bread you’ve ever tasted.
In this guide, we’re going to walk step-by-step, day-by-day, through the entire process. We’ll demystify the “discard,” celebrate the first bubbles, and get you to a point where you have a vibrant, active starter ready to bake with. You don’t need fancy equipment or a culinary degree. You just need flour, water, a jar, and a little bit of patience. So, let’s roll up our sleeves, embrace the mess, and create something truly magical together. Your journey to the perfect loaf of homemade sourdough starts right here, right now.
The Jar of Possibility on My Counter
My love affair with sourdough started not in a fancy bakery, but in my grandmother’s sun-drenched kitchen. She didn’t call it a “starter”; she called it “Herman.” Herman lived in a crooked ceramic crock on the countertop, and to my young eyes, he was a weird, bubbly, slightly smelly science experiment. I didn’t get it. But then, every Saturday like clockwork, that weird goop would transform. My grandma would lovingly feed Herman, take a portion of him, and with a few more ingredients and a lot of kneading, she’d create these majestic, crackly-crusted loaves that filled the whole house with an aroma I can still summon from memory.
One day, she let me stir the flour and water into Herman. “You have to be gentle with him,” she’d say with a wink. “He’s alive, you know.” That idea captivated me. We were nurturing this living thing made of nothing but wild yeast and bacteria from the very air we breathed. It felt like a secret, ancient knowledge. When I moved into my first apartment, the first thing I made wasn’t a piece of furniture—it was my own starter. I named her “Stella,” and she became my first real kitchen companion. She’s traveled with me through three homes, survived a few forgotten feedings, and has been the star of countless loaves, pancakes, and pizza nights. She’s more than a recipe; she’s a story, a connection to my past, and a daily reminder that the simplest ingredients can hold the most profound magic.
Gathering Your Sourdough Starter Kit
One of the best parts about this project is its beautiful simplicity. You only need two core ingredients! The “equipment” is likely already in your kitchen. Let’s break it down.
Core Ingredients
- Organic, Unbleached All-Purpose Flour: This is your starter’s main food source. I recommend organic and unbleached because they haven’t been treated with chemicals that can hinder the wild yeasts we’re trying to attract. Think of it as giving your new pet the good stuff right from the start!
- Filtered or Dechlorinated Room Temperature Water: Tap water often contains chlorine, which is great for making water safe to drink but not so great for cultivating delicate wild yeast and bacteria. Using filtered, bottled, or simply tap water that’s been left out on the counter for a few hours (to let the chlorine evaporate) makes a world of difference. Room temp is key—too cold and it slows everything down, too hot and you risk killing your fledgling yeast.
Optional Boosters (For Day 1 Only!)
- Whole Wheat or Rye Flour: These flours are richer in nutrients and microbes than all-purpose flour. Adding just a tablespoon or substituting a small amount on the first day can give your starter a fantastic microbial kickstart, encouraging more bubble activity early on.
- A Pinch of Sugar or an Apple Peel: A tiny bit of sugar on day one gives the initial yeasts an easily accessible snack. An unwashed organic apple peel can introduce wild yeasts from its skin. It’s a fun little trick, but not at all necessary—the flour and air have plenty of yeast already!
Essential Equipment
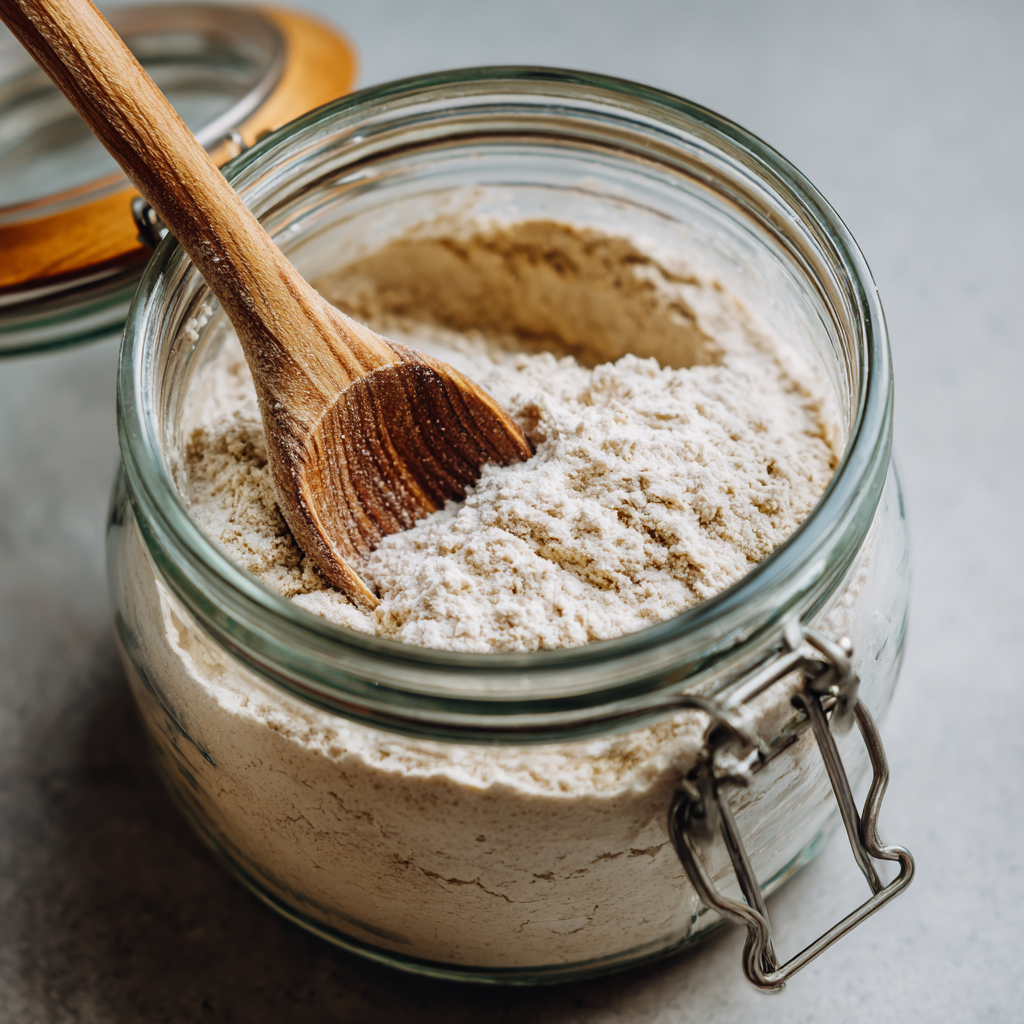
- Two 16 oz (2 Cup) Glass Jars: I like having two so I can easily switch to a clean one during a feeding. Glass lets you see all the beautiful bubble action, and a wide mouth makes stirring and cleaning a breeze.
- Wooden Spoon or Silicone Spatula: For mixing. Some bakers swear by non-metallic utensils, though a quick stir with a metal spoon won’t ruin anything. I just love the feel of a wooden spoon!
- Rubber Band or Erasable Marker: This is your most important tool for tracking growth! Placing a rubber band around the jar at the level of your starter after feeding lets you easily see how much it has risen. It’s incredibly satisfying to watch it climb!
Your Day-by-Day Sourdough Starter Journey
Alright, let’s get our hands (virtually) floury! This process is a rhythm: mix, wait, discard, feed. It might feel strange to throw away half of your mixture at first (we’ll talk about all the amazing things you can do with that “discard” later!), but it’s essential for keeping the population of yeast and bacteria healthy and hungry. Follow these steps, and you’ll be a sourdough parent in no time.
Day 1: The Beginning
In a clean glass jar, combine ½ cup of flour and ¼ cup of water. Stir with your spoon or spatula until you have a thick, pasty mixture with no dry streaks of flour. It will be stiff, and that’s okay! Use your spatula to scrape down the sides of the jar for a tidy look. Now, place a rubber band on the outside of the jar, right at the level of the mixture. This is your starting point. Cover the jar loosely with its lid—don’t screw it on tight! We want the gasses to escape and the wild yeasts in the air to find their way in. Place it in a warm spot (70-75°F is ideal), out of direct sunlight, and let it be for 24 hours. Chef’s Hack: If your kitchen is cool, the inside of your oven with just the light on is a perfect, draft-free incubator. Just remember to take it out before preheating!
Day 2: The Waiting Game
You might not see much action today, and that’s completely normal! You might see a few small bubbles, or it might look totally inactive. Either way, we proceed. Today, we “discard” half of the mixture. Simply spoon out about half of your starter and compost it or throw it away. To the remaining half in the jar, add another ½ cup of flour and ¼ cup of water. Mix thoroughly, scrape down the sides, re-position your rubber band to the new level, cover loosely, and let it rest for another 24 hours.
Days 3–6: The Exciting Part!
This is when the party really gets started! Continue your daily routine: discard half, then add ½ cup flour and ¼ cup water. By day 3 or 4, you should start to see some real activity. Look for bubbles throughout the mixture, and you’ll definitely notice a smell. It might smell a little funky, cheesy, or even like nail polish remover—don’t panic! This is all part of the microbial battle happening in your jar. The good guys are establishing their territory. The smell will eventually mellow into a pleasant, yogurty tang. Chef’s Insight: If you see a dark, greyish liquid on top, that’s called “hooch.” It’s a sign your starter is hungry! You can either stir it back in for a more sour flavor or pour it off before you feed. No harm done.
Day 7 and Onward: Is It Ready?
After about a week of consistent feeding, your starter should be getting strong and active. It’s ready to bake with when it consistently doubles in size within 4 to 6 hours of feeding and has a bubbly, aerated texture. The ultimate test is the “float test.” Take a small spoonful of your active starter and drop it into a glass of room-temperature water. If it floats, congratulations! It’s filled with enough gas from the happy yeast and is ready to leaven bread. If it sinks, don’t be discouraged. Just keep up with your daily feedings for a few more days—it can sometimes take up to two weeks, depending on your environment. Once it’s ready, you can move it to the refrigerator for weekly feedings. You did it!
Your Starter is Ready… Now What?
Congratulations, you’re now the proud parent of a vibrant sourdough starter! The first thing you should do is give it a name. Trust me, it makes the whole experience even more fun. Now, your starter lives in the fridge. When you’re ready to bake, you’ll take it out, feed it to wake it up, and once it’s bubbly and active, you’ll use a portion in your recipe, returning the rest to the fridge. But the true “serving” of your hard work is that first loaf of bread. The moment you pull a golden, crackling, impossibly beautiful loaf from your own oven, you’ll feel like a kitchen wizard. Slice it while it’s still warm, slather it with good butter, and take a moment to savor what you’ve created.
Creative Twists for Your Sourdough Starter
Once you’ve mastered the basic method, you can play with these fun variations to give your starter a unique personality!
- The Rye Boost: For the first 3 days, substitute 1 tablespoon of your all-purpose flour with dark rye flour. It adds a wonderful, earthy complexity and can really supercharge the fermentation.
- The Fruity Introduction: On Day 1, add a small, unwashed piece of organic apple peel or a few raisins to the mix. Remove them on Day 3. This can introduce a different profile of wild yeasts.
- 100% Whole Wheat Starter: For a heartier, more robust starter, use 100% whole wheat flour from the beginning. It will be thicker and may ferment more quickly.
- The Warm Spot Solution: If your house is consistently cold, create a proofing box by placing your jar in the microwave (don’t turn it on!) with a bowl of just-boiled water. The steam and enclosed space create a perfect warm, humid environment.
A Few More Thoughts from My Kitchen
My starter, Stella, has been with me for years, and she’s a resilient little thing. I’ve forgotten her in the back of the fridge for almost a month, only to find her with a thick layer of hooch on top. A couple of good feedings and she was back to her bubbly self. Don’t stress about perfection. Your starter is a living reflection of your kitchen’s unique environment—the flour you use, the water, the air. No two starters are exactly alike, and that’s the beauty of it.
This recipe has evolved for me over time. I started out meticulously weighing everything on a scale (which is great for precision baking!), but for the starter itself, the volume measurements work perfectly fine. The most important lesson I’ve learned is to watch and listen to your starter. It will tell you what it needs. Bubbles and growth? It’s happy. Hooch? It’s hungry. A sluggish response? Maybe it’s a bit cold. You’ll develop a rhythm and a relationship with it. It’s one of the most human, connected experiences you can have with your food.
Sourdough Starter FAQs: Your Questions, Answered!
Q: Why do I have to discard half of the starter? It feels so wasteful!
A: I know, it feels counterintuitive at first! But think of it this way: if you kept adding flour and water to the same jar every day without discarding, you’d end up with a massive, unmanageable amount of starter. More importantly, discarding keeps the population of yeast and bacteria in balance with their food supply. It prevents the starter from becoming too acidic, which can eventually weaken the yeast. And it’s not wasteful! That “discard” is packed with flavor and can be used in dozens of non-leavened recipes like crackers, pancakes, and muffins. I keep a separate jar in the fridge for my discard and use it for weekend waffles.
Q: My starter was really bubbly on Day 3, but now on Day 5 it seems dead. What happened?
A> This is one of the most common concerns, and it’s almost always perfectly normal! The initial burst of activity is often from bacteria that are first to the party. They create a lot of gas and then die off as the environment becomes more acidic. This lull is when the more resilient, bread-leavening wild yeasts are slowly establishing themselves. It can seem like your starter has died, but just stick with the feeding schedule. The true, stable yeast activity will return in a day or two. Patience is key!
Q: There’s a weird liquid on top of my starter. Is it mold? Should I throw it out?
A> That liquid is called “hooch.” It’s a byproduct of fermentation and a sign that your starter is hungry and has exhausted its food supply. It’s not mold! It’s usually dark grey, brown, or clear. You can either stir it back in for a more tangy flavor in your final bread, or you can pour it off before you feed your starter. Only throw your starter away if you see pink, orange, or fuzzy patches of mold, which is very rare if you’re using clean utensils.
Q: I’m going on vacation! How do I keep my starter alive?
A> Don’t worry, your starter is tougher than you think! For a vacation of up to two weeks, simply give it a hearty feeding (one part starter to one part flour and one part water by weight is ideal), let it sit at room temperature for an hour or two, then pop it in the fridge. The cold will significantly slow its metabolism. When you return, it will likely have a layer of hooch, but just pour that off, feed it, and it should bounce back within a feed or two. For longer trips, you can dry your starter into a powder for long-term storage!
Easy Beginner Sourdough Starter Recipe (With Creative Twists)
Description
Making your own sourdough starter might sound intimidating, but it’s simpler than you think! With just flour, water, and a little patience, you can cultivate a living starter that will help you bake tangy, crusty, homemade bread. This step-by-step guide is perfect for beginners and doesn’t require any fancy equipment.
Ingredients
-
½ cup (60g) organic, unbleached all-purpose flour
-
¼ cup (60ml) filtered or dechlorinated water, room temperature
-
Optional Day 1 boosters:
-
1 tbsp whole wheat or rye flour
-
Small piece of unwashed organic apple peel or a pinch of sugar
-
Equipment
-
Two 16 oz (2 cup) glass jars
-
Wooden spoon or silicone spatula
-
Rubber band or erasable marker
Instructions
-
In a clean jar, mix ½ cup flour and ¼ cup water (add optional boosters if using) until smooth.
-
Scrape down sides, mark the level with a rubber band, and cover loosely.
-
Place in a warm spot (70–75°F) for 24 hours.
Day 2:
-
Discard half of the starter.
-
Add ½ cup flour and ¼ cup water to the remaining starter, stir well, scrape down sides, mark new level, and cover loosely.
-
Let rest 24 hours.
Days 3–6:
-
Repeat the discard and feed routine daily.
-
Watch for bubbles and a tangy smell. Don’t worry about the initial funky odors—they’ll mellow.
-
If you see a dark liquid (hooch), stir it in for extra sourness or pour it off.
Day 7 and onward:
-
Starter is ready when it doubles in size within 4–6 hours of feeding and passes the float test (a spoonful floats in water).
-
Move to the fridge for weekly feedings until ready to bake.
Notes
-
Discard Use: Don’t throw away the discarded starter—use it for pancakes, waffles, crackers, or muffins.
-
Warm Spot: If your kitchen is cold, place the jar in the oven with just the light on or in a microwave with a bowl of warm water.
-
Feeding Routine: Consistency is key; feed the starter daily until it’s strong and active.
-
Troubleshooting:
-
Hooch: Dark liquid means hungry starter. Stir in or pour off.
-
No bubbles: Continue feeding; some environments take longer for wild yeast to establish.
-
Mold: Only discard if you see pink, orange, or fuzzy patches.
-
Nutritional Perks
While we’re here for the incredible flavor and joy of baking, it’s worth noting that sourdough has some fantastic nutritional benefits! The long, slow fermentation process helps to pre-digest the gluten, making it easier for some people to tolerate. It also helps break down phytic acid found in grains, which can improve the bioavailability of minerals. Plus, it has a lower glycemic index than commercial yeast breads. So, you can feel good about enjoying that delicious slice!
Final Thoughts: You’ve Created More Than a Starter
As you stand there, looking at your jar of bubbly, active starter, I hope you feel a profound sense of accomplishment. You didn’t just follow a recipe; you harnessed the invisible, wild magic of your own kitchen. You’ve cultivated a living ecosystem in a simple glass jar. That is no small feat.
Remember the feeling of intimidation you might have had at the beginning? Look at you now. You understand the rhythm of feeding, you can read the bubbles like a map, and you know that a little hooch is just a cry for a snack, not a crisis. You’ve become a caretaker, a patient observer, and an alchemist.
This starter is your new beginning. It’s the key to crusty, airy loaves that will make your house smell like a bakery. It’s the secret to tangy pancakes on a Saturday morning and pizza crust with character on a Friday night. But more than that, it’s a connection—to the bakers who came before us, to the simple, profound wisdom of slowing down, and to the tangible joy of creating something real with your own two hands.
Don’t be afraid of it. Name it, love it, but don’t coddle it. It is resilient. It wants to live and help you bake. There will be loaves that don’t turn out perfectly, and that’s okay. Each one is a lesson. The journey is the point.


