Easter Cake Pops: Your New Favorite Spring Tradition
Hey there, friend! Come on in and grab an apron. Can you smell that? It’s the warm, sweet scent of vanilla cake baking in the oven, mixed with the faint, hopeful hint of spring flowers drifting through the window. There’s a certain magic in the air around Easter, isn’t there? It’s all about bright colors, playful shapes, and that wonderful feeling of sharing something homemade and joyful.
If the thought of elaborate Easter desserts makes you a little nervous, I’m right there with you. I’ve had my share of lopsided layer cakes and runny frosting. But what if I told you the cutest, most crowd-pleasing treat on your holiday table is also one of the simplest and most fun to make? Enter: Easter Cake Pops. These adorable, bite-sized bundles of joy are my secret weapon for spring celebrations. They’re perfect for parties, absolutely magical for kids (and kids-at-heart!), and they bring a smile to every face.
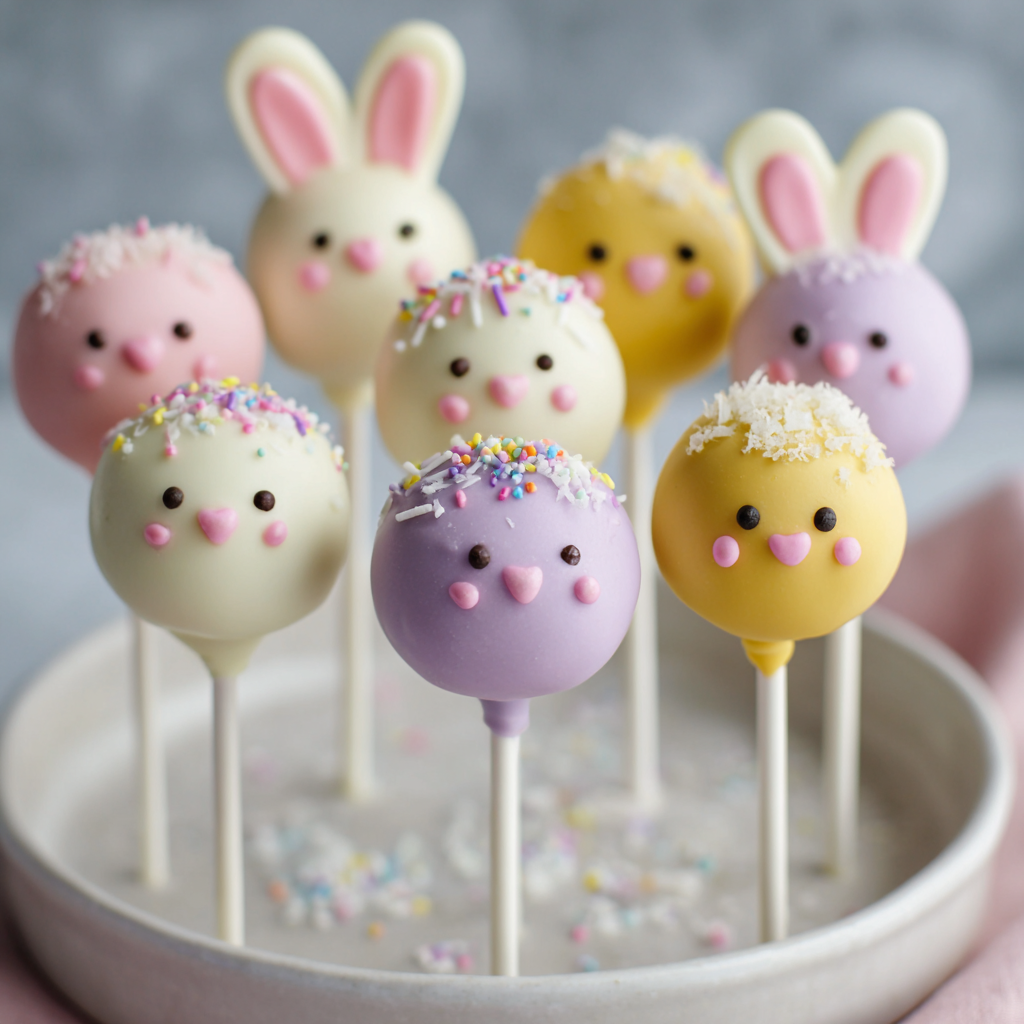
Today, I’m sharing my go-to, foolproof recipe for the most delightful Easter Cake Pops. We’re talking moist cake centers, a creamy binding hug of frosting, all dipped in a shiny pastel coat and dressed up as mini Easter eggs, little bunnies, or even cute chick faces. The best part? You don’t need to be a pastry chef. You just need a willingness to get your hands a little messy and have a whole lot of fun. So, let’s turn up the music, clear some counter space, and create something wonderfully sweet together.
The Messy Magic of First Attempts
My love affair with cake pops started not with a triumph, but with a hilarious, sticky disaster. Picture this: me, a decade ago, utterly determined to make “the most beautiful Easter treats ever” for my family gathering. I had watched the tutorials, bought all the supplies, and felt supremely confident. What could go wrong?
Well, everything. I didn’t chill the cake balls long enough. My first dip into the melted candy coating resulted in a cascade of cake crumbs turning the pastel pink into a murky, lumpy beige. Cake balls slid off sticks like they were on a water slide. My kitchen looked like a confectionery crime scene, and I was covered in chocolate. I nearly gave up. But then, my youngest niece peeked in. She pointed at a particularly lopsided, sprinkle-encrusted pop and gasped, “Auntie Liv, it’s a funny bunny! I love it!”
That was the moment it clicked. It wasn’t about perfection. It was about the laughter, the shared mess, and the pure joy of creating something together. We spent the next hour salvaging the “funny bunnies,” and they were the hit of the party. That’s the spirit I want to bring to your kitchen today. Embrace the quirks! A slightly crooked ear or an extra-thick coat of sprinkles just adds character. Let’s make some memories, not just cake pops.
Gathering Your Happy Ingredients
Here’s the beautiful part: you likely have most of this in your pantry already. This recipe is wonderfully forgiving and customizable. Here’s what you’ll need to make about 18-20 pops of happiness.
Cake Base
- 1 baked 9-inch cake (vanilla or chocolate), completely cooled: This is your blank canvas! I love using a simple vanilla box mix for ease and consistent texture—it crumbles perfectly. Bake it according to package directions and let it cool COMPLETELY. A warm cake will turn into mush. Feeling homemade? Your favorite from-scratch recipe works beautifully too.
- 1/2 cup frosting (store-bought or homemade): This is the “glue.” Cream cheese or vanilla frosting are my top picks for flavor. A pro tip: Start with 1/3 cup and add more as needed. You want the mixture to hold together when pinched, not be greasy. If you accidentally add too much frosting and the mix is sticky, a sprinkle of powdered sugar can help firm it up.
Coating & Decoration
- 12 oz white or pastel candy melts: Also called candy wafers, these are formulated to melt smoothly and set firm without tempering. They’re a cake pop lifesaver! You can find them in pastel colors for Easter. If you only have white, we can tint them (see below).
- Food coloring (if tinting white chocolate): Use oil-based food coloring only! Water-based (the standard liquid kind) will cause your chocolate to seize up into a grainy mess. Gel food coloring can sometimes work, but oil-based is the guaranteed safe bet.
- Sprinkles, sanding sugar, or drizzle icing: This is where personality shines! Pastel jimmies, flower-shaped sprinkles, or even pastel nonpareils are perfect. Have fun with it!
- Lollipop sticks: You can find these at any craft or baking store. Poke a test hole in your chilled cake ball with a stick before dipping to prevent cracking.
- Optional: Shredded coconut (for a nest look), mini candy eggs: For a super festive “bird’s nest” pop, roll the coated pop in toasted coconut and press in a few mini candy eggs while wet. Instant spring scene!
Let’s Make Some Magic: Step-by-Step
Okay, team. Let’s do this! Read through all the steps once, then put on your favorite playlist and dive in.
- Crumble & Combine: Take your completely cooled cake and crumble it into a large mixing bowl. You want fine, even crumbs—no big chunks. I use my fingers (so therapeutic!) but two forks work great. Now, add about half of your frosting. Use a spatula or your hands to mix it in. Keep adding frosting a spoonful at a time until the mixture holds together when you squeeze a bit in your palm. It should feel like soft, moldable dough, not like wet sand. Chef’s Hack: If you’re unsure, roll one test ball. If it holds its shape and doesn’t crack, you’re golden. If it’s crumbly, add a touch more frosting. If it’s sticky, you can add a tiny bit of powdered sugar.
- Roll & Chill (Part 1): Scoop out portions (about 1 tablespoon each) and roll them into smooth, tight balls. Place them on a parchment or wax paper-lined baking sheet. Once all rolled, pop the tray into the freezer for about 15 minutes. This short chill makes them firmer and easier to handle for the next step.
- Stick ‘Em Up: Melt a small amount of your candy melts (about 1/4 cup) in a microwave-safe bowl. Take your cake balls out of the freezer. Dip the tip of a lollipop stick about 1/2 inch into the melted candy, then immediately insert it straight into a cake ball, pushing it about 3/4 of the way through. The melted candy acts like edible cement, securing the stick so your cake ball doesn’t take a swim later. Place the pops back on the tray and transfer to the freezer for another 15-20 minutes. They should be firm but not frozen solid.
- Melt & Dip: While the pops chill, melt the rest of your candy melts. Do this slowly! Microwave in 30-second bursts, stirring vigorously between each, until completely smooth. If you’re tinting white candy melts, stir in the oil-based coloring now. Pour the melted candy into a tall, narrow cup or glass—this gives you the depth needed for a clean dip. Take a few cake pops out of the freezer at a time (keeping the rest cold). Holding the stick, dip the cake ball straight down into the coating until submerged. Gently lift it out and, without turning it upside down, tap your wrist lightly while rotating the stick to let the excess coating drip off. Biggest Tip Here: Patience with the tapping! Too much coating = heavy pops that can slide off the stick. A thinner coat sets better and looks more professional.
- Decorate & Set: This is the fun, fast part! Immediately after dipping, while the coating is still wet, add your sprinkles or decorations. If you’re doing a drizzle, let the base coat dry completely first. To dry, stand the pops upright. I use a block of styrofoam, but an upside-down egg carton or a box with holes poked in it works perfectly. Let them set at room temperature until the coating is completely hard. Do not refrigerate to set, as this can cause condensation and make the coating sticky.
Presenting Your Masterpieces
Displaying these cuties is half the fun! Stick them in a vase filled with pastel Easter grass or granulated sugar for a stunning centerpiece. For a party favor, let each pop dry, then wrap them individually in clear cellophane bags tied with a pretty ribbon. Arrange them on a cake stand layered with more sprinkles or edible flowers for your dessert table. They’re not just a treat; they’re part of the decoration!
Mix It Up! Fun Variations
- Carrot Cake Pops: Use carrot cake and cream cheese frosting! Add a pinch of cinnamon to the cake crumbs. Coat in orange candy melts and use green icing to pipe little carrot tops on top.
- Bunny Butt Pops: Shape the cake ball into a slight oval. After dipping in white coating, immediately attach a pink candy melt for the foot pad and two white candy melts for the bunny feet. Use a dab of icing to add tiny edible pearl sprinkles for toes.
- Chick Pops: Coat in yellow candy melts. Before it sets, add two mini chocolate chips for eyes and an orange sprinkle or piece of candy for the beak. So sweet!
- “Dirt” Nest Pops: Use chocolate cake and frosting. Coat in chocolate, then immediately roll in crushed chocolate cookie crumbs (the “dirt”). Press in a few jelly bean “eggs.”
- Gluten-Free/Dairy-Free: Use your favorite GF cake mix and frosting. Ensure your candy melts are dairy-free (many are!), or use a dairy-free chocolate bar chopped finely and mixed with a teaspoon of coconut oil for dipping.
Olivia’s Chef Notes & Kitchen Confessions
This recipe has evolved from that first sticky disaster into my reliable happy-place project. I now deliberately make a double batch of cake so I can freeze half the un-dipped cake balls for a future “I need a treat NOW” moment—they keep for months! My biggest evolution? I stopped aiming for bakery-perfect and started aiming for joy-perfect. The pop that got a little extra sprinkle love from my nephew is my favorite one.
A funny story: Last year, I was so focused on documenting the process for the blog that I accidentally used an entire jar of sprinkles on one pop. It looked like a glitter bomb exploded on it. We named it “The Party Animal” and gave it pride of place. It was the first one eaten. The moral? Don’t sweat the small stuff. The love and fun you bake into them are the most important ingredients. Now, go make a beautiful, happy mess!
Your Questions, Answered!
Q: My cake balls keep cracking when I dip them! What am I doing wrong?
A: This is usually a temperature issue. If the cake ball is too cold (frozen solid) and the coating is too hot, the thermal shock causes cracks. Let your frozen cake balls sit at room temp for 5 minutes before dipping. Also, ensure your coating isn’t too hot—it should be fluid but just warm to the touch.
Q: Why is my coating so thick and clumpy?
A: Candy melts can seize if overheated or if a tiny bit of water gets in. Always melt slowly and use completely dry tools. If it’s thick, you can add a teaspoon of solid vegetable shortening or paramount crystals (made for this purpose) to thin it to a dipping consistency. Do not add butter or milk.
Q: Can I make these ahead of time?
A> Absolutely! Undipped cake balls can be frozen for up to 2 months. Fully finished cake pops are best eaten within 3-4 days. Store them in a single layer in an airtight container at cool room temperature. Avoid the fridge due to humidity.
Q: My cake pops keep falling off the stick! Help!
A> Two key reasons: 1) You didn’t use the “glue” step of dipping the stick in melted coating first. 2) The cake ball is too heavy from too much frosting or too thick a coating. Next time, use less frosting and tap off more excess coating. You can also try inserting the stick at a slight upward angle, which can provide more support.

Easter Cake Pops (Cute & Easy Spring Party Treats)
Description
Easter Cake Pops
Your New Favorite Spring Tradition
If spring had a dessert mascot, it would absolutely be these Easter Cake Pops. They’re colorful, joyful, perfectly portioned, and secretly one of the easiest “wow” desserts you can make.
Moist cake + creamy frosting + a pastel candy shell = pure Easter magic.
And the best part? Perfection is not required. Personality is encouraged.
Ingredients
Cake Base
-
1 baked 9-inch cake (vanilla or chocolate), completely cooled
-
⅓–½ cup frosting (vanilla or cream cheese work beautifully)
Coating & Decorating
-
12 oz candy melts (white or pastel colors)
-
Oil-based food coloring (if tinting white melts)
-
Sprinkles, sanding sugar, or drizzle icing
-
Lollipop sticks
Optional:
-
Shredded coconut (for nest pops)
-
Mini candy eggs
-
Mini chocolate chips (for chick faces)
Instructions
1️⃣ Crumble & Mix
Crumble cooled cake into fine crumbs in a large bowl.
Add frosting gradually (start with ⅓ cup).
Mix until it holds together when squeezed — like soft dough, not sticky paste.
Test: Roll one ball. If it cracks → add a bit more frosting.
If it’s greasy/sticky → add a spoonful of powdered sugar.
2️⃣ Roll & Chill (Round 1)
Roll into 1-tablespoon-sized balls.
Place on parchment-lined tray.
Freeze 15 minutes (firm, not rock solid).
3️⃣ Secure the Sticks
Melt a small amount of candy melts.
Dip stick tip about ½ inch into melted candy.
Insert into cake ball (¾ of the way in).
Return to freezer 15–20 minutes.
This step prevents “cake pop collapse.”
4️⃣ Melt & Dip
Melt remaining candy melts slowly in microwave:
-
30-second intervals
-
Stir between each
Pour into a tall cup for easy dipping.
Remove a few pops at a time from freezer.
Dip straight down, fully submerge.
Lift and gently tap wrist while rotating to remove excess coating.
Thin coat = better hold.
5️⃣ Decorate Immediately
While coating is wet:
-
Add sprinkles
-
Attach decorations
-
Roll in coconut
Let dry standing upright in:
-
Styrofoam block
-
Upside-down egg carton
-
Box with holes poked in it
Let set at room temperature (avoid fridge to prevent condensation).
Notes
Cracking coating?
Cake balls too cold. Let sit 5 minutes before dipping.
Coating too thick?
Add 1 teaspoon vegetable shortening.
Never add water.
Pops falling off stick?
Always use the melted candy “glue” step.
Avoid too much frosting or overly thick coating.
A Quick Nutritional Note
Let’s be real—these are a celebratory treat! While they’re portion-controlled (one pop is plenty sweet), here’s a general idea per cake pop (approximate): Calories: 170, Protein: 2g, Carbohydrates: 24g, Fat: 7g. The joy and memories you create while making them, however, are calorie-free and infinitely enriching.
Final Thoughts
As you stand back and admire your tray of finished Easter cake pops—a cheerful army of pastel eggs, winking chicks, and maybe a few “party animals” covered in an avalanche of sprinkles—I hope you feel what I feel every time I make them: pure, unfiltered joy.
These little treats have taught me something important over the years. Perfection is overrated. Connection is everything. That first disastrous attempt a decade ago, the one that left me covered in melted candy and questioning my life choices? It became my favorite baking memory precisely because it was imperfect. It brought my niece into the kitchen. It turned a solo project into a shared laugh. It reminded me that the best recipes aren’t just about the food—they’re about the moments they create.
So as you package these up for an Easter egg hunt, arrange them on a platter for Sunday dinner, or simply sneak one off the tray before anyone else sees (I won’t tell), know that you’ve done something special. You’ve taken simple ingredients—cake, frosting, a little color—and turned them into edible happiness. You’ve continued a tradition of making things with your hands and sharing them with people you love.
And here’s the beautiful secret: now that you know how easy they are, you’ll start seeing cake pops everywhere. Birthdays. Baby showers. Random Tuesday afternoons when you need a creative pick-me-up. The method stays the same; only the decorations change. You’ve just added a genuinely useful skill to your kitchen repertoire.
Thank you for spending this time with me today. For trusting my recipe, reading my stories, and bringing a little spring sweetness into your home. Now go ahead—pick up the wonkiest cake pop on the tray, the one with the slightly crooked eyes or the extra-heavy sprinkle situation. Take a bite. Taste the love, the laughter, and the beautiful mess of making something yourself.