
Cozy Christmas Cocoa Cookies: Your New Holiday Baking Tradition
Hello, my friends, and welcome back to my kitchen! Can you smell that? It’s officially beginning to feel a lot like Christmas. The air is crisp, the lights are twinkling, and my oven is calling my name. If your idea of holiday magic involves a flour-dusted counter, a warm mug of something delicious, and the incredible aroma of cookies baking, then you and I are on the exact same page. Today, we’re making a batch of pure, unadulterated joy: my Cozy Christmas Cocoa Cookies.
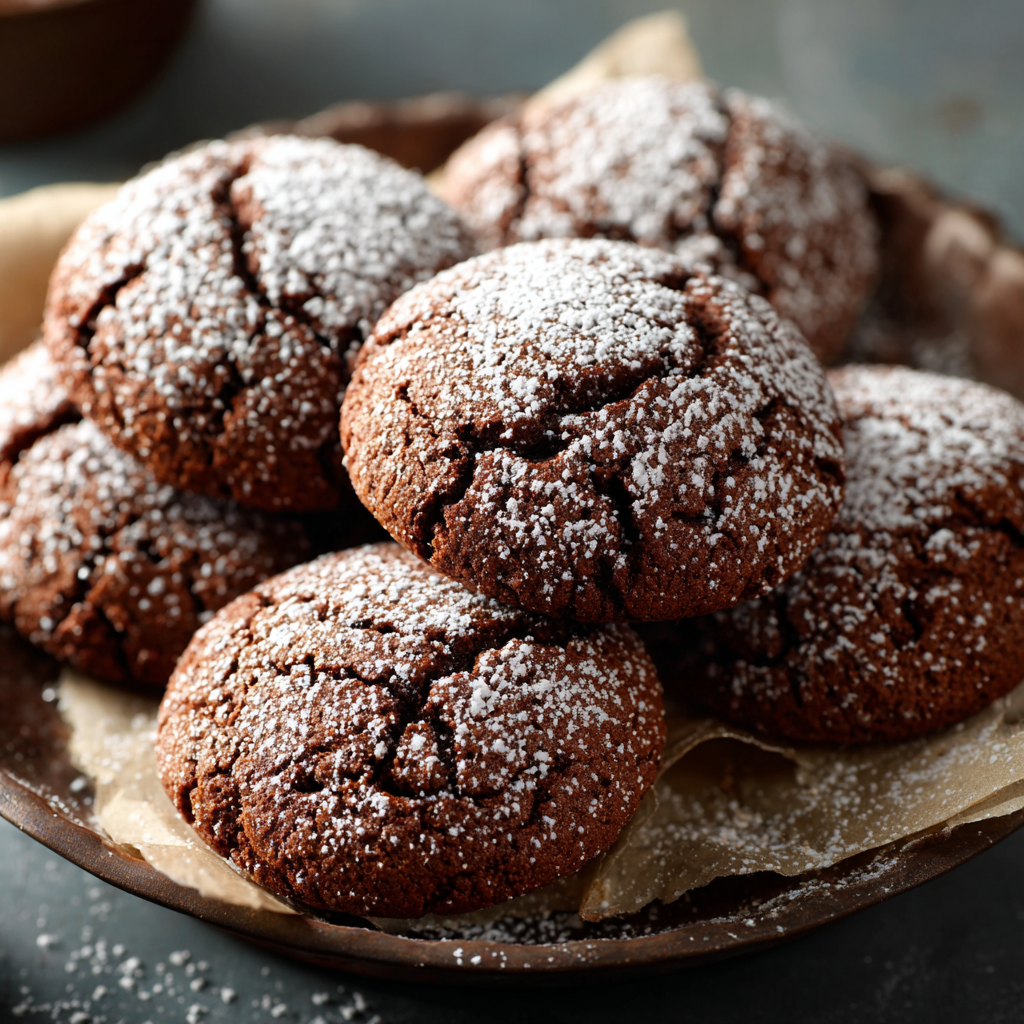
These aren’t just any cookies. They’re the soft, cake-like, cocoa-kissed pillows of delight that melt in your mouth and warm your soul. They’re the kind of cookie you sneak while they’re still warm from the tray, the kind you pile high on a plate for Santa (and let’s be honest, for yourself), and the kind that makes your entire house smell like a festive wonderland. The best part? They come together in one bowl and about 20 minutes. No fancy mixer, no complicated techniques—just simple, honest ingredients transforming into something truly special.
Whether you’re a seasoned baker or just dipping your toes into the world of holiday treats, this recipe is your perfect companion. It’s forgiving, fun, and absolutely foolproof. So, tie on your favorite apron (the messy one with the stories!), preheat that oven, and let’s create some delicious memories together. This is more than a recipe; it’s a little piece of my holiday heart, and I’m so excited to share it with you.
A Cookie Tin Full of Memories
This recipe takes me right back to my grandma’s kitchen, a place that always felt like the heart of our home, especially in December. She wasn’t a fancy pastry chef; she was a “pinch of this, dash of that” kind of cook, and her hands could magically turn the simplest ingredients into love. I remember standing on a wobbly wooden stool next to her, my small hands covered in flour, as she taught me how to roll the dough into little balls.
She called these her “Snowball Cookies,” and every year, we’d make dozens to fill her vast collection of vintage tins. We’d deliver them to neighbors, teachers, and the mailman. The act of baking them was just as important as eating them. It was our quiet time together, filled with stories and laughter, the radio softly playing Christmas carols in the background. The scent of cocoa and vanilla would wrap around us like a warm hug. To this day, the first bite of one of these soft, sugary cookies instantly transports me back to that stool, to her patient guidance, and to the simple, powerful joy of giving something made by hand. That’s the spirit I want to share with you today.
Gathering Your Ingredients
One of the things I love most about this recipe is its beautiful simplicity. You likely have most of these pantry staples on hand already! Here’s what you’ll need to make about 20 cookies, plus a little insight into why each ingredient plays its part.
- ⅓ cup Granulated Sugar: This gives our cookies just the right amount of sweetness without being overpowering. It also helps create a tender texture. If you prefer a deeper flavor, you can swap this out for light brown sugar for a hint of molasses.
- 2 Large Eggs: Our binding agent and a key player for structure! They make the cookies soft and cake-like. Make sure your eggs are at room temperature for a smoother, more cohesive dough.
- ⅓ teaspoon Salt: Don’t skip this! Salt is the flavor enhancer that makes the chocolate and sweetness truly pop. It balances everything out perfectly.
- ⅓ cup Sunflower Oil (or any neutral oil): This is the secret to an incredibly moist and tender crumb. Using oil instead of butter keeps these cookies wonderfully soft for days. I love sunflower oil for its light taste, but canola, vegetable, or even a light olive oil will work just fine.
- 2 cups All-Purpose Flour: The foundation of our cookie. When you measure your flour, fluff it up in the bag first, then spoon it into your measuring cup and level it off with a knife. This prevents packing in too much flour, which can lead to dry cookies.
- 1½ teaspoons Baking Powder: This is our leavening agent—the magic that gives the cookies their lovely lift and airy texture. Make sure your baking powder is fresh for the best rise!
- 1 teaspoon Vanilla Extract (or a pinch of Vanillin): The aromatic soul of so many baked goods! Pure vanilla extract adds a warm, complex flavor. Vanillin is a great, cost-effective alternative that still delivers that classic vanilla taste.
- 2 teaspoons Cocoa Powder: We’re using just enough for a gentle chocolate flavor and a beautiful light brown color. This isn’t an intense double-chocolate experience; it’s a subtle, cozy cocoa kiss. Use natural, unsweetened cocoa powder for the best result.
- Powdered Sugar for dusting (optional): This is the “snow” on our snowballs! A light dusting right after baking makes them look festive and adds a lovely little sweetness. It’s purely optional, but highly recommended for the full holiday effect.
Let’s Get Baking: Your Step-by-Step Guide
Ready to make some magic? Follow these simple steps, and I’ll be with you every step of the way with my favorite tips and hacks.
- Preheat and Prep: First things first, preheat your oven to 350°F (175°C). This is non-negotiable for perfect cookies! While it’s heating, line a baking sheet with parchment paper. Chef’s Hack: If you don’t have parchment, a light coating of baking spray works, but parchment is my gold standard for easy cleanup and preventing any sticking.
- The Wet Team Unites: Grab a large mixing bowl. Add the sugar, eggs, salt, and sunflower oil. Now, take your whisk and go to town! Whisk until the mixture is smooth, pale, and slightly thickened. You’re not just mixing; you’re incorporating a little air, which helps with the texture. You should see a slight ribbon form when you lift the whisk.
- Vanilla Love: Stir in your vanilla extract. Inhale that beautiful scent—that’s the smell of happiness right there.
- The Dry Team Joins the Party: Here’s a pro-tip for extra-light cookies: sift your flour, baking powder, and cocoa powder directly into the wet ingredients. Yes, sifting! It breaks up any lumps in the cocoa and flour and, you guessed it, adds more air. If you don’t have a sifter, just use a fine-mesh sieve or a whisk to fluff the dry ingredients together in a separate bowl before adding them.
- Mix with Care: Using a spatula or a wooden spoon, gently fold the dry ingredients into the wet until just combined. Chef’s Warning: Do not overmix! As soon as you no longer see streaks of flour, stop. Overmixing can develop the gluten in the flour and make the cookies tough instead of tender.
- Shape with Heart: The dough will be soft and a little sticky—that’s perfect! I use a small cookie scoop (about 1.5 tablespoons) to portion the dough. If you don’t have a scoop, two spoons work great. Roll the portions into small, rough balls with your hands. They don’t need to be perfect! Place them about 2 inches apart on your prepared baking sheet to give them room to spread.
- The Gentle Flatten: Use your fingers or the flat bottom of a glass to gently flatten each ball just slightly. This helps them bake evenly. If the dough sticks to the glass, dip the bottom in a little flour or sugar first.
- Bake to Perfection: Slide the tray into your preheated oven and bake for 10-12 minutes. You’re looking for the cookies to be “set”—the edges might look just slightly firmer, but the centers should still look soft. Chef’s Secret: They will continue to cook on the hot tray after you take them out. This is the key to a soft, not crunchy, cookie!
- The Patience Test: This is the hardest part! Let the cookies cool on the baking sheet for at least 5 minutes before you even think about moving them. They are very fragile when hot. After that, you can transfer them to a wire rack to cool completely, or, if you’re like me, dig in while they’re still warm.
- The Final Touch: Once the cookies are just slightly warm or completely cool, it’s time for the snow! Place a little powdered sugar in a sieve and dust it over the cookies for that picture-perfect, festive finish.
How to Serve These Cozy Delights
Presentation is part of the fun! I love piling these cookies high on a rustic wooden board or a vintage Christmas plate. They look absolutely beautiful next to a mug of steaming hot cocoa or a glass of cold milk—the ultimate pairing. For a real holiday touch, place a few in a cellophane bag tied with a ribbon for a heartfelt homemade gift that anyone would adore. They’re the star of any cookie swap or holiday dessert table.
Get Creative: Fun Recipe Twists!
Once you’ve mastered the classic, feel free to play! Here are a few of my favorite variations:
- Peppermint Twist: Add ¼ teaspoon of peppermint extract along with the vanilla. After dusting with powdered sugar, crush a candy cane and sprinkle the pieces on top for a festive crunch.
- Orange Zest Delight: Add the zest of one large orange to the sugar at the beginning. The citrus and chocolate combo is a classic winter winner.
- Chocolate Chip Version: Fold in ½ cup of mini chocolate chips at the end. Because sometimes, more chocolate is the only answer.
- Gluten-Free Swap: Substitute the all-purpose flour with a 1:1 gluten-free baking blend. The texture will be just as wonderful!
- Spiced Cocoa Cookie: Add ½ teaspoon of cinnamon and a pinch of nutmeg to the dry ingredients for a warm, spiced flavor that screams holidays.
From My Kitchen to Yours: Chef’s Notes
This recipe has been a living, evolving thing in my kitchen. The first time I made them, I was so worried about overbaking that I took them out too early. They were a gooey, delicious mess! I’ve learned that the 10-minute mark is just a guide; your oven might be different. Trust your instincts and your nose. If your kitchen smells like heaven, they’re probably done.
I also have a funny habit of always making a double batch. The first batch is for immediate consumption (quality control, you understand), and the second is for the freezer. Yes, you can freeze the shaped dough balls on a tray and then transfer them to a bag. Then, you can bake just two or ten cookies anytime a craving strikes. It’s my little secret for having fresh, warm cookies on demand all season long. This recipe is a canvas—make it your own and have fun with it!
Your Questions, Answered!
Q: My dough was really sticky and hard to roll. What did I do wrong?
A: You likely did nothing wrong! The dough is meant to be soft. If it’s unmanageably sticky, it could be due to humidity or slight variations in flour. The easy fix is to pop the bowl of dough into the refrigerator for 15-20 minutes. This will firm it up just enough to make rolling a breeze. You can also lightly oil or flour your hands before shaping the balls.
Q: My cookies turned out flat. Why?
A: Flat cookies are usually caused by two things. First, check the expiration date on your baking powder. If it’s old, it won’t provide the necessary lift. Second, make sure your oven was fully preheated. Putting dough into a cool oven can cause it to spread before it sets.
Q: Can I use butter instead of oil?
A: You can, but the texture will change! Butter will create a slightly crispier edge and a richer flavor, while oil guarantees an supremely soft and moist cookie throughout. If you want to try it, use ⅓ cup of melted, cooled butter in place of the oil.
Q: How should I store these cookies, and how long will they last?
A> Store them in an airtight container at room temperature. They will stay soft and delicious for up to 4-5 days. If you want to keep them longer, they freeze beautifully for up to 3 months. Just thaw at room temperature and give them a fresh dusting of powdered sugar before serving.
Cozy Christmas Cocoa Cookies
Description
Hello, friends! Olivia here. Can you smell that? It’s officially beginning to feel like Christmas—the crisp air, twinkling lights, and the irresistible aroma of cookies baking. Today, we’re making Cozy Christmas Cocoa Cookies: soft, cake-like, cocoa-kissed pillows of delight that melt in your mouth and warm your soul.
Ingredients
-
⅓ cup granulated sugar (or light brown sugar for a deeper flavor)
-
2 large eggs, at room temperature
-
⅓ tsp salt
-
⅓ cup sunflower oil (or neutral oil like canola or vegetable)
-
2 cups all-purpose flour
-
1½ tsp baking powder
-
1 tsp vanilla extract (or a pinch of vanillin)
-
2 tsp unsweetened cocoa powder
-
Powdered sugar, for dusting (optional)
Tip: Sift the flour, cocoa, and baking powder for extra light, fluffy cookies.
Instructions
-
Preheat & Prep: Preheat oven to 350°F (175°C). Line a baking sheet with parchment paper.
-
Mix Wet Ingredients: In a large bowl, whisk together sugar, eggs, salt, and oil until smooth and slightly thickened.
-
Add Vanilla: Stir in vanilla extract for that warm, festive aroma.
-
Combine Dry Ingredients: Sift flour, baking powder, and cocoa directly into the wet mixture. Fold gently with a spatula until just combined. Do not overmix!
-
Shape Cookies: Scoop dough (~1.5 tbsp per cookie) and roll into balls. Place 2 inches apart on the baking sheet and gently flatten slightly with your fingers or a glass bottom.
-
Bake: 10–12 minutes until edges are set but centers are still soft. Cookies continue to firm as they cool.
-
Cool & Dust: Let cool on the sheet for 5 minutes, then transfer to a wire rack. Dust with powdered sugar for a festive “snow” effect.
Notes
-
Peppermint Twist: Add ¼ tsp peppermint extract and crushed candy canes on top.
-
Orange Zest Delight: Add zest of one orange to the sugar for a citrusy cocoa combo.
-
Chocolate Chip: Fold in ½ cup mini chocolate chips.
-
Spiced Cocoa Cookie: Add ½ tsp cinnamon and a pinch of nutmeg for a warm, spiced flavor.
-
Gluten-Free: Substitute all-purpose flour with a 1:1 gluten-free baking blend.
Nutritional Information (Per Cookie, Approximate)
Calories: 110 | Fat: 5g | Carbs: 14g | Sugar: 6g | Protein: 2g
Prep Time: 10 minutes | Cook Time: 10–12 minutes | Total Time: ~20–25 minutes | Servings: 20 cookies
Final Thoughts: A Recipe for Connection
And there you have it—more than just a cookie recipe, but a little vessel for memory-making. These Cozy Christmas Cocoa Cookies are a tribute to the simple, heartfelt moments that define the season: the warmth of the oven, the dusting of “snowy” sugar, and the joy of sharing something made with your own two hands.
I hope this recipe finds its way into your holiday traditions, creating its own stories in your kitchen. May your home be filled with their wonderful aroma, and may you share them with people who fill your heart with light. From my family to yours, happy holidays and happy baking!


