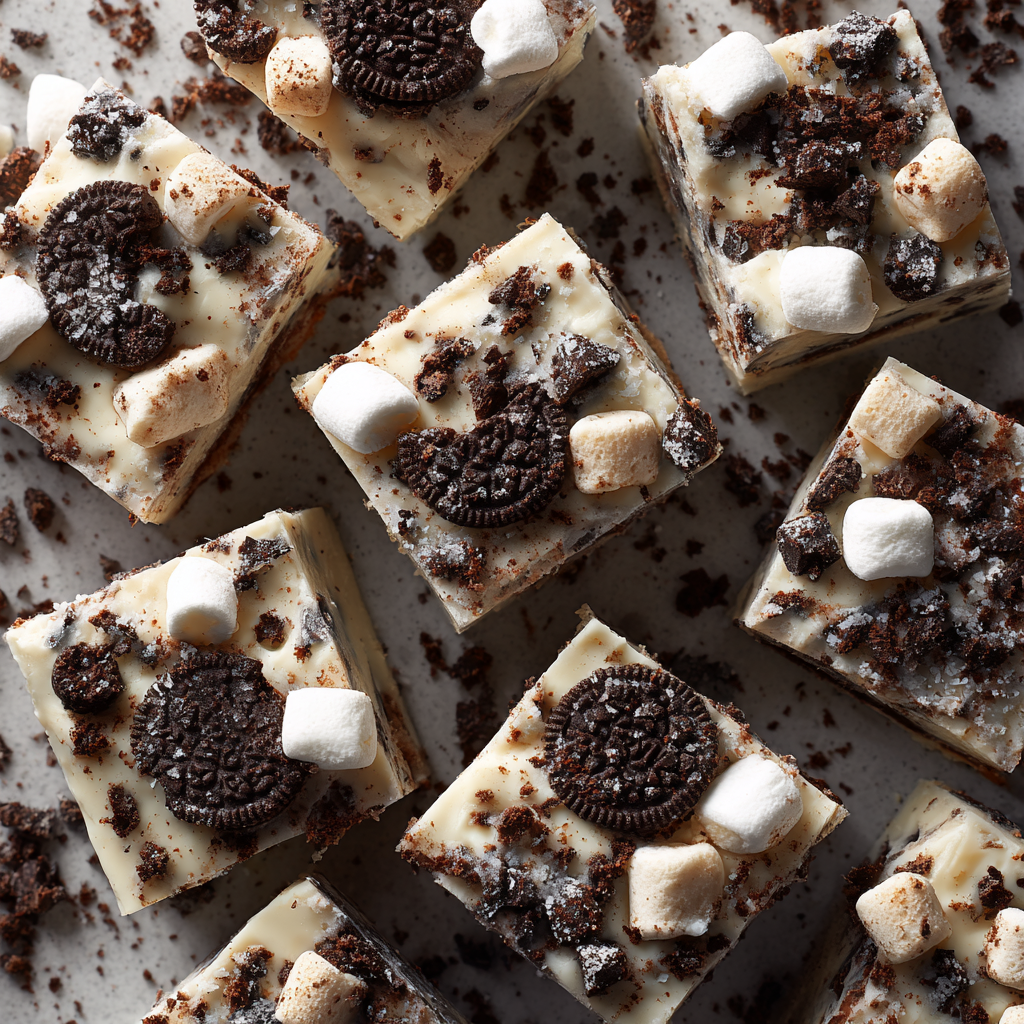
Your New Favorite No-Fuss Treat: Cookies and Cream Fudge
Hey there, friend! Come on in, grab an apron, and get ready to make something that’s about to become your go-to dessert for, well, every occasion. Is there anything more universally loved than the magical combo of rich, creamy white chocolate and crunchy, chocolatey Oreos? I don’t think so. This Cookies and Cream Fudge is the stuff of sweet dreams, and I’m so excited to share it with you.
Now, I know what you might be thinking: “Fudge? Isn’t that fussy? Don’t I need a candy thermometer and the patience of a saint?” I’m here to tell you a delicious secret: not this fudge! This is the ultimate no-fuss, no-fail, microwave-in-minutes kind of recipe. We’re taking a classic and giving it a little *oomph* with mini marshmallows for a fun, fluffy texture and a whisper of sea salt to make all those sweet flavors pop. It’s rich, it’s decadent, and it’s so easy you’ll have it chilling in the fridge before your favorite show’s opening credits are over. This is the perfect recipe to build your kitchen confidence and create a treat that will have everyone asking, “You made this?!” Let’s get started!
A Fudge That Feels Like a Hug
This recipe always takes me right back to my grandma’s linoleum-floored kitchen. She was the queen of “semi-homemade” before it was even a term, a wizard at turning simple ingredients into pure magic. One particularly chaotic Christmas Eve, she realized she’d forgotten to make a dessert for the next day. With a house full of cousins and a pantry that was looking sparse, she didn’t panic. She pulled out a bag of white chocolate chips, a can of sweetened condensed milk, and a sleeve of cookies I’d been sneaking all afternoon.
In what felt like mere moments, she whipped up this fudge. The moment she added the crushed Oreos, the whole kitchen smelled like a chocolatey dream. That pan of fudge wasn’t just a dessert; it was a saving grace. It taught me that the best recipes aren’t always the most complicated ones—they’re the ones made with a little ingenuity and a whole lot of love. Every time I make this fudge, I think of her, and I hope it becomes a little piece of your own family’s story, too.
Gathering Your Fudge-Making Crew
Here’s the beautiful part: you only need a handful of simple ingredients to create this spectacular treat. Let’s break them down so you know exactly why each one is a star player.
- 24 oz White Baking Chips: This is the creamy base of our fudge. I recommend a high-quality brand for the smoothest melt. Chef’s Insight: If you can find them, vanilla baking wafers are even better than chips, as they’re designed to melt more evenly!
- 2 cups Sweetened Condensed Milk (about 1.5 cans): This is our sweetener and the magic ingredient that gives fudge its signature smooth, firm-yet-soft texture. Substitution Tip: There’s no great direct sub for this, as it’s essential for the no-cook method. For a dairy-free version, you can find coconut-based sweetened condensed milk at many health food stores.
- 36 Oreos, roughly chopped: The “cookies” in our cookies and cream! Rough chopping gives you a mix of fine crumbs and satisfying chunks. Chef’s Insight: Don’t use a food processor here—pulsing them by hand in a bag with a rolling pin gives you the perfect, varied texture.
- 2 cups Mini Marshmallows (optional, for texture): This is our fun twist! They add little pockets of airy, chewy sweetness that play so nicely against the creamy fudge. Substitution Tip: Not a marshmallow fan? Swap them for an extra cup of chopped Oreos or even some chopped toasted almonds for crunch.
- ½ tsp Sea Salt (optional, for contrast): Trust me on this! A little flaky sea salt sprinkled on top doesn’t make it taste salty; it enhances the sweetness of the white chocolate and deepens the flavor of the Oreos. It’s a game-changer.
- Extra Crushed Oreos for Topping (optional): This is all about the bakery-style finish! A sprinkle on top makes it look gorgeous and promises the cookie-packed goodness inside.
Let’s Make Some Magic: The Foolproof Steps
Ready? This is where the fun happens. I’ll walk you through every single step, sharing all my little hacks to ensure your fudge is absolutely perfect.
- Prep Your Pan. Line a 9×13 inch baking dish with parchment paper, leaving a little overhang on two sides. Chef’s Hack: Giving the pan a very light spritz of cooking spray *before* laying down the parchment paper helps the paper stick in place, making your job so much easier. This little step is your ticket to effortlessly lifting the entire slab of fudge out for clean, easy cutting later.
- The Melting Moment. In a large, microwave-safe bowl, combine the entire bag of white baking chips and the sweetened condensed milk. Chef’s Tip: “Large” is key here—you want plenty of room to stir without making a mess. Now, microwave on high for 30 seconds. Take it out and stir. It won’t look like much has happened, but this is crucial! Microwave for another 30 seconds, stir again. You should see it starting to melt beautifully. Continue in 20-30 second bursts, stirring vigorously in between, until the mixture is completely smooth and glossy. This should take about 2-3 minutes total. Do not be tempted to microwave it for longer intervals! White chocolate is delicate and can scorch easily, which gives it a grainy texture. Patience is your best friend here.
- The Big Mix-In. Once your base is silky smooth, it’s time for the add-ins! Stir in most of your roughly chopped Oreos and the mini marshmallows (if you’re using them). Chef’s Insight: I like to save a small handful of each to press into the top for a prettier finish. Stir until everything is just combined. You don’t want to over-mix and turn the whole thing gray from the Oreo crumbs.
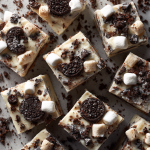
- Pan and Pretty It Up. Pour the thick, glorious mixture into your prepared pan. Use a spatula or the back of a spoon to spread it into an even layer. Now, take your reserved Oreos and marshmallows and sprinkle them artistically over the top. Follow it up with that optional-but-highly-recommended light pinch of flaky sea salt. Gently press the toppings down just so they adhere.
- The Chill Out. Carefully transfer the pan to the refrigerator. Let it chill for at least 1 hour, or until it’s completely firm to the touch. Chef’s Hack: If you’re in a real hurry, you can pop it in the freezer for 20-25 minutes. But the fridge gives it the perfect, creamy set.
- The Grand Finale: Cutting. Using the parchment paper overhang, lift the entire block of fudge out of the pan and onto a cutting board. Use a large, sharp knife to slice it into squares. Chef’s Pro-Tip: For super clean cuts, wipe your knife clean with a hot, damp cloth between each slice. You should get about 72 perfect, bite-sized squares of joy.
Sharing the Sweetness: How to Serve
This fudge is a star all on its own, but presentation is part of the fun! Pile these creamy squares high on a beautiful ceramic platter for a holiday party. For a fun, casual gathering, I love stacking them in a rustic mason jar or a little glass cloche. They make fantastic edible gifts, too—line a small gift box or tin with parchment paper and create a gorgeous layered pattern. No matter how you serve it, be prepared to share the recipe!
Make It Your Own: Delicious Variations
Once you’ve mastered the base, the flavor world is your oyster! Here are a few of my favorite ways to mix it up:
- Peppermint Twist: Use peppermint Oreos (or add ½ tsp of peppermint extract to the melted base) and swap the mini marshmallows for crushed candy canes for a festive holiday treat.
- Peanut Butter Paradise: Swirl ½ cup of warm, smooth peanut butter into the fudge base before adding the Oreos. It’s a Reese’s cup in fudge form!
- Dark Chocolate Delight: For a richer flavor, use dark chocolate chips instead of white and keep the Oreos for a double-chocolate experience.
- Birthday Cake Fun: Use Golden Oreos and stir in a handful of rainbow sprinkles along with the marshmallows. It’s a party in a pan!
- Mocha Madness: Add 1-2 tablespoons of instant espresso powder to the white chocolate and condensed milk as it melts for a sophisticated coffee kick.
Olivia’s Chef’s Notes
This recipe has truly evolved in my kitchen. The first time I made it, I stuck strictly to the classic formula. But one day, I had a half-bag of mini marshmallows left over from a camping trip and just tossed them in on a whim. The textural surprise was a revelation! It’s a testament to my kitchen philosophy: don’t be afraid to play with your food.
A funny story: I once brought this to a potluck, and a friend spent five minutes trying to figure out what the “little white things” were. When I said “marshmallows,” her eyes lit up like I’d just revealed the secret of the universe. It’s now the only way she’ll make it. This recipe is a living, breathing thing in my home, and I hope it becomes one in yours, too. Adapt it, love it, and make it yours.
Your Fudge Questions, Answered!
I’ve made this fudge more times than I can count, and I’ve heard all your wonderful questions. Here are the answers to the most common ones!
Q: My fudge is too soft/grainy. What happened?
A: Graininess is almost always from overheating the white chocolate. If it seizes or gets grainy, it’s very hard to fix. For future batches, stick to short microwave bursts! If your fudge is too soft, it likely just needs more chilling time. Make sure it’s firm all the way through before cutting. Your fridge temp can also be a factor.
Q: Can I make this without a microwave?
A: Absolutely! You can use a double boiler. Fill a saucepan with an inch or two of water and bring to a simmer. Place a heatproof bowl on top (ensuring the bottom doesn’t touch the water) with the chips and condensed milk. Stir constantly until melted and smooth. This method gives you even more control and prevents scorching.
Q: How long does this fudge keep, and how should I store it?
A: This fudge stores beautifully! Keep it in an airtight container in the refrigerator for up to 2 weeks. The cold helps it maintain its perfect texture. You can also freeze it for up to 3 months. Just separate layers with parchment paper in a freezer-safe container. Thaw in the fridge overnight.
Q: My marshmallows melted/disappeared into the fudge! Is that normal?
A> It can be, especially if your fudge base was still very warm when you stirred them in. They will soften and mostly melt in, creating that wonderful chewy texture rather than distinct shapes. If you want them to hold their form more, let the melted fudge base cool for 5-10 minutes before folding them in.
Cookies and Cream Fudge
- Total Time: 1 hr 6 min
Description
Meet the dessert that’s about to steal every heart at your table. This Cookies and Cream Fudge is creamy, dreamy, and ridiculously easy — no candy thermometer, no stress, just pure white chocolate magic swirled with crunchy Oreos and pillowy marshmallows. It’s the kind of treat that looks impressive, tastes divine, and takes less time than your favorite sitcom’s opening scene. Whether you’re gifting, entertaining, or sneaking a piece at midnight (no judgment here), this fudge is comfort and nostalgia in every bite.
Ingredients
-
24 oz white baking chips
-
2 cups sweetened condensed milk (about 1½ cans)
-
36 Oreos, roughly chopped
-
2 cups mini marshmallows (optional but highly recommended)
-
½ tsp flaky sea salt (optional, but magical)
-
Extra crushed Oreos for topping
Instructions
-
Prep the Pan: Line a 9×13” dish with parchment paper, leaving overhang for easy removal.
-
Melt & Mix: In a large microwave-safe bowl, heat white chips and condensed milk in 30-second bursts, stirring each time until smooth and glossy (about 2–3 minutes total).
-
Add the Good Stuff: Fold in most of the Oreos and marshmallows, reserving a few for the top.
-
Spread the Joy: Pour into your pan, smooth the surface, and sprinkle on the remaining cookies and marshmallows. Add a pinch of sea salt for that flavor “pop.”
-
Chill Time: Refrigerate for at least 1 hour, or until firm.
-
Slice & Serve: Lift out using parchment, slice into bite-sized squares, and admire your masterpiece!
Notes
-
Peppermint Magic: Add crushed candy canes for a festive flair.
-
Birthday Bash: Use Golden Oreos and rainbow sprinkles.
-
Mocha Love: Stir in 1 tbsp instant espresso for a coffee kick.
-
PB Swirl: Add ½ cup warm peanut butter before mixing in cookies.
- Prep Time: 3 min
- Cook Time: 3 min
Nutrition
- Calories: 72 squares (~90 cal each)
Quick Bite: Prep & Nutrition
- Prep time: 3 minutes
- Cook time: 3 minutes
- Chill time: 1 hour
- Total time: 1 hour 6 minutes
- Servings: 72 pieces
- Estimated calories: ~90 per square
Rich, creamy, and packed with cookie crunch—this upgraded fudge is dangerously good. Make a batch and watch it disappear!