
Colorado Green Chili: Your New Favorite Bowl of Comfort
Hey there, friend! Come on in, pull up a stool. Can you smell that? It’s the kind of aroma that fills every corner of the house, promising something seriously good is about to happen. We’re talking about the legendary, the soul-warming, the downright irresistible Colorado Green Chili. This isn’t just any chili; it’s a big, cozy hug in a bowl, a flavor-packed celebration that turns simple ingredients into pure magic.
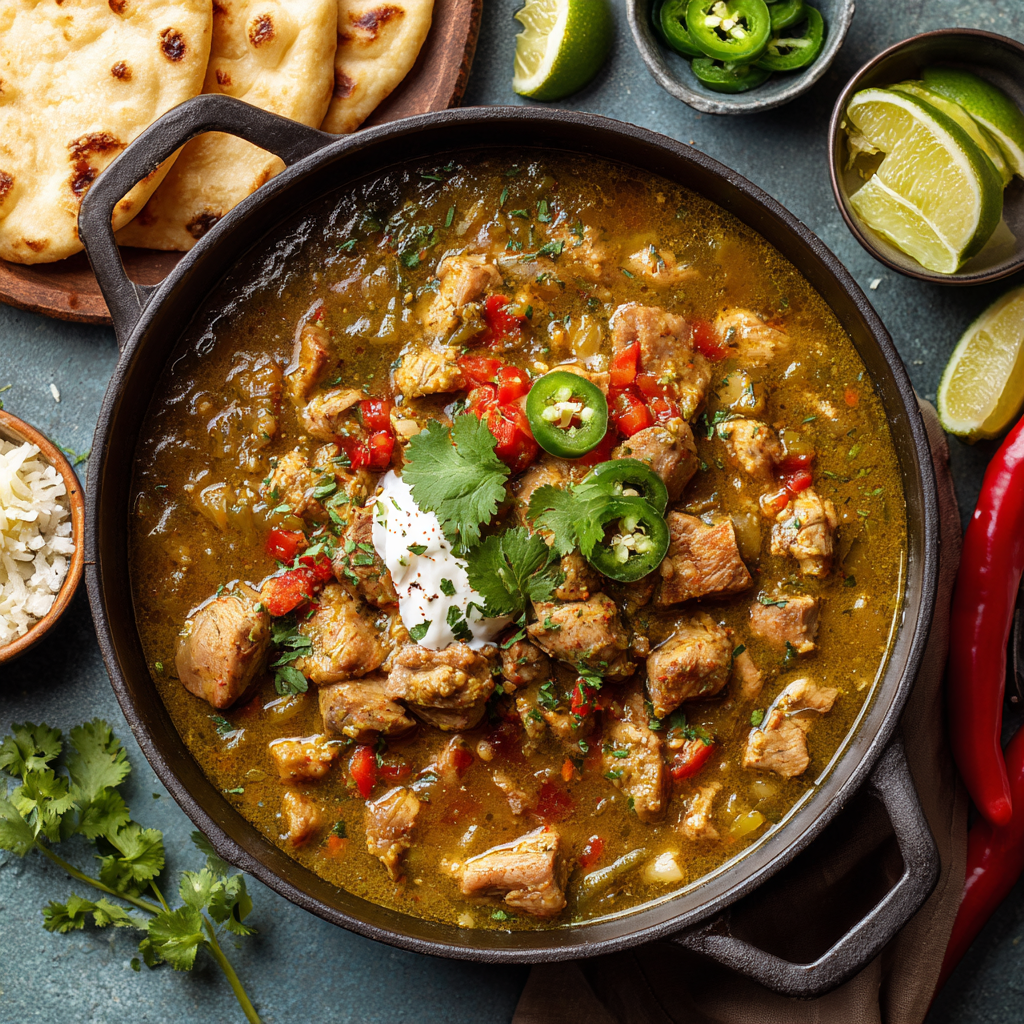
If you’ve never experienced this Rocky Mountain classic, you are in for a treat. Imagine tender, fall-apart pork simmered for hours in a rich, savory broth with the smoky, slightly spicy kick of roasted green chilies. It’s hearty but not heavy, complex but incredibly approachable. This is the dish you make on a crisp autumn weekend, the one you proudly serve to a crowd during game day, or the one you lovingly spoon over a pile of cheesy burritos for the most epic smothered meal of your life.
I know the words “simmer for hours” can sound a little intimidating, but trust me, this is one of the easiest, most forgiving recipes in my arsenal. It’s mostly hands-off time, letting the pot do all the work while you relax. My goal today is to walk you through every single step, sharing all my little kitchen secrets, so you feel like a green chili pro by the time we’re done. So, grab your favorite Dutch oven, and let’s make some memories together!
A Bowl Full of Mountain Memories
This recipe takes me straight back to my first autumn living in Colorado. A new friend invited me over for a “chili party,” and I, a Midwesterner used to tomato-based ground beef chili, had no idea what to expect. I walked into her kitchen and was hit by this incredible, smoky, savory scent that was completely foreign but instantly inviting.
She handed me a bowl, not of a thick, red paste, but of this beautiful, brothy, green-hued stew with big chunks of pork. I took one bite, and my culinary world tilted on its axis. It was spicy, but in a flavorful way that built slowly. It was rich, but the lime juice cut through it perfectly. We spent the entire evening gathered around her table, bowls in hand, laughing and passing around toppings. It was more than a meal; it was an experience of warmth and welcome. That night, I knew I had to learn how to make this magic myself. This recipe is my homage to that feeling of discovery and community—a taste of the Rockies, no matter where you are.
Gathering Your Green Chili Dream Team
Great flavor starts with great ingredients! Here’s everything you’ll need. Don’t stress if you can’t find something exact—I’ve included plenty of swaps and chef-y insights to guide you.
- 3 lbs pork shoulder or pork butt, cut into 1-inch cubes: This is our star! Pork shoulder has the perfect amount of fat that renders down during the long simmer, making the meat incredibly tender and flavorful. Chef’s Insight: Don’t use pork loin or tenderloin—they’re too lean and will become dry and tough.
- 2 tbsp olive oil: For searing that pork to golden-brown perfection.
- 1 large onion, diced: The sweet, aromatic base of our chili. Yellow or white onion works best here.
- 4 cloves garlic, minced: Because what’s a cozy dish without garlic? Fresh is always best!
- 2 cups roasted green chilies, chopped (Hatch or Anaheim preferred): The heart and soul of the dish! Hatch chilies from New Mexico are the gold standard for their unique flavor, but Anaheims are a fantastic and widely available alternative. You can find them canned or frozen in many grocery stores. Substitution Tip: In a real pinch, you can use canned diced green chilies (like Ortega), but seek out the “fire-roasted” kind for a deeper flavor.
- 2 jalapeños, seeded and chopped (optional for extra heat): This is your heat control! Leave the seeds in if you like a bigger kick, or omit them entirely for a milder chili.
- 2 cups chicken broth: Forms our delicious, savory broth. Use low-sodium so you can control the salt level yourself.
- 1 (14 oz) can diced tomatoes: Adds a touch of acidity and body. I prefer fire-roasted diced tomatoes for an extra layer of smokiness.
- 1 tbsp tomato paste: Our secret weapon for adding depth and richness to the base.
- 1 tsp ground cumin: Brings that essential warm, earthy flavor.
- 1 tsp dried oregano: A classic Mexican oregano would be authentic, but Mediterranean oregano works just fine.
- 1 tsp smoked paprika: This is key! It gives a subtle smokiness that complements the roasted chilies beautifully.
- ½ tsp ground coriander: Adds a slight citrusy, floral note that brightens the whole dish.
- Salt & black pepper, to taste: Season as you go! You’ll add more at the end.
- Juice of 1 lime: The final, crucial touch! A squeeze of fresh lime juice right before serving lifts all the flavors and balances the richness.
- Fresh cilantro, for garnish: For a pop of fresh, herbal color.
- Optional toppings: shredded cheese, sour cream, avocado, warm tortillas: The fun part! Let everyone customize their bowl.
Let’s Get Cooking: Building Flavor, Layer by Layer
Okay, now for the fun part! We’re going to build this chili like we’re building a flavor skyscraper—one solid layer at a time. Read through the steps once before you start, and you’ll be a pro.
Step 1: Sear the Pork. Pat your pork cubes completely dry with paper towels—this is the #1 secret to getting a good sear, not a steam! Heat the olive oil in a large Dutch oven or heavy-bottomed pot over medium-high heat. Working in batches to avoid crowding the pot, add the pork and sear until it’s beautifully browned on all sides. This isn’t just for color; those browned bits at the bottom of the pot (the “fond”) are pure flavor gold! Remove the pork and set it aside on a plate. Chef’s Hack: Don’t rush this step. Good browning = deep flavor.
Step 2: Cook the Aromatics. In that same glorious pot, with all the pork drippings, add the diced onion. Sauté for about 5-7 minutes, until it becomes soft and translucent. Now, add the minced garlic and cook for just one more minute until it’s fragrant. You’ll know it’s ready when your kitchen smells amazing. Be careful not to burn the garlic!
Step 3: Build the Flavor Base. Push the onions and garlic to the side and add the tomato paste right onto the hot surface of the pot. Let it cook for about 30 seconds—you’ll see it darken slightly and smell a richer, sweeter aroma. This quick cook removes the raw tinny taste. Now, sprinkle in all your ground spices—the cumin, oregano, smoked paprika, and coriander. Stir everything together with the onions and garlic for another 30 seconds. This “blooms” the spices, waking up their essential oils and making their flavor more pronounced.
Step 4: The Grand Simmer. It’s time to bring it all together! Return the seared pork (and any accumulated juices) to the pot. Add the chopped green chilies, jalapeños, diced tomatoes, and chicken broth. Give it a good stir, scraping up all those delicious browned bits from the bottom of the pot. Bring the whole thing to a lively boil, then immediately reduce the heat to low. Cover the pot with a lid and let it simmer gently for 1 ½ to 2 hours. You’ll know it’s done when the pork is so tender you can cut it with a spoon. Chef’s Tip: Resist the urge to boil it! A gentle simmer is what makes the meat tender.
Step 5: The Final Touch. Once the pork is melt-in-your-mouth tender, turn off the heat. Stir in the fresh lime juice. This is non-negotiable—it brightens the entire dish! Now, taste your masterpiece. This is when you adjust the seasoning with salt and pepper. It will likely need a good pinch of both.
How to Serve Your Green Chili Masterpiece
This is where the party starts! Ladle the steaming hot chili into deep bowls. I love a big, rustic bowl for this. Garnish generously with a handful of fresh, chopped cilantro. Now, set up a topping bar! Offer bowls of shredded Monterey Jack or cheddar cheese, a dollop of cool sour cream or Mexican crema, creamy slices of avocado, and a stack of warm flour or corn tortillas on the side. For the ultimate Colorado experience, spoon it over a couple of hot, cheesy burritos for “smothered” burritos—it’s a game-changer!
Make It Your Own: Delicious Twists & Swaps
Love this recipe? Try these fun variations!
- Chicken Green Chili: Swap the pork for 2 lbs of boneless, skinless chicken thighs. Reduce simmer time to 45-60 minutes, or until chicken shreds easily.
- Vegetarian/Vegan Delight: Omit the pork. Use vegetable broth and add 2 cans of drained and rinsed white beans (like cannellini or great northern) when you would add the tomatoes. You’ll still get a hearty, flavorful chili!
- White Green Chili: For a lighter version, omit the diced tomatoes and tomato paste. Use a little extra chicken broth. It’s a different but equally delicious take!
- Spice Level Control: For mild, use only mild green chilies and omit jalapeños. For extra hot, use hot Hatch chilies, leave the seeds in the jalapeños, or add a diced serrano pepper.
- Colorado Pork & Bean: Purists might gasp, but adding a can of drained pinto beans during the last 30 minutes of cooking makes it even heartier.
Olivia’s Chef Notes & Kitchen Stories
This recipe has evolved so much in my kitchen over the years. The first time I made it, I was so nervous about the spice level that I used one single, tiny Anaheim pepper. Let’s just say it was… very savory. My husband, bless him, smiled and said, “This is a great pork stew!” Now I’m not afraid to really go for it with the chilies.
My other favorite kitchen memory involves my Dutch oven. I was so proud of it, but I didn’t realize the lid wasn’t on quite right. I came back after an hour to check on the chili and found it had simmered so vigorously it painted my stovetop with little green polka dots. A delicious mess! The moral of the story? Make sure your lid is snug, and if you’re unsure, peek more often. Cooking is an adventure, and a little mess just means you’re having fun.
Your Green Chili Questions, Answered!
Q: My chili is too thin! How can I thicken it?
A: No problem! Here are two easy fixes: 1) The Simmer: Uncover the pot and let it simmer for an additional 15-20 minutes to reduce and concentrate the liquid. 2) The Slurry: Mix 1 tablespoon of cornstarch with 2 tablespoons of cold water until smooth. Stir this into the simmering chili and cook for 2-3 minutes until thickened.
Q: Can I make this in a slow cooker or Instant Pot?
A: Absolutely! Slow Cooker: Follow steps 1-3 in a skillet, then transfer everything to the slow cooker. Cook on LOW for 6-8 hours or HIGH for 3-4 hours. Instant Pot: Use the Sauté function for steps 1-3. Add all other ingredients, secure the lid, and cook on High Pressure for 35 minutes, followed by a natural pressure release for 10 minutes.
Q: How long does it last, and can I freeze it?
A: This chili is even better the next day! Store it in an airtight container in the fridge for up to 4 days. It freezes beautifully for up to 3 months. Let it cool completely before freezing. Thaw overnight in the fridge and reheat gently on the stovetop.
Q: It’s not spicy enough for me. How can I add more heat?
A: Easy fixes! Stir in a few dashes of your favorite hot sauce at the end, add a pinch of cayenne pepper with the other spices, or serve with sliced fresh jalapeños or serranos on the side for people to add themselves.

Colorado Green Chili
Description
Step into your kitchen and breathe in the aroma: tender, fall-apart pork simmering in a smoky, savory green chili broth. This Colorado classic isn’t just a meal—it’s a hug in a bowl. Hearty but not heavy, spicy yet balanced, it’s perfect for crisp autumn weekends, game-day gatherings, or smothering your favorite burritos.
Ingredients
Main Ingredients:
-
3 lbs pork shoulder or pork butt, cut into 1-inch cubes
-
2 tbsp olive oil
-
1 large onion, diced
-
4 cloves garlic, minced
-
2 cups roasted green chilies, chopped (Hatch or Anaheim)
-
2 jalapeños, seeded and chopped (optional for heat)
-
2 cups chicken broth (low-sodium)
-
1 (14 oz) can diced tomatoes (fire-roasted preferred)
-
1 tbsp tomato paste
-
1 tsp ground cumin
-
1 tsp dried oregano
-
1 tsp smoked paprika
-
½ tsp ground coriander
-
Salt & black pepper, to taste
-
Juice of 1 lime
-
Fresh cilantro, for garnish
Optional Toppings:
Shredded cheese, sour cream, avocado, warm tortillas
Instructions
Pat pork cubes dry. Heat olive oil in a Dutch oven or heavy pot over medium-high heat. Sear pork in batches until golden brown on all sides. Remove and set aside.
In the same pot, sauté onion for 5–7 minutes until translucent. Add garlic and cook 1 minute more until fragrant.
Add tomato paste directly to the hot pot; cook 30 seconds to deepen flavor. Stir in cumin, oregano, smoked paprika, and coriander for another 30 seconds to bloom the spices.
Return pork to the pot. Add green chilies, jalapeños, diced tomatoes, and chicken broth. Stir, scrape up browned bits, bring to a boil, then reduce to a gentle simmer. Cover and cook 1½–2 hours, until pork is tender.
Stir in fresh lime juice. Adjust seasoning with salt and pepper.
Notes
-
Too Thin? Simmer uncovered 15–20 minutes or stir in 1 tbsp cornstarch mixed with 2 tbsp water.
-
Slow Cooker/Instant Pot: Sear pork and aromatics, then transfer. Slow Cooker: LOW 6–8 hrs or HIGH 3–4 hrs. Instant Pot: High Pressure 35 min, natural release 10 min.
-
Storage: Refrigerate up to 4 days, freeze up to 3 months.
Nutritional Information*
*This is an estimate provided for informational purposes only. Values can vary based on specific ingredients used.
Per serving (approx., based on 8 servings): 370 calories | 22g fat | 8g carbs | 34g protein
Final Thoughts
So there you have it—your passport to a bowl of pure Colorado comfort. This green chili is more than just a recipe; it’s a story in a pot, a dish that’s meant to be shared with good friends and loud laughter. Don’t be intimidated by the simmer time; that’s just the magic working. It’s a forgiving, flexible recipe that welcomes your own personal touch.
I hope this chili finds a place in your own kitchen story, creating memories as warm and comforting as the first spoonful. Now, go grab that Dutch oven and get cooking! Your new favorite bowl of comfort is waiting.


