
Hey There, Hungry Friend! Let’s Make a Snack You’ll Absolutely Love
Is it just me, or is 3 PM a universal vortex of snack cravings? You’re powering through your day, feeling productive, and then… it hits. That undeniable, gotta-eat-something-NOW feeling. You stare into the abyss of the pantry, hoping for a miracle—something that tastes like a treat but fuels you like the champion you are. Well, my friend, consider your snack prayers answered. I’m so excited to share one of my all-time favorite, no-bake, life-saving recipes: Coconut Almond Energy Bites.
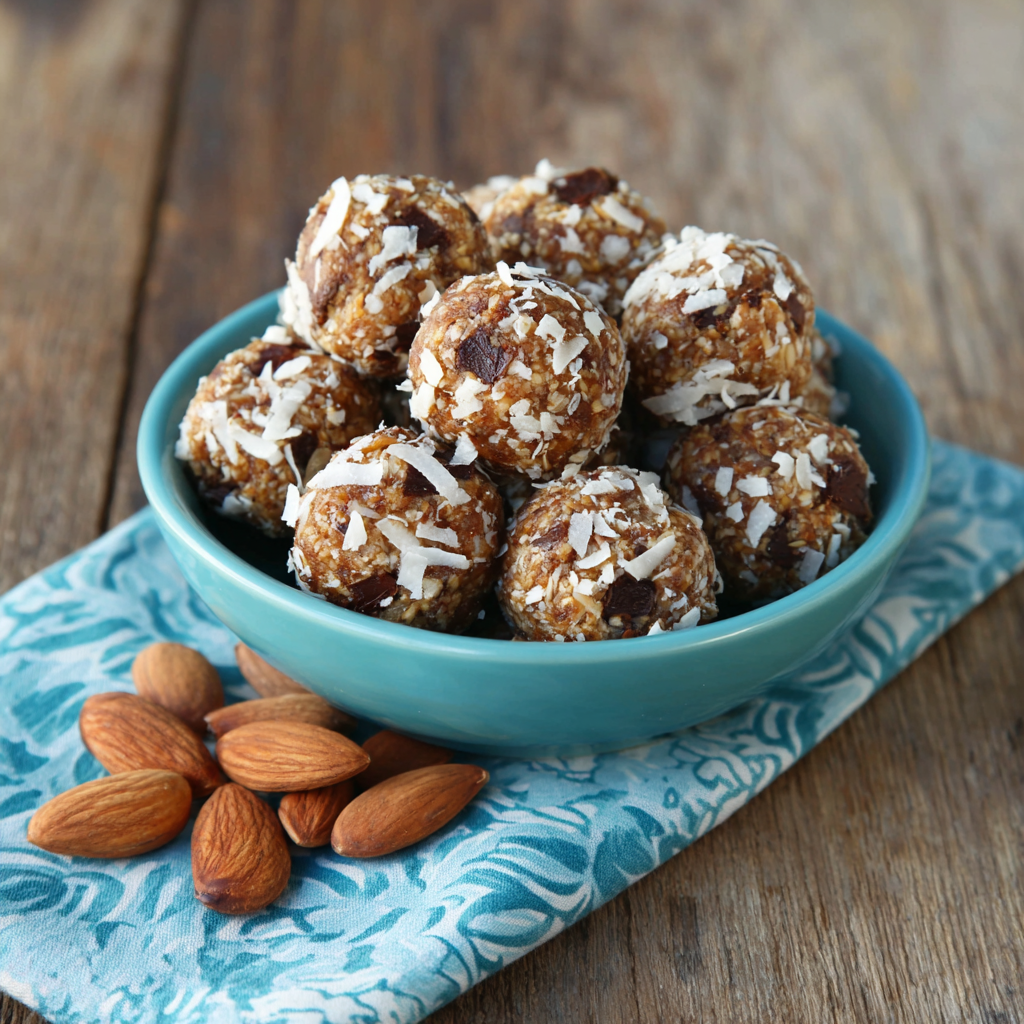
Imagine the irresistible, nostalgic flavor of an Almond Joy candy bar—toasty coconut, rich chocolate, creamy almond—all wrapped up in a wholesome, chewy, bite-sized package. But here’s the best part: these little powerhouses are made with real, simple ingredients that will actually love you back. They’re naturally sweetened, packed with good-for-you fats and fiber, and they come together in about 10 minutes with just one bowl. No baking required! Whether you need a quick breakfast on the run, a pre-workout boost, or just a little something to satisfy that sweet tooth, these energy bites are your secret weapon. So, tie that apron on (embrace the mess, I always do!), and let’s make something delicious together.
The Day the Pantry Saved the Party
This recipe is my kitchen MVP, and it earned its title during a near-catastrophic playdate a few years ago. My daughter had a few friends over, and I’d promised them “special cookies.” I had the music on, the kitchen was prepped, and then… I realized I was out of eggs. And butter. And, honestly, the will to turn on the oven in the middle of a chaotic afternoon. A chorus of tiny, disappointed voices loomed in my future.
In a slight panic, I started frantically pulling open cabinets. Oats? Check. Almond butter from that phase I went through? Check. A bag of coconut that needed using up? Check. I started throwing things into a bowl, thinking, “Well, let’s see what happens.” I let the kids roll the sticky mixture into little balls. They were suspicious but intrigued. Twenty minutes later, after a quick chill in the fridge, we had a plate of these adorable, truffle-like bites. The kids devoured them. One of them, with a chocolatey grin, declared, “These taste like vacation!” They’ve been a staple in my fridge ever since—the ultimate proof that the best creations often come from a happy little kitchen accident and a well-stocked pantry.
Gathering Your (Simple, Wholesome) Ingredients
Here’s the beautiful part: you probably have most of this in your kitchen right now! This is a no-judgment zone, so use what you’ve got. Here’s what you’ll need and why each ingredient is a rockstar:
- 1 cup rolled oats (old-fashioned oats): This is the heartier, chewier base of our bite. They provide lasting energy and fiber. Chef’s Insight: Don’t use instant or quick oats—they’re too fine and can make the texture a bit mushy. If you need a gluten-free option, just ensure your oats are certified GF!
- 1/2 cup almond butter: This binds everything together and gives us that incredible, nutty creaminess. Substitution Tip: Any nut or seed butter works beautifully here! Peanut butter will make it taste more like a no-bake peanut butter cookie, and sunflower seed butter is a fantastic nut-free alternative.
- 1/2 cup shredded coconut: Hello, tropical vibe! This brings the chewy texture and sweet, toasty flavor we’re after. Chef’s Insight: I prefer unsweetened to let the other sweeteners shine, but sweetened will work just fine and make them a tad sweeter. Toasting it beforehand adds a whole new depth of flavor!
- 1/4 cup honey or maple syrup: This is our natural sweetener and the other key binder that makes everything stick together. Substitution Tip: For a vegan version, maple syrup is the way to go. Agave nectar also works in a pinch!
- 1/4 cup mini chocolate chips: Because… chocolate. The mini chips distribute the chocolatey goodness perfectly in every single bite. Chef’s Insight: I love using dark chocolate chips for a less sweet, more antioxidant-rich option. Cacao nibs are also a great crunchier, less sugary alternative.
- 1 tbsp chia seeds or flaxseed: Our sneaky little nutrition boost! They add omega-3s, fiber, and a bit of texture, but you’d never know they’re there. A true kitchen hack.
- 1/4 tsp almond extract: This is the secret weapon! It amplifies the almond flavor and makes these taste incredibly decadent and bakery-style. A little goes a long way.
Let’s Get Rolling! Your Foolproof Steps to Perfect Bites
I promise, this is the easiest “cooking” you’ll do all week. There’s no heat, no fancy equipment, just you and a bowl. Let’s do this!
Step 1: The Big Mix. Grab your largest mixing bowl. Seriously, go bigger than you think you need. It makes stirring so much easier. Dump in the rolled oats, almond butter, shredded coconut, honey (or maple syrup), mini chocolate chips, chia seeds, and that magical almond extract. Now, arm yourself with a sturdy spoon or spatula and start combining. It might seem dry at first, but keep going! You’re looking for a uniformly sticky mixture where every oat is coated. Chef’s Hack: If your almond butter is super thick and cold, pop it in the microwave for 15-20 seconds to loosen it up. This makes mixing a total breeze.
Step 2: The Chill (Optional but Recommended). Once everything is combined, I sometimes like to cover the bowl and pop it in the fridge for about 10-15 minutes. This isn’t mandatory, but it firms up the mixture just enough to make the next step less messy. If you’re impatient (no shame!), you can skip it.
Step 3: Roll It, Baby! Now for the fun part! Using a tablespoon-sized cookie scoop, a melon baller, or just your clean hands, portion out the mixture. I aim for about a tablespoon per bite. Roll them firmly between your palms into smooth, tight balls. If the mixture is sticking to your hands, a little pro tip: lightly dampen your palms with water. It creates a non-stick barrier and makes the process incredibly smooth. Chef’s Hack: Get the kids involved here! It’s a fantastic, no-bake way to get little hands helping in the kitchen.
Step 4: The Final Set. Place your beautiful little energy bites on a plate or baking sheet lined with parchment paper. They’re pretty soft at this stage, so we need to let them firm up. Slide them into the refrigerator for at least 20-30 minutes. This step is crucial—it allows the oats and chia seeds to soak up the moisture, making them chewy and perfect, and it solidifies the shape.
Step 5: Store and Enjoy! Once they’re firm, transfer your Coconut Almond Energy Bites to an airtight container. They live happily in the fridge for up to a week (if they last that long!), or you can freeze them for up to 3 months for a ready-to-go snack anytime.
How to Serve These Little Bites of Joy
These energy bites are the definition of grab-and-go perfection, but that doesn’t mean we can’t make them feel special! For a quick snack, just pile them high in a cute bowl on the counter. For a healthier dessert option, plate two or three alongside a few fresh raspberries and a drizzle of melted almond butter. They’re also the star of any snack board or picnic basket—just toss a few in a reusable container and you’re out the door, feeling prepared and oh-so-satisfied.
Mix It Up! 5 Delicious Variations to Try
The base recipe is incredibly versatile. Once you’ve mastered the original, play around with these fun twists!
- Cookie Dough Delight: Swap the almond extract for vanilla extract and use peanut butter instead of almond. Roll the finished bites in a light dusting of cocoa powder.
- Tropical Escape: Add 2-3 tablespoons of finely chopped dried mango or pineapple along with the chocolate chips for a true taste of the islands.
- Double Chocolate Craving: Replace 2 tablespoons of the oats with cocoa powder or cacao powder for an intense chocolate flavor.
- Nut-Free Sunshine: Use sunflower seed butter instead of almond butter and omit the almond extract. Perfect for school lunchboxes!
- Protein Powerhouse: Stir in a scoop of your favorite vanilla or chocolate protein powder. You may need to add a tiny splash more of honey or maple syrup to compensate for the dryness.
Olivia’s Chef Notes & Kitchen Confessions
This recipe has evolved so much since that first panicked playdate! I’ve learned that toasting the shredded coconut in a dry skillet until it’s golden brown before adding it to the mix is an absolute game-changer. It adds a nutty, deep flavor that makes these taste truly gourmet. My other confession? I almost always double the batch. One for now, one for the freezer. Because when a snack craving hits, it hits hard, and future-you will be so grateful for the preparation.
The beauty of this recipe is its forgiveness. Too sticky? Add a few more oats. Too dry? A tiny drizzle more of almond butter or honey will fix it right up. Treat it as a template and make it your own. That’s what home cooking is all about!
Your Questions, Answered!
Q: My mixture is too dry and won’t stick together. What did I do wrong?
A: Don’t worry! This usually happens if your nut butter is particularly thick or if you accidentally packed your oats. The fix is easy: add more binder. Drizzle in another tablespoon of almond butter or honey/maple syrup and mix again. It should come together perfectly.
Q: Can I make these without any sweetener?
A: The sweetener is key for both flavor and binding. Without it, the bites will be crumbly and not very sweet. If you want to reduce sugar, you could try using a date paste, but you’ll need to adjust the amount of dry ingredients to compensate for the extra moisture. I’d start with the recipe as written!
Q: Why do I have to chill them? Can’t I eat them right away?
A> You absolutely *can* eat them right away (chef’s treat!), but chilling them allows the ingredients to set and meld together. The oats and chia seeds absorb the moisture, transforming the texture from soft and sticky to firm and delightfully chewy. It’s worth the wait!
Q: Are these freezer-friendly?
A: Yes! They freeze wonderfully. Place the chilled bites in a single layer on a parchment-lined baking sheet and freeze until solid (about 1 hour). Then, toss them all into a freezer-safe bag or container. They’ll keep for up to 3 months. Thaw at room temperature for 10-15 minutes or just grab one and eat it frozen—it’s like a little bite of ice cream!

Coconut Almond Energy Bites
Description
The 3 PM snack that tastes like an Almond Joy but fuels you like a champ!
Ingredients
-
1 cup rolled oats (not quick oats; GF if needed)
-
½ cup almond butter (or peanut/sunflower seed butter)
-
½ cup shredded coconut (unsweetened preferred)
-
¼ cup honey or maple syrup
-
¼ cup mini chocolate chips (dark or semi-sweet)
-
1 tbsp chia seeds or flaxseed
-
¼ tsp almond extract (or vanilla for a cookie-dough vibe)
Instructions
-
Mix – In a large bowl, stir together oats, almond butter, coconut, sweetener, chocolate chips, seeds, and almond extract until sticky and well combined.
-
Chill (optional) – Cover and refrigerate 10–15 min to make rolling easier.
-
Roll – Scoop 1 tbsp portions and roll into tight balls. Damp hands help prevent sticking.
-
Set – Place on parchment and chill 20–30 min until firm.
-
Store – Keep in an airtight container in the fridge (1 week) or freezer (3 months).
Nutritional Information*
*This is an estimate for 1 energy bite using unsweetened coconut and honey. Values will vary based on your specific ingredients and portion size.
Calories: ~120 | Fat: 7g | Carbohydrates: 10g | Fiber: 2g | Sugar: 6g | Protein: 3g
Final Thoughts: Your Snack-Time Superpower
And just like that, you’ve unlocked a new level of snack-time mastery. These Coconut Almond Energy Bites are more than just a quick fix; they’re a tiny, tangible act of self-care. They’re proof that you can create something incredibly delicious and nourishing without a huge time commitment or a sink full of dishes.


