

Welcome to Cookie Bliss: The Ultimate Peanut Butter Blossom
Is there any smell more instantly, joyfully nostalgic than peanut butter cookies baking in the oven? That warm, nutty aroma just seems to hug the whole house. And then there’s the grand finale: that iconic chocolate kiss, gently pressed into the center, just waiting to melt into a pool of chocolatey perfection. If you’re like me, one bite of a Peanut Butter Blossom cookie instantly transports you back to childhood holidays, messy aprons, and the simple, profound joy of a homemade treat. This isn’t just a cookie; it’s a memory you can hold in your hand. Today, we’re making a double batch of these classic beauties because, let’s be real, one batch is never enough. I’ve also sprinkled in a few of my favorite flavor twists to make this beloved recipe feel both comfortingly familiar and excitingly new. So, preheat those ovens, unwrap those kisses, and let’s bake up a whole lot of happiness together.
The Cookie That Stole My Heart
My love affair with Peanut Butter Blossoms started in my grandma’s kitchen. Every December, her countertops would transform into a cookie factory, and I was her chief taste-tester and chocolate kiss unwrapper. I’ll never forget the year she finally let me press the kisses into the warm cookies myself. I was so determined to get it *just right* that I pressed a little too hard on my first one, creating a charmingly lopsided cookie with a kiss that was practically sinking into the center. I was devastated, thinking I’d ruined it. Grandma just laughed her warm, rumbling laugh, popped the “mistake” into my mouth, and said, “Olivia, honey, the best cookies are the ones made with a little extra love—and a little extra chocolate.” That lopsided cookie tasted like pure magic. It taught me that baking isn’t about perfection; it’s about the joy you pour into it. To this day, every time I press a kiss into a cookie, I think of her and that delicious, messy, perfect first try.
Gathering Your Cookie Crew: Ingredients & Insights
This is a double batch, designed for sharing and savoring. Here’s what you’ll need and why each ingredient plays a starring role:
- 3 ½ cups all-purpose flour: The foundation of our cookie. It gives structure. For a slightly more tender cookie, you can swap out ½ cup with bread flour.
- 2 tsp baking soda: Our leavening agent! This is what makes the cookies puff up beautifully. Make sure it’s fresh for the best rise.
- 1 tsp salt: Do not skip this! Salt is the flavor superhero that makes the peanut butter and chocolate taste even more amazing.
- 1 cup creamy peanut butter: The star of the show! Use a standard shelf-stable brand like Jif or Skippy for the ideal texture and consistency. Natural peanut butter (the kind that separates) can make the dough too oily.
- 1 cup unsalted butter, room temperature: Room temp butter is non-negotiable for creaming properly. It should leave a slight indent when you press it. Unsalted lets us control the salt level perfectly.
- 1 cup granulated sugar + 1 cup light brown sugar: White sugar gives us crisp edges and that classic sugary roll, while brown sugar brings moisture, chew, and a lovely caramel note.
- 2 large eggs: They bind everything together and add richness. Make sure they’re at room temperature to emulsify seamlessly into the butter.
- ¼ cup milk: My secret weapon for an extra-soft, cake-like texture. It makes the dough just the right consistency.
- 2 tsp vanilla extract: The flavor enhancer. It rounds out all the other flavors beautifully.
- 1 cup granulated sugar (for rolling): This creates that irresistible crackly, sparkly crust. It’s a textural dream!
- 2 (11 oz) bags of Hershey’s Kisses, unwrapped: The crowning glory! Unwrapping them is a perfect job for eager little helpers (or for you to snack on a few).
Let’s Get Baking: The Step-by-Step Magic
Follow these steps for cookie perfection. I’ve included all my best chef hacks along the way!
Step 1: Preheat & Prep
Preheat your oven to 350°F (175°C). Line your baking sheets with parchment paper. This is my biggest hack for perfect cookies—no sticking, easy cleanup, and even baking. Don’t grease the pans, as it can cause the cookies to spread too much.
Step 2: Whisk the Dry Team
In a medium bowl, whisk together the flour, baking soda, and salt. Whisking is better than sifting here—it aerates the flour and ensures the baking soda and salt are evenly distributed, so every bite is consistent.
Step 3: Cream the Dream Team
In a large bowl, use a hand mixer or stand mixer fitted with a paddle attachment to cream together the room-temperature butter, peanut butter, granulated sugar, and brown sugar. Beat it on medium-high speed for a full 2-3 minutes, until it becomes light, fluffy, and pale in color. This step is crucial for incorporating air, which gives us a tender cookie. Don’t rush it!
Step 4: Incorporate the Wet Ingredients
Beat in the eggs one at a time, making sure each is fully incorporated before adding the next. This prevents the emulsion from breaking. Then, mix in the milk and vanilla. The mixture might look a little curdled at this point—that’s okay! The flour will bring it all together.
Step 5: Bring It All Together
Gradually add the dry ingredients to the wet ingredients, mixing on low speed just until the flour disappears. Do not overmix! Overworking the dough develops gluten, leading to tough cookies. A few stray flour bits are better than overmixing.
Step 6: Roll & Sugar Coat
Use a tablespoon-sized cookie scoop or your hands to portion the dough into 1-inch balls. Roll each ball between your palms until smooth, then roll generously in the reserved cup of granulated sugar. The sugar coating isn’t just for looks; it creates a delightful sweet crunch.
Step 7: Bake to Perfection
Place the dough balls on your prepared baking sheets, spacing them about 2 inches apart. They will spread! Bake for 8-10 minutes. They are done when the edges are just set and very lightly golden. The centers will still look soft and puffy—that’s perfect! They will set up as they cool. Remember, cookies continue to bake on the hot pan after you take them out of the oven.
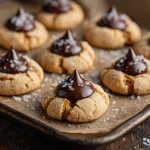
Step 8: The Grand Finale: The Kiss!
As soon as the cookies come out of the oven, gently but firmly press a Hershey’s Kiss into the center of each one. You’ll hear a little sigh as it sinks in—that’s the sound of success! Let the cookies cool on the baking sheet for at least 5 minutes before transferring them to a wire rack. This allows them to set and prevents the chocolate from smearing.
How to Serve Your Masterpiece
These cookies are best served on a giant platter, piled high for everyone to admire. They are fantastic slightly warm when the chocolate is still gooey, or at room temperature with a cold glass of milk. For a truly decadent experience, place two cookies together with the chocolate kisses facing in to make a mini cookie sandwich—it’s a peanut butter and chocolate lover’s dream come true!
Get Creative: Recipe Variations
Feel free to play with this classic! Here are a few of my favorite twists:
- Nutty Swap: Replace ½ cup of the peanut butter with almond butter or Nutella for a deliciously different flavor profile.
- Spiced Up: Add ½ teaspoon of cinnamon or a pinch of cayenne pepper to the dry ingredients for a warm, subtle kick.
- Chocolate Choice: Use flavored Hershey’s Kisses! Mint, caramel, dark chocolate, or even hugs add a fun surprise.
- Salty-Sweet: Right after pressing in the kiss, sprinkle the warm cookies with a tiny bit of flaky sea salt. It elevates the chocolate and peanut butter incredibly.
- Gluten-Free: Substitute the all-purpose flour with a 1:1 gluten-free baking blend for a celiac-friendly treat.
Olivia’s Chef Notes
This recipe has evolved in my kitchen over the years. I started adding the milk after a small kitchen disaster where my dough was so crumbly I could barely roll it. A splash of milk saved the day and resulted in a softer, more forgiving cookie that I now prefer! Another pro-tip: if you’re a planner, you can scoop and roll the dough balls, then freeze them on a baking sheet before transferring to a freezer bag. Then, you can bake frozen cookies anytime a craving hits—just add a minute or two to the bake time. It’s like having a cookie emergency kit! And remember my grandma’s wisdom: the slightly messy, lopsided cookies often taste the best because they’re made with a little extra heart.
FAQs & Troubleshooting
Q: My cookies spread too much and came out flat. What happened?
A: This is usually caused by butter that was too warm. Make sure your butter is at cool room temperature, not melty. Also, ensure your baking soda is fresh and that you didn’t over-cream the butter and sugar (3 minutes max!). Chilling the dough for 30 minutes before baking can also help prevent spreading.
Q: Why did my Hershey’s Kisses completely melt into the cookie?
A: You likely pressed them into cookies that were too hot. The cookies need to be out of the oven, but if they’re still scalding hot, the chocolate will melt. Wait about 60 seconds after pulling them out before pressing. The cookie should be firm enough to support the kiss without it drowning.
Q: Can I make the dough ahead of time?
A: Absolutely! The dough balls can be stored in an airtight container in the fridge for up to 3 days. Let them sit at room temperature for 15 minutes before rolling in sugar and baking. You can also freeze them for up to 3 months.
Q: My dough is too sticky to roll. Help!
A: This can happen on a warm day. Pop the mixed dough into the refrigerator for 20-30 minutes to firm up. If you’re in a real pinch, lightly dampen your hands with water while rolling to prevent sticking.
Classic Peanut Butter Blossoms
- Total Time: 4 minute
Description
Soft, chewy peanut butter cookies crowned with melty chocolate kisses—these beauties are holiday staples, after-school favorites, and pure nostalgia in every bite. They’re fun to bake, irresistible to eat, and guaranteed to make any cookie platter shine. Whether you’re baking with little helpers or whipping up a batch for yourself, these blossoms bring joy with every press of chocolate. Let’s bake up some happiness!
Ingredients
-
3 ½ cups all-purpose flour
-
2 tsp baking soda
-
1 tsp salt
-
1 cup creamy peanut butter (Jif/Skippy style)
-
1 cup unsalted butter, room temp
-
1 cup granulated sugar
-
1 cup light brown sugar
-
2 large eggs, room temp
-
¼ cup milk
-
2 tsp vanilla extract
-
1 cup granulated sugar (for rolling)
-
2 (11 oz) bags Hershey’s Kisses, unwrapped
Instructions
-
Prep: Preheat oven to 350°F (175°C). Line baking sheets with parchment paper.
-
Mix Dry: Whisk flour, baking soda, and salt in a bowl.
-
Cream Butter & Sugars: In a large bowl, beat butter, peanut butter, granulated sugar, and brown sugar until light and fluffy (2–3 min).
-
Add Wet: Beat in eggs one at a time, then mix in milk and vanilla.
-
Combine: Gradually mix in dry ingredients until just combined. Don’t overmix.
-
Shape: Roll dough into 1-inch balls. Coat in sugar. Place 2 inches apart on baking sheets.
-
Bake: 8–10 minutes, until edges are set and tops puffed.
-
Finish: Press a chocolate kiss into each cookie immediately after baking. Cool 5 min on sheet, then transfer to a rack.
Notes
-
Nutty Swap: Try almond butter or Nutella.
-
Spice It Up: Add ½ tsp cinnamon or a pinch of cayenne.
-
Flavored Kisses: Use mint, caramel, or dark chocolate.
-
Salty-Sweet: Sprinkle flaky sea salt right after adding the kiss.
-
Freezer-Friendly: Roll dough balls and freeze—bake anytime!
- Prep Time: 20 min
- Cook Time: 8–10 min per batch
Nutrition
- Calories: 130 kcal Per cookie
- Sugar: 10g
- Fat: 7g
- Carbohydrates: 14g
- Protein: 2g
Nutritional Information (Approximate, Per Cookie)
Prep Time: 20 minutes | Bake Time: 8-10 minutes per batch | Servings: About 60 cookies
- Calories: 130 kcal
- Fat: 7g
- Sugar: 10g
- Carbohydrates: 14g
- Protein: 2g
Final Thoughts: Share the Bliss
And there you have it—the recipe for more than just a cookie. It’s a recipe for connection, for nostalgia, and for creating new, delicious memories with every batch.
As you pull that final sheet of golden, chocolate-topped cookies from the oven, take a moment to appreciate what you’ve made. This isn’t just a dessert; it’s a tangible piece of warmth and love, ready to be shared. Whether you’re carrying on a family tradition, starting a new one, or simply treating yourself after a long day, you’ve baked a little bit of joy into existence.


