µ
Classic Egg Salad: Creamy, Tangy & Always a Favorite
Hey there, friend! Come on in, pull up a stool. Can you smell that? It’s the simple, humble, and absolutely irresistible scent of hard-boiled eggs cooling on the counter. That smell, for me, is the unofficial start of spring. It’s the promise of picnics in the park, breezy lunches on the porch, and the kind of effortless, no-fuss cooking that just makes you happy.
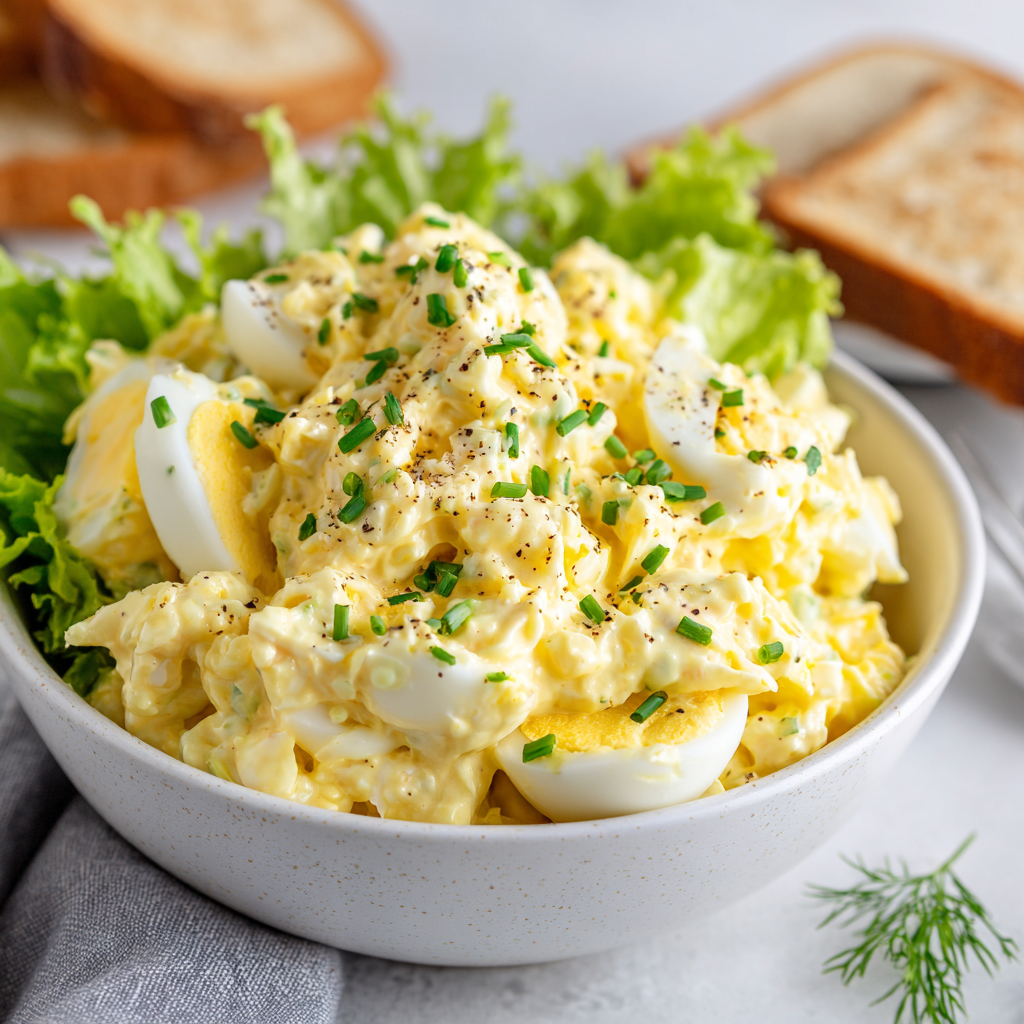
If you’re looking for a recipe that’s equal parts comforting and exciting, you’ve found it. This isn’t just any egg salad. This is my go-to, my secret weapon, the one I’ve tweaked and perfected over years of sandwich-making. We’re talking about a creamy, dreamy, perfectly seasoned filling that strikes the ideal balance between rich and tangy. It’s the kind of dish that feels both nostalgic and brand new with every single bite.
Whether you’re a seasoned pro looking for a little inspiration or you’re nervously boiling your first egg (we’ve all been there!), this guide is for you. We’re going to walk through this together, step-by-step, with plenty of my favorite kitchen hacks and stories along the way. So, tie on your apron—the cute one with the ruffles or the messy one stained with last night’s dinner—and let’s make something wonderfully simple and delicious.
A Sunny Porch & My Grandma’s Yellow Bowl
For me, egg salad is more than just a recipe; it’s a time machine. It instantly whisks me back to my grandma’s house on a bright Saturday afternoon. After a morning of helping her in the garden, we’d head inside, our hands smelling of tomato vines and earth. She’d already have a dozen eggs boiling, a ritual as dependable as the sunrise.
She’d let me carefully peel the warm eggs, my small fingers fumbling with the shells. She’d then pile them into her favorite old yellow bowl—the one with a tiny chip on the rim—and hand me a fork. “Now, Olivia, don’t mash them to paste,” she’d say with a wink. “We want texture!” As we mixed in the mayo and a big spoonful of her homemade sweet pickle relish, she’d tell stories about making this same salad for my dad when he was a boy.
We’d pile the finished egg salad onto thick slices of soft white bread, cut the sandwiches on a diagonal (because they just taste better that way, obviously), and take our plates out to the porch swing. Eating that sandwich, with the sun on my face and my grandma by my side, is one of my most cherished flavor memories. It’s that feeling of pure, simple joy that I try to capture every time I make this recipe.
Gathering Your A-Team: The Ingredients
One of the best things about egg salad is its beautiful simplicity. You likely have most of these ingredients in your kitchen right now! Here’s what you’ll need and why each one is a superstar:
- 6 large hard-boiled eggs, peeled and chopped: The star of the show! I highly recommend using older eggs (about 7-10 days old) as they are much easier to peel. We’ll get into the perfect boiling method in just a bit.
- 1/4 cup mayonnaise: This is our creamy base. Use a good-quality, full-fat mayo for the best flavor and texture. For a tangier twist, try Japanese Kewpie mayo! Substitution: Greek yogurt or mashed avocado for a lighter option, though the texture will be less rich.
- 1 tsp Dijon mustard: This is our flavor secret weapon! Dijon adds a subtle tang and a slight sharpness that cuts through the richness of the mayo and eggs. Yellow mustard works perfectly fine too for a more classic, picnic-style flavor.
- 1 tbsp chopped fresh chives or green onions: This little bit of green provides a necessary fresh, mild oniony bite and a pop of color. Chives are a bit more delicate, while green onions offer a stronger flavor.
- 1 tbsp finely chopped dill pickles or relish: Optional, but highly recommended! This is my grandma’s influence. The briny, tangy crunch of pickles is a game-changer. Use dill relish for ease or chop up your favorite crunchy dill pickles. Sweet relish is also a classic choice if that’s your preference!
- Salt & freshly ground black pepper to taste: Don’t you dare forget to season! Taste as you go. The eggs need a good amount of salt to really sing.
- Optional flavor boosters: A pinch of paprika (smoked or sweet) adds a beautiful color and depth. A tiny pinch of garlic powder or onion powder can enhance the savory notes. A squeeze of lemon juice can brighten everything up!
Let’s Get Cooking: Step-by-Step Instructions
Okay, team! Let’s transform these simple ingredients into something magical. Follow these steps, and you’ll have perfect egg salad every single time.
Step 1: The Perfect Hard-Boiled Egg
Place your eggs in a single layer in a saucepan and cover them with cold water by about an inch. Bring the water to a full, rolling boil over high heat. Once boiling, immediately remove the pan from the heat, cover it with a tight-fitting lid, and set your timer for 10-12 minutes (10 for slightly creamier yolks, 12 for fully set). While they wait, prepare an ice bath—a large bowl filled with ice and cold water. As soon as the timer goes off, use a slotted spoon to transfer the eggs directly into the ice bath. Let them chill for at least 5-10 minutes. This shock stops the cooking process and makes peeling a total breeze. Chef’s Hack: Adding a tablespoon of baking soda to the boiling water can also help make the shells slide right off!
Step 2: The Chop & The Mash
Once your eggs are completely cool, tap them on the counter and roll them gently to crack the shell all over. Peel under a slight trickle of cold water—the water helps wash away any stubborn shell bits. Now, for the texture! Chop the eggs to your desired consistency. I like a medium chop for great texture. You can use an egg slicer, a knife, or even a pastry blender for a quick, easy mash. Add them to your mixing bowl. Chef’s Commentary: I like to take one of the yolks and mash it separately with the mayo and mustard first. This creates an ultra-creamy base that coats every chunk beautifully.
Step 3: The Flavorful Mix-In
To the chopped eggs, add your mayonnaise, Dijon mustard, chopped chives (or green onions), and your chopped pickles or relish if you’re using them. Chef’s Tip: Start with 3 tablespoons of mayo and add the fourth only if you think it needs it. You can always add more moisture, but you can’t take it away! Gently fold everything together with a spatula. You want it combined, but not homogenous—we’re not making paste!
Step 4: The All-Important Seasoning
This is the most crucial step! Season generously with salt and freshly ground black pepper. Add any optional spices you like (paprika, garlic powder, etc.). Now, taste it! Does it need more tang? Add a bit more mustard. More brightness? A tiny squeeze of lemon juice. More creaminess? Another dollop of mayo. Make it yours!
Step 5: The Chill Time
For the best flavor, cover the bowl with plastic wrap and let the egg salad chill in the refrigerator for at least 30 minutes. This rest time allows the flavors to get to know each other, mingle, and become best friends. It’s worth the wait, I promise!
How to Serve Your Masterpiece
The beauty of egg salad is in its versatility! My absolute favorite way is the classic: piled high on soft, lightly toasted white or wheat bread with a few crisp leaves of butter lettuce. For a low-carb option, large, crisp romaine or butter lettuce leaves make fantastic, refreshing wraps. For a fancy little appetizer, spoon a dollop onto endive leaves or cucumber rounds. Or, simply grab a sleeve of your favorite buttery crackers and dig in! No matter how you serve it, it’s guaranteed to bring a smile.
Make It Your Own: Delicious Variations
Once you’ve mastered the classic, the world is your oyster (or should I say, egg?). Here are a few of my favorite twists:
- The Garden Club: Add 1/4 cup each of finely diced celery and red onion for an incredible crunch and fresh flavor.
- The Protein Power-Up: Stir in 1/2 cup of chopped cooked bacon for a smoky, salty, BLT-inspired twist.
- The Avocado Swap: Replace the mayo entirely with the flesh of one ripe avocado for a creamy, healthy-fat-packed version. (Best eaten immediately).
- Curry In A Hurry: Add 1-2 teaspoons of your favorite curry powder and a handful of golden raisins for a sweet and savory flavor adventure.
- Herbaceous Delight: Swap the chives for 2 tablespoons of fresh, finely chopped dill or tarragon for a beautifully aromatic salad.
Chef Olivia’s Notes & Nibbles
This recipe has been a living, evolving thing in my kitchen. I once, in a frantic pre-party panic, added a tablespoon of capers and a squeeze of lemon juice, and it was a revelation! My husband prefers his with a hefty dash of hot sauce mixed right in. Don’t be afraid to play.
A funny kitchen story? I once tried to double this recipe for a big family gathering and, in my distraction, completely forgot the mustard. I served it and couldn’t figure out why it tasted so… flat. My aunt patted my hand and said, “It’s good, dear, but it’s missing its spark.” She was right! The mustard is the spark. Never forget the spark!
This egg salad will keep beautifully in an airtight container in the fridge for 3-4 days, making it the perfect make-ahead lunch hero. The flavor might even get better on day two!
Your Egg Salad Questions, Answered!
Q: My egg salad is too runny! How can I fix it?
A: The most common culprit is over-mashing the eggs or adding too much mayo. You can try draining any visible liquid. To thicken it up, you can add another finely chopped hard-boiled egg white or a tiny sprinkle of breadcrumbs to absorb the excess moisture. Remember for next time: start with less mayo and add more as needed!
Q: Why are my eggs so hard to peel?
A: This is the eternal question! The age of the egg is key—slightly older eggs peel much easier. The ice bath shock is also non-negotiable. Also, try steaming your eggs! Place a steamer basket in a pot with an inch of water, bring to a boil, add the eggs, cover, and steam for 12-13 minutes. I find steamed eggs are consistently easier to peel.
Q: Can I make this egg salad healthier?
A: Absolutely! You can use a light mayonnaise, replace half the mayo with plain Greek yogurt (adds a nice tang!), or go all-in with the avocado swap mentioned above. Loading it up with extra veggies like celery and onion also adds fiber and nutrients.
Q: Is it safe to make egg salad for a picnic?
A: Food safety first! Because mayo is actually an emulsification of oil and egg, the real risk is the temperature of the eggs themselves. Always keep egg salad chilled until you’re ready to serve. For a picnic, pack it in a cooler with ice packs and don’t let it sit out in the sun for more than two hours (one hour if it’s very hot out).
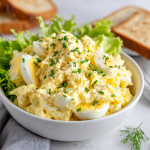
Classic Egg Salad
- Total Time: 45 minutes
Description
Hey there! There’s something irresistibly comforting about a bowl of freshly made egg salad. Creamy, tangy, and full of flavor, this classic is perfect for sandwiches, wraps, or even scooped onto crackers. It’s simple, versatile, and a little bit nostalgic—perfect for a quick lunch or picnic.
Ingredients
-
6 large hard-boiled eggs, peeled and chopped
-
1/4 cup mayonnaise (full-fat recommended; Greek yogurt or avocado for lighter options)
-
1 tsp Dijon mustard (yellow mustard works too)
-
1 tbsp chopped fresh chives or green onions
-
1 tbsp finely chopped dill pickles or relish (optional but recommended)
-
Salt & freshly ground black pepper, to taste
-
Optional: pinch of paprika, garlic powder, or squeeze of lemon juice for extra flavor
Instructions
-
Cook the Eggs:
-
Place eggs in a single layer in a saucepan, cover with cold water by 1 inch.
-
Bring to a rolling boil, then remove from heat, cover, and let sit 10-12 minutes.
-
Transfer to an ice bath for 5-10 minutes. Chef Tip: Add 1 tsp baking soda to boiling water to make peeling easier.
-
-
Peel & Chop:
-
Gently crack and peel eggs under cold running water.
-
Chop eggs to your desired texture. For extra creaminess, mash one yolk with mayo and mustard first.
-
-
Mix the Salad:
-
In a bowl, combine chopped eggs, mayo, mustard, chives, and pickles/relish.
-
Gently fold until combined but still slightly chunky.
-
-
Season:
-
Add salt, black pepper, and optional spices. Taste and adjust seasoning.
-
-
Chill:
-
Cover and refrigerate for at least 30 minutes to let flavors meld.
-
Notes
-
Slightly older eggs peel more easily
-
Don’t over-mash—leave some texture
-
Keep chilled until serving, especially for picnics
-
Adjust mayo and mustard to your taste; start small and add more if needed
- Prep Time: 15 minutes
Nutrition
- Calories: 190cal Per Serving
- Sodium: 220 mg
- Fat: 16 g
- Saturated Fat: 3.5 g
- Protein: 10 g
- Cholesterol: 190 mg
Nutritional Information*
*This is an estimate for 1/3 of the recipe made with full-fat mayo and no optional additions. Values will vary based on your specific ingredients and substitutions.
Per Serving: Calories: ~190 | Total Fat: 16g | Saturated Fat: 3.5g | Cholesterol: 190mg | Sodium: 220mg | Total Carbohydrates: 1g | Dietary Fiber: 0g | Sugar: 1g | Protein: 10g
Prep Time: 10 mins (plus boiling and chilling time) | Yield: 3 servings
Final Thoughts
Classic egg salad is a testament to the power of humble ingredients. It requires no special skills or expensive tools, just a little care and attention to detail. It’s a recipe that teaches foundational kitchen lessons: the importance of proper technique (the hard boil), the art of balance (texture and acidity), and the joy of versatility. It’s a blank canvas for your culinary imagination, equally happy to be a comforting, nostalgic sandwich as it is a sophisticated cucumber canapé.
It’s a dish that reminds us that some of the very best foods aren’t found in fancy restaurants, but are created in our own kitchens, often from ingredients we already have on hand. It’s a symbol of resourcefulness, of picnics shared with friends, and of quiet lunches enjoyed in solitude. So whether you make it exactly as written or use it as a springboard for your own creations, know that you’re participating in a long, delicious tradition of simple, satisfying cooking. Now, go make a sandwich

