

Your New Favorite Holiday Tradition: Christmas Swirl Fudge
Is there anything more magical than the smell of the holidays? That cozy blend of pine, cinnamon, and something sweet baking in the oven. But what if I told you that you can capture that festive joy in a treat that requires zero baking, minimal fuss, and delivers maximum wow-factor? Friends, welcome to the glorious world of Christmas Swirl Fudge.
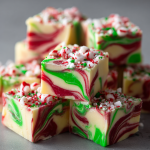
This isn’t just any fudge. This is the kind of confection that stops a party in its tracks. It’s the treat that makes your holiday cookie trays the talk of the neighborhood. With its merry swirls of red, white, and green, it looks like you spent hours crafting a masterpiece. But here’s our little secret: it’s almost unbelievably simple. We’re talking about a handful of ingredients and about 15 minutes of active kitchen time. That’s it!
Whether you’re a seasoned baker or someone who considers ordering takeout a form of “cooking,” this recipe is for you. It’s my go-to for last-minute hostess gifts, teacher appreciation presents, and stocking the fridge for those surprise holiday visitors. It’s creamy, sweet, and that hint of peppermint just sings “Christmas.” So, tie on your favorite festive apron (the messy one with the candy cane print is highly encouraged), and let’s make some memories—and some seriously delicious fudge.
The Fudge That Started It All
I have to confess, my love affair with this fudge began with a near-disaster. Picture it: my first-ever holiday party in my own apartment. I was 22, armed with ambition and a kitchen the size of a postage stamp. I decided to make a complicated, candy-thermometer-required fudge from my grandmother’s handwritten recipe book. Four hours, two burned fingers, and one grainy, seized mess of chocolate later, I was in tears. The party was in an hour, and I had nothing to serve.
In a panic, I called my mom. She listened patiently and then laughed her wonderful, warm laugh. “Honey,” she said, “you’re trying to run a marathon before you can walk. Let me give you the *real* secret weapon.” She dictated this very recipe over the phone. Twenty minutes later, I had a gorgeous pan of swirled fudge setting in the fridge. It was a triumph! That fudge didn’t just save the party; it taught me a valuable lesson that shapes this blog to this day: the best recipes aren’t about being complicated. They’re about being reliable, joyful, and bringing people together. Every time I make this fudge, I remember that feeling of panic turning into pure pride.
Gathering Your Fudge-Making Magic
The beauty of this recipe is in its simplicity. You only need a few key players to create something spectacular. Here’s what you’ll need:
- 44 oz white chocolate chips (four 11-oz bags): This is the foundation of our fudge! I recommend using a good-quality brand you trust. The better the chocolate, the creamier the result. Chef’s Insight: White chocolate can be a bit finicky to melt. Be patient and use low, gentle heat to avoid seizing.
- 3 ½ cups vanilla frosting: Yes, you read that right! This is the secret hack that gives the fudge its perfect, creamy texture without any fuss. You can use store-bought frosting from a tub for ultimate ease, or if you’re feeling fancy, a batch of your favorite homemade buttercream. Substitution Tip: Cream cheese frosting works beautifully here for a slightly tangy twist!
- 2 tsp red gel food coloring & 2 tsp green gel food coloring: Gel food coloring is your best friend for this project. Unlike liquid food coloring, it adds vibrant color without thinning out the fudge mixture. Pro Tip: Start with a little less—you can always add more to reach your desired holiday hue!
- 1 tsp peppermint extract (optional): This is what gives the fudge that classic, festive flavor. If you’re not a peppermint fan, you can leave it out or swap it for a teaspoon of vanilla or almond extract for a different flavor profile.
- ½ cup crushed candy canes or Christmas sprinkles: This is the festive crown on our creation! The crunch of the candy cane against the creamy fudge is pure heaven. Chef’s Insight: To easily crush candy canes, place them in a zip-top bag and use a rolling pin to gently smash them.
Let’s Make Some Swirly Magic: Step-by-Step
Ready? This is where the fun begins. I’ll walk you through each step, with all my favorite tips and tricks to ensure fudge perfection.
- Prep Your Pan: First things first, line a 9×13-inch baking dish with parchment paper. Here’s a little hack: take a small dab of butter or a bit of non-stick spray and lightly grease the pan first. This will help the parchment paper stick to the sides, making it much easier to line. Leave a few inches of overhang on the two long sides—these will be your “handles” to lift the entire slab of fudge out later. Trust me, this is a game-changer!
- Melt the Base: Now, grab a large, heatproof bowl (glass is perfect) and pour in all four bags of white chocolate chips. We’re going to melt these gently in the microwave. The key word is *gently*! Microwave on high for 30 seconds, then stop and stir. Even if it doesn’t look melted, stir. Repeat this process in 30-second bursts until the chocolate is mostly melted. Then, switch to 15-second bursts, stirring vigorously each time, until it’s completely smooth. Watchpoint: Do not overheat! White chocolate holds its shape even when warm, so stirring is crucial to see how melted it truly is. Once smooth, quickly stir in the entire tub of vanilla frosting and the peppermint extract (if using). You’ll have a gloriously smooth, thick, and creamy base.
- Divide and Color: Now for the festive part! Divide the fudge mixture evenly into three separate bowls. I like to use a kitchen scale for precision, but eyeballing it works just fine. Leave one bowl plain—this is our beautiful white. To the second bowl, add the red gel food coloring, and to the third, the green. Stir each one until the color is fully and evenly incorporated. Don’t be shy! Get those colors nice and vibrant.
- Layer and Swirl: This is the artistic step! Using three separate spoons, start dropping random spoonfuls of the three colored mixtures into your prepared pan. Alternate the colors—a dollop of red, then white, then green, and so on—until you’ve used up all the batter. Now, take a knife, a skewer, or even the tip of a spoon, and gently drag it through the colored dollops in a zig-zag or figure-eight pattern. Pro Tip: Less is more! Just a few gentle swirls will create a beautiful marbled effect. If you over-swirl, the colors will start to blend into one muddy color.
- Top It Off: Immediately after swirling, generously sprinkle the top with your crushed candy canes or festive sprinkles. Doing this while the fudge is still soft ensures that the toppings will stick perfectly once it sets.
- Chill Until Firm: Carefully transfer the pan to the refrigerator. Let it chill for at least 1 hour, or until the fudge is completely firm to the touch. This is the hardest part—waiting!
- Slice and Serve: Once firm, use the parchment paper handles to lift the entire slab of fudge out of the pan and onto a cutting board. Using a large, sharp knife, wipe the blade with a hot, damp cloth between cuts for super clean edges. Cut into 1-inch squares. Admire your beautiful work! You just made holiday magic.
How to Serve Your Festive Masterpiece
Presentation is part of the fun! I love piling these fudge squares high on a vintage cake stand or a simple white platter to really let the colors pop. For gifting, line a festive tin or a cardboard gift box with waxed or parchment paper and layer the fudge squares inside. They make the most thoughtful, homemade gift. These little squares are perfect with a cup of hot coffee after dinner, as a sweet treat on a holiday cookie tray, or set out for Santa on Christmas Eve (along with the carrots for the reindeer, of course!).
Get Creative: Fun Flavor Twists!
The basic recipe is a classic, but don’t be afraid to play with it! Here are a few of my favorite variations:
- Chocolate Peppermint Swirl: Replace the white chocolate chips with semi-sweet or dark chocolate chips for a rich, decadent twist.
- Funfetti Birthday Fudge: Omit the peppermint extract and food coloring. Instead, stir rainbow sprinkles directly into the white base mixture for a birthday-celebration fudge!
- Almond Joy Variation: Add 1 cup of shredded coconut and ½ cup of chopped almonds to the base mixture before dividing. Use just a drop of green food coloring for a subtle hint.
- Dairy-Free Delight: Use a high-quality dairy-free white chocolate and a vegan vanilla frosting to make this treat allergy-friendly.
- Orange Cranberry: Swap the peppermint extract for orange extract and fold in ½ cup of dried cranberries. Use only red food coloring for a beautiful cranberry-red hue.
Olivia’s Chef Notes & Kitchen Stories
This recipe has been my holiday sidekick for over a decade now, and it’s evolved in little ways. One year, I was out of gel coloring and used liquid—the fudge was still delicious, but the colors were much more pastel than vibrant. Another time, my nephew wanted to help, and his “swirling” technique was so enthusiastic that we ended up with a solid pink slab of fudge! We called it “Reindeer Blush” and it was a hit anyway. The moral of the story? Don’t stress. This fudge is incredibly forgiving.
I also highly recommend doubling the batch. It takes almost no extra effort, and having a second pan ready to go for unexpected guests or a last-minute gift is a lifesaver. It freezes beautifully, too! Just layer the squares between parchment paper in an airtight container and freeze for up to 3 months. Thaw in the fridge overnight.
Your Fudge Questions, Answered!
Q: My white chocolate seized and became grainy. What happened? Can I fix it?
A: This usually means the chocolate got too hot. White chocolate is very sensitive. If it seizes, it’s tricky to fix, but you can try this rescue method: stir in a tablespoon of solid vegetable shortening (like Crisco) and microwave for 10 more seconds, then stir vigorously. This can sometimes bring it back. Prevention is key: low heat and frequent stirring!
Q: Can I use milk chocolate chips instead?
A: Absolutely! The flavor will be richer and less sweet. Just note that the red and green colors won’t show up as vibrantly against the brown chocolate. It will still be delicious, just more of a marbled brown effect.
Q: How long does this fudge keep, and how should I store it?
A: Store the fudge in an airtight container in the refrigerator for up to 2 weeks. It can also be stored at cool room temperature for a few days, but I find the texture holds up best when chilled.
Q: My fudge is very soft, even after chilling. Why?
A: This could be due to a few things. First, make sure you chilled it for a full hour (or even two if your fridge is packed). Second, check the brands you used; different frostings and chocolates have different fat and sugar contents, which can affect firmness. If it’s still too soft, it will still taste amazing—just serve it with a spoon as a “fudge dip” for fruit!
Christmas Swirl Fudge
Description
Your New Favorite Holiday Tradition: Christmas Swirl Fudge
Capture the magic of the holidays in a treat that requires no baking, minimal fuss, and delivers maximum wow-factor. Vibrant red, green, and white swirls, creamy texture, and a hint of peppermint make this fudge a showstopper for cookie trays, hostess gifts, and last-minute holiday treats.
Ingredients
-
44 oz white chocolate chips (four 11-oz bags)
-
3 ½ cups vanilla frosting (store-bought or homemade)
-
2 tsp red gel food coloring
-
2 tsp green gel food coloring
-
1 tsp peppermint extract (optional)
-
½ cup crushed candy canes or festive sprinkles
Instructions
1. Prep Your Pan
-
Line a 9×13-inch baking dish with parchment paper, leaving a 2-inch overhang on the long sides for easy lifting.
-
Optional: Lightly grease the pan first to help parchment stick.
2. Melt the Base
-
Place white chocolate chips in a large, heatproof bowl. Microwave in 30-second intervals, stirring after each, until mostly melted.
-
Switch to 15-second intervals, stirring each time, until completely smooth.
-
Stir in vanilla frosting and peppermint extract.
3. Divide and Color
-
Divide the mixture into three bowls. Leave one plain (white), add red gel coloring to the second, and green to the third. Mix until fully incorporated.
4. Layer and Swirl
-
Drop spoonfuls of each color randomly into the prepared pan.
-
Using a knife or skewer, gently swirl the colors to create a marbled effect. Less is more to avoid muddying the colors.
5. Top It Off
-
Sprinkle crushed candy canes or festive sprinkles over the fudge while still soft.
6. Chill
-
Refrigerate at least 1 hour or until firm.
7. Slice and Serve
-
Lift fudge using parchment handles, cut into 1-inch squares. Wipe the knife with a hot, damp cloth between cuts for clean edges.
Notes
-
Prevent Seizing: Melt white chocolate slowly with frequent stirring. Add a small amount of vegetable shortening to rescue seized chocolate.
-
Soft Fudge Fix: Chill longer or accept as a “fudge dip”—still delicious.
-
Storage: Airtight container in the fridge for up to 2 weeks; freezes well for up to 3 months.
-
Coloring Hack: Gel food coloring keeps fudge thick; liquid coloring can thin the mixture.
Nutritional Information (Approximate)
Per Square (based on 80 pieces): 110 calories | 5g fat | 15g carbohydrates | 1g protein
Please note: This is an estimate generated from an online calculator and will vary based on the specific ingredients and brands you use.
Final Thoughts: More Than Just a Treat
As you place that final square of swirled fudge on a platter or tuck a gift box into a friend’s hands, take a moment to appreciate what you’ve created. This Christmas Swirl Fudge is more than just a delicious confection; it’s a little edible piece of holiday magic. It’s proof that the most memorable traditions aren’t born from stress and complexity, but from simplicity, joy, and the warmth of sharing something made with love.
This recipe has been my holiday anchor for years—the one I can always count on to deliver smiles without delivering a mountain of dishes. It’s a reminder that sometimes, the sweetest moments come from the simplest recipes. So whether this becomes your new signature holiday gift or a fun afternoon in the kitchen with your family, I hope it brings you as much happiness as it has brought me.


