
Let’s Make Some Edible Holiday Magic!
Hey there, friend! Come on in—can you smell that? Okay, maybe not yet, because we’re not actually baking, but I can almost smell the sweet, salty, chocolatey magic we’re about to create. It’s that time of year again, isn’t it? The air is crisp, the carols are playing, and our kitchens transform into little hubs of holiday happiness. And if your schedule is anything like mine, you’re looking for those golden recipes—the ones that deliver maximum joy with minimum fuss.
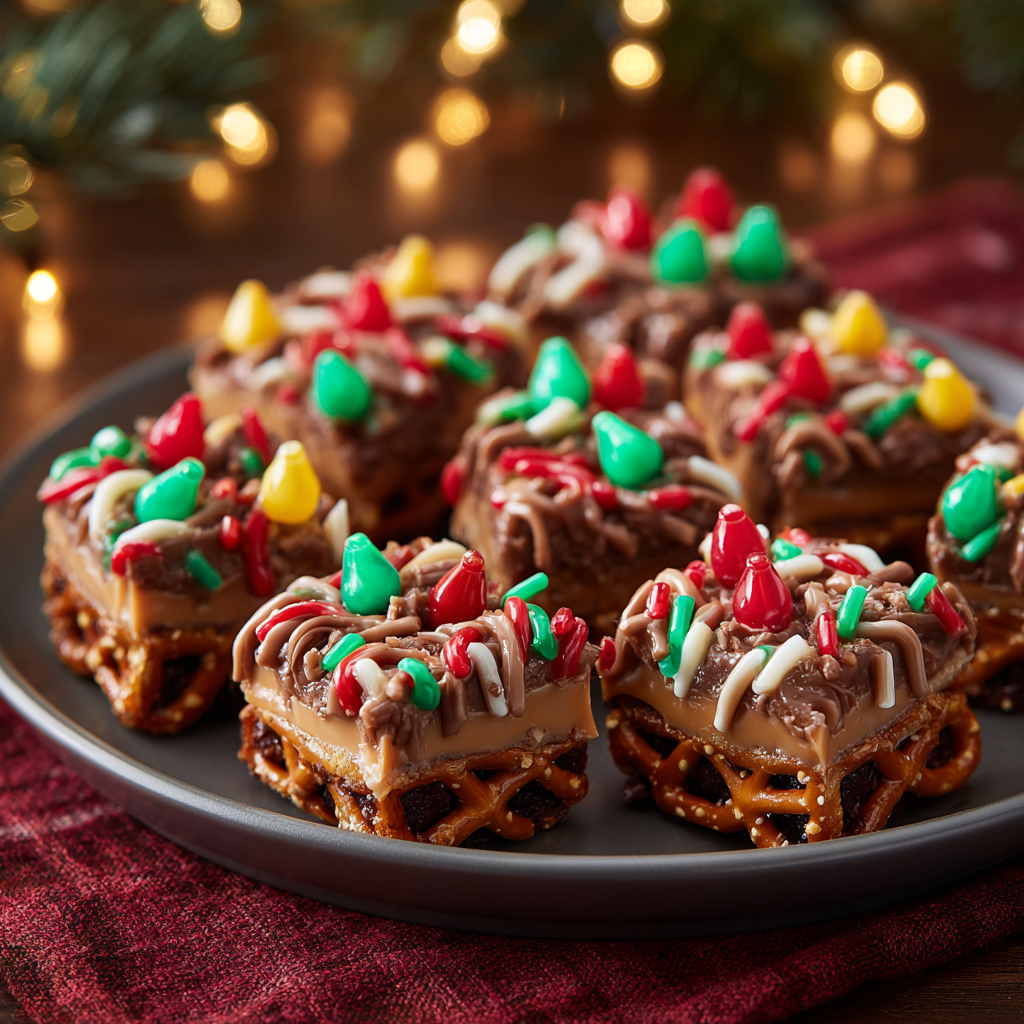
Well, get ready to fall in love, because these Christmas Lights Pretzel Fudge Bars are about to become your new holiday MVP. Imagine this: a salty-sweet pretzel crust that gives you that perfect crunch, a layer of luxuriously rich chocolate and peanut butter fudge that melts in your mouth, and a decoration so cute it’ll make you smile every time you look at it. We’re turning this treat into a string of festive lights, complete with colorful M&M “bulbs”!
The best part? We’re doing it all without turning on the oven. This is the ultimate edible craft project, perfect for a cozy afternoon with kids, a fun cookie exchange showstopper, or just a little moment of creative kitchen therapy for yourself. So, tie on your favorite (probably messy) apron, and let’s make a treat that’s as fun to create as it is to eat!
A Spark of Inspiration: My First Holiday Kitchen Disaster
I have to share a little story with you. My love for these no-bake, festive treats started years ago, back when I was maybe ten years old and desperately trying to impress my family with my “culinary skills.” I decided to make fudge from a complicated recipe I’d found, and let’s just say it involved a candy thermometer, a lot of panic, and a final product you could have used as a doorstop. It was a grainy, sugary mess, and I was so disappointed.
But my grandma, the wisest woman I’ve ever known, saw my face and simply said, “Olivia, the best treats aren’t about being perfect. They’re about the joy you bake into them.” She then cleared the counter and we made the simplest no-bake bars with pretzels and chocolate we had in the pantry. We decorated them haphazardly with sprinkles, laughing the whole time. That was the moment I got it. The magic wasn’t in a perfect candy temperature; it was in the togetherness, the creativity, the fun. These Christmas Lights Bars are the direct descendant of that kitchen rescue mission—foolproof, joyful, and guaranteed to spark happiness.
Gathering Your Edible Art Supplies
One of my favorite parts of any recipe is the ingredient gathering! It’s like a little treasure hunt. Here’s everything you’ll need to create this masterpiece. I’ve also included some of my favorite chef-y insights and substitution tips, because I believe every recipe should be your own.
For the Salty-Sweet Pretzel Crust:
- 2 cups crushed pretzels: I use the classic twisted knots for this. You want a mix of fine crumbs and some small chunks for that fantastic texture. Gluten-free pretzels work beautifully here too! Pro tip: toss them in a zip-top bag and roll a rolling pin over them—it’s a great way to get out any pre-holiday stress.
- 1/2 cup melted butter: This is the glue that holds our crust together and gives it that rich, buttery flavor. Unsalted is best so we can control the saltiness, but if salted is all you have, it’ll still be delicious!
- 2 tbsp brown sugar: This little addition is my secret weapon. It doesn’t make the crust sweet, per se, but it adds a deep, caramel-like note that makes the salty pretzel flavor absolutely sing.
For the Dreamy Fudge Layer:
- 1 1/2 cups semi-sweet chocolate chips: The star of the show! I love the deep, not-too-sweet flavor of semi-sweet, but feel free to use milk chocolate if that’s your family’s preference. For a truly next-level experience, chop up a good quality chocolate bar instead of using chips.
- 1/2 cup peanut butter: Creamy and standard is perfect here, as it melts smoothly into the fudge. This adds a wonderful richness and helps the fudge set up beautifully. If you have a nut allergy, see the variations section below for a perfect swap!
- 1 (14 oz) can sweetened condensed milk: This is the magic ingredient that gives us that smooth, creamy, foolproof fudge texture. Do not substitute with evaporated milk—they are very different!
- 1 tsp vanilla extract: The flavor enhancer! A splash of vanilla rounds out all the other flavors and makes the chocolate taste even more chocolatey. Always use pure vanilla extract if you can.
For the Festive “Lights” Decoration:
- Mini M&M’s: Our colorful little light bulbs! The mini size is perfect for creating a delicate, string-light effect. You’ll need a few tablespoons, and I always buy extra for “quality control” snacking.
- Thin black licorice or chocolate strings: This is our “wire.” I find thin black licorice laces work perfectly, but if you’re not a licorice fan, chocolate “sprinkle” strings or even piped melted chocolate are fantastic alternatives.
Let’s Build Our Masterpiece, Step-by-Step!
Alright, hands-on time! This is where the fun really begins. I’ll walk you through each step with all my favorite little hacks to ensure your bars are absolutely perfect.
- Prep Your Pan: First things first, let’s make our lives easier later. Line an 8×8 inch baking pan with parchment paper, leaving some overhang on two opposite sides. This creates a “sling” that will let you lift the entire block of fudge out of the pan for super clean, easy cutting. No more wrestling with the first stubborn corner piece! Give the parchment a light spritz with cooking spray for a completely non-stick guarantee.
- Create the Pretzel Crust: In a medium bowl, combine your crushed pretzels, melted butter, and brown sugar. Mix it with a fork until every last pretzel bit is shimmering and coated in that buttery goodness. Now, dump it into your prepared pan and press it down firmly and evenly. I like to use the bottom of a flat measuring cup or a glass to really compact it—this prevents a crumbly crust later. Pop the pan into the fridge for a solid 10 minutes to let the butter firm up. This creates a solid foundation for our fudge layer.
- Whip Up the Fudge: While the crust is chilling, let’s make the magic happen. In a medium saucepan, combine the chocolate chips, peanut butter, and the entire can of sweetened condensed milk. Chef’s key tip here: use LOW heat. We’re not boiling, we’re gently melting. Stir constantly with a spatula or wooden spoon. High heat is the enemy of smooth chocolate and can cause it to seize up. Just keep stirring until everything is melted, glossy, and beautifully smooth. Once it’s off the heat, stir in that teaspoon of vanilla extract. Your kitchen should smell incredible right now.
- The Grand Assembly: Pull your chilled crust out of the fridge. Pour the warm fudge mixture directly over the top. Use an offset spatula or the back of a spoon to spread it into a perfectly even layer, making sure you get right into the corners. Work relatively quickly here, as the fudge will start to set as it cools.
- Time for the Fun Part—Decorating! Now, while the fudge is still soft and warm, it’s time to turn it into Christmas lights! Take your licorice laces or chocolate strings and gently press them into the fudge in curvy, swooping lines, just like real light strands draped over a tree. Don’t overthink it—the more organic, the better! Then, take your mini M&M’s and press them along the “wires,” spacing them out like little bulbs. I love mixing up the colors for a truly festive look. This is the perfect step to hand over to the kiddos (or the kid in you!).
- The Final Chill: Once your edible art is complete, carefully transfer the pan to the refrigerator. Now, for the hardest part: the wait. You need to let it chill for at least 2 hours, or until it’s completely firm. I know it’s tempting, but don’t rush this! A firm chill is what gives us that perfect, clean slice.
- Slice and Serve with Pride: When the fudge is fully set, use the parchment paper sling to lift the whole block out of the pan and onto a cutting board. For picture-perfect bars, warm a large knife under hot water, wipe it dry, and then make your cuts. Wipe the knife clean and re-warm it between each slice. This little trick gives you those gorgeous, professional-looking clean edges.
How to Serve These Shining Stars
Presentation is part of the fun! I love placing these bars on a simple white platter or a rustic wooden board to really let their colorful “lights” pop. They’re rich, so cutting them into 16 smaller bars is perfect. They’re a fabulous addition to any holiday dessert table, a wonderful homemade gift stacked in a cute cellophane bag tied with a ribbon, or the star of your next cozy movie night with a cup of hot cocoa. However you serve them, get ready for the “oohs” and “aahs”!
Let’s Get Creative! Recipe Variations
The beauty of this recipe is its versatility. Don’t be afraid to play and make it your own!
- Nut-Free Nirvana: Swap the peanut butter for SunButter (sunflower seed butter)! It works exactly the same way and gives a similar, deliciously rich flavor.
- White Christmas Lights: Use white chocolate chips instead of semi-sweet and decorate with pastel M&M’s for a beautiful, wintry look.
- Peppermint Twist: Add 1/4 teaspoon of peppermint extract to the fudge layer along with the vanilla, and crush up some candy canes to sprinkle on top instead of M&M’s for a cool, festive crunch.
- Pretzel Crunch Explosion: For extra salty crunch, fold an additional 1/2 cup of crushed pretzel pieces into the fudge mixture right before you pour it over the crust.
Olivia’s Chef Notes & Kitchen Confessions
This recipe has seen many iterations in my kitchen over the years. One memorable time, I was so excited to make them for a party that I completely forgot the sweetened condensed milk. I poured a weird, separated chocolate-and-peanut-butter mixture over the crust and stood there bewildered for a solid minute before I realized my mistake. We had to scrape it all out and start over! So, learn from my brain-fog moment: have all your ingredients out on the counter before you start. It’s a simple step that saves so much heartache.
I’ve also learned that the quality of your chocolate really does matter. When I splurge on a good bar of chocolate from the baking aisle instead of using the standard chips, the fudge layer is noticeably smoother and richer. It’s a small upgrade that makes a big difference for special occasions. But honestly? Even with standard chips, these bars are a total home run. They’re a testament to the fact that the most beloved recipes are often the simplest ones, made with a whole lot of heart.
Your Questions, Answered!
Over the years, I’ve gotten a few repeat questions about this recipe. Here are the answers to make your fudge-bar journey seamless!
Q: My fudge layer is too soft and doesn’t set firm. What happened?
A: The most common culprit is not chilling it for long enough. This fudge needs a full 2 hours, minimum, in the fridge. If your kitchen is warm, it might even need 3-4. If it’s still soft after that, it’s possible the fudge mixture was overheated, which can change its texture. Ensure you’re using low heat and the correct ingredients (especially the sweetened condensed milk!).
Q: Can I make these bars ahead of time?
A: Absolutely! They are the perfect make-ahead treat. Once set and sliced, store them in an airtight container in the refrigerator for up to a week. The layers actually get better as they sit! You can also freeze them for up to 2 months. Just thaw in the fridge before serving.
Q: I don’t have an 8×8 pan. Can I use a 9×13?
A: You can, but your bars will be much thinner. I’d recommend making a 1.5x batch of the recipe to get a good thickness in a 9×13 pan. The crust might be a little harder to spread thin, so just pat it down as evenly as you can.
Q: My M&M’s are cracking when I press them in. Help!
A) This usually means the fudge layer has cooled down too much before you started decorating. The key is to decorate right after you spread the fudge, while it’s still warm and soft. If it has set, you can try gently warming the surface with a hairdryer for a few seconds to just slightly soften the top layer.

Christmas Lights Pretzel Fudge Bars
Description
Christmas Lights Pretzel Fudge Bars (No-Bake)
Salty, sweet, chocolatey, and festive—these no-bake bars are perfect for gifting, cookie exchanges, or holiday movie nights.
Ingredients
Pretzel Crust
-
2 cups crushed pretzels (classic twisted knots; gluten-free optional)
-
½ cup melted butter (unsalted preferred)
-
2 tbsp brown sugar
Fudge Layer
-
1½ cups semi-sweet chocolate chips (or chopped chocolate bar)
-
½ cup creamy peanut butter (or SunButter for nut-free)
-
1 (14 oz) can sweetened condensed milk
-
1 tsp vanilla extract
Festive Decoration
-
Mini M&M’s, a few tablespoons
-
Thin black licorice laces or piped chocolate for the “wire”
Optional variations: peppermint extract + crushed candy canes, white chocolate + pastel M&M’s, extra crushed pretzels folded into fudge for crunch
Instructions
1️⃣ Prep Pan
-
Line an 8×8-inch pan with parchment paper, leaving overhang for easy removal.
-
Lightly spray parchment with cooking spray.
2️⃣ Make Pretzel Crust
-
Combine crushed pretzels, melted butter, and brown sugar in a bowl.
-
Press evenly into the pan using a flat cup or glass. Chill 10 minutes in the fridge.
3️⃣ Make Fudge Layer
-
In a saucepan over low heat, melt chocolate chips, peanut butter, and sweetened condensed milk, stirring constantly until smooth.
-
Remove from heat and stir in vanilla extract.
4️⃣ Assemble Bars
-
Pour warm fudge over chilled crust and spread evenly.
5️⃣ Decorate
-
While fudge is still warm, press licorice laces or piped chocolate lines for “wires.”
-
Place mini M&M’s along the lines like colorful bulbs.
6️⃣ Chill
-
Refrigerate at least 2 hours until fully firm.
7️⃣ Slice & Serve
-
Lift the block using the parchment sling onto a cutting board.
-
Use a warm knife (run under hot water, dry) for clean slices.
Notes
-
Fudge too soft? Chill longer—2–4 hours depending on kitchen temperature.
-
Make ahead: Store in the fridge up to 1 week, or freeze up to 2 months.
-
Pan swap: A 9×13 pan works, but bars will be thinner—consider 1.5× batch for same thickness.
-
M&M cracking: Decorate while fudge is still warm; gently reheat surface if fudge has set.
Quick Nutritional Info (Per Bar)
Let’s be real, we’re here for a good time, not a long time! But for those who like to know, here’s a general breakdown (approximate, and will vary with specific ingredients used):
- Calories: ~270
- Fat: 16g
- Carbohydrates: 28g
- Sugar: 21g
- Protein: 4g
There you have it! My ultimate guide to creating these unforgettable Christmas Lights Pretzel Fudge Bars. I hope this recipe brings as much laughter and light into your kitchen as it has into mine. Happy holidays and happy no-bake baking!
Final Thoughts: More Than Just a Treat
As you box these up for friends, arrange them on a platter, or simply sneak one more from the fridge, I hope you feel a deep sense of accomplishment. You’ve created more than just a dessert; you’ve crafted an experience. You’ve taken simple, humble ingredients and woven them into a tapestry of salty, sweet, and crunchy joy, topped with a little spark of festive color.
In a season that can sometimes feel rushed, this no-bake project is a gentle reminder to slow down and savor the simple, creative moments. It’s a recipe built for laughter, for togetherness, and for making memories. So whether your “lights” are perfectly straight or charmingly crooked, whether you followed the recipe to a T or made it uniquely yours, you’ve baked a whole lot of love into every single bar.
From my kitchen to yours, I wish you a holiday season filled with warmth, wonder, and of course, delicious magic. Happy holidays!


