

The Snack That Changed Everything: My Chocolate Peanut Butter Protein Balls
Hey there, friend! Olivia here. Can I tell you a secret? I have a major weakness for the classic flavor combo of chocolate and peanut butter. It’s a love affair that started in childhood and shows no signs of slowing down. But as much as I adore a classic Reese’s cup, my adult self also craves something that doesn’t leave me crashing an hour later with a sugar headache. Sound familiar?
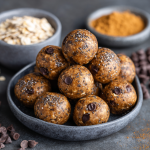
That’s exactly why I created these little powerhouses of joy: my No-Bake Chocolate Peanut Butter Protein Balls. We’re talking about a snack that feels like a treat but acts like fuel. They’re the answer to that 3 PM slump, the perfect pre-workout bite, the “I-need-something-sweet-but-don’t-want-to-ruin-my-dinner” solution, and the ultimate healthy grab-and-go breakfast for those mornings when you’re running out the door.
The best part? You don’t need to be a kitchen whiz to make them. We’re talking one bowl, one spoon, and about five minutes of active time. No baking required! I’ve made this recipe countless times, tweaking and perfecting it until it reached what I truly believe is snack perfection. We’ve got a double batch here (because they disappear fast!), a secret splash of water for the perfect texture, and my special twist: a sprinkle of chopped peanuts and a pinch of flaky sea salt to take that sweet-and-salty situation to a whole new level. So, grab your favorite mixing bowl and let’s make something deliciously satisfying together!
A Messy Apron and a Happy Discovery
This recipe brings me right back to my college days. Picture this: a tiny shared kitchen, textbooks piled on the table, and a desperate need for a study snack that wasn’t another packet of instant noodles. I was experimenting in the kitchen (a great form of procrastination, by the way) and threw together some oats, peanut butter, and honey. They were… okay. A bit bland, a bit gluey, but they did the job.
The real “aha!” moment came years later, when I was training for my first half-marathon. My early morning runs demanded real fuel, and my post-run hunger was a force to be reckoned with. I remembered those simple oat balls and thought, “How can I make these better? More powerful? More… me?” I started adding a scoop of my chocolate protein powder, a handful of chocolate chips for pure joy, and that magical pinch of salt. The first time I made this new version, I knew it was a game-changer. They became my secret weapon, the thing I’d pack for my friends after a long hike or bring to a potluck to share the love. It’s a recipe born from necessity and perfected with passion, and that’s always the best kind.
Gathering Your Dream Team: The Ingredients
Here’s everything you’ll need to make about 32 perfectly portioned protein balls. The beauty of this recipe is its flexibility, so I’ve included my favorite tips and substitutions for each ingredient. Don’t be afraid to make it your own!
- 2 cups Rolled Oats (Old-Fashioned Oats): This is the hearty, wholesome base that gives our balls structure and a lovely chewy texture. Chef’s Insight: I don’t recommend using quick oats if you can avoid it—they can make the mixture a bit pasty. Gluten-free? Just make sure your oats are certified GF!
- ⅔ cup Chocolate Protein Powder: This is our protein powerhouse! It adds flavor and helps bind everything together. Substitution Tip: Vanilla or even a plain/unflavored protein powder works great too. If you use unflavored, you might want to add an extra tablespoon of honey or a dash of vanilla extract.
- ½ cup Mini Chocolate Chips: Because life is better with chocolate! The mini chips distribute the chocolatey goodness perfectly in every single bite. Chef’s Insight: I like using semi-sweet, but dark chocolate chips are a fantastic, slightly less sweet option.
- 1 heaping cup Peanut Butter: The star of the show! This provides healthy fats, flavor, and acts as the main “glue.” CRUCIAL TIP: Please use a natural, drippy peanut butter where the only ingredients are peanuts and maybe salt. Avoid the shelf-stable, hydrogenated kinds (like Jif or Skippy) as they make the mixture too stiff and dry.
- 6 tablespoons Honey: Our natural sweetener that adds a touch of floral sweetness and perfect stickiness. Substitution Tip: Pure maple syrup or agave nectar are excellent vegan-friendly swaps.
- 6 teaspoons Water: This is my secret weapon! A little water helps bring the dough together without making it too wet. It’s the key to a rollable, not-too-sticky texture.
- ¼ cup Chopped Roasted Peanuts (Optional Twist): I love the extra crunch and nutty flavor this adds! It breaks up the texture and makes them feel a bit more gourmet.
- Pinch of Flaky Sea Salt (Optional): Don’t you dare skip this! A pinch of salt balances the sweetness and makes the chocolate and peanut butter flavors pop in a incredible way.
Let’s Get Rolling! Your Foolproof Steps
Ready? This is where the magic happens. It’s so simple, but I’ll walk you through each step with my best tips to ensure perfect results every single time.
- The Big Mix. Grab your largest mixing bowl. Seriously, bigger than you think you need—it gives you room to stir without spilling! Dump in the rolled oats, chocolate protein powder, mini chocolate chips, chopped peanuts (if using), and that all-important pinch of sea salt. Give these dry ingredients a good stir with a sturdy spoon or spatula until they’re fully combined. This ensures the protein powder is evenly distributed so every ball gets its fair share of protein power.
- Bring in the Wet Team. Now, plop in the heaping cup of peanut butter and pour in the honey and water. Here’s a little chef hack: if your peanut butter is cold and hard to measure, pop the closed jar in a bowl of warm water for a few minutes to loosen it up. Also, to get every last drop of honey out of the measuring spoon, give it a quick spritz of cooking spray before you measure—the honey will slide right out!
- Mix Until Magic Happens. Now, roll up your sleeves and start mixing! It might seem dry at first, but keep going. Use a cutting and pressing motion with your spoon or spatula. After a minute or two, the mixture will transform into a thick, slightly sticky dough that holds together when you pinch it. If it seems *too* dry and crumbly, add another teaspoon of water, one at a time, until it comes together.
- The Roll-Up. Line a baking sheet or large plate with parchment paper. Using a tablespoon-sized cookie scoop (my favorite tool for uniformity!) or a regular spoon, scoop up a portion of the dough. Roll it between your palms for a few seconds until it forms a smooth ball. If the mixture is too sticky to handle, here’s your pro-tip: just pop the whole bowl into the fridge for 10-15 minutes. This firms up the peanut butter and makes rolling a breeze.
- The Final Chill. Place each ball on the prepared parchment paper. Once they’re all rolled, slide the tray into the refrigerator for at least 20 minutes. This final chill is non-negotiable—it firms them up, sets the shape, and makes them perfectly chewy.
- Store and Enjoy! After the chill time, transfer your beautiful protein balls to an airtight container. They’ll keep happily in the fridge for up to a week, or in the freezer for up to 3 months for a ready-when-you-are snack!
How to Serve & Savor
These protein balls are the ultimate no-fuss food, but that doesn’t mean we can’t make them look pretty! For a simple snack, just pile them high in a rustic ceramic bowl on the counter for everyone to grab. For a more elegant touch at a brunch or party, arrange them on a platter and give them a light dusting of extra cocoa powder or a drizzle of melted peanut butter. My favorite way to eat them? Straight from the fridge, slightly chilled, with a hot cup of coffee for the ultimate afternoon pick-me-up.
Get Creative! 5 Fun Flavor Twists
Once you’ve mastered the classic, the fun really begins. This recipe is a fantastic canvas for your creativity! Here are a few of my favorite variations:
- Coconut Dream: Replace ½ cup of the oats with unsweetened shredded coconut, and use vanilla protein powder for a tropical vibe.
- Monster Cookie Style: Swap the chocolate chips for butterscotch chips and add a few colorful sprinkles to the mix—kids (and kids-at-heart) adore this one!
- Nut-Free Delight: Use sunflower seed butter instead of peanut butter and omit the chopped peanuts. Perfect for school lunches!
- Double Chocolate Espresso: Add 1-2 teaspoons of instant espresso powder to the dry ingredients for a mocha kick that’s amazing for breakfast.
- Peanut Butter & Jelly: After rolling the balls, use your thumb to make a small indent in the top and fill it with a tiny dollop of your favorite jam or jelly.
Chef’s Notes: From My Kitchen to Yours
This recipe has truly evolved with me. I remember one time, early on, I was so excited to make a triple batch for a big family camping trip. I was rushing and accidentally used sweetened, toasted oat cereal instead of plain rolled oats. It was a happy accident! They were a bit sweeter and had a different texture, but everyone loved them. It just goes to show that sometimes the best recipes come from a little kitchen chaos.
Over the years, I’ve learned that the brand of protein powder can slightly change the texture. If you find your mixture is too wet, add a couple more tablespoons of oats. If it’s too dry, add more water, a teaspoon at a time. Trust your instincts! You’ve got this. The most important ingredient is the joy you put into making them.
Your Questions, Answered!
Q: My mixture is too dry and crumbly. It won’t stick together when I roll it. What did I do wrong?
A: This is the most common issue, and it’s an easy fix! It usually happens if the peanut butter was particularly thick or if the protein powder absorbed more liquid than usual. Simply add more liquid. Add one teaspoon of water (or honey/maple syrup) at a time, mixing thoroughly after each addition, until the dough holds together when pinched.
Q: Can I make these vegan?
A: Absolutely! This recipe is super easy to veganize. Just use a plant-based chocolate protein powder (many great options exist!), swap the honey for pure maple syrup or agave nectar, and ensure your chocolate chips are vegan-friendly (check the label for milk products).
Q: Why do I have to chill them? Can’t I eat them right away?
A> You can sneak one right away (I always do!), but the chill time is crucial for the final texture. It allows the oats to soften slightly and absorb the moisture, and it firms up the fats from the peanut butter. This transforms them from a sticky dough into a firm, chewy, perfect snack.
Q: Help! My mixture is way too sticky and messy to roll. What now?
A: No worries! This can happen if your peanut butter was very oily or if your kitchen is warm. The easiest solution is to chill the entire mixture in the bowl for 10-15 minutes in the refrigerator. This will firm up the fats and make rolling clean and easy. You can also lightly wet or oil your hands to prevent sticking.
Chocolate Peanut Butter Protein Balls
Description
The Snack That Changed Everything: Chocolate Peanut Butter Protein Balls
If you love chocolate and peanut butter, these little powerhouses are your new best friend. No-bake, quick, and perfectly balanced for a sweet yet satisfying snack, they’re ideal for a pre-workout boost, a mid-afternoon pick-me-up, or a healthy grab-and-go breakfast.
Ingredients
-
2 cups rolled oats (old-fashioned, gluten-free if needed)
-
⅔ cup chocolate protein powder (or vanilla/unflavored)
-
½ cup mini chocolate chips
-
1 heaping cup natural peanut butter (softened if needed)
-
6 tbsp honey (or maple syrup/agave)
-
6 tsp water (secret trick for perfect texture)
-
¼ cup chopped roasted peanuts (optional, for crunch)
-
Pinch of flaky sea salt (optional, but highly recommended)
Instructions
1. Mix the Dry Ingredients
-
In a large mixing bowl, combine oats, protein powder, chocolate chips, chopped peanuts (if using), and sea salt.
-
Stir until everything is evenly distributed.
2. Add the Wet Ingredients
-
Add peanut butter, honey, and water to the bowl.
-
Mix thoroughly using a cutting and pressing motion with a spoon or spatula until a thick, slightly sticky dough forms.
-
If too dry, add more water, 1 tsp at a time; if too wet, add a little more oats.
3. Roll the Balls
-
Line a baking sheet or plate with parchment paper.
-
Use a tablespoon or cookie scoop to portion the dough, then roll between your palms until smooth.
-
If sticky, chill the mixture in the fridge for 10–15 minutes before rolling.
4. Chill and Set
-
Place the rolled balls on the parchment-lined tray and refrigerate for at least 20 minutes.
-
This firms them up and creates the perfect chewy texture.
5. Store and Enjoy
-
Keep in an airtight container in the fridge for up to a week.
-
Freeze for up to 3 months, layering parchment paper between portions.
Notes
-
Peanut butter type matters! Use natural peanut butter for the right texture.
-
Protein powder brands vary—adjust oats or water as needed to achieve a rollable dough.
-
Chill time is key for firm, chewy texture, but sneaky tasters are always allowed.
Nutrition
- Calories: 120 cal per ball
- Fat: 6g
- Carbohydrates: 11g
- Fiber: 2g
Nutritional Information*
*Please note: This is an approximate estimate based on the specific ingredients I used and can vary greatly depending on your choices, especially the brand of protein powder and peanut butter.
Per Ball (approx.): 120 calories | 6g protein | 11g carbohydrates | 2g fiber | 6g fat | 7g sugar
Final Thoughts: Your New Secret Weapon
So there you have it—the snack that truly changed the game for me. These No-Bake Chocolate Peanut Butter Protein Balls are proof that you don’t have to choose between what’s delicious and what’s good for you. They’re your ticket to conquering the 3 PM slump, fueling your adventures, and satisfying those cravings without the crash.
Whip up a batch, stash them in the fridge, and get ready to feel like you’ve unlocked a new level of easy, healthy living. This is more than a recipe; it’s your new secret weapon. Now, go fuel your awesome!


