Game Day Magic: The Treat That Steals the Show Every Time
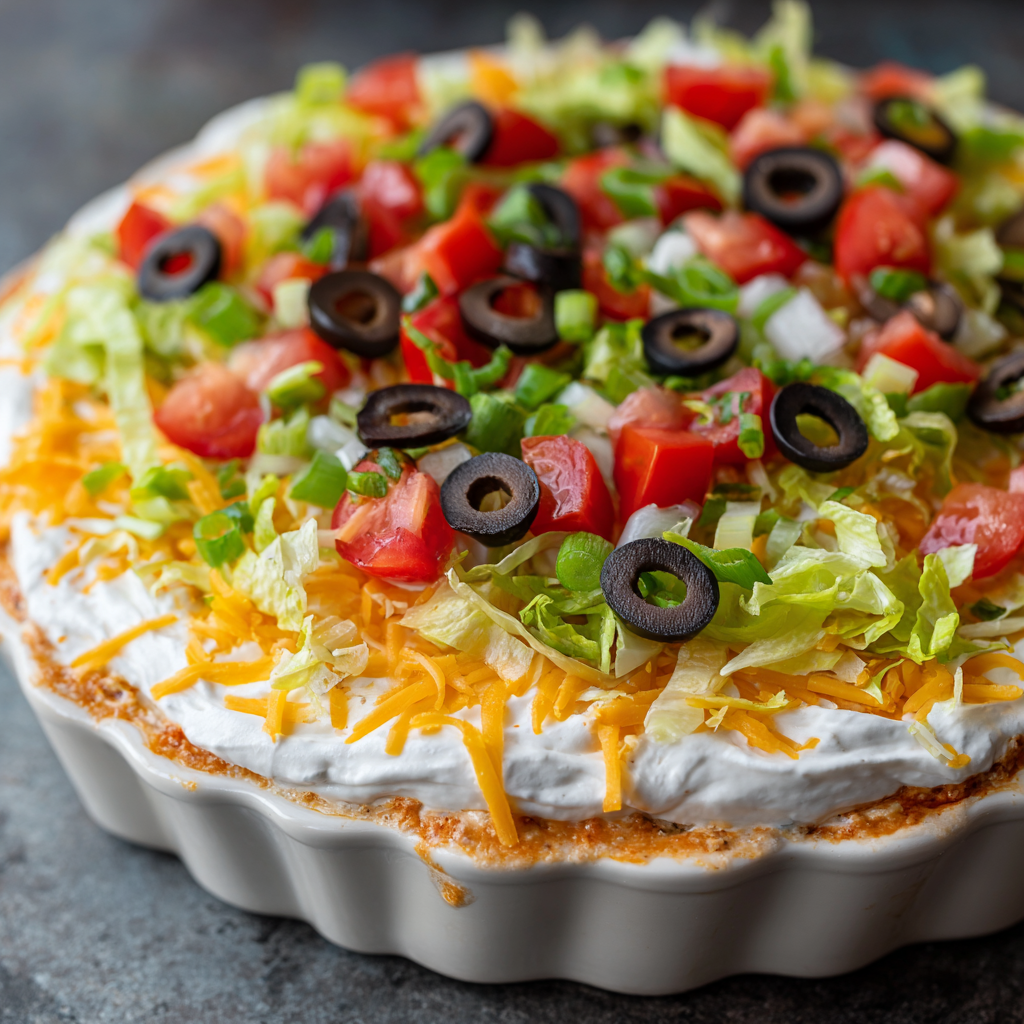
Hey friends! Olivia here. Can we talk about the unsung hero of game day spreads? I’m not talking about the seven-layer dip (though, I love you, seven-layer dip). I’m talking about that one platter that makes everyone’s eyes go wide, the one that disappears in minutes, the one that somehow manages to be both a little bit fancy and totally, joyfully fun.
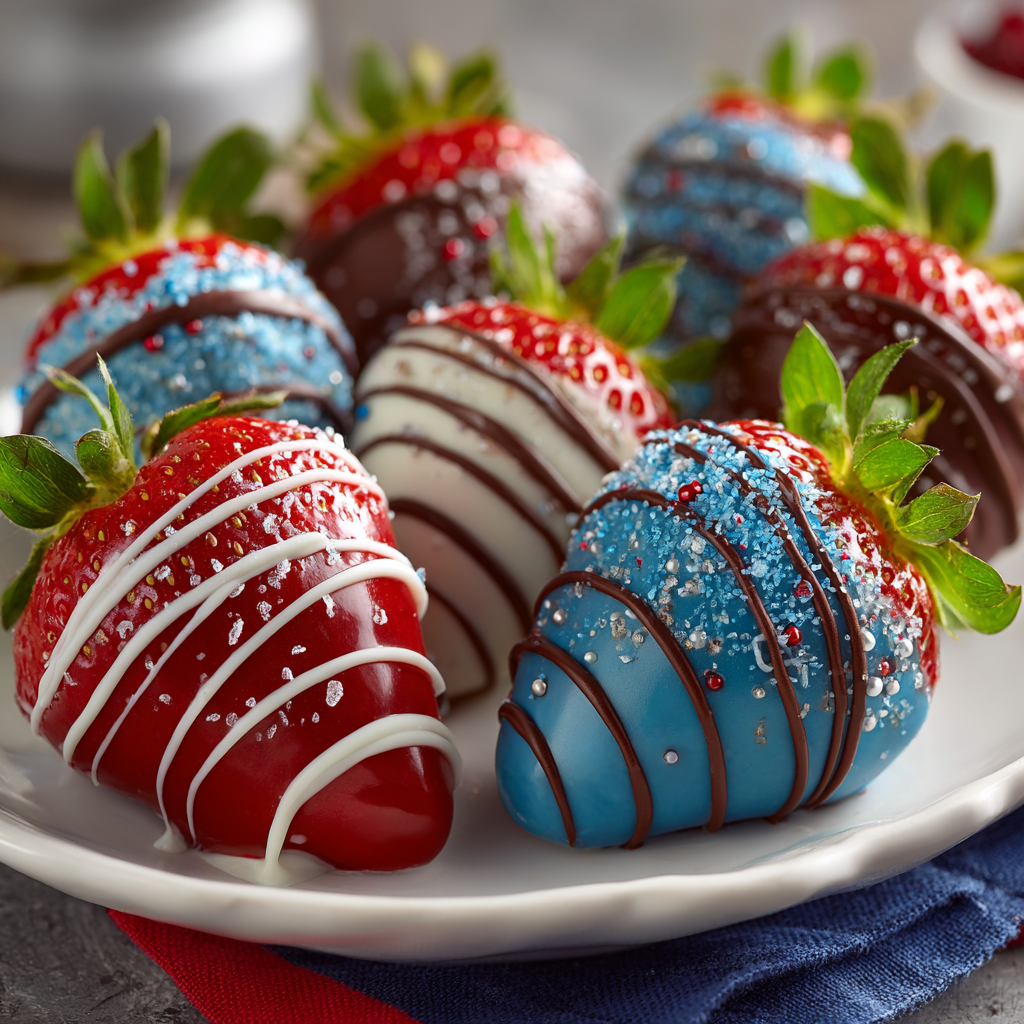
Picture this: Your team is on the screen, the energy is buzzing, and amidst the sea of savory snacks, you place a platter of gleaming, jewel-toned strawberries. These aren’t just any strawberries. They’re Chocolate-Dipped Strawberries in your team’s colors, a fresh, vibrant, and downright celebratory dessert that says, “I’ve got this,” without you having to spend all day in the kitchen.
I’m a firm believer that the best game day treats are the ones that bring a little sparkle to the party while being secretly simple to make. These strawberries are exactly that. They combine the classic, irresistible pairing of juicy fruit and rich chocolate with the pure, unadulterated fun of team spirit. So, tie on your favorite (probably messy) apron, and let’s create something that’ll have your whole crew cheering—both for the team and for you!
A Sweet Tradition is Born
This whole idea started a few years ago during a particularly nail-biting championship game. My best friend’s husband is a die-hard fan, and she wanted to surprise him with a dessert that screamed team pride. The usual suspects—frosting-laden cakes and food-colored cookies—felt a little heavy. We wanted something fresh, something that would cut through all the other rich foods.
We found ourselves in my kitchen, surrounded by strawberries and a rainbow of candy melts, giggling like kids as we attempted to drizzle perfect lines. We messed up a few (which we happily “quality tested”), but when we finally arranged those red and blue berries on a platter, they looked incredible. The moment we brought them out, the entire room erupted. They were a sensation! Now, making these team-spirited strawberries is our non-negotiable pre-game ritual. It’s less about perfection and more about the joy of creating something delicious and festive together.
Gathering Your All-Star Lineup
Here’s everything you need to create this show-stopping dessert. The beauty of this recipe lies in its simplicity and flexibility!
- 2 lbs Fresh Strawberries: Look for berries that are bright red, firm, and have a vibrant green cap. Size and shape matter—choose uniformly medium or large berries with a classic conical shape for the easiest, prettiest dipping. Chef’s Insight: Wash and dry them completely *before* you even think about melting chocolate. Any hidden water droplets are the arch-nemesis of smooth chocolate coating!
- 12 oz Colored Candy Melts (your primary team color): These are my go-to for vibrant, easy-to-use color. They melt smoothly and set firmly. Substitution Tip: You can absolutely use high-quality white chocolate chips or melting wafers and mix in a few drops of oil-based food coloring gel (not liquid food coloring, as it can cause the chocolate to seize).
- 4 oz Contrasting Color Melts (your secondary team color): This is for the dazzling drizzle or decorative stripes that really make your team’s logo pop. Chef’s Insight: If your team’s colors are similar (like two shades of blue), using a white or dark chocolate drizzle can create a beautiful, crisp contrast.
- Optional: Sprinkles or Edible Glitter in Team Colors: For maximum festive effect! A little sprinkle of team-colored jimmies or a dusting of edible glitter adds fantastic texture and sparkle.
- Optional: ¼ tsp Flavored Extract (mint, almond, or orange): Want to level up the flavor? A tiny dash of extract mixed into your melted candy can create a delicious twist, like a chocolate-orange or a mint-chocolate sensation.
Let’s Get Dipping: Your Play-by-Play Guide
Ready for some kitchen magic? Follow these steps, and you’ll have a stadium-worthy treat in no time. I’ve packed this section with all my favorite hacks to ensure your strawberries are flawless.
- Prep Your Station Like a Pro. Line a large baking sheet with parchment or a silicone baking mat. This is your landing pad. Give your washed strawberries one final, thorough pat-down with paper towels. I’m serious—be relentless about drying them! Then, set everything up so it’s within easy reach: your dried berries, candy melt bowls, and the prepared baking sheet. Chef’s Hack: To keep your workspace clean when drizzling, slide the parchment-lined baking sheet over a large cutting board or the back of another baking sheet. This gives you a stable, movable surface you can easily slide into the fridge.
- Melt the Candy Coating with Care. Divide your candy melts into separate, microwave-safe bowls. Melt them one color at a time, using the microwave. Heat in 30-second intervals on medium power, stirring vigorously between each burst. The goal is to melt them slowly. Chef’s Hack: Stop heating when a few small lumps remain, and keep stirring—the residual heat will melt them completely. This prevents the candy from overheating and becoming thick and clumpy.
- The Main Event: Dip with Confidence! Hold a strawberry by its leafy stem. Swirl it gently in the melted primary color, coating about ¾ of the berry. Lift it up and gently shake off any excess coating back into the bowl. You can also use a spoon to help guide the chocolate over any bare spots. Place the dipped berry carefully on your parchment-lined sheet. Repeat with the remaining strawberries and your first color. Chef’s Hack: If your coating starts to thicken as you work, just pop it back in the microwave for 10-15 seconds and give it a good stir.
- Accessorize with Team Flair. Now for the fun part! Using a fork or a small piping bag with the tiniest tip snipped off, quickly drizzle the contrasting color over your dipped strawberries. Work swiftly before the first layer sets. If you’re using sprinkles, add them immediately after dipping each berry. Chef’s Hack: To create a super fine drizzle, dip the tines of a fork into the melted candy and wave it quickly back and forth over the berries.
- The Chill Victory Lap. Once all your berries are decorated, carefully transfer the entire baking sheet to the refrigerator. Let them chill for 15-20 minutes, or until the candy coating is completely firm to the touch. This sets the chocolate perfectly and makes them easy to handle. Chef’s Hack: Don’t leave them in the fridge for hours on end, as the strawberries can start to sweat when brought back to room temperature.
Plating for the Win
Presentation is key! For a truly stunning display, arrange your finished strawberries on a simple white or neutral-colored platter. This lets those vibrant team colors really shine. You can group them by color pattern or create an alternating pattern. For an extra touch, place the platter on a bed of green lettuce leaves or sprinkle a few extra team-colored sprinkles around the base. They look incredible and instantly elevate your entire snack table!
Mix It Up: Creative Twists for Every Fan
This recipe is a fantastic base for so much creativity. Don’t be afraid to make it your own!
- The Jersey Stripe: Use a toothpick to draw vertical lines in the wet coating of a dipped strawberry. Then, use your contrasting color to pipe thin lines over the indentations for a classic jersey stripe effect.
- Team Initials & Numbers: Got a steady hand? Fit a piping bag with a #1 or #2 tip and use your contrasting color to pipe a player’s number or your team’s initial onto the dipped berry.
- Dairy-Free & Vegan Victory: Simply use dairy-free dark or white chocolate melting wafers and ensure your sprinkles are vegan-friendly. It’s an easy swap that makes the treat inclusive for everyone.
- Flavor Fusions: Stir a ¼ teaspoon of orange zest and extract into orange-colored coating for a chocolate-orange berry, or use peppermint extract for a cool, refreshing twist.
- The “Half & Half” Fan: For a dramatic look, dip one half of the strawberry in one team color, let it set, then dip the other half in the second color.
From My Kitchen to Yours: A Few Final Whispers
I can’t tell you how many batches of these I’ve made over the years, and let me be the first to say—they don’t have to be perfect! Some of my most-loved batches were the ones where the drizzle was a little wild or a sprinkle landed in a funny spot. It adds to the homemade charm.
This recipe has evolved in my kitchen, too. I started by just dipping them solidly in one color. Then came the drizzle. Then one day, fueled by maybe a bit too much coffee, I attempted tiny football laces on some. They looked… abstract. But we laughed, and we ate them, and they were delicious. The point is to have fun with it. This is about bringing people together and adding a splash of sweet, colorful joy to your game day. That’s a win in my book, no matter what the scoreboard says.
Your Game Day Questions, Answered!
Let’s tackle some common hurdles so you can feel confident going into your dipping session.
- Q: Why did my chocolate get thick, clumpy, and seize up?
A: This usually happens if even a tiny bit of moisture gets into the melts. This includes steam from a double boiler or a not-completely-dry strawberry or bowl. To fix it, try stirring in a teaspoon of solid vegetable shortening (like Crisco) or coconut oil. This can often smooth it back out. Prevention is key: keep everything bone-dry!
- Q: Can I make these the night before the party?
A: You can, but for the absolute best texture and appearance, I recommend making them the day of. If you must make them ahead, store them in a single layer in an airtight container in the fridge for up to 24 hours. They might sweat a little when you take them out, so let them sit at room temperature for just a few minutes before serving and gently pat them dry if needed.
- Q: My drizzle isn’t fine and pretty—it’s gloppy! Help!
A: No worries! This means your drizzling chocolate might be a bit too warm or thick. Let it sit for a minute to cool and thicken slightly. You can also transfer it to a small plastic bag, snip a TINY corner off, and use that for more control. Practice on a piece of parchment paper first!
- Q: The chocolate isn’t sticking to some parts of the strawberry. What did I do wrong?
A: This is almost always a moisture issue. If the berry is even slightly damp, the chocolate will slide right off. Double and triple-check that your berries are thoroughly dry. Also, make sure your coating is fluid enough; if it’s too thick, it won’t coat evenly.
Chocolate-Dipped Strawberries in Team Colors : A Festive & Fresh Game Day Treat
Description
This whole idea started a few years ago during a nail-biting championship game. My best friend wanted to surprise her die-hard-fan husband with a themed dessert that wasn’t heavy or overly sugary. Cakes felt boring. Cookies felt predictable. Then we glanced at the strawberries on my counter and the candy melts in my pantry. The rest? Pure, giggly chaos.
Ingredients
Ingredients
-
2 lbs fresh strawberries
Choose bright red, firm berries with vibrant green caps. Medium or large, evenly shaped berries dip the prettiest.
Chef’s Insight: Dry them completely. Even one droplet of water ruins chocolate’s smooth finish. -
12 oz candy melts (primary team color)
These give you bold, reliable color.
Substitution: White chocolate + oil-based coloring gel (not liquid). -
4 oz candy melts (secondary team color)
Perfect for decorative stripes or drizzles.
Tip: If your team colors are similar, use white or dark chocolate for the contrast. -
Optional: Team-colored sprinkles or edible glitter
-
Optional: ¼ tsp flavored extract (mint, almond, or orange)
Instructions
Line a baking sheet with parchment or a silicone mat. Pat each strawberry absolutely dry — get in there like your victory depends on it.
Hack: Place the parchment-lined tray on a cutting board for easy transport.
Place melts into separate microwave-safe bowls. Heat in 30-second intervals at medium power, stirring between each one.
Hack: Stop when a few lumps remain — stirring melts the rest without overheating.
Hold the strawberry by the leaves and dip it ¾ of the way into the primary color. Gently shake off excess and set onto your tray. Repeat with all berries.
Hack: If the coating thickens, microwave it for 10–15 seconds.
Use a fork or a piping bag with a tiny snipped corner to drizzle the contrasting color over the dipped berries. Add sprinkles immediately while the coating is still wet.
Hack: For ultra-fine drizzle lines, flick the melted candy off the fork tines in quick motions.
Refrigerate for 15–20 minutes until the coating is fully set.
Hack: Don’t chill for hours — strawberries “sweat” when they warm back up.
Notes
-
Jersey Stripes: Make light indentations with a toothpick, then drizzle contrasting lines along them.
-
Team Initials & Numbers: Pipe letters or player numbers with a #1 or #2 tip.
-
Dairy-Free Version: Use vegan chocolate wafers + vegan sprinkles.
-
Flavor Fusions: Add orange zest to orange melts or peppermint extract to white melts.
-
Half & Half Fan: Dip one half in one color, let it set, then dip the other half in the second color.
Quick Bite: Nutritional Info
Here’s a rough estimate per strawberry (because knowledge is power, even on game day!). Remember, these are a treat, but they’re a lighter option compared to many other desserts.
Prep Time: 20 minutes | Chill Time: 20 minutes | Total Time: 40 minutes | Servings: ~24 strawberries
Nutrition per strawberry (approximate): Calories: 90 | Fat: 4g | Carbs: 12g | Sugar: 10g | Fiber: 1g | Protein: 1g
Final Thoughts: A Sweet Victory, Every Time
So, there you have it—your secret weapon for the most memorable game day spread. These Chocolate-Dipped Team Spirit Strawberries are more than just a dessert; they’re a conversation starter, a burst of joy, and a deliciously fresh counterpoint to all the savory snacks.
Remember, the goal isn’t a flawless, bakery-perfect finish. It’s about the fun of making them, the pride of showcasing your colors, and the shared “ooh” and “aah” when you bring them out. Whether you nail the drizzle or your stripes are wonderfully wonky, they’ll be devoured with smiles.
So this weekend, grab those berries and melts. Turn the pre-game into your own kitchen party, and create a treat that’s guaranteed to steal the show. Here’s to good food, great company, and a sweet victory for your team—or at the very least, for your snack table!