
Cherry Pie Bars: The Easy, Crowd-Pleasing Dessert You Need
There’s something magical about cherry pie—the sweet-tart filling, the buttery crust, the way it instantly transports you to summer picnics and family gatherings. But let’s be honest: rolling out pie dough isn’t always how we want to spend our time. Enter Cherry Pie Bars—all the flavor of homemade cherry pie, but in easy, portable, no-fuss bar form!
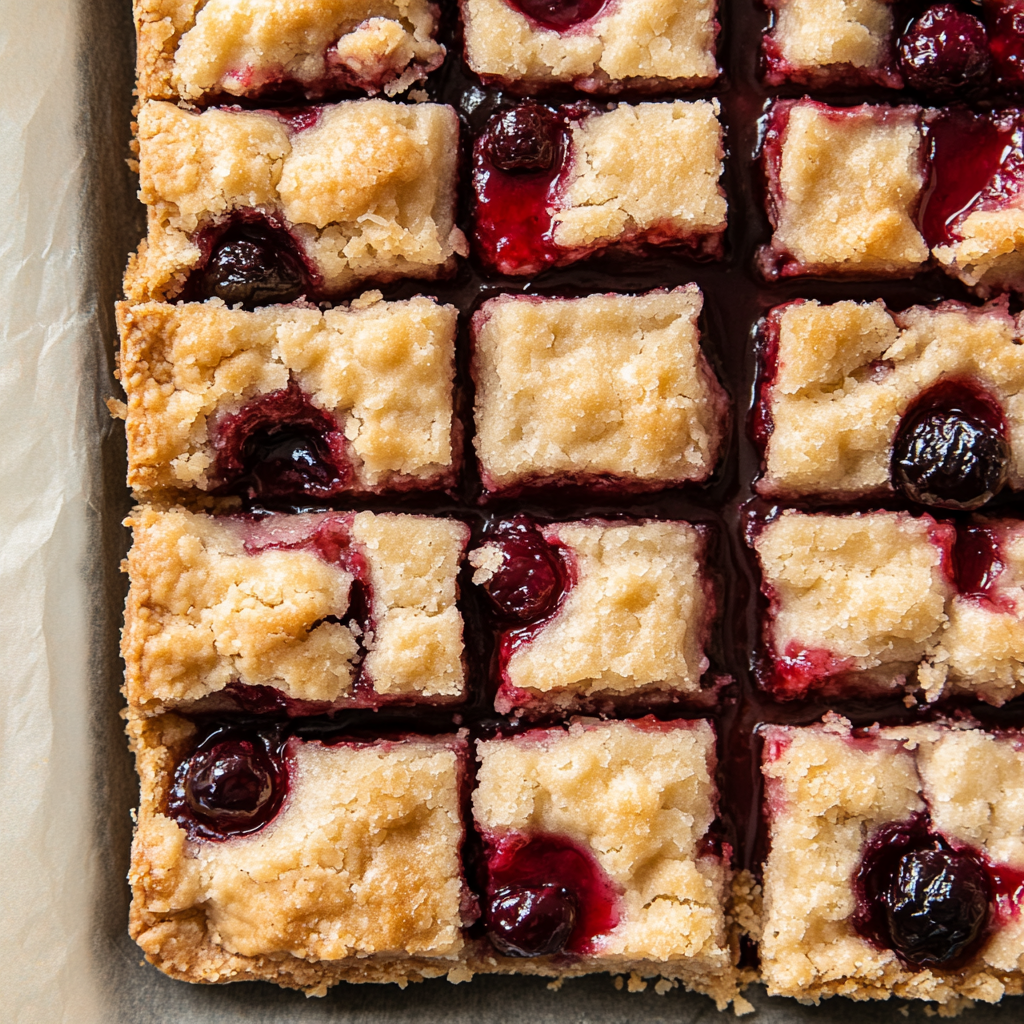
These bars are perfect for potlucks, bake sales, or just treating yourself (because you deserve it). With a buttery shortbread-like base, a luscious cherry filling, and a sweet almond glaze, they’re guaranteed to disappear fast.
Why You’ll Love These Cherry Pie Bars
✔ No pie crust stress – Just press the dough into the pan—no rolling, crimping, or blind baking!
✔ Perfect for feeding a crowd – One batch makes 24 bars, ideal for parties and gifting.
✔ Make-ahead friendly – These taste even better the next day as the flavors meld.
✔ Endless variations – Swap the cherry filling for blueberry, apple, or even chocolate!
Ingredients You’ll Need
For the Bars:
-
1 cup (2 sticks) unsalted butter, softened – The key to a rich, tender crust.
-
2 cups granulated sugar – Sweetens the dough and balances the tart cherries.
-
4 large eggs – Gives structure and richness.
-
1 tsp vanilla extract + ¼ tsp almond extract – The almond extract makes the cherry flavor pop!
-
3 cups all-purpose flour – Spoon & level for the perfect texture.
-
2 (21 oz) cans cherry pie filling – Look for brands with plump cherries (like Comstock).
For the Glaze:
-
1 cup powdered sugar – Sifted for smoothness.
-
½ tsp vanilla + ½ tsp almond extract – Echoes the flavors in the bars.
-
2-3 tbsp milk – Adjust for your desired drizzle consistency.
Step-by-Step Instructions
1. Prep & Preheat
-
Preheat oven to 350°F (175°C).
-
Grease a 9×13-inch pan (or line with parchment for easy removal).
2. Make the Dough
-
Cream butter & sugar until light and fluffy (3-5 mins).
-
Beat in eggs one at a time, then add vanilla and almond extract.
-
Mix in flour just until combined—don’t overmix!
3. Layer the Bars
-
Press ⅔ of the dough into the pan (it’ll be thick—use wet fingers to spread).
-
Spread cherry filling evenly over the dough.
-
Dot remaining dough on top (no need to cover completely—gaps are good!).
4. Bake & Cool
-
Bake 35-40 mins until golden brown.
-
Cool completely before glazing (this prevents a melty mess!).
5. Drizzle & Serve
-
Whisk glaze ingredients and drizzle over cooled bars.
-
Slice & enjoy!
Can you smell that? It’s the sweet, buttery scent of nostalgia wafting from my oven right into your kitchen. If you’re anything like me, the mere mention of cherry pie makes your heart do a happy little dance – but let’s be real, rolling out pie crust isn’t always how we want to spend a golden afternoon. That’s where these glorious Cherry Pie Bars swoop in like culinary superheroes! Imagine all the joy of homemade cherry pie – the jammy fruit, the tender crumb, that gorgeous ruby hue – but in fuss-free bar form. No lattice-weaving required, no soggy-bottom panic, just pure, uncomplicated bliss. I created these for a lakeside picnic last summer, and let me tell you, the empty pan came back faster than kids chasing an ice cream truck. Whether you’re feeding a crowd, surprising a neighbor, or just treating yourself (you deserve it!), these bars are your golden ticket to homemade happiness. So tie on that apron – the slightly flour-dusted one, you know the one – and let’s bake some magic!
The Picnic That Started It All
Picture this: It’s the Fourth of July, and my family’s annual lakeside potluck is in full swing. My aunt always brought her legendary cherry pie – crimped edges perfect enough to make Martha Stewart weep. Last year, I wanted to bring something equally special but less… high-maintenance. (Have you ever tried transporting a full pie in a crowded car on a 90-degree day? Disaster waiting to happen!) Inspiration struck: why not capture that pie magic in portable bar form? I whipped up my first batch of these cherry-studded wonders, nervously setting them beside Aunt Linda’s masterpiece. The result? My bars vanished faster than the fireworks at dusk! My cousin’s toddler even smeared cherry filling across her cheeks like war paint – the ultimate compliment. That day, these bars earned their permanent spot in my recipe hall of fame. They’re not just dessert; they’re edible confetti for life’s little celebrations.
Your Cherry Pie Bar Toolkit
Gather these simple stars – pantry heroes unite!
For the Dreamy Bars:
- 1 cup (2 sticks) unsalted butter, softened – The flavor foundation! Unsalted lets you control the salt. If using salted, reduce added salt by half. Vegan? Swap in equal amounts of high-quality plant-based butter (I love Miyoko’s).
- 2 cups sugar – Sweetens the deal. Granulated white sugar gives that classic texture, but feel free to sub 1 cup with light brown sugar for caramel notes.
- 1 tsp salt – Secret weapon! Balances the sweetness and makes flavors pop. Use fine sea salt.
- 4 large eggs – Room temp is key for smooth blending! Pull them out an hour before baking.
- 1 tsp pure vanilla extract – The warm hug in every bite. Splurge on the good stuff!
- ¼ tsp almond extract – The cherry’s BFF! This tiny amount makes the fruit sing. Omit if allergic, but you’ll miss the magic.
- 3 cups all-purpose flour – Spoon and level it, friends! No packing. For slightly denser bars, swap 1 cup with cake flour.
- 2 (21 oz) cans cherry pie filling – The superstar! Look for brands with plump cherries (Comstock or Oregon Fruit are fab). Feeling ambitious? Use 4 cups of homemade cherry filling!
For the Glorious Glaze:
- 1 cup powdered sugar – Sift it first for silky smoothness.
- ½ tsp vanilla extract – Echoes the bar’s flavor.
- ½ tsp almond extract – Doubles down on that bakery-worthy aroma.
- 2–3 tbsp milk – Any kind works! Start with 2 tbsp; add the 3rd only if needed for drizzling consistency.
Let’s Build Some Bar Magic!
Ready? Aprons on, oven preheating, and let’s get mixing!
- Preheat & Prep: Fire up your oven to 350°F (175°C). Grease your trusty 9×13-inch pan really well with butter or baking spray, or line it with parchment paper (leaving overhangs for easy lifting later – game changer!).
- Creamy Dreams: In your largest bowl, beat the softened butter and sugar together with an electric mixer on medium-high. Keep going for 3-5 minutes until it’s light, fluffy, and almost white. Chef’s Whisper: “This isn’t just mixing; it’s creating tiny air pockets for lift! Don’t rush it.”
- Egg-cellent Adventure: Beat in the eggs, one at a time, letting each fully incorporate before adding the next. Scrape the bowl! Now mix in the vanilla, almond extract, and salt. That almond-vanilla perfume? Heavenly.
- Flour Power: Reduce mixer speed to low. Gradually add the flour, mixing just until no dry streaks remain. Pro Tip: “Overmixing = tough bars! Stop when it looks shaggy but combined.”
- Layer Up: Dollop about ⅔ of your batter into the pan. Use a spatula or lightly wet fingers to spread it evenly – it’ll be thick, like cookie dough. Don’t stress perfection!
- Cherry Bomb: Spoon the glorious cherry pie filling evenly over the base layer. Gently spread it, leaving a tiny border. Fun Hack: “Use the back of a spoon to create slight ‘wells’ – helps the top layer settle in.”
- Top It Off: Drop spoonfuls of the remaining batter randomly over the cherries. No need to cover completely – the gaps let the ruby filling peek through beautifully!
- Bake to Bliss: Slide the pan into the oven’s center rack. Bake 35-40 minutes until the top is golden brown, the edges are pulling away slightly, and a toothpick inserted near the center (avoid cherries!) comes out clean. Watch Closely: “Ovens vary! Mine sings at 38 minutes.”
- Cool It, Hot Stuff: Let the pan cool completely on a wire rack. I know it’s tempting, but glazing warm bars = melty mess! Patience, grasshopper.
- Glaze Glory: Whisk all glaze ingredients in a small bowl. Start with 2 tbsp milk; add the 3rd only if needed for a thick but drizzle-able consistency. Drizzle artfully (or enthusiastically!) over the cooled bars. Let set for 10 minutes before slicing.
Showtime! Serving Your Masterpiece
Presentation is half the fun! Slice these beauties into 24 squares (or be generous and cut 12 larger bars – no judgment!). For a casual vibe, serve them right from the pan with a stack of napkins. Feeling fancy? Plate individual bars on vintage dessert plates with a dollop of softly whipped cream or a scoop of vanilla bean ice cream melting seductively alongside. A tiny sprinkle of flaky sea salt or toasted sliced almonds on top adds gourmet flair. These bars shine brightest at room temperature, letting all those buttery, cherry-almond flavors sing. Perfect for bake sales, brunch buffets, or that 3pm coffee break when you deserve something splendid!
Make It Your Own!
Love the base recipe? Try these tasty twists:
- Berry Bonanza: Swap cherry filling for blueberry, apple, or mixed berry pie filling. Raspberry + cherry is a stunning combo!
- Nutty Nirvana: Stir 1/2 cup chopped toasted pecans or walnuts into the batter for crunch. Sprinkle more on the glaze.
- Chocolate-Cherry Romance: Add 1/2 cup mini chocolate chips to the batter. Drizzle glaze with melted dark chocolate.
- Gluten-Free Friendly: Use a 1:1 gluten-free flour blend (like Bob’s Red Mill). Ensure extracts and pie filling are GF.
- Lemon Zing: Add 1 tbsp lemon zest to the batter and replace almond extract in the glaze with lemon extract for a bright, sunny vibe.
Olivia’s Extra Sprinkles of Wisdom
These bars have evolved like a fine wine (or, well, a really good pie)! The almond extract was a happy accident – I grabbed it instead of vanilla once and never looked back. They freeze beautifully too! Cool completely, freeze UNGLAZED bars in a single layer, then wrap tightly. Glaze after thawing. A funny kitchen confession? I once mistook salt for sugar in the glaze (yikes!). We salvaged it by scraping off the glaze and making a new batch, but lesson learned: label your pantry jars! Over the years, I’ve found these bars taste even better on day two, as the flavors meld. If you can resist, cover them overnight before slicing. Most importantly? Share them. Seeing someone’s eyes light up after that first bite? That’s the real recipe for joy.
Cherry Bar SOS: Your Questions Answered
Let’s tackle those baking hiccups before they happen!
- My top layer disappeared into the cherries! Help! “Ah, the great cherry sinkhole!” This usually means the batter was a bit too thin or the filling very juicy. No worries – taste is unaffected! Next time: Chill your batter 15 mins before layering, spoon filling gently without pressing down, and freeze the dolloped top batter 10 mins before baking for extra structure.
- Can I use fresh cherries instead of canned filling? Absolutely! Pit 4 cups fresh cherries. Toss with 1/2 cup sugar, 3 tbsp cornstarch, 1 tbsp lemon juice, and 1/4 tsp almond extract. Simmer 5-7 mins until thickened. Cool completely before using.
- Bars are browning too fast on top! Ovens can be feisty! Tent loosely with aluminum foil after 25 minutes if the top looks deep golden before the center is set. Also, ensure your rack is in the middle – too high = scorched tops!
- Glaze too runny/thick? Easy fixes! Too runny: Whisk in more powdered sugar, 1 tbsp at a time. Too thick: Add milk or cream, 1 tsp at a time. Aim for honey-like consistency – it should drizzle but hold its shape briefly.
5 Delicious Variations to Try
-
Berry Bliss – Swap cherry filling for blueberry or raspberry.
-
Apple Cinnamon – Use apple pie filling + 1 tsp cinnamon in the dough.
-
Chocolate-Cherry – Add ½ cup mini chocolate chips to the batter.
-
Nutty Crunch – Stir ½ cup chopped pecans into the dough.
-
Lemon Zest – Add 1 tbsp lemon zest for a bright twist.
Storage & Freezing Tips
-
Room Temp: Keep covered for 2-3 days.
-
Freeze (unglazed): Wrap tightly and freeze for up to 3 months. Thaw and glaze before serving.

Cherry Pie Bars
- Total Time: 55 mins
Description
Born on a sunny picnic blanket and loved ever since, these Cherry Pie Bars bring all the flavor of homemade cherry pie—ruby fruit, buttery crumb, and nostalgic sweetness—without the rolling, crimping, or soggy-bottom stress. They’re simple to bake, easy to slice, and a guaranteed hit from potlucks to porch snacks. Grab your apron and let’s turn cherries into pure delight!
Ingredients
For the Bars:
-
1 cup unsalted butter, softened
-
2 cups sugar
-
1 tsp salt
-
4 large eggs (room temp)
-
1 tsp vanilla extract
-
¼ tsp almond extract
-
3 cups all-purpose flour
-
2 (21 oz) cans cherry pie filling
For the Glaze:
-
1 cup powdered sugar
-
½ tsp vanilla extract
-
½ tsp almond extract
-
2–3 tbsp milk
Instructions
-
Preheat oven to 350°F (175°C). Grease or line a 9×13-inch baking dish.
-
Cream butter & sugar until fluffy (3–5 mins). Add eggs one at a time, then vanilla, almond extract, and salt.
-
Mix in flour gradually just until combined. Don’t overmix!
-
Spread ⅔ of dough into pan evenly. Layer cherry filling on top.
-
Dot remaining dough over filling by spoonfuls—let some cherry peek through!
-
Bake 35–40 mins until golden and set. Cool completely.
-
Whisk glaze until smooth. Drizzle over cooled bars. Let set before slicing.
Notes
-
Use a spoon’s back to press filling gently into base.
-
Want deeper flavor? Sub half the sugar with light brown sugar.
-
Bars taste even better the next day!
Nutrition
- Serving Size: 24 small bars or 12 large
- Calories: 280 per bar
- Sugar: 27g
- Fat: 12g
- Carbohydrates: 40g
Final Thoughts & Category
These Cherry Pie Bars are the ultimate easy, crowd-pleasing dessert—perfect for when you want all the flavor of pie without the fuss.
Category: Easy Dessert Bars / No-Roll Pie Alternatives
Nutritional Nibbles (Per Bar, 24 Servings)
Calories: ~230 | Fat: 9g | Saturated Fat: 5g | Cholesterol: 50mg | Sodium: 110mg | Carbohydrates: 35g | Fiber: 1g | Sugar: 22g | Protein: 2g
Note: Estimates based on ingredients used. Values may vary with substitutions.
Prep Time: 15 mins | Cook Time: 40 mins | Total Time: 55 mins (+ cooling) | Serves: 24


