

No-Bake Banana Bread Balls: Your New Favorite Healthy Snack!
Hey there, friend! Come on in, grab an apron (a clean one, or a messy one—I won’t judge!), and get ready to fall in love with your new go-to snack. If you’ve ever stood over a bunch of spotty bananas and thought, “I should make banana bread… but I just don’t have the energy to preheat the oven,” then this recipe is your kitchen soulmate.
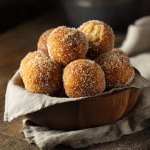
I’m talking about my famous No-Bake Banana Bread Balls. Imagine all the warm, spiced, comforting flavor of a freshly baked loaf of banana bread, but rolled up into a perfectly portable, energy-boosting bite. They’re soft, a little nutty, naturally sweet, and seriously satisfying. Whether you need a breakfast you can eat with one hand while wrangling kids or a cup of coffee, a post-workout pick-me-up that actually tastes like a treat, or a little something sweet after dinner that won’t leave you feeling guilty, these little balls of joy have got you covered.
The best part? You don’t need any baking skills whatsoever. No waiting for butter to soften, no worrying about over-mixing, and definitely no heating up your kitchen on a hot day. All you need is one bowl, a spoon, and about ten minutes of hands-on time. It’s the kind of simple, wholesome, feel-good recipe that reminds us that cooking doesn’t have to be complicated to be incredible. So, let’s mash some bananas and make a mess together!
A Bowlful of Comfort and Crazy Schedules
This recipe was born out of pure necessity and a serious craving for comfort. It was a few years ago, right in the middle of a chaotic week where my schedule was packed from morning until night. I had a major work deadline looming, the house was a whirlwind, and my favorite overripe bananas were staring me down from the counter, begging to be used.
I desperately wanted the cozy, familiar taste of my mom’s banana bread—that specific flavor that feels like a warm hug. But the thought of creaming butter and sugar, carefully folding in flour, and babysitting a loaf in the oven for an hour felt utterly impossible. I was about to resign myself to tossing the bananas when I had a “what if?” moment.
I started grabbing things from the pantry: oats for heartiness, peanut butter for protein and richness, walnuts for crunch, and a scoop of my favorite cinnamon protein powder. I mashed it all together, rolled it into a ball, and took a tentative bite. And oh my goodness, it was magic! It tasted exactly like the soul of banana bread, but in a fun, no-fuss, energy-packed form. It was the perfect solution for my crazy day, and it’s been a staple in my fridge ever since. It’s my little reminder that even on the busiest days, we can still make something delicious and nourishing for ourselves.
Gathering Your Banana Bread Ball Crew
Here’s your shopping list! This is where the magic starts. The beauty of this recipe is its flexibility, so don’t stress if you need to make a swap or two.
- 1 Ripe Banana, Mashed: This is our star! The spottier and browner the banana, the sweeter and more flavorful your balls will be. That’s because the natural starches have converted into sugars. Chef’s Insight: If your bananas are ripening faster than you can use them, peel them, pop them in a freezer bag, and freeze them for future batches! Just thaw before using.
- 1 Cup Rolled Oats (Old-Fashioned Oats): These give our balls structure and a wonderful chewy texture. They’re also packed with fiber to keep you full. Substitution Tip: For a gluten-free version, make sure your oats are certified gluten-free. You can also use quick oats, but the texture will be a bit less chewy.
- 1/2 Cup Vanilla or Cinnamon Protein Powder: This adds a huge boost of protein and helps bind everything together while amplifying that classic bakery flavor. Substitution Tip: No protein powder? No problem! You can swap it out for 1/2 cup of almond flour or oat flour. You might need a touch more peanut butter or a teaspoon of milk to help it all stick together.
- 1/4 Cup Peanut Butter: Our rich, creamy binder! It adds healthy fats and makes the mixture rollable. Substitution Tip: Any nut or seed butter works beautifully here. Try almond butter, cashew butter, or for a nut-free version, sunflower seed butter is fantastic.
- 1/4 Cup Chopped Walnuts: For that essential banana bread crunch and nutty flavor. Substitution Tip: Not a walnut person? Pecans, almonds, or even dark chocolate chips would be delicious here. For a nut-free version, try sunflower seeds or just leave them out.
- 1/2 Tsp Ground Cinnamon: The spice that makes it taste like home. Don’t be shy with it! Chef’s Insight: Feel free to add a pinch of nutmeg or allspice for even more warmth.
- 1–2 Tsp Honey (Optional): This is your sweetness dial. If your banana is super ripe and sweet and your protein powder is already pretty sweet, you might not need it. Taste the mixture before you add it! Substitution Tip: Maple syrup or agave nectar work perfectly here for a vegan version.
Let’s Get Rolling! Your Foolproof Steps to Success
Ready? This is so easy, you’ll have it memorized after one try. Let’s do this!
Step 1: The Mash-Up. Peel that beautiful ripe banana and plop it into a medium-sized mixing bowl. Get your muscles ready and mash it with a fork until it’s smooth and almost liquidy. No big chunks! Now, add your peanut butter right on top. Chef’s Hack: If your peanut butter is super thick and hard to stir, pop it in the microwave for 10-15 seconds to loosen it up first. Mix the banana and peanut butter together until they’re one perfectly creamy, slightly goopy mixture.
Step 2: The Dry Crew Joins the Party. Now, dump in your rolled oats, protein powder, chopped walnuts, and cinnamon. Take a wooden spoon or a sturdy spatula and start stirring! It might seem dry at first, but keep going. The moisture from the banana and peanut butter will eventually hydrate the oats and powder, and it will come together into a thick, slightly sticky dough. Chef’s Tip: This is the perfect time to taste your mixture. Want it sweeter? Add that honey or maple syrup now. Want more cinnamon? Go for it! Make it yours.
Step 3: The Roll. Now for the fun part! Line a small baking sheet or plate with parchment paper. Using a tablespoon or a small cookie scoop, portion out the dough. I like to make mine about the size of a ping pong ball. Then, get your hands in there! Roll each portion between your palms until it forms a smooth, round ball. If the mixture is sticking to your hands too much, a little trick is to lightly dampen your palms with water. It works like a charm!
Step 4: The Chill. Place each finished ball onto your prepared parchment-lined tray. Once they’re all rolled, slide the entire tray into the refrigerator for at least 20-30 minutes. This step is non-negotiable, my friend! This chilling time allows the oats to soften fully and allows everything to firm up, transforming them from a slightly crumbly dough into a perfect, firm, snackable bite.
Step 5: Enjoy and Store! After their beauty rest in the fridge, your Banana Bread Balls are ready to devour! Store any leftovers (if you have any!) in an airtight container in the refrigerator for up to a week. They also freeze amazingly well for up to 3 months. Just thaw in the fridge or at room temperature for a bit before eating.
How to Serve These Little Gems
These balls are the definition of versatile. I love to pile a few into a small bowl for a quick snack at my desk. For a more decadent feel, you can roll them in a light coating of cinnamon, crushed graham cracker crumbs, or even a drizzle of melted dark chocolate after they’ve chilled. They’re fantastic paired with a hot cup of coffee for breakfast, a green smoothie for a balanced lunch, or just on their own when that 3 PM hunger slump hits. There’s no wrong way to enjoy them!
Mix It Up! Endless Flavor Possibilities
The basic formula is your playground. Here are a few of my favorite ways to switch it up:
- Chocolate Chip Cookie Dough: Swap the walnuts for 1/4 cup of mini dark chocolate chips and use vanilla protein powder. It’s like healthy edible cookie dough!
- Tropical Twist: Use almond butter, swap the walnuts for 2 tablespoons of shredded coconut and 2 tablespoons of chopped dried pineapple, and add a tiny pinch of nutmeg.
- Double Chocolate: Use chocolate protein powder and add 2 tablespoons of cocoa powder to the dry ingredients. Fold in chocolate chips for the ultimate chocolate fix.
- Sunflower Seed Crunch (Nut-Free): Use sunflower seed butter instead of peanut butter and replace the walnuts with roasted sunflower seeds.
- Gingerbread Spice: Swap the cinnamon for a blend of 1/4 tsp ginger, 1/4 tsp cinnamon, and a pinch of cloves. So cozy for the holidays!
Olivia’s Chef Notes & Kitchen Stories
This recipe has truly evolved over time. The first batch I ever made was a little too wet because I used a massive banana, and I ended up with more of a “banana bread pile” than a ball! I quickly learned that if your mixture seems too wet, you can add another tablespoon or two of oats or protein powder. If it seems too dry and crumbly, add another tiny spoonful of peanut butter or a teaspoon of milk. It’s all about finding that perfect, rollable consistency.
I also have a funny memory of my nephew helping me make these. He was about five at the time and was *very* enthusiastic about the rolling process. Let’s just say we ended up with balls that were all wildly different sizes, and he was covered head-to-toe in peanut butter and oats. But he was so proud of his creations, and they tasted just as good. So don’t worry about perfection—just have fun with it!
Your Questions, Answered!
Q: My mixture is too wet and sticky to roll. What did I do wrong?
A: This usually means your banana was on the extra-large side! No worries, it’s an easy fix. Just add more of your dry ingredients. Sprinkle in an extra tablespoon of oats and/or protein powder at a time, mixing well after each addition, until the mixture is firm enough to hold its shape when rolled.
Q: Can I make these without protein powder?
A> Absolutely! As mentioned in the ingredients, you can substitute the 1/2 cup of protein powder with 1/2 cup of almond flour or oat flour. The texture will be slightly different but still delicious. Because these flours don’t absorb liquid quite the same way, your mixture might be a tad softer, so you might need to chill them a bit longer to firm up.
Q: How long will they keep, and can I freeze them?
A: They will stay fresh and delicious in an airtight container in the refrigerator for up to 1 week. And yes, they freeze beautifully! Place the chilled balls on a parchment-lined baking sheet and freeze until solid (about 1-2 hours), then transfer them to a freezer-safe bag or container. They’ll keep for up to 3 months. Thaw in the fridge or on the counter for 15-20 minutes before eating.
Q: Are these vegan?
A: They can be! Just ensure you use a plant-based protein powder (many are!) and swap the honey for maple syrup or agave nectar. Also, double-check that your oats are certified gluten-free if that’s a concern.
Banana Bread Balls
Description
Hey there, friend! If you’ve ever looked at a bunch of overripe bananas and thought, “I should make banana bread… but I don’t have the energy to preheat the oven,” these No-Bake Banana Bread Balls are here to save the day. They capture all the cozy, spiced flavor of banana bread in a perfectly portable, energy-boosting bite. Soft, slightly nutty, naturally sweet, and satisfying, they’re ideal for breakfast on-the-go, a post-workout snack, or a little something sweet after dinner without guilt.
Ingredients
-
1 ripe banana, mashed
-
1 cup rolled oats (old-fashioned)
-
½ cup vanilla or cinnamon protein powder (or substitute with ½ cup almond or oat flour)
-
¼ cup peanut butter (or any nut/seed butter)
-
¼ cup chopped walnuts (or pecans, almonds, sunflower seeds, or chocolate chips)
-
½ tsp ground cinnamon
-
1–2 tsp honey, optional (maple syrup or agave for vegan option)
Instructions
Step 1: Mash the Banana
Peel and mash the banana in a medium bowl until smooth. Add peanut butter and mix until creamy.
Step 2: Mix Dry Ingredients
Add oats, protein powder, walnuts, and cinnamon. Stir until a thick, slightly sticky dough forms. Taste and adjust sweetness with honey or syrup if desired.
Step 3: Roll into Balls
Line a plate with parchment paper. Using a tablespoon or small cookie scoop, portion out the dough and roll into balls. If sticky, dampen your hands slightly.
Step 4: Chill
Place balls on the parchment-lined tray and refrigerate for 20–30 minutes until firm.
Step 5: Serve & Store
Enjoy immediately, or store in an airtight container in the fridge for up to a week. Freeze for up to 3 months.
Notes
-
The riper the banana, the sweeter and more flavorful the balls.
-
If mixture is too wet, add extra oats or protein/almond flour.
-
If too dry, add a little more peanut butter or a teaspoon of milk.
Nutrition
- Calories: 100 cal Per balls
- Fat: 5g
- Carbohydrates: 10g
- Protein: 4g
Nutritional Information*
*This is an estimate per ball (based on a batch of 12) and will vary based on your specific ingredients and brands used.
Calories: ~100 | Fat: 5g | Carbohydrates: 10g | Protein: 4g
Final Thoughts: Your Snack Game, Upgraded
And just like that, you’ve done it! You’ve turned a few simple, wholesome ingredients into a powerhouse snack that’s ready for anything your week throws at you. No oven, no fuss, just pure, banana-bread-inspired goodness.
These little balls are proof that eating well doesn’t have to be complicated or time-consuming. They’re your secret weapon for busy mornings, your reliable afternoon rescue, and your healthy-ish treat that feels like a true indulgence. I love keeping a batch tucked away in the fridge—it’s like having a little bit of culinary magic on standby, ready to make any moment a bit brighter and a whole lot more delicious.
Most of all, I hope this recipe empowers you to play, to experiment, and to make it your own. Cooking should be fun, flexible, and fit into your life, not the other way around.


