
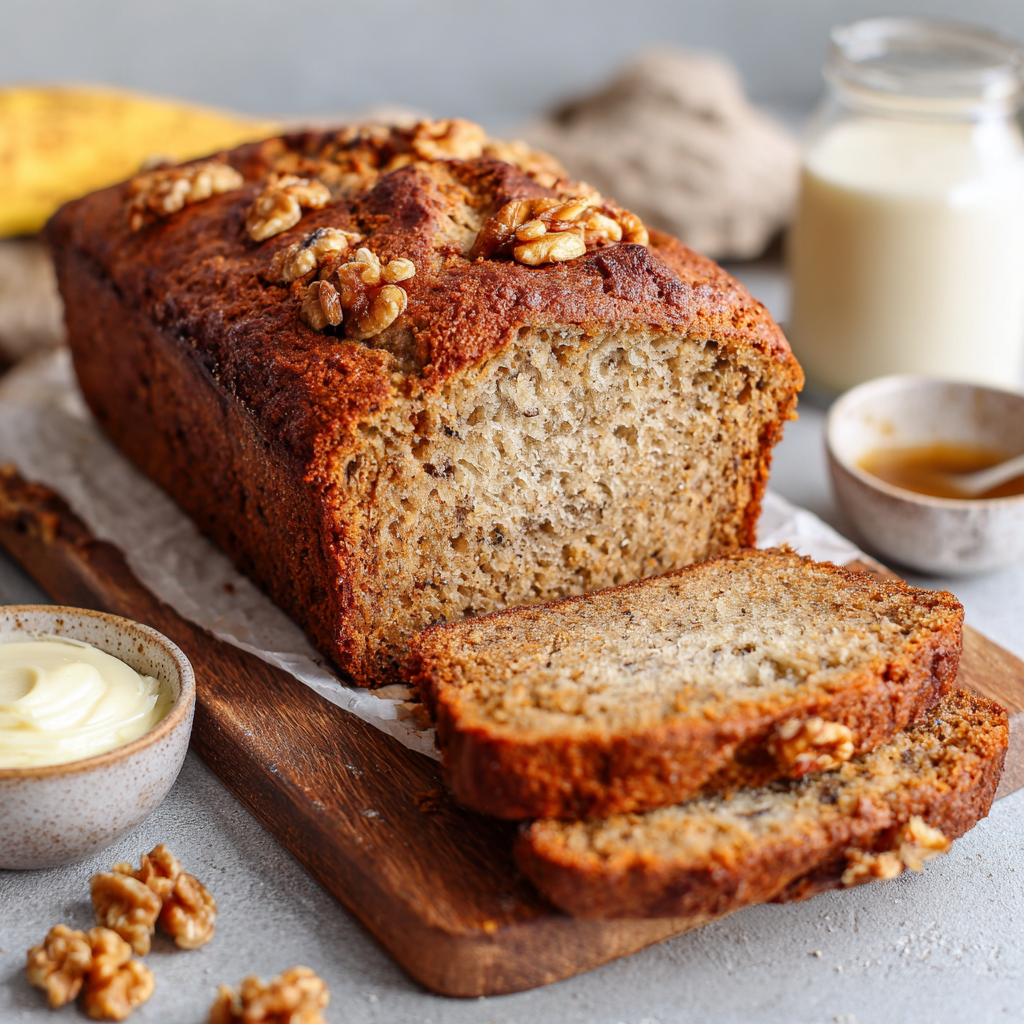
Moist Vegan Banana Bread : One-Bowl, No-Fail Classic
The Ultimate Cozy Bake: My One-Bowl, No-Fail Vegan Banana Bread
Hey there, friend! Come on in, pull up a stool, and let’s chat. You know that moment when you walk into a kitchen and it just smells like happiness? That warm, sweet, spiced aroma that wraps around you like a hug? That’s exactly what we’re creating today. I’m talking about the timeless, soul-soothing magic of banana bread. But here’s the twist: this version is entirely plant-based, unbelievably moist, and comes together in one single bowl. No fancy equipment, no hard-to-find ingredients, and absolutely zero compromise on that classic, cozy flavor we all crave.
If you’ve got a couple of those speckled, almost-too-ripe bananas sitting on your counter, you’re already halfway to kitchen hero status. This recipe is my absolute go-to, my “need a quick gift,” “want a comforting snack,” or “the house needs to smell amazing” secret weapon. It’s the recipe I hand out to friends who swear they can’t bake because it’s genuinely no-fail. We’re keeping it simple, joyful, and deeply delicious. Whether you’re vegan, dairy-free, or just someone who loves a damn good piece of banana bread, this loaf is for you. So, tie on your apron (messy ones are welcome here!), and let’s turn those forgotten bananas into something unforgettable.
A Bunch of Overripe Love
This recipe has roots in what I like to call “gentle kitchen rebellion.” Growing up, my mom had a strict rule: we did not waste food. Those brown, mushy bananas at the bottom of the fruit bowl? They were a culinary challenge, not a tragedy. I remember one rainy Saturday, I was about ten, and she plopped three particularly sad-looking bananas in front of me. “Your mission,” she said with a wink, “is to make them the star of the show.”
That first attempt was… lumpy. And dense. But the smell that filled our kitchen was pure magic. It sparked something in me—the thrill of transformation. Now, years later, I actually buy extra bananas and let them ripen on purpose, just for this moment. That lesson stuck: the most humble, overlooked ingredients often hold the most potential for joy. Baking this bread feels like a little celebration of resourcefulness and a sweet nod to my mom’s wise, waste-not kitchen. Every slice tastes like a happy memory.
Your Simple, Star-Studded Cast of Ingredients
Gather your squad! Here’s everything you’ll need. The beauty is in the simplicity.
- 3 ripe bananas (mashed): The browner, the better! Those black spots mean maximum sweetness and banana flavor. This is your natural sweetener and moisture MVP. No ripe bananas? Speed up the process by baking unpeeled bananas on a lined tray at 300°F for 15-20 minutes until the skins blacken.
- ½ cup brown sugar: Adds a deep, caramel-like moisture and richness. Light or dark works—dark gives a more molasses-y note. For a less refined option, coconut sugar is a great 1:1 swap.
- ¼ cup maple syrup: Our liquid gold! It brings a lovely, nuanced sweetness and helps create a tender crumb. Pure maple syrup is ideal, but agave nectar works in a pinch.
- ½ cup neutral oil: This is our key to that dreamy, moist texture. Canola, vegetable, or a light olive oil are perfect. Chef’s Insight: Melted coconut oil is a fantastic option too—it adds a very subtle sweetness. Just make your other liquids are at room temp so it doesn’t solidify when you mix.
- ¼ cup non-dairy milk: Almond, oat, soy—whatever you have! This just loosens the batter to the perfect consistency. If you only have dairy milk, that works too if you’re not strictly vegan.
- 1 tsp vanilla extract: The flavor enhancer. It rounds out all the sweetness. Don’t skip it!
- 1 ½ cups all-purpose flour: The trusty foundation. For a gluten-free version, a good 1:1 gluten-free flour blend works wonderfully.
- 1 tsp baking soda: Our leavening agent. It reacts with the acidic bananas to make the bread rise. Make sure it’s fresh for the best lift!
- ½ tsp cinnamon: The cozy factor. It whispers “comfort” in every bite. Feel free to add a pinch of nutmeg or allspice for extra warmth.
- ¼ tsp salt: Crucial! It balances all the sweetness and makes the flavors pop. I use fine sea salt.
- Optional: ½ cup of your favorite add-in: This is your playground! Chopped walnuts or pecans for crunch, vegan chocolate chips for indulgence, or fresh blueberries for little bursts of tang.
Let’s Bake! (The One-Bowl Wonder Method)
See? I told you it was easy. One bowl, one spoon, maximum satisfaction.
- Preheat & Prep: Fire up your oven to 350°F (175°C). Grab an 8×4 or 9×5 inch loaf pan. Lightly grease it, then line it with a strip of parchment paper so it hangs over the two long sides. Chef’s Hack: This “sling” makes removing the baked bread an absolute dream—no wrestling, just a clean lift-out!
- Mash & Mix the Wet Crew: In your large bowl, peel those ripe bananas and mash them with a fork until you have a chunky-smooth puree. A few small lumps are totally fine! To the bananas, add the brown sugar, maple syrup, oil, non-dairy milk, and vanilla. Whisk it all together with gusto until it’s one beautifully smooth, fragrant, caramel-colored liquid. Take a sniff—you’re already winning.
- Bring in the Dry Team: Right into the same bowl, sprinkle the flour, baking soda, cinnamon, and salt directly over the wet ingredients. Here’s the most important tip: GENTLY FOLD. Use a spatula and stir from the bottom up, just until the last streaks of flour disappear. A few tiny lumps are better than overmixing! Overworking the flour develops gluten, which can make the bread tough. We want tender and cloud-like.
- Fold in the Fun: If you’re using walnuts, chocolate chips, or berries, now’s the time! Gently fold them in with just one or two turns to distribute.
- Pan & Smooth: Pour your beautiful batter into your prepared loaf pan. Use the spatula to smooth the top into an even layer. For a bakery-style finish, sprinkle a few extra chips or nuts on top before baking.
- The Big Bake: Slide the pan into the center of your preheated oven. Bake for 50-60 minutes. Ovens vary, so start checking at the 50-minute mark. The classic test: insert a toothpick or thin skewer into the very center of the loaf. It should come out with just a few moist crumbs clinging to it, not wet batter. The top will be a deep golden brown and might have a sexy crack down the middle—that’s perfect!
- The Crucial Cool-Down: This is the hardest part—patience! Let the loaf cool in the pan on a wire rack for 10 minutes. This allows it to set. Then, using your parchment paper sling, lift it out and let it cool completely on the rack. Chef’s Plea: I know it’s tempting, but try to wait until it’s fully cool before slicing. This gives the crumb time to firm up, so you get neat, beautiful slices instead of a crumbly mess.
How to Serve Your Masterpiece
Once cooled, slice it thick! This bread is glorious all on its own, still slightly warm from the oven. For the ultimate experience, I love a generous slather of creamy almond or peanut butter. A drizzle of extra maple syrup or a dollop of vegan coconut yogurt turns it into dessert. Feeling fancy? Lightly toast a slice and add a scoop of vanilla bean ice cream for the best impromptu sundae. It’s also the perfect companion to your morning coffee or afternoon tea.
Make It Your Own: 5 Delicious Twists
Once you master the base, the world is your banana bread! Try these fun variations:
- Double Chocolate Bliss: Swap ¼ cup of the flour for cocoa powder and fold in ½ cup vegan chocolate chips.
- Lemon Blueberry Burst: Add the zest of one lemon to the wet ingredients and fold in ½ cup fresh or frozen blueberries.
- Morning Glory Loaf: Fold in ½ cup shredded carrot, ⅓ cup raisins, and ¼ cup shredded coconut for a nutrient-packed twist.
- Nutty Espresso Crunch: Add 1 tablespoon of instant espresso powder to the dry ingredients and fold in ½ cup chopped toasted hazelnuts.
- Muffin Magic: Turn this into 12 perfect muffins! Just divide the batter into a lined muffin tin and bake for 20-25 minutes.
From My Kitchen to Yours: A Few Final Notes
This recipe has been my faithful friend for years, and it’s evolved in the best way. I used to complicate things with flax eggs and apple sauce, but simplifying to this one-bowl method gave me the same—if not better—result. The biggest laugh? The time I was filming a video for this recipe and accidentally used baking powder instead of soda. The resulting “loaf” was about an inch tall and strangely metallic-tasting. A hilarious (and delicious-smelling) failure! It taught me to always, always double-check my leavening agents. Now, this recipe feels like an old friend—reliable, comforting, and always ready to impress. Don’t be afraid to make it your own; that’s where the real kitchen joy lives.
Your Questions, Answered!
Q: My bread sank in the middle! What happened?
A: This is usually due to under-baking or (less commonly) expired baking soda. The toothpick test is your best friend! If it sinks slightly but is baked through, it’s still delicious—just call it “extra moist.” Next time, bake for a few extra minutes.
Q: Can I make this without oil?
A: You can try substituting an equal amount of unsweetened applesauce, but the texture will be more cake-like and less moist/rich. For the best classic texture, I recommend sticking with the oil.
Q: How do I store it to keep it moist?
A: Once completely cool, wrap the whole loaf or individual slices tightly in plastic wrap or beeswax wrap. It stays supremely moist at room temperature for 2-3 days. For longer storage, freeze it! Wrap slices individually and thaw at room temp or pop them straight into the toaster.
Q: My bananas aren’t very ripe. Can I still use them?
A: You can, but the bread will be less sweet and have a milder banana flavor. I’d recommend adding an extra 1-2 tablespoons of maple syrup to compensate. For the best flavor, truly ripe bananas are worth the wait!

Moist Vegan Banana Bread : One-Bowl, No-Fail Classic
Description
This banana bread is plant-based, one-bowl simple, and endlessly comforting. It’s moist, flavorful, and requires no fancy equipment—perfect for breakfast, snacks, or impromptu gifts. Those overripe bananas? They’re your secret ingredient for natural sweetness and maximum banana flavor.
Ingredients
Wet Ingredients:
-
3 ripe bananas, mashed (the browner, the sweeter!)
-
½ cup brown sugar (or coconut sugar)
-
¼ cup maple syrup (or agave)
-
½ cup neutral oil (canola, vegetable, or melted coconut)
-
¼ cup non-dairy milk (almond, oat, soy, etc.)
-
1 tsp vanilla extract
Dry Ingredients:
-
1 ½ cups all-purpose flour (or 1:1 gluten-free flour blend)
-
1 tsp baking soda
-
½ tsp cinnamon (optional: pinch of nutmeg or allspice)
-
¼ tsp salt
Optional Add-Ins:
-
½ cup chopped nuts (walnuts, pecans), chocolate chips, or berries
Instructions
1. Preheat & Prep
-
Oven: 350°F (175°C)
-
Loaf pan: 8×4 or 9×5 inches, greased and lined with parchment paper “sling” for easy removal
2. Mix Wet Ingredients
-
Mash bananas in a large bowl until mostly smooth.
-
Stir in brown sugar, maple syrup, oil, non-dairy milk, and vanilla until combined.
3. Add Dry Ingredients
-
Sprinkle flour, baking soda, cinnamon, and salt over the wet mixture.
-
Gently fold until just combined—some small lumps are fine. Overmixing = dense bread.
4. Fold in Optional Add-Ins
-
Add nuts, chocolate chips, or berries, folding gently to distribute evenly.
5. Bake
-
Pour batter into prepared pan and smooth the top.
-
Bake 50–60 minutes, checking at 50 minutes with a toothpick. It’s done when it comes out with a few moist crumbs (not wet batter).
-
The top should be golden brown with a slight crack—perfect!
6. Cool
-
Let cool 10 minutes in pan.
-
Lift using parchment sling and cool completely on a wire rack before slicing.
Notes
-
Double Chocolate Bliss: Replace ¼ cup flour with cocoa powder; fold in ½ cup vegan chocolate chips.
-
Lemon Blueberry Burst: Add zest of 1 lemon and ½ cup blueberries.
-
Morning Glory Loaf: Add ½ cup shredded carrot, ⅓ cup raisins, ¼ cup shredded coconut.
-
Nutty Espresso Crunch: Add 1 tbsp instant espresso powder and ½ cup chopped toasted hazelnuts.
-
Banana Bread Muffins: Divide batter into 12 muffin cups; bake 20–25 minutes.
Nutritional Information*
*This is an estimate for 1 slice (of 10) made with canola oil and without optional add-ins, calculated using a standard online nutrition calculator. For precise dietary needs, use your preferred calculator with your exact brands and ingredients.
- Calories: ~220
- Carbohydrates: 30g
- Fat: 9g
- Sugar: 14g
- Fiber: 2g
Prep Time: 10 mins | Cook Time: 55 mins | Total Time: ~1 hour 5 mins
Final Thoughts: A Loaf of Pure Joy
This isn’t just banana bread. It’s a promise of simplicity, a testament to how a few humble ingredients can create something that feels like home. In a world that often feels complex, this one-bowl wonder is a gentle reminder of the quiet pleasures: the therapeutic act of mashing bananas, the anticipation as a sweet, spiced aroma fills your kitchen, and the deep satisfaction of sharing a slice with someone you love.
This recipe is a blueprint for comfort, built to be unfussy and forgiving. It invites you to pause, to create something tangible and good with your own hands. Whether you’re a seasoned baker or someone who feels nervous about turning on the oven, this loaf welcomes you. It’s a first step, a sure thing, and a delicious triumph.
So, let those bananas go spotty. Gather your single bowl. And bake this bread not just for the incredible taste, but for the process—the quiet joy of making something from scratch that is unpretentious, nourishing, and deeply satisfying. Keep it classic or make it your own with endless riffs. However you slic
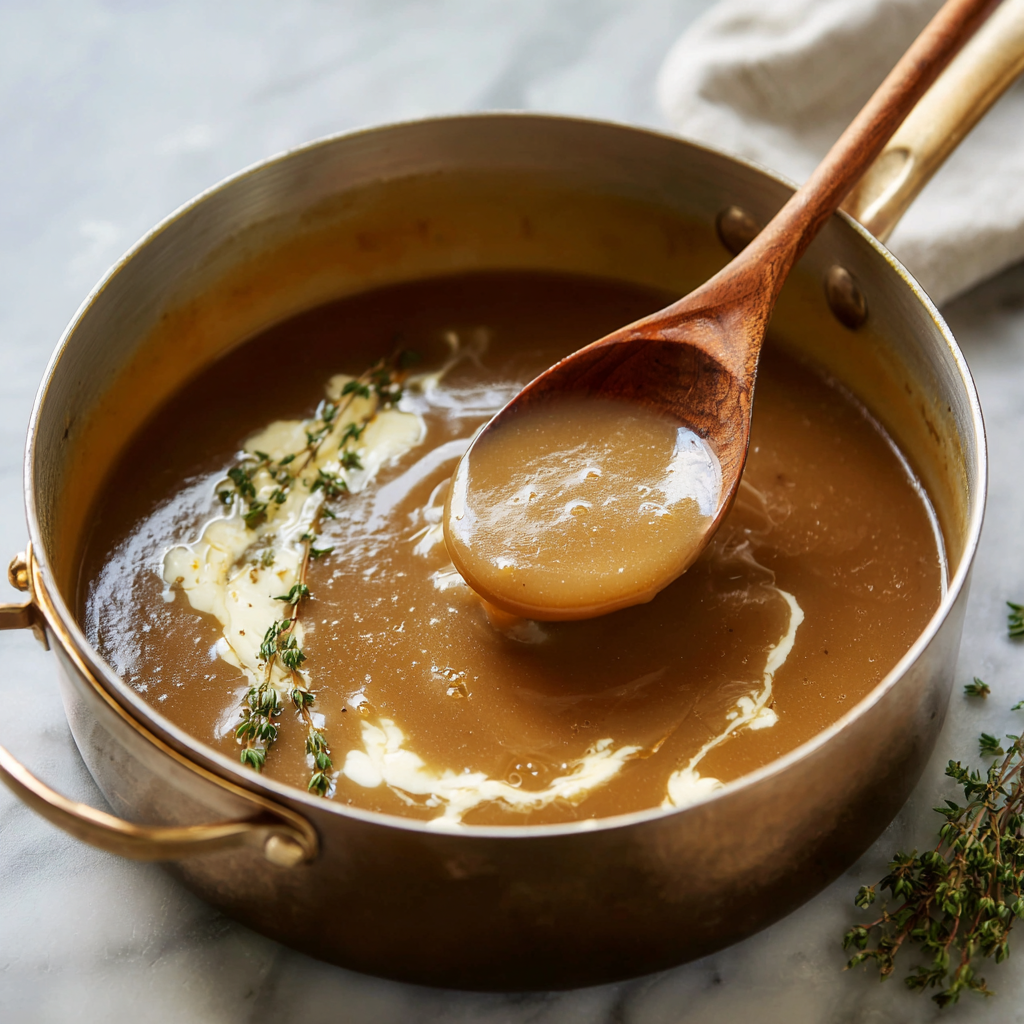
Homemade Turkey Gravy : Rich, Silky, and Full of Flavor
Homemade Turkey Gravy – Rich, Silky, and Full of Flavor: The Only Gravy Recipe You’ll Ever Need
For the Love of Gravy
Let’s be honest: the turkey is the star, the sides are the supporting cast, but the gravy? The gravy is the magic. It’s the silky, savory ribbon that ties every single element on your holiday plate into one harmonious, delicious bite. A spoonful of truly great gravy can transform a simple mound of mashed potatoes into a cloud of comfort and turn even the most humble slice of turkey into a memorable mouthful.
And yet, for something so essential, gravy gets a bad rap. It’s often the last-minute scramble that fills the kitchen with stress, visions of lumpy disasters, or (heaven forbid) the sad sound of a can opener. I’m here to tell you, with my whole heart and my slightly flour-dusted apron, that it doesn’t have to be that way.
This recipe is my everything. It’s the one I make for Thanksgiving, for Sunday roast chicken dinners, and honestly, sometimes just because I need a vehicle for extra mashed potatoes. It’s rich, impossibly smooth, and deeply flavorful, made with just a handful of simple ingredients you probably already have. Whether you’re working with golden, glorious pan drippings from your turkey or a good-quality store-bought broth, this method is foolproof. We’re talking no lumps, no fuss, and a whole lot of “wow, you made this?” from your guests.
So, grab your favorite whisk and a sturdy saucepan. We’re about to make the easiest, most luxurious homemade turkey gravy you’ve ever tasted. I promise, once you see how simple it is, you’ll never look back. This is the kind of kitchen magic I live for.
The Gravy That Started It All
My gravy obsession, like most of my best food memories, traces back to my Grandma Eleanor’s kitchen. Every Thanksgiving, the adults would be bustling around the turkey, the pies, the stuffing. But my job, from the time I could stand steadily on a stool, was “Gravy Guardian.”
It wasn’t a glamorous title. It meant standing sentry by the stovetop, watching the pot where the turkey neck and giblets simmered into a fragrant broth for hours. My grandma would pour the precious drippings from the roasting pan through a sieve, and I’d get to whisk. “Slow and steady, Livvy,” she’d say, her hand gently over mine. “The roux has to smell like toasted nuts, not burnt regrets.”
The moment of truth came when she’d slowly ladle the hot drippings into the roux. My job was to whisk like my life depended on it, our movements in sync until the liquid magically thickened into a glossy, mahogany cascade. The first taste, always from a tiny spoon, was the official start of the feast. It wasn’t just gravy; it was a ritual, a shared secret, and the taste of pure, unadulterated home.
This recipe is hers, with just a few of my own cozy tweaks learned along the way. It’s more than a sauce; it’s a ladleful of love and continuity. Now, I get to be the one saying, “Slow and steady,” and I hope this recipe becomes part of your own family’s story.
Gathering Your Flavor Makers
Beautiful things are built from beautiful ingredients. Here’s everything you’ll need for about 2 cups of pure gravy bliss—perfect for a family dinner with leftovers for the next day’s turkey sandwiches (a non-negotiable).
- ¼ cup unsalted butter OR ¼ cup turkey drippings
Chef’s Insight: This is your fat base and where we choose our adventure! Butter gives a rich, rounded flavor and is perfect if you’re making gravy separately from the bird. Straight turkey drippings are liquid gold—they carry all the roasted, savory depth from the pan. For the ultimate flavor, I often do a 50/50 split: 2 tbsp butter and 2 tbsp drippings. If using only drippings, let them settle and skim off the clear fat from the top to measure. - ¼ cup all-purpose flour
Chef’s Insight: Our trusty thickener! All-purpose is perfect here. The key is to cook it fully with the fat to make a roux, which gets rid of any raw flour taste and gives the gravy a beautiful, nutty base. For a gluten-free version, a 1:1 gluten-free flour blend works beautifully. - 2 cups liquid gold: turkey drippings, broth, or a mix
Chef’s Insight: This is the soul of your gravy. Option 1 (The Champion): Defatted pan drippings plus any giblet broth you made, topped up with store-bought broth to hit 2 cups. Option 2 (The Easy MVP): A good-quality, low-sodium turkey or chicken broth. “Low-sodium” is key—it lets you control the seasoning. Pro Tip: If using store-bought, simmer it for 10 minutes with a sprig of thyme, a chunk of onion, and a few peppercorns to mimic homemade depth. - Kosher salt and freshly ground black pepper
Chef’s Insight: Season at the end! Broths and drippings vary wildly in saltiness. Let the gravy thicken first, then taste and season. Freshly cracked pepper makes a world of difference compared to pre-ground. - Optional Splash (1-2 tbsp heavy cream or half-and-half)
Chef’s Insight: This isn’t traditional, but oh, is it lovely. A small splash right at the end adds a velvety richness and a beautiful sheen. It’s my little “secret” for extra-indulgent gravy. - Optional Freshness (1 tsp chopped fresh thyme or sage)
Chef’s Insight: A tiny bit of finely chopped fresh herb stirred in at the very end lifts all that deep, savory flavor with a whisper of fragrance. Thyme is my go-to, but sage is fantastic with poultry.
Let’s Make Some Magic: Your Foolproof Gravy Method
Ready? This comes together in under 15 minutes. The most important tool is your attention—and a good whisk. Let’s do this.
- Create Your Flavor Foundation (The Roux)
In a medium, heavy-bottomed saucepan (light-colored is best so you can see the roux color), melt your butter (and/or drippings) over medium heat. Once it’s foamy, sprinkle in the flour all at once. Immediately start whisking! You’ll create a thick paste. Now, keep whisking almost constantly for 2 to 3 minutes. You’re looking for it to bubble gently and turn a lovely pale golden color—it should smell warm and nutty, like toasted biscuits. This step, called “cooking the roux,” is non-negotiable for the best flavor and a smooth texture. Chef’s Hack: No whisk? A silicone flat spatula works in a pinch—just keep it moving and scrape the corners of the pan well. - The Grand Union (Adding the Liquid)
Here’s the only slightly nerve-wracking part, but I’ve got you. Take your hot (very important—warm or cold liquid will cause lumps!) broth/drippings and slowly, and I mean slowly, start dribbling it into the roux while whisking like your gravy depends on it (it does). Start with just a few tablespoons and whisk until completely smooth. Add another big splash, whisk smooth. Once you’ve incorporated about half a cup and have a very thick, smooth paste, you can add the remaining liquid in a steadier stream, still whisking. This method prevents lumpy gravy every single time. - Simmer to Silky Perfection
Once all the liquid is added, bring the mixture to a simmer. It will look thin at first—that’s okay! Reduce the heat to medium-low and let it bubble gently for 5 to 7 minutes, whisking occasionally. Watch as it transforms, thickening to a luxurious, coating consistency. It should coat the back of a spoon nicely. Chef’s Tip: If it gets too thick for your liking, just whisk in a bit more warm broth or even hot water, a tablespoon at a time. - The Finishing Touches (Taste & Adjust)
Take the gravy off the heat. Now, taste it! This is the moment. Season with kosher salt and plenty of fresh black pepper. Remember, it should be seasoned well—it’s going over unsalted mashed potatoes and turkey. If you’re using the cream or fresh herbs, stir them in now. The cream adds a lovely pale sheen, and the herbs a pop of freshness. - The Final Act (Straining – My Secret for Silk)
This is my pro move for absolutely restaurant-smooth gravy: pour it through a fine-mesh sieve into your serving pitcher or bowl. It catches any tiny, stubborn flour lumps, bits of herb, or peppercorns, guaranteeing a flawlessly silky texture. It’s a quick step that elevates your gravy from “great” to “unbelievable.”
Pour with Pride: How to Serve Your Masterpiece
You did it! Now, for the best part. Pour your gorgeous gravy into a warm gravy boat or a small pitcher. I like to garnish it with a single fresh thyme sprig or a crack of black pepper on top for a pretty touch. Serve it immediately while it’s piping hot. The ideal move? Place it right in the center of the table and watch as hands reach for it simultaneously. It belongs on everything: a river over sliced turkey, a pool in your mashed potato volcano, a generous drizzle on stuffing, and even a dip for your dinner roll. Don’t hold back.
Make It Your Own: Delicious Twists & Swaps
The beauty of this base recipe is how easily it adapts. Here are a few ways to play:
- Mushroom & Thyme: Sauté ½ cup finely chopped mushrooms in the butter before adding the flour. Use beef broth for a deeper, umami-rich “faux” beef gravy perfect for roast dinners.
- Herb-Infused White Wine Gravy: After making the roux, add ½ cup of dry white wine (like Sauvignon Blanc). Let it simmer and reduce by half before adding your broth. Finish with fresh tarragon or chives.
- Sweet Onion Gravy: Slowly caramelize 1 thinly sliced large onion in the butter until golden and sweet, about 20 minutes, then proceed with the flour. Excellent for sausages and mash!
- Dairy-Free & Rich: Use all drippings or olive oil for the fat, and choose a rich vegetable broth. For creaminess, finish with a splash of unsweetened coconut milk or cashew cream.
- Spicy Kick: Add a pinch of cayenne pepper to the roux, or finish with a few dashes of hot sauce or a spoonful of pickled jalapeño brine.
From My Kitchen to Yours: A Few Parting Thoughts
This recipe has been my Thanksgiving constant for over a decade. The only evolution has been in my confidence—knowing that if I just trust the process (and whisk diligently), it will work. One year, I accidentally used sweetened almond milk instead of broth for a split second (pre-coffee holiday mornings are real). We laughed, started over, and now it’s a family joke. The point is, don’t fear a gravy do-over. It’s a 10-minute project.
My biggest piece of advice? Make more than you think you need. I always double this recipe. Leftover gravy is a gift to your future self. It reheats beautifully in a saucepan with a splash of broth or water to loosen it. Pour it over leftover turkey sandwiches, use it as a base for a pot pie, or stir it into soup for instant richness. Gravy is love, and love should never run out.
Gravy Guru: Your Questions, Answered
Q: Help! My gravy is lumpy. Can I save it?
A: Absolutely! Don’t panic. The best fix is an immersion blender—a few pulses will smooth it right out. No immersion blender? Pour the gravy through a fine-mesh sieve, pressing the lumps through with a spatula or the back of a ladle. If the lumps are severe, you can strain it, then blend the smooth liquid with a bit of fresh roux (1 tbsp butter + 1 tbsp flour cooked together) and re-simmer.
Q: My gravy is too thin / too thick. What do I do?
A: For too-thin gravy, let it simmer a bit longer to reduce and concentrate. If it’s still not thickening, make a “slurry”: mix 1 tbsp of cold water with 1 tbsp of flour in a small bowl until smooth. Whisk this into the simmering gravy and cook for 2-3 more minutes. For too-thick gravy, simply whisk in more warm broth, water, or even a bit of milk, a tablespoon at a time, until it reaches your perfect pouring consistency.
Q: Can I make gravy ahead of time?
A: You can! Let it cool completely, then store it in an airtight container in the fridge for up to 3 days. When reheating, do it slowly in a saucepan over medium-low heat. It will thicken significantly when cold, so have some warm broth or water on hand to whisk in and bring it back to life.
Q: My gravy tastes bland. How can I boost the flavor?
A: No problem! Depth is what we’re after. A splash of soy sauce or Worcestershire sauce (start with ½ tsp) adds umami. A teaspoon of tomato paste cooked with the roux at the beginning adds sweetness and color. A pinch of dried mushroom powder is a powerhouse. And never underestimate the power of proper seasoning—another pinch of salt and a few more cranks of pepper can work wonders.
Homemade Turkey Gravy : Rich, Silky, and Full of Flavor
Description
Gravy: the unsung hero of the holiday table. Silky, savory, and deeply flavorful, it ties together turkey, mashed potatoes, stuffing, and all the sides into one harmonious bite. This recipe is foolproof, takes under 15 minutes, and works whether you’re using golden turkey drippings or store-bought broth.
Ingredients
Fat & Thickener:
-
1/4 cup unsalted butter OR 1/4 cup turkey drippings
-
1/4 cup all-purpose flour (or gluten-free flour blend)
Liquid:
-
2 cups turkey drippings, broth, or a mix (defatted if using drippings)
Seasoning & Optional Enhancements:
-
Kosher salt & freshly ground black pepper, to taste
-
Optional: 1–2 tbsp heavy cream or half-and-half (for extra richness)
-
Optional: 1 tsp fresh thyme or sage, finely chopped
Instructions
1. Make the Roux (Flavor Foundation)
-
In a medium saucepan, melt the butter and/or drippings over medium heat.
-
Sprinkle in the flour and whisk immediately to form a thick paste.
-
Cook 2–3 minutes, whisking constantly, until it turns pale golden and smells nutty.
Chef’s Tip: This step removes raw flour taste and ensures smooth, flavorful gravy.
2. Add the Liquid Slowly
-
Warm your broth/drippings. Slowly drizzle a few tablespoons into the roux while whisking constantly.
-
Continue adding liquid gradually, whisking to keep the mixture lump-free.
-
Once all liquid is incorporated, bring to a gentle simmer.
Pro Tip: Hot liquid prevents lumps. Whisk constantly to keep gravy silky.
3. Simmer to Perfection
-
Reduce heat to medium-low and simmer 5–7 minutes, whisking occasionally.
-
Gravy will thicken and coat the back of a spoon.
Too thin? Simmer longer or whisk in a slurry (1 tbsp flour + 1 tbsp cold water).
Too thick? Whisk in warm broth, water, or milk, 1 tbsp at a time.
4. Finish & Flavor Boost
-
Remove from heat, season with salt and pepper to taste.
-
Stir in cream or fresh herbs if desired.
-
Optional: Strain through a fine-mesh sieve for perfectly smooth gravy.
Notes
-
Mushroom & Thyme: Sauté 1/2 cup chopped mushrooms in fat before adding flour. Use beef broth for umami richness.
-
Herb-Infused White Wine: Add 1/2 cup dry white wine after making the roux; reduce by half before adding broth. Finish with fresh tarragon or chives.
-
Sweet Onion Gravy: Slowly caramelize 1 thinly sliced onion in fat, then add flour. Perfect for sausages and mash.
-
Dairy-Free: Use all drippings or olive oil, and finish with coconut or cashew cream.
-
Spicy Kick: Add a pinch of cayenne, hot sauce, or pickled jalapeño brine.
Nutritional Information*
*This is an estimate for ¼ cup serving, based on using butter and low-sodium turkey broth.
Calories: ~90 | Fat: 7g | Saturated Fat: 4.5g | Carbohydrates: 5g | Protein: 1g | Sodium: 150mg
Remember, this is a celebratory sauce meant to be enjoyed in delicious moderation as part of a festive meal!
Final Thoughts: The Ladle of Love
And that, my friends, is the secret to gravy that deserves a standing ovation. It’s not a last-minute hurdle; it’s the triumphant finale of the feast. This recipe is my kitchen touchstone—a blend of my grandmother’s timeless technique and the quiet confidence that comes from knowing a few simple rules: toast your roux, whisk with purpose, and season with your heart.
Remember, great gravy isn’t about perfection; it’s about presence. It’s the steam rising from the pitcher as you bring it to the table, the collective “ahhh” as you pour it over a carefully crafted plate, and the silent satisfaction of watching someone take that first, gravy-laden bite. It turns a meal into a moment.
Whether this becomes your new holiday essential or your secret weapon for a Sunday supper, I hope it brings as much joy to your table as it has to mine. It’s more than a sauce. It’s a warm, savory hug in a bowl—the edible embodiment of home, heritage, and the simple, profound act of feeding the people you love.
So here’s to no more lumps, no more stress, and to every single plate being united by a river of rich, silky, homemade magic. You’ve got this.
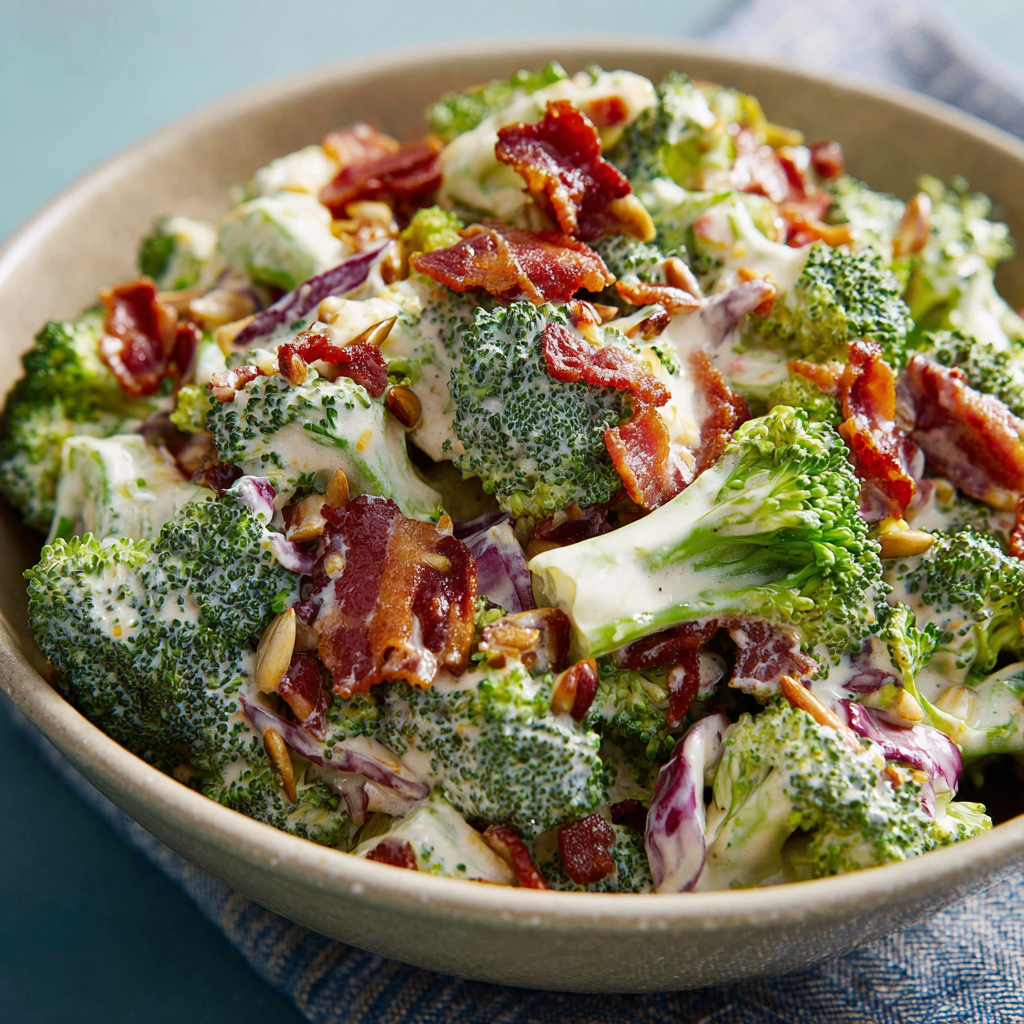
Easy Keto Broccoli Salad : Low-Carb, Crunchy, and Totally Craveable
Easy Keto Broccoli Salad – Low-Carb, Crunchy, and Totally Craveable
Hey there, friend! Olivia here, wiping a bit of bacon grease off my apron as I type. Tell me, does this sound familiar? You’re heading to a summer potluck, planning a week of healthy lunches, or just craving something that’s both indulgent and nourishing. You remember that classic broccoli salad—the one with the sweet, creamy dressing and all the crunchy bits—but then the thought of all that sugar and those sneaky carbs makes you pause. Yeah, I’ve been there too, standing in my kitchen, wanting that nostalgic flavor without the compromise.
Well, get ready to do a happy dance, because this Easy Keto Broccoli Salad is about to become your new best friend. We’re talking about a bowl full of vibrant, crisp broccoli, smoky bacon crumbles, sharp cheddar, and a sunflower seed crunch, all coated in a tangy, creamy, unbelievably satisfying dressing that has zero guilt attached. It’s the salad that proves that eating low-carb doesn’t mean sacrificing an ounce of flavor or fun.
This isn’t just a “good for keto” recipe. It’s a legitimately great recipe that everyone at the table will devour, regardless of how they eat. It’s perfect for make-ahead meal prep, it’s a star at any BBQ, and it comes together in about 15 minutes of active time. My goal today is to hand you not just a recipe, but all my little kitchen secrets to make it flawless every single time. So, grab your favorite chopping board and let’s make something wonderfully crunchy and delicious together!
The Broccoli Salad That Won Over the Doubters
I have to take you back to my first big family gathering after I started eating a lower-carb lifestyle. It was my Aunt Carol’s legendary Fourth of July bash, a table groaning with potato salads, baked beans, and her famous (and very sugary) broccoli salad. I brought my new, keto-friendly version, a bit nervous it would be dismissed as the “weird healthy” dish.
I watched from the kitchen window as my cousin Mike, a self-proclaimed carb connoisseur, piled it onto his plate. He took a bite, paused, and then went back for a gigantic second scoop. Later, he hunted me down, barbecue sauce on his chin, and said, “Liv, what did you do to this? It’s better than Mom’s!” (Aunt Carol still hasn’t fully forgiven me, but she did ask for the recipe). That moment cemented it for me: food that makes you feel good should also make your taste buds sing. This salad bridges that gap beautifully, turning skeptical side-eyes into requests for seconds. It’s a little bowl of kitchen magic.
Gathering Your Flavor Crew: Ingredients & Insights
Every ingredient here plays a specific role in the texture and taste symphony. Here’s exactly what you need and why, plus my favorite swaps to make it your own!
- 4 cups fresh broccoli florets (chopped small): Chef’s Insight: The star of the show! Chopping them small is KEY—it makes the salad easier to eat and allows the dressing to cling to every nook and cranny. You want little, bite-sized trees. Substitution Tip: In a pinch, you can use about 12 oz of pre-chopped florets from the salad bar or bagged section to save time.
- 1/2 cup cooked bacon, crumbled: Chef’s Insight: This is your flavor bomb and source of salty, smoky joy. I highly recommend baking your own bacon on a sheet pan—it gets evenly crispy and is less messy. Substitution Tip: For a shortcut, use real bacon bits from the refrigerated section (check for no added sugar), or for a vegetarian twist, try crispy pan-fried halloumi or chopped sun-dried tomatoes.
- 1/2 cup shredded cheddar cheese: Chef’s Insight: Sharp cheddar brings a tangy punch that cuts through the creaminess. I always shred my own from a block—it melts better into the dressing and doesn’t have the anti-caking powders that pre-shredded bags do.
- 1/4 cup red onion, finely diced: Chef’s Insight: That sharp, bright bite is essential! To tame the raw onion flavor for sensitive palates, soak the diced onion in ice water for 10 minutes, then drain and pat dry. It works wonders.
- 1/4 cup sunflower seeds or chopped almonds: Chef’s Insight: CRUNCH FACTOR! Sunflower seeds are classic, but slivered almonds or even roasted pepitas are fantastic. Toasting them in a dry pan for a few minutes before adding takes the nutty flavor to a whole new level.
- 1/2 cup mayonnaise: Chef’s Insight: The base of our creamy dream. Use a high-quality, full-fat mayo you love the taste of. It makes all the difference. My personal favorite is an avocado oil-based mayo for its clean flavor.
- 2 tbsp sour cream: Chef’s Insight: This is the secret weapon! It lightens the dressing just a touch and adds a lovely tang that balances the richness of the mayo.
- 1 tbsp apple cider vinegar: Chef’s Insight: Don’t skip this! The acidity is crucial for balancing the fat and brightening the entire dish. It keeps the salad from tasting heavy.
- 1 tsp Dijon mustard: Chef’s Insight: A tiny amount adds depth and a subtle sharpness that enhances all the other flavors. It’s the unsung hero of the dressing.
- Salt & pepper to taste: Chef’s Insight: Always season in stages. The bacon and cheese are already salty, so I like to add a pinch, toss, taste after chilling, and then adjust.
- Optional: 1 tsp powdered erythritol or monk fruit sweetener: Chef’s Insight: This is your call! Traditional versions are quite sweet. A tiny bit of keto-friendly sweetener can mimic that vibe. I often add it, but it’s equally delicious without for a more savory profile.
Let’s Build Some Crunch: Your Step-by-Step Guide
Follow these simple steps, and lean in for my favorite chef hacks sprinkled throughout. You’ve got this!
- Prep Your Broccoli: Wash and thoroughly dry your broccoli florets. This is important—water on the florets will make your dressing watery. Chop them into small, uniform pieces. Pro-Tip: Don’t toss the stalks! Peel the tough outer layer with a vegetable peeler, then slice the tender inner core into thin half-moons. It adds more crunch and reduces waste.
- Crisp Your Bacon: If you’re cooking bacon, lay the strips on a baking sheet and bake at 400°F for 15-20 minutes until crispy. Let it cool on a paper towel, then crumble. Little Hack: Bake an extra few slices. Trust me, you’ll want a chef’s snack, and it prevents “bacon shrinkage” from your measured amount!
- Combine the Salad Base: In a large mixing bowl, add your chopped broccoli, crumbled bacon, shredded cheddar, finely diced red onion, and your seeds or nuts. Give it a gentle stir with a large spoon or spatula just to mix the colors and textures.
- Whisk the Dreamy Dressing: In a separate medium bowl, add the mayonnaise, sour cream, apple cider vinegar, Dijon mustard, and the optional sweetener. Whisk, whisk, whisk until it’s completely smooth, creamy, and homogenous. Key Insight: Taste it right now on a spoon! This is your moment to adjust. Want more tang? A splash more vinegar. More zip? Another 1/4 tsp of Dijon. Season with a pinch of salt and pepper.
- The Grand Toss: Pour the dressing over the broccoli mixture. Using those same trusty utensils, fold and toss until every single piece of broccoli is lightly and evenly coated in that creamy, tangy goodness. It should look abundant and glossy.
- The Magic Wait (Chill Time): Cover the bowl tightly with plastic wrap or transfer to an airtight container. Refrigerate for at least 30 minutes, but ideally 1-2 hours. This is non-negotiable for flavor magic! The chill time softens the broccoli just a touch (in the best way), allows the flavors to marry, and lets the dressing soak into every crevice.
- Serve and Shine: Just before serving, give the salad one final toss to redistribute the dressing. Taste one more time and adjust salt or pepper if needed. Serve it cold, and get ready for the compliments to roll in!
How to Serve This Superstar Salad
This salad is incredibly versatile! For a casual dinner, I serve it right from the bowl with a big spoon. For a prettier presentation, spoon it into a wide, shallow salad bowl and sprinkle a little extra crumbled bacon and seeds on top for a chef’s finish. It’s the perfect side to grilled chicken, steak, or burgers. I also pack it into single-serving containers for a ready-to-go lunch all week—just grab and go!
Make It Your Own: Delicious Variations
Love the base recipe? Here are some fun ways to switch it up!
- Everything Bagel Twist: Swap the sunflower seeds for everything bagel seasoning and add a handful of everything bagel-seasoned roasted almonds (chopped).
- Buffalo Blue Cheese: Omit the cheddar. Add 1/3 cup crumbled blue cheese and 2-3 tbsp of Frank’s RedHot sauce to the dressing. Divine!
- Brighter & Herb-y: Stir in 1/4 cup of freshly chopped herbs like dill, parsley, or chives right before serving for a fresh, garden flavor.
- Dairy-Free Delight: Use a dairy-free mayo and sour cream alternative, skip the cheese, and add extra bacon and seeds for crunch.
- Add More Veg: Toss in some finely chopped cauliflower, shredded Brussels sprouts, or even some matchstick radishes for extra veggie power.
Chef’s Notes: From My Kitchen to Yours
This recipe has evolved from my early keto days of just mixing mayo and vinegar into something I’m truly proud of. The sour cream addition was a happy accident when I was low on mayo, and the Dijon was inspired by my husband, who puts it in everything. The first time I made it, I was so worried about it being “too keto” that I over-sweetened it. Lesson learned: trust the natural flavors! Now, I keep it balanced. It’s also become my most-requested potluck dish, and I love hearing how people’s kids (who normally hate broccoli) gobble it up. The power of bacon and cheese, my friends! It’s a reminder that the best food is shared, simple, and made with a dash of love.
FAQs & Quick Troubleshooting
Q: Can I make this salad ahead of time?
A: Absolutely! That’s one of its best features. You can make it up to 24 hours in advance. In fact, it gets even better as it sits. Store it covered in the fridge. If the dressing seems to soak in a lot, you can stir in a tiny extra spoonful of mayo before serving to refresh it.
Q: My salad got watery after chilling. What happened?
A: This usually means the broccoli wasn’t dried thoroughly after washing, or the onion released some moisture. Next time, be diligent about drying your florets with a salad spinner or kitchen towels. You can also salt the chopped broccoli lightly, let it sit in a colander for 20 minutes, then rinse and pat dry—this “dry-brining” draws out excess water. For now, just drain off any liquid in the bottom of the bowl and give it a stir.
Q: Is there a way to make it with less fat?
A: You can use a light mayo and light sour cream, though the texture and richness will change slightly. Remember, on keto, healthy fats are fuel! But for a lower-calorie version, those swaps work.
Q: Can I use frozen broccoli?
A: I don’t recommend it for this raw salad. Frozen broccoli, once thawed, is too soft and wet and will make the salad mushy and watery. Fresh is definitely the way to go for that essential crisp-crunch.
Easy Keto Broccoli Salad : Low-Carb, Crunchy, and Totally Craveable
Description
Hey friend! Olivia here, apron dusted with bacon grease. This keto broccoli salad hits all the right notes: crisp broccoli, smoky bacon, sharp cheddar, crunchy sunflower seeds, and a creamy, tangy dressing—all low-carb and totally satisfying. It’s perfect for potlucks, lunch prep, or anytime you want a side that tastes indulgent without the sugar.
Ingredients
Salad Base:
-
4 cups fresh broccoli florets, chopped small
-
1/2 cup cooked bacon, crumbled
-
1/2 cup shredded sharp cheddar cheese
-
1/4 cup red onion, finely diced
-
1/4 cup sunflower seeds or chopped almonds (toasted if desired)
Creamy Dressing:
-
1/2 cup mayonnaise (full-fat or avocado oil-based)
-
2 tbsp sour cream
-
1 tbsp apple cider vinegar
-
1 tsp Dijon mustard
-
Salt & pepper, to taste
-
Optional: 1 tsp powdered erythritol or monk fruit sweetener
Instructions
1. Prep the Broccoli
-
Wash and thoroughly dry broccoli florets to avoid a watery salad.
-
Chop into small, bite-sized pieces.
-
Optional: Peel and slice the tender inner stalks into thin half-moons for extra crunch.
2. Cook & Crumble the Bacon
-
Lay bacon strips on a baking sheet and bake at 400°F (200°C) for 15–20 minutes until crispy.
-
Cool on paper towels, then crumble.
3. Combine the Salad Base
-
In a large mixing bowl, add broccoli, crumbled bacon, shredded cheddar, diced onion, and seeds/nuts.
-
Gently toss to mix.
4. Make the Dressing
-
In a medium bowl, whisk together mayonnaise, sour cream, apple cider vinegar, Dijon mustard, and optional sweetener until smooth.
-
Taste and adjust seasoning: more vinegar for tang, more Dijon for zip, a pinch of salt & pepper as needed.
5. Toss the Salad
-
Pour the dressing over the broccoli mixture.
-
Fold gently until all pieces are evenly coated and glossy.
6. Chill for Flavor Magic
-
Cover and refrigerate for at least 30 minutes, ideally 1–2 hours.
-
Chilling softens the broccoli slightly and lets flavors meld.
7. Serve & Garnish
-
Give one final toss before serving.
-
Optional: Sprinkle extra bacon or seeds on top for presentation.
-
Perfect alongside grilled meats, burgers, or as a ready-to-go lunch.
Notes
-
Make ahead: Salad improves as it chills; store up to 24 hours.
-
Avoid watery salad: Dry broccoli thoroughly; optional dry-brine for 20 minutes.
-
Lower fat: Use light mayo and sour cream (texture will change slightly).
-
Frozen broccoli not recommended: It becomes too soft and watery once thawed.
Nutritional Information (Per Serving)
Approximate values, based on 6 servings and using the ingredients listed. Optional sweetener not included.
Calories: ~220 | Total Fat: 19g | Saturated Fat: 5g | Cholesterol: 25mg | Sodium: 320mg | Total Carbohydrates: 5g | Dietary Fiber: 2g | Sugars: 1g | Protein: 7g | Net Carbs: 3g
Happy cooking, friends! I hope this salad brings as much joy to your table as it does to mine. Don’t forget to tag me on social if you make it—I love seeing your creations!
With love and a crunchy bite,
Olivia 🥦✨
Final Thoughts: A Salad You’ll Crave Again and Again
And there you have it—the crunch, the creamy dressing, the salty-savory bites that make this so much more than just a side dish. This Keto Broccoli Salad isn’t a “substitute” for anything; it’s a star in its own right. It proves that eating to feel your best doesn’t mean giving up on flavor, texture, or the simple joy of a truly delicious bite.
Whether you’re packing it for lunch, bringing it to a gathering, or just treating yourself to a vibrant, satisfying meal, this recipe is designed to work for you. It’s forgiving, flexible, and built on the kind of ingredients that make everyone at the table happy.
So, the next time that craving for something creamy, crunchy, and comforting hits, you know exactly what to make. No compromise needed.
Hearty Vegan Chili : One-Pot, Protein-Packed & Totally Comforting
Hearty Vegan Chili – One-Pot, Protein-Packed & Totally Comforting
The Ultimate Cozy Bowl – 100% Plant-Based
Hey there, friend! Olivia here, apron already dusted with a bit of chili powder, just the way I like it. Is there anything better than the feeling of a warm, heavy bowl in your hands on a crisp evening? That moment you sink into the couch, take that first savory, smoky, spice-kissed bite, and just… sigh with pure contentment. That’s the magic we’re making today.
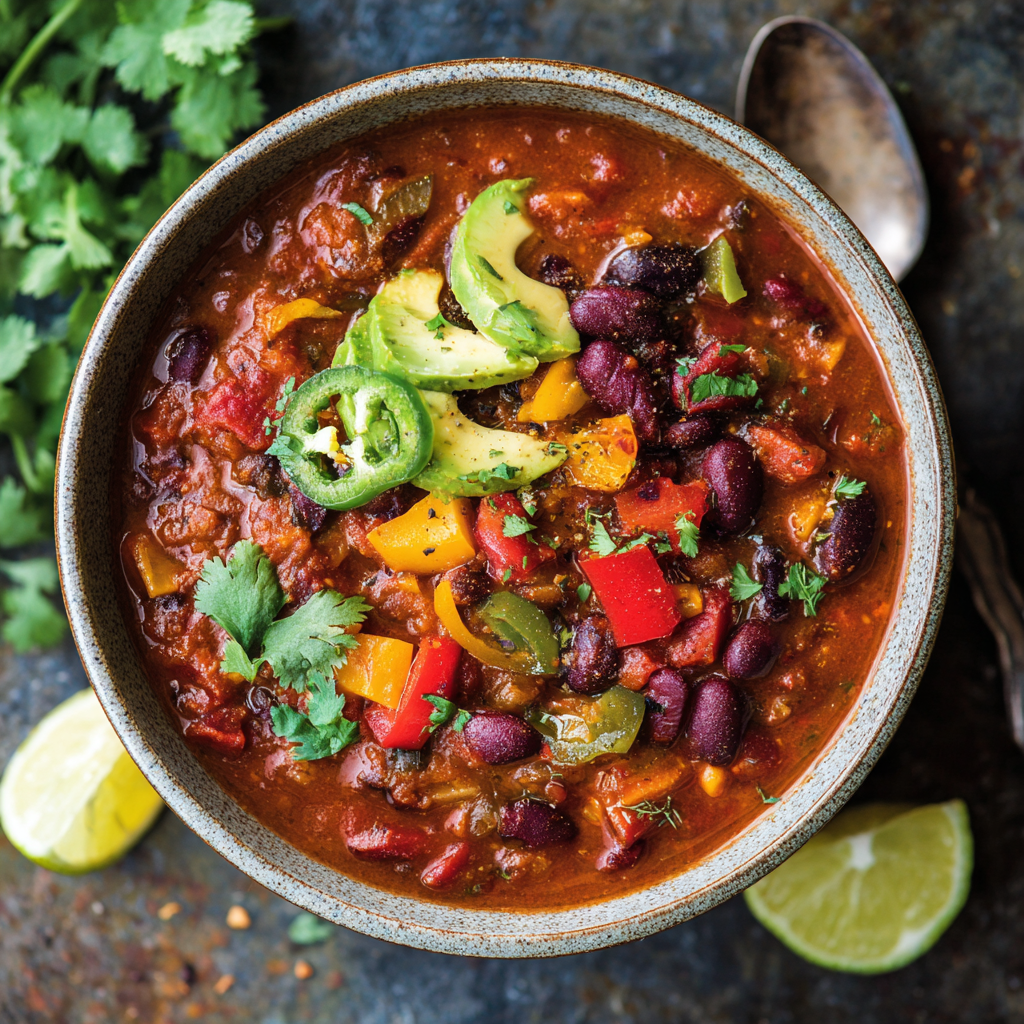
This vegan chili is everything you want in a comfort meal: thick, hearty, and packed with bold, layered flavor that makes you forget it’s 100% plant-based. We’re talking a symphony of three kinds of beans, fire-roasted tomatoes, and a blend of warm spices that’ll have your whole house smelling like a hug. It’s a glorious one-pot wonder that masterfully walks the line between “I need to feed a hungry crowd” and “I just want something deliciously simple for myself.”
The best part? You don’t need to be a professional chef or have hours to spare. This is relaxed, forgiving, “chop-and-drop” cooking at its finest. Whether you’re meal prepping for the week, hosting a casual game-day gathering, or simply answering that deep, soul-level craving for something filling and wholesome, this chili is your answer. So, grab your favorite pot and let’s make a mess and a memory. I promise, no meat is needed for this to be utterly unforgettable.
My First Chili Cook-Off & A Lesson in Boldness
Let me take you back to my first (and only!) backyard chili cook-off. Picture a young, slightly nervous Olivia, surrounded by my partner’s family—a crew of proud Texans whose chili recipes were family heirlooms guarded closer than state secrets. And there I was, the “vegetarian girlfriend,” rolling up with a giant pot of my meatless concoction.
I’ll be honest, my knees were knocking. But I remembered my grandma’s advice: “When in doubt, build flavor with love and layers.” So, I toasted my spices until they were fragrant enough to wake up the neighbors, and I let that pot simmer low and slow, filling the entire backyard with a smell so enticing it drew people over out of pure curiosity. The result? While I didn’t “win” the traditional trophy (a can of beans with a ribbon, it was adorable), I won something better. Empty bowls, requests for the recipe, and the sweetest compliment: “I didn’t even miss the meat.” It was a powerful reminder that good food, made with intention and bold flavors, brings people together, no matter where it comes from.
Gathering Your Flavor Arsenal
Here’s the beautiful cast of characters that’ll come together in your pot. Think of this as building blocks of texture and taste!
- 1 tbsp olive oil – Our flavor-starter. Avocado oil works great here too for its high smoke point.
- 1 yellow onion, diced – The sweet, savory foundation of so many great dishes. Don’t rush sautéing it!
- 3 cloves garlic, minced – Fresh is best! It adds a pungent depth that powder just can’t match.
- 1 bell pepper, chopped (any color!) – I love red for sweetness, but green adds a classic, slightly bitter note. It’s your kitchen—pick your favorite.
- 1 carrot, diced – A little sweet secret! It melts into the chili, adding body and a touch of natural sweetness that balances the spices perfectly.
- 1 zucchini, chopped (optional) – My “clean out the fridge” hero. It adds great texture and soaks up all the surrounding flavors. Summer squash works too!
- 1 tbsp chili powder – The MVP. This is usually a blend of ground chilis, cumin, garlic, and oregano. For more heat, add a pinch of cayenne.
- 1 tsp cumin – Earthy, warm, and absolutely non-negotiable for that authentic chili taste.
- 1 tsp smoked paprika – This is the magic ingredient! It gives that “cooked-over-a-campfire” smoky depth without any actual smoke.
- 1 tsp oregano – Use dried here. Its slightly bitter, aromatic quality is a classic backbone in chili.
- 1 (15 oz) can each: black beans, kidney beans, pinto beans, drained – The protein-packed trio! Draining them gives you control over the chili’s thickness. For a creamier texture, rinse them instead of just draining.
- 1 (28 oz) can crushed tomatoes – I love fire-roasted crushed tomatoes for an extra layer of smoky flavor. Regular works beautifully too.
- 1 cup vegetable broth or water – Broth adds another layer of flavor, but water works perfectly fine—the beans and tomatoes create an incredible base on their own.
- Salt & pepper to taste – Season in layers! A pinch when you sauté the veggies, and then again at the end to make everything pop.
- Optional toppings: avocado, cilantro, lime, tortilla chips, vegan sour cream – The fun part! This is where everyone can customize their bowl.
Let’s Get Cooking: Your Step-by-Step Guide
Alright, let’s fire up the stove! This is where the alchemy happens.
- Build Your Flavor Base: In your largest, heaviest-bottomed pot or Dutch oven, heat the olive oil over medium heat. Add the diced onion, carrot, and bell pepper. Sauté for 5-7 minutes, stirring occasionally, until the onion is translucent and the veggies have just started to soften. Chef’s Tip: We’re not looking for color here, just tenderness. This step sweetens the veggies and builds a foundation of flavor. Now, add the minced garlic and stir for just 30 seconds until incredibly fragrant—don’t let it burn!
- Wake Up the Spices: This is my favorite step! Sprinkle in the chili powder, cumin, smoked paprika, and oregano directly onto the veggies. Stir constantly for about 1 minute. You’ll smell the spices transforming from raw and dusty to warm, toasted, and incredibly aromatic. This “blooming” step unlocks their essential oils and makes a massive difference in depth of flavor.
- The Big Pour & Simmer: Now, add all three cans of drained beans, the entire can of crushed tomatoes, the chopped zucchini (if using), and your vegetable broth or water. Give everything a very good, hearty stir, making sure to scrape up any tasty bits from the bottom of the pot. Bring the mixture to a lively simmer—you should see steady bubbles breaking the surface.
- Low and Slow Magic: Once simmering, reduce the heat to medium-low and cover the pot with a lid. Let it cook for 25-30 minutes, stirring every 10 minutes or so to prevent sticking. This gentle cooking time allows the flavors to marry, the carrots to become perfectly tender, and the chili to thicken beautifully.
- The Final Touch & Thicken Up: After 30 minutes, remove the lid. Taste your masterpiece! This is when you add salt and pepper. Start with ½ tsp of salt, stir, taste, and add more if needed. If you prefer an even thicker, stew-like chili (I usually do!), let it simmer uncovered for an additional 10 minutes. The excess liquid will evaporate, leaving you with a rich, hearty consistency.
- Serve It Up! Ladle the steaming chili into bowls. This is where the party starts with all those fun toppings. A squeeze of lime is non-negotiable for me—the bright acid cuts through the richness perfectly.
How to Serve Your Cozy Creation
Presentation is part of the joy! I love using wide, shallow bowls for chili. Ladle a generous portion into the center, then artfully (or messily—no judgment!) arrange your toppings. A dollop of creamy avocado, a sprinkle of fresh cilantro, a few crunchy tortilla strips standing at attention, and that crucial lime wedge on the side. For a complete meal, serve it alongside a slice of warm, buttery cornbread or over a bed of fluffy quinoa or brown rice to soak up every last drop.
Make It Your Own: Delicious Twists
This recipe is a fantastic canvas! Here are a few ways to play:
- Sweet & Smoky: Add 1 cup of sweet corn (frozen works) and swap the bell pepper for a diced poblano.
- “Beefy” & Hearty: Crumble in a cup of cooked brown lentils or a plant-based ground “meat” alternative when you add the beans.
- Spicy Kick: Add a minced jalapeño (seeds and all for max heat) with the bell pepper, and use hot chili powder.
- Pumpkin Power: For a fall twist, stir in ½ cup of pure pumpkin puree with the tomatoes. It adds creaminess and a subtle earthiness.
- Instant Pot Shortcut: Use the Sauté function for steps 1 & 2. Add everything else, secure lid, and cook on High Pressure for 10 minutes. Quick release!
Olivia’s Kitchen Notes
This recipe has been my trusty companion for years, and it’s evolved with me. The zucchini was a happy accident one summer when my garden overproduced. The smoked paprika was a revelation I discovered after that fateful cook-off! I’ve made this chili for first dates, sick friends, and potlucks where I needed a guaranteed crowd-pleaser. It always delivers. A funny story: I once accidentally doubled the smoked paprika, and you know what? We loved it. It tasted like the chili was grilled. So don’t fear mistakes—they might just be your next favorite twist. Remember, the flavor gets even better the next day, so leftovers are a prize, not an afterthought.
Your Questions, Answered!
Q: My chili turned out too watery. How can I fix it?
A: No worries! The easiest fix is to simmer it uncovered for an extra 10-15 minutes to reduce the liquid. You can also mash a small portion of the beans against the side of the pot with a spoon and stir them back in—this releases their starch and naturally thickens the broth.
Q: Can I make this in a slow cooker?
A> Absolutely! Sauté the onions, peppers, and spices in a skillet first (this step is key for flavor). Then, transfer everything to your slow cooker and cook on LOW for 6-8 hours or HIGH for 3-4 hours.
Q: How long will leftovers keep?
A> Stored in an airtight container in the fridge, this chili is happy for 4-5 days. It also freezes beautifully for up to 3 months. Let it cool completely, then freeze in portion-sized containers for easy future meals.
Q: I’m not a fan of spicy food. Is this chili mild?
A> As written, it’s warmly spiced but not spicy-hot. The “chili powder” blend is generally mild. If you’re sensitive to heat, just ensure your chili powder and paprika are labeled “mild” or “sweet,” and omit any cayenne. You’ll get all the cozy flavor without the burn.
Hearty Vegan Chili : One-Pot, Protein-Packed & Totally Comforting
Description
Hey friend! Olivia here, apron dusted with chili powder, ready to bring you a bowl of comfort in its finest, plant-powered form. This vegan chili is thick, hearty, and bursting with bold flavor—without a hint of meat. Three kinds of beans, fire-roasted tomatoes, and a blend of warm spices make every spoonful feel like a hug in a bowl.
Ingredients
Base & Veggies:
-
1 tbsp olive oil (or avocado oil)
-
1 yellow onion, diced
-
3 cloves garlic, minced
-
1 bell pepper, diced (any color)
-
1 carrot, diced
-
1 zucchini, chopped (optional)
Spices:
-
1 tbsp chili powder (mild or hot, your choice)
-
1 tsp cumin
-
1 tsp smoked paprika
-
1 tsp oregano
-
Salt & pepper, to taste
Beans & Tomatoes:
-
1 (15 oz) can black beans, drained
-
1 (15 oz) can kidney beans, drained
-
1 (15 oz) can pinto beans, drained
-
1 (28 oz) can crushed tomatoes (fire-roasted preferred)
-
1 cup vegetable broth or water
Optional Toppings:
-
Avocado slices
-
Fresh cilantro
-
Lime wedges
-
Tortilla chips
-
Vegan sour cream
Instructions
In a large, heavy-bottomed pot or Dutch oven, heat the olive oil over medium heat.
Add onion, carrot, and bell pepper. Sauté 5–7 minutes, until onion is translucent and veggies start to soften.
Add garlic and stir for 30 seconds until fragrant.
Sprinkle in chili powder, cumin, smoked paprika, and oregano. Stir 1 minute to toast and release their flavors—this is what makes your chili smell irresistible.
Stir in drained beans, crushed tomatoes, zucchini (if using), and broth/water. Scrape up any tasty bits from the bottom. Bring to a gentle simmer.
Reduce heat to medium-low, cover, and cook 25–30 minutes, stirring every 10 minutes. This allows flavors to meld, veggies to soften, and chili to thicken.
Remove lid. Taste and season with salt & pepper. For thicker chili, simmer uncovered 10 more minutes to reduce excess liquid.
Ladle chili into bowls and top as you like: avocado, cilantro, lime, tortilla strips, or vegan sour cream. Serve with cornbread, quinoa, or rice for a hearty meal.
Notes
-
Too watery? Simmer uncovered or mash a few beans to thicken naturally.
-
Slow cooker friendly: Sauté onions, peppers, and spices first. Cook on LOW 6–8 hours or HIGH 3–4 hours.
-
Make it mild: Use sweet/mild chili powder and paprika; omit cayenne.
-
Flavor boost: Chili tastes even better the next day.
Nutritional Information (Per Serving, approx. 1.5 cups)
Calories: ~250 | Protein: 12g | Carbohydrates: 35g | Dietary Fiber: 10g | Sugars: 8g | Fat: 6g | Sodium: 500mg (varies based on broth/beans used). This is a nutrient-dense, high-fiber, and protein-packed meal that’s as wholesome as it is delicious!
Prep Time: 10 mins | Cook Time: 35 mins | Total Time: 45 mins | Serves: 6-8
Final Thoughts
And there you have it—a pot of pure, unapologetic comfort, ready to warm you from the inside out. This chili is more than just a meal; it’s a reminder that plant-based cooking can be deeply satisfying, boldly flavorful, and incredibly generous. It’s the kind of recipe that doesn’t just fill your bowl, but also fills your home with the kind of aroma that makes everyone ask, “What’s cooking?”
As you ladle out that first steaming serving, take a moment to appreciate what you’ve made: a wholesome, one-pot wonder that’s kind to your body, your schedule, and the planet. Whether you’re cozying up solo or serving a table full of friends, this chili has a way of making moments feel a little more special.
Remember, the best dishes are living things—they grow and change with you. So take this recipe and make it your own. Add more heat, try new beans, or throw in that extra veggie hiding in the back of the fridge. Cook it with confidence, share it with joy, and savor every last spoonful.
Here’s to many more cozy bowls ahead. You’ve just added a new classic to your repertoire.
Stay warm and well-fed,
Olivia
Save This Recipe for Later!
The Best Crispy Baked Chicken Nuggets : Healthy, Easy & Kid-Approved
The Best Crispy Baked Chicken Nuggets – Healthy, Easy & Kid-Approved
Hey there, fellow flavor-seeker! Come on in, grab an apron (a messy one is totally welcome here), and let’s talk about one of life’s great universal joys: a really, really good chicken nugget. You know the kind. The ones with that irresistible, shatteringly crisp coating that gives way to the most tender, juicy bite of chicken. The kind that makes everyone, from the pickiest toddler to the most discerning foodie uncle, light up and ask for “just one more.”
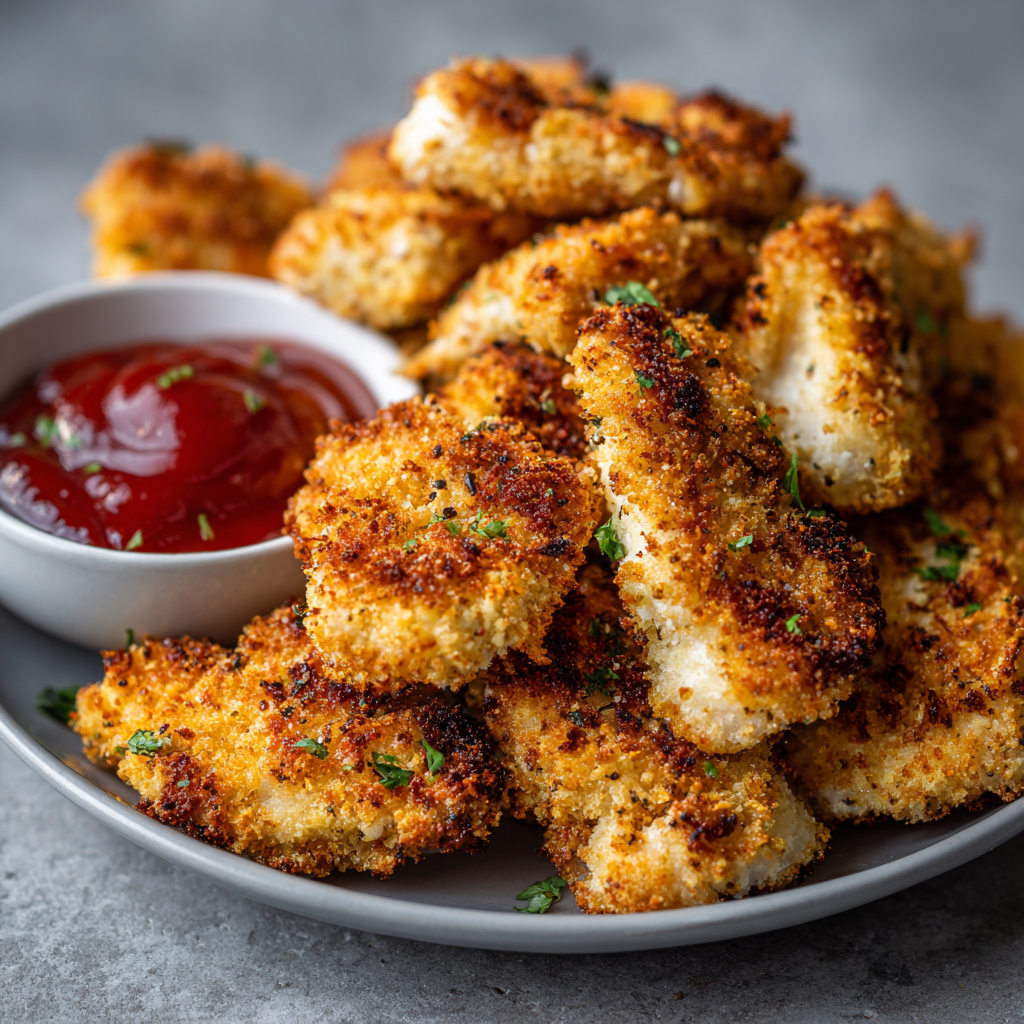
For years, I thought that magical crunch was the exclusive domain of deep fryers and drive-thru windows. But then, through a little kitchen experimentation (and a few not-so-perfect batches), I cracked the code. I’m so excited to share with you my absolute favorite method for making crispy baked chicken nuggets that are not only healthier but, I swear, taste even better than the takeout kind. We’re talking golden-brown, audibly crunchy perfection on the outside, and perfectly moist and flavorful on the inside—all without a vat of oil in sight.
This recipe is my weeknight hero, my party pleaser, and my secret weapon for happy kids. It’s deceptively simple, uses pantry-friendly ingredients, and comes together in about 30 minutes. Whether you’re meal-prepping for easy lunches, hosting a game-day spread, or just need a surefire win for dinner tonight, these nuggets are your answer. So, preheat that oven, and let’s make some magic happen!
Why These Nuggets Hold a Special Place in My Heart (and Freezer)
My love affair with this recipe started not in a fancy test kitchen, but at my slightly wobbly kitchen table, covered in construction paper and glitter. It was my niece Lily’s 5th birthday, and she had one request: “Auntie Liv, can we have a nugget party? But the kind you make, not the box.” My heart melted, and then immediately panicked. Could my from-scratch version really compete with the iconic, salty bliss of her usual favorite?
I tweaked and tested, finally landing on this combo of toasted panko and simple spices. The moment I pulled that first tray out of the oven, the whole house smelled like a cozy, happy dream. Watching Lily’s eyes go wide as she took her first bite, followed by a solemn, sauce-covered thumbs-up, was a victory sweeter than any five-star review. Now, I always keep a batch in the freezer. They’re my edible hug, my go-to for playdates, sick days, and those “I just need something delicious and uncomplicated” evenings. They remind me that the best recipes aren’t about perfection; they’re about connection, one crispy, joyful bite at a time.
Your Nugget Toolbox: Simple Ingredients, Big Flavor
Here’s everything you’ll need to create this crispy masterpiece. I’ve added my little chef notes next to each one because knowing your ingredients is the first step to kitchen confidence!
- 1 ½ cups panko breadcrumbs: This is the MVP of crunch! Panko is a Japanese-style breadcrumb that’s lighter, flakier, and crisps up way better than regular breadcrumbs. Chef’s Tip: Toasting them first is the non-negotiable secret for maximum crunch and golden color.
- Olive oil cooking spray: Helps the panko toast in the oven and gives our nuggets that beautiful, all-over crispness when we spray them before baking. You can use any neutral oil spray you like.
- 1 ½ tsp kosher salt: I prefer kosher salt for its clean taste. If using fine table salt, reduce to about 1 tsp to avoid over-salting.
- 1 tsp black pepper: Freshly ground is always best for the brightest flavor!
- 1 tsp onion powder & ½ tsp garlic powder: These dried wonders add a savory, aromatic base that permeates the coating. No chopping required!
- 1 tsp paprika: Sweet paprika adds a lovely color and a subtle, smoky warmth. Smoked paprika is a fantastic twist if you have it!
- ¼ tsp cayenne pepper (optional): Just a tiny pinch adds a background hum of warmth without being “spicy.” Feel free to skip it for super-sensitive palates.
- 2 large eggs: Our glue! They help the crunchy coating stick to the chicken beautifully.
- 2 tbsp almond milk (or milk of choice): A splash of milk lightens the egg wash just a touch. Any milk—dairy or non-dairy—works perfectly here.
- 1 ½ lbs boneless, skinless chicken breast: The star! Look for evenly-sized breasts for uniform nuggets. Pro Tip: For even more tender nuggets, you can use chicken thighs. They have more fat and stay incredibly juicy.
Let’s Get Cooking: Your Path to Crunchy Bliss
Okay, friends! It’s time to turn these ingredients into golden glory. Follow these steps, lean into my little hacks, and you’ll be a nugget maestro in no time.
Step 1: The Crunch Catalyst (Toast That Panko!)
Preheat your oven to 400°F (200°C). Now, take your panko breadcrumbs and spread them in a thin, even layer on a large, rimmed baking sheet. Give them a generous mist with your cooking spray. This bit of oil helps them toast evenly and get that perfect golden hue. Pop the tray in the oven for 5-6 minutes, but don’t walk away! Stir them around at the halfway mark. You’ll know they’re ready when they turn a light, toasty brown and smell wonderfully nutty. This step is the absolute game-changer—it locks in the crunch before the nuggets even hit the oven.
Step 2: Build Your Flavor Station
Transfer your beautifully toasted panko to a wide, shallow bowl—a pie plate works great here. Immediately stir in all your spices: the salt, pepper, onion powder, paprika, garlic powder, and that optional cayenne. Mixing the spices into the warm panko helps “wake up” their flavors. In a second shallow bowl, whisk your eggs and milk together until completely smooth and uniform. Set up an assembly line: chicken cubes, egg wash, seasoned panko, and finally, a baking sheet fitted with a wire rack that you’ve lightly sprayed with nonstick spray. The wire rack is another key player—it lets hot air circulate all around the nugget for 360-degree crispiness!
Step 3: The Coating Dance
Let’s get those hands messy! Take one piece of chicken and fully submerge it in the egg wash. Let the excess drip off for a second—this prevents a gloopy coating. Then, roll it firmly in the panko mixture, using your dry hand to press the crumbs onto all sides to form a solid, even crust. Place it on the wire rack. Repeat with all pieces, leaving a little space between each nugget on the rack so they crisp up instead of steam. Once they’re all coated, give the tops one more light, even mist of cooking spray. This final spray mimics the effect of frying, helping every nook and cranny turn golden and crisp.
Step 4: Bake to Perfection
Slide your loaded rack into the hot oven and bake for 15-20 minutes. Ovens can vary, so start checking at 15 minutes. You’re looking for a deep, golden-brown crust and an internal temperature of 165°F (74°C) on an instant-read thermometer. Trust me, the thermometer is your best friend for never-overcooked, always-juicy chicken. The nuggets will be firm to the touch and smell absolutely incredible. Let them cool on the rack for just a couple of minutes—this lets the coating set into its final, crunchy form.
Dipping & Serving: The Grand Finale
Now for the fun part! Pile these warm, crispy nuggets high on a big platter or into individual baskets. The serving options are endless! I love setting up a “dipping station” with small bowls of honey mustard, classic ketchup, tangy BBQ sauce, and maybe a creamy ranch or zesty marinara. For a full meal, tuck them into a soft bun with slaw for a killer sandwich, slice them over a big green salad, or serve them alongside some baked sweet potato fries and crunchy veggie sticks. They’re the ultimate crowd-pleasing centerpiece!
Mix It Up! Creative Twists on the Classic
Once you’ve mastered the base recipe, the world is your nugget! Try these easy variations:
- Parmesan-Herb: Add ½ cup finely grated Parmesan and 1 tbsp of dried Italian herbs to the panko mix.
- Gluten-Free: Use certified gluten-free panko breadcrumbs. Almond flour (toasted first) also makes a great crunchy coating.
- Extra Zesty: Add the zest of one lemon to the panko mixture and serve with a lemon-herb yogurt dip.
- Air Fryer Method: Cook at 400°F for 10-12 minutes, shaking halfway. They get insanely crispy!
- “Buffalo” Style: After baking, toss the hot nuggets in a mix of ¼ cup melted butter and ½ cup hot sauce. Serve with blue cheese dressing.
Olivia’s Kitchen Notes & Stories
This recipe has evolved from a “let’s see if this works” experiment to a rock-solid staple in my home. I’ve learned that patting the chicken pieces very dry before dipping is a small step with a big payoff—it helps the coating stick like a dream. And one time, I accidentally used seasoned croutons, blitzed into crumbs, when I was out of panko… and you know what? They were delicious! Don’t be afraid to improvise.
The biggest laugh came when my husband tried to “help” by coating an entire piece of chicken in just the spice mix, forgetting the panko entirely. We called it “Naked Nugget” and it was… intensely seasoned. We still joke about it. The moral? Cooking is supposed to be fun. A little mess, a little laughter, and a lot of flavor—that’s the real recipe.
Your Nugget Questions, Answered
Q: My coating sometimes falls off after baking. How can I prevent that?
A: The most common culprit is not letting the excess egg wash drip off. A quick drip ensures the coating is a thin, adhesive layer, not a thick, sliding one. Also, really press the panko on firmly! And finally, the wire rack is key—it prevents the bottom from getting soggy, which can loosen the crust.
Q: Can I make these ahead of time?
A: Absolutely! You have two great options: 1) Freeze before baking: Prepare nuggets up to placing them on the rack, then freeze solid on the rack before transferring to a freezer bag. Bake from frozen, adding 5-10 minutes to the time. 2) Reheat leftovers: To revive leftover nuggets, reheat them in a 400°F oven or toaster oven for 5-10 minutes. The microwave will make them soft.
Q: Can I use chicken thighs instead of breasts?
A: Yes, and they’ll be incredibly juicy! Just trim any excess fat and cut into even pieces. The baking time may be similar, but always use your thermometer to be sure.
Q: Are these really kid-approved?
A> From my own experience and the countless messages from readers, the resounding answer is YES! Letting kids help with the dipping and coating (expect mess!) or choose their own dips makes them even more invested. The familiar shape with the homemade, tastier flavor is a total win.

The Best Crispy Baked Chicken Nuggets : Healthy, Easy & Kid-Approved
Description
Hey there, fellow flavor-seeker! These crispy baked chicken nuggets are proof that you don’t need a deep fryer to get that crave-worthy crunch. With a golden, shatter-crisp coating and juicy, tender chicken inside, they’re everything we love about nuggets—only lighter, homemade, and just plain better.
Ingredients
-
1½ cups panko breadcrumbs
-
Olive oil cooking spray
-
1½ teaspoons kosher salt
-
1 teaspoon black pepper
-
1 teaspoon onion powder
-
½ teaspoon garlic powder
-
1 teaspoon paprika
-
¼ teaspoon cayenne pepper (optional)
-
2 large eggs
-
2 tablespoons milk (any kind)
-
1½ lbs boneless, skinless chicken breast, cut into bite-size pieces
Instructions
Preheat oven to 400°F (200°C).
Spread panko on a baking sheet and mist lightly with cooking spray. Bake 5–6 minutes, stirring halfway, until lightly golden and fragrant. Transfer to a shallow bowl and stir in salt, pepper, onion powder, garlic powder, paprika, and cayenne.
In a second shallow bowl, whisk eggs and milk until smooth.
Line a baking sheet with a wire rack and lightly spray with nonstick spray.
Dip chicken pieces into egg wash, letting excess drip off. Press firmly into seasoned panko to coat all sides. Place nuggets on the wire rack, leaving space between each. Lightly spray the tops with cooking spray.
Bake for 15–20 minutes, until nuggets are deep golden and reach an internal temperature of 165°F (74°C). Let rest for 2–3 minutes before serving to set the crust.
Notes
-
Toast the panko first for maximum crunch
-
Pat chicken dry before coating for better adhesion
-
Use a wire rack to keep nuggets crisp on all sides
-
Press crumbs firmly onto chicken to prevent coating loss
Nutritional Information*
*This is an estimate for 1 serving (approx. ¼ of the recipe), calculated without dipping sauces. Values can vary based on specific ingredients used.
Per Serving: Calories: 227 | Protein: 29g | Carbohydrates: 19g | Dietary Fiber: 1g | Total Fat: 5g | Saturated Fat: 1g
Final Thoughts
Sometimes, the greatest kitchen victories aren’t about mastering a complicated technique or sourcing a rare ingredient. They’re about taking a beloved classic and making it yours—healthier, crispier, and brimming with the kind of love that only comes from your own oven.
These nuggets are more than just a meal; they’re a promise of a happy table. They prove that you don’t have to choose between wholesome and delicious, or between a quick dinner and a memorable one. With a handful of simple ingredients and a few smart tricks, you can create something that truly delights everyone who gathers around your plate.
So, here’s to crispy triumphs, to sauce-covered smiles, and to the simple joy of a perfectly golden bite. May your baking sheets always be full, your panko always toasted, and your chicken forever juicy.
Now, go on—preheat that oven and get your crunch on.
Happy cooking,
Olivia

Mini Berry Tarts with Vanilla Bean Cream : Elegant, Fresh & Bite-Sized Bliss
Sunshine on a Plate: Welcome to Mini Berry Tart Bliss!
Hey there, friend! Come on in, grab an apron, and let’s chat about one of life’s simplest, most beautiful pleasures: a perfect, bite-sized dessert. You know the one. It looks like it came from the window of a tiny, magical Parisian patisserie, but it’s made with your own two hands, right in your cozy kitchen. If your heart does a little happy dance at the thought of buttery pastry, silky vanilla cream, and a burst of fresh, juicy berries, then you and I are already on the same delicious wavelength.
Today, we’re creating Mini Berry Tarts with Vanilla Bean Cream. These aren’t just desserts; they’re tiny edible celebrations. They’re what you make when you want to turn an ordinary Tuesday into something special, or when you need a show-stopping treat for a baby shower, brunch, or just because the berries at the market looked too good to pass up. The best part? They’re secretly simple. We’re going to walk through every single step together, with plenty of my favorite chef hacks and reassuring whispers. No fancy skills required—just a love for good food and the joy of creating something gorgeous. So, preheat your oven, and let’s make some berry-packed magic!
A Tale of Two Tarts: My Grandma’s Lessons in Love
This recipe always takes me back to my grandma’s linoleum-floored kitchen, a place perpetually dusted with flour and smelling of sugar. She wasn’t a “fancy” baker, but she was a generous one. Her version involved a big, free-form galette piled with whatever fruit was ripe, but the principle was the same: start with a good, honest crust and let the seasonal fruit shine.
I remember one sweltering summer afternoon, maybe eight years old, perched on a stool “helping” her pat dough into her old, warped tart pan. She’d let me painstakingly arrange the raspberries in concentric circles, never minding that my rows were wobbly and juice was running down my arms. “It’s not about perfect, Livvy,” she’d say, wiping her hands on her flower-print apron. “It’s about the love you fold into it. And the butter. Always the good butter.” These mini tarts are my homage to her—scaled down for modern gatherings, with a luxurious vanilla bean cream she’d have called “posh,” but with the same soul. It’s that feeling of sharing something made with care that I want to pass on to you.
Gathering Your Berry Best Friends: The Ingredients
Let’s break down our cast of characters. Using great ingredients is the first secret to a spectacular tart! Don’t worry if you need to swap something—I’ve got you covered.
- For the Tart Shells:
- 1¼ cups all-purpose flour: The foundation. It gives our shells structure. For a slightly more tender, nutty flavor, you can swap out ¼ cup for almond flour.
- ¼ cup powdered sugar: Sweetens the crust subtly and, because it contains cornstarch, helps keep it tender. Granulated sugar works in a pinch but will give a slightly grainier texture.
- ½ cup unsalted butter, cold and cubed: This is non-negotiable for flakiness! Cold butter creates little steam pockets as it bakes. I pop my cubed butter in the freezer for 10 minutes before starting. Unsalted lets us control the salt level.
- 1 egg yolk: Adds richness, flavor, and helps bind the dough. Save the white for a healthy omelet!
- 1–2 tbsp ice water: The “just enough” hydrator. Too much makes tough pastry. Start with one tablespoon and add drops from the second only if the dough won’t come together when pinched.
- For the Vanilla Bean Cream:
- 1½ cups whole milk: Full-fat is key for a luxuriously creamy texture. For a richer custard, sub half the milk with heavy cream.
- 1 vanilla bean (or 1 tsp vanilla bean paste): The star! A split and scraped bean gives incredible flavor and those gorgeous black specks. Paste is a fantastic, convenient alternative. In a true emergency, 2 tsp of pure vanilla extract works (add it after cooking).
- 3 egg yolks: They thicken the cream into a lush custard. Pro tip: Crack your eggs into your hand over a bowl, letting the whites slip through your fingers to catch the yolk cleanly.
- ⅓ cup sugar: Sweetens and balances the tart berries.
- 2 tbsp cornstarch: Our thickening guardian angel. It stabilizes the custard so it holds its shape in the shells. Arrowroot powder is a 1:1 substitute.
- 2 tbsp butter: Stirred in at the end for a silky mouthfeel and gorgeous sheen.
- For the Topping:
- Fresh mixed berries: The jewel box! Use what’s in season and looks best. A mix of colors and sizes (blueberries, raspberries, sliced strawberries, blackberries) is visually stunning.
- Optional: powdered sugar or apricot glaze: A dusting of powdered sugar is the easy, elegant finish. For a professional, glossy shine, warm a tablespoon of apricot jam with a teaspoon of water and brush it lightly over the arranged berries.
Let’s Get Baking: A Step-by-Step Adventure
Ready? We’ll tackle this in three easy acts: the shells, the cream, and the grand assembly. Put on some good music, and let’s do this!
Act I: The Buttery, Crisp Tart Shells
1. Make the Dough: In a food processor, pulse the flour and powdered sugar just to combine. Scatter the ice-cold butter cubes over top. Pulse 8-10 times until the mixture looks like coarse sand with some pea-sized butter bits remaining. Chef’s Whisper: This is the key to flakiness! If you don’t have a processor, use a pastry cutter or even grate the frozen butter into the flour and work it quickly with your fingertips.
2. Bring It Together: Whisk the egg yolk with 1 tbsp of ice water. Drizzle it over the flour mixture while pulsing. Stop as soon as the dough begins to clump. Pinch a bit—if it holds together, you’re done! If it’s too dry, add more ice water a teaspoon at a time.
3. Press & Chill: Turn the crumbly dough out onto a surface. Gently knead it once or twice just to form a disc. Don’t overwork it! Divide into 8-10 pieces and press each piece evenly into your mini tart pans (with removable bottoms if you have them!). Use a small glass or measuring cup to help press it neatly up the sides. Prick the bottoms all over with a fork. Chill for at least 15 minutes. This re-solidifies the butter and prevents major shrinking. Trust me on this chill time!
4. Bake to Golden Perfection: Preheat your oven to 350°F (175°C). Bake the chilled shells for 15-18 minutes, until they are lightly golden all over. Let them cool completely in the pans on a wire rack. They’ll crisp up as they cool.
Act II: The Silky Vanilla Bean Cream
1. Infuse the Milk: In a medium saucepan, pour the milk. Split your vanilla bean lengthwise and scrape out the tiny, fragrant seeds with the back of your knife. Add both the seeds and the empty pod to the milk. Heat over medium until it’s just beginning to simmer (little bubbles around the edges), then remove from heat. Let it steep for 15 minutes. This infuses every molecule with vanilla goodness!
2. Temper the Yolks: In a separate bowl, whisk the egg yolks, sugar, and cornstarch until it’s thick, pale, and smooth. This is called “blanching” and it helps prevent scrambled eggs in your custard. Now, slowly—and I mean a slow, thin stream—whisk about ½ cup of the warm vanilla milk into the yolk mixture. This gently raises their temperature. Then, you can whisk in the rest of the milk.
3. Cook to Creamy Bliss: Pour the entire mixture back into the saucepan. Cook over medium heat, whisking constantly and getting into the corners of the pan. It will thicken quite suddenly after a few minutes. Once you see the first big, lazy bubble plop to the surface, cook for one more minute while whisking vigorously. You’ve made pastry cream!
4. Finish and Chill: Remove from heat. Fish out and discard the vanilla pod. Whisk in the butter until it melts completely and the cream is gloriously smooth. Pour it into a clean bowl, press plastic wrap directly onto the surface (to prevent a skin), and chill for at least 1 hour. It will thicken up perfectly.
Act III: The Grand (& Easy) Assembly
1. Fill ‘Em Up: Once shells and cream are completely cool, spoon or pipe the vanilla cream into the tart shells, leaving a little rim.
2. Berry Artistry: Now for the fun part! Arrange your washed and dried berries in a gorgeous, colorful pattern. Get creative! I love a concentric circle of raspberries, a few plump blueberries tucked in, and a single pristine blackberry in the center.
3. The Final Flourish: Just before serving, dust lightly with powdered sugar using a fine-mesh sieve, or brush with that warm apricot glaze for a professional, fruity shine.
How to Serve These Little Showstoppers
Presentation is part of the fun! Arrange these mini tarts on a simple white platter or a rustic wooden board for a gorgeous contrast. For a party, I love placing each one on a tiny, individual dessert plate—it makes everyone feel special. They pair beautifully with a cup of strong coffee, a glass of sparkling wine, or a light herbal tea. The rule here? Keep it simple and let the tarts be the colorful, delicious stars they were born to be.
Make It Your Own: Delicious Twists & Swaps
- Lemon Zest Brightness: Add the zest of one lemon to the pastry cream along with the butter for a vibrant lemon-berry combo.
- Chocolate Dreams: Brush the inside of your cooled tart shells with melted dark chocolate before adding the cream. It adds a subtle barrier and a rich flavor layer.
- Dairy-Free Delight: Use a high-fat coconut milk for the pastry cream and vegan butter in both the crust and cream. The coconut adds a lovely flavor that works with berries.
- Ginger Snap Crust: Swap the flour for crushed ginger snap cookies mixed with a little melted butter for a spiced, no-bake crust alternative.
- Stone Fruit Fancy: In late summer, top with thinly sliced peaches, nectarines, or plums instead of (or mixed with) berries.
Olivia’s Kitchen Notes & Stories
This recipe is a living thing in my kitchen! It started as one big tart, but I found mini versions just make people smile more—everyone gets their own perfect little world. My biggest “disaster-turned-discovery” was the time I forgot to chill the dough. The shells shrank comically in the oven, like little pastry turtlenecks! Now I know: cold butter + chilled dough = tart shell success. I also used to be terrified of tempering eggs until I realized it’s just about going slow and trusting the process. If a few tiny bits do scramble, don’t panic! Just strain the finished cream through a fine-mesh sieve as you pour it into the bowl. No one will ever know, and you’ll feel like a total kitchen wizard.
Your Questions, Answered!
Q: Can I make these ahead of time?
A: Absolutely! That’s their superpower. Bake the shells and make the cream up to 2 days ahead. Store shells in an airtight container at room temp and the cream in the fridge. Assemble no more than 2-3 hours before serving so the shells stay crisp.
Q: My pastry cream is lumpy! What do I do?
A: First, don’t worry! We can fix it. Immediately strain it through a fine-mesh sieve into your bowl, pressing it through with a spatula. This will catch any cooked egg bits. Then whisk in the butter. It will save the texture completely.
Q: My tart shells got soggy after filling.
A: This usually means the shells or the cream weren’t totally cool before assembly. Make sure both are room-temp cool or chilled. A light brush of melted chocolate inside the shell (as mentioned in variations) also creates a fantastic moisture barrier.
Q: Can I use frozen berries?
A: I don’t recommend it for the fresh topping, as they release too much juice and can make things soggy. However, frozen berries are fantastic for making a quick compote or glaze to spoon under the fresh cream before adding berries!

Mini Berry Tarts with Vanilla Bean Cream : Elegant, Fresh & Bite-Sized Bliss
Description
Hey there, friend! If a dessert could smile back at you, this would be it. These Mini Berry Tarts are buttery, creamy, and bursting with fresh berries—tiny treats that look bakery-fancy but are completely doable at home. Crisp tart shells, silky vanilla bean cream, and jewel-toned berries come together in a dessert that feels special without being stressful.
Ingredients
For the Tart Shells
-
1¼ cups all-purpose flour
-
¼ cup powdered sugar
-
½ cup unsalted butter, cold and cubed
-
1 egg yolk
-
1–2 tablespoons ice water
For the Vanilla Bean Cream
-
1½ cups whole milk
-
1 vanilla bean (or 1 teaspoon vanilla bean paste)
-
3 egg yolks
-
⅓ cup sugar
-
2 tablespoons cornstarch
-
2 tablespoons butter
For the Topping
-
Fresh mixed berries (strawberries, raspberries, blueberries, blackberries)
-
Optional: powdered sugar or apricot glaze
Instructions
Preheat oven to 350°F (175°C).
In a food processor, pulse flour and powdered sugar to combine. Add cold butter and pulse until the mixture resembles coarse crumbs. Add egg yolk and 1 tablespoon ice water; pulse just until dough begins to clump. Add more water only if needed.
Divide dough into 8–10 portions and press evenly into mini tart pans. Prick bottoms with a fork. Chill for 15 minutes, then bake 15–18 minutes, until lightly golden. Cool completely.
Heat milk with vanilla bean seeds and pod until just simmering. Remove from heat and let steep 15 minutes.
Whisk egg yolks, sugar, and cornstarch until smooth. Slowly whisk warm milk into yolks, then return mixture to saucepan. Cook over medium heat, whisking constantly, until thick and bubbling. Cook 1 minute more.
Remove from heat, discard vanilla pod, and whisk in butter. Cover cream with plastic wrap pressed directly on the surface and chill at least 1 hour.
Fill cooled tart shells with vanilla cream. Top with fresh berries. Just before serving, dust with powdered sugar or brush lightly with warm apricot glaze.
Notes
-
Cold butter + chilled dough = crisp shells
-
Let shells and cream cool completely before assembling to avoid sogginess
-
Strain pastry cream if any lumps appear—instant fix
-
Brush shells with melted chocolate for a moisture barrier if making ahead
Nutritional Info (Per Tart, Approximate)
Calories: 220 | Fat: 13g | Saturated Fat: 8g | Carbohydrates: 22g | Sugar: 10g | Protein: 4g | Fiber: 1g
Remember, these are tiny treats meant to be savored! This info is an estimate based on the specific ingredients used.
Final Thoughts: A Tiny Taste of Joy
Making these Mini Berry Tarts isn’t just about baking—it’s about creating small, edible moments of delight. It’s the satisfaction of pressing dough into a pan, the meditative swirl of whisking custard, and the quiet pride of arranging a jewel box of berries into something beautiful.
This recipe proves that elegance doesn’t have to be complicated. With a little patience and care, you can craft a dessert that feels both special and deeply personal. It carries the warmth of my grandma’s kitchen, the lessons from my own happy accidents, and the simple truth that the best food is made to be shared—whether that’s with friends around a table or with yourself as a quiet afternoon treat.
Remember, your version doesn’t have to be perfect. A wobbly berry or a slightly lopsided shell just adds character. What matters is the love and attention you pour into each step. So embrace the process, lick the spoon, and don’t forget the most important ingredient: your own enjoyment.
I hope these little tarts bring as much sunshine to your table as they have to mine. Now, go on—bake, share, and savor every sweet, buttery, berry-filled bite. You’ve earned it.
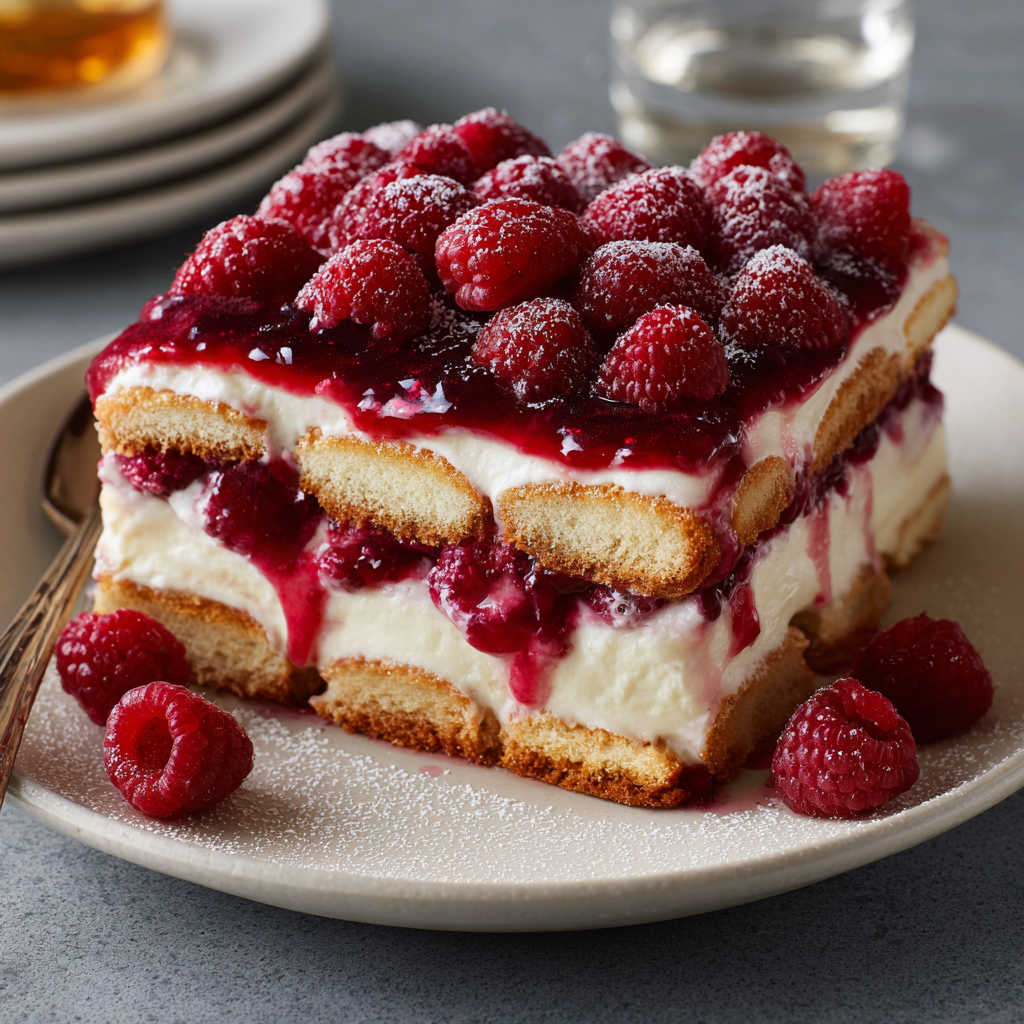
Fresh Raspberry Tiramisu : A Fruity Twist on the Classic Dessert
Fresh Raspberry Tiramisu: The Sun-Kissed Italian Classic You Need to Make
Hey there, friend! Pull up a stool and let’s chat about one of life’s greatest pleasures: dessert. Specifically, that magical, cloud-like, coffee-kissed masterpiece we all know and love—tiramisu. It’s the dessert of celebrations, of “I-love-yous,” and of “oops, I need something spectacular and I need it now.” But what if we took that beloved classic on a little summer adventure? What if we swapped the deep, moody coffee for something bright, tangy, and bursting with sunshine? That, my friends, is the magic of this Fresh Raspberry Tiramisu.
Imagine this: layers of delicate ladyfingers, just barely kissed with a sweet-tart raspberry syrup instead of strong espresso. Between them, a cloud of the creamiest, dreamiest mascarpone filling you’ve ever tasted, punctuated by little pops of fresh, juicy raspberries. It’s elegant enough for your fanciest dinner party, yet simple enough to whip up for a Tuesday treat (because why not?). The best part? It’s a no-bake wonder. No oven, no stress—just you, a few bowls, and the joyful anticipation of that first glorious spoonful after it sets up in the fridge. This dessert isn’t just a recipe; it’s a mood. It’s the taste of a perfect summer afternoon, of garden parties, and of sharing something beautiful with people you adore. So, tie on that apron (the messy one is totally fine), and let’s make a dessert that’s going to have everyone begging for the recipe.
A Berry Sweet Memory: Where This Recipe Was Born
This recipe has its roots in a sun-drenched memory. A few summers back, my husband and I spent a blissful afternoon at a “pick-your-own” berry farm. The air was warm, the sky was impossibly blue, and we ended up with about three pints more raspberries than any two people could reasonably eat. They were perfect—plump, warm from the sun, and so fragrant. That evening, we were having friends over for a last-minute grill-out, and I was desperately craving something sweet to make. Tiramisu was my go-to “impress with minimal effort” dessert, but the strong coffee felt all wrong for a balmy summer night.
Staring at those jewel-toned berries, it hit me. What if I created a syrup with them? I warmed some jam with a splash of water, mashed in a handful of the fresh berries, and let that become my soaking liquid. The result was nothing short of revelatory. The dessert was light, refreshing, and felt completely new yet comfortingly familiar. Our friends devoured it, and it’s been a staple in my summer repertoire ever since. It reminds me that the best cooking often comes from a little improvisation and a lot of love—and maybe an accidental surplus of perfect raspberries.
Gathering Your Sunshine: The Ingredients & Why They Matter
Here’s everything you’ll need to build this berry bliss. Don’t sweat the details—I’ve got notes and swaps for you!
- 1 cup fresh raspberries (plus extra for topping): The star of the show! Look for berries that are bright, plump, and fragrant. If they’re out of season, frozen raspberries (thawed and drained) work in a pinch for the layers, but use fresh for the top if you can. Chef’s Insight: Raspberries bring that essential tangy punch that cuts through the rich cream.
- ½ cup raspberry jam or preserves: This is the flavor booster for our syrup. Seedless jam gives a smoother syrup, but seeded has a lovely rustic texture. Any berry jam (blackberry, strawberry) can step in for a different twist.
- ½ cup water: Just plain water to loosen the jam into a perfect dipping consistency.
- 2 tbsp raspberry liqueur (optional): Like Chambord. This adds a wonderful depth of berry flavor. No-alcohol swap: Use 1 tbsp of raspberry syrup (the kind for drinks) or just skip it—the dessert will still be fantastic!
- 1 cup heavy whipping cream: Must be cold, cold, cold! This whips up into the light structure for our filling. For a stable whip, chill your bowl and beaters for 10 minutes first.
- 8 oz mascarpone cheese: The heart of tiramisu. Let it sit on the counter for 15-20 minutes before using to take the chill off—this prevents lumps when you mix it. In a true emergency, full-fat cream cheese can sub, but the flavor will be tangier and less luxurious.
- ⅓ cup powdered sugar: Sweetens the filling without grittiness. You can adjust this to your taste—a little more if you like it sweeter, a touch less if you love the tartness of the berries.
- 1 tsp vanilla extract: The warm background note that makes everything taste like home. Pure vanilla is worth it here!
- 24 ladyfinger cookies (Savoiardi): The classic choice. They’re dry and sturdy, perfect for a quick dip. Gluten-free? Many stores carry GF ladyfingers now. Chef’s Hack: If you can only find soft ladyfingers, just brush the syrup on lightly—don’t dip!
Let’s Build Some Layers: Your Foolproof Step-by-Step Guide
Ready? Let’s do this. It’s all about layers, and each one is simple. I’ll walk you through it.
- Make the Raspberry “Kiss” (The Syrup): In a small saucepan, combine the raspberry jam, water, and raspberry liqueur (if using). Warm this over low heat, stirring gently, just until the jam melts and everything becomes a smooth, beautiful magenta syrup. This takes about 3-4 minutes. Do not let it boil. Pour it into a shallow dish (a pie plate is perfect) and let it cool completely. We want it at room temperature so it doesn’t melt our gorgeous cream later.
- Whip Up the Cloud (The Mascarpone Cream): Here’s the key to success: two bowls. First, grab your chilled bowl and beaters. Pour in the heavy cream and whip it on medium-high speed until you get soft peaks. That means when you lift the beaters, the cream forms peaks that gently curl over at the tips. Don’t go to stiff peaks—we’ll fold it in, and soft peaks integrate more smoothly. Set this aside. In a larger bowl, combine the slightly softened mascarpone, powdered sugar, and vanilla. Use a spatula or hand mixer on low to blend this until just smooth and combined. Over-mixing mascarpone can make it grainy. Now, use your spatula to add about a third of the whipped cream to the mascarpone mixture. Fold it in gently to lighten it up. Then, carefully fold in the remaining whipped cream until no white streaks remain. Be patient and gentle—you’re preserving all that airy volume! Look at that gorgeous, billowy cream. You’re a star.
- The Dipping Dance (Assemble Layer 1): Grab your serving dish (a 9×9-inch dish, trifle bowl, or even individual glasses work). Working one at a time, quickly dip each ladyfinger into the cooled raspberry syrup. I mean quick—a one-second dip per side is plenty. We want them flavored and softened, not sodden and falling apart. Lay them in a single, snug layer in the bottom of your dish. You may need to break a few to fill in gaps.
- Spread, Scatter, Repeat (Build the Dream): Spread half of your magnificent mascarpone cream evenly over the ladyfinger layer. Now, take half of your fresh raspberries and scatter them over the cream. Gently press them in just a bit. Time for layer two! Dip and arrange another layer of ladyfingers over the berries. Spread the remaining cream on top, making it nice and smooth. Cover the dish with plastic wrap, being careful not to let it touch the cream surface.
- The Torturous Wait (Chill Time): This is the hardest part. Pop the tiramisu into the fridge for at least 4 hours, but honestly, overnight is magic. This time allows the flavors to marry, the ladyfingers to soften perfectly into cake-like layers, and the whole thing to set up so you get a clean, beautiful slice.
- The Grand Finale (Serve!): Just before serving, take the tiramisu out of the fridge. Artfully scatter the remaining fresh raspberries over the top. For extra pizzazz, you can dust with a little powdered sugar or add a few mint leaves. Then, grab a spoon, dig in, and prepare for the compliments to roll in.
How to Serve This Stunner
Presentation is part of the fun! For a family-style vibe, serve it right from the dish at the table with a big spoon. For a more elegant feel, slice it into clean squares (dip your knife in hot water and wipe it dry between cuts for super-clean edges) and plate individually. A little drizzle of the extra raspberry syrup or a dollop of softly whipped cream on the side never hurts. It pairs beautifully with a glass of Prosecco, a cup of herbal tea, or just the joyful chatter of good company.
Make It Your Own: Delicious Twists & Swaps
- Mixed Berry Bonanza: Use a mix of raspberries, blackberries, and blueberries for a summer berry patch in every bite.
- Lemon-Raspberry Love: Add the zest of one lemon to the mascarpone cream for a bright, citrusy zing that sings with the berries.
- Chocolate Berry Dream: Add a layer of finely chopped dark chocolate or a drizzle of chocolate sauce between the cream and berry layers.
- Dairy-Free Delight: Use chilled coconut cream (the solid part from a can) whipped with a little sugar for the cream layer, and a vegan mascarpone alternative.
- Individual Portions: Layer the dipped ladyfingers, cream, and berries in clear glasses or mason jars for adorable, ready-to-go desserts.
From My Kitchen to Yours: A Few Final Thoughts
This recipe has evolved from that first berry farm experiment. I’ve learned that the quality of the mascarpone makes a huge difference—splurge on the good stuff if you can. I’ve also had my share of kitchen “oops” moments, like the time I forgot to cool the syrup and created a raspberry cream soup (we drank it with a straw and called it a smoothie—no dessert wasted here!). The recipe is wonderfully forgiving. The longer it sits, the better it gets, making it the ultimate make-ahead dessert for stress-free entertaining. Remember, cooking is about joy, not perfection. If your layers are a little lopsided or your berries roll where they shouldn’t, it just adds character. It will still taste incredible.
Your Questions, Answered (Let’s Troubleshoot!)
Q: Can I make this more than a day ahead?
A: Absolutely! You can make it up to 2 days in advance. In fact, I think it’s even better on day two. Just hold off on adding the final berry garnish until a few hours before serving so they stay pretty and fresh.
Q: My cream won’t whip! What’s going on?
A> This is usually a temperature issue. Your cream, bowl, and beaters must be very cold. If your kitchen is warm, try placing the bowl of cream inside a larger bowl filled with ice water while you whip it. Also, ensure your cream is “heavy whipping cream” with a fat content of at least 36%.
Q: My mascarpone mixture is lumpy. Can I fix it?
A> Lumps usually happen if the mascarpone was too cold. You can try to vigorously whisk it by hand or beat it with a mixer on low for a few more seconds. If a few tiny lumps remain, don’t worry—they’ll likely disappear when you fold in the whipped cream. For next time, let the mascarpone sit out for 20-30 minutes before using.
Q: Is there a non-alcoholic substitute that adds more flavor than just omitting it?
A> Yes! Instead of the liqueur, you can use 1 tablespoon of high-quality raspberry syrup (like Torani), or even a splash of raspberry juice or pure pomegranate juice for a tangy kick.

Fresh Raspberry Tiramisu : A Fruity Twist on the Classic Dessert
Description
Hey there, friend! Let’s talk dessert—the kind that feels elegant, indulgent, and yet effortlessly light. Fresh Raspberry Tiramisu is a bright, summery twist on the beloved Italian classic. Instead of bold espresso, delicate ladyfingers are gently soaked in a sweet-tart raspberry syrup, then layered with cloud-soft mascarpone cream and bursts of fresh berries.
Ingredients
For the Raspberry Syrup
-
½ cup raspberry jam or preserves
-
½ cup water
-
2 tablespoons raspberry liqueur (optional, such as Chambord)
For the Cream Layer
-
1 cup cold heavy whipping cream
-
8 oz mascarpone cheese, slightly softened
-
⅓ cup powdered sugar
-
1 teaspoon vanilla extract
For Assembly
-
24 ladyfinger cookies (Savoiardi)
-
1 cup fresh raspberries, divided
-
Extra raspberries, for topping
Instructions
In a small saucepan, combine raspberry jam, water, and liqueur (if using).
Warm gently over low heat, stirring until smooth—do not boil.
Pour into a shallow dish and allow to cool completely.
In a chilled bowl, whip the heavy cream until soft peaks form. Set aside.
In a separate bowl, gently mix mascarpone, powdered sugar, and vanilla until smooth.
Fold one-third of the whipped cream into the mascarpone to lighten it, then gently fold in the remaining whipped cream until fluffy and smooth.
Quickly dip each ladyfinger into the cooled raspberry syrup (about 1 second per side).
Arrange in a single layer in the bottom of a 9×9-inch dish or similar serving dish.
Spread half of the mascarpone cream evenly over the ladyfingers.
Scatter half of the fresh raspberries over the cream.
Add a second layer of dipped ladyfingers.
Top with remaining mascarpone cream and smooth the surface.
Cover gently with plastic wrap.
Refrigerate for at least 4 hours, preferably overnight, to allow flavors to meld and layers to set.
Just before serving, top with remaining fresh raspberries.
Optional: dust lightly with powdered sugar or garnish with mint.
Slice and serve chilled.
Notes
-
Dip ladyfingers quickly—do not soak
-
Use high-quality mascarpone for best texture
-
Chill overnight for the best flavor and structure
-
Add berries on top just before serving for freshness
Nutritional Information*
*This is an estimated nutritional breakdown per serving, based on 8 servings. Values may vary based on specific ingredients used.
- Calories: 340
- Fat: 21g
- Carbohydrates: 32g
- Sugar: 17g
- Protein: 4g
- Sodium: 90mg
Prep Time: 25 mins | Chill Time: 4+ hours | Total Time: 4 hours 25 mins | Servings: 8
Final Thoughts
Creating this Fresh Raspberry Tiramisu is more than following a recipe—it’s an invitation to slow down and savor the sweetness of the season. In just a few simple layers, you’ve woven together the brightness of summer berries with the timeless elegance of a classic Italian dessert. The result? A treat that feels both joyfully spontaneous and deeply comforting.
This dessert is a celebration of contrasts: the tangy raspberries against the rich, cloud-like mascarpone, the tender ladyfingers holding just a hint of syrup. It’s proof that the most memorable dishes often come from a moment of inspiration—like a surplus of sun-warmed berries and a desire for something new. It reminds us that traditions can be gently nudged in beautiful new directions, creating fresh memories while honoring the old.
Whether you serve it under twinkling lights at a gathering or sneak a spoonful straight from the dish after a long day, this tiramisu is a little jar of sunshine. It’s the taste of generosity, of shared laughter, and of taking a simple pleasure and making it extraordinary.
So here’s to dessert that makes you smile, to recipes that hold stories, and to the beautiful, delicious moments they create. May your bowl be full, your berries be bright, and your spoon always ready for another bite.
Enjoy every last layer.
With love and a whisk in hand,
Olivia
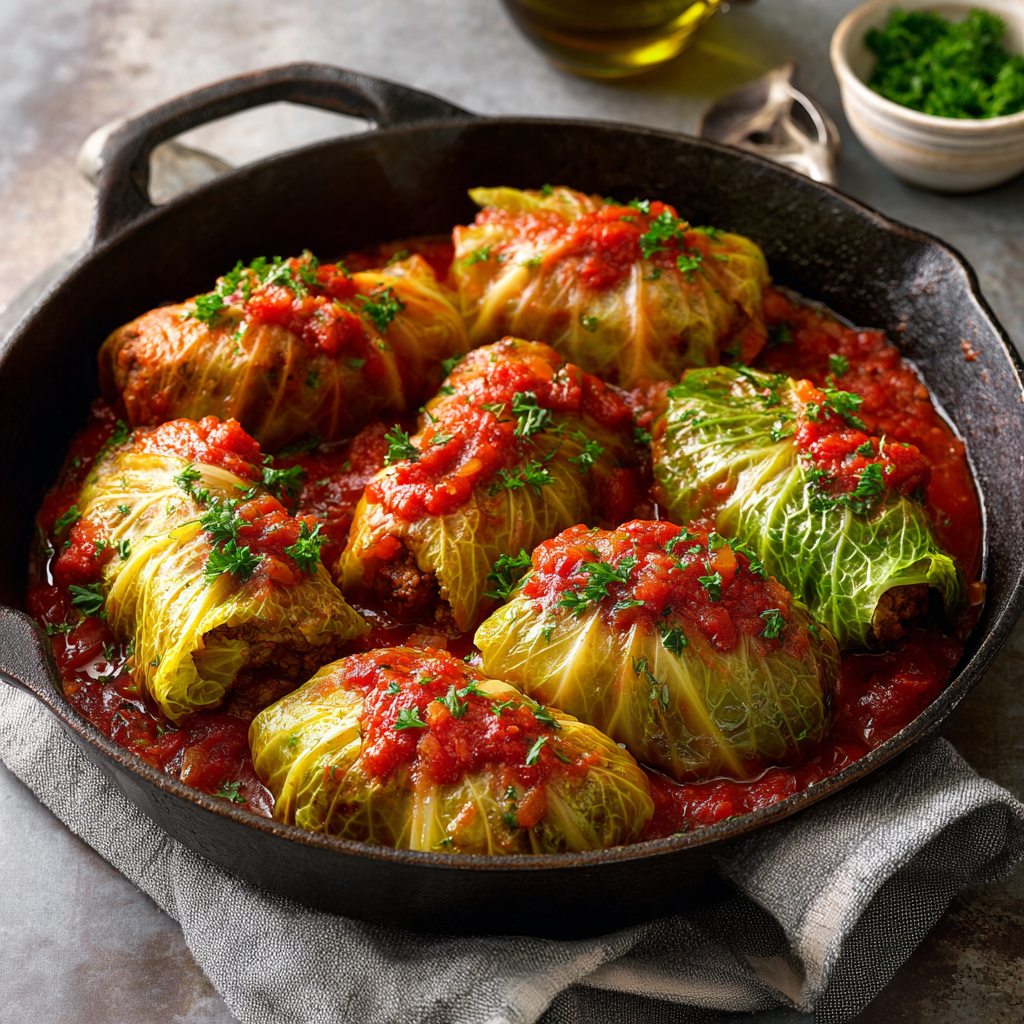
Classic Cabbage Rolls : Hearty, Comforting, and Made from Scratch
Classic Cabbage Rolls – Hearty, Comforting, and Made from Scratch
The Cozy Embrace of a Homemade Classic
Hey there, friend! Come on in, grab an apron, and let’s get something wonderfully comforting simmering in the oven. Today, we’re diving into one of those iconic dishes that feels less like a recipe and more like a warm, delicious hug: Classic Cabbage Rolls. If you’ve never made them before, you might think they’re complicated or old-fashioned. But trust me, once you experience the magic of tender cabbage wrapped around a savory, herby filling, all bathed in a rich tomato sauce, you’ll understand why this dish has been a beloved staple for generations.
This isn’t just food; it’s a feeling. It’s the smell that fills your kitchen and makes everyone wander in, asking, “Is it ready yet?” It’s the perfect make-ahead meal for busy weeks and the ultimate showstopper for a cozy Sunday dinner. Whether your family has passed down a version of this recipe for years or you’re discovering it for the first time, I’m so excited to walk you through it. We’re keeping it approachable, from the cabbage-leaf wrestling (it’s a rite of passage!) to that final, satisfying bake. So, preheat your oven and let’s turn simple ingredients into something absolutely unforgettable together.
Nana’s Kitchen & The First Roll
My love for cabbage rolls is deeply rooted in the memory of my Nana’s tiny, always-warm kitchen. She was a powerhouse of a woman who measured ingredients in “glugs” and “handfuls,” and her cabbage rolls were legendary at every family gathering. I remember standing on a step stool, peering over the counter as she deftly peeled blanched cabbage leaves. To my little-kid eyes, it looked like she was performing wizardry—transforming what I thought was a boring vegetable into soft, pliable wrappers for the most delicious filling I’d ever tasted.
The best part was the “quality control” bite. Before the rolls even hit the baking dish, she’d fry up a tiny patty of the meat-and-rice filling in a sizzling skillet, just for me to try. “We gotta make sure the magic’s in there, Livvy,” she’d say with a wink. That small ritual made me feel like a vital part of the process. Now, every time I core a cabbage or mix that filling, I’m right back in her kitchen. This recipe is my homage to her—a little more measured for clarity, but still packed with all the heart and soul of her original “glug and go” method.
Your Flavor Toolkit: Ingredients & Insights
Great food starts with understanding your ingredients. Here’s everything you’ll need, along with some tips to make this recipe truly yours.
For the Filling:
- 1 lb ground beef or pork (or a mix) – I love a 50/50 blend! The beef brings rich, savory depth, while the pork adds a touch of sweetness and incredible juiciness. For a leaner option, ground turkey or chicken works beautifully, just add an extra tablespoon of olive oil to the mix to keep it moist.
- ½ cup uncooked white rice – Use a long-grain variety like Jasmine or Basmati. It cooks perfectly inside the roll, absorbing all the meaty juices and tomato sauce flavor. Chef’s Insight: The rice is uncooked when you mix it in—it steams to perfection during the long bake!
- 1 small onion, finely chopped & 2 cloves garlic, minced – The aromatic foundation. Don’t rush the chopping here; you want these nice and fine so they integrate seamlessly into the filling.
- 1 egg – Our binder! It holds everything together so your rolls stay firm and sliceable.
- 1 tsp salt, ½ tsp black pepper, 1 tbsp chopped fresh parsley – Simple, classic seasoning. The fresh parsley adds a bright, grassy note. If you only have dried, use 1 tsp.
For the Cabbage:
- 1 large green cabbage – Look for one that feels heavy for its size with crisp, vibrant outer leaves. The core is our friend for easy leaf removal!
- Salt for boiling water – This helps soften the leaves and seasons them from the start.
For the Tomato Sauce:
- 1 can (15 oz) tomato sauce, 1 can (14.5 oz) diced tomatoes, 1 tbsp tomato paste – This trio creates a sauce with perfect body and texture. The tomato paste deepens the flavor, while the diced tomatoes give little pops of freshness. Fire-roasted diced tomatoes are a fantastic upgrade for a smoky twist.
- 1 tsp sugar – A tiny bit balances the acidity of the tomatoes without making the sauce sweet. Trust me on this!
- 1 tsp dried oregano, Salt and pepper to taste – Oregano is the classic herb here. Feel free to add a pinch of smoked paprika or thyme if you’re feeling adventurous.
Let’s Get Rolling: Step-by-Step Guide
Ready for the fun part? Let’s break it down. Don’t worry about perfection—rustic, hearty, and homemade is the goal!
- Prep the Cabbage Like a Pro: Bring a large pot of generously salted water to a rolling boil. While it heats, use a sharp paring knife to cut a deep circle around the core of the cabbage and remove it. This loosens the leaves! Gently peel off 12 of the largest outer leaves. Chef’s Hack: If the inner leaves are stubborn, you can carefully lower the whole cored cabbage into the boiling water for a minute, then peel. The heat will loosen them up! Blanch the leaves, 2-3 at a time, for 2-3 minutes until they are pliable and bright green. Immediately transfer them to a bowl of ice water to stop the cooking, then lay them flat on a clean kitchen towel to drain. Pat them dry—this helps the filling stick!
- Mix the Flavor-Packed Filling: In a large bowl, add your ground meat, uncooked rice, onion, garlic, egg, salt, pepper, and parsley. Now, get your hands in there! Mix everything together just until combined. Over-mixing can make the meat tough, so stop when you no longer see streaks of egg or big clumps of rice. Pro-Tip: Want to check your seasoning? Take a small spoonful of the mixture and microwave it for 20 seconds or pan-fry it. Taste and adjust the salt or pepper if needed.
- The Art of the Roll: Take a cabbage leaf and place it with the stem-end facing you. If the thick center rib is very prominent, you can carefully shave it down with a knife so it rolls easier. Place about 2-3 tablespoons of filling near the base. Fold the bottom flap up over the filling, then fold in the sides (like you’re starting a burrito!), and roll it up tightly towards the top of the leaf. The goal is a neat little package. Don’t stress if a little filling peeks out; they’ll still taste amazing.
- Whisk Up the Simple Sauce: In a medium bowl, combine the tomato sauce, diced tomatoes (with their juices), tomato paste, sugar, oregano, and a good pinch of salt and pepper. Whisk it all together until the tomato paste is fully dissolved. Give it a taste! This is your last chance to adjust the seasoning before the bake.
- Assemble & Bake to Perfection: Preheat your oven to 350°F (175°C). Spread about ½ cup of the tomato sauce on the bottom of a 9×13 inch baking dish. Arrange your cabbage rolls seam-side down in the dish, snuggling them close so they support each other. Pour the remaining sauce all over the top, making sure each roll gets some love. Cover the dish tightly with aluminum foil. Why tight? This creates a steamy environment that cooks the rice and tenderizes the cabbage. Bake for 1 hour. Then, the hardest part: let them rest, still covered, for 10 minutes after baking. This allows the rolls to set and the flavors to meld beautifully.
Setting the Scene: How to Serve
Presentation is part of the joy! I love serving these directly from the baking dish at the table—it’s so homey and inviting. Use a large spoon to lift out 2-3 rolls per person, making sure to get plenty of that luscious sauce. A final sprinkle of fresh chopped parsley or dill adds a gorgeous pop of color. For the ultimate comfort food plate, pair them with a big dollop of creamy mashed potatoes or buttery egg noodles to soak up every drop of sauce. A simple green salad with a bright vinaigrette on the side cuts through the richness perfectly. And don’t forget a chunk of crusty bread for mopping!
Make It Your Own: Delicious Twists
The beauty of this recipe is its adaptability. Here are a few ways to play with it:
- Vegetarian Delight: Swap the meat for a mix of cooked brown lentils and finely chopped mushrooms. Add an extra egg to help bind it. You’ll get a wonderfully earthy and satisfying filling.
- Greek-Inspired: Use ground lamb in the filling and add a teaspoon of dried mint. For the sauce, stir in a cinnamon stick before baking. The aroma is incredible!
- Low-Carb / Keto: Replace the rice with riced cauliflower. No need to pre-cook it! Just squeeze out any excess moisture from the cauliflower rice before mixing it in.
- “Unstuffed” Casserole: Short on time? Chop the blanched cabbage, layer it in the dish with the raw filling mixture and sauce, and bake. All the flavor, half the work!
- Tangy Sweet & Sour: Add ¼ cup of raisins to the filling and use a sauce made with tomato sauce and a few tablespoons of apple cider vinegar and brown sugar.
From My Kitchen to Yours: Chef’s Notes
This recipe has been my kitchen companion for years, and it’s evolved with me. My biggest “aha” moment was realizing I could freeze the whole, unbaked dish (just hold off on the sauce on top until you’re ready to bake). It’s my secret weapon for new parents or busy friends. I just write “Bake at 350°F, covered, for 1.5 hours from frozen” on the foil with a Sharpie.
And a funny story: I once tried to impress a date by making these, only to discover my cabbage was…let’s say, exceptionally fragrant. The whole apartment smelled like a sulfur spring for days! We laughed about it, and he still married me, so I guess the rolls won him over. The moral? Always smell your cabbage at the store and choose a fresh, tight one. These little kitchen adventures are what make cooking so human and so much fun.
Your Questions, Answered
Q: My cabbage leaves keep tearing! How can I get them off in one piece?
A: This is the most common hurdle! First, make sure your core removal cut is deep enough—about 1-2 inches into the cabbage. If they’re still stubborn, try freezing the whole cabbage overnight. Thaw it completely, and the leaves will be wilted and pliable, ready to peel without blanching. If you do get a tear, don’t panic. You can often patch it with a small piece of another leaf, or simply place two smaller leaves together, overlapping them to create a “wrap.”
Q: Can I use pre-cooked rice?
A> You can, but the texture will be different. If using cooked rice, reduce the amount to about 1 ½ cups packed. Be aware that the rolls might be a bit softer, as the rice won’t absorb as much liquid. The baking time remains the same.
Q: My rolls came out a bit dry. What happened?
A> A few things can cause this: 1) The meat was very lean. Next time, use a mix with more fat or add a glug of olive oil to the filling. 2) The foil wasn’t sealed tightly, letting steam escape. Press the foil right against the sauce around the edges. 3) Overbaking. Ovens vary, so start checking at the 50-minute mark. The rolls should be tender when pierced with a knife.
Q: Can I make these ahead of time?
A> Absolutely! They are a fantastic make-ahead meal. Assemble the rolls in the dish, cover with sauce, and refrigerate for up to 24 hours before baking. You may need to add 10-15 minutes to the bake time since you’re starting from cold. You can also freeze the unbaked, sauced dish for up to 3 months.

Classic Cabbage Rolls : Hearty, Comforting, and Made from Scratch
Description
Classic Cabbage Rolls
Hearty, Comforting, and Made from Scratch
Hey there, friend! If comfort food had a signature dish, this would be it. Classic Cabbage Rolls are tender, savory, and wrapped in pure nostalgia. Soft cabbage leaves cradle a flavorful meat-and-rice filling, all baked gently in a rich tomato sauce until everything is cozy, juicy, and deeply satisfying.
Ingredients
For the Filling
-
1 lb ground beef, pork, or a mix
-
½ cup uncooked long-grain white rice
-
1 small onion, finely chopped
-
2 garlic cloves, minced
-
1 large egg
-
1 teaspoon salt
-
½ teaspoon black pepper
-
1 tablespoon fresh parsley, chopped (or 1 teaspoon dried)
For the Cabbage
-
1 large green cabbage
-
Salt, for boiling water
For the Tomato Sauce
-
1 (15 oz) can tomato sauce
-
1 (14.5 oz) can diced tomatoes (with juices)
-
1 tablespoon tomato paste
-
1 teaspoon sugar
-
1 teaspoon dried oregano
-
Salt and black pepper, to taste
Instructions
1. Prepare the Cabbage
Bring a large pot of salted water to a boil. Cut around the core of the cabbage and remove it.
Carefully peel off 12 large outer leaves. Blanch leaves 2–3 at a time for 2–3 minutes until soft and pliable.
Transfer to ice water, then drain and pat dry.
Tip: If the thick rib is very firm, shave it down slightly for easier rolling.
2. Make the Filling
In a large bowl, combine ground meat, uncooked rice, onion, garlic, egg, salt, pepper, and parsley.
Mix gently just until combined—do not overmix.
Optional check: Cook a small spoonful to taste and adjust seasoning.
3. Roll the Cabbage
Place a cabbage leaf flat with the stem end facing you.
Add 2–3 tablespoons of filling near the base.
Fold bottom up, fold in sides, and roll tightly.
Repeat with remaining leaves.
4. Make the Sauce
In a bowl, whisk together tomato sauce, diced tomatoes, tomato paste, sugar, oregano, salt, and pepper.
5. Assemble and Bake
Preheat oven to 350°F (175°C).
Spread ½ cup of sauce in the bottom of a 9×13-inch baking dish.
Arrange rolls seam-side down. Pour remaining sauce over the top.
Cover tightly with foil and bake for 1 hour.
Let rest 10 minutes before serving.
Serving Suggestions
-
Mashed potatoes or buttered egg noodles
-
Crusty bread for soaking up sauce
-
Simple green salad for balance
-
Fresh parsley or dill on top
Notes
-
Use uncooked rice—it cooks perfectly inside the rolls
-
Seal foil tightly to keep steam inside
-
Don’t rush the blanching—pliable leaves roll best
-
Leftovers taste even better the next day
Nutritional Information*
*Estimated values per serving (2 rolls).
Calories: 360 | Protein: 24g | Carbohydrates: 25g | Dietary Fiber: 5g | Sugars: 6g | Fat: 18g | Saturated Fat: 6g | Sodium: 540mg
Final Thoughts: More Than Just a Meal
Classic cabbage rolls are so much more than the sum of their humble parts. They are a testament to the power of home cooking—a dish that transforms simple, affordable ingredients into something nourishing for both body and soul. Yes, there’s a bit of hands-on work involved, but that’s where the magic happens. In the gentle folding of a leaf, in the patient simmering, you’re not just making dinner; you’re creating a memory.
This recipe is a keeper, a blueprint you can return to again and again, adapting it to your taste and the contents of your pantry. It teaches foundational skills, rewards a little patience, and delivers immense comfort. Whether it becomes your new Sunday tradition, your go-to potluck contribution, or a dish you make to share care with a friend, it carries a legacy of warmth.

Flavorful Peruvian Chicken with Green Sauce : Bold, Smoky, and Addictively Good
The Smell That Promises an Adventure: Welcome to Peruvian Chicken Night
Hey there, friend! Come on in, pull up a stool. Can you smell that? It’s the scent of garlic and cumin toasting in the oven, the bright zing of lime, and the herby promise of cilantro. That, my friends, is the soundtrack to one of my absolute favorite weeknight (or any-night!) escapes: Flavorful Peruvian Chicken with Green Sauce. This isn’t just roasted chicken; this is a passport stamp on a plate. It’s juicy, spice-crusted chicken that gives way to a sauce so vibrant, so creamy, and so downright addictive that you’ll be looking for things to put it on for days. (Spoiler: it’s good on everything.)
I know the idea of “world cuisine” can sometimes feel intimidating, like it requires a pantry overhaul or a degree in spice blending. But trust me on this one. This dish is all about bold, simple flavors coming together in the most magical way. We’re talking smoky paprika, earthy cumin, a kick of fresh chile, and the bright freshness of lime—all working in harmony. It’s the kind of meal that feels like a celebration, but is utterly doable on a Wednesday. So, tie on your apron (messy is totally welcome here), and let’s turn your kitchen into a little corner of Peru. I promise, your taste buds will thank you.
The Dinner Party That Started It All
My love affair with this dish began not in a fancy restaurant, but at a packed, noisy, incredibly warm dinner party at my friend Marco’s apartment years ago. His abuelita was visiting from Lima, and she had taken over his tiny kitchen with the confident calm of a five-star general. The air was thick with the smells I just described to you. I watched, mesmerized, as she massaged the chicken with a paste she’d made in a molcajete, laughing and chatting without a recipe in sight.
The real “wow” moment came when she whipped out this electric green sauce from the blender. She handed me a spoonful with a wink. One taste and my eyes went wide. It was cool yet spicy, herby yet rich, and had this unbelievable depth that made you immediately go back for more. That night, we ate with our hands, laughing, dripping sauce everywhere, and sopping it all up with crusty bread. It was more than a meal; it was a connection, a story shared through food. I begged for the recipe, and while I’ve made it my own over the years, every time I make this green sauce, I’m right back at that loud, joyful table, reminded that the best recipes are the ones that gather people and create memories.
Gathering Your Flavor Arsenal
Here’s the beautiful part: the ingredient list is straightforward, but each one plays a starring role. Let’s break it down so you feel like a pro before we even start cooking.
For the Peruvian Chicken:
- 4–6 bone-in, skin-on chicken thighs: The MVP! Thighs are forgiving and stay incredibly juicy. The skin gets beautifully crispy, creating the perfect texture contrast. Chef’s Insight: If you prefer, use a whole spatchcocked chicken! Just increase the marinade slightly and adjust cooking time.
- 2 tbsp olive oil: Our marinade base. It helps the spices cling and promotes that gorgeous browning.
- Juice of 1 lime: Fresh is non-negotiable here! The acidity tenderizes the chicken and cuts through the richness.
- 4 garlic cloves, minced: The flavor foundation. Don’t be shy!
- 1½ tsp ground cumin: Brings that warm, earthy, quintessential Latin American flavor. Toasting it in the marinade wakes it right up.
- 1 tsp smoked paprika: This is the secret to the “smoky” descriptor. It adds a beautiful depth that regular paprika just can’t match.
- 1 tsp dried oregano: Use Mexican or Italian oregano. It adds a subtle, aromatic layer.
- ½ tsp ground coriander: Has a slight citrusy, floral note that complements the cumin beautifully.
- Salt & pepper to taste: Season generously! This is your chance to flavor the chicken from the inside out.
For the Peruvian Green Sauce (Ají Verde):
- 1 cup fresh cilantro leaves & stems: The heart and soul. Stems have tons of flavor, so don’t waste them! If you’re in the “cilantro tastes like soap” camp, substitute flat-leaf parsley, but know the character will change.
- 1–2 jalapeños or 1 ají amarillo: For authentic heat, seek out ají amarillo paste in a Latin market. Jalapeños are a perfect, accessible substitute. Pro-Tip: Leave the seeds in one for more heat, remove them all for a milder sauce.
- 1 garlic clove: A fresh pop for the sauce.
- ¼ cup mayonnaise: Creates the luxurious, creamy body. Use a good-quality mayo you like.
- ¼ cup Greek yogurt or sour cream: Adds tang and lightens up the mayo. Greek yogurt is my go-to for a little protein boost.
- 1 tbsp lime juice: Brightens all the herbal flavors.
- 1 tbsp olive oil: Helps emulsify and adds silkiness.
- Salt, to taste: Crucial for balancing the sauce. You’ll likely need more than you think.
- Optional: 1 tbsp grated parmesan cheese: My little “chef’s secret” add. It melts into the sauce, adding an incredible umami savoriness that makes it even more addictive.
Let’s Get Cooking: Step-by-Step to Flavor Town
Ready? This is where the magic happens. We’re going to marinate, roast, and blend our way to glory.
- Marinate the Chicken: In a bowl big enough to hold your chicken, whisk together the olive oil, lime juice, minced garlic, cumin, smoked paprika, oregano, coriander, salt, and pepper. It’ll look and smell amazing already. Add the chicken thighs and, using your hands (the best tools!), massage that flavorful paste all over every nook and cranny, especially under the skin. Get in there! Chef’s Hack: Place the chicken in a large zip-top bag with the marinade. Seal it and squish it around—minimal mess, maximum coverage! Let it hang out in the fridge for at least 30 minutes, but oh, if you can plan ahead… letting it marinate overnight will make the flavor penetrate deeply. It’s a game-changer.
- Cook the Chicken (Oven Method): Preheat your oven to 425°F (220°C). Take the chicken out of the fridge about 20 minutes before cooking to take the chill off—this helps it cook more evenly. Place the thighs skin-side up on a baking sheet lined with foil or parchment (for easy cleanup). Make sure they’re not crowded so the skin can crisp up. Roast for 35-40 minutes, until the skin is deeply golden, crispy, and the internal temperature hits 165°F when checked with a meat thermometer. Pro-Tip: If you want EXTRA crispy skin, switch your oven to broil for the last 2-3 minutes and watch it like a hawk!
- Make the Green Sauce: While the chicken is roasting, make your superstar sauce. It’s so easy. Simply combine the cilantro, jalapeño(s), garlic, mayo, Greek yogurt, lime juice, olive oil, salt, and that optional parmesan in a blender or food processor. Blend until it’s completely smooth and vibrant green. Stop, scrape down the sides, and taste. This is your moment! Need more salt? More lime? A pinch more heat? Adjust it to your heart’s content. Pour it into a bowl and pop it in the fridge. The flavors get even better as they mingle.
- Rest and Serve: Once the chicken is out of the oven, let it rest for 5-10 minutes on the pan. This lets the juices redistribute so every bite is succulent, not dry. This is a chef’s rule you never want to skip!
Bringing It All to the Table
Presentation is part of the fun! I love serving this family-style for that “gather round” feeling. Spread a big bed of fluffy white rice (or cilantro-lime rice for extra punch!) on a large platter. Nestle those gorgeous, crispy chicken thighs right on top. Now, take that bowl of green sauce and either drizzle it generously over everything or serve it right on the side in a little bowl with a spoon—because people will want extra. Scatter some fresh cilantro leaves over the top and wedge a few lime halves around the edges. The final touch? A big, confident squeeze of lime over everything right at the table. Dig in!
Make It Your Own: Fun Twists & Swaps
This recipe is a fantastic canvas. Here’s how to play with it:
- Grill It! For incredible smoky flavor, cook the marinated chicken on a medium-high grill (or grill pan) until cooked through and charred in spots.
- Spice Level Play: For a milder sauce, use a poblano pepper. For a fruity, unique heat, add a spoonful of chopped habanero (carefully!).
- Dairy-Free/Different Creamy Base: Swap the mayo and yogurt for ½ cup of vegan mayo or even ripe, mashed avocado for a super fresh, green version.
- Veggie-Packed: Add a handful of baby spinach or arugula to the blender with the cilantro for an extra nutrient boost in your sauce.
- Leftover Magic: Shred the leftover chicken, mix it with more green sauce, and stuff it into warm tortillas or lettuce cups for epic next-day tacos.
Olivia’s Kitchen Notes & Stories
This recipe has been on quite a journey in my kitchen! The first time I made it alone, I was so nervous I quadruple-checked every measurement. Now, I make the marinade by feel and taste, and the sauce is a “little of this, little of that” affair. It’s become my go-to for impressing guests without stress—it always gets rave reviews and recipe requests.
A funny story: I once accidentally used hot paprika instead of smoked. Let’s just say we had VERY spicy Peruvian chicken that night! We powered through with extra yogurt in the sauce and lots of laughter. It’s a good reminder that cooking is an adventure, and even the “mistakes” can be delicious. The green sauce has also evolved. The parmesan cheese was a happy accident one day when I was cleaning out the fridge, and now I can’t imagine it without that savory depth. Don’t be afraid to make it your own!
Your Questions, Answered!
Q: My green sauce turned out too runny. What did I do wrong?
A: No worries! This usually happens if the herbs are very wet or if you added a bit too much lime/oil. The fix is easy: add more mayo or Greek yogurt, a tablespoon at a time, and blend again until it thickens up. You can also add a few more cilantro leaves.
Q: Can I use chicken breasts instead of thighs?
A> You can, but be extra vigilant. Boneless, skinless breasts cook much faster and can dry out. If using them, reduce the oven time to 20-25 minutes and use a meat thermometer to pull them out at 165°F exactly. I’d recommend keeping the skin on for bone-in breasts for better flavor and moisture.
Q: How long does the green sauce last in the fridge?
A> It keeps beautifully for up to 5 days in a sealed container. The color may darken slightly, but the flavor is still fantastic. It’s amazing on eggs, sandwiches, roasted veggies, or as a dip.
Q: I don’t have a blender. Can I make the sauce?
A> Yes! You can make a more rustic version by very finely chopping the cilantro and jalapeño, then whisking everything together in a bowl. It won’t be super smooth, but it will still be incredibly tasty.

Flavorful Peruvian Chicken with Green Sauce : Bold, Smoky, and Addictively Good
Description
Hey there, friend! If dinner ever needs to feel like a mini escape, this Peruvian Chicken with Green Sauce is your ticket. The aroma alone—garlic, cumin, lime, and smoky paprika—sets the mood before the first bite. Juicy, spice-rubbed chicken pairs with a vibrant, creamy green sauce that’s fresh, tangy, and completely addictive.
Ingredients
For the Peruvian Chicken
-
4–6 bone-in, skin-on chicken thighs
-
2 tablespoons olive oil
-
Juice of 1 lime
-
4 garlic cloves, minced
-
1½ teaspoons ground cumin
-
1 teaspoon smoked paprika
-
1 teaspoon dried oregano
-
½ teaspoon ground coriander
-
Salt and freshly ground black pepper, to taste
For the Creamy Green Sauce
-
1 cup fresh cilantro (leaves and tender stems)
-
1–2 jalapeños (seeds removed for mild, kept for heat)
-
1 garlic clove
-
¼ cup mayonnaise
-
¼ cup Greek yogurt or sour cream
-
1 tablespoon lime juice
-
1 tablespoon olive oil
-
Salt, to taste
-
Optional: 1 tablespoon grated Parmesan cheese
Instructions
1. Marinate the Chicken
In a large bowl, whisk together olive oil, lime juice, garlic, cumin, smoked paprika, oregano, coriander, salt, and pepper. Add chicken and massage the marinade all over, including under the skin.
Cover and marinate for at least 30 minutes (overnight for best flavor).
2. Roast the Chicken
Preheat oven to 425°F (220°C).
Arrange chicken skin-side up on a lined baking sheet, leaving space between pieces.
Roast for 35–40 minutes, until skin is crispy and internal temperature reaches 165°F (74°C).
Optional: Broil for 2–3 minutes at the end for extra crispiness (watch closely).
Let rest for 5–10 minutes before serving.
3. Make the Green Sauce
While the chicken cooks, add all green sauce ingredients to a blender or food processor.
Blend until smooth and vibrant. Taste and adjust salt, lime, or heat as needed.
Chill until ready to serve—flavor improves as it rests.
Serving Suggestions
-
Serve over steamed white rice or cilantro-lime rice
-
Add roasted potatoes or corn on the cob
-
Drizzle sauce generously—or serve on the side for dipping
-
Finish with fresh cilantro and extra lime wedges
Notes
-
Chicken thighs are best for juiciness and flavor
-
Fresh lime juice matters—it brightens everything
-
Let the sauce rest at least 10 minutes for best flavor
-
Salt the sauce well—it brings all the herbs to life
Nutritional Information (Approximate, per serving with sauce)
Calories: 460 | Protein: 30g | Fat: 34g | Carbohydrates: 6g | Fiber: 1g | Sugar: 1g | Sodium: 360mg
Final Thoughts: More Than Just a Meal
So there you have it—the story, the spices, and the steps to one of my kitchen’s greatest hits. But this Peruvian chicken is more than just a collection of ingredients and instructions. It’s a reminder of what I love most about cooking: its power to transport, connect, and delight.
Every time the scent of toasted cumin and garlic fills my kitchen, I’m reminded that adventure doesn’t require a plane ticket. Sometimes, it’s waiting in a paste of smoked paprika and lime, or whirring away in a blender until it turns electric green. This dish is a celebration of bold, uncomplicated flavors that work in perfect harmony. It proves that “global” cooking can be wonderfully approachable, and that the most memorable meals are often the ones shared with laughter and maybe a little sauce on your chin.
I hope this recipe becomes more than just a dinner in your home. I hope it becomes a conversation starter at your table, a solution for a busy Tuesday, and a reason to gather friends on a Friday. Most of all, I hope it inspires you to play, to taste fearlessly, and to create your own delicious stories.
Now, go forth, roast that chicken, and blend that sauce. Your flavor adventure awaits.
With love from my kitchen to yours,
Olivia

Pesto Chicken Tortellini Skillet with Asparagus and Tomatoes
Pesto Chicken Tortellini Skillet: Your New Favorite 30-Minute Dinner
Hey there, friend! Come on in, pull up a stool, and let me tell you about the dinner that’s been on repeat in my kitchen lately. You know those nights when you crave something that feels special, vibrant, and deliciously comforting, but the clock is loudly ticking past 6 PM? Yeah, me too. That’s exactly why I created this Pesto Chicken Tortellini Skillet.
Imagine this: tender bites of chicken, plush cheese-filled tortellini, crisp-tender asparagus, and sweet, juicy tomatoes, all dancing together in a glorious, fragrant basil pesto sauce. And the best part? It all happens in one single skillet in about 30 minutes. This isn’t just a meal; it’s a burst of sunshine on a plate. It’s the kind of dish that makes everyone at the table lean in for a second helping, and makes you, the brilliant cook, look like a total rockstar with minimal fuss.
Whether you’re a seasoned home cook or just finding your way around a sauté pan, this recipe is for you. It’s forgiving, flexible, and packed with tips from my kitchen to yours. So, tie on that apron (the messy one is welcome here!), and let’s make something incredibly tasty together.
Why This Skillet Holds a Special Place in My Heart
This recipe always takes me right back to my first tiny apartment kitchen. It was the size of a postage stamp, with exactly one usable burner and a window that looked out onto a fire escape. But when spring would hit the city, the farmers’ markets would explode with the most beautiful bundles of asparagus and pints of cherry tomatoes that looked like little gems.
I lived for those market hauls. One particular Saturday, I had friends coming over last-minute, and my budget (and kitchen space) was limited. I had some chicken, a package of tortellini from the corner deli, pesto in my fridge, and that beautiful market produce. In a moment of “what do I have to lose?” energy, I tossed it all in my one decent skillet. The smell of garlicky pesto and roasting vegetables filled my whole apartment, and my friends’ faces when I brought that colorful, steaming pan to the fold-out table… pure magic. It was a reminder that the best meals aren’t about perfection; they’re about flavor, color, and sharing. That’s the spirit I want you to bring to your kitchen tonight.
Gathering Your Flavor Crew
Here’s your shopping list for this flavor party. Don’t stress about exactitudes—cooking is about intuition! I’ve included my favorite tips and swaps for each ingredient.
- 1 lb boneless, skinless chicken breast, cut into bite-sized pieces: The protein anchor. Cutting it evenly ensures everything cooks at the same time. Chef’s Tip: For even more flavor, you can use chicken thighs! They’re juicier and a bit more forgiving if you overcook them slightly.
- 1 tbsp olive oil: Our cooking workhorse. It adds a subtle fruitiness and prevents sticking.
- Salt and freshly ground black pepper to taste: The fundamental flavor boosters. Please, please season your chicken well before it hits the pan—it makes all the difference.
- 1½ cups cherry or grape tomatoes, halved: I love a mix of red and yellow for maximum color pop! They burst slightly in the heat, creating little pockets of sweet, acidic juice that becomes part of the sauce. Substitution: Sun-dried tomatoes (packed in oil, chopped) will add an intense, sweet-savory punch.
- 1 bunch of asparagus, trimmed: The taste of spring! Look for firm, bright green stalks with tight tips. To trim, just snap the woody ends off—they’ll naturally break where the tough part begins.
- 1 package (about 9 oz) refrigerated cheese tortellini: The comforting, cheesy heart of the dish. I love the three-cheese blend. Chef’s Insight: Using refrigerated (not dried) tortellini is key here for the quick cook time and tender texture. Feel free to use spinach tortellini or mushroom tortellini for a different twist!
- ⅓ cup pesto (homemade or a good-quality store-bought): The flavor superstar. A vibrant pesto brings the basil, garlic, pine nut, and parmesan party. Pro Tip: If you’re using store-bought, give it a taste first. Sometimes I stir in an extra handful of freshly grated parmesan or a squeeze of lemon juice to brighten it up.
- Optional: Freshly grated Parmesan cheese and a sprinkle of red pepper flakes for serving: The finishing touches! The parmesan adds a salty, umami-rich finish, and a pinch of red pepper flakes gives the slightest warmth.
Let’s Get Cooking: Your Foolproof Steps to Skillet Success
Ready? Let’s turn these beautiful ingredients into dinner. I’ll walk you through each step with all my favorite kitchen hacks to ensure perfection.
- Prep is Power: Before you even turn on the stove, do all your chopping! Cut the chicken into 1-inch cubes, halve the tomatoes, and trim the asparagus. This “mise en place” (everything in its place) makes the cooking process feel like a smooth, relaxing dance instead of a frantic scramble. My Little Hack: Season your chicken pieces generously with salt and pepper while they’re on the cutting board. This gives the seasoning time to penetrate.
- Cook the Tortellini: Bring a pot of salted water to a boil and cook the tortellini according to the package directions for *al dente* (usually just 2-3 minutes for fresh). Drain it, but do not rinse! That tiny bit of starch helps the pesto cling to every nook and cranny. Set it aside. Chef’s Whisper: I sometimes drizzle a tiny bit of olive oil over the drained tortellini and give it a gentle toss to prevent sticking while it waits.
- Brown That Chicken: Heat the olive oil in a large skillet (I use a 12-inch cast iron or stainless steel) over medium-high heat. Once the oil shimmers, add the chicken in a single layer. Don’t crowd the pan! We want a golden sear, not steam. Cook for 3-4 minutes per side until beautifully browned and cooked through. Transfer the chicken to a clean plate. See those golden bits left in the pan? That’s flavor gold—we’re building our sauce right there.
- Sauté the Veggies: In that same glorious skillet (no need to wash it!), add the asparagus spears. Sauté for 4-5 minutes, until they turn bright green and are tender-crisp. You should be able to pierce them with a fork, but they should still have a pleasant snap. Now, add the halved tomatoes and cook for just 1-2 minutes more. We want them warmed through and just starting to soften and release their juices, but not completely mushy.
- The Grand Reunion: Return the cooked chicken (and any juices from the plate!) to the skillet. Add the cooked tortellini. Dollop the pesto over everything. Here’s the fun part: using a gentle folding motion, toss everything together until every piece of chicken, tortellini, and vegetable is lovingly coated in that vibrant green sauce. Let it heat through for a final minute or two, so all the flavors get to know each other.
Plating Your Masterpiece
Serving this is a joy. I love to bring the whole skillet right to the table—it’s rustic, inviting, and means fewer dishes to wash! Use a big spoon to scoop generous portions into shallow bowls. The final flourish is everything: a generous shower of freshly grated Parmesan cheese, a few cracks of black pepper, and maybe a pinch of red pepper flakes for those who like a kick. A simple green salad with a lemon vinaigrette or a slice of crusty, warm bread to soak up any extra sauce is the perfect sidekick.
Make It Your Own: Delicious Twists & Swaps
This recipe is a fantastic canvas! Here are a few ways to play with it:
- “Creamy Dreamy” Version: Stir in ¼ cup of heavy cream or full-fat coconut milk with the pesto for an ultra-luxurious, creamy sauce.
- Seafood Swap: Replace the chicken with large shrimp or scallops. Cook them quickly (just 1-2 minutes per side) before setting aside and adding back at the end.
- Vegetarian/Vegan Delight: Omit the chicken. Use vegan cheese tortellini and a dairy-free pesto. For extra protein, add a can of drained and rinsed white beans or chickpeas when you add the tortellini.
- Summer Squash Slam: In peak summer, swap the asparagus for sliced zucchini or yellow squash. Sauté just until tender.
- Lemon Zest Zing: Add the zest of one lemon when you add the pesto. It brightens the whole dish phenomenally.
From My Kitchen to Yours: A Few Parting Thoughts
This skillet dinner has evolved from that scrappy apartment meal into my ultimate back-pocket dinner party savior. Over the years, I’ve learned a few things: don’t skimp on searing the chicken, embrace the colorful veggies, and always, always make a little extra because someone will inevitably want seconds. One funny fail? I once tried to shortcut by cooking the raw tortellini directly in the skillet with broth. Friends, it was a starchy, gloppy mess. Lesson learned: boil the pasta separately for the perfect texture.
The beauty of this recipe is in its simplicity and adaptability. It’s a reflection of how I love to cook: with heart, a bit of intuition, and a focus on ingredients that make you smile. I hope it becomes a trusted friend in your recipe rotation, too.
FAQs & Kitchen Rescue Tips
Q: Can I make this ahead of time?
A: You can prep the components! Cook the tortellini, chop the veggies, and cube the chicken ahead (store them separately). When ready to eat, just sauté and combine. The assembled dish is best eaten fresh, as the tortellini can soak up the sauce and soften over time.
Q: My pesto seems thick and isn’t coating everything well. Help!
A: No problem! Pesto can vary in thickness. Simply thin it out with a tablespoon or two of the pasta cooking water, a splash of olive oil, or even a little lemon juice before adding it to the skillet. This will help it become a silky sauce that coats everything beautifully.
Q: Can I use frozen tortellini?
A: You can, but you’ll need to adjust the method. Boil the frozen tortellini separately according to package directions first. Don’t add it to the skillet frozen, as it will release too much starch and water and won’t cook evenly with the other ingredients.
Q: My asparagus is either too crunchy or too mushy. What’s the secret?
A> The key is the size of your asparagus and the heat of your pan. For standard spears, 4-5 minutes over medium heat is perfect. If your spears are very thick, consider slicing them in half lengthwise. If they’re super thin (pencil asparagus), reduce the cook time to 2-3 minutes. You want that vibrant green color and a tender-crisp bite.
Pesto Chicken Tortellini Skillet with Asparagus and Tomatoes
Description
Hey there, friend! This is one of those dinners that looks like you tried really hard—but secretly comes together in about 30 minutes, all in one skillet. Juicy chicken, cheesy tortellini, crisp asparagus, and sweet tomatoes are tossed in vibrant basil pesto for a meal that feels fresh, comforting, and a little bit fancy.
Ingredients
-
1 lb (450 g) boneless, skinless chicken breast, cut into bite-size pieces
-
1 tablespoon olive oil
-
Salt and freshly ground black pepper, to taste
-
1½ cups cherry or grape tomatoes, halved
-
1 bunch asparagus, trimmed and cut into 2-inch pieces
-
1 package (about 9 oz / 250 g) refrigerated cheese tortellini
-
⅓ cup basil pesto (homemade or good-quality store-bought)
Optional for serving:
-
Freshly grated Parmesan cheese
-
Red pepper flakes
Instructions
-
Cook the tortellini
Bring a pot of well-salted water to a boil. Cook tortellini according to package directions until al dente. Drain and set aside (do not rinse). -
Season and cook the chicken
Season chicken generously with salt and pepper. Heat olive oil in a large skillet over medium-high heat. Add chicken in a single layer and cook 3–4 minutes per side until golden and cooked through. Remove to a plate. -
Sauté the vegetables
In the same skillet, add asparagus and sauté for 4–5 minutes until bright green and tender-crisp. Add tomatoes and cook 1–2 minutes, just until slightly softened. -
Bring it all together
Return chicken (and any juices) to the skillet. Add cooked tortellini and pesto. Gently toss until everything is evenly coated and warmed through, about 1–2 minutes. -
Serve
Taste and adjust seasoning. Serve hot with Parmesan and red pepper flakes if desired.
Notes
-
Use refrigerated tortellini for the best texture and fastest cooking time
-
Don’t crowd the chicken—a good sear equals better flavor
-
Thin thick pesto with a splash of pasta water, olive oil, or lemon juice
-
Cut asparagus evenly so it cooks at the same rate
Nutritional Information*
*This is an estimate for informational purposes, based on the specific ingredients listed and using a nutrition calculator.
- Prep Time: 10 minutes
- Cook Time: 20 minutes
- Total Time: 30 minutes
- Servings: 4
Estimated Per Serving: Calories: 480 | Protein: 35g | Carbohydrates: 34g | Dietary Fiber: 5g | Sugars: 4g | Fat: 22g | Saturated Fat: 5g | Sodium: 590mg
Final Thoughts: More Than Just a Meal
So, there you have it—the story, the steps, and the secrets behind my beloved Pesto Chicken Tortellini Skillet. But more than just a recipe, I hope this gives you a little slice of confidence and joy in the kitchen.
Remember, the magic isn’t in following the instructions perfectly. It’s in the sizzle of the chicken hitting the pan, the vibrant green of the pesto coating every bite, and the simple pleasure of gathering around a table to share something made with your own two hands. This recipe is a reminder that a truly great dinner doesn’t have to be complicated. It just has to be made with a bit of heart (and one trusty skillet).




