

Fluffy Cheddar Cheese Muffins with Chives : Easy, Savory, and Irresistible!
The Ultimate Comfort in a Cup: My Fluffy Cheddar Cheese Muffins with Chives
Hello, my fellow flavor-chasers! Olivia here. If you’ve spent any time in my kitchen (and I hope you feel like you have!), you know there are two sounds that make my heart do a little happy dance: the soft “whoosh” of the oven door opening, and the collective “mmm…” that follows when something warm and cheesy lands on the table. Today, I’m sharing a recipe that’s a master of both ceremonies: my beloved Fluffy Cheddar Cheese Muffins with Chives.
Imagine this: you pull a tray from the oven, and there they are. Golden-brown crowns, slightly craggy and utterly inviting, with little flecks of emerald-green chives peeking out. The air smells like toasted cheese and warm bread, a scent that can rally anyone to the kitchen table. You break one open, and steam wafts up, revealing a tender, feather-light crumb woven with ribbons of melted, sharp cheddar cheese. It’s not just a muffin; it’s a hug in edible form.
These muffins are my secret weapon. They’re the perfect partner for a steaming bowl of tomato soup on a rainy day, the star of a lazy weekend brunch board, and the ultimate “I-made-this-for-you” snack tucked into a lunchbox. The best part? They come together in one bowl (almost!) and are ready in just 30 minutes. No fancy skills required, just a love for good, simple, cozy food. So, tie on that apron—the messy ones are the most loved—and let’s bake some joy.
A Panic, a Party, and the Birth of a Go-To Recipe
I have to confess, these muffins were born from a near-crisis. A few years back, I was hosting a last-minute, casual dinner for a big group of friends. The plan was a giant pot of chili—foolproof, right? As everyone was arriving, laughing and filling the house with noise, I realized my cornbread wasn’t rising. It was a sad, dense puck in the cast iron. Cue the internal panic!
With people already here, I did what any slightly-frazzled home cook would do: I winged it. I grabbed my basic muffin tin, whisked together the simplest savory batter I could think of, and emptied an entire bag of leftover sharp cheddar into the bowl. I snipped some chives from the window sill herb garden that was barely hanging on. In a flurry, I popped them in the oven, not expecting much.
Twenty minutes later, I pulled out a tray of the most glorious, puffed, cheesy, golden muffins. They were an instant sensation. The chili was great, but those impromptu cheese muffins stole the show. Everyone begged for the recipe, and I had to sheepishly admit I didn’t have one. That night, I knew I had to recreate and perfect that happy accident. Now, this recipe is a testament that sometimes the best things in the kitchen—and in life—come from a little bit of beautiful chaos.
Gathering Your Flavor Allies: The Ingredients Breakdown
Let’s talk about our team players! Every ingredient here has a purpose, and knowing the “why” makes you a more confident cook. Here’s what you’ll need:
- 2 cups all-purpose flour: The reliable foundation. It gives our muffins structure. For a slightly more tender crumb, you can swap out 1/2 cup with cake flour. Chef’s Insight: For accuracy (and less cleanup!), I fluff the flour in its bag, spoon it gently into the measuring cup, and level it off with a knife. No compacting!
- 2 tsp baking powder: Our leavening hero! This is what gives the muffins their signature lift and fluffy texture. Make sure yours is fresh—if it doesn’t fizz when you add a pinch to hot water, it’s time for a new can.
- 1 tsp salt: The flavor enhancer. Don’t skip it! Salt makes the cheese and butter flavors truly sing by balancing everything out.
- 1½ cups shredded sharp cheddar cheese: The star of the show! I insist on sharp or extra-sharp cheddar for maximum flavor impact. Pre-shredded bags contain anti-caking agents that can make things a bit gummy, so I always grab a block and shred it myself for the best melt. (It’s a great arm workout, I promise!).
- 2 large eggs, at room temperature: Our binders and tenderizers. Room temp eggs incorporate more evenly into the batter, leading to a better rise. In a hurry? Place cold eggs in a bowl of warm water for 5 minutes.
- 1 cup milk: The hydrator. Whole milk will give you the richest flavor and texture, but 2% works beautifully too. For a dairy-free version, unsweetened almond or oat milk are great substitutes.
- ½ cup (1 stick) unsalted butter, melted: This adds incredible moisture, tenderness, and that irresistible buttery flavor. Using unsalted lets you control the salt level perfectly. Let it cool slightly before mixing so it doesn’t cook the eggs!
- 2 tbsp chopped fresh chives: The fresh, aromatic finish. They add a mild oniony pop and gorgeous color. In a pinch, 1 tbsp of dried chives works, or try the green parts of thinly sliced scallions.
Let’s Get Baking: The Foolproof, Step-by-Step Guide
Ready? This is where the magic happens. Follow these steps, embrace the tips, and you’ll have perfect muffins every single time.
Step 1: Preheat & Prep. Crank that oven to 400°F (200°C). This high heat is key for that initial explosive rise that creates the beautiful muffin top. While it heats, generously grease your 12-cup muffin tin with butter or non-stick spray, or line it with paper liners for super-easy cleanup. I’m a fan of liners for muffins this cheesy—they prevent any stubborn sticking.
Step 2: The Dry Team Huddle. In a large mixing bowl, take your whisk and energetically blend together the flour, baking powder, and salt. You’re not just mixing; you’re aerating the flour and ensuring the baking powder is evenly distributed. This simple act guarantees every muffin gets an equal share of lift. Set this bowl aside.
Step 3: The Wet Team Mix. In another medium bowl, whisk your room-temperature eggs until they’re just broken up and uniform. Pour in the milk and the slightly cooled melted butter. Whisk it all together until it’s a smooth, homogenous, pale yellow liquid. See those tiny bubbles forming on the surface? That’s a good sign!
Step 4: The Grand (Gentle) Union. Here’s the most crucial step for fluffy muffins: DO NOT OVERMIX. Pour the wet ingredients into the bowl with the dry ingredients. Using a rubber spatula or a wooden spoon, gently fold them together. Stir just until the last traces of dry flour disappear. The batter will be lumpy and thick, and that is PERFECT. Overmixing develops gluten, leading to tough, dense muffins. We want tender, cloud-like crumbs!
Step 5: Fold in the Goodies. While there are still a few streaks of flour visible, dump in your gorgeous pile of shredded cheddar and the bright green chives. Fold them in gently, just 4-5 folds, until they’re evenly dispersed. Let the batter rest for 2 minutes while you get your muffin tin ready. This allows the flour to fully hydrate.
Step 6: Fill ‘Er Up! Using a large spoon or an ice cream scoop (my secret weapon for even portions!), divide the batter among the 12 muffin cups. Fill each one about ¾ of the way full. Don’t be shy—this gives them room to rise into that perfect domed shape we love.
Step 7: Bake to Golden Perfection. Slide the tin into your preheated oven. Now, set your timer for 18 minutes, but don’t wander too far. Ovens vary, so at the 18-minute mark, check them. They’re done when the tops are golden, the edges are just starting to pull away from the tin, and a toothpick inserted into the center comes out clean (maybe with a little melted cheese, but no wet batter). This can take up to 22 minutes.
Step 8: The Finishing Touch (Optional, but Highly Recommended). The minute you pull them from the oven, brush the tops with a little extra melted butter. This gives them a gorgeous glossy sheen, adds a whisper more buttery flavor, and keeps the tops soft. It’s my non-negotiable chef hack!
Step 9: The (Brief) Wait. Let the muffins cool in the tin for exactly 5 minutes. This allows them to set so they don’t fall apart when you take them out. Then, transfer them to a wire rack. I know it’s hard, but try to let them cool for another 5-10 minutes. That molten cheese is dangerously hot! Serve warm.
How to Serve These Savory Stars
Presentation is part of the joy! Pile these warm muffins into a rustic basket lined with a checkered napkin for that homemade, welcoming feel. They are incredible all on their own, but they truly shine as part of a meal. Serve them alongside a creamy tomato basil soup or a hearty chili for the ultimate cozy dinner. For brunch, pair them with scrambled eggs and crispy bacon. Or, simply split one open, spread it with a little soft herb butter, and savor the moment.
Get Creative: Recipe Twists & Swaps
Once you’ve mastered the classic, make it your own! Here are a few of my favorite riffs:
- Everything Bagel Style: Fold in 2 tbsp of everything bagel seasoning with the chives. Before baking, sprinkle the tops with more seasoning and sesame seeds.
- Jalapeño Popper: Add 1-2 finely diced jalapeños (seeds removed for mild, kept for heat) and swap ½ cup of the cheddar for cream cheese, diced into small cubes.
- Herb Garden Delight: Swap chives for a mix of fresh dill, parsley, and thyme for a more complex herbal note.
- Gluten-Free: Use a 1:1 gluten-free all-purpose flour blend (like Bob’s Red Mill) and ensure your baking powder is GF.
- Bacon & Cheddar: Fold in ½ cup of cooked, crumbled crispy bacon for the ultimate savory treat.
Olivia’s Chef Notes & Kitchen Confessions
This recipe has evolved from that first panicked batch! I’ve learned that the brand of cheddar matters—a good, aged supermarket block works wonders. I’ve also started adding a tiny pinch of smoked paprika or garlic powder to the dry ingredients sometimes, just for a hidden layer of flavor. My biggest kitchen story? I once, in a sleepy morning haze, accidentally used powdered sugar instead of flour. Do not recommend. The resulting “muffins” were a sweet, cheesy, bizarre puddle. We laughed about it over proper, savory ones the next day. The moral: always turn on the kitchen light before you bake! And remember, even the flops make good stories.
Your Questions, Answered: FAQs & Troubleshooting
Q: My muffins turned out dense and heavy. What happened?
A: The most common culprit is overmixing the batter. Remember, fold just until combined—lumps are your friend! Also, check your baking powder’s freshness. If it’s old, it won’t provide the necessary lift.
Q: Why did my cheese sink to the bottom?
A: This usually happens if the cheese shreds are too large or wet. Make sure to shred your own cheese from a block (it’s drier) and toss the shreds in a tablespoon of the measured flour before folding them in. This light coating helps suspend them throughout the batter.
Q: Can I make these ahead of time?
A: Absolutely! Bake them, let them cool completely, and store in an airtight container at room temp for 2 days, or freeze for up to 3 months. To reheat, warm in a 350°F oven for 10 minutes or microwave for 15-20 seconds.
Q: My muffin tops didn’t dome. They’re flat.
A> This could be from an oven that wasn’t hot enough. Make sure it’s fully preheated to 400°F. Also, don’t overfill the cups—¾ full is the sweet spot. Finally, avoid opening the oven door during the first 15 minutes of baking.

Fluffy Cheddar Cheese Muffins with Chives : Easy, Savory, and Irresistible!
Description
Golden-brown, cheesy, and flecked with fresh chives, these muffins are a cozy hug in edible form. Perfect alongside tomato soup, chili, or a weekend brunch, they’re quick, simple, and irresistibly fluffy.
Ingredients
Dry Ingredients:
-
2 cups all-purpose flour (or swap ½ cup for cake flour for a more tender crumb)
-
2 tsp baking powder
-
1 tsp salt
Wet & Flavor Ingredients:
-
2 large eggs, room temperature
-
1 cup milk (whole or 2%; almond/oat milk works too)
-
½ cup (1 stick) unsalted butter, melted and slightly cooled
-
1½ cups shredded sharp cheddar cheese (shred from a block for best results)
-
2 tbsp chopped fresh chives (or 1 tbsp dried chives)
Optional Finish:
-
Extra melted butter for brushing tops
Instructions
-
Preheat & Prep:
-
Heat oven to 400°F (200°C).
-
Grease a 12-cup muffin tin or line with paper liners.
-
-
Mix Dry Ingredients:
-
Whisk together flour, baking powder, and salt in a large bowl.
-
-
Mix Wet Ingredients:
-
In another bowl, whisk eggs, milk, and slightly cooled melted butter until smooth.
-
-
Combine (Gently!):
-
Pour wet ingredients into dry. Fold with a spatula or wooden spoon until just combined. Lumps are perfect—don’t overmix.
-
-
Fold in Cheese & Chives:
-
Add cheddar and chives. Fold gently 4–5 times to evenly distribute. Let batter rest 2 min.
-
-
Fill Muffin Cups:
-
Using a spoon or ice cream scoop, fill each cup ~¾ full.
-
-
Bake:
-
Bake 18–22 min until golden, edges slightly pull away, and a toothpick inserted comes out clean (some melted cheese is fine).
-
-
Optional Finish:
-
Brush tops with melted butter for extra sheen and flavor.
-
-
Cool Slightly & Serve:
-
Let muffins cool 5 min in the tin, then transfer to a wire rack. Serve warm.
-
Notes
-
Dense muffins? Likely overmixing or old baking powder. Fold gently and ensure leavening is fresh.
-
Cheese sinks? Toss shreds in 1 tbsp flour before folding.
-
Flat tops? Oven too cool, batter overfilled, or opened oven door too early.
Nutritional Information (Per Muffin)
Calories: ~210 | Protein: 7g | Carbohydrates: 22g | Fat: 12g (Saturated Fat: 7g) | Cholesterol: 60mg | Sodium: 350mg | Fiber: 1g | Sugar: 1g
Note: Nutritional information is an estimate provided for convenience and may vary based on specific ingredients and brands used.
Final Thoughts: The Quiet Magic of a Simple Muffin
In a world that often feels overwhelmingly complex, there is a profound comfort in simplicity. These Cheddar Cheese Muffins with Chives are a testament to that truth. They aren’t fussy or fragile. They are humble, hearty, and deeply reliable—the kind of food that feels like a grounding force in a chaotic day.
What I love most about this recipe is its generous spirit. It asks for little—a few pantry staples, a single bowl, half an hour of your time—and gives back so much: warmth, nourishment, and the undeniable joy of sharing something made by hand. It’s a recipe that builds confidence, reminding you that great cooking isn’t about perfection; it’s about the intention you stir into the bowl.
So, whether you’re serving them to a crowd with a pot of soup, packing one as a secret treat in a lunchbox, or simply enjoying a warm muffin with your afternoon tea, remember this: you’re not just baking a snack. You’re creating a small, delicious moment of pause. You’re crafting an edible reminder that the best comforts are often the simplest ones, rising golden and fragrant from your own oven.
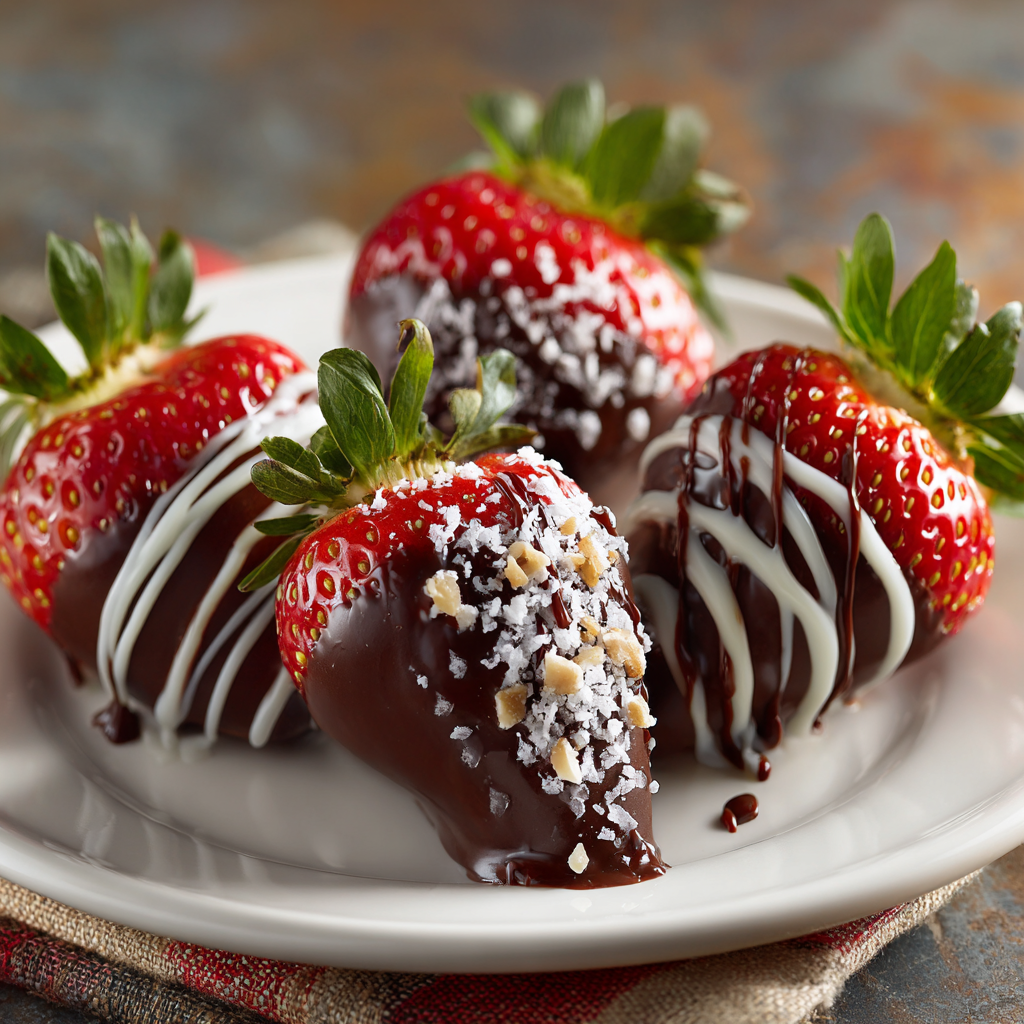
Easy Chocolate-Covered Strawberries : Classic 3-Step Treat
Your New Favorite 3-Ingredient Miracle: Chocolate-Covered Strawberries
Hey there, friend! Come on in, grab an apron, and let’s make something magical happen. Is there anything more universally delightful than a chocolate-covered strawberry? That perfect, glossy sheen, the crack of dark chocolate giving way to a juicy, sweet-tart berry… it’s a tiny, handheld masterpiece. And the best part? You don’t need to be a pastry chef to pull it off. I’m here to show you that creating stunning, elegant treats can be one of the simplest, most joyful acts in the kitchen.
Maybe you’re looking for a last-minute Valentine’s surprise, a charming addition to a party platter, or just a little “you deserve it” moment on a Tuesday afternoon. This is your recipe. With just three main ingredients and a method so easy you’ll have it memorized after one try, we’re turning humble components into pure celebration. Forget complicated tempering and fancy equipment. We’re going for approachable, foolproof, and utterly delicious. So, let’s ditch the intimidation and embrace the fun. I promise, by the end of this, you’ll be dipping strawberries like a pro, feeling that wonderful buzz that comes from creating something beautiful with your own two hands. Ready to make some magic?
A Sweet Start: My First (Slightly Melty) Kitchen Triumph
My love affair with chocolate-dipped strawberries started not in a fancy kitchen, but at my grandmother’s wobbly Formica table. I was about seven, wearing an apron that was basically a dish towel with a neck strap, and my mission was to create a “restaurant” dessert for my parents’ anniversary. Grandma, ever the patient co-conspirator, set out a bag of chocolate chips and a pint of berries. We used a makeshift double boiler—a heatproof bowl perched precariously over a pot of simmering water. I remember the intense focus of holding the strawberry by its leafy crown, the thrilling moment of the dip, and the agonizing wait as they chilled on her vintage floral platter.
They were… lumpy. Some had way too much chocolate, others had suspicious fingerprints, and they all softened quickly in our warm kitchen. But when I presented them to my beaming parents, it was like I’d brought out the crown jewels. That moment—the messy, heartfelt, *homemade* effort being met with pure delight—stuck with me. It taught me that the best food isn’t about perfection; it’s about the intention and the shared joy. Every time I make these now, I get a little flash of that childhood pride. And now, with a few chef-approved hacks up my sleeve, I can help you make versions that are both stunning *and* structurally sound!
What You’ll Need: A Closer Look at Your Ingredients
Great food starts with great ingredients, but don’t stress—this is a short list! Here’s the breakdown of what you need and why each component matters.
- 1 pound fresh strawberries – This is your canvas! Look for berries that are bright red, firm, and fragrant, with bright green leaves (called the hull or calyx) attached. The leaves are your built-in handle, so don’t remove them! Size is up to you, but medium to large berries give you more to dip. Chef’s Insight: Wash and dry them incredibly, painstakingly well. Any leftover water will cause the chocolate to seize up and become a grainy mess. I wash them, then pat them dry and let them air-dry on a towel for a bit. This step is non-negotiable for glossy chocolate!
- 1 cup semi-sweet chocolate chips or chopped baking chocolate – You have options here! Chocolate chips are convenient and melt fairly well. For a truly professional, snappy finish, I recommend using a chopped chocolate bar (look for brands like Ghirardelli or Baker’s in the baking aisle). It has less stabilizers than chips, so it melts more smoothly. Substitution Tip: Feel free to use dark, milk, or even white chocolate here. Just ensure it’s real chocolate (check for cocoa butter in the ingredients) for the best melting and setting properties.
- 1 teaspoon coconut oil or shortening (optional but recommended) – This is my secret weapon! Adding just a tiny bit of fat to your melting chocolate makes it more fluid for easier dipping, gives it a beautiful sheen, and helps it set a bit softer so it doesn’t crack when you bite into it. It’s a simple trick for a major upgrade.
- Toppings & Drizzles (Optional, but so fun!):
- Melted white or dark chocolate for drizzling
- Finely chopped nuts (pistachios, almonds, pecans)
- Sprinkles (choose colors for the season!)
- Crushed cookies or pretzels for a sweet & salty twist
- Shredded coconut or sea salt flakes
Chef’s Insight: Have your toppings ready in small bowls before you start dipping. You’ll need to add them while the chocolate is still wet!
Let’s Get Dipping: Your Foolproof 3-Step Process
Okay, everything is prepped and ready. Let’s transform these ingredients into something gorgeous. Follow these steps, lean into the process, and have fun with it!
- Prep Your Station. This is the “measure twice, cut once” of the dessert world. Line a baking sheet with parchment or wax paper. This prevents sticking and makes cleanup a breeze. Make absolutely sure your strawberries are bone-dry. Gather your toppings. Now, let’s melt! Chef’s Hack: If your kitchen is warm, pop your lined baking sheet in the freezer for 10 minutes before you start. A cold pan helps the chocolate set faster when you place the dipped berries down.
- Melt the Chocolate (The Gentle Way). Place your chocolate (and the teaspoon of coconut oil, if using) in a clean, dry, microwave-safe bowl. Heat in the microwave on 50% power for 30-second intervals. After each interval, stop and stir vigorously. Repeat until the chocolate is just about 90% melted—it should look mostly liquid with a few soft lumps. Keep stirring off the heat; the residual warmth will melt those last bits. This gentle method prevents the chocolate from burning, which can happen in an instant. Chef’s Commentary: If you’re a double-boiler fan, go for it! A heatproof bowl over a pot of barely simmering water (making sure the bowl doesn’t touch the water) works beautifully. It’s slower but gives you more control.
- The Dip & Decorate. Here’s the fun part! Hold a strawberry by its leafy stem. Swirl it in the melted chocolate, letting it coat about ¾ of the way up. Lift it out and let the excess chocolate drip back into the bowl for a few seconds—gently shake it or twirl your wrist. Place it on your prepared baking sheet. If you’re adding toppings like nuts or sprinkles, do it immediately after placing it on the sheet, before the chocolate sets. For a drizzle, wait until all berries are dipped and the chocolate is fully set, then use a fork or a small piping bag to zig-zag a different colored chocolate over the top. Chef’s Hack: For a perfect “foot” at the base of the strawberry, after dipping, touch the very tip of the berry to the parchment and pull it slightly toward you before releasing. This creates a little chocolate puddle that gives it a clean, finished look.
- The Chill. Once all your berries are beautifully adorned, carefully transfer the baking sheet to the refrigerator. Let them chill undisturbed for at least 30 minutes, or until the chocolate is completely firm to the touch. Chef’s Tip: No peeking! Letting them set fully is key for that satisfying snap.
Presenting Your Sweet Creations
You’ve made edible jewels, so let’s show them off! For a casual gathering, a simple rustic platter works perfectly. For something more elegant, place each strawberry in a mini paper cupcake liner and arrange them on a tiered stand. You can also pack them into a cute gift box lined with parchment or tissue paper—tie it with a ribbon for an instantly thoughtful homemade present. Remember, the contrast of the dark chocolate against the red berry is stunning, so don’t crowd them. Give them a little space to shine!
Mix It Up! Creative Twists on the Classic
The basic recipe is just the beginning. Once you’ve mastered it, play with these fun variations!
- “Turtle” Strawberries: After dipping in chocolate, roll in chopped pecans, then drizzle with caramel sauce after chilling.
- “Cookies & Cream”: Roll the wet chocolate-dipped berry in finely crushed Oreo cookie crumbs.
- “Zesty Delight”: Add a whisper of flavor by zesting an orange or a lime over the wet chocolate before it sets.
- “Pink & White Swirl”: Melt white chocolate separately. Dip the berry mostly in dark chocolate, then quickly drizzle with lines of white chocolate. Use a toothpick to swirl the two chocolates together for a marbled effect.
- “S’mores Style”: Dip in milk chocolate, then immediately roll in crushed graham cracker crumbs and a few mini marshmallow bits.
A Few More Thoughts from My Kitchen to Yours
This recipe has been my go-to for years, and it’s evolved with every batch. I’ve learned that a rainy or humid day can make the chocolate set slower and less crisply, so patience is key. I’ve also learned that kids (and kids-at-heart) absolutely love being put on “sprinkle duty.” It’s the perfect way to get little hands involved in the kitchen. One of my favorite kitchen stories involves a batch I made for a friend’s wedding shower. I was rushing and didn’t let the berries dry thoroughly… let’s just say I ended up with a bowl of delicious but decidedly un-dippable chocolate paste. We laughed, ordered pizza, and ate the berries plain with chocolate sauce for dipping. The lesson? Even the “failures” are fun. So don’t be afraid. Put on some music, embrace the process, and enjoy the sweet, sweet results.
Your Questions, Answered
Q: My chocolate got thick and grainy when I melted it. What happened?
A: This is called “seizing,” and it’s almost always caused by a tiny drop of water or steam getting into the chocolate. Chocolate and water are arch-nemeses! To fix it, try stirring in a teaspoon of warm vegetable oil or shortening (not butter, which contains water) until it smooths out. To prevent it, ensure all your bowls, spoons, and strawberries are completely dry.
Q: How far in advance can I make these?
A: For the absolute best texture and flavor, enjoy them within 24 hours. As they sit, the berry releases moisture into the chocolate shell, which can cause it to soften and sweat. Store them in a single layer in an airtight container in the refrigerator. Don’t let them sit out at room temperature for more than an hour or two, especially if it’s warm.
Q: Can I use frozen strawberries?
A: I wouldn’t recommend it for this recipe. Frozen strawberries become very soft when thawed and will release too much water, making it impossible to get a crisp chocolate shell. Fresh is definitely the way to go here.
Q: My chocolate won’t harden all the way, even after chilling. Why?
A> This could be a few things: 1) The chocolate may have been overheated. 2) The humidity is very high. 3) You may have used a chocolate that doesn’t set firmly (some “melting wafers” are designed to stay softer). Ensure your fridge is cold enough and give them more time. Placing them in the freezer for 10-15 minutes can help in a pinch, but let them come back to a cool fridge temp before serving to avoid condensation.

Easy Chocolate-Covered Strawberries : Classic 3-Step Treat
Description
These chocolate-covered strawberries are an easy, elegant treat perfect for Valentine’s Day, parties, or a little “treat yourself” moment. Glossy chocolate coats juicy, fresh berries, and optional toppings take them to the next level—without requiring any fancy equipment or tempering.
Ingredients
Main Ingredients:
-
1 lb fresh strawberries, washed and thoroughly dried (keep stems attached)
-
1 cup semi-sweet chocolate chips or chopped baking chocolate
-
1 tsp coconut oil or shortening (optional, for shine and smoother chocolate)
Optional Toppings & Drizzles:
-
Melted white or dark chocolate for drizzling
-
Chopped nuts (pistachios, almonds, pecans)
-
Sprinkles
-
Crushed cookies or pretzels
-
Shredded coconut or sea salt
Chef’s Insight: Prepare toppings in small bowls before dipping—the chocolate sets fast!
Instructions
-
Prep Your Station:
-
Line a baking sheet with parchment or wax paper.
-
Ensure strawberries are completely dry. Optional: chill the lined sheet in the freezer for 10 min to help chocolate set faster.
-
-
Melt the Chocolate:
-
In a microwave-safe bowl, combine chocolate and coconut oil (if using).
-
Microwave on 50% power in 30-second intervals, stirring vigorously each time, until about 90% melted. Let residual heat melt the rest.
-
Optional: Use a double boiler for more controlled, gentle melting.
-
-
Dip & Decorate:
-
Hold a strawberry by the stem and dip about ¾ of the berry into chocolate.
-
Let excess chocolate drip off, then place on prepared sheet.
-
Add toppings immediately while chocolate is wet. Drizzle contrasting chocolate after berries are fully set if desired.
-
-
Chill:
-
Refrigerate for at least 30 minutes or until chocolate is firm. Avoid peeking to prevent fingerprints or condensation.
-
Notes
-
Turtle Style: Roll dipped berries in chopped pecans, then drizzle with caramel.
-
Cookies & Cream: Roll in crushed Oreo cookies.
-
Zesty Twist: Sprinkle orange or lime zest on wet chocolate.
-
Pink & White Swirl: Drizzle white chocolate over dark chocolate and use a toothpick to swirl.
-
S’mores Style: Dip in milk chocolate, roll in crushed graham crackers and mini marshmallows.
Quick Nutritional Snapshot
Prep Time: 15 minutes | Chill Time: 30 minutes | Total Time: 45 minutes | Servings: About 15 strawberries
Nutrition per strawberry (approximate, using semi-sweet chocolate): 60-70 calories | 1g protein | 4g fat | 7g carbohydrates | 1g fiber | 5g sugar.
Final Thoughts
So there you have it—a little magic in just three ingredients, a few simple steps, and less than an hour. What started as a pint of fresh berries and a bowl of chocolate has transformed into something far greater: a moment of indulgence, a gesture of care, or maybe just a sweet pause in a busy day.
This recipe is more than just a treat—it’s a reminder that joy doesn’t have to be complicated. Whether you’re making these for someone you love or as a gift to yourself, the act of creating something beautiful with your own hands is its own kind of sweetness. The glossy chocolate, the jewel-like berries, the satisfying snap when you take that first bite—it’s an experience that feels special every single time.
Don’t forget: perfection is overrated. A slightly uneven dip or a rogue sprinkle? That’s the charm of homemade. It’s the love and intention that make these truly delicious. So go ahead—play with toppings, swirl colors, and make this classic your own. You’ve got all the tools you need to create sweet moments anytime.
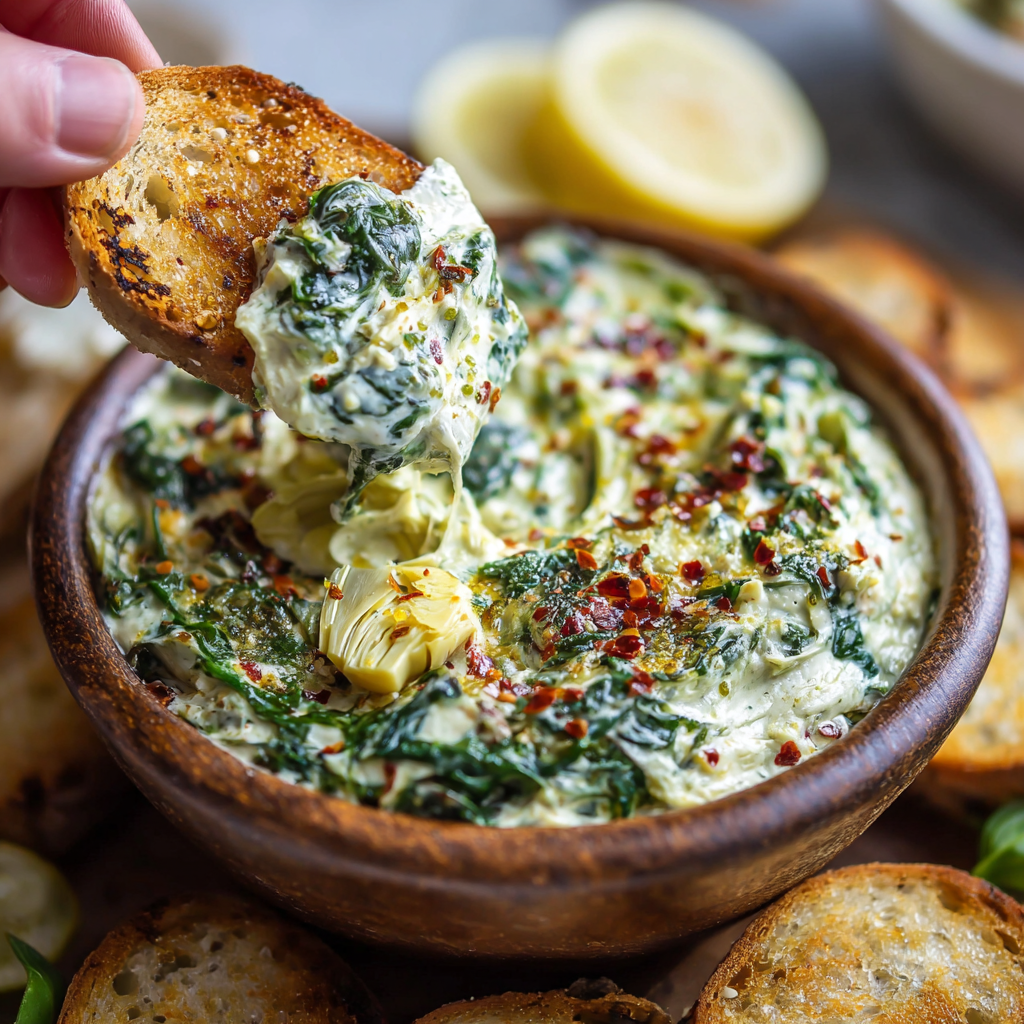
Healthy Spinach Artichoke Dip : Light, Creamy & Crowd-Pleasing
Healthy Spinach Artichoke Dip: Your New Go-To Party Hero
Hey there, friend! Olivia here. Can we talk about the universal language of a really good dip for a second? You know the scene: a cozy get-together, laughter in the air, and in the center of it all, a warm, bubbling, irresistible dish that has everyone hovering with a cracker in hand, deep in a very important debate about… well, probably the dip itself. It’s the ultimate kitchen alchemy, turning simple ingredients into the heart of the party.
But here’s the thing. Sometimes, after that third (or fourth) generous scoop, you can feel a little… weighed down. Traditional versions, while glorious, often come with a side of regret. That’s exactly why I became a woman on a mission in my kitchen. I was determined to crack the code on a Healthy Spinach Artichoke Dip that didn’t just *taste* light, but actually *was* lighter, without sacrificing a single ounce of that creamy, cheesy, soul-warming goodness we all crave.
After more taste-tests than I can count (a tough job, but someone had to do it), I’m so excited to share this recipe with you. This isn’t a “diet” food. This is a straight-up, flavor-forward, crowd-pleasing triumph. We’re using clever, simple swaps that your taste buds will celebrate. It’s creamy from Greek yogurt, tangy from artichokes, savory from garlic and Parmesan, and gets that perfect golden, stringy-cheese pull from a quick bake in the oven. It’s the dip you can feel great about serving and indulging in, whether it’s game day, book club, or just a Tuesday that needs a little spark. So, grab your favorite mixing bowl and let’s make some magic that brings people together.
Why This Dip Has a Permanent Spot on My Table
This recipe is more than just a list of ingredients to me; it’s tied to one of my favorite kitchen memories. A few years back, I was hosting my first big “Friendsgiving.” I was nervous—I wanted everything to be perfect. The turkey was (mostly) cooperating, the pies were lined up, but I needed a knockout appetizer. Something that would welcome everyone, keep them happy while the final touches were made, and set the tone for the feast.
I had my old, heavy-laden spinach artichoke dip recipe, but with a table full of rich food ahead, I wanted to start things on a brighter note. On a whim, I swapped out the majority of the mayo and sour cream for the plain Greek yogurt I always have in the fridge. I was skeptical. Would it be tangy? Would it get creamy? My best friend, who was my kitchen accomplice that day, gave me a “trust the process” look as we popped it in the oven.
The moment it came out, bubbly and gorgeous, and we took the first scoop with a warm pita chip, we looked at each other and grinned. It was *better*. It was fresher, the flavors of the spinach and artichoke shone brighter, and it had this wonderful lightness that made you excited for the next bite—and the meal to come. It disappeared in minutes, and the recipe requests started flying. That was the moment this healthy version was born, and it’s been my secret (until now!) party weapon ever since. It reminds me that sometimes, the best recipes come from a little adaptation and a lot of love.
Gathering Your Flavor All-Stars
Here’s everything you’ll need to build this flavor masterpiece. I’ve added my little chef notes next to each one—think of them as helpful whispers from across the kitchen counter!
- 1 cup plain nonfat Greek yogurt: This is our superstar swap! It provides incredible creaminess and a protein boost, replacing heavier bases. Chef’s Insight: The tang from the yogurt balances the cheese perfectly. For extra richness, you can use whole milk Greek yogurt, but nonfat works beautifully here.
- 4 oz light cream cheese, softened: Just a bit gives us that classic, luxurious dip texture. Pro Tip: Let it sit on the counter for 30 minutes before you start. Soft cream cheese blends seamlessly, preventing any lumps.
- 1/2 cup grated Parmesan cheese: Hello, savory depth! I use the finely grated kind from the refrigerated section, not the shelf-stable canister. Why it matters: Freshly grated Parmesan melts and integrates into the sauce much better.
- 1/2 cup shredded mozzarella cheese: Divided! We’ll mix a little in and save most for that gorgeous, golden top. Fun Fact: Part-skim mozzarella melts like a dream and gives you those irresistible cheese pulls.
- 1 (14 oz) can artichoke hearts, drained and chopped: The “artichoke” in the title! Look for them packed in water, not oil. Time-Saver: No need to be perfect here. A rough chop gives lovely texture and bursts of flavor.
- 1 cup frozen chopped spinach, thawed and squeezed DRY: This is the most crucial step! Chef’s Command: Squeeze that spinach in a clean kitchen towel or with your hands until no more green liquid comes out. Excess water is the enemy of a creamy dip.
- 2 garlic cloves, minced: Fresh is best for that aromatic punch. Substitution Tip: In a pinch, 1/2 teaspoon of garlic powder works, but fresh really sings here.
- Salt & pepper to taste: Your flavor conductors. Season as you go!
- Optional: red pepper flakes or lemon zest for extra zing: My little “choose your own adventure” moment. A pinch of red pepper flakes adds a subtle heat, while a teaspoon of lemon zest brightens everything up. Try one, or both!
Let’s Get Cooking: Building Your Dip, Step-by-Step
This is where the magic happens, and it’s so simple. I’ll walk you through each step with my favorite kitchen hacks to ensure dip perfection.
- Preheat & Prep: Fire up your oven to 375°F (190°C). While it’s warming, lightly grease a small baking dish (an 8×8-inch or a 1-quart dish is perfect) with a little olive oil or cooking spray. Chef’s Hack: Doing this first means your oven is ready to go the second your dip is assembled. No waiting around!
- Create the Creamy Base: In a large mixing bowl, combine the Greek yogurt, softened cream cheese, grated Parmesan, minced garlic, a good pinch of salt, and a few cracks of black pepper. Now, grab a sturdy spoon or spatula and mix, mix, mix until it’s completely smooth and harmonious. My Tip: Taste it here! This is your chance to adjust the seasoning. Remember, the cheeses are salty, so you can always add more later.
- Fold in the Veggies: Time for the green stuff! Add your thoroughly squeezed-dry spinach and the chopped artichoke hearts to the bowl. Here’s my favorite technique: use a folding motion. Instead of stirring vigorously (which can break down the artichokes too much), gently turn the mixture over onto itself until the veggies are evenly distributed. This keeps the texture interesting.
- Assemble for Baking: Transfer your gorgeous, creamy, veggie-filled mixture into your prepared baking dish. Spread it out into a nice even layer. Now, take that reserved shredded mozzarella and sprinkle it evenly over the top. Why we do this: This top layer of cheese creates a protective, bubbling, golden-brown crust that is pure delight.
- Bake to Bubbly Perfection: Slide the dish into your preheated oven and let it bake for 20-25 minutes. You’re looking for the edges to be gently bubbling and the top to be spotted with glorious golden brown patches. Don’t Overdo It: If the top is browning too quickly, you can lay a loose piece of foil over it for the last few minutes. Once it’s hot, bubbly, and inviting, take it out!
How to Serve This Dip Like a Pro
Presentation is part of the fun! I love serving this dip right in the warm baking dish placed on a trivet or cutting board. It feels homey and inviting. Surround it with an array of dippers for a beautiful, colorful spread. Think: sturdy tortilla chips, sliced baguette, crisp pita chips, and a vibrant rainbow of fresh veggies like bell pepper strips, cucumber rounds, and carrot sticks. The contrast of the warm, creamy dip with a cool, crunchy veggie is absolute heaven. Don’t forget a small spoon for easy serving!
Make It Your Own: Delicious Twists & Swaps
The beauty of this recipe is its flexibility. Here are a few ways to play with it:
- Make it Spicy: Stir in a finely chopped jalapeño (seeds removed for less heat) or a tablespoon of chopped pickled jalapeños into the base mixture.
- Herb It Up: Fold in 2 tablespoons of freshly chopped herbs like dill, chives, or parsley just before baking for a fresh, garden-fresh flavor.
- Protein-Packed Version: Add 1 cup of shredded cooked chicken or drained canned white beans for a more substantial, meal-worthy dip.
- Dairy-Free Delight: Use your favorite plain, unsweetened dairy-free yogurt and cream cheese, along with vegan Parmesan and mozzarella shreds.
- Hot Crab & Artichoke: Feeling fancy? Fold in 1 cup of lump crab meat for an incredible seafood twist.
Olivia’s Kitchen Notes & Stories
This recipe has truly evolved with me. The first time I made it, I was so paranoid about the yogurt “splitting” that I baked it at a super low temperature for what felt like hours. Let me save you the time: trust the 375°F oven! The high heat sets everything quickly and creates that perfect texture.
One funny fail turned into a favorite shortcut: I once forgot to thaw the spinach. In a panic, I microwaved it in a bowl, and while squeezing it out, it was so hot I did a little kitchen dance. Lesson learned: thaw it early! But also, the microwave method in a pinch? Totally valid—just let it cool enough to handle.
This dip also makes a phenomenal leftover. Seriously, the next day, spread it on a whole-wheat tortilla, add some sliced turkey or extra spinach, roll it up, and grill it in a pan for the world’s best warm wrap. It’s a recipe that keeps on giving!
Your Dip Questions, Answered!
Q: Can I make this spinach artichoke dip ahead of time?
A: Absolutely! You’re a hosting genius for thinking ahead. Assemble the dip completely (including the mozzarella topping) in the baking dish, cover tightly with plastic wrap, and refrigerate for up to 24 hours. When you’re ready, bake it straight from the fridge. You may need to add 5-10 extra minutes to the baking time since it will be cold.
Q: My dip seems a bit watery after baking. What happened?
A> This almost always comes back to the spinach. Frozen spinach holds a *lot* of water. Next time, be relentless when squeezing it dry. Use a clean kitchen towel, cheesecloth, or even your hands, and press until no more liquid is released. For canned artichokes, also make sure they are well-drained and give them a gentle pat with a paper towel.
Q: Can I use fresh spinach instead of frozen?
A> You can! Sauté about 5-6 cups of fresh spinach in a pan with a tiny bit of oil just until it wilts down massively. Then, let it cool and follow the same crucial step: squeeze it completely dry before adding it to the mix.
Q: Is there a way to make this in a slow cooker or air fryer?
A> For a slow cooker: Mix everything (saving some mozzarella for the last 30 mins) and cook on LOW for 2-3 hours, stirring occasionally. Top with remaining cheese for the last 30 mins. For an air fryer: Use a small, oven-safe dish that fits inside. Bake at 370°F for about 12-15 minutes, checking frequently, as it cooks faster.
Healthy Spinach Artichoke Dip : Light, Creamy & Crowd-Pleasing
Description
This creamy, protein-packed spinach artichoke dip is a lighter, healthier take on a classic party favorite. Greek yogurt replaces heavier bases, artichokes bring tang, spinach adds nutrients, and a cheesy topping gives that irresistible pull. Perfect for game day, book club, or any gathering.
Ingredients
-
1 cup plain nonfat Greek yogurt
-
4 oz light cream cheese, softened
-
½ cup grated Parmesan cheese
-
½ cup shredded mozzarella cheese (divided)
-
1 (14 oz) can artichoke hearts, drained and chopped
-
1 cup frozen chopped spinach, thawed and squeezed dry
-
2 garlic cloves, minced
-
Salt & black pepper, to taste
-
Optional: red pepper flakes or 1 tsp lemon zest
Instructions
-
Preheat & Prep: Preheat oven to 375°F (190°C). Lightly grease an 8×8-inch or 1-quart baking dish.
-
Creamy Base: In a large bowl, mix Greek yogurt, cream cheese, Parmesan, garlic, salt, and pepper until smooth. Taste and adjust seasoning.
-
Fold in Veggies: Gently fold in squeezed-dry spinach and chopped artichokes to maintain texture.
-
Assemble & Top: Transfer mixture to the prepared dish, spread evenly, and sprinkle the reserved mozzarella over the top.
-
Bake: Bake 20-25 minutes until edges bubble and cheese turns golden. Optional: cover with foil if browning too fast.
-
Serve: Serve warm with tortilla chips, pita, baguette slices, or fresh veggies.
Notes
-
Make Ahead: Assemble fully, cover, and refrigerate up to 24 hours. Bake from cold, adding 5-10 extra minutes.
-
Watery Dip: Ensure spinach is squeezed completely dry; pat artichokes dry.
-
Fresh Spinach: Sauté 5–6 cups fresh spinach, cool, and squeeze dry before using.
-
Slow Cooker: Mix all (reserve some mozzarella) and cook LOW 2–3 hours; add cheese in last 30 min.
-
Air Fryer: Use oven-safe dish; bake at 370°F 12–15 min, checking frequently.
Nutritional Information*
*This is an estimate for 1 serving (about 1/6th of the recipe) and will vary based on specific ingredients used and serving size.
Prep Time: 10 minutes | Cook Time: 25 minutes | Total Time: 35 minutes | Servings: 6
Calories per serving: ~120 | Protein: 9g | Carbs: 6g | Fat: 7g
Parting Thoughts
At the end of the day, the very best recipes are the ones that create connection. They’re the dishes passed across tables, the ones that spark conversation and leave people feeling nourished in every sense of the word. This dip, born from a happy kitchen accident on a Friendsgiving years ago, has become that recipe for me. It’s more than just an appetizer; it’s a warm welcome, a gesture of care, and proof that a healthier twist can become the favorite version. I hope it finds its way into your kitchen and becomes a part of your own story, creating light, joyful moments one scoop at a time.
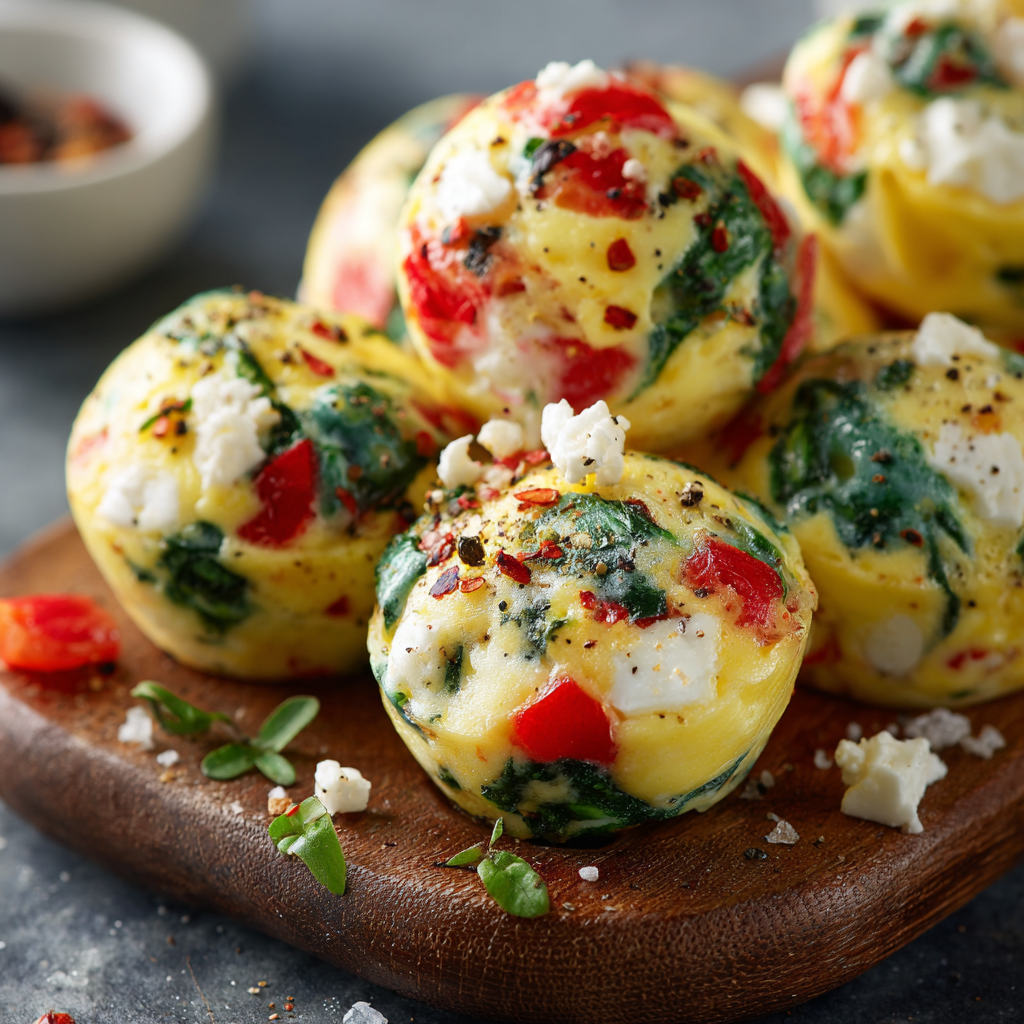
Protein Egg White Bites : Low-Cal, High-Protein Breakfast You Can Meal Prep
The Secret to Morning Sanity: Protein-Packed Egg White Bites You’ll Actually Crave
Okay, let’s be real for a second. How many of us have stared into the fridge at 7:03 AM, bleary-eyed, wondering how a piece of toast suddenly feels like an insurmountable culinary challenge? Or worse, grabbed something “convenient” that left us crashing by 10 AM, hangry and regretting all our life choices? I’ve been there more times than I’d like to admit, usually while wearing one slipper and trying to locate my car keys in the fruit bowl.
That’s exactly why I became obsessed with creating the ultimate grab-and-go breakfast. I wanted something that felt like a treat but acted like fuel. Something light yet satisfying, packed with protein to power through the morning, and flexible enough to please picky eaters and meal-prep heroes alike. After more experiments than I can count (some involving suspiciously green omelets and one tragically deflated soufflé situation), I landed on these: my glorious, foolproof, Protein Egg White Bites.
Think of them as the sophisticated, healthier cousin of a fast-food breakfast sandwich—without the grease or guilt. They’re fluffy, flavor-packed little clouds baked with creamy cottage cheese, vibrant veggies, and a dreamy trio of cheeses. Each bite is a low-calorie, high-protein powerhouse that you can make once and enjoy all week long. Whether you’re dashing to the office, fueling a workout, or just savoring a quiet coffee moment, these bites turn a chaotic morning into a calm, delicious win. Let’s get your week off to a smart, scrumptious start.
My Grandma’s Kitchen & The Quest for the Perfect Bite
This recipe, like so many of my favorites, has roots in a memory. My grandma, a woman who believed a problem could always be solved with a well-timed snack, made these incredible little cheese soufflés. They were puffy, cheesy miracles that appeared for Sunday brunch. As a kid, I was mesmerized by the process—the whirring of her old hand-mixer, the careful folding, the suspenseful peek through the oven door. They felt like magic.
Years later, living in my first apartment and navigating a hectic job, I craved that feeling of a special, nurturing breakfast, but I needed it to fit my busy, health-conscious life. My grandma’s soufflés, while divine, were a weekend project. I started playing with the concept: Could I capture that same comforting, cheesy satisfaction in something more stable, packable, and protein-forward? The journey involved many “interesting” texture experiments (let’s not speak of the rubbery puck phase), but the moment I blended cottage cheese into the egg whites and used a water bath, I knew I had it. I’d taken the cozy, cherished essence of my grandma’s brunch table and turned it into a modern, everyday staple. Now, every time I pull a tray of these golden bites out of the oven, I think of her, and it makes my kitchen—and my morning—feel just as warm.
Gathering Your Flavor Crew: Ingredients & Why They Matter
Part of what makes these bites so brilliant is how each ingredient plays a specific role. It’s a team effort! Here’s exactly what you’ll need and why it’s in the bowl.
- 1 (16 oz) carton egg whites: This is our lean protein superstar, giving the bites their structure and that classic, light flavor. Chef’s Insight: Using a carton is a huge time-saver! No separating eggs, no waste. If you prefer, you can separate about 10-12 large eggs yourself.
- ½ cup cottage cheese: The SECRET WEAPON for unbelievable creaminess without heaviness. It blends right in, adding protein and moisture for a melt-in-your-mouth texture. Substitution Tip: An equal amount of plain Greek yogurt works in a pinch, though the flavor will be tangier.
- ½ cup shredded mozzarella: Brings that wonderful, stretchy, mild cheesy goodness and helps the bites hold together. Chef’s Insight: Pre-shredded is fine for convenience, but shredding a block yourself gives a smoother melt.
- ¼ cup crumbled feta cheese: My favorite flavor pop! The salty, tangy kick of feta elevates everything. Substitution Tip: Goat cheese crumbles or even a sharp shredded cheddar would be delicious here.
- ¼ tsp sea salt & ¼ tsp black pepper: Essential seasoning buddies. The salt enhances all the other flavors, and the pepper adds a subtle warmth.
- ¼ yellow onion, finely chopped: Aromatic base flavor. Cooking it slightly in the muffin cup (as we do) softens its bite and brings out a touch of sweetness.
- ½ red bell pepper, diced: Color, crunch, and a sweet, fresh flavor. Substitution Tip: Any color bell pepper works! Or try diced roasted red peppers from a jar for a deeper, smoky note.
- ⅓ cup chopped spinach: An easy, nutrient-packed green. It wilts down perfectly into the bites. Chef’s Insight: If using frozen spinach, thaw and squeeze out ALL the excess water first, or your bites will be soggy.
Let’s Make Some Magic: Step-by-Step Instructions
Don’t let the fancy result fool you—this process is straightforward. I’ll walk you through every step with my best tips to ensure perfection.
Step 1: Prep Your Stage. Preheat your oven to 350°F (175°C). Now, grab your 12-cup muffin tin and give it a really good coat of non-stick spray. I mean it—get in those crevices! This is your number one defense against stuck-on bites. Little Chef Hack: For ultimate non-stick insurance, you can use silicone muffin liners. They pop out like a dream.
Step 2: The Super-Smooth Base. In a blender, combine the egg whites, cottage cheese, mozzarella, feta, salt, and pepper. Blend on high for about 30 seconds, or until the mixture is completely smooth and slightly frothy. You shouldn’t see any chunks of cottage cheese. This blending step is key for that uniform, cloud-like texture! No blender? A large bowl and an immersion blender work great too.
Step 3: Veggie Prep Party. Finely chop your onion and dice that beautiful red pepper. Give the spinach a rough chop if the leaves are large. Toss them all together in a small bowl. Easy does it!
Step 4: Assemble with Gusto. Evenly distribute your veggie mix among the 12 muffin cups. I like to use a small spoon or my hands. Then, give your blended egg mixture one last quick swirl and pour it over the veggies, filling each cup about ¾ of the way full. Pro Tip: Pouring from a blender with a spout or a large measuring cup with a pour spout gives you the most control and minimizes spills.
Step 5: The Secret Steam Bath. Here’s the pro trick that guarantees a tender, not-rubbery, soufflé-like texture: the water bath. Place your filled muffin tin on a larger baking sheet (like a rimmed half-sheet pan). Carefully pour about 1 inch of *boiling* water onto the baking sheet, around the muffin tin. This creates a steamy oven environment that cooks the eggs gently and evenly. Be careful not to splash water into the cups!
Step 6: Bake to Golden Perfection. Carefully transfer the whole baking sheet setup to your preheated oven. Bake for 30-35 minutes. You’re looking for the tops to be lightly golden and completely set. A toothpick inserted in the center should come out clean. They’ll puff up beautifully!
Step 7: The Patience Payoff. Remove the tray from the oven and then carefully lift the muffin tin out of the water bath. Let the bites cool in the tin for a full 5 minutes. This allows them to firm up and makes removal much easier. Then, run a small offset spatula or a butter knife around the edges of each bite and gently lift them out.
How to Serve & Savor Your Creation
These bites are delicious warm, at room temperature, or straight from the fridge—truly versatile! For a simple, satisfying meal, I love stacking two bites on a plate with a side of fresh berries or a simple arugula salad dressed with lemon juice. If you’re feeling fancy, drizzle a little hot sauce or a spoonful of vibrant salsa or pesto over the top. They also make a fantastic protein side for a bigger weekend brunch spread alongside sweet potato hash or turkey sausage. Pack them in a small container with a napkin, and you have the world’s most portable breakfast!
Make It Your Own: Flavor Twists & Swaps
The basic formula is your canvas! Get creative with these easy variations:
- Sun-Dried Tomato & Basil: Swap the bell pepper and spinach for ¼ cup chopped oil-packed sun-dried tomatoes and 2 tbsp fresh chopped basil. So Mediterranean!
- Everything Bagel: Omit the other veggies. Stir 2 tbsp of Everything Bagel seasoning into the egg mixture. Top each cup with a tiny extra sprinkle before baking.
- Broccoli Cheddar: Use ⅓ cup finely chopped steamed broccoli instead of spinach and bell pepper. Swap the feta for an extra ¼ cup of sharp cheddar cheese.
- Dairy-Free/Paleo: Substitute the cottage cheese with ½ cup full-fat coconut milk and the cheeses with ¼ cup nutritional yeast for a “cheesy” flavor. Add more diced veggies for bulk.
- Meat Lover’s: Add ⅓ cup of cooked, crumbled breakfast sausage, chopped ham, or crumbled bacon to the veggie mix.
From My Messy Apron to Yours: Chef’s Notes
This recipe has truly evolved in my kitchen. The first batch was…edible, but dense. I realized I was overmixing after adding the veggies, which deflated the air we’d whipped in. Hence, the blender-only blend for the wet ingredients! Another funny fail: I once forgot the water bath and baked them straight on the rack. Let’s just say I ended up with 12 little golden hockey pucks that could have doubled as dog toys. The water bath is non-negotiable for tenderness!
Over time, I’ve learned these bites freeze like a dream. Once cooled, pop them in a single layer on a baking sheet to freeze solid, then transfer to a freezer bag for up to 3 months. Reheat in the microwave for 60-90 seconds straight from frozen—it’s like having a personal breakfast café in your freezer. This recipe is a testament to the idea that the best home cooking is forgiving, adaptable, and always shared with love (and a good story).
Your Questions, Answered: FAQs & Troubleshooting
Q: My bites came out watery. What happened?
A: Excess moisture is the usual culprit! This most often comes from veggies (like frozen spinach or very watery fresh tomatoes) that weren’t dried enough. Always squeeze thawed frozen spinach in a clean kitchen towel until it’s very dry. For fresh veggies, pat them dry after washing. Also, ensure your oven is fully preheated—a slow start can cause weeping.
Q: Can I use whole eggs instead of just egg whites?
A: Absolutely! For a richer, more traditional flavor, use 6-7 large whole eggs, lightly beaten, in place of the 16 oz of egg whites. The texture will be slightly denser and more “eggy,” and the calorie/fat content will be higher, but they’ll be delicious. You may need to reduce the bake time by a minute or two.
Q: How long do they last in the fridge, and what’s the best way to reheat them?
A: Stored in an airtight container, they’ll stay fresh and tasty for up to 5 days. To reheat, I prefer the microwave: place 1-2 bites on a microwave-safe plate and heat for 30-45 seconds until warm. You can also reheat them in a 300°F oven for about 10 minutes to regain a bit of the original texture on the outside.
Q: They stuck to the pan! Help!
A> Don’t worry, it happens to the best of us. First, invest in a better non-stick spray or use silicone liners next time. For this batch, just use a thin, flexible utensil to gently work your way under each bite. A little patience usually frees them. If a little bit sticks, it’s still going to taste amazing!

Protein Egg White Bites : Low-Cal, High-Protein Breakfast You Can Meal Prep
Description
These egg white bites are fluffy, protein-packed, and full of flavor. With cottage cheese for creaminess, a trio of cheeses for depth, and colorful veggies for nutrition and crunch, they’re perfect for grab-and-go mornings, meal prep, or a healthy brunch.
Ingredients
Egg Base:
-
16 oz carton egg whites (or 10–12 large eggs)
-
½ cup cottage cheese (or plain Greek yogurt)
-
½ cup shredded mozzarella
-
¼ cup crumbled feta (or goat cheese / sharp cheddar)
-
¼ tsp sea salt
-
¼ tsp black pepper
Veggies:
-
¼ yellow onion, finely chopped
-
½ red bell pepper, diced
-
⅓ cup chopped spinach (fresh or well-drained thawed frozen)
Instructions
-
Prep: Preheat oven to 350°F (175°C). Spray a 12-cup muffin tin generously with non-stick spray or use silicone liners.
-
Blend Egg Mixture: Combine egg whites, cottage cheese, mozzarella, feta, salt, and pepper in a blender. Blend until smooth and slightly frothy (about 30 seconds).
-
Prepare Veggies: Finely chop onion, dice bell pepper, and roughly chop spinach.
-
Assemble Muffins: Evenly divide veggies into muffin cups. Pour egg mixture over veggies, filling each cup about ¾ full.
-
Water Bath: Place muffin tin on a rimmed baking sheet. Carefully pour 1 inch of boiling water around the tin. Bake 30–35 minutes until tops are lightly golden and a toothpick comes out clean.
-
Cool & Remove: Let sit 5 minutes in tin, then gently lift out with a spatula. Serve warm, at room temp, or refrigerate/freeze for later.
Notes
-
Fridge: Airtight container, up to 5 days.
-
Freezer: Freeze individually on a sheet, then bag up to 3 months.
-
Reheat: Microwave 30–45 sec from fridge, 60–90 sec from frozen; or oven 300°F for ~10 min.
Nutritional Information (Per Bite)
Calories: 54 | Protein: 6.7g | Carbohydrates: 1.5g | Dietary Fiber: 0.2g | Total Fat: 2.2g | Saturated Fat: 1.3g | Sodium: 203mg
Final Thoughts: The Takeaway
Let’s cut to the chase: morning stress is optional. The choice between a sugar crash and sustained energy is yours. These Protein Egg White Bites are your tool—simple, reliable, and incredibly effective. They bridge the gap between nostalgic comfort and modern need, delivering fuel that feels like a treat.
Take this flexible formula, make it yours, and break the cycle of breakfast regret. A little prep one day delivers a whole week of graceful, delicious mornings. That’s not just meal prep; it’s self-care. Your coffee (and your 10 AM self) will thank you.
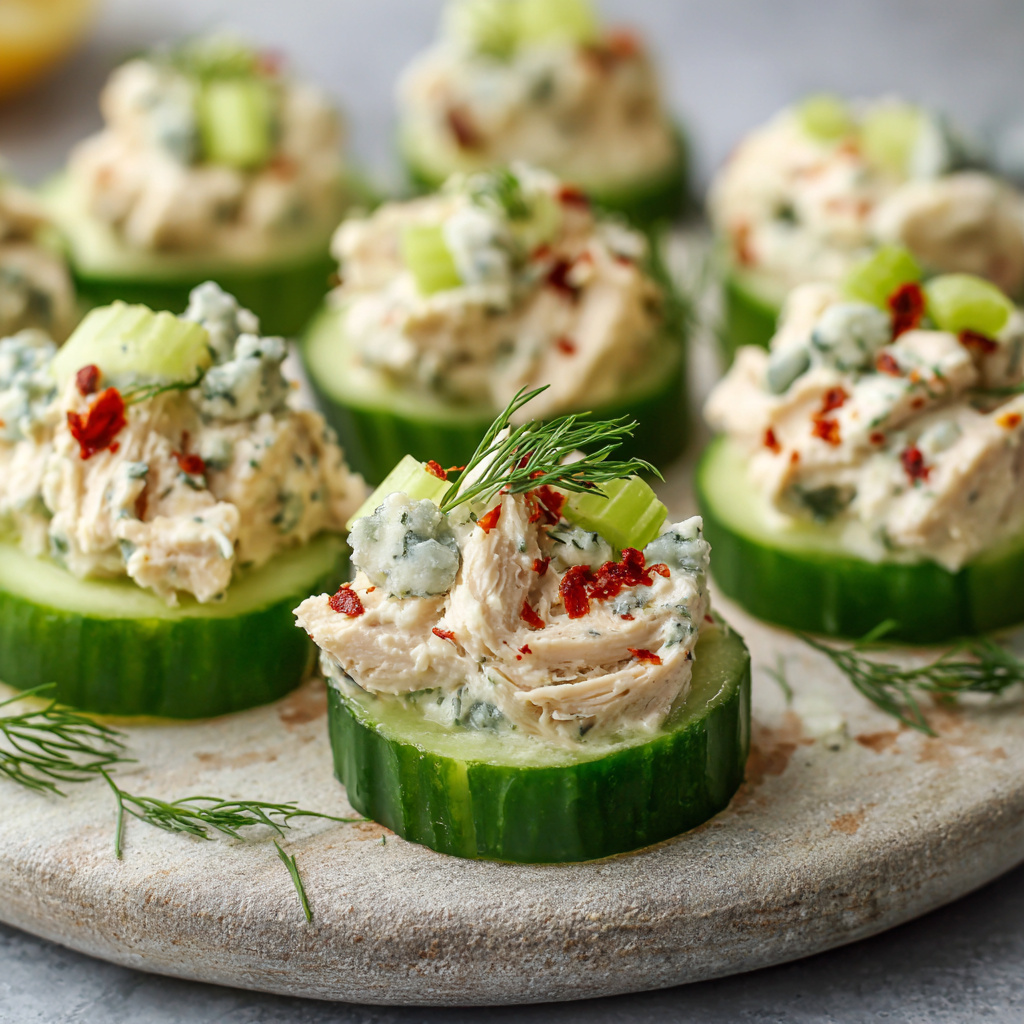
Chicken Salad Bites on Cucumber : High-Protein, Low-Carb Appetizer
The Crisp, Creamy Bite That Steals Every Party (And Your Heart)
Hey friends, Olivia here! Let’s talk about that magical, often stressful, moment: you’re hosting. The doorbell is ringing, laughter is bubbling in the living room, and you’re in the kitchen doing that last-minute plating dance. You want to serve something that feels special, looks gorgeous, and makes everyone—from your keto bestie to your carb-conscious uncle—feel included and thrilled. But you also don’t want to be stuck over the stove all night. Sound familiar? I’ve been there more times than I’ve burned garlic (which is saying something).
That’s exactly why I’m utterly obsessed with these Chicken Salad Bites on Cucumber. They are my not-so-secret weapon for effortless entertaining and smart snacking. Imagine: a cool, crisp base of fresh cucumber, piled high with the most flavorful, creamy, and tangy chicken salad you’ve ever tasted. It’s a texture party in your mouth, a protein-packed punch, and it comes together with the simplicity of a weeknight meal. This isn’t just another recipe; it’s a little edible invitation to relax, enjoy your own gathering, and watch your guests’ eyes light up. So tie on that (probably already stained) apron, and let’s make something deliciously simple together.
A Picnic Blanket Epiphany
This recipe is a love letter to my Grandma Eleanor, the queen of “making do” and creating magic from leftovers. Every summer, she’d pack these elaborate picnics. There was always a container of her famous chicken salad, made from Sunday’s roast chicken, tucked between the lemonade and the checkered blanket. One blisteringly hot afternoon, the bread for our sandwiches had gone disappointingly soggy. My grandma, never one to be flustered, looked around, spied the crisp cucumbers from her garden, and simply spooned the chicken salad right on top. “There,” she declared with a wink. “Now it’s a fancy canapé!”
That moment stuck with me. It was a lesson in resourcefulness, in not letting perfection get in the way of joy, and in the fact that the best food often comes from happy accidents. My version today is a slightly grown-up, spicier nod to hers—I think she’d approve, especially of the blue cheese and hot sauce. Every time I make these bites, I’m right back on that picnic blanket, reminded that good food is less about fancy ingredients and more about the heart (and clever thinking) you put into it.
Gathering Your Flavor Players
Here’s everything you’ll need to create these irresistible bites. I’ve added my little chef’s notes next to each one—think of it as us chatting over the grocery cart!
- 1 English cucumber: I specify English because they have fewer seeds, thinner skin (so no need to peel!), and a delightfully crisp, less watery flesh. They’re the perfect sturdy “cracker” for our salad. Chef’s Tip: If you can only find a regular cucumber, slice it and gently pat the rounds dry with a paper towel to prevent sogginess.
- 4 tbsp cream cheese, softened: This is our creamy base binder. Full-fat gives the richest flavor and best texture. Let it sit on the counter for 30 minutes before you start—it mixes like a dream when soft.
- 2 tbsp sour cream (or Greek yogurt): The tangy counterpart to the cream cheese. Sour cream adds a lovely richness, but plain, full-fat Greek yogurt is a fantastic, high-protein swap I use often.
- 4 tbsp red hot sauce (adjust to taste): This is where the magic happens! I use a classic cayenne pepper sauce like Frank’s, but feel free to use your favorite. Start with 2 tbsp if you’re sensitive to heat, and add more until it sings to you.
- 2 cups cooked chicken breast, shredded: The star protein! A store-bought rotisserie chicken is your best friend here for speed and flavor. Chef’s Hack: Shred it by hand for the best texture, or use two forks. Avoid a food processor—it can make the chicken pasty.
- 1/3 cup diced celery: The essential crunch factor! It adds a fresh, watery crispness that contrasts beautifully with the creamy salad.
- 3 tbsp crumbled blue cheese: Don’t skip this! It adds a sharp, salty, umami depth that makes the flavor complex and utterly addictive. If blue cheese really isn’t your thing, a sharp feta or even grated Parmesan can stand in.
- 2 scallions, sliced: They add a mild, fresh oniony bite and a pop of green color. Use both the white and green parts!
- Salt and black pepper to taste: Season in layers. Remember, the blue cheese and hot sauce are salty, so taste before you add a heavy hand.
- For Garnish: Fresh dill, chopped (or parsley): The final flourish! Dill pairs amazingly with cucumber and chicken, but parsley adds a clean, bright finish. A sprinkle makes them look professionally pretty.
Let’s Build Some Bites! (Step-by-Step)
Okay, team, let’s get assembling. This is the fun, no-stress part. I’ll walk you through each step with my favorite kitchen hacks to ensure perfection.
Step 1: The Creamy Foundation
In a medium-sized mixing bowl, plop in your softened cream cheese, sour cream (or yogurt), and that glorious hot sauce. Grab a sturdy spatula or a wooden spoon and mix, mix, mix until it’s completely smooth and one uniform, creamy orange-pink color. No cream cheese lumps allowed! Chef’s Tip: Doing this first ensures every bit of chicken and celery gets evenly coated later. A smooth base = a cohesive bite.
Step 2: The Flavor Party
Now, add your star players to the bowl: the shredded chicken, diced celery, crumbled blue cheese, and sliced scallions. Here’s my favorite part: use your hands (clean ones, of course!) or a fork to gently fold everything together. Why? You want to incorporate all the ingredients without over-mixing and smushing the delicate chicken shreds. Season with a pinch of salt and a few cranks of fresh black pepper. Taste it! This is the most important step. Does it need more heat? More salt? More tang? Adjust now. Chef’s Hack: Let this mixture sit for 10-15 minutes in the fridge if you have time. The flavors marry and intensify beautifully.
Step 3: The Crisp Canvas
While your salad is chilling (figuratively or literally), grab your English cucumber. Slice it into thick rounds, about 1/2-inch thick. You’re aiming for 18 sturdy bases. Thinner slices will wilt under the weight of the salad. Lay them out on your serving platter or a baking sheet. Chef’s Tip: If you’re prepping these more than an hour ahead, lightly salt the cucumber slices and let them sit on paper towels for 10 minutes, then pat dry. This draws out excess moisture and guarantees the crispest bite possible, even hours later.
Step 4: The Artful Assembly
Using a tablespoon or a small cookie scoop, mound a generous tablespoon of the chicken salad onto each cucumber round. Don’t be shy—pile it high! The contrast between the cool cucumber and the flavorful mound is what makes these so special. I like to gently press the salad onto the cucumber so it adheres.
Step 5: The Finishing Touch
Right before serving, take your chopped fresh dill or parsley and give each bite a little confetti sprinkle. This isn’t just for looks (though it’s gorgeous); that fresh herbal note is the perfect final layer of flavor. And voila! You’ve just created the easiest, most crowd-pleasing appetizer on the block.
Plating for Maximum “Wow”
Presentation is the final act of love! I love using a large, simple white platter or a beautiful rustic wooden board. Arrange the bites in a circular pattern or rows, and tuck a few extra sprigs of dill or some edible flowers in the gaps for a pop of color. For a party, I’ll even label it with a cute little chalkboard sign: “High-Protein Buffalo Chicken Bites.” Serve them immediately for the ultimate crisp-crunch experience, and watch them disappear!
Make It Your Own: Creative Twists
- Greek Style: Swap the hot sauce for 2 tbsp of lemon juice and 1 tsp of dried oregano. Use feta instead of blue cheese, and add a few chopped Kalamata olives. Garnish with fresh mint.
- Everything Bagel: Mix 1 tbsp of everything bagel seasoning into the cream cheese base. Omit the hot sauce and blue cheese. Garnish with extra seasoning and tiny bagel chip pieces.
- Curried & Sweet: Replace hot sauce with 2 tbsp of mango chutney and 1-2 tsp of your favorite curry powder. Use golden raisins instead of blue cheese, and garnish with toasted coconut flakes.
- Keto-Friendly Boost: Add 1/4 cup of finely chopped, cooked bacon and use full-fat everything. It’s a flavor and fat bomb in the best way!
- Vegan “Chick’n”: Use shredded jackfruit or a store-bought vegan chicken alternative. Swap the cream cheese and sour cream for a vegan version, and use a vegan blue cheese or omit it. The hot sauce is already your best plant-based friend!
Olivia’s Kitchen Notes
This recipe has lived on my fridge door for years, and it’s seen some evolutions! The original from my grandma had just mayo and celery. The blue cheese and hot sauce addition came after a particularly enthusiastic “Wing Night” with friends—I wanted that flavor in a healthier format. One time, I accidentally used horseradish sauce instead of hot sauce. It was… pungent, but my dad loved it! The beauty is in its flexibility.
My biggest tip? Don’t stress about exact measurements. Cooking is about feeling. Love blue cheese? Add an extra sprinkle. Want more crunch? Toss in some sunflower seeds. This is your canvas. The only non-negotiable is sharing them with people you love and seeing those smiles of delight. That’s the real secret ingredient.
Your Questions, Answered!
Q: Can I make the chicken salad ahead of time?
A: Absolutely! The chicken salad mixture actually tastes better after chilling for a few hours or overnight. Just store it in an airtight container in the fridge. However, only assemble the bites on the cucumber right before serving. This keeps the cucumber perfectly crisp. Prep your cucumber slices and store them separately in a container lined with a damp paper towel.
Q: My salad seems a bit dry. How can I fix it?
A: No problem! The cream cheese can thicken when cold. Simply stir in an extra tablespoon of sour cream, Greek yogurt, or even a tiny splash of milk or lemon juice to loosen it up to your desired creaminess. Remember, different brands of chicken and cream cheese have varying moisture levels.
Q: What’s the best way to shred chicken?
A: For the perfect texture, let cooked chicken cool slightly, then use two forks to pull it apart. You can also use the paddle attachment on a stand mixer on low speed for 30 seconds—it works shockingly well! For quick shredding, pop warm chicken into a bowl and use a hand mixer on low for a few pulses.
Q: I’m not a fan of spicy food. What can I use instead of hot sauce?
A: Easy! Omit the hot sauce entirely and add 1-2 tablespoons of Dijon mustard or whole-grain mustard for a tangy kick. You could also add a squeeze of lemon juice and a pinch of smoked paprika for depth without the heat.
Chicken Salad Bites on Cucumber : High-Protein, Low-Carb Appetizer
Description
These Chicken Salad Bites on Cucumber are crisp, creamy, and crowd-pleasing. Perfect for parties, picnics, or simple high-protein snacking—they combine cool cucumber rounds with a flavorful, tangy chicken salad that’s easy to prep and assemble.
Ingredients
Base & Salad:
-
1 English cucumber, sliced into ½-inch rounds (approx. 18 slices)
-
4 tbsp cream cheese, softened
-
2 tbsp sour cream or Greek yogurt
-
4 tbsp red hot sauce (adjust to taste)
-
2 cups cooked chicken breast, shredded
-
1/3 cup diced celery
-
3 tbsp crumbled blue cheese (or feta/Parmesan)
-
2 scallions, sliced (white + green parts)
-
Salt and black pepper, to taste
Garnish:
-
Fresh dill or parsley, chopped
Instructions
-
Make Creamy Base:
-
In a medium bowl, mix softened cream cheese, sour cream (or yogurt), and hot sauce until smooth.
-
-
Add Chicken Salad Ingredients:
-
Gently fold in shredded chicken, celery, blue cheese, and scallions.
-
Season with salt and pepper. Taste and adjust for heat or salt.
-
Optional: Chill 10–15 minutes to enhance flavors.
-
-
Prepare Cucumber Slices:
-
Slice cucumber into ½-inch rounds.
-
Optional: Lightly salt and pat dry if prepping ahead to remove excess moisture.
-
-
Assemble Bites:
-
Using a tablespoon or cookie scoop, mound a generous spoonful of chicken salad onto each cucumber slice.
-
Press lightly to adhere.
-
-
Garnish & Serve:
-
Sprinkle chopped dill or parsley on top.
-
Arrange on a platter and serve immediately for maximum crispness.
-
Notes
-
Assemble on cucumber just before serving to keep slices crisp.
-
Adjust creaminess by adding more sour cream, Greek yogurt, or a splash of milk/lemon juice if needed.
-
Shred chicken with two forks for best texture.
Nutritional Snapshot (Per Serving – 3 Bites)
Prep Time: 20 minutes | Servings: 6 | Category: Appetizer, Snack
Calories: 137 | Protein: 16g | Carbohydrates: 2.3g | Fat: 6.7g
Note: Nutritional information is an estimate calculated using the base ingredients and may vary with specific brands or substitutions.
Final Thoughts: The Crispy, Creamy Bite That Steals Every Party (And Your Heart)
Friends, that’s it—the not-so-secret formula for effortless elegance. These Chicken Salad Bites on Cucumber are more than just an appetizer; they’re a promise. A promise that you can host with grace, savor your own party, and serve something that feels special without the stress. They are the beautiful intersection of smart prep and generous flavor, where cool crunch meets creamy, tangy bliss.
Every time I set these out, I’m reminded of that picnic with my grandma: food doesn’t need to be complicated to be memorable. It just needs to be made with a little heart and a lot of deliciousness. Whether you stick to the spicy, blue cheese-kissed original or make it your own with one of the fun twists, you’re creating a moment—a moment of shared delight, of clean plates, and of happy guests.
So here’s my final chef’s kiss of advice: trust yourself, taste as you go, and don’t be afraid to pile that salad high. The only real mistake you can make is not making enough.
Now go on—tie on that apron, whip up a batch, and get ready to take a bow. Your party is about to get a whole lot crispier, creamier, and more unforgettable.
With love and a full platter,
Olivia

Crispy Pizza Chips : The Ultimate 15-Minute Snack Adventure
Crispy Pizza Chips: Your 15-Minute Ticket to Snack Paradise
Hey there, friend! Welcome back to my kitchen. Is it just me, or is there something magical about that moment when a snack craving hits? You know the one. It’s not quite dinner time, but your stomach is staging a polite rebellion. The popcorn seems a little…meh. The chips in the pantry are whispering, but not shouting. You want something with pizzazz, something that feels like a treat but doesn’t require a culinary degree or an hour of prep.
Well, pull up a stool, because I have the absolute perfect solution, and it’s sitting in your fridge and pantry right now. Today, we’re turning the humble tortilla into a crunchy, cheesy, flavor-exploding masterpiece: Crispy Pizza Chips. This isn’t just a recipe; it’s a 15-minute snack adventure. We’re talking golden, crispy vessels loaded with gooey mozzarella, zesty sauce, and all your favorite pizza toppings, baked to bubbly perfection. They’re perfect for game day crowds, last-minute movie nights, or just treating yourself after a long day. So, tie on that (probably messy) apron with me, and let’s create some instant joy!
A Slice of Nostalgia: Where This Recipe Was Born
This recipe has its roots in two of my favorite things: childhood nostalgia and kitchen improvisation. Growing up, Friday nights were sacred. They were for homemade pizza—the kind where my dad would stretch the dough, my mom would artfully arrange the toppings, and my sister and I would fight over who got to sprinkle the extra cheese. The smell of baking pizza is literally the scent of happiness for me.
But as an adult, sometimes you want that hit of pizza flavor without the commitment of making dough. One desperate, snack-less afternoon, staring at a pack of tortillas and some leftover marinara, I had a “what if?” moment. What if I treated a tortilla like a blank, crispy canvas? I cut, sauced, cheesed, and baked… and what emerged from the oven was a revelation. They were better than I imagined—craveably crunchy, delightfully messy, and packed with all that familiar, cozy pizza flavor. It was like capturing the soul of my family’s Friday nights in a bite-sized, 15-minute crunch. Now, it’s my go-to secret weapon for instant satisfaction, and I’m so thrilled to share it with you.
Your Flavor Toolkit: What You’ll Need
Grab these simple ingredients, and let’s talk about why each one matters and how you can make it your own!
- 4 Corn or Flour Tortillas: This is our crispy foundation! Corn tortillas give a heartier, more rustic chip with a distinct corn flavor. Flour tortillas bake up a bit lighter and flakier, almost like a thin-crust pizza. I love both—use what you have! For extra sturdiness with lots of toppings, go flour. For a gluten-free, robust bite, go corn.
- 1 Cup Thick Pizza or Marinara Sauce: The flavor anchor! The key word here is THICK. A watery sauce will make your chips soggy. I use a good-quality jarred pizza sauce or a chunky, slow-simmered marinara. Chef’s Hack: If your sauce is on the thinner side, simmer it in a pan for 5-10 minutes to reduce and concentrate the flavor and texture.
- 1 Cup Shredded Mozzarella: The glorious, melty glue! Pre-shredded bags are convenient, but for the best melt, buy a block of low-moisture mozzarella and shred it yourself. The anti-caking agents in pre-shredded cheese can sometimes inhibit that perfect ooze. Feel free to mix in other cheeses like provolone for tang, cheddar for sharpness, or a sprinkle of Parmesan for a salty, umami kick.
- 1 Cup Toppings of Choice: This is your playground! We’re using about a cup total. Think:
- Pepperoni: Classic! For extra crisp, chop it into small bits.
- Bell Peppers or Onions: Chop them finely so they cook quickly.
- Black Olives or Jalapeños: For briny or spicy pops of flavor.
- Cooked Italian Sausage or Ham: Fantastic for a heartier chip.
- Mushrooms: Slice them super thin!
- 1 tsp Italian Herbs (Oregano/Basil): The aromatic soul. Dried oregano is my MVP here—it wakes up beautifully in the oven’s heat. If you have fresh basil, tear it over the chips after baking for a vibrant finish.
- 1 tsp Garlic Powder: Our flavor booster. It distributes evenly and gives that “what is that delicious taste?” background note. Granulated garlic works too!
- ½ tsp Crushed Red Pepper Flakes (Optional): The friendly fire. I always add these because I love a little heat, but it’s totally optional for spice-sensitive folks.
Let’s Get Crispy: Your Step-by-Step Guide
Ready? This is where the magic happens, fast! Follow these steps for guaranteed chip perfection.
- Preheat & Prep: Fire up your oven to 400°F (200°C). This high heat is the secret to maximum crispiness without burning the cheese. While it heats, line a large baking sheet with parchment paper. No parchment? A light spray of cooking oil will work, but parchment is the MVP for easy cleanup and preventing any sticky situations.
- Shape Your Chips: Grab your tortillas. Using a pizza cutter or sharp knife, slice them into triangles (like a pizza!) or into squares for a fun, rustic look. Don’t worry about perfection—this is homemade charm! Pro Tip: Stack 2 tortillas at a time to cut them all in half the work.
- Arrange for Success: Lay your tortilla pieces out on the prepared baking sheet in a single layer. This is non-negotiable! If they’re overlapping, they’ll steam instead of crisp up. Give them a little breathing room. You might need two sheets or to bake in batches.
- Sauce with a Light Hand: Using a spoon, spread a thin layer of your thick sauce over each chip. Think of it as painting a canvas—you want coverage, but you don’t want to glob it on. Too much sauce = a soggy chip. A little goes a long way here to carry the flavor.
- The Topping Tango: Now for the fun part! Sprinkle a generous amount of shredded cheese over each sauced chip. This cheesy blanket will melt and hold everything together. Then, artfully scatter your chosen toppings. Remember, less is more per chip—you want a bit of everything in each bite, not a mountain that will slide off.
- Season to Shine: Finish by sprinkling the Italian herbs, garlic powder, and optional red pepper flakes over the top. This simple step transforms them from “cheesy chips” to “PIZZA chips.”
- Bake to Golden Perfection: Slide the baking sheet into your hot oven. Bake for 10-12 minutes, but keep an eye on them starting at 9 minutes. You’re looking for the cheese to be fully melted and bubbly, and the edges of the tortillas to turn a deep, golden brown. The smell will be incredible!
- The Crucial Cool Down: This might be the hardest step! Let the chips cool on the baking sheet for 3-5 minutes before diving in. This allows the cheese to set slightly and the tortilla to finish crisping up as it cools. Trust me, it’s worth the wait for the perfect crunch.
How to Serve & Savor
Presentation is part of the fun! Slide the whole parchment paper onto a big wooden board or platter for a casual, shareable feel. Pile them high and watch them disappear. For dipping, I love serving a little side bowl of extra warmed marinara sauce or a cool, creamy ranch dressing for dipping. They’re perfect with a cold beer, a glass of fizzy soda, or just your own two hands and a big smile.
Make It Your Own: Flavor Twists & Swaps
The beauty of this recipe is its versatility! Here are a few ways to switch it up:
- BBQ Chicken: Swap pizza sauce for BBQ sauce, use a mozzarella-cheddar blend, and top with finely chopped cooked chicken and red onion.
- Veggie Supreme: Load up with finely chopped mushrooms, bell peppers, red onion, black olives, and spinach. A sprinkle of feta cheese at the end is divine.
- Breakfast Pizza Chips: Use a light schmear of garlic-infused olive oil instead of sauce. Top with cheese, crumbled cooked sausage, and a few dots of ricotta. After baking, a drizzle of hot honey is amazing.
- Spicy Pepperoni & Jalapeño: Use pepperoni slices, fresh jalapeño rounds, and mix some smoked paprika into your garlic powder seasoning.
- Dairy-Free/Deluxe: Use your favorite vegan mozzarella shreds and vegan pepperoni. The flavor from the sauce and seasonings still makes these irresistible!
Olivia’s Kitchen Notes
This recipe has seen many iterations in my kitchen! I’ve learned that the type of tortilla really changes the game—my family is fiercely divided between Team Corn and Team Flour. I’ve also been known to get… overly ambitious with toppings. One time, I added too many juicy fresh tomatoes and learned a valuable lesson about moisture control the hard way (soggy chips, but still tasty!). Now I stick to drier or pre-cooked toppings. These chips also have a funny way of bringing people into the kitchen. The second that cheesy, garlicky aroma hits the air, I suddenly have “helpers” appearing, ready for quality control. It’s my favorite kind of chaos.
Your Questions, Answered!
Q: My chips turned out a little soft/soggy. What happened?
A: The usual culprits are too much sauce or overly wet toppings (like fresh tomatoes or mushrooms that release a lot of water). Ensure your sauce is thick, use a light hand, and pat any wet veggies dry before adding. Also, make sure they’re in a single layer and not overcrowded on the pan, and let them cool completely on the sheet—they crisp up as they cool!
Q: Can I make these ahead of time?
A: They are absolutely best served fresh and warm. However, you can do the prep work ahead! Cut the tortillas, shred the cheese, and prep your toppings. Store them separately in the fridge, then assemble and bake when you’re ready. It cuts the active time down to about 5 minutes!
Q: Can I use pita bread or naan instead of tortillas?
A> Absolutely! Pita or naan would make a delicious, slightly thicker and chewier “chip.” Just cut them into smaller pieces, adjust the baking time slightly (maybe add 1-2 minutes), and keep an eye on them.
Q: How do I store leftovers?
A> While they’re best fresh, you can store cooled leftovers in an airtight container at room temperature for a day. They will lose some crispness. To re-crisp, pop them on a baking sheet in a 350°F oven for 3-5 minutes. Avoid the microwave, as it will make them chewy.

Crispy Pizza Chips : The Ultimate 15-Minute Snack Adventure
Description
These 15-minute Crispy Pizza Chips are the ultimate snack! Crunchy tortilla triangles topped with melty mozzarella, zesty sauce, and your favorite pizza toppings. Perfect for movie nights, game day, or anytime you need a fast, flavorful treat.
Ingredients
Base:
-
4 corn or flour tortillas
-
1 cup thick pizza or marinara sauce
-
1 cup shredded mozzarella cheese
-
1 cup toppings of choice (pepperoni, cooked sausage, veggies, olives, etc.)
Seasoning:
-
1 tsp Italian herbs (oregano/basil)
-
1 tsp garlic powder
-
½ tsp crushed red pepper flakes (optional)
Equipment:
-
Baking sheet
-
Parchment paper or cooking spray
Tips:
-
Use thick sauce to prevent soggy chips.
-
Pre-shred cheese for better melt.
-
Arrange tortilla pieces in a single layer for crispiness.
Instructions
-
Preheat Oven: 400°F (200°C). Line a baking sheet with parchment or lightly oil it.
-
Slice Tortillas: Cut tortillas into triangles or squares.
-
Arrange: Place tortilla pieces in a single layer on the sheet.
-
Sauce & Toppings: Spread a thin layer of sauce on each chip. Top with cheese, your choice of toppings, and seasonings.
-
Bake: 10–12 minutes until cheese is melted, bubbly, and tortilla edges are golden. Watch carefully starting at 9 min.
-
Cool: Let chips cool 3–5 min on the sheet to crisp up before serving.
Notes
-
Prep ahead: cut tortillas, shred cheese, prep toppings separately. Assemble and bake in ~5 min.
-
Leftovers: store in airtight container at room temp up to 1 day. Re-crisp in 350°F oven for 3–5 min. Avoid microwave.
Nutritional Info (Per Serving, 1 of 4)
Calories: 150 | Carbohydrates: 20g | Protein: 5g | Fat: 7g | Sodium: 300mg
Note: This is a rough estimate based on using flour tortillas, part-skim mozzarella, and light sauce. Values will vary significantly with your choice of toppings and ingredients.
Final Thoughts
So there you have it—your ticket from snack-time slump to pure, crispy joy in just 15 minutes. These Crispy Pizza Chips are more than a recipe; they’re a reminder that the best moments often come from simple, playful cooking. They capture the heart of pizza—the gooey cheese, the tangy sauce, the savory toppings—and deliver it in a crunchy, dippable, totally addictive form.
Whether you stick with the classic pepperoni or venture into BBQ chicken or veggie supreme territory, these chips are a celebration of flavor and convenience. They’re proof that you don’t need fancy ingredients or hours in the kitchen to create something truly special. All you need is a tortilla, a little creativity, and the willingness to treat yourself.
I hope these chips bring as much fun and satisfaction to your kitchen as they have to mine. They’ve saved countless snack emergencies, turned ordinary nights into mini celebrations, and always—without fail—drawn a crowd the moment that cheesy, garlicky aroma fills the air.
Now, I’d love to hear from you! Did you go classic or try a wild twist? What’s your ultimate topping combo? Tag me on social or leave a comment—I love seeing your creations.
Until next time, keep your pantry stocked, your oven hot, and never underestimate the power of a good snack.
Happy crunching!
With love,
Olivia
McGriddle Bites : Sweet & Savory Sausage Pancake Muffins for Busy Mornings
McGriddle Bites: Your New Secret Weapon for Crazy Busy Mornings
Hey there, friend! Come on in, pull up a stool, and let’s talk about the most important meal of the day. I don’t know about you, but my mornings can feel like a whirlwind. There’s the frantic search for matching socks, the “where are my keys?” panic, and the eternal struggle of trying to get out the door with something actually satisfying in your belly. Cereal feels boring, toast is forgettable, and who has time to whip up a full pancake breakfast on a Wednesday?
That’s exactly why I’m so ridiculously excited to share these McGriddle Bites with you today. Imagine all the cozy, comforting magic of a diner breakfast—fluffy pancakes, savory sausage, melty cheese—all baked into a adorable, grab-and-go muffin. They’re sweet, they’re savory, and they’re an absolute game-changer for your morning routine.
This isn’t about slaving over a hot stove. It’s about smart, joyful cooking that gives you back your time and fills your kitchen with the best smell in the world. Whether you’re meal-prepping for the week ahead, need a hungry-kid-quieting snack, or want the star of your next brunch spread, these little muffins deliver. They freeze like a dream, reheat in a flash, and honestly, they might just make you look forward to your alarm clock. Let’s make your mornings deliciously simple.
The Little Pancake That Could: A Drive-Thru Daydream
This recipe was born from a very specific, slightly chaotic memory. Picture it: a rainy Saturday morning, me with a serious pancake craving, but zero desire to do the whole flour-flying, batter-splattering dance. My husband jokingly said, “Just go get a McGriddle.” And while the drive-thru line was tempting, I had a fridge full of good sausage and real maple syrup from my cousin’s farm in Vermont.
I started thinking… what is it about that combo that’s so genius? It’s the perfect bite. The salty, hearty sausage against the sweet, fluffy pancake, with that hint of maple in every mouthful. But I wanted it homemade. I wanted it better. I wanted it in a form I could make once and enjoy all week. Standing in my kitchen, still in my pajamas, I started experimenting with my trusty pancake mix and a mini muffin tin. The first batch was a little wonky, but that second batch? Pure gold. My kitchen smelled like a Sunday morning, and I knew I’d stumbled onto something special. It was the happy marriage of convenience and homemade love, and I’ve been tweaking and sharing it ever since.
Gathering Your Flavor Crew
Here’s the beautiful part: you only need a handful of simple ingredients to create these flavor-packed bites. Let’s break them down, because knowing your ingredients is the first step to feeling like a rockstar in the kitchen.
- 1 lb breakfast sausage – I’m a fan of regular pork breakfast sausage for its classic, sage-kissed flavor. It’s the savory anchor. Chef’s Insight: For a leaner option, turkey breakfast sausage works wonderfully. For a kick, use spicy sausage or add a pinch of red pepper flakes while browning.
- 2 cups “just-add-water” pancake mix – I use Hungry Jack for its consistent fluffiness. This is our shortcut to tender pancakes without measuring flour, baking powder, etc. Pro Tip: Any similar complete mix will work. If you only have a “complete” mix that calls for milk/egg, just use the liquid it calls for instead of my water below, and still add the maple syrup.
- 1 cup water – Simple! This brings our batter together. If you want a richer bite, you can swap this for milk.
- 1/4 cup pure maple syrup – This is the magic wand. It sweetens the batter and gives that iconic “McGriddle” maple flavor. Please, for the love of cozy breakfasts, use the real stuff! The imitation syrup just won’t give you the same deep, caramel-like notes.
- 1 cup shredded cheddar cheese – The melty, creamy, tangy glue that holds it all together. Biggest hack right here: Shred your own cheese from a block. Pre-shredded cheese is coated to prevent clumping, which also prevents it from melting as beautifully. Trust me, the extra minute of shredding is 100% worth it.
Optional Add-Ins (Get Creative!):
- 1/4 cup diced jalapeños – For a sweet, savory, and spicy trifecta. Remove the seeds for less heat.
- 1/2 cup fresh blueberries – Adds little bursts of juicy sweetness. If using frozen, don’t thaw them first to prevent dye bleed.
Let’s Get Baking: Your Foolproof Blueprint
Ready to see how quickly these come together? Grab your favorite mixing bowl and let’s do this. I’ll walk you through every step with my best tips to ensure muffin perfection.
- Preheat & Prep: Fire up your oven to 400°F (204°C). While it warms, generously grease a 24-cup mini muffin tin with non-stick spray or butter. This is non-negotiable for easy release! My little secret: I use that bakery-style non-stick spray with flour in it. It’s a game-changer.
- Brown the Sausage: Crumble the sausage into a skillet over medium-high heat. Cook for 5-7 minutes, breaking it up with your spoon until it’s nicely browned and cooked through. Drain off any excess grease (I pour it into an old jar, not down the drain!). Let it cool for a few minutes. Why cool it? Tossing hot sausage into the batter can start cooking the eggs in the mix prematurely. We want to control the bake in the oven!
- Make the Maple Batter: In a large bowl, whisk together the pancake mix, water, and that glorious pure maple syrup. Whisk until just combined. A few small lumps are totally fine—overmixing is the enemy of fluffy pancakes! The batter will be thick, but that’s perfect for holding all our goodies.
- Fold in the Goodies: Now for the fun part! Add the cooled sausage and your freshly shredded cheddar cheese to the batter. If you’re using any add-ins like jalapeños, add them now. Use a spatula to gently fold everything together. You want everything evenly distributed without deflating the batter.
- Fill the Muffin Cups: Using a spoon or a small cookie scoop, fill each prepared muffin cup about 3/4 of the way full. Don’t be tempted to overfill! They need room to puff up and become beautiful little domes.
- Bake to Golden Perfection: Slide the tin into your preheated oven and bake for 12-15 minutes. You’re looking for gorgeous golden tops and a clean toothpick inserted into the center of a muffin. Ovens vary, so start checking at 12 minutes.
- The Cool-Down (The Hardest Part!): Let the muffins cool in the tin for about 5 minutes. This lets them set. Then, run a small knife around the edges and gently pop them out onto a wire rack. Try to let them cool for another 5-10 minutes before devouring—the cheese inside is like molten lava straight from the oven!
How to Serve These Little Treasures
The beauty of these bites is in their versatility! Serve them warm, straight from the oven (my personal favorite). For the full experience, put a small bowl of extra warm maple syrup on the table for dipping. They’re fantastic on a big platter for brunch, piled into a lunchbox with some fruit, or simply grabbed with a napkin as you run out the door. A side of scrambled eggs or fresh berries turns them into a full, happy meal.
Make Them Your Own: Endless Twists!
Once you’ve mastered the base recipe, the world is your breakfast oyster! Here are a few of my favorite spins:
- Apple Cheddar: Swap the sausage for 1 cup of finely diced, sautéed apples and use sharp white cheddar.
- Pizza Bites: Use cooked, crumbled Italian sausage, swap cheddar for mozzarella, and fold in 2 tbsp of grated Parmesan and 1 tsp of Italian seasoning. Dip in marinara!
- Maple Bacon: Replace the sausage with 1 cup of cooked, crumbled bacon. So good.
- Veggie Lover’s: Skip the meat and add 3/4 cup of a finely diced, sautéed veggie mix (bell peppers, onions, spinach).
- Sweet Tooth: Omit the sausage and cheese. Fold in 1/2 cup chocolate chips or diced strawberries for a pure pancake muffin.
Olivia’s Kitchen Notes & Stories
This recipe has become a staple in my home, and it’s evolved in the funniest ways. The first time I made them, I was so eager I burnt my tongue on the steaming cheese—lesson learned! Now I practice “patient anticipation.” I’ve also learned that these are the ultimate peace offering. Forgot to call a friend back? Show up with a bag of these. Neighbor helped with a package? McGriddle Bites to the rescue. They’re little edible hugs.
My biggest evolution was realizing their freezer potential. I double the batch every time now. Once cooled completely, I freeze them in a single layer on a baking sheet before tossing them into a freezer bag. That way they don’t stick together, and I can pull out two or twelve whenever the craving (or chaos) strikes. They’ve saved more busy mornings than I can count!
Your Questions, Answered!
Q: Can I make these in a regular-sized muffin tin?
A: Absolutely! Just grease a standard 12-cup tin and fill the cups halfway. The bake time will increase to about 18-22 minutes. Use the toothpick test for doneness.
Q: My muffins stuck to the pan! What did I do wrong?
A: Oh, we’ve all been there! First, make sure you’re greasing the tin extremely well, getting into every corner. Second, let them cool for that full 5 minutes in the tin—this lets them steam-release. If they still stick, a gentle wiggle of a butter knife around all edges usually does the trick.
Q: Can I make the batter ahead of time?
A: I don’t recommend it. Pancake batter starts activating as soon as the liquid hits the mix. Letting it sit will result in dense, flat muffins because the leavening power fizzles out. It’s so quick to mix, it’s best done right before baking.
Q: How long do they last, and what’s the best way to reheat?
A: They’ll stay fresh in an airtight container in the fridge for 3-4 days. To reheat, pop them in the microwave for 15-20 seconds, or for the crispiest exterior, warm them in a 350°F oven or toaster oven for about 8-10 minutes. From frozen, microwave for 30-45 seconds or bake at 350°F for 12-15 minutes.

McGriddle Bites : Sweet & Savory Sausage Pancake Muffins for Busy Mornings
Description
These McGriddle Bites are the ultimate grab-and-go breakfast! Fluffy pancake batter, savory sausage, melty cheddar, and a hint of maple syrup come together in a mini muffin for a sweet-and-savory morning treat. Perfect for meal prep, busy mornings, or brunch spreads—they even freeze and reheat beautifully.
Ingredients
Base Recipe:
-
1 lb breakfast sausage (pork or turkey)
-
2 cups “just-add-water” pancake mix
-
1 cup water (or milk for richer flavor)
-
1/4 cup pure maple syrup
-
1 cup shredded cheddar cheese
Optional Add-Ins:
-
1/4 cup diced jalapeños
-
1/2 cup fresh blueberries
Equipment:
-
24-cup mini muffin tin, greased
Tips:
-
Shred your own cheddar for best melt and texture.
-
Cool sausage before mixing into batter to prevent overcooking in the oven.
-
For classic McGriddle flavor, use real maple syrup—not imitation.
Instructions
-
Preheat & Prep:
Preheat oven to 400°F (204°C). Grease mini muffin tin with non-stick spray or butter. -
Cook Sausage:
Brown sausage in a skillet over medium-high heat until fully cooked, 5–7 minutes. Drain excess grease and let cool slightly. -
Make Batter:
In a large bowl, whisk together pancake mix, water, and maple syrup until just combined. Lumps are fine—don’t overmix. -
Fold in Ingredients:
Add cooled sausage and shredded cheddar (and optional add-ins). Gently fold until evenly distributed. -
Fill Muffin Tin:
Spoon batter into prepared tin, filling each cup about 3/4 full. -
Bake:
Bake 12–15 minutes, until tops are golden and a toothpick inserted in the center comes out clean. -
Cool:
Let muffins cool 5 minutes in the tin, then carefully remove to a wire rack. Cool 5–10 minutes more before serving.
Notes
-
Regular muffin tin: Fill halfway; bake 18–22 min.
-
Muffins stuck? Grease well and let cool 5 min in tin.
-
Batter ahead of time? Not recommended—pancake leavening loses power.
Nutritional Info (Per Mini Muffin)
This is an approximation based on the base recipe using the specific ingredients listed and will vary with substitutions.
Calories: ~150 | Fat: 7g | Carbohydrates: 15g | Protein: 6g
Final Thoughts: More Than Just a Muffin
At first glance, these McGriddle Bites are a simple recipe—a clever hack for harried mornings. But if you spend a little time with them, you’ll realize they’re something more. They’re a tangible piece of kindness you can give to your future self. They’re the smell of a slow weekend morning, captured and ready for a frantic Tuesday. They’re proof that the most satisfying solutions often come from embracing a little convenience and a lot of heart.
This recipe isn’t about rigid perfection. It’s an invitation—to play, to adapt, to make it yours. Maybe you’ll add a dash of hot sauce to the batter, or crown one with a tiny pat of butter fresh from the oven. That’s the spirit. It’s home cooking that understands real life: sometimes messy, always busy, but always better with something delicious to look forward to.
So here’s my final wish for you: Let these bites give you back ten minutes of peace in the morning chaos. Let them turn an ordinary Wednesday into a small celebration. Share them, freeze them, and rediscover the joy of a meal that feels like a treat, even when you’re racing out the door.
Because you deserve a great morning, every morning. And sometimes, it starts with a single, perfect bite.

Indian Egg Curry : Spiced, Comforting & Full of Flavor
The Cozy Magic of Indian Egg Curry: Your New Comfort Food Obsession
Hey there, friend! Come on in, pull up a stool, and let me pour you a cup of something warm. Can you smell that? It’s the deep, toasty aroma of cumin seeds hitting hot oil, followed by the sweet sizzle of onions softening into golden perfection. That, my friend, is the sound of comfort being made. It’s the opening act for what we’re cooking today: a glorious, soul-warming pot of Indian Egg Curry.
If you’ve ever craved a meal that feels like a hug from the inside out, you’ve come to the right place. This isn’t just dinner; it’s an experience. It’s about taking humble, everyday ingredients—eggs, tomatoes, onions, a handful of spices from your cabinet—and transforming them into something utterly spectacular. This dish is a staple in homes across India for a reason: it’s incredibly satisfying, packed with protein, and sings with layers of flavor that are complex to taste but beautifully simple to create.
Whether you’re a seasoned pro at Indian cooking or you’re just dipping your toes into these gorgeous flavors, this recipe is your perfect guide. We’re going to walk through it together, step-by-step, with plenty of my favorite kitchen hacks and stories along the way. So, tie on your favorite apron (the messy one with all the character is highly encouraged), and let’s make something unforgettable.
A Pot of Curry and a Lesson in Love
My love affair with this curry started not in a fancy restaurant, but in my college apartment kitchen, during a serious bout of homesickness. My roommate, Priya, noticed my gloomy mood and declared, “No more. You need real food.” With the confidence of someone who’d watched her mother make this a thousand times, she pulled out a single pot.
What happened next felt like alchemy. The small kitchen filled with the most incredible smells. She talked me through each spice, not just as an ingredient, but as a character in the story: the earthy foundation of turmeric, the bright kick of coriander, the warm, finishing hug of garam masala. When we finally sat down with bowls of steaming rice and that rich, red gravy cradling perfect halved eggs, it was a turning point. It wasn’t just about feeding hunger; it was about sharing a piece of home, of history, and of heart. That’s the power of this dish. It’s humble, it’s hearty, and it has an incredible ability to connect and comfort. Every time I make it now, I think of that lesson: the best meals are often the simplest, made with intention and shared with someone you care about.
Gathering Your Flavor Arsenal: Ingredients & Insights
Here’s everything you’ll need. Think of this as gathering your cast of characters before the big show! Don’t stress about perfection—cooking is an adventure, and substitutions are part of the fun.
- 6 hard-boiled eggs, peeled: The protein-packed stars of the show! Chef’s Insight: I like to prick them lightly with a fork before adding to the gravy. This helps them soak up all that incredible flavor like little sponges.
- 2 tbsp oil: A neutral oil like avocado or vegetable oil works great. This is the medium that coaxes out the flavor from our spices.
- 1/2 tsp cumin seeds: These tiny seeds are our flavor launchpad. When they hit the hot oil and sizzle, you know the magic is starting. If you only have ground cumin, use about 1/4 tsp added with the other powdered spices.
- 1 large onion, finely chopped: The sweet, savory backbone of our gravy. Take your time here! Golden-brown onions equal deep, rich flavor.
- 1 tbsp ginger-garlic paste: The dynamic duo of Indian cooking. Freshly made is fantastic, but a good-quality store-bought paste is a total time-saver and kitchen hero.
- 2 tomatoes, finely chopped or pureed: They bring a tangy sweetness and beautiful body. Sub Tip: No fresh tomatoes? A ½ cup of canned crushed tomatoes or puree works in a pinch!
- 1/2 tsp turmeric powder: Earthy, warm, and gives that classic golden hue. It’s also a nutritional powerhouse.
- 1 tsp coriander powder: This is the bright, citrusy, floral note that balances everything. Don’t skip it!
- 1/2 tsp red chili powder (adjust to taste): This is where you control the heat. Start with 1/2 tsp if you’re unsure—you can always add more. For smoky heat, use Kashmiri chili powder.
- 1/2 tsp garam masala: The “warming spice blend.” We add it at the end to preserve its beautiful, complex aroma. It’s the finishing flourish.
- Salt to taste: Your most important tool. It unlocks and marries all the other flavors.
- 1/2–3/4 cup water: This gets us to our perfect gravy consistency. Start with less, you can always add more.
- Fresh cilantro for garnish: A pop of fresh, green flavor that makes the whole dish sing. If you’re a cilantro-hater, fresh chopped parsley or even a squeeze of lemon works.
Let’s Get Cooking: Your Step-by-Step Roadmap to Delicious
Ready? Let’s turn these ingredients into magic. I’ll be right here with you, talking you through every step.
Step 1: The Egg Prep. If you haven’t already, boil and peel your eggs. Here’s my foolproof method: place eggs in a pot, cover with cold water by an inch. Bring to a rolling boil, then cover, remove from heat, and let sit for 10-12 minutes. Plunge into an ice bath. Chef’s Hack: Once peeled, take a fork and lightly prick or make small scores all over the egg whites. This is the secret handshake that invites the curry right into the egg! Set them aside.
Step 2: The Flavor Foundation. Heat your oil in a deep skillet or pan over medium heat. Test the heat with one cumin seed—if it sizzles immediately, you’re good. Add all the cumin seeds and let them dance and sizzle for about 30 seconds until they’re fragrant and maybe a shade darker. This “blooms” the spice, releasing its essential oils.
Step 3: The Golden Onions. Add your chopped onions. Now, here’s where patience pays off. Stir occasionally and let them cook slowly for 8-10 minutes. We’re not just softening them; we’re caramelizing them to a lovely golden-brown. This sweetness is non-negotiable for a deep, rich gravy. No rushing!
Step 4: Ginger-Garlic Glory. Add the ginger-garlic paste. Stir constantly for about a minute. You’ll know it’s ready when that raw, sharp smell mellows out and transforms into something mouthwatering. It should just coat the onions beautifully.
Step 5: Tomato Time. Toss in your tomatoes. If using fresh, cook them down until they’re completely soft and mushy, and you’ll see the oil start to separate from the mixture, pooling around the edges of the pan. This is called “cooking out the masala” and it’s the sign of a well-developed, concentrated base. This can take 5-8 minutes.
Step 6: Spice It Up! Now, reduce the heat to low (so the spices don’t burn!). Add the turmeric, coriander powder, red chili powder, and salt. Stir vigorously for a full 1-2 minutes. You’re toasting the spices in the oil and tomato mixture, which cooks out any raw powder taste and unlocks their full potential. Your kitchen should smell incredible right now.
Step 7: Simmer & Combine. Carefully add 1/2 cup of water. It will sizzle and steam—that’s good! Stir, scraping up any tasty bits from the bottom of the pan. Bring this to a gentle simmer. Let it bubble happily for 2-3 minutes to let the flavors meld. Taste and adjust salt or spice. Want it thinner? Add a splash more water.
Step 8: Welcome the Eggs. Gently place your prepared eggs into the simmering gravy. Spoon the sauce over them to coat. Let them simmer and get cozy in the sauce for 5-7 minutes, allowing them to heat through and absorb flavor.
Step 9: The Final Flourish. Turn off the heat. This is crucial—sprinkle the garam masala over the top and give it one gentle stir. The residual heat will wake up the spices without burning them. Garnish with a generous handful of fresh cilantro.
Let’s Dish It Up: How to Serve Your Masterpiece
Presentation is part of the joy! I love serving this family-style. Spoon the curry into a warm, shallow bowl. Halve or quarter the eggs and nestle them right into the gravy, or leave them whole for a dramatic reveal. A final sprinkle of cilantro on top is a must. Now, the all-important pairing: a big, fluffy mound of basmati rice is classic and perfect for soaking up every last drop. Warm, buttery roti or naan bread for tearing and scooping is equally heavenly. For a simple side, a cool cucumber raita or a quick onion-cucumber salad cuts through the richness beautifully.
Make It Your Own: Delicious Twists & Swaps
- Creamy Coconut Dream: Stir in 1/4 cup of coconut milk (or heavy cream for a dairy version) at the end of cooking for a luscious, slightly sweet, and rich curry.
- Spinach & Egg Power Curry: Add a few large handfuls of fresh baby spinach in the last 2 minutes of cooking. It wilts down and adds gorgeous color and nutrients.
- “Butter Chicken” Style Eggs: Add 1 tbsp of cashew or almond butter (or 2 tbsp soaked, blended cashews) with the tomatoes, and finish with a knob of butter for an ultra-rich, restaurant-style gravy.
- Vegan “No-Egg” Curry: Swap the eggs for pan-fried cubes of extra-firm tofu or even cooked chickpeas! The spiced gravy is so good, it makes anything taste amazing.
- Extra Heat & Tang: Add a slit green chili with the onions, and finish the dish with a squeeze of fresh lemon juice for a bright kick.
Olivia’s Chef Notes: Stories from a Messy Apron
This recipe has been my trusty friend for years, and like any good friend, it’s evolved. I’ve made it in a rush with pre-chopped veggies, and I’ve made it slowly on a Sunday, letting the onions caramelize for what felt like forever. Both versions were delicious, but the slow version? Sublime. One time, I accidentally used smoked paprika instead of sweet paprika thinking it was chili powder (the jars looked identical in my chaotic spice drawer!). The result was a surprisingly delicious, smoky twist that my husband still asks for. So, embrace the happy accidents!
The biggest lesson this curry has taught me is that great food doesn’t need complexity; it needs care. Taking those few extra minutes to brown the onions, to toast the spices—that’s where the love is. That’s what transforms a simple egg curry from just food into a memory on a plate.
Your Questions, Answered: FAQs & Troubleshooting
Q: My curry is too thin/watery. How can I fix it?
A: No worries! First, let it simmer uncovered for a few more minutes to reduce and thicken. If it’s still too thin, make a quick slurry: mix 1 teaspoon of cornstarch with 1 tablespoon of cold water until smooth. Stir this into the simmering curry and cook for another 1-2 minutes until thickened.
Q: I made it too spicy! Help!
A: It happens to the best of us! The best fix is to add a bit of fat and sweetness to balance the heat. Stir in a tablespoon of plain yogurt, coconut milk, or even a pinch of sugar. Adding more diced tomatoes can also help dilute the spice level.
Q: Can I make this ahead of time?
A: Absolutely! In fact, the flavors get even better as they mingle. Let the curry cool completely, then store it (with the eggs in it) in an airtight container in the fridge for up to 3 days. Reheat gently on the stovetop, adding a splash of water if needed. I don’t recommend freezing as the boiled eggs can become rubbery.
Q: My spices taste a bit raw or bitter. What did I do wrong?
A: This usually means the spices weren’t cooked long enough in the oil/tomato mixture (Step 6). Remember to reduce the heat to low and really cook them, stirring, for a full minute or two until they’re fragrant. Toasting them properly removes the raw edge and brings out their true flavor.

Indian Egg Curry : Spiced, Comforting & Full of Flavor
Description
Hey friend! This Indian Egg Curry is pure comfort in a bowl—soft-boiled eggs cradled in a rich, spiced tomato-onion gravy. It’s hearty, flavorful, and surprisingly simple to make. Whether you’re serving it with rice, roti, or naan, every bite feels like a warm hug from the inside out.
Ingredients
-
6 hard-boiled eggs, peeled (pricked lightly with a fork)
-
2 tbsp neutral oil (vegetable or avocado)
-
1/2 tsp cumin seeds
-
1 large onion, finely chopped
-
1 tbsp ginger-garlic paste
-
2 tomatoes, finely chopped or pureed
-
1/2 tsp turmeric powder
-
1 tsp coriander powder
-
1/2 tsp red chili powder (adjust to taste)
-
1/2 tsp garam masala
-
Salt to taste
-
1/2–3/4 cup water (adjust for desired gravy consistency)
-
Fresh cilantro for garnish
Tips:
-
For richer curry, stir in 1/4 cup coconut milk or cream at the end.
-
Add baby spinach in the last 2 minutes for extra greens.
-
Use Kashmiri chili powder for mild, bright color without too much heat.
Instructions
-
Boil & Prep Eggs
-
Boil eggs in covered water for 10–12 minutes, then plunge into ice water.
-
Peel, and lightly prick eggs with a fork so they soak up the curry flavors.
-
-
Bloom Spices
-
Heat oil over medium heat. Add cumin seeds and let them sizzle for 30 seconds.
-
-
Caramelize Onions
-
Add onions and cook slowly, stirring occasionally, until golden-brown (8–10 min).
-
-
Add Ginger-Garlic
-
Stir in ginger-garlic paste and cook 1 min until fragrant.
-
-
Cook Tomatoes
-
Add tomatoes and cook until soft and oil separates from the mixture (5–8 min).
-
-
Add Spices
-
Reduce heat to low. Stir in turmeric, coriander, chili powder, and salt. Cook 1–2 min to toast spices and remove raw flavor.
-
-
Simmer Gravy
-
Add 1/2 cup water and stir. Simmer 2–3 min. Adjust consistency with extra water if needed.
-
-
Add Eggs
-
Gently place eggs into the gravy. Spoon sauce over them and simmer 5–7 min for flavors to meld.
-
-
Finish
-
Turn off heat. Sprinkle garam masala and garnish with fresh cilantro.
-
Serving Suggestions
-
Serve with steamed basmati rice, warm roti, or naan.
-
Optional sides: cucumber raita or a simple onion-cucumber salad.
Notes
-
Too thin? Simmer longer or stir in a cornstarch slurry (1 tsp cornstarch + 1 tbsp water).
-
Too spicy? Add yogurt, coconut milk, or extra tomatoes to balance heat.
-
Spices taste raw? Make sure they’re cooked thoroughly in oil/tomato before adding water.
Nutritional Information*
Prep Time: 10 min | Cook Time: 25 min | Servings: 4
*Approximate values per serving (1/4 of recipe with 1.5 eggs):
Calories: 190 | Fat: 12g | Saturated Fat: 2.5g | Carbohydrates: 7g | Fiber: 2g | Sugar: 3g | Protein: 12g | Cholesterol: 280mg
Final Thoughts
So, here we are at the end of our cozy culinary journey—but really, it’s just the beginning of yours. What started with the sizzle of cumin seeds has hopefully ended with a steaming bowl of comfort that’s as rich in flavor as it is in soul.
This isn’t just a recipe for egg curry; it’s an invitation. An invitation to slow down, to play with spices, to fill your kitchen with aromas that warm more than just your stomach. It’s proof that the most memorable meals aren’t about perfection or complexity—they’re about intention. Whether you’re cooking for one on a quiet weeknight, or doubling the batch to share with friends, this dish meets you right where you are.
Remember, every pot of curry tells a story. Yours might be about mastering a new technique, finding solace in stirring, or simply giving yourself the gift of a nourishing, homemade meal. Don’t be afraid to make it your own. Add an extra pinch of chili, swirl in some coconut milk, or let the onions caramelize until they’re practically jam. This recipe is a wonderful, flexible framework—but you’re the artist.
Food, at its very best, is a connector. It connects us to different cultures, to memories, to the people we share it with, and to the simple, profound joy of creating something good. This humble egg curry—with its golden gravy and hearty, satisfying eggs—is a beautiful place to start.
So, go ahead. Take that first bite. Sop up that sauce with a piece of warm bread. And know that you’ve just created something truly special. Welcome to your new comfort food obsession. May it bring as much warmth and joy to your table as it has to mine.
Happy cooking, and even happier eating.
Pear & Brie Salad Skewers : Elegant, Easy & Perfect for Entertaining
The Appetizer That Steals Every Party (And Takes 15 Minutes Flat!)
Hey there, friend! Come on in, grab an apron, and let me pour you a glass of something bubbly. If you’ve ever stared at your fridge before guests arrive, torn between wanting to serve something impressive and needing something ridiculously easy, then you and I are kindred spirits. I’ve been there more times than I can count, usually with a flour smudge on my cheek and a dog circling my feet hoping for a dropped snack.
That’s exactly why I’m utterly obsessed with these Pear & Brie Salad Skewers. They are my secret weapon, my go-to, my “look-at-me-I’m-a-catering-whiz” trick that requires almost zero actual whiz-ness. Imagine this: a juicy, sweet slice of pear, a luscious cube of creamy Brie, a pop of peppery greens, all hugged together with a drizzle of syrupy balsamic glaze. Each bite is a perfect little symphony of sweet, savory, creamy, and fresh. They look like you fussed for hours, arranged artfully on a beautiful platter, but the truth is, they come together in about the time it takes to choose a playlist. Whether you’re setting the scene for a cozy girls’ night, a festive holiday party, or just treating yourself to a fancy snack (you deserve it!), these skewers are about to become your new best friend. Let’s make some magic—the easy, delicious, totally foolproof kind.
My “Aha!” Moment with a Pear and a Cheese Plate
This recipe was born from a happy accident, as the best ones often are. A few years back, I was frantically pulling together a last-minute book club spread. I had a beautiful wedge of Brie, some nearly-too-ripe pears, and a bag of arugula that needed using. In a panic, I started stabbing things onto toothpicks, figuring a deconstructed salad-on-a-stick was better than nothing. I drizzled the whole haphazard platter with the last of my good balsamic glaze from a fancy little bottle.
Well, you would have thought I’d slaved over a four-course meal! My friends couldn’t get enough. They raved about the “elegant presentation” and the “inspired flavor pairing.” I just stood there, hiding my messy bun and flour-dusted jeans, thinking, “If only you knew this was my ‘clean out the fridge’ move!” That night taught me a valuable lesson: incredible food doesn’t have to be complicated. Often, it’s about combining a few high-quality, beautiful ingredients with confidence and a dash of love. These skewers are my edible reminder that some of life’s (and cooking’s) best moments come from relaxed, playful improvisation.
Gathering Your Flavor Party: The Simple, Stellar Ingredients
Here’s the beautiful part: we only need a handful of ingredients to create something spectacular. Quality is key here, since each component shines individually. Let’s break it down.
- 2 ripe pears, sliced into bite-sized chunks: I adore Anjou or Bartlett pears for their sweet, juicy texture that holds up well. The slight firmness is perfect for skewering. Chef’s Insight: Give your pear a gentle press near the stem—if it yields slightly, it’s perfect. Too hard, and it’s bland; too soft, and it’s messy. No ripe pears? A crisp, sweet apple (like Honeycrisp) is a fabulous stand-in!
- 6 oz Brie cheese, cut into cubes: The star of our show! Look for a wheel that feels slightly soft to the touch. Chef’s Hack: Pop your Brie in the freezer for 15-20 minutes before cutting. This firms it up just enough to slice cleanly into neat cubes without oozing everywhere. If you’re not a Brie fan, a creamy goat cheese or even a firm camembert works beautifully.
- 1 cup baby arugula or spinach: This is our fresh, peppery crunch. I love the punch that arugula adds, but tender baby spinach is a milder, equally delightful option. Make sure your greens are dry so the dressing sticks!
- 1/4 cup candied pecans or walnuts (optional but highly recommended): This is the “party in your mouth” element! The sweet, crunchy nut adds a fantastic textural contrast and a layer of cozy flavor. Don’t have candied nuts? Toasted plain pecans or walnuts work great, or you can leave them off for a simpler bite.
- Balsamic glaze for drizzling: This is non-negotiable for that professional finish! The thick, syrupy glaze clings to the ingredients and adds a sweet-tart complexity. You can find it near the vinegars at most grocery stores. Pro-Tip: A reduced balsamic glaze is far superior to straight balsamic vinegar here, which would just run off and make things soggy.
- Toothpicks or small skewers (4-6 inch): The vehicle for our flavor! Simple wooden toothpicks are perfect for cocktail bites. For a slightly more dramatic presentation, mini bamboo skewers are a fun choice.
Let’s Build Some Bite-Sized Bliss: The Foolproof Steps
Ready? This is the fun, almost meditative part. Turn on some music, and let’s assemble.
- Prep Your Players. First, let’s get everything ready to go (this is called mise en place, and it makes you feel incredibly chef-y). Rinse and dry your pears thoroughly. Slice them in half, core them, and then cut them into generous, bite-sized chunks—about 1-inch cubes are perfect. Take your slightly chilled Brie and cut it into cubes roughly the same size. Try to include a little bit of that gorgeous edible rind on each piece; it adds flavor! Give your arugula a spin in a salad spinner or pat it gently with a towel. Have your nuts and glaze handy. My Little Tip: Squeeze a tiny bit of lemon juice over your pear chunks if you’re prepping ahead. It keeps them from browning!
- The Art of the Skewer. Now for the assembly line! Take a toothpick or skewer and pierce a piece of pear. Slide it down, leaving room at the top to hold. Next, add a cube of Brie. Finally, gently spear a small leaf or two of arugula, folding it if needed. The order is a suggestion—sometimes I do cheese, then pear, then green! If you’re using nuts, you can add one now, or simply scatter them on the platter later. The goal is to make each skewer a complete, beautiful little package. Don’t over-pack them; simplicity is elegance.
- Platter Panache. Choose a beautiful plate, a rustic wooden board, or even a simple white platter. Arrange the skewers in a sunburst pattern, lay them neatly in rows, or just pile them artfully in the center. The deep colors of the pear and greens against the white cheese are stunning on their own. Now, scatter any extra nuts or little arugula leaves around the base for a professional, abundant look.
- The Grand Finale: The Drizzle. This is the moment! Take your balsamic glaze and, holding it a foot or so above the platter, drizzle it back and forth in a loose zig-zag pattern over the skewers. A little goes a long way! The key is to do this right before serving. If you drizzle too early, the arugula can wilt and the presentation loses its crispness. Chef’s Secret: For ultra-precise drizzling, you can put the glaze in a small squeeze bottle or even a zip-top bag with a tiny corner snipped off.
How to Serve & Shine
Presentation is half the fun with these! I love serving them on a large, circular slate board or a beautiful marble platter. Tuck in a few whole pears or a small bunch of grapes around the edges for a truly lush, bountiful look. These skewers are the ultimate team players: pile them onto a grazing board next to charcuterie, crusty bread, and olives. Let them star as the appetizer at a bridal or baby shower brunch. Or, honestly, make a dozen just for you and your significant other with a glass of crisp white wine or a dry cider. They’re a conversation starter, a crowd-pleaser, and a testament to the fact that fancy can be fun and easy.
Make It Your Own: Delicious Twists & Swaps
Once you master the basic blueprint, the flavor world is your oyster! Here are a few of my favorite riffs:
- Fall Spice: Swap the balsamic glaze for a warm maple syrup drizzle and use toasted, spiced pecans.
- Summer Herb: Use a ripe peach or nectarine instead of pear. Add a tiny fresh basil leaf with the arugula and use a honey-lemon glaze.
- Prosciutto-Wrapped: For a savory punch, wrap the Brie cube in a thin slice of prosciutto before skewering.
- Vegan & Dairy-Free: Use creamy vegan cheese (a good almond-based brie-style works) and a maple-balsamic glaze. Ensure your candied nuts are vegan.
- Holiday Cranberry: Add a single plump, dried cranberry to each skewer and drizzle with a pomegranate molasses for a festive touch.
From My Kitchen to Yours: A Few Parting Thoughts
Over the years, this recipe has become my culinary security blanket. I’ve made it in a tiny apartment kitchen for two and multiplied it by ten for a 50-person wedding shower. The beauty is in its flexibility. I once even used end-of-season figs instead of pears when my tree went wild—divine! Don’t stress about perfection. If a Brie cube crumbles a bit, eat it as a chef’s treat. If your drizzle goes a little wild, call it “abstract art.” The most important ingredient is your joy. When you’re having fun in the kitchen, it translates directly to the food. These little skewers carry that happy, relaxed energy, and I promise, people can taste it. So, put on your favorite apron (the messy one tells the best stories), and enjoy every minute of creating these gorgeous, simple bites.
Your Questions, Answered!
Q: Can I make these skewers ahead of time?
A: You can do most of the work ahead! Prep and cube the pears (give them a lemon juice bath), cube the cheese, wash the greens, and have your nuts ready. Store each component separately in airtight containers in the fridge. Assemble the skewers and drizzle the glaze no more than 30 minutes before serving to keep everything looking and tasting fresh.
Q: My Brie is too soft and won’t cube neatly. Help!
A: Welcome to the club—this is the most common “issue”! The freezer trick is a lifesaver (15-20 minutes, no more!). If it’s still too soft, don’t fight it. You can slice it into wedges or simply spread a little on the pear chunk before adding the arugula. It will taste just as amazing, I promise.
Q: Is the rind on the Brie edible? Should I cut it off?
A: Yes, the white rind is completely edible and delicious! It’s a bloomy rind made of edible mold (in the best way possible, like on camembert). It adds a subtle earthy, mushroomy flavor that complements the creamy interior. I always leave it on for maximum flavor and ease.
Q: What can I use if I don’t have balsamic glaze?
A: You can make a quick mock-glaze by simmering ½ cup of balsamic vinegar in a small saucepan over medium-low heat until it reduces by half and becomes syrupy (about 10-15 minutes). Let it cool slightly before drizzling. Honey or a thick, aged balsamic vinegar can also work in a pinch.
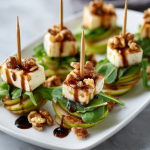
Pear & Brie Salad Skewers : Elegant, Easy & Perfect for Entertaining
Description
Hey friend! These Pear & Brie Salad Skewers are the ultimate party starter—juicy, sweet pears, creamy Brie, peppery greens, and a drizzle of balsamic glaze all come together in just 15 minutes. They look fancy, taste incredible, and require almost zero effort. Perfect for last-minute guests, brunches, or just a little treat for yourself!
Ingredients
-
2 ripe pears (Anjou or Bartlett), cut into 1-inch chunks
-
6 oz Brie cheese, cut into cubes (slightly chilled for easier slicing)
-
1 cup baby arugula or spinach, dry
-
1/4 cup candied pecans or walnuts (optional)
-
Balsamic glaze for drizzling
-
12–15 toothpicks or small skewers (4–6 inch)
Tips:
-
If pears aren’t ripe, a Honeycrisp apple works beautifully.
-
The white rind on Brie is edible and adds flavor—no need to remove it.
-
Freeze Brie for 15–20 minutes before cutting to prevent squishing.
Instructions
-
Prep Ingredients
-
Slice, core, and cube the pears. Optionally, squeeze a little lemon juice on them to prevent browning.
-
Cube the Brie into pieces roughly the same size as the pears.
-
Wash and dry the arugula. Keep nuts and balsamic glaze ready.
-
-
Assemble Skewers
-
On each toothpick, layer a pear chunk, a Brie cube, and a small leaf of arugula. Optional: add a candied nut.
-
Don’t overcrowd; each skewer should be a neat, bite-sized package.
-
-
Plate & Drizzle
-
Arrange skewers on a platter in rows, sunburst, or any artful pattern.
-
Scatter extra nuts and arugula around for a polished look.
-
Drizzle balsamic glaze lightly over the top right before serving.
-
Notes
-
Prep ahead: cut pears and cheese, wash greens, and store separately. Assemble and drizzle glaze just before serving.
-
If Brie is too soft, slice into wedges or spread on pears—still delicious.
-
Quick balsamic glaze substitute: simmer ½ cup balsamic vinegar over medium-low heat until syrupy (~10–15 minutes).
Nutritional Information*
*Estimated per skewer, based on 12 skewers and including candied pecans.
Calories: ~80 | Fat: 5g | Saturated Fat: 2.5g | Carbohydrates: 6g | Fiber: 1g | Sugar: 4g | Protein: 3g
This information is provided as a courtesy and is an estimate based on the ingredients used. For precise dietary needs, please calculate using your specific ingredients.
A Final Note from My Kitchen
This little recipe holds a special place in my heart. It’s a tangible memory of a messy, happy, last-minute moment that turned into something I’ve shared with you. That’s the beautiful thing about cooking—the recipes that stick are often the ones born from real life, not perfection.
As you make these, I hope you feel that same sense of playful ease. I hope you swap the pear for a peach, or add a slice of prosciutto, or double the nuts just because you love them. I hope you make it for people you love, or just for yourself on a quiet afternoon. Most of all, I hope it reminds you that creating joy can be wonderfully, deliciously simple.

Bacon Jalapeño Cream Cheese Balls : Bold, Cheesy Bites with a Kick
The Ultimate Party Starter: Bacon Jalapeño Cream Cheese Balls
Hey there, friend! Come on in, grab an apron, and get ready to make the appetizer that’s going to steal the show at your next gathering. If you’ve ever stood in front of the snack table at a party, wondering which delicious bite to try first, let me introduce you to the undisputed champion: Bacon Jalapeño Cream Cheese Balls. These little spheres of joy are everything you want in a party food—creamy, a little spicy, wonderfully smoky, and packed with so much flavor that people will literally follow the tray around the room.
I live for recipes that look like you spent hours in the kitchen but secretly come together with minimal effort and zero baking required. This is one of those magical dishes. We’re talking about a base of lush, tangy cream cheese, loaded with crispy bacon, sharp cheddar, and a fresh jalapeño kick, all rolled into a perfect, pop-in-your-mouth bite. They’re the culinary equivalent of your favorite cozy sweater: familiar, comforting, and always a good idea.
Whether you’re prepping for game day, hosting a book club, need a stunning potluck contribution, or just want a dangerously good snack waiting in your fridge (no judgment here!), this recipe is your new best friend. It’s forgiving, fun to make, and absolutely foolproof. So, let’s ditch the stress and create something unforgettable. Trust me, your future self, hosting a relaxed and happy party, will thank you.
My Football Sunday Revelation
I have to confess: my love for these cheesy bites was born out of sheer desperation (and a serious craving). Picture this: it’s a crisp autumn Sunday, my living room is packed with friends for the big game, and I’ve somehow managed to burn two separate batches of wings. The smoke alarm is singing its tragic song, and my timeline for delicious snacks is rapidly collapsing. Panic mode: activated.
I frantically yanked open the fridge, staring down the usual suspects: cream cheese, a block of cheddar, leftover bacon from breakfast, and a few jalapeños winking at me from the veggie drawer. In a “nothing left to lose” moment, I softened the cream cheese in the microwave, threw everything into a bowl, and started mashing it together with a fury usually reserved for kneading bread. I scooped the mixture, rolled it into haphazard balls, and tossed them on a platter with some crackers, fully expecting polite nibbles at best.
Friends, they were gone in six minutes flat. Six minutes! The burnt wing disaster was instantly forgotten, replaced by requests for the recipe and a chorus of “What *are* these?!” That day, a star was born. It taught me a beautiful kitchen lesson: sometimes the most celebrated dishes aren’t the most complicated ones. They’re the ones made with a bit of heart, a dash of improvisation, and ingredients that love each other’s company. Now, I make them with a little more finesse, but the spirit—and the speed at which they disappear—remains exactly the same.
Gathering Your Flavor All-Stars
Here’s what you’ll need to create this flavor fiesta. The beauty of this recipe is in its simplicity and the quality of a few key players. Let’s break it down:
- 8 oz cream cheese, softened – This is the creamy, tangy foundation. Full-fat is my go-to for the best texture and flavor. For a lighter version, Neufchâtel works, but avoid fat-free cream cheese as it won’t set up properly. Pro Tip: Let it sit on the counter for a good 30-60 minutes. Truly softened cream cheese mixes effortlessly, preventing a lumpy filling.
- 1 cup shredded sharp cheddar cheese – The sharper, the better! It cuts through the richness of the cream cheese. I always shred my own from a block. Pre-shredded bags contain anti-caking agents that can make the texture a bit grainy and less melty.
- 4 slices cooked bacon, crumbled – Our smoky, salty, crunchy superstar. Bake it in the oven for perfectly even, crispy strips. For a time-saver, good-quality pre-cooked bacon works in a pinch. Reserve a little extra for garnish if you’re feeling fancy!
- 1–2 fresh jalapeños, finely chopped – The “kick”! For mild heat, remove all the seeds and white ribs. For a bolder punch, leave some in. Remember to wash your hands thoroughly after handling!
- ½ tsp garlic powder & ¼ tsp onion powder – These pantry heroes add a deep, savory background note without the bite of raw alliums. They’re non-negotiable for that “what is that amazing flavor?” factor.
- Salt & pepper to taste – Go easy on the salt at first, as the bacon and cheddar bring plenty. A few cracks of black pepper are essential.
- ¼ cup chopped green onions or chives (optional) – I almost always add these for a fresh, grassy pop of color and flavor. They brighten up the whole bite.
- ½ cup crushed pecans, bacon bits, or more cheddar for coating – The fun part! Toasted, crushed pecans add a wonderful buttery crunch. Extra bacon or cheddar makes for a visually striking, flavor-packed outer layer. Get creative here!
Let’s Get Rolling: Your Foolproof Guide
Ready to make magic? Follow these simple steps, and you’ll have a platter of perfect cheese balls in no time. I’m sharing all my little hacks along the way!
Step 1: The Big Mix. In a medium-sized bowl, combine your beautifully softened cream cheese, shredded cheddar, crumbled bacon, chopped jalapeños, garlic powder, onion powder, and those optional green onions. Now, get in there with a sturdy spatula or even clean hands and mix until everything is fully and evenly incorporated. You want no streaks of plain cream cheese. Chef’s Hack: If you have a stand mixer with a paddle attachment, you can use it on low speed for about 30 seconds. Just don’t overmix!
Step 2: The Essential Chill. This step is crucial, so don’t skip it! Cover the bowl with plastic wrap and pop it into the refrigerator for at least 20-30 minutes. This firms up the mixture, making it infinitely easier to roll into neat, non-sticky balls. Think of it as giving the flavors a chance to get to know each other and become best friends.
Step 3: Scoop & Shape. After chilling, use a small cookie scoop (about 1 tablespoon size), a melon baller, or a spoon to portion out the mixture. Roll each portion between your palms to form smooth, 1 to 1.5-inch balls. If your hands start to get sticky, lightly dampen them with water. This creates a perfect, non-stick surface. Pro Tip: For ultra-uniform balls (great for that professional look), weigh each portion—aim for about 1 ounce each.
Step 4: The Coating Carnival. Spread your chosen coating (crushed pecans, extra bacon bits, reserved cheddar) on a plate or shallow bowl. Roll each cheese ball in the coating, pressing gently to make sure it adheres on all sides. This is where they get their personality and fantastic texture contrast!
Step 5: Final Chill & Serve. You can serve them immediately if you’re in a rush (they’ll still be delicious), but I recommend arranging them on a serving platter and giving them one more brief 10-minute chill to set completely. This makes them easier to pick up and ensures they hold their perfect round shape.
Plating Up for Party Success
Presentation is part of the fun! I love using a simple wooden board, a sleek slate slab, or a colorful ceramic platter. Scatter some extra fresh jalapeño slices, whole pecans, and herb sprigs around the cheese balls for a gorgeous, inviting look. For serving, offer an array of vehicles for these flavor bombs: sturdy crackers (like water crackers or Wheat Thins), pretzel crisps, slices of baguette, or even fresh, crisp veggies like endive leaves, cucumber rounds, and bell pepper strips for a lighter option. Place a small spreader or cocktail forks nearby for easy grabbing.
Make It Your Own: Creative Twists
The basic formula is a blank canvas for your cravings! Here are a few of my favorite spins:
- Southwestern Fiesta: Swap cheddar for pepper jack cheese, add 2 tbsp of finely chopped cilantro, and use crushed tortilla chips or pepitas (pumpkin seeds) for coating.
- Everything Bagel: Skip the bacon and coat the balls generously in “Everything But The Bagel” seasoning. Instant brunch superstar!
- Sweet & Smoky: Use brown sugar or maple-glazed bacon, and coat the balls in finely chopped candied pecans. A surprising and addictive combo.
- Buffalo Chicken: Fold in ½ cup of finely shredded cooked chicken and 2-3 tbsp of Buffalo sauce. Use blue cheese crumbles for coating.
- Keto-Friendly: Use full-fat ingredients and roll in crushed pork rinds or everything seasoning for a perfect low-carb snack.
A Few More Thoughts from My Kitchen
Over the years, this recipe has seen some fun experiments. Once, for a 1970s-themed party, I shaped the entire mixture into one giant cheese “ball,” coated it in a ridiculous amount of chopped walnuts, and served it with an antique cheese knife. It was a hilarious hit! I’ve also learned that these freeze beautifully. After the initial chill and before the final coating, place the uncoated balls on a parchment-lined baking sheet and flash-freeze for an hour. Then, toss them in a freezer bag. When a surprise guest pops by, just thaw in the fridge for a bit, roll in your coating, and you look like a hosting genius. The recipe has evolved from a panic-inspired mash-up to my most-requested party trick, and I love that it gives you the freedom to play. The only rule? Have fun with it.
Your Questions, Answered!
Q: My mixture is too soft/sticky to roll! What did I do wrong?
A: Don’t worry! This almost always means either a) the cream cheese wasn’t soft enough to start with, leaving little lumps that break down when mixed, or b) (most commonly) it just needs more chill time. Pop it back in the fridge for another 20 minutes. You can also lightly dampen your hands with water when rolling to prevent sticking.
Q: Can I make these ahead of time?
A: Absolutely! They are the perfect make-ahead appetizer. Prepare them fully (including coating) up to 24 hours in advance. Store them in a single layer in an airtight container in the fridge. Let them sit out for 15-20 minutes before serving to take the chill off.
Q: How long do they last in the fridge?
A: Stored properly in an airtight container, they will stay fresh and delicious for 3-4 days. The bacon may soften slightly over time, but the flavor will still be fantastic.
Q: Any tips for controlling the jalapeño heat?
A> For total control, start with one jalapeño, removing all seeds and membranes (the white ribs). After mixing, do a taste test for heat level. Remember, the heat can intensify slightly as it chills. You can always add more finely chopped jalapeño, but you can’t take it out!

Bacon Jalapeño Cream Cheese Balls : Bold, Cheesy Bites with a Kick
Description
These little flavor-packed bites are creamy, smoky, slightly spicy, and guaranteed to vanish fast at any gathering. No baking required, forgiving to make, and endlessly customizable, they’re perfect for game day, potlucks, or just a dangerously good snack waiting in your fridge.
Ingredients
Base Mix:
-
8 oz cream cheese, softened (full-fat preferred; Neufchâtel for lighter version)
-
1 cup shredded sharp cheddar cheese
-
4 slices cooked bacon, crumbled
-
1–2 fresh jalapeños, finely chopped (seeds/ribs removed for mild, left in for extra heat)
-
½ tsp garlic powder
-
¼ tsp onion powder
-
Salt & pepper, to taste
-
¼ cup chopped green onions or chives (optional)
Coating Options:
-
½ cup crushed pecans
-
Extra crumbled bacon
-
Shredded cheddar
(Get creative! You can mix and match.)
Instructions
-
Mix the Base:
-
In a medium bowl, combine cream cheese, cheddar, bacon, jalapeños, garlic powder, onion powder, and optional green onions.
-
Mix with a spatula or clean hands until smooth and fully incorporated. Stand mixer (low speed, 30 sec) works too—don’t overmix.
-
-
Chill:
-
Cover and refrigerate for 20–30 minutes to firm up mixture for easier rolling.
-
-
Scoop & Roll:
-
Use a 1-tablespoon cookie scoop, melon baller, or spoon to portion.
-
Roll each portion into 1–1.5-inch balls.
-
Lightly dampen hands with water if mixture sticks.
-
-
Coat:
-
Spread your coating choice on a plate. Roll each ball until fully coated, pressing gently.
-
-
Final Chill & Serve:
-
Serve immediately, or chill an additional 10 minutes for perfect set and easier handling.
-
Notes
-
Southwestern Fiesta: Swap cheddar for pepper jack, add 2 tbsp cilantro, coat in crushed tortilla chips or pepitas.
-
Everything Bagel: Skip bacon, coat in “Everything But The Bagel” seasoning.
-
Sweet & Smoky: Use maple-glazed bacon, coat in finely chopped candied pecans.
-
Buffalo Chicken: Fold in ½ cup shredded cooked chicken + 2–3 tbsp Buffalo sauce; coat in blue cheese crumbles.
-
Keto-Friendly: Roll in crushed pork rinds or everything seasoning.
Nutritional Information*
*Estimated per ball, based on a yield of 12, using full-fat ingredients and a pecan coating.
Calories: 130 | Fat: 11g | Saturated Fat: 5g | Cholesterol: 25mg | Sodium: 180mg | Carbohydrates: 2g | Fiber: 0.5g | Sugar: 1g | Protein: 5g
Final Thoughts
And there you have it—the ultimate no-fuss, high-reward party appetizer that’s guaranteed to earn you rave reviews. These Bacon Jalapeño Cream Cheese Balls are proof that the most memorable dishes don’t need to be complicated. They’re born from simple, bold ingredients and a little bit of kitchen confidence.
Whether you stick to the classic version or run wild with your own creative twists, this recipe is designed to work for you—not the other way around. It’s forgiving, flexible, and most importantly, fun to make. So the next time you’re tasked with bringing “something delicious,” walk in with that platter held high, knowing you’ve got the crowd-pleaser that’ll have everyone asking, “How did you make these?”




