
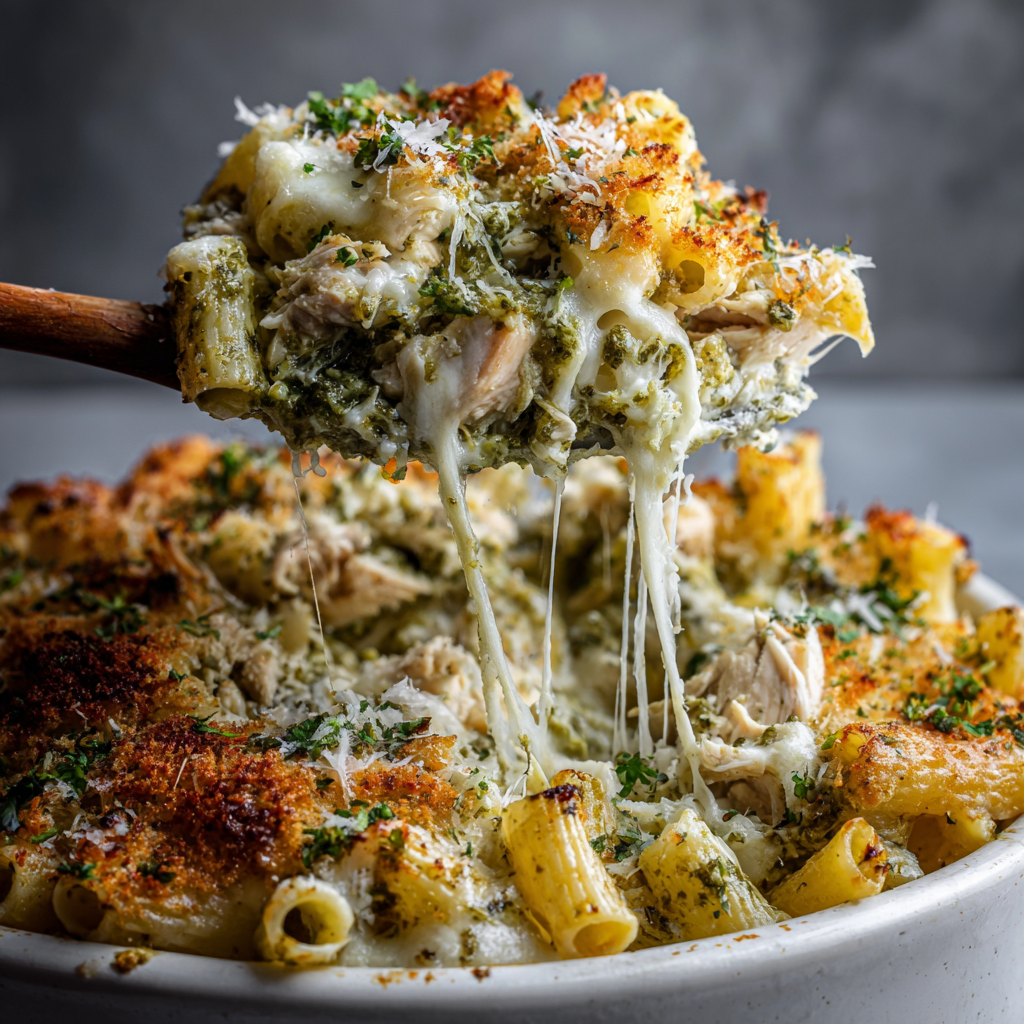
Cheesy Pesto Chicken Pasta Bake with Mozzarella & Crispy Topping
The Ultimate Cozy Night In: Cheesy Pesto Chicken Pasta Bake
Hey there, friend! Come on in, wipe your feet on the mat (we don’t stand on ceremony here), and take a deep breath. Do you smell that? It’s the promise of something warm, cheesy, and incredibly satisfying wafting from the oven. It’s the scent of a plan coming together, of a busy day finally unwinding, and of a meal that’s about to make everyone at your table do a little happy dance. If you’re staring into your fridge wondering how to turn that leftover chicken and half a jar of pesto into culinary magic, or if you simply crave a guaranteed hit of comfort, you’ve landed in the perfect spot.
Today, we’re making my Cheesy Pesto Chicken Pasta Bake with Mozzarella & a Crispy Topping. Let’s be real: sometimes, you just need a hug in a baking dish. This is that hug. It’s the glorious love child of vibrant, herby pesto, tender chicken, perfectly al dente pasta, and not one, but two kinds of cheese, all crowned with a golden, crunchy crust that gives you that perfect textural contrast. It’s the definition of easy comfort food with a fresh, flavorful twist that keeps it exciting.
The best part? This isn’t a fussy, all-day project. This is a 35-minute weeknight hero, a last-minute potluck savior, and a weekend comfort staple all rolled into one. We’re using smart shortcuts and layering flavors like pros, so you get maximum deliciousness with minimal stress. So, grab your favorite apron (the messy one with stories), preheat that oven, and let’s turn simple ingredients into something absolutely unforgettable. Get ready for the pasta bake that might just become your new favorite tradition.
Why This Bake is My Happy Place
This recipe lives in my memory as the “Great Impromptu Feast of 2018.” It was a rainy, blustery Friday. Plans had fallen through, my friends were all texting about their boring nights in, and I had a fridge full of “almost” ingredients—some leftover rotisserie chicken, half a box of penne, a jar of pesto I’d bought for a recipe I never made, and a tragic-looking nub of mozzarella. Instead of ordering pizza (tempting!), I decided to throw it all together, hoping for the best.
I called my two closest friends, who lived down the street. “Dinner’s on in 30. Bring sweatpants.” I tossed everything in a dish, smashed some crackers for a topping (I was out of breadcrumbs!), and crossed my fingers. What emerged from the oven was a bubbling, fragrant, glorious mess. We piled onto the couch, bowls in lap, and for a solid ten minutes, the only sounds were forks scraping and happy sighs. It wasn’t fancy, but it was perfect. It was the meal that proved the best gatherings aren’t planned weeks in advance—they’re born from a little creativity, what you already have, and the simple joy of feeding people you love. That’s the spirit of this bake: effortless, welcoming, and always a hit.
Gathering Your Flavor Team
Here’s what you’ll need to create this masterpiece. Think of this list as your crew—each member plays a key role!
- 2 cups cooked pasta (penne or fusilli): I love shapes that trap the sauce and chicken in their nooks! Chef’s Tip: Cook it just al dente (a minute less than package says). It will soften more in the oven, avoiding mushiness. Gluten-free pasta works beautifully here, too.
- 2 cups cooked chicken breast, shredded or cubed: The ultimate time-saver! Use leftover grilled chicken, a store-bought rotisserie bird, or quickly poach or bake two breasts. Shredded soaks up flavor; cubed gives a meatier bite. Both are great!
- ½ cup basil pesto (store-bought or homemade): This is the flavor superstar. A good store-bought pesto is fantastic. If you’re feeling fancy, my quick hack: blend a handful of fresh basil, a garlic clove, a handful of pine nuts or walnuts, a big pinch of salt, and enough olive oil to get it moving. The fresh taste is incredible!
- 1 cup shredded mozzarella cheese: For that iconic, stretchy, melty goodness. I prefer low-moisture, part-skim mozzarella for better melt and less oil. For a richer flavor, try a blend with provolone!
- ½ cup grated Parmesan cheese: The salty, umami powerhouse. Please, for the love of flavor, grate it fresh from a block if you can. The pre-grated stuff in tubs often has anti-caking agents that don’t melt as smoothly.
- ½ cup milk or cream (optional for creamier texture): This is our “luxury lane.” The pesto and cheese create plenty of sauciness, but a splash of whole milk or heavy cream makes it extra lush and cohesive. I almost always add it!
- ½ cup breadcrumbs (panko for extra crunch): The crown jewel! Panko breadcrumbs are lighter and crispier than regular. For insane flavor, toast them in a skillet with a little olive oil, garlic powder, and dried herbs before sprinkling over the bake.
- Olive oil spray or a light drizzle: This helps the topping achieve that perfect, even, golden-brown crunch. Don’t skip it!
- Salt & pepper to taste: Season as you go! Taste your mixture before it goes in the dish. Remember, pesto and parmesan are already salty, so go easy and adjust at the end.
Let’s Build Some Deliciousness: Step-by-Step
Okay, team! Let’s fire up the oven and get layering. This is the fun, no-pressure part. I’m right here with you, talking you through every step.
- Preheat & Prep: First things first, get that oven humming. Crank it to 375°F (190°C). This gives it time to reach the perfect, even temperature while we assemble. Lightly grease your favorite 8×8 or 9×9 baking dish (or a similar-sized oven-safe skillet!) with a bit of olive oil or non-stick spray. Little Chef Hack: Doing this now means no frantic scrambling with a full bowl of pasta in your hands later.
- The Big Mix: In a large, cozy-looking bowl, combine your cooked pasta, chicken, pesto, and that optional splash of milk or cream. Now, add in HALF of your shredded mozzarella and a good tablespoon or two of the parmesan. This is genius because it means you get melted cheese throughout the bake, not just on top. Give it a really good, gentle stir until everything is evenly coated in that gorgeous green pesto. This is your moment to taste! Does it need a pinch more salt? A crack of black pepper? Adjust now.
- Transfer & Top with Cheese: Pour this glorious, cheesy pesto mixture into your prepared baking dish and spread it into an even layer. Now, shower the top with the remaining mozzarella and almost all of the remaining parmesan (save a tiny bit for the very top if you’re feeling fancy). This creates that iconic, bubbly, cheesy blanket we all dream about.
- Create the Crispy Crown: In a small bowl, take your breadcrumbs. If you’re using my toasted trick, they’re already flavored and amazing. If not, you can mix in a little dried Italian herbs or garlic powder. Sprinkle them evenly over the cheesy layer. Follow this with a final dusting of the last bit of parmesan. Now, take your olive oil spray or a bottle of oil and give the top a light, even mist or drizzle. This is the secret to a uniformly crispy, golden-brown topping, not a pale, dry one.
- Bake to Perfection: Slide your masterpiece into the middle of the preheated oven. Bake for 20-25 minutes. You’re looking for the edges to be actively bubbling with cheesy goodness and the top to be a beautiful, deep golden brown. If your broiler is separate, you can give it a quick 1-2 minute broil at the end for extra browning—just don’t walk away! It goes from golden to charcoal in seconds.
- The Crucial Rest: I know, I know. It smells incredible and you want to dive in. But trust your friend Olivia: let it sit for 5 full minutes after pulling it from the oven. This allows the sauce to thicken slightly and the layers to set, so you get perfect, clean slices or scoops instead of a lava-hot, cheesy landslide. Use this time to toss a quick salad or light some candles!
How to Serve Your Masterpiece
This bake is a showstopper all on its own, straight from the dish with a big serving spoon. For the full cozy-night experience, I love scooping generous portions into shallow bowls. Garnish with a few fresh basil leaves or a little extra crack of black pepper for a pretty touch. To round out the meal, a simple arugula salad with a lemon vinaigrette cuts through the richness perfectly. Some garlic bread or a crusty baguette is also non-negotiable for mopping up every last bit of sauce. For a veggie boost, roasted cherry tomatoes or asparagus on the side are fabulous.
Make It Your Own: Creative Twists
The beauty of this recipe is its flexibility! Here are a few ways to play:
- Sun-Dried Tomato & Spinach: Swap half the pesto for chopped sun-dried tomatoes (oil-packed, drained). Stir in a couple handfuls of fresh baby spinach into the mix before baking.
- “Everything But The Kitchen Sink” Veggie: Add in sautéed mushrooms, bell peppers, or zucchini when you mix everything. Use veggie broth instead of milk for a dairy-free creaminess.
- Spicy Arrabbiata Twist: Love heat? Use a spicy red pesto or mix your basil pesto with a few tablespoons of your favorite arrabbiata or marinara sauce.
- Gluten-Free & Dairy-Free: Use your favorite GF pasta and breadcrumbs. For cheese, a blend of vegan mozzarella and nutritional yeast (for that parmesan flavor) works wonders. Use a vegan pesto (often made without dairy) and omit the milk or use unsweetened plant milk.
Chef’s Notes: From My Kitchen to Yours
This recipe has been my trusty sidekick for years, and it’s evolved in fun ways. That first time with the cracker topping? Actually brilliant—so feel free to use crushed Ritz, saltines, or even crushed potato chips in a pinch! I’ve also learned that this bake is a fantastic freezer friend. Assemble it (without baking), wrap it tightly, and freeze. Thaw overnight in the fridge, then bake as directed, adding maybe 10 extra minutes. It’s like giving your future self a delicious gift. The biggest lesson? Don’t stress about precision. Cooking is about joy, not perfection. A little more chicken, a little less pesto—it will still be delicious. This dish is a vibe, not a science experiment.
Your Questions, Answered!
Q: Can I use uncooked pasta?
A: I don’t recommend it for this specific recipe. The short bake time isn’t enough to cook raw pasta through, and the liquid ratio would be off, leaving you with a dry top and hard pasta underneath. Precooking to al dente is the key to success here.
Q: My topping is getting soggy/burning. Help!
A: Sogginess usually means the dish is too crowded or covered in steam. Make sure your baking dish isn’t overfilled. If things are looking too wet midway, you can leave it in a few minutes longer with the oven door cracked. Burning? Your oven might run hot, or the rack is too high. Next time, try baking at 350°F or moving the rack to the middle. A piece of foil loosely laid over the top can shield it if it’s browning too fast.
Q: It tastes a bit bland. What happened?
A> Pesto potency varies wildly by brand! This is why the “taste and adjust” step is so crucial. If it’s bland, you likely need more salt, a squeeze of lemon juice to brighten it, or more pesto. Next time, try a different brand or make a small batch of your own—the flavor difference is night and day.
Q: Can I make this ahead of time?
A> Absolutely! Assemble the entire bake, cover tightly, and refrigerate for up to 24 hours. When ready, bake straight from the fridge, adding 5-10 minutes to the bake time since it’s starting cold. The breadcrumbs might not get quite as crisp, but it will still be delicious.
Cheesy Pesto Chicken Pasta Bake with Mozzarella & Crispy Topping
Description
Cheesy Pesto Chicken Pasta Bake
Comforting, cheesy, and ready fast
Time
-
Prep: 10 minutes
-
Cook: 25 minutes
-
Total: 35 minutes
Ingredients
-
2 cups cooked pasta (penne or fusilli)
-
2 cups cooked chicken, shredded or cubed
-
½ cup basil pesto
-
1 cup shredded mozzarella cheese
-
½ cup grated Parmesan cheese
-
½ cup milk or cream (optional, for extra creaminess)
-
½ cup breadcrumbs or panko
-
Olive oil spray or drizzle
-
Salt & black pepper, to taste
Instructions
-
Preheat Oven
Preheat oven to 375°F (190°C). Lightly grease an 8×8 or 9×9 baking dish. -
Mix Filling
In a large bowl, combine pasta, chicken, pesto, milk/cream (if using),
½ cup mozzarella, and ¼ cup Parmesan.
Season lightly with salt and pepper. -
Assemble
Transfer mixture to prepared baking dish and spread evenly.
Top with remaining mozzarella and Parmesan. -
Add Topping
Sprinkle breadcrumbs evenly over the top.
Lightly spray or drizzle with olive oil. -
Bake
Bake uncovered for 20–25 minutes, until bubbly and golden brown. -
Rest & Serve
Let rest 5 minutes before serving.
Notes
-
Cook pasta al dente to avoid mushy texture
-
Add sautéed mushrooms, spinach, or sun-dried tomatoes if desired
-
Broil 1–2 minutes for extra crispy topping (watch closely)
Nutritional Info (Per Serving, approx.)
Calories: ~480 | Protein: 32g | Carbs: 36g | Fat: 24g
Prep Time: 10 mins | Cook Time: 25 mins | Total Time: 35 mins | Serves: 4
Thanks for cooking with me today! I hope this bake brings as much warmth and joy to your kitchen as it has to mine. Now, go enjoy that well-earned feast. Until next time, keep your whisks busy and your heart full!
Final Thoughts
As the last bites are scraped from the dish and the kitchen fills with that post-feast contentment, I’m reminded why this bake is a forever favorite. It’s not about fancy techniques or perfect presentation. It’s about the quiet magic of turning a handful of everyday ingredients into a moment of genuine comfort.
This recipe is a blueprint for warmth—a dish that asks for little but gives back so much. It’s proof that a great meal doesn’t have to be complicated, and that the best gatherings often happen when you least expect them, with sweatpants and full hearts.
So, bookmark this page, share it with a friend, or simply trust that you can always come back here when you need a guaranteed dose of delicious. Thank you for letting me share my kitchen table with you today. May your baking dish always be bubbly, your cheese always stretchy, and your nights always a little cozier because of it.
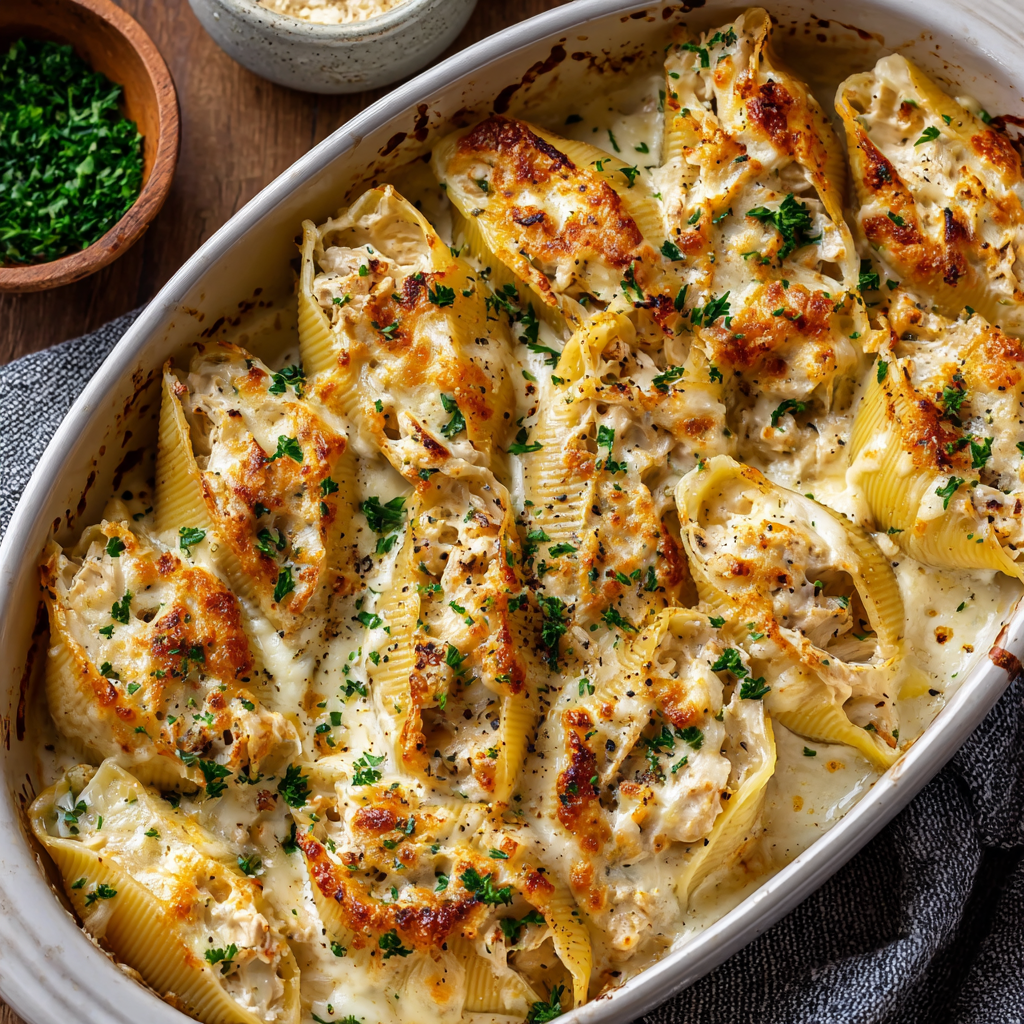
Chicken Alfredo Stuffed Shells : Creamy, Cheesy, and Comfort-Filled
Chicken Alfredo Stuffed Shells: The Cozy, Cheesy Hug Your Dinner Table Needs
Hey friends, Olivia here! Can we all just agree that sometimes, the universe sends a sign in the form of a recipe? It usually looks like a chaotic kitchen, a craving you just can’t shake, and a deep, soul-level need for something that feels like a warm hug from the inside out. For me lately, that sign has been flashing in big, cheesy, pasta-shaped letters. If you’ve been dreaming of a dish that’s the glorious love child of creamy fettuccine Alfredo and the fun, shareable joy of stuffed shells, my friends, your dream is about to become delicious reality.
These Chicken Alfredo Stuffed Shells are my latest obsession, and I’m so thrilled to share them with you. We’re talking tender jumbo pasta shells, each one lovingly packed with a rich, savory filling of shredded chicken, creamy ricotta, and nutty Parmesan. Then, because we believe in abundance, we drench the whole glorious pan in a velvety Alfredo sauce and blanket it with melty, golden mozzarella. It bakes up bubbly, fragrant, and utterly irresistible. This isn’t just dinner; it’s an experience. It’s the kind of meal that makes everyone gather in the kitchen, asking “is it ready yet?” and that yields the coveted silent table, broken only by murmurs of “oh wow.” Perfect for a bustling family dinner, impressive enough for guests, and fabulous as leftovers (if you’re lucky enough to have any), this recipe is your new secret weapon for pure, unadulterated comfort.
And the best part? It’s deceptively simple. No fancy techniques, no hard-to-find ingredients. Just good, honest food made with heart. So, tie on your favorite apron (the messy one tells the best stories), preheat that oven, and let’s make some magic together.
The Night That Started It All: A Tale of Empty Fridges & Full Hearts
This recipe was born from one of those “what on earth am I going to make for dinner?” nights. You know the ones. It was a chilly Friday, my best friends were coming over for a much-needed catch-up, and my fridge was a landscape of random leftovers: some shredded chicken from Tuesday’s roast, a half-container of ricotta from a lasagna experiment, and a jar of Alfredo sauce staring at me from the pantry door. Pasta was a given, but plain old pasta felt… meh.
Then I spotted the box of jumbo shells hiding behind the spaghetti. A lightbulb went off. What if I *stuffed* them? I figured, at worst, we’d have a cheesy, laughable mess. At best? Well, let me tell you. The smell that filled my kitchen as it baked was pure wizardry. When I pulled that golden, bubbling dish out of the oven, the “oohs” and “aahs” were immediate. We dug in, passed the garlic bread, and spent the next two hours laughing, talking, and scraping the baking dish clean. It was one of those perfectly unplanned, cozy nights that reminded me why I love to cook: it’s not about perfection, it’s about connection. These shells became an instant legend in our friend group, and I’ve been refining the recipe ever since. It’s a reminder that the best creations often come from a little bit of chaos and a whole lot of love.
Gathering Your Cozy Kitchen Crew: Ingredients & Insights
Here’s everything you’ll need to create this masterpiece. I’ve added some notes and swaps because cooking should be flexible, not stressful!
- 18–20 jumbo pasta shells: The edible vessels of joy! Look for “conchiglioni” or just “jumbo shells.” Don’t stress if a few crack while boiling—we call those “chef’s snacks.”
- 2 cups cooked shredded chicken: The ultimate time-saver! I use leftover roasted chicken, a store-bought rotisserie bird, or even boiled chicken breasts. Want a twist? Try shredded turkey or even finely chopped mushrooms for a veggie version.
- 1 cup ricotta cheese: Our creamy, dreamy filling base. For the best texture, use whole-milk ricotta. If you’re in a pinch, small-curd cottage cheese (drained) works surprisingly well!
- 1/2 cup grated Parmesan cheese: Please, for the love of flavor, grab a wedge and grate it yourself! The pre-grated stuff has anti-caking agents that can make it grainy. This adds a salty, umami punch to the filling.
- 1 1/2 cups shredded mozzarella (divided): We use half in the filling for gooey pockets and half on top for that iconic golden crust. A low-moisture, part-skim mozzarella melts beautifully without making things watery.
- 2 cups Alfredo sauce: Homemade is divine (just butter, cream, Parm!), but a high-quality store-bought jar is a fantastic shortcut. No judgment here! Want to lighten it up? A lighter Alfredo or even a garlic-bechamel works.
- 1 tsp garlic powder: This might seem small, but it distributes garlic flavor evenly throughout the filling without the risk of burning. Fresh garlic is great in the sauce, but here, powder is our secret weapon.
- Salt and black pepper, to taste: Season as you go! Taste your filling before stuffing—it should be delicious on its own.
- Fresh parsley, for garnish (optional): A sprinkle of green adds a fresh pop of color and a nice little flavor contrast to all that richness.
Let’s Build Some Deliciousness: Step-by-Step Instructions
Ready? Let’s do this! I’ll walk you through each step with my favorite tips to ensure pasta perfection.
1. Preheat & Prep: Crank your oven to 180°C (350°F). This gives it plenty of time to get perfectly toasty while you work. Grab a 9×13 inch baking dish and give it a light spray with cooking oil. Trust me, it makes cleanup a dream.
2. Cook the Shells: Bring a large pot of heavily salted water to a boil. Think “sea-water salty”—it’s your one chance to season the pasta itself. Add your jumbo shells and cook for about 9-10 minutes, or just until al dente. They should be pliable but still have a firm bite, as they’ll cook more in the oven. Immediately drain them and arrange them in a single layer on a baking sheet or plate to cool. Pro Tip: Drizzle them with a tiny bit of olive oil and gently toss to prevent sticking. This makes them much easier to handle when stuffing!
3. Create the Magical Filling: In a large mixing bowl, combine the ricotta, shredded chicken, grated Parmesan, 1/2 cup of the mozzarella, garlic powder, salt, and pepper. Mix it gently but thoroughly with a fork. Give it a taste! This is your moment to adjust seasoning. Need more pepper? Add it now. Chef’s Hack: For extra flavor and moisture, stir in a tablespoon or two of the Alfredo sauce into the filling mixture. It’s a game-changer!
4. Assemble with Love: Spread about half a cup (just enough to coat the bottom) of your Alfredo sauce in the prepared baking dish. Now, for the fun part! Take a cooled shell in your hand. Using a spoon (a teaspoon or small cookie scoop works great), fill it generously with the chicken-ricotta mixture. Don’t be shy! Place it seam-side up in the dish. Repeat with all shells, snuggling them close together in the dish. They support each other beautifully.
5. Sauce & Cheese Blanket: Pour the remaining Alfredo sauce evenly over the top of all your stuffed shells. Use the back of a spoon to gently spread it and let some drip down the sides. Now, shower the top with the remaining 1 cup of shredded mozzarella. This is going to create that irresistible, bubbly, golden-brown lid we all crave.
6. Bake to Perfection: Cover the dish tightly with aluminum foil. This initial covered bake steams the shells, heating everything through without drying out the top. Bake for 25 minutes. Then, carefully remove the foil (watch out for steam!), and bake for another 10-15 minutes, or until the cheese is gloriously melted and spotted with golden brown, and the sauce is bubbling around the edges.
7. The Finishing Touch: Remove from the oven and let it rest for 5-10 minutes. This is crucial! It allows the sauce to settle and the shells to firm up just a bit, making serving so much easier. Then, sprinkle with chopped fresh parsley if you like, and get ready to serve up some serious happiness.
How to Serve These Cheesy Wonders
Presentation is part of the fun! I like to use a large, shallow serving spoon to scoop out 3-4 shells per person, making sure to get some of that saucy goodness from the bottom of the dish. Plate them alongside something vibrant and fresh to cut through the richness. My go-tos are a simple crisp green salad with a lemony vinaigrette, some garlic butter-roasted broccoli, or a pile of sautéed green beans with almonds. And let’s be real—a warm, crusty loaf of garlic bread is basically mandatory for sauce-mopping duties. It’s a feast that feels fancy but is built on the foundation of pure, simple comfort.
Make It Your Own: Delicious Variations
Love the base recipe? Here are some fun ways to play with it:
- Spinach & Artichoke Twist: Stir a thawed and thoroughly squeezed 10-oz package of frozen chopped spinach and 1/2 cup of chopped marinated artichoke hearts into the filling. It’s like your favorite dip in pasta form!
- Sun-Dried Tomato & Basil: Add 1/3 cup of chopped oil-packed sun-dried tomatoes and 2 tablespoons of chopped fresh basil to the filling for a sweet, tangy, and aromatic punch.
- Mushroom “Alfredo” (Veggie): Swap the chicken for 2 cups of finely chopped, sautéed cremini mushrooms and use a vegetarian Alfredo sauce for a deeply savory, meat-free masterpiece.
- Spicy Buffalo Chicken: Toss your shredded chicken in 1/4 cup of Buffalo sauce before adding it to the ricotta mixture. Use a blue cheese dressing instead of Alfredo sauce for the ultimate game-day twist.
- Gluten-Free/Dietary Friendly: Use your favorite gluten-free jumbo shells and a gluten-free Alfredo sauce. For a lower-carb option, try stuffing the mixture into hollowed-out zucchini boats and baking as directed.
Olivia’s Chef Notes & Kitchen Confessions
This recipe has truly evolved from that “clean out the fridge” experiment. I’ve learned a few things along the way: First, letting the shells cool before stuffing saves your fingerprints! Second, if you’re making homemade Alfredo, a pinch of fresh nutmeg is a secret, old-world trick that makes the flavor sing. And third, this dish freezes like a dream. Assemble it completely in a freezer-safe dish (hold the final bake), cover tightly, and freeze for up to 3 months. Bake from frozen, adding an extra 20-30 minutes covered baking time.
One funny kitchen story? The first time I made these, I was so eager I didn’t let them rest. I went to serve them and my beautiful stuffed shells turned into a delicious, but decidedly sloppy, “Alfredo Chicken Shell Casserole.” Still tasted amazing, but my plating dreams were dashed. The 10-minute rest is now non-negotiable in my kitchen—a lesson learned with a smile (and a spoon).
Your Questions, Answered: FAQs & Troubleshooting
Q: My shells cracked/ripped while boiling! Help!
A: No panic! This happens to everyone. First, make sure your water is at a rolling boil before adding the shells. Gently lower them in. If a few do crack, they’re still totally usable. Just place them crack-side down in the baking dish—the filling and sauce will hold them together. Consider them “well-ventilated.”
Q: Can I make this ahead of time?
A: Absolutely! It’s a fantastic make-ahead meal. Assemble the entire dish (through step 5), cover tightly, and refrigerate for up to 24 hours. When ready to bake, you may need to add 5-10 extra minutes to the covered baking time since it’s starting from cold. You can also freeze it as noted above.
Q: My sauce seems dry or thick after baking. What happened?
A: This usually means the sauce was a bit too thick to begin with, or the oven temp was too high. Next time, thin your Alfredo sauce with a splash of milk or pasta water before pouring it over the shells. Also, ensure your oven is calibrated correctly—an oven thermometer is a cheap and invaluable tool! To fix it now, just serve with a little extra warmed sauce on the side.
Q: What’s the best way to shred chicken?
A> My favorite easy method: place warm, cooked chicken breasts (or meat from a rotisserie chicken) in the bowl of a stand mixer fitted with the paddle attachment. Mix on low speed for 30-60 seconds. It shreds it perfectly! Two forks also do the trick, if you don’t mind a little arm workout.
Chicken Alfredo Stuffed Shells : Creamy, Cheesy, and Comfort-Filled
Description
Chicken Alfredo Stuffed Shells
Creamy, cheesy comfort baked to perfection
Time
-
Prep: 20 minutes
-
Cook: 40 minutes
-
Total: 1 hour
-
Serves: 6
Ingredients
-
18–20 jumbo pasta shells
-
2 cups cooked shredded chicken
-
1 cup whole-milk ricotta cheese
-
½ cup grated Parmesan cheese
-
1½ cups shredded mozzarella cheese, divided
-
2 cups Alfredo sauce
-
1 tsp garlic powder
-
Salt & black pepper, to taste
-
Cooking spray or olive oil (for dish)
-
Fresh parsley, chopped (optional garnish)
Instructions
-
Preheat Oven
Preheat oven to 350°F (180°C). Lightly grease a 9×13-inch baking dish. -
Cook Pasta Shells
Boil shells in well-salted water until al dente. Drain and lay flat to cool. -
Make Filling
In a large bowl, mix:-
shredded chicken
-
ricotta
-
Parmesan
-
½ cup mozzarella
-
garlic powder
-
salt & pepper
-
-
Assemble
Spread about ½ cup Alfredo sauce on the bottom of the baking dish.
Stuff each shell generously with filling and place seam-side up in dish. -
Sauce & Cheese
Pour remaining Alfredo sauce over shells.
Sprinkle with remaining 1 cup mozzarella. -
Bake
Cover with foil and bake 25 minutes.
Uncover and bake 10–15 minutes until bubbly and golden. -
Rest & Serve
Let rest 5–10 minutes before serving. Garnish with parsley if desired.
Notes
-
Add 1–2 tbsp Alfredo sauce to filling for extra creaminess
-
Let shells cool before stuffing to prevent tearing
-
Thin thick sauce with a splash of milk if needed
Nutritional Information (Approximate, Per Serving)
Please note: This is an estimate based on the ingredients listed and using a standard store-bought Alfredo sauce. Values will vary with specific brands and substitutions.
Servings: 6 | Calories: ~460 | Fat: 26g | Saturated Fat: 13g | Carbohydrates: 25g | Fiber: 1g | Sugar: 2g | Protein: 32g | Sodium: 850mg
Final Thoughts: More Than Just a Meal
In the end, these Chicken Alfredo Stuffed Shells are about so much more than a list of ingredients and steps. They’re a reminder that the most beloved dishes aren’t always the most elaborate. They’re often born from a little ingenuity, a desire to gather, and the simple goal of sharing something delicious and comforting.
This recipe is your invitation to slow down and enjoy the process—the rhythm of stuffing each shell, the anticipation as the cheesy aroma fills your kitchen, and the shared contentment around the table. It’s forgiving, adaptable, and consistently rewarding. Whether it becomes your go-to for feeding a hungry family, your star dish for impressing friends, or your secret weapon for meal prep, I hope it brings as much joy to your kitchen as it has to mine.
So here’s to the cozy hugs, the empty baking dishes, and the full hearts. Happy cooking, friends. May your shells be always stuffed, your cheese always bubbly, and your table always surrounded by good company.
With love and a full baking dish,
Olivia
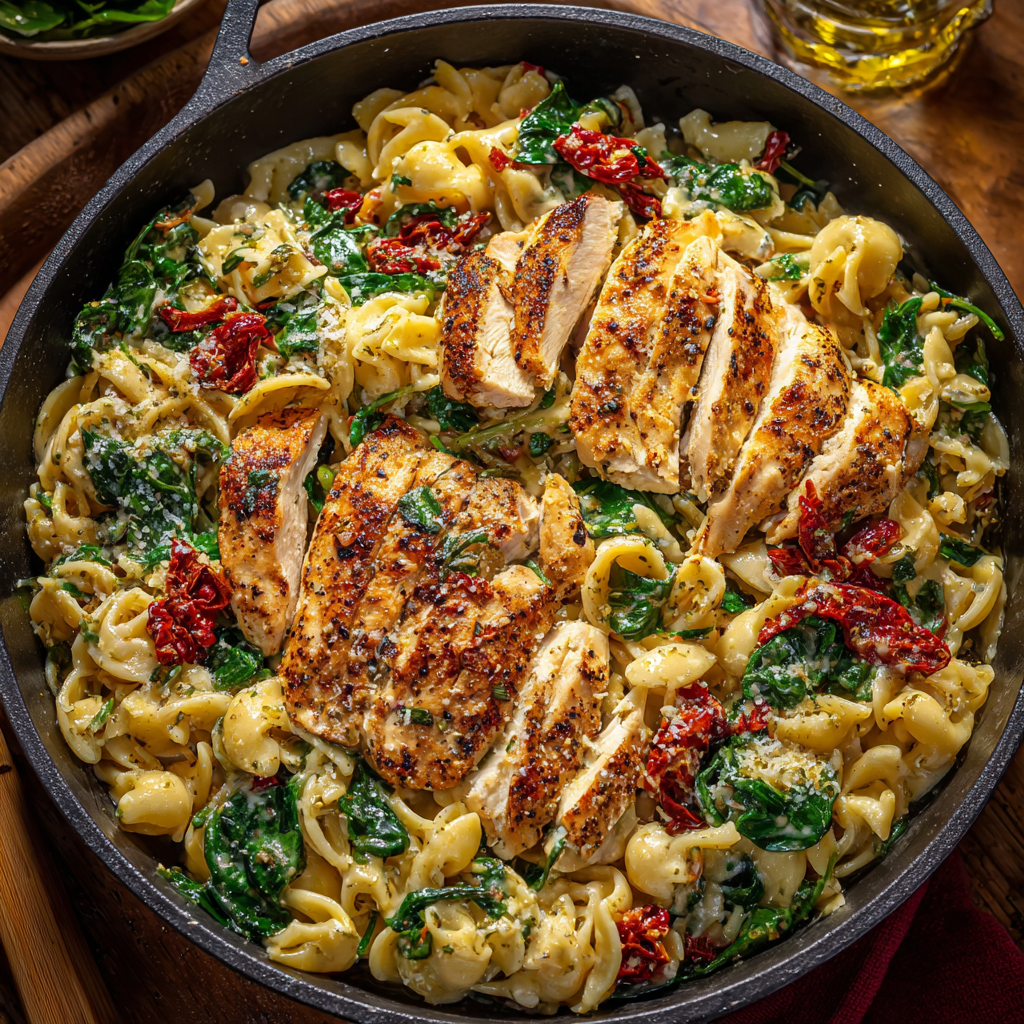
One-Pan Tuscan Chicken Pasta Skillet with Spinach & Sun-Dried Tomatoes
One-Pan Tuscan Chicken Pasta: Your New Weeknight Best Friend
Hey there, friend! Come on in, pull up a stool, and let me pour you a glass of something good. Can you smell that? It’s the scent of garlic just starting to sizzle, the rich perfume of sun-dried tomatoes, and the promise of a creamy, cheesy sauce bubbling away. That, my fellow flavor-lover, is the soundtrack to tonight’s dinner: a One-Pan Tuscan Chicken Pasta Skillet that’s about to change your weeknight game forever.
If you’re anything like me, your brain hits about 5 PM and starts screaming two things: “I want something incredibly delicious that tastes like I spent hours in a sun-drenched Italian kitchen,” and “But I also want to be done with dishes and relaxing on the couch in 30 minutes flat.” Can we have both? I’m here to tell you, with a big, confident nod and a flourish of my (probably stained) apron, YES. Absolutely yes.
This dish is my love letter to busy people who refuse to sacrifice flavor. It’s creamy, comforting, and packed with those bold, rustic Tuscan flavors we all crave—juicy chicken, sweet-tangy sun-dried tomatoes, fresh spinach, and tender pasta, all swimming in a luxurious garlic-parmesan sauce. The best part? You cook the pasta right in the sauce. One pan. Minimal fuss. Maximum applause from anyone lucky enough to be at your table. So, grab your favorite large skillet, and let’s turn a handful of simple ingredients into pure, unadulterated dinnertime magic.
The Night Nonna’s Spirit Visited My Skillet
This recipe didn’t start in a fancy test kitchen; it was born from a happy accident and a serious craving for a memory. Years ago, I spent a dreamy autumn in a little stone cottage just outside Florence. My neighbor, an unstoppable nonna named Giulia, would often call me over just as the sun was setting. “Olivia! Vieni! Mangia!” She’d gesture to a table groaning under platters of food, always featuring some version of pasta in a rich, savory sauce that had simmered all afternoon.
Fast forward to a chaotic Tuesday in my own kitchen, years later. I was missing that feeling, that depth of flavor, but Giulia’s all-day simmer wasn’t an option. I had chicken, I had some lonely sun-dried tomatoes from another recipe, and a “what if?” moment struck. What if I built a sauce with those intense flavors and cooked the pasta in it, letting it soak up every bit of goodness? I gave it a shot, throwing in spinach for color and cream for lushness. The second that first forkful hit my mouth, I was transported. It wasn’t Giulia’s slow-simmered ragù, but it captured its spirit—its heartiness, its generosity, its absolute joy. It was Tuscan flavor, translated for the reality of a modern, busy life. And that, I knew, was a recipe worth sharing with you.
Gathering Your Flavor Team: Ingredients & Insights
Great dishes start with great ingredients, but flexibility is my kitchen mantra. Here’s what you’ll need and my little chef notes on why each one matters.
- 2 chicken breasts, sliced thin: Slicing them thin ensures quick, even cooking and more surface area for that gorgeous golden sear. Chef’s Tip: For maximum tenderness, place the breasts between two pieces of plastic wrap and gently pound them to an even ½-inch thickness before slicing.
- 2 cups uncooked pasta (penne or rotini work well): Short, sturdy shapes are perfect for catching the creamy sauce. I’m a penne fanatic! Substitution: Use gluten-free pasta if needed—just check the liquid amounts, as some GF pasta absorbs more.
- 2 cups chicken broth: This forms the flavorful base of our sauce. Chef’s Insight: Using a low-sodium broth lets you control the salt level perfectly. A good-quality broth makes a noticeable difference here!
- 1 cup milk or cream: Milk gives a lighter sauce, heavy cream delivers ultimate indulgence. I often use half-and-half for the perfect middle ground. Dietary Swap: Full-fat coconut milk is a fantastic dairy-free alternative that adds a lovely richness.
- ½ cup sun-dried tomatoes, chopped: These are the flavor bombs! They add a concentrated sweet-tart punch. Note: If using oil-packed, drain them lightly. If using dry-packed, soak them in hot water for 10 minutes first to soften.
- 2 cups baby spinach: It wilts down beautifully and adds a pop of color and nutrients. Don’t worry—it seems like a mountain but melts down to nothing!
- 3 cloves garlic, minced: Non-negotiable for that aromatic foundation. Fresh is best here!
- ½ cup grated parmesan cheese: Adds salty, nutty depth and helps thicken the sauce. Pro Move: Grate it yourself off a block for superior meltiness. The pre-grated stuff often contains anti-caking agents.
- 1 tablespoon olive oil: For sautéing. Use the oil from your sun-dried tomato jar for an extra flavor kick if you have it!
- Salt, pepper, and Italian seasoning to taste: Season in layers! We’ll season the chicken, then the sauce. Your Italian seasoning blend is your best friend—it’s like a little flavor party in a jar.
Let’s Get Cooking: Your Foolproof Steps to Skillet Glory
Ready? Tie on that apron, and let’s dance. This is where the one-pan magic happens, step by simple step.
- Brown Your Chicken to Perfection. Heat that olive oil in your large, deep skillet over medium-high heat. Pat your chicken slices dry with a paper towel (this is KEY for a good sear!), then season them generously with salt, pepper, and Italian seasoning. Add them to the hot pan in a single layer—don’t crowd them! Let them cook undisturbed for 3-4 minutes per side until they’re beautifully golden and cooked through. Chef’s Hack: Don’t move the chicken around right away. Let it develop that golden crust—that’s where the big flavor lives. Remove the chicken to a plate and let it rest. It will finish cooking there and stay juicy.
- Build Your Flavor Foundation. In that same glorious skillet (see all those tasty brown bits? That’s fond, and it’s liquid gold!), reduce the heat to medium. Add the minced garlic and sauté for just about 60 seconds until it’s fragrant. Do not let it brown! Burnt garlic turns bitter. Then, stir in your chopped sun-dried tomatoes. Let them mingle with the garlic for another minute, soaking up all those pan juices.
- The One-Pan Pasta Magic. Now, pour in your uncooked pasta. Give it a quick stir to coat it in the garlicky tomato oil. Here comes the game-changer: pour in the chicken broth and your milk or cream. Give everything a good stir, scraping up any browned bits from the bottom of the pan. Bring the liquid to a lively simmer, then immediately reduce the heat to medium-low, cover the skillet with a lid, and let it cook for 10-12 minutes. Stir it once or twice to prevent sticking. You’ll know it’s ready when the pasta is al dente (tender but with a slight bite) and most of the liquid has been absorbed.
- Bring It All Home. Uncover your masterpiece! The sauce will look a bit thin—that’s perfect. Remove the skillet from the heat. Stir in the grated parmesan cheese until it melts into a creamy dream. Then, add the fresh spinach and your reserved cooked chicken (and any juices from the plate!). Gently fold everything together. The residual heat will wilt the spinach perfectly and warm the chicken through. Let it sit for 2-3 minutes—the sauce will thicken up luxuriously as it rests.
- The Final Touch. Give it a final taste. Does it need another pinch of salt? A crack of black pepper? Adjust to your heart’s content. This is your dish!
Plating Your Tuscan Masterpiece
Serving this is a joy. I love using a big, shallow serving bowl or just spooning it directly from the skillet onto plates for that rustic, family-style vibe. Garnish with an extra snowfall of parmesan, a few red pepper flakes for a subtle kick, and a generous sprinkle of fresh chopped basil or parsley. A simple side of crusty bread for mopping up every last drop of sauce is non-negotiable in my house. Pour a glass of crisp Pinot Grigio or a light Chianti, and you’ve got a meal that feels like a hug.
Make It Your Own: Delicious Twists & Swaps
The beauty of this skillet is its adaptability! Here are a few ways to play with the formula:
- Seafood Sensation: Swap the chicken for peeled shrimp or scallops. Add them in the last 3-4 minutes of cooking, just until opaque.
- Mushroom & Artichoke Twist: Love veggies? Sauté 8 oz of sliced cremini mushrooms after the chicken. Stir in a cup of marinated artichoke hearts with the spinach.
- Sun-Dried Tomato Pesto Power: For an even deeper flavor, stir in 2 tablespoons of sun-dried tomato pesto with the broth.
- Dairy-Free Delight: Use full-fat coconut milk and a dairy-free parmesan alternative. The coconut flavor pairs surprisingly well with the Tuscan notes!
- Extra Protein Punch: Add a can of drained and rinsed white beans (cannellini or great northern) with the spinach for a heartier, fiber-rich meal.
From My Kitchen to Yours: A Few Parting Notes
This recipe has evolved so much since that first “what if” Tuesday. I’ve made it for best friends after a long day, for new parents needing a no-fuss meal, and for myself more times than I can count. My biggest lesson? Trust the process. That moment when you add the dry pasta to the liquid might feel strange, but it works! Also, your skillet size matters—a 12-inch deep skillet or braiser is ideal. If yours is smaller, the liquid might evaporate too fast; just add a splash more broth if needed.
And a funny story: I once made this for a friend who claimed to “hate spinach.” I didn’t say a word, just served it. She devoured two helpings before I mentioned the spinach. Her eyes went wide. “That was spinach?!” The magic of wilting it right in—it just becomes part of the creamy sauce. A stealthy veggie win!
Your Questions, Answered: FAQs & Troubleshooting
Q: My sauce is too thin/too thick. What did I do wrong?
A: Don’t worry, both are easy fixes! If it’s too thin after the rest time, simply return the skillet to low heat and let it simmer uncovered for a few more minutes, stirring frequently. It will reduce and thicken. If it’s too thick (the pasta absorbed all the liquid a bit too eagerly), just stir in a splash of additional broth, milk, or even water until it reaches your desired creaminess.
Q: Can I use a different type of pasta?
A> You can, but stick to short shapes with a similar cook time (around 10-12 minutes). Fusilli, farfalle, or medium shells are great. Avoid long pasta like spaghetti or delicate shapes like orzo, as they cook differently and won’t work as well with this method.
Q: How do I store and reheat leftovers?
A> Store cooled leftovers in an airtight container in the fridge for up to 3 days. Reheat gently in a skillet over low heat, adding a small splash of broth or milk to loosen the sauce back up. The microwave works too, but stir it well mid-way.
Q: Is it really only one pan? What about the plate for the chicken?
A> Okay, you got me! Technically, it’s one cooking skillet. You’ll use a plate or bowl to hold the chicken and a cutting board for prep. But the promise of no separate pot for pasta and no extra pan for sauce? That, my friend, is the weeknight victory we’re celebrating.
One-Pan Tuscan Chicken Pasta Skillet with Spinach & Sun-Dried Tomatoes
Description
One-Pan Tuscan Chicken Pasta
Creamy, comforting, and ready in 30 minutes—all in one skillet.
Ingredients
-
2 boneless, skinless chicken breasts, sliced thin
-
Salt & black pepper, to taste
-
1 tsp Italian seasoning
-
1 tbsp olive oil
-
3 cloves garlic, minced
-
½ cup sun-dried tomatoes, chopped
-
2 cups uncooked pasta (penne or rotini)
-
2 cups chicken broth (low sodium)
-
1 cup milk, half-and-half, or heavy cream
-
½ cup grated Parmesan cheese
-
2 cups baby spinach
Instructions
-
Cook the Chicken
Heat olive oil in a large deep skillet over medium-high heat.
Season chicken with salt, pepper, and Italian seasoning.
Cook 3–4 minutes per side until golden and cooked through.
Remove chicken to a plate and set aside. -
Build the Flavor
Reduce heat to medium. Add garlic and sauté 30–60 seconds until fragrant.
Stir in sun-dried tomatoes. -
Cook the Pasta (One Pan!)
Add uncooked pasta, chicken broth, and milk/cream.
Stir well, scraping the bottom of the pan.
Bring to a simmer, cover, and cook 10–12 minutes, stirring once or twice, until pasta is tender. -
Finish the Dish
Remove from heat. Stir in Parmesan cheese until melted.
Add spinach and cooked chicken (with juices).
Stir until spinach wilts and sauce thickens (about 2–3 minutes). -
Serve
Taste and adjust seasoning. Serve hot with extra Parmesan if desired.
Notes
-
If sauce is too thick: add a splash of broth or milk
-
If too thin: simmer uncovered for a few minutes
-
Use oil from sun-dried tomatoes for extra flavor
-
Half-and-half gives the best balance of creamy without being heavy
Nutritional Information (Per Serving)
Approximate values, based on using milk and serving 4.
Calories: ~520 | Protein: 35g | Carbohydrates: 42g | Fat: 22g
Prep Time: 10 minutes | Cook Time: 20 minutes | Total Time: 30 minutes | Serves: 4

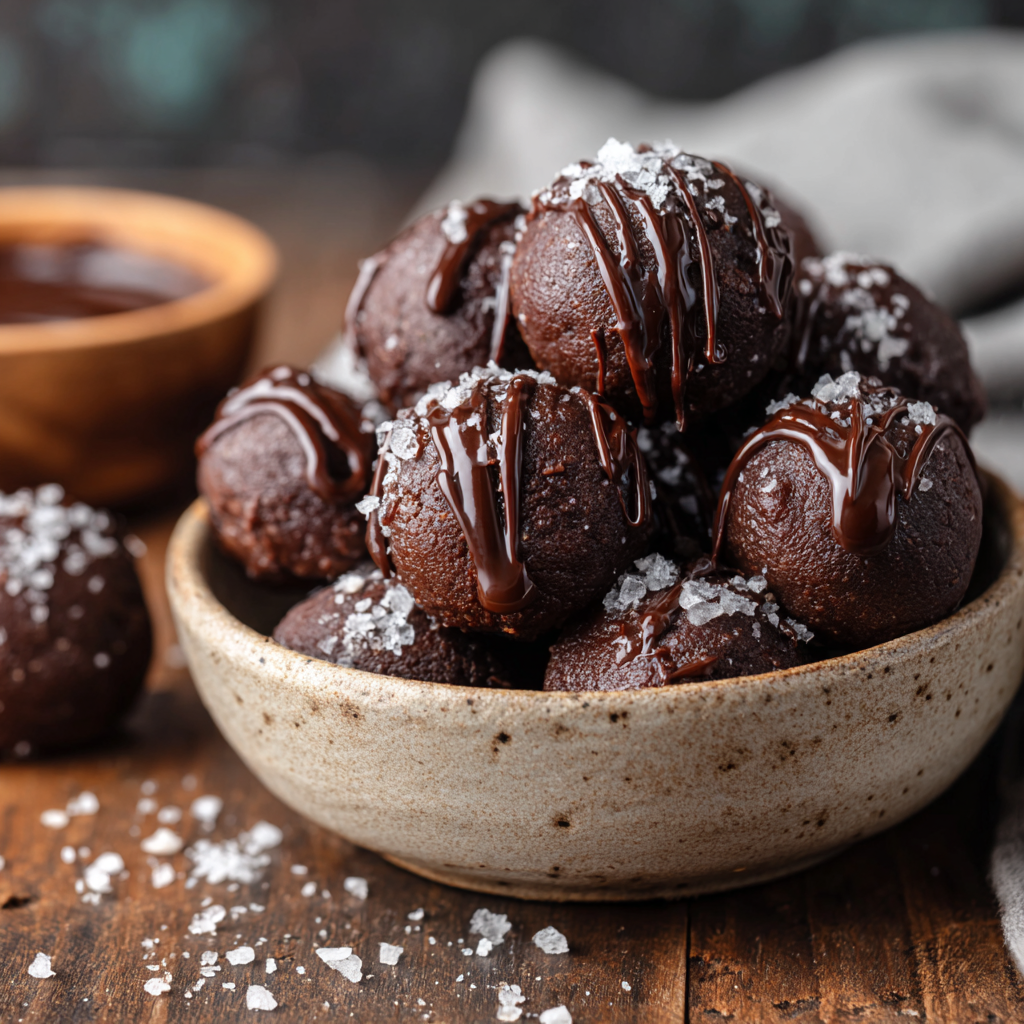
Viral Brownie Batter Balls : Protein-Packed, No-Bake, and Ultra Fudgy
Viral Brownie Batter Balls: The No-Bake Treat That’s Actually Good For You
Hey there, friend! Welcome back to my cozy kitchen corner. Can we talk about that magical moment when you swipe a finger through a bowl of raw brownie batter? That deep, chocolatey, fudgy taste that feels like a hug from the inside? I’ve been chasing that feeling my whole life, but let’s be real—licking the spoon comes with a side of guilt (and a concerned glance from anyone watching).
Well, get ready to meet your new best friend. These Viral Brownie Batter Balls are the internet’s latest obsession, and honey, they deserve every single bit of hype. Imagine all the rich, gooey indulgence of your favorite brownie batter, rolled into a perfect little bite, dipped in dark chocolate, and finished with a whisper of sea salt. The kicker? They’re no-bake, packed with protein, and made with wholesome ingredients that’ll make you feel as good as they taste.
This isn’t just another trendy recipe. It’s a game-changer for that 3pm slump, a post-workout treat that doesn’t feel like “health food,” or the perfect sweet bite to share with friends without needing to turn on the oven. I’ve been making these on repeat, and today, I’m so excited to walk you through every step. Grab your favorite mixing bowl and let’s make some magic!
The Brownie Batter That Started It All
My love affair with brownie batter started in my grandma’s kitchen. She was a firm believer that the batter was the best part of baking anything, and she’d always leave just a little extra in the bowl “for the helpers” (a.k.a. me and my cousins). We’d crowd around, spoons at the ready, fighting over the last chocolatey streak. It was pure, unadulterated joy.
Years later, as I got more into mindful eating and balancing my sweet tooth with fueling my body, I missed that ritual. Store-bought “protein balls” often tasted chalky or just… sad. I wanted that childhood euphoria in a grown-up, feel-good package. After what my husband calls my “brownie batter experiment phase” (there were some interesting flops!), I finally landed on this perfect blend. The first time I bit into one of these balls, I literally did a little happy dance right there in the kitchen. It tasted like a secret—decadent, fudgy, and nostalgic, but with a clean, energized feeling afterwards. It was the bridge between my grandma’s spoon and my own kitchen philosophy. Now, every time I make them, I think of her, and I know she’d absolutely approve.
Your Shopping List for Fudgy Bliss
Here’s everything you need to create these little wonders. The beauty is in the simplicity! I’ve added my chef notes next to each one because knowledge is power (and tastier brownie balls).
- 1 cup almond flour: This is our base, giving a tender, moist crumb that mimics real brownie texture. Chef’s Insight: For a nut-free version, you can swap in an equal amount of oat flour (just blitz rolled oats in a blender until fine!). Almond flour adds a richer flavor and healthy fats.
- 1 scoop chocolate protein powder: The secret protein punch! Chef’s Insight: This is key for the “batter” flavor and structure. Use a powder you enjoy the taste of on its own. A whey/casein blend or a plant-based one like brown rice/pea protein works great. If you don’t have it, you can use an extra ¼ cup of almond flour, but you’ll miss the classic brownie taste.
- 3 tbsp cocoa powder: For that deep, authentic chocolate flavor. Chef’s Insight: Not all cocoas are created equal! I use a Dutch-processed cocoa for a smoother, less acidic chocolate hit, but natural unsweetened cocoa powder works perfectly too. This is non-negotiable for true chocolate lovers.
- ½ cup cashew butter: Our “fat” that brings incredible creaminess and binds everything. Chef’s Insight: Cashew butter is mild and lets the chocolate shine. Almond butter or even sunflower seed butter (for nut-free) are fabulous subs. Just make sure it’s drippy and natural, not the super-stiff kind.
- ⅓ cup honey: The natural sweetener that also acts as glue. Chef’s Insight: Maple syrup works just as well for a vegan version! The liquid sweetener is essential for the right dough consistency—it shouldn’t be dry or crumbly.
- A pinch of salt: This is the flavor enhancer that makes the chocolate pop. Trust me!
- Optional for coating: Dark chocolate & sea salt: The glamorous finish! Melting a bar of good dark chocolate (70% is my sweet spot) gives a professional-looking shell. A sprinkle of flaky sea salt on top creates that irresistible sweet-salty contrast that’s downright addictive.
Let’s Make Some No-Bake Magic: Step-by-Step
Ready? This is the fun part. Put on some music, clear a little space on your counter, and let’s get rolling (literally!).
Step 1: The Dry Team Assembly. In a medium-sized mixing bowl, add your almond flour, chocolate protein powder, cocoa powder, and that all-important pinch of salt. Grab a whisk and give it a really good stir. Chef’s Hack: Whisking the dry ingredients first ensures there are no clumps of protein powder or cocoa, so every bite is uniformly chocolatey. It feels professional and takes 30 seconds—totally worth it!
Step 2: Bring in the Wet Crew. Make a well in the center of your dry ingredients and plop in the cashew butter and honey. Now, get ready to use some muscle! Start mixing with a sturdy spatula. It’ll look crumbly at first, but keep faith. After about a minute of pressing and folding, it will magically transform into a thick, fudgy, play-doh-like dough. Chef’s Commentary: This is your arm workout for the day! If it seems too dry, add a teaspoon of water or milk. If it’s too sticky, a dusting more of almond flour will fix it. You’re looking for a dough that holds together when you pinch it.
Step 3: Roll It Out. Line a baking sheet or plate with parchment paper. Using a tablespoon or a small cookie scoop, portion out the dough. Then, using the palms of your hands, roll each portion into a smooth, round ball. Chef’s Tip: If the dough is sticking to your hands, lightly dampen them with water. It creates a non-stick barrier without adding extra flour. Aim for balls about 1-inch in diameter—the perfect pop-in-your-mouth size.
Step 4: The Chocolate Dip (Optional but Highly Recommended). Melt your dark chocolate in a microwave-safe bowl in 20-second bursts, stirring in between, until just smooth. Using a fork or two spoons, dunk each ball, let the excess drip off, and place it back on the parchment paper. Chef’s Hack: For a super-easy drizzle instead of a full coat, just melt a smaller amount of chocolate, scoop it into a zip-top bag, snip a tiny corner, and zig-zag it over the tops. Less mess, just as pretty!
Step 5: The Finishing Touch. Before the chocolate sets, immediately sprinkle a tiny bit of flaky sea salt on top of each ball. This isn’t just for looks—that salt crackle with the sweet chocolate is *chef’s kiss*.
Step 6: The Chill. Pop the whole tray into the refrigerator for at least 30 minutes to let everything set firm. Chef’s Final Note: This waiting period is crucial! It allows the flavors to meld and gives you that perfect, firm-yet-fudgy texture. I know it’s hard, but try to wait!
How to Serve & Savor
Once they’re set, transfer your Brownie Batter Balls to an airtight container (they keep best in the fridge). For serving, I love piling them high on a little ceramic plate or in a shallow bowl. They’re stunning on their own, but for a real treat, place a couple on a small dish with a few fresh raspberries or a tiny cup of espresso. They’re the perfect ending to a casual dinner, a luxurious midday pick-me-up, or a beautiful homemade gift stacked in a cute jar with a ribbon.
Get Creative: Fun Flavor Twists!
Once you’ve mastered the classic, the canvas is yours to play with! Here are a few of my favorite riffs:
- Mint Chocolate Chip: Add ¼ tsp of peppermint extract to the dough and roll the finished balls in crushed sugar-free dark chocolate chips.
- Peanut Butter Cup: Swap the cashew butter for peanut butter and roll in melted peanut butter-chocolate blend.
- Cookie Dough: Use vanilla protein powder, omit the cocoa powder, and add a handful of mini chocolate chips.
- Spicy Mexican Chocolate: Add ¼ tsp of cinnamon and a tiny pinch of cayenne pepper to the dry ingredients for a warm, spicy kick.
- Vegan & Paleo: Use plant-based protein powder, maple syrup, and ensure your chocolate coating is dairy-free. It works like a dream!
Olivia’s Chef Notes & Kitchen Stories
This recipe is a living, breathing thing in my kitchen! The first batch I ever made was way too sticky because I was heavy-handed with the honey. My “balls” looked more like abstract chocolate sculptures! I learned that you can always add more moisture, but you can’t take it away, so start with a slightly heaping ⅓ cup of honey and add more only if needed.
Over time, I’ve found that letting the dough sit for 5 minutes after mixing lets the almond flour fully absorb the moisture, making rolling even easier. Also, a confession: I almost never measure the chocolate for coating. I just chop up what looks right and melt it. Cooking should feel intuitive, not stressful! These balls have become my signature “I-made-you-something” gift for new neighbors, friends having a tough week, or as a thank you. They’re little edible hugs, and that’s what my kitchen is all about.
Your Questions, Answered!
Q: My dough is too dry and crumbly. What did I do wrong?
A: No worries! This usually means your nut butter was a bit too thick or your almond flour was packed down. The fix is simple: Add a teaspoon of water or milk at a time, mixing thoroughly after each addition, until the dough comes together. It can take a minute of mixing for the ingredients to fully incorporate, so be patient and keep pressing it together.
Q: Can I make these without protein powder?
A: You can, but it will change the flavor and texture. The protein powder adds a distinct “brownie mix” taste and helps firm up the balls. To substitute, use an additional ¼ cup of almond flour and 1 extra tablespoon of cocoa powder. They’ll still be delicious, just a different kind of chocolate treat!
Q: How long do they keep, and can I freeze them?
A: They keep beautifully! In an airtight container in the fridge, they’re perfect for up to 2 weeks (if they last that long!). For longer storage, freeze them on a parchment-lined tray until solid, then transfer to a freezer bag. They’ll keep for up to 3 months. Thaw in the fridge or eat straight from the freezer for a cool, fudgy bite.
Q: The chocolate coating is clumpy and hard to work with. Help!
A> This means the chocolate may have gotten too hot or had a tiny bit of water in it. For smooth melting, chop chocolate finely, melt slowly (using those 20-second bursts!), and stir well. If it’s still thick, stir in a tiny bit of coconut oil (½ tsp) to thin it. For dipping, using a fork and letting excess drip back into the bowl is the cleanest method.
Viral Brownie Batter Balls : Protein-Packed, No-Bake, and Ultra Fudgy
Description
These Viral Brownie Batter Balls taste just like licking the spoon—rich, fudgy, and chocolatey—but they’re made with wholesome ingredients and zero baking. Perfect for a quick snack, post-workout treat, or a sweet bite that won’t weigh you down.
Ingredients
-
1 cup almond flour (or oat flour for nut-free)
-
1 scoop chocolate protein powder
-
3 tbsp unsweetened cocoa powder
-
½ cup cashew butter (or almond/peanut/sunflower butter, runny)
-
⅓ cup honey (or maple syrup for vegan)
-
Pinch of salt
Optional coating:
-
½ cup dark chocolate, melted
-
Flaky sea salt for topping
Instructions
-
Mix dry ingredients:
In a bowl, whisk almond flour, protein powder, cocoa powder, and salt. -
Add wet ingredients:
Stir in cashew butter and honey until a thick, fudgy dough forms. If dry, add 1–2 tsp water or milk. -
Roll:
Scoop and roll into 1-inch balls. Place on a parchment-lined plate or tray. -
Optional chocolate dip:
Dip balls in melted dark chocolate or drizzle over the top. Sprinkle with sea salt. -
Chill:
Refrigerate 30 minutes until firm.
Notes
-
Use drippy nut butter for the best texture.
-
If dough is sticky, chill 5 minutes before rolling.
-
For extra fudginess, let the dough rest 5 minutes before shaping.
-
Skip the coating for a lighter snack—or don’t
Nutritional Info (Per Ball, Approximate)
Calories: ~130 | Protein: 6g | Carbs: 10g | Fat: 9g | Sugar: 6g
Note: This is an estimate based on the specific ingredients I used. Values will vary slightly depending on your brand of protein powder, nut butter, and whether you add the chocolate coating.
Final Thoughts
There’s something quietly magical about these Brownie Batter Balls. They feel like a small, delicious rebellion—against the idea that treats must be either indulgent or healthy, but never both. Against the notion that cooking has to be complicated. Against the guilt that so often shadows our simplest pleasures.
In my kitchen, these little bites have become more than a recipe. They’re a reminder that joy can be intentional. That nurturing your body and savoring a moment of pure, childhood delight aren’t mutually exclusive. They’re proof that a few wholesome ingredients, stirred together with a bit of love, can become something greater than the sum of their parts.
As you roll the fudgy dough between your palms, you’re not just making a snack. You’re crafting a portable piece of comfort, a secret weapon for the long afternoons, a tangible bit of kindness to share. Whether you’re making them for yourself, for your family, or for a friend who needs a sweet lift, you’re participating in the oldest, most beautiful kitchen tradition: feeding the soul, one bite at a time.
So here’s to the batter-lickers, the chocolate-lovers, and the joy-seekers. May your bowls be sweet, your hands slightly sticky, and your hearts full. Thank you for letting me share this corner of my kitchen with you. Now, go enjoy your well-deserved bite of bliss.
With love and a sprinkle of sea salt,
Olivia
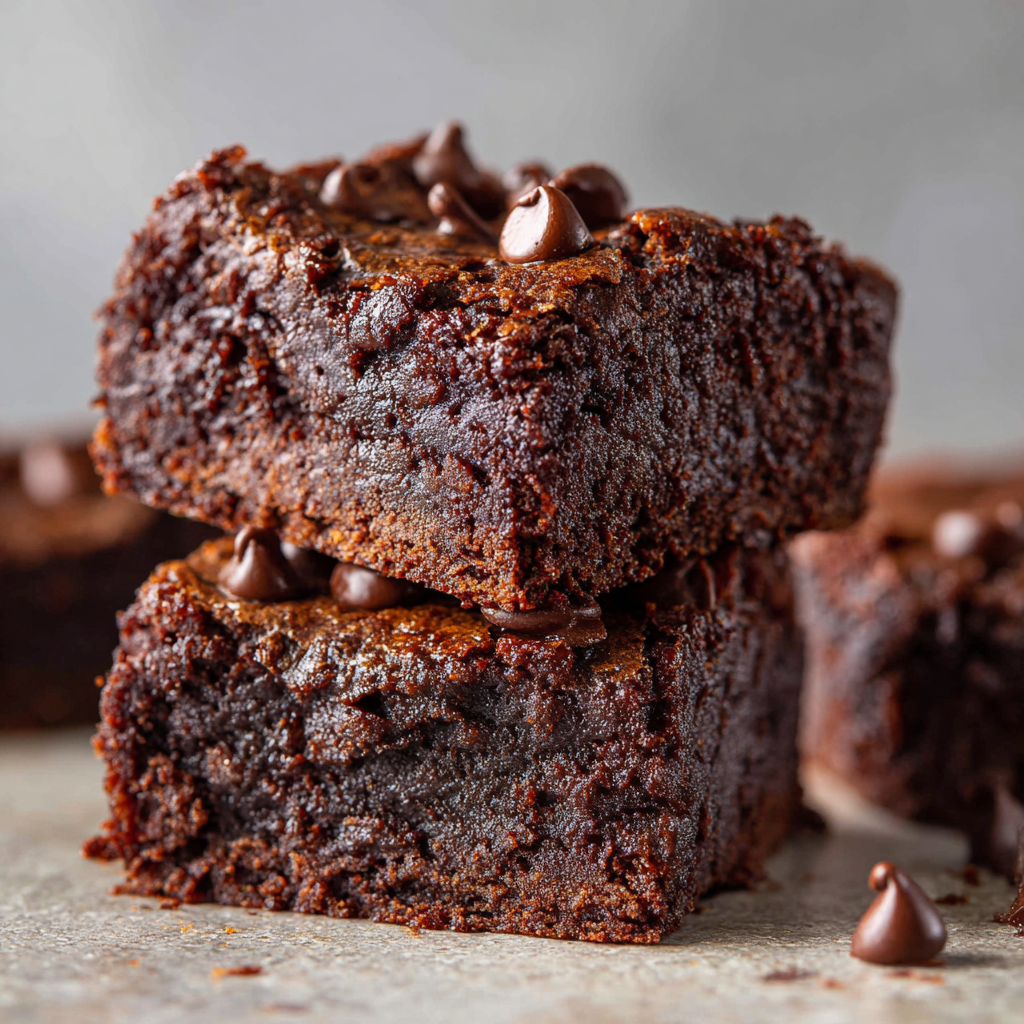
Sweet Potato Brownies : Fudgy, Clean, and Naturally Sweet
Let’s Bake a Batch of Magic: Fudgy Sweet Potato Brownies
Hey friend! Come on in. Can you smell that? It’s that deep, rich, intoxicating scent of chocolate baking in the oven – the one that makes everyone in the house magically appear in the kitchen, eyes wide with hopeful anticipation. It’s brownie time.
But here’s the twist: these aren’t just any brownies. These are my secret weapon, my go-to “I-need-something-decadent-but-don’t-want-to-feel-sluggish-after” heroes: Fudgy Sweet Potato Brownies. I know, I know. Sweet potatoes? In a brownie? Trust me on this. When I first heard the idea, my inner chocolate purist raised an eyebrow too. But one bite of these dense, fudgy, intensely chocolatey squares and I was a complete convert. The sweet potato isn’t there to shout “I’m a vegetable!” – it’s there to work silently in the background, creating an incredibly moist, rich texture and a natural sweetness that means we can skip the refined sugar.
Best part? This recipe is beautifully simple. No flour, no dairy, no crazy techniques. Just a handful of wholesome ingredients you probably have right now, a bowl, a spoon, and about 40 minutes between you and dessert heaven. Whether you’re gluten-free, dairy-free, or just “trying-to-feel-a-little-better-about-my-second-brownie-free,” this recipe is for you. So, tie on your apron (messy is encouraged), and let’s make something wonderfully, deliciously unexpected together.
The Happy Accident That Started It All
This recipe was born from a happy kitchen “oops” a few years ago. I’d roasted a whole tray of sweet potatoes for meal prep, dreaming of savory bowls and lunches. But, as often happens, life got busy, and by Thursday, I was staring at one lone, perfectly cooked sweet potato sitting sadly in my fridge. I couldn’t face another savory meal with it. At the same time, a serious chocolate craving hit – the kind that demands immediate attention.
I remembered a vague concept of “black bean brownies” and wondered, “Could my sweet, orange friend here do the same job?” I mashed it up, grabbed my trusty almond butter, cocoa powder, and maple syrup, and mixed it all together with a healthy dose of skepticism. The batter tasted shockingly good – deep and chocolatey. When they came out of the oven, they were so fudgy and perfect that I did a little dance right there in my kitchen. My husband, the ultimate taste-tester, devoured two before asking what was in them. His shocked, happy face when I told him is a memory I treasure. It was a beautiful reminder that some of the best creations come from playful experimentation and using what you’ve got. Now, I almost always roast an extra sweet potato, just in case brownie emergencies strike!
Your Simple, Wholesome Ingredient Lineup
Here’s everything you’ll need. The beauty is in its simplicity! Let’s chat about each one.
- 1 cup cooked & mashed sweet potato: This is our magic ingredient! It provides moisture, natural sweetness, and that incredible fudgy body. Chef’s Insight: For the best, sweetest flavor, roast your sweet potato whole (prick it with a fork first) at 400°F until super tender, rather than boiling it. Roasting concentrates the sugars. You can also use canned pure sweet potato puree in a pinch—just make sure it’s plain, not the sugary pie filling!
- 1/2 cup creamy almond butter: Our “flour” and fat source. It binds everything together and adds a lovely, nutty richness. Substitution Tip: Any runny, natural nut or seed butter works great here! Cashew butter is ultra-creamy, peanut butter will give a PB-chocolate twist (yum!), and sunbutter is a perfect nut-free option.
- 1/4 cup cocoa powder: The star of the show! Use the best quality unsweetened cocoa powder you can for the deepest chocolate flavor. Dutch-processed works beautifully here too.
- 1/4 cup pure maple syrup: Our natural sweetener. It adds a hint of caramel-like flavor that pairs perfectly with chocolate and sweet potato. Substitution Tip: Raw honey or agave nectar will work, though the flavor profile will change slightly.
- Chocolate chips (to taste, plus extra for topping): Because more chocolate is always the answer! They create those melty pockets of joy. I use about 1/3 to 1/2 cup. Chef’s Insight: For a truly dairy-free treat, check the labels and use Enjoy Life or Hu brand chips. A flaky sea salt sprinkle on top before baking? *Chef’s kiss*.
Let’s Get Mixing: Your Foolproof Steps to Brownie Bliss
Ready? This is the easiest process ever. No mixer needed – just some good old-fashioned arm power and a spatula.
- Preheat & Prep: Fire up your oven to 350°F (175°C). This gives it plenty of time to get perfectly hot while you make the batter. Now, line an 8×8 inch baking pan with parchment paper, letting some hang over the sides. This is my #1 hack for getting perfect, clean brownie squares later. No sticking, no fuss. If you don’t have parchment, a good greasing with a bit of coconut oil will do the trick.
- Mash & Combine: In a medium mixing bowl, make sure your cooked sweet potato is beautifully smooth and lump-free. A fork or potato masher works, but for ultra-silky brownies, I sometimes give it a quick whirl with an immersion blender. Add the almond butter, cocoa powder, and maple syrup right on top. Now, take your spatula and stir, stir, stir! It might look a bit thick and dry at first, but keep going. Within a minute, it will transform into a thick, glossy, irresistibly chocolatey batter. Taste it—I dare you not to. Isn’t that amazing already?
- Fold in the Joy: Time for the chocolate chips! Pour in your desired amount (I’m generous here) and gently fold them in until they’re evenly distributed. This batter is thick, so folding ensures you don’t crush all your chips.
- Pan & Top: Scrape every last bit of that glorious batter into your prepared pan. Use your spatula to smooth it into an even layer, getting right into the corners. Now, take a handful of extra chocolate chips and sprinkle them liberally over the top. They’ll melt and create a beautiful, studded finish. If you’re feeling fancy, that flaky sea salt sprinkle happens now.
- Bake to Fudgy Perfection: Slide the pan into the center of your preheated oven. Set your timer for 25 minutes. The key here is not to overbake. We want fudgy, not cakey. At 25 minutes, the top should look set and maybe have a few tiny cracks. A toothpick inserted will come out with some moist crumbs (and possibly melted chocolate from a chip)—that’s what we want! If it looks too wet, give it another 3-5 minutes. My sweet spot is usually 28-30 minutes.
- The Crucial Cool: This is the hardest step, but the most important! Pull the pan out and let it cool completely on a wire rack. I know, the smell is torture. But if you cut into these while warm, they’ll be too gooey to hold a shape. Letting them cool allows them to set up into that perfect, dense, fudgy texture. For the cleanest slices, I sometimes pop the whole pan in the fridge for an hour after it’s cooled. Then, use the parchment paper “handles” to lift the whole slab out before slicing.
How to Serve These Chocolatey Beauties
Once they’re cooled and sliced, the world is your oyster! I love them simply as is, with a cup of black coffee in the afternoon. For dessert, warm a square slightly and top it with a scoop of vanilla bean coconut milk ice cream—the hot/cold, fudgy/creamy contrast is unreal. A drizzle of extra almond butter or a dollop of whipped coconut cream also takes it over the top. Pack them in lunchboxes, bring them to a potluck (watch people’s minds be blown when you reveal the secret ingredient!), or just keep them in a container on the counter for whenever a sweet, wholesome bite calls your name.
Play With Your Food! Recipe Twists & Swaps
Love the base recipe? Here are some fun ways to make it your own:
- Double Chocolate Chunk: Swap out half the chocolate chips for cacao nibs. They add an amazing, intense dark chocolate crunch without the extra sweetness.
- Spiced Sweet Potato: Add 1 tsp of cinnamon, 1/4 tsp of nutmeg, and a pinch of cayenne pepper to the batter for a “Mexican hot chocolate” vibe. It’s incredible.
- Nut-Free & Seedful: Use sunflower seed butter (sunbutter) instead of almond butter. It works perfectly and gives the brownies a lovely, slightly earthier flavor that pairs wonderfully with chocolate.
- Add Some Crunch: Fold in 1/4 cup of chopped walnuts or pecans along with the chocolate chips for texture.
- Blender Brownies: For the absolute smoothest texture, add all the ingredients (except chips) to a high-speed blender and blend until silky. Then fold in the chips and bake as usual.
Chef’s Notes & Kitchen Confessions
This recipe has evolved so much since that first fridge-clearing experiment! I’ve learned that the moisture content of sweet potato can vary, so if your batter seems too wet (almost like cake batter), you can add a tablespoon of almond flour to thicken it up. Conversely, if it’s too thick and dry, a tiny splash of plant milk or even water will bring it together.
My biggest kitchen fail with these? The time I was rushing and tried to “quick-cool” the pan by setting it on my cold stovetop… which happened to be directly over a gas burner I’d just turned off. The residual heat from the burner below literally cooked the bottom into a blackened crust! Lesson learned: patience is a virtue, and wire racks exist for a reason. Now, I just use the cooling time to clean up the (minimal) mess and dream of that first perfect square.
Your Questions, Answered!
Q: My brownies turned out too gooey in the middle, even after cooling. What happened?
A: This usually means they needed a few more minutes in the oven. Sweet potato moisture can vary. Next time, bake until the top is fully set and doesn’t jiggle when you gently shake the pan. The toothpick test should show moist crumbs, not wet batter. If it happens this time, no worries – just enjoy them with a spoon! They’re delicious as a pudding-like dessert.
Q: Can I use an egg in this recipe to make them more cake-like?
A> You can! Adding one large egg will give the brownies a bit more structure and a lighter, cake-ier crumb. It’s a great variation if you don’t need them to be egg-free. Just add it in with the wet ingredients and mix well.
Q: How should I store these, and do they freeze well?
A: They keep beautifully in an airtight container at room temperature for 2 days, or in the fridge for up to a week. They also freeze like a dream! Slice them, wrap individual squares in parchment, and store in a freezer bag for up to 3 months. Thaw at room temp or pop one straight into the microwave for a warm treat.
Q: My batter was really thick and hard to spread. Is that normal?
A> Yes! This is a very thick, fudgy batter, not a pourable cake batter. That’s what gives you the dense end result. Use your spatula to press and smooth it into the pan. Wetting your fingers or the spatula with a tiny bit of water can help prevent sticking as you spread.
Sweet Potato Brownies : Fudgy, Clean, and Naturally Sweet
Description
These Fudgy Sweet Potato Brownies are rich, dense, and deeply chocolatey—without flour, dairy, or refined sugar. Sweet potato works quietly behind the scenes to add moisture and natural sweetness, giving you that classic brownie texture with feel-good ingredients. Easy to make, easy to love.
Ingredients
-
1 cup cooked & mashed sweet potato (smooth)
-
½ cup creamy almond butter (or peanut/cashew/sunflower butter)
-
¼ cup unsweetened cocoa powder
-
¼ cup pure maple syrup (or honey/agave)
-
⅓–½ cup chocolate chips, plus extra for topping
-
Optional: pinch of flaky sea salt
Instructions
-
Preheat & prep:
Preheat oven to 350°F (175°C). Line an 8×8-inch pan with parchment paper or lightly grease. -
Mix the batter:
In a bowl, stir together mashed sweet potato, almond butter, cocoa powder, and maple syrup until thick and glossy. -
Add chocolate:
Fold in chocolate chips. -
Bake:
Spread batter evenly in the pan. Sprinkle extra chocolate chips (and salt, if using) on top.
Bake 25–30 minutes, until the top is set and a toothpick shows moist crumbs (not wet batter). -
Cool completely:
Let cool fully before slicing for the best fudgy texture.
Notes
-
Roast, don’t boil the sweet potato for better flavor and less moisture.
-
Don’t overbake—fudgy brownies finish setting as they cool.
-
Too wet? Add 1 tbsp almond flour. Too thick? Add 1–2 tsp plant milk or water.
-
For clean slices, chill 30–60 minutes before cutting.
Nutritional Information (Approximate, per brownie)
Yield: 9 brownies | Serving Size: 1 brownie
Calories: 140 | Total Carbohydrates: 15g | Dietary Fiber: 2g | Total Sugars: 8g (Naturally occurring) | Protein: 3g | Total Fat: 8g
These brownies are naturally gluten-free, dairy-free, and refined sugar-free. They are a source of fiber, vitamin A (from the sweet potato!), and healthy fats. Enjoy as part of a balanced lifestyle!
Final Thoughts: More Than Just a Brownie
So, there you have it—the story, the secrets, and the simple steps to baking a pan of pure, fudgy magic. These sweet potato brownies are more than just a dessert; they’re a little reminder that wonderful things often come from playful experimentation and a willingness to see potential where others might not.
They prove that indulgence and nourishment don’t have to be opposites. With a base of vibrant sweet potato and creamy almond butter, each bite delivers deep chocolate satisfaction alongside real, wholesome ingredients. Whether you’re catering to dietary needs, looking for a lunchbox treat that won’t lead to a sugar crash, or simply curious, this recipe is an open invitation to rethink what a brownie can be.
Remember, the best part of cooking is making it your own. Don’t be afraid to play—add a swirl of peanut butter, a dash of espresso powder, or a sprinkle of toasted coconut. This recipe is wonderfully forgiving and eager to adapt.
As you pull that pan from the oven and your kitchen fills with the scent of warm chocolate, take a moment to appreciate what you’ve made: something deliciously unexpected, wonderfully simple, and utterly satisfying. Share them with someone you love (or don’t—we won’t tell), and enjoy that beautiful moment when they take a bite, their eyes light up, and they ask, “What’s in these? They’re amazing!”
Happy baking, friend. May your kitchen be messy, your sweet potatoes be roasted, and your brownies always be fudgy.
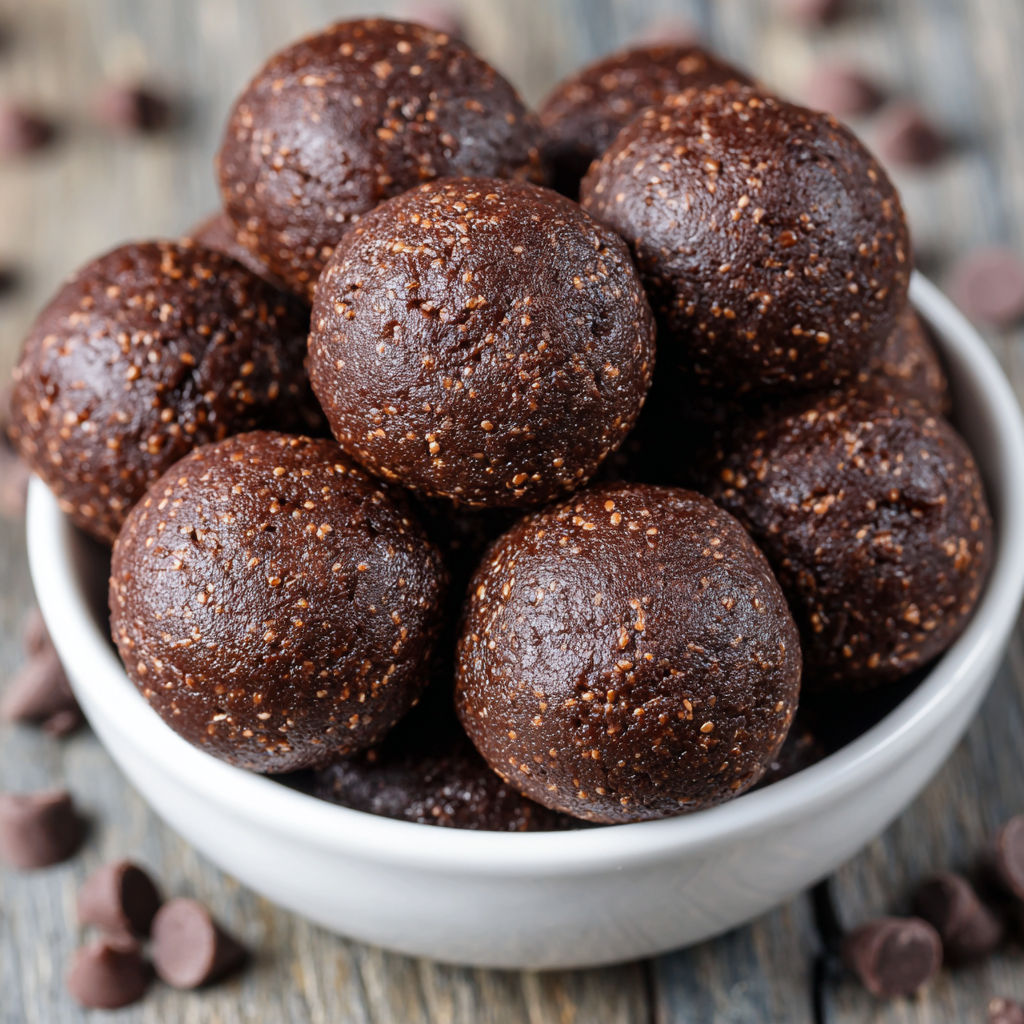
No-Bake Protein Brownie Bites : Fudgy, Healthy & Naturally Sweet
The Snack That Beats the 3 PM Slump: Fudgy, No-Bake Protein Brownie Bites
Hey there, friend! Let’s talk about that moment. You know the one. It’s mid-afternoon, your energy is doing that weird disappearing act, and a deep, undeniable craving for something chocolatey, rich, and fudgy starts whispering your name. But then the other voice chimes in—the one that reminds you of your goals, your workout, or just your desire to feel good, not sluggish. For the longest time, I felt stuck in this tug-of-war. Reach for a processed snack bar that tastes like sweetened cardboard, or cave and have a brownie, promising to be “better” tomorrow?
Well, I’m here to tell you the game is over, and we all win. These No-Bake Protein Brownie Bites are my kitchen’s happy ending to that daily drama. Imagine the deepest, darkest, chewiest corner of a brownie pan. Now, imagine that transformed into a blissful, pop-in-your-mouth bite that’s secretly packed with protein and fiber, naturally sweetened, and requires exactly zero oven time. That’s what we’re making today.
This isn’t about deprivation; it’s about delicious empowerment. Whether you’re dashing out the door for a busy day, need a post-workout refuel that actually excites you, or just want a sweet treat that loves you back, these little guys are your new best friends. So, tie on that apron (embrace the mess with me!), and let’s make something that proves healthy and decadent can absolutely be the same thing.
The Brownie Batter Spoon & A Healthier Promise
My love affair with brownies started, as many great food stories do, with a spoon and a bowl. As a kid, I was my grandma’s official “batter taster.” Her classic brownie recipe was a thing of beauty, and she’d always hand me the wooden spoon laden with that glossy, dark batter, a wink in her eye. The raw, chocolatey goodness was, in my opinion, even better than the baked version. (We didn’t know about raw flour risks back then—shhh!).
Fast forward to my early days of trying to eat more mindfully, and I missed that experience. I missed the fudgy texture, the intense chocolate hit, and the simple joy of a no-fuss treat. Store-bought “healthy” snacks felt like a compromise on flavor, and I just wouldn’t have it. The mission was clear: recreate that nostalgic, spoonable brownie feeling, but in a way I could enjoy any day of the week. After more batches than I can count (a delicious, if messy, research process), these Protein Brownie Bites were born. They capture every bit of that childhood joy and my grandma’s secret wink, now with a powerful protein punch that keeps me going. It’s the best of both worlds, straight from my kitchen to yours.
Your Simple, Wholesome Lineup
Here’s the beautiful part: you probably have most of this in your pantry already! This is about simple, real ingredients coming together to make something magical.
- ½ cup oat flour: This is our wholesome base, giving structure and a lovely, soft chew. Chef’s Insight: You can easily make your own by blitzing rolled oats in a food processor or high-speed blender until fine and powdery. It’s cheaper and adds that satisfying homemade touch!
- ¼ cup cocoa powder: Not just any cocoa—use the best quality unsweetened cocoa powder you can find. This is where the deep, sophisticated chocolate flavor comes from, so skip the drinking chocolate mixes here.
- ¼ cup chocolate chips: The double chocolate delight! I prefer dark chocolate chips (70% or higher) for a less sweet bite. Substitution Tip: Need it dairy-free? Use your favorite vegan chocolate chips. You can also chop up a dark chocolate bar for lovely, irregular melty bits.
- ¼ cup protein powder: The protein powerhouse! A chocolate or vanilla whey/casein blend works beautifully and binds well. Chef’s Insight: For a plant-based version, a chocolate vegan protein powder (like pea or brown rice protein blend) is fantastic. Just note the texture might be slightly drier, so have that extra milk handy.
- 1 tbsp chia seeds: Our tiny nutrient superheroes! They add fiber, omega-3s, and help bind everything together as they absorb moisture. If you don’t have chia, ground flaxseed works just as well.
- 1 tsp vanilla extract: The flavor enhancer. It rounds out the chocolate and makes everything taste more… well, brownie-like! Pure vanilla extract is worth it, I promise.
- 2–4 tbsp milk: The unifier. Start with 2 tablespoons of your milk of choice (I love almond or oat milk) and add from there. The type of protein powder and oat flour you use will affect how much you need.
- A generous pinch of salt: This is non-negotiable! Salt makes the chocolate flavor pop and balances the sweetness. Don’t you dare skip it.
Let’s Get Rolling: Your Foolproof Steps to Brownie Bliss
See? I told you it was easy. Ten minutes is all you need for active prep. Let’s walk through it together.
- The Dry Team Huddle. In a medium mixing bowl, add your oat flour, cocoa powder, protein powder, chia seeds, and that all-important pinch of salt. Grab a whisk and give them a good, enthusiastic stir. We want everything evenly distributed so every bite is perfectly chocolatey. This is also your moment to make sure there are no sneaky clumps in your protein powder.
- Bring in the Flavor & Fat. Now, you have a choice for ultimate customization! For an ultra-fudgy, cohesive dough, melt your chocolate chips gently (microwave in 20-second bursts, stirring in between) and pour it into the dry mix. For a chunkier, texture-filled bite, just toss the whole chocolate chips in. I love the melty pockets the second method creates! Add the vanilla extract here too.
- The Magical Transformation to Dough. Here’s where your chef intuition shines. Pour in 2 tablespoons of milk and start mixing with a sturdy spoon or spatula. It will seem dry at first—that’s okay! Keep mixing, pressing and folding the mixture. If it’s still very crumbly and won’t hold together when pinched, add milk one tablespoon at a time. Pro-Tip: We want a pliable, slightly sticky dough that holds its shape when squeezed, not a wet batter. Different ingredients absorb liquid differently, so go slow!
- Rolling Time—Get Those Hands Dirty! Using a small cookie scoop or a tablespoon, portion out the dough. Then, roll it between your palms into smooth, bite-sized balls. Life-Changing Hack: If the dough is sticking to your hands, lightly dampen them with water or a tiny bit of oil. It creates a non-stick barrier and makes the process blissfully clean.
- The Optional (But Highly Recommended) Glaze of Glory. Want to take these from amazing to “I can’t believe this is healthy” incredible? Melt a few more tablespoons of chocolate chips, dunk or drizzle each bite, and place them on a parchment-lined tray. It creates a professional-looking shell and an extra hit of chocolate ecstasy.
- The Chill Factor. Pop your tray of brownie bites into the fridge for at least 20-30 minutes. This is crucial! It allows the chia seeds to fully hydrate, the flavors to marry, and the bites to firm up into that perfect, fudgy texture. Consider this the hardest part of the recipe—waiting!
How to Serve Your Chocolatey Treasures
Once they’re chilled and set, the world is your oyster! I love storing them in an airtight container in the fridge. They’re fantastic straight from the cold, with a satisfying, dense bite. Pack a few in a small container for a desk-side energy boost, or arrange them on a pretty plate for a guilt-free dessert platter at your next gathering. A dusting of extra cocoa powder or a tiny sprinkle of flaky sea salt on top before chilling makes them look utterly gourmet. Pair one with your afternoon coffee or post-dinner tea for the ultimate moment of cozy satisfaction.
Make It Your Own: Delicious Twists & Swaps
The basic recipe is a canvas for your creativity! Here are a few of my favorite riffs:
- Salted Caramel Pretzel: Swap 2 tbsp of the oat flour for crushed pretzel bits. After rolling, press a tiny piece of soft, gooey date or a grain-free caramel into the center of each ball.
- Orange Zest Zing: Add the zest of one small orange to the dry ingredients. The bright citrus paired with dark chocolate is a classic, elegant combo that will wow a crowd.
- Mint Chocolate Chip: Use a scoop of chocolate mint protein powder if you can find it, or add ¼ tsp of pure peppermint extract (not mint extract!) with the vanilla. Fold in mini chocolate chips for that classic ice cream vibe.
- Nutty Double Chocolate: Replace the chia seeds with 2 tablespoons of finely ground almonds or hazelnuts. Roll the finished bites in crushed, toasted nuts for a gorgeous, crunchy exterior.
- Peanut Butter Cup: Use a chocolate peanut butter protein powder, or add a tablespoon of natural powdered peanut butter to the dry mix. For the ultimate treat, press a small, square of dark chocolate into the top of each bite before chilling.
A Few More Thoughts From My Kitchen to Yours
This recipe has evolved more than any other on my blog, and that’s because of you! Reader feedback has been the best ingredient of all. The big “aha” moment was realizing that melting the chocolate chips into the dough, rather than keeping them whole, solved the “dry bite” issue some people had with certain protein powders. It acts as an extra binder and fat source, creating that foolproof fudgy texture.
One funny kitchen fail story? The first time I made these, I was so excited I completely forgot the chia seeds. The “dough” was a sad, crumbly pile that refused to roll. I almost tossed it, but instead, I pressed it into a small dish, chilled it, and ate it with a spoon like brownie crumble over yogurt. It was delicious! So remember, even a “mistake” can be a happy accident. Cooking is about play, not perfection. These bites are forgiving and flexible—trust yourself and have fun with it.
Your Questions, Answered!
Q: My dough is too dry and won’t stick together, even after 4 tbsp of milk. Help!
A: Don’t panic! This usually means your protein powder or oat flour is extra absorbent. Add more liquid, one teaspoon at a time, until it comes together. You can also add a tiny bit of nut butter (½ tsp) or maple syrup for extra binding power and moisture.
Q: Can I use a different flour?
A: Absolutely. Almond flour works well, but it will yield a denser, oilier bite. You may need slightly less milk. I don’t recommend coconut flour as it’s a sponge and will throw off the ratios completely.
Q: Why do they need to chill? Can’t I eat them right away?
A: You can sneak one, of course! But the chilling step is key for texture. It allows the chia seeds to gel and the fats from the chocolate to firm up, transforming the dough from sticky to a perfect, firm-yet-chewy brownie bite. It’s worth the wait!
Q: How long do they last, and can I freeze them?
A: They keep beautifully in an airtight container in the fridge for up to 1 week. For longer storage, they freeze like a dream for up to 3 months! Place them on a tray to freeze solid first, then transfer to a bag. Thaw in the fridge or enjoy straight from the freezer for a frozen treat.
No-Bake Protein Brownie Bites : Fudgy, Healthy & Naturally Sweet
Description
When your energy dips and only chocolate will do, these No-Bake Protein Brownie Bites have your back. They taste like the fudgiest part of a brownie, but they’re made with wholesome ingredients, no oven, and just a few minutes of prep. Perfect for busy days, post-workout fuel, or a feel-good sweet snack.
Ingredients
-
½ cup oat flour (or finely blended rolled oats)
-
¼ cup unsweetened cocoa powder
-
¼ cup chocolate chips (dark chocolate recommended)
-
¼ cup protein powder (chocolate or vanilla)
-
1 tbsp chia seeds (or ground flaxseed)
-
1 tsp vanilla extract
-
2–4 tbsp milk of choice (almond, oat, dairy, etc.)
-
Pinch of salt
Instructions
-
Mix dry ingredients:
In a bowl, whisk together oat flour, cocoa powder, protein powder, chia seeds, and salt. -
Add flavor:
Stir in vanilla extract and chocolate chips (melt them first for extra fudginess, or leave whole for texture). -
Form the dough:
Add 2 tablespoons of milk and mix. Add more milk, one tablespoon at a time, until a thick, slightly sticky dough forms. -
Roll:
Scoop and roll into bite-sized balls using your hands. -
Chill:
Refrigerate for 20–30 minutes to firm up. Enjoy!
Notes
-
Too dry? Add milk a teaspoon at a time or a tiny bit of nut butter.
-
Too sticky? Chill for 10 minutes or lightly dampen your hands before rolling.
-
Protein powder matters: Plant-based powders may need a little extra liquid.
-
Storage: Keep in an airtight container in the fridge for up to 1 week, or freeze for up to 3 months.
Nutritional Info (Per Bite, Approximate)
This is an estimate and can vary based on your specific brand choices, especially the protein powder and chocolate.
Calories: ~90 | Protein: 5g | Carbohydrates: 8g | Dietary Fiber: 2g | Total Fat: 4g | Sugar: 3g
Final Thoughts: More Than Just a Snack
These No-Bake Protein Brownie Bites represent something simple yet profound: the joy of creating a treat that genuinely nourishes you, body and spirit. They are a small but mighty declaration that you don’t have to choose between what feels good in the moment and what feels good in the long run. The rich, fudgy satisfaction and the steady, uplifting energy they provide are one and the same.
What I love most about this recipe is its spirit of flexibility. It’s a foundational formula, a launchpad for your own creativity. Whether you stick to the classic version or venture into the fun twists, you’re participating in the best kind of kitchen magic—the kind that’s forgiving, personal, and deeply rewarding.
So, the next time that 3 PM whisper calls, or you need a pre-gym boost, or you simply crave a moment of chocolatey comfort, I hope you remember these little bites. I hope you give yourself the ten minutes of messy, joyful prep that leads to a week of ready-to-go goodness.
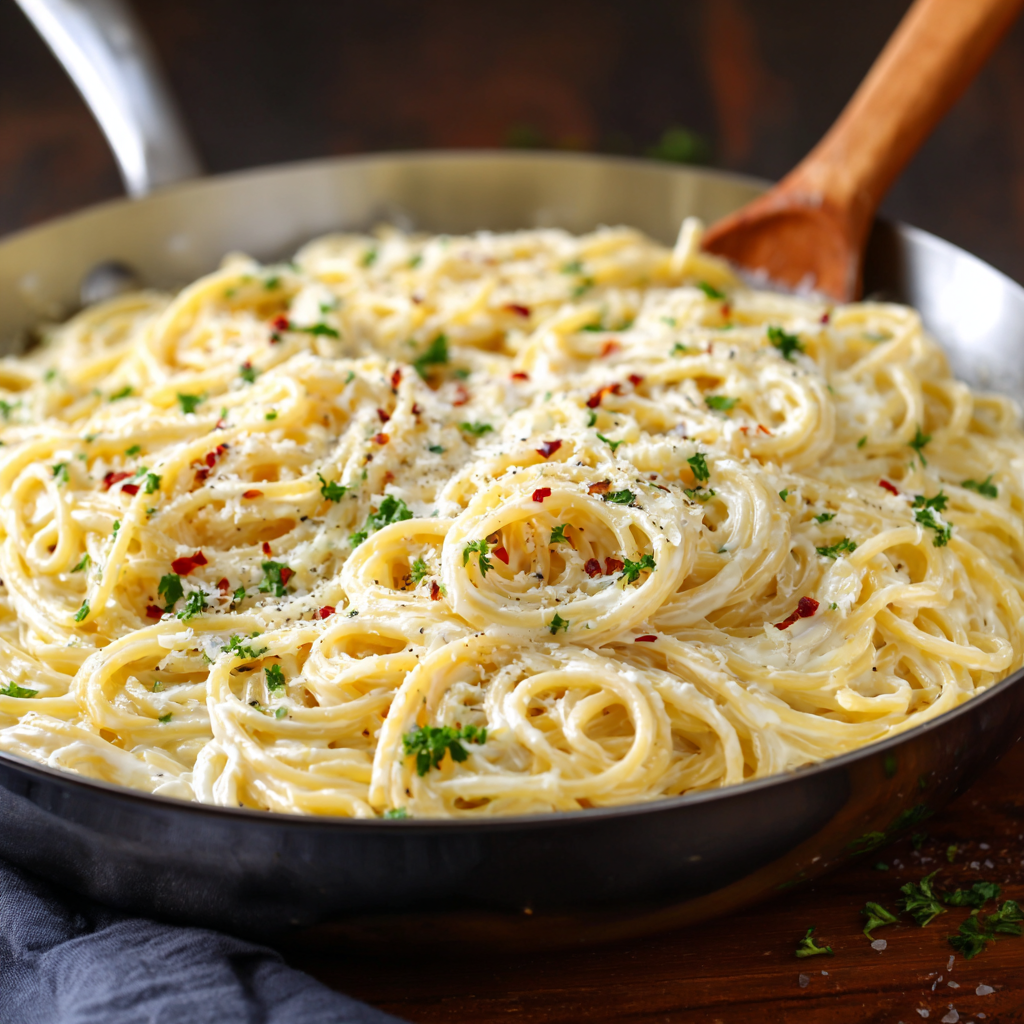
Cream Cheese Garlic Pasta : Ultra-Creamy and Ready in 20 Minutes
The 20-Minute Creamy Pasta Miracle You Need in Your Life
Hey there, friend! Come on in, pull up a stool. Can you smell that? It’s the scent of garlic sizzling in butter, and it means dinner is about to get very, very good, very, very fast. We’ve all been there: it’s been a long day, your energy is at zero, but your stomach is at a solid, rumbling ten. The thought of a complicated recipe makes you want to order takeout, but your heart (and maybe your wallet) is craving something homemade, comforting, and real.
That’s exactly why I’m so obsessed with this Cream Cheese Garlic Pasta. This isn’t just a recipe; it’s a kitchen lifeline. It’s the culinary equivalent of a warm hug at the end of a chaotic Tuesday. With a handful of ingredients you probably already have and one trusty pan, you can conjure up a pasta dish so luxuriously creamy, so perfectly garlicky, that your family will think you spent hours over the stove. The magic? It all happens in the time it takes to boil water and cook pasta. Twenty minutes, start to slurp. I’m not kidding. This is the ultimate proof that simple, humble ingredients, when treated with a little love, can create something absolutely sensational. So, tie on that apron (embrace the mess!), and let’s turn pantry staples into a weeknight legend.
The “Oops, No Cream!” Discovery
This recipe has a fun little origin story that’s pure, unplanned kitchen chaos. A few years back, I had promised my niece her favorite “fancy” creamy pasta for her birthday dinner. I had the music going, the table set, and was ready to impress. I went to the fridge for the heavy cream… and found an almost-empty carton. Panic! It was too late to run to the store.
My eyes scanned the shelves and landed on a block of plain cream cheese. Desperation is the mother of invention, right? I figured, it’s dairy, it’s rich, it melts… worth a shot. I tossed it into the pan with my butter and garlic, splashed in some of that magical starchy pasta water, and started whisking. What emerged was a sauce so velvety, so clingy, and so decadent that it actually beat my original recipe. My niece took one bite, her eyes got wide, and she declared it the best pasta she’d ever had. That happy accident taught me a beautiful lesson: sometimes the best dishes aren’t born from perfect planning, but from a little ingenuity and a willingness to play. Now, I intentionally reach for the cream cheese every single time.
Your Short & Sweet Shopping List
Here’s the beautiful part. You likely have most of this already. Each ingredient plays a starring role, and I’ve got some insider tips for each one.
- 12 oz spaghetti or fettuccine: The vehicle for all that creamy goodness. I love the way fettuccine’s broad ribbons hold sauce, but spaghetti is a classic pantry staple that works perfectly. Chef’s Insight: Don’t shy away from fun shapes! Rigatoni, penne, or shells are fantastic at trapping pockets of sauce.
- 4 oz cream cheese, softened: The secret weapon! Using full-fat cream cheese gives you the richest, silkiest result. Pro Tip: Leave it on the counter for 30-60 minutes before you start cooking. A soft block melts into a sauce effortlessly, while cold cream cheese can get clumpy. Substitution: For a lighter version, Neufchâtel works. For dairy-free, a plain, block-style vegan cream cheese alternative can do the trick.
- 2 tablespoons butter: Our flavorful cooking fat. It browns the garlic to nutty perfection and adds a layer of rich, toasty flavor you just don’t get with oil. Chef’s Hack: Salted or unsalted is fine—just taste before you add more salt at the end.
- 3 garlic cloves, minced: The aromatic heart of the dish. Fresh is best here! The quick sauté in butter tames the raw bite and unlocks its sweet, mellow side. Pro Tip: Don’t burn it! Burnt garlic turns bitter. We’re just looking for fragrant, about 60 seconds.
- ½ cup reserved pasta water (more as needed): THIS IS NOT OPTIONAL. This starchy, salty liquid is the key to a glossy, restaurant-quality sauce that perfectly coats each noodle. It helps emulsify the butter and cream cheese into a cohesive, velvety sauce. Always reserve more than you think you need!
- Salt and black pepper, to taste: Your flavor finishers. Season your pasta water well (it should taste like the sea), and always do a final taste at the end.
- Optional garnishes: This is where you make it your own! A shower of grated Parmesan adds a salty, umami punch. Fresh chopped parsley or basil brings color and a bright note. A pinch of red pepper flakes introduces a welcome touch of heat.
Let’s Make Magic: Step-by-Step
Ready? Let’s do this. It’s so straightforward, you’ll have it memorized after one try.
Step 1: Cook the Pasta – Strategically.
Fill a large pot with water, add a generous handful of salt (seriously, don’t be shy—this seasons the pasta from the inside out), and bring it to a rolling boil. Add your pasta and cook according to package directions until it’s al dente—that means it still has a slight bite to it. Here’s the critical move: Before you drain it, use a mug or ladle to scoop out at least ½ cup of that cloudy, starchy pasta water. Set it aside. Then, drain your pasta. Chef’s Hack: I don’t rinse my pasta after draining. You want that residual starch to help the sauce stick!
Step 2: Build the Sauce – The Aromatics.
While the pasta cooks, place a large skillet (big enough to hold the pasta later) over medium heat. Add the butter. Once it’s melted and just starting to foam, add your minced garlic. Now, lean in and listen. You’ll hear a gentle sizzle. Stir it constantly for about 60 seconds, just until it becomes incredibly fragrant. You’re looking for a light golden color, not brown. The second you smell that gorgeous, toasty garlic aroma, you’re ready for the next step.
Step 3: Create the Creaminess – The Emulsification.
Reduce the heat to medium-low. Add your softened cream cheese to the garlic butter. It might look a bit separated at first—that’s okay! Pour in about ¼ cup of your reserved pasta water. Now, start whisking or stirring vigorously with a wooden spoon. You’ll see the magic happen: the water, butter, and cream cheese will come together into a smooth, luscious, pale sauce. If it seems too thick, add another splash of pasta water. This is your sauce base, and it should be pourable.
Step 4: The Grand Finale – Bringing It All Together.
Add the drained, hot pasta directly into the skillet with your creamy sauce. Using a pair of tongs, start tossing and turning the pasta, coating every inch in that creamy goodness. The skillet’s residual heat and the hot pasta will loosen the sauce further. Add more pasta water, a tablespoon or two at a time, until the sauce is glossy and clings to each strand beautifully. You’re not looking for a pool of sauce at the bottom of the pan, but a perfect, even coating. Remove from heat.
Step 5: Season and Serve – The Personal Touch.
Give it a taste. Does it need a pinch more salt? A few cracks of fresh black pepper? Now is the time. Toss once more, then dish it up immediately while it’s gloriously hot and creamy.
How to Serve It Up in Style
Presentation is part of the fun! I love using a pair of tongs to twirl a big nest of pasta into a shallow bowl. The glossy sauce should catch the light. Then, go to town with your garnishes. A snowfall of Parmesan cheese, a bright green sprinkle of fresh parsley or chives, and maybe just a whisper of red pepper flakes for those who like a kick. For a complete, cozy meal, serve it alongside a simple green salad with a sharp vinaigrette (to cut the richness) and a slice of crusty, warm bread for… you know… sauce mopping. No judgment here.
Make It Your Own: Delicious Twists
The beauty of this base recipe is how adaptable it is. Here are a few of my favorite riffs:
- Sun-Dried Tomato & Spinach: Stir in ¼ cup chopped sun-dried tomatoes (oil-packed, drained) and two big handfuls of fresh spinach with the pasta. The tomatoes add a sweet-tart punch, and the spinach wilts into the sauce beautifully.
- Lemon Herb: Add the zest of one lemon and 2 tablespoons of its juice when you add the cream cheese. Finish with a handful of fresh basil or dill. It’s incredibly fresh and bright.
- Protein Power: Add cooked, shredded rotisserie chicken, diced sautéed shrimp, or crispy pancetta bits when you toss the pasta with the sauce. Instant, satisfying meal.
- Roasted Veggie Delight: Toss in a cup or two of roasted broccoli florets, cherry tomatoes, or mushrooms for a veggie-packed version.
- Spicy Arrabbiata-Style: Add ½ teaspoon of red pepper flakes with the garlic, and stir in 2-3 tablespoons of tomato paste for a creamy, spicy, rosé-style sauce.
Olivia’s Kitchen Notes
This recipe has become a living, breathing thing in my kitchen. It’s the one I teach friends who are nervous to cook, and it’s the one my family requests on rainy Sundays. Over time, I’ve learned a few things: First, the power of the pasta water cannot be overstated. I once had a friend call me in a panic because her sauce was “a gloppy mess.” She’d forgotten the water. A quick reminder saved dinner! Second, I’ve started adding a tiny splash of the pasta water to the skillet before I add the cream cheese. It creates a steamy base that helps it melt even more smoothly. Finally, don’t be afraid to let the pasta finish cooking for the last minute directly in the sauce. It absorbs flavor and helps thicken the sauce perfectly. This recipe is forgiving—play with it and make it yours!
Your Questions, Answered
Q: My sauce turned out grainy/lumpy. What happened?
A: This usually means the cream cheese was too cold when it hit the pan, or the heat was too high. Always soften your cream cheese first! If you get lumps, don’t panic. Remove the pan from heat and whisk in an extra splash of hot pasta water vigorously. You can also use an immersion blender for a few seconds to smooth it out completely.
Q: Can I make this ahead of time?
A: Creamy pasta is always best served fresh. The sauce will thicken significantly as it sits. If you have leftovers, reheat them gently in a skillet over low heat with a tablespoon or two of milk, water, or (you guessed it) a splash of fresh water to loosen the sauce back up.
Q: I’m out of fresh garlic. Can I use garlic powder?
A: You can in a pinch, but the flavor profile will be different. Use about ¾ teaspoon of garlic powder. Add it directly to the melted butter and stir for just 10 seconds to “toast” it before adding the cream cheese. The flavor will be more diffuse and less pungent than fresh.
Q: How can I make this dish richer or lighter?
A> For extra richness: Use ½ cup of heavy cream or half-and-half in place of some of the pasta water. Stir in a handful of grated Parmesan at the end. For a lighter version: Use Neufchâtel or light cream cheese, and swap the butter for a tablespoon of olive oil. Load it up with veggies to bulk it out!
Cream Cheese Garlic Pasta : Ultra-Creamy and Ready in 20 Minutes
Description
This is your weeknight lifesaver—ultra-creamy pasta made with everyday ingredients and one pan. No heavy cream, no fuss. Just buttery garlic, silky cream cheese, and pasta water magic that turns dinner into comfort food fast.
Ingredients
-
12 oz spaghetti or fettuccine
-
4 oz full-fat cream cheese, softened
-
2 tbsp butter
-
3 garlic cloves, minced
-
½ cup reserved pasta water (plus more as needed)
-
Salt and black pepper, to taste
-
Optional: grated Parmesan, fresh parsley, red pepper flakes
Instructions
-
Cook the pasta:
Boil pasta in well-salted water until al dente. Reserve ½ cup pasta water, then drain. -
Sauté the garlic:
Melt butter in a large skillet over medium heat. Add garlic and cook ~60 seconds until fragrant (don’t brown). -
Make it creamy:
Lower heat. Add cream cheese and ¼ cup reserved pasta water. Stir until smooth and saucy. -
Combine:
Add pasta to the skillet. Toss, adding more pasta water a little at a time until glossy and well coated. -
Season & serve:
Season with salt and pepper. Finish with Parmesan, herbs, or chili flakes if you like.
Notes
-
Soften the cream cheese first to avoid lumps.
-
Pasta water is key—it emulsifies the sauce. Save extra!
-
Low heat keeps the sauce silky, not grainy.
-
Finish cooking in the sauce for the last minute so the pasta absorbs flavor.
Nutritional Information (Per Serving, Approximate)
Calories: 430 | Protein: 11g | Carbohydrates: 45g | Fat: 23g | Saturated Fat: 14g | Cholesterol: 65mg | Sodium: 220mg | Fiber: 2g | Sugar: 2g
Note: Nutritional info is an estimate based on the base recipe without garnishes and will vary with specific ingredients and substitutions used.
Final Thoughts: More Than Just a Meal
This 20-Minute Cream Cheese Garlic Pasta isn’t just a recipe—it’s a revelation. It proves that a magnificent dinner doesn’t require a dozen ingredients, fancy techniques, or hours of your time. It requires a little trust, a splash of starchy pasta water, and the willingness to see a simple block of cream cheese as a ticket to creamy pasta paradise.
It’s the recipe that rescues your evening, impresses your family, and reminds you that the best moments often come from unplanned, imperfect beginnings. It’s a reminder that cooking is meant to be joyful, forgiving, and deeply personal. So, whether you stick to the classic, garlicky version or spin it into something new with your favorite add-ins, you’re not just making pasta. You’re creating a warm, satisfying, and deeply delicious anchor to your day.
Keep this one in your back pocket. Print it, bookmark it, or commit it to memory. Because that next chaotic Tuesday? You’ll be ready. And it’s going to taste incredible.
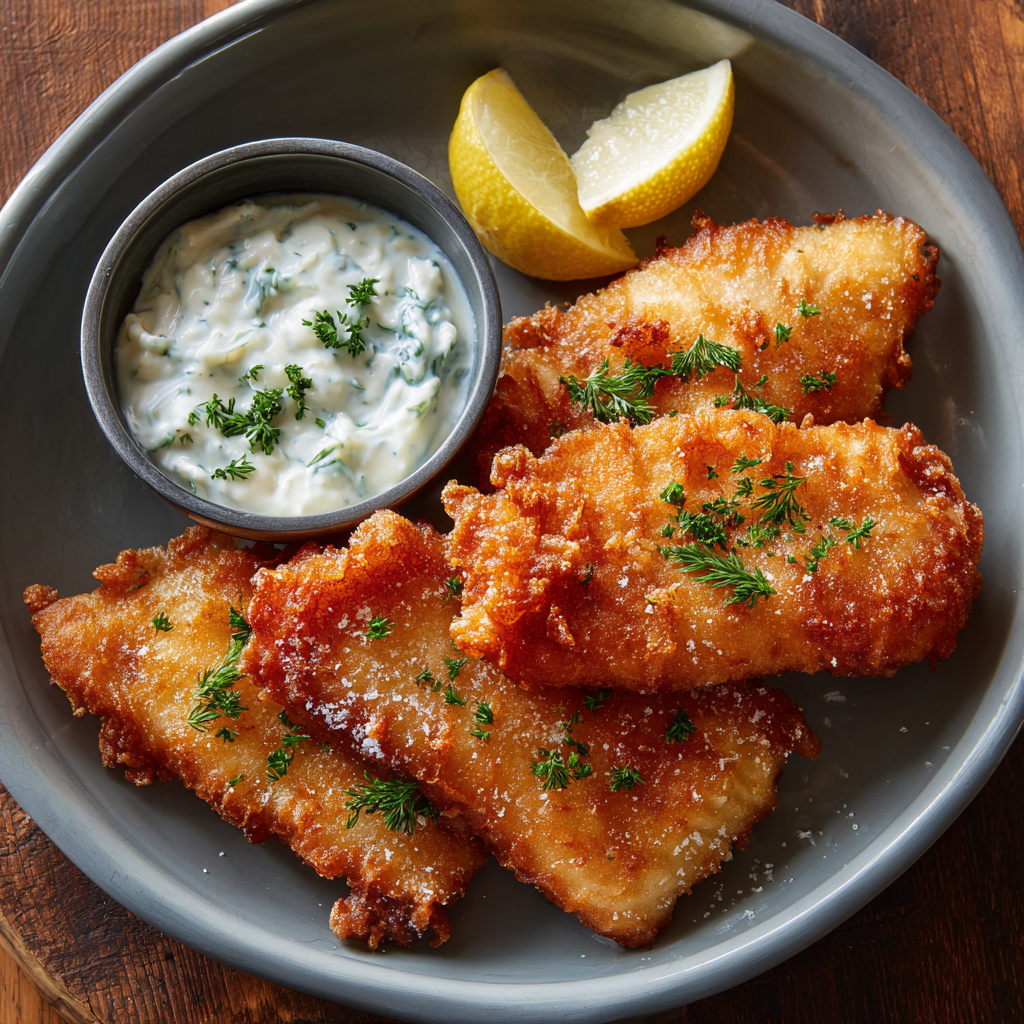
Healthy Crispy Fish Batter : Light, Golden, and Stays Crunchy
The Golden Secret to Fish That Stays Crispy (Yes, Really!)
Hey there, friend. Can we talk about a universal kitchen heartbreak for a second? You know the one. You spend time carefully coating fresh fish in batter, you fry it to a beautiful, shatteringly crisp, golden perfection… and by the time you carry the plate to the table, it’s already starting to soften. That gorgeous crunch you worked so hard for is gone, replaced by a sad, soggy blanket. It’s enough to make you want to order takeout forever.
I’ve been there, standing in my kitchen with a sigh, wondering why my homemade efforts never matched the magic of a great pub or seafood shack. But what if I told you the secret isn’t a mystery guarded by chefs in tall hats? What if you could make a fish batter at home that is not only incredibly light and crispy but actually stays that way long enough for everyone to sit down, snap a photo, and take that first glorious, crunchy bite?
This recipe is my kitchen-tested, crowd-pleasing, game-changing answer. We’re using a brilliant blend of flours and one simple, fizzy liquid to create a batter that fries up into an airy, golden lace cloak for your fish. It’s quicker than you think, healthier than traditional deep-fry batters (thanks to a faster cook time and less oil absorption), and so reliable it’s become my go-to for everything from classic Friday night fish and chips to zesty fish tacos. So, tie on that apron—let’s make some magic that stays magical.
A Lakeside Lesson in Crunch
My love for perfectly crispy fish was cemented one hazy summer afternoon at my grandparent’s lakeside cabin. My grandpa, a man of few words but infinite patience when it came to a frying pan, was in charge of the day’s catch—a few beautiful perch. He set up his old cast-iron skillet on the outdoor burner, and I watched, mesmerized, as he mixed his batter in a chipped blue bowl. It wasn’t a recipe from a book; it was a feeling. A splash of this, a pinch of that.
The moment that fish hit the hot oil, it erupted in a furious, joyful sizzle. He’d pull out pieces that looked like they were wearing suits of golden armor. We’d eat them on paper towels on the porch, sprinkling them with malt vinegar straight from the bottle, burning our fingers because we couldn’t wait. The crunch was seismic—you could hear it three feet away. That texture, that sound, that feeling of pure, simple joy is what I’m chasing every time I make this recipe. It’s not just about frying fish; it’s about creating a moment of uncomplicated happiness, right in your own kitchen.
Your Crispy Fish Battery Arsenal
Here’s where the science meets the soul. Every ingredient here has a purpose, a little job to do in creating that perfect, lasting crunch. Let’s break it down:
- 1 cup all-purpose flour: This is our sturdy base. It provides structure and that classic fried flavor. Chef’s Insight: For a slightly nuttier, whole-grain vibe, you can swap out ¼ cup of the AP flour for fine rye flour or whole wheat pastry flour.
- ½ cup cornstarch: This is the SECRET WEAPON! Cornstarch fries up crisper than flour and creates a finer, delicate crunch that stays crispy longer. It’s the non-negotiable star of the show.
- 1 teaspoon baking powder: Our leavening agent. When it hits the hot oil, it creates tiny bubbles in the batter, making it light, airy, and beautifully puffed. Make sure yours is fresh for maximum lift!
- 1 teaspoon salt: Seasoning from the inside out. It wakes up all the other flavors. I use fine sea salt.
- ½ teaspoon black pepper: A warm, aromatic base note. Freshly cracked is always best if you have it.
- ½ teaspoon paprika (optional): Mostly for that gorgeous golden-brown color, but it adds a whisper of sweet, smoky depth too. Smoked paprika is a fun twist here.
- 1 cup cold sparkling water or club soda: The other SECRET WEAPON! The carbonation creates millions of micro-bubbles, leading to an ultralight, lacy batter. The cold temperature also helps prevent gluten development, keeping the coating tender, not tough. Substitution Tip: Chilled light beer works fantastically here too, adding a yeasty flavor.
- 1 egg (optional): I add this when I want a slightly richer, more substantial coating (think fish and chip shop style). It adds color and a touch more structure. For the lightest, laciest batter (perfect for tacos), leave it out.
- 1–1.5 lbs firm white fish fillets: Cod, haddock, halibut, or tilapia all work beautifully. The key is thickness—aim for fillets that are ¾ to 1-inch thick for the best fry-to-fish ratio.
- Neutral oil for frying: Canola, vegetable, peanut, or avocado oil. You want something with a high smoke point. You’ll need enough to come about 1.5 inches up the side of your pan.
Let’s Fry: Step-by-Step to Golden Perfection
Okay, team. Mise en place! Get everything measured, your fish patted dry, and your station set up. Hot oil waits for no one. Follow these steps, and you’re guaranteed success.
Step 1: The Dry Team Meeting. In a large, wide bowl (this makes dipping easier!), whisk together the all-purpose flour, cornstarch, baking powder, salt, pepper, and paprika (if using). Whisk it really well—we want the baking powder and salt evenly distributed throughout. This is your flavor and structure base camp. Chef’s Hack: I sometimes do this step in a gallon zip-top bag. When it’s time to batter, I add the liquid, zip it shut, and give it a few gentle squeezes to mix. Less mess!
Step 2: Bring in the Bubbles. Take your sparkling water or club soda straight from the fridge. If using the egg, beat it lightly in a small bowl first. Make a well in the center of your dry ingredients and gradually pour in the cold bubbly water (and egg, if using), whisking as you go. Here’s the crucial part: stop whisking when it’s just combined. A few lumps are not just okay; they’re desirable! Overmixing develops gluten, which makes the batter tough and bready. You’re aiming for a consistency like thin pancake batter. Set it aside while you heat the oil.
Step 3: Fish Prep is Key. Use paper towels to pat your fish fillets completely, utterly, bone-dry. This is non-negotiable. Any surface moisture will create steam, which is the enemy of crispiness. Then, give each fillet a very light dusting of plain flour. This “primer coat” gives the wet batter something extra to grip onto, preventing it from sliding off in the oil.
Step 4: Heat it Right. Pour your oil into a heavy-bottomed Dutch oven or deep, large skillet until it’s about 1.5 inches deep. Attach a deep-fry or candy thermometer to the side. Heat over medium-high heat until the oil reaches 375°F (190°C). This is the sweet spot. If it’s too cool, the fish will soak up oil and be greasy. Too hot, and the outside burns before the inside cooks. No thermometer? Test with a wooden chopstick or the handle of a wooden spoon. Dip it in the oil; if steady, vigorous bubbles form around it immediately, you’re likely in the right zone.
Step 5: The Dip & Sizzle. Working with one piece at a time, hold your dried, floured fish by one end and dip it into the batter. Let the excess drip off for a good 3-5 seconds back into the bowl. Gently lay the fish into the hot oil, away from you to avoid splatters. Don’t overcrowd the pan! Fry 2-3 pieces at a time to keep the oil temperature stable. They should fry actively, not just simmer. Cook for 4-6 minutes total, turning once halfway, until the coating is a deep, even golden brown and crisp.
Step 6: Drain Like a Pro. This is the final, critical trick! Do NOT drain your crispy fish on a plate lined with paper towels. The bottom will steam and get soggy. Instead, use a wire rack set over a baking sheet or a plate. This allows air to circulate around the entire piece, keeping every single inch crispy. Let it rest for just a minute before serving—this allows the internal steam to finish cooking the fish gently.
How to Serve Your Masterpiece
Get that fish to the table fast! I love serving it on a big warm platter or right on the wire rack (rustic charm!). For classic fish and chips, pile it next to a mountain of twice-cooked fries, with lemon wedges, tartar sauce, and malt vinegar. For fish tacos, flake the crispy fillets into warm corn tortillas and top with crunchy cabbage slaw, a creamy lime crema, and fresh cilantro. A simple side of lemon-dressed arugula or vinegary cucumber salad cuts through the richness beautifully.
Make It Your Own: Fun Twists & Swaps
- Gluten-Free Magic: Swap the all-purpose flour for your favorite 1:1 gluten-free flour blend. The cornstarch is already GF, so you’re good to go!
- Spicy Kick: Add 1 teaspoon of chili powder, ½ teaspoon of garlic powder, and a pinch of cayenne to the dry mix for a Tex-Mex style batter perfect for tacos.
- Herb & Citrus: Whisk the zest of one lemon or lime into the dry ingredients, and add 2 tablespoons of chopped fresh dill or parsley to the batter.
- Tempura-Style: For an even lighter, more delicate coating, use only cornstarch (1.5 cups total) and very cold seltzer. Keep the batter very lumpy and fry immediately.
- Air Fryer Option: For a lighter version, spray battered fish generously with oil and air fry at 400°F for 10-12 minutes, flipping halfway. It won’t be *quite* as shatteringly crisp as deep-frying, but it’s a fantastic healthier alternative.
Olivia’s Kitchen Notes
This recipe is a living thing in my kitchen! It started as a scribbled note after one too many soggy disappointments, inspired by my grandpa’s intuition and tips from chef friends. The biggest “aha!” moment was switching from milk to sparkling water—the difference in texture was night and day. I’ve also learned to embrace the lumps; my instinct was always to whisk until smooth, but resisting that urge was a game-changer.
A funny story? The first time I made this for a big family dinner, I was so focused on the oil temperature and batter consistency that I completely forgot to season the fish itself with salt and pepper before dusting it with flour! We had to do a major post-fry seasoning rescue. The moral? Season every layer, friends. Now, it’s a ritual I don’t skip. This batter has become so trusted that my friends text me photos of their crispy fish triumphs, which is honestly the biggest compliment of all.
Your Crispy Fish Questions, Answered
Q: My batter keeps sliding off the fish in the oil! What am I doing wrong?
A: This usually boils down to two things: 1) The fish wasn’t patted completely dry. Moisture is a barrier. 2) You skipped the light flour dusting before dipping. That dusting is the glue! Make sure you’re doing both steps, and your batter will stick like a charm.
Q: Can I make the batter ahead of time?
A: I don’t recommend it. The baking powder and carbonation start working the moment they’re mixed. Letting it sit will result in a flat, less bubbly (and therefore less crispy) batter. Mix it right before you’re ready to fry.
Q: Why is my fish greasy instead of crispy?
A: Greasiness is a sign the oil temperature was too low. The fish absorbs the oil before it can seal and crisp. Always use a thermometer and let the oil come back up to 375°F between batches. Also, don’t overcrowd the pan, as that causes a major temperature drop.
Q: What’s the best oil for frying fish?
A: You want a neutral-flavored oil with a high smoke point. My top choices are peanut oil (adds a great flavor) or avocado oil (very high smoke point). Canola and vegetable oil are perfect, affordable workhorses. Avoid olive oil (low smoke point, strong flavor) or butter (it will burn).
Healthy Crispy Fish Batter : Light, Golden, and Stays Crunchy
Description
Learn how to make fish that stays crispy, golden, and irresistible long enough to snap a photo and enjoy every crunchy bite. This batter uses a secret mix of flours, a fizzy liquid, and a few simple tricks to create a light, airy coating that clings perfectly to firm white fish. Perfect for classic fish & chips, tacos, or any weeknight craving.
Ingredients
Dry Mix:
-
1 cup all-purpose flour (or swap ¼ cup for rye or whole wheat pastry flour)
-
½ cup cornstarch (secret to lasting crisp!)
-
1 tsp baking powder
-
1 tsp salt
-
½ tsp black pepper
-
½ tsp paprika (optional; smoked paprika adds depth)
Wet Mix:
-
1 cup cold sparkling water or club soda (or chilled light beer)
-
1 egg (optional; for richer, more substantial coating)
Fish & Frying:
-
1–1.5 lbs firm white fish fillets (cod, haddock, halibut, or tilapia; ¾–1-inch thick)
-
Neutral oil for frying (peanut, avocado, canola, or vegetable), ~1.5 inches deep
Instructions
-
Mix Dry Ingredients:
-
Whisk together flour, cornstarch, baking powder, salt, pepper, and paprika in a large bowl.
-
-
Add Wet Ingredients:
-
Make a well in the center. Gradually pour in sparkling water and egg (if using), whisking gently.
-
Stop whisking when just combined; lumps are okay. Batter should be like thin pancake batter.
-
-
Prep the Fish:
-
Pat fillets completely dry.
-
Lightly dust with plain flour to help batter stick.
-
-
Heat the Oil:
-
Heat oil in a heavy-bottomed Dutch oven or deep skillet to 375°F (190°C).
-
No thermometer? Test with a wooden chopstick—vigorous bubbles indicate readiness.
-
-
Batter & Fry:
-
Dip fish into batter, letting excess drip off.
-
Carefully lay in hot oil; don’t overcrowd.
-
Fry 4–6 min, turning once, until golden brown and crisp.
-
-
Drain Properly:
-
Use a wire rack over a baking sheet to drain; avoids soggy bottoms. Let rest ~1 min.
-
Serving Suggestions
-
Classic Fish & Chips: Serve with fries, lemon wedges, tartar sauce, malt vinegar.
-
Fish Tacos: Flake into warm tortillas, top with cabbage slaw, lime crema, and cilantro.
-
Light & Fresh: Pair with lemon-dressed arugula, cucumber salad, or roasted vegetables.
Notes
-
Gluten-Free: Swap AP flour for a 1:1 gluten-free blend. Cornstarch keeps it crisp.
-
Spicy: Add 1 tsp chili powder, ½ tsp garlic powder, and a pinch of cayenne to dry mix.
-
Herb & Citrus: Add zest of 1 lemon or lime + 2 tbsp chopped dill or parsley to batter.
-
Tempura-Style: Use only cornstarch (1.5 cups) + very cold seltzer. Fry immediately for a delicate, airy coating.
-
Air Fryer: Spray battered fish generously; air fry 400°F for 10–12 min, flipping halfway. Slightly less crisp than deep-fried.
Nutritional Information*
Per Serving (1 fillet, approx. 6 oz fish with batter):
Calories: ~270 | Protein: 15g | Fat: 9g | Saturated Fat: 1g | Carbohydrates: 32g | Fiber: 1g | Sugars: 0g | Sodium: 450mg
*This is an estimate based on the specified ingredients and frying method. Actual values will vary based on fish type, exact oil absorption, and specific brands used. Draining on a wire rack versus paper towels significantly reduces fat content.
Final Thoughts: The Sound of Success
There it is. The not-so-secret formula for fish so crisp it could be heard across a room—just like my grandpa’s on that sun-dappled porch. This recipe isn’t about hiding fish in a heavy coat of batter; it’s about adorning it in a golden, lacy cloak of air and crunch that stands up to time, travel, and tartar sauce.
Remember, the magic lies in the partnership of cornstarch for crispness, carbonation for lift, and the cardinal rule of dry fish, hot oil. It’s a simple pact that banishes sogginess for good. Whether you’re building the ultimate fish taco, recreating a classic pub supper, or simply treating yourself to something special, you now hold the key.
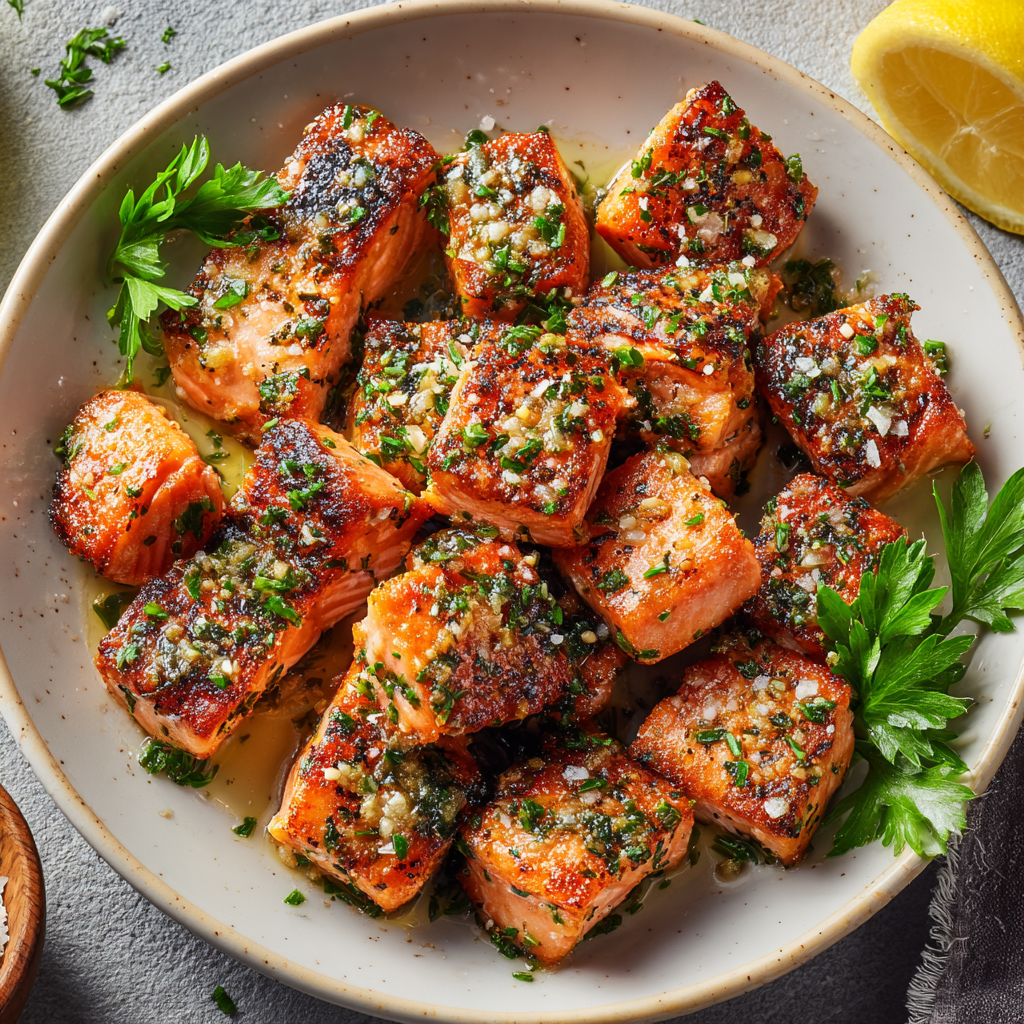
Crispy Garlic Butter Salmon Bites : Quick, Juicy & Packed with Flavor
Turn a Simple Salmon Filet Into Your New Favorite Weeknight Hero!
Hey there, friend! Come on in, grab an apron, and let’s get something sizzling. Have you ever stood in front of the fridge, staring at a beautiful piece of salmon, and thought… “Again?” We’ve all been there. You want that fantastic, flaky, omega-3 packed goodness, but you’re craving something a little different, a little more fun, and a lot faster than a traditional baked filet. Well, my fellow flavor-seeker, I have the absolute joy of introducing you to your new kitchen best friend: Crispy Garlic Butter Salmon Bites.
Picture this: tender, juicy cubes of salmon, seared in a hot pan until their edges are irresistibly golden and crisp, then tossed in a glossy, fragrant bath of melted butter, minced garlic, and a bright kiss of lemon. They’re like the best part of a salmon filet—the crispy skin—but in every single, addictive bite. The best part? This isn’t a fancy, fussy recipe. This is a 20-minute, one-pan wonder that feels wildly indulgent but is secretly super nutritious.
Whether you pile them over a fluffy bed of rice for a cozy dinner, scatter them atop a vibrant salad for a power lunch, or simply eat them straight from the pan with a fork (no judgment here, I’ve done it), these salmon bites are about to revolutionize your routine. They’re my go-to for busy weeknights, impressive last-minute guests, and meal prep that I actually look forward to. So, let’s turn up the heat, melt some butter, and make something truly magical together.
The Little Bite That Started It All
This recipe was born out of pure, unadulterated hunger and a serious case of impatience. A few years back, I was hosting a last-minute, very casual girls’ night. The plan was big salads, good wine, and easy conversation. I had a gorgeous piece of salmon I wanted to add to the greens, but the thought of waiting for the oven to preheat and then bake it felt like an eternity. My stomach was growling, my friends were chatting, and I needed protein, stat.
In a moment of “what if,” I grabbed my sharpest knife, cubed that salmon right on the cutting board, and tossed the pieces into a screaming-hot skillet. In mere minutes, they were browned and beautiful. On autopilot, I reached for the butter and garlic—a duo that has never let me down. As I tossed the crispy bites in that golden sauce, the most incredible aroma filled the kitchen. My friends literally stopped talking, wandered over, and started hovering with plates. We ended up eating half the batch right there by the stove, laughing and burning our tongues a little, before the salads ever saw a single salmon cube. It was a messy, perfect, shared moment of discovery. Now, I make them just for me sometimes, and that sizzle still brings back that happy, spontaneous feeling every single time.
Gathering Your Flavor Squad
Here’s what you’ll need to create this simple masterpiece. I’ve added my little chef insights next to each one—because knowing your ingredients is the first step to cooking with confidence!
- 1 lb salmon filet, skin removed and cut into 1-inch cubes – This is your star! I prefer wild-caught salmon for its flavor and leanness, but farm-raised works beautifully and is often more budget-friendly. Pro-Tip: Ask your fishmonger to remove the skin for you, or slide a flexible knife between the skin and flesh at a slight angle—it’s easier than it sounds!
- 1 tbsp olive oil – Our searing agent. Its high smoke point is perfect for getting that initial crisp without burning. Avocado oil is a great high-heat alternative.
- 1 tbsp butter – This is where the rich, nutty flavor magic happens. For dairy-free, a plant-based butter or even a touch more olive oil works, but you’ll miss that classic butter flavor.
- 2 cloves garlic, minced – Fresh is best here! The quick cook in the butter mellows its bite into sweet, aromatic perfection. In a pinch, ½ tsp of good-quality garlic powder can work, but add it with the dried spices.
- 1 tsp paprika – This adds a subtle smokiness and gorgeous color. Smoked paprika will give a deeper campfire vibe, while sweet paprika is milder.
- 1/2 tsp salt & 1/2 tsp black pepper – The fundamental flavor enhancers. I use fine sea salt for even distribution. Always season your protein well—it makes all the difference.
- 1 tbsp lemon juice – The essential bright finish! Freshly squeezed lemon juice cuts through the richness and makes the whole dish sing. Don’t skip it.
- Optional: chopped parsley or green onion for garnish – A pop of green for freshness and a restaurant-quality look. Chives or a little dill would also be lovely.
Let’s Get Cooking: Your Foolproof Roadmap to Crispy Bites
Ready? Let’s turn these ingredients into your new favorite meal. Follow these steps, and you’ll have perfect salmon bites every single time.
Step 1: Prep & Season Your Salmon. First, pat your salmon cubes very dry with paper towels. This is the #1 secret to getting a crispy sear instead of a steamy poach. Moisture is the enemy of crispiness! Place the dry cubes in a bowl and sprinkle evenly with the paprika, salt, and pepper. Gently toss to coat every side. See? We’re building flavor from the inside out.
Step 2: Sear to Golden Perfection. Heat the olive oil in a large, heavy-bottomed skillet (I love my cast iron or stainless steel for this) over medium-high heat. You want the oil to shimmer. Carefully add the salmon cubes in a single layer. Don’t crowd the pan! If they’re all touching, they’ll steam. Cook in batches if you need to—it’s worth it. Let them sear, untouched, for 2-3 minutes. You’ll know it’s time to flip when the bottom releases easily and is a deep golden brown. Flip each piece and sear for another 2-3 minutes. The sides should be opaque, and the center should still give slightly when pressed—it will finish cooking in the next step.
Step 3: Create the Garlic Butter Glaze. Reduce the heat to medium. Push the salmon bites to one side of the pan or, if you’re confident, just make a little space. Add the butter. Once it melts and starts to foam, add the minced garlic right into the butter. Let it sizzle for just 30-60 seconds until it’s incredibly fragrant—do not let it burn! Burnt garlic turns bitter. Now, use a spoon to gently toss and baste the salmon bites in that glorious garlic butter for about a minute, letting the flavors marry and the salmon cook through to tender, flaky perfection.
Step 4: The Bright Finish. Remove the skillet from the heat. Drizzle the fresh lemon juice over everything. Give it one final, gentle toss. The residual heat will cook the sharpness out of the lemon juice, leaving just its vibrant essence clinging to each bite.
How to Serve These Flavor-Packed Bites
The beauty of these salmon bites is their versatility! For a quick, balanced bowl, I love them over cauliflower rice or quinoa with a side of roasted broccoli. Feeling fancy? Serve them on a bed of creamy mashed potatoes or lemon risotto, letting that garlic butter sauce become part of the sauce. For a light and vibrant meal, toss them into a big garden salad with a simple vinaigrette, or stuff them into lettuce wraps with avocado and a drizzle of Sriracha mayo. However you plate them, garnish with that fresh parsley or green onion for a photo-worthy finish!
Make It Your Own: Delicious Twists & Swaps
- Spicy Honey Garlic: Add ¼ tsp red pepper flakes with the garlic, and after removing from heat, toss with 1 tablespoon of warm honey.
- Herb & Lemon Zest: Stir in 1 teaspoon of lemon zest and 2 tablespoons of chopped fresh herbs (like dill, tarragon, or chives) with the butter.
- Creamy Dill Sauce: After removing the salmon, turn the heat to low. Add ¼ cup of sour cream or Greek yogurt and 1 tbsp of fresh dill to the pan juices. Stir to create a sauce, then return salmon to coat.
- Asian-Inspired: Swap the paprika for a dash of ginger. Use 1 tbsp each of soy sauce and honey instead of lemon juice for a sticky, savory glaze.
- Air Fryer Method: For less oil, toss seasoned cubes with 1 tsp oil. Air fry at 400°F (200°C) for 6-8 minutes, shaking once. Melt butter with garlic and lemon separately, then toss with cooked bites.
Olivia’s Kitchen Notes & Stories
This recipe has become such a staple in my home that I’ve lost count of how many times I’ve made it. The funny thing is, I almost never make it the exact same way twice! Sometimes I’ll grab the Cajun seasoning instead of paprika, or throw in a handful of cherry tomatoes to blister in the pan alongside the salmon. It’s that kind of forgiving, flexible recipe.
One of my favorite kitchen memories with this dish was teaching my niece, who claimed to be “scared of cooking fish,” how to make it. Seeing her face light up when she flipped her first perfect, crispy cube was priceless. She texted me a week later saying she’d made it for her roommates and felt like a “real chef.” That’s exactly the feeling I want this recipe to give you. It’s not about rigid rules; it’s about understanding a simple, delicious technique you can adapt forever. And yes, I still eat a few bites straight from the pan every single time. It’s the chef’s treat!
Your Questions, Answered!
Q: My salmon is sticking to the pan! What did I do wrong?
A: Sticking usually means the pan wasn’t hot enough when you added the salmon, or you tried to flip the pieces too soon. Ensure your oil is shimmering hot, and let the salmon form a proper crust before moving it. A good non-stick, well-seasoned cast iron, or stainless steel pan is also key.
Q: Can I use frozen salmon?
A: Absolutely! Thaw it completely in the refrigerator first, then pat it extra, extra dry. Frozen fish often retains more moisture, so take your time with those paper towels to ensure a good sear.
Q: How do I know when the salmon bites are cooked through?
A: The best test is texture and sight. The salmon should be opaque on all sides and flake easily with a fork. The internal temperature should reach 125°F (52°C) for medium-rare to 145°F (63°C) for well-done, according to USDA guidelines. Remember, it will continue to cook a bit after you take it off the heat.
Q: Can I meal prep these?
A: Yes, they’re a fantastic meal prep option! Let them cool completely, then store in an airtight container in the fridge for up to 3 days. They’re delicious cold on salads, or you can gently reheat them in a skillet over low heat to maintain texture.
Crispy Garlic Butter Salmon Bites : Quick, Juicy & Packed with Flavor
Description
Tender, juicy cubes of salmon, seared to golden perfection and tossed in a fragrant garlic butter sauce with a bright kiss of lemon. Quick, indulgent, and packed with flavor—perfect for weeknight dinners, meal prep, or impressing last-minute guests.
Ingredients
-
1 lb salmon filet, skin removed and cut into 1-inch cubes
-
1 tbsp olive oil (or avocado oil)
-
1 tbsp butter (or plant-based alternative)
-
2 cloves garlic, minced
-
1 tsp paprika (smoked or sweet)
-
½ tsp salt
-
½ tsp black pepper
-
1 tbsp lemon juice, freshly squeezed
-
Optional garnish: chopped parsley, green onion, chives, or dill
Instructions
-
Prep & Season Salmon:
-
Pat salmon cubes very dry with paper towels.
-
Toss gently with paprika, salt, and pepper to coat evenly.
-
-
Sear Salmon Cubes:
-
Heat olive oil in a large skillet over medium-high heat until shimmering.
-
Add salmon cubes in a single layer. Don’t overcrowd the pan—cook in batches if needed.
-
Sear 2–3 minutes per side until deep golden brown. The centers should remain slightly soft; they’ll finish cooking in the next step.
-
-
Make Garlic Butter Glaze:
-
Reduce heat to medium. Push salmon to the side or create a space in the skillet.
-
Add butter and let it melt and foam. Stir in minced garlic and cook 30–60 seconds until fragrant (do not burn).
-
Spoon butter over salmon bites and gently toss for 1 minute until fully coated and cooked through.
-
-
Bright Finish:
-
Remove skillet from heat. Drizzle lemon juice over salmon and toss gently.
-
-
Serve:
-
Plate as desired. Serve over rice, quinoa, salad, or in lettuce wraps. Garnish with parsley, green onion, or herbs of choice.
-
Notes
-
Spicy Honey Garlic: Add ¼ tsp red pepper flakes and toss with 1 tbsp warm honey after cooking.
-
Herb & Lemon Zest: Add 1 tsp lemon zest and 2 tbsp fresh herbs with butter.
-
Creamy Dill Sauce: After removing salmon, stir ¼ cup sour cream or Greek yogurt + 1 tbsp fresh dill into pan juices and coat salmon.
-
Asian-Inspired: Replace paprika with ginger and use 1 tbsp soy sauce + 1 tbsp honey instead of lemon juice.
-
Air Fryer Option: Toss seasoned cubes with 1 tsp oil. Air fry at 400°F for 6–8 min. Melt butter with garlic and lemon separately, then toss with cooked bites.
Nutritional Information*
Prep Time: 5 minutes | Cook Time: 10-12 minutes | Total Time: ~17 minutes | Servings: 2-3
*Per serving (based on 3 servings, using all butter/oil). For informational purposes only.
- Calories: ~280
- Protein: 25g
- Carbohydrates: 1g
- Fat: 18g (Saturated Fat: 5g)
Final Thoughts: Your Weeknight Hero Is Served
There you have it—the simple, sizzling secret to turning a humble salmon filet into something spectacular. These Garlic Butter Salmon Bites aren’t just dinner; they’re a confidence boost in a skillet. They prove that incredible flavor doesn’t need hours of prep or a laundry list of ingredients—just good technique, a hot pan, and the holy trinity of butter, garlic, and lemon.
Every time I make them, I’m reminded of that first hungry, happy experiment in my kitchen. Cooking should feel like that: playful, intuitive, and full of little victories. Whether you’re cooking for one on a tired Tuesday or impressing a table full of friends, these bites deliver—crispy, tender, and draped in just enough garlicky gold to feel like a treat.
So the next time you see that piece of salmon in your fridge, smile. You’re not just making dinner; you’re about to create a moment—a sizzle, a smell, a taste that turns an ordinary weeknight into something memorable. Now go ahead, take that first bite straight from the pan. You’ve earned it.
Here’s to simple food, made extraordinary,
Olivia
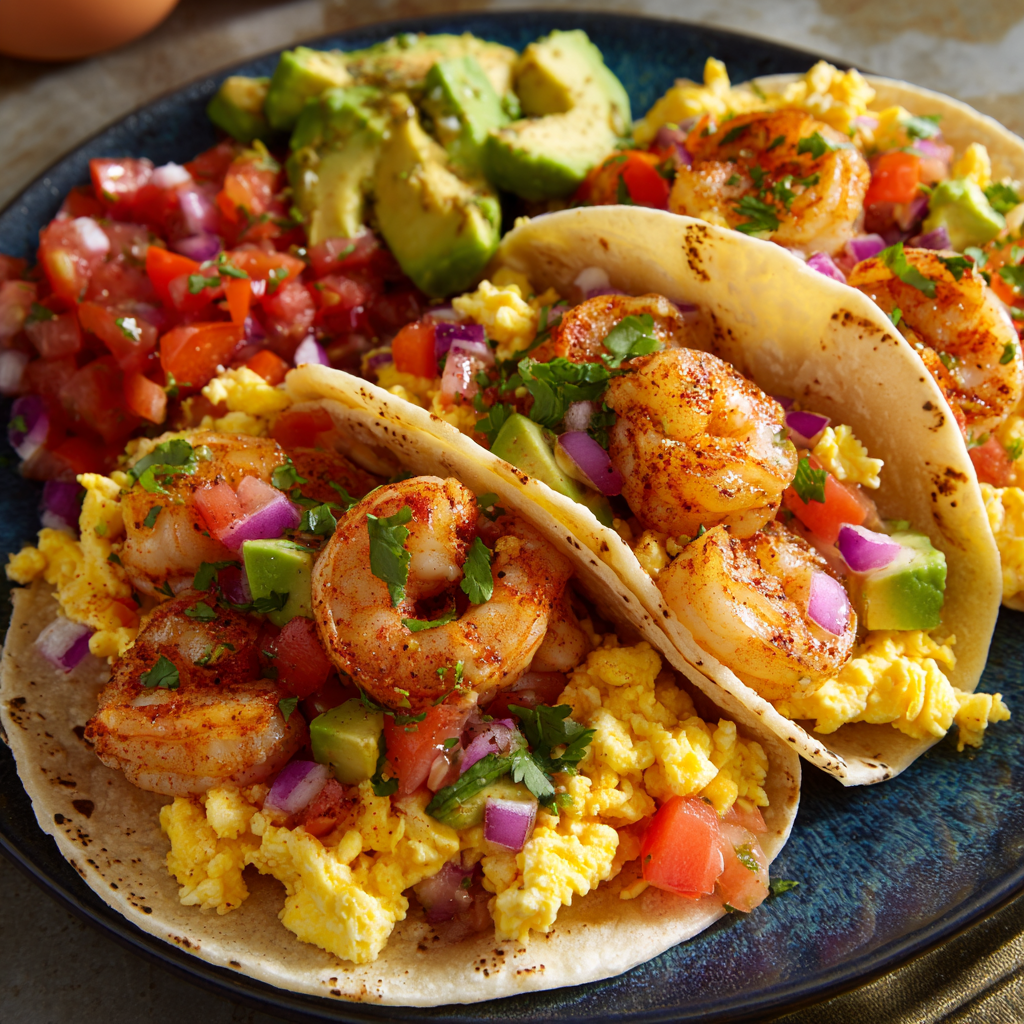
Easy Breakfast Shrimp Tacos with Scrambled Eggs & Avocado Salsa
Why Your Morning is About to Get a Whole Lot Tastier
Hey there, friend! Come on in, the coffee’s fresh and I’ve got the skillet heating. Can we talk about breakfast for a second? I mean, really talk about it. Are you, like me, sometimes caught between wanting something wildly delicious and needing to get out the door before the world wakes up? Do you ever stare at the same carton of eggs and think, “My darling, I love you, but we need to see other people… maybe someone who wears a shell of a different kind?”
That’s exactly the daydream that led me straight to these Breakfast Shrimp Tacos. This isn’t just a recipe; it’s a full-on morning mood shift. We’re taking the vibrant, quick-cooking magic of shrimp—usually reserved for fancy dinners—and inviting it to the most important meal of the day. Paired with creamy scrambled eggs and a bright, chunky avocado salsa that basically screams “GOOD MORNING!”, these tacos are a flavor fiesta that happens to be packed with enough protein to power you through anything.
I promise you, this isn’t fussy chef territory. It’s faster than waiting in a drive-thru line, more exciting than toast, and guaranteed to make anyone you share them with feel insanely special. So, let’s ditch the routine, grab a couple of bowls, and turn breakfast into the most delicious adventure of your day. Trust me, your taste buds will send you a thank-you note.
The Coastal Sunrise That Inspired It All
This recipe was born from a misty, salt-air morning on a tiny strip of coast in Oregon. My husband and I were on one of those “let’s just drive and see where we end up” trips, and we ended up at a rickety wooden pier cafe at 6 AM, shivering slightly and ordering whatever the fisherman-cook recommended. What arrived were the most incredible fish tacos I’d ever had—for breakfast. The flaky white fish was nestled next to perfectly soft scrambled eggs, all topped with a salsa so fresh it must have been made minutes after the sun rose.
It was a revelation. A total “why don’t we do this all the time?!” moment. The combination was so simple yet so profound. On the long drive home, all I could think about was how to recreate that feeling—that vacation-level joy—on a regular Wednesday morning. Shrimp became my go-to because of its incredible speed and sweet, briny flavor that feels like a treat. Every time I make these now, I’m transported back to that chilly pier, wrapped in a blanket, watching the waves, and realizing that the best memories often come with a side of something unexpectedly delicious.
Gathering Your Flavor Crew
Here’s the beautiful part: the ingredient list is short, sweet, and flexible. This is about quality, not quantity. Let’s break it down.
- 1/2 lb (approx. 250g) medium shrimp, peeled and deveined – The star! I buy frozen, tail-off shrimp and thaw them overnight in the fridge. It’s cheaper and easier. The “deveined” part just means that little digestive tract is removed—it’s purely for texture and aesthetics. Chef Insight: Pat your shrimp very dry with a paper towel before cooking. This is the #1 secret to getting a nice sear instead of a steamy simmer.
- 4 large eggs – Our creamy, comforting base. For the fluffiest scramble, I add a tiny splash of water or milk when whisking. It creates steam as they cook. Sub Tip: Any fat works for scrambling—butter for rich flavor, olive oil for a lighter touch, or a neutral oil like avocado.
- 1 ripe avocado, diced – For that lush, creamy salsa base. Need to ripen one fast? Pop it in a paper bag with a banana overnight!
- 1 small tomato, diced – Adds juicy acidity. I use Roma tomatoes because they’re less watery, but any kind works. Just scoop out the seedy gel in the middle if it’s very juicy to prevent a soggy salsa.
- 2 tbsp red onion, finely chopped – A little bite for balance. If raw onion is too intense for you, soak the chopped bits in cold water for 5 minutes. It mellows the flavor perfectly.
- Juice of 1/2 a lime – The brightening agent! Fresh is non-negotiable here. It “cooks” the avocado slightly and brings all the salsa flavors to life.
- Salt & freshly cracked black pepper, to taste – Your fundamental flavor builders. I season the shrimp, the eggs, and the salsa separately. Don’t be shy!
- 1 tbsp olive oil or butter – For the pan. I often start with oil for the shrimp and add a pat of butter at the end for the eggs. Best of both worlds.
- 4 small tortillas (flour or corn) – The vessel! Flour tortillas are soft and pliable. Corn tortillas have a wonderful earthy flavor and are gluten-free—just be sure to warm them well so they don’t crack. Chef Hack: Heat tortillas directly over a low gas flame for a few seconds each side for incredible flavor. No gas? A dry skillet works great.
- Optional magic makers: Chopped fresh cilantro & your favorite hot sauce – Cilantro is a love-it-or-leave-it herb, but for those who love it, it’s essential. And hot sauce? That’s your personal morning soundtrack.
Let’s Get Cooking: Your Foolproof Taco Assembly Line
We’re going to work in a logical flow so everything comes together hot and fresh. Get your bowls and plates ready—this moves fast!
- The Salsa First (Mise en Place!): Dice your avocado, tomato, and red onion. Combine them in a medium bowl. Squeeze the lime juice over everything, add a pinch of salt, and give it a gentle stir. Now, walk away. Letting it sit for even 5-10 minutes while you cook everything else allows the flavors to marry and become something truly magical. This is my favorite “looks fancy, took zero effort” trick.
- Shrimp Time – Hot and Fast: Heat your skillet over medium-high heat and add half the oil or butter. While it heats, pat those shrimp bone dry and season them with salt and pepper. When the oil shimmers (or butter foam subsides), add the shrimp in a single layer. Don’t crowd them! Cook for 1.5-2 minutes per side, just until they turn pink, opaque, and curl into a loose “C” shape. Overcooked shrimp are tough shrimp. As soon as they’re done, transfer them to a plate. We’ll use that same flavorful pan for the eggs—no washing, maximum flavor.
- Scramble Like a Pro: Reduce the heat to medium-low. Add the remaining fat to the pan. In a bowl, whisk your eggs with a tiny splash of water and a good pinch of salt and pepper until uniform. Pour them into the pan. Let them sit for a few seconds until the edges just start to set, then using a spatula, push the cooked edges toward the center, letting the uncooked egg flow to the edges. Keep doing this gentle pushing and folding until the eggs are just set, but still look slightly wet and shiny. Remove from the heat immediately—they’ll carryover cook to perfect doneness. This is the secret to tender, not rubbery, eggs.
- Tortilla Warm-Up: While the eggs are doing their thing, warm your tortillas. My favorite method is a dry skillet over medium heat for about 30 seconds per side. You can also wrap them in a damp paper towel and microwave for 20-30 seconds. We want them soft and pliable, not crispy.
- The Grand Assembly: Lay your warm tortillas on plates. Divide the fluffy scrambled eggs between them. Top with the juicy, warm shrimp. Finish with a generous spoonful (or two!) of that vibrant avocado salsa. The contrast of the warm shrimp/eggs and the cool salsa is *chef’s kiss*.
- The Final Flourish: This is where you make it yours. A scattering of fresh cilantro? A few dashes of fiery hot sauce? A sprinkle of cotija cheese? Go for it. You’ve earned it.
Plating Your Morning Masterpiece
Presentation is part of the joy! I love serving these family-style: a big platter of warm tortillas, a bowl of the fluffy eggs, the pink shrimp piled high, and the gorgeous green salsa in a separate bowl. Let everyone build their own—it’s interactive and fun. For a solo breakfast, I just layer it all right on the plate, maybe with a lime wedge on the side for an extra squeeze. Pair it with a strong cup of coffee, a glass of icy orange juice, or for a real weekend vibe, a spicy Bloody Mary. It’s a complete, vibrant, and satisfying meal on its own.
Make It Your Own: Endless Taco Possibilities
The beauty of this framework is its flexibility. Here are a few of my favorite spins:
- The Southwest Kick: Add a pinch of cumin and chili powder to the shrimp while cooking. Swap the avocado salsa for a dollop of store-bought pico de gallo and a drizzle of crema or sour cream.
- “Everything but the Bagel” Twist: Season the scrambled eggs with a hefty sprinkle of everything bagel seasoning. It’s insanely good.
- Pescatarian Power-Up: Add a layer of quick-sautéed spinach or kale to the tortilla before adding the eggs and shrimp.
- Baja-Inspired: Use beer-battered or panko-crusted shrimp (you can use frozen for ease!) and top with a simple cabbage slaw instead of the avocado salsa.
- No-Shrimp? No Problem! For a vegetarian version, swap the shrimp for a can of seasoned black beans, warmed and smashed slightly, or some crispy cubes of seasoned tofu.
From My Kitchen to Yours: A Few Extra Thoughts
This recipe has become a weekend staple in our house, and it’s evolved in funny ways. I once, in a pre-coffee haze, accidentally used vanilla Greek yogurt instead of sour cream for a topping. Shockingly, it wasn’t a disaster—the sweet and savory thing kind of worked! My biggest lesson learned? Don’t skip drying the shrimp. I’ve done it, and you end up boiling them in their own juice instead of getting that nice, light sear. They still taste fine, but the texture is worlds better when you take that 30-second step.
Also, this is a fantastic “clean out the fridge” recipe. That last bit of feta cheese? Crumble it on. A lonely ear of corn? Cut off the kernels and toss them into the salsa. A half a bell pepper? Dice it up and sauté it with the shrimp. Cooking should feel creative, not rigid. This taco is your delicious canvas.
Your Questions, Answered!
Q: Can I make any part of this ahead of time for a busy morning?
A: Absolutely! The avocado salsa is the only part that doesn’t love sitting too long (avocados brown). You can prep the veggies the night before and store them separately in the fridge: diced tomato in one container, diced onion in another, and just combine with the avocado and lime in the morning. You can also peel/devein your shrimp the night before and keep them sealed on a plate in the fridge.
Q: My tortillas keep cracking/falling apart when I try to fold them. Help!
A: This usually means they need more hydration or warmth. For corn tortillas, warming them is non-negotiable. My pro tip: heat them in the microwave between two damp paper towels for 30 seconds, OR quickly pass them through a hot, dry skillet. For flour tortillas, ensure they’re fresh and warm. If all else fails, double them up—two tortillas per taco adds structural integrity and more carbs, which is never a bad thing.
Q: How do I know when the shrimp are perfectly cooked?
A: Visual cues are your best friend! Raw shrimp are gray and translucent. Perfectly cooked shrimp turn pink and opaque (you can’t see through them) and their bodies curl into a relaxed “C” shape. If they curl into a tight “O,” they’re likely overcooked and will be chewy. They cook incredibly fast, so stay close to the stove.
Q: Is this recipe kid-friendly?
A> It can be! My strategy is to deconstruct it. Serve the scrambled eggs, the shrimp (maybe cut into smaller pieces), the tortillas, and the salsa all separately on a plate. Let them dip, build, or eat the components side-by-side. Often, the familiar eggs are the gateway to trying a bite of shrimp in their taco.

Easy Breakfast Shrimp Tacos with Scrambled Eggs & Avocado Salsa
Description
Fluffy scrambled eggs, quick-cooked shrimp, and bright avocado salsa come together in warm tortillas for a protein-packed, flavor-packed breakfast taco experience. Perfect for a quick weekday morning or a leisurely weekend brunch.
Ingredients
-
½ lb (250g) medium shrimp, peeled & deveined
-
4 large eggs
-
1 ripe avocado, diced
-
1 small tomato, diced
-
2 tbsp red onion, finely chopped
-
Juice of ½ lime
-
Salt & freshly cracked black pepper, to taste
-
1 tbsp olive oil or butter
-
4 small tortillas (flour or corn)
-
Optional: chopped cilantro, hot sauce, cotija cheese
Chef Tips / Swaps:
-
Add a pinch of cumin or chili powder to shrimp for a Southwest twist.
-
Vegetarian? Swap shrimp for black beans or crispy tofu.
-
Make it Baja-style: panko-crusted shrimp + cabbage slaw.
Instructions
-
Prepare avocado salsa: Combine diced avocado, tomato, red onion, lime juice, and a pinch of salt. Let sit while cooking shrimp and eggs.
-
Cook shrimp: Heat ½ tbsp oil or butter in a skillet over medium-high. Pat shrimp dry and season with salt & pepper. Cook 1.5–2 min per side until pink, opaque, and curled in a loose “C.” Remove from skillet.
-
Scramble eggs: Reduce heat to medium-low. Add remaining fat to skillet. Whisk eggs with a tiny splash of water. Pour into skillet, gently pushing edges toward center until just set but still shiny. Remove from heat.
-
Warm tortillas: Heat tortillas in a dry skillet for 30 sec per side or microwave between damp paper towels for 20–30 sec.
-
Assemble tacos: Layer eggs on tortillas, top with shrimp, then spoon avocado salsa on top. Finish with optional cilantro, hot sauce, or cotija. Serve immediately.
Notes
-
Tortilla hack: Warm them properly for pliability; double up if they crack.
-
Shrimp doneness: Look for pink, opaque, and “C” curl. Avoid tight “O” curl—overcooked!
-
Make ahead: Prep veggies and shrimp night before; assemble in the morning.
Nutritional Info (A Per Taco Estimate)
This is a rough estimate based on using medium shrimp, olive oil, and corn tortillas. Remember, it will vary with your specific ingredients and toppings!
- Calories: ~210
- Protein: 16g (A fantastic morning protein boost!)
- Fat: 11g (Mostly the good, unsaturated kind from avocado and olive oil)
- Carbohydrates: 16g
- Fiber: 4g
Prep Time: 10 mins | Cook Time: 10 mins | Total Time: 20 mins | Servings: 2 (makes 4 tacos)
Pin This Recipe for Later!
Found your new favorite breakfast? Don’t let it get lost! Pin the image below to save these Easy Breakfast Shrimp Tacos to your favorite board.
Final Thoughts: Why This Recipe Sticks
So, there you have it. What started as a chilly, serendipitous breakfast on a distant pier has become a trusted, 20-minute ritual that never fails to turn an ordinary morning into something special.
I’ll leave you with this: the true magic of these Breakfast Shrimp Tacos isn’t just in the sweet shrimp, the creamy eggs, or the bright salsa—it’s in the permission they give you. Permission to break the routine. To treat a Tuesday like a vacation morning. To look at your first meal not as a hurried obligation, but as a small, delicious celebration.




