

Easter Swirl Pie : A No-Bake Pastel Dream
Easter Swirl Pie: Your New No-Bake Spring Tradition
Hey there, friend! Come on in—can you smell that? It’s the sweet, buttery scent of a graham cracker crust and the promise of something wonderfully pastel chilling in the fridge. If your heart does a little happy dance at the sight of a dessert that looks almost too pretty to eat, you and I are on the same wavelength. Welcome to the joy of my Easter Swirl Pie.
This isn’t just a pie; it’s a celebration on a plate. A no-bake, fuss-free masterpiece that captures the playful, hopeful spirit of spring in every pastel swirl. Picture this: clouds of silky, creamy filling in soft shades of pink, sunshine yellow, and sky blue, all swirled together like a watercolor painting. It sits in a crisp, golden crust and gets a crown of fluffy whipped cream and festive Easter candy. It’s the dessert that makes everyone—from your littlest niece to your most discerning foodie uncle—lean in with wide eyes and say, “You made that?”
The best part? You absolutely can. This recipe is my love letter to busy people who want to create magic without the stress. No oven thermometers, no fussy pastry dough, no hours of labor. Just simple ingredients, a little creative swirling, and the magic of your freezer and fridge doing the hard work. Whether you’re hosting a big Easter brunch, bringing a show-stopper to a potluck, or just want to make a regular Tuesday feel special, this pie is your secret weapon. So, tie on that (probably already flour-dusted) apron, and let’s make something unforgettable together.
The Story Behind the Swirl: A Messy, Sweet Beginning
This recipe has its roots in a kitchen covered in more food coloring than a toddler’s art project. Years ago, long before this blog was even a thought, I was determined to make an Easter dessert for my family that was more exciting than a basic boxed cake. I wanted color, whimsy, and pure joy in every slice. I started with my grandma’s no-bake cheesecake base—a trusted, beloved formula—and decided to get playful.
I remember dividing that creamy mixture into three bowls, my hands shaking a little as I added drops of liquid food coloring. What was supposed to be delicate pastels turned into neon pink, electric yellow, and a blue so bright it could have guided airplanes. My first attempt at swirling looked less like a gentle spring sky and more like a tie-dye shirt from the 90s. I was convinced it was a disaster. But when I brought it to the table, my family’s faces lit up. They didn’t see a mistake; they saw a burst of happiness. That pie, messy swirls and all, disappeared in minutes, accompanied by laughter and requests for “a piece with more blue!” It taught me a beautiful lesson: food made with joy and a dash of bravery is always a success. This Easter Swirl Pie is the polished, prettier version of that happy kitchen accident, but the spirit of playful, loving creation is exactly the same.
Gathering Your Pastel Palette: Ingredients & Insights
Here’s everything you’ll need to build your dreamy pie. Think of this as gathering the paints for your edible masterpiece! I’ve added my little chef notes to help you understand the “why” behind each item and how to swap things if needed.
- 1 pre-made graham cracker crust: Our trusty, time-saving foundation. The buttery sweetness is the perfect contrast to the airy filling. Chef’s Insight: Feel free to use a chocolate cookie crust for a fun twist, or make your own by mixing 1 ½ cups graham cracker crumbs with 6 Tbsp melted butter and a tablespoon of sugar, pressed into a pie plate.
- 1 package (8 oz) cream cheese, softened: This is the backbone of our filling, giving it structure and that classic, tangy richness. Pro Tip: For truly “softened” cream cheese, leave it on the counter for 1-2 hours. In a pinch? Unwrap it, microwave on a plate for 10-15 seconds, flip, and repeat until it yields gently to a finger press. Never melt it!
- 1 container (8 oz) whipped topping (like Cool Whip), thawed: This is our secret for an impossibly light, fluffy texture without whipping heavy cream. Substitution Tip: You can absolutely use an equal amount of freshly whipped, sweetened heavy cream. Just whip 1 ½ cups of cold heavy cream with 2-3 tablespoons of powdered sugar until stiff peaks form.
- 1 box (3.4 oz) instant vanilla pudding mix: The magical stabilizer! It sets the filling perfectly without baking and adds a lovely vanilla flavor. Chef’s Note: It must be “instant” pudding. Cook-and-serve won’t work here.
- 1 cup cold milk: Whole milk will give the richest result, but any milk you have works. The cold temperature helps activate the pudding mix quickly.
- Gel food coloring (pink, yellow, blue, purple): The artist’s tools! Critical Tip: Use gel or paste food coloring, not liquid. Gels are more concentrated, so you get vibrant color without adding extra liquid that could thin out your filling. A tiny drop or a swipe on a toothpick is all you need for beautiful pastels.
- Whipped cream, candy eggs, sprinkles for garnish: The final festive flourish! Use store-bought whipped cream, make your own, or use more of the whipped topping. Let your inner decorator go wild here.
Let’s Make Some Magic: Step-by-Step Instructions
Ready to swirl? Follow these steps, and don’t forget to read my little commentary—it’s like I’m right there with you, passing you the spatula!
Step 1: The Creamy Foundation. In a large mixing bowl, beat the softened cream cheese with a hand mixer or stand mixer fitted with the paddle attachment until it’s completely smooth and lump-free. This is crucial! No one wants little bits of cream cheese in their silky pie. Scrape down the sides of the bowl with a rubber spatula to make sure everything is incorporated. My Little Hack: If your cream cheese is still a bit chilly and fighting you, beat in 1 tablespoon of the cold milk from your measured cup. It will loosen right up.
Step 2: Activate the Magic. Sprinkle the entire box of instant vanilla pudding mix over the smooth cream cheese. Pour in the 1 cup of cold milk. Start beating on low speed at first (to avoid a powdered sugar snowstorm!), then increase to medium and beat for 1-2 minutes. You’ll see it thicken almost immediately. It should look like a very thick, smooth, and cohesive batter. Scrape the bowl again.
Step 3: Lighten & Fluff. Now, we fold. Add about one-third of the thawed whipped topping to the bowl. Use your spatula to gently fold it in—scoop down the side, across the bottom, and up over the top. This incorporates air. Once it’s mostly mixed, add the remaining whipped topping and continue folding gently until no white streaks remain. The mixture will be gloriously light, airy, and spreadable. Resist the urge to mix aggressively; we want to keep that volume!
Step 4: Create Your Pastel Palette. Divide the fluffy filling evenly between 3 or 4 small bowls. I love using three colors (pink, yellow, blue), but a fourth (like purple or mint green) makes it extra spectacular. Now, add your gel food coloring. Pro-Tip: Start with a TINY amount—literally, a dip of a toothpick. You can always add more, but you can’t take it away! Stir gently until the color is uniform. Aim for soft, Easter-egg shades.
Step 5: The Artistic Swirl. Here’s the fun part! Using separate spoons for each color (to keep them clean), drop random spoonfuls of each colored filling into your graham cracker crust. Alternate the colors, piling them next to and on top of each other. Don’t worry about being neat! Once all the filling is in the crust, take a butter knife, a skewer, or even the tip of a spoon. Gently drag it through the mounds of color in a loose figure-eight or zig-zag pattern just 2-3 times. The goal is to marble them, not mix them into one uniform muddy color. Less is more!
Step 6: The Patient Chill. Carefully transfer your pie to the refrigerator. You must let it chill, uncovered, for at least 4 hours, but overnight is ideal. This sets the pudding and allows the flavors to meld beautifully. Chef’s Secret: If you’re in a serious time crunch, you can pop it in the freezer for 1.5-2 hours to set quickly, then move it to the fridge.
Step 7: The Grand Finale. Just before serving, decorate! Pipe or dollop whipped cream around the edges. Artfully place your candy eggs and sprinkles. This is your moment—have fun with it! Slice with a sharp knife dipped in hot water for the cleanest cuts.
Presenting Your Pastel Masterpiece
This pie is a showstopper, so let it shine! Serve it on a simple, elegant cake stand or a colorful charger plate that complements the pastels. For individual slices, use a pie server to lift out each gorgeous, swirled piece. A little extra dollop of whipped cream on the side never hurt anybody. Pair it with a cup of fresh coffee, a glass of cold milk, or a sparkling mimosa for brunch. The most important serving suggestion? Bring it to the table with a big smile and get ready for the “oohs” and “aahs.”
Make It Your Own: Fun Variations
The beauty of this recipe is its versatility! Here are a few ways to twist it:
- Lemon Berry Bliss: Use instant lemon pudding mix. Tint the filling shades of pale yellow, pink (with a drop of raspberry extract), and purple. Garnish with fresh raspberries and blueberries.
- Chocolate Coconut Nest: Use a chocolate cookie crust. Fold ½ cup of toasted coconut into the filling before dividing. Color it light blue and green for a “spring sky and grass” effect and top with chocolate egg candies in a coconut “nest.”
- Funfetti Fiesta: Keep the vanilla pudding, but use pastel rainbow sprinkles as your “color.” Fold ¼ cup sprinkles into the white filling, pour into the crust, and top with more sprinkles. Instant party!
- Dairy-Free Dream: Use dairy-free cream cheese and whipped topping, and your favorite non-dairy milk. The pudding mix is usually dairy-free, but always check the label!
Olivia’s Chef Notes
This recipe has been my Easter go-to for years, and it’s evolved from that neon tie-dye experiment into the reliable beauty you see today. One funny fail I remember: I once was so eager to swirl that I used a thick-handled spoon and basically mixed the whole pie into a solid lavender color. My husband kindly called it “a very confident shade of purple.” We learned that a thin knife is your best friend! Over time, I’ve also learned that this pie is the ultimate fridge-forager’s friend. Have a handful of leftover strawberries? Chop them and press them into the bottom of the crust before adding filling. A bit of lemon zest? Stir it in. It’s a forgiving, joyful recipe. The version I’m sharing with you is the most crowd-pleasing, foolproof iteration, but never be afraid to add your own chapter to its story.
Your Questions, Answered
Q: My filling seems runny after I mix it. What did I do wrong?
A: This usually happens for one of three reasons: 1) The cream cheese wasn’t fully softened, creating lumps that didn’t incorporate. 2) You used a “Cook & Serve” pudding mix instead of “Instant.” 3) The whipped topping was still frozen or you over-mixed and deflated it. To salvage, try popping the whole bowl of filling (before coloring) into the fridge for 20 minutes to firm up, then proceed.
Q: Can I make this ahead of time?
A> Absolutely! In fact, I recommend it. You can make this pie up to 24 hours in advance. Just wait to add the whipped cream and candy garnish until 1-2 hours before serving so they stay fresh and don’t bleed color.
Q: Why do you insist on gel food coloring?
A> Liquid food coloring is mostly water. Adding enough to get a nice color can thin out your delicate filling, potentially making it weep or not set as firmly. Gel colors are potent and water-free, so you get vibrant color without compromising texture. It’s a game-changer!
Q: My swirls disappeared after chilling! What happened?
A> You likely over-swirled. When you drag the knife through, you’re just blending the very top layer. If you go too deep or swirl too many times, the colors will blend together as the pie sets. Next time, remember the 2-3 gentle passes rule. It’ll still taste amazing, I promise!

Easter Swirl Pie : A No-Bake Pastel Dream
Description
Hey there! If you want a dessert that looks festive and fun but is super simple to make, this Easter Swirl Pie is perfect. It’s creamy, colorful, and completely no-bake — which means less stress and more smiles. Great for Easter, spring parties, or anytime you want a cheerful treat from the fridge instead of the oven.
Ingredients
-
1 pre-made graham cracker crust
-
8 oz cream cheese, softened
-
1 box (3.4 oz) instant vanilla pudding mix
-
1 cup cold milk
-
8 oz whipped topping, thawed
-
Gel food coloring (pink, yellow, blue, or other pastel colors)
-
Whipped cream (for topping)
-
Easter candy or pastel sprinkles (optional garnish)
Instructions
-
Beat the cream cheese
In a large bowl, beat softened cream cheese until smooth and lump-free. -
Add pudding & milk
Add instant pudding mix and cold milk. Beat 1–2 minutes until thick and smooth. -
Fold in whipped topping
Gently fold in the whipped topping with a spatula until light and fluffy. -
Divide and color
Split the mixture into 3–4 small bowls. Add a tiny drop of gel food coloring to each and stir to make pastel shades. -
Create the swirl
Spoon dollops of each color randomly into the crust. Layer and scatter them around. -
Swirl gently
Use a knife or skewer to make a few light swirl motions. Don’t overmix — just 2–3 passes for a marbled look. -
Chill
Refrigerate at least 4 hours (overnight is best) until fully set. -
Decorate & serve
Top with whipped cream and Easter candy or sprinkles just before serving.
Notes
-
Use gel coloring, not liquid — it keeps the filling thick and pastel instead of watery.
-
Cream cheese must be soft or the filling can turn lumpy.
-
Don’t over-swirl or the colors blend into one shade.
-
Make ahead friendly: Best made the day before serving.
-
Need it faster? Freeze 90 minutes, then transfer to the fridge.
Nutritional Information (Per Slice, Approximate)
Calories: ~280 | Total Fat: 16g | Saturated Fat: 10g | Cholesterol: 30mg | Sodium: 280mg | Total Carbohydrates: 30g | Dietary Fiber: 0g | Sugars: 20g | Protein: 3g
Disclaimer: Nutritional info is an estimate based on the specific ingredients listed and may vary with substitutions.
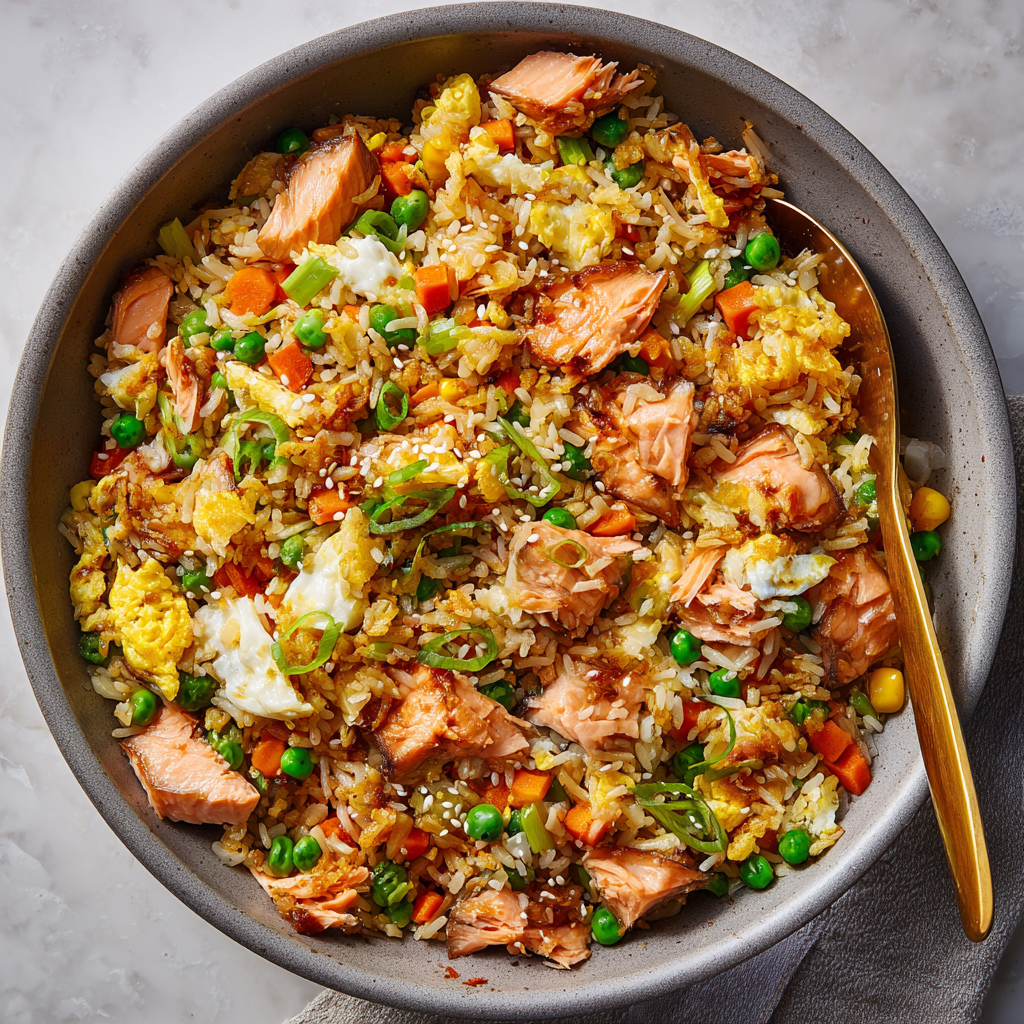
Salmon Fried Rice : Fast, Flavorful, and Weeknight-Ready
Dinner in 25 Minutes? Let’s Make It Happen!
Hey there, friend! Come on in. Can you smell that? It’s the sizzle of garlic hitting a hot pan, the sweet scent of onions softening, and the savory promise of a meal that’s about to come together in record time. If your weeknights are anything like mine—a delightful chaos of to-do lists, hungry people, and the eternal question of “what’s for dinner?”—then you and I need to have a serious talk about fried rice.
Not just any fried rice, though. We’re making Salmon Fried Rice. This isn’t a side dish; it’s a glorious, one-pan, nutrient-packed main event that turns humble leftovers into something you’ll actively crave. We’re talking flaky, rich salmon, vibrant pops of veggies, and every grain of rice coated in a simple, addictive garlic-soy sauce. It’s the culinary equivalent of a cozy hug that also happens to be ready in about 25 minutes.
I live for recipes like this. The kind that feel like a clever kitchen hack, where you get to be a resourceful home cook hero, transforming “What can I do with this?” into “Wow, I made this?” So, grab your favorite skillet or wok, and let’s turn a busy weeknight into a flavorful victory. This is cooking that’s fast, forgiving, and deeply satisfying. Let’s get started!
The Night Fried Rice Saved Dinner (and My Sanity)
I have to confess: this recipe was born from a beautiful, beautiful mess. Picture it: a rainy Tuesday, an overstuffed fridge, and one lonely fillet of salmon from last night’s dinner looking a bit forlorn next to a takeout container of plain rice. My motivation was at an all-time low, but the grumbling stomachs in my house were not.
In a moment of “let’s just see what happens,” I heated up the biggest skillet I own, chopped an onion, and started sizzling. I threw in that salmon, broke up the cold rice, and gave it all a generous glug of soy sauce. The kitchen filled with that unmistakable, magical fried rice aroma. My partner wandered in, nose in the air, asking, “What are you making that smells so good?” That’s when I knew. What felt like a throw-together meal was actually a secret weapon.
We ate it straight from the pan, standing at the kitchen island, marveling at how something so easy could taste so complete. It was a reminder that the best meals often aren’t the most elaborate ones—they’re the ones that meet you right where you are, with what you have, and turn it into joy. That’s the spirit I want to bring to your kitchen tonight.
Your Flavor Toolkit: What You’ll Need
Here’s where the magic begins! The beauty of this recipe is its flexibility. Think of this list as your roadmap, but feel free to take a few scenic detours based on what’s in your fridge. I’ll give you all my chef-y insights and swap ideas below.
- 1 tablespoon sesame oil (or neutral oil): Sesame oil adds a wonderful nutty, toasty base flavor that’s classic for fried rice. Chef’s Insight: If you only have olive or avocado oil, that’s perfectly fine! You can add a ½ teaspoon of toasted sesame oil at the very end for fragrance if you have it.
- 2 garlic cloves, minced: Our flavor foundation. Please, use fresh garlic! The pre-minced stuff just doesn’t sizzle and perfume the oil in the same way.
- 1/2 onion, diced: Yellow, white, or even a shallot works. This adds a crucial sweet, aromatic base.
- 1 cup frozen mixed vegetables (peas, carrots, corn): The ultimate weeknight shortcut. No chopping required, and they add color, texture, and nutrients. Easy Swap: Fresh diced bell peppers, broccoli florets, or edamame are fantastic too—just sauté them a minute or two longer.
- 2 cups cold cooked rice (preferably day-old): This is the golden rule for perfect fried rice! Cold, dry rice (like leftover takeout rice or rice cooked ahead and chilled) fries up beautifully without turning mushy. Pro Tip: If you’re in a pinch, spread freshly cooked rice on a baking sheet and pop it in the freezer for 15 minutes to dry it out.
- 1–1½ cups cooked salmon, flaked: Leftover grilled, baked, or pan-seared salmon is ideal. Canned salmon (well-drained) is a brilliant pantry standby. Even a pre-cooked salmon fillet from the store works!
- 2 eggs, lightly beaten: Our protein-packed binder. They add richness and body.
- 2 tablespoons soy sauce: The salty, umami backbone. Use tamari for a gluten-free version.
- 1 tablespoon oyster sauce or hoisin (optional but recommended): My “secret” for depth of flavor. Oyster sauce adds a rich, savory-sweet complexity. Hoisin is sweeter and thicker. A dash of either one makes a huge difference!
- Salt and pepper to taste: Always taste before adding extra salt—the soy sauce is plenty salty!
- Green onions and sesame seeds for garnish (optional): The fresh finish! Chopped green onions add a bright bite, and sesame seeds give a lovely little crunch and visual pop.
Let’s Get Cooking: Your Foolproof Steps
Ready? Apron on (or not, I won’t tell), and let’s fire up the stove. We’re moving quickly once we start, so I recommend having all your ingredients prepped and within arm’s reach. This is called mise en place—fancy chef talk for “get your stuff together,” and it’s a total game-changer for stir-fries.
- Heat the Oil: Place your largest skillet or wok over medium-high heat. Add the oil and let it get nice and hot—you should see it shimmer slightly. Chef’s Hack: Tilt the pan to coat the entire surface. A hot pan is key for that classic “wok hei” (breath of the wok) flavor and to prevent sticking.
- Sizzle the Aromatics: Add the minced garlic and diced onion. Stir-fry for about 1-2 minutes, just until they become fragrant and the onion turns translucent. Don’t let the garlic burn! Burnt garlic turns bitter. If the pan seems too hot, don’t be shy to lower the heat a touch.
- Cook the Veggies: Toss in your frozen mixed vegetables. Stir-fry for 2-3 minutes. You want them to thaw, heat through, and maybe get a few tiny browned spots for extra flavor. My Tip: If using fresh, harder veggies (like carrots or broccoli), add them right after the onion to give them more time to soften.
- Scramble the Eggs: Push all the veggies to one side of the pan. Pour the beaten eggs into the empty space. Let them sit for 10 seconds to start setting, then gently scramble them with your spatula until they’re just cooked through but still soft. Now, mix everything in the pan together beautifully.
- Introduce the Rice: Add the cold rice, breaking up any large clumps with your fingers or the spatula as you add it. Stir-fry, pressing the rice into the hot pan and tossing frequently, for 3-4 minutes. Listen for a faint crackling sound—that’s the sound of perfect, slightly crispy fried rice! You want every grain to be heated through and separate.
- Bring It All Together: Reduce the heat to medium. Gently fold in the flaked salmon. You want to preserve those lovely chunks, not pulverize them. Drizzle the soy sauce and oyster sauce (if using) evenly over everything. Give it a few strong, thorough stirs to coat every single ingredient in that glossy, savory sauce.
- The Final Touch: Taste it! This is the most important step. Does it need a crack of black pepper? A tiny extra splash of soy sauce? Adjust to your liking. Once it’s perfect to you, remove it from the heat.
Plating Up Your Masterpiece
You did it! Now, for the fun part. I’m a big believer that food tastes better when it looks inviting. Spoon your gorgeous salmon fried rice into shallow bowls. Generously sprinkle with thinly sliced green onions and a pinch of sesame seeds. For a final restaurant-worthy flourish, I sometimes add a tiny extra drizzle of toasted sesame oil or a sprinkle of red pepper flakes for heat. It’s a complete meal in a bowl, so all you need is a fork (or chopsticks!) and a hungry heart.
Make It Your Own: Creative Twists
The canvas of fried rice is yours to paint! Here are a few of my favorite ways to mix it up:
- Sweet & Spicy Thai-Inspired: Swap the soy sauce for 2 tbsp of Thai sweet chili sauce and a squeeze of lime juice. Garnish with fresh cilantro and chopped peanuts.
- Teriyaki Twist: Use a store-bought or homemade teriyaki sauce instead of soy/oyster sauce. Add diced pineapple along with the veggies for a sweet contrast.
- Grain Swap: Use leftover quinoa, farro, or even cauliflower rice for a different texture (cook cauliflower rice at the very end, as it releases more water).
- Protein Power-Up: No salmon? No problem! Use flaked cooked chicken, shrimp, diced ham, or crumbled extra-firm tofu for a vegetarian version.
- Go Green: Stir in a big handful of fresh baby spinach or kale right at the end, just until wilted.
A Few More Thoughts From My Kitchen to Yours
This recipe has truly become a living, evolving staple in my home. I’ve made it for last-minute guests (who always ask for the recipe), packed it cold for picnic lunches (it’s delicious!), and even used it to clean out the veggie drawer. The one constant evolution? The sauce. I started with just soy sauce, then discovered the joy of oyster sauce, and now I sometimes add a tiny spoonful of gochujang (Korean chili paste) for a kick. Don’t be afraid to play!
My funniest kitchen fail with this was the time I was talking so much I added the soy sauce before the rice. It pooled at the bottom and started to burn before I could stir it in! A little smoky, but still edible. The lesson? Even when you mess up, fried rice is incredibly forgiving. It’s more of a vibe than a rigid science experiment. So have fun with it!
Your Questions, Answered!
Q: My fried rice turned out soggy/mushy. What happened?
A: This almost always traces back to the rice. Using freshly cooked, warm rice has too much moisture. Always use cold, day-old rice. If you don’t have time, spread fresh rice on a tray and chill it fast. Also, make sure your pan is hot enough to evaporate moisture quickly.
Q: Can I make this with raw salmon?
A: Absolutely! Dice a raw salmon fillet into small chunks. After sautéing the garlic and onion, push them aside and cook the salmon chunks in the same pan for 2-3 minutes until just cooked through. Remove them to a plate, then proceed with the recipe, adding the cooked salmon back in at the very end.
Q: It tastes a bit bland. How can I boost the flavor?
A: No problem! First, make sure you’re using enough salt (via soy sauce). Next, that optional oyster/hoisin sauce is a major flavor booster. Finally, consider adding a teaspoon of grated fresh ginger with the garlic, or finish with a splash of rice vinegar for brightness.
Q: How long do leftovers keep?
A> Stored in an airtight container in the fridge, it keeps beautifully for 3-4 days. Reheat in a skillet over medium heat with a tiny splash of water to re-steam it, or microwave it until hot.

Salmon Fried Rice : Fast, Flavorful, and Weeknight-Ready
Description
Hey there, friend! Need a fast dinner that still feels special? This Salmon Fried Rice is your weeknight hero. It’s quick, filling, and made in one pan with simple ingredients. Flaky salmon, colorful veggies, and garlicky rice come together in about 25 minutes — perfect for busy nights when you still want real food on the table.
Ingredients
-
1 tbsp oil (sesame or any cooking oil)
-
2 garlic cloves, minced
-
½ onion, diced
-
1 cup frozen mixed vegetables
-
2 cups cold cooked rice (best if day-old)
-
1–1½ cups cooked salmon, flaked (leftover or canned, drained)
-
2 eggs, beaten
-
2 tbsp soy sauce (or tamari)
-
1 tbsp oyster sauce or hoisin (optional)
-
Salt and black pepper to taste
-
Sliced green onions or sesame seeds (optional garnish)
Instructions
-
Heat pan: Place a large skillet or wok over medium-high heat. Add oil.
-
Cook aromatics: Add garlic and onion. Cook 1–2 minutes until soft and fragrant.
-
Add vegetables: Stir in frozen vegetables and cook 2–3 minutes until heated through.
-
Scramble eggs: Push everything to one side. Pour eggs into empty space and scramble until just set. Mix with veggies.
-
Add rice: Add cold rice. Break up clumps and stir-fry 3–4 minutes until hot and slightly crisp.
-
Add salmon: Gently fold in flaked salmon.
-
Season: Pour in soy sauce and optional oyster/hoisin sauce. Stir well to coat everything evenly.
-
Taste & serve: Adjust with pepper or a bit more soy sauce if needed. Garnish and serve hot.
Notes
-
Use cold rice: Fresh warm rice turns mushy. Cold rice fries better.
-
Hot pan = better texture: Let the pan heat before adding ingredients.
-
Don’t over-stir salmon: Fold gently to keep nice chunks.
-
Extra flavor boost: Add ½ tsp grated ginger with the garlic.
-
No leftover salmon? Cook small cubes of raw salmon in the pan first for 2–3 minutes, then continue.
Nutritional Information*
*Please note: The following is an approximate estimate calculated for one serving (based on 4 servings) using standard ingredients. Values may vary based on specific brands and substitutions.
- Calories: ~400
- Protein: 25g
- Carbohydrates: 35g
- Fat: 18g
- Fiber: 3g
This dish is a fantastic source of high-quality protein and healthy omega-3 fatty acids (from the salmon), and provides a balanced mix of carbs and fats to keep you satisfied.
Final Thoughts
The 25-minute promise of this Salmon Fried Rice isn’t just about speed—it’s about reclaiming your evenings. In the time it takes to debate takeout or stare blankly into the fridge, you can create something warm, nourishing, and truly delicious. This recipe is more than a meal; it’s a mindset. It’s about embracing flexibility, celebrating leftovers, and finding joy in the simple act of sizzling garlic in a hot pan.
What I love most about this dish is how it meets you where you are. Tired? Use frozen veggies and leftover rice. Adventurous? Play with sauces and spices. Pressed for time? It comes together in minutes. It’s a testament to how a few humble ingredients, treated with a little care and confidence, can become something greater than the sum of their parts.
So the next time your weeknight feels chaotic, remember this: your secret weapon is waiting. A hot pan, a few staples, and the simple magic of fried rice can turn “What’s for dinner?” into “Wow, this is dinner.” And that—the quiet triumph of a meal made, enjoyed, and shared—is a victory worth savoring.
Here’s to many more quick, flavorful, and satisfying meals ahead. You’ve got this.
Happy cooking,
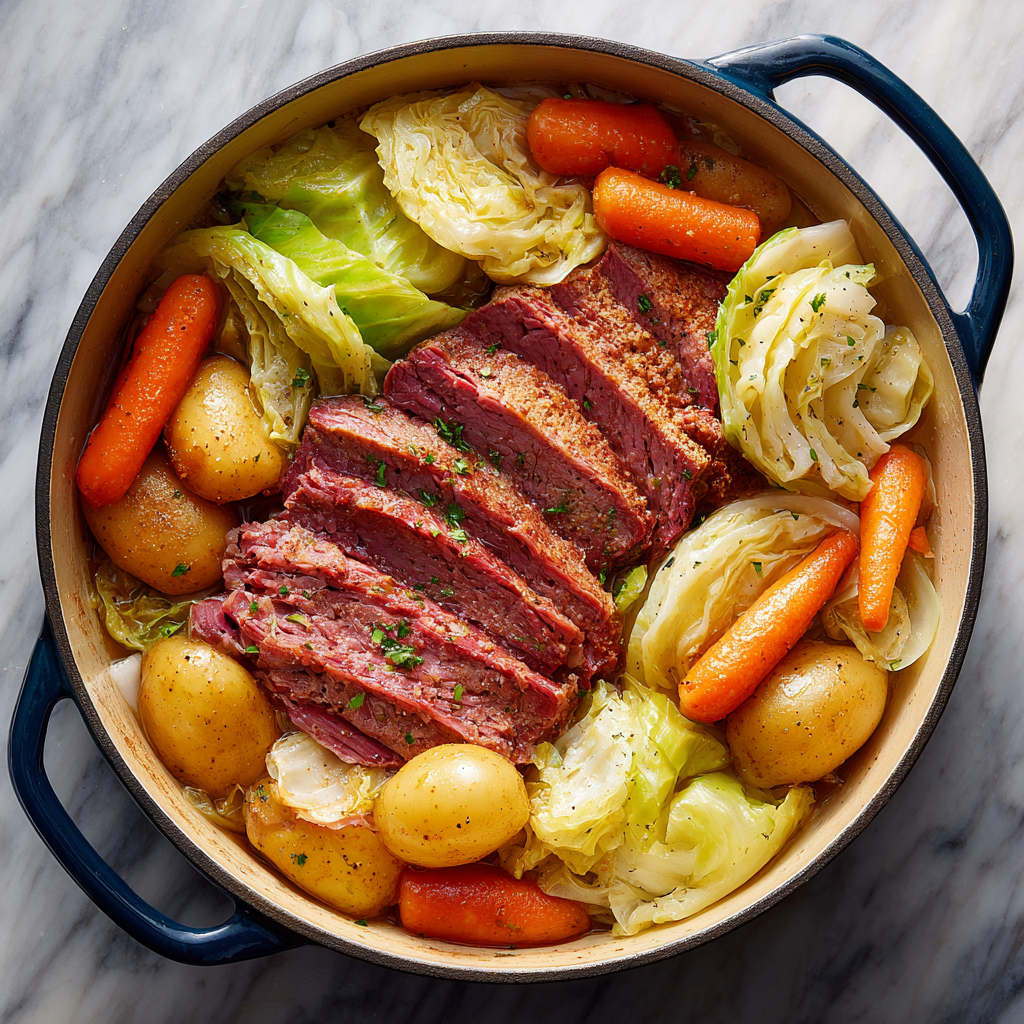
Classic Corned Beef and Cabbage : Hearty, Tender & Irish-Inspired
Let’s Make Some Kitchen Magic: Classic Corned Beef & Cabbage
Hey there, friend! Come on in – can you smell that? It’s the warm, salty, incredibly comforting aroma of something hearty simmering on the stove. It’s the smell of conversation waiting to happen, of a table about to be gathered around, of pure, uncomplicated comfort. Today, we’re diving into a dish that’s so much more than the sum of its simple parts: my go-to, soul-warming, Classic Corned Beef and Cabbage.
Now, I know what you might be thinking. “Olivia, that’s just for St. Patrick’s Day!” But let me let you in on a little secret: this recipe is a year-round superhero. It’s for those chilly Sunday afternoons when you want the house to smell amazing for hours. It’s for when you need a no-fuss, one-pot wonder that feeds a crowd (or promises glorious leftovers). It’s tender, it’s flavorful, and it turns humble vegetables into something you’ll fight over. This isn’t about fancy techniques; it’s about low, slow love. So, tie on your apron (the messy one is totally acceptable here), and let’s create something unforgettable together. This recipe is my hug in a bowl, and I’m so excited to share it with you.
A Pot of Memories: More Than Just Dinner
For me, this dish will always smell like my grandma’s kitchen in March. It wasn’t just a meal; it was an event. The giant speckled blue pot would take up residence on her stove top by mid-morning, letting out little puffs of fragrant steam that promised something good was coming. My job, as the “official taste-tester,” was to sneak a tiny piece of carrot when she wasn’t looking (a job I took very seriously).
But the real magic happened when the whole family arrived. As my grandpa carefully sliced the beef against the grain, we’d all jostle around the small kitchen, piling our plates high with steaming cabbage and buttery potatoes. The laughter was loud, the stories were silly, and for that hour, nothing else mattered but the food and the people sharing it. That’s the spirit I want to bring to your table with this recipe. It’s not just about corned beef; it’s about creating your own warm, delicious, and deeply satisfying memories.
Your Flavor Line-Up: Simple Ingredients, Big Taste
Here’s everything you’ll need to create this cozy masterpiece. I’ve added a few of my chef-y insights and swaps, so you can make it your own!
- 3–4 lb corned beef brisket with its spice packet: This is our star! The brisket is a tough cut that becomes incredibly tender with long, slow cooking. Chef’s Tip: Don’t skip the spice packet—it’s usually a perfect blend of coriander, mustard seed, bay, and peppercorns that flavors the whole pot. If your brisket doesn’t have one, see the variations below for a quick homemade mix.
- 10 cups water (or enough to cover): This is your cooking liquid, and it transforms into a gorgeous broth. Insight: For extra depth, you can swap out a cup or two of the water for beef broth, but it’s truly delicious with just water.
- 1 onion, quartered: It adds a sweet, savory foundation to the broth. No need to chop finely—big chunks are perfect for flavor and easy fishing out later.
- 3 cloves garlic, smashed: Just give each clove a whack with the flat side of your knife to release its magic. It infuses the broth with a mellow, aromatic warmth.
- 1½ lbs baby potatoes, halved: I love the creamy texture and cute factor of baby potatoes. Substitution Tip: Yukon Golds or red potatoes cut into 2-inch chunks work beautifully too. The key is similar sizing so they cook evenly.
- 4 carrots, peeled and chopped into 2-inch pieces: They add a pop of color and a lovely sweetness. Cut them on the larger side so they don’t turn to mush.
- 1 small head green cabbage, cut into 6-8 wedges: Keep the core intact on each wedge! This little trick holds the leaves together so you get beautiful, intact servings instead of a pile of soggy shreds.
- Optional Boosters: A bay leaf and a teaspoon of black peppercorns. These aren’t essential, but they add another layer of classic, aromatic flavor to the simmering pot.
Let’s Get Cooking: Your Step-by-Step Guide
Ready? This is where the magic happens. We’re going low and slow, letting time do most of the work. I’ll walk you through every step with my favorite tips.
- The Simmering Start: Grab your largest, heaviest pot or Dutch oven. Place the corned beef brisket in it, fatty side up. Tuck the quartered onion and smashed garlic around it. Sprinkle over the contents of the spice packet (and your optional bay leaf and peppercorns). Now, pour in enough cold water to completely submerge the meat by about an inch. Chef’s Hack: Starting with cold water helps draw out any excess salt from the curing process gradually, leading to a perfectly seasoned final dish.
- Patience is a Delicious Virtue: Bring the pot to a boil over high heat. Once you see a good boil, immediately reduce the heat to the lowest setting that maintains a gentle, lazy simmer. You should see just a few small bubbles breaking the surface. Cover the pot. Now, set a timer for 2.5 hours and walk away! This is the perfect time to tidy up, read a book, or just enjoy the amazing smells filling your kitchen. The brisket needs this quiet, wet heat to relax and become tender.
- The Veggie Party: After 2.5 hours, carefully uncover your pot. The beef should be fork-tender. Now, gently add your halved potatoes and carrot chunks right into the simmering broth. Make sure they’re mostly submerged. Cover again and let them cook for 10 minutes. This gives the heartier veggies a head start.
- Cabbage’s Grand Entrance: After those 10 minutes, it’s cabbage time! Nestle the cabbage wedges into the broth, pushing them down a bit. They’ll wilt quickly. Cover and simmer for another 15-20 minutes, until the potatoes and carrots are easily pierced with a fork and the cabbage is tender but still has a tiny bit of bite. Important Tip: Don’t overcook the cabbage into sogginess! We want it silky, not mushy.
- The Grand Finale – Rest & Slice: Using tongs or a large slotted spoon, carefully transfer the corned beef to a cutting board. Let it rest for a full 10 minutes. This is non-negotiable! It allows the juices to redistribute, ensuring every slice is moist. While it rests, use a slotted spoon to arrange the beautiful, broth-infused vegetables on a large serving platter. Finally, slice the beef against the grain. Look for the lines of muscle fibers and cut perpendicular to them. This makes each piece incredibly tender to eat.
Plating Up the Comfort
Presentation is part of the fun! I love using a big, rustic platter. Pile the vibrant carrots, golden potatoes, and glistening cabbage wedges in the center. Artfully arrange the beautiful, pink slices of corned beef around the edges or fanned over the top. Ladle a little of that incredible cooking broth over everything to keep it moist and add a final hit of flavor. Serve with grainy mustard and a punchy prepared horseradish on the side – let everyone add their own zing! Don’t forget some crusty bread for sopping up every last drop of that broth.
Make It Your Own: Delicious Twists & Swaps
- Spice It Up: No spice packet? No problem! Make your own with 1 tbsp mustard seeds, 1 tbsp coriander seeds, 1 tsp black peppercorns, 4 allspice berries, 2 bay leaves, and 4 whole cloves.
- Low & Slow (Hands-Off): This is a slow cooker dream! Do steps 1-2 in your slow cooker on LOW for 8-9 hours. Add veggies for the last 2-3 hours on HIGH.
- Glazed & Glorious: For a show-stopper, after simmering, place the cooked brisket on a baking sheet. Brush with a mix of brown sugar, mustard, and a splash of the cooking broth. Broil for 3-5 minutes until caramelized and sticky.
- Veggie Power: Add parsnips or turnips with the carrots. Throw in a handful of green beans during the last 5 minutes of cooking.
- Leftover Remix: Chop everything up tomorrow, sauté with a little onion, and make the most incredible hash topped with a fried egg.
From My Kitchen to Yours: Chef’s Notes
This recipe has been my trusty friend for years, and it’s evolved in little ways. I used to throw all the veggies in at once, which resulted in some overcooked carrots and undercooked potatoes – a lesson learned! The staggered addition is key. One funny kitchen story? I once was so excited to serve it that I forgot to slice against the grain. Let’s just say we were chewing for a while! It was a hilarious (and tasty) reminder of that one crucial step. The beauty of this dish is in its simplicity and its power to gather people. Don’t stress over perfection; just enjoy the process and the incredible meal at the end.
Your Questions, Answered
Q: My corned beef turned out really salty. What happened?
A: This is common! Some brands are saltier than others. Next time, try this: after bringing the initial pot to a boil, drain off the water. Cover the brisket with fresh cold water and continue with the recipe. This can remove a significant amount of the surface salt. Also, avoid adding any extra salt to the pot.
Q: Can I cook this faster? 3 hours is a long time.
A> Tender brisket can’t be rushed! However, the slow cooker method (8-9 hours on LOW) is a fantastic “set it and forget it” alternative that yields equally tender results. A pressure cooker can also drastically reduce the time to about 90 minutes.
Q: What does “slice against the grain” mean, and why is it so important?
A> The “grain” refers to the long muscle fibers you can see running through the meat. If you slice with the grain (parallel to those lines), you’ll be serving long, tough fibers that are hard to chew. Slicing against the grain (perpendicular) cuts those fibers into short pieces, making each bite beautifully tender. It’s the single most important step for perfect texture!
Q: My cabbage turned to mush! How can I prevent that?
A> You likely overcooked it. Cabbage only needs 15-20 minutes in the simmering broth to become tender. Add it last, and keep an eye on it. It should be soft enough to pierce easily with a fork but still hold its wedge shape.
Classic Corned Beef and Cabbage : Hearty, Tender & Irish-Inspired
Description
Hey there, friend! Today we’re making a true comfort-food classic: Corned Beef & Cabbage. It’s hearty, simple, and perfect for a cozy family meal. With just one big pot and a little patience, you’ll get tender beef, flavorful vegetables, and a rich broth that brings everything together. Let’s keep it easy and delicious.
Ingredients
Ingredients (Serves 6)
-
3–4 lb corned beef brisket (with spice packet)
-
10 cups water (or enough to cover)
-
1 onion, quartered
-
3 garlic cloves, smashed
-
1½ lb baby potatoes, halved
-
4 carrots, cut into large chunks
-
1 small green cabbage, cut into wedges (core left in)
-
Optional: 1 bay leaf, 1 tsp peppercorns
Instructions
-
Start the pot: Place corned beef in a large pot or Dutch oven. Add onion, garlic, and spice packet. Pour in water to fully cover the meat by about 1 inch.
-
Bring to a boil: Heat on high until boiling, then reduce to a gentle simmer. Cover and cook for about 2½–3 hours, until the beef is fork-tender.
-
Add root vegetables: Add potatoes and carrots. Simmer covered for 10 minutes.
-
Add cabbage: Nestle cabbage wedges into the pot. Simmer another 15–20 minutes until vegetables are tender but not mushy.
-
Rest and slice: Remove beef to a cutting board and rest 10 minutes. Slice against the grain for maximum tenderness.
-
Serve: Arrange beef and vegetables on a platter. Spoon a little broth over the top. Serve with mustard or horseradish if you like.
Notes
-
Too salty? Bring beef to a boil for 5 minutes, drain, then add fresh water and continue cooking.
-
Don’t rush it: Low, gentle simmer = tender meat.
-
Cut big veggie pieces: They hold up better during long cooking.
-
Cabbage goes last: It cooks fast — adding it too early makes it mushy.
-
Slice against the grain: Look for the lines in the meat and cut across them, not along them.
Nutritional Information (Approximate, per serving)
Calories: 460 | Protein: 32g | Carbohydrates: 25g | Fat: 25g | Fiber: 4g
Note: Sodium content varies widely based on the specific corned beef brisket used. Check your package label for the most accurate information.
Final Thoughts
This recipe for Classic Corned Beef & Cabbage is more than just a meal—it’s an invitation. An invitation to slow down, to fill your home with warmth, and to gather people around a table for a truly satisfying experience. It’s proof that the most memorable dishes aren’t always the most complicated, but the ones made with care and shared with joy.
Whether you’re honoring a tradition, feeding a hungry family, or simply craving a bowl of pure comfort, this recipe is your reliable guide. It’s forgiving, flexible, and built for creating moments—not just dinner. From the first gentle simmer to the final slice against the grain, you’re crafting something wonderful.
So here’s to the simple magic of a single pot, to the stories shared over steaming plates, and to the delicious memories you’re about to make. I’m so glad we could cook this together. Now, go enjoy every bite—you’ve earned it.
With love and a full pot,
Olivia
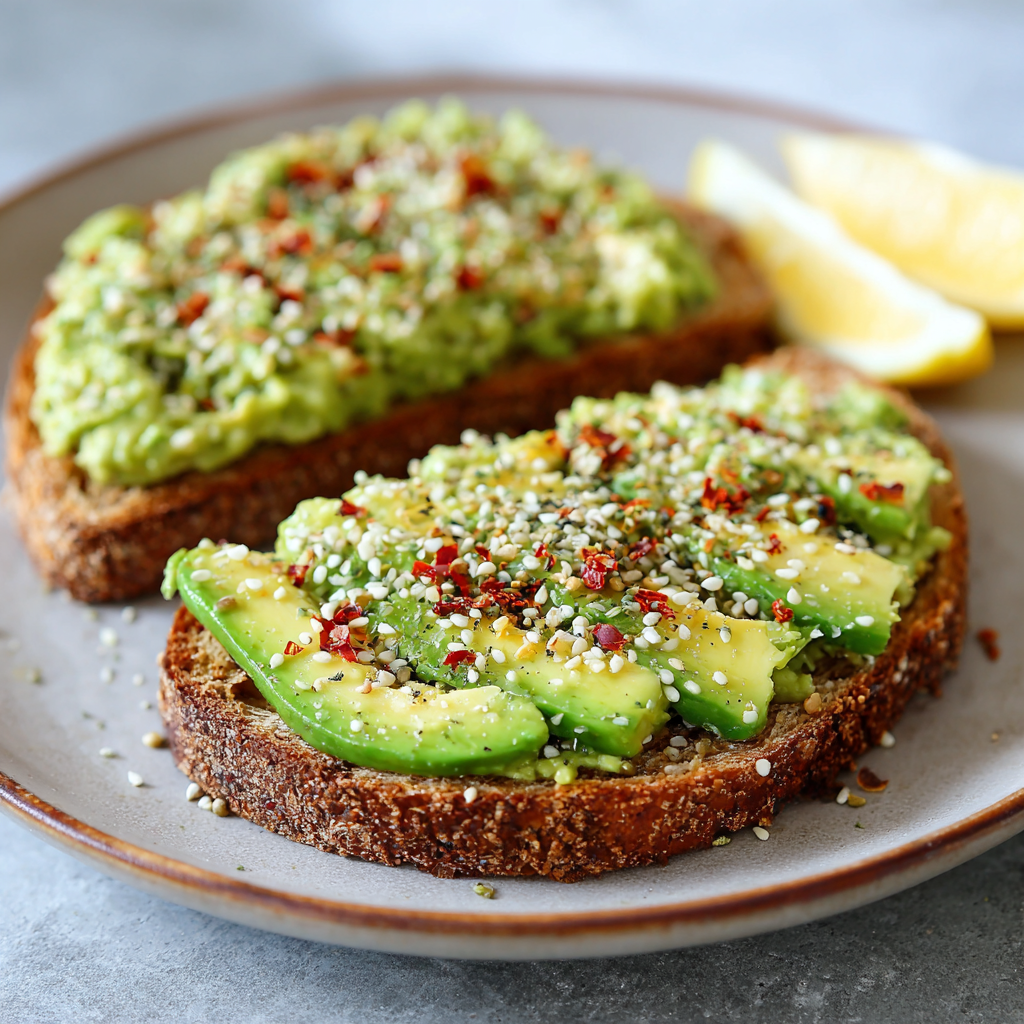
Avocado Toast on Whole Grain Bread : Quick, Nutritious & Delicious
The Simple Joy of Avocado Toast: Your New Morning Ritual
Hey there, friend! Come on in, grab an apron (a clean one, or a messy one—I won’t judge), and let’s talk about one of life’s simplest, most satisfying pleasures: a perfect slice of avocado toast. Now, I know what you’re thinking. “Olivia, avocado toast? Isn’t that, like, so 2015?” And to that, I say a resounding, “Nope!” This isn’t just a trendy brunch order or a millennial meme. When you make it with a little intention and a lot of love, avocado toast transforms from a quick snack into a tiny, edible hug—a powerhouse of nourishment that genuinely makes you feel good from the inside out.
What I adore about this dish is its beautiful duality. It’s incredibly simple, requiring barely five minutes and a handful of ingredients you probably already have. Yet, it’s also a blank canvas, a launchpad for your culinary creativity. It can be a sleek, minimalist affair with just sea salt and a crack of pepper, or it can become a towering masterpiece with a drippy fried egg, a confetti of microgreens, and a zigzag of hot honey. It’s whatever you need it to be: fast fuel before a busy day, a vibrant lunch, or a satisfying afternoon pick-me-up. Today, I’m sharing my absolute favorite, no-fail blueprint for avocado toast on whole grain bread. We’re going to make it creamy, crunchy, nutritious, and utterly delicious. This is the version I make most mornings, and it never, ever gets old. Let’s turn this basic into brilliant, together!
My Avocado Toast Awakening: A Tale of Two Slices
My love affair with avocado toast didn’t start in some chic café. It began in my grandma’s sunny California kitchen, a place that always smelled like citrus and fresh coffee. I was about ten, and she called it “California butter.” She’d spread mashed avocado thickly on warm, homemade wheat toast, sprinkle it with a little garlic salt from the shaker, and hand it to me with a wink. To me, it was magic. It was rich and creamy, yet somehow felt clean and healthy. It was so different from the sugary cereals I was used to, and it made me feel…grown-up. More importantly, it was our thing. We’d sit at her yellow Formica table, eating our “California butter” toast and talking about everything and nothing.
Years later, when avocado toast exploded onto every menu, I’d smile. My grandma was a trendsetter all along! That memory is why this dish will always be more than just food to me. It’s connection. It’s taking a moment to nourish yourself with something real. Every time I mash an avocado now, I think of her, and I’m reminded that the best recipes aren’t about complexity; they’re about the feeling they create. This one, for me, will always taste like sunshine and love.
Gathering Your Goodness: Ingredients & Why They Matter
Here’s what you’ll need for one glorious slice. Remember, great ingredients make a great result, so let’s choose wisely! I’ve added my little chef notes for each one.
- 1 slice of hearty whole grain bread: This is your foundation! I’m talking about a robust, seedy, fiber-packed loaf. It needs to stand up to the creamy avocado without getting soggy. Chef’s Insight: Look for “100% whole wheat” or “sprouted grain” as the first ingredient. Sourdough whole wheat is a fantastic option too—the tang plays so nicely with the rich avocado. If you’re gluten-free, a sturdy GF bread works perfectly.
- ½ a perfectly ripe avocado: The star of the show! A ripe avocado yields gently to a soft squeeze. If it’s rock-hard, give it a couple days in a paper bag with a banana. If it’s mushy, it’s past its prime. Chef’s Insight: Hass avocados are my go-to for their creamy, nutty flavor and smaller pits.
- A generous pinch of flaky sea salt: This is non-negotiable. Flaky salt (like Maldon) doesn’t just add salinity; it provides little bursts of texture and a cleaner taste than fine table salt. It makes the avocado flavor pop.
- 1 teaspoon of hemp seeds (optional but HIGHLY recommended): My secret weapon! They add a delightful, subtle crunch and a massive boost of plant-based protein and omega-3s. Chef’s Insight: If you don’t have hemp seeds, a sprinkle of everything bagel seasoning, sesame seeds, or even chia seeds makes a great stand-in.
- The “Make It Your Own” Toppings: This is where you shine! I’ll always suggest a squeeze of fresh lemon or lime juice (it adds brightness and helps prevent browning) and a crack of black pepper. From there, the world is your oyster: red pepper flakes for heat, sliced cherry tomatoes for freshness, a drizzle of good olive oil, or the pièce de résistance—a perfectly fried egg with a runny yolk.
Let’s Make Magic: Step-by-Step to Perfect Avocado Toast
Okay, ready? This takes five minutes, but we’re going to do it with purpose. Let’s build some texture and flavor layers!
- Toast Your Foundation: Pop your slice of whole grain bread into the toaster, toaster oven, or even a regular oven (at 400°F for about 5-7 minutes). We’re going for deeply golden and crisp. Why? A sturdy, well-toasted base is crucial. It provides a satisfying crunch that contrasts with the creamy avocado and, most importantly, it creates a moisture barrier to help prevent sogginess. Little Chef Hack: If I’m using the oven, I sometimes rub the toasted bread lightly with a cut garlic clove for a subtle, aromatic kick. It’s a game-changer!
- Prepare Your Avocado: While the bread toasts, cut your ripe avocado in half, remove the pit, and scoop the flesh of one half into a small bowl. Little Chef Hack: Save the pit! If you’re only using half the avocado, leave the pit in the unused half, squeeze a little lemon juice over the exposed flesh, wrap it tightly in plastic wrap, and store it in the fridge. The pit helps slow down oxidation (browning). Now, grab a fork and mash the avocado. Here’s my style: I don’t go for a completely smooth puree. I leave it a little chunky and textured. It makes the eating experience so much more interesting!
- The Assembly (This is Key!): Place your hot, crispy toast on a plate. Immediately, spread the mashed avocado evenly over the surface, pushing it all the way to the edges. Doing this while the toast is hot helps the avocado kind of “meld” with the bread. Don’t be shy—pile it on!
- Season with Intent: Now, season from a height! Take your pinch of flaky sea salt and sprinkle it evenly over the avocado. This distributes the salt more evenly than if you just dumped it in one spot. Follow it with your hemp seeds (if using), and any dry spices like black pepper or red pepper flakes.
- Add Your Finishing Flourishes: Finally, add your juicy or wet toppings. A squeeze of fresh lemon juice right at the end is brilliant. If you’re adding tomatoes, sliced radish, or a fried egg, layer them on now. A final, tiny drizzle of good extra-virgin olive oil or a hot sauce of your choice is the perfect signature.
Plating Your Masterpiece
Avocado toast is rustic and beautiful in its simplicity. I love serving it right on a simple, colorful plate or a wooden board. If it’s a snack, just the toast is perfect. For a more substantial meal, make it a duo! Serve two slices, or accompany one slice with a simple side salad of arugula with lemon vinaigrette, some crispy roasted chickpeas, or a bowl of fresh berries. The key is to let that gorgeous green avocado be the star. Eat it immediately with your hands or a knife and fork—no rules here, just enjoyment.
5 Fun Ways to Mix It Up
- The Everything Bagel: Swap hemp seeds for everything bagel seasoning. Add a schmear of cream cheese under the avocado and top with thinly sliced red onion and capers.
- Mediterranean Twist: Top your avocado with crumbled feta cheese, chopped Kalamata olives, a sprinkle of dried oregano, and a drizzle of olive oil.
- Spicy Sriracha Lime: Add a squeeze of lime and a generous drizzle of sriracha or your favorite hot sauce. Top with sliced jalapeño for an extra kick.
- Protein-Packed Power: Layer on a few slices of smoked salmon, a dollop of everything bagel-seasoned Greek yogurt, and some fresh dill.
- Sweet & Savory: Sounds wild, but try it! Top with a drizzle of balsamic glaze, a few sliced strawberries, and a crack of black pepper.
From My Kitchen to Yours: A Few Final Thoughts
This recipe has been my morning constant for years, but it’s evolved in tiny ways. I went through a “more is more” phase, piling on every topping imaginable. Then I circled back to the minimalist beauty of just avocado, salt, and lemon. Now, I’ve found my happy medium: creamy avocado, that crucial flaky salt, a texture element (hello, hemp seeds!), and one “flavor pop” like lemon or pepper flakes. It’s a formula that never fails.
A funny story? The time I tried to get fancy and make “avocado roses” for a blog photo. Let’s just say my kitchen looked like an avocado crime scene, and the roses looked more like… abstract green blobs. I ate the evidence (it still tasted amazing) and learned that perfectly smashed, rustic avocado is always more “me.” Don’t stress about making it Instagram-perfect. Focus on making it taste perfect for you.
Your Questions, Answered!
Q: How do I keep my avocado toast from getting soggy?
A: The two biggest tricks are 1) Toast your bread REALLY well. A pale, soft toast will wilt instantly. Go for deep golden brown. 2) Eat it immediately! This is not a make-ahead dish. Assemble and enjoy within minutes for the best texture.
Q: Can I make this ahead for meal prep?
A: You can do component prep! Keep sliced whole grain bread in the freezer and toast slices as needed. You can also pre-scoop avocado halves (with pit and lemon juice) in airtight containers. But assemble right before eating. The one exception? If you’re adding a fried egg, you can fry the egg ahead and reheat it gently when ready to assemble.
Q: My avocado is underripe/hard. Can I speed up the ripening?
A: Absolutely! Tuck the firm avocado into a paper bag with a banana or an apple. Fold the bag closed. These fruits release ethylene gas, a natural ripening agent. Check it in 12-24 hours. It works like a charm!
Q: Is avocado toast actually healthy, or is it just fattening?
A: It’s wonderfully healthy! Avocados provide monounsaturated fats (the good kind) that support heart health and help you absorb nutrients from other foods. Paired with fiber-rich whole grain bread, it’s a balanced meal that provides lasting energy. It’s about quality calories that nourish your body.
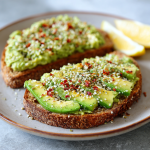
Avocado Toast on Whole Grain Bread : Quick, Nutritious & Delicious
Description
The Simple Joy of Avocado Toast – Creamy, Crunchy, Perfect Every Time
Time
-
Prep: 5 minutes
-
Cook: 5–7 minutes (toasting bread)
-
Total: ~10 minutes
-
Serves: 1 slice (adjust as needed)
Ingredients
Base Toast:
-
1 slice hearty whole grain bread (or sprouted grain/sourdough)
Avocado Topping:
-
½ ripe avocado
-
Pinch of flaky sea salt
-
1 tsp hemp seeds (optional but adds crunch & nutrition)
Flavor Boosters (Optional):
-
Fresh lemon or lime juice
-
Black pepper, red pepper flakes, sliced tomatoes, radishes, or microgreens
-
Protein add-ons: fried egg, smoked salmon, Greek yogurt with seasoning
Instructions
-
Toast the Bread
-
Toast your slice until deeply golden and crisp (toaster, oven, or 400°F oven for 5–7 minutes).
-
Optional: rub lightly with a cut garlic clove for subtle flavor.
-
-
Prepare the Avocado
-
Cut the avocado in half, remove the pit, and scoop the flesh into a small bowl.
-
Mash with a fork, leaving it slightly chunky for texture.
-
Optional: add a squeeze of lemon or lime to brighten flavor and slow browning.
-
-
Assemble the Toast
-
Spread the mashed avocado evenly over the hot toast.
-
Sprinkle with flaky sea salt and hemp seeds (or your preferred topping).
-
Add optional extras like black pepper, red pepper flakes, tomatoes, microgreens, or a fried egg.
-
Finish with a drizzle of olive oil or hot sauce if desired.
-
-
Serve Immediately
-
Enjoy as-is or pair with a side salad, fresh berries, or roasted chickpeas. Eat right away for best texture.
-
Notes
-
Keep It Crisp: Toast your bread thoroughly and eat immediately.
-
Speed Up Ripening: Place a firm avocado in a paper bag with a banana or apple for 12–24 hours.
-
Creative Twists:
-
Everything Bagel Style: Cream cheese under avocado, top with red onion and capers.
-
Mediterranean: Feta, Kalamata olives, oregano, olive oil drizzle.
-
Spicy: Sriracha, lime, sliced jalapeño.
-
Sweet & Savory: Balsamic glaze and sliced strawberries.
-
Protein Boost: Add smoked salmon, Greek yogurt with seasoning, or a fried egg.
-
Nutritional Breakdown (Per 1 Slice with Hemp Seeds)
Please note: This is an estimate and will vary based on your specific bread and avocado size.
Calories: ~220 | Protein: 6g | Carbohydrates: 20g | Dietary Fiber: 8g | Total Fat: 14g (Primarily healthy unsaturated fats) | Sodium: 300mg (from added salt)
There you have it! My heart-on-a-plate, my sunny morning ritual, my favorite five-minute feast. I hope this inspires you to see the humble avocado toast not as a cliché, but as a daily opportunity for a little delicious self-care. Now, go forth and mash with confidence! And don’t forget to tag me if you make it—I love seeing your kitchen creations.
With love and a well-seasoned cast iron,
Olivia
Final Thoughts
So there you have it—the simplest of rituals transformed into a daily act of delicious self-care. This isn’t just about mashing avocado on toast. It’s about pausing in a busy morning to nourish yourself with something vibrant and real. It’s about honoring that little spark of creativity as you sprinkle on your chosen topping, making the meal uniquely yours. Whether you keep it minimalist or pile it high, you’re not just making breakfast—you’re setting a tone of intention and kindness for the day ahead.
Remember what my grandma taught me: good food doesn’t need to be complicated to feel special. It just needs to be made with attention and enjoyed with gratitude. That sunny kitchen feeling, that moment of quiet satisfaction with a perfectly crafted bite—that’s the true magic of avocado toast. It’s a small, sustainable luxury you can gift yourself any day of the week.
I hope this becomes more than a recipe for you. I hope it becomes a gentle morning habit, a moment of peace, or even a new way to connect with someone you love over a shared plate. Thank you for letting me share one of my most cherished kitchen rituals with you. Now, go find your perfect ripe avocado, toast that bread until it sings, and savor every single bite.
Here’s to simple joys, sunny kitchens, and food that makes you feel good.
With love,
Olivia

One-Pan Cajun Chicken Sausage & Rice : Bold, Easy, and Ready in 40 Minutes
The Weeknight Hero We All Deserve: One-Pan Cajun Chicken Sausage & Rice
Hey there, kitchen friend! Come on in, grab an apron (don’t worry about the flour on mine), and let’s talk about the universal dinner dilemma. You know the one: it’s been a long day, your energy is dipping lower than a soufflé in a draft, but the family (or your very own stomach) is rumbling. You crave something deeply satisfying, bursting with flavor, but the thought of using every pot and pan in the cupboard makes you want to just order takeout. Sound familiar? I’ve been there more times than I can count, usually while staring blankly into the fridge.
Well, my friend, today is the day we banish that dilemma for good. I’m so excited to share with you my absolute go-to, never-fail, always-impressive solution: One-Pan Cajun Chicken Sausage & Rice. This isn’t just a recipe; it’s a flavorful rebellion against complicated cooking and messy kitchens. Imagine juicy chicken and smoky sausage, dancing with crisp bell peppers and onion in a bold Cajun spice blend, all nestled into fluffy, perfectly cooked rice that has soaked up every single drop of that incredible juice. The best part? All of this magic happens in one single pan. I’m talking 40 minutes from fridge to table, with a cleanup so easy it almost feels like a trick.
This dish is the embodiment of everything I love about cooking: big, unapologetic flavors, a foolproof method that builds confidence, and the incredible ability to bring people together over a truly delicious, comforting meal. So, let’s turn up some tunes, pour yourself a drink (sweet tea, lemonade, or a crisp white wine—you do you!), and let’s make a meal that’s going to become a regular in your rotation. Get ready for flavor that’s bold, a process that’s easy, and a kitchen that stays (mostly) clean. Let’s cook!
A Taste of Louisiana, Right in My Midwestern Kitchen
This recipe has a special place in my heart because it’s a delicious souvenir from one of my favorite trips. A few years back, my husband and I took a wildly memorable road trip through Louisiana. We ate our way through New Orleans, sure, but the real magic happened in the small towns, at roadside stands and family-run cafes where the air smelled like paprika, garlic, and smoke.
I’ll never forget this one little place in Lafayette. It was tiny, with checkered tablecloths and the most incredible, soul-warming smell pouring out the door. We ordered a “one-pot special” that the server just winked at and said, “You’ll see.” What arrived was a steaming, chaotic, beautiful skillet of rice, meat, peppers, and spices. It wasn’t fancy, but it was everything. It was hearty, spicy, smoky, and deeply comforting. We sopped up every last grain with crusty bread, sitting in contented silence.
When we got home, I was determined to recreate that feeling—not necessarily the exact recipe, but the essence of it: the boldness, the simplicity, the way it felt like a hug in a dish. After some playful tinkering (and a few less-successful, slightly burnt attempts), this one-pan wonder was born. It’s my weekly ticket back to that sunny roadside table, no plane ticket required. It’s proof that the best recipes aren’t just lists of ingredients; they’re stories waiting to be tasted.
Gathering Your Flavor Arsenal
Here’s everything you’ll need to build this flavor masterpiece. The beauty of this list is its flexibility—I’ll give you all my favorite chef insights and swaps so you can make it your own!
- 2 tablespoons olive oil: Our cooking fat. It has a nice neutral flavor and good heat tolerance. Avocado oil works great here too!
- 1 lb boneless, skinless chicken breast or thighs, diced: Chef’s Choice! I highly recommend thighs for their juicy, forgiving nature. They stay tender even if you cook them a minute too long. Breast works perfectly fine if it’s what you have—just keep an eye on it.
- 12 oz smoked Cajun sausage, sliced: This is your flavor bomb! Andouille is classic, but any smoked sausage labeled “Cajun” or “spicy” will do. Kielbasa is a fantastic, milder substitute. The smokiness is non-negotiable for that authentic taste.
- 1 cup long-grain white rice: The foundation. Long-grain (like Jasmine or Basmati) stays fluffy and separate. Do not use instant rice—it will turn to mush. For brown rice, see the variations section below for cooking adjustments.
- 1 small onion, diced & 1 red bell pepper, diced: The “holy trinity” start (we’re just missing celery!). They add sweetness, texture, and a beautiful color pop. A green or yellow bell pepper works just as well!
- 2 cloves garlic, minced: The aromatic heart. Fresh is best here—that jarred stuff just doesn’t sing the same song.
- 2 ½ cups chicken broth: This is KEY. Using broth instead of water infuses the rice with incredible savoriness from the inside out. Low-sodium is my go-to so I can control the salt level with my seasoning.
- 2 teaspoons Cajun seasoning (or to taste): The soul of the dish! Check the salt content of your blend. I love a robust, homemade mix (paprika, garlic powder, onion powder, oregano, cayenne, black pepper), but a good store-bought blend like Slap Ya Mama or Tony Chachere’s is perfect. Start with 2 tsp and you can always add more at the end.
- Salt & black pepper to taste: Season in layers! We’ll season the chicken first and then check again at the end.
- Optional: chopped green onions or parsley for garnish: Don’t skip the green! A fresh garnish adds a crucial pop of color and a bright, fresh flavor that cuts through the richness perfectly.
Let’s Build Some Flavor, One Layer at a Time
Okay, pan on the stove, ingredients prepped? Let’s do this. Remember, we’re building flavor in stages, all in the same pan. That’s where the magic happens!
- Heat the oil in a large, deep skillet or Dutch oven over medium heat. You want a pan with a tight-fitting lid. Get that oil shimmering—it means it’s hot enough to sear our chicken beautifully without stewing it.
- Add the diced chicken, season with half of the Cajun seasoning, and a pinch of salt and pepper. Here’s a chef hack: pat your chicken dry with a paper towel before dicing. A dry surface = a gorgeous, golden-brown sear, not a steamy pale one. Let the chicken cook undisturbed for 4-5 minutes to get that great color, then stir and cook until it’s no longer pink on the outside (it doesn’t need to be fully cooked through yet).
- Add the sliced sausage, onion, and bell pepper to the pan. Push the chicken to the side to make a little room if needed. We’re adding the sausage now so it can render a bit of its smoky fat and get some color, which will flavor the entire dish. Sauté for 3-4 minutes until the veggies start to soften and look vibrant.
- Stir in the minced garlic, then immediately add the uncooked rice. Big flavor tip here! Stir everything together and let the rice toast for 1-2 minutes. You’ll hear it crackle slightly. This simple step coats each grain in that flavorful oil and toasts it slightly, which helps prevent the rice from becoming gummy later.
- Pour in the chicken broth, stir well, and bring to a lively boil. Use your wooden spoon to scrape up any of those delicious browned bits from the bottom of the pan—that’s pure flavor, also known as “fond.” Make sure the rice is settled in an even layer. Once it’s at a full, rolling boil, give it one more gentle stir.
- Reduce the heat to low, cover the pan tightly, and simmer for 18-20 minutes. This is the “walk away but don’t go far” moment. DO NOT PEEK. Lifting the lid lets out precious steam and can throw off the cooking time. Set a timer and trust the process. The rice is absorbing all that incredible broth and spice.
- After 18 minutes, check to see if the liquid is absorbed and the rice is tender. If it looks a little wet, cover it again and give it another 2-3 minutes off the heat to steam through. Once done, fluff the rice gently with a fork—this separates the grains instead of smushing them.
- Taste and adjust! This is the most important step. Does it need another pinch of salt? A shake more Cajun spice? A crack of black pepper? Now’s the time. Then, sprinkle generously with your green onions or parsley and serve it right from the pan for maximum cozy vibes.
How to Serve Up This Cozy Masterpiece
Presentation is part of the fun! I love to bring the whole skillet right to the table (on a trivet, of course—let’s not burn the table). The sight and smell of it all steamy and colorful is half the experience. Use a big spoon to scoop hearty portions into shallow bowls. For that final restaurant-style touch, sprinkle on a little extra fresh herb. If you’re feeling indulgent, a side of warm, crusty bread for mopping up any extra bits is never a bad idea. A simple green salad with a bright lemon vinaigrette on the side is the perfect, fresh counterpoint to all the rich, spicy goodness.
Make It Your Own: Delicious Twists & Swaps
The beauty of a recipe like this is its adaptability. Play with it!
- Spice Level Control: For a milder dish, use a mild smoked sausage and a low-sodium Cajun seasoning. For extra heat, add a pinch of cayenne with the spices or top with sliced jalapeños.
- Brown Rice Version: Swap in brown rice. You’ll need about ½ cup more broth and an extra 15-20 minutes of simmering time. Keep it covered!
- Seafood Sensation: Add ½ lb of peeled, raw shrimp or scallops in the last 5 minutes of cooking. Just nestle them into the hot rice, cover, and let them cook through.
- Veggie-Packed: Stir in a cup of frozen peas, corn, or diced okra when you add the broth. It’s an easy way to get more color and veggies in.
- Cheesy Finish: For a decadent twist, stir in a handful of shredded sharp cheddar or pepper jack cheese right after fluffing the rice. Let it melt in for a gooey, delicious treat.
Olivia’s Kitchen Notes & Stories
This recipe has seen it all in my kitchen! It’s been the hero of countless last-minute potlucks (just double it in a big Dutch oven) and the savior of many “I have no idea what to cook” nights. One time, I was filming a quick video of the process for my Instagram and got so caught up in chatting that I completely forgot to add the broth! I had a pan of beautifully browned ingredients and very confused, toasted rice. We had a good laugh, poured the broth in, and it actually turned out fine—proof that even when you mess up, this dish is forgiving.
Over time, I’ve learned that the “toast the rice” step is my secret weapon for perfect texture, and that using the best broth you can find (homemade if you’re a superstar, or a good quality store-bought) makes a tangible difference. This recipe is a template for joy—don’t be afraid to make it yours.
Your Questions, Answered!
Q: My rice is still hard/crunchy after 20 minutes. What happened?
A: Don’t worry! This usually means the liquid was absorbed too quickly, often due to the heat being a tad too high or the lid not being tight enough. Simply add a splash (¼ cup) of hot water or broth, re-cover tightly, and let it cook on the lowest heat for another 5-8 minutes. The rice will steam to tenderness.
Q: Can I make this ahead of time or with leftovers?
A: Absolutely! It stores beautifully. Let it cool completely, then keep it in an airtight container in the fridge for up to 4 days. Reheat it in a skillet over medium-low heat with a tiny splash of broth or water to rehydrate the rice. It also freezes well for up to 3 months.
Q: My dish turned out a bit salty. How can I fix that for next time?
A: This is a common one, as sausages and seasonings can vary in salt. First, always use low-sodium broth. Second, season the chicken lightly at the start, but wait to add any extra salt until the very end, after you’ve tasted it. You can balance a slightly salty batch by stirring in a squeeze of fresh lemon juice at the end or serving it with a dollop of cool sour cream or Greek yogurt.
Q: Is it okay to stir the rice while it’s simmering?
A> Resist the urge! Stirring the rice while it’s cooking releases its starch, which can make the final dish gluey or gummy. Trust the process, keep that lid on, and only fluff it once all the liquid is absorbed.

One-Pan Cajun Chicken Sausage & Rice : Bold, Easy, and Ready in 40 Minutes
Description
One-Pan Cajun Chicken Sausage & Rice – Bold Flavor, Minimal Cleanup
Ingredients
Main Dish:
-
2 tbsp olive oil (or avocado oil)
-
1 lb boneless, skinless chicken (thighs recommended), diced
-
12 oz smoked Cajun sausage, sliced (Andouille or similar)
-
1 cup long-grain white rice
-
1 small onion, diced
-
1 red bell pepper, diced
-
2 cloves garlic, minced
-
2 ½ cups chicken broth (low-sodium recommended)
-
2 tsp Cajun seasoning (adjust to taste)
-
Salt & black pepper, to taste
Optional Garnish:
-
Chopped green onions or parsley
Instructions
-
Sear the Chicken
-
Heat oil in a large skillet or Dutch oven over medium heat.
-
Pat chicken dry, season with half the Cajun seasoning, salt, and pepper.
-
Cook 4–5 minutes undisturbed until golden, then stir until no longer pink on the outside.
-
-
Add Sausage & Veggies
-
Add sausage, onion, and bell pepper. Sauté 3–4 minutes until veggies are soft and sausage renders some fat.
-
-
Toast Rice & Add Broth
-
Stir in garlic, then rice. Toast 1–2 minutes until slightly crackling.
-
Pour in chicken broth, scrape up any browned bits, and bring to a boil.
-
-
Simmer
-
Reduce heat to low, cover, and cook 18–20 minutes. Do not stir.
-
Check if rice is tender; if needed, cover and let steam 2–3 more minutes.
-
-
Finish & Serve
-
Fluff rice with a fork. Taste and adjust seasoning.
-
Sprinkle with green onions or parsley and serve straight from the pan.
-
Notes
-
Milder/Spicy: Adjust Cajun seasoning or add cayenne.
-
Brown Rice: Add ½ cup more broth and 15–20 extra minutes simmering.
-
Veggies: Mix in peas, corn, or okra when adding broth.
-
Cheesy Twist: Stir in shredded cheddar or pepper jack after fluffing for a creamy finish.
-
Seafood Version: Add ½ lb peeled shrimp or scallops in the last 5 minutes.
Nutritional Information*
*Please note: This is an estimate per serving (based on 4 servings) and can vary significantly based on specific ingredients used, especially the type of sausage and Cajun seasoning blend.
- Calories: 520
- Total Fat: 24g
- Saturated Fat: 7g
- Cholesterol: 90mg
- Sodium: 950mg
- Carbohydrates: 42g
- Fiber: 2g
- Sugar: 2g
- Protein: 33g
Prep Time: 10 minutes | Cook Time: 30 minutes | Total Time: 40 minutes | Yield: 4 generous servings
Final Thoughts: Your New Weeknight Secret Weapon
Friends, if this recipe teaches us anything, it’s that incredible flavor doesn’t have to come with a sink full of dishes or hours of your time. This One-Pan Cajun Chicken Sausage & Rice is more than just a convenient meal—it’s a vibrant, soul-satisfifying experience that delivers maximum impact with minimal fuss.
It’s the kind of dish that builds kitchen confidence with its straightforward, one-pan magic, while simultaneously feeling special enough for any night of the week. That glorious combination of smoky sausage, tender chicken, and spice-infused rice creates a harmony of flavors that’s deeply comforting yet exciting with every bite. It’s a testament to the power of simple techniques—searing, toasting, simmering—to transform humble ingredients into something truly memorable.
This recipe is your invitation to reclaim your weeknights. To trade stress for satisfaction, and to create a meal that nourishes both body and spirit. Keep it as your faithful standby, or use it as a canvas for your own culinary creativity with the endless variations. No matter how you make it, you’ll be rewarded with a delicious, communal meal that brings everyone to the table.
So here’s to less cleanup, more flavor, and the joy of discovering a recipe that truly works as hard as you do. May your skillet always be sizzling, your rice always fluffy, and your evenings a little bit easier and a whole lot tastier.
With a clean kitchen and a full belly,
Olivia

Crispy Carnitas Tacos : Juicy, Flavorful & Street-Taco Approved
The Unforgettable Magic of Crispy Carnitas Tacos
Hey there, friend! Come on in, grab a stool, and let’s chat. Can you smell that? It’s the scent of citrus and garlic slowly coaxing tenderness from a hunk of pork, the promise of a crispy edge forming in a hot skillet, and the fresh, bright zip of cilantro and lime waiting in the wings. It’s the smell of my kitchen on a perfect, lazy Sunday, and today, we’re making that magic together with my ultimate Crispy Carnitas Tacos.
If you’ve ever wandered the vibrant streets of a Mexican mercado or even just been lucky enough to find that one perfect food truck, you know the carnitas I’m talking about. They’re not just “shredded pork.” They’re a textural masterpiece—meltingly tender shreds of pork shoulder with impossibly crispy, caramelized bits clinging to every edge, all seasoned with a soulful blend of spices and bright citrus. They’re juicy, flavorful, and 100% street-taco approved.
I know the idea of “slow-cooked” anything can feel like a weekend-only project, but trust me, this recipe is built for real life. We’re going to use your oven or your trusty slow cooker to do all the heavy lifting. Your main job? To be patient while the flavors get to know each other, and then to have a little fun crisping everything up at the end. Whether it’s a festive Taco Tuesday with the family or a casual weekend feast with friends, this recipe delivers huge, unforgettable flavor with a surprisingly manageable fuss. So, tie on your apron (the messy one is always the best), and let’s turn simple ingredients into something absolutely legendary.
My Carnitas “Aha!” Moment
My love affair with carnitas didn’t start in a fancy cooking class. It started with a near-disaster and a lesson in patience. Years ago, I was determined to impress a group of friends with an “authentic” taco night. I found a recipe, threw everything in a pot, and cranked the heat, thinking I could hurry the process along. What I pulled out was… dry. Chewy. Sad. It was edible, but it was missing that magical contrast of textures that defines true carnitas.
Feeling defeated, I called my abuelita’s best friend, Señora Rosa. She listened kindly and then laughed her wonderful, booming laugh. “Mija,” she said, “You cannot rush the conversation between the meat and the fat. You have to let them talk slowly, for a long time. Then, you let them shout in a hot pan!” Her words stuck with me. The next weekend, I tried again. Low heat, plenty of time, and that final, crucial step of crisping the shredded pork in its own flavorful juices. The result was a revelation—tender, juicy, and packed with those irresistible crispy bits. That “shout in a hot pan” moment changed my cooking forever. It taught me that the best food isn’t about complexity; it’s about respecting the process and understanding a few key techniques. These carnitas are that lesson, served in a warm tortilla.
Gathering Your Carnitas Crew: Ingredients & Insights
Here’s everything you’ll need to build these incredible tacos. Don’t just think of this as a shopping list—think of it as your flavor blueprint! I’ve included my chef insights and swaps so you can cook with confidence.
For the Carnitas:
- 3 lbs pork shoulder (boneless), cut into large chunks – This is our star! Pork shoulder (also called pork butt) is marbled with fat, which melts during the long cook time, basting the meat from the inside and guaranteeing juicy, succulent results. It’s forgiving and perfect for slow cooking. Chef’s Insight: Don’t trim off too much fat! That fat is flavor gold.
- 1 tablespoon salt – Essential for seasoning the meat deeply. I use kosher salt.
- 1 teaspoon black pepper – Freshly cracked adds a nice, warm bite.
- 1 tablespoon dried oregano – Mexican oregano is ideal if you can find it (it’s more floral and less minty than Mediterranean oregano), but standard dried oregano works beautifully too.
- 1 tablespoon ground cumin – Our earthy, warm foundation spice. Toasting whole cumin seeds and grinding them yourself is next-level, but pre-ground is just fine.
- 4 cloves garlic, minced – Because what’s a cozy recipe without plenty of garlic? It mellows and sweetens as it cooks.
- 1 onion, quartered – Yellow or white onion is perfect. The quarters will break down and add a sweet, savory backbone to the cooking liquid.
- 1 orange, juiced (save the peel!) – The sweet acidity of orange juice is the classic secret to carnitas. The natural sugars help with browning and caramelization. Chef’s Hack: Toss one or two of the spent orange halves into the pot with the meat. The oils in the peel add incredible fragrance.
- 1 lime, juiced – Adds a brighter, sharper acidity to balance the orange. Fresh is key here!
- 1/2 cup water or chicken broth – Just enough liquid to get the party started without boiling the meat. Broth adds an extra layer of savory flavor.
For Serving:
- Corn or flour tortillas – It’s a personal choice! I adore the authentic, slightly nutty taste of double-cooked corn tortillas (warm them directly over a gas flame or in a dry skillet). Flour tortillas are softer and more pliable. You can’t go wrong.
- Chopped white onion & fresh cilantro – The classic, non-negotiable fresh garnish. Their sharp, clean crunch and herbal notes cut through the rich pork perfectly.
- Lime wedges – A final squeeze of bright acid right before eating makes every flavor pop.
- Salsa or hot sauce (optional) – Go with your favorite! A creamy avocado salsa or a smoky red salsa would be divine.
Let’s Get Cooking: Step-by-Step to Carnitas Heaven
Ready to create some magic? Follow these steps, lean into the slow-cook vibe, and get excited for that epic crisp at the finish line.
Step 1: Cook the Pork (The Low & Slow Hug)
First, preheat your oven to 300°F (150°C) if you’re going that route. Grab a large, heavy-bottomed Dutch oven or your slow cooker insert. Place your pork chunks inside and sprinkle them evenly with the salt, pepper, oregano, and cumin. Use your hands to toss everything together, massaging those spices right onto the meat. Don’t be shy! Add the minced garlic, quartered onion, orange juice, lime juice, and those spent orange halves if you’re using them. Pour in the 1/2 cup of water or broth.
For the Oven Method: Cover the Dutch oven with a tight-fitting lid and slide it into the preheated oven. Let it bake, undisturbed, for 2.5 to 3 hours. You’ll know it’s ready when you poke a piece of pork with a fork and it offers no resistance, practically begging to be shredded.
For the Slow Cooker Method: Place the lid on your slow cooker. Set it to LOW for 8 hours or HIGH for 4-5 hours. The low and slow setting is always my preference for the most melt-in-your-mouth texture.
Chef’s Tip: No peeking! Every time you lift the lid, you let out precious heat and steam, which can extend the cooking time. Trust the process.
Step 2: The Grand Shred & The Crispy Finish (The “Shout in the Pan”)
Once the pork is fall-apart tender, carefully remove it from the pot (oven or slow cooker) and place it on a large cutting board or plate. SAVE THAT LIQUID! Use a fat separator if you have one, or just carefully spoon off some of the glorious, flavorful fat from the top of the juices left in the pot. You’ll need about 1/4 to 1/3 cup of this liquid/fat mixture.
Now, take two forks and shred the pork. It should pull apart effortlessly. Discard any large, unrendered pieces of fat or the orange peels.
Here’s where the magic happens: Heat a large cast-iron or heavy stainless steel skillet over medium-high heat. Add a few spoonfuls of the reserved cooking liquid/fat to the skillet. Once it’s shimmering, add the shredded pork in an even layer. Let it cook, WITHOUT STIRRING, for 3-4 minutes to allow the bottom layer to get seriously crispy and browned.
Then, give it a good stir and let it cook again for another 3-4 minutes. You want a mix of tender shreds and those irresistible caramelized, crispy bits. If the pan looks dry, add another spoonful or two of the cooking juices. This step usually takes about 5-7 minutes total.
Chef’s Hack: For maximum crisp, press the shredded pork down gently with your spatula to increase contact with the hot skillet. Don’t crowd the pan—work in batches if needed!
Step 3: Assemble & Devour (The Reward)
While the pork is crisping (or before you even start), warm your tortillas. For corn tortillas, my absolute favorite method is to heat them directly over the low flame of a gas burner for 15-20 seconds per side, using tongs. You’ll get a few beautiful char marks and an incredible toasted flavor. No gas? A dry skillet over medium heat works perfectly.
To assemble, place a generous heap of crispy carnitas onto the center of a warm tortilla. Top with a sprinkle of chopped white onion, a hearty pinch of fresh cilantro, and a generous squeeze of fresh lime juice. Add salsa or hot sauce if your heart desires.
Serve immediately while everything is hot, crispy, and vibrant. Watch as everyone’s eyes light up at first bite!
Serving Your Carnitas Masterpiece
Presentation is part of the fun! I love serving these family-style. Pile the crispy carnitas into a warm, shallow bowl. Arrange the warm tortillas in a cloth-lined basket to keep them soft. Place small bowls of the chopped onion, cilantro, lime wedges, and your favorite salsas on the table. Let everyone build their own perfect taco. It’s interactive, communal, and guarantees happy faces. For a full feast, pair them with simple sides like black beans sprinkled with cotija cheese, Mexican street corn (elote), or a crisp cabbage slaw with a lime vinaigrette.
Make It Your Own: Creative Twists & Swaps
Love the base recipe? Here are some fun ways to switch it up!
- The Pineapple Push: Add 1 cup of fresh pineapple chunks to the pot before cooking. The enzymes tenderize the meat even further, and the fruit caramelizes into sweet, tangy bites among the pork.
- Spice It Up: Add 1-2 chopped chipotle peppers in adobo sauce to the pot for a deep, smoky heat.
- Citrus Swap: Use a grapefruit instead of an orange for a more complex, slightly bitter citrus note.
- Chicken Carnitas: Use 3 lbs of boneless, skinless chicken thighs. Reduce cook time slightly (check for tenderness). The result is a lighter but still incredibly flavorful version.
- Instant Pot Speed Run: Use the sauté function to brown pork chunks first, then add remaining ingredients. Pressure cook on high for 45 minutes, natural release for 15 minutes, then shred and crisp on the sauté setting.
Chef’s Notes & Kitchen Confessions
This recipe has been my trusty friend for years, evolving from that first dry batch to the foolproof method it is today. A funny confession: I once, in a multitasking haze, almost forgot the citrus entirely! I realized as the pork went into the oven and had to quickly pour the juice over the top. The lesson? Even imperfect steps can lead to delicious results (but yes, the citrus is non-negotiable for the best flavor).
Over time, I’ve learned that the quality of your initial spice rub matters. Take 30 seconds to really rub it into the meat. Get your hands in there! It makes a difference in how the flavor penetrates. Also, don’t skip crisping. It transforms the dish from “very good shredded pork” to “OMG, these are the best carnitas I’ve ever had.” This recipe is a testament to the beauty of slow food and a quick, fiery finish. It’s a story in every bite, and I’m so glad to be sharing it with you.
Your Carnitas Questions, Answered!
Q: My meat isn’t shredding easily. What did I do wrong?
A: It simply needs more time! Meat becomes tender and shreddable when the tough connective tissues have fully melted, which only happens with enough low, slow heat. If using the oven, give it another 30 minutes and check again. For the slow cooker, ensure it’s set correctly and the lid is on tight. Patience is key.
Q: Can I make carnitas ahead of time?
A: Absolutely, and they might even be better! You can cook and shred the pork 1-2 days in advance. Store it in its cooking juices in the fridge. When you’re ready to serve, skim the solidified fat from the top, use that fat to crisp the meat in a skillet, and you’re good to go. The flavors deepen beautifully overnight.
Q: The meat is tender but seems a bit bland. How can I fix it?
A: No worries! This is easily fixed during the crisping stage. When you add the shredded pork to the hot skillet, taste a piece. You can sprinkle on a little more salt, cumin, or a pinch of chili powder as it crisps. The direct heat will toast the new spices and wake everything right up.
Q: Is there a way to make the carnitas crispy without the skillet step?
A: For a slightly less messy (but still effective) method, you can spread the shredded pork on a parchment-lined baking sheet, drizzle with some of the reserved fat/juices, and broil it for 3-5 minutes, watching carefully to prevent burning. Stir once halfway through. You won’t get *quite* the same concentrated crisp as the skillet, but it works in a pinch!

Crispy Carnitas Tacos : Juicy, Flavorful & Street-Taco Approved
Description
Crispy Carnitas Tacos – Juicy, Crispy, and Flavor-Packed
Time
-
Prep: 15 minutes
-
Cook: 2.5–3 hours (oven) or 4–8 hours (slow cooker)
-
Total: 3–8 hours depending on method
-
Serves: 6–8 tacos
Ingredients
For the Carnitas:
-
3 lbs pork shoulder (boneless), cut into large chunks
-
1 tbsp kosher salt
-
1 tsp black pepper
-
1 tbsp dried oregano (Mexican or regular)
-
1 tbsp ground cumin
-
4 cloves garlic, minced
-
1 onion, quartered
-
Juice of 1 orange (save the peel)
-
Juice of 1 lime
-
½ cup water or chicken broth
For Serving:
-
Corn or flour tortillas
-
Chopped white onion
-
Fresh cilantro
-
Lime wedges
-
Salsa or hot sauce (optional)
Instructions
-
Cook the Pork (Low & Slow)
-
Oven: Preheat to 300°F (150°C). Place pork in a Dutch oven, season with salt, pepper, oregano, and cumin. Add garlic, onion, orange & lime juice, orange peel, and water/broth. Cover and bake 2.5–3 hours until fork-tender.
-
Slow Cooker: Combine ingredients in slow cooker. Cook LOW 8 hours or HIGH 4–5 hours.
-
-
Shred & Crisp
-
Remove pork, reserving ¼–⅓ cup of cooking liquid/fat. Shred pork with forks.
-
Heat a skillet over medium-high, add cooking liquid/fat, and spread shredded pork in an even layer. Cook 3–4 minutes without stirring to form crispy edges. Stir and cook another 3–4 minutes for mixed crispy and tender bits.
-
-
Warm Tortillas & Assemble
-
Heat tortillas over a gas flame or dry skillet.
-
Pile pork into tortillas, top with chopped onion, cilantro, lime juice, and optional salsa. Serve immediately.
-
Notes
-
Roast or broil for crispiness if you prefer not to skillet-fry: Spread shredded pork on a parchment-lined baking sheet, drizzle with reserved fat/juices, and broil 3–5 minutes, stirring halfway.
-
Make ahead: Cook and shred pork 1–2 days in advance; crisp right before serving.
-
Adjust flavor: Sprinkle extra salt, cumin, or chili powder during crisping for deeper taste.
Nutritional Information*
*This is an estimate for informational purposes, calculated for 2 carnitas-filled corn tortillas with standard toppings.
Per Serving: Calories: ~420 | Protein: 30g | Carbohydrates: 15g | Fat: 25g | Fiber: 2g
Final Thoughts: The Heart of a Feast
These Crispy Carnitas Tacos are more than just a meal—they are an experience, a celebration of contrasts. They teach us that true satisfaction lies in the balance of time and technique: the patient, low-and-slow coaxing of tenderness, followed by the joyful, fiery shout of the crisp.
This recipe is a love letter to the power of transformation. A humble cut of pork, through a simple alchemy of citrus, spice, and heat, becomes something extraordinary. It becomes the centerpiece of a gathering, the reason friends linger at the table, the quiet pride of a home cook.
But beyond the recipe itself, remember the wisdom of Señora Rosa: “You cannot rush the conversation between the meat and the fat.” Let this be a gentle reminder, not just for carnitas, but for life’s richer moments. Some of the best things—the deepest flavors, the most meaningful connections—require that slow, patient “conversation.” The magic happens when we give them the time and attention they deserve, and then have the courage to finish with a flourish.
So, make these tacos for a crowd on a Sunday, or for yourself on a Wednesday, because you deserve that crispy, citrus-kissed joy. Let the aroma fill your home. Get your hands messy shredding the pork. Listen to the glorious sizzle in the pan. Build your taco with intention.
Because this is more than food. It’s a lesson in texture, in patience, and in the profound happiness found in a warm tortilla cradling perfectly cooked pork. It’s a dish that doesn’t just feed the body; it feeds the soul with its generosity and heart.
Italian Chicken Flatbreads : Pesto, Mozzarella & Roasted Tomato Magic
Italian Chicken Flatbreads: Your 20-Minute Ticket to Gourmet Weeknight Magic
Hey there, friend! Come on in, grab an apron, and let’s get something incredible on the table. I don’t know about you, but some nights I’m caught in that classic dinner dilemma: I’m craving something that feels special—something with vibrant, bold flavors that spark a little joy—but I absolutely do not have the time or energy for a complicated recipe. Sound familiar?
Well, pull up a stool, because these Italian Chicken Flatbreads are about to become your new secret weapon. We’re talking a crispy, golden crust slathered with zesty basil pesto, piled high with tender roasted chicken and melty, stretchy mozzarella, then finished with sweet, blistered tomatoes that burst in your mouth. It’s a symphony of textures and tastes that looks like it came from a fancy wood-fired oven, but honestly? It comes straight from your trusty home oven in about 20 minutes flat.
This isn’t just about throwing toppings on bread. It’s about creating a mini culinary experience that turns an ordinary Tuesday into something to savor. Whether you’re cooking for a busy family, whipping up a quick dinner for two, or needing a stunning appetizer for friends that’s guaranteed to get “oohs” and “aahs,” this recipe has your back. So, let’s preheat that oven and make some magic happen!
The Little Flatbread That Could: A Kitchen Memory
This recipe always takes me back to my first tiny apartment kitchen. It was about the size of a postage stamp, with one countertop and an oven that had… let’s say, *personality*. I was hosting my best friends for the first time, determined to impress, but my ambitious plans for homemade pasta dissolved into mild panic as the clock ticked down.
Raid-the-fridge mode activated. I found a pack of naan, leftover roast chicken from the night before, a nearly-empty jar of pesto, and some cherry tomatoes threatening to go soft. With nothing to lose, I threw them together. Ten minutes later, we were gathered around my wobbly IKEA table, pulling apart these gorgeously melted, fragrant flatbreads, laughing and talking over each other. It was messy, imperfect, and an absolute hit. That night taught me a beautiful lesson: the best meals aren’t about perfection; they’re about flavor, ease, and the people you share them with. This flatbread is a tribute to that happy, delicious chaos.
Gathering Your Flavor Allies: The Ingredients
Here’s the beautiful part: this recipe is a fantastic template for creativity. Think of this list as your flavor foundation. You likely have half of this already! Let’s break it down:
- 2 Flatbreads or Naan: This is our canvas! I love the soft, chewy texture of naan, but any sturdy flatbread, pre-made pizza crust, or even large pitas will work. For a super-crispy base, brush the edges lightly with olive oil before adding toppings.
- 1 cup Cooked Roasted Chicken, shredded: The ultimate weeknight shortcut. Use leftovers from a rotisserie chicken, a baked breast, or even the shreds from a store-bought roast chicken. Short on time? A can of high-quality chunk chicken (well-drained) works in a pinch!
- 1/3 cup Basil Pesto: This is the flavor powerhouse. Jarred pesto is a total lifesaver—I always have one in the fridge. For a fresh twist, try sun-dried tomato pesto or a kale-walnut pesto. Feeling adventurous? My 5-minute homemade pesto is a game-changer.
- 1 cup Shredded Mozzarella Cheese: Low-moisture, pre-shredded mozzarella melts beautifully and gives you those classic pizza pulls. For more depth, mix in some shredded fontina or asiago. Fresh mozzarella pearls or slices are also divine—just pat them dry first to avoid sogginess.
- 1/2 cup Cherry Tomatoes, halved: Little bursts of sweet acidity! Roasting them first is my non-negotiable chef hack—it concentrates their flavor and keeps the flatbread from getting watery. Rainbow cherry tomatoes make it extra pretty!
- Olive Oil, Salt, and Pepper: The holy trinity. A good drizzle of olive oil on the tomatoes before roasting makes them caramelize beautifully. Don’t be shy with the seasoning!
- Optional: Fresh Basil & Balsamic Glaze: These are the “gourmet finish” that takes it from great to *wow*. A handful of torn fresh basil added after baking brings a bright, fragrant pop. A drizzle of syrupy-sweet balsamic glaze balances the richness perfectly. Trust me, it’s worth it!
Let’s Build Some Deliciousness: Step-by-Step
Ready? Preheat your oven to 400°F (200°C) and let’s dance. This comes together so fast, it’s almost magical.
Step 1: Blister Those Tomatoes. On a small baking sheet, toss your halved cherry tomatoes with a drizzle of olive oil, a pinch of salt, and a crack of black pepper. Spread them out in a single layer. Pop them into the oven for 10-12 minutes. You’ll know they’re ready when the skins start to wrinkle and caramelize at the edges. This step is your secret weapon for deep, sweet tomato flavor without a soggy flatbread!
Step 2: Assemble with Gusto. Place your flatbreads on a clean surface. Using a spoon, spread the pesto in an even layer, leaving just a tiny border around the edge for your “crust.” Scatter the shredded chicken evenly over the pesto, then blanket everything with that glorious mound of mozzarella. Finally, artfully arrange your roasted tomatoes over the cheese.
Chef’s Hack: For an extra-crispy bottom crust, I sometimes bake the flatbreads directly on the oven rack. Just make sure they’re sturdy and you place them carefully! If you’re nervous, a preheated baking sheet or pizza stone works wonders.
Step 3: Bake to Golden Perfection. Carefully transfer your loaded flatbreads to the oven (directly on the rack or on a tray). Bake for 8-10 minutes. You’re looking for the cheese to be completely melted, bubbly, and possibly even getting a few golden-brown spots, and the edges of the flatbread to be crisp. Keep an eye on them—ovens can vary!
Step 4: The Grand Finale. The moment you pull them out, the aroma will be insane. Immediately sprinkle with torn fresh basil leaves. Let them cool for just a minute (this helps the cheese set slightly so it doesn’t all slide off!), then drizzle lightly with that luxurious balsamic glaze. Grab your pizza cutter or a sharp knife, slice, and prepare for the compliments to roll in.
Serving It Up With Style
I love serving these flatbreads right on a big wooden board in the middle of the table, letting everyone grab a slice family-style. For a full meal, pair them with a simple arugula salad dressed with lemon juice and olive oil—the peppery greens are the perfect fresh contrast. If it’s game day or party time, cut them into smaller squares for the ultimate crowd-pleasing appetizer. No matter how you serve them, have plenty of napkins ready—this is gloriously messy, finger-licking food!
Make It Your Own: Delicious Variations
The fun doesn’t stop here! This recipe is a perfect playground for your taste buds. Try one of these twists:
- Mediterranean Twist: Swap the pesto for a layer of hummus, use feta cheese instead of mozzarella, and add sliced Kalamata olives and a sprinkle of za’atar after baking.
- Spicy Pepperoni Lover’s: Use a tomato-based pizza sauce instead of pesto, add mini pepperoni slices under the cheese, and finish with a drizzle of hot honey.
- Veggie-Powered: Skip the chicken and load up with roasted red peppers, sautéed mushrooms, and artichoke hearts. A sprinkle of goat cheese at the end is heavenly.
- Caprese-Style: Use slices of fresh mozzarella (buffalo mozzarella if you’re feeling fancy!) and add the tomatoes fresh (no roasting). After baking, top with lots of basil and a thick balsamic reduction.
- Dairy-Free Delight: Use a vegan pesto, your favorite dairy-free mozzarella shreds, and ensure your chicken is plant-based if going fully vegan.
Olivia’s Kitchen Notes
Over the years, this recipe has seen it all. I’ve made it on camping trips using naan over a grill, and I’ve served a fancied-up version with prosciutto and figs for a book club. My biggest lesson? Don’t stress about precise measurements. This is a “handful of this, sprinkle of that” kind of meal. The only real mistake is overloading the flatbread—too many toppings can lead to a soggy middle. Keep it balanced!
A funny story: I once was so eager to eat that I drizzled the balsamic glaze before slicing. Let’s just say my “artistic drizzle” turned into a “abstract painting” all over the cutting board. It still tasted amazing, but now I’ve learned: slice first, *then* drizzle. Little victories!
Your Questions, Answered (FAQs & Troubleshooting)
Q: My flatbread got soggy in the middle. What happened?
A: Sogginess usually comes from too many wet toppings. The key is roasting the tomatoes first to remove excess moisture. Also, make sure your pesto and chicken aren’t overly wet (pat chicken dry if needed). Baking directly on the oven rack or a preheated pizza stone/steel also creates a fierce bottom heat that crisps things up beautifully.
Q: Can I make these ahead of time for a party?
A: Absolutely! You can roast the tomatoes and shred the chicken up to 2 days ahead. Assemble the flatbreads (up to the baking point) and keep them on a tray in the fridge for up to 4 hours before your guests arrive. Then, just pop them in the oven—you may need to add 1-2 extra minutes since they’re starting cold.
Q: I don’t have cooked chicken. What’s the quickest way to make some?
A: My go-to quick method: season a chicken breast with salt, pepper, and Italian herbs. Pan-sear it in a bit of olive oil over medium-high heat for 5-7 minutes per side, until cooked through. Let it rest for 5 minutes, then shred! Or, as mentioned, a quality rotisserie chicken is the ultimate time-saver.
Q: Can I use fresh mozzarella instead of shredded?
A: Yes, but pat the fresh mozzarella balls or slices VERY dry with paper towels first. Fresh mozzarella has more water content, which can release during baking. I often use a mix—shredded for the melt and a few fresh slices for those gorgeous milky pockets.
Italian Chicken Flatbreads : Pesto, Mozzarella & Roasted Tomato Magic
Ingredients
-
2 flatbreads or naan (any sturdy flatbread works)
-
1 cup cooked roasted chicken, shredded
-
1/3 cup basil pesto (jarred or homemade)
-
1 cup shredded mozzarella cheese
-
1/2 cup cherry tomatoes, halved
-
1–2 tsp olive oil
-
Salt and pepper, to taste
-
Optional: fresh basil leaves & balsamic glaze for finishing
Instructions
-
Preheat Oven
Preheat to 400°F (200°C). -
Roast Tomatoes
Toss cherry tomatoes with olive oil, salt, and pepper. Spread on a baking sheet and roast for 10–12 minutes until skins wrinkle and caramelize. -
Assemble Flatbreads
Spread pesto evenly over each flatbread, leaving a small border. Top with shredded chicken, then mozzarella. Arrange roasted tomatoes on top. -
Bake
Place flatbreads on a baking sheet or directly on the oven rack/pizza stone. Bake 8–10 minutes until cheese is melted, bubbly, and edges are crisp. -
Finish & Serve
Remove from oven, sprinkle with torn fresh basil, and drizzle with balsamic glaze if using. Slice and serve immediately.
Notes
-
Roast tomatoes to reduce moisture and prevent soggy flatbreads.
-
For extra-crispy bases, bake directly on a preheated pizza stone or oven rack.
-
Pat fresh mozzarella dry before baking to avoid extra water.
-
Flatbreads can be prepared ahead—assemble just before baking.
Quick Nutritional Snapshot
Please note: The following is an estimate per serving (1/2 of one flatbread) and will vary based on specific ingredients and brands used.
- Calories: ~390
- Protein: 28g
- Fat: 20g
- Carbohydrates: 25g
Final Thoughts
Italian Chicken Flatbreads are more than just a quick dinner—they’re a small celebration of flavor, efficiency, and joy. In a world that often tells us that “gourmet” means complicated and time-consuming, this recipe stands as a delicious rebuttal: you can create something vibrant, satisfying, and beautiful on even the busiest of nights.
What I love most about this dish is its spirit of generosity. It welcomes improvisation, forgives substitutions, and consistently delivers a moment of “wow” with minimal effort. It’s the culinary equivalent of a confident smile—simple, warm, and utterly winning.
As you pull those golden, bubbling flatbreads from the oven, take a second to appreciate what you’ve made: a meal that nourishes not just the body, but also the rhythm of a busy life. It’s permission to eat well without stress, to gather people without fuss, and to remember that sometimes, the most memorable meals are the ones that fit seamlessly into your real, beautiful, imperfect day.
So here’s to the quick wins, the flavorful shortcuts, and the little kitchen triumphs that make weeknights sparkle. May your cheese always be stretchy, your crust crispy, and your table full of good conversation.
Buon appetito!
With love and a drizzle of balsamic,
Olivia
Chicken Involtini : Spinach and Cheese-Stuffed Chicken Rolls
Chicken Involtini: Your New Favorite Fancy-But-Easy Weeknight Wonder
Hey there, friend! Come on in, tie on an apron, and let’s get something incredible bubbling away on the stove. You know that feeling when you crave a meal that feels special—the kind you’d order at a cozy little trattoria with a checkered tablecloth and a candle flickering in a chianti bottle—but you also don’t want to spend your entire evening wrestling with a million steps? That, my fellow flavor-seeker, is precisely where Chicken Involtini swoops in to save the day.
Imagine this: tender, thin chicken cutlets, rolled around a creamy, garlicky, herby filling of spinach and cheese. They get a quick sear until they’re gorgeously golden, then finish baking in the oven, emerging juicy, fragrant, and ready to make you feel like a certified kitchen hero. The best part? It’s mostly assembly and a bit of patience while your oven works its magic. This dish is my ultimate secret weapon for turning a regular Tuesday into a “wow, you made this?!” kind of night. It’s impressive enough to serve to your most foodie friends but straightforward enough that you won’t be frazzled when they arrive. So, let’s turn up some music, pour ourselves a little something, and create some magic together. Welcome to the joy of Chicken Involtini!
The Night I Realized Rolls Could Be Revolutionary
My love affair with involtini didn’t start in a grand Italian kitchen. Oh no. It started in my tiny first apartment kitchen, with a wobbly table and a dream of hosting a “real” dinner party. I was determined to make something that looked like I’d spent all day cooking, but between my job and a budget that screamed “grad student,” my options were limited. I stumbled upon the concept of “rolling things up in other things.” It sounded fun, like culinary arts and crafts.
That night, I used what I had: a lonely chicken breast I pounded into submission with a can of beans, some frozen spinach, and the last nub of cream cheese. I rolled them up, secured them with toothpicks like a precarious science project, and held my breath. When I pulled that pan out of the oven, the smell was unbelievable. My friends’ faces lit up. It wasn’t just dinner; it was an event. We felt fancy. We felt grown-up. That messy, imperfect meal taught me a core truth I carry into this kitchen every day: food doesn’t have to be complicated to feel celebratory. It just has to be made with a little love and a sense of adventure. This recipe is that same spirit, just refined with a few more years of messy-apron experience.
Gathering Your Flavor Toolkit
Here’s everything you’ll need to build these beautiful rolls. Think of it as gathering your construction materials for the tastiest project ever! I’ve added my little chef notes because knowing the “why” behind an ingredient makes you a more confident cook.
- 4 thin chicken cutlets (or 2 large chicken breasts): The canvas! If you’re using breasts, you’ll halve them horizontally (“butterfly” them) and then pound them to an even ¼-inch thickness. This is therapeutic, I promise. Chef’s Tip: Look for packages labeled “thin-cut chicken cutlets” to save a step. If pounding, place the chicken between two sheets of plastic wrap or parchment paper to avoid a splattered mess.
- 1 cup fresh spinach, sautéed and squeezed very dry: This is KEY. We want flavor, not water. Sauté a big heap (it wilts down dramatically) with a tiny drizzle of oil until just wilted, then let it cool and squeeze it in a clean kitchen towel or your fists until no more green liquid runs out. Substitution: A 10-oz box of frozen chopped spinach, thawed and squeezed dry, works perfectly here. No shame in that game!
- 1/2 cup whole-milk ricotta or full-fat cream cheese: Ricotta gives a lovely, light graininess, while cream cheese offers a supremely creamy, rich tang. I adore ricotta for authenticity, but I’ve used cream cheese in a pinch and it was divine. Chef’s Insight: The fat is your friend here—it keeps the filling lush and the chicken moist. Don’t reach for the low-fat versions for this one.
- 1/4 cup finely grated Parmesan cheese: The salty, umami punch that makes the filling sing. Please grate it fresh if you can! The pre-grated stuff in a canister often has anti-caking agents that can make it a bit grainy. Substitution: Pecorino Romano is a fantastic, sharper alternative.
- 1 large garlic clove, minced: Because what’s a cozy Italian-inspired dish without garlic? Mince it finely so it distributes evenly and doesn’t create a harsh bite.
- 1 teaspoon of your favorite dried Italian herbs: Oregano, basil, thyme, or a mix. Rub them between your palms as you add them to wake up their oils. Chef’s Tip: If you have fresh herbs, use 1 tablespoon finely chopped. Fresh basil or thyme is especially lovely.
- Kosher salt and freshly cracked black pepper: Season every layer—the filling AND the chicken. This builds depth of flavor.
- 1 tablespoon olive oil: For searing. A good extra-virgin olive oil adds a fruity note.
- Toothpicks or kitchen twine: The little helpers that keep our rolls from unfurling! Soak toothpicks in water for 10 minutes before using to prevent burning.
- Optional for serving: Marinara sauce or a simple lemon-butter pan sauce. I’ll give you the quick pan sauce hack in the instructions—it’s a game-changer.
Let’s Build & Cook: A Step-by-Step Dance
Ready? Let’s transform these simple ingredients into something spectacular. Follow along, and don’t worry—it’s harder to mess up than you think!
Step 1: Preheat & Prep. First, get that oven heating to a toasty 190°C (375°F). This ensures it’s ready to go when our chicken is beautifully seared. While it warms, pat your chicken cutlets completely dry with paper towels. This is the secret to a perfect, golden sear instead of a steamy, pale one. Give them a good sprinkle of salt and pepper on both sides.
Step 2: Make the Magical Filling. In a medium bowl, combine your thoroughly squeezed spinach, ricotta (or cream cheese), Parmesan, minced garlic, herbs, a good pinch of salt, and a few cranks of pepper. Mix it all together until it’s homogenous. Give it a taste! Does it need more salt? A bit more Parmesan? Adjust to your heart’s content. This is your creation.
Step 3: The Roll-Up (The Fun Part!). Lay your seasoned chicken cutlets flat on a clean surface. Spoon about 2-3 tablespoons of the filling onto the lower third of each cutlet (closer to you). Don’t overstuff, or it will burst out the sides. Now, gently but firmly, roll the chicken away from you, tucking the filling in as you go, until you have a neat little log. Secure the seam with 2-3 toothpicks or a small piece of kitchen twine. It doesn’t have to be perfect—rustic is charming!
Step 4: Sear to Perfection. Heat the olive oil in a large, oven-safe skillet (like cast iron or stainless steel) over medium-high heat. When the oil shimmers, carefully add the chicken rolls, seam-side down if possible. Don’t crowd the pan; work in batches if needed. Let them sear, undisturbed, for 2-3 minutes per side, until you have a deep golden-brown crust all around. This step isn’t just for looks—it locks in juices and builds incredible flavor.
Step 5: Bake to Juicy Tenderness. Once all sides are golden, if you worked in batches, nestle all the rolls back into the skillet. Immediately transfer the entire skillet to your preheated oven. Bake for 15-20 minutes, until the chicken is cooked through and registers 74°C (165°F) on an instant-read thermometer inserted into the thickest part. This tool is your best friend for never-overcooked chicken!
Step 6: Rest & Sauce (The Chef’s Hack). Carefully remove the skillet from the oven (remember, the handle is HOT!). Transfer the chicken rolls to a cutting board, tent loosely with foil, and let them rest for 5-10 minutes. THIS IS CRUCIAL. It lets the juices redistribute so they don’t all run out when you cut in. Meanwhile, look at those gorgeous browned bits in your still-hot skillet. That’s liquid gold! For a quick pan sauce, add a couple tablespoons of broth or white wine to the hot pan, scrape up the bits (deglaze!), and swirl in a knob of cold butter and a squeeze of lemon juice. Voilà! Restaurant-worthy sauce in 60 seconds.
Step 7: Serve with Love. Remove the toothpicks or twine from the rested chicken rolls. Slice them in half on a diagonal for a beautiful presentation. Drizzle with your simple pan sauce or a spoonful of warm marinara. Get ready for the compliments.
How to Plate Like a Pro (Without the Stress)
Presentation is just sharing the love with your eyes first! I love slicing the rolls on a slight diagonal to show off the stunning swirl of green filling. Arrange them on a warm platter or individual plates. Spoon over that easy pan sauce or a vibrant marinara. For a complete, cozy meal, I nestle them alongside a pile of creamy polenta, buttery mashed potatoes, or a simple tangle of garlicky spaghetti. A bright, crisp arugula salad with a lemon vinaigrette on the side cuts through the richness perfectly. Don’t forget a final flourish of fresh herbs or a little extra Parmesan grated on top!
Make It Your Own: Delicious Twists
The beauty of this recipe is its versatility. Once you master the basic roll, the world is your oyster (or, more aptly, your stuffed chicken)!
- Sun-Dried Tomato & Feta: Swap the spinach for ⅓ cup chopped oil-packed sun-dried tomatoes (pat them dry) and use crumbled feta instead of ricotta/Parmesan. Add a sprinkle of dried oregano.
- Prosciutto-Wrapped: Before rolling, lay a thin slice of prosciutto over each chicken cutlet. Then add the filling and roll. The prosciutto gets crispy and adds a wonderful salty depth.
- Dairy-Free/Paleo: Use a thick, creamy cashew “cheese” or a dairy-free cream cheese alternative. Swap Parmesan for a sprinkle of nutritional yeast for a cheesy flavor.
- Mushroom & Fontina: Sauté ½ cup finely chopped mushrooms with the garlic until all their liquid evaporates. Let cool, then mix with fontina cheese and a touch of thyme.
- “Pizza” Style: Use a tablespoon of pesto mixed into the ricotta, and add a few small cubes of low-moisture mozzarella to the filling. Serve with marinara for dipping!
From My Kitchen to Yours: A Few More Thoughts
This recipe has been a living, evolving thing in my kitchen. I’ve made it for first dates, for comforting friends after breakups, and for chaotic family potlucks where it’s always the first dish to disappear. The biggest lesson? Don’t fear the toothpick. My first batch looked like a pincushion rebellion! You only need 2 or 3 per roll, placed strategically. Over time, I’ve gotten better at the “tuck and roll” motion, but even the messy ones taste incredible. I also used to skip the searing step to save time—big mistake. That golden crust is non-negotiable for flavor. It’s the difference between “good” and “can I have the recipe?!” Finally, this dish is a fantastic make-ahead friend. You can assemble the rolls, secure them, and keep them covered in the fridge for up to 8 hours before searing and baking. It makes hosting feel effortless.
Your Questions, Answered!
Q: My filling keeps leaking out while baking! What am I doing wrong?
A: This usually means one of two things: 1) Overstuffing (less is more! The filling expands a little), or 2) Not securing the seam well enough. Make sure your final seam is on the bottom when you place it in the pan for searing, and use enough toothpicks to hold it closed. A little leakage is normal and tasty, but a major blowout means you need a lighter hand with the filling.
Q: Can I make this without an oven-safe skillet?
A> Absolutely! Just sear the rolls in any skillet you have, then carefully transfer them to a baking dish or sheet pan lined with parchment paper for the oven portion. You might lose some of the flavorful pan drippings for a sauce, but you can still make a simple sauce separately in the skillet after.
Q: How do I know it’s done without a thermometer?
A> While I highly recommend a $10 instant-read thermometer for kitchen confidence, you can also check by making a small cut into the thickest part of one roll. The juices should run clear, not pink, and the chicken should be white throughout with no translucency. But really, get the thermometer—it’s a life-changer!
Q: What’s the best way to reheat leftovers?
A> To keep them from drying out, reheat gently. Cover with foil and warm in a 175°C (350°F) oven for 10-15 minutes, or microwave at 50% power in short bursts. A splash of broth or water in the container can help add steam.
Chicken Involtini : Spinach and Cheese-Stuffed Chicken Rolls
Description
Chicken Involtini – Fancy-But-Easy Weeknight Wonder
Time
-
Prep: 15 minutes
-
Cook: 25 minutes
-
Total: 40 minutes
Ingredients
-
4 thin chicken cutlets (or 2 large chicken breasts, butterflied and pounded to ¼-inch thickness)
-
Kosher salt and freshly cracked black pepper, to taste
-
1 tsp dried Italian herbs (or 1 tbsp fresh, chopped)
-
1 cup fresh spinach, sautéed and squeezed dry (or 10 oz frozen, thawed and squeezed)
-
½ cup whole-milk ricotta or full-fat cream cheese
-
¼ cup finely grated Parmesan cheese
-
1 large garlic clove, minced
-
1 tbsp olive oil
-
Toothpicks or kitchen twine
-
Optional for serving: marinara sauce or simple lemon-butter pan sauce
Instructions
-
Preheat Oven
Preheat oven to 190°C (375°F). -
Prepare Chicken
Pat chicken dry. Season both sides with salt, pepper, and Italian herbs. -
Make Filling
In a bowl, mix spinach, ricotta (or cream cheese), Parmesan, garlic, salt, and pepper until smooth. -
Assemble Rolls
Spoon 2–3 tbsp filling onto the lower third of each cutlet. Roll chicken away from you and secure with toothpicks or twine. -
Sear Chicken
Heat olive oil in an oven-safe skillet over medium-high heat. Add chicken rolls seam-side down. Sear 2–3 minutes per side until golden brown. -
Bake
Transfer skillet to preheated oven and bake 15–20 minutes, until internal temperature reaches 74°C (165°F). -
Rest & Sauce
Let chicken rest 5–10 minutes. For a quick pan sauce, add 2 tbsp broth or white wine to the hot skillet, scrape up browned bits, and swirl in butter and lemon juice. -
Serve
Remove toothpicks or twine. Slice diagonally, drizzle with sauce or marinara, and serve.
Notes
-
Don’t overstuff rolls—less filling prevents leakage.
-
Sear before baking for golden crust and flavor.
-
Oven-safe skillet is best; otherwise, transfer to a baking dish.
-
Rest chicken after baking to retain juices.
Nutritional Information (Per Serving)
Estimated for one chicken roll, using ricotta and olive oil. Values are approximate.
Calories: 320 | Protein: 35g | Fat: 18g | Saturated Fat: 6g | Carbohydrates: 4g | Fiber: 1g | Sugar: 1g | Cholesterol: 110mg | Sodium: 320mg
Final Thoughts: The Elegance of Simplicity
And there you have it—the art of turning a simple chicken breast into a meal that feels like a warm embrace from a Tuscan nonna. Chicken Involtini isn’t just a recipe; it’s a lesson in culinary elegance hidden within everyday ingredients. It teaches us that a little rolling, a confident sear, and a patient bake can transform the ordinary into something worthy of a slow, savored dinner.
This dish celebrates the beautiful middle ground where weeknight practicality meets weekend celebration. It’s proof that you don’t need a dozen ingredients or complicated techniques to create depth, moisture, and wow-factor. All you need is a good roll, a hot pan, and the understanding that the best meals often come from a spirit of playful assembly—of wrapping something good inside something else and letting the heat work its magic.
As you sit down to your plate, with its golden-brown swirls and the scent of garlic and herbs filling the air, take a moment. This is more than fuel. It’s the result of your own hands creating something beautiful and nourishing. It’s a reminder that cooking is a craft where love is the most important ingredient, and a few well-placed toothpicks can feel like a secret superpower.
So, here’s to many more kitchen adventures—to rolling, searing, and sharing meals that are as joyful to make as they are to eat. May your chicken be tender, your filling be flavorful, and your weeknights feel a little more special.
Buon appetito, my friend.
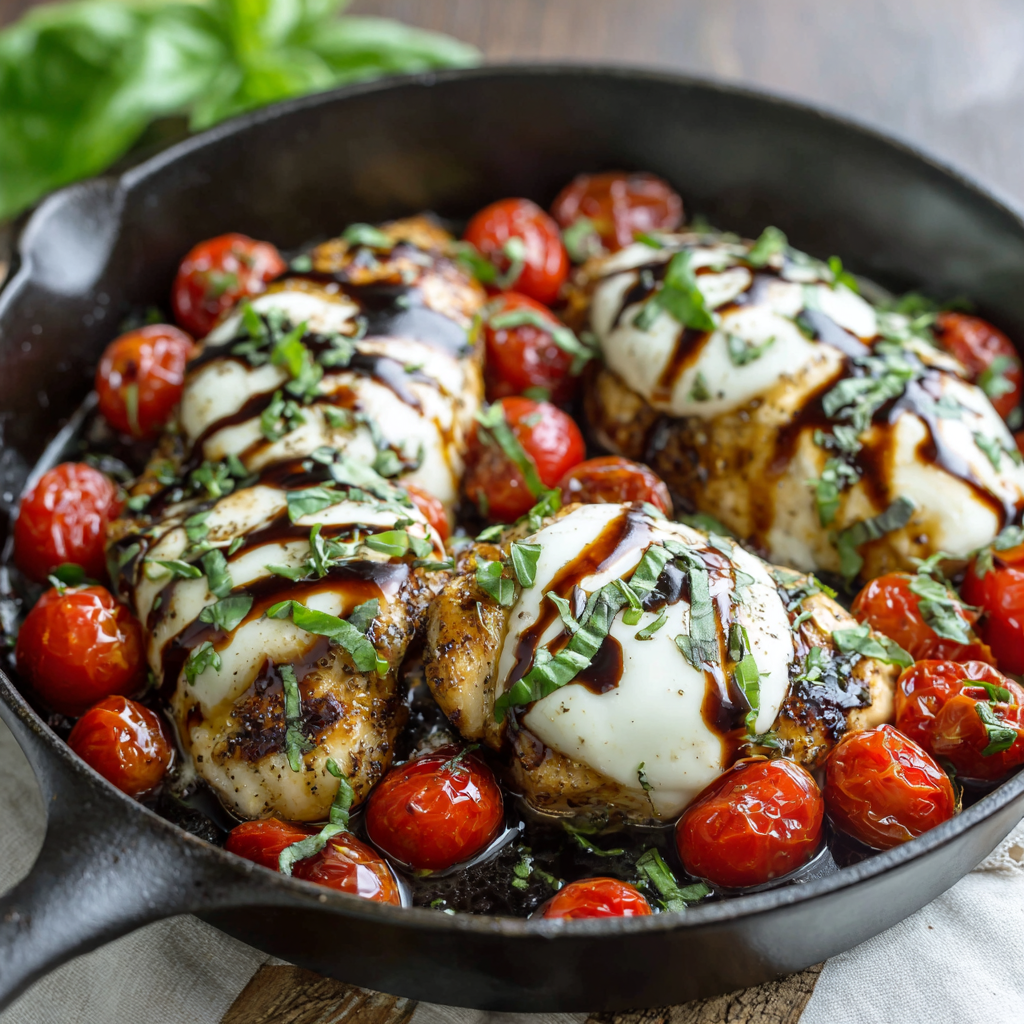
Caprese Chicken Skillet with Mozzarella, Basil & Balsamic Glaze
When a Salad Inspires Dinner: Welcome to Your New Favorite Skillet
Hey there, friend! Come on in, pull up a stool. Can you smell that? It’s the sizzle of chicken hitting a hot pan, the sweet perfume of tomatoes just starting to burst, and the promise of melted, creamy mozzarella. It’s the sound of a weeknight dinner that’s about to go from “I guess we should eat” to “Wow, did you make this?!” without you spending all evening in the kitchen.
I don’t know about you, but some nights I crave something that feels special—restaurant-quality, even—but my energy and time budget are screaming for something simple. That’s where this beauty, my Caprese Chicken Skillet, swoops in to save the day (and our dinner routine). It takes everything we adore about the classic Italian Caprese salad—the juicy tomatoes, the milky-soft fresh mozzarella, the aromatic basil, and the tangy-sweet balsamic—and turns it into a hearty, satisfying, one-pan main event.
This isn’t just a recipe; it’s a 25-minute strategy for a happier evening. It’s for the nights you want to nourish your body with lean protein and vibrant veggies but also your soul with something incredibly delicious. It’s a dish that looks gorgeous on the plate but is built on humble, straightforward techniques. Whether you’re cooking for a date night in, trying to impress a picky eater, or just treating yourself to a meal that sparks joy, this Caprese Chicken Skillet is your ticket. So, grab your favorite skillet, and let’s make something wonderful together.
A Sun-Drenched Memory & The Birth of a Go-To Recipe
This dish always takes me back to a little farmers’ market in Siena, Italy. I was 22, wide-eyed, and completely overwhelmed (in the best way) by the stalls overflowing with ruby-red tomatoes that actually smelled like sunshine, fragrant basil bunches the size of my head, and creamy balls of mozzarella so fresh they wept milky tears. Lunch was, predictably, a perfect Caprese salad on a scratched wooden plate, eaten with a view of rolling hills. It was a flavor revelation.
Fast forward to a busy Tuesday years later, staring into my fridge. I had chicken, a pint of cherry tomatoes from my CSA box, and a leftover ball of mozzarella from pizza night. That Italian memory flashed, and I thought: “What if I put that salad on the chicken?” One skillet and twenty minutes later, my Caprese Chicken was born. It was an instant hit with my family—a way to capture that vibrant, summery feeling any night of the week. It’s become my edible postcard from Tuscany, no passport required.
Gathering Your Flavor Players: Simple Ingredients, Big Impact
Here’s the beautiful part: this recipe relies on a handful of high-quality ingredients. When you have a short list, each one really gets to shine. Let’s break it down:
- 2 boneless, skinless chicken breasts: The star of our show! I look for breasts that are roughly the same size so they cook evenly. Chef’s Insight: If yours are very thick or uneven, place them between parchment paper and gently pound the thicker ends to an even ½-inch thickness. This ensures quick, uniform cooking and prevents the thin end from drying out.
- Salt, pepper, and garlic powder to taste: Our simple but mighty flavor base. Don’t be shy with the salt—it’s what makes the chicken itself taste great, not just the toppings. Substitution Tip: No garlic powder? A minced fresh garlic clove added to the pan for the last 30 seconds of searing works beautifully.
- 1 tablespoon olive oil: For that perfect golden sear. I use a good extra-virgin olive oil for its flavor.
- 1 cup cherry tomatoes, halved: Little bursts of sweetness! Halving them helps them blister and release their juices faster, creating a mini-pan sauce. Chef’s Insight: Use the sweetest tomatoes you can find. In winter, grape tomatoes are often a bit more reliable, or try sun-dried tomatoes (in oil, drained) for an intense flavor punch.
- 4 slices fresh mozzarella (about 4 oz): The “caprese” crown! Fresh mozzarella (the kind stored in water) is key here for its creamy, soft melt. Substitution Tip: Avoid pre-shredded low-moisture mozzarella—it won’t melt into the same luscious pools. Burrata is a decadent upgrade if you’re feeling fancy!
- Fresh basil leaves: The aromatic finish. Tear them, don’t chop them, to prevent bruising and release the most fragrance.
- 2 tablespoons balsamic glaze: The sweet-and-tangy ribbon that ties it all together. Chef’s Insight: You can buy this ready-made (a total timesaver) or make your own by simmering ½ cup of balsamic vinegar with 1 tbsp of honey or brown sugar until it reduces by half and coats the back of a spoon. It’s thicker and sweeter than plain vinegar.
Let’s Get Cooking: Your Foolproof, Step-by-Step Guide
Ready? Apron on? Let’s transform these simple ingredients into something magical. I’ll walk you through each step with all my favorite little kitchen hacks.
- Prep & Season the Chicken: Pat your chicken breasts completely dry with paper towels. This is the #1 secret to a beautiful, golden sear instead of a pale steam. Season both sides generously with salt, pepper, and garlic powder. Let them sit for 5 minutes while your pan heats up—this lets the seasoning start to do its work.
- Sear to Golden Perfection: Heat the olive oil in a large skillet (I use a 10-inch cast iron or stainless steel) over medium-high heat. Once the oil is shimmering, carefully add the chicken. Listen for that satisfying sizzle! Don’t move it for a good 4-5 minutes. We’re building a flavorful crust. Chef’s Hack: If the chicken sticks, it’s not ready to flip. It will release from the pan naturally when a proper sear forms. Flip and cook the other side for another 4-5 minutes, or until the internal temperature reaches 165°F. Remove the chicken to a plate and tent loosely with foil.
- Blister Those Tomatoes: In the same glorious pan (with all those chicken-y, flavorful bits!), add the halved cherry tomatoes. Reduce the heat to medium. They’ll sizzle and pop, softening and getting little charred spots. This takes about 3 minutes. Use your spoon to scrape up any browned bits from the chicken—that’s pure flavor gold!
- The Cheesy Meltdown: Slide the chicken breasts back into the pan, nestling them among the tomatoes. Top each breast with two slices of fresh mozzarella. Now, cover the skillet with a lid (or a baking sheet if you don’t have one). This traps the heat and steam, melting the cheese into dreamy, gooey pools in just 1-2 minutes. Keep an eye on it!
- The Grand Finale: Remove the skillet from the heat. Immediately scatter a generous handful of torn fresh basil leaves over everything. The residual heat will wilt them slightly, releasing their incredible aroma. Finally, drizzle the entire pan with that gorgeous, dark balsamic glaze.
Plating Up & Serving with Style
This dish is a stunner all on its own in the skillet—I often bring it right to the table for that rustic, family-style vibe. Use a spatula to transfer a cheesy chicken breast to each plate, then spoon all those blistered tomatoes and pan juices right over the top. The final drizzle of balsamic looks beautiful against the white cheese and green basil. For sides, I love keeping it Italian: a simple arugula salad with lemon vinaigrette, a pile of creamy polenta to soak up the juices, or some crusty garlic bread for the ultimate “scoop.” It’s a complete, vibrant meal that feels anything but ordinary.
Make It Your Own: Delicious Twists & Swaps
The beauty of this framework is how easily it adapts! Here are a few of my favorite riffs:
- Pesto Lover’s Dream: Before adding the cheese, spread a tablespoon of basil pesto over each chicken breast, then top with the mozzarella.
- Balsamic & Berry: In the summer, add a handful of fresh raspberries or blackberries to the tomatoes in the last minute of cooking. The berries break down into a sweet-tart sauce that’s incredible with the balsamic.
- Spicy Arrabbiata Twist: Add a pinch of red pepper flakes to the pan with the tomatoes. For a richer sauce, splash in ¼ cup of marinara when you add the tomatoes back.
- Chicken Thigh Version: Prefer dark meat? Use boneless, skinless chicken thighs! They’re more forgiving and juicy. Sear them a minute or two longer per side.
- Vegetarian Power Play: Swap the chicken for two large portobello mushroom caps (stems removed). Sear them gill-side up first, then flip and proceed with the recipe for a hearty meat-free option.
From My Kitchen to Yours: A Few Parting Notes
This recipe has evolved from that first “aha!” moment into my ultimate reliable weeknight hero. I’ve learned a few things along the way: First, if your tomatoes aren’t super juicy, adding a tiny splash of chicken broth or white wine to the pan after blistering them creates just enough saucy goodness. Second, the first time I made this, I was so excited I added the basil before covering the pan to melt the cheese… and ended up with dark, sad, cooked basil. Lesson learned: fresh herbs are almost always a finish, not a cook-through ingredient! Now, I keep a little plant on my windowsill just for recipes like this. Finally, don’t stress about perfection. Even if your sear isn’t magazine-worthy or your cheese melts over the side, I promise it will taste absolutely incredible. That’s the magic of these flavors coming together.
Your Questions, Answered: FAQs & Troubleshooting
Q: How do I know when the chicken is done without cutting into it?
A: I swear by a simple digital meat thermometer! Insert it into the thickest part of the breast – it should read 165°F. No thermometer? Make a small cut in the thickest part; the juices should run clear, not pink.
Q: My cheese isn’t melting nicely, it’s just sitting there. Help!
A: This usually means the pan isn’t quite hot enough or isn’t covered. Make sure you’re covering the skillet tightly to trap steam. If needed, you can pop the entire oven-safe skillet under a low broiler for 60-90 seconds, but watch it like a hawk!
Q: Can I make this ahead of time?
A: You can prep the components: season the chicken and halve the tomatoes. But for the best texture, cook it fresh. The cooked dish doesn’t reheat well as the chicken can dry out and the cheese becomes rubbery.
Q: My sauce/pan seems watery. What happened?
A> This usually comes from the tomatoes releasing a lot of liquid. Two fixes: 1) Don’t overcrowd the pan when blistering the tomatoes—they should sizzle, not steam. 2) After blistering, let the liquid reduce for an extra minute or two before adding the chicken back. You want a jammy texture, not a puddle.
Caprese Chicken Skillet with Mozzarella, Basil & Balsamic Glaze
Description
Caprese Chicken Skillet
Time
-
Prep: 5 minutes
-
Cook: 20 minutes
-
Total: 25 minutes
-
Serves: 2
Ingredients
-
2 boneless, skinless chicken breasts
-
Salt & black pepper, to taste
-
Garlic powder, to taste
-
1 tbsp olive oil
-
1 cup cherry or grape tomatoes, halved
-
4 slices fresh mozzarella (about 4 oz)
-
Fresh basil leaves, torn
-
2 tbsp balsamic glaze
Instructions
-
Season Chicken
Pat chicken dry. Season both sides with salt, pepper, and garlic powder. -
Sear Chicken
Heat olive oil in a large skillet over medium-high heat.
Add chicken and cook 4–5 minutes per side until golden and cooked through (internal temp 165°F).
Remove chicken to a plate. -
Cook Tomatoes
In the same skillet, reduce heat to medium.
Add tomatoes and cook 2–3 minutes until softened and blistered, scraping up browned bits. -
Melt Cheese
Return chicken to the skillet.
Top each breast with mozzarella slices.
Cover and cook 1–2 minutes until cheese is melted. -
Finish & Serve
Remove from heat.
Top with fresh basil and drizzle with balsamic glaze.
Serve immediately.
Notes
-
Pound thick chicken breasts to even thickness for quicker cooking
-
Cover the pan tightly to help the cheese melt
-
Broil 1 minute if cheese needs extra melting (watch closely)
Nutritional Information (Per Serving)
Approximate values, for 1 chicken breast with half the toppings.
Calories: ~350 | Protein: 32g | Carbohydrates: 8g | Fat: 20g | Saturated Fat: 7g | Cholesterol: 105mg | Sodium: 380mg | Fiber: 1g | Sugar: 5g
Prep Time: 5 minutes | Cook Time: 20 minutes | Total Time: 25 minutes | Serves: 2
Final Thoughts: A Skillet Full of Joy
If this Caprese Chicken Skillet teaches us anything, it’s that a memorable meal doesn’t have to be complicated. In less than 30 minutes, you can transform humble ingredients into something that feels celebratory—a dish that feeds not just the body, but also the sense of joy we all deserve at the end of a busy day.
What I love most about this recipe is how it bridges nostalgia and practicality. It carries the spirit of a sun-drenched Italian afternoon straight to your weeknight table, without the fuss. It’s proof that cooking can be both an act of care and a moment of ease. Whether you stick to the classic version or make it your own with one of the fun twists, you’re creating more than dinner—you’re creating a moment of warmth and connection.
So the next time you’re staring into the fridge wondering what to make, I hope you remember this skillet. I hope you trust that a few good ingredients, a hot pan, and a little bit of inspiration are all you need to turn an ordinary evening into something special.
Here’s to simple food, made with love, and shared with joy. May your skillet always sizzle with possibility.
Buon appetito!
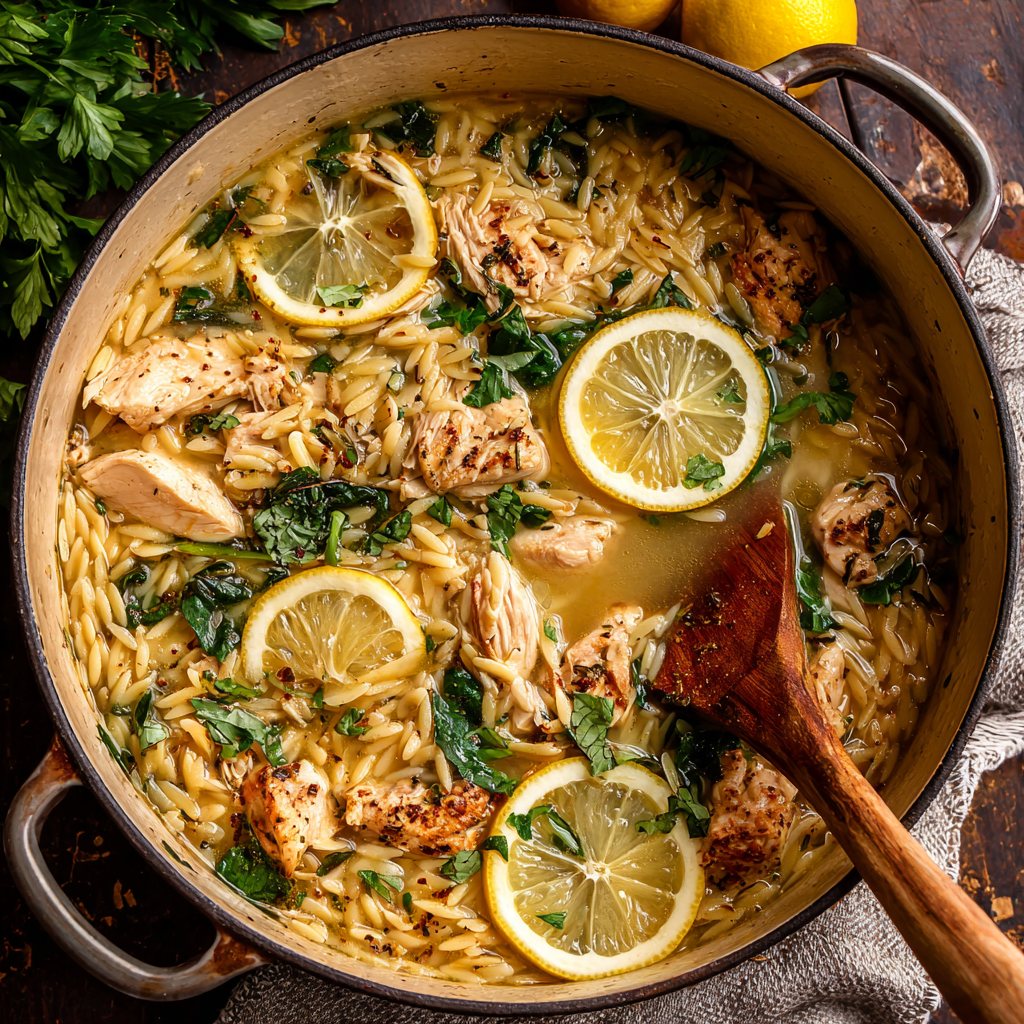
Lemon Chicken Orzo : Light, Brothy, and Full of Coastal Italian Flavor
Sunshine in a Bowl: My One-Pot Lemon Chicken Orzo
Hey there, friend! Come on in, grab an apron, and let me pour you a virtual glass of crisp white wine. Today, we’re not just making dinner; we’re taking a mini-vacation. Close your eyes for a second and imagine this: you’re sitting at a little wrought-iron table, a soft sea breeze carrying the scent of lemon groves and salty air. In front of you is a wide, shallow bowl cradling the most glorious, brothy, sun-kissed chicken and pasta. That’s the feeling I want to bottle up and bring to your kitchen table with my Lemon Chicken Orzo.
This dish is my weeknight hero and my soul-soother all in one. It’s the culinary equivalent of a cozy sweater and your favorite playlist. It’s light enough to feel vibrant and fresh, yet comforting enough to hug you from the inside. The tender chicken, the lemony broth that’s somehow both rich and bright, the little orzo pearls that soak up every drop of flavor—it’s pure magic. And the best part? It all happens in one pot. We’re talking about 30 minutes from stovetop to tabletop, with minimal fuss and maximum flavor payoff. Whether you’re cooking after a long day or prepping a stress-free meal for friends, this recipe is your ticket to a delicious, feel-good moment. Let’s make some sunshine together.
The Meal That Sparked a Love Affair
I have to tell you about the first time I truly fell for this flavor combination. It wasn’t in a fancy restaurant or even in Italy (though I dream of that trip!). It was on a gloriously messy, sandy family vacation when I was a teenager. After a long day of sun and surf, we stumbled into this tiny, family-run café that was basically someone’s porch overlooking the water. The air was thick with the smell of garlic and the sea.
I ordered something the menu simply called “pasta in brodo al limone.” What arrived was a humble, steaming bowl. It wasn’t fancy. But with one spoonful, my tired, sunburnt self was transported. The sharp, clean hit of lemon cut through the richness of the broth. The pasta was impossibly tender. It was restorative. It tasted like care, like simplicity, like home—even though I was miles from mine. I’ve spent years trying to recapture that feeling in my own kitchen, and this Lemon Chicken Orzo is my love letter to that memory. It proves that the most unforgettable meals are often the simplest ones, shared with good company (or happily savored alone with a good book).
Gathering Your Sunshine Ingredients
Here’s everything you’ll need to create this bowl of coastal comfort. Don’t stress about perfection—cooking is about intuition and joy!
- 2 tablespoons olive oil: Our cooking fat and flavor foundation. Use a good extra virgin olive oil if you can; its fruity notes really shine here.
- 2 chicken breasts or thighs, diced: I’m team thigh all the way for this! Thighs stay juicier and add more flavor, but breasts work beautifully for a leaner option. Just don’t overcook them.
- 3 garlic cloves, minced: The aromatic heartbeat of the dish. Please, use fresh garlic! That jarred stuff just won’t give you the same fragrant punch.
- 1 small onion, finely chopped: Yellow or white onion adds a sweet, savory base. A shallot would be a lovely, delicate swap.
- 1 cup orzo pasta: Not rice, not a long pasta—orzo’s little rice-shaped grains are perfect for a brothy dish. It thickens the broth just enough to feel luxurious.
- 4 cups chicken broth: This is your liquid gold. Use the best quality broth you can find or have on hand—it makes all the difference. Low-sodium is best so you can control the salt.
- Juice and zest of 1 lemon: THIS IS NON-NEGOTIABLE. We use both. The zest packs an intense citrus perfume, and the juice gives that bright, tangy kick. Zest the lemon before you juice it—trust me on this.
- 1 teaspoon dried oregano or Italian seasoning: A little herbal earthiness. I adore the floral note of dried oregano with lemon. If you have fresh oregano or thyme, chop up a tablespoon and add it at the end.
- Salt and pepper, to taste: Season in layers! We’ll season the chicken, then the onions, then adjust at the end. It builds flavor beautifully.
- 1 cup baby spinach or chopped parsley (optional): A pop of color and freshness. Spinach wilts dreamily into the hot broth. Parsley adds a vibrant, clean finish.
- Grated parmesan, for serving (optional): A salty, umami-rich finish that makes everything better. A vegetarian hard cheese works too, or a sprinkle of nutritional yeast for a dairy-free kick.
Let’s Get Cooking: Your Step-by-Step Guide
Alright, let’s fire up the stove! Grab your favorite deep skillet or Dutch oven—something with a heavy bottom is ideal for even cooking.
Step 1: Brown That Chicken Beautifully. Heat your olive oil over medium-high heat. Pat your diced chicken dry with a paper towel (this is the secret to a good sear!). Season it generously with salt, pepper, and your dried oregano. Add it to the hot oil in a single layer—don’t crowd the pan! We want golden-brown edges, not steamed chicken. Let it cook undisturbed for a few minutes, then stir until cooked through. Remove it to a plate and let it rest. Chef’s Hack: Don’t skip browning! Those little browned bits (fond) left in the pan are pure flavor gold for the next step.
Step 2: Build Your Flavor Base. In that same glorious pan, you’ll see those tasty bits. Reduce the heat to medium. Add your chopped onion and a pinch of salt. Cook, stirring, until the onion is soft and translucent, about 3-4 minutes. Now add the minced garlic and cook for just 30 seconds to a minute until fragrant—you’ll smell it! Don’t let the garlic burn, or it’ll turn bitter.
Step 3: Toast the Orzo. Add the dry orzo pasta straight to the pan with the onions and garlic. Stir it around for 1-2 minutes. You’ll hear it make a slight clicking sound and maybe take on a touch of color. This quick toasting step gives the orzo a wonderful nutty depth and helps it hold its shape later in the broth.
Step 4: Simmer to Perfection. Pour in all 4 cups of chicken broth. Give everything a good scrape with your spoon to loosen any remaining fond from the bottom of the pan. Bring it to a lively simmer, then reduce the heat to maintain a gentle bubble. Let it cook, stirring occasionally so the orzo doesn’t stick, for 10-12 minutes. The orzo will plump up and become tender, and the broth will thicken slightly into a light, silky sauce.
Step 5: The Grand Finale & The Lemon Rule. Once the orzo is al dente (tender but with a slight bite), return the chicken and any accumulated juices to the pot. This is the moment! Turn off the heat. Stir in your lemon zest and lemon juice, and if you’re using them, the spinach or parsley. The residual heat will wilt the greens perfectly. Chef’s Golden Rule: Always add fresh lemon juice OFF the heat, or it can turn bitter. The bright, sunny flavor stays true this way. Give it one final taste. Does it need more salt? A crack of pepper? A tiny extra squeeze of lemon? Adjust to make it sing for you.
How to Serve It Up in Style
Ladle this sunshine directly into wide, shallow bowls—you want to see all that beautiful broth! Finish each serving with a generous sprinkle of grated Parmesan cheese, which will melt into salty, creamy ribbons. A final grind of black pepper and a tiny drizzle of your best olive oil on top adds a professional touch. Serve it with a simple green salad dressed with lemon vinaigrette and some crusty, warm bread for dunking. Honestly, the sound of people tearing bread to scoop up every last drop of that lemony broth is the best compliment you’ll ever get.
Make It Your Own: Delicious Twists
This recipe is a fantastic canvas! Get creative:
- Mediterranean Veggie Boost: Add a pinch of red pepper flakes with the garlic, and stir in chopped sun-dried tomatoes and a handful of kalamata olives at the end with the spinach.
- Lemon Herb & White Bean: Swap half the chicken for a can of rinsed cannellini beans. Use fresh dill or tarragon instead of oregano.
- Creamy Lemon Orzo: For a richer version, stir in ¼ cup of heavy cream or full-fat coconut milk at the end with the lemon juice.
- Seafood Swap: Replace the chicken with peeled shrimp or scallops. Sauté them quickly first, remove, and add back at the very end just to heat through.
- Keep it Veggie: Use vegetable broth and replace the chicken with sliced mushrooms (sauté them first until golden) or chickpeas.
From My Kitchen to Yours: A Few Parting Thoughts
This recipe has evolved so much since I first scribbled it on a Post-It note. My early versions were… well, let’s just say they were more “lemon water with pasta” than “silky, flavorful broth.” The game-changers? Toasting the orzo and adding the lemon off the heat. I also used to be so precise with measurements, but now I almost always grab a second lemon. I’ll zest it all in, and then juice it to my taste—sometimes it’s a full two lemons if they’re not super juicy! Cooking is about tasting and adjusting. The funniest kitchen fail? I once accidentally used a cup of curry powder instead of a teaspoon of turmeric in a different dish. We ordered pizza. So, please, double-check your spice jars! But with this recipe, it’s hard to go wrong. It’s forgiving, flexible, and always brings a smile.
Your Questions, Answered!
Q: My orzo turned out mushy/gummy. What happened?
A: This usually means it overcooked. Keep an eye on the simmer—it should be gentle, not a rolling boil. Start tasting the orzo at the 9-minute mark. Remember, it will continue to absorb liquid and soften a bit even off the heat. If your broth is absorbed but the orzo isn’t tender, just add a splash more hot broth or water.
Q: Can I make this ahead of time?
A> You can prep the components (chop chicken, veggies) ahead, but I highly recommend serving this fresh. The orzo continues to soak up the broth, so leftovers will be thicker, more like a pasta salad. Still tasty, but not the same brothy bowl. If you must, store it in the fridge and add a splash of broth when reheating.
Q: Is it too sour? My family is wary of very lemony food.
A> You are in control! Start with the juice of half a lemon, let everyone serve themselves, and then offer extra lemon wedges at the table for the lemon-lovers (like me!) to add. The Parmesan cheese also beautifully balances and mellows the acidity.
Q: Can I use a different pasta?
A> You can, but the cooking method will change. Orzo cooks quickly in the broth. For pastas like ditalini or small shells, you may need slightly more liquid and a longer cook time. For long pasta, I’d recommend cooking it separately and adding it to the finished broth and chicken.

Lemon Chicken Orzo : Light, Brothy, and Full of Coastal Italian Flavor
Description
Bright, cozy, and weeknight-easy, this One-Pot Lemon Chicken Orzo is a feel-good dinner that tastes like a little Mediterranean escape. Tender chicken, silky lemony broth, and pearl-like orzo come together in one pot—ready in about 30 minutes with minimal cleanup.
Ingredients
-
2 tbsp olive oil
-
2 chicken breasts or thighs, diced
-
Salt & black pepper, to taste
-
1 small onion, finely chopped
-
3 garlic cloves, minced
-
1 cup orzo pasta
-
4 cups chicken broth (low-sodium preferred)
-
Zest and juice of 1 lemon
-
1 tsp dried oregano or Italian seasoning
-
1 cup baby spinach or chopped parsley (optional)
-
Grated Parmesan, for serving (optional)
Instructions
-
Brown the Chicken
Heat olive oil in a deep skillet or Dutch oven over medium-high heat. Season chicken with salt, pepper, and oregano. Add to the pan and cook until golden and cooked through. Remove to a plate. -
Build the Base
Reduce heat to medium. Add onion with a pinch of salt and cook until soft, 3–4 minutes. Stir in garlic and cook 30 seconds until fragrant. -
Toast the Orzo
Add dry orzo to the pan and stir for 1–2 minutes to lightly toast. -
Simmer
Pour in chicken broth, scraping up any browned bits. Bring to a simmer and cook, stirring occasionally, for 10–12 minutes until orzo is tender and broth slightly thickened. -
Finish with Lemon
Return chicken to the pot. Remove from heat and stir in lemon zest, lemon juice, and spinach or parsley (if using). Taste and adjust seasoning. -
Serve
Ladle into bowls and top with Parmesan if desired.
Notes
-
Use thighs for juicier chicken; breasts work well for a leaner option.
-
Add lemon off the heat to keep the flavor bright (not bitter).
-
If it thickens too much, stir in a splash of warm broth before serving.
-
Leftovers will thicken—reheat with extra broth for a soupier texture.
Nutritional Info (A Rough Estimate)
This is a general estimate per serving (based on 4 servings, using chicken breasts and without optional cheese):
Calories: ~370 | Protein: 28g | Carbohydrates: 30g | Fat: 15g | Fiber: 2g
Final Thoughts: A Bowl Full of Brightness
This One-Pot Lemon Chicken Orzo is more than a recipe—it’s a reminder that good food doesn’t have to be complicated to feel special. In just one pot and about 30 minutes, you can create something that tastes like care, like warmth, like a little escape from the everyday. It’s the kind of meal that feels both nourishing and celebratory, whether you’re serving a crowd or savoring a quiet dinner for one.
What I love most about this dish is its beautiful balance. The rich, savory broth, the tender chicken, the comforting orzo—all lifted and brightened by that burst of lemon. It’s a masterclass in how a few simple ingredients, treated with intention, can create a harmony of flavors that feels greater than the sum of its parts.
So the next time you need a reset, a dose of comfort, or a quick win in the kitchen, remember this sunshine in a bowl. Keep it as your classic, or play with the endless riffs—it’s a recipe that welcomes your own touch. No matter how you make it, I hope it brings as much light and joy to your table as it has to mine.




