
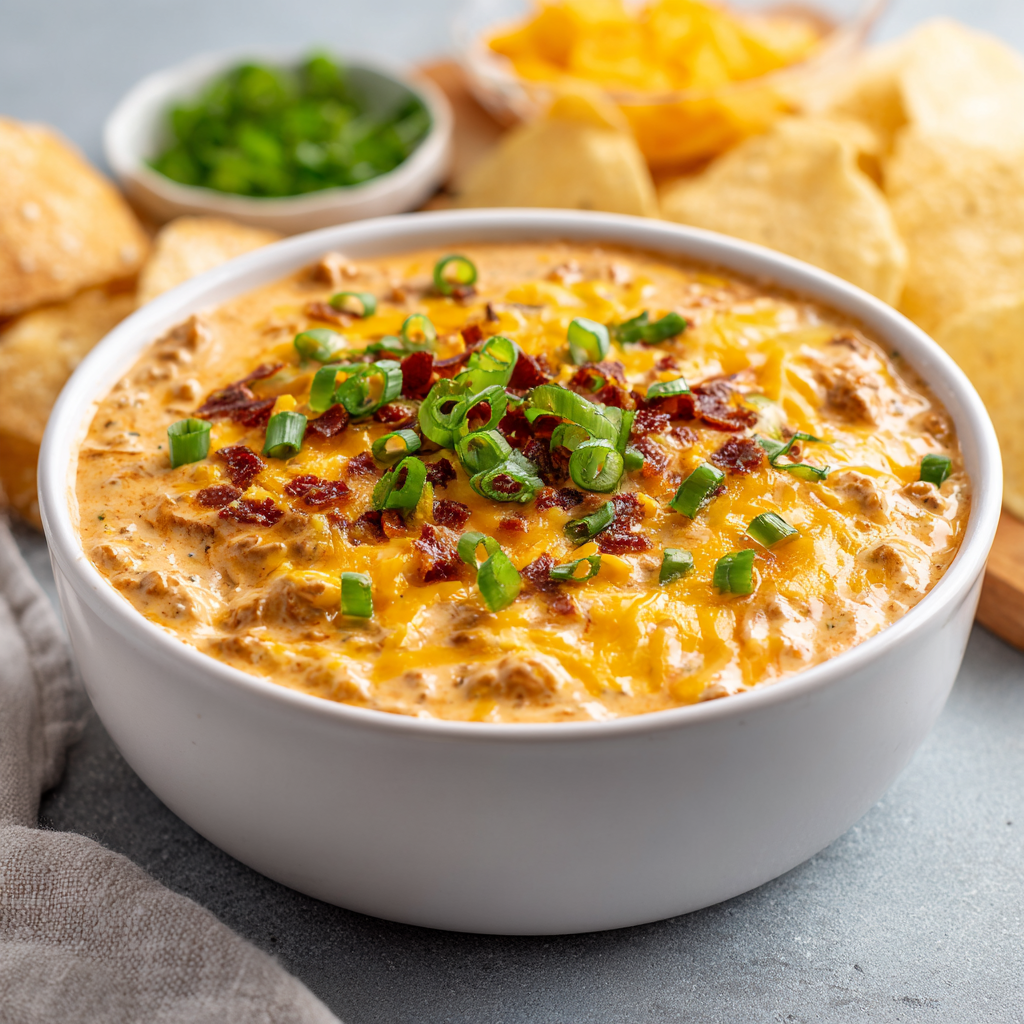
Quick and Easy Boat Dip : Creamy, Zesty, and Party-Ready
Quick and Easy Boat Dip: Your New Secret Weapon for Fun
Hey there, friend! Come on in, grab an apron (don’t worry, mine’s already got a few smudges), and let’s talk about one of life’s greatest pleasures: a truly epic, crowd-devoured dip. If your idea of a perfect snack involves creamy, zesty, and absolutely zero fuss, then you and I are about to become best kitchen confidantes. I’m talking about my legendary Quick and Easy Boat Dip. The name says it all—it’s the hero of lake days, the MVP of last-minute game nights, and the life of the party when friends show up unannounced (the best kind of friends, in my opinion).
What I love most about this recipe is its beautiful, beautiful simplicity. We’re talking 5 minutes, one bowl, and ingredients you probably already have doing a happy little dance in your fridge and pantry. No cooking, no complicated techniques, just a quick stir that results in pure magic. It’s creamy from the sour cream, tangy and gently spicy from the Rotel tomatoes, perfectly cheesy, and seasoned with that familiar, cozy taco flavor we all adore. This isn’t just a dip; it’s a conversation starter, a chip’s best friend, and your ticket to being deemed the “host with the most” without breaking a sweat. So, let’s make a mess, make some memories, and make a dip that’s guaranteed to disappear faster than you can say, “Wait, did you try that boat dip?”
From the Dock to the Dinner Party: A Dip’s Journey
This dip’s origin story is as casual and fun as the recipe itself. Picture this: a few summers back, we were packing for a long, sunny day on my uncle’s boat. The rule was everyone brings one thing. I, of course, volunteered for snack duty, but I’d spent the morning baking for the blog and had precisely zero time left. I did a frantic fridge forage and pulled out half a tub of sour cream, a bag of cheese, and a can of Rotel that had been hanging around. In a total “why not?” moment, I dumped them in a bowl, shook some taco seasoning over the top, gave it a stir, and threw it in the cooler.
Fast forward a few hours, anchored in a calm cove. I pulled out this hastily-mixed concoction with a bag of chips, slightly embarrassed next to the beautiful sandwiches and fruit skewers. But you know what happened? That container was scraped CLEAN. People were using chip fragments like little spoons to get every last bit. “What *is* this?!” “You have to give me the recipe!” The accidental dip was the star. That’s when I knew it had a permanent place in my repertoire. It’s proof that the best food isn’t about perfection; it’s about flavor, fun, and feeding the people you’re with, whether you’re on a boat or just dreaming of one.
Gathering Your Flavor Crew: Ingredients & Chef Insights
Here’s the dream team that makes this dip so irresistible. Each one plays a crucial role, and I’ve got some fun swaps and tips to make it your own!
- 1 cup sour cream: This is our creamy, tangy base. It creates the luxurious texture we’re after. Chef’s Insight: For a protein-packed, lighter twist, swap in full-fat plain Greek yogurt. It’s just as thick and tangy!
- 1 can (10 oz) Rotel Original Diced Tomatoes & Green Chilies, drained: The flavor MVP! It brings juicy tomato bits, a touch of vinegar tang, and a gentle, accessible heat. Chef’s Tip: DRAIN IT WELL. I give it a good press in the can’s lid or a small sieve. Less liquid means a thicker, more scoopable dip.
- 1 cup shredded sharp cheddar cheese: Salty, cheesy goodness that brings body and that classic melty flavor (even though we don’t melt it!). Chef’s Insight: Pre-shredded works in a pinch, but grating a block of cheddar yourself makes it melt into the dip more cohesively and tastes fresher.
- 2 tablespoons taco seasoning: Our flavor booster! It’s a instant blend of chili powder, cumin, garlic, and more. Chef’s Tip: Use your favorite store-bought packet or 2 tbsp of a homemade blend. Taste as you go—you can always add more!
- 2 tablespoons chopped green onions (plus more for garnish): The fresh finish! They add a necessary pop of color and a mild, oniony crunch that cuts the richness perfectly.
Let’s Make It! Your Foolproof, 5-Minute Roadmap
See? I told you this was easy. Let’s walk through it together. I’ll be right here with my spatula, sharing all my little kitchen hacks.
- The Flavor Foundation: In a medium mixing bowl, plop in your sour cream. Sprinkle the taco seasoning over the top. Now, take a spatula or spoon and stir, stir, stir until it’s completely smooth and that orangey seasoning is evenly distributed. No white streaks! This first step ensures every single bite is perfectly seasoned. Chef’s Hack: If you have time, let this mixture sit for 5 minutes before adding anything else. It lets the dried spices in the seasoning “bloom” a little in the fat of the sour cream, deepening the flavor.
- Add the Fun Mix-Ins: Time for texture! Grab your well-drained can of Rotel and gently fold it into the seasoned sour cream. “Folding” just means using a gentler motion to combine without crushing all the tomato pieces. Next, add your glorious pile of shredded cheese and the chopped green onions. Chef’s Hack: Reserve a small pinch of cheese and green onions for a pretty garnish on top later!
- Bring It All Together: Now, mix everything until it’s happily combined. You want little bursts of red tomato and green onion in every creamy, cheesy scoop. Don’t over-mix into a homogenous pink paste—a little variation is beautiful!
- The Patience Payoff (Optional, but Recommended): Okay, the hard part. If you can possibly wait, cover the bowl with plastic wrap and pop it in the fridge for at least 30 minutes. I know, I know! But this chill time lets the flavors get to know each other and mingle beautifully. The dip also firms up just a bit, making it the ideal scooping consistency. Chef’s Tip: If you’re truly in a “dip emergency,” it’s still delicious right away. But the wait is worth it!
- The Grand Finale: When you’re ready to serve, give it one last stir. Transfer it to a cute serving bowl, and sprinkle the top with those reserved green onions and a little extra cheese. It makes it look like you fussed (we’ll keep our secret).
Setting the Scene: How to Serve Your Masterpiece
Presentation is part of the fun! I love using a wide, shallow bowl so everyone can dive in easily. Place it right in the center of a big platter and surround it with an array of dippers. Sturdy, salty tortilla chips are the classic and perfect vehicle. But don’t stop there! Add some buttery crackers, crisp bell pepper strips, cucumber rounds, or thick slices of toasted baguette for variety. For a lake day or picnic, I simply put the whole storage container in the cooler with a bag of chips tucked alongside—easy, transportable, and always a hit.
Make It Your Own: Delicious Twists & Swaps
Once you’ve mastered the base, the world is your dip bowl! Here are a few of my favorite riffs:
- Fiesta Ranch Style: Swap the taco seasoning for a packet of dry ranch seasoning. It’s a cooler, herby twist that’s equally addictive.
- Spicy Southwest: Use Hot Rotel instead of Original, add a diced jalapeño (seeds removed if you’re wary of heat), and swap the cheddar for pepper jack cheese.
- Loaded “Baked Potato”: Add 1/2 cup of real crumbled bacon and swap 1/4 cup of the cheddar for grated parmesan. A drizzle of chive sour cream on top? Divine.
- Light & Lean: Use full-fat Greek yogurt, reduced-fat cheese, and load up the platter with every veggie you can find.
- Beefy Taco Dip: For a heartier version, brown 1/2 pound of ground beef with a pinch of salt, drain it well, let it cool, and fold it in with the other ingredients.
Olivia’s Notebook: Extra Bites of Wisdom
This recipe has evolved from that frantic boat day into my most-requested party staple. I’ve learned a few things along the way! First, the dip actually gets better on day two, so making it ahead is a fantastic strategy. Just hold the garnish until serving. Second, I once accidentally used a can of *undrained* Rotel and learned the hard way that a watery dip is a sad dip. Drain, drain, drain! And finally, don’t be afraid to double or even triple the batch for a big crowd. It scales up perfectly, and I’ve never, ever had leftovers. The biggest compliment is an empty bowl and a chorus of “Is there any more?”
Your Questions, Answered: Dip Dilemmas Solved
Q: My dip turned out a bit watery. What happened?
A: The most common culprit is not draining the Rotel well enough. Next time, really press the liquid out in a sieve or with the lid of the can. Also, make sure your sour cream is full-fat if possible; low-fat versions can sometimes release more moisture.
Q: Can I make this ahead of time?
A> Absolutely! In fact, I encourage it. Make it up to 24 hours in advance, cover tightly, and store it in the fridge. The flavors will meld and deepen beautifully. Just give it a good stir and add your fresh garnish right before serving.
Q: What can I use if I don’t have Rotel?
A> No problem! You can use a 10-oz can of plain diced tomatoes (well-drained) mixed with a 4-oz can of diced green chilies. You might want to add a tiny pinch of salt and a squeeze of lime juice to brighten it up.
Q: Help! I only have mild cheddar. How can I boost the flavor?
A> Great question. First, use sharp cheddar next time for a bigger punch. For now, try adding an extra tablespoon of taco seasoning, a pinch of garlic powder, or even a dash of smoked paprika to amp up the flavor profile.
Quick and Easy Boat Dip : Creamy, Zesty, and Party-Ready
Description
This 5-minute, no-cook dip is creamy, tangy, cheesy, and just a little zesty—the ultimate crowd-pleaser for game nights, lake days, or any snack attack.
Ingredients
-
1 cup sour cream (or full-fat Greek yogurt for a lighter twist)
-
1 can (10 oz) Rotel Original Diced Tomatoes & Green Chilies, drained
-
1 cup shredded sharp cheddar cheese
-
2 tbsp taco seasoning (store-bought or homemade)
-
2 tbsp chopped green onions, plus extra for garnish
Optional Twists:
-
Fiesta Ranch: Replace taco seasoning with ranch seasoning
-
Spicy Southwest: Use Hot Rotel, add 1 diced jalapeño, swap cheddar for pepper jack
-
Loaded Baked Potato: Fold in ½ cup crumbled bacon, swap ¼ cup cheddar for parmesan, top with chive sour cream
-
Light & Lean: Use Greek yogurt + reduced-fat cheese + extra veggies
-
Beefy Taco Dip: Fold in ½ lb cooked ground beef
Instructions
-
Mix the Base: In a medium bowl, combine sour cream and taco seasoning. Stir until smooth and evenly blended. Optional: let sit 5 minutes to bloom the spices.
-
Add Mix-Ins: Gently fold in drained Rotel, shredded cheddar, and chopped green onions. Reserve a pinch of cheese and onions for garnish.
-
Chill (Optional but Recommended): Cover and refrigerate at least 30 minutes for flavors to meld.
-
Serve: Stir once more, transfer to a serving bowl, and top with reserved cheese and green onions. Surround with tortilla chips, crackers, or veggies for dipping.
Notes
-
Watery Dip? Drain Rotel well, and use full-fat sour cream.
-
Make Ahead: Mix up to 24 hours in advance; garnish right before serving.
-
No Rotel? Use diced tomatoes + diced green chilies; add a pinch of salt and a squeeze of lime.
-
Mild Cheddar? Boost flavor with extra taco seasoning, garlic powder, or smoked paprika.
Quick Nutritional Snapshot
Please note: This is an approximate estimate per serving (based on 8 servings), calculated using full-fat sour cream and cheddar. Values will change with substitutions.
- Calories: ~120
- Protein: 4g
- Carbohydrates: 4g
- Fat: 9g
- Fiber: 1g
- Sodium: 310mg
Final Thoughts
Let’s be honest: the best recipes aren’t about complexity—they’re about connection. This Quick and Easy Boat Dip proves that the most memorable moments often come from the simplest creations. It’s a humble bowl of joy that turns strangers into friends, quiet gatherings into lively parties, and any ordinary day into a little celebration.
Whether you’re on a sun-drenched boat, hosting a last-minute game night, or simply treating yourself to a delicious snack, this dip is your trusty sidekick. It asks for so little—just five minutes and a willingness to share—and gives back so much: laughter, compliments, and the satisfied silence of people happily dipping away.
So here’s to the unplanned moments, the fridge-forage victories, and the magic that happens when good food meets good company. May your chips be sturdy, your dip bowl always within reach, and your gatherings filled with the kind of easy joy this recipe represents.
Now, grab that bowl and start stirring. Your secret weapon for fun is ready.

Butter Swim Biscuits : Ultra Buttery & Fluffy Southern-Style Treats
Butter Swim Biscuits: Your New Favorite Recipe for Unspeakably Good, Buttery Comfort
Hey there, friend! Come on in, pull up a stool, and let’s talk about one of life’s simplest, most profound joys: a warm, freshly baked biscuit. Not just any biscuit, though. I’m talking about the kind of biscuit that makes you close your eyes and sigh with the first buttery, flaky bite. The kind that requires zero fancy equipment, zero rolling-pin acrobatics, and absolutely zero stress. I’m so excited to share with you the magic of Butter Swim Biscuits.
If you’ve never heard of them, the name says it all. These glorious, Southern-style biscuits quite literally take a swim in a pool of melted butter before they hit the oven’s heat. It sounds decadent (and, okay, it totally is), but it’s also a stroke of sheer genius. This method gifts you with the most incredible contrast of textures: a shatteringly crisp, golden-brown crust that gives way to a cloud-soft, fluffy, and richly flavored interior. Every single square is infused with that unmistakable, heavenly butteriness.
I promise you, this is the biscuit recipe that will change your game. It’s for the nights you’re whipping up a pot of chili, the mornings you’re hosting a lazy brunch, and every single time you need a warm hug from the oven. So, tie on that apron, and let’s make something unforgettable together. Trust me, your kitchen is about to smell like a dream.
The Biscuit That Started It All: A Memory From My Grandma’s Table
My love affair with biscuits didn’t start in a fancy cooking class. It began at my Grandma Eleanor’s linoleum-topped kitchen table, dusted with a perpetual sprinkle of flour. She was a woman of few words but immense culinary warmth, and her biscuits were legendary. They were tall, flaky, and required a patience I, as a fidgety kid, just didn’t have. I’d watch, mesmerized, as she worked the cold butter into the flour with her swift, knowing hands.
Years later, when I stumbled upon the concept of “butter swim” biscuits, it felt like a revelation. It was the antithesis of Grandma’s meticulous method—wildly simple, almost reckless in its butter commitment. I was skeptical. Could something so easy really deliver? I tried it one rainy Sunday, and the moment I pulled that pan from the oven—seeing those biscuits puffed high, golden, and swimming in a bubbling, fragrant butter moat—I was transported right back to that linoleum table. The smell was identical: toasty, buttery, loving. While the technique was different, the soul was the same. It was a hug in food form. This recipe became my bridge between honoring the past and embracing the joyful simplicity of modern home cooking. It proved that incredible flavor doesn’t have to be complicated; sometimes, it just needs to take a good, long swim in butter.
Gathering Your Cast of Characters (It’s a Short & Sweet List!)
Part of the beauty of this recipe is its short, pantry-friendly ingredient list. Each one plays a crucial role in creating biscuit magic. Here’s what you’ll need:
- 2 ½ cups all-purpose flour – The foundation. I use regular, unbleached all-purpose flour for the perfect balance of structure and tenderness. For a slightly more robust flavor, you can swap in ½ cup of whole wheat pastry flour, but stick mostly to AP for that classic fluffy texture.
- 1 tablespoon baking powder – This is our primary leavening agent, the little miracle worker that makes our biscuits rise sky-high without any yeast. Make sure yours is fresh! If it’s been in the pantry for over a year, it may have lost its oomph.
- 1 tablespoon granulated sugar – Just a touch! It’s not for sweetness, really, but to help with browning and to balance the tang of the buttermilk. It creates that perfect golden top.
- 1 teaspoon salt – Non-negotiable. Salt is the flavor enhancer that makes the butter and flour sing. I use fine sea salt. If you only have table salt, you might use a scant teaspoon.
- 1 ¾ cups buttermilk – The secret to tenderness and tang. The acid in buttermilk reacts with the baking powder for maximum lift and gives that iconic flavor. Chef’s Hack: For the best rise, use it cold straight from the fridge. No buttermilk? No panic! Make a quick “soured milk” by adding 1 tablespoon of white vinegar or lemon juice to a liquid measuring cup, then filling it to the 1 ¾ cup line with regular milk. Let it sit for 5 minutes until it curdles slightly.
- ½ cup (1 stick) unsalted butter, melted – The star of the show, the swimming pool itself! I prefer unsalted so I can control the salt level. Melt it gently—you don’t want it boiling or browning. This butter is going to create that incredible crispy, flavorful crust and rich interior.
Let’s Make Some Magic: Step-by-Step to Biscuit Heaven
Ready? This is where the fun happens. Preheat your oven to a hot 450°F (232°C). That high heat is key for the initial explosive rise and beautiful color.
- Mix the Dry Team. In a large mixing bowl, whisk together the flour, baking powder, sugar, and salt. I mean really whisk it! You want those leaveners and salt completely distributed throughout the flour. This ensures every bite is even and perfect. No one wants a pocket of baking powder, trust me.
- Bring in the Buttermilk. Make a well in the center of your dry ingredients and pour in that cold buttermilk. Now, with a sturdy wooden spoon or a rubber spatula, gently stir until just combined. I’ll say it again: JUST COMBINED. The batter will be wet, lumpy, and shaggy—that’s exactly what you want. Over-mixing is the enemy of tender biscuits; it develops the gluten and makes them tough. A few dry streaks are totally fine. Walk away from the spoon!
- Prepare the Butter Pool. Take your 8×8-inch baking dish (glass or metal both work great) and pour in the melted butter. Swirl it around so it coats the bottom evenly. See that pool? That’s your ticket to flavor town.
- The Big Plunge. Here’s the fun part. Spoon the thick, shaggy dough right on top of the melted butter. I do it in 9 roughly equal dollops to make spreading easier. Then, using the back of your spoon or a small offset spatula, gently nudge and spread the dough to the edges of the pan. Don’t press down hard or compact it; you’re just coaxing it into an even layer. It’s okay if some butter pools up around the edges—that’s the whole point!
- Score the Dough. Take a sharp knife or a bench scraper and score the dough into 9 squares. You’re not cutting all the way through to the bottom of the pan—just making guide marks about halfway down. This does two things: it gives the biscuits a “break here” line for serving, and it allows heat to penetrate more evenly during baking for a more uniform rise.
- Bake to Golden Perfection. Carefully slide the pan into your preheated oven. Now, resist the urge to open the door! Let the magic happen for 20-25 minutes. You’ll know they’re done when the tops are a deep, gorgeous golden brown, and the edges are crispy and pulling away from the sides of the pan. Your kitchen will smell absolutely incredible.
- The (Brief) Patience Test. When you pull them out, you’ll see that beautiful butter still bubbling around the biscuits. Let the pan rest on a wire rack for 5-10 minutes. This allows the biscuits to reabsorb some of that surface butter, making them impossibly moist, and lets them set just enough so you can lift them out cleanly.
How to Serve These Buttery Beauties
Getting these from pan to plate is a joyful, delicious event. Use a spatula to lift out each square, letting any excess butter drip back into the pan. I love serving them in a warm basket lined with a tea towel. They are the ultimate sidekick to a big bowl of soup, stew, or chili, where they’re perfect for sopping up every last drop. For brunch, they’re divine split and topped with sausage gravy, jam, or honey. Honestly, one of my favorite ways is all on its own, still warm, with just a tiny extra smear of butter. Pure bliss.
Make It Your Own: Delicious Twists & Swaps
Once you’ve mastered the classic, try playing with flavors! Here are a few of my favorite riffs:
- Herb & Garlic: Whisk 1 teaspoon of garlic powder and 2 tablespoons of finely chopped fresh herbs (chives, rosemary, or thyme) into the dry ingredients.
- Cheesy Pull-Apart: Fold 1 cup of shredded sharp cheddar cheese into the dough with the buttermilk. Sprinkle another ¼ cup on top before baking for a cheesy crust.
- Everything Bagel: After spooning the dough into the butter, sprinkle the top generously with everything bagel seasoning before scoring and baking.
- Sweet Cinnamon Swirl: Mix ¼ cup sugar with 1 tablespoon cinnamon. After spreading the dough in the pan, sprinkle this mixture evenly over the top and swirl it lightly with a knife before scoring.
- Dairy-Free: Use a plant-based milk + vinegar “buttermilk” and a high-quality vegan butter stick. The texture will be slightly different but still delicious!
Olivia’s Kitchen Notes & Stories
This recipe has become a staple in my home, and it’s evolved in the funniest ways. The first time I made it, I was so nervous about the amount of butter that I actually *reduced* it. Big mistake. The biscuits were… fine. They were *cute*. But they weren’t the transcendent, crispy-edged wonders they were meant to be. I learned my lesson: you must commit to the swim! Trust the process.
I also have a favorite kitchen fail story. Once, I was chatting away with a friend while making these and accidentally used baking soda instead of baking powder. The result was biscuits that tasted… metallic and weirdly flat. We still ate them (because butter), but it was a powerful lesson in paying attention to your labels! Now, I always do the “sniff test” – baking powder is neutral, baking soda has a distinct smell. Little checks make a big difference!
Your Questions, Answered: FAQ & Troubleshooting
Q: My biscuits are dense and didn’t rise much. What happened?
A: The most common culprits are old baking powder (it loses potency over time) or over-mixing the dough. Remember, mix just until the flour disappears! Also, ensure your oven is fully preheated. That initial blast of heat is crucial for the rise.
Q: Can I make the dough ahead of time?
A: For the best results, I recommend mixing and baking immediately. The reaction between the cold buttermilk and baking powder starts right away. If you let the batter sit, you’ll get less rise. However, you can mix the dry ingredients the night before to save a step in the morning!
Q: The bottom seems overly greasy. Did I do something wrong?
A> Not necessarily! Some butter will always remain in the pan—that’s normal. The 5-10 minute rest after baking is vital for the biscuits to absorb some of that surface butter. If it still seems excessive, you can gently lift each biscuit and place it on a piece of paper towel for a moment before serving.
Q: Can I use a different size pan?
A: An 8×8 is ideal. A 9-inch round cake pan will work, but the biscuits will be slightly thinner. A 9×13 would make them too thin and they’d bake too quickly. Stick to 8×8 for the perfect thick, fluffy square.

Butter Swim Biscuits : Ultra Buttery & Fluffy Southern-Style Treats
Description
These biscuits are pure comfort: golden, flaky, buttery, and ridiculously easy. The trick? They literally swim in melted butter before baking, creating a crisp exterior and a cloud-soft, tender interior. Perfect with soups, chili, brunch, or just a slab of butter on top.
Ingredients
-
2 ½ cups all-purpose flour (or 2 cups AP + ½ cup whole wheat pastry flour)
-
1 tbsp baking powder (fresh!)
-
1 tbsp granulated sugar
-
1 tsp salt
-
1 ¾ cups cold buttermilk (or milk + 1 tbsp vinegar/lemon juice)
-
½ cup (1 stick) unsalted butter, melted
Optional Twists:
-
Herbs & Garlic: 1 tsp garlic powder + 2 tbsp fresh chopped herbs
-
Cheesy Pull-Apart: Fold in 1 cup shredded cheddar + sprinkle ¼ cup on top
-
Everything Bagel: Sprinkle seasoning on top before scoring
-
Sweet Cinnamon Swirl: ¼ cup sugar + 1 tbsp cinnamon, lightly swirled on top
-
Dairy-Free: Plant milk + vinegar “buttermilk” and vegan butter
Instructions
-
Preheat Oven: 450°F (232°C). Use an 8×8-inch pan.
-
Mix Dry Ingredients: Whisk flour, baking powder, sugar, and salt until evenly combined.
-
Add Buttermilk: Pour cold buttermilk into the center and stir gently just until combined. The batter should be wet and shaggy—some streaks of flour are fine.
-
Prepare Butter Pool: Pour melted butter into the pan, swirling to coat evenly.
-
Spoon & Spread: Drop 9 dollops of dough into the butter. Using a spoon or spatula, gently spread to the pan edges. Some butter pooling at the edges is perfect!
-
Score the Dough: Lightly mark the dough into 9 squares without cutting all the way through.
-
Bake: 20–25 minutes, until tops are deep golden brown and edges pull slightly from the pan.
-
Rest: Let biscuits sit 5–10 minutes to reabsorb butter and firm up.
Notes
-
Dense biscuits: Check baking powder freshness, don’t over-mix, ensure oven is preheated.
-
Bottom too greasy: Rest for 5–10 minutes; excess butter is normal.
-
Make-ahead: Mix dry ingredients the night before, add buttermilk and bake immediately for best rise.
-
Pan size: 8×8 is ideal; smaller = thicker, larger = thinner.
Nutritional Information (Per Biscuit)
This is a treat, through and through! Approximate values per biscuit (based on 9 biscuits):
Calories: 260 | Fat: 16g | Saturated Fat: 10g | Carbohydrates: 26g | Protein: 4g | Sodium: 430mg | Sugar: 2g
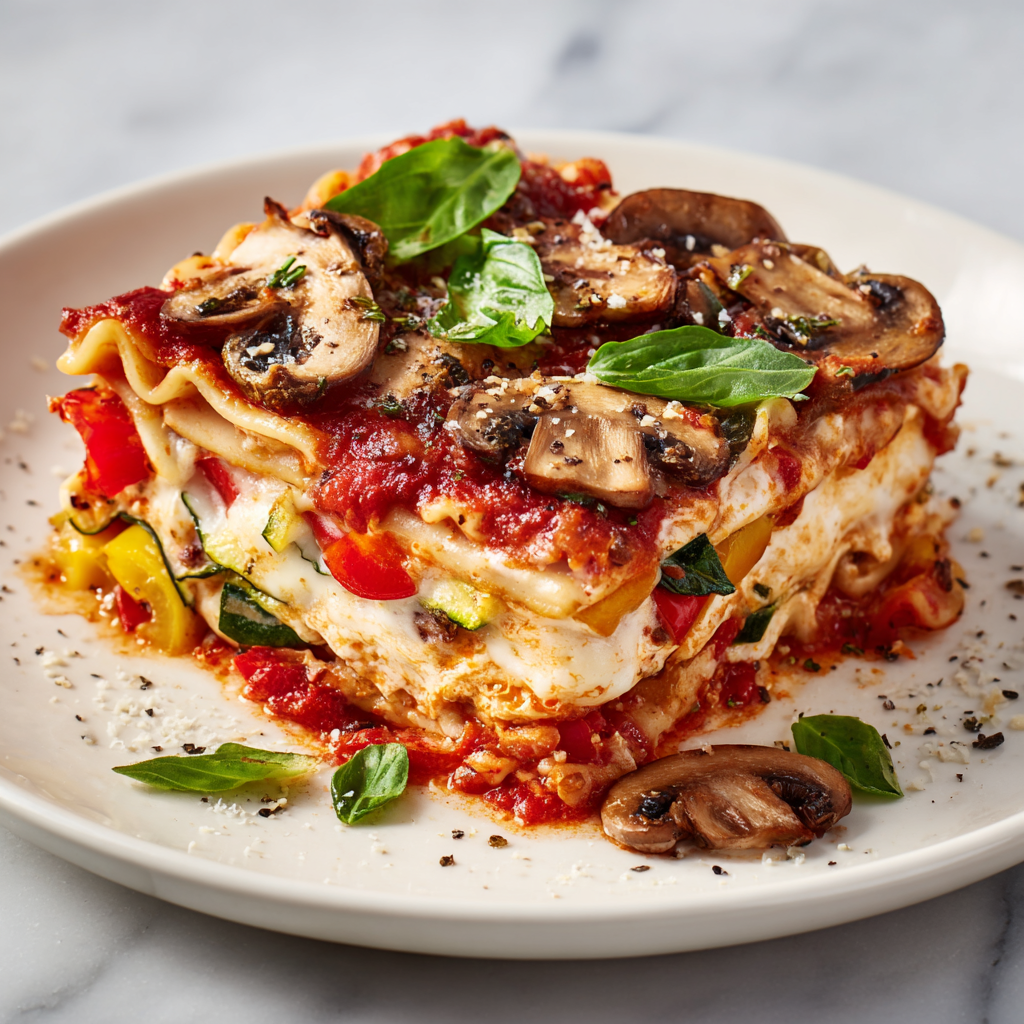
Vegetarian Lasagna with Layers of Flavor : A Meatless Classic
The Coziest Slice of Comfort: Your New Go-To Vegetarian Lasagna
Hey there, friend! Come on in, pull up a stool, and let’s talk about one of life’s greatest edible hugs: a truly spectacular vegetarian lasagna. I’m Olivia, and if there’s one thing I know for sure, it’s that a bubbling, golden-topped pan of lasagna has this magical power to gather people, soothe souls, and turn any ordinary Wednesday into a tiny celebration. You know the scene – the incredible aroma of tomatoes and herbs wafting from the oven, the promise of oozy, stretchy cheese, and that first perfect square you slide onto a plate, layers holding together just so.
Now, I hear you. “Lasagna? That’s a project.” But trust me, this isn’t about culinary gymnastics. This is about layering love, quite literally. We’re ditching the meat but doubling down on deep, satisfying flavor with a garden’s worth of vibrant veggies, creamy ricotta, and a rich, garlicky marinara. This vegetarian lasagna recipe is my love letter to cozy cooking – it’s nourishing, impressively delicious, and proof that meatless meals can be the undisputed star of the dinner table. Whether you’re feeding a hungry family, prepping meals for the week, or needing a show-stopping dish to bring to a potluck, this layered masterpiece has got your back. So, tie on that apron (messy is totally welcome here), and let’s build something beautiful together.
More Than Layers: A Pan Full of Memories
This recipe always takes me right back to my Nonna’s warm, always-slightly-floury kitchen. She was a lasagna purist – her meaty, hours-simmered ragù version was legendary. When I first told her I was exploring vegetarian cooking, she patted my hand and said, “Cara, if there’s no meat, what’s the point?” Talk about a challenge! I spent months trying to create a version that would even get a nod of approval from her. The breakthrough came one summer when my garden was overflowing with zucchini and basil. I loaded a lasagna with every fresh vegetable I had, focusing on texture and savory depth. When Nonna took her first bite, she was quiet for a moment (agonizing for me!). Then she smiled, that knowing twinkle in her eye. “Okay,” she said. “This… this has a point.” It wasn’t her lasagna, but it had become unmistakably mine – a dish that celebrated abundance, seasonality, and the simple joy of sharing a full, flavorful plate. Now, every time I layer the noodles and cheese, I think of that garden bounty and her hard-won smile.
Gathering Your Flavor Builders
Here’s where the magic starts! These ingredients are all about building layers of texture and taste. Don’t stress about exact measurements – cooking is about feeling, too!
- 9 lasagna noodles (regular or oven-ready): The foundation! I often use regular noodles and boil them just shy of al dente (they’ll finish cooking in the oven). Chef’s Insight: If you’re using oven-ready, just make sure your sauce layers are a little saucier to hydrate them.
- 2 cups marinara sauce: Your flavor backbone. Use a good-quality jarred sauce to save time, or your favorite homemade recipe. Substitution Tip: A simple can of crushed San Marzano tomatoes seasoned with salt, garlic, and a pinch of red pepper flakes works beautifully too!
- 1 tbsp olive oil: For sautéing our veggie dream team.
- 1 zucchini, sliced thin: Adds a lovely, mild sweetness and structure. Slice it on a slight angle for pretty, elongated pieces.
- 1 cup mushrooms, sliced: Our secret weapon for that “meaty,” umami depth. Cremini or baby bellas are perfect here.
- 1 red bell pepper, chopped: Brings a pop of color and a subtle, sweet smokiness.
- 2 cups fresh spinach: It wilts down to almost nothing, sneaking in gorgeous color and nutrients. Chef’s Insight: Roughly chop it after wilting for easier layering!
- 1½ cups ricotta cheese: The creamy, dreamy layer. Look for whole-milk ricotta for the best flavor and texture.
- 1½ cups shredded mozzarella: For that iconic, stretchy, golden melt. I like to shred a block myself – it melts far better than pre-shredded (which has anti-caking agents).
- ½ cup grated parmesan: The salty, nutty flavor booster. Freshly grated Parmigiano-Reggiano is worth every penny.
- 1 egg: The binder for our ricotta layer, helping it stay firm and sliceable.
- 2 cloves garlic, minced: Because… well, garlic. Is anything truly cozy without it?
- ½ tsp dried oregano: That classic Italian herb flavor. Rubbing it between your palms before adding wakes up the oils!
- Salt & pepper to taste: Your most important tools. Season each layer as you build.
- Fresh basil (optional, for garnish): The fresh, aromatic finish that makes it look and taste like a restaurant dish.
Let’s Build Your Masterpiece: Step-by-Step
Step 1: Preheat & Prep. Fire up your oven to 375°F (190°C). This is our target for cheesy, bubbly perfection. Grab your favorite 9×13 inch baking dish – no need to grease it, the sauce will handle that.
Step 2: Sauté the Veggie Symphony. In a large skillet, heat the olive oil over medium heat. Add the garlic and let it sizzle for just 30 seconds until fragrant – don’t let it brown! Toss in the zucchini, mushrooms, and bell pepper. We’re not just softening them; we’re concentrating their flavors. Sauté for 7-8 minutes until they’re tender and any liquid from the mushrooms has evaporated. Chef’s Hack: This step is KEY to avoiding a watery lasagna! Now, add the massive pile of spinach and a pinch of salt. It will wilt down dramatically in about a minute. Stir in the oregano, give it one last taste for seasoning, then set this colorful mix aside.
Step 3: Create the Creamy Ricotta Heart. In a medium bowl, combine the ricotta, egg, half of the parmesan (save the rest for the top!), a good pinch of salt, and a few cracks of black pepper. Mix it until it’s smooth and homogenous. This creamy, cheesy mixture is going to be our luxurious separator between the noodles and veggies.
Step 4: The Joyful Layering Process. This is the fun, therapeutic part! Spread about ½ cup of marinara sauce thinly over the bottom of your baking dish. This prevents sticking and starts the flavor party. Place 3 noodles side-by-side to create your first layer. Now, dollop and spread half of the ricotta mixture over the noodles. Follow with half of your sautéed veggie mix, then sprinkle over a handful of mozzarella. That’s one complete layer! Repeat: sauce, noodles, the remaining ricotta, the remaining veggies, more mozzarella. For your final layer, top with the last 3 noodles, spread the remaining sauce evenly over top (make sure the noodle edges are covered so they don’t dry out!), and finish with the last of the mozzarella and that reserved parmesan. Chef’s Tip: Don’t press down too hard as you build. Let those layers stay fluffy!
Step 5: Bake to Golden, Bubbly Bliss. Cover the dish tightly with aluminum foil. This creates a steamy environment that cooks the noodles and melds the flavors without over-browning the cheese. Bake for 25 minutes. Then, carefully remove the foil (steam alert!), and bake for another 15-20 minutes, until the top is beautifully spotted with gold and the sauce is bubbling around the edges.
Step 6: The Crucial Rest. I know, the temptation is REAL. But please, let the lasagna rest on a cooling rack for at least 10-15 minutes before you cut into it. This allows the layers to set, ensuring you get those clean, photogenic squares instead of a delicious but sloppy pile. Use this time to tear up some fresh basil for garnish!
Serving Up the Cozy
Slide a spatula under a generous square and lift it onto a warm plate. That cross-section of red, white, and green is your reward! I love serving this with a simple, crisp green salad dressed with a bright lemon vinaigrette to cut through the richness. A chunk of crusty garlic bread is never a wrong answer for sauce-mopping, either. For a true family-style vibe, just plop the baking dish right in the center of the table, hand everyone a fork (kidding… mostly), and watch it disappear.
Make It Your Own: Creative Twists
- Pesto Swirl: Swap one cup of marinara for a cup of basil pesto. Layer it with the sauce or swirl it into the ricotta mix for a herby punch.
- Roasted Veggie Power: Instead of sautéing, toss the zucchini, pepper, and mushrooms with oil, salt, and pepper and roast at 400°F until caramelized for deeper flavor.
- Spinach & Artichoke: Replace the veggie mix with a thawed, squeezed box of frozen chopped spinach and a can of chopped artichoke hearts mixed right into the ricotta.
- Gluten-Free/Dairy-Smart: Use your favorite GF noodles. For dairy-free, try a firm tofu ricotta (blend crumbled tofu with nutritional yeast, lemon, and salt) and vegan mozzarella shreds.
- Extra Protein Boost: Stir a cup of cooked brown lentils or plant-based crumbles into your marinara sauce.
Olivia’s Kitchen Notes
This recipe is a living, breathing thing in my kitchen! I’ve made it in a hundred tiny ways over the years. Once, I accidentally used wonton wrappers because I was out of noodles (surprisingly delicious in a pinch, but not recommended for the purists!). Another time, I added too much spinach and it turned into The Incredible Hulk lasagna – still tasty. The biggest evolution has been in the veggie prep; I used to just layer them in raw, but sautéing first is the absolute game-changer for texture and preventing a soggy bottom. Don’t be afraid to play with the seasons – butternut squash and sage in the fall, asparagus and leeks in the spring. It’s your canvas!
Your Lasagna Questions, Answered
Q: My lasagna always turns out watery. What am I doing wrong?
A: The most common culprit is excess moisture from the vegetables. Sautéing them as directed drives off that liquid. Also, make sure your ricotta isn’t overly wet (draining it in a fine-mesh strainer for 10 minutes can help). Letting it rest before slicing is non-negotiable for letting everything set up!
Q: Can I assemble this ahead of time?
A: Absolutely! Assemble the whole thing, cover tightly, and refrigerate for up to 24 hours. When you’re ready, you may need to add 5-10 minutes to the bake time since it’s starting from cold. You can also freeze the unbaked lasagna for up to 3 months. Thaw in the fridge overnight before baking.
Q: Do I HAVE to boil the noodles if I’m not using oven-ready?
A: For traditional noodles, I recommend boiling them for about 2-3 minutes LESS than the package says for al dente. They’ll finish cooking in the saucy oven environment. If you use them completely raw, they’ll soak up too much sauce and might still be too firm.
Q: The top isn’t browning enough after I remove the foil.
A> No worries! Crank your oven to broil for the last 2-3 minutes, but WATCH IT LIKE A HAWK. It can go from golden to charcoal in seconds. Also, ensure your top cheese layer is generous – more cheese = better browning.
Vegetarian Lasagna with Layers of Flavor : A Meatless Classic
Description
Hey there! This vegetarian lasagna is the ultimate comfort food: layers of tender noodles, sautéed veggies, creamy ricotta, and melty mozzarella, all wrapped in a garlicky marinara. It’s warm, satisfying, and perfect for family dinners, meal prep, or a cozy night in.
Ingredients
-
9 lasagna noodles (regular or oven-ready)
-
2 cups marinara sauce (store-bought or homemade)
-
1 tbsp olive oil
-
1 zucchini, sliced thin
-
1 cup mushrooms, sliced
-
1 red bell pepper, chopped
-
2 cups fresh spinach
-
1½ cups ricotta cheese
-
1½ cups shredded mozzarella
-
½ cup grated parmesan, divided
-
1 egg
-
2 cloves garlic, minced
-
½ tsp dried oregano
-
Salt & pepper to taste
-
Fresh basil, for garnish (optional)
Instructions
-
Preheat Oven: Set to 375°F (190°C). Use a 9×13 inch baking dish.
-
Sauté Veggies: Heat olive oil in a skillet. Add garlic, then zucchini, mushrooms, and bell pepper. Cook 7–8 minutes until tender. Add spinach and a pinch of salt; wilt about 1 minute. Stir in oregano, taste, and adjust seasoning.
-
Mix Ricotta Layer: In a bowl, combine ricotta, egg, half of parmesan, salt, and pepper. Stir until smooth.
-
Layer the Lasagna:
-
Spread ½ cup marinara on the dish bottom.
-
Layer 3 noodles, half the ricotta, half the veggies, and a sprinkle of mozzarella.
-
Repeat: noodles, ricotta, veggies, mozzarella.
-
Top with remaining noodles, sauce, mozzarella, and reserved parmesan.
-
-
Bake: Cover with foil, bake 25 minutes. Remove foil and bake another 15–20 minutes until top is golden and sauce bubbles.
-
Rest & Serve: Let lasagna rest 10–15 minutes before slicing. Garnish with fresh basil if desired. Serve with a side salad or garlic bread.
Notes
-
Lasagna gets watery? Likely from excess veggie moisture—sauté them first.
-
Make-ahead: Assemble and refrigerate up to 24 hours; add a few minutes to bake. Freeze unbaked lasagna up to 3 months.
-
Noodles: Boil regular noodles 2–3 minutes less than package instructions for al dente.
Nutritional Information (Per Serving)
Calories: 370 | Protein: 19g | Carbohydrates: 34g | Fat: 18g | Saturated Fat: 8g | Cholesterol: 70mg | Sodium: 680mg | Fiber: 4g | Sugar: 6g
Prep Time: 20 minutes | Cook Time: 40 minutes | Total Time: 1 hour | Category: Main Course | Method: Baking
Final Thoughts: The Coziest Slice of Comfort
There you have it—a pan full of layered love, ready to transform your kitchen into the heart of the home. This vegetarian lasagna isn’t just a recipe; it’s an edible embrace, a reminder that the most satisfying meals are often the ones built slowly, with care and attention to every colorful, flavorful layer.
Whether you’re cooking for a crowd, meal prepping for the week ahead, or simply craving a nourishing dinner that feels like a celebration, this lasagna delivers. It’s proof that vegetarian cooking can be deeply comforting, richly flavorful, and utterly crave-worthy—no compromises needed.
So the next time you’re in need of a culinary hug, remember this: great food isn’t about perfection. It’s about the sizzle of garlic in the pan, the vibrant colors of fresh veggies, the joy of layering, and the shared silence around the table as everyone takes that first, perfect bite. It’s about creating your own version, with your favorite seasonal twists, and maybe even earning your own version of Nonna’s nod of approval.
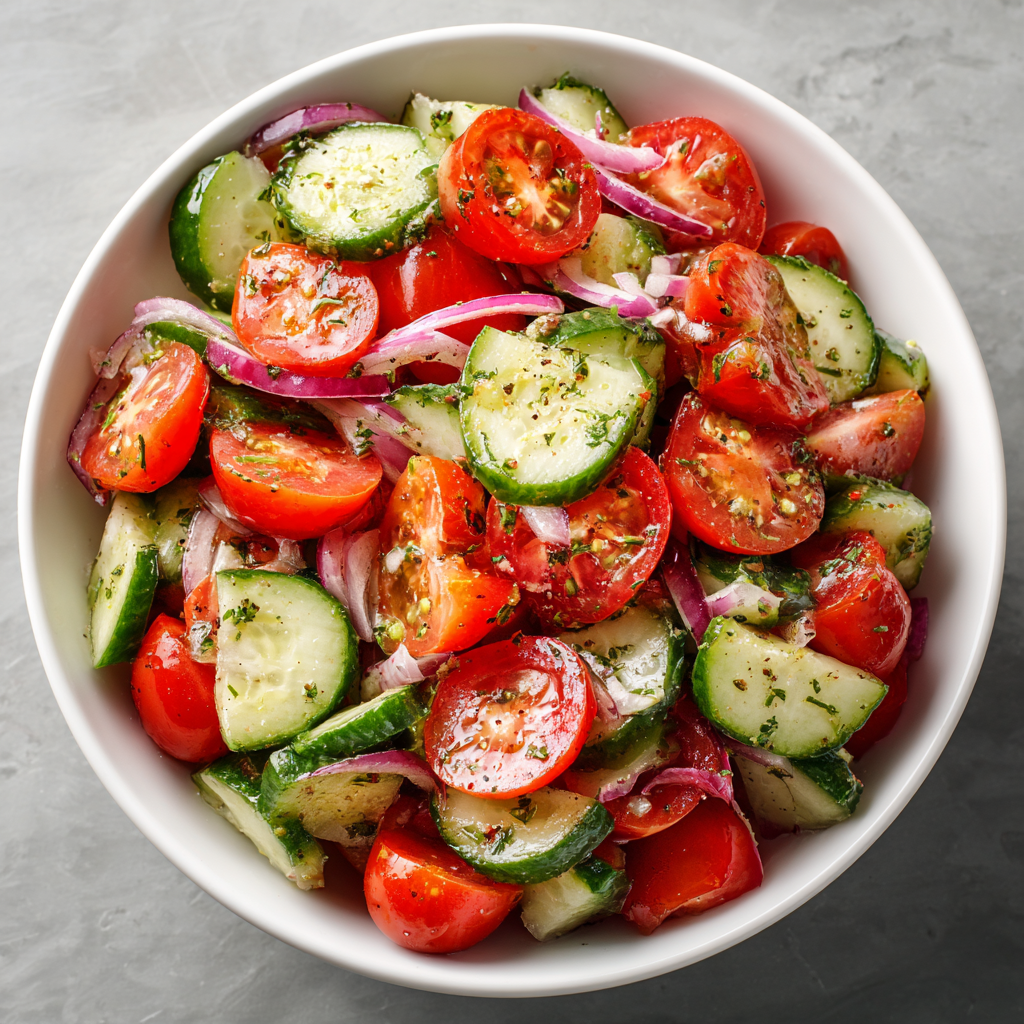
Refreshing Cucumber Tomato Salad : Crisp, Juicy & Ready in 10 Minutes
Welcome to My Summer Table: The Salad That Steals the Show
Hey friends! Olivia here. Raise your hand if you’ve ever stared into the fridge on a hot summer day, willing something delicious and cool to magically appear. Yeah, me too. Too often, we think making something amazing requires hours of effort, a mountain of ingredients, and a serious bout of dishwashing despair. But what if I told you that some of the very best food comes from the simplest combinations, thrown together with love and zero fuss? That’s where this little superstar comes in.
Today, we’re making my go-to, never-fail, always-impresses Refreshing Cucumber Tomato Salad. This isn’t just a side dish; it’s a vibe. It’s the crunch you crave, the juicy burst of flavor that cools you down, and the vibrant color that makes any dinner plate look like a celebration. It’s the salad you’ll bring to every potluck, serve with every grilled steak, and whip up at 5 PM when you realize you need a vegetable but can’t bear to turn on the oven.
In just 10 minutes, with ingredients you probably already have, you can create a side dish that people will ask you for the recipe to every single time. The secret? It’s all about letting peak-season produce shine and tying it together with a zesty, garlicky, herby dressing that clings to every nook and cranny. So, tie on that apron (embrace the mess!), grab your favorite cutting board, and let’s make something wonderfully simple and simply wonderful together.
A Salad Steeped in Sunshine and Grandma’s Table
This recipe takes me right back to my grandparents’ backyard. Every summer, my grandma’s garden would explode with cherry tomatoes and sprawling cucumber vines. Us kids were often tasked with “harvesting,” which usually meant eating as many sun-warmed tomatoes straight off the vine as we put in the bowl.
But the magic happened at the table. She’d take our haul, slice it up with a few onion slivers from the pantry, and dress it with nothing but oil, vinegar, salt, and a huge handful of fragrant basil she’d rip with her hands. There was no recipe card, just muscle memory and a sense of what tasted right. That bowl, sweating lightly in the summer heat, sat next to grilled burgers and buttery corn. It was the first thing to disappear. It taught me that food doesn’t need to be complicated to be memorable; it just needs to be real, fresh, and made with the joy of sharing. Every time I make this salad, I’m channeling that garden-to-table magic, and I hope it brings a little of that simple joy to your table, too.
Gathering Your Cast of Characters
Here’s what you’ll need to bring this crisp, juicy salad to life. Don’t stress about exact measurements—this is a forgiving recipe! Think of this as your playground.
- 2 cups cherry tomatoes, halved: I love cherry or grape tomatoes here. They’re reliably sweet, less watery than many big tomatoes, and their small size means pops of flavor in every bite. In the winter, these are your best bet. In peak summer, feel free to chop 2 large, gorgeous heirloom tomatoes instead!
- 1 large cucumber, sliced or chopped: Go for an English/hothouse cucumber if you can. They have thinner skins and fewer seeds, which means more crisp flesh and less prep. No need to peel! If using a standard cucumber, you might want to peel it partially for pretty stripes and scoop out the seedy center with a spoon.
- ¼ red onion, thinly sliced: The purple color is stunning, and its sharp bite mellows beautifully in the dressing. Chef’s Hack: Soak the slices in ice water for 10 minutes before adding to the salad. This tames the raw onion flavor dramatically, making it crisp and mild.
- 2 tbsp extra virgin olive oil: This is the base of our dressing, so use the good stuff! A fruity, high-quality olive oil makes a world of difference.
- 1 tbsp red wine vinegar: My favorite for its bright, tangy kick. Substitution Tip: Fresh lemon juice (about half a lemon) is a fantastic alternative for a brighter, fresher acidity. White wine vinegar or even a dash of balsamic (use less, it’s stronger) work too.
- 1 small clove garlic, minced: (My secret addition to the classic!) This adds a wonderful savory backbone. If you’re not a garlic fan, you can skip it, but I promise it’s subtle and magical.
- ½ tsp dried oregano: It brings a little earthy, Mediterranean warmth. Fresh Herb Bonanza: In summer, swap this for a big handful of torn fresh basil, dill, or parsley. Or use both dried and fresh for an herb party!
- Salt & black pepper to taste: Don’t be shy here! Salt draws out the natural juices of the tomatoes and cucumbers to create a little extra “dressing” in the bowl. Freshly cracked black pepper is non-negotiable for me.
- Optional for extra joy: ½ cup crumbled feta cheese or fresh mozzarella pearls: Adding cheese turns this from a side salad into a light meal. Feta brings salty tang, while mozzarella is creamy and mild. A few pitted Kalamata olives are also a fabulous add-in.
Let’s Get Chopping & Mixing: Your Foolproof Steps
See? I told you this was easy. Follow these simple steps, and you’ll have a perfect salad every single time.
Step 1: Prep Your Veggies with Love.
Grab your largest cutting board. Halve those cherry tomatoes, letting any stray juices fall onto the board—that’s flavor! For the cucumber, slice it into crisp half-moons about ¼-inch thick. If you’re using that red onion, slice it as thinly as you can manage. Remember that ice water bath trick if you want it extra mild! Throw all these colorful friends into a large, spacious mixing bowl. Why a big bowl? It gives you room to toss everything gently without bruising your beautiful veggies.
Step 2: Whisk Up That Zesty Dressing.
In a small bowl or even a jar with a lid, combine your good olive oil and red wine vinegar (or lemon juice). Add the minced garlic, dried oregano, a big pinch of salt (start with ¼ tsp), and several cracks of fresh black pepper. Now, whisk it like you mean it until it looks creamy and slightly emulsified, or give your jar a vigorous 30-second shake. Taste it! Dip a tiny piece of cucumber in and adjust. Need more tang? Add a splash more vinegar. Need more richness? A drizzle more oil. This is your moment to make it yours.
Step 3: The Grand Toss & The Magic Wait.
Pour that delicious dressing all over your waiting vegetables. Using two large spoons or your (clean!) hands, toss everything together gently but thoroughly, making sure every cucumber slice and tomato half gets a glossy, flavorful coat. Here’s the most important step that’s not on the clock: let it sit for at least 10 minutes. Don’t skip this! This rest time allows the salt to gently season the veggies, the vinegar to mellow, and all the flavors to get to know each other and become best friends. The salad will start to create its own little pool of incredible juice at the bottom of the bowl—that’s liquid gold.
Step 4: Final Flourishes & Serve.
Just before serving, give the salad one more gentle toss. Taste again for seasoning—this is when you might add that last pinch of salt. If you’re using fresh herbs like basil or dill, tear them and scatter them over the top now. The same goes for any cheese or olives. This keeps the herbs bright and the cheese from dissolving. Serve it straight from the bowl at room temperature or slightly chilled. That juicy, garlicky, herby dressing is meant to be sopped up with crusty bread, trust me.
How to Serve This Summer Star
This salad is the ultimate team player. I love serving it in a big, beautiful shallow bowl so all the colors can shine. For a casual backyard BBQ, place it right next to the grilled chicken or burgers. For a more elegant dinner, spoon individual portions onto plates alongside a simple piece of pan-seared fish or roasted chicken. And please, please, have some crusty bread on the table for dipping into that incredible dressing left at the bottom of the bowl. It’s the cook’s reward.
Make It Your Own: 5 Delicious Twists
Once you’ve mastered the classic, have fun playing with these variations!
- Greek-Inspired: Add crumbled feta, Kalamata olives, and a sprinkle of dried mint. Use lemon juice in the dressing.
- Creamy Italian: Swap the vinegar for a splash of balsamic glaze and add small balls of fresh mozzarella (ciliegine).
- Herb Garden Delight: Skip the dried oregano and use a full ¼ cup of mixed fresh soft herbs: basil, parsley, chives, and dill.
- Spicy & Sweet: Add a finely chopped jalapeño and a handful of sweet corn kernels (fresh off the cob or thawed frozen).
- Bread Salad (Panzenella) Style: Toss in 2 cups of cubed, day-old crusty bread (like ciabatta) during the final 10-minute rest. The bread soaks up all the glorious juices.
Olivia’s Kitchen Notebook
This recipe has been my loyal sidekick for years, and it’s evolved in funny ways. I once accidentally used apple cider vinegar when I was out of red wine vinegar, and you know what? It was delicious—slightly sweeter. I’ve also learned that while I love making it right before serving, it actually holds up pretty well in the fridge for a few hours if you need to get a head start. The veggies will soften a bit and release more juice, becoming almost a quick pickle situation, which is also delightful. The biggest laugh came when I tried to “fancy it up” for a date by meticulously shaping cucumber ribbons with a peeler. It took forever and the salad was…fine. But the classic, chunky, rustic chop? That’s the one that gets the compliments every time. Keep it simple, friends.
Your Questions, Answered!
Q: My salad got watery after a while. What did I do wrong?
A: You didn’t do anything wrong! Cucumbers and tomatoes are mostly water, and salt draws that moisture out. That juicy liquid is flavor! For make-ahead, you can prep the veggies and dressing separately and combine them no more than 30 minutes before serving. Or, embrace the juice and serve it with bread to soak it all up.
Q: Can I make this salad ahead of time?
A: Yes, but with a strategy. Chop your veggies and store them in an airtight container. Make the dressing and keep it in a separate jar in the fridge. Combine them up to 30 minutes before you plan to eat. This keeps everything crisp.
Q: The dressing separated in the bowl. How do I fix it?
A> Simply give the salad another good toss! Oil and vinegar naturally separate, so re-emulsifying them by tossing is all you need to do. Whisking the dressing again before pouring it on also helps.
Q: I don’t like raw onion. What can I use instead?
A> No problem! You can simply leave it out. For a similar texture with a milder flavor, try very thinly sliced green onions (scallions), or even a handful of chopped fresh chives. The soak-in-ice-water trick for red onions is a genuine game-changer, though—give it a try!
Refreshing Cucumber Tomato Salad : Crisp, Juicy & Ready in 10 Minutes
Description
Hey friends! This cucumber tomato salad is the ultimate easy, fresh, and flavorful summer side. Crisp cucumbers, juicy tomatoes, zesty garlic, and herbs come together in a light, garlicky dressing. It’s quick, forgiving, and perfect with grilled meats, fish, or just a slice of crusty bread.
Ingredients
-
2 cups cherry tomatoes, halved (or 2 large heirloom tomatoes, chopped)
-
1 large cucumber, sliced or chopped (English cucumber preferred)
-
¼ red onion, thinly sliced (optional)
-
2 tbsp extra virgin olive oil
-
1 tbsp red wine vinegar (or lemon juice)
-
1 small garlic clove, minced
-
½ tsp dried oregano (or fresh herbs like basil, parsley, or dill)
-
Salt & black pepper to taste
-
Optional: ½ cup crumbled feta or mozzarella pearls, Kalamata olives
Instructions
-
Prep Veggies:
Halve cherry tomatoes, slice cucumbers into ¼-inch rounds or half-moons, and thinly slice red onion. Toss all into a large mixing bowl. -
Make Dressing:
In a small bowl or jar, combine olive oil, red wine vinegar (or lemon juice), minced garlic, dried oregano, salt, and pepper. Whisk or shake until emulsified. Taste and adjust seasoning. -
Toss & Rest:
Pour dressing over vegetables and gently toss to coat. Let sit 10 minutes so flavors meld. -
Add Finishing Touches:
Just before serving, toss again and sprinkle with fresh herbs, cheese, or olives if using. Serve chilled or at room temperature.
Notes
-
Watery salad? It’s just vegetable juices—flavor, not a mistake.
-
Make-ahead: Keep veggies and dressing separate until 30 minutes before serving.
-
Don’t like raw onion? Use thinly sliced green onions or chives.
Nutritional Information (Per Serving, serves 4)
Please note: This is an estimate and does not include optional add-ins like cheese.
Calories: 100 | Fat: 7g | Saturated Fat: 1g | Carbohydrates: 7g | Fiber: 2g | Sugar: 4g | Protein: 1g | Sodium: 90mg
Final Thoughts
So, the next time the summer sun is high and your kitchen feels too hot for anything complicated, remember this little bowl of magic. This salad is more than a recipe—it’s a reminder that the best food is often the simplest. It’s about letting ripe, juicy ingredients speak for themselves and trusting that a little oil, vinegar, and care can create something extraordinary.
Whether it’s a quiet dinner on the patio or the centerpiece of a festive gathering, this salad brings a burst of freshness to every bite. I hope it becomes your summer staple, your potluck hero, and your go-to for those “what should I make?” moments. Most of all, I hope it brings a taste of sunshine and a feeling of effortless joy to your table.
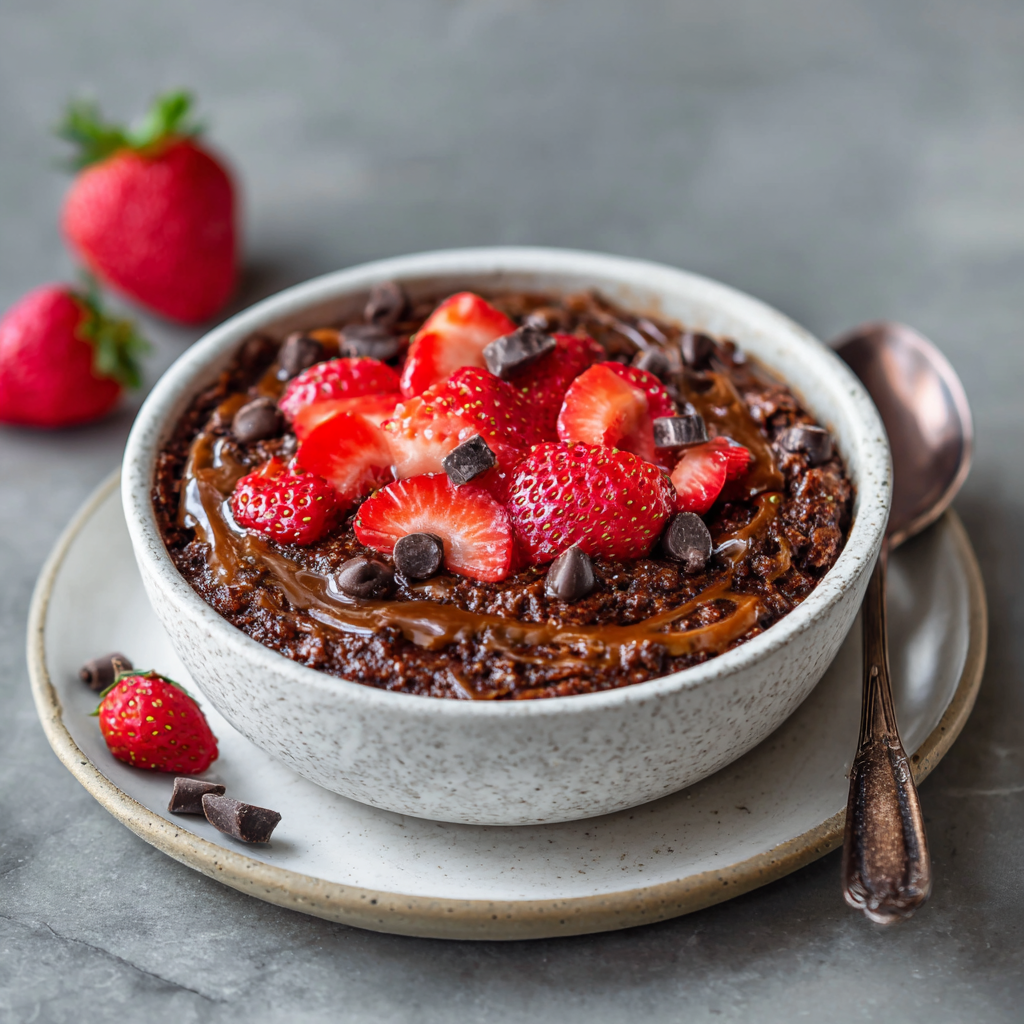
Strawberry Chocolate Baked Oats : A Dessert-Inspired Vegan Breakfast
Good Morning, Chocolate Lovers: Let’s Bake Breakfast!
Raise your hand if your morning routine could use a little more joy. You know the drill: the alarm buzzes, you stumble to the kitchen, and you’re faced with the same old decisions. Cereal? Yogurt? Toast? Again? It’s enough to make you hit the snooze button one more time. But what if I told you that your breakfast could be something you actually look forward to? Something that feels like a decadent weekend treat but is secretly packed with wholesome, feel-good ingredients that will power you through your morning?
Friends, I’m about to let you in on my favorite kitchen secret: dessert-inspired breakfasts. And before you raise an eyebrow, I’m not talking about a slice of cake. I’m talking about transforming humble, nutritious staples into something magical, warm, and deeply satisfying. The star of today’s show is a recipe that has become a non-negotiable in my house: Strawberry Chocolate Baked Oats.
Imagine, if you will, the fudgy, rich heart of a brownie meeting the juicy, bright burst of summer strawberries, all baked into a cozy, spoonable breakfast. It’s rich, it’s comforting, and it fills your kitchen with an aroma that smells like a hug. The best part? This beauty is vegan, naturally sweetened, gluten-free-friendly, and comes together in one bowl in about 5 minutes of hands-on time. It’s the ultimate “chef’s kiss” for your morning—or your afternoon snack, no judgment here! So, tie on that messy apron with me, and let’s turn the simple act of breakfast into a moment of pure, chocolatey delight.
The Happy Accident That Started It All
This recipe was born from a classic “kitchen sink” moment and a serious brownie craving at 8 a.m. It was a rainy Sunday, the kind perfect for baking, but I wanted something that felt indulgent without the sugar crash. I had a bowl of ripe bananas staring at me, a half-pint of strawberries that needed using, and my eternal love for chocolate. I started throwing things into a bowl: oats, cocoa, banana, a splash of my favorite oat milk.
As I mixed, I remembered my grandma’s baked oatmeal—a simple, hearty dish she’d make for a big family brunch. Hers was studded with apples and cinnamon, always served with a pitcher of cold cream. I wanted that same comforting, shareable vibe, but with my own chocolate-obsessed twist. I folded in the strawberries and some dark chocolate chunks, crossed my fingers, and slid the dish into the oven.
What emerged 25 minutes later was nothing short of a revelation. The top was gently crisp, the center was soft and almost custardy, and the pockets of melted chocolate and warm strawberry were pure bliss. My partner wandered into the kitchen, drawn by the smell, and said, “Are we having brownies for breakfast?” I just grinned and handed him a spoon. We stood right there at the counter, sharing the first warm, gooey bites straight from the dish. It was one of those perfectly imperfect, joyful kitchen moments that reminded me why I love to cook: to create simple, delicious happiness. This recipe is my edible love letter to that feeling.
Your Simple, Wholesome Ingredient Lineup
Here’s everything you’ll need to create this morning magic. I love that most of these are pantry staples or easy fridge finds!
- 1 cup rolled oats (old-fashioned oats): The hearty, chewy base of our bake. They give structure and that wonderful, wholesome texture. Chef’s Insight: For a gluten-free version, ensure your oats are certified gluten-free. You can use quick oats in a pinch, but the texture will be a bit softer and less defined.
- 2 tbsp cocoa powder: This is where the rich, chocolatey magic happens! I prefer natural cocoa powder for its deep, classic chocolate flavor. Sub Tip: If you only have Dutch-processed cocoa, that’s fine—it will result in a slightly mellower, darker chocolate flavor.
- 1 tsp baking powder: Our little leavening agent that gives the baked oats a lovely, light texture, helping it rise just a bit instead of being a dense brick.
- 1 ripe banana, mashed: Nature’s perfect sweetener and binder! The riper the banana (think lots of brown spots), the sweeter and more fragrant your bake will be. Sub Tip: No banana? You can use ½ cup of unsweetened applesauce or even pumpkin puree.
- 1 cup plant-based milk: Almond, oat, or soy milk all work beautifully. This adds moisture and creaminess. Chef’s Insight: Oat milk is my top choice here—it adds a subtle sweetness and creaminess that pairs perfectly with the oats.
- 2 tbsp maple syrup: A touch of liquid sweetness to complement the banana. It also adds a lovely flavor depth. You can adjust this to your taste or use agave nectar.
- 1 tsp vanilla extract: The flavor enhancer! It rounds out the chocolate and makes everything taste more homemade and warm.
- ½ cup chopped strawberries (plus more for topping): The juicy, tart contrast to the rich chocolate. Chopping them ensures a burst of berry in every bite. Fresh is ideal, but frozen (not thawed) work too—just add a couple extra minutes to the bake time.
- ¼ cup dark chocolate chips or chunks: Because more chocolate is always the answer. These create glorious melty pockets. Chef’s Insight: For a truly vegan bake, check the label to ensure they’re dairy-free. Chopping a bar of good dark chocolate is my personal favorite for irregular, puddles of chocolate.
Let’s Bake! Simple Steps to Chocolatey Bliss
This is where the fun happens. I promise, it’s as easy as mix, pour, and bake. Let’s do this!
- Preheat & Prep: Start by preheating your oven to 350°F (175°C). This ensures it’s perfectly hot and ready when your batter is. Lightly grease an 8×8-inch baking dish with a bit of oil or vegan butter, or line it with parchment paper for super easy cleanup. Chef’s Hack: A quick spray of cooking oil is my go—it gets into the corners perfectly.
- Mix the Dry Goods: In a large mixing bowl, combine your rolled oats, cocoa powder, and baking powder. Give it a good whisk. This isn’t just about mixing; it’s about evenly distributing the cocoa and baking powder so every bite is consistently chocolatey and fluffy. No one wants a pocket of plain oats!
- Bring in the Wet Team: To the same bowl (yes, one bowl for the win!), add the mashed banana, plant-based milk, maple syrup, and vanilla extract. Now, take your spatula or a big spoon and stir everything together with love until it’s just combined and you have a smooth, chocolaty batter. Chef’s Tip: Don’t overmix! Once you don’t see dry streaks of cocoa or oats, you’re done. A few lumps from the banana are totally fine.
- The Fun Fold-In: Here comes the confetti! Gently fold in the ½ cup of chopped strawberries and the dark chocolate chips. “Folding” just means using a gentle, turning motion to incorporate them without crushing the berries or overworking the batter. You want them evenly dotted throughout.
- Bake to Perfection: Pour the beautiful, speckled batter into your prepared dish. Use the spatula to smooth the top into an even layer. Now, take a few extra strawberry slices or chunks and press them lightly onto the surface. This makes it look gorgeous and promises berry goodness in the first bite. Slide the dish into the center of your preheated oven and bake for 25-30 minutes. Chef’s Cue: You’ll know it’s done when the edges look set and are pulling slightly away from the dish, the top is dry to the touch, and a toothpick inserted into the center comes out mostly clean (a few sticky crumbs are okay, but it shouldn’t be wet batter).
- The (Brief) Patience Test: I know, the smell is incredible. But let the dish cool on a wire rack for at least 10-15 minutes before slicing. This allows it to set fully, making it easier to cut into neat squares, and it also lets the flavors settle. It will be warm and wonderful, not molten lava.
How to Serve Your Masterpiece
This is the best part! I love serving these baked oats warm, straight from the dish for a family-style treat. Slice them into squares or scoop them out like a crumble. For the ultimate experience, add a drizzle of extra maple syrup or almond butter, a splash of cold plant milk, or a dollop of vegan yogurt. A little dusting of powdered sugar or extra berries on the side makes it feel extra special. It’s perfect with a big mug of coffee or tea for the coziest morning imaginable.
Make It Your Own: Fun Recipe Twists
The beauty of this recipe is its flexibility! Here are a few ways to play:
- Peanut Butter Swirl: Drop spoonfuls of creamy peanut butter or almond butter onto the batter before baking and use a knife to swirl it in for a chocolate-pb cup vibe.
- Tropical Twist: Swap strawberries for diced mango and add ¼ cup of shredded coconut to the batter.
- Protein Power-Up: Stir 1-2 scoops of your favorite vanilla or chocolate plant-based protein powder into the dry ingredients. You may need to add a splash more milk to keep the batter loose.
- Nutty Crunch: Fold in ¼ cup of chopped walnuts or pecans with the strawberries for added texture.
- Double Berry Bliss: Use a mix of strawberries and raspberries or blueberries for a berry medley explosion.
A Few More Kitchen-Table Thoughts
This recipe has evolved into my most-requested breakfast from friends, and it’s seen a few funny moments. Once, I was filming a reel for Instagram and was so busy chatting to the camera I accidentally used baking SODA instead of powder. Let’s just say we got a very… enthusiastic… rise and a distinct metallic aftertaste. Lesson learned: always double-check your containers! Over time, I’ve played with the liquid ratio—I found the 1 cup of milk creates my ideal texture: fudgy but not soggy. If you like it more cake-like, you can reduce it to ¾ cup. The recipe is forgiving, so don’t be afraid to make it yours. Most of all, have fun with it. Food is meant to be joyful, especially first thing in the morning.
Your Questions, Answered
Q: Can I make this less sweet?
A: Absolutely! You can reduce the maple syrup to 1 tablespoon or omit it entirely, especially if your banana is very ripe and your chocolate chips are sweet. The strawberries also add natural sweetness.
Q: Mine turned out too wet/mushy in the center. What happened?
A: This usually means it needed more bake time. Ovens vary, so if yours runs cool, it might need 5-10 extra minutes. Also, ensure you’re using rolled oats, not instant porridge oats, which absorb liquid differently. If using frozen fruit, that adds extra moisture, so bake a bit longer.
Q: How do I store and reheat leftovers?
A: Let it cool completely, then cover the dish or transfer portions to an airtight container. It keeps in the fridge for up to 4 days. Reheat single portions in the microwave for 60-90 seconds, or warm the whole dish in a 300°F oven for 10-15 minutes until heated through.
Q: Can I prepare this the night before?
A> You can! Assemble the wet and dry ingredients separately the night before (keep the banana mashed with the wet ingredients to prevent browning). In the morning, just mix, fold in berries/chocolate, and bake. You can also bake it fully, let it cool, and reheat portions all week for a fantastic grab-and-go breakfast.
Strawberry Chocolate Baked Oats : A Dessert-Inspired Vegan Breakfast
Description
Good morning, chocolate lovers! If your breakfast routine feels boring, this recipe is your upgrade. These strawberry chocolate baked oats taste like a warm brownie but are made with simple, wholesome ingredients. It’s quick to mix, easy to bake, and perfect for busy mornings or cozy weekends.
Ingredients
-
1 cup rolled oats
-
2 tbsp cocoa powder
-
1 tsp baking powder
-
1 ripe banana, mashed
-
1 cup milk (any kind)
-
2 tbsp maple syrup or honey
-
1 tsp vanilla extract
-
1/2 cup chopped strawberries
-
1/4 cup chocolate chips or chunks
-
Pinch of salt
Instructions
-
Preheat oven to 350°F (175°C). Lightly grease a small baking dish (about 8×8 inch).
-
Mix dry ingredients
In a bowl, stir together oats, cocoa powder, baking powder, and salt. -
Add wet ingredients
Mix in mashed banana, milk, maple syrup, and vanilla. Stir until combined. -
Fold in extras
Gently stir in chopped strawberries and chocolate chips. -
Pour & top
Pour into the baking dish and spread evenly. Add a few extra strawberry pieces on top if you like. -
Bake for 25–30 minutes, until the edges are set and the center is just firm.
-
Cool slightly
Let sit 10 minutes before serving.
Notes
-
Spoon it warm into bowls with yogurt or milk
-
Add a drizzle of nut butter
-
Top with extra berries
-
Great with coffee or tea
Nutritional Information*
Prep Time: 5 mins | Bake Time: 25 mins | Total Time: 30 mins | Servings: 4
*Estimated per serving: Calories: 240 | Protein: 5g | Carbs: 38g | Fat: 8g | Fiber: 5g | Sugar: 12g
Nutrition information is a rough estimate calculated using an online tool and will vary based on specific ingredients and brands used.
Final Thoughts
Turning your breakfast into a moment of warmth and delight isn’t just about nourishment—it’s about setting the tone for your entire day. This Strawberry Chocolate Baked Oats recipe is more than a meal; it’s an invitation to start your morning with intention and a little bit of joy. It proves that wholesome ingredients can transform into something that feels decadent, and that taking a few extra minutes for yourself can be the ultimate act of self-care.
I love how this recipe blurs the line between a comforting breakfast and a celebratory treat. It’s for slow Sunday mornings with a pot of tea, for busy weekdays when you need a grab-and-go energy boost, and for those days when you just deserve something special. It’s a reminder that cooking, even first thing in the morning, can be a simple, creative, and deeply satisfying act.
So the next time you’re facing the breakfast monotony, remember: a bowl, a few simple ingredients, and a warm oven can change everything. Let the aroma of chocolate and berries fill your kitchen, and let that first spoonful be your delicious declaration that today is going to be a good day.
Here’s to breakfasts that feel like a hug, to happy accidents in the kitchen, and to starting your day with something truly wonderful.
Sweet mornings ahead,
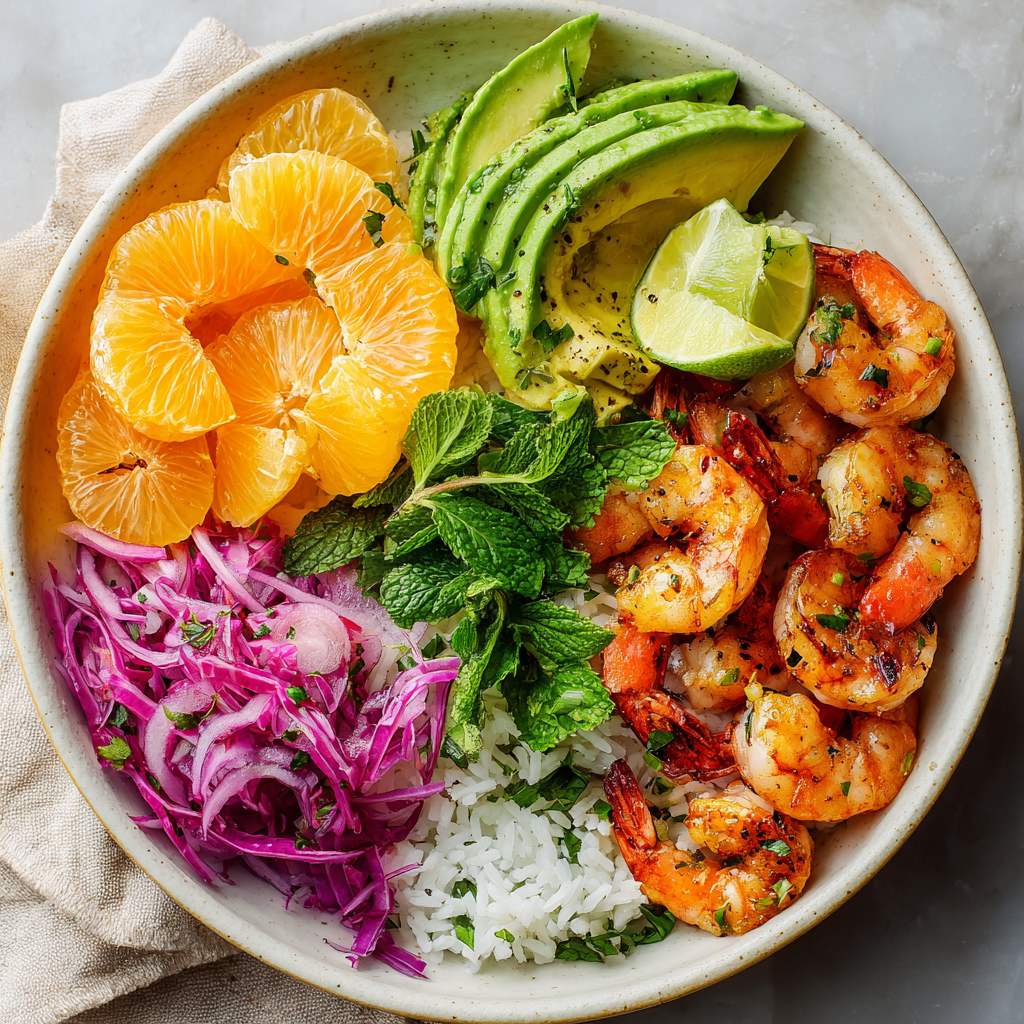
Shrimp & Avocado Citrus Bowl : Light, Zesty & Perfect for Summer
Shrimp & Avocado Citrus Bowl: Your New Go-To Summer Sunshine Meal
Hey there, friend! Come on in, pull up a stool. Can you smell that? It’s the scent of sunshine, sea salt, and a perfectly ripe avocado—all whispering that summer is officially here in the kitchen. If you’re like me, sometimes you crave a meal that’s as vibrant and energizing as a perfect summer day, but you don’t want to spend hours making it. You want something fresh, fast, and fantastically flavorful. Well, my dear foodie, you’ve just found your new favorite recipe.
This Shrimp & Avocado Citrus Bowl is more than just a recipe; it’s a celebration on a plate. We’re talking juicy, succulent shrimp, buttery-soft avocado, pops of sweet-tart citrus, and the most satisfying crunch, all tied together with a zippy homemade citrus vinaigrette that you’ll want to put on everything. It’s the kind of dish that looks like you fussed for hours but secretly comes together in about 25 minutes flat. It’s perfect for a light lunch, a stunningly easy dinner, or even as the star of your next casual get-together. So, tie on your favorite apron (the messy one tells the best stories, I swear), and let’s make something that tastes as good as summer feels.
A Taste of Coastal Memories
This bowl always takes me right back to a tiny, sun-drenched patio on a family trip to the coast. I was about twelve, and my dad had just grilled the most amazing shrimp skewers. We didn’t have much else in the rental kitchen—just some leftover rice, a lone avocado, and a few oranges from a roadside stand. In a moment of hungry inspiration, we chopped and tossed everything together in a big, chipped ceramic bowl. We squeezed orange juice right over the top and called it “Beach Bowl Surprise.” It was messy, we ate it with our fingers, and it was absolutely divine. That spontaneous, joyful mix of simple, bright flavors stuck with me. This recipe is my grown-up, slightly more polished (but no less joyful) homage to that memory. It captures that feeling of easy summer living, where the best meals are often the unplanned ones shared with good company.
Gathering Your Sunshine Ingredients
Here’s the beautiful part: every ingredient here plays a starring role. Let’s break it down. I’ll share why each one matters and how you can swap things based on what’s in your fridge or pantry.
- 1 lb (450g) shrimp, peeled & deveined – I prefer large (31/40 count) for a meatier bite. For the ultimate flavor, look for wild-caught. Chef’s Tip: If using frozen shrimp (totally fine!), thaw them overnight in the fridge in a sealed bag or under cold running water for a quick thaw. Pat them very dry with paper towels before cooking—this is the secret to a perfect sear, not a steam!
- 1 tbsp olive oil – Just a slick for cooking our shrimp. Use your good extra-virgin here for flavor.
- Salt & pepper to taste – The foundational flavor boosters. Don’t be shy!
- 1 avocado, diced – Look for one that’s slightly soft to the touch but not mushy. To keep it from browning too fast, wait to dice it until you’re ready to build your bowls.
- 1 orange, segmented – Navel or cara cara oranges are perfect. Segments (or “supremes”) give you pure, juicy flesh without the bitter pith. Substitution: Grapefruit (pink or ruby red) is a fantastic, more tangy twist!
- 1/2 cup thinly sliced red cabbage or radish – I love the purple pop of color and the peppery crunch. A mandoline makes quick work of this, but a sharp knife works great too.
- 1/4 cup thinly sliced red onion – Soaking these in ice water for 5-10 minutes takes the sharp edge off and leaves them crisp and mild.
- 1 cup cooked rice or mixed greens – Choose your adventure! Chilled jasmine or basmati rice is wonderfully fluffy, while a mix of baby spinach and arugula adds a fresh, peppery base.
- Fresh cilantro or mint (optional garnish) – A sprinkle of herbs is like a final high-five of freshness. If you’re a cilantro-hater, fresh mint or even chopped chives are lovely.
For the Citrus Vinaigrette:
- 2 tbsp fresh orange juice – Squeeze it from the orange you just segmented! Fresh is key for that vibrant zing.
- 1 tbsp fresh lime juice – Adds the necessary acidity to balance the sweetness. Lemon works in a pinch.
- 1 tbsp olive oil – This emulsifies with the citrus to create a silky dressing.
- 1 tsp honey – Just a touch to round out the sharp edges. Maple syrup or agave work for a vegan swap.
- Pinch of salt – This is what makes all the flavors in the dressing “wake up.” Trust the process.
Let’s Build Some Sunshine: Step-by-Step
Okay, let’s cook! We’ll move fast, but I’ll be right here with tips for every step. You’ve got this.
- Prep Your Veggies & Citrus. Before you even turn on the stove, let’s get our mise en place (that’s just a fancy chef term for “get everything ready”). Thinly slice your cabbage or radish and red onion (give that onion its ice bath!). Segment your orange over a bowl to catch any juice—you’ll use some for the dressing. Dice the avocado last. This front-loaded prep means you can just assemble and enjoy when the shrimp are done.
- Cook the Shrimp to Perfection. Heat the olive oil in a large skillet over medium-high heat. Make sure your shrimp are very dry—this is the golden rule! Season them generously with salt and pepper. When the oil shimmers, add the shrimp in a single layer. Don’t crowd the pan; cook in batches if needed. Let them sear undisturbed for 2-3 minutes until you see the bottoms turn pink and get a slight golden crust. Flip and cook another 1-2 minutes until they’re pink and opaque all the way through. Chef’s Hack: The second they curl into a loose “C” shape, they’re done! An “O” shape means they’re overcooked and can get rubbery. Immediately transfer them to a plate to stop the cooking.
- Whisk Up Magic (The Dressing). In a small bowl or jar, combine the 2 tablespoons of fresh orange juice, lime juice, olive oil, honey, and that pinch of salt. Whisk like you mean it until it looks creamy and combined, or screw the lid on the jar and give it a vigorous shake. Taste it! Want more tang? Add a squeeze more lime. More sweetness? A drizzle more honey. This is your dressing, make it sing to you.
- The Grand Assembly. Now for the fun part. Into each of your four serving bowls, add a base of fluffy rice or a handful of lively greens. Artfully (or just happily) arrange your cooked shrimp, diced avocado, orange segments, crunchy cabbage, and drained red onion on top. There’s no wrong way to do this—make it colorful and inviting!
- The Finishing Touches. Drizzle that gorgeous, sunny dressing generously over each bowl. Finish with a sprinkle of fresh cilantro or mint leaves. I sometimes add an extra grind of black pepper or a tiny pinch of flaky sea salt on the avocado.
How to Serve & Savor
I love serving this bowl immediately, while the shrimp are still slightly warm and the avocado is cool and creamy. It creates the most delightful temperature contrast. You can also prep all the components ahead of time and keep them separate in the fridge, then assemble right before eating for the absolute freshest texture. For a true “feel-good summer” moment, pair it with a glass of chilled sparkling water with a lime wedge or a crisp Sauvignon Blanc. This dish is a total showstopper, so don’t be afraid to let it shine as the main event!
Make It Your Own: Delicious Twists
The beauty of a bowl is its flexibility. Here are a few ways to play with the formula:
- Spicy Mango Twist: Add diced fresh mango and a pinch of chili flakes or a drizzle of sriracha to the dressing.
- Mediterranean Style: Swap shrimp for grilled chicken, use quinoa instead of rice, and add chopped cucumber and kalamata olives. A lemon-oregano vinaigrette would be perfect here.
- Vegan Power Bowl: Replace shrimp with seasoned, baked chickpeas or crispy tofu cubes. Use maple syrup in the dressing.
- “Deconstructed Ceviche” Version: Marinate raw, diced shrimp (use sushi-grade) in the citrus dressing for 15-20 minutes until “cooked” by the acid. Then assemble your bowl. So refreshing!
Chef Olivia’s Notes from a (Slightly Messy) Kitchen
This recipe has been a work-in-progress in my kitchen for years. The original “Beach Bowl” had zero measurements and often included whatever chips were left in the bag for crunch! Over time, I found that the balance of sweet citrus, rich avocado, and savory shrimp was just magic. One funny fail: I once tried to segment a grapefruit without a sharp knife. Let’s just say it looked less like a beautiful bowl and more like a citrus crime scene. Lesson learned—a sharp paring knife is your best friend for perfect, pith-free segments. Also, don’t stress about the arrangement. The first time you make it, just pile everything in happily. The tenth time, you might get fancy with concentric circles. Both taste exactly the same—incredible.
Your Questions, Answered!
Q: Can I make this ahead of time?
A: Absolutely! Prep is your best friend. Cook the shrimp, make the dressing, chop the veggies, and segment the citrus. Store everything separately in airtight containers in the fridge for up to a day. The avocado is the only fussy one—dice it right before assembling. Build your bowls when you’re ready to eat for the best textures.
Q: My shrimp turned out rubbery. What happened?
A: The most common culprit is overcooking. Shrimp cook incredibly fast! Follow the visual cues: they’re done as soon as they turn pink and opaque and form that loose “C” shape. Also, ensure your pan is nice and hot before adding them for a quick sear, not a steam.
Q: I’m not a fan of raw onion. Any tips?
A: I totally get it. The ice-water soak is a game-changer! Soaking the thin slices for 5-10 minutes mellows their flavor and makes them wonderfully crisp. You can also quickly pickle them in a mix of the lime juice and a pinch of sugar while you prep everything else.
Q: What other protein could I use?
A: This bowl is a fantastic template. Grilled salmon, scallops, shredded rotisserie chicken, or even blackened tofu would all be phenomenal. Just adjust the cooking method for your protein of choice.
Shrimp & Avocado Citrus Bowl : Light, Zesty & Perfect for Summer
Description
Shrimp & Avocado Citrus Bowl
Fresh, bright, and ready in about 25 minutes — perfect for a light lunch or summer dinner.
Servings: 4
Prep Time: 15 min
Cook Time: 10 min
Total Time: 25 min
Ingredients
Shrimp
-
1 lb (450 g) large shrimp, peeled & deveined
-
1 tbsp olive oil
-
Salt & black pepper
Bowl Base (choose one)
-
2 cups cooked rice (jasmine or basmati), cooled
or -
4 cups mixed greens
Toppings
-
1 avocado, diced
-
1 orange, segmented
-
1/2 cup thinly sliced red cabbage or radish
-
1/4 cup thinly sliced red onion
-
2 tbsp chopped fresh cilantro or mint (optional)
Citrus Vinaigrette
-
2 tbsp fresh orange juice
-
1 tbsp fresh lime juice
-
1 tbsp olive oil
-
1 tsp honey or maple syrup
-
Pinch of salt
Instructions
-
Prep ingredients
Slice cabbage/radish and onion (soak onion in cold water 5–10 minutes if you want milder flavor). Segment the orange. Dice avocado last. -
Cook the shrimp
Pat shrimp very dry and season with salt and pepper.
Heat olive oil in a skillet over medium-high heat. Cook shrimp 2–3 minutes per side until pink and opaque. Remove from heat. -
Make the dressing
Whisk orange juice, lime juice, olive oil, honey, and salt until combined. -
Assemble bowls
Add rice or greens to bowls. Top with shrimp, avocado, orange segments, cabbage/radish, and onion. -
Finish
Drizzle with citrus vinaigrette and sprinkle with fresh herbs. Serve immediately.
Notes
-
Swap orange for grapefruit or mango
-
Add cucumber for extra crunch
-
Use quinoa instead of rice
-
Add chili flakes or hot sauce for heat
Nutritional Information (Per Serving, with rice)
Please note: This is an estimate provided for informational purposes. Actual values may vary based on specific ingredients used.
- Calories: ~400
- Protein: 25g
- Carbohydrates: 22g
- Fat: 24g
- Fiber: 5g
Prep Time: 15 minutes | Cook Time: 10 minutes | Total Time: 25 minutes | Serves: 4
Final Thoughts
This Shrimp & Avocado Citrus Bowl isn’t just a recipe—it’s a bright, vibrant reminder of how joyful and effortless a truly delicious meal can be. It’s proof that with a handful of fresh ingredients and a simple, zesty dressing, you can create something that feels both nourishing and celebratory. Whether you’re fueling a busy day, treating yourself to a little weekday luxury, or sharing sunshine on a plate with friends, this bowl is designed to make you smile from the first bite.
Remember, cooking should be an act of creativity, not stress. So if you don’t have red cabbage, use radishes. If you’re out of oranges, try grapefruit. If you want to add a dash of chili or a sprinkle of sesame seeds, go for it. This is your bowl—make it taste like your summer.
I hope it brings as much light and flavor to your table as it does to mine. Now, go enjoy that taste of sunshine.
With a happy heart and a zest-loving spirit,
Olivia
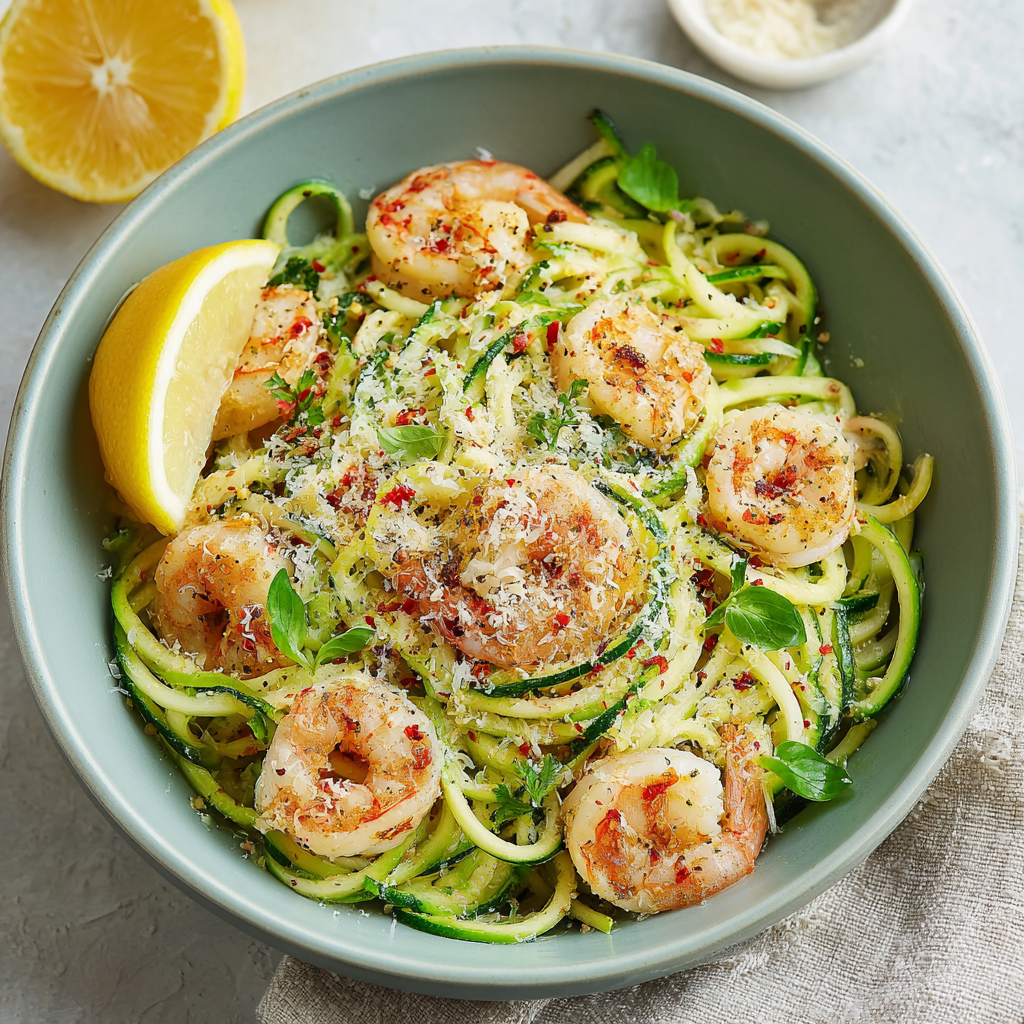
Garlic Shrimp Zoodle Bowl : Low-Carb, High-Flavor & Ready in Minutes
Garlic Shrimp Zoodle Bowl: Your New Favorite 20-Minute Wonder
Hey there, friend! Come on in, the kitchen’s warm, and I’ve got something sizzling in the pan that’s about to make your whole week. If you’ve ever looked at a bowl of pasta and thought, “I love you, but you don’t love me back,” then you and I are about to become besties. Today, we’re making magic with a Garlic Shrimp Zoodle Bowl that is everything you crave—garlicky, a little spicy, deeply satisfying—but feels as light and energizing as a spring breeze.
Let’s be real: some nights, you want food that makes you feel good, not food that makes you want to unbutton your jeans and nap for three hours. This dish is that glorious middle ground. It’s a vibrant, low-carb, high-flavor powerhouse that comes together in the time it takes to watch half an episode of your favorite show. We’re talking plump, juicy shrimp, tender-crisp zucchini noodles tangled in the most aromatic garlic oil, a bright squeeze of lemon, and a snow shower of Parmesan. It’s a meal that tastes indulgent but leaves you feeling fantastic.
Whether you’re navigating a busy weeknight, aiming for lighter meals, or just love the idea of turning veggies into “pasta,” this bowl is your answer. No fancy skills required—just a good skillet and a willingness to embrace the delicious chaos. So, tie on your apron (messy is welcome here!), grab your spiralizer or pre-spiralized zoodles, and let’s create something seriously delicious together.
The Summer I Fell in Love with Zoodles
This recipe takes me straight back to a tiny apartment kitchen in my early twenties, the air conditioner fighting a losing battle against the July heat. My best friend and I had committed to a “summer of health,” which mostly meant we were bored of our usual pasta and frozen pizza routine. One sweltering evening, determined not to turn on the oven, we unearthed a gadget my mom had gifted me—a spiralizer. It looked complicated. We were skeptical.
With a mountain of zucchini from the farmer’s market and some garlic shrimp we’d mastered for appetizers, we decided to experiment. I remember the sound of the spiralizer cranking, creating these hilarious green ribbons that looked nothing like dinner. But the moment those zoodles hit the garlicky oil and we tossed in the pink, perfect shrimp? The kitchen filled with this incredible, fresh aroma. We ate straight out of the skillet, standing at the counter, marveling at how something so simple could taste so *complete*. It wasn’t just a “healthy alternative”; it was a revelation. It became our weekly ritual, the meal that felt like a treat without any of the sluggishness. That’s the spirit I want to bring to your kitchen tonight—a little experimentation, a lot of flavor, and the joy of a meal that just *works*.
Gathering Your Flavor Makers
Here’s everything you’ll need to make this quick, feel-good feast. The beauty is in the simplicity, and each ingredient plays a starring role. I’ve added my little chef notes to help you shop, swap, and understand the “why” behind each one.
- 1 lb (450g) large shrimp, peeled and deveined: I prefer fresh or thawed raw shrimp for the best texture. The “deveined” part just means that little dark tract is removed—it’s for aesthetics and texture, not safety. Chef’s Insight: If using frozen, thaw them overnight in the fridge or in a bowl of cold water for 30 minutes. Patting them very dry is the #1 secret to getting a good sear instead of them steaming in their own juice.
- 2 tbsp olive oil: We’ll use it in two stages. A good extra-virgin olive oil adds a lovely fruitiness, but a regular olive oil works great for sautéing. Sub Tip: Avocado oil or ghee are fantastic high-heat alternatives.
- 3 medium zucchini, spiralized: About 1.5 lbs total. Look for firm, vibrant zucchini. Chef’s Insight: You can buy pre-spiralized “zoodles” to save time! Just give them a quick pat with a paper towel to remove excess moisture.
- 3–4 garlic cloves, minced: This is a garlic-forward dish, so don’t be shy! Fresh is best here. Chef’s Hack: Use a microplane to grate the garlic if you want it to melt seamlessly into the oil and coat every strand.
- 1/4 tsp red pepper flakes (optional): This is for a gentle, background warmth. It doesn’t make the dish “spicy,” just wonderfully complex. Omit if sensitive, or add a pinch more if you love a kick!
- Salt & black pepper to taste: Season in layers! We’ll season the shrimp, then the zoodles, then do a final taste at the end. Kosher salt and freshly cracked pepper make all the difference.
- 1/4 cup grated Parmesan cheese: Use the good stuff you grate yourself from a block, or a high-quality pre-grated Parm. The powdery stuff in a canister won’t melt or flavor the same way. Sub Tip: Nutritional yeast or a sprinkle of Pecorino Romano are great dairy-free or sharper alternatives.
- Juice of 1/2 lemon: The bright, acidic finish that lifts the entire dish. Always add fresh lemon juice off the heat at the end to preserve its vibrant flavor.
- Fresh parsley or basil for garnish: This isn’t just pretty! The fresh herbs add a pop of color and a final layer of fresh flavor that ties it all together.
Let’s Get Cooking: Your Foolproof Guide
Ready? This comes together fast, so have all your ingredients prepped and within arm’s reach. We’re going for high heat and quick moves—it’s more fun that way, I promise!
- Prep is Power: First, ensure your shrimp are peeled, deveined, and thoroughly patted dry with paper towels. This is non-negotiable for a good sear! Season them generously with salt and pepper on both sides. Spiralize your zucchini if you haven’t already. Mince the garlic, juice your lemon half, and grate your Parmesan. Having everything ready (this is called mise en place) turns cooking from stressful to serene.
- Sear the Shrimp: Heat 1 tablespoon of olive oil in a large skillet or sauté pan over medium-high heat. You want the oil to shimmer. Add the shrimp in a single layer—don’t crowd the pan; cook in batches if needed. Let them cook undisturbed for 2-3 minutes until you see the edges turn pink and opaque. Flip and cook for another 1-2 minutes on the other side until they’re pink throughout and slightly curled. Chef’s Tip: They cook lightning-fast! The moment they’re opaque, they’re done. Overcooked shrimp become rubbery. Transfer them to a clean plate immediately.
- Build the Garlicky Base: In the same pan (keep all those tasty browned bits!), add the remaining 1 tablespoon of olive oil. Reduce the heat to medium. Add the minced garlic and red pepper flakes. Stir constantly for about 30 seconds to 1 minute. You’ll smell the most incredible aroma—the moment it becomes fragrant, move fast! You’re toasting the garlic, not burning it. Burnt garlic is bitter, so watch it like a hawk.
- Toss the Zoodles: Immediately add all your spiralized zucchini to the pan. Using tongs, toss and stir to coat every strand in the garlic oil. We’re not boiling them! Sauté for just 2-3 minutes, tossing frequently, until they are just tender but still have a slight bite (al dente, if you will). Biggest Chef Hack: Do NOT add salt to the zoodles yet! Salt draws out water, and we want to avoid a soupy pan. We’ll season at the end.
- The Grand Reunion: Return the cooked shrimp (and any juices that collected on the plate) to the skillet with the zoodles. Squeeze the fresh lemon juice right over everything. Give it a big, celebratory toss to combine and heat the shrimp through for about 30 seconds. Now, off the heat, season the whole dish with another pinch of salt and pepper. Taste and adjust! Remember, the Parmesan will add saltiness, too.
- Finish and Serve: Sprinkle the grated Parmesan over the hot zoodle and shrimp mixture. The residual heat will soften it beautifully. Give it one final gentle toss. Divide into bowls and garnish generously with chopped fresh parsley or basil. You did it!
How to Serve Your Masterpiece
This bowl is a beautiful, complete meal all on its own! I love serving it in wide, shallow bowls to show off all those gorgeous green tendrils and plump shrimp. For a restaurant-style touch, use tongs to twirl a nest of zoodles into each bowl, then artfully arrange the shrimp on top. Finish with that extra sprinkle of herbs and maybe a tiny extra zest of lemon right over the top. If you’re feeling fancy, a slice of crusty, toasted sourdough on the side is perfect for sopping up any delicious garlicky juices left behind. It’s a meal that looks like you fussed for hours, but only we’ll know your 20-minute secret!
Make It Your Own: Creative Twists
- Creamy Garlic Parmesan: After sautéing the garlic, add 1/4 cup of heavy cream or full-fat coconut milk and let it simmer for a minute before adding the zoodles. You’ll get a luxurious, creamy sauce that clings to every bite.
- Sun-Dried Tomato & Spinach: Add 1/4 cup chopped sun-dried tomatoes (oil-packed, drained) and a big handful of fresh baby spinach to the pan with the zoodles. The tomatoes add a sweet, intense pop of flavor.
- Lemon Herb Chicken: Swap the shrimp for 1 lb of thinly sliced chicken breast or thighs. Cook through, then set aside and proceed with the recipe. The lemon-herb-garlic combo is classic for a reason.
- Spicy Arrabiata Style: Love marinara? Add 1/2 cup of your favorite marinara or crushed tomatoes with the garlic, let it simmer for 2 minutes, then add the zoodles. A pinch of dried oregano completes the vibe.
- Pesto Toss: Skip the garlic sauté and simply toss the cooked zoodles and shrimp with 1/3 cup of homemade or high-quality store-bought pesto. Instant flavor bomb.
Olivia’s Kitchen Notes
This recipe has been my weeknight guardian angel for years, and it’s evolved with me. In my “I own one pot” phase, I’d cook everything in the same skillet, which honestly, still works perfectly. I’ve learned that the brand of spiralizer matters less than just getting those zoodles into the pan. And about the “soggy zoodle” fear—it’s real, but we conquer it with high heat, no overcrowding, and that no-salt-until-the-end trick. One time, I was so engrossed in telling a story to my husband that I completely forgot the shrimp on the plate! We ended up with garlic zoodles topped with cold shrimp… which we ate anyway because it was still delicious. The moral? This recipe is forgiving. Play your favorite music, pour yourself a little something to drink, and enjoy the process. Cooking should be fun, not perfect.
Your Questions, Answered
Q: My zoodles turned out watery and soggy. What happened?
A: This is the most common hurdle! It usually means 1) The pan wasn’t hot enough, so the zoodles steamed instead of sautéed, 2) You added salt too early (salt draws out moisture), or 3) You overcrowded the pan. Next time, make sure your pan is nice and hot, don’t add salt until the very end, and if your skillet is smaller, cook the zoodles in two batches. Also, patting dry pre-spiralized zoodles is a game-changer.
Q: Can I make this ahead of time?
A: You can prep the components! Spiralize the zucchini (store it in a container lined with paper towels in the fridge), peel the shrimp, and mince the garlic. But for the best texture, I highly recommend cooking it just before serving. Leftovers can be stored in the fridge for a day, but the zoodles will release more water upon reheating. It’ll still taste good, just softer.
Q: What’s the best tool for spiralizing zucchini?
A: I’ve used them all! A handheld spiralizer is cheap and effective for small jobs. A countertop spiralizer with different blades (like the Inspiralizer) is my workhorse for bigger meals. If you have a stand mixer, the spiralizer attachment is fantastic. And in a pinch? A simple vegetable peeler can create wide, ribbon-like “noodles” that work beautifully, too.
Q: Can I use frozen shrimp directly in the pan?
A: I don’t recommend it. Frozen shrimp will release a ton of water as they cook, leading to steamed, rubbery shrimp and a pool of liquid in your pan. Taking the 30 minutes to thaw them properly in cold water is worth it for perfect, seared shrimp.
Garlic Shrimp Zoodle Bowl : Low-Carb, High-Flavor & Ready in Minutes
Description
Garlic Shrimp Zoodle Bowl
A fast, light, and flavorful low-carb bowl with garlicky shrimp, lemon, and Parmesan — ready in 20 minutes.
Servings: 3–4
Prep Time: 10 min
Cook Time: 10 min
Total Time: 20 min
Ingredients
-
1 lb (450 g) large shrimp, peeled & deveined
-
2 tbsp olive oil, divided
-
Salt & black pepper
-
1/4 tsp red pepper flakes (optional)
-
3 medium zucchini, spiralized (or store-bought zoodles)
-
3–4 garlic cloves, minced
-
Juice of 1/2 lemon
-
1/4 cup grated Parmesan cheese
-
2 tbsp chopped fresh parsley or basil (optional)
Instructions
-
Prep the shrimp
Pat shrimp very dry with paper towels. Season with salt and pepper. -
Cook the shrimp
Heat 1 tbsp olive oil in a large skillet over medium-high heat. Add shrimp in a single layer. Cook 2–3 minutes per side until pink and opaque. Remove to a plate. -
Make the garlic oil
Lower heat to medium. Add remaining 1 tbsp olive oil to the same pan. Stir in garlic and red pepper flakes. Cook about 30–60 seconds until fragrant (do not brown). -
Cook the zoodles
Add zucchini noodles. Toss with tongs for 2–3 minutes until just tender but not soft. Avoid overcooking. -
Combine
Return shrimp (and any juices) to the pan. Add lemon juice and toss 30 seconds to warm through. Season with additional salt and pepper to taste. -
Finish
Remove from heat. Sprinkle with Parmesan and fresh herbs. Serve immediately.
Notes
-
Add a splash of cream for a creamy garlic version.
-
Toss in cherry tomatoes or spinach with the zoodles.
-
Swap shrimp for sliced chicken breast.
-
Stir in a spoon of pesto at the end for a flavor boost.
Nutritional Information*
*This is an estimate for 1 of 3 servings, using the ingredients listed. Values can vary based on specific products used.
- Calories: ~290
- Protein: 30g
- Carbohydrates: 8g
- Dietary Fiber: 2g
- Net Carbs: 6g
- Total Fat: 16g
- Saturated Fat: 3.5g
Final Thoughts: More Than Just a Recipe
So, there you have it—your ticket to a delicious, feel-good dinner that respects your time and your well-being. This Garlic Shrimp Zoodle Bowl is more than just a list of ingredients and steps; it’s a reminder that eating well doesn’t require complexity or compromise. It’s about vibrant flavors, simple techniques, and the joy of creating something nourishing with your own hands.
Whether this becomes your new go-to weeknight savior or a canvas for your own creative twists, I hope it brings a little bit of that same magic to your kitchen that it brought to mine all those summers ago. Remember, the best meals are the ones that make you feel as good after eating them as you did while cooking. Now, go grab that skillet—your 20-minute wonder awaits.
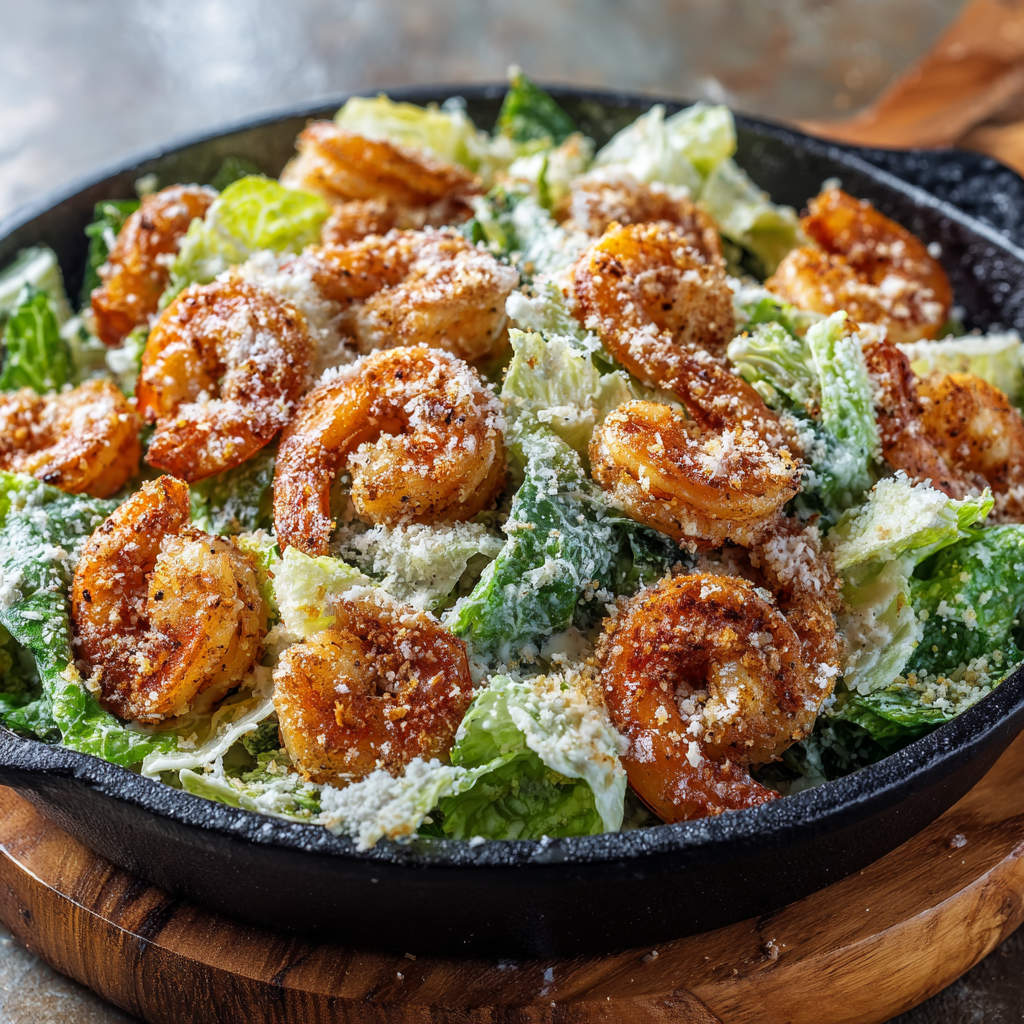
Warm Shrimp Caesar Salad : Crispy, Creamy & Restaurant-Worthy
Your New Go-To Salad That Feels Like a Hug and a High-Five
Hey there, friend! Come on in, grab an apron, and let’s make something incredibly delicious happen in about twenty minutes flat. If you’ve ever thought, “Caesar salad is great, but I wish it felt more like a complete, cozy, show-stopping meal,” then you and I are on the exact same page. Today, we’re taking everything we adore about that classic, creamy, crunchy salad and giving it a seriously warm and wonderful upgrade.
I’m talking about my Warm Shrimp Caesar Salad. Imagine this: perfectly cooked, juicy shrimp, still warm from the pan with a hint of smoky spice, nestled on a bed of chilled, crisp romaine that’s been lovingly coated in a rich Caesar dressing. The final, non-negotiable flourish? A shower of golden, buttery toasted breadcrumbs that add a texture so good, you’ll want to put them on everything. It’s the ultimate play of temperatures and textures—warm and cool, creamy and crunchy, hearty and fresh—all in one stunning bowl.
This isn’t just a salad; it’s a 20-minute culinary magic trick that feels restaurant-fancy but is built for real life. It’s perfect for a quick yet impressive weeknight dinner, a lunch that actually excites you, or a effortless starter when friends come over. You don’t need any special skills, just a willingness to create something simple and spectacular. So, let’s turn up some tunes, warm up that skillet, and build a salad that’s about to become a regular in your rotation. Trust me, your taste buds are going to thank you!
Why This Salad Has a Permanent Spot in My Heart
This recipe always takes me right back to my first tiny apartment kitchen. It was about the size of a postage stamp, with one window overlooking a fire escape, but it was all mine. I was fresh out of college, living on a tight budget, but desperately wanting to feel “grown-up” and host my friends for dinner. Fancy restaurants were out of the question, but I was determined to make a meal that felt special.
One Thursday, I had a couple friends coming over. My grocery budget had dwindled to shrimp (on sale!), a head of romaine, and the last of a bottle of Caesar dressing. In a moment of “what’s the worst that could happen?” inspiration, I decided to cook the shrimp and toss them warm on top of the salad. I toasted the last of my bread heels into crumbs for a topping. When we sat down at my rickety IKEA table, the combination of the warm, savory shrimp with the cold, crisp lettuce was a revelation. My friend Mike took one bite, looked up, and said, “Olivia, this is legitimately better than the $24 salad I had last week.” We all laughed, but in that moment, surrounded by good people and eating something I made with love (and not much else), I realized this is what cooking is all about. It’s not about the fanciest ingredients; it’s about the joy of creating and sharing. This Warm Shrimp Caesar Salad has been my little secret weapon for creating that feeling ever since.
Gathering Your Flavor Team
Here’s everything you’ll need to make this flavor magic happen. I’ve included my favorite little tips and swaps so you can make this recipe work perfectly for you!
- 1 lb (450g) large shrimp, peeled and deveined: I prefer 21/25 count (that means 21-25 shrimp per pound) for a nice, meaty bite. Chef’s Insight: If using frozen shrimp (totally fine!), thaw them overnight in the fridge or under cold running water. Pat them incredibly dry with paper towels—this is the secret to getting a good sear, not a steam!
- 1 tbsp olive oil: For cooking our shrimp. A good extra-virgin olive oil adds a lovely fruitiness.
- 1 tsp Cajun or blackening seasoning (optional but amazing): This is our “flavor twist.” It adds a subtle warmth and depth. No Cajun spice? A mix of paprika, garlic powder, onion powder, and a pinch of cayenne works beautifully.
- 2 heads of romaine lettuce: The classic Caesar crunch! Look for firm, bright green heads. Pro Tip: I chop the stems a bit finer than the tender leaves for even texture in every forkful.
- 1/2 cup Caesar dressing: The heart of the matter! Use your favorite store-bought brand or whip up a quick homemade one. I won’t judge either way—we’re about ease and deliciousness here.
- 1/4 cup grated Parmesan cheese: For that essential salty, umami punch. Freshly grated from a wedge will always have superior flavor and melt into the dressing better than the pre-shredded kind (which has anti-caking agents).
- For the Golden Breadcrumbs:
- 1 tbsp butter or olive oil: Butter gives unparalleled rich flavor, but oil works great for a dairy-free version.
- 1/2 cup panko breadcrumbs: I adore panko for their incredible, shatteringly crisp texture. If you only have regular breadcrumbs, they’ll work too—just watch them closely as they toast faster.
- Pinch of salt & pepper: To season the crumbs and make them pop!
Let’s Build Your Masterpiece, Step-by-Step
Ready? Let’s cook! We’re going to move quickly, but I’ll be right here with you every step of the way.
Step 1: Toast Those Breadcrumbs to Golden Perfection. Place a large skillet (I use my trusty cast-iron or a heavy stainless steel pan) over medium heat. Add the butter or oil. Once it’s melted and shimmering, add the panko breadcrumbs, salt, and pepper. Now, here’s the fun part: stir them almost constantly! They go from pale to perfect to burnt surprisingly fast. You’re looking for a beautiful, even golden brown color and a nutty, toasted aroma—this should take about 3-5 minutes. As soon as they’re there, immediately pour them onto a plate or bowl to stop the cooking. Chef’s Hack: Wipe the pan out quickly with a paper towel, but don’t wash it! We want all those delicious, buttery bits left behind for the shrimp.
Step 2: Cook the Shrimp Like a Pro. Return the same skillet to medium-high heat. Add the tablespoon of olive oil. While it heats, toss your thoroughly dried shrimp in the Cajun seasoning (if using). You want each shrimp to have a light, even coating. When the oil is hot (a shrimp should sizzle gently when it touches the pan), add them in a single layer. Do not crowd the pan! If you need to, cook them in two batches. Crowding steams them, and we want a nice sear. Let them cook undisturbed for 2-3 minutes, until the bottoms are pink and lightly charred. Flip each shrimp and cook for another 1-2 minutes on the other side, until they’re opaque and firm to the touch. The whole process is lightning fast! Transfer them to a clean plate. Key Tip: They will continue to cook a tiny bit from residual heat, so it’s better to pull them off a touch early than risk rubbery shrimp.
Step 3: Assemble the Salad Foundation. While the shrimp are cooking or resting, take your largest, most beautiful bowl (I swear, food tastes better from a big bowl!). Add your chopped romaine. Pour over about 3/4 of your Caesar dressing and sprinkle in the grated Parmesan. Now, with clean hands or two large spoons, toss, toss, toss! You want every single leaf to be lightly and evenly kissed by that creamy, cheesy dressing. Start with less dressing—you can always add more, but you can’t take it away.
Step 4: The Grand Finale Assembly. Divide the dressed romaine between four shallow bowls or plates. This isn’t a deep-bowl salad; we want to see all the gorgeous layers. Artfully arrange the warm shrimp over the top of each salad. Then, take a handful of those glorious, golden breadcrumbs and shower them over everything. That contrast of the warm shrimp and the crisp, cool lettuce with the crunchy topping is the whole point! Final Flourish: A little extra crack of black pepper and maybe a small extra sprinkle of Parmesan never hurt anybody.
How to Serve It Up in Style
Presentation is part of the fun! I love serving this on wide, shallow pasta bowls or large rimmed plates so everything has room to shine. For a full meal, I’ll sometimes add a slice of crusty, warm garlic bread on the side for dipping into any leftover dressing on the plate. If you want to lean into the restaurant vibe, garnish each plate with a lemon wedge for a bright, fresh squeeze right before eating, and a few whole anchovies on the side for the traditionalists at the table. Pour a crisp glass of Sauvignon Blanc or a light Pinot Grigio, and you’ve just turned your kitchen table into the best seat in the house.
Make It Your Own: Delicious Twists & Swaps
- The “Keto/Low-Carb” Crunch: Skip the breadcrumbs! Instead, toast 1/4 cup of crushed pork rinds or sliced almonds in the butter for a fantastic, crunchy, low-carb topping.
- Chicken Caesar, Reimagined: Swap the shrimp for 1 lb of chicken breast or thighs, cut into bite-sized pieces. Season the same way and sauté until cooked through (about 6-8 minutes).
- Spicy Chipotle Caesar: Add 1-2 tsp of minced chipotle in adobo sauce to your Caesar dressing and mix well before tossing. It adds a smoky, fiery kick that’s incredible with the shrimp.
- Veggie-Packed Power Bowl: Before adding the lettuce, toss in some halved cherry tomatoes, thinly sliced red onion, and a handful of roasted chickpeas for extra fiber and plant-based protein.
- Dairy-Free Delight: Use a vegan Caesar dressing (many great brands exist now!) and swap the Parmesan for a sprinkle of nutritional yeast or a vegan parm alternative. Use oil instead of butter for the breadcrumbs.
Olivia’s Kitchen Notebook
This recipe has evolved so much from that first apartment version! I used to just use plain shrimp, but one day I grabbed the wrong spice jar and accidentally dusted them with Cajun seasoning instead of paprika. Best. Mistake. Ever. Now that hint of spice is my signature. I also became a breadcrumb convert after a trip to Italy, where they use “pangrattato” (fried breadcrumbs) as a magical finishing touch on pasta. I thought, “Why not salad?” and it was a game-changer. The biggest lesson this recipe has taught me? Don’t be afraid to play with temperature. Serving something warm on a cold salad breaks all the “rules” in the best possible way and creates an eating experience that’s truly memorable. So have fun, make it yours, and always, always make extra breadcrumbs—you’ll find excuses to eat them straight from the bowl.
Your Questions, Answered!
Q: Can I make any part of this ahead of time?
A: Absolutely! You can toast the breadcrumbs up to 2 days ahead and store them in an airtight container at room temperature. You can also clean and chop the romaine, store it in a bag with a paper towel to absorb moisture, and make or measure your dressing. Cook the shrimp just before serving for the best texture and that wonderful warm-on-cold contrast.
Q: My salad got soggy! What happened?
A> The most common culprit is dressing the salad too far in advance. Romaine has a high water content and wilts quickly when dressed. Always dress your greens right before you plan to eat. Also, ensure your lettuce is completely dry after washing. A salad spinner is your best friend here!
Q: How do I store leftovers?
A> This salad is truly best enjoyed fresh. However, if you have leftovers, store the components separately: undressed lettuce in one container, shrimp in another, and breadcrumbs in a third. The dressing will keep in the fridge. Reassemble (you can briefly reheat the shrimp in a microwave for 10 seconds) for the best leftover experience.
Q: My shrimp turned out rubbery. How can I prevent that?
A> Two key things: 1) Don’t overcook them! Shrimp cook in just 2-3 minutes per side. They’re done when they form a loose “C” shape and are opaque. If they curl into a tight “O,” they’re overdone. 2) Pat them DRY before seasoning and cooking. Excess water creates steam, which leads to boiling instead of searing, resulting in a tough texture.
Warm Shrimp Caesar Salad : Crispy, Creamy & Restaurant-Worthy
Description
Warm Shrimp Caesar Salad with Toasted Breadcrumbs
A quick, hearty Caesar upgrade with warm seared shrimp and crispy golden crumbs.
Servings: 4
Prep Time: 10 min
Cook Time: 10 min
Total Time: 20 min
Ingredients
Shrimp
-
1 lb (450 g) large shrimp, peeled & deveined
-
1 tbsp olive oil
-
1 tsp Cajun or blackening seasoning (optional)
-
Salt & pepper
Salad
-
2 heads romaine lettuce, chopped and dried well
-
1/2 cup Caesar dressing
-
1/4 cup grated Parmesan cheese
-
Extra black pepper, to finish
Toasted Breadcrumbs
-
1 tbsp butter or olive oil
-
1/2 cup panko breadcrumbs
-
Pinch salt & pepper
Instructions
-
Toast the breadcrumbs
Heat butter or oil in a skillet over medium heat. Add panko, salt, and pepper. Stir 3–5 minutes until golden and crisp. Transfer to a plate. -
Cook the shrimp
Pat shrimp very dry. Toss with olive oil and seasoning.
Heat the same skillet over medium-high heat. Cook shrimp in a single layer 2–3 minutes per side until pink and opaque. Remove from heat. -
Dress the lettuce
Put chopped romaine in a large bowl. Toss with Caesar dressing and Parmesan until evenly coated. -
Assemble
Divide salad into bowls. Top with warm shrimp and a generous sprinkle of toasted breadcrumbs. Add extra pepper and Parmesan if desired.
Notes
-
Add cherry tomatoes or avocado slices
-
Serve with lemon wedges for squeezing
-
Swap shrimp for cooked chicken if preferred
Nutritional Information (Per Serving, Approximate)
Calories: 360 | Protein: 30g | Carbohydrates: 10g | Dietary Fiber: 2g | Total Fat: 22g | Saturated Fat: 5g | Cholesterol: 225mg | Sodium: 780mg
Note: Nutrition information is an estimate calculated using a standard store-bought Caesar dressing and will vary based on the specific brands and ingredients you use.
Final Thoughts
This Warm Shrimp Caesar Salad is more than just a recipe—it’s a reminder that joy often lives in the simplest of places. In just twenty minutes, you can create something that feels both comforting and exciting, familiar and fresh. It’s proof that you don’t need fancy techniques or expensive ingredients to make a meal that truly delights.
Whether you’re cooking for yourself on a busy weeknight, wanting to impress a date, or sharing a casual dinner with friends, this salad meets you where you are. It’s flexible enough to adapt to your pantry, forgiving enough for a beginner, and delicious enough to earn a permanent spot in your recipe rotation.
So here’s to breaking the salad rules—to serving warm shrimp on crisp lettuce, to showering everything with buttery breadcrumbs, and to creating those small, happy moments around the table. May this recipe become your own secret weapon for turning an ordinary evening into something a little special.
Now, go warm up that skillet. Your new favorite salad is waiting.
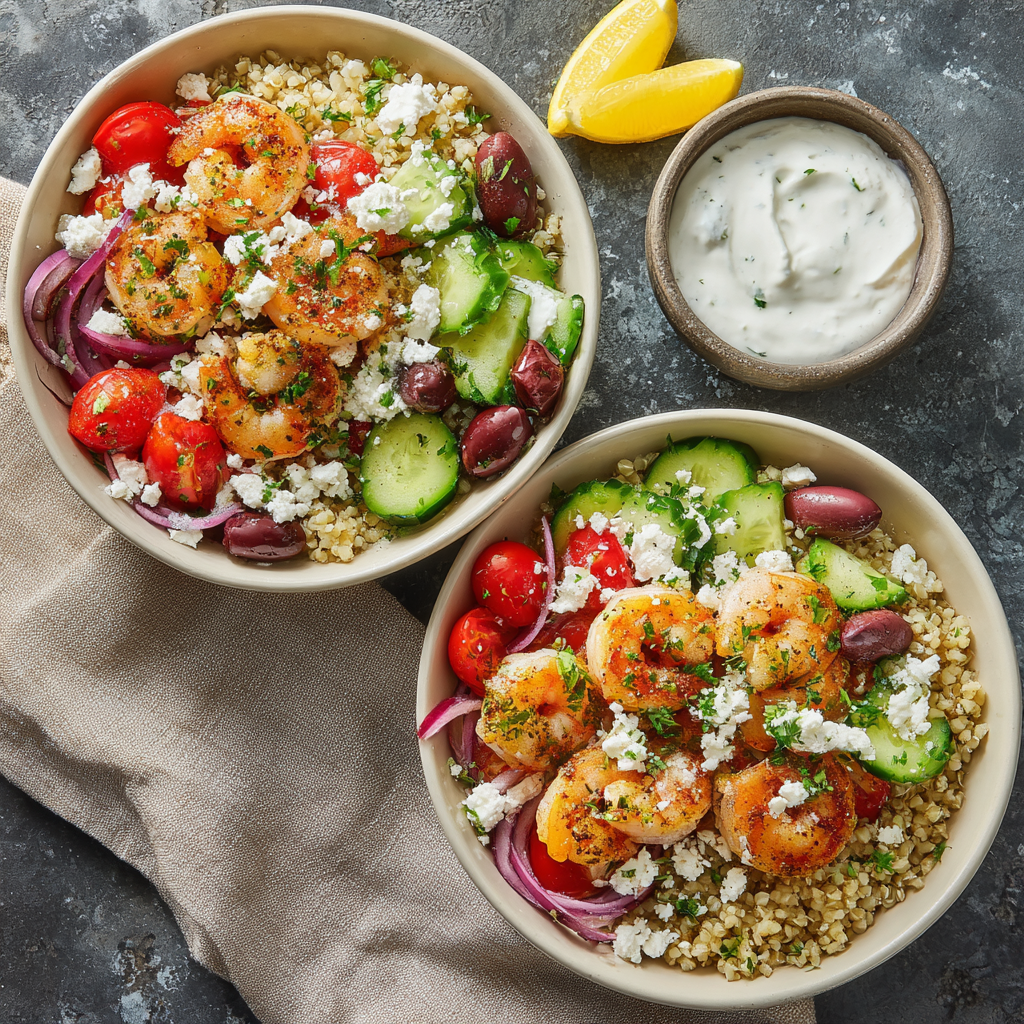
Mediterranean Shrimp Grain Bowls : Fresh, Zesty & Protein-Packed
Mediterranean Shrimp Grain Bowls: A Bowl of Sunshine for Busy Days
Hey there, friend! Come on in, grab an apron, and let’s talk about the kind of meal that doesn’t just feed your body, but totally lifts your spirits. You know those days when you crave something that feels bright, nourishing, and utterly delicious, but the thought of a complicated recipe makes you want to order takeout instead? I hear you. I’ve been there more times than I can count.
That’s exactly why I’m so obsessed with these Mediterranean Shrimp Grain Bowls. They are my go-to, my culinary happy place, my answer to “what’s for dinner?” when I want something that tastes like a vacation but comes together with the ease of a weekday staple. Imagine this: plump, juicy shrimp, kissed with lemon and garlic, piled high on a bed of fluffy grains. Then, we add the crunch of cool cucumber, the burst of sweet tomatoes, the salty punch of olives and feta, and the whole thing gets a luscious drizzle of herby yogurt sauce. Every single forkful is a perfect, harmonious bite.
This isn’t just a recipe; it’s a formula for feeling good. It’s protein-packed, veggie-loaded, endlessly adaptable, and honestly, just so pretty to look at. Whether you’re meal-prepping for a winning week ahead or whipping up a stress-free dinner that will have everyone at the table asking for seconds, this bowl is your new best friend. So, let’s turn up some music, pour ourselves something refreshing, and make a little sunshine together.
A Coastal Memory in a Bowl
The first time I truly fell in love with these flavors, I wasn’t in my kitchen. I was sitting at a rickety wooden table on a sun-drenched Greek island, my feet dusty from exploring, with the Aegean Sea sparkling in the distance. Lunch was a sprawling, shared platter—grilled seafood, bowls of olives, creamy tzatziki, ripe tomatoes, and baskets of bread for soaking up every last drop. There was laughter, incredible simplicity, and this profound sense that food was about so much more than eating; it was about connection and joy.
I came home desperate to bottle that feeling. While I can’t ship us all to the Mediterranean coast (a girl can dream!), I can recreate those vibrant, soul-satisfying flavors on a random Tuesday. This grain bowl is my tribute to that afternoon. It’s my way of bringing that carefree, sunny vibe right to our dinner tables. Every time I make it, I get a little nostalgic for that sea breeze, but I also feel incredibly grateful that such vibrant joy is just a few simple ingredients away.
Gathering Your Sunshine Ingredients
Here’s the beautiful part: everything here is fresh, simple, and easy to find. I love recipes where you can read the ingredient list and instantly picture the flavors coming together. Let’s break it down.
For the Lemon-Garlic Shrimp:
- 1 lb (450g) large shrimp, peeled and deveined: I prefer tail-on for pretty presentation, but tail-off saves messy fingers later—your call! For the best texture, look for wild-caught shrimp if possible. Chef’s Tip: If using frozen shrimp (totally okay!), thaw them overnight in the fridge or in a sealed bag under cold running water. Pat them very dry with paper towels before marinating. This is the secret to getting a nice sear instead of them steaming in the pan.
- 2 tbsp olive oil: Extra virgin is my go-to for its fruity flavor. It helps the marinade cling and prevents sticking in the pan.
- Juice and zest of 1 lemon: Zest first, then juice! The zest is packed with fragrant oils and gives an incredible perfume, while the juice provides the tangy punch. A microplane makes zesting a breeze.
- 2 garlic cloves, minced: Fresh is best here. That pungent, aromatic bite is non-negotiable for that classic Mediterranean flavor.
- Salt & freshly cracked black pepper to taste: Season confidently! Shrimp can handle it.
For the Bowls & Assembly:
- 2 cups cooked quinoa, farro, or brown rice: This is your hearty base! I’m partial to quinoa for its protein content and quick cooking time, but chewy farro or nutty brown rice are fantastic. Pro Swap: For a low-carb option, use cauliflower rice or a big bed of fresh spinach or arugula.
- 1 cup cherry tomatoes, halved: Their sweetness is magic. Use heirloom varieties for crazy color, or regular red ones—they’re all good. Halve them so their juicy insides mingle with everything else.
- 1 cup cucumber, diced: I use English/hothouse cucumbers because their seeds are smaller and skin is thinner, so no peeling needed. That crisp, clean crunch is essential.
- 1/4 cup red onion, thinly sliced: They add a sharp, colorful bite. If raw onion is too strong for you, soak the slices in ice water for 10 minutes. It mellows the flavor beautifully.
- 1/3 cup Kalamata olives, sliced: Their briny, salty depth is the flavor anchor. Don’t skip them! If you’re not an olive fan, try capers for a similar salty pop.
- 1/2 cup crumbled feta cheese: The creamy, tangy crown. I love a good Greek or Bulgarian feta. For a dairy-free version, a sprinkle of nutritional yeast or a few dollops of creamy vegan “feta” spread works wonders.
- Fresh parsley or dill for garnish: A final shower of green herbs makes it look (and taste) restaurant-worthy.
For the Herby Yogurt Sauce:
- 1/2 cup plain Greek yogurt: Full-fat gives the creamiest, richest sauce, but low-fat works too. For a vegan sauce, unsweetened plain coconut or almond yogurt is a great substitute.
- Juice of 1/2 lemon: Brightens up the creaminess.
- 1 tbsp olive oil: Adds silkiness and blends the flavors.
- 1 tbsp chopped fresh dill or parsley: Dill feels very classic Greek to me, but parsley is fantastic if that’s what you have.
- Salt & pepper to taste: Don’t be shy—season until it sings!
Let’s Build Some Bowls: Your Foolproof Steps
Ready? This comes together faster than you can say “delicious.” We’ll work in a logical flow so everything is ready at the same time.
Step 1: The Prep & Marinate (5 minutes)
First, get your shrimp ready. In a medium bowl, combine the olive oil, lemon juice, lemon zest, minced garlic, salt, and pepper. Give it a whisk. Add your thoroughly dried shrimp and toss until each one is lovingly coated. Let them hang out and marinate on the counter for 10-15 minutes. This isn’t just for flavor—taking the chill off the shrimp helps them cook more evenly in the pan. Chef’s Hack: While they marinate, I chop all my veggies and make the sauce. Multitasking for the win!
Step 2: Whip Up the Magic Sauce (3 minutes)
In a small bowl, combine the Greek yogurt, lemon juice, olive oil, chopped herbs, salt, and pepper. Stir until it’s smooth, creamy, and beautiful. Taste it! Does it need more lemon? A pinch more salt? Adjust it to your taste buds. Pop this in the fridge to let the flavors get to know each other while you cook everything else.
Step 3: Cook the Shrimp to Perfection (6-7 minutes)
Here’s the only part that requires your full attention, but it’s over in a flash. Heat a large skillet (stainless steel or cast iron are great for a good sear) over medium-high heat. You want it nice and hot. No need to add more oil—the shrimp have plenty in the marinade. Using tongs, add the shrimp to the hot pan in a single layer. Don’t crowd them! If you need to, cook in two batches. Crowded shrimp will steam and turn rubbery.
Let them cook, undisturbed, for 2-3 minutes, until the bottoms turn pink and get a slight golden sear. Flip each shrimp and cook for another 1-2 minutes on the other side. They’re done when they’ve formed a loose “C” shape and are opaque all the way through. The biggest tip I can give you: the second they’re opaque, take them off the heat! Overcooked shrimp are tough and sad. Transfer them to a clean plate immediately.
Step 4: The Joyful Assembly (5 minutes)
Now for the fun, artistic part! Grab your favorite bowls—I love using wide, shallow ones so you can see all the gorgeous layers. Start with a generous scoop of your cooked grains as the base. Then, create little piles or artfully scatter your chopped tomatoes, cucumber, red onion, and sliced olives around the edges. Place a glorious pile of the warm, lemony shrimp right in the center. Crumble that creamy feta cheese over everything like delicious snow. Finally, take that herby yogurt sauce out of the fridge and drizzle it liberally over the whole masterpiece. Finish with a final sprinkle of fresh herbs.
How to Serve & Savor
These bowls are fantastic served warm right after you cook the shrimp, when the grains are fluffy and the shrimp are juicy. But here’s a secret: they are equally incredible served chilled, making them the ultimate make-ahead lunch. If you’re serving for dinner, I love adding a side of warm pita bread or crusty baguette for dipping into any extra sauce. For a fuller spread, pair it with a simple arugula salad dressed with lemon and olive oil. Serve everything family-style and let everyone dig in, creating their own perfect bite. It’s interactive, colorful, and guaranteed to spark happy conversation.
Make It Your Own: Endless Twists
The beauty of a grain bowl is its versatility. Play with it! Here are a few of my favorite spins:
- Greek Chicken Bowl: Swap the shrimp for bite-sized pieces of seasoned chicken breast or thighs. Cook until golden and cooked through.
- Falafel Power Bowl: Go vegetarian! Use crispy baked or pan-fried falafel as your protein. Add a scoop of hummus and some pickled turnips if you’re feeling fancy.
- Lemony White Bean Bowl: For a pantry-friendly, vegan option, toss a can of rinsed cannellini beans in the same lemon-garlic marinade (skip the marinating time) and warm them in the pan. They’re creamy and protein-packed.
- “Everything but the Kitchen Sink” Bowl: Roast some bell peppers and zucchini. Add artichoke hearts, pepperoncini, or sun-dried tomatoes. Use up whatever fresh veggies you have!
- Spicy Harissa Twist: Add 1-2 teaspoons of harissa paste to the shrimp marinade and a little to the yogurt sauce for a smoky, spicy kick.
Mediterranean Shrimp Grain Bowls : Fresh, Zesty & Protein-Packed
Description
Mediterranean Shrimp Grain Bowls
Bright, fresh, protein-packed bowls with lemon-garlic shrimp, crisp veggies, grains, and herby yogurt sauce.
Servings: 4
Prep Time: 15 min
Cook Time: 10 min
Total Time: 25 min
Ingredients
Lemon-Garlic Shrimp
-
1 lb (450 g) large shrimp, peeled & deveined
-
2 tbsp olive oil
-
Zest and juice of 1 lemon
-
2 garlic cloves, minced
-
Salt and black pepper to taste
Grain Base
-
2 cups cooked quinoa, farro, or brown rice
Bowl Toppings
-
1 cup cherry tomatoes, halved
-
1 cup cucumber, diced
-
1/4 cup red onion, thinly sliced
-
1/3 cup Kalamata olives, sliced
-
1/2 cup crumbled feta cheese
-
Fresh parsley or dill, chopped
Herby Yogurt Sauce
-
1/2 cup plain Greek yogurt
-
Juice of 1/2 lemon
-
1 tbsp olive oil
-
1 tbsp chopped fresh dill or parsley
-
Salt & pepper to taste
Instructions
-
Marinate the shrimp
In a bowl, mix olive oil, lemon zest, lemon juice, garlic, salt, and pepper. Add shrimp and toss to coat. Let sit 10–15 minutes. -
Make the yogurt sauce
Stir yogurt, lemon juice, olive oil, herbs, salt, and pepper until smooth. Chill until serving. -
Cook the shrimp
Heat a skillet over medium-high heat. Add shrimp in a single layer. Cook 2–3 minutes per side until pink and opaque. Remove from heat immediately. -
Build the bowls
Divide cooked grains among bowls. Top with tomatoes, cucumber, onion, olives, and shrimp. -
Finish
Sprinkle with feta and fresh herbs. Drizzle with yogurt sauce and serve.
Notes
-
Use cauliflower rice or greens instead of grains.
-
Swap shrimp for grilled chicken or chickpeas.
-
Add roasted peppers or zucchini for extra veggies.
A Few Notes from My (Messy) Apron
This recipe has been on a journey with me. It started as a frantic “what’s in the fridge?” dinner and has evolved into my most-requested meal prep recipe. I’ve made it for book club, after yoga class, and on nights when my only goal was to eat something that made me feel amazing. The biggest evolution? The sauce. I used to just squeeze lemon over the top, but one day I mixed yogurt with the leftover marinade ingredients and had a total “aha!” moment. It ties the entire bowl together.
Final Thoughts
These Mediterranean Shrimp Grain Bowls are more than just a meal—they’re a reminder that joyful, vibrant eating doesn’t have to be complicated. In the rush of everyday life, it’s easy to forget that food can be both nourishing and soul-filling, that a simple bowl can carry the memory of a sun-drenched coast or the comfort of a well-loved routine.
What I love most about this recipe is its generous flexibility. It meets you where you are—whether you’re meal-prepping for a busy week, improvising with what’s in the fridge, or setting a beautiful table for friends. It’s a blueprint for building something beautiful, one layer at a time.
As you take that first bite—the tang of lemon, the brine of olives, the creaminess of feta and yogurt, the tender pop of shrimp—I hope you feel a little spark of that Mediterranean sunshine, no matter where you are. I hope it becomes not just a recipe you make, but a feeling you return to, again and again.
So here’s to simple ingredients, vibrant flavors, and the small act of making something good for yourself and the people you love. May your bowls always be colorful, your shrimp never overcooked, and your kitchen filled with the kind of easy joy that makes even a Tuesday feel special.
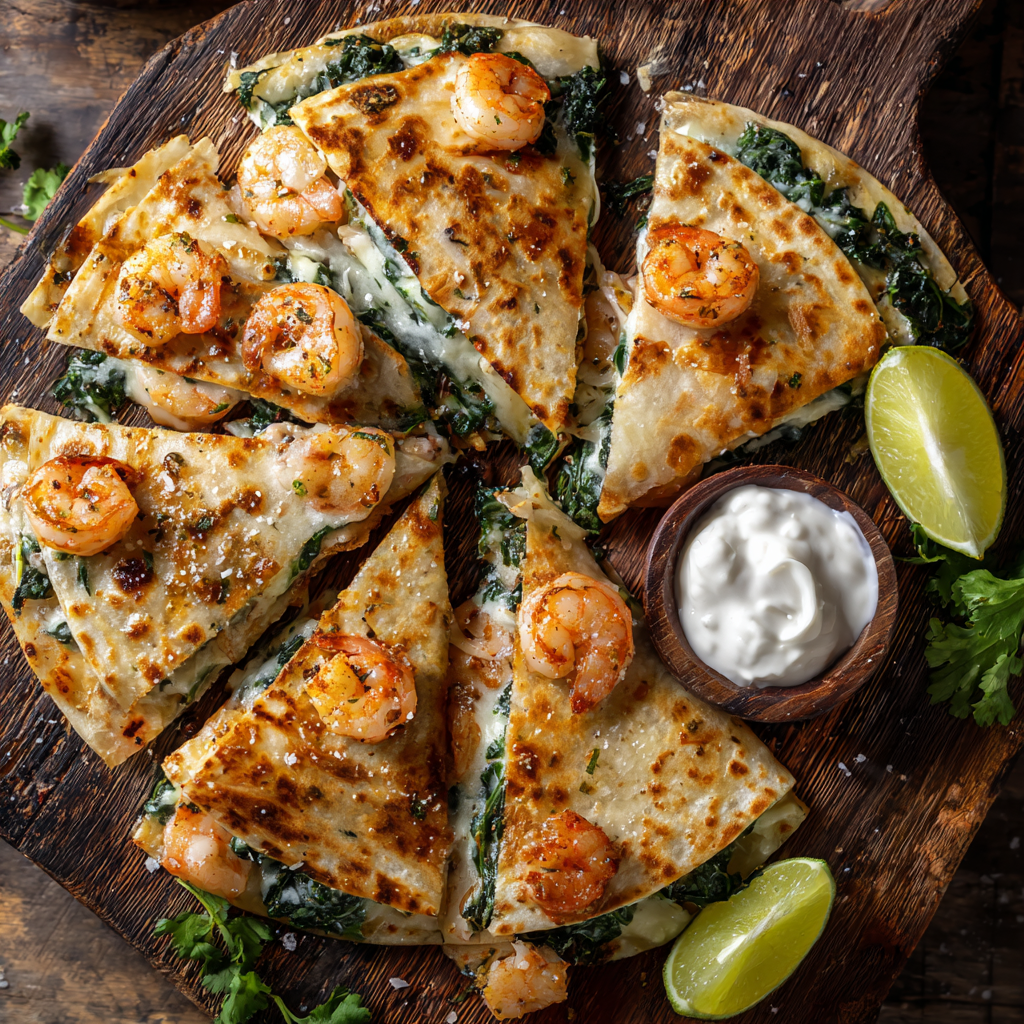
Shrimp & Spinach Quesadillas : Golden, Cheesy & Packed with Flavor
The Easiest Way to Turn a Tuesday into a Fiesta
Hey there, friend! Come on in and pull up a stool. Can you smell that? It’s the sizzle of garlic hitting a hot pan, the buttery scent of a tortilla toasting to golden perfection, and the unmistakable promise of melted cheese. That, my friend, is the soundtrack to one of my all-time favorite quick-fix meals: Shrimp & Spinach Quesadillas.
Let’s be real. Some nights, you want a project—a simmering pot of ragù, a lovingly laminated pastry. But most nights? You want something fast, fabulous, and deeply satisfying. You want a meal that feels like a treat without the treat-level effort. That’s where these golden, crispy, flavor-packed pockets of joy come in.
Imagine plump, garlicky shrimp and tender wilted spinach, all hugged by a gooey blanket of melty cheese, sandwiched between two layers of tortilla that crackle with every bite. It’s comfort food with a coastal twist, a dinner that’s as fun to make as it is to eat. And the best part? You’re about 25 minutes and one slightly messy skillet away from making it happen. I promise you, this isn’t just a recipe; it’s your new secret weapon for turning simple ingredients into pure, unadulterated deliciousness. So, tie on that apron (the messy one is always the best one), and let’s get cooking!
A Beachside Snack That Stuck
This recipe has a little bit of my heart baked right into it, and it all started on a windswept family trip to the coast. I was about ten, and after a long day of chasing waves and building lopsided sandcastles, my hunger had reached legendary proportions. We stumbled into a tiny, sun-bleached shack that served exactly three things: fish tacos, cold soda, and shrimp quesadillas.
My dad ordered one to share. When it arrived—blistered, oozing, and smelling like the ocean and heaven had a baby—I was skeptical. Shrimp? In a quesadilla? But one bite transformed me. The crunch, the sweet shrimp, the sharp bite of the salsa… it was a revelation. I’ve spent years tinkering in my own kitchen to recreate that magic, adding my spin with garlic and spinach for a pop of color and nutrition. Every time I make these, I’m ten years old again, sandy-toed and blissfully happy, reminded that the best food isn’t about fancy techniques; it’s about the memories you fold into it.
Gathering Your Flavor Crew
Here’s the beautiful part: this is a short, sweet, and simple ingredient list. Each one plays a starring role, and I’ve got some notes to help you make it your own.
- 1 lb (450g) shrimp, peeled & deveined – I prefer medium-sized (41/50 count) for the perfect bite. Chef’s Insight: If you’re using frozen shrimp (no shame, I do it all the time!), thaw them overnight in the fridge or under cold running water. Pat them very dry with paper towels—this is the secret to a good sear, not a steam!
- 1 tbsp olive oil or butter – Olive oil for a lighter feel, butter for that rich, indulgent flavor. Why not a mix of both? You’re the boss here.
- 2 garlic cloves, minced – Fresh is key! That bright, pungent aroma is non-negotiable for building the flavor base.
- 2 cups fresh spinach – It looks like a mountain, but it wilts down to nothing. Baby spinach is tender and perfect, but regular spinach works great—just give the stems a rough chop.
- 1 ½ cups shredded cheese – I love a blend of mozzarella (for its epic melt) and Monterey Jack (for a little tang). A Mexican blend or even pepper jack for a kick are fabulous swaps.
- 4 large flour tortillas – The “blank canvas.” Burrito-sized tortillas give you plenty of room to fill and fold. For a crispier result, look for thin “street taco” style tortillas and make more, smaller quesadillas.
- Salt & pepper – Your trusty sidekicks. Season the shrimp generously!
For the Creamy Dip:
- 1/2 cup sour cream or Greek yogurt – Sour cream is classic and luscious. Greek yogurt adds a lovely tang and a protein boost. I use them interchangeably depending on what’s in my fridge.
- Juice of 1/2 lime – The acid cuts through the richness and brightens everything up.
- Pinch of salt – Just a pinch to wake up the flavors.
- Optional: chopped cilantro or a dash of hot sauce – This is your chance to personalize. I’m team “cilantro and a few drops of Cholula.”
Let’s Build Some Crispy, Cheesy Magic
Ready? Let’s fire up the stove. This process is fast and fluid, so I like to have my shrimp prepped, cheese shredded, and tortillas laid out before I start. We’re going for “weeknight dinner flow,” not “chaotic scramble.” You’ve got this!
- Cook the Shrimp: Heat your olive oil or butter in a large skillet over medium-high heat. Add the minced garlic and sauté for just 30 seconds—until it’s fragrant but not brown! Add your dried-off shrimp in a single layer. Let them cook undisturbed for 2-3 minutes until the bottoms turn pink and get a slight sear. Flip them, cook another 1-2 minutes until opaque and curled. Season with salt and pepper, then transfer them to a plate. Chef’s Hack: Don’t overcrowd the pan! If you need to, cook the shrimp in two batches. Steamed shrimp are sad shrimp.
- Wilt the Spinach: In that same glorious pan (no need to wash it—all that flavor stays!), toss in the spinach. It might seem like a lot, but just keep stirring for 1-2 minutes until it dramatically wilts down. Turn off the heat. Little Tip: If there’s a lot of liquid in the pan from the spinach, just drain it off. We want flavor, not sogginess.
- Assemble with Strategy: Lay your tortillas flat. On one half of each tortilla, sprinkle a light layer of cheese—this acts as the “glue.” Then, distribute the shrimp and spinach evenly. Top with another, more generous handful of cheese. The cheese on the top and bottom melts together, sealing the deal. Fold the empty half over the filling. Pro Move: Leave a small cheese-free border around the edge. When you fold it, the melting cheese will seal the quesadilla shut, preventing any filling from escaping during the flip.
- Cook to Golden Perfection: Wipe out your skillet or heat a griddle over medium heat. No extra oil is needed if you’re using a good non-stick pan. Place a quesadilla in the pan and cook for 2-3 minutes per side, pressing down gently with a spatula, until it’s beautifully golden brown and you can hear the cheese bubbling inside. The Flip: Be confident! Slide your spatula fully under the quesadilla, lift, and flip in one smooth motion. Repeat with remaining quesadillas.
- Whisk the Dip: While the quesadillas cook, mix the sour cream, lime juice, salt, and any add-ins in a small bowl. Give it a taste and adjust—more lime? More heat? Perfect.
Plate It Like a Pro (Or Just Dig In!)
Transfer each quesadilla to a cutting board and let it rest for just a minute—this helps the cheese set slightly so it doesn’t all gush out when you cut. Use a sharp knife or pizza cutter to slice each into 3 or 4 wedges. Arrange them on a platter with the bowl of that zesty creamy dip right in the center. For a real restaurant-style touch, add a quick side: a handful of mixed greens tossed with lime juice, or some colorful pico de gallo. But honestly? A plate of these golden wedges and that dip is a complete and happy meal.
Make It Your Own: 5 Tasty Twists
- Spicy Fiesta: Add a diced jalapeño to the garlic when sautéing. Use pepper jack cheese and add a drizzle of sriracha to the dip.
- Mediterranean Flip: Swap spinach for chopped sun-dried tomatoes and kalamata olives. Use feta cheese mixed with a little mozzarella, and add a sprinkle of dried oregano.
- “Creamy” Cajun: Toss the shrimp in 1 tsp of Cajun seasoning before cooking. Stir 2 tbsp of cream cheese into the wilted spinach for an ultra-rich filling.
- Chicken Swap: Not a shrimp fan? Use an equal amount of shredded rotisserie chicken or diced, cooked chicken breast.
- Low-Carb/Gluten-Free: Use your favorite gluten-free or grain-free tortillas. For a keto-style version, you can even use large cheese wraps or make “quesadillas” by folding the filling inside two crispy cheese shells.
From My Kitchen to Yours
This recipe is a living, breathing thing in my house. I’ve made it for rushed weeknights, casual Friday night gatherings with a bottle of wine, and even as a fun, interactive meal where everyone assembles their own at the table. It’s evolved from that simple beach shack version to include whatever I have on hand—sometimes it’s a handful of corn kernels, a sprinkle of red onion, or the last of a bell pepper. The formula is foolproof: protein + veg + cheese + tortilla = happiness.
A funny confession: I used to be so impatient that I’d crank the heat to high to cook the quesadillas faster. The result? Burnt tortillas with cold, unmelted cheese in the middle. I learned the hard way that medium heat is your best friend—it gives the cheese time to melt into gooey perfection while the tortilla crisps up slowly. Trust the process!
Your Questions, Answered
Q: My quesadilla falls apart when I try to flip it! What am I doing wrong?
A: Ah, the classic flip-flop! First, make sure you’re not overstuffing it—too much filling is heavy. Second, that initial light layer of cheese on the bottom is crucial as a sealant. Third, and most importantly, wait until the bottom is truly golden and crisp before attempting the flip. A floppy tortilla won’t support the weight. Use a wide, thin spatula and be decisive!
Q: Can I make these ahead of time?
A> You can absolutely prep the components ahead! Cook the shrimp and spinach, shred the cheese, and store them separately in the fridge for up to a day. When you’re ready to eat, assembly and cooking take just minutes. I don’t recommend assembling them hours ahead, as the tortilla can get soggy.
Q: My cheese is leaking out and burning in the pan. Help!
A> This usually means the heat is a touch too high, or you’re using too much cheese right at the very edge. Remember that border I mentioned? Keep the filling centered. If a little cheese does escape, don’t stress—it creates delicious, crispy cheese “frico” bits. Just scrape the pan clean between quesadillas.
Q: What’s the best way to reheat leftovers?
A> To maintain the crispness, avoid the microwave. Reheat leftover wedges in a toaster oven or a 375°F oven for about 5-10 minutes, or in a dry skillet over medium heat until warmed through. They won’t be *quite* as perfect as fresh, but they’ll still be delicious.
Shrimp & Spinach Quesadillas : Golden, Cheesy & Packed with Flavor
Description
Hey there! If you want a dinner that’s quick, crispy, and packed with flavor, these Shrimp & Spinach Quesadillas are a perfect pick. They come together in about 25 minutes with simple ingredients and one pan. Garlicky shrimp, melty cheese, and tender spinach tucked inside golden tortillas — easy and satisfying.
Ingredients
For the quesadillas
-
1 lb (450g) shrimp, peeled and deveined
-
1 tbsp olive oil or butter
-
2 garlic cloves, minced
-
2 cups fresh spinach
-
Salt and black pepper to taste
-
1½ cups shredded cheese (mozzarella, Monterey Jack, or Mexican blend)
-
4 large flour tortillas
For the quick dip (optional but recommended)
-
½ cup sour cream or Greek yogurt
-
Juice of ½ lime
-
Pinch of salt
-
Optional: chopped cilantro or a few drops of hot sauce
Instructions
-
Cook the shrimp
Heat oil or butter in a skillet over medium-high heat. Add garlic and cook 30 seconds. Add shrimp in a single layer and cook 2–3 minutes per side until pink and opaque. Season with salt and pepper. Remove to a plate. -
Cook the spinach
In the same pan, add spinach and cook 1–2 minutes until wilted. Drain any excess liquid. -
Assemble
Lay tortillas flat. Sprinkle cheese over one half of each tortilla. Add shrimp and spinach, then more cheese on top. Fold tortillas over. -
Toast
Cook quesadillas in a dry skillet over medium heat for about 2–3 minutes per side until golden brown and cheese is melted. -
Make the dip
Stir dip ingredients together in a small bowl. -
Slice & serve
Rest 1 minute, slice into wedges, and serve warm with dip.
Notes
-
Pat shrimp dry before cooking so they sear instead of steam.
-
Medium heat is best — too hot burns the tortilla before cheese melts.
-
Don’t overfill or flipping gets messy.
-
Cheese on bottom and top helps “glue” everything together.
-
Use a wide spatula and flip confidently.
Nutritional Info (Per Quesadilla, Approximate)
Calories: 420 | Protein: 28g | Carbohydrates: 28g | Fat: 22g | Fiber: 2g
Note: Nutrition calculated using olive oil, mozzarella, and full-fat sour cream. Values will vary with substitutions.
Prep Time: 10 minutes | Cook Time: 15 minutes | Total Time: 25 minutes | Serves: 4
Final Thoughts: The Easiest Way to Turn a Tuesday into a Fiesta
So there you have it—a crispy, cheesy, garlicky journey from a windswept beach shack to your very own kitchen. These Shrimp & Spinach Quesadillas are more than just a quick meal; they’re a reminder that great food doesn’t need to be complicated. It’s about simplicity, flavor, and a little bit of joy sizzling in a pan.
In 25 minutes, you can transform humble ingredients into something truly special—a dinner that feels like a celebration, no matter what day it is. Whether you stick to the classic version or spin it into something new with one of the tasty twists, you’re not just feeding your body; you’re creating a moment. A moment of crunch, of melty goodness, of maybe even a little sandy-toed nostalgia.
So the next time you’re staring into the fridge, wondering what to make, remember this: happiness is just a tortilla, a handful of shrimp, and a little bit of melted magic away. Don’t overthink it. Just heat the pan, trust the process, and turn an ordinary Tuesday into your own personal fiesta.




