
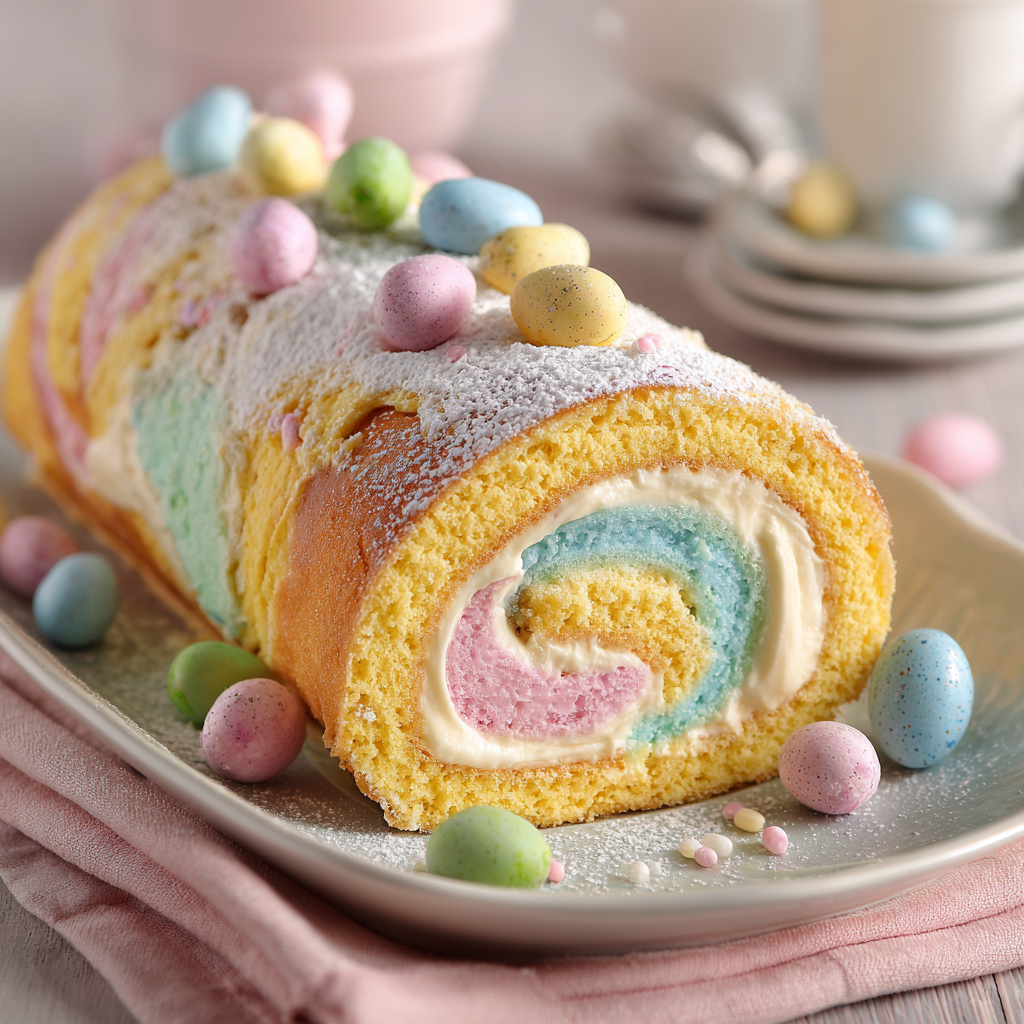
Easter Swiss Roll : A Pastel-Perfect Spring Dessert
Easter Swiss Roll: Your New Spring Tradition Awaits!
Hey there, friend! Can you smell that? It’s the sweet, promising scent of a cake baking, mixed with the crisp, hopeful air of spring. Welcome back to my kitchen—I’m so glad you’re here. As the days get longer and the world outside starts to blush with pastel colors, my baking instincts kick into high gear. There’s something magical about creating a dessert that doesn’t just taste good, but looks like a celebration. That’s exactly what this Easter Swiss Roll is all about.
Imagine slicing into a cloud-soft, marbled sponge cake, revealing a swirl of dreamy cream cheese filling dotted with cheerful bits of pastel candy. It’s whimsical, it’s delicious, and it has that undeniable “wow” factor that makes everyone at the table lean in for a closer look. But here’s my favorite part: it’s deceptively simple. If you’ve ever felt intimidated by the elegant spiral of a roll cake, I’m here to be your guide. We’re going to walk through this together, step-by-cozy-step, and I’ll share all my favorite kitchen hacks to ensure success. This isn’t just a recipe; it’s a chance to create a gorgeous, shareable centerpiece that embodies the joy of the season. So, tie on your favorite apron (the messy one tells the best stories), and let’s make something unforgettable!
Of Sugar, Spring, and Sweet Memories
This recipe always takes me straight back to my Grandma Rose’s sun-drenched kitchen. Easter was her holiday. While other families had elaborate feasts, her pride and joy was the dessert table—a pastel wonderland of coconut nests, lemon bars, and, the crowning glory, her “Rainbow Log.” It wasn’t a Swiss roll per se (hers was a bit denser, packed with walnuts), but the spirit was the same: a beautiful, rolled cake that looked like it came from a fancy bakery. My job, as her designated “sous-chef,” was to sprinkle the crushed pastel mints. I took this duty very seriously, arranging each fragment as if it were a precious jewel.
One year, I got a little… overzealous. A whole cup of candies ended up in the filling. When we went to roll it, the log cracked spectacularly. My heart sank, but Grandma just laughed her warm, crinkly-eyed laugh. “Olivia, darling,” she said, “now it’s a rustic bark!” She slathered on extra frosting, stuck whole marshmallow chicks on top, and declared it the best one yet. That day, she taught me that kitchen “failures” are often just opportunities for creativity, and that the real magic isn’t in perfection—it’s in the joy of making and sharing something with love. This Easter Swiss Roll is my homage to her and that lesson: a little whimsical, a little sweet, and absolutely full of heart.
Gathering Your Pastel Palette
Here’s everything you’ll need to create this spring masterpiece. I’ve included my little chef notes to help you understand the “why” behind each ingredient—knowledge is power (and better baking)!
For the Cake:
- 6 large egg whites: Room temperature is key! They whip up to a much greater volume, giving us that light, airy sponge we crave. Save the yolks for a rich pasta carbonara or custard later.
- 1 tsp lemon juice (or white vinegar): This acidic magic helps stabilize the egg white foam, making it less likely to collapse. It’s our little insurance policy for a tall, fluffy cake.
- ¼ tsp salt: A flavor enhancer! It balances the sweetness and makes all the other flavors pop.
- ¼ cup granulated sugar: We add this gradually while whipping to dissolve it completely, creating a smooth, glossy meringue.
- ½ cup + 1 tbsp sifted cake flour: Cake flour has a lower protein content than all-purpose, which means a more tender, delicate crumb. Sifting is non-negotiable—it aerates the flour, making it easier to fold in without deflating our precious meringue.
- Gel food coloring (pink, yellow, blue, green): Gel is the champion here. It’s super concentrated, so you get vibrant pastels without adding extra liquid that could thin the batter.
- Powdered sugar (for dusting): This will be our “blank canvas” dusting to prevent sticking when we roll the warm cake, and our final snowy finish.
For the Filling:
- 4 oz cream cheese, softened: Leave it on the counter for a good hour. Soft cream cheese blends smoothly, preventing any lumpy surprises. Full-fat gives the best flavor and stability.
- ¾ cup heavy cream (cold): The colder the cream, the faster and better it whips. We’re looking for stiff peaks that will hold our roll’s shape.
- 1 tbsp sugar: Just a touch to subtly sweeten the filling and complement the tang of the cream cheese.
- Dash of vanilla extract: The flavor backbone. A pure vanilla extract makes all the difference.
- Crushed Easter candies: The fun part! Mini eggs, pastel M&M’s, or malted milk eggs add delightful crunch and bursts of chocolatey flavor. Crush them roughly—you want varied sizes for texture.
Let’s Roll! Step-by-Step Instructions
Follow these steps, breathe, and have fun. You’ve got this!
Step 1: Prep Like a Pro. Preheat your oven to 350°F (175°C). Line a standard 10×15 inch jelly roll pan with parchment paper, letting a little excess hang over the short sides for easy lifting. Give it a very light spray with nonstick spray—this glues the paper down and ensures the cake releases perfectly. Chef’s Hack: Do this first. An anxious batter waiting for a pan is a deflating batter!
Step 2: Whip the Meringue Base. In the impeccably clean bowl of your stand mixer (or using a hand mixer), combine the room-temperature egg whites, lemon juice, and salt. Beat on medium-high until the mixture is frothy and opaque. With the mixer running, gradually—I mean, a tablespoon at a time—add the granulated sugar. Once it’s all in, crank the speed to high and whip until you get soft, glossy peaks. This means when you lift the whisk, the peak will curl over gently. Don’t go to stiff peaks; it can make the cake dry and difficult to roll.
Step 3: Fold with a Gentle Touch. Sift the cake flour over the meringue in two additions. Using a large rubber spatula, fold it in gently. Imagine you’re carefully turning the batter over onto itself, scraping from the bottom of the bowl. We want to incorporate the flour while preserving as many of those precious air bubbles as possible. No vigorous stirring!
Step 4: Create Your Pastel Swirl. Now for the art project! Divide the batter evenly between three small bowls. Add a tiny drop of gel food coloring to each—pink, yellow, and one more (blue and green mixed make a lovely spring aqua). Gently fold the color in until just combined. Here’s the fun part: spoon dollops of each colored batter back into one large bowl. With a knife or skewer, give the batter just 2-3 lazy swirls. We want a marbled effect, not mud!
Step 5: Bake & the Critical Warm Roll. Pour and spread the marbled batter evenly into your prepared pan, getting it into the corners. Bake for 10-12 minutes. The cake is done when the top springs back lightly when touched. While it bakes, lay out a clean kitchen towel and dust it liberally with powdered sugar. The moment the cake comes out, invert it onto the towel. Carefully peel off the parchment paper it baked on. Now, starting at a short end, use the towel to gently roll the cake up into a loose spiral. Let it cool completely rolled up like this. This “trains” the cake to roll and prevents cracking later!
Step 6: Make the Dreamy Filling. In your mixer bowl, beat the softened cream cheese and 1 tbsp sugar until smooth. Switch to the whisk attachment. With the mixer on low, gradually pour in the cold heavy cream and vanilla. Once combined, increase speed to medium-high and whip until you have firm, spreadable peaks. Don’t over-whip, or it can become grainy.
Step 7: Assemble with Love. Carefully unroll the completely cooled cake. It’s okay if it stays slightly curled. Spread the cream cheese filling evenly over the surface, leaving a small border at the far edge. Sprinkle the crushed candies generously over the filling. Then, using the towel to help guide you, re-roll the cake forward into a tight spiral, peeling the towel away as you go.
Step 8: Chill, Garnish, and Slice. Place the roll seam-side down on a serving platter and refrigerate for at least 30 minutes (up to 4 hours) to set. This makes slicing cleanly a breeze. Just before serving, dust the top with a snowfall of powdered sugar and decorate with a few whole candies for that “wow” factor. Use a sharp serrated knife, wiping it clean between slices, for perfect pieces.
Presenting Your Masterpiece
Place your finished roll on a long, rustic wooden board or a simple white platter to let the colors shine. For a truly stunning Easter table, scatter a few real or ceramic eggs, sprigs of fresh mint or lavender, and pastel napkins around the platter. Slice it thick for a hearty dessert portion, or thinner for a dainty afternoon tea treat. I love serving it with a pot of fresh herbal tea or a glass of cold milk for the kids (and kids-at-heart).
Make It Your Own: Fun Variations
- Citrus Sunshine: Add 1 tsp of lemon or orange zest to the cake batter and a tbsp of the corresponding juice to the filling for a bright, zingy twist.
- Berry Bliss: Fold 1/2 cup of finely chopped, well-dried strawberries or raspberries into the filling along with the candies.
- Chocolate Indulgence: Swap 2 tbsp of the cake flour for cocoa powder. Use chocolate candies and add a tbsp of cocoa powder to the filling.
- “Bunny Garden”: Skip the candies inside. After frosting, press shredded coconut onto the outside of the roll to look like “grass” and top with jelly bean “eggs” and a marshmallow bunny.
- Dairy-Free Swap: Use a plant-based cream cheese and coconut cream (chilled overnight, use the solid part) for the filling.
Olivia’s Chef Notes
This recipe has been my spring fling for years, and it’s evolved with every batch. The first time I made it, I used liquid food coloring and ended up with a sad, greyish swirl—a true pastel fail! That’s when I became a gel-color evangelist. I’ve also learned that the “roll while warm” step is the hill I will die on. It feels counterintuitive, but it’s the secret handshake of all successful roll cakes. One year, my cat Waffles decided the dusted towel was his new throne mid-process. Let’s just say we had to start over, and he got a powdered sugar mustache. The mess was worth the laugh. Don’t stress the small cracks; a little powdered sugar covers a multitude of sins, and the flavor is always a home run.
Your Questions, Answered
Q: My cake cracked when I re-rolled it with the filling! What happened?
A: The most common culprits are overbaking (which dries it out) or not rolling it tightly enough while it was warm and flexible. Don’t worry! It’s still delicious. Just press it together, chill it well so the filling acts like glue, and dust generously with powdered sugar. It’ll taste incredible, I promise.
Q: Can I make this ahead of time?
A: Absolutely! You can bake the cake, roll it in the towel, and let it cool completely. Then wrap the whole towel-wrapped roll tightly in plastic wrap and keep it at room temperature for up to a day. Make the filling and assemble the day you plan to serve it. The assembled roll holds beautifully in the fridge for up to 24 hours.
Q: Why did my filling turn out runny?
A: This usually means the cream cheese wasn’t soft enough (causing lumps that break the emulsion) or the heavy cream wasn’t cold enough. Also, ensure you’re using full-fat, brick-style cream cheese, not the spreadable kind in a tub. If it’s a bit soft, just pop the whole assembled roll in the freezer for 20 minutes before slicing to firm it up.
Q: I don’t have a jelly roll pan. Can I use a baking sheet?
A> You can, but the result will be different. A standard baking sheet is larger and has lower sides, so the batter will spread thinner and bake faster, leading to a drier cake that’s harder to roll. If it’s all you have, keep a very close eye on the bake time (maybe 7-9 minutes) and be extra gentle.

Easter Swiss Roll : A Pastel-Perfect Spring Dessert
Description
This Easter Swiss Roll is soft, fluffy, and filled with creamy goodness and cheerful pastel candy. It looks fancy on the table but is surprisingly simple to make. With a light sponge cake and smooth cream cheese filling, it’s the kind of dessert that becomes a yearly tradition. Perfect for Easter gatherings, spring parties, or a fun weekend bake.
Ingredients
For the Cake
-
6 large egg whites, room temperature
-
1 tsp lemon juice or white vinegar
-
¼ tsp salt
-
¼ cup granulated sugar
-
½ cup + 1 tbsp cake flour, sifted
-
Gel food coloring (pastel colors)
-
Powdered sugar, for dusting
For the Filling
-
4 oz cream cheese, softened
-
¾ cup cold heavy cream
-
1 tbsp sugar
-
1 tsp vanilla extract
-
½–¾ cup crushed pastel Easter candies or mini chocolate eggs
Instructions
1️⃣ Prep Pan & Oven
Preheat oven to 350°F (175°C). Line a 10×15-inch jelly roll pan with parchment and lightly grease.
2️⃣ Whip Egg Whites
Beat egg whites, lemon juice, and salt until foamy. Slowly add sugar while mixing. Beat to soft glossy peaks.
3️⃣ Add Flour
Sift flour over the meringue in two additions. Gently fold with a spatula until just combined.
4️⃣ Color & Marble
Divide batter into 3 bowls. Tint each with gel coloring. Spoon dollops back into one bowl and swirl lightly for a marbled look.
5️⃣ Bake
Spread batter evenly in pan. Bake 10–12 minutes until the top springs back when touched.
6️⃣ Roll While Warm
Dust a clean towel with powdered sugar. Turn hot cake onto towel, peel parchment, and roll up from the short side with the towel. Cool completely.
7️⃣ Make Filling
Beat cream cheese and sugar until smooth. Add cream and vanilla. Whip to firm peaks.
8️⃣ Fill & Roll Again
Unroll cooled cake. Spread filling evenly and sprinkle crushed candies. Roll back up tightly (without towel).
9️⃣ Chill & Serve
Chill at least 30 minutes. Dust with powdered sugar, slice with a serrated knife, and serve.
Notes
-
Roll the cake while warm — this prevents cracking later.
-
Use gel coloring only so the batter doesn’t thin out.
-
Don’t overbake — dry cake cracks more easily.
-
Cold cream whips best for a stable filling.
-
Leave a border when spreading filling so it doesn’t squeeze out.
Nutritional Info (Per Slice, Approximately)
Calories: ~166 | Fat: 8g | Saturated Fat: 5g | Carbohydrates: 19g | Sugar: 12g | Protein: 4g
***
There you have it! Your guide to creating a show-stopping, delicious, and joyful Easter Swiss Roll. I can’t wait for you to try it. Remember, baking is an act of love, especially when shared. Tag me on social if you make it—I love seeing your kitchen creations! Happy baking, and happy spring!
The Final Whisk
In the quiet hum of the oven and the soft peak of whipped cream, we find more than a recipe. We find a rhythm—the rhythm of a season turning, of memories woven into batter, of creating something beautiful to offer up with love.
This Swiss Roll is a celebration captured in cake. A marbled promise of new beginnings, a swirl of sweetness to share. It’s the tangible proof that a bit of flour, eggs, and sugar, handled with care, can become a small piece of art for the people you cherish.
So as you slice into those soft, pastel layers, may it taste like spring itself: light, hopeful, and full of delight. Here’s to sweet traditions, both old and new.
Wishing you and yours an Easter filled with the coziest moments and the most delicious slices of joy.
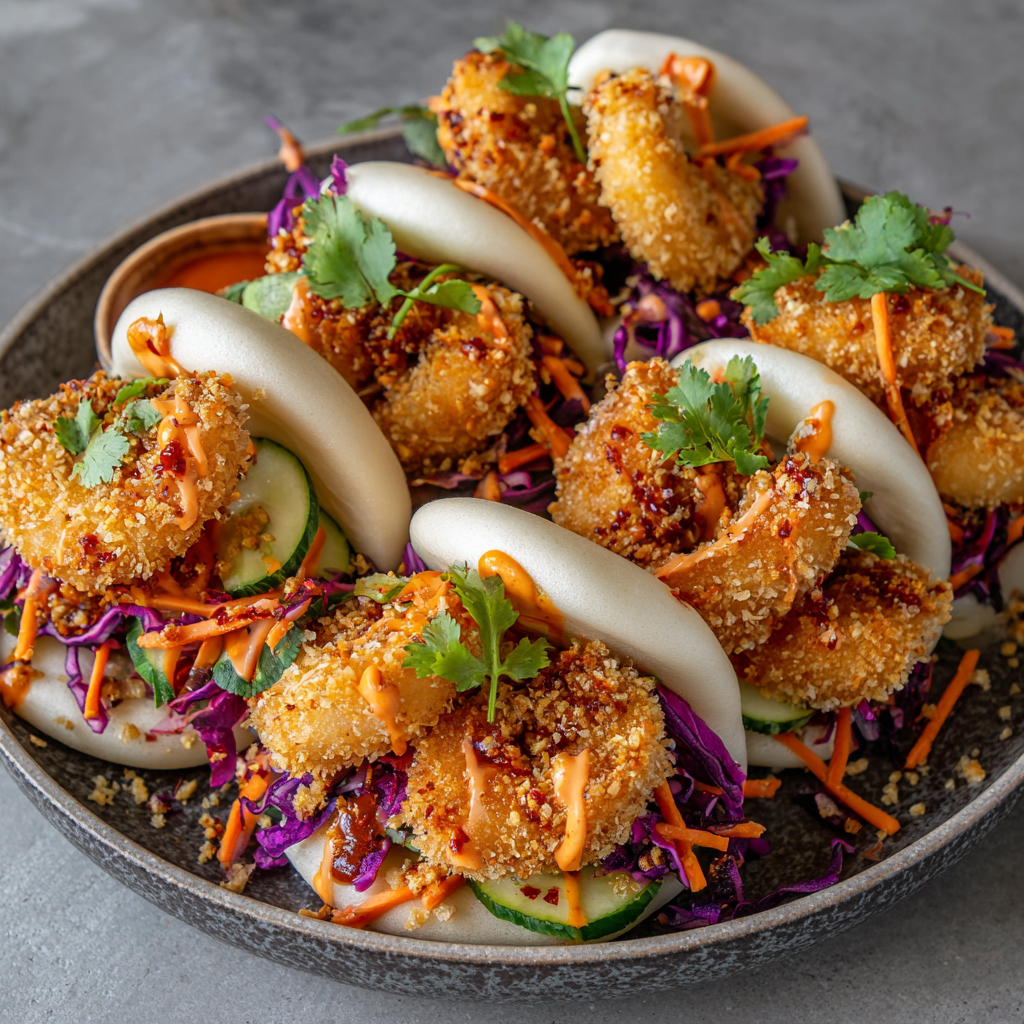
Crispy Shrimp Bao Buns : Panko Crunch, Spicy Mayo & Pickled Veggie Magic
Fluffy Bao, Crispy Shrimp, and the Best Kind of Kitchen Mess
Hey there, friend! Can we talk for a second about that magical moment when you take a bite of something so perfectly balanced, so texturally brilliant, that you just have to stop and close your eyes? The crackle of a golden crust giving way to a tender bite, all hugged by a cloud-soft bun and zinged awake by something spicy and tangy? That’s the exact feeling I’m chasing with these Crispy Shrimp Bao Buns, and let me tell you, they deliver. Big time.
This recipe is my love letter to fun, fearless, and totally approachable cooking. We’re not just making dinner; we’re building a handheld flavor experience. Imagine: juicy shrimp encased in a shatteringly crisp panko jacket, nestled into a pillowy steamed bao, then drizzled with a creamy, spicy mayo and topped with a confetti of bright, quick-pickled veggies. It’s a party in your mouth where every guest—the crunchy, the fluffy, the spicy, the fresh—shows up and gets along famously.
I know the word “bao” might sound a little fancy or intimidating, but I promise you, this is one of the most joyfully simple projects we can tackle together. Whether you use store-bought buns (zero judgment, my secret weapon!) or dive into homemade, the process is a blast. This is the kind of meal that turns a regular Tuesday into a celebration, makes you the star of your next gathering, and fills your kitchen with the kind of smells that make everyone wander in, asking, “What’s cooking and when can I try it?” So, tie on your favorite apron (the messy one tells the best stories), and let’s make some magic.
The Ferry Boat Bao That Started It All
My obsession with bao buns began not in a fancy restaurant, but on a rickety ferry boat chugging across a river in Thailand. I was traveling, wide-eyed and hungry, when a vendor came onboard with a massive steamer basket. The air filled with the warm, sweet scent of steamed dough, and for a few baht, he handed me a little bundle wrapped in paper. It was a steamed bun, split open and stuffed with crispy fried chicken and a sweet-chili sauce. I took my first bite leaning against the railing, the wind in my hair, and it was a revelation. It was messy, bold, hot, cool, crunchy, and soft—all at once.
That moment cemented it for me: the best food is often the simplest concept, executed with love and eaten with gusto. When I got home, I couldn’t stop thinking about that perfect textural contrast. I started playing in my kitchen, swapping in plump shrimp for the chicken, adding a quick pickle for brightness, and whipping up a spicy mayo that had just the right kick. After a few (delicious) trials, I landed on this recipe. It’s my tribute to that ferry boat surprise—a reminder that the most memorable meals are often unplanned, shared with strangers (or loved ones), and delightfully, wonderfully messy. Every time I make these, I’m transported right back to that deck, and I hope they create a little happy memory in your kitchen, too.
Gathering Your Flavor Arsenal
Here’s everything you’ll need to create these little masterpieces. I’ve included my favorite tips and swaps so you can shop and cook with confidence!
- 1 lb large shrimp, peeled and deveined – Size matters here! Go for “large” (31/40 count). They’re substantial enough to be the star. Chef’s Insight: Pat them bone-dry with paper towels. This is the #1 secret for getting the panko to stick perfectly and fry up super crispy.
- 1/2 cup all-purpose flour – Our first layer of the crispy-coating trifecta. It creates a glue for the egg. For a gluten-free version, rice flour works beautifully.
- 2 large eggs, beaten – The “glue” that binds the panko to the shrimp. A quick beat with a fork is all you need.
- 1 cup panko breadcrumbs – The MVP of crunch! Panko is lighter and flakier than regular breadcrumbs, giving us that iconic, airy crispiness. Don’t substitute here—this is where the magic texture comes from.
- Salt & pepper to taste – Season every layer! I like to add a pinch to the flour, the egg, and the panko.
- Oil for frying or air frying – For frying: a neutral oil with a high smoke point like avocado, canola, or peanut. You’ll need enough for about 1 inch in your pan. For air frying: a light spray of cooking oil.
- 1/2 cup mayonnaise – The creamy base of our sauce. Use your favorite brand! For a lighter touch, Greek yogurt is a tasty, tangy swap.
- 1–2 tbsp sriracha – Adjust to your heat tolerance! Start with 1 tbsp and taste. Love it fiery? Go for the full 2 (or more!).
- 1 tsp honey or lime juice – A tiny bit of sweet (honey) or sour (lime) balances the heat and creaminess perfectly. I use honey for a rounded flavor, lime for a brighter kick.
- 1/2 cup julienned carrots – Adds sweetness and crunch. A mandoline or a sharp knife does the trick. No carrots? Try matchstick jicama!
- 1/2 cup thinly sliced cucumber or radish – Cucumber is cool and refreshing; radish adds a peppery punch. I often use both for a color pop!
- 1/2 cup rice vinegar – Mild and slightly sweet, it’s perfect for quick pickling. White vinegar works in a pinch, but rice vinegar is gentler.
- 1 tbsp sugar & 1/2 tsp salt – These dissolve into the vinegar to create the perfect sweet-sour brine that brings the veggies to life.
- 10–12 store-bought or homemade bao buns – The fluffy throne for our shrimp! Frozen bao buns (found at Asian grocery stores) are a fantastic, convenient option. Just steam according to package directions.
- Cilantro, green onions, sesame seeds for topping – The confetti! Cilantro adds freshness, green onions a mild bite, and sesame seeds a nutty finish and pretty look.
Let’s Build Some Bao Magic: Step-by-Step
Follow these steps, lean into the process, and don’t worry about perfection. The mess is part of the fun!
- Pickle Your Veggies (First!): In a small bowl, whisk together the rice vinegar, sugar, and salt until the sugar dissolves. Toss in your carrots and cucumber (or radish). Let them sit at room temperature for at least 20 minutes. Chef’s Hack: Doing this first means they’ll be perfectly tangy and crisp by the time everything else is ready. You can even do this hours ahead and stash them in the fridge!
- Set Up Your Breading Station: Get three shallow dishes (pie plates or soup bowls work great). In the first, place your flour. In the second, the beaten eggs. In the third, the panko breadcrumbs. Line them up in that order: flour, egg, panko. Keep one hand for dry ingredients and one for wet to avoid “club fingers” (you’ll thank me later!).
- Bread the Shrimp: Take a dry shrimp and dredge it fully in the flour, shaking off any excess. Next, dip it into the egg, letting the excess drip off. Finally, press it firmly into the panko, turning to coat completely. Gently press the panko to ensure it adheres. Place the breaded shrimp on a plate or baking sheet. Repeat with all shrimp. Pro Tip: Don’t overcrowd your breading dishes. Work in batches if needed for clean, even coating.
- Cook to Crispy Perfection:
- For Frying: Heat about 1 inch of oil in a heavy-bottomed skillet or Dutch oven over medium-high heat to 350°F (a breadcrumb should sizzle immediately when dropped in). Fry the shrimp in batches for 2-3 minutes per side, until deeply golden brown. Transfer to a wire rack set over a paper towel-lined plate. This keeps them crispy all around!
- For Air Frying: Preheat air fryer to 400°F. Lightly spray the breaded shrimp with oil. Cook in a single layer for 8-10 minutes, flipping halfway through, until golden and crispy.
- Whip Up the Spicy Mayo: While the shrimp cook, stir together the mayo, sriracha, and honey (or lime) in a small bowl. Taste and adjust! Want more heat? Add sriracha. More tang? A squeeze of lime. Set aside.
- Steam Your Bao Buns: Follow the instructions on your package for steaming frozen or fresh bao buns. Usually, it takes 5-8 minutes over boiling water until they’re puffed, soft, and warm. Little Story: The first time I steamed buns, I placed them directly on the steamer rack and they stuck terribly. Lesson learned! Now I always line the steamer with parchment paper with holes poked in it, or use cabbage leaves – game changer.
- The Grand Assembly: Gently open a warm steamed bun (don’t tear it all the way apart—think of it like a happy little taco). Spread a dollop of spicy mayo inside. Add one or two crispy shrimp. Top with a generous pinch of your drained pickled veggies. Finish with a sprinkle of cilantro, green onions, and sesame seeds.
How to Serve & Savor
These bao buns are meant to be eaten with your hands, so serve them immediately while the shrimp are still hot and crunchy and the buns are soft and warm. I love to set up a “bao bar” for guests: a platter of steamed buns, a bowl of crispy shrimp kept warm in the oven, little dishes of pickled veggies, spicy mayo, and all the toppings. Let everyone build their own masterpiece—it’s interactive, fun, and guarantees happy faces. Pair with a simple cucumber salad or edamame to start, and maybe a crisp lager or sparkling ginger lemonade to drink.
Mix It Up! Creative Twists
The beauty of this recipe is its versatility! Here are a few ways to play:
- Sweet & Sticky: Swap the spicy mayo for a hoisin-garlic glaze. Mix 3 tbsp hoisin, 1 tbsp soy sauce, 1 tsp minced garlic, and a splash of water. Brush on the shrimp after cooking.
- Pork Belly Bliss: Replace shrimp with slices of braised or crispy fried pork belly for a rich, decadent twist.
- “No-Fry” Crispy: For a lighter version, skip breading and toss shrimp in a little oil, cornstarch, salt, and pepper. Bake or air fry at 400°F until pink and firm.
- Veggie Power: Use thick slices of sweet potato or sturdy cauliflower florets, breaded and cooked the same way, for a fantastic plant-based option.
- Gochujang Kick: Mix the mayo with 1-2 tbsp of gochujang (Korean chili paste) instead of sriracha for a deeper, fermented, slightly sweet heat.
From My Kitchen to Yours: A Few Final Thoughts
This recipe has seen many iterations in my kitchen. I once tried to “save time” by breading all the shrimp hours ahead… only to find a sad, soggy plate when it was time to fry. Lesson learned: bread just before cooking! I’ve also learned that the joy of these bao buns is in the contrast, so don’t skip the pickle—its sharpness cuts through the richness perfectly. Over the years, I’ve served these to skeptical kids (who now request them), at potlucks where they disappear in minutes, and on quiet nights when my husband and I just want to treat ourselves. They never fail to bring a smile. Remember, cooking is about the journey and the people you share it with. If a bun tears a little or your mayo is extra spicy, you’re doing it right. Now, go make a (delicious) mess!
Your Questions, Answered
Q: My bao buns are dense/gummy. What did I do wrong?
A: This usually happens from over-steaming or condensation dripping onto the buns. Make sure your water is at a steady boil, but don’t let it violently boil up onto the buns. Keep the lid slightly ajar if needed, and don’t exceed the recommended steaming time. Using a liner (parchment or cabbage) also helps absorb excess moisture.
Q: Can I make any parts ahead of time?
A> Absolutely! The pickled veggies can be made 2-3 days ahead and stored in their brine in the fridge. The spicy mayo can be made 1-2 days ahead. You can also bread the shrimp and freeze them in a single layer on a baking sheet, then transfer to a bag. Fry directly from frozen, adding 1-2 minutes to the cooking time.
Q: My panko isn’t sticking well to the shrimp. Help!
A> The most common culprit is moisture. Make sure your shrimp are thoroughly patted dry before you start. Also, when dredging, shake off excess flour and let excess egg drip off before moving to the panko. A firm, gentle press into the panko helps it adhere.
Q: I don’t have a steamer. How can I heat the buns?
A> No worries! You can microwave them wrapped in a damp paper towel for 20-30 seconds until soft and warm. Or, wrap them in foil and warm in a 300°F oven for 5-10 minutes. They won’t be quite as fluffy as steamed, but they’ll still be delicious.

Crispy Shrimp Bao Buns : Panko Crunch, Spicy Mayo & Pickled Veggie Magic
Description
If you want a meal that’s fun to make and even more fun to eat, crispy shrimp bao buns are a perfect pick. You get golden crunchy shrimp, soft pillowy buns, creamy spicy sauce, and bright pickled veggies all in one handheld bite. They look impressive, but with store-bought bao buns and a simple breading method, they’re totally doable at home. Great for weekend cooking, sharing with friends, or turning an ordinary dinner into something special.
Ingredients
For the Shrimp
-
1 lb large shrimp, peeled and deveined, patted dry
-
½ cup all-purpose flour
-
2 eggs, beaten
-
1 cup panko breadcrumbs
-
Salt and pepper
-
Oil for frying (or spray oil for air fryer)
Spicy Mayo
-
½ cup mayonnaise (or Greek yogurt)
-
1–2 tbsp sriracha (adjust to taste)
-
1 tsp honey or lime juice
Quick Pickled Veggies
-
½ cup julienned carrots
-
½ cup thin cucumber or radish slices
-
½ cup rice vinegar
-
1 tbsp sugar
-
½ tsp salt
For Serving
-
10–12 bao buns (store-bought or homemade)
-
Chopped cilantro or green onions
-
Sesame seeds (optional)
Instructions
1️⃣ Quick-Pickle the Veggies
Mix vinegar, sugar, and salt in a bowl until dissolved. Add carrots and cucumber/radish. Let sit at least 20 minutes (or refrigerate up to 2 days).
2️⃣ Set Up Breading Station
Prepare three bowls:
-
Flour + pinch salt/pepper
-
Beaten eggs
-
Panko + pinch salt/pepper
Dip shrimp → flour → egg → panko, pressing crumbs on well. Place on a plate.
Tip: Keep one hand for dry and one for wet ingredients to avoid clumping.
3️⃣ Cook the Shrimp
Pan Fry:
Heat 1 inch oil to medium-high. Fry shrimp in batches 2–3 minutes per side until golden. Drain on rack or paper towels.
Air Fry:
Heat air fryer to 400°F / 205°C. Spray shrimp lightly with oil. Cook 8–10 minutes, flipping halfway.
4️⃣ Make the Sauce
Stir mayo, sriracha, and honey/lime. Taste and adjust heat or tang.
5️⃣ Steam the Bao
Steam buns according to package directions (usually 5–8 minutes) until soft and fluffy.
Tip: Line steamer with parchment or cabbage leaves so buns don’t stick.
6️⃣ Assemble
Open each bun gently and add:
-
Dollop spicy mayo
-
1–2 crispy shrimp
-
Pickled veggies (drained)
-
Herbs + sesame seeds
Serve immediately while warm and crisp.
Notes
-
Dry shrimp = better crunch — pat very well before breading.
-
Use panko only for that light crispy texture.
-
Bread right before cooking so coating stays crisp.
-
Don’t overcrowd the pan or air fryer — cook in batches.
-
Always include something tangy (pickles or lime) to balance richness.
Nutritional Info (Per Bao Bun, Approximate)
Calories: ~230 | Protein: 12g | Carbohydrates: 22g | Fat: 11g | Fiber: 1g | Sugar: 3g
Note: This is an estimate based on specific ingredients and frying method. Values will vary with substitutions and air frying will reduce fat/calories.
Final Thoughts: A Delicious Journey in Every Bite
These Crispy Shrimp Bao Buns are more than just a meal—they’re an experience. They celebrate the joy of cooking with your senses: the sizzle of shrimp in hot oil, the warm, pillowy softness of steamed buns, the tangy crunch of pickled veggies, and the creamy kick of spicy mayo. This recipe is an invitation to play, to embrace a little mess, and to create something truly special with your own hands.
Whether you’re a seasoned cook or a curious beginner, these buns remind us that great food doesn’t have to be complicated—it just needs to be made with heart and shared with joy. So gather your friends, set up a DIY bao bar, and watch as these handheld bites turn an ordinary meal into a memory.
Here’s to the crispy, the fluffy, the spicy, and the fresh. Here’s to meals that make you smile, kitchens filled with laughter, and the simple pleasure of a perfect bite. Now, go create your own delicious story—one bao at a time.
Happy eating,
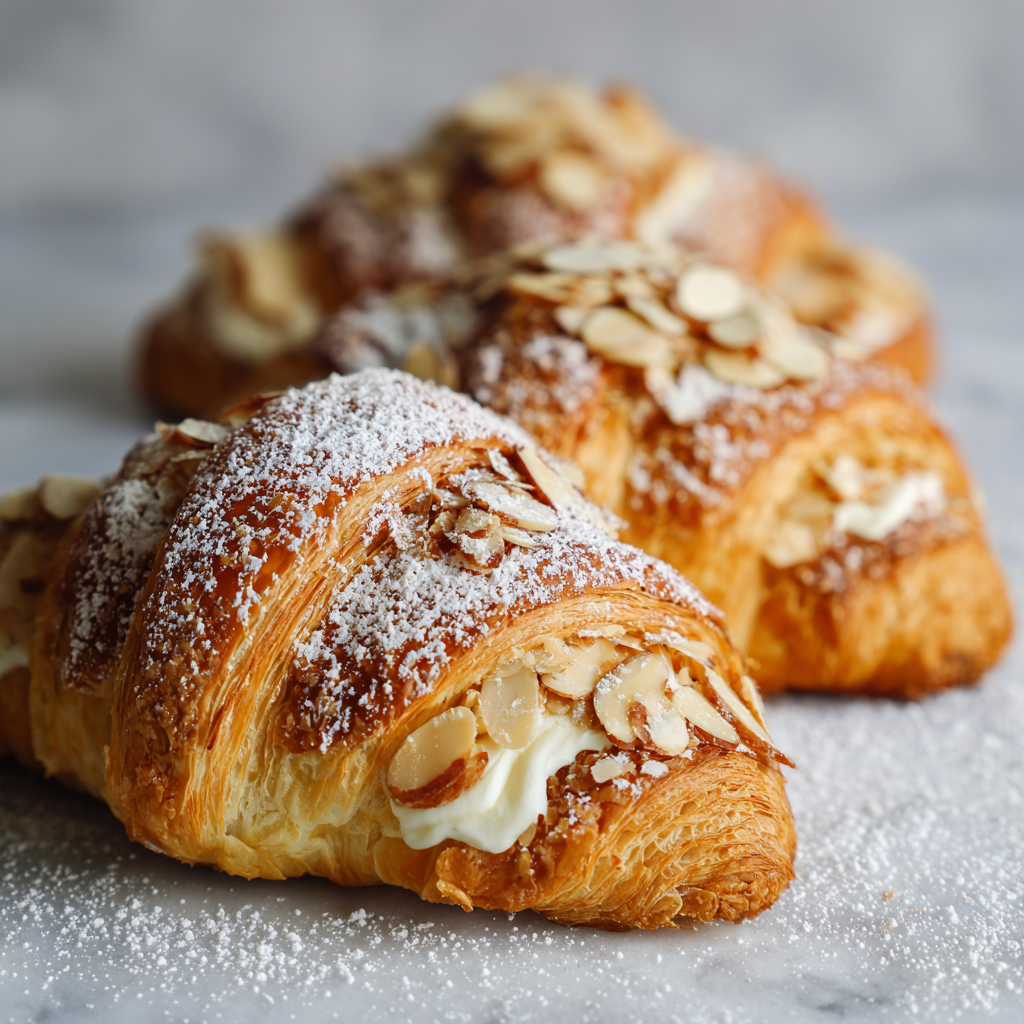
Homemade Almond Croissants : Bakery-Style & Easy to Make
The Simple Joy of a Perfect Almond Croissant
There’s a particular kind of magic that happens in a kitchen just as the sun is coming up. It’s the quiet hum of the oven warming, the nutty, sweet aroma of toasting almonds beginning to fill the air, and the gentle promise of something truly wonderful coming to life. And for me, nothing captures that cozy, special-occasion feeling quite like a homemade Almond Croissant, fresh from the oven.
Picture this: a pastry that’s shatteringly crisp on the outside, giving way to impossibly soft, buttery layers within. Then, the surprise—a rich, marzipan-like almond cream (we call it frangipane in the chef world) that’s both sweet and deeply nutty. It’s finished with a snowy dusting of powdered sugar that melts just slightly on the warm surface. Is your mouth watering yet? Mine certainly is.
For years, I thought these were a treat reserved for professional bakers and fancy Parisian cafés. I’d order them with my coffee, feeling a little extravagant, never dreaming I could make them at home. Then, I discovered the secret: you don’t have to be a pastry chef with three days to spare. With a few simple ingredients and a little know-how, you can create bakery-level Almond Croissants that will make your entire house smell like a dream and have everyone at your table feeling deeply, truly spoiled.
This recipe is my love letter to that feeling. It’s about taking something simple—even a day-old croissant—and transforming it into pure gold. It’s perfect for lazy weekend brunches, holiday mornings, or when you simply want to say “I love you” with food. So, tie on that apron (messy is encouraged here!), and let’s bake some joy together.
A Café in the Rain & The Croissant That Changed Everything
My love affair with the almond croissant began not in France, but on a drizzly, gray afternoon in a tucked-away café in Seattle. I was in college, stressed over finals, and desperately needed a cozy escape. I ducked into this little spot, the windows steamy from the espresso machine, and ordered a coffee and the first thing that caught my eye: an almond croissant.
When it arrived, it wasn’t just a pastry; it was an experience. It was warm, almost too hot to touch, and the powdered sugar drifted down like the rain outside. That first bite was a revelation—the contrast of textures, the intense almond flavor, the way it paired with the bitter coffee. It was more than a snack; it was a moment of pure comfort. I sat there for an hour, watching the world go by, feeling completely at peace. I’ve been chasing that feeling in my own kitchen ever since.
Now, whenever I make these, that memory comes flooding back. It reminds me that the best food isn’t just about fuel; it’s about creating a moment of pause, a pocket of happiness. And the beautiful part? You can create that moment for yourself, right at home, no rain required (though it does add to the ambiance!).
What You’ll Need: Simple Ingredients, Big Flavor
Gathering your ingredients is the first step in the kitchen dance. Here’s everything you need to make four gloriously indulgent almond croissants. Don’t be fooled by the short list—each one plays a starring role!
For the Almond Cream (Frangipane):
- ½ cup almond flour: This is the heart of the flavor! Using finely ground almond flour (not almond meal, which is coarser) gives our frangipane that luxuriously smooth, melt-in-your-mouth texture. Chef’s Insight: For a toastier flavor, you can spread the almond flour on a baking sheet and toast it in the oven at 350°F for 5-7 minutes before using. Let it cool completely first!
- ¼ cup unsalted butter, softened: The base of our cream. Unsalted lets you control the salt level. It MUST be soft to room temperature so it creams beautifully with the sugar. Quick Tip: If you forgot to take it out, cut it into small cubes and let it sit for 15-20 minutes. No microwave!
- ¼ cup granulated sugar: Sweetens the deal. I use regular white sugar here for a clean sweetness that lets the almond shine.
- 1 large egg: Our binder. It gives the frangipane structure and a lovely richness as it bakes. Pro Tip: Crack it into a small bowl first to avoid any shell sneaking into your perfect cream.
- ½ teaspoon almond extract: This is the flavor booster! It intensifies the nutty aroma beautifully. A little goes a long way. Substitution: You can use vanilla extract in a pinch, but the almond character won’t be as pronounced.
- A tiny pinch of salt: Never underestimate the power of salt in sweets! It balances the sugar and heightens all the other flavors.
For Assembly & Baking:
- 4 day-old croissants: This is the secret weapon! Slightly stale croissants are actually perfect—they’re sturdier for filling and soak up the syrup without becoming mushy. Don’t have day-old? Fresh works too! Just be gentle. You can use store-bought, bakery-bought, or even homemade if you’re feeling ambitious.
- 2 tablespoons sliced almonds: For that iconic crunchy topping. They toast up golden in the oven, adding fantastic texture and visual appeal.
- Powdered sugar, for dusting: The final, snowy touch. It looks beautiful and adds a whisper of extra sweetness.
- Simple Syrup (Optional but Recommended): Just ½ cup water + 2 tablespoons sugar simmered together. This is my “bakery-style” hack! Brushing it inside the croissant adds moisture and a subtle sweetness that takes these from good to “oh-my-goodness” incredible.
Let’s Bake! Your Step-by-Step Guide to Almond Croissant Bliss
Ready to create some magic? Follow these steps, and you’ll be a frangipane pro in no time. I’ve sprinkled in my favorite tips and hacks to ensure your success.
- Preheat & Prep: First things first, preheat your oven to 350°F (175°C). This gives it plenty of time to reach a steady, even temperature, which is key for pastries. Line a baking sheet with parchment paper. No parchment? A light coating of butter or non-stick spray will do. My Little Ritual: I always do this first. It’s like setting the stage before the actors (the croissants) come out!
- Make the Simple Syrup (If Using): In a small saucepan, combine the ½ cup water and 2 tablespoons of sugar. Bring it to a gentle simmer over medium heat, stirring just until the sugar completely dissolves. This takes only 2-3 minutes. Once clear, remove it from the heat and let it cool for a few minutes. Chef’s Hack: I often add a drop of almond extract to this syrup for an extra flavor punch!
- Create the Frangipane Filling: In a medium bowl, add your softened butter and granulated sugar. Using a hand mixer (or a sturdy whisk and some elbow grease!), beat them together for 1-2 minutes until the mixture is light, fluffy, and pale in color. This “creaming” process incorporates air, making the filling lighter. Scrape down the sides of the bowl. Add the egg and beat until fully combined. Now, add the almond flour, almond extract, and that all-important pinch of salt. Mix on low speed just until everything is smooth and homogenous. Be careful not to overmix. You should have a thick, spoonable, dreamy almond paste. Set this aside.
- Prepare the Croissants: Take your croissants and, using a serrated bread knife, slice them horizontally. Here’s the trick: slice almost all the way through, but leave one edge attached, like a book! This creates a perfect pocket for our filling and helps them hold their shape. If you’re using the simple syrup, now is the time. Use a pastry brush (or a spoon in a pinch) to lightly brush the inside of each croissant with the syrup. Don’t drench it—just a light, even coating. This adds moisture and flavor.
- Fill & Assemble: Open your croissant “books.” Spoon about 1-2 tablespoons of the frangipane onto the bottom half. Use the back of the spoon to spread it evenly. Don’t be shy, but also don’t overfill, or it might ooze out too much during baking. Close the croissant gently. Now, take another spoonful (about a tablespoon) and spread a thin, even layer of the almond cream over the top of the croissant. This creates that classic bakery look and gives the sliced almonds something to cling to.
- Add the Finishing Touch & Bake: Sprinkle the sliced almonds generously over the frangipane on top of each croissant. Gently press them down so they stick. Place the croissants on your prepared baking sheet. Slide them into the preheated oven and bake for 12-15 minutes. You’re looking for the frangipane to be set and golden brown, the almonds on top to be toasted, and the whole croissant to be heated through and crisp.
- The Grand Finale: Carefully remove the baking sheet from the oven. Let the croissants cool on the sheet for at least 5-10 minutes. They are molten-lava hot inside! This resting time lets the filling set a bit. Just before serving, use a fine-mesh sieve to dust the tops with a generous cloud of powdered sugar.
How to Serve Your Masterpiece
Presentation is part of the fun! Place a warm croissant on a simple, elegant plate—a plain white or vintage china piece works beautifully. That dusting of powdered sugar is your best friend for instant “wow” factor. I love serving these on a wooden board for a rustic brunch spread. The perfect partner? A strong, hot cup of coffee, a frothy cappuccino, or a pot of black tea. The bitter notes cut through the sweetness perfectly. For a truly decadent weekend treat, add a small dollop of lightly sweetened whipped cream or a side of fresh berries on the plate. Now, sit down, take a bite, and savor the moment you created.
Make It Your Own: Fun Variations to Try
Once you’ve mastered the classic, the kitchen playground opens up! Here are a few of my favorite twists:
- Chocolate-Almond Dream: Before adding the frangipane, tuck a few dark chocolate chips or a thin piece of a dark chocolate bar inside the croissant. The melted chocolate paired with the almond cream is next-level.
- Berry Bliss: Add a layer of raspberry or apricot jam inside the croissant, underneath the frangipane. The sweet-tart fruit is a gorgeous contrast to the nutty cream.
- Gluten-Free Friendly: Use your favorite gluten-free croissants! The frangipane is naturally GF, so this swap works like a charm.
- Orange Zest Delight: Add the zest of one small orange to the frangipane mixture. The citrus brightens the whole flavor profile beautifully.
- “Everything” Danish Style: Skip the sliced almonds and top with a streusel crumble before baking for a different kind of crunchy, Danish-inspired treat.
From My Kitchen to Yours: A Few Parting Thoughts
This recipe has been a living, evolving thing in my kitchen. I’ve made it for nervous first dates (it worked!), for heartbroken friends (it helped), and for sleepy-eyed family on Christmas morning (it became a tradition). I once, in a pre-coffee haze, accidentally used salted butter and forgot to reduce the salt pinch. The result was oddly, wonderfully salted-caramel-esque! A happy accident, but I still recommend unsalted for control.
The biggest lesson I’ve learned? Don’t stress about perfection. If the frangipane oozes out a little, that’s just more crispy, caramelized goodness. If the powdered sugar doesn’t dust perfectly, it still tastes incredible. Cooking, especially baking like this, is an act of love. The slight imperfections are what make it homemade and heartfelt. So have fun with it, put on some good music, and enjoy the process as much as the delicious result.
Your Questions, Answered
Q: Can I make the frangipane ahead of time?
A: Absolutely! You can prepare the almond cream, cover it tightly, and store it in the refrigerator for up to 3 days. Let it come to room temperature and give it a good stir before using, as it will firm up when chilled.
Q: My croissants got a bit soggy. What happened?
A> The most likely culprit is too much simple syrup. Remember, you’re just brushing for moisture, not soaking. Also, using a very fresh, super soft croissant can lead to sogginess—day-old is truly ideal here. Ensure your oven is fully preheated so they start cooking and crisping immediately.
Q: Can I freeze assembled but unbaked almond croissants?
A> Yes, you can! Assemble them completely (including the almonds on top), then place them on a baking sheet and freeze until solid. Once frozen, transfer them to a freezer bag. When ready to bake, bake straight from frozen, adding 3-5 extra minutes to the baking time. The frangipane may not brown quite as much, but they’ll still be delicious.
Q: What’s the best way to store leftovers?
A> They are truly best the day they are made. However, you can store any cooled leftovers in an airtight container at room temperature for 1 day. To recrisp, warm them in a 300°F oven for 5-8 minutes. I don’t recommend refrigerating, as it can make the pastry tough.

Homemade Almond Croissants : Bakery-Style & Easy to Make
Description
There’s something extra special about an almond croissant — crisp, flaky layers, a rich almond cream center, and a snowy dusting of powdered sugar. The best part? You don’t need to make croissant dough from scratch. With store-bought croissants and a quick almond filling, you can turn a simple pastry into a café-worthy treat in under 30 minutes. Perfect for brunch, holidays, or a cozy morning upgrade.
Ingredients
For the Almond Cream (Frangipane)
-
½ cup almond flour (finely ground)
-
¼ cup unsalted butter, softened
-
¼ cup granulated sugar
-
1 large egg
-
½ tsp almond extract
-
Pinch of salt
For Assembly
-
4 croissants (preferably day-old)
-
2 tbsp sliced almonds
-
Powdered sugar, for dusting
Optional Simple Syrup (Recommended)
-
½ cup water
-
2 tbsp sugar
-
Optional: drop of almond or vanilla extract
Instructions
Preheat oven to 350°F (175°C). Line a baking sheet with parchment paper.
In a small saucepan, simmer water and sugar for 2–3 minutes until dissolved. Cool slightly. Add a drop of almond extract if you like.
In a bowl, beat softened butter and sugar until light and fluffy (about 1–2 minutes).
Add egg and mix until smooth.
Stir in almond flour, almond extract, and salt until thick and creamy. Set aside.
Slice each croissant horizontally like a sandwich, keeping one edge attached.
Lightly brush the inside with simple syrup if using.
Spread 1–2 tablespoons almond cream inside each croissant. Close gently.
Spread a thin layer of almond cream on top of each croissant.
Sprinkle sliced almonds over the tops and press lightly so they stick.
Bake for 12–15 minutes until golden, crisp, and the almond topping is set and lightly toasted.
Cool 5–10 minutes, then dust generously with powdered sugar before serving.
Notes
-
Day-old croissants work best — they absorb filling without getting soggy.
-
Use almond flour, not almond meal for smooth texture.
-
Don’t overfill or the cream will spill out too much while baking.
-
Warm, not hot serving temp gives the best texture and flavor.
-
Toast almond flour first (optional) for deeper nutty flavor.
Nutritional Information (Per Croissant, Approximate)
Calories: ~330 | Carbohydrates: ~25g | Fat: ~22g | Protein: ~7g
Prep Time: 10 mins | Bake Time: 15 mins | Total Time: 25 mins | Makes: 4 croissants
Note: Nutritional information is an estimate calculated using the specific ingredients listed. Values may vary based on the brand of croissant and exact quantities used.
Final Thoughts: The Simple Joy of a Perfect Almond Croissant
In the end, this isn’t just a recipe—it’s an invitation. An invitation to slow down, to savor, and to create a small, sweet moment of joy in your own kitchen. Whether you’re baking for yourself on a quiet morning or for loved ones gathered around your table, these almond croissants are more than pastry; they’re edible warmth, a hug in food form.
Remember my rainy Seattle café? What I yearned for wasn’t just the croissant, but the feeling it gave me: a sense of peace, indulgence, and presence. And that’s the true magic of this recipe—you don’t need a Parisian bakery or a special occasion to capture that feeling. You just need a few simple ingredients, a warm oven, and the willingness to treat yourself.
So the next time you have a day-old croissant, don’t see it as stale—see it as potential. See it as the beginning of something golden, fragrant, and deeply satisfying. Baking these is a gentle reminder that the finest pleasures often come from the simplest transformations, and that a little butter, sugar, and care can turn an ordinary morning into something quietly extraordinary.
Thank you for baking with me. May your kitchen always be filled with wonderful aromas, your pastries be ever flaky, and your moments at the table be sweet.
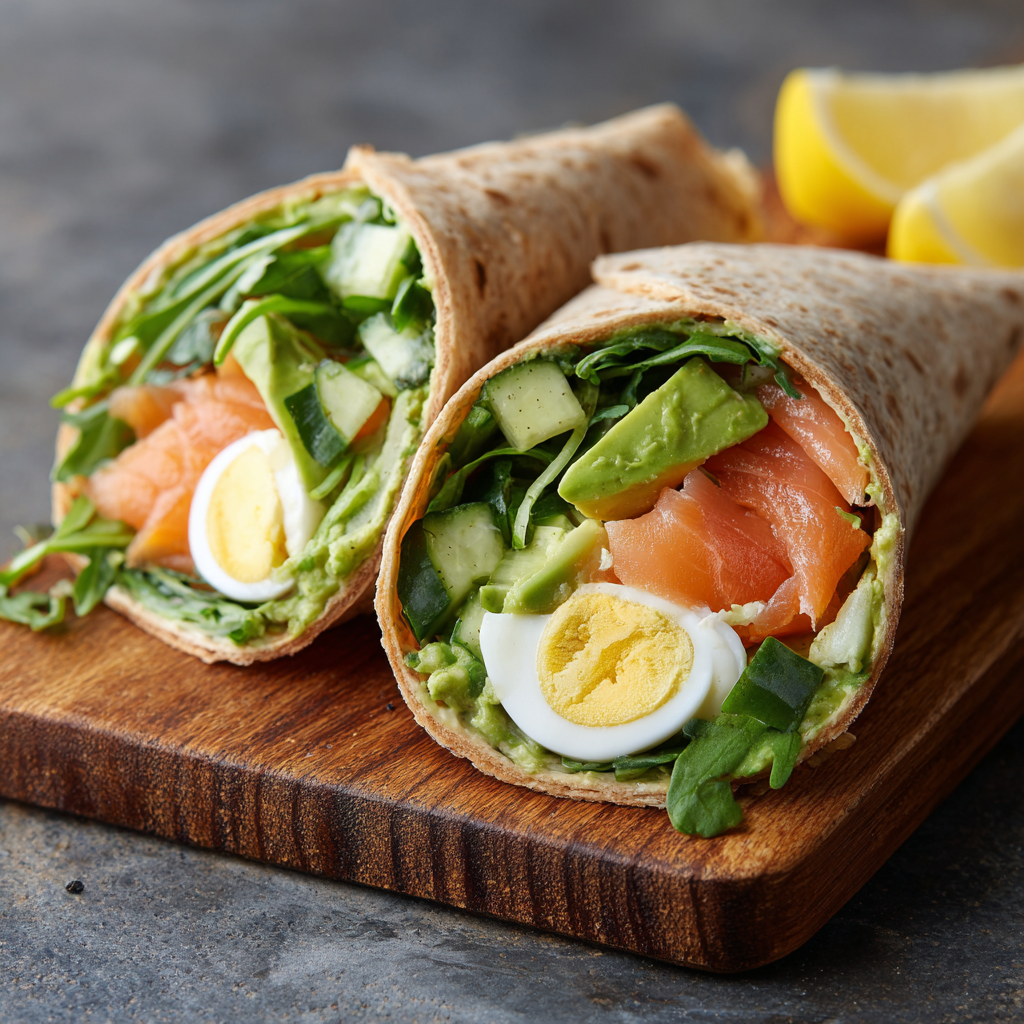
Smoked Salmon and Avocado Wrap : Protein-Packed, Heart-Healthy Meal
Your New Go-To Lunch Hero is Here!
Picture this: you’re rummaging through the fridge, stomach grumbling, torn between wanting something delicious, nourishing, and fast. You deserve a meal that feels like a treat but fuels your body like a champion. You, my friend, are moments away from meeting your new kitchen best friend: the Smoked Salmon & Avocado Wrap.
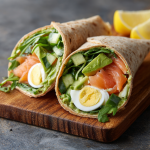
This isn’t just any wrap. It’s a vibrant, protein-packed bundle of joy that comes together in about 10 minutes flat. We’re talking creamy avocado, silky smoked salmon, hearty hard-boiled egg, and a crisp crunch of cucumber, all hugged by a wholesome tortilla. It’s a heart-healthy powerhouse loaded with omega-3s, lean protein, and good fats that will keep you energized for hours. Perfect for a desk lunch that doesn’t disappoint, a light yet satisfying dinner, or that crucial post-workout refuel. Let’s roll up our sleeves (and this glorious wrap) together!
More Than a Wrap: A Sunny Sunday Tradition
This recipe always takes me straight back to lazy Sunday mornings with my family. After a long week, we’d ditch the big, heavy breakfast for what we called “Build-Your-Own-Brunch Buffet.” The kitchen counter would become a mosaic of colors: a platter of ruby-red smoked salmon, a bowl of perfectly sliced hard-boiled eggs, another of chunky avocado, and every fresh herb and veggie we had.
The real magic wasn’t just in the eating, but in the creating. We’d stand around, assembling our masterpieces, comparing notes (“Did you try the dill in yours?”), and laughing. My wrap was always overloaded—I’m an “everything but the kitchen sink” kind of assembler. That spirit of ease, freshness, and sharing is baked right into this recipe. Every time I make one now, it feels like a little, delicious dose of Sunday calm, no matter what day it is.
Gathering Your Flavor Dream Team
Here’s the beautiful part: you only need a handful of fresh, fantastic ingredients. Quality matters here, as each component shines. Let’s break it down:
- 1 large whole grain tortilla or wrap: This is our foundation! I love the nutty flavor and extra fiber of whole grain, but a spinach wrap, a low-carb tortilla, or even a large, pliable lettuce leaf (for a gluten-free option) works perfectly. Chef’s Tip: Look for tortillas without hydrogenated oils for a cleaner choice.
- 2 oz (about 3-4 slices) good-quality smoked salmon: The star! Opt for cold-smoked salmon (lox-style) for its delicate, silky texture. You can find it pre-sliced at most deli counters. A sustainable or wild-caught option is a great choice if available.
- ½ a ripe avocado, sliced or mashed: Our creamy, heart-healthy glue. A perfectly ripe avocado should yield slightly to gentle pressure. Substitution Tip: In a pinch, a tablespoon of hummus or mashed white beans can offer a similar creaminess.
- 1 hard-boiled egg, sliced: Adds incredible protein and richness. I’ll share my foolproof boiling method in the steps! Chef’s Insight: A slightly soft-centered jammy egg is a delicious, messy alternative if you’re eating immediately!
- ¼ cup cucumber, thinly sliced or julienned: This is our crucial CRUNCH. It lightens every bite. English or Persian cucumbers have fewer seeds and thinner skins.
- A small handful of baby spinach, arugula, or microgreens (optional): I almost never skip this! It adds a peppery note (arugula), a nutrient boost (spinach), or a fancy touch (microgreens).
- Fresh lemon juice, salt, and black pepper: The seasonings that make everything pop! A squeeze of bright lemon over the salmon and avocado is non-negotiable for me. Freshly cracked pepper makes all the difference.
Let’s Build the Perfect Bite: Step-by-Step
Ready? This is the fun, no-stress part. Follow these steps, and you’ll be a wrap-rolling pro in no time.
- Prep Your Station (2 mins): Get all your ingredients out and prepped. Slice the egg, cucumber, and avocado. Having everything ready to go (the French call this mise en place) makes assembly a breeze and keeps you from forgetting anything.
- The Tortilla Warm-Up (30 secs): This is my secret for a crack-free wrap! Warm your tortilla in a dry skillet over medium heat for about 15-20 seconds per side, OR microwave it between two damp paper towels for 10-15 seconds. This makes it pliable and prevents tearing when you roll. Little Chef Hack: Don’t skip this! A cold tortilla from the fridge will almost always crack.
- Spread & Layer with Love (3 mins): Lay your warm tortilla flat. Spread the mashed avocado (or lay the slices) in the center, leaving about 2 inches bare on the sides. This is your moisture barrier and flavor base. Now, layer on the smoked salmon, followed by the elegant egg slices, the crisp cucumber, and finally, your greens if using. Commentary: Try to keep the fillings in a neat, horizontal line down the center—it makes rolling infinitely easier.
- The Seasoning Shower (1 min): Give your creation a generous squeeze of fresh lemon juice right over everything. The acid cuts through the richness beautifully. Now, season with a pinch of salt (go easy, as the salmon is salty) and a good grind of black pepper.
- The Masterful Roll (1 min): Here’s the technique: Fold the two sides (left and right) of the tortilla inward over the ends of your filling. Then, starting from the side closest to you, use your fingers to tightly tuck and roll the tortilla away from you, keeping the side folds in place. Imagine you’re rolling a sleeping bag tightly! Apply gentle pressure as you roll. Pro Tip: If you’re packing it for later, wrap it snugly in parchment paper or foil, twisting the ends like a candy wrapper. It holds its shape and makes for a neat, portable package.
- Slice & Savor (1 min): Using a sharp serrated knife, slice the wrap in half on a slight diagonal. Admire your beautiful, colorful cross-section! Serve immediately for the ultimate fresh, crisp experience.
How to Serve Your Masterpiece
This wrap is a complete meal all on its own! For a real treat, I love serving it with a side of bubbly sparkling water with an extra lemon wedge, or a simple, tangy side salad dressed with a lemon vinaigrette. If I’m feeling fancy for guests, I’ll slice it into four “pinwheels” and arrange them on a platter with a little bowl of extra lemon-dill yogurt for dipping. It instantly becomes party food!
Make It Your Own: 5 Tasty Twists
The beauty of this formula is its flexibility. Don’t be afraid to play!
- The “Everything Bagel”: Add a schmear of whipped cream cheese before the avocado, and sprinkle everything bagel seasoning over the fillings.
- Mediterranean Sunshine: Swap the cucumber for chopped Kalamata olives and roasted red peppers. Add a pinch of dried oregano.
- Dairy-Free Delight: Skip any cream cheese variations and add a layer of smashed chickpeas with lemon for extra protein and creaminess.
- Herb Garden Fresh: Scatter loads of fresh dill, chives, or parsley over the salmon. It’s a game-changer.
- Spicy Kick: Add a few slices of pickled jalapeño or a drizzle of sriracha or sriracha mayo for a sweet heat.
Olivia’s Kitchen Notes
This recipe has evolved from my “use whatever’s left in the fridge” lunches into a trusted classic. I’ve learned a few things along the way! First, if your avocado isn’t quite ripe, don’t despair. Mash it with that lemon juice, salt, and pepper right on the tortilla—it almost “cures” it and improves the flavor. Second, I once tried to use a flavored tortilla that was too small… let’s just say the Great Wrap Explosion of 2020 was a messy lesson in not overstuffing! Finally, this recipe is a fantastic template. Got leftover grilled chicken? Use it. Have some quinoa? Sprinkle it in. Trust your taste buds and what you have on hand.
Your Questions, Answered!
Q: Can I make this ahead of time for meal prep?
A: You can, with one caveat: the avocado may brown slightly. To combat this, make sure it’s well-coated with lemon juice, wrap it VERY tightly in parchment paper and then foil or plastic wrap, and store it upright in the fridge. Eat within 24 hours for best texture. Prepping the ingredients separately and assembling the morning of is your best bet.
Q: My wrap always falls apart when I eat it. Help!
A: The twin pillars of wrap integrity are: 1) Don’t overfill it. Less is more. 2) Roll it TIGHTLY. That initial tuck is crucial. Also, ensure your tortilla is warm and pliable before you start. If all else fails, eating it with the parchment paper pulled halfway down (like a burrito) is a totally acceptable life hack.
Q: What’s the best way to hard-boil eggs so they peel easily?
A: My foolproof method: Place eggs in a saucepan, cover with cold water by an inch. Bring to a full boil, then immediately cover and remove from heat. Let sit for 10-12 minutes. Transfer to an ice bath to cool completely. The shock helps separate the membrane from the egg. Also, slightly older eggs peel better than super-fresh ones!
Q: Can I use canned salmon instead?
A: Absolutely! Drain a can of wild salmon, flake it, and mix it with a little lemon juice and dill. It’s a more budget-friendly and equally delicious protein swap. The flavor will be different but still fantastic.
Smoked Salmon and Avocado Wrap : Protein-Packed, Heart-Healthy Meal
Description
When you want a lunch that’s quick but still feels special, this Smoked Salmon & Avocado Wrap is a perfect go-to. It’s creamy, crunchy, and satisfying, with healthy fats and protein to keep you full and focused. Best part: it comes together in about 10 minutes with zero cooking (if your egg is already boiled).
Ingredients
-
1 large whole grain tortilla (or wrap of choice)
-
2 oz smoked salmon
-
½ ripe avocado, sliced or mashed
-
1 hard-boiled egg, sliced
-
¼ cup cucumber, thinly sliced
-
Small handful spinach or arugula (optional)
-
Squeeze of fresh lemon juice
-
Pinch of salt and black pepper
Optional add-ons
-
Cream cheese or hummus spread
-
Fresh dill or chives
-
Everything bagel seasoning
-
Sliced tomatoes
Instructions
-
Warm the tortilla
Heat in a dry pan 20 seconds per side or microwave 10–15 seconds until soft and flexible. -
Add the base
Spread or layer the avocado across the center, leaving space at the edges. -
Layer fillings
Add smoked salmon, egg slices, cucumber, and greens. -
Season
Squeeze lemon juice over the top and add a light pinch of salt and pepper. -
Wrap tightly
Fold in the sides, then roll from the bottom up, keeping it snug. -
Slice & serve
Cut in half and enjoy immediately.
Notes
-
Warm wraps don’t crack — always soften first.
-
Don’t overfill — easier rolling, cleaner eating.
-
Use ripe avocado for creaminess and structure.
-
Add lemon to avocado to boost flavor and slow browning.
-
Roll tight like a burrito for a wrap that holds together.
Nutritional Information*
*This is an estimate for one whole wrap using a standard whole grain tortilla and the ingredients listed. Values may vary based on specific brands and amounts used.
- Calories: ~350
- Protein: 20g
- Carbohydrates: 24g
- Dietary Fiber: 8g
- Total Fat: 22g (Rich in heart-healthy mono- and polyunsaturated fats)
- Prep Time: 10 minutes
- Total Time: 10 minutes
- Servings: 1
Final Thoughts
This isn’t just a recipe—it’s an invitation to reclaim your lunch break, fuel your body with joy, and savor a moment of calm in a busy day. The Smoked Salmon & Avocado Wrap is more than a meal; it’s proof that eating well doesn’t have to be complicated or time-consuming. With a handful of fresh ingredients and 10 minutes, you can create something that feels special, nourishing, and deeply satisfying.
It’s a reminder that the best food often comes from simple, quality ingredients combined with a little intention. Whether you’re packing it for work, whipping it up for a quick dinner, or slicing it into elegant pinwheels for friends, this wrap meets you where you are—and always delivers.
So the next time you’re staring into the fridge, wondering what to make, remember: your lunch hero has arrived. Roll it up, take that first crunchy, creamy, bright bite, and enjoy. You’ve earned it.
Happy wrapping!
Olivia
Quinoa Berry Breakfast Bowl : Wholesome, Sweet & Protein-Packed
Rise, Shine, and Nourish: Your New Favorite Morning Ritual Awaits
Good morning, sunshine! Is there anything better than starting your day with a breakfast that actually makes you excited to get out of bed? I’m talking about the kind of meal that feels like a warm hug, fuels your adventures, and tastes so good you almost can’t believe it’s good for you. If your current morning routine involves a sad, rushed slice of toast or a granola bar you barely taste, my friend, it’s time for an upgrade. And I have just the thing to make your mornings sparkle.
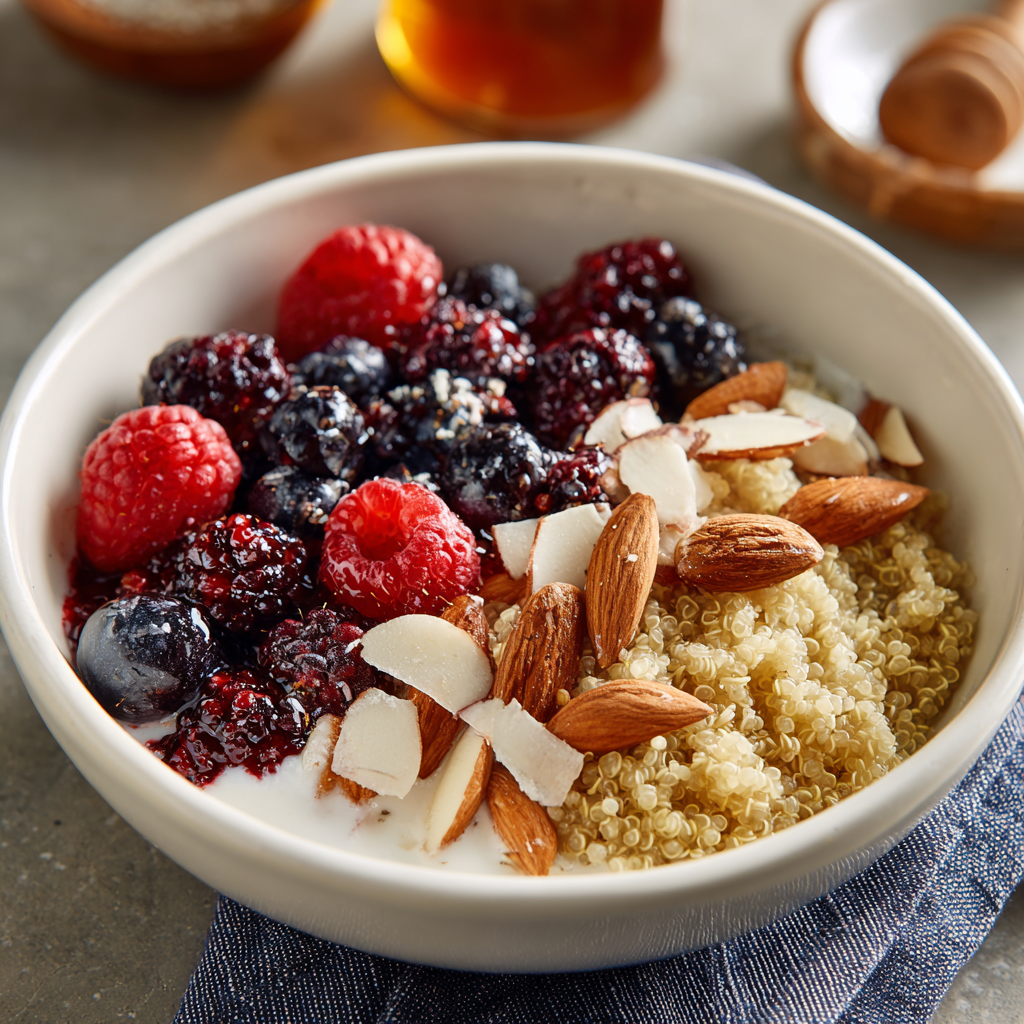
Let me introduce you to my Quinoa Berry Breakfast Bowl. This isn’t just a bowl of food; it’s a vibrant, protein-packed, joy-in-a-bowl masterpiece that will change the way you think about breakfast. Imagine this: a fluffy, warm base of nutty quinoa, swimming in creamy coconut milk, topped with a confetti of juicy, sweet-tart berries, a satisfying crunch of toasted almonds, and a sweet kiss of maple syrup. Every spoonful is a perfect harmony of textures and flavors—wholesome, sweet, and deeply satisfying.
I know what you might be thinking: “Quinoa for breakfast? Olivia, have you lost it?” But trust me on this. Quinoa is the ultimate breakfast superfood. It’s a complete protein, packed with fiber, and it gives you steady, lasting energy—no mid-morning slump in sight. Paired with antioxidant-rich berries and healthy fats, this bowl is a powerhouse. It’s plant-based, gluten-free, and endlessly customizable. Best of all? It comes together in about the time it takes to brew your coffee. So, grab your favorite bowl, and let’s make a morning masterpiece together.
How a Tiny Seed Saved My Chaotic Mornings
This recipe was born out of pure, unadulterated morning chaos. Picture it: a few years back, I was juggling a new blog, a freelance job, and a life that felt like it was moving at warp speed. My breakfasts were an afterthought—coffee, and maybe a sad banana if I was lucky. I’d crash by 10:30 AM, hangry and foggy-brained. One day, after a particularly disastrous morning, I stared into my pantry and saw a forgotten bag of quinoa. On a whim, I cooked a big batch that night.
The next morning, I threw some of that quinoa in a bowl, poured over the last of the coconut milk from a curry night, and scavenged the fridge for toppings. Some frozen berries, a handful of almonds, a drizzle of syrup. That first bite was a revelation. It was warm, comforting, substantial, and sweet. I felt nourished. It became my non-negotiable morning anchor. That simple bowl was more than fuel; it was a act of self-care. It was the calm, delicious center of my hectic days. Now, it’s my go-to for busy mornings, lazy weekend brunches, and anytime I need a delicious reset. It’s a little bowl of love, and I’m so thrilled to share it with you.
Gathering Your Sunshine: The Ingredients Breakdown
Here’s everything you’ll need to build your breakfast masterpiece. I’ve included my little chef insights and swaps so you can make this bowl your own with what you have on hand!
- 1 cup cooked quinoa: This is your powerhouse base! I love using tri-color quinoa for visual flair, but any color works. Chef’s Insight: Cook your quinoa in vegetable broth instead of water for an extra layer of savory depth that plays beautifully with the sweet toppings. No pre-cooked quinoa? See the FAQ for my perfect fluffy quinoa method!
- 1/2 cup mixed berries: Fresh or frozen are perfect. I adore the mix of strawberries, blueberries, and raspberries. Substitution Tip: No berries? Try diced apple, pear, or mango! In winter, stewed cinnamon apples are divine.
- 2 tablespoons sliced almonds: For that essential CRUNCH. Chef’s Hack: Toast them in a dry pan for 2-3 minutes until fragrant. It unlocks a whole new world of nutty flavor.
- 1 tablespoon ground flax seeds: A stealthy nutrient boost! They add omega-3s and fiber. Chef’s Insight: Using ground flax (flax meal) is key so your body can absorb all the goodness. You can buy it pre-ground or whizz whole seeds in a coffee grinder.
- 1–2 tablespoons pure maple syrup: Nature’s liquid gold! Start with 1 tbsp and add more to taste. Substitution Tip: Honey, agave, or even a mashed ripe banana blended in with the quinoa work wonderfully.
- 1/4 cup coconut milk: I use canned full-fat coconut milk for incredible creaminess. Substitution Tip: Any milk works here! Almond, oat, dairy—use what you love. For extra protein, vanilla protein milk is a fantastic choice.
- Optional Toppings: This is your playground! Shredded coconut, chia seeds, banana slices, cacao nibs, a spoonful of nut butter, or a sprinkle of cinnamon. Go wild!
Let’s Build Your Bowl: Simple Steps to Breakfast Bliss
Follow these steps, and in mere minutes, you’ll have a restaurant-worthy breakfast that’s all yours. I’ve sprinkled in my favorite tips to ensure your success!
- Warm Your Quinoa (The Cozy Factor): If you prefer a warm breakfast—which I highly recommend on chilly mornings—add your cooked quinoa to a small saucepan with a splash of water or your milk of choice. Warm it over low heat, stirring gently, for 3-5 minutes until heated through. Chef’s Hack: You can also do this in the microwave in a bowl for 60-90 seconds. The goal is just to take the chill off and make it welcoming.
- Bowl Foundation: Spoon your lovely, warm (or cool) quinoa into your favorite bowl. The wider the bowl, the more room for artistic topping placement—just saying!
- The Creamy Cascade: Pour that luscious coconut milk (or your chosen milk) right over the center of the quinoa. Watch it pool and seep into all the little crevices. This is the “sauce” that brings everything together.
- Artful Arrangement (The Fun Part!): Now, let’s decorate! Scatter your mixed berries over one section. Sprinkle the toasted almonds over another. Dust the ground flax seeds across the top. Chef’s Tip: I like to keep my toppings in little piles rather than all mixed together—it’s prettier and lets you get a different flavor combo with each bite.
- The Sweet Finish: Drizzle that beautiful maple syrup in a zig-zag or spiral pattern over everything. The berries will glisten, and the almonds will get a little sticky-sweet goodness.
- Final Flourish: Add any of your optional toppings here. A sprinkle of shredded coconut? A few banana slices fanned out? A dollop of almond butter? This is your signature. Make it beautiful!
- Serve Immediately: Grab a spoon and dive right in while the textures are perfect—warm quinoa, cool berries, creamy milk. It’s a symphony in a bowl.
How to Serve It Up: Making It Special
Presentation is part of the joy! Serve this bowl in a wide, shallow bowl to show off all the gorgeous colors. I love pairing it with a big mug of hot coffee or a bright herbal tea. For a real “treat yourself” moment, light a candle, put on some morning jazz, and actually sit down to enjoy it. If you’re serving a crowd, set up a breakfast bowl bar with bowls of quinoa, small dishes of all the toppings, and little pitchers of different milks and syrups. Let everyone build their own masterpiece—it’s a guaranteed brunch hit!
Make It Your Own: Delicious Twists & Swaps
This recipe is a beautiful canvas. Here are a few ways to paint a different flavor picture:
- Tropical Vacation Bowl: Swap berries for diced mango and pineapple. Use coconut milk, top with toasted coconut flakes, macadamia nuts, and a drizzle of honey.
- Chocolate Berry Bliss Bowl: Stir 1 tablespoon of unsweetened cocoa powder into the warm quinoa. Top with berries, almonds, and a drizzle of peanut butter.
- Apple Pie Bowl: Use warm stewed cinnamon apples instead of berries. Use almond milk, top with walnuts, and a sprinkle of granola for extra crunch.
- Savory Sunrise Bowl: Skip the syrup and berries. Top quinoa with a fried or poached egg, sautéed spinach, avocado slices, everything bagel seasoning, and a splash of hot sauce.
- High-Protein Power Bowl: Use vanilla protein milk. Stir a scoop of vanilla protein powder into the quinoa while warming (add a little extra milk to keep it creamy). Top with berries and nuts.
From My Kitchen to Yours: A Few Parting Thoughts
This recipe has evolved so much from that first desperate pantry raid. I’ve learned that toasting the nuts is non-negotiable for me—it just elevates everything. I also almost always double or triple the quinoa I cook on Sunday, so I have my base ready for the whole week. It keeps beautifully in the fridge for 4-5 days. My husband, who was once a skeptic, now requests it! He calls it his “power bowl.” The funniest kitchen fail related to this? I once accidentally used cayenne pepper instead of cinnamon when making the apple pie variation. That was a… spicy start to the day! Let’s just say I’ve labeled my spice jars very clearly since then. The moral of the story? Cook with love, laugh at the mistakes, and always taste as you go.
Your Questions, Answered: FAQs & Troubleshooting
Q: My quinoa sometimes turns out bitter or mushy. What am I doing wrong?
A: Bitterness often comes from not rinsing quinoa thoroughly before cooking. It has a natural coating called saponin that can taste soapy. Give it a good rinse in a fine-mesh strainer under cold water until the water runs clear. For perfect, fluffy quinoa, use the absorption method: For 1 cup of quinoa, use 2 cups of liquid (water or broth). Bring to a boil, reduce to a simmer, cover, and cook for 15 minutes. Remove from heat and let it sit, covered, for 10 minutes. THEN fluff with a fork. This steam-rest is the secret to fluffiness!
Q: Can I make this the night before as overnight oats-style?
A> Absolutely! It makes a fantastic chilled “quinoa porridge.” Just mix the cooked quinoa, milk, maple syrup, and flax seeds in a jar. Seal and refrigerate overnight. In the morning, give it a stir (it will thicken), add your berries and nuts, and enjoy cold. The texture is pudding-like and delicious.
Q: Is this really filling enough for breakfast?
A> I promise, it is! The combo of complex carbs from quinoa, fiber from berries and flax, protein from quinoa and nuts, and healthy fats from the nuts/milk creates a satiating meal that digests slowly. If you’re extra hungry, don’t be shy—add an extra spoonful of nut butter or a side of Greek yogurt for even more staying power.
Q: My bowl got soggy after I added the milk. Help!
A> No worries! This is meant to be a creamy, porridge-like dish, but if you prefer more texture, you have two options: 1) Serve the milk on the side and pour over each bite as you go. 2) Use a thicker milk like Greek yogurt thinned with a splash of regular milk, or a dollop of coconut cream instead of the runnier liquid.
Quinoa Berry Breakfast Bowl : Wholesome, Sweet & Protein-Packed
Description
Good morning! If you want a breakfast that’s quick, colorful, and actually keeps you full, this Quinoa Berry Breakfast Bowl is a winner. It’s creamy, naturally sweet, loaded with fiber and protein, and easy to customize with whatever you have on hand. Perfect for busy mornings or slow, cozy starts.
Ingredients
-
1 cup cooked quinoa
-
1/2 cup mixed berries (fresh or frozen)
-
2 tbsp sliced almonds (toasted if possible)
-
1 tbsp ground flaxseed
-
1–2 tbsp pure maple syrup (to taste)
-
1/4 cup coconut milk (or any milk you like)
Optional toppings
-
Banana slices
-
Chia seeds
-
Shredded coconut
-
Nut butter
-
Cinnamon
-
Granola
Instructions
-
Warm the quinoa (optional)
Add cooked quinoa to a small saucepan with a splash of milk or water. Heat gently for 3–5 minutes, or microwave 60–90 seconds until warm. -
Build the base
Spoon quinoa into a bowl. -
Add milk
Pour coconut milk (or your preferred milk) over the quinoa. -
Add toppings
Top with berries, sliced almonds, and ground flaxseed. -
Sweeten
Drizzle maple syrup over the top. -
Finish & serve
Add any extra toppings and enjoy right away.
Notes
-
Rinse quinoa well before cooking to remove bitterness.
-
Batch-cook quinoa for the week — it keeps 4–5 days in the fridge.
-
Toast the almonds in a dry pan for 2–3 minutes for deeper flavor.
-
Use frozen berries straight from the freezer — they thaw quickly in the warm quinoa.
-
Add protein with protein milk, yogurt, or a spoon of nut butter.
Nutritional Snapshot (A Per Serving Estimate)
Please note: This is an approximation based on the specific ingredients listed and can vary with substitutions.
Servings: 1 | Calories: ~350 | Protein: ~9g | Fat: ~12g | Carbohydrates: ~45g | Fiber: ~8g
Prep time: 5 minutes | Cook time: 0–10 minutes (using pre-cooked quinoa) | Total time: 10 minutes
Final Thoughts
This Quinoa Berry Breakfast Bowl is more than just a recipe—it’s an invitation to reclaim your mornings. In a world that often feels rushed and chaotic, this bowl is a gentle reminder to pause, nourish yourself, and find joy in the simple act of preparing something beautiful and wholesome.
From that first life-changing bite born out of pantry chaos to the countless mornings it has anchored me since, this recipe has become a ritual of care. It’s proof that eating well doesn’t have to be complicated or time-consuming. With a handful of vibrant ingredients and a few peaceful minutes, you can create a meal that truly fuels your body and brightens your day.
So tomorrow morning, before the rush begins, I encourage you to try it. Let the nutty aroma of warm quinoa fill your kitchen. Take a moment to artfully arrange those jewel-like berries. Drizzle that maple syrup with a flourish. Then, sit down—even just for five minutes—and savor it. Taste the comfort, feel the energy, and enjoy the quiet satisfaction of starting your day with intention.
Here’s to mornings that sparkle, to food that feels like a hug, and to you—deserving every delicious, nourishing bite.
Avocado Toast on Whole Grain Bread : Quick, Nutritious & Delicious
Why This Isn’t Just Avocado Toast (It’s a Ritual)
Good morning, sunshine! Or hey, good afternoon, or good… whenever you’re reading this with a rumbly tummy and a craving for something creamy, satisfying, and downright good for you. Let’s talk about the humble, sometimes misunderstood, absolute rockstar of simple meals: avocado toast.
I know, I know. You’ve seen it a million times. It’s the poster child for millennial brunch, the subject of countless eye-rolls about simplicity priced like luxury. But hear me out. When you strip away the hype, what you have is a perfect canvas. A 5-minute masterpiece that can fuel your body, delight your taste buds, and become a daily ritual you actually look forward to. This isn’t about following a trend; it’s about mastering a foundational skill.
My version, which I’m so excited to share with you today, is built on a few key principles: texture contrast (creamy meets crunchy), nutritional balance (healthy fats + fiber + protein), and most importantly, flavor layers. We’re not just smashing avocado on bread. We’re creating a moment. Whether it’s your pre-workout fuel, a post-school snack for the kids, or a lazy Saturday treat for yourself, this avocado toast on whole grain bread is designed to make you feel nourished, energized, and seriously happy.
So, tie on that apron (messy is welcome here), grab a perfectly ripe avocado, and let’s turn the simple into the spectacular. No fancy skills required—just a hungry heart and a love for good food.
The Brunch That Started It All: A Love Letter to Simple Food
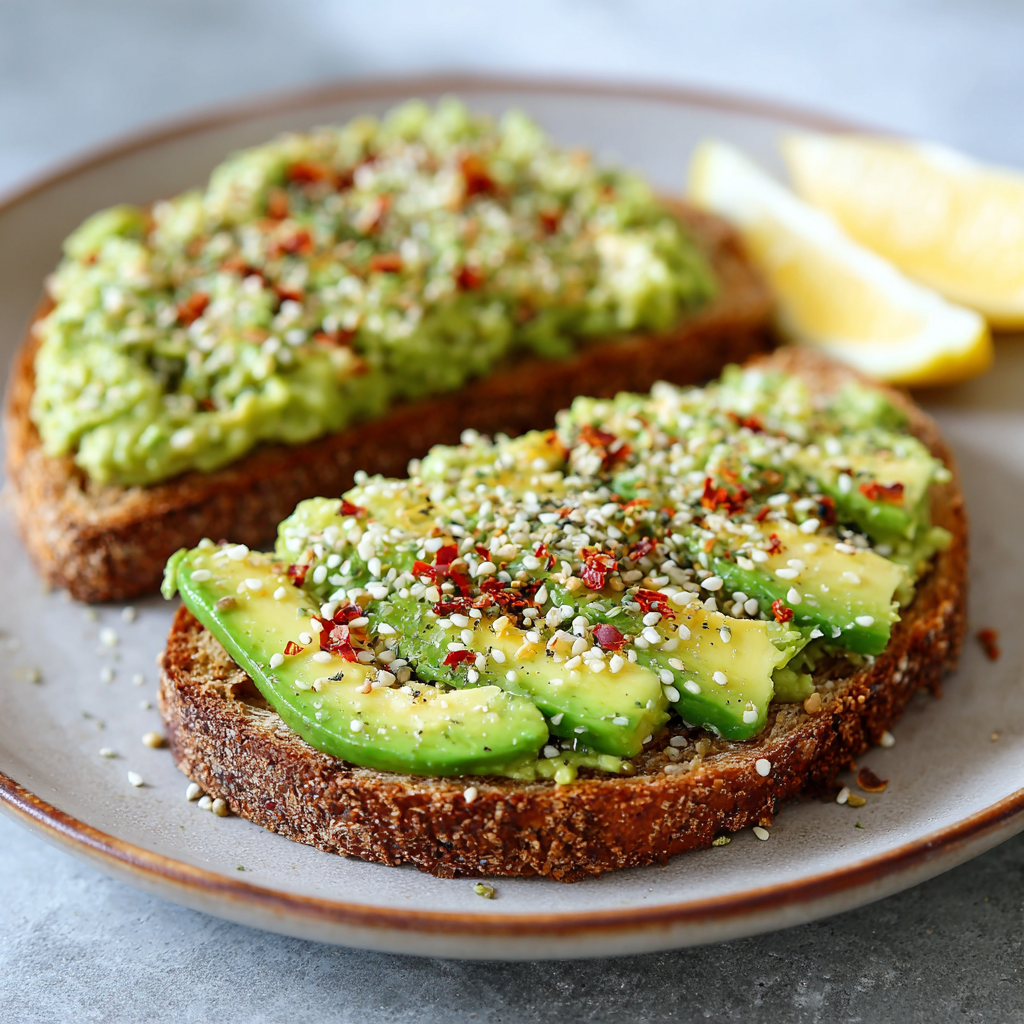
My love affair with avocado toast didn’t start in a trendy cafe. It started in my Aunt Clara’s sun-drenched California kitchen, circa 2008, long before it was a “thing.” I was visiting, jet-lagged and groggy, and she handed me a plate with a single slice of thick, nutty bread piled high with the most vibrant green mash I’d ever seen. “Eat,” she said. “It’s California penicillin.”
I took a bite. The bread was warm and substantial, giving a hearty *crackle* under my teeth. The avocado was cool, rich, and seasoned with just a flaky salt and a squeeze from a lemon tree outside her window. She’d scattered some weird little seeds on top (hemp seeds, I’d later learn) for crunch. It was so simple it felt profound. We sat at her counter, not talking much, just enjoying the quiet morning, the crunch of toast, and the shared understanding that sometimes the best food doesn’t need a recipe at all—it just needs good ingredients and a generous spirit.
That moment, that feeling of calm, satiating joy, is what I try to recreate every time I make this. It’s my edible deep breath. It reminds me that cooking doesn’t have to be complicated to be meaningful. Every time I mash an avocado, I’m back in that sunny kitchen, and I’m sharing a bit of that California calm with you.
Your Building Blocks: Choosing the Best Ingredients
Great avocado toast is like a great outfit: it all comes down to quality basics. Let’s break down each component, because every single one matters. Here’s what you’ll need for one perfect, generous slice (double, triple, quadruple as needed!):
- 1 slice whole grain bread: This is your foundation. Look for bread with visible grains and seeds, a short ingredient list (think: whole wheat flour, oats, sunflower seeds, flax), and no added sugars. Chef’s Insight: The density and nuttiness of a good whole grain bread stand up to the creamy avocado without getting soggy. Substitution Tip: Sourdough is a fabulous, tangy alternative. For gluten-free, a sturdy seeded GF loaf works wonders.
- ½ ripe avocado: The star of the show! “Ripe” means it yields gently to a soft squeeze near the stem. Avoid rock-hard or mushy avocados. Chef’s Insight: I prefer Haas avocados for their richer, nuttier flavor and creamier texture compared to the larger, sometimes watery Florida varieties.
- Pinch of flaky sea salt: Not all salt is created equal. Flaky sea salt (like Maldon) or a good kosher salt provides little bursts of flavor that table salt can’t match. Chef’s Insight: The texture and clean taste of flaky salt elevate this from a snack to a experience.
- 1 tsp hemp seeds (hearts): My not-so-secret weapon. These tiny, nutty seeds add a delightful crunch, a complete plant-based protein punch, and a boost of omega-3s. Substitution Tip: If you don’t have hemp seeds, try everything bagel seasoning, toasted sesame seeds, or even a sprinkle of chia seeds.
- The “Make It Your Own” Toppings (Optional but encouraged!):
- Red pepper flakes: For a gentle, warming heat.
- Fresh lemon or lime juice: A tiny squeeze brightens the rich avocado and slows browning.
- Cherry tomatoes, sliced: Adds freshness, color, and a juicy pop.
- A perfectly fried or poached egg: Turns your toast into a protein-packed, decadent meal. The runny yolk is *chef’s kiss*.
Let’s Make It: Your Foolproof, Flavor-Packed Steps
Okay, friends! Time to assemble our masterpiece. Follow these steps, and in about five minutes, you’ll have a plate of pure joy.
- Toast Your Foundation. Pop your slice of whole grain bread into the toaster, toaster oven, or even a hot skillet. We’re going for deeply golden and thoroughly crisp. Why? A sturdy, well-toasted base is crucial—it’s the armor that prevents sogginess once you add the creamy avocado. Little Chef Hack: If using a skillet, toast it dry over medium heat for 2-3 minutes per side until it’s fragrant and has some color. This gives it an incredible, rustic flavor.
- Mash with Personality. While the bread toasts, halve your avocado, remove the pit, and scoop the flesh of one half into a small bowl. Grab a fork and mash! Now, here’s a personal preference: I like it creamy with some satisfying chunks. Don’t turn it into a completely smooth puree. Those little bits of avocado give you something to bite into. Little Chef Hack: If you’re adding lemon juice or red pepper flakes, mix them into the mash now so the flavors can marry.
- Spread with Abandon. The moment your toast pops, get it on a plate. Immediately, take your mashed avocado and spread it evenly right to the edges. Doing this while the bread is hot helps the avocado cling and warm up slightly, which is magical. Don’t be shy—pile it on!
- Season with Intention. This is where you awaken the flavors. Take that pinch of flaky sea salt and, holding your hand up high, sprinkle it evenly over the green landscape. The height helps distribute the salt evenly. Then, scatter your hemp seeds over the top for that nutritional crunch.
- Top with Flair (The Fun Part!). This is your stage. Slice a few cherry tomatoes and artfully arrange them? Go for it. Add a few more pinches of red pepper flakes for a kick? Yes, please. For an egg: fry one sunny-side up in a little olive oil until the whites are set but the yolk is gloriously runny, then gently slide it on top. Let it be the crown jewel.
The key through all of this? Move with purpose, but enjoy the process. This is a 5-minute act of self-care.
How to Serve Your Masterpiece
This toast deserves a moment. Serve it immediately, on a simple plate that lets its colors shine. I love eating mine straight off the cutting board if I’m flying solo. For a brunch spread, pair it with a bright side of mixed berries or a simple green salad. If you’ve added an egg, have a knife and fork ready for the delicious, messy excavation. And always, always have extra napkins nearby—the best food is often the one you can’t eat neatly!
Mix It Up! 5 Delicious Twists on the Classic
Once you’ve mastered the basic blueprint, the world is your oyster (or, well, your avocado). Try these fun variations:
- Mediterranean Fiesta: Top with crumbled feta, chopped Kalamata olives, a drizzle of olive oil, and a sprinkle of dried oregano.
- Everything Bagel Style: Swap hemp seeds for a generous sprinkle of everything bagel seasoning. Add a schmear of cream cheese under the avocado for ultimate decadence.
- Spicy Sriracha & Sesame: Drizzle with sriracha and a sprinkle of black and white sesame seeds. Add sliced radish for extra crunch.
- Caprese-Inspired: Layer sliced fresh mozzarella or burrata under the avocado, then add halved cherry tomatoes, fresh basil leaves, and a balsamic glaze drizzle.
- Protein Powerhouse (Vegan): Mash in a tablespoon of chickpeas or white beans with the avocado for extra fiber and protein. Top with microgreens.
Olivia’s Kitchen Notes & Stories
This recipe has lived a hundred lives in my kitchen. It’s been my 6 AM pre-gym fuel (extra hemp seeds!), my “I’m working through lunch” desk meal, and my go-to for calming a hangry toddler (cut into fun shapes, obviously). The biggest evolution? Learning that the avocado doesn’t have to be perfect. A few brown spots? Scoop ’em out and carry on. An avocado slightly under-ripe? Mash it finer and add a tiny drizzle of olive oil for creaminess. A little over-ripe? It’s perfect for mashing!
One of my favorite kitchen blunders turned into a win: I once ran out of whole grain bread and used a cinnamon-raisin bagel thin. Skeptical, I topped it with the avocado, salt, and hemp seeds. The sweet-salty-creamy combo was bizarrely incredible. So don’t be afraid to experiment! The worst that can happen is you make a weird snack and order pizza. The best? You discover your new favorite thing.
Your Questions, Answered!
Q: How do I prevent the avocado from browning if I want to make this ahead for a crowd?
A: The key is air exposure. You can mash the avocado with lemon/lime juice (the acid slows oxidation) and press plastic wrap directly onto the surface before refrigerating. For individual portions, assemble the toast *just* before serving. You can also prep the mashed, lemon-spiked avocado and toasted bread separately, then spread and top when ready to eat.
Q: My toast gets soggy so fast! What am I doing wrong?
A: Two likely culprits: 1) Your bread isn’t toasted enough. It needs to be *crisp* to act as a barrier. 2) You’re using an over-ripe or watery avocado. Make sure your avocado is just-ripe and drain any excess liquid from the mash if needed. Always spread the avocado on hot toast right after it comes out of the toaster!
Q: Is this actually filling enough for a meal?
A> The basic version is a fantastic snack or light breakfast. To transform it into a satiating meal, add a protein source. My top picks: a fried/poached egg, a handful of chickpeas mashed into the avocado, a couple slices of smoked salmon, or a sprinkle of nutritional yeast for a cheesy, protein-packed vegan boost.
Q: Can I use frozen avocado?
A> You can, but the texture will be different. Thawed frozen avocado often becomes quite watery and mushy, perfect for smoothies but less ideal for the chunky texture we love on toast. For the best experience, fresh is the way to go. If you must use frozen, thaw it in a strainer over a bowl to drain excess liquid before mashing.
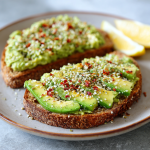
Avocado Toast on Whole Grain Bread : Quick, Nutritious & Delicious
Description
Avocado toast isn’t just trendy — it’s one of the fastest, most satisfying breakfasts you can make. With creamy avocado, crunchy whole grain bread, and a few smart toppings, you get great texture, healthy fats, and steady energy. It takes only minutes, but it feels like a small morning win every time.
Ingredients
-
1 slice whole grain bread
-
½ ripe avocado
-
Pinch flaky sea salt (or kosher salt)
-
1 tsp hemp seeds (or sesame seeds / everything seasoning)
-
Optional: squeeze of lemon or lime juice
Optional toppings
-
Cherry tomatoes, sliced
-
Red pepper flakes
-
Fried or poached egg
-
Avocado slices instead of mashed (for texture)
Instructions
-
Toast the bread
Toast the whole grain bread until golden and crisp. -
Prepare the avocado
Scoop avocado into a small bowl. Mash with a fork until mostly smooth with a few chunks.
Add a small squeeze of lemon or lime if using. -
Spread
Spread the mashed avocado evenly over the hot toast. -
Season and top
Sprinkle with salt and hemp seeds (or your chosen topping).
Add any extras like tomatoes or red pepper flakes. -
Serve immediately
Enjoy while the toast is still warm and crisp.
Notes
-
Use truly ripe avocado — it should give slightly when pressed.
-
Toast well — extra crunch prevents soggy bread.
-
Season enough — avocado needs salt to taste its best.
-
Add protein — an egg or seeds makes it more filling.
-
Mash chunky, not smooth — better texture and bite.
Nutritional Info (Per Slice, Basic Recipe)
This is an estimate and can vary based on your specific bread and avocado size. Toppings will change the values.
Calories: ~220 | Protein: 6g | Carbohydrates: 20g | Fiber: 8g | Fat: 14g (Primarily healthy monounsaturated fats)
Prep Time: 5 minutes | Cook Time: 2 minutes (for toasting) | Total Time: 7 minutes | Servings: 1
Final Thoughts: Why This Isn’t Just Avocado Toast (It’s a Ritual)
At its surface, this is a recipe for avocado toast. But really, it’s an invitation—to slow down, to nourish yourself with intention, and to find joy in the simplest of acts. In a world that often feels hurried and complex, there is profound comfort in creating something both wholesome and delightful in just a few minutes.
This isn’t about chasing a trend or crafting a picture-perfect brunch for social media. It’s about the ritual: the satisfying crackle of toasted bread, the vibrant green of mashed avocado, the ritualistic sprinkle of flaky salt. It’s a small, daily practice of mindfulness. Whether you’re fueling a busy day, sharing a quiet moment, or feeding someone you love, this recipe is a tool for connection—to good food, to fond memories, and to your own well-being.
Remember Aunt Clara’s sun-drenched kitchen. Remember that the “best” version is the one you make with what you have, seasoned with a generous spirit. The beauty of this canvas is its flexibility—its ability to be a protein-packed powerhouse, a Mediterranean getaway, or a nostalgic bite of California calm, all with a few tweaks.
Spinach and Mushroom Egg White Omelette : Light, Protein-Packed Breakfast
Welcome to a Lighter, Brighter Morning!
Hey there, friend! Can you smell that? It’s the scent of coffee brewing, the quiet sizzle from a pan on the stove, and the promise of a brand new day. If you’re anything like me, your morning routine sets the tone for everything that follows. And what better way to kick things off than with a breakfast that makes you feel amazing? Not just full, but genuinely nourished, energized, and ready to tackle your to-do list with a smile.
Today, we’re ditching the heavy, grease-laden breakfasts and celebrating something beautifully simple: the mighty Spinach and Mushroom Egg White Omelette. Now, I know what you might be thinking—”egg whites? Aren’t those… boring?” Trust me, I hear you! I used to be a devout whole-egg enthusiast, convinced that yolks were the sole carriers of flavor. But this recipe? It’s a total game-changer. It’s my go-to when I want something that feels clean, light, and packed with pure, sustained energy.
This isn’t about deprivation; it’s about celebration. We’re celebrating the earthy depth of sautéed mushrooms, the vibrant green pop of fresh spinach, and the incredible, cloud-like fluffiness you can achieve with egg whites. It’s a canvas for your favorite flavors—a sprinkle of tangy feta, a few creamy avocado slices, or a dash of your favorite hot sauce. It comes together in about the time it takes for your toast to pop, and it delivers a powerful punch of protein to keep you going strong all morning long. So, grab your favorite non-stick skillet and let’s turn a few simple ingredients into your new favorite feel-good breakfast.
The Omelette That Saved My Saturday Mornings
This recipe has a special place in my heart because it perfectly solved a classic weekend dilemma. Picture this: It’s a lazy Saturday. You’ve just come back from a long walk or maybe a fun workout class, and you’re ravenous. But you also have that post-exercise glow and you don’t want to weigh yourself down with a heavy, nap-inducing brunch. You want something satisfying that honors that energetic, “I did something good for myself” feeling.
That was me, every single weekend. I’d stare into the fridge, craving something substantial but not stodgy. One Saturday, after a particularly sweaty morning, I saw a carton of egg whites I’d bought for baking and a fridge drawer full of veggies begging to be used. I threw them together with a hopeful heart. The result was this incredibly fluffy, bright, and filling omelette. I ate it right off the pan, standing in my sunlit kitchen, and it was pure joy. It became my little ritual—a reward for moving my body and a gift of clean energy for the rest of my day off. It’s proof that the food that makes you feel your best doesn’t have to be complicated. Sometimes, it’s just a few good things, cooked with intention, in a quiet kitchen.
Gathering Your Flavorful, Power-Packed Ingredients
Here’s everything you need to make one perfect, plate-sized omelette. The beauty is in the simplicity, and each ingredient plays a starring role. Let’s break it down:
- 4 large egg whites: This is our protein-packed base! For the fluffiest results, I like to separate the eggs myself. Pro tip: Ensure no trace of yolk gets in, as fat can prevent the whites from achieving maximum volume. If you’re in a hurry, carton egg whites work just fine—look for a brand with no added preservatives for the cleanest flavor.
- ½ cup fresh spinach, chopped: I’m talking about big handfuls here! Spinach wilts down dramatically, so don’t be shy. It adds iron, a beautiful color, and a mild, fresh flavor. If you only have baby spinach, you can skip the chopping.
- ½ cup mushrooms, sliced: Cremini or white button mushrooms are perfect. They sauté into little flavor bombs with a meaty, umami texture. Slice them evenly so they cook at the same rate. Feeling fancy? Try shiitakes for an even deeper, woodsier taste.
- 1 tbsp onion, finely diced (optional): This is my “flavor booster” add-in. A little onion adds a sweet, aromatic base note. If you’re not an onion person, a pinch of onion powder works, or you can skip it entirely.
- 1 tsp olive oil or nonstick spray: Just enough to coat the pan and create a non-stick barrier. I love a light drizzle of good olive oil for a hint of flavor, but a spritz of avocado or coconut oil spray is great for keeping things ultra-light.
- Salt & black pepper to taste: Season as you go! A pinch of salt on the veggies as they cook, and another on the egg whites, makes all the difference. Freshly cracked black pepper is non-negotiable for me.
- Optional toppings: feta cheese, avocado slices, or hot sauce: This is where you make it your own! A tiny sprinkle of crumbled feta adds a salty tang. Creamy avocado brings healthy fats and richness. And a dash of your favorite hot sauce (I’m a Cholula girl) ties everything together with a zing.
Let’s Cook! Your Step-by-Step Guide to Fluffy Perfection
Ready to create some magic? Follow these steps, and you’ll have a restaurant-worthy omelette in minutes. I’m sharing all my little chef hacks along the way!
- Prep Your Station: Before you even turn on the heat, get everything ready. Chop your spinach, slice your mushrooms, and dice your onion if using. Crack and separate your eggs (or have your carton ready). Having your “mise en place” (everything in its place) makes the cooking process smooth and stress-free. Trust me on this—it’s the secret to never burning your veggies while you frantically separate eggs!
- Sauté the Veggies: Heat your olive oil or spray in a quality 8-inch nonstick skillet over medium heat. Toss in the mushrooms (and onions). Here’s a tip: Don’t crowd the pan and don’t stir them constantly! Let them sit for a minute to get a nice golden-brown sear, which builds incredible flavor. Sauté for 3-4 minutes until they’re softened and fragrant.
- Wilt the Greens: Add the massive pile of chopped spinach to the pan. It will look like a lot, but it wilts down in about 60 seconds! Stir it gently with the mushrooms just until it turns bright green and limp. Immediately remove the whole veggie mixture to a plate. This step is crucial—if we leave the veggies in the pan, they’ll release moisture and make our omelette soggy. We want that filling dry and happy.
- Create the Egg Cloud: Give the pan a quick wipe with a paper towel if needed, then return it to medium heat. Pour in your egg whites. Immediately tilt the pan in a circular motion to let the whites spread into a beautiful, even circle covering the bottom.
- The Gentle Lift: As the edges begin to set and turn opaque (about 1-2 minutes), take your spatula and gently lift one edge. Tilt the pan so the uncooked, runny egg white on top flows underneath the cooked part. Do this around the edges a couple of times. This technique ensures even cooking and no raw patches, giving you that perfect, fully-set yet tender omelette.
- Fill and Fold: Once the surface is mostly set with just a little shimmer on top, spoon your spinach and mushroom mixture onto one half of the omelette. Now, with confidence, use your spatula to fold the empty half over the filling. It’s like tucking in a flavor blanket! Let it cook for another 30-60 seconds to warm the filling through and set the fold.
- Slide and Serve: Here’s the grand finale: tilt your pan over your plate and let the omelette slide gracefully out. No fighting, no tearing—just a perfect, golden package ready for toppings.
Plating with Pizzazz
Presentation is part of the joy! Slide your gorgeous omelette onto a warm plate. Let the vibrant green spinach peek out from the side. Add your toppings: a few artful slices of avocado, a sprinkle of bright white feta, or a zig-zag of hot sauce. I love serving this with a side of juicy cherry tomatoes or a small handful of peppery arugula tossed in lemon juice. It adds fresh texture and color, making your breakfast feel like a special café treat, right at home.
Make It Your Own: Creative Twists
- The “Everything Green”: Swap mushrooms for chopped asparagus tips and add a handful of fresh herbs like chives or dill to the egg whites before cooking.
- Mediterranean Sunshine: Use sun-dried tomatoes (packed in oil, chopped) and a spoonful of chopped kalamata olives in the filling. Top with a dollop of Greek yogurt.
- Southwest Fiesta: Add diced bell pepper and a pinch of cumin to the sauté. Fill with a tablespoon of black beans and top with salsa and a lime wedge.
- Dairy-Free Delight: Skip the feta and top with nutritional yeast for a cheesy flavor, or add creamy sliced avocado.
- Herb-Infused Whites: Whisk a teaspoon of fresh, finely chopped herbs (parsley, chervil, tarragon) directly into the egg whites before they hit the pan for an aromatic lift.
Olivia’s Kitchen Notes
This recipe has evolved from a “what’s in the fridge?” experiment to a beloved staple. My biggest lesson learned? Patience with the pan. I used to crank the heat to high, wanting it done fast. That only leads to a rubbery, brown-bottomed omelette. Medium heat is your best friend for gentle, even cooking. Also, I’ve learned to embrace the “messy first omelette” rule. The first one is for the cook (that’s you!), eaten straight from the pan to perfect your technique. The second one is the photogenic masterpiece. It’s a delicious rule, if you ask me. Finally, don’t be afraid to season each layer—a little salt on the veggies, a little on the eggs. It builds depth in every single bite.
Your Questions, Answered!
Q: My omelette always sticks and tears! Help!
A: The likely culprits are heat and your pan. First, ensure you’re using a good quality non-stick skillet in good condition. Second, make sure your pan is properly heated with oil before adding the eggs. Medium heat is key—too hot causes sticking. Finally, a little more fat (a teaspoon of oil or butter) never hurt for extra insurance.
Q: Can I make this with whole eggs instead?
A: Absolutely! For a whole-egg version, use 2 large eggs. Whisk them well with a tablespoon of water or milk for extra fluff. The cooking method remains the same, though it may cook a touch quicker.
Q: My egg whites turn out flat and rubbery. What am I doing wrong?
A> Rubberiness usually means overcooking. Cook just until the surface is set and no longer runny. The residual heat will finish the job once it’s folded and plated. Also, avoid over-mixing the whites—just a quick whisk to break them up is plenty. Over-whisking can deflate them.
Q: Can I prep the filling ahead of time?
A: Yes! Sauté a big batch of mushrooms and spinach at the start of the week. Store it in an airtight container in the fridge for 3-4 days. When you’re ready for breakfast, just warm a spoonful in the pan before adding your fresh egg whites. Weekday breakfast saved!

Spinach and Mushroom Egg White Omelette : Light, Protein-Packed Breakfast
Description
If you want a breakfast that’s quick, filling, and energizing without feeling heavy, this Spinach and Mushroom Egg White Omelette is a perfect choice. It’s fluffy, savory, and loaded with nutrients, yet comes together in just minutes. Great for busy mornings or post-workout meals, it delivers clean protein and fresh flavor in every bite.
Ingredients
-
4 large egg whites
-
½ cup fresh spinach, chopped
-
½ cup mushrooms, sliced
-
1 tbsp finely diced onion (optional)
-
1 tsp olive oil or nonstick spray
-
Salt and black pepper, to taste
Optional toppings
-
Crumbled feta
-
Avocado slices
-
Hot sauce or fresh herbs
Instructions
-
Prep ingredients
Chop spinach, slice mushrooms, and dice onion if using. -
Cook the vegetables
Heat oil in an 8-inch nonstick skillet over medium heat.
Add mushrooms and onion. Cook 3–4 minutes until softened and lightly browned. -
Add spinach
Stir in spinach and cook about 1 minute until wilted.
Transfer vegetables to a plate. -
Cook the egg whites
Lightly recoat the pan if needed. Pour in egg whites and season with salt and pepper.
Tilt pan to spread evenly. -
Set and fill
When edges are set, gently lift them with a spatula and tilt the pan so uncooked egg flows underneath.
Once mostly set, add vegetables to one half. -
Fold and finish
Fold the omelette over the filling. Cook 30–60 seconds more, then slide onto a plate.
Notes
-
Use medium heat — too high makes egg whites rubbery.
-
Don’t overcook — remove when just set for the best texture.
-
Cook veggies first — this prevents excess moisture.
-
Use a good nonstick pan — it makes folding much easier.
-
Add herbs to the whites — chopped chives or parsley boost flavor.
Nutritional Information (Per Omelette, without optional toppings)
Calories: ~100 | Protein: 14g | Carbohydrates: 3g | Fat: 3g | Fiber: 1g
Note: This is an estimate. Adding toppings like feta or avocado will increase the fat (healthy fats!) and calorie count.
Final Thoughts: A Simple Recipe, A Brighter Start
This isn’t just an omelette recipe. It’s an invitation to begin your day with intention and kindness—to yourself.
We often rush through mornings, grabbing whatever is easiest. But this recipe is a gentle reminder that taking a few mindful minutes to nourish your body can transform your entire outlook. It’s more than eggs and veggies; it’s a ritual of self-care that says, “I am worth this small, good thing.”
What I love most about this dish is its beautiful flexibility. It’s a loyal base for whatever you crave or whatever your fridge holds. It meets you where you are—whether you need a post-workout recharge, a quiet weekend treat, or a swift, protein-packed weekday launchpad. It proves that eating well doesn’t require complexity or deprivation, but rather a handful of fresh ingredients and a little know-how.
So, here’s my wish for you: Let this be more than a meal. Let it be a moment of calm in your morning. Let the sizzle of the mushrooms and the bright green wilt of the spinach be a small meditation. Enjoy the simple act of creating something good for your body.
May your skillet be non-stick, your egg whites fluffy, and your mornings feel lighter and brighter because of it.
Here’s to good food and good days,
Olivia
Sheet-Pan Frittata Slices : Meal Prep Magic with 30–40g Protein
Your New Breakfast BFF: The Sheet-Pan Frittata Slice
Okay, let’s talk about weekday mornings. You know the drill. The alarm blares, your to-do list already feels a mile long, and the last thing you have brain space for is figuring out a breakfast that’s both delicious and actually keeps you full past 10 AM. You’re stuck between a sad, lonely granola bar and the siren call of the drive-thru. I’ve been there more times than I’d like to admit, usually while wearing one slipper and trying to find my car keys in the fruit bowl.
But what if I told you your breakfast salvation is waiting for you on a single sheet pan? Enter the hero we all need: Sheet-Pan Frittata Slices. This isn’t just another egg recipe. This is your weekly meal prep magic trick, your protein-packed secret weapon, and your ticket to calm, delicious mornings. Imagine baking one gorgeous, veggie-and-cheese-studded egg masterpiece, slicing it into perfect, handheld squares, and having a powerhouse breakfast ready to grab-and-go for days. No more scrambling in the morning scramble! Each slice packs a serious 30-40 grams of protein to fuel your adventures, whether that’s a busy workday, a killer workout, or just keeping up with life. It’s hearty, customizable, and tastes like you fussed—but the secret is, you only really cook once. So, tie on that apron (embrace the mess!), and let’s make mornings something to look forward to, together.
Why This Recipe Has My Heart: A Tale of Two Kitchens
This recipe is more than just eggs in a pan; it’s a little piece of my culinary lineage. My grandma, who we called Nana, was the queen of “feeding the crowd.” Every Sunday after church, her kitchen would be a whirlwind of laughter, clattering plates, and the most incredible aromas. She didn’t believe in making one thing at a time. If she was cooking, she was cooking for an army—or at least for any neighbor, cousin, or stray friend who might stop by.
One sleepy Sunday, I was helping her prep brunch. She had a mountain of eggs, leftover roasted potatoes from dinner, and some wilting spinach that needed a purpose. Instead of making individual omelets, she poured it all into her biggest, heaviest baking sheet—the one that barely fit in her oven. “Why make ten when you can make one big one, Livvy?” she’d say with a wink. That giant, golden-brown frittata emerged, was cut into a grid of squares, and disappeared faster than you could say “seconds, please.” It was effortless hospitality. It was genius. My sheet-pan frittata is a direct descendant of Nana’s “big pan” philosophy: simple, generous, and designed to bring people together (or in our modern case, to bring peace to your weekly routine). Every time I make it, I think of her, and I hope this recipe helps you create your own little moments of kitchen magic, too.
Gathering Your Frittata Crew: Ingredients & Smart Swaps
Here’s where the fun begins! This is your canvas. I’ll give you the classic blueprint, but remember, the best frittata is the one that uses what you love (and what’s lurking in your fridge).
- 10 large eggs: The star of the show! They provide the structure and that incredible protein punch. For a richer flavor, I sometimes use 8 whole eggs and 4 extra egg whites.
- 1/2 cup milk or unsweetened almond milk: This is the key to a tender, fluffy texture, not a rubbery one. The milk proteins and fats work magic. Any milk you have works—dairy, oat, cashew. Just avoid flavored varieties!
- 1 cup cooked breakfast sausage, turkey bacon, or diced ham: Hello, savory protein! Chef’s Insight: Make sure your meat is cooked and crumbled/diced before adding. This prevents excess grease from making the frittata soggy. Vegetarian? Swap in a cup of canned (drained) black beans or chickpeas for a plant-based protein boost.
- 1 cup chopped spinach or kale: We’re getting our greens in! I prefer baby spinach as it’s tender, but chopped kale adds a nice heartiness. No need to cook it first—the oven will wilt it perfectly. Zucchini (grated and squeezed dry) or broccoli florets are fantastic too.
- 1/2 cup diced bell pepper: For color, crunch, and sweetness. I love the red or orange ones for their vibrancy! Frozen diced peppers work in a pinch—just thaw and pat them dry.
- 1/2 cup shredded cheddar or feta cheese: The glorious glue of flavor! Cheddar is melty and classic. Crumbled feta or goat cheese adds a tangy punch. Feel free to use a blend. Pro-tip: shred your own cheddar for better meltability (pre-shredded has anti-caking agents).
- Salt and pepper to taste: Don’t be shy! Eggs need seasoning. I start with 3/4 tsp kosher salt and 1/4 tsp black pepper in the egg mix.
- Optional: chopped green onion or herbs for topping: The fresh finish! A sprinkle of chives, green onion, or parsley after baking makes it look and taste restaurant-worthy.
Let’s Build Some Breakfast Magic: Step-by-Step
Ready? This is the easy part. I’ll walk you through every step with my favorite kitchen hacks to guarantee success.
Step 1: Preheat & Prep Your Pan (The No-Stick Secret)
First, crank that oven to 375°F (190°C). This is the sweet spot for even cooking without over-browning. Now, for your pan: a standard 9×13-inch baking sheet or dish is perfect. Here’s my golden rule: line it with parchment paper. Not just grease it—line it. This guarantees your frittata will lift out in one beautiful piece for easy slicing. No scraping, no sticking. Just blissful cleanup. If you don’t have parchment, a good spray of oil will do in a pinch.
Step 2: The Whisking Ritual
Grab your biggest mixing bowl. Crack in all 10 eggs. Add the milk, salt, and pepper. Now, whisk with purpose! You’re not just combining; you’re incorporating air. Whisk until the mixture is completely uniform—no streaks of egg white visible. This takes a good 60 seconds. This effort is what gives you that lovely, consistent texture. Little Chef Hack: Add a tiny pinch of baking powder (1/8 tsp) here for an extra-airy lift. It’s a game-changer!
Step 3: The Mix-In Mingle
Time to invite the fillings to the party! Add your cooked meat, chopped veggies, and most of your cheese (save a small handful for the top). Give it all a good stir with a fork or spatula. The goal is an even distribution so every bite is a treasure hunt of goodies. Don’t over-mix, just combine.
Step 4: The Big Pour & Final Touch
Carefully pour your egg-and-filling mixture into your prepared pan. Use a spatula to scrape every last bit out. Now, gently shake the pan or tap it on the counter to settle everything evenly. Sprinkle that reserved handful of cheese over the top. This creates a gorgeous, golden, cheesy crust.
Step 5: Bake to Perfection
Slide your pan into the middle of the preheated oven. Now, resist the urge to open the door! Let it bake, undisturbed, for 20-25 minutes. How do you know it’s done? The edges will be set and pulling away slightly, the top will be beautifully golden, and most importantly, the center should be just set—no jiggly liquid when you give the pan a gentle shake. A toothpick inserted near the center should come out clean.
Step 6: The Cool-Down (Patience is a Virtue!)
This might be the hardest step. Take the pan out and let it cool on a rack for at least 10-15 minutes. This allows the frittata to firm up, making slicing clean and easy. If you cut it steaming hot, it will fall apart. Use this time to pour that coffee you’ve earned!
How to Serve Your Frittata Slices: Beyond the Plate
Here’s where your meal prep pays off! Once cooled, use a sharp knife to slice your frittata into 6 large squares (for max protein) or 8 smaller rectangles. For serving, I love to slide a spatula under a slice and serve it on a piece of toasted whole-grain bread for an open-faced sandwich. Or, pile a slice atop a simple arugula salad with a lemony vinaigrette for a fantastic lunch. For the ultimate grab-and-go, just wrap each slice in a little parchment paper and foil—breakfast is literally in your hand!
Make It Your Own: 5 Flavor Twists to Try
Don’t stop at one version! This recipe is a shape-shifter. Here are a few of my favorite spins:
- Mediterranean: Swap in crumbled feta, sun-dried tomatoes, chopped Kalamata olives, and fresh oregano.
- Southwest Fiesta: Use pepper jack cheese, add a can of diced green chiles, swap bell peppers for corn, and top with avocado and salsa after reheating.
- Everything Bagel: Stir 2 tbsp of everything bagel seasoning into the egg mix and use a mix of cream cheese dollops and cheddar.
- Dairy-Free/Paleo: Omit the milk or use almond milk, skip the cheese, and load up on more veggies and compliant protein like sugar-free bacon or chicken apple sausage.
- “Clean Out the Fridge”: Got 1/4 cup of mushrooms, a handful of cherry tomatoes, and some leftover roasted asparagus? Chop ’em up and throw them in! This recipe is famously forgiving.
Chef’s Notes: From My Messy Kitchen to Yours
This recipe has evolved from that first giant pan in Nana’s kitchen. I’ve learned a few things: First, the parchment paper trick was born from a disastrous morning where I spent 15 minutes chiseling egg off my favorite pan. Never again! Second, I used to cram in every veggie known to man, but I’ve learned that a 2:1 ratio of egg to total fillings is perfect—any more and it doesn’t hold together as well. Finally, don’t underestimate the power of a good hot sauce drizzle or a dollop of herby yogurt on top when serving. It takes it from “meal prep” to “café-worthy” in two seconds flat. The beauty is, once you nail the basic method, you can truly let your imagination (and your fridge contents) run wild.
FAQs & Troubleshooting: Your Questions, Answered
Q: My frittata turned out watery/soggy. What happened?
A: This is almost always due to excess moisture from the veggies. Make sure your cooked meat isn’t greasy (drain it well on paper towels). For vegetables like zucchini or mushrooms, sauté them first to drive off water, or use the “squeeze dry” method for thawed frozen spinach. Also, ensure your milk is measured accurately—too much can thin the mixture.
Q: Can I freeze these slices? How do I reheat them?
A: Absolutely! They freeze like a dream. Let slices cool completely, then wrap individually in plastic wrap and place in a freezer bag. They’ll keep for 1-2 months. To reheat from frozen, unwrap and microwave for 60-90 seconds, or thaw overnight in the fridge and warm in a toaster oven or skillet for the best texture.
Q: How long do they last in the fridge?
A: Stored in an airtight container, they are perfect for 4-5 days. They are the ultimate make-ahead breakfast!
Q: Can I make this without a sheet pan?
A: Of course! A 9×13-inch ceramic or glass baking dish works identically. The baking time might be a few minutes longer as it’s a bit deeper. Just keep an eye on the “set in the center” test.

Sheet-Pan Frittata Slices : Meal Prep Magic with 30–40g Protein
Description
Busy mornings don’t have to mean boring breakfasts. This Sheet-Pan Frittata is a simple, make-once, eat-all-week solution that’s hearty, customizable, and packed with protein. You mix, pour, and bake everything in one pan, then slice it into grab-and-go portions. It’s perfect for meal prep and tastes just as good reheated as it does fresh from the oven.
Ingredients
-
10 large eggs
-
½ cup milk (or unsweetened almond milk)
-
1 cup cooked breakfast sausage, diced ham, or turkey bacon (cooked and crumbled)
-
1 cup chopped fresh spinach or kale
-
½ cup diced bell pepper
-
½ cup shredded cheddar cheese (or feta/goat cheese)
-
¾ tsp salt
-
¼ tsp black pepper
-
Optional: chopped green onions or fresh herbs for topping
Instructions
-
Preheat oven to 375°F (190°C). Line a 9×13-inch pan with parchment paper or grease well.
-
Whisk eggs
In a large bowl, whisk eggs, milk, salt, and pepper until fully blended and slightly frothy. -
Add fillings
Stir in cooked meat, chopped greens, bell pepper, and most of the cheese (save a little for the top). -
Pour and top
Pour mixture into the prepared pan and spread evenly. Sprinkle remaining cheese on top. -
Bake
Bake 20–25 minutes, until the center is set and a knife inserted comes out clean. -
Cool and slice
Let cool 10–15 minutes, then slice into squares or rectangles.
Notes
-
Use cooked, dry fillings — excess moisture from veggies or meat can make the frittata watery.
-
Whisk well — fully blended eggs give a better texture.
-
Don’t overload — too many add-ins can make slices fall apart.
-
Line with parchment — makes lifting and slicing much easier.
-
Meal prep friendly — store slices in the fridge up to 5 days or freeze individually.
Nutritional Info (A Per-Slice Estimate)
These numbers are for 1 of 6 slices, made with whole milk, pork breakfast sausage, spinach, bell pepper, and cheddar cheese. Remember, your specific counts will vary based on your ingredient choices!
- Calories: ~320
- Protein: 30–35g (Your muscle-building MVP!)
- Carbohydrates: 4g
- Fat: 20g
- Fiber: 1g
Prep Time: 10 mins | Cook Time: 25 mins | Total Time: 35 mins | Servings: 6-8
Final Thoughts: Your Week, Transformed
So, there you have it. The humble sheet-pan frittata slice—more than a recipe, it’s a strategy. A strategy for reclaiming your mornings, nourishing your body with something real, and carrying a little bit of that “Sunday comfort” into every busy day.
It’s the ultimate kitchen chameleon, ready to morph into whatever flavor adventure you’re craving. It’s a tangible link to the past, a nod to the wisdom of feeding people generously and simply. Most importantly, it’s a promise to your future self: tomorrow morning doesn’t have to be hectic. It can be calm, delicious, and powered by something you made with your own two hands.
Whip up a batch this weekend. Slice it, pack it, and feel that little surge of victory each time you grab a piece on the go. Here’s to less scrambling and more savoring. Happy prepping!

Creamy Bacon Ranch Roll-Ups : Easy Party-Ready Tortilla Wraps
Creamy Bacon Ranch Roll-Ups: Your New Go-To Party Hero
Hey there, friend! Come on in, grab an apron, and let’s get rolling. Literally. If you’ve ever found yourself staring into the fridge, willing a magical, crowd-pleasing appetizer to appear an hour before guests arrive, you and I are kindred spirits. We’ve all been there. The good news? The secret to stress-free, always-delicious party food isn’t a secret at all. It’s waiting right here, in these incredibly simple, flavor-packed Creamy Bacon Ranch Roll-Ups.
Picture this: a soft flour tortilla, slathered with a tangy, herby ranch cream cheese, loaded with crispy bacon, sharp cheddar, and a pop of fresh green onion. Rolled tight, sliced into beautiful little pinwheels, and served up cold. Every single bite is a perfect harmony of creamy, crunchy, salty, and fresh. They disappear from the platter faster than you can say “More, please!” and the best part? You can make them in the quiet of your morning, stash them in the fridge, and become the chilled-out, confident host you were always meant to be by party time.
This isn’t just a recipe; it’s a trusty sidekick. It’s for game day screams, potluck smiles, after-school hunger, and those “I just need a little something tasty” moments. You don’t need any fancy skills—just a bowl, a spoon, and about ten minutes of hands-on fun. So, let’s turn simple ingredients into your next unforgettable bite. Ready? Let’s make some magic happen.
The Party That Started It All
I have to tell you about the first time these roll-ups truly saved my sanity. It was years ago, my first big “grown-up” holiday party in my tiny apartment. I had ambitiously planned a menu that was far too complex, my kitchen looked like a tornado had hit a farmers market, and I was about 45 minutes from my friends arriving in a full-blown panic. My mom, sensing the impending meltdown from 300 miles away, called.
After listening to my frantic list of soufflés and sauces, she simply said, “Liv, stop. What do you have in your fridge right now?” I listed off cream cheese, leftover bacon from breakfast, a packet of ranch mix, and tortillas. “Perfect,” she laughed. “Now, soften that cheese, mix it all together, spread it, roll it, slice it. Put it on your nicest plate. No one will know you didn’t plan it.”
Twenty minutes later, I had a stunning platter of colorful pinwheels. They were the first thing to vanish that night. Friends asked for the recipe, convinced it was some complicated chef’s creation. I just smiled. That night taught me a priceless lesson: the best recipes aren’t about showing off. They’re about sharing joy, creating connection, and giving yourself the grace to keep things deliciously simple. Every time I make these, I think of my mom’s calm voice and that feeling of last-minute triumph.
Gathering Your Flavor Crew
Here’s the beautiful cast of characters that makes these roll-ups so irresistible. I’ve added my little chef insights and swaps so you can make this recipe your own!
- 8 large flour tortillas: The blank canvas! I like the burrito-size ones for nice, hefty roll-ups. For a lighter option, you can use spinach or tomato herb wraps for extra color and flavor. Chef’s Tip: Let them sit at room temp for 10 minutes before rolling—they’re less likely to crack.
- 8 oz cream cheese, softened: This is the creamy glue that holds everything together. Full-fat is best here for the ultimate rich texture and stability. For softening, leave it out for an hour, or microwave a cold block for 15-20 seconds. Not melty, just spreadable!
- 1 packet (1 oz) ranch seasoning mix: Our flavor powerhouse! It brings the tang, herbs, and garlicky goodness. For a from-scratch twist, mix 2 tsp dried dill, 1½ tsp garlic powder, 1 tsp onion powder, ½ tsp black pepper, and a pinch of salt.
- 1 cup shredded cheddar cheese: I love the sharpness of a good aged cheddar against the creamy base. Pre-shredded is convenient, but block cheese you shred yourself melts into the mix more cohesively and tastes fresher.
- ½ cup cooked and crumbled bacon: The salty, smoky crunch! Real bacon bits make a world of difference. Cook it until crisp, drain well, and let it cool before adding. For a shortcut, good-quality pre-cooked bacon works. Turkey bacon is a great lighter swap.
- ¼ cup finely chopped green onions: The essential fresh finish! They cut through the richness beautifully. Use both the green and white parts. In a pinch, a tablespoon of dried chives can sub, but fresh is ideal.
- ¼ cup finely chopped red bell pepper (optional): My “secret” for a pop of color and a subtle sweet crunch. It’s optional, but highly recommended for texture and visual appeal. Yellow pepper or very finely minced celery work too!
Let’s Roll! Your Foolproof Guide
Okay, team. This is where the fun happens. Follow these steps, and you’ll have perfect roll-ups every single time.
- Create the Dreamy Filling. In a medium bowl, plop in your beautifully softened cream cheese and the entire packet of ranch seasoning. Grab a sturdy spatula or wooden spoon and mix, mix, mix until it’s completely smooth and no dry seasoning pockets remain. This is your flavor base—get it nice and homogenous! Little Chef Hack: If your cream cheese is still a bit stiff, a quick 10-second blast in the microwave for the whole mixture can make it wonderfully pliable.
- Fold in the Goodies. Now, add your shredded cheddar, crumbled bacon, green onions, and that pretty red bell pepper if you’re using it. Here’s the key: fold gently until everything is just evenly distributed. You don’t want to over-mix and break down your beautiful bacon bits or turn the cheese into a paste. We want distinct, happy little bites of each ingredient.
- Spread with Abandon. Lay a tortilla flat on your clean counter or a cutting board. Using a butter knife or an offset spatula, spread a generous, even layer of the cream cheese mixture over the entire surface, going all the way to the edges. Don’t be shy! A good, even ⅛-inch layer ensures every slice is packed with flavor and holds together. Repeat with all 8 tortillas.
- The Art of the Tight Roll. Starting at the edge closest to you, gently but firmly begin rolling the tortilla away from you. Keep it snug as you go. Think “firm but gentle”—you want a compact roll without squeezing the filling out the ends. When you get to the end, place the roll seam-side down on a plate or baking sheet. The weight of the roll will help “seal” it shut. Repeat with all your tortilla masterpieces.
- The Chill (The Most Important “Passive” Step). For pinwheels, this is non-negotiable. Cover your rolls tightly with plastic wrap and pop them in the fridge for at least 30 minutes, but ideally 1-2 hours. This firms up the filling, sets the shape, and makes slicing cleanly an absolute breeze. If you’re enjoying them as whole wraps, you can skip this and dig right in!
- Slice and Reveal the Magic. Using a very sharp serrated knife (this is crucial for clean cuts!), trim off the very ends of each roll where the filling might be sparse. Then, slice the rest into 1-inch pieces. Wipe your knife clean between cuts for pretty pinwheels. Arrange them on a platter, watch everyone’s eyes light up, and take a bow.
Plating Your Party Perfection
Presentation is the final sprinkle of joy! For a party platter, I love arranging the pinwheels in a concentric circle on a large white plate or a rustic wooden board. Tuck in a few sprigs of fresh dill or parsley for a green accent. If you’re packing them for lunch, keep 3-4 slices in a small container with some grapes or carrot sticks. Serving them as whole wraps? Just wrap the bottom half in a cute parchment paper sleeve to keep hands clean. No matter how you serve them, they promise to be the star of the snack table.
Make It Your Own: Endless Twists!
The beauty of this recipe is its adaptability. Play with these fun variations:
- Southwest Fiesta: Swap ranch for taco seasoning. Add a drained can of black beans and a handful of corn to the filling.
- Veggie Lover’s Delight: Skip the bacon. Add ½ cup finely chopped sun-dried tomatoes (oil-packed, drained) and ¼ cup chopped black olives.
- Buffalo Chicken: Mix in ½ cup shredded rotisserie chicken and 2-3 tablespoons of buffalo sauce to the cream cheese base. Blue cheese crumbles are a fantastic add-in here too!
- Everything Bagel: Use everything bagel seasoning instead of ranch. Add a thin layer of sliced smoked salmon before rolling for a next-level treat.
- Low-Carb/Keto: Use large, pliable lettuce leaves (like butter lettuce) instead of tortillas for fresh, crunchy wraps.
From My Kitchen to Yours: Chef’s Notes
This recipe has been my faithful companion for over a decade, and it’s evolved in the best ways. I once tried to “healthify” it with fat-free cream cheese and it was a gloopy, sad disaster—lesson learned, embrace the full-fat joy! I’ve also learned that letting guests slice their own giant roll at a casual gathering is a hilarious and interactive way to serve it. One time, a friend’s toddler declared the pinwheels “flavor wheels” and now that’s the only name my nieces and nephews will use for them. The recipe may start with precise measurements, but it lives and grows with your stories and your taste buds. Don’t be afraid to play, to substitute, and to make it yours. That’s what home cooking is all about.
Your Questions, Answered!
Q: Can I make these ahead of time?
A: Absolutely! They are the ultimate make-ahead appetizer. You can assemble the whole rolls, wrap them tightly in plastic wrap, and store them in the fridge for up to 24 hours before slicing. You can also slice them and store the pinwheels in a single layer in an airtight container for up to a day. I don’t recommend freezing them, as the texture of the cream cheese and tortillas can suffer.
Q: My tortillas keep cracking when I roll them. Help!
A: This usually means your tortillas are too cold or stale. Let them sit out on the counter for 10-15 minutes to come to room temperature. You can also very briefly warm them, one at a time, in a dry skillet for 5-10 seconds per side to make them ultra-pliable. Just don’t get them hot, just warm.
Q: The filling is oozing out the ends when I slice. What did I do wrong?
A: Two likely culprits: 1) You didn’t chill them long enough. That firm-up time is essential. 2) You may have over-filled the very ends. Next time, spread the mixture evenly but leave a tiny, tiny bare margin (like ¼ inch) at the far edge before you start rolling. This gives the filling somewhere to go as you roll and creates a cleaner seal.
Q: Can I use a different kind of cheese?
A: Of course! Pepper Jack adds a nice kick, a Monterey Jack blend is mellower, or even a Swiss with some finely diced ham would be delicious. Just keep it to a similarly textured shredded cheese for the best results.

Creamy Bacon Ranch Roll-Ups : Easy Party-Ready Tortilla Wraps
Description
Need a fast, no-cook appetizer that always disappears first? These Creamy Bacon Ranch Roll-Ups are the answer. They’re cool, creamy, salty, and packed with flavor in every bite. Perfect for parties, lunchboxes, game day, or quick snacks, they come together in minutes and can be made ahead for zero stress later.
Ingredients
-
8 large flour tortillas
-
8 oz (225 g) cream cheese, softened
-
1 packet (1 oz) ranch seasoning mix
-
1 cup shredded cheddar cheese
-
½ cup cooked bacon, crumbled
-
¼ cup finely chopped green onions
-
¼ cup finely chopped red bell pepper (optional)
Instructions
-
Make the filling
In a medium bowl, mix softened cream cheese and ranch seasoning until smooth. -
Add mix-ins
Stir in cheddar cheese, bacon, green onions, and bell pepper until evenly combined. -
Spread
Lay out a tortilla and spread a thin, even layer of the mixture over the entire surface. -
Roll
Roll the tortilla up tightly into a log. Place seam-side down. Repeat with remaining tortillas. -
Chill
Wrap rolls and refrigerate at least 30–60 minutes to firm up (this makes slicing easier). -
Slice
Use a sharp knife to cut into 1-inch pinwheels. Arrange and serve cold.
Notes
-
Soft tortillas roll better — let them sit at room temp first so they don’t crack.
-
Crispy bacon works best — soft bacon can make the filling mushy.
-
Don’t overfill — a thin layer holds together better when sliced.
-
Make ahead — whole rolls can be refrigerated up to 24 hours before slicing.
-
Clean cuts — wipe your knife between slices for neat pinwheels.
Nutritional Info (Aproximate, per 1 full roll-up)
Calories: 280 | Fat: 20g | Carbs: 15g | Protein: 9g | Sugar: 1g | Fiber: 1g
Prep Time: 10 minutes | Chill Time (optional): 30 minutes | Total Time: 10–40 minutes
Perfect For: Potlucks, school lunches, game day snacks, or quick dinners!
Final Thoughts: Your Culinary Secret Weapon
These Creamy Bacon Ranch Roll-Ups are more than a recipe—they’re a memory in the making, a party-saver, and a testament to the magic of simple, honest ingredients coming together. They remind us that the best food doesn’t have to be complicated; it just has to be made with a little joy and shared with people you care about.
Whether you’re hosting a crowd, surprising the family, or just treating yourself, these roll-ups deliver satisfaction in every bite. They’re forgiving, adaptable, and endlessly delicious—a true hero in the kitchen. So here’s to less stress, more flavor, and the confidence that comes with having a guaranteed win tucked in your recipe box.
Now go on—roll ‘em up, slice ‘em, watch ‘em disappear, and savor the compliments. You’ve got this.

Classic Popovers : Light, Puffy & Perfect Every Time
Easy Homemade Popover Recipe – Light and Airy with Crisp Edges
The Magic of the Popover: Your New Kitchen Superpower
Hey there, friend! Come on in, grab an apron, and let’s talk about one of the most magical, satisfying, and downright impressive things you can bake with just a bowl and a whisk. I’m talking about classic popovers. If you’ve never experienced the joy of pulling a tray of these golden, towering puffs from your oven, you are in for the absolute best kind of treat.
What’s not to love? They’re crispy and shatteringly golden on the outside, with a soft, steamy, and slightly eggy interior that’s just begging for a pat of melting butter or a drizzle of honey. The best part? They look like you spent years in a fancy pastry school, but the reality is gloriously simple: no yeast, no kneading, no complicated techniques. Just a humble batter of pantry staples that performs a little bit of oven sorcery.
Whether you’re dreaming of a cozy weekend breakfast, need a show-stopping side for your Sunday roast, or just want to bake something that will make everyone at the table go “WOW,” this popover recipe is your secret weapon. I’ve made these a hundred different ways, in a dozen different kitchens, and I’m here to guide you to popover perfection. So, let’s preheat that oven and make some magic together. Trust me, once you see them puff, you’ll be hooked for life.
My First Popover (& The Day I Fell in Love with Steam)
My popover story starts not in a fancy restaurant, but in my Nana’s warm, always-smelling-of-cinnamon kitchen. I must have been about ten, and I was her designated “batter whisker.” One rainy afternoon, instead of our usual chocolate chip cookies, she pulled out this weird, bumpy-looking metal pan. “Today, Olivia,” she said with a wink, “we’re making edible clouds.” I was skeptical. The batter was thinner than pancake mix, and she poured it into these scary-hot, butter-sizzling cups. “Now we wait,” she said, “and we do NOT open that door.”
I pressed my nose against the oven window, watching in pure disbelief as those sad little puddles of batter began to climb. They swelled upwards, forming crazy, uneven tops that looked like chef’s hats. When she finally pulled them out—golden, towering, and steaming—I was convinced it was actual magic. We ripped one open right there, the heat warming our faces, and slathered it with her homemade strawberry jam. The contrast of the crisp shell and the tender, almost hollow inside was a revelation. It was the day I learned that sometimes, the simplest recipes hold the most wonder. That sense of awe? I still feel it every single time I bake a batch.
Gathering Your Clouds: The Simple Ingredients
See? I told you it was simple! These are the building blocks for your edible architecture. Using room-temperature ingredients is a little chef’s secret for a smoother batter and better rise. If you forgot to take things out, place your eggs in a bowl of warm water for 5 minutes, and microwave the milk in 10-second bursts until it’s no longer cold.
- 1 cup all-purpose flour – The sturdy backbone. It gives structure to all those air pockets. For a slightly more tender popover, you can swap in 1/4 cup cake flour, but all-purpose works beautifully.
- 1 cup whole milk, at room temperature – The liquid that creates steam (the key to the “pop”!). Whole milk gives the best richness and browning. In a pinch, 2% works, but avoid skim for the best texture.
- 2 large eggs, at room temperature – The heroes! Eggs provide structure, richness, and help with the lift. They are non-negotiable for that classic texture.
- 1/2 teaspoon salt – The flavor enhancer. It balances everything and makes the popovers taste wonderfully of themselves. Don’t skip it!
- 1 tablespoon melted butter (plus more for greasing) – For flavor and a touch of tenderness. The butter for greasing is CRUCIAL—it helps create that crispy, flavorful exterior. Don’t be shy with it!
Let’s Make Some Magic: Step-by-Step Popover Perfection
Ready? Let’s do this. Follow these steps, embrace the “no-peeking” rule, and you’re guaranteed success.
Step 1: Preheat & Heat the Pan (This is the #1 Secret!)
Preheat your oven to a hot 425°F (220°C). Now, here’s the game-changer: place your empty popover pan or muffin tin right on the middle rack while the oven preheats. We want those cups screaming hot. This flash of heat when the batter hits is what starts the explosive rise and gives you that crispy bottom.
Step 2: Whisk Together the Wet Team
In a large bowl, whisk the room-temperature eggs and milk together until they’re completely combined and look a little frothy on top. This incorporates air, which is a good thing! A few bubbles are your friends.
Step 3: Bring in the Dry Crew
Add the flour and salt directly to the wet ingredients. Now, whisk! Go for it until the batter is mostly smooth. A few tiny lumps are absolutely fine—overmixing is the enemy of tenderness. Once it’s combined, whisk in the tablespoon of melted butter until it’s fully incorporated. The batter will be thin, like heavy cream. This is perfect. Let it rest for 5-10 minutes while your pan gets nuclear hot.
Step 4: The Sizzle & Pour
Carefully (I mean, oven-mitt hands, please!) pull the hot pan out of the oven. Immediately, add a small pat of butter or brush melted butter into each scorching-hot cup. It will sizzle and maybe even brown—that’s what you want! Quickly, divide the batter among the cups, filling each one about halfway to 2/3 full. The hot pan will start cooking the batter instantly.
Step 5: The Bake (& The Faith)
Slide the pan back into the oven quickly and close the door. Bake at 425°F for 20 minutes. DO NOT OPEN THE OVEN DOOR. I know it’s tempting, but that rush of cold air can deflate your rising masterpieces. After 20 minutes, reduce the heat to 350°F (without opening the door!) and bake for another 10-15 minutes. They’re done when they are a deep, glorious golden brown and feel dry/crisp to the touch.
Step 6: The Grand Finale
Pull them out! You might hear a faint crackling sound—that’s the music of success. Immediately, use a knife to loosen each popover and transfer them to a wire rack. This stops the bottoms from getting soggy. Poke a small slit in the side of each with a knife to let the steam escape and prevent sogginess inside.
Serving Your Edible Clouds
Popovers are at their peak the moment they are cool enough to handle. Serve them piled high in a basket or bowl, with all the accompaniments on the side. For breakfast or brunch, offer soft salted butter, local honey, fruit jams, or lemon curd. As a dinner side to roast beef, stew, or holiday ham, they are sublime with whipped honey butter or just a flaky sea salt sprinkle. The goal: let everyone tear into their warm, hollow popover and fill it with their own little bit of joy.
Play With Your Food: Fun Variations
Once you’ve mastered the classic, try these delicious twists!
- Herb & Cheese: Fold 1/2 cup grated Gruyère or sharp cheddar and 1 tablespoon of chopped fresh herbs (chives, thyme, rosemary) into the batter.
- Everything Bagel: Brush baked popovers with melted butter and sprinkle generously with everything bagel seasoning right after they come out of the oven.
- Sweet Cinnamon Sugar: Whisk 2 tablespoons of sugar into the dry ingredients. After baking, brush with butter and roll in cinnamon sugar while warm.
- Dairy-Free: Use a plain, unsweetened almond or oat milk and a neutral oil (like avocado) in place of the milk and butter.
- Yorkshire Pudding: For a savory version, use the fat from a beef roast (drippings) to grease the hot pan instead of butter. Serve with gravy!
Olivia’s Chef Notes & Kitchen Confessions
This recipe has been my faithful companion for years, evolving from my Nana’s vague “a bit of this, a cup of that” to this foolproof version. My biggest kitchen fail? I once got impatient and used a cold pan. The result was sad, muffin-like lumps. I learned my lesson! I’ve also found that a proper popover pan with tall, straight sides really does give the most dramatic “pop,” but a standard muffin tin makes absolutely delicious, slightly wider ones—no special equipment needed to start.
The funniest moment was when my dog, Biscuit, sat staring at the oven the entire bake time, head cocked, as if also wondering how on earth they were growing. He now knows the sound of the popover pan hitting the counter means buttery scraps are coming his way. Remember, baking is part science, part love. Don’t stress the small lumps, embrace the sizzle, and always, always make a mess. That’s where the memories are.
Popover FAQs & Troubleshooting
Q: My popovers didn’t pop! They’re dense. What happened?
A: The most common culprits are: 1) The pan wasn’t hot enough. Make sure you preheat it fully in the oven. 2) The oven door was opened too early. Treat it like a sacred rule! 3) The batter was overmixed, developing too much gluten. Mix just until combined.
Q: Can I make the batter ahead of time?
A: You can! Whisk it up, cover, and refrigerate for up to 24 hours. Let it come to room temperature for about 30 minutes and give it a gentle whisk before pouring into the hot pan. The rest can actually improve the texture.
Q: Why did they collapse after I took them out?
A: A small amount of deflation is normal as they cool. To minimize it, make sure they are fully baked (deep golden brown) and immediately poke a small slit in the side to release steam. Transferring them to a wire rack also helps.
Q: Can I use gluten-free flour?
A: Yes, but results vary. Use a 1:1 gluten-free all-purpose flour blend that contains xanthan gum. The texture may be slightly more delicate, but they will still puff beautifully!

Classic Popovers : Light, Puffy & Perfect Every Time
Description
These golden, towering puffs have a crisp shell, a soft steamy interior, and are shockingly easy to make. No yeast, no kneading—just simple pantry staples and a little oven magic.
Ingredients
-
1 cup all-purpose flour (or swap ¼ cup for cake flour for extra tenderness)
-
1 cup whole milk, room temperature (2% works in a pinch, skim not recommended)
-
2 large eggs, room temperature
-
½ tsp salt
-
1 tbsp melted butter (plus extra for greasing)
Optional Variations:
-
Herb & Cheese: Add ½ cup grated Gruyère or sharp cheddar + 1 tbsp fresh herbs
-
Everything Bagel: Brush with melted butter and sprinkle everything bagel seasoning
-
Sweet Cinnamon Sugar: Mix 2 tbsp sugar into dry ingredients; roll baked popovers in butter + cinnamon sugar
-
Dairy-Free: Use almond or oat milk + neutral oil instead of milk/butter
-
Instructions
Step 1: Preheat & Heat the Pan
Preheat oven to 425°F (220°C). Place your popover pan or muffin tin on the middle rack while the oven heats—this ensures the cups are screaming hot.
Step 2: Whisk Wet Ingredients
In a bowl, whisk together eggs and milk until frothy. A few bubbles are good!
Step 3: Add Dry Ingredients
Whisk in flour and salt until mostly smooth (tiny lumps are fine). Stir in melted butter. Batter should be thin, like heavy cream. Let rest 5–10 minutes.
Step 4: Sizzle & Pour
Remove hot pan carefully. Grease each cup with butter—it should sizzle. Pour batter into cups, filling ½ to 2/3 full.
Step 5: Bake
Bake at 425°F for 20 minutes without opening the door. Reduce heat to 350°F and bake 10–15 more minutes until deep golden and crisp.
Step 6: Cool Properly
Immediately loosen popovers with a knife and transfer to a wire rack. Poke a small slit in each to release steam and prevent sogginess.
Notes
Dense Popovers: Pan wasn’t hot enough, oven opened too early, or batter overmixed.
Collapsed After Cooling: Normal, but minimize by fully baking, slitting sides, and cooling on a wire rack.
Make Ahead: Batter can be refrigerated up to 24 hours; bring to room temp and whisk before baking.
Gluten-Free: Use a 1:1 GF all-purpose flour with xanthan gum. Texture slightly more delicate but still puffs.
Nutritional Information (Per Popover, Approximate)
Calories: 130 | Protein: 5g | Carbohydrates: 13g | Fat: 6g | Fiber: 0g
Remember, these are best enjoyed fresh and as part of a moment shared with others. So bake, share, and savor!
Final Thoughts
So there you have it—the simple, magical science of homemade popovers. From my Nana’s kitchen to yours, this recipe is more than just bread; it’s a little edible wonder, a lesson in patience, and proof that some of the most impressive things in life come from the humblest beginnings.
Remember, the keys are simple: a hot pan, a well-heated oven, and the discipline not to peek. Whether you stick to the classic version or embark on cheesy, herby, or sweet variations, each batch is a chance to create something truly special. Don’t be discouraged if your first batch isn’t perfect—mine weren’t either. Every popover tells a story, and even the slightly dense ones still taste wonderful slathered in jam.
At its heart, this recipe is about embracing the joy of process and the thrill of result. It’s about the sizzle of butter in a hot pan, the quiet mystery of the oven, and the collective “wow” when you bring your golden, towering creations to the table.
So go ahead—preheat that pan, whisk that batter, and bake with confidence. You’re not just making popovers; you’re making memories, one puffed-up, steamy, delicious cloud at a time.
Happy baking!
Olivia




