
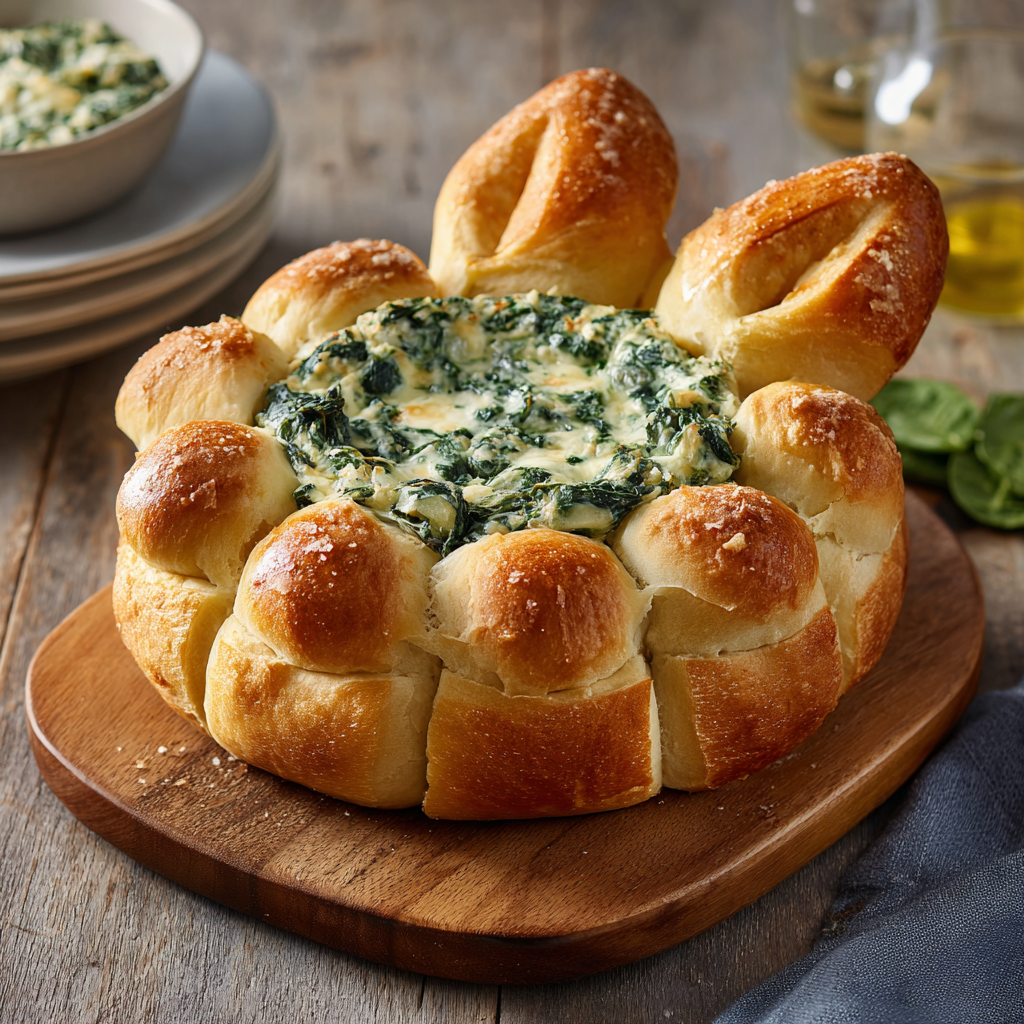
Bunny-Shaped Spinach Dip Bread Bowl (Pull-Apart Party Centerpiece)
Bunny-Shaped Spinach Dip Bread Bowl: Your New Party Showstopper!
Hello, my friend! Come on in, grab an apron, and let’s get ready to make something that’s going to have everyone at your table grinning from ear to ear. Is there anything better than the smell of freshly baked bread? Okay, maybe it’s the smell of freshly baked bread surrounding a pool of warm, creamy, garlicky spinach dip. Now we’re talking.
Today, we’re rolling up our sleeves (literally) to create the ultimate edible centerpiece: a Bunny-Shaped Spinach Dip Bread Bowl. This isn’t just food; it’s an experience. Imagine a soft, golden, pull-apart bread bunny, its belly hollowed out and filled with the most decadently cheesy spinach dip you’ve ever tasted. It’s playful, it’s delicious, and I promise, it’s way easier to make than it looks. This is the magic trick you pull out for Easter brunch, spring baby showers, garden parties, or any gathering where you want to hear a chorus of “Aww!” followed by “Mmmm.” It brings people together, sparks joy, and let’s be honest, it’s just really, really fun to tear into a bread bunny with your favorite people. So, let’s ditch the boring serving bowl and create a memory instead.
The Dip That Started It All: A Nostalgic Nibble
This recipe has its roots in one of my earliest (and messiest) kitchen memories. Every holiday at my Grandma Eleanor’s house featured her legendary “Green Goblin Dip,” a mysterious, deliciously creamy spinach concoction served in a hollowed-out rye bread round. My sister and I were obsessed. We’d strategically hover near the appetizer table, plotting how to snag the biggest chunks of soggy, dip-infused bread from the bowl’s edges without getting caught.
Years later, when hosting my first Easter, I wanted to capture that same magic but with a springtime twist. I remembered the joy of pulling that bread apart, of sharing it. Why not make the bread part of the show? Thus, the bread bunny was born—a tribute to Grandma’s dip, wrapped up in a shape that makes my inner kid (and my actual kids) do a happy dance. It’s that beautiful blend of nostalgic flavor and whimsical presentation that turns a simple snack into the heart of the party.
Gathering Your Ingredients: A Chef’s Notes
Here’s everything you’ll need to bring our bread bunny to life. Don’t stress about perfection—cooking is about creativity!
- 1 lb pizza dough (store-bought or homemade): This is our bunny’s body! Store-bought dough is a fantastic, consistent timesaver. I often grab it from the bakery section of my grocery store. If you’re feeling ambitious, your favorite homemade dough works wonderfully. Let it sit at room temp for 30 minutes before shaping—it becomes much more cooperative.
- 1 egg, beaten (for egg wash): This is the secret to that gorgeous, glossy, golden-brown finish. It gives our bunny a professional bakery shine.
- Olive oil, for brushing: A light brush adds flavor and helps the bread achieve a perfect crisp-tender texture.
- 8 oz cream cheese, softened: The lush, tangy base of our dip. Pro Tip: Leave it on the counter for a good hour before you start. Truly soft cream cheese blends into silky perfection with zero lumps.
- ½ cup sour cream or Greek yogurt: Sour cream gives classic tang, while Greek yogurt adds a lovely protein boost and slight zing. I use them interchangeably based on what’s in my fridge!
- 1 cup cooked spinach, squeezed VERY dry and chopped: This is crucial! Frozen chopped spinach, thawed and wrung out in a clean kitchen towel until it’s nearly crumbly, is my go-to. Excess water is the enemy of a thick, creamy dip.
- ½ cup shredded mozzarella: For that iconic, stretchy, mild cheesiness. Pre-shredded is fine, but blocks you shred yourself melt even creamier.
- ¼ cup grated parmesan: The flavor powerhouse. The salty, nutty punch takes the dip from good to “can I have the recipe?” good.
- 1 clove garlic, minced: Fresh is best here! It delivers a bright, aromatic kick that powdered garlic just can’t match.
- Salt and pepper, to taste: Always season in stages. Taste your dip mix before adding more—the cheeses already bring salt to the party.
Let’s Build Our Bunny: Step-by-Step Fun
Ready for the fun part? Let’s shape, bake, and fill! Put on some music, and don’t worry about making it “perfect.” A lopsided bunny has character.
- Preheat & Prep: Fire up your oven to 375°F (190°C). This is the ideal temperature for our dough to puff up beautifully without burning. Line a large baking sheet with parchment paper—trust me, it’s a lifesaver for cleanup.
- Shape the Bunny Body & Head: Take about two-thirds of your dough and form it into a smooth, oval-shaped ball. This is the bunny’s body. Place it on one end of your baking sheet. With the remaining third, form a smaller, round ball for the head and place it touching the top of the body. Gently press where they meet to fuse them slightly.
- Craft the Ears & Pull-Apart Balls: Here’s where personality comes in! Pinch off two small pieces of dough (you can borrow a tiny bit from the body if needed). Roll them into ropes and taper one end to form ears. Place them above the head. Now, take the rest of your dough (or use a second, smaller dough ball if you want more pieces) and roll marble-sized balls. Arrange them snugly around the body to create a “halo” of pull-apart pieces. They’ll bake together into a tear-and-share dream.
- Create the Dip Hollow: Using a small, sharp knife or the bottom of a round teaspoon, gently cut a shallow, wide circle into the center of the bunny’s body (not all the way through to the pan!). Remove this dough plug—you can bake it alongside as a chef’s treat! This well is where our glorious dip will live.
- Egg Wash & Bake: Beat that egg with a tablespoon of water and, using a pastry brush, give the entire bunny and its dough balls a gentle, even coat. This is what gives you that beautiful color. Follow with a very light brushing of olive oil. Slide your creation into the oven and bake for 18-22 minutes. You’re looking for a deep, golden brown all over.
- Mix the Dip (Chef’s Hack Time!): While the bunny bakes, make the dip. In a medium bowl, combine the softened cream cheese, sour cream, dried spinach, mozzarella, parmesan, and garlic. Mix until gloriously smooth and cohesive. Season to taste. Here’s my hack: if you have time, pop this dip in the fridge for 15 minutes while the bread cools slightly. A cooler dip won’t soak into the hot bread as quickly when you assemble.
- The Grand Assembly: Once your bread bunny is out of the oven and has cooled for just 5-10 minutes (you want it warm, not molten), carefully spoon the spinach dip into the hollowed-out center. Watch it pool enticingly—that’s the money shot. Serve immediately while everything is warm and inviting!
Serving Your Masterpiece: The Final Flourish
Presentation is part of the joy! Place your bunny on a large board or platter. Scatter some extra veggies like radish slices, snap peas, and carrot sticks (bunny food!) around it, alongside sturdy crackers and potato chips for dipping. I love adding sprigs of fresh dill or parsley for a pop of green. Don’t just bring it to the table—present it with a flourish. “Everyone, meet our guest of honor!” Then, demonstrate the pull-apart magic by tearing off a dough ball, dragging it through the dip, and enjoying the first bite. Watch the crowd gather.
Make It Your Own: Delicious Twists & Swaps
- Artichoke & Jalapeño: Swap the spinach for a drained can of artichoke hearts (chopped) and add 1-2 diced jalapeños for a kick.
- Buffalo Chicken: Mix 1 cup of shredded rotisserie chicken with ¼ cup of buffalo sauce into the cream cheese base. Omit spinach. Top with blue cheese crumbles after baking.
- Everything Bagel: Before baking, sprinkle the egg-washed dough generously with everything bagel seasoning. Use green onions in the dip.
- Dairy-Free: Use your favorite plant-based cream cheese, sour cream, and shredded cheeses. The shaping and baking process remains exactly the same!
- Crescent Roll Shortcut: In a pinch, use two cans of crescent roll dough. Unroll, piece together into a large rectangle, and shape your bunny on the pan. It bakes a little faster, so keep an eye on it!
Olivia’s Kitchen Notes: The Story Behind the Snack
This recipe has seen some… experimental phases. There was the “long-ear” incident of 2019 where the dough ears stretched during baking and my bunny looked more like a sleepy llama. (It still tasted amazing.) I’ve learned that a chill, not-too-sticky dough is easiest to shape. Over the years, I’ve added the ring of pull-apart balls because, frankly, we always ran out of bread for the dip! This ensures every last bit of that creamy filling finds a perfect carb vehicle. The biggest evolution? Fearlessness. The first time I made it, I was so nervous. Now, I know it’s meant to be fun, a little messy, and utterly delicious. It always works out, and it always brings smiles. That’s the real secret ingredient.
Your Questions, Answered!
Q: My dough is super sticky and hard to shape. Help!
A: No worries! This is common. Lightly flour your hands and your work surface. If the dough is very warm, you can even pop it in the fridge for 10 minutes to firm up. A little stickiness is okay—our bunny is homemade, not machine-made!
Q: Can I make any part of this ahead of time?
A> Absolutely! You have two great options: 1) Shape the bread bunny on the parchment-lined baking sheet, cover loosely with plastic wrap, and refrigerate for up to 24 hours before baking. Let it sit at room temp for 20 minutes before egg washing and baking. 2) Make the dip a full day ahead and store it covered in the fridge. Let it soften a bit at room temp before filling the bread.
Q: My dip seems a bit runny. What did I do wrong?
A> The culprit is almost always moisture in the spinach. Next time, really go to town squeezing it in that kitchen towel—you’ll be shocked how much water comes out! For this batch, you can stir in an extra tablespoon or two of grated parmesan to help thicken it up.
Q: The bread is done but the pull-apart balls in the middle aren’t golden. What now?
A> Great observation! Ovens can have hot spots. If the main body is perfectly browned, you can loosely tent the ears and outer edges with aluminum foil to prevent over-browning, and let it bake for another 3-5 minutes so the inner pieces catch up.
Bunny-Shaped Spinach Dip Bread Bowl (Pull-Apart Party Centerpiece)
Description
This Bunny-Shaped Spinach Dip Bread Bowl is the kind of dish that makes everyone smile before they even take a bite. Soft golden bread baked into a cute bunny shape surrounds a warm, creamy spinach cheese dip — perfect for parties, spring gatherings, or holiday tables. It looks impressive, but it’s surprisingly easy to make using pizza dough and a simple homemade dip.
Ingredients
Bread Bunny
-
1 lb pizza dough (store-bought or homemade), room temperature
-
1 egg, beaten (for egg wash)
-
1 tbsp olive oil
Spinach Dip
-
8 oz cream cheese, softened
-
½ cup sour cream or Greek yogurt
-
1 cup cooked spinach, squeezed very dry and chopped
-
½ cup shredded mozzarella
-
¼ cup grated parmesan
-
1 clove garlic, minced
-
Salt and pepper to taste
Instructions
-
Preheat oven to 375°F (190°C). Line a baking sheet with parchment paper.
-
Shape the bunny:
-
Use about ⅔ of the dough to form an oval body.
-
Use the remaining dough to form a round head and attach it.
-
Shape two ears from small dough pieces and place above the head.
-
Roll remaining dough into small balls and arrange around the body for pull-apart pieces.
-
-
Create the dip well:
Cut a shallow circle in the center of the body and remove the dough plug (don’t cut through to the pan). -
Brush & bake:
Brush all dough with egg wash, then lightly with olive oil.
Bake 18–22 minutes until golden brown. -
Make the dip:
Mix cream cheese, sour cream or yogurt, spinach, mozzarella, parmesan, garlic, salt, and pepper until smooth. -
Fill & serve:
Let bread cool 5–10 minutes, then spoon dip into the center well. Serve warm and pull apart to eat.
Notes
-
✅ Dry spinach thoroughly — squeeze hard in a towel to prevent watery dip.
-
✅ Room-temp dough shapes easier and won’t spring back.
-
✅ Chill the dip 15 minutes before filling to keep it thick.
-
✅ If bread browns too fast, loosely cover ears with foil.
-
✅ Add everything-bagel seasoning on top before baking for extra flavor.
Nutritional Info (Approximate)
Per serving (based on 10 servings): Calories: 210 | Fat: 12g | Carbs: 18g | Protein: 7g | Fiber: 1g. Remember, this is a celebratory treat meant for sharing and enjoying!
Final Thoughts: More Than Just a Recipe
This Bunny-Shaped Spinach Dip Bread Bowl is so much more than the sum of its parts. It’s a conversation starter, a memory maker, and a delicious testament to the fact that food should be fun. It bridges the gap between the nostalgic comfort of Grandma’s classic dip and the sheer joy of a playful, edible centerpiece.
Don’t let the shape intimidate you. The beauty lies in its homemade charm—whether your bunny looks poised for a magazine or delightfully whimsical, it will be met with the same delight. This recipe is designed to be forgiving, flexible, and, above all, a shared experience. It invites you into the kitchen, encourages you to put your own spin on it, and guarantees a moment of collective happiness when you bring it to the table.
So, embrace the light flour dusting on your counter, the smell of garlic and baking dough filling your kitchen, and the inevitable “Wow!” as you present your creation. You’re not just serving a snack; you’re serving an instant mood-lifter, a story, and a whole lot of love.
Now, go create your own kitchen magic. Your party showstopper awaits.
Happy baking, and even happier sharing!
With love from my kitchen to yours,
Olivia

Carrot-Shaped Puff Pastry Bites : Cute & Easy Party Appetizer
Welcome Spring with the Cutest Appetizer on the Block
Hey there, friend! Come on in, the kitchen’s warm, and I’ve got something utterly delightful baking in the oven. If you’ve ever scrolled through party platter ideas and thought, “Wow, that’s adorable but looks way too complicated,” then I’m so glad you’re here. Today, we’re throwing fussy out the window and embracing pure, playful fun with these Carrot-Shaped Puff Pastry Bites.
Imagine this: golden, flaky pastry cones that look just like sweet little carrots, waiting to be filled with your favorite creamy filling. One bite gives you that satisfying crunch followed by a smooth, savory herbed cheese or classic egg salad. They’re conversation starters, they’re delicious, and the best part? They’re shockingly simple. Whether you’re hosting an Easter brunch, a spring baby shower, or just want to add a splash of whimsy to your Tuesday night snacks, these bites are your secret weapon. You don’t need a pastry degree or fancy tools—just a roll of puff pastry, a few basic ingredients, and a sense of joy. So, tie on your favorite apron (the messy one tells the best stories, right?), and let’s create some edible magic that will have everyone reaching for more.
A Dash of Nostalgia & a Pinch of Whimsy
This recipe always takes me right back to my grandma’s sun-drenched kitchen in April. She was the queen of “food that makes you smile.” While other grandmas had perfect china, mine had a collection of whimsical cookie cutters and a belief that a meal should be as fun to look at as it is to eat. I remember one spring, she tried to make carrot-shaped rolls from scratch. They were… well, let’s just say they looked more like plump, confused sweet potatoes! We laughed until we cried, but the spirit of it—the joy of creating something special and thematic—stuck with me.
Years later, while playing with store-bought puff pastry (a true modern kitchen miracle), I had a lightbulb moment. What if the shape wasn’t in the dough itself, but in how you formed it? Wrapping pastry around a cone was a game-changer. It was my grandma’s playful idea, but with a shortcut that actually works! Now, every time I make these, I think of her, our kitchen laughter, and the beautiful truth that cooking isn’t about perfection. It’s about the love and the little bit of magic you fold into every bite.
Gathering Your Garden of Goodies
Here’s everything you’ll need to grow your own edible carrot patch! I’ve added my little chef insights for each one because knowing the *why* makes you a more confident cook.
- 1 sheet puff pastry, thawed: The superstar! Look for an all-butter puff pastry in the freezer aisle for the best flavor and flakiness. Chef’s Tip: Thaw it in the fridge overnight, not on the counter. This keeps the butter cold, which is the secret to those epic, flaky layers when it bakes.
- 1 egg, beaten (for egg wash): This is our edible glue and golden-brown magic potion. A simple egg wash gives the pastry that beautiful, professional-looking sheen and color.
- Orange food coloring (optional, for visual effect): A tiny drop mixed into the egg wash takes the “carrot” visual to the next level! Gel food coloring is more vibrant than liquid. No coloring? No problem—they’ll still be gorgeous and golden.
- For the Herbed Cream Cheese Filling:
- ¾ cup cream cheese, softened: Full-fat cream cheese pipes and tastes best. Let it sit out for 30 minutes to soften perfectly.
- 1 tablespoon fresh chives, finely chopped: They give a mild, oniony freshness. In a pinch, the green tops of scallions work too!
- 1 teaspoon parsley, chopped: For a pop of green flavor. Dill or tarragon would also be lovely here.
- Salt and pepper to taste: Don’t skip seasoning your filling—it wakes up all the flavors.
- For the Classic Egg Salad Filling:
- 3 hard-boiled eggs, finely chopped: Pro tip: Steam your eggs! Place them in a steamer basket over boiling water for 12 minutes, then into an ice bath. Peels glide right off.
- 2 tablespoons mayonnaise: Binds it all together. Greek yogurt can sub for a tangier twist.
- 1 teaspoon mustard: Dijon or yellow, whichever you love. Adds a necessary zip.
- Salt and pepper to taste: Essential for the egg salad symphony.
- Optional Garnish:
- Fresh dill or parsley sprigs: Our “carrot tops”! Stick a small sprig in the wide end of each filled cone. It’s the final, adorable touch.
Let’s Build Our Carrot Patch: Step-by-Step
Ready to create? Follow these steps, and you’ll have a platter of cuteness in no time. I’ve packed each step with my favorite hacks to ensure your success.
- Prep Your “Garden” & Tools: Preheat your oven to 400°F (200°C). Line a baking sheet with parchment paper—this is non-negotiable for easy cleanup and no sticking! Now, for the cones. If you have metal cone molds, give them a light spray with cooking oil. No molds? No stress! Tear off small sheets of foil and shape them into rough cone shapes, about 2-3 inches long. Make them as smooth as you can. This foil hack is my go-to and works like a charm.
- Shape Your Carrots: On a lightly floured surface, unfold your thawed puff pastry sheet. Using a sharp knife or a pizza cutter, cut the pastry into long, thin strips, about ½ to ¾-inch wide. They don’t have to be perfect! Starting at the pointed tip of your foil cone, wrap one strip of pastry around it, slightly overlapping as you go. Press the end to seal. You can use a second strip if needed to cover the cone fully. Place the wrapped cone seam-side down on your prepared baking sheet. Repeat with all cones. Chef’s Hack: If the pastry gets too soft and sticky, pop the whole baking sheet into the freezer for 5 minutes. Cold pastry is easier to work with!
- Add Color & Shine: In a small bowl, beat your egg with a fork until smooth. If using, add just a tiny drop of orange gel food coloring and mix thoroughly. Using a pastry brush, gently brush the egg wash all over each pastry cone. This gives them that gorgeous golden color and helps any pastry layers seal. Don’t drown them—a light, even coat is perfect.
- Bake to Golden Perfection: Bake for 15-18 minutes. You’re looking for them to be puffed, deeply golden, and crisp. Ovens vary, so keep an eye on them after the 15-minute mark! The smell will be incredible. Once done, remove the pan and let the cones cool on the sheet for about 5 minutes. They need to firm up a bit. Then, gently twist and pull to remove the foil cones from inside the pastry. Let the hollow pastry shells cool completely on a wire rack before filling. This is key! Filling them while warm will make the pastry soggy.
- Whip Up Your Filling: While the shells cool, make your filling. For the herbed cream cheese, simply beat the softened cream cheese with the herbs, salt, and pepper until smooth and spreadable. For the egg salad, mix all ingredients in a bowl until well combined. Taste and adjust seasoning—this is your moment! For extra flair, you can spoon either filling into a piping bag fitted with a large star or round tip.
- Assemble with Love: Once the pastry cones are completely cool, it’s assembly time! Either pipe or carefully spoon your chosen filling into the wide end of each carrot shell. Fill them generously but don’t overstuff. Finally, take a small, fresh sprig of dill or parsley and gently insert it into the filling at the wide end to mimic the leafy carrot top. And voilà! You just grew a batch of the most charming appetizers ever.
Setting the Scene: How to Serve Your Carrot Bites
Presentation is half the fun! Arrange your carrot-shaped puff pastry bites on a large platter or a wooden board. Scatter a few extra herb sprigs around them to look like greenery. For a true “garden party” vibe, you can even nestle them in a bed of clean wheatgrass or lettuce leaves. Serve them immediately so the pastry stays crisp. Pair them with a bright, citrusy cocktail, iced tea, or sparkling water for the perfect spring or Easter appetizer spread. Watch them disappear—they’re irresistible!
Planting Different Seeds: Recipe Variations
Love the concept? Let’s play! Here are some easy twists to make this recipe your own:
- Everything Bagel Carrots: Add 1 tbsp of everything bagel seasoning to the cream cheese filling. Before baking, sprinkle the egg-washed pastry cones with sesame and poppy seeds.
- Smoked Salmon & Dill: Fold finely chopped smoked salmon and extra fresh dill into the cream cheese filling for an elegant, savory bite.
- Vegan Garden Patch: Use vegan puff pastry. For the filling, blend soaked cashews with lemon juice, nutritional yeast, and herbs for a lush, dairy-free “cream cheese.”
- Sweet Cinnamon “Carrots”: Make a dessert version! Fill cooled cones with sweetened mascarpone or cinnamon-spiced cream cheese. Garnish with a mint leaf “top.”
- Autumn Harvest “Squash”: For fall, add a drop of yellow food coloring to the egg wash to make them look like mini acorn squash. Fill with a sage-infused goat cheese.
Olivia’s Kitchen Notes & Stories
This recipe has become my go-to for any occasion that needs a smile. I’ve made them for kids’ birthday parties (they adore them!), sophisticated cocktail hours, and everything in between. The biggest lesson? Don’t stress about the shape. My first batch looked a little… abstract. Some were plump, some were skinny, but once they were on a platter with their cute green tops, everyone just saw “adorable carrots.”
Over time, I started making the foil cones in advance and storing them in a container—it makes assembly so fast. I’ve also learned that the egg wash is your best friend. Even without food coloring, it gives such a beautiful, glossy finish that makes these look bakery-level. The most important ingredient, as always, is the joy you bring to the process. So put on some music, embrace the little imperfections, and have fun. That’s the real secret flavor.
Your Questions, Answered!
Q: Can I make these ahead of time?
A: Absolutely! You can bake the pastry cones a day ahead. Let them cool completely, then store in an airtight container at room temperature. Make the filling and store it separately in the fridge. Assemble (fill and garnish) no more than an hour before serving to keep the pastry perfectly crisp.
Q: My pastry didn’t puff much/deflated after baking. What happened?
A: This usually points to the butter in the pastry getting too warm. Remember to thaw in the fridge, not on the counter. If your kitchen is very warm, chill the wrapped cones on the baking sheet for 10-15 minutes before baking. Also, ensure your oven is fully preheated before they go in!
Q: I don’t eat eggs. Can I skip the egg wash?
A: You can, but you’ll lose some shine and color. A great vegan substitute is to brush the cones with a mixture of non-dairy milk (like almond or oat) and a tiny bit of maple syrup or agave. It won’t brown as deeply, but it will add a subtle gloss.
Q: What other fillings would work?
A: Oh, so many! Chicken salad, tuna salad, whipped goat cheese with honey, or even a simple, seasoned hummus for a super quick option. The pastry cone is your blank canvas for any savory (or sweet!) spread you love.

Carrot-Shaped Puff Pastry Bites : Cute & Easy Party Appetizer
Description
These carrot-shaped puff pastry bites are a cute and easy spring appetizer that looks impressive but takes very little effort. Flaky baked pastry cones are filled with a creamy savory mixture and topped with fresh herbs to look like little carrots — perfect for brunch, parties, or holiday platters.
Ingredients
Pastry Shells
-
1 sheet puff pastry, thawed in the fridge
-
1 egg, beaten (for egg wash)
-
Orange food coloring (optional)
-
Foil or metal cone molds
-
Parchment paper
Simple Herbed Cream Cheese Filling
-
¾ cup cream cheese, softened
-
1 tbsp chopped chives or green onion tops
-
1 tsp chopped parsley or dill
-
Salt and pepper to taste
Optional swap: use egg salad, hummus, or whipped goat cheese instead.
Instructions
-
Preheat oven to 400°F (200°C). Line a baking sheet with parchment paper.
-
Make cone molds
Shape small cones from foil (about 2–3 inches long) or use metal cream horn molds. Lightly grease them. -
Cut pastry
Roll out puff pastry and cut into long strips about ½–¾ inch wide. -
Wrap cones
Wrap strips around each cone, overlapping slightly. Place seam-side down on the baking sheet. -
Egg wash
Mix egg with a tiny drop of orange coloring if using. Brush lightly over pastry. -
Bake
Bake 15–18 minutes until puffed and golden. Cool 5 minutes, then gently remove cones. Cool shells completely. -
Make filling
Mix cream cheese, herbs, salt, and pepper until smooth. -
Fill
Spoon or pipe filling into cooled pastry cones. Add a small herb sprig at the wide end for the “carrot top.”
Notes
-
Keep puff pastry cold — warm dough won’t puff as well.
-
If pastry gets soft while wrapping, chill it 5 minutes.
-
Bake shells fully before removing molds to prevent collapse.
-
Fill close to serving time so pastry stays crisp.
-
Make shells one day ahead and store unfilled in an airtight container.
Nutritional Information (Approximate)
Per bite (with herbed cream cheese filling, assuming 12 servings):
Calories: 120 | Protein: 3g | Carbohydrates: 9g | Fat: 8g
Note: This is an estimate based on the ingredients used. Values can vary depending on specific brands and any modifications you make.
Final Thoughts
And just like that, our kitchen garden is complete. You’ve not only made an appetizer; you’ve created little edible smiles. That’s the true magic of recipes like this one—they prove that a bit of creativity and a simple shortcut (hello, puff pastry!) can transform everyday ingredients into something that sparks pure delight.
Remember, these carrot-shaped bites aren’t about achieving cookie-cutter perfection. Some will be elegantly slender, others charmingly stout—each one has its own personality, just like the hands that made them. The goal isn’t flawless execution; it’s the shared moment of wonder when you bring that platter to the table and hear the first “Oh, how cute!”
So, as you wrap up, I hope you carry forward not just the steps of this recipe, but the spirit behind it. Take my grandma’s lesson to heart: food is meant to be fun, a vehicle for joy and connection. Whether you stick to the classic fillings or invent your own seasonal twist, you’re adding your own chapter to a story that started in a sunlit kitchen filled with laughter.
Thank you for spending this time creating with me. Now, go share your beautiful, flaky carrot patch with the people you love. I have a feeling they’ll be asking for your secret—and you can just smile and say, “It’s all in the twist.”
Happy Spring, and happy baking!
With love from my kitchen to yours,
Olivia
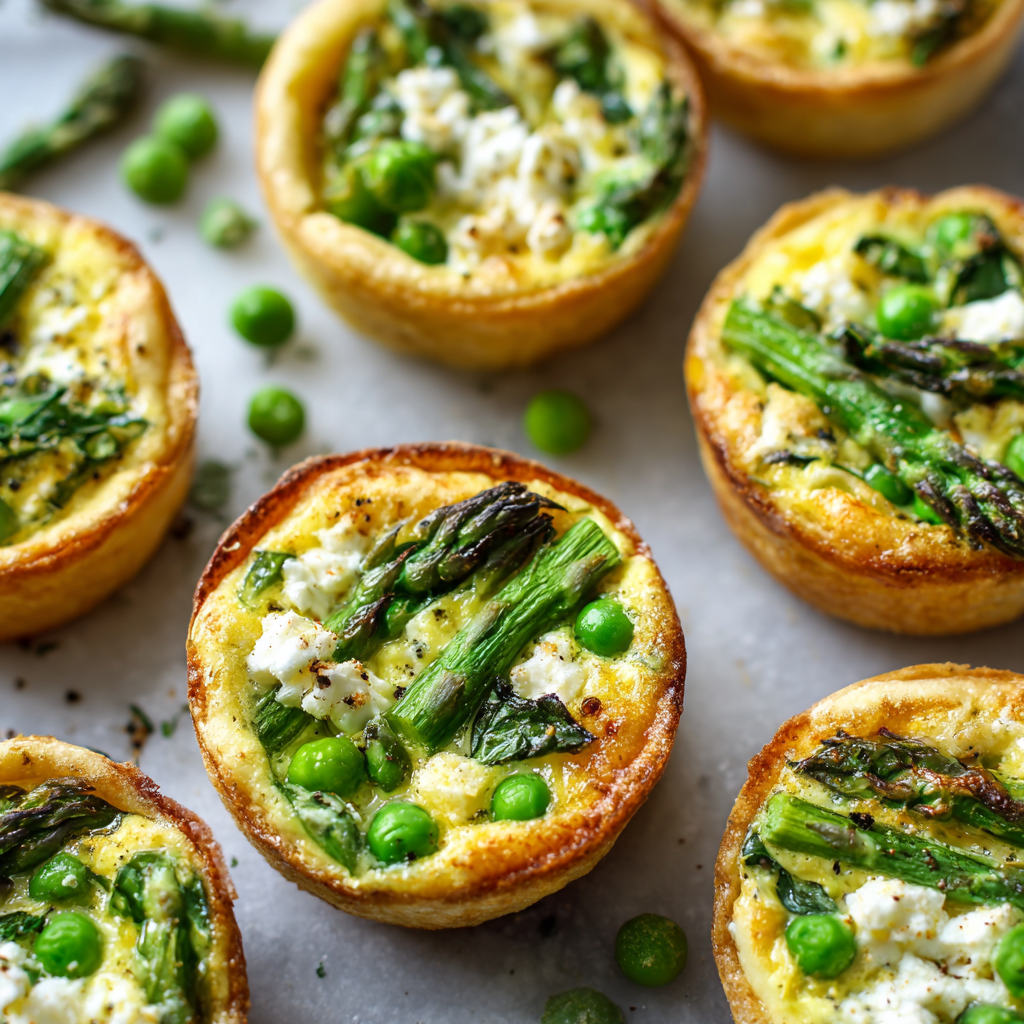
Mini Spring Veggie Quiches (Muffin-Tin, Vegetarian & Meal-Prep Friendly)
Sunshine on a Plate: My Mini Spring Veggie Quiches
Hey there, friend! Come on in, pull up a stool, and let’s chat. Is there anything better than that first truly warm, sunshine-filled day of spring? The kind where you fling open the windows, hear the birds chattering, and suddenly, your body and your kitchen just crave something light, bright, and fresh. You want to eat the season, you know? That’s the exact feeling that sent me scrambling to the fridge the other day, pulling out every green and lovely thing I could find, and dreaming up these perfect Mini Spring Veggie Quiches.
These aren’t just any quiches. They’re the ultimate kitchen hug—a celebration of spring in a perfectly portable, muffin-tin package. We’re talking tender bites of asparagus, sweet pops of pea, flecks of vibrant spinach, all held together by a creamy, protein-rich egg filling and little crumbles of salty, tangy feta cheese. They bake up golden and puffy, filling your kitchen with a smell that’s pure comfort and promise.
The best part? They are so incredibly easy. No fussy pie crust, no stress. Just chop, whisk, pour, and bake. Whether you’re hosting a breezy brunch, need a genius meal-prep solution for busy mornings, or simply want a lunch that feels special without the effort, these little guys are your new best friends. They’re vegetarian, naturally gluten-free, and totally forgiving—the kind of recipe that makes you feel like a kitchen rockstar with minimal cleanup. So, tie on your favorite apron (the messy one with good memories), and let’s make some edible sunshine together!
A Basket Full of Spring & Grandma’s Apron
This recipe always takes me right back to my grandma’s kitchen in April. She had this tiny, wild patch of asparagus that would magically appear by her back fence, and she’d treat those first few spears like absolute gold. “Olivia,” she’d say, her hands covered in earth, “food tastes best when you know where it comes from and you eat it right on time.” We’d hunt for the spears, snap them off at the base, and she’d let me carry them in her old woven basket.
Back inside, she’d wrap me in an apron that was far too big and set me to work shelling fresh peas or washing spinach from the farmer’s market. She never made mini quiches (hers were always big, dramatic pies), but the spirit is exactly the same: taking humble, seasonal treasures and turning them into something shared and wonderful. That basket of our foraged haul felt like a treasure chest. Now, every time I chop asparagus for these quiches, I get a little flash of that feeling—the damp spring air, the smell of dirt and grass, and the excited anticipation of turning our find into a meal. It’s a nostalgia I bake right into every batch.
Your Farmers’ Market Basket: The Ingredients
Here’s the beautiful, simple lineup. This is where we get to play! Don’t be afraid to swap based on what’s in your fridge or looks best at the market.
- 6 large eggs: The glorious, protein-packed base that gives our quiches structure and richness. For an even silkier texture, I sometimes use one or two extra yolks!
- ¼ cup milk or cream: This is our secret for a tender, creamy custard, not a rubbery egg puck. Whole milk is great, half-and-half is luxurious, and for a dairy-free twist, unsweetened almond or oat milk works in a pinch.
- ½ cup asparagus, finely chopped: The star of spring! Look for bright green, firm spears with tight tips. Chop them small so they cook perfectly in the short bake time. No asparagus? Try finely chopped broccoli or zucchini.
- ½ cup fresh spinach, chopped: A powerhouse of color and nutrients. I roughly chop it so it distributes evenly. Kale (de-stemmed and finely chopped) or Swiss chard are fantastic, sturdy substitutes.
- ¼ cup green peas: Little bursts of sweetness! Frozen peas are a brilliant, year-round freezer staple—just run them under warm water to thaw before using. Freshly shelled peas are a divine treat if you have them.
- ⅓ cup crumbled feta cheese: That salty, tangy punch that makes every bite sing. Feta doesn’t melt into a gooey pool; it holds its shape beautifully. Goat cheese or a sharp cheddar would be delicious too.
- Salt and black pepper, to taste: Season with love! I start with ½ tsp kosher salt and a few cracks of pepper, then adjust. Remember, feta is salty, so taste your mix before adding tons more.
- Optional: pinch of garlic powder or nutmeg: My little chef’s hack. Garlic powder adds a subtle savory depth without raw garlic bite. A tiny pinch of nutmeg is a classic French quiche move—it adds a mysterious, warm background note that’s just magical.
- Cooking spray or oil for muffin tin: Non-stick is our friend here. A good spray or a brush of melted butter ensures clean, easy releases.
Let’s Get Baking: Step-by-Step
Ready? Let’s do this. It’s a simple process, but these little tips will take your quiches from good to “can-I-have-the-recipe?” great.
- Preheat & Prep: Fire up your oven to 375°F (190°C). This gives it time to reach a steady, even temperature. While it’s warming, generously grease your muffin tin—every cup, every nook and cranny. I use a baking spray with flour for extra insurance, but oil or melted butter works too. This step is non-negotiable for easy release!
- The Custard Base: In a large mixing bowl, crack in your eggs. Grab a whisk and beat them energetically until they’re completely uniform and a little frothy. This incorporates air for a lighter texture. Now, whisk in your milk or cream, salt, pepper, and that optional pinch of garlic powder or nutmeg. You’ve just made a beautiful, simple custard. Give it a taste! Adjust seasoning now—it should taste a tiny bit too salty on its own, as the veggies will balance it.
- Fold in the Garden: To your custard, add the chopped asparagus, spinach, peas, and crumbled feta. Switch to a spatula or a big spoon and gently fold everything together until it’s evenly distributed. You want every muffin cup to get a little bit of every good thing. Don’t over-mix!
- Portion with Care: Carefully pour or ladle the mixture into your prepared muffin cups. Fill each one about ¾ of the way full. They need a little room to puff up as they bake! Pro-tip: Pouring from a liquid measuring cup with a spout gives you so much control and minimizes spills.
- Bake to Golden Perfection: Slide the tin into the center of your preheated oven. Now, the magic happens. Bake for 18-22 minutes. You’re looking for the tops to be set, no longer liquidy, and lightly golden around the edges. A toothpick inserted near the center should come out clean. They’ll puff up beautifully like little savory soufflés!
- The Patient Finish: This is crucial: let them cool in the tin for at least 5-10 minutes. They will deflate a bit, and that’s okay—it’s normal! This resting time allows them to set fully, making them much easier to remove. Then, run a small offset spatula or butter knife around the edges and gently lift them out.
How to Serve These Sunny Bites
Presentation is part of the joy! For a brunch spread, pile them high on a beautiful platter or in a rustic basket lined with a checkered napkin. Tuck in some fresh herbs like dill or chives around them. Serve with a big, bright salad of mixed greens with a lemony vinaigrette, a bowl of fresh fruit, and maybe some crispy roasted potatoes. For a grab-and-go breakfast, let them cool completely and store them in a container—they’re delicious at room temperature. And for a simple lunch? Two or three quiches with a dollop of garlicky yogurt or a side of soup is pure happiness on a plate.
Make It Your Own: Delicious Variations
- “Everything but the Bagel” Quiche: Swap the feta for cream cheese pieces and stir 1 tbsp of Everything Bagel Seasoning into the egg mix. Top each quiche with a sprinkle more before baking.
- Sun-Dried Tomato & Basil: Use mozzarella instead of feta. Add ¼ cup chopped oil-packed sun-dried tomatoes and 2 tbsp of fresh chopped basil to the veggie mix.
- Dairy-Free Delight: Use your favorite unsweetened non-dairy milk and swap the feta for a dairy-free crumble (like one made from almonds or tofu) or just leave it out and add a few sliced Kalamata olives for that salty bite.
- Meat-Lover’s Twist: Add ½ cup of cooked, crumbled breakfast sausage or diced ham to the veggie mixture for a heartier bite.
- Crust Option (Not GF): Want a *hint* of crust? Use store-bought puff pastry squares, press them into greased muffin cups, par-bake for 5 minutes, then add filling and bake as directed.
Olivia’s Kitchen Notes
This recipe has become my springtime security blanket. I’ve made it for newborn parents, packed it for picnics, and served it at fancy-ish bridal showers. It’s never let me down. Over the years, I’ve learned a few things: First, if your veggies are extra wet (like after washing spinach), give them a quick pat with a paper towel. Too much moisture can make the quiches soggy. Second, don’t skip the “cool in the tin” step—I learned that the hard way when I eagerly flipped a tin and got a pan of delicious but crumbled scramble! And finally, the biggest evolution? I now always double the batch. One for now, one for the freezer. Because future-you will be so grateful on a busy Tuesday morning. Trust me.
Your Questions, Answered!
Q: Can I make these ahead of time and how do I store them?
A: Absolutely! They are a meal-prep dream. Let them cool completely, then store in an airtight container in the fridge for up to 4 days. Reheat in the microwave for 30-60 seconds or in a 350°F oven for about 10 minutes until warm. They also freeze beautifully for up to 2 months. Thaw in the fridge overnight before reheating.
Q: My quiches stuck to the pan! What did I do wrong?
A> Oh, we’ve all been there! It usually comes down to greasing. Be really, really generous with that cooking spray or oil. Using a non-stick muffin tin is a big help. If they do stick, don’t panic. Let them cool a bit more, then carefully slide a thin, flexible silicone spatula all the way around and under to loosen. They might not be perfect, but they’ll still taste perfect.
Q: The centers sunk a lot after cooling. Is that normal?
A> Yes, this is totally normal! As they cool, the hot air inside condenses and they will deflate somewhat. It doesn’t affect the flavor or texture at all. If you want them slightly puffier, you can try adding an extra egg white to the mixture for more structure.
Q: Can I use different vegetables?
A> Please do! This recipe is a canvas. Just keep the total volume of add-ins roughly the same (about 1 ¼ cups). For watery veggies like mushrooms or zucchini, I recommend sautéing them first to drive off excess moisture and prevent a soggy quiche. Bell peppers, caramelized onions, or roasted cherry tomatoes are all fabulous.
Mini Spring Veggie Quiches (Muffin-Tin, Vegetarian & Meal-Prep Friendly)
Description
These Mini Spring Veggie Quiches are light, colorful, and perfect for breakfast, brunch, or meal prep. Packed with fresh vegetables, eggs, and feta, they’re baked in a muffin tin for easy portions. No crust, simple steps, and big flavor — great warm or cold.
Ingredients
-
6 large eggs
-
¼ cup milk or cream
-
½ cup asparagus, finely chopped
-
½ cup fresh spinach, chopped
-
¼ cup green peas (fresh or thawed frozen)
-
⅓ cup crumbled feta cheese
-
½ tsp salt (adjust to taste)
-
¼ tsp black pepper
-
Optional: pinch garlic powder or nutmeg
-
Oil or cooking spray for muffin tin
Instructions
-
Preheat oven to 375°F (190°C). Grease a 12-cup muffin tin well.
-
Mix eggs
In a bowl, whisk eggs, milk, salt, pepper, and optional seasoning until smooth. -
Add vegetables & cheese
Stir in asparagus, spinach, peas, and feta. -
Fill cups
Pour mixture into muffin cups, filling each about ¾ full. -
Bake
Bake 18–22 minutes, until centers are set and tops lightly golden. -
Cool & remove
Let cool 5–10 minutes, then loosen edges with a knife and lift out.
Notes
-
Chop vegetables small so they cook through quickly.
-
Pat wet veggies dry to avoid soggy quiches.
-
Use silicone or non-stick muffin tins for easiest release.
-
Add cooked mushrooms, bell peppers, or onions for variety.
-
Great for meal prep — double the batch and freeze extras.
Nutritional Info (Per Quiche, approx.)
Calories: 100 | Fat: 7g | Saturated Fat: 3g | Carbohydrates: 2g | Fiber: 0.5g | Sugar: 1g | Protein: 7g
Note: Nutritional information is an estimate and will vary based on the specific ingredients and brands you use.
Final Thoughts: A Recipe That Grows With You
As I wipe down the counter, the last of the golden afternoon light catching the crumbs, I’m struck by how a simple recipe can hold so much. These Mini Spring Veggie Quiches are more than just a convenient bite. They’re a feeling—the hopeful, energetic, sun-on-your-skin feeling of spring, made tangible.
They’ve become my seasonal marker. The first time I make them each year, with whatever the early market offers, feels like a quiet celebration. A promise to myself to slow down, to notice the green shoots pushing through, and to nourish my body with the same bright energy bursting forth outside my window.
What I love most is their gentle flexibility. They welcome your creativity and adapt to your life, whether it’s a chaotic weekday or a leisurely weekend. They’re equally at home on a porcelain platter as they are wrapped in parchment paper, tucked into a lunchbox. This recipe isn’t about perfection; it’s about joy. The joy of a colorful, messy mixing bowl. The joy of a kitchen smelling of promise. The joy of sharing something made with your own hands.
So, I hope you’ll make them. I hope you’ll swap in the vegetables that make your heart sing. I hope you’ll double the batch and stash some away for a future self who needs a taste of sunshine. Most of all, I hope they bring you a moment of simple, delicious contentment—a little plate of spring, anytime you need it.
Happy baking, friend.
With love from my kitchen to yours,
Olivia
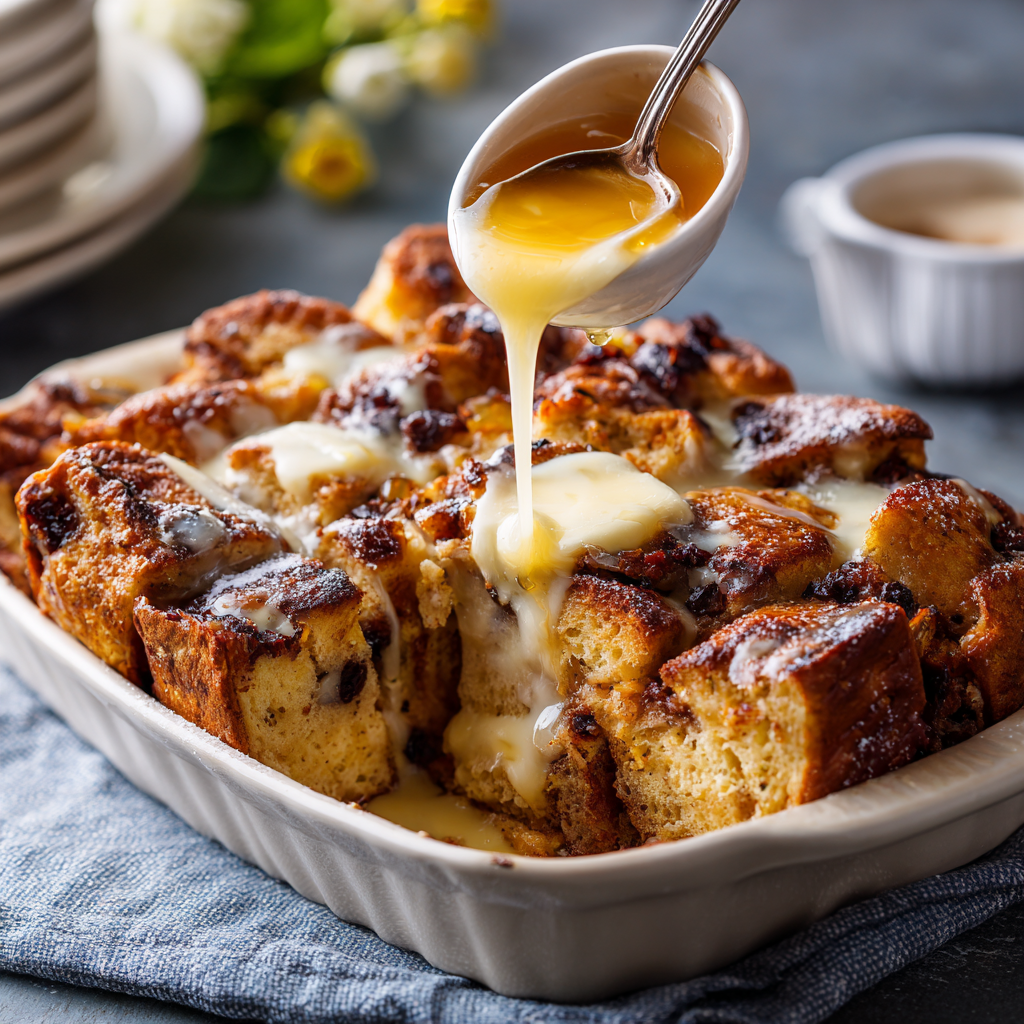
Hot Cross Bun French Toast Bake : Easy Make-Ahead Brunch Favorite
Hot Cross Bun French Toast Bake: Your New Favorite Make-Ahead Brunch
Hey there, friend! Come on in, the oven’s on and the coffee’s brewing. Is there any better feeling than a slow, lazy morning where the only mission is to enjoy a plate of something warm, sweet, and deeply comforting? I’m talking about that magical moment when the scent of cinnamon, vanilla, and toasted bready goodness starts weaving its way from the kitchen into every corner of your home. It’s the universal signal for “brunch is served, and it’s going to be amazing.”
But let’s be real—as much as I love a classic stack of French toast, standing at the stove flipping slices while everyone else is sipping mimosas isn’t always my idea of a relaxing time. That’s where this glorious creation comes in: the Hot Cross Bun French Toast Bake. Imagine all the cozy, spiced flavor of your favorite Easter treat, transformed into a puffed, golden, shareable dish that does all the hard work in the oven. You simply cube, soak, and bake. It’s the ultimate hack for feeding a crowd (or just treating yourself) with zero morning stress.
This recipe is my love letter to easy elegance. It takes those beautifully spiced, fruit-studded hot cross buns and gives them a second act that’s arguably even better than the first. Whether you’ve got leftover buns from the bakery or you snagged a fresh pack just for this purpose, we’re turning them into a creamy, custardy, utterly irresistible bake. So, tie on your favorite apron (the messy one is totally welcome here), and let’s make a brunch memory that’s as easy as it is unforgettable.
A Sweet Slice of Nostalgia
This recipe didn’t start in a fancy test kitchen; it was born from a happy accident and a serious case of “brunch panic.” A few years ago, my family descended for a post-Easter weekend. The night before, I realized I had a whole basket of beautiful, but slightly stale, homemade hot cross buns. I couldn’t let them go to waste! Frantically, I cubed them, threw them in a dish with the classic French toast custard I always make, and shoved it in the fridge, hoping for the best.
The next morning, bleary-eyed and pre-coffee, I popped the dish in the oven. What emerged was nothing short of magic. The spices from the buns had infused the whole custard, the dried fruit had plumped into little juicy gems, and that iconic cross on top became delightfully crispy. My grandma took one bite, her eyes lit up, and she said, “Olivia, you’ve outdone yourself. This tastes like my childhood, but better.” In that moment, I knew this wasn’t just a salvage operation—it was a new tradition. It’s proof that the best recipes often come from a little resourcefulness and a lot of love.
Gathering Your Cozy Ingredients
Here’s what you’ll need to create this cozy masterpiece. Don’t worry about being too precise—this is a wonderfully forgiving dish.
- 6–8 Hot Cross Buns: The star! Their warm spices (cinnamon, nutmeg, allspice) and sweet dried fruit are the flavor foundation. Chef’s Insight: Stale buns are actually perfect here—they soak up the custard like a dream without getting mushy. No buns? A sturdy challah or brioche loaf spiced with 1 extra teaspoon of cinnamon and a handful of raisins works too.
- 4 Large Eggs: The backbone of our rich custard. They create that lovely, tender set.
- 1 ½ cups Milk: Whole milk gives great richness. Substitution Tip: For a decadent twist, use half-and-half or even a mix of milk and cream. Dairy-free? Unsweetened almond or oat milk works beautifully.
- ¼ cup Sugar or Pure Maple Syrup: For sweetness. I love maple syrup for its deep, caramel-like flavor that pairs so well with the spices.
- 1 teaspoon Vanilla Extract: The flavor enhancer. Always use pure vanilla if you have it—it makes a difference.
- 1 teaspoon Cinnamon & ¼ teaspoon Nutmeg: We’re doubling down on the warm, cozy vibes. Freshly grated nutmeg is a game-changer!
- Pinch of Salt: Crucial! It balances the sweetness and makes all the other flavors pop.
- 2 tablespoons Melted Butter: Drizzled over the top before baking for that irresistible golden, slightly crispy finish.
For the Optional (But Highly Recommended) Toppings: Powdered sugar for a snowy finish, more warm maple syrup, a drizzle of honey, or a cascade of fresh berries for a bright, juicy contrast.
Let’s Build Your Brunch Masterpiece: Step-by-Step
Ready? This is the fun, no-fuss part. I’ll walk you through each step with all my favorite tips and hacks.
- Prep Your Stage. Lightly grease your favorite 9×13 inch baking dish with butter or non-stick spray. Cube your hot cross buns into about 1-inch pieces—no need for perfection! Scatter them evenly in the dish. Little Chef Hack: If your buns are very fresh, you can spread the cubes on a baking sheet and toast them in a 300°F oven for 10 minutes first. This dries them out slightly and helps them hold their texture better in the custard.
- Create the Magic Custard. In a large bowl, crack in your eggs and give them a quick whisk. Add the milk, your sweetener of choice, vanilla, cinnamon, nutmeg, and that all-important pinch of salt. Whisk it all together until it’s completely smooth and homogenous. You should see a beautiful, speckled, fragrant liquid. Take a whiff—that’s the smell of success!
- The Soak. Slowly and evenly pour your custard mixture over the cubed buns in the baking dish. Now, here’s a key move: using clean hands or a spatula, gently press down on the buns and give everything a very gentle toss to ensure every single nook and cranny gets kissed by that custard. You want them all to be nicely damp.
- The Butter Drizzle & The Big Chill. Drizzle the melted butter all over the top. This will create those delicious crispy edges we all fight over. Now, cover the dish tightly with plastic wrap or a lid and pop it in the fridge. This is the make-ahead secret weapon! Let it chill for at least 1 hour, but overnight is truly best. This slow soak allows the custard to fully penetrate the bread, resulting in a luxuriously uniform texture and deeper flavor.
- Bake to Golden Perfection. When you’re ready to bake, take the dish out of the fridge while you preheat your oven to 350°F (175°C). This takes the chill off for more even baking. Remove the cover and place the dish right in the center of the oven. Bake, uncovered, for 35-40 minutes. You’re looking for a beautifully puffed center and a deep golden-brown top. A knife inserted in the center should come out clean.
- The (Brief) Rest. I know it’s tempting to dive right in, but let the bake rest for about 5-10 minutes after pulling it from the oven. This lets the custard set fully, making it easier to slice and serve. It also gives you just enough time to brew a fresh pot of coffee or whip some cream!
Serving Up the Cozy
Presentation is easy and beautiful with this bake. Use a large spoon or spatula to scoop out generous portions onto plates or into shallow bowls. I love a dusting of powdered sugar (use a fine-mesh sieve for that professional “snowy” look) right before serving. Then, let everyone customize their plate! Set out little pitchers of warm maple syrup, bowls of fresh berries, dollops of yogurt or whipped cream, and even a small dish of extra cinnamon. The contrast of the warm, soft bake with cool, fresh berries is absolute heaven.
Make It Your Own: Delicious Twists
This recipe is a fantastic canvas! Here are a few ways to play with it:
- Chocolate Chip Delight: Use chocolate chip hot cross buns, or sprinkle ½ cup of dark chocolate chips over the cubed buns before adding the custard.
- Apple Cinnamon Swirl: Thinly slice 1-2 apples and layer them amongst the bun cubes. Add an extra ½ tsp of cinnamon to the custard.
- “Tropical” Escape: Use buns with dried cranberries and orange zest. Add a teaspoon of orange zest to the custard and top with toasted coconut flakes after baking.
- Decadent Cream Cheese Pocket: Before cubing, use a knife to create small pockets in the buns and fill them with a teaspoon of sweetened cream cheese. Then cube and proceed!
- Dairy-Free & Vegan-Friendly: Use your favorite plant-based milk, a flax egg substitute (for binding), and replace the butter with coconut oil. The spices will still shine brilliantly.
Chef Olivia’s Notebook
This recipe has become my go-to for so much more than Easter. It’s my holiday morning lifesaver, my “I-have-company” secret, and sometimes, my Friday night treat (because why should weekends have all the fun?). Over time, I’ve learned that the longer it soaks, the better—I once forgot about it in the fridge for a full 24 hours, and it was the most custardy, pudding-like version yet. A happy accident indeed!
One funny kitchen story: I was once filming this recipe for my blog and was so busy chatting to the camera that I completely forgot to add the sugar to the custard. I baked it, took a triumphant bite for the “final shot,” and my face must have been priceless. It was… very eggy. We had a good laugh, drenched it in syrup, and dubbed it the “Savory Surprise” edition. Moral of the story? Even when it doesn’t go perfectly, it’s still pretty good, and it always makes for a great memory.
Your Questions, Answered!
Q: Can I make this completely the night before?
A: Absolutely, and I highly recommend it! Assemble the entire dish up to the baking step, cover, and refrigerate overnight. In the morning, just take it out while the oven preheats and bake as directed. You might need to add 5-10 extra minutes of bake time since it’s going in cold from the fridge.
Q: My bake turned out soggy in the middle. What happened?
A: This usually means it needed a bit more time in the oven. Ovens can vary! Next time, test for doneness with a knife—it should come out clean. If the top is getting too brown but the center is still wet, loosely tent the dish with aluminum foil for the remainder of the bake time to protect the top while the center cooks through.
Q: Can I freeze this French toast bake?
A: You can! Bake it completely, let it cool fully, then wrap it tightly in plastic wrap and foil. Freeze for up to 2 months. Thaw overnight in the fridge and reheat, covered, in a 325°F oven until warmed through.
Q: I can’t find hot cross buns. What’s the best substitute?
A: No problem! A loaf of challah, brioche, or even a sturdy Italian bread is perfect. Just cube it, and add 1 ½ teaspoons of cinnamon, ½ teaspoon of allspice, and ½ cup of raisins or dried currants to the custard mixture to mimic those classic hot cross bun flavors.
Hot Cross Bun French Toast Bake : Easy Make-Ahead Brunch Favorite
Description
This Hot Cross Bun French Toast Bake is a cozy, crowd-pleasing brunch dish that’s easy to prepare ahead of time. Instead of flipping slices at the stove, you simply cube, soak, and bake. The spiced buns and creamy custard turn into a warm, golden casserole that’s perfect for holidays or relaxed weekend mornings.
Ingredients
-
6–8 hot cross buns, cubed
-
4 large eggs
-
1½ cups milk (or plant-based milk)
-
¼ cup sugar or maple syrup
-
1 tsp vanilla extract
-
1 tsp ground cinnamon
-
¼ tsp nutmeg
-
Pinch of salt
-
2 tbsp melted butter
Optional toppings
-
Powdered sugar
-
Maple syrup or honey
-
Fresh berries
-
Yogurt or whipped cream
Instructions
-
Prepare the dish
Grease a 9×13-inch baking dish. Add cubed hot cross buns and spread evenly. -
Make the custard
In a bowl, whisk eggs, milk, sugar or maple syrup, vanilla, cinnamon, nutmeg, and salt. -
Soak
Pour custard over the bread cubes. Gently press so all pieces are moistened. -
Add butter & chill
Drizzle melted butter on top. Cover and refrigerate at least 1 hour or overnight. -
Bake
Heat oven to 350°F (175°C). Bake uncovered 35–40 minutes, until puffed and golden and the center is set. -
Rest & serve
Let rest 5–10 minutes before serving. Add toppings as desired.
Notes
-
Slightly stale buns work best — they absorb more custard without getting mushy.
-
If buns are very fresh, toast the cubes for 8–10 minutes at low heat first.
-
For extra richness, replace ½ cup of milk with cream.
-
If the top browns too fast, loosely cover with foil near the end.
-
Add sliced apples or chocolate chips for an easy variation.
Nutritional Information (Approximate, per serving)
Please note: This is an estimate for 6 servings, based on the ingredients listed and without extra toppings. Values can vary based on specific brands and ingredients used.
- Calories: 360
- Protein: 11g
- Carbohydrates: 48g
- Fat: 14g
- Prep Time: 15 mins
- Chill Time: 1 hour (or overnight)
- Bake Time: 40 mins
- Total Time: 55 mins (plus chilling)
- Servings: 6
There you have it! The ultimate guide to a stress-free, spectacular brunch. I hope this Hot Cross Bun French Toast Bake becomes a beloved, repeat recipe in your kitchen, filling your home with warmth and your table with happy, well-fed people. Now, go enjoy that well-deserved mimosa. You’ve earned it!
With love and a sprinkle of cinnamon,
Olivia
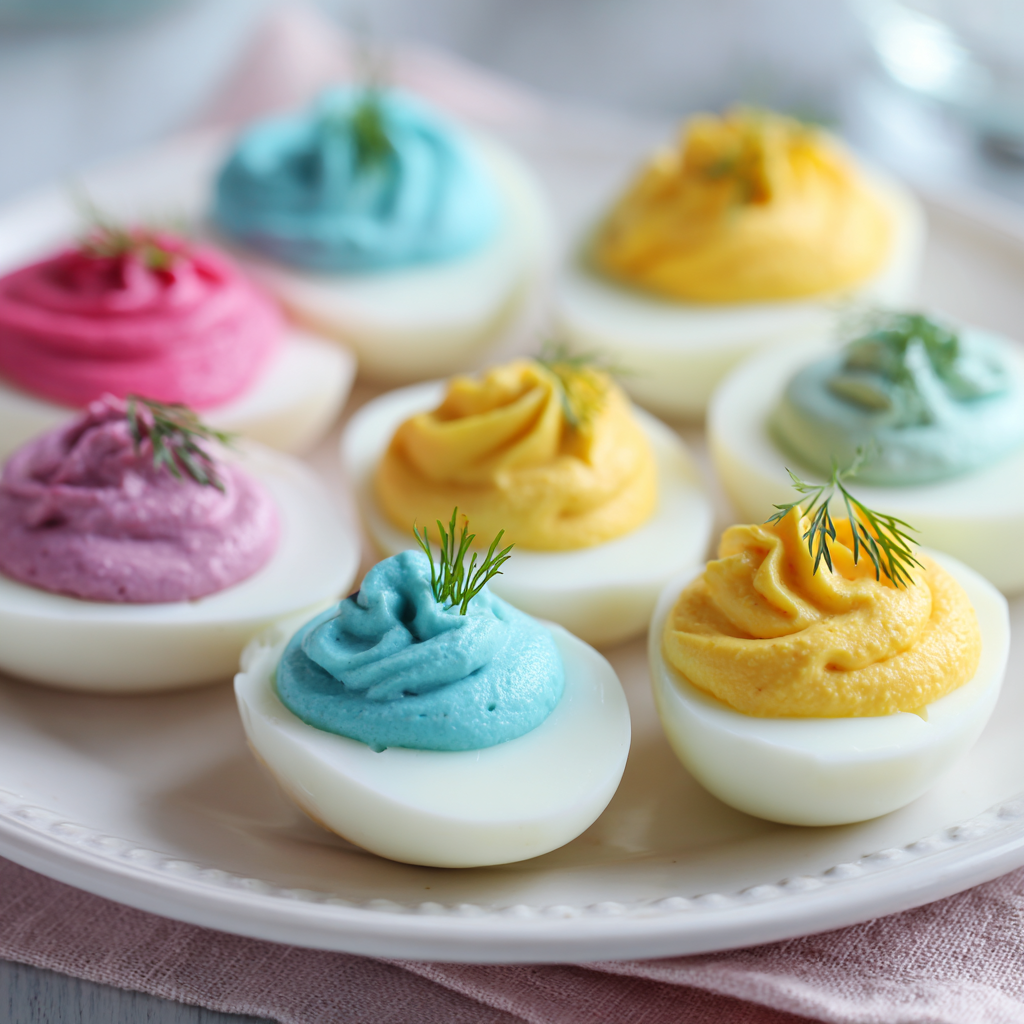
Pastel Deviled Eggs (Naturally Dyed, Easter-Perfect Appetizer)
Pastel Deviled Eggs: Your New Favorite Easter (or Anytime!) Appetizer
Hey there, friend! Olivia here. Can you smell that? It’s the warm, comforting scent of hard-boiled eggs mingling with the promise of spring. I’m so glad you’ve pulled up a chair in my kitchen today because we’re about to make something that’s equal parts magic and delicious: Naturally Dyed Pastel Deviled Eggs.
Now, I know what you might be thinking. “Deviled eggs? Aren’t those just a potluck classic?” And you’re right, they are! But that’s exactly why I love giving them a playful, seasonal twist. Imagine a platter of these little gems, their whites glowing in the softest shades of blush pink, sunshine yellow, and lavender blue, all cradling that creamy, savory filling we know and love. They’re a total conversation starter, and the best part? We’re creating all those beautiful colors straight from the earth, using things like beets, turmeric, and cabbage.
This isn’t about complicated kitchen science or fancy tools. It’s about embracing a little whimsy, celebrating the seasons, and creating food that makes people’s eyes light up. Whether you’re hosting Easter brunch, a spring baby shower, or just want to add a splash of joy to Tuesday’s dinner table, these eggs are your ticket. So, tie on that “messy apron” (you know I’m right there with you), and let’s turn simple ingredients into something unforgettable together. I promise, your guests—and your inner food artist—are going to be thrilled.
A Dash of Nostalgia: Why These Eggs Mean Spring to Me
My love affair with deviled eggs started long before I had my own kitchen. It was in my Nana’s warm, always-bustling house on Easter Sunday. While the grown-ups handled the ham, my cousin and I had one sacred job: decorating the deviled eggs. Back then, our “decoration” was a very enthusiastic, slightly haphazard sprinkle of paprika from a height of about two feet, resulting in a festive (if somewhat fiery) red dusting over everything, the countertops included.
Years later, when I first saw the idea of naturally dyed egg whites, it felt like unlocking a new level of that childhood joy. It was my “aha!” moment where classic family tradition met creative play. The first time I slid those pure white halves into a jar of brilliant pink beet juice, I felt like a kitchen wizard. Pulling them out, transformed into the prettiest pastel, brought back that same giddy excitement from Nana’s kitchen. Now, making these is my own spring ritual. It’s my way of honoring those messy, happy memories while creating new ones, proving that the food that brings us together can always find a fresh, beautiful spin.
Gathering Your Rainbow: Ingredients & Why They Work
Here’s everything you’ll need to create your pastel masterpiece. I’ve included my little chef insights for each one, because knowing the “why” makes you feel more confident in the kitchen!
For the Eggs & Natural Dyes:
- 6 large eggs: The star of the show! Older eggs (about 7-10 days) are actually easier to peel after boiling. Size matters here—large eggs give you the perfect canvas-to-filling ratio.
- 1 cup beet juice (for pink): This creates the most gorgeous, natural pink hue. Chef’s Tip: You can juice a small raw beet, use the liquid from canned beets (my easy shortcut!), or simmer a chopped beet in 1.5 cups water for 20 minutes to make your own dye.
- 1 teaspoon turmeric + 1 cup warm water (for yellow): Turmeric is a potent, vibrant natural dye. The warm water helps it dissolve. Substitution Tip: A pinch of saffron steeped in hot water makes a stunning golden yellow, but turmeric is much more budget-friendly.
- 1 cup red cabbage water (for blue/purple): This is the coolest kitchen science trick! Boiled red cabbage water is a pH indicator. Chef’s Insight: It starts blueish and can turn more lavender or even teal depending on the vinegar. It’s pure magic.
- 1 tablespoon white vinegar (per dye bath): This is non-negotiable! The vinegar’s acidity helps set the natural dye onto the egg white proteins, making the color stick beautifully.
For the Dreamy Filling:
- Cooked egg yolks: Reserved from your peeled eggs, of course! They’re the rich, creamy base of our filling.
- 3 tablespoons mayonnaise: This binds everything into luscious, smooth perfection. Use your favorite brand—full-fat will give the richest flavor and texture.
- 1 teaspoon Dijon mustard: My secret weapon! Dijon adds a subtle tang and depth that plain yellow mustard just can’t match. It elevates the flavor without being overpowering.
- Salt and pepper, to taste: Seasoning is key. I always start with a pinch of each, mix, taste, and then add more. Remember, you can always add, but you can’t take away!
- Optional: Fresh herbs (dill, chives, parsley), finely chopped: A pop of green and fresh flavor. Chives are my top pick for a classic, mild oniony bite that complements everything.
Let’s Get Cooking: Step-by-Step with Chef Olivia
Ready to create some magic? Follow these steps, and don’t skip my little commentary—it’s where all my favorite hacks live!
- Perfect Hard-Boiled Eggs: Place your eggs in a single layer in a saucepan. Cover with cold water by about an inch. Bring to a full, rolling boil over high heat. Once boiling, immediately cover the pot, remove it from the heat, and let it sit for exactly 12 minutes. My #1 Tip: This “steam” method prevents that nasty gray/green ring around the yolk! After 12 minutes, transfer the eggs to an ice bath (a bowl of cold water with ice cubes) to stop the cooking. Let them chill completely—this also makes peeling a breeze.
- Peel & Prep: Gently tap each egg on the counter and roll it lightly to crackle the shell all over. Start peeling from the wider end (where there’s usually an air pocket) under a trickle of cool running water—the water helps loosen the membrane. Chef’s Hack: Patience is your friend here. Rinse off any little bits of shell, then pat the eggs completely dry with a paper towel. A dry egg is crucial for clean slicing.
- Slice & Scoop: Using a sharp knife, slice each egg in half lengthwise. Wipe the knife clean between cuts for neat edges. Gently pop the yolks out into a medium bowl. Arrange the empty white halves on a plate or tray—they’re ready for their color bath!
- Create Your Dye Baths: In three separate small bowls or jars, prepare your dyes. For pink: mix 1 cup beet juice with 1 tbsp vinegar. For yellow: dissolve 1 tsp turmeric in 1 cup warm water, then stir in 1 tbsp vinegar. For blue/purple: use 1 cup of the liquid from boiled red cabbage (simmer 1/4 of a chopped cabbage in 2 cups water for 10 min, strain) mixed with 1 tbsp vinegar. Color Note: The cabbage dye might look blue or purple; both are beautiful!
- The Dyeing Magic: Divide your egg white halves among the three dye baths, making sure they’re fully submerged. Pop them in the refrigerator! Check them after 30 minutes for soft pastels. For more vibrant color, you can go up to 2 hours. Don’t leave them overnight—the vinegar will start to toughen the whites.
- Rinse & Dry: Using a slotted spoon, carefully remove the dyed eggs. Give them a very gentle rinse under cool water to remove any surface dye particles, then pat them completely dry with paper towels. This step is important so your filling doesn’t get watery.
- Make the Filling: To your bowl of yolks, add the mayo, Dijon, salt, and pepper. Mash it all together with a fork until it’s perfectly smooth and creamy. Taste it! Adjust seasoning if needed. Fold in your chopped herbs now, if using.
- Fill & Flourish: You can simply spoon the filling back into the wells, but for a truly elegant look, piping is the way to go. Spoon the filling into a zip-top bag, snip off a corner (about 1/2 inch), and pipe away! No fancy piping tip needed. Swirl it, peak it, get creative!
- Chill & Serve: Cover your finished pastel deviled eggs loosely with plastic wrap and refrigerate for at least 15-20 minutes before serving. This lets the flavors meld and makes them the perfect cool, refreshing bite.
Plating Your Pastel Masterpiece
Presentation is part of the fun! I love using a simple white platter or a rustic wooden board to really let the colors sing. Arrange them in a rainbow gradient or mix the colors playfully. For a final touch, garnish the platter with a few sprigs of fresh dill, edible flowers like pansies or violas, or a light dusting of smoked paprika or extra chopped chives. The contrast is stunning! Serve them chilled, and watch them disappear.
Make It Your Own: Fun Twists & Swaps
Once you’ve mastered the classic, the playground is open! Here are a few ways to mix it up:
- Herb Garden Filling: Swap the Dijon for 2 tablespoons of finely minced fresh herbs (think tarragon, chervil, and parsley) for a super fresh, spring-forward flavor.
- The “Avocado Devil”: Replace half the mayonnaise with mashed ripe avocado for a wonderfully creamy, slightly green-tinged filling with healthy fats. Add a squeeze of lime juice to prevent browning.
- Spicy Sriracha Kick: Add 1/2 to 1 teaspoon of sriracha (or your favorite hot sauce) to the yolk mixture. The pink and orange-red filling looks amazing in the pastel shells!
- Dairy-Free & Paleo: Use a high-quality, avocado oil-based mayonnaise to keep things creamy without the dairy. It works like a charm!
- Extra Color: Create a green dye by simmering spinach or kale! Or, add a tiny bit of baking soda (1/4 tsp) to your blue cabbage dye to shift it toward a more turquoise/teal color. Experiment!
Chef Olivia’s Notebook: Extra Thoughts & A Kitchen Story
This recipe has evolved so much in my kitchen. The first time I made them, I was so impatient I didn’t let the dye baths chill—I left them on the counter. The colors were… muted, to say the least. Lesson learned: patience makes pretty pastels! Also, I once got overzealous with the turmeric and my yellow eggs could have doubled as highlighter pens. A little truly goes a long way.
My biggest piece of advice? Don’t stress the small stuff. If an egg tears while peeling, it’s okay. If your colors aren’t perfectly even, they’re more charming for it. If you just want to spoon the filling instead of pipe, do it! These are meant to bring joy, not perfection. The real magic is in the sharing, the “oohs” and “aahs,” and the empty platter at the end of the party. That’s the true sign of a recipe made with love.
Your Questions, Answered (FAQs & Troubleshooting)
Q: My yolks have a gray/green ring! What did I do wrong?
A: Don’t worry, they’re still safe to eat! That ring means they were overcooked or not cooled quickly enough. Next time, try my “cover and steam” method (Step 1) and get them into an ice bath immediately. The ring is just a visual thing, but we’re aiming for pretty, bright yellow yolks!
Q: The dye isn’t sticking to my egg whites very well. Why?
A: Two likely culprits! First, make sure you added the vinegar to the dye bath—it’s essential for setting the color. Second, ensure your peeled egg whites are patted completely dry before submerging.
Pastel Deviled Eggs (Naturally Dyed, Easter-Perfect Appetizer)
Description
These pastel deviled eggs are a fun, colorful twist on the classic appetizer. Naturally dyed with simple ingredients like beet juice, turmeric, and red cabbage, they look impressive but are surprisingly easy to make. Perfect for spring gatherings, brunch tables, or party platters, they taste just as good as they look.
Ingredients
Eggs
-
6 large eggs
Natural Dye Baths
-
1 cup beet juice + 1 tbsp white vinegar (pink)
-
1 cup warm water + 1 tsp turmeric + 1 tbsp white vinegar (yellow)
-
1 cup red cabbage water + 1 tbsp white vinegar (blue/purple)
To make cabbage water: simmer chopped red cabbage in water for 10 minutes, then strain and cool.
Filling
-
Cooked egg yolks (from the eggs)
-
3 tbsp mayonnaise
-
1 tsp Dijon mustard
-
Salt and black pepper, to taste
-
Optional: 1–2 tbsp finely chopped chives or dill
-
Optional garnish: paprika or extra herbs
Instructions
-
Hard-boil the eggs
Place eggs in a saucepan and cover with cold water. Bring to a boil, then cover and remove from heat. Let sit 12 minutes. Transfer to an ice bath and cool completely. -
Peel and slice
Peel eggs and pat dry. Slice in half lengthwise. Remove yolks to a bowl and set whites aside. -
Prepare dye baths
Pour each dye mixture into a separate cup or bowl. -
Dye the egg whites
Submerge egg white halves in the dye baths. Refrigerate 30–90 minutes depending on how deep you want the color. -
Rinse and dry
Remove whites with a spoon, lightly rinse, and pat dry with paper towels. -
Make the filling
Mash yolks with mayonnaise, Dijon, salt, and pepper until smooth. Stir in herbs if using. -
Fill the eggs
Spoon or pipe the filling into each colored egg white half. -
Chill and serve
Refrigerate at least 20 minutes before serving.
Notes
-
Use slightly older eggs — they peel more easily.
-
Always add vinegar to dye baths so the color sticks.
-
Pat egg whites dry before dyeing for more even color.
-
Don’t soak longer than 2 hours or the whites can become firm.
-
Pipe the filling with a zip-top bag (snip the corner) for a neat look.
-
Make them the day of serving for the freshest texture.
Final Thoughts: Your Turn to Shine
And there you have it—your guide to creating little bites of edible, pastel joy. From the science of the perfect hard-boil to the magic of turning cabbage water into a lavender dream, I hope you feel equipped and inspired.
Remember, this recipe is more than just an appetizer; it’s an invitation. An invitation to slow down, play with your food, and add a splash of unexpected beauty to an ordinary day. Whether these eggs grace your Easter table, become the star of a spring picnic, or simply make a Tuesday night feel a bit more special, their purpose is to delight—both you and anyone lucky enough to try one.
So, embrace the process. Don’t fret if a few eggs tear (they’ll still taste amazing), or if your “purple” leans more toward slate blue (it’s gorgeous, I promise). Your version will be uniquely yours, and that’s the best part. The real success isn’t in flawless presentation, but in the shared smiles, the stories told over the platter, and the quiet satisfaction of creating something beautiful with your own two hands.
Thank you for spending this time in my kitchen. Now, go tie on that apron, gather your dyes, and make some magic. I can’t wait to hear how your pastel creations turn out! Happy cooking, friend.
With love and a sprinkle of paprika,
Olivia
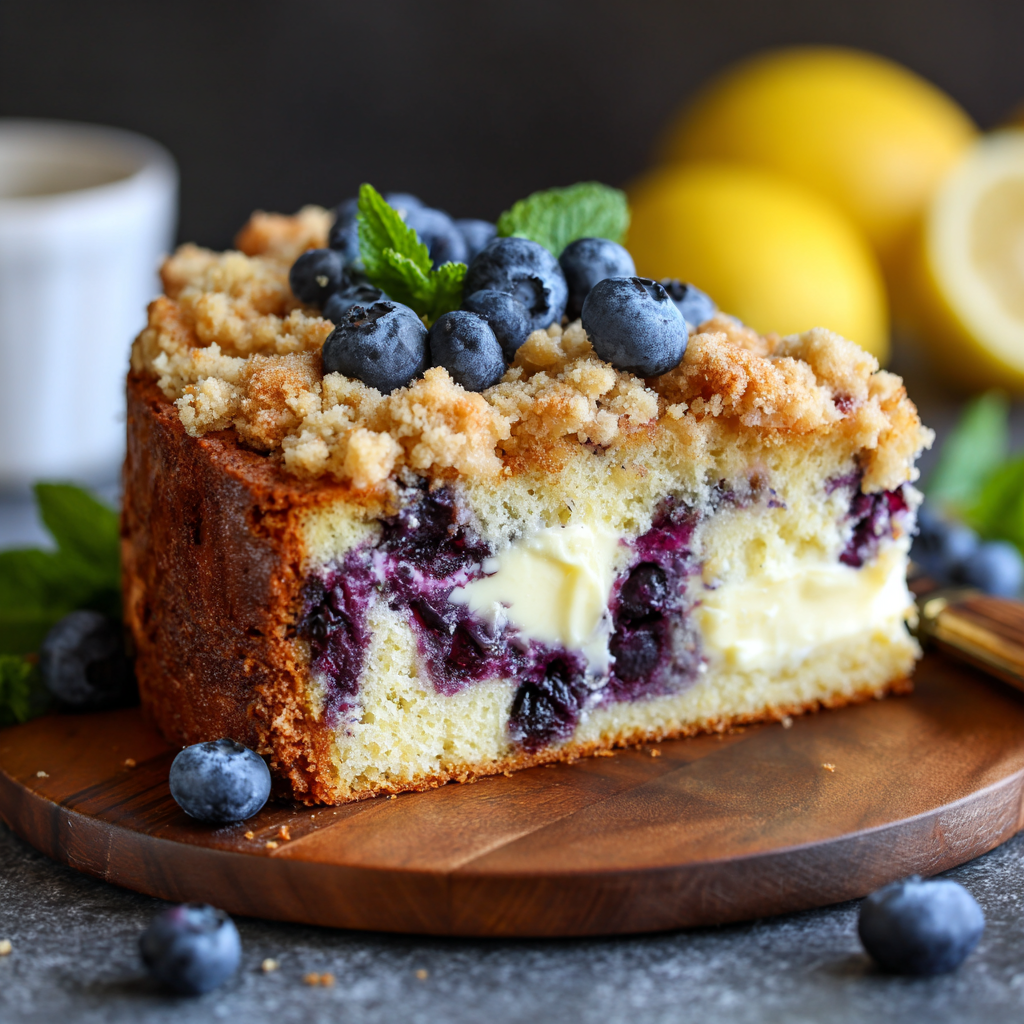
Lemon Blueberry Cream Cheese Coffee Cake : A Bright and Buttery Brunch Star
Lemon Blueberry Cream Cheese Coffee Cake: Your New Brunch Best Friend
Hey there, friend! Olivia here. Come on in, pull up a stool, and let me pour you a virtual cup of coffee. I want to talk about one of my absolute favorite moments: that slow, sun-drenched weekend brunch. You know the one. The table is crowded with mismatched mugs, there’s laughter in the air, and the star of the show is sitting right in the center, still warm from the oven, filling the whole kitchen with the most incredible buttery, citrusy perfume.
That star, my friends, is what we’re making today. This Lemon Blueberry Cream Cheese Coffee Cake isn’t just a cake; it’s a mood. It’s the promise of a delicious, unhurried morning. Imagine: a supremely tender, moist cake packed with sunny lemon zest and juicy, jammy blueberries. Running through its center is a river of sweet, tangy cream cheese filling that makes every slice feel decadent. And crowning it all? A generous blanket of buttery, brown sugar streusel that adds the perfect crunch.
I know “coffee cake” can sound a little humble, but trust me—this one is a showstopper. It has layers of flavor and texture that will make everyone think you spent hours with a fancy pastry degree. The secret? It’s actually wonderfully straightforward. We’re using simple techniques and ingredients you probably already have. My goal is to guide you through it so you feel like a rockstar, creating something beautiful and soul-warming for the people you love (which, let’s be real, can definitely include just you and a good book on a quiet Sunday). So, tie on that apron, grab your favorite mixing bowl, and let’s bake some joy!
Why This Cake Tastes Like Sunshine & Memories
This recipe always takes me back to my grandma’s kitchen table. She wasn’t a fancy baker, but she had a magical touch with simple, comforting treats. Her version of “special occasion” was a blueberry buckle, warm from the oven, served with a gossipy chat and a pot of strong tea. The kitchen windows would be open, the scent of lilacs mixing with baked sugar and fruit.
I wanted to create a cake that captured that feeling of cozy, generous hospitality but with a little extra “wow” factor my younger self would have adored. Adding the bright punch of lemon was my twist—it cuts through the sweetness and makes the blueberries sing. And the cream cheese swirl? That’s the ultimate indulgence, the hidden treasure in every slice that makes you close your eyes for a second. Every time I make this, it feels like I’m blending her timeless, comforting wisdom with my own love for bold, vibrant flavor. It’s a hug from the past and a high-five for the present, all in one delicious pan.
Gathering Your Flavor Toolkit
Here’s what you’ll need. Don’t just think of these as a list—think of them as the building blocks of something amazing. I’ve added my little chef insights to help you understand the “why” behind each one!
- For the Cake:
- 1/2 cup unsalted butter, softened: The foundation of our rich, tender crumb. Chef’s Tip: “Softened” means when you press it, your finger leaves a clear indent. Too cold and it won’t cream properly; too melted and the texture changes. If you forget to take it out, you can microwave it for 5-7 seconds at a time!
- 3/4 cup granulated sugar: For sweetness and, crucially, helping to create a light, airy texture when creamed with the butter.
- 2 large eggs, at room temperature: They bind everything together and add structure. Room temp eggs incorporate much more smoothly into the butter mixture!
- 1 tsp pure vanilla extract & 1 tbsp lemon zest: Our flavor power couple. The vanilla adds depth, the lemon zest gives that potent, aromatic citrus oil. Use a microplane if you have one!
- 2 tbsp fresh lemon juice: Bright, tangy liquid gold. Please, please use fresh! The bottled stuff just doesn’t compare for flavor.
- 2 cups all-purpose flour: The workhorse. I usually spoon and level it into the cup to avoid packing in too much.
- 2 tsp baking powder & 1/2 tsp baking soda: Our leavening dream team. They work together to give us a perfect, even rise. Check they’re not expired!
- 1/4 tsp salt: The ultimate flavor enhancer. It makes all the other flavors pop, balancing the sweetness.
- 1/2 cup sour cream: This is the SECRET WEAPON for unbelievable moisture and a slight tang. Substitution: Full-fat plain yogurt works in a pinch.
- 1 1/2 cups fresh or frozen blueberries: The juicy gems! If using frozen, do not thaw—toss them in a bit of the measured flour to prevent them from sinking and bleeding too much.
- For the Cream Cheese Filling:
- 8 oz (one block) cream cheese, softened: Full-fat for the best texture and flavor. Softening is key for a smooth, lump-free swirl.
- 1/4 cup granulated sugar & 1 tsp vanilla: Sweetens and flavors our creamy ribbon.
- For the Streusel Topping:
- 1/2 cup all-purpose flour & 1/3 cup packed brown sugar: The base of our crumble. The brown sugar adds molasses notes and helps create clumps.
- 1/4 cup cold unsalted butter, cubed: Cold is non-negotiable! It creates those perfect, pea-sized buttery crumbs as you cut it in.
Let’s Build This Beautiful Cake, Step-by-Step
Ready? Let’s do this. I’ll walk you through each step like you’re here in my (probably slightly flour-dusted) kitchen with me.
- Prep Like a Pro: Preheat your oven to 350°F (175°C). Now, grab a 9-inch springform pan. This is my pan of choice because the removable sides make getting this tall, beautiful cake out a breeze. Grease the bottom and sides generously with butter or baking spray, then line the bottom with a round of parchment paper. This guarantees a clean release. Set it aside. Chef’s Hack: Doing this first means your oven is hot and ready to go when your batter is, which is crucial for a good rise.
- Whip Up the Dreamy Filling: In a medium bowl, beat the softened cream cheese with the 1/4 cup sugar and 1 tsp vanilla. Use a hand mixer or a sturdy whisk. Beat it until it’s completely smooth and silky—no lumps allowed! Set this aside. Why now? Getting this done first means it’s ready to go when we assemble, and we don’t have to wash the beaters before creaming the butter and sugar. Efficiency, my friend!
- Create the Cake Batter: In a large bowl, cream together the softened butter and 3/4 cup granulated sugar. Beat it on medium-high speed for 2-3 minutes until it’s light, fluffy, and almost pale in color. This step incorporates air, which is vital for texture. Scrape down the bowl. Add the eggs, one at a time, beating well after each so they’re fully incorporated. Beat in the vanilla, lemon zest, and lemon juice. The mixture might look a little curdled at this point—that’s the lemon juice doing its thing! Don’t panic; the flour will fix it.
- Bring It All Together: In a separate bowl, whisk together the flour, baking powder, baking soda, and salt. With your mixer on low, add about one-third of the dry ingredients to the butter mixture, mixing just until combined. Follow with half of the sour cream. Repeat with another third of flour, the rest of the sour cream, and finally the last of the flour. Stop mixing as soon as the last streaks of flour disappear. Overmixing = tough cake. Gently fold in the blueberries. If using frozen, they’ll turn the batter a bit purple—that’s part of the charm!
- The Fun Part: Layering! Now for the assembly. Spoon and spread half of the cake batter into your prepared pan. It will be a relatively thin layer; just get it even. Next, carefully dollop all of the cream cheese filling over the batter. Use a spoon or offset spatula to spread it into an even layer, leaving a small border around the edge. Finally, dollop and spread the remaining cake batter over the top. This can be tricky as the cream cheese layer is slippery! It’s okay if some peeks through or if you just drop spoonfuls and gently connect them. It will all bake together beautifully.
- Make the Streusel & Top It Off: In a small bowl, mix the 1/2 cup flour and 1/3 cup brown sugar. Add the cold, cubed butter. Using your fingertips, a pastry cutter, or even two forks, work the butter into the flour mixture until you have a crumbly texture with pieces ranging from sandy bits to pea-sized clumps. Sprinkle this evenly over the entire top of the cake. Don’t press it down!
- Bake to Golden Perfection: Place the pan on the center rack of your preheated oven. Bake for 50-60 minutes. The cake is done when the top is a deep golden brown, the streusel is crisp, and a toothpick inserted into the cake part (avoiding the cream cheese swirl in the center) comes out clean or with just a few moist crumbs. Watch it: Ovens vary! Start checking at 50 minutes. If the top is browning too fast, you can loosely tent it with foil for the last 10-15 minutes.
- The Hardest Step: Let it Cool! Once baked, place the pan on a wire rack. Let it cool for at least 30 minutes before you even think about removing the springform ring. Then, carefully run a thin knife around the edge and release the clasp. Let the cake cool completely (or just until warm—I won’t judge) before slicing. This waiting period allows the structure to set, so you get clean slices instead of a gooey mess (a delicious gooey mess, but still).
How to Serve This Masterpiece
Presentation is part of the fun! I love placing the whole cake (with the springform bottom still on) on a pretty cake stand. Slice it into generous wedges. A light dusting of powdered sugar right before serving looks gorgeous. For an extra touch of luxury, serve each slice with a dollop of lightly sweetened whipped cream or a scoop of vanilla bean ice cream if you’re going the dessert route. And of course, have that pot of coffee or a pitcher of iced tea ready! It’s perfect for a brunch buffet, a holiday morning, or as the sweet grand finale to a weekend dinner with friends.
Make It Your Own: Delicious Twists & Swaps
- Berry Bliss: Swap the blueberries for raspberries, blackberries, or a mix! Chopped strawberries can work too, but pat them very dry.
- Citrus Switch-Up: Try orange zest and juice instead of lemon for a sweeter, warmer citrus note.
- Nutty Crunch: Add 1/3 cup of chopped pecans or sliced almonds to your streusel topping before sprinkling.
- Gluten-Free Friendly: Use a 1:1 gluten-free all-purpose flour blend (like Bob’s Red Mill or King Arthur) for both the cake and streusel. The texture is fantastic.
- Muffin Mode: Turn these into incredible muffins! Layer batter, cream cheese, and more batter in lined muffin tins, top with streusel, and bake for 22-28 minutes. You’ll get about 14-16 show-stopping muffins.
Olivia’s Kitchen Notebook
This recipe has evolved so much over the years! The first time I made it, I completely forgot the baking soda and wondered why it was so dense (we ate it anyway, with spoons). The sour cream was a game-changer—it took the cake from “good” to “OMG, can I have the recipe?” moist. A funny story: I once brought this to a potluck, and a friend spent five minutes trying to find the “store-bought cheesecake” I’d “hidden” in the middle before believing I’d actually made the whole thing. That’s the best compliment! My biggest piece of advice? Don’t stress about the top layer of batter being perfect. It’s a rustic, homemade beauty, and those imperfect swirls where the cream cheese peeks through are what make it special. This cake is forgiving and full of love.
Your Questions, Answered
Q: Can I use frozen blueberries? Do I need to thaw them?
A: Absolutely! Frozen blueberries work great. The key is to use them straight from the freezer. Do not thaw, or they’ll bleed color and moisture everywhere. Toss them in a tablespoon or two of the measured flour right before folding them in—this helps prevent them all from sinking to the bottom.
Q: My cream cheese layer sunk into the cake/swirled too much. What happened?
A: This is common and usually means the cream cheese filling was a bit too soft/runny or the cake batter around it was too thin. Make sure your cream cheese is softened but not *warm*. Also, ensure you spread the bottom layer of batter evenly to create a solid base. Even if it swirls, it still tastes incredible! Some marbling is totally normal and delicious.
Q: How do I store leftovers, and how long will it last?
A: Cover the cooled cake tightly with plastic wrap or store slices in an airtight container in the refrigerator for up to 4 days. The cold will firm up the streusel, so I love letting a slice come to room temp for 20 minutes or warming it gently in the microwave for 10 seconds before eating. You can also freeze the whole cake or individual slices for up to 2 months. Thaw overnight in the fridge.
Q: My toothpick came out wet even after a long bake time. Is it done?
A: First, make sure you’re testing the *cake* part and not hitting a pocket of cream cheese or a blueberry. If the cake itself is still wet, your oven might run cool, or the pan might be in a slightly cooler spot. Give it 5 more minutes and check again. The top should be firm to a gentle touch, and the edges will be pulling away slightly from the pan.
Lemon Blueberry Cream Cheese Coffee Cake : A Bright and Buttery Brunch Star
Description
Bright, buttery, and irresistibly tender, this coffee cake is a weekend brunch dream. Fluffy lemon-scented cake cradles a luscious cream cheese swirl and juicy blueberries, all topped with a crunchy brown sugar streusel. It’s the perfect combination of cozy, indulgent, and showstopping.
Ingredients
For the Cake:
-
½ cup unsalted butter, softened
-
¾ cup granulated sugar
-
2 large eggs, room temperature
-
1 tsp vanilla extract
-
1 tbsp lemon zest (about 1 large lemon)
-
2 tbsp fresh lemon juice
-
2 cups all-purpose flour
-
2 tsp baking powder
-
½ tsp baking soda
-
¼ tsp salt
-
½ cup sour cream (or full-fat plain yogurt)
-
1½ cups fresh or frozen blueberries
For the Cream Cheese Filling:
-
8 oz cream cheese, softened
-
¼ cup granulated sugar
-
1 tsp vanilla extract
For the Streusel Topping:
-
½ cup all-purpose flour
-
⅓ cup packed brown sugar
-
¼ cup cold unsalted butter, cubed
Instructions
1️⃣ Prep & Preheat
-
Preheat oven to 350°F (175°C).
-
Grease a 9-inch springform pan and line the bottom with parchment paper.
2️⃣ Make the Cream Cheese Filling
-
Beat cream cheese, ¼ cup sugar, and 1 tsp vanilla until smooth. Set aside.
3️⃣ Cake Batter
-
Cream butter and ¾ cup sugar until light and fluffy, 2–3 min.
-
Add eggs, one at a time, then vanilla, lemon zest, and lemon juice. Batter may look slightly curdled—no worries!
-
Whisk flour, baking powder, baking soda, and salt in a separate bowl.
-
Mix in flour and sour cream in 3 additions, starting and ending with flour. Fold in blueberries gently.
4️⃣ Assemble the Cake
-
Spread half the batter in the pan.
-
Carefully layer cream cheese filling on top, leaving a small border at edges.
-
Spread remaining batter over the cream cheese. Don’t worry if some filling peeks through.
5️⃣ Streusel Topping
-
Combine flour and brown sugar. Cut in cold butter until pea-sized crumbs form.
-
Sprinkle evenly over the cake.
6️⃣ Bake
-
Bake 50–60 min until top is golden and a toothpick in cake (avoiding cream cheese) comes out clean.
-
Tent with foil if browning too fast.
7️⃣ Cool & Serve
-
Cool at least 30 min before releasing springform.
-
Slice and serve warm or at room temperature. Optional: dust with powdered sugar or serve with whipped cream.
Notes
-
Frozen Blueberries: Toss in 1–2 tbsp flour before folding in.
-
Citrus Twist: Use orange or lime zest/juice instead of lemon.
-
Nutty Crunch: Add ⅓ cup chopped nuts to streusel.
-
Muffin Version: Layer batter, cream cheese, more batter in lined muffin tins, top with streusel, bake 22–28 min for 14–16 muffins.
-
Gluten-Free: Use a 1:1 gluten-free flour blend
Final Thoughts: Your New Brunch Best Friend
So here it is—your new go-to recipe for every occasion that calls for something special, comforting, and undeniably delicious. This Lemon Blueberry Cream Cheese Coffee Cake isn’t just a dessert or a brunch item; it’s a memory-maker. It’s the cake you’ll bake for sleepy weekend mornings, for welcoming new neighbors, for celebrating small victories, and for turning ordinary days into something a little sweeter.
What I love most about this recipe is how it balances elegance with ease. It looks and tastes like you fussed for hours, yet the process is straightforward and forgiving. It’s a reminder that the best baking doesn’t have to be complicated—it just has to be made with a little intention and a lot of heart.
Every time I slide this cake into the oven, I’m reminded of my grandma’s kitchen and the simple truth she lived by: good food is love made visible. Whether you’re sharing it with a crowd or savoring a quiet slice with your coffee, you’re creating a moment of warmth and connection. The bright lemon, the bursting blueberries, the rich cream cheese, and that buttery streusel—they all work together to create something truly greater than the sum of its parts.
So the next time you’re looking for a way to say “I’m glad you’re here,” or “let’s make this morning special,” or even just “I deserve a treat,” I hope you’ll turn to this recipe. Let its sunny aroma fill your kitchen, and let its delicious layers bring a smile to your face. Because sometimes, the simplest pleasures—like a perfect slice of coffee cake shared (or not shared!) with good company—are the ones that stay with us the longest.
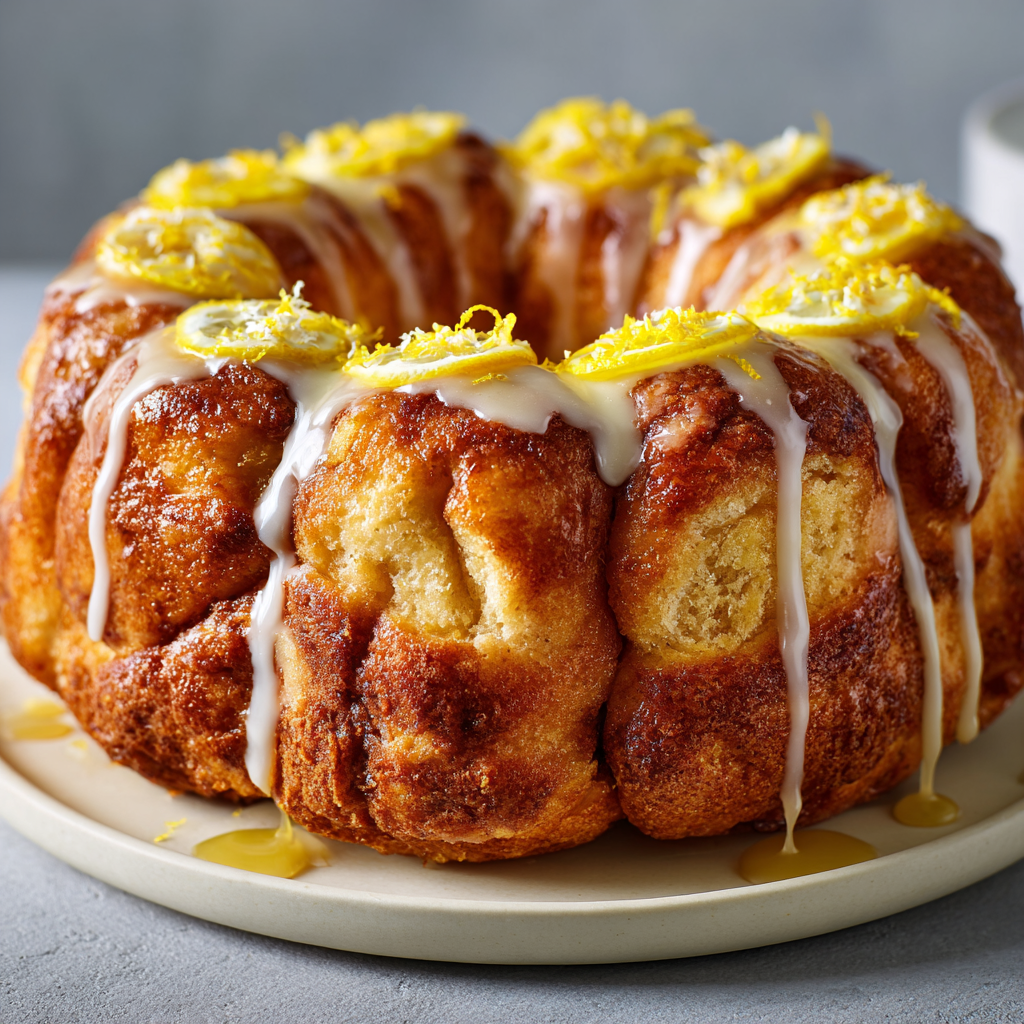
Glazed Lemon Monkey Bread : A Bright & Buttery Easter Brunch Showstopper
Glazed Lemon Monkey Bread: Your New Easter Brunch Obsession
Hey there, friend! Olivia here, apron on and lemon zest already under my fingernails. Can you smell it? That incredible, warm, buttery aroma of something sweet baking in the oven, mixed with the bright, sunny burst of lemon. It’s the smell of a kitchen full of love and a table full of people you adore. If you’re looking for that one showstopping dish to anchor your Easter brunch, the star that makes everyone go “WOW” before they’ve even taken a bite, you’ve just found it.
This isn’t just any monkey bread. This is Glazed Lemon Monkey Bread, a sunshiny, pull-apart masterpiece that turns simple ingredients into pure magic. Imagine soft, pillowy homemade dough, each little ball rolled in a sparkly, zesty lemon sugar, then baked until golden and gorgeous. Just when you think it can’t get better, we drench the whole thing in a sweet-tart lemon glaze that soaks into every nook and cranny. It’s sticky, it’s gooey, it’s bursting with spring flavor, and I promise you, it’s an absolute joy to make.
I know the words “homemade dough” can make some folks nervous, but trust me—this recipe is your new best friend. It’s forgiving, fun (hello, rolling dough balls is therapeutic!), and designed for real life. Whether you’re hosting the whole family or just want to make a slow, sweet morning for your inner circle, this bread is about creating a moment. So, preheat that oven, grab your favorite mixing bowl, and let’s make a memory (and a seriously delicious mess) together.
The Lemon Zest That Started It All
This recipe has a special little origin story, as all the best ones do. A few years ago, I was planning my first big Easter brunch in my first real “grown-up” home. I wanted everything to be perfect: the tablecloth, the flowers, the playlist. And for the centerpiece? I defaulted to a classic cinnamon monkey bread. It was delicious, but as I set it on the table, surrounded by all these fresh, vibrant spring dishes, it felt… a little dark. A little wintry. It was missing the season.
Then, my mom walked in, carrying a huge grocery bag. Without a word, she pulled out a net bag bursting with the brightest, most beautiful Meyer lemons. “Found these at the farmer’s market,” she said with a wink. “Thought you could use some sunshine.” In that moment, it clicked. I quickly zested a few lemons, whisked up a simple glaze, and poured it over the still-warm bread. That last-minute shower of lemon zest and juice transformed everything. The bread went from a cozy treat to a celebration of spring. The room filled with that citrusy perfume, and it was the first dish emptied. Now, it’s not Easter in my house without this lemony, pull-apart sunshine. It reminds me that sometimes, the most perfect touches come from a simple, spontaneous act of love (and a well-timed farmer’s market run).
Gathering Your Sunshine: Ingredients & Insights
Here’s everything you’ll need to create this citrusy wonder. I’ve added my little chef notes next to each one because knowing your ingredients is the first step to kitchen confidence!
For the Dough:
- 1 cup warm milk – “Warm” means between 105-110°F—think baby bottle temperature. Too hot and it will kill the yeast; too cold and it won’t wake it up. If you don’t have a thermometer, it should feel pleasantly warm on your wrist. Chef’s Tip: Whole milk gives the richest flavor, but 2% works perfectly!
- 2 ¼ tsp active dry yeast (one standard packet) – This is our magic leavening agent. Make sure your yeast is fresh for the best rise. I always give mine a quick “bloom” in the warm milk with a pinch of sugar to make sure it’s alive and bubbly.
- ¼ cup granulated sugar – Just enough sweetness to feed the yeast and give the dough a lovely base flavor.
- 4 tbsp unsalted butter, melted – Butter equals tenderness and flavor. Using unsalted lets you control the salt level in the dough. Chef’s Tip: Let it cool slightly before adding it to the yeast mixture so you don’t scramble the egg!
- 1 large egg – Our binding agent, adding richness and structure to the dough.
- 3 ½ cups all-purpose flour – The workhorse! I like to fluff the flour in its container, then spoon it gently into my measuring cup and level it off. This prevents packing in too much flour, which leads to a dense bread.
- ½ tsp salt – Never skip the salt in sweet doughs! It balances the sweetness and enhances all the other flavors.
For the Lemon Sugar Coating:
- ¾ cup granulated sugar – This will get transformed with our lemon zest.
- Zest of 2 lemons – Use organic if possible, since we’re using the outer peel. This is where the powerful, aromatic lemon oil lives! Chef’s Hack: Zest your lemons before you juice them—it’s infinitely easier.
- ¼ cup melted butter – For dipping the dough balls. It creates that irresistible, crispy, buttery exterior as it bakes.
For the Lemon Glaze:
- 1 cup powdered sugar – Also called confectioner’s sugar. It dissolves instantly for a smooth glaze.
- 2–3 tbsp fresh lemon juice – Fresh is non-negotiable here! Bottled juice just doesn’t have the same bright, vibrant punch. Start with 2 tablespoons and add more to reach your desired consistency.
- ½ tsp lemon zest – A little extra pop of color and flavor right in the glaze.
Let’s Bake: Step-by-Step with Chef Olivia
Okay, apron tied? Let’s dive into the fun part. Follow these steps, and you’ll have a golden, glorious masterpiece in no time.
Step 1: Wake Up the Yeast & Make the Dough
In the bowl of your stand mixer (or a large mixing bowl), combine the warm milk, yeast, and a pinch of the sugar from your ¼ cup. Give it a quick stir and let it sit for 5-7 minutes. You’re looking for a foamy, creamy-looking layer on top—this tells you your yeast is active and ready to go! If it doesn’t foam, your liquid was likely too hot/cold or your yeast is old. Now, add in the rest of the ¼ cup sugar, the slightly cooled melted butter, and the egg. Use the paddle attachment to mix until just combined. Switch to the dough hook, and add the flour and salt all at once. Mix on low speed until the dough comes together, then increase to medium and knead for 5-7 minutes. The dough should be smooth, slightly tacky but not sticky, and pull away from the sides of the bowl. My Little Kitchen Secret: If you don’t have a stand mixer, you can absolutely do this by hand on a floured surface. Just knead with confidence for about 8-10 minutes—it’s great for working out any stress!
Step 2: The First Rise (Let It Breathe!)
Shape the dough into a ball. Lightly grease a large, clean bowl with a bit of oil or butter. Place your dough ball in, turning it once to coat it lightly in oil. This prevents a dry skin from forming. Cover the bowl with a damp kitchen towel or plastic wrap and let it rise in a warm, draft-free spot for about 1 hour, or until doubled in size. My favorite warm spot? The oven with just the light on (oven OFF!). Patience is key here. A good rise = a light and fluffy bread.
Step 3: The Fun Part: Lemon Sugar Coating
While the dough rises, make your lemon sugar. In a medium bowl, rub the lemon zest into the ¾ cup sugar with your fingertips. This releases the incredible citrus oils and infuses every single granule with flavor. It will smell like sunshine! Place the ¼ cup melted butter in another small bowl. Grease your Bundt pan generously with butter or non-stick spray—don’t be shy.
Once your dough has doubled, gently punch it down to release the air. Turn it out onto a lightly floured surface. Using your hands or a bench scraper, divide the dough into roughly 1-inch pieces (don’t stress about perfection—rustic is charming!). Roll each piece into a ball. Working one at a time, dip a dough ball into the melted butter, letting the excess drip off, then roll it generously in the lemon sugar. Place it in the prepared Bundt pan. Repeat with the remaining dough, creating a single, haphazard layer. This isn’t a puzzle; just pile them in!
Step 4: Second Rise & Bake to Golden Perfection
Cover the pan with that same towel and let the assembled bread rise again for about 30 minutes. It should look puffy. Meanwhile, preheat your oven to 350°F (175°C). Once risen, bake for 30-35 minutes. You’ll know it’s done when the top is a deep golden brown and the sugary, buttery goodness is bubbling up the sides. Pro-Tip: If the top is browning too quickly, loosely tent it with aluminum foil for the last 10 minutes.
Step 5: The Flip & The Glaze
This is the most thrilling (and slightly nerve-wracking) part! Let the bread cool in the pan for exactly 10 minutes—no more, no less. This allows it to set just enough so it doesn’t collapse, but is still warm enough to release from the pan. Place your serving plate upside-down over the pan. With confidence (and oven mitts!), quickly and carefully flip the whole thing over. Give the pan a gentle tap, and lift it off to reveal your beautiful, golden creation. If a piece or two sticks, just gently pry it out and place it back on the bread—the glaze will hide any evidence!
While the bread cools slightly, make the glaze. Whisk the powdered sugar, lemon juice, and zest together. Start with 2 tbsp of juice and add the third only if you want a thinner glaze. Using a spoon or a whisk, drizzle the glaze all over the warm bread, letting it seep down into all the cracks and crevices. Serve it warm and watch the magic happen.
How to Serve This Sunshine on a Plate
Presentation is part of the fun! Place the whole glazed Bundt on a cake stand or a pretty serving platter. I love to scatter a few extra lemon zest curls or edible flowers around the base for a springtime touch. Let people gather around and pull apart their own pieces—it’s interactive and always gets smiles. This bread is rich, so serve it alongside savory brunch staples like a fluffy frittata, crispy bacon, or a simple green salad to balance the sweetness. Of course, a big pot of coffee or a pitcher of mimosas is absolutely mandatory.
Make It Your Own: Creative Twists
Love the base recipe? Here are some fun ways to play with it!
- Blueberry Lemon: Tuck a single fresh blueberry into the center of each dough ball before rolling in the sugar.
- Lavander Infused: Add 1 tsp of culinary-grade dried lavender to the lemon sugar for a beautiful, floral note that screams spring.
- Cream Cheese Glaze: Swap the lemon glaze for one made with 4 oz softened cream cheese, 1 cup powdered sugar, 1 tbsp milk, and 1 tsp vanilla. Drizzle over the cooled bread.
- Dairy-Free/Vegan: Use plant-based milk and butter, and a “flax egg” (1 tbsp ground flaxseed + 3 tbsp water) for the dough.
- Orange or Lime: Swap the lemon zest and juice for orange or lime for a totally different citrus vibe!
Chef Olivia’s Notebook
This recipe has become my Easter staple, but it’s evolved. I used to meticulously weigh each dough ball—now I just eyeball it for that wonderfully rustic look. The “mess” of rolling buttery, sugary dough balls is half the memory-making, especially if you have little helpers. Their hands might be sticky for hours, but the joy on their faces is worth it.
One funny fail? The first time I made it, I was so excited I inverted the bread after only 2 minutes of cooling. It… did not hold its shape. Let’s just say we ate a delicious “monkey bread cobbler” that year! The 10-minute rule is now etched on my heart. Also, this bread is best the day it’s made, but if you have leftovers (a miracle!), they make an unbelievable base for bread pudding the next day.
Your Questions, Answered
Q: My dough didn’t double in size during the first rise. What happened?
A: The most common culprits are old yeast or liquid that was too hot/cold. Yeast is a living thing! Make sure it’s within its expiration date and that your milk is just warm to the touch. Also, ensure your rising spot is warm and draft-free. If it’s a cold day, let it rise longer.
Q: Can I make this the night before?
A: Absolutely! For an overnight version, complete all the steps up through layering the coated dough balls in the Bundt pan. Instead of letting it do the second 30-minute rise, cover the pan tightly with plastic wrap and refrigerate overnight. In the morning, let it sit on the counter for about an hour to take the chill off, then bake as directed. You may need to add a few minutes to the bake time.
Q: I don’t have a Bundt pan. What can I use?
A: No problem! A 9×13-inch baking dish, a deep 9-inch round cake pan, or even a tube pan will work beautifully. Just adjust the bake time slightly—keep an eye on it for that golden brown color.
Q: My glaze is too thin/too thick. How do I fix it?
A> Glazes are very forgiving! Too thin? Whisk in more powdered sugar, a tablespoon at a time. Too thick? Add more lemon juice or a tiny splash of milk, a teaspoon at a time, until it’s pourable.

Glazed Lemon Monkey Bread : A Bright & Buttery Easter Brunch Showstopper
Description
Turn your Easter brunch into a citrus-scented celebration with this sticky, gooey, lemony monkey bread. Soft, buttery dough balls are coated in zesty lemon sugar, baked golden, and finished with a sweet-tart lemon glaze. It’s easy, forgiving, and an instant crowd-pleaser.
Ingredients
For the Dough:
-
1 cup warm milk (105–110°F / 40–43°C)
-
2 ¼ tsp active dry yeast (1 packet)
-
¼ cup granulated sugar
-
4 tbsp unsalted butter, melted
-
1 large egg
-
3 ½ cups all-purpose flour
-
½ tsp salt
For the Lemon Sugar Coating:
-
¾ cup granulated sugar
-
Zest of 2 lemons
-
¼ cup melted butter
For the Lemon Glaze:
-
1 cup powdered sugar
-
2–3 tbsp fresh lemon juice
-
½ tsp lemon zest
Instructions
1️⃣ Wake Up the Yeast & Make Dough
-
Combine warm milk, yeast, and a pinch of sugar; let sit 5–7 min until foamy.
-
Add remaining sugar, cooled melted butter, and egg. Mix until combined.
-
Add flour and salt; knead 5–7 min (stand mixer or by hand) until smooth and slightly tacky.
2️⃣ First Rise
-
Shape dough into a ball, lightly grease a bowl, and coat dough in oil.
-
Cover and let rise in a warm, draft-free spot until doubled (~1 hour).
3️⃣ Lemon Sugar Coating
-
Rub lemon zest into sugar with your fingers. Melt butter in a separate bowl.
-
Punch down risen dough and cut into ~1-inch pieces.
-
Roll each piece in melted butter, then coat in lemon sugar. Place in a greased Bundt pan haphazardly.
4️⃣ Second Rise & Bake
-
Cover pan and let dough rise 30 min.
-
Preheat oven to 350°F (175°C). Bake 30–35 min until golden brown. Tent with foil if browning too quickly.
5️⃣ Flip & Glaze
-
Cool in pan 10 min, then invert onto a serving plate.
-
Whisk powdered sugar, lemon juice, and zest; drizzle over warm bread.
Notes
-
Blueberry Lemon: Add a blueberry inside each dough ball before coating.
-
Lavender Infused: Stir 1 tsp dried culinary lavender into the lemon sugar.
-
Cream Cheese Glaze: Use 4 oz cream cheese, 1 cup powdered sugar, 1 tbsp milk, 1 tsp vanilla.
-
Dairy-Free/Vegan: Substitute plant-based milk/butter, and use a flax egg (1 tbsp flax + 3 tbsp water).
-
Citrus Twist: Swap lemon zest/juice for lime or orange.
Nutritional Information (Per Serving, approximately 1/10th of recipe)
Calories: ~310 | Total Fat: 11g | Saturated Fat: 6g | Cholesterol: 45mg | Sodium: 150mg | Total Carbohydrates: 50g | Dietary Fiber: 1g | Sugars: 28g | Protein: 5g
Note: Nutritional info is an estimate provided by an online calculator. Values may vary based on specific ingredients used and portion sizes.
Final Thoughts
In the end, the best recipes are the ones that engage all our senses: the sight of golden, sugar-crusted dough, the sound of a bubbling glaze, the feel of pillowy softness pulling apart, the bright aroma of lemon and butter warming the air, and finally, the unforgettable taste—a perfect balance of sweet, rich, and tangy.
This bread is an edible sunbeam, a shared delight, a tangible expression of care. It’s the culinary equivalent of a sunny spring morning. So as you pull apart your first piece and see that delicate steam rise, take a moment. You didn’t just follow a recipe; you conjured a little bit of magic. May it brighten your table and fill your home with the sweetest kind of joy.
With love and a sprinkle of lemon zest,
Olivia

Easter Bunny Cinnamon Rolls : Cute, Quick, and Crowd-Pleasing
Easter Morning Magic, Made Easy: Introducing Bunny Cinnamon Rolls!
Is there anything better than the smell of something sweet baking in the oven on a lazy morning? Now, imagine that heavenly scent of cinnamon and sugar wafting through your house on Easter Sunday, mingling with the excitement of little ones hunting for eggs. That’s the exact feeling I wanted to bottle up and share with you today. But here’s my chef’s secret: creating that magical, memory-filled moment doesn’t have to mean waking up at dawn and wrestling with yeast dough. Not today, my friend!
I’m thrilled to share my absolute favorite last-minute Easter brunch idea: these impossibly cute Easter Bunny Cinnamon Rolls. We’re taking a brilliant shortcut (a trusty can of refrigerated dough) and transforming it with just a few clever twists into a whole family of adorable bunny faces. They’re quick, crowd-pleasing, and so simple that you can literally make them with one cup of coffee in your system. Whether you’re hosting a big spring gathering, want a fun project to do with kids, or just need a dose of edible joy on your table, these bunnies are here to deliver. They’re sweet, soft, and decorated with a simple “flower crown” of icing and sprinkles that just screams spring. Let’s put on our favorite aprons and make a breakfast that’s as fun to look at as it is to eat!
The Year of the Lopsided Bunny & A Kitchen Epiphany
This recipe was born out of a happy kitchen disaster, as the best ones often are. A few Easters ago, I ambitiously promised my then five-year-old niece, Chloe, that we would make “special bunny bread” from scratch. Well, life happened, and I found myself the night before with zero time for a dough to rise. Panic set in! But as I stared at a can of cinnamon rolls in my fridge (my secret weeknight treat), I had a wild idea. What if we just… shaped them?
Chloe and I unrolled the dough on my flour-dusted counter, giggling as we attempted to fashion ears from the trimmings. Our first bunny looked more like a sleepy hamster, and the second one’s ears were comically different sizes. But her eyes lit up like I’d just performed actual magic. “Aunt Liv, they’re perfect!” she declared. That moment of pure, unfiltered joy—the mess, the laughter, the proud way she presented our lopsided bunnies to the family—stuck with me. It reminded me that the heart of cooking isn’t perfection; it’s connection, creativity, and the shared smile when you pull something wonderfully whimsical out of the oven. Now, these bunnies are our non-negotiable Easter tradition, and I can’t wait for you to start your own.
Your Bunny-Making Toolkit: Simple Ingredients, Big Flavor
Here’s everything you need to bring these cute characters to life. I’ve included my chef insights and swaps so you can bake with confidence, no matter what’s in your pantry.
- 1 can (typically 12.4 oz) refrigerated cinnamon roll dough (with included icing) – This is our glorious shortcut! I like the classic “grands” size for nice, plump bunny faces. Chef’s Insight: The dough is perfectly portioned and forgiving, making it ideal for shaping. If your can has 8 rolls, you get 8 bunnies!
- Non-stick spray or a dab of butter for the pan – A quick spritz ensures your bunnies slide off the baking sheet with ease, keeping their cute faces intact.
- All-purpose flour, for dusting (just a pinch!) – This is our secret weapon for handling the dough without stickiness. A light sprinkle on your hands and work surface makes shaping a breeze.
- Edible icing flowers or pastel sprinkles (optional, but highly recommended!) – This is where the “flower crown” magic happens. Icing flowers are found in the baking aisle and instantly make these look professional. Substitution Tip: No flowers? Use pastel sprinkles, colored sugar, or even a few mini chocolate chips for eyes and a nose for a different kind of cute!
- Optional: A dash of cinnamon or orange zest – Want to zhuzh up the flavor? Before rolling, you can sprinkle a tiny bit of extra cinnamon on the dough. A little grated orange zest mixed into the icing is also a sunny, spring-like twist!
Step-by-Step: Shaping Your Sweet Bunny Brigade
Follow these simple steps, and in less than 30 minutes, you’ll have a whole basket of baked bunny goodness. I’ve packed each step with my personal tips to guarantee success.
- Preheat & Prep: Fire up your oven to 350°F (or to the temperature specified on your dough package – they’re the experts!). While it warms, line a baking sheet with parchment paper or give it a light coat of non-stick spray. This little step is a game-changer for easy cleanup and no-stick baking. Chef’s Hack: If you don’t have parchment, a silicone baking mat works wonders.
- Unroll & Meet Your Dough: Pop open the can (that satisfying *thwump* never gets old!) and separate the rolls. Place them on a very lightly floured surface. Now, here’s the fun part: gently unroll each cinnamon roll about halfway. You’ll see the beautiful cinnamon swirl. We’re creating the bunny’s head from the larger, coiled portion. My Tip: Don’t unroll it completely—just enough to have a “tail” of dough to work with for the ears.
- Shape the Face & Ears: Take the main, coiled part of the unrolled dough and simply coil it back into a circle, tucking the end underneath. This is your bunny’s face. Now, look at the remaining dough “tail.” Pinch off a small piece (about 1-inch long) and split it in half. Roll each half into a little rope, then form each rope into a loop, pinching the ends together. Place these loop-ears on top of the bunny head, pressing gently to attach. Don’t stress perfection—charming and handmade is the goal! Visual Cue: It should look like a round face with two looped antennae on top.
- Bake to Golden Perfection: Carefully place your shaped bunnies on the prepared baking sheet, giving them about 2 inches of space to puff up. Slide them into your preheated oven and bake for 12-15 minutes, or until they’re a gorgeous, deep golden brown. Chef’s Secret: Ovens vary, so start checking at 10 minutes. The golden color and a firm, springy touch are your best indicators.
- Ice & Create Flower Crowns: The moment they’re out of the oven, spread the included icing over the warm bunnies. The heat will make the icing melt into every nook, creating a delicious glaze. Now, immediately sprinkle on your edible icing flowers or pastel sprinkles to make their festive flower crowns. Do this while the icing is wet so the decorations stick. Step back and admire your adorable edible art!
How to Serve Your Easter Bunnies
Presentation is half the fun! Arrange your bunnies on a festive platter or a wooden board. For a full spring brunch spread, I love pairing them with fresh fruit salad, crispy bacon or savory breakfast sausages to balance the sweetness, and a big pot of coffee or orange juice. They’re the star of the table, so let them shine! Serve them warm for that ultimate soft, gooey experience.
Get Creative: Bunny Roll Variations
Once you’ve mastered the basic bunny, try one of these fun twists!
- Nutty Bunny: Before baking, press a few chopped pecans or walnuts into the dough for a crunchy texture.
- Fruity Bunny: Add a few dried cranberries or raisins to the cinnamon filling before you re-coil the face.
- Citrus Glaze: Mix a teaspoon of fresh lemon or orange zest into the canned icing for a bright, springy flavor.
- Chocolate Chip Bunny: Press mini chocolate chips into the warm icing for eyes and a smile after baking.
- “Carrot Patch” Bunnies: Add a drop of orange food coloring to the icing and a tiny sprinkle of green sprinkles or coconut on top to look like a carrot!
Chef’s Notes: From My Kitchen to Yours
This recipe has become my go-zero-stress Easter staple, and over the years, I’ve learned to embrace the unique personality of each bunny. One year, I was chatting so much with my sister that I accidentally gave a bunny one giant ear and one tiny ear. We named him “Radar” and he was the family favorite! The dough is incredibly forgiving, so if an ear falls off during transfer, just press it back on—it will fuse as it bakes. I also love making a double batch and freezing the un-baked shaped bunnies on a sheet pan, then transferring them to a bag. On Easter morning, I pop them straight from the freezer into the oven (adding a few extra minutes). Fresh, hot bunnies with zero morning effort? That’s my kind of holiday magic.
FAQs & Troubleshooting: Your Questions, Answered
Q: My dough is super sticky and hard to shape. Help!
A: This is common! Simply dust your fingers and the work surface with a tiny amount of all-purpose flour. Don’t go overboard, but just enough to prevent sticking. You can also chill the dough in the can for 15 minutes before starting.
Q: The ears keep falling off my bunnies. What am I doing wrong?
A: Make sure you’re pressing them firmly onto the head. You can also use a tiny dab of water on the ends of the ear loops to act as “glue” before pressing. Once baked, they’ll be firmly attached.
Q: Can I make these ahead of time?
A> Absolutely! For the best texture, I recommend shaping the bunnies the night before, covering the baking sheet tightly with plastic wrap, and refrigerating. In the morning, let them sit at room temp while the oven preheats, then bake as directed. You can also bake, cool completely, and store in an airtight container for 1 day, then briefly warm in the microwave before icing.
Q: I can’t find edible icing flowers. What else can I use?
A> Get creative! Pastel M&Ms, seasonal Easter sprinkles, colored sanding sugar, or even a simple drizzle of extra icing in a zig-zag pattern looks beautiful. The goal is festive and fun!

Easter Bunny Cinnamon Rolls : Cute, Quick, and Crowd-Pleasing
Description
Bring the magic of Easter morning to life with these quick, no-stress Bunny Cinnamon Rolls! Using a can of refrigerated cinnamon roll dough, you can transform simple rolls into cute bunny faces with minimal effort and maximum smiles. Perfect for brunch, a kids’ activity, or a spring dessert centerpiece.
Ingredients
-
1 can (12.4 oz) refrigerated cinnamon roll dough (with icing)
-
Non-stick spray or butter, for the pan
-
All-purpose flour, for dusting
-
Edible icing flowers or pastel sprinkles (optional, for “flower crowns”)
-
Optional flavor boosters: cinnamon, orange or lemon zest, mini chocolate chips
Instructions
1️⃣ Preheat & Prep
-
Preheat oven to 350°F (or per dough package instructions).
-
Line a baking sheet with parchment or lightly grease with non-stick spray.
2️⃣ Unroll & Shape Dough
-
Separate the rolls and unroll each about halfway. The coiled part becomes the bunny’s face.
-
Tuck the end underneath to form a round, smooth head.
3️⃣ Make Ears
-
Pinch off ~1-inch of remaining dough, split in two, roll into ropes, and form loops.
-
Attach looped ears to the top of the face, pressing gently. Don’t worry about perfect symmetry!
4️⃣ Bake
-
Space bunnies ~2 inches apart on the baking sheet.
-
Bake 12–15 minutes until golden brown. Check at 10 minutes for visual cues: deep golden color and springy touch.
5️⃣ Ice & Decorate
-
Spread included icing over warm bunnies.
-
Immediately top with edible flowers or pastel sprinkles for a festive “flower crown.”
Notes
-
Sticky dough? Dust hands and work surface lightly with flour.
-
Falling ears? Press firmly and use a tiny dab of water to “glue” before baking.
-
Make-ahead: Shape bunnies and refrigerate overnight. Bake in the morning. Or freeze unbaked shaped bunnies and bake from frozen, adding a few minutes.
-
Decorations: No flowers? Use pastel sprinkles, colored sugar, mini M&Ms, or simple icing drizzle.
Nutritional Information (Per Bunny, Approximate)
Calories: 180 | Total Fat: 6g | Carbohydrates: 29g | Sugar: 12g | Protein: 2g
Note: Nutrition is estimated based on standard canned dough and will vary by brand.
Final Thoughts
And there you have it—a basketful of edible joy, ready to hop straight onto your Easter table. These Bunny Cinnamon Rolls are proof that holiday magic doesn’t require a chef’s hat or hours of labor. Sometimes, it’s found in a simple tube of dough, a playful twist, and the shared laughter that comes from creating something charming together.
This recipe is more than just a sweet treat; it’s a memory in the making. It’s about the smile on your family’s faces when they see their breakfast smiling back. It’s about turning an ordinary morning into a small, sweet celebration. Whether your bunnies are perfectly symmetrical or delightfully lopsided like my dear “Radar,” they carry the same spirit of love, creativity, and springtime joy.
So this Easter, give yourself the gift of ease. Let the oven do the work while you sip your coffee and enjoy the moment. Embrace the sprinkle of flour on the counter and the gleam of excitement in your loved ones’ eyes. You’re not just baking cinnamon rolls—you’re crafting a warm, delicious tradition that might just become the highlight of your holiday.
From my kitchen (and Chloe’s) to yours, I wish you a morning filled with sweetness, laughter, and the simple, heartwarming magic of homemade happiness.
Happy Easter, and happy baking!
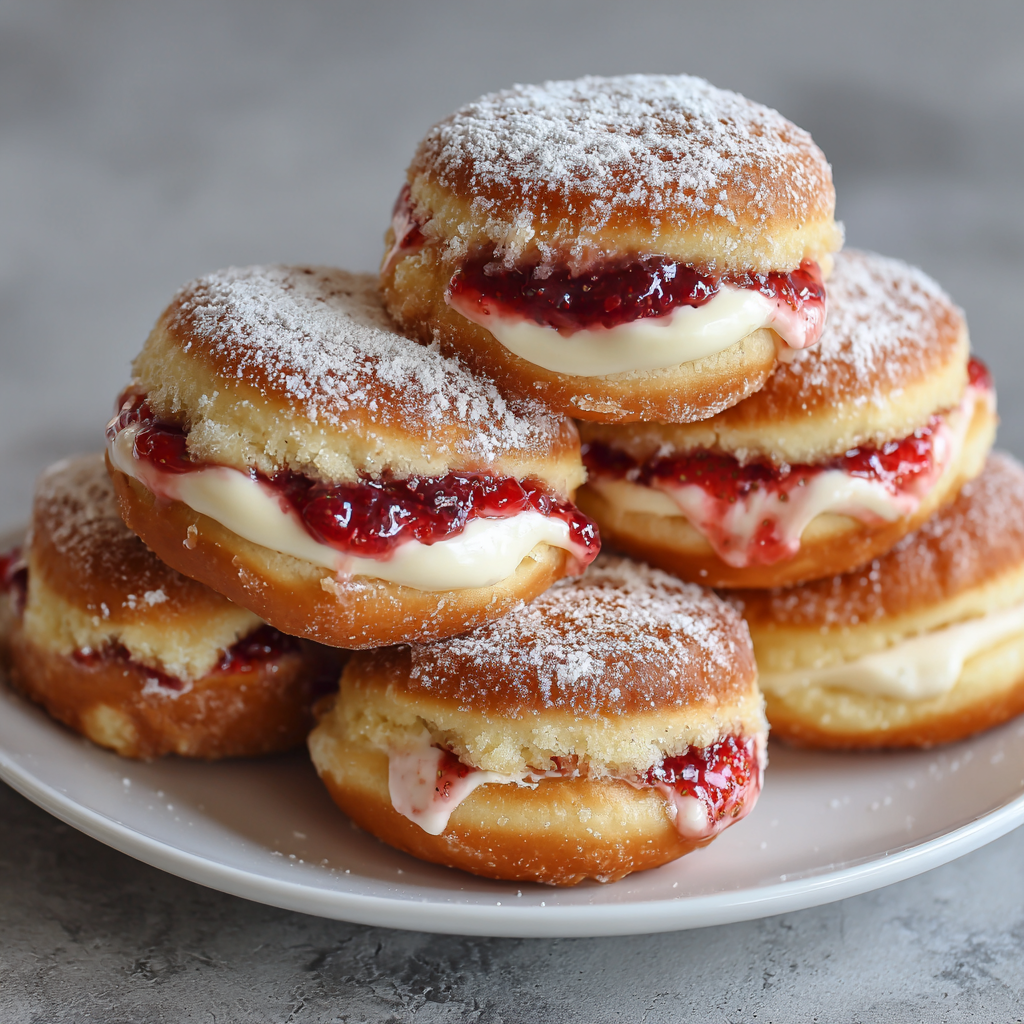
Strawberry Cheesecake Stuffed Donuts : Creamy, Crispy, and Irresistible
The Donut That Dreams Are Made Of: Strawberry Cheesecake Stuffed!
Hey there, friend! Come on in, grab an apron, and let’s get a little messy. Is there anything in the world that smells more like pure, unadulterated joy than something frying in a hot pan? That sweet, toasty scent that floats through the house and magically gathers everyone in the kitchen? Today, we’re making magic. We’re turning a humble can of biscuits into the most spectacular, show-stopping, conversation-halting treat you’ve ever tasted: Strawberry Cheesecake Stuffed Donuts.
Imagine this: a golden-brown, crispy-on-the-outside, cloud-soft-on-the-inside donut. You pick it up, still warm, and take that first bite. Not just a bite into dough, but a bite into a hidden pocket of creamy, tangy cheesecake filling and a burst of sweet, fruity strawberry jam. It’s a surprise party in your mouth, and everyone’s invited. This isn’t just a dessert; it’s an experience. It’s the thing you make on a lazy Sunday morning that turns into a yearly tradition. It’s the “wow” you bring to a brunch that makes you a legend. And the best part? You don’t need to be a pastry chef or have hours to spare. We’re using a brilliant shortcut (refrigerated biscuit dough, you beautiful genius) and focusing all our energy on the fun part: the filling and the frying. So, are you ready to create some kitchen magic and probably become someone’s favorite person? Let’s do this.
My Grandma’s Apron and the Magic of “Fancy” Donuts
This recipe always takes me back to my grandma’s linoleum-floored kitchen. She was a wizard with simple ingredients. One rainy afternoon, when I was about seven and complaining of boredom, she pulled out a can of biscuits. My eyes went wide – we only had those with gravy! She smiled her secret-keeping smile, fried them in a shallow skillet of oil, and rolled them in cinnamon sugar. To my mind, it was the fanciest, most exotic donut ever created. The kitchen filled with that incredible smell, and for that hour, we were in our own warm, sugary world. These Strawberry Cheesecake Stuffed Donuts are my grown-up, extra-indulgent homage to her. It’s that same magical transformation of the ordinary into the extraordinary, but now with a creamy, fruity heart. It’s about creating that same sense of wonder, whether it’s for yourself, your kids, or your friends. Food memories are the best kind, and I have a feeling you’re about to make one.
Gathering Your Treasure: What You’ll Need
Here’s the beautiful lineup. Simple, accessible, and about to become something incredible. Let’s chat about each one:
- 1 can (8 count) refrigerated biscuit dough: Our golden ticket! These flaky, layered biscuits fry up into the most perfect, airy donut base. No yeast, no rising time—just instant pillowy potential. I like the classic buttermilk or “grands” flaky layers variety.
- 4 oz cream cheese, softened: Key word: softened! Leave it on the counter for a good 30-60 minutes before you start. Room temp cream cheese blends into a silky-smooth filling with zero lumps. Trying to beat it cold is a workout for your arm and your patience.
- 1/4 cup powdered sugar: Also called confectioners’ sugar. It dissolves instantly into the cream cheese, sweetening it perfectly without any grit. It also helps thicken the filling a touch.
- 1/2 tsp vanilla extract: The flavor enhancer. It rounds out the sharpness of the cream cheese and adds that warm, classic bakery note. Use pure vanilla if you have it!
- 1/4 cup strawberry jam or preserves: Here’s where you can shine. Use a good-quality jam you love. Preserves have little bits of fruit for texture, while jam is smoother. Either is delicious! Feel free to swap for raspberry, blueberry, or even a citrus marmalade.
- Oil for frying: You’ll need about 1-2 inches in your pot. A neutral oil with a high smoke point is best. Canola, vegetable, or peanut oil are all great choices. They’ll fry the donuts cleanly without imparting any odd flavors.
- Extra powdered sugar for dusting (optional): The snowy, pretty finish that makes them look (and taste) just a bit more special.
Let’s Get Frying: Your Step-by-Step Guide to Donut Bliss
Okay, team. Aprons on, hair tied back, and let’s get into the rhythm of creating. Follow these steps, and you’ll be a donut-stuffing pro in no time.
Step 1: Make the Dreamy Filling. In a medium bowl, plop in your softened cream cheese, powdered sugar, and vanilla. Grab a hand mixer (or a sturdy whisk and some determination) and beat it all together on medium speed until it’s completely smooth, creamy, and lump-free. This should only take a minute or two. Give it a taste – be your own quality control! Set this bowl aside. Chef’s Hack: If you want to pipe the filling later for neatness, scrape it into a plastic baggie, snip off a corner, and you’ve got a makeshift piping bag. Otherwise, a spoon works perfectly!
Step 2: Flatten and Prep the Dough. Pop open that can of biscuits (the best sound in the world, right?). Separate the rounds. On a lightly floured surface, use your fingers or a rolling pin to gently press and stretch each biscuit into a circle about ¼-inch thick. Don’t stress about perfection—we’re not aiming for a perfect circle here! Just a nice, even, flat round that’s about 4-5 inches across. This gives us plenty of room for our filling.
Step 3: The Grand Stuffing Operation. This is the fun part! Lay out your flattened dough rounds. Spoon about 1 ½ teaspoons of strawberry jam into the center of each round. Then, add about 1 tablespoon of the cheesecake filling right on top of the jam. Now, imagine the dough is a little taco. Carefully fold it over the filling to create a half-moon shape. Here’s the MOST IMPORTANT STEP: Pinch the edges together incredibly tightly. Really seal it well, then go back and crimp it with the tines of a fork. We’re creating a watertight (or jam-tight!) seal so our delicious filling doesn’t escape during its hot oil bath. Take your time here.
Step 4: Fry to Golden Perfection. In a heavy-bottomed pot or deep skillet, heat 1-2 inches of oil over medium heat until it reaches 350°F (175°C). If you don’t have a thermometer, test it by dropping a tiny piece of dough in. If it sizzles immediately and rises to the top, you’re good to go. Carefully slide in 2-3 donuts at a time—don’t crowd the pan! Fry for 2-3 minutes on one side until deep golden brown, then gently flip and fry for another 2 minutes. They cook fast, so keep an eye on them. That gorgeous color is your guide.
Step 5: Drain and Glam Up. Use a slotted spoon or spider strainer to lift the donuts out of the oil. Let the excess oil drip off for a second, then transfer them to a plate or baking sheet lined with paper towels. Let them cool for just a minute—they’re molten inside! While still warm, you can dust them generously with that extra powdered sugar. The warmth helps the sugar stick in a lovely, snowy layer.
How to Serve These Little Pieces of Heaven
Serve these beauties warm! The filling will be luxuriously creamy and the jam pleasantly soft. Pile them high on a rustic wooden board or a pretty plate. I love serving them with mugs of strong coffee, glasses of cold milk, or even little cups of espresso for dipping. They are messy, joyful, and meant to be eaten with your hands (napkins mandatory!). The ooze of filling is part of the charm, so lean in and enjoy every single bite.
Mix It Up! Fun Flavor Twists
Once you master the basic technique, the flavor world is your oyster! Try these delicious spins:
- Lemon Blueberry Cheesecake: Use blueberry jam and add 1 tsp of lemon zest to the cream cheese filling. So bright and fresh!
- Chocolate Hazelnut: Swap the jam for a spoonful of chocolate-hazelnut spread (like Nutella). Dust with cocoa powder instead of powdered sugar.
- Apple Pie: Use a thick apple butter or finely chopped cooked apples with a pinch of cinnamon in the filling. Add a pinch of cinnamon to the sugar for dusting.
- Glazed Instead of Dusted: Whisk together 1 cup powdered sugar with 2-3 tbsp milk and 1/2 tsp vanilla for a simple glaze. Dip the warm donuts right in.
- Baked Option: Want to avoid frying? Brush stuffed donuts with melted butter, place on a parchment-lined sheet, and bake at 375°F for 12-15 minutes until puffed and golden. They’ll be more like pastries, but still delicious!
Olivia’s Chef Notes & Kitchen Confessions
This recipe is my ultimate “cheat code” for impressing people. I’ve made it probably fifty times, and it never fails to get gasps. Over time, I’ve learned a few things: First, sealing is EVERYTHING. A poorly sealed donut is a leaky, messy (but still tasty) disaster. Second, don’t be afraid of the oil temperature. If it’s too low, the donuts absorb oil and get greasy. Too high, they brown before the inside cooks. 350°F is the sweet spot. My funniest kitchen fail? The first time I made these, I got so excited I overstuffed them to cartoonish levels. They burst open in the oil like little volcanoes, creating a delicious but chaotic strawberry-cheesecake lava flow in my frying pot. Lesson learned: a heaping tablespoon of filling is plenty! These donuts are best eaten the day they’re made, but honestly, they’ve never lasted more than an hour in my house.
Your Questions, Answered!
Q: My filling keeps leaking out while frying! What am I doing wrong?
A: This is almost always a sealing issue. Make sure you’re pinching the dough edges together very firmly, then double-seal by pressing with a fork. Also, don’t overfill! A tablespoon of cream cheese mix and 1.5 tsp of jam is perfect. Finally, ensure your oil is hot enough (350°F) so the outside sears and sets quickly, locking the filling in.
Q: Can I make these ahead of time?
A: You can prep the components ahead! Make the cream cheese filling and keep it covered in the fridge for up to 2 days. Let it come to room temperature before using. You can also flatten and fill the donuts, place them on a baking sheet, and refrigerate for an hour before frying. Fry just before serving for the best texture.
Q: What’s the best way to dispose of the used frying oil?
A> Great question! Never pour it down the drain. Let the oil cool completely in the pot. Then, carefully pour it back into the original bottle or another sealable container (like an old milk jug) and throw it in the trash. Some municipalities have oil recycling drop-offs—check your local guidelines!
Q: Can I use an air fryer?
A> You can experiment! Brush the stuffed, sealed donuts lightly with oil or melted butter. Air fry at 350°F for about 6-8 minutes, flipping halfway, until golden. The texture will be different—more like a baked pastry—but still tasty.

Strawberry Cheesecake Stuffed Donuts : Creamy, Crispy, and Irresistible
Description
Golden, pillowy donuts with a creamy cheesecake and strawberry jam surprise inside—this recipe is a showstopper for brunch, dessert, or anytime you want to impress (and indulge). Using a simple shortcut—refrigerated biscuit dough—you can make bakery-style stuffed donuts at home without yeast or long rising times.
Ingredients
Dough & Filling
-
1 can (8 count) refrigerated biscuit dough (flaky layers or buttermilk preferred)
-
4 oz cream cheese, softened
-
¼ cup powdered sugar (plus extra for dusting)
-
½ tsp vanilla extract
-
¼ cup strawberry jam or preserves
For Frying
-
1–2 inches neutral oil (canola, vegetable, or peanut)
Optional Decoration / Variations
-
Glaze: 1 cup powdered sugar + 2–3 tbsp milk + ½ tsp vanilla
-
Cocoa powder, cinnamon sugar, or extra sprinkles
-
Fruit variations: blueberry jam, raspberry, lemon curd, etc.
Instructions
1️⃣ Make the Cheesecake Filling
-
In a bowl, beat cream cheese, powdered sugar, and vanilla until smooth and lump-free.
-
Optional: transfer to a piping bag or a plastic baggie with a corner snipped for easy filling.
2️⃣ Prep the Dough
-
Flatten each biscuit on a lightly floured surface to about ¼-inch thick, 4–5 inches wide.
-
Doesn’t need to be perfect—just enough surface to hold the filling.
3️⃣ Stuff & Seal the Donuts
-
Spoon 1 ½ tsp jam onto the center, then top with 1 tbsp cheesecake filling.
-
Fold dough into a half-moon and pinch edges tightly.
-
Crimp with a fork to ensure a secure seal.
4️⃣ Fry to Golden Perfection
-
Heat 1–2 inches of oil to 350°F (175°C).
-
Fry 2–3 donuts at a time for 2–3 minutes per side until deep golden brown.
-
Remove with a slotted spoon and drain on paper towels.
5️⃣ Dust or Glaze
-
While slightly warm, dust with powdered sugar or drizzle with glaze.
-
Optional: top with cinnamon sugar or cocoa for a flavor twist.
Notes
-
Sealing is everything: Poorly sealed donuts = leaks. Pinch and fork-crimp edges.
-
Oil temperature: 350°F is ideal—too low = greasy, too high = browned outside but raw inside.
-
Filling amount: 1 tbsp cream cheese + 1 ½ tsp jam per donut keeps everything tidy.
-
Advance prep: Filling can be made 1–2 days ahead; dough can be stuffed and refrigerated 1 hour before frying.
Nutritional Information*
*Approximate values per donut, based on 8 donuts and using 1 tbsp oil absorption.
Calories: ~220 | Fat: 12g | Saturated Fat: 4g | Cholesterol: 15mg | Sodium: 380mg | Carbohydrates: 25g | Fiber: 0g | Sugar: 10g | Protein: 3g
There you have it! Your guide to creating pure, stuffed donut joy. I hope you make them, share them, and absolutely love them. Don’t forget to tag me if you share a photo—nothing makes me happier than seeing your kitchen creations! Now go forth and fry something wonderful.
Final Thoughts: The Alchemy of Everyday Magic
What we’ve made here is more than a recipe. It’s a lesson in alchemy—the transformative magic of turning the simple and humble into something extraordinary. A can of biscuits becomes a vessel for joy. Cream cheese and jam become a hidden treasure. A few minutes in hot oil creates a memory.
This recipe embodies a beautiful truth: you don’t need professional training or rare ingredients to create wonder. You just need a bit of courage (hello, frying!), a sense of play, and the desire to make an ordinary moment special. It’s a tribute to grandmas everywhere who understood that love is often best expressed through warm, homemade treats.
So remember, the next time you’re faced with a boring afternoon, a last-minute gathering, or simply a craving for something celebratory, you hold the power to create magic. It’s in your hands, your kitchen, and that wonderfully familiar pop of a biscuit can.
Embrace the mess. Share the warmth. Savor the sweet, creamy, golden-brown proof that a little effort can yield pure, unadulterated delight.
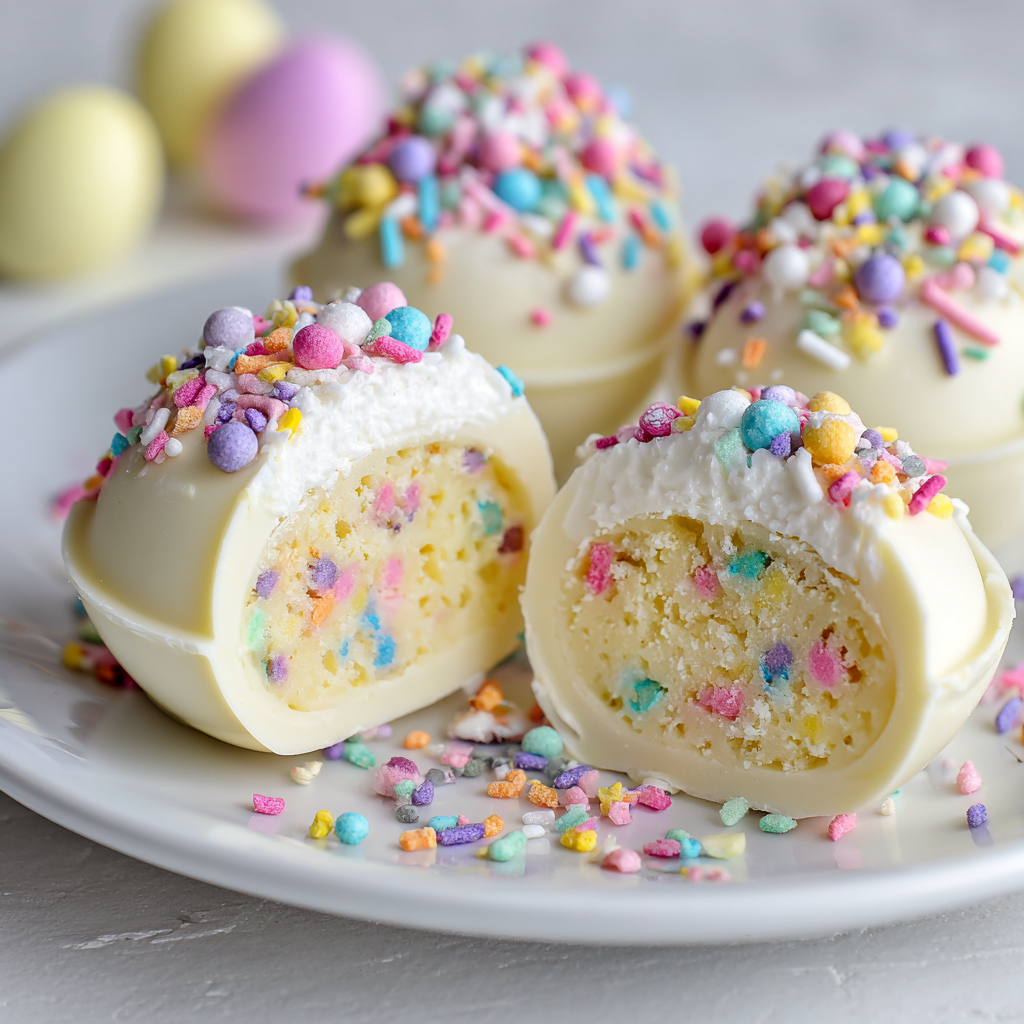
Easter Confetti Pudding Bombs : A No-Bake Surprise in Every Shell
Easter Confetti Pudding Bombs: Your New Favorite No-Bake Tradition
Hey there, friend! Come on in, grab an apron, and let’s make a mess. I’m so glad you’re here. Is there anything better than the promise of a kitchen project that’s equal parts playful and delicious? I don’t think so. Today, we’re trading in our rolling pins for a little bit of kitchen magic as we create the most delightful, surprise-filled Easter treat: Easter Confetti Pudding Bombs.
Imagine this: a crisp, beautiful white chocolate egg sits on your dessert table. It looks almost too pretty to eat. But then, you (or an excited little one) give it a gentle tap. *Crack.* Inside? Not what anyone expects! Instead of a solid center, you reveal a cloud of silky, creamy vanilla pudding, studded with cheerful pastel confetti sprinkles. The combination of that smooth, cool filling and the sweet snap of the chocolate shell is pure, unadulterated joy in every bite.
This is the recipe for the fun-seeker, the busy host, and the person who believes dessert should be an experience. You don’t need an oven, you don’t need professional pastry skills—you just need a sense of adventure and a love for making people smile. These Pudding Bombs are the star of any Easter egg hunt, the dazzling centerpiece of your brunch table, or the most memorable homemade gift. They’re a conversation starter, a memory maker, and proof that the best things in life often come in delicious, surprise packages. Ready to play with your food? Let’s do this!
The Day I Learned Dessert Could Be an Adventure
This recipe takes me straight back to my grandma’s linoleum-floored kitchen, the air thick with the scent of ham and yeast rolls. Easter was a big deal. While the adults handled the savory feast, my cousin Mia and I were always put in charge of “something sweet.” One year, a well-intentioned but slightly chaotic aunt brought over a bag of chocolate molds and a box of instant pudding, telling us to “invent something.” What resulted was… messy. Pudding everywhere, chocolate shells that were more like thick lace, and sprinkles stuck to our foreheads.
But when we finally managed to seal a pudding-filled egg and presented it to my grandpa, his face lit up. The surprise of the soft filling inside the hard shell made him laugh out loud—a deep, rumbling sound that meant true delight. It wasn’t perfect, but it was fun. That’s the spirit I’ve chased ever since. These Confetti Pudding Bombs are the polished, sprinkle-fied version of that childhood experiment. They capture that same feeling of playful surprise, but I’ve worked out all the messy kinks for you. They’re my edible homage to the idea that cooking isn’t just about the final product; it’s about the laughter and the stories you collect along the way.
Gathering Your Rainbow: Ingredients & Insights
Here’s everything you’ll need to create your own batch of edible magic. I’ve added my little chef notes next to each one because knowledge is power (and in this case, power leads to perfect pudding bombs!).
For the Chocolate Shell:
- 12 oz white chocolate, chopped: Use a good-quality baking bar, not chips if you can help it! Chips have stabilizers that help them hold their chip shape, which can make melting and tempering trickier. Chopping a bar gives you smooth, meltable pieces for a gorgeous, snappy shell.
- 2 oz pastel-colored candy melts (optional): These are my secret weapon for that perfect Easter egg color without thinning out the chocolate. You can melt a handful of pink, yellow, or blue melts and stir them into your white chocolate for a soft pastel hue. Chef Tip: If you don’t have these, a tiny drop of oil-based food coloring works, but candy melts are more reliable for color and consistency.
- 2 tbsp rainbow confetti sprinkles: We’re putting sprinkles right in the shell! This gives the outside a festive, textured look and a little extra crunch.
For the Pudding Filling:
- 1 ½ cups cold milk: The colder the better! Instant pudding sets by bonding with the milk proteins, and cold milk speeds this process up, giving you a thick, luscious filling faster.
- 1 (3.4 oz) box instant vanilla pudding mix: The trusty workhorse. It provides the perfect base texture and flavor. For a richer taste, seek out a “cook and serve” pudding mix and prepare it according to package directions, then let it cool completely before using.
- ½ cup whipped cream (optional for fluffier filling): This is the “fluffier filling” game-changer! Fold in some lightly sweetened whipped cream or even thawed whipped topping to make the filling airy and mousse-like.
- 1 tsp vanilla extract: A dash of pure vanilla amplifies that cozy, homemade flavor and rounds out any overly-sweet notes from the chocolate.
- ¼ cup rainbow confetti sprinkles: The “confetti” in the confetti bomb! Use the classic round sprinkles (jimmies) for the best texture. Avoid nonpareils (the tiny balls) inside the filling as their color can bleed.
For Decoration:
- Extra white chocolate for drizzling: A little drizzle makes them look professionally pretty.
- Pastel sprinkles: Go wild! This is where you personalize your bombs.
- Mini chocolate eggs (optional): A cute topper that hints at what’s inside (sort of!).
Let’s Build Some Magic: Step-by-Step Instructions
Put on some happy music, clear a space in your fridge, and let’s get crafting. I’ll walk you through every step with all my favorite hacks.
Step 1: Make the Chocolate Shells. This is the most important step, but don’t stress—I’ve got you. Start by finely chopping your white chocolate bar. Place it in a microwave-safe bowl. Microwave it in 30-second bursts, stirring vigorously between each one. Stop when there are just a few small lumps left; the residual heat will melt them as you stir. This prevents scorching. If using candy melts for color, stir them in now until smooth. Grab your Easter egg molds (silicone is easiest!). Using a pastry brush or a small spoon, coat the inside of each mold cavity with a thick, even layer of melted chocolate. Don’t be shy! A thin shell is a fragile shell. Immediately sprinkle the backs with your 2 tablespoons of confetti sprinkles and gently press them in. Pop the molds onto a tray and into the freezer for a solid 15 minutes. Once set, take them out and apply a second coat of chocolate. This double-layer method is my #1 tip for bombshells that won’t crack prematurely. Freeze again for 15 minutes.
Step 2: Prepare the Pudding Filling. While the shells are setting, let’s make the fluffy surprise. Pour your ice-cold milk into a medium bowl. Sprinkle the entire box of pudding mix over the milk. Immediately start whisking! Whisk for a full 2 minutes—set a timer. You want it thick and smooth. If you’re using the whipped cream option, gently fold it in now along with the vanilla extract. Finally, fold in your ¼ cup of confetti sprinkles with a light hand to avoid over-mixing. Cover the bowl with plastic wrap pressed directly onto the surface of the pudding (this prevents a skin from forming) and pop it in the fridge to firm up a bit more while your second chocolate coat sets.
Step 3: The Grand Assembly. Time for the fun part! Remove your chocolate shells from the freezer. Carefully pop them out of the molds; they should release easily if they’re fully set. You’ll have two halves for each bomb. Place half of the shells (the ones that look the prettiest!) on a parchment-lined tray, sprinkle-side down—these will be your bottoms. Take your chilled pudding and spoon or pipe it into these bottom shells, filling them almost to the top but leaving a tiny lip. Now, take your other shell halves. Using a small amount of your re-melted chocolate (just zap it for a few seconds), “paint” a thin line around the edge of a top shell. Quickly and carefully place it, sprinkle-side up, onto a pudding-filled bottom shell, pressing the edges together gently to seal. The chocolate acts as your edible glue. Repeat with all your eggs. Place the tray back in the fridge for at least 20 minutes to let the seal set.
Step 4: Decorate with Abandon. This is your artist moment! Melt a little more white or pastel chocolate. Using a fork or a piping bag with a tiny tip, drizzle the chocolate over your sealed bombs in zig-zags or swirls. Immediately, before the drizzle sets, shower them with more pastel sprinkles and maybe a mini chocolate egg or two. The key is to work quickly and embrace the happy chaos.
Step 5: Serve & Celebrate! Keep your finished Easter Confetti Pudding Bombs refrigerated until the very moment you’re ready to serve. The cold ensures the shell has a satisfying snap and the filling stays dreamy and creamy. Present them on a platter and watch the delight unfold as everyone discovers the surprise inside.
How to Serve Your Edible Masterpieces
Presentation is half the fun! Arrange your Pudding Bombs on a cake stand lined with Easter grass or nestled in a bed of shredded green coconut “grass.” For a brunch table, place each one in a small, colorful paper cupcake liner on everyone’s plate—it’s an instant individual dessert that feels special. If you’re including them in an egg hunt, tuck them gently into obvious spots (they’re not for hiding in the dirt!). The real magic happens when you encourage everyone to tap their egg with the back of a spoon to crack it open, revealing the hidden confetti treasure inside.
Make It Your Own: Fun Variations
- Chocolate Lover’s Dream: Use milk or dark chocolate for the shell and chocolate pudding mix for the filling. Fold in mini chocolate chips instead of sprinkles.
- Lemon Berry Burst: Use lemon pudding mix. Fold in finely chopped freeze-dried strawberries (they won’t bleed color!) and use a tiny drop of yellow food coloring in the white chocolate shell.
- Cookies & Cream: Fold crushed Oreo pieces into the vanilla pudding. Use a mix of white and black cookie crumbs to decorate the outside.
- Dairy-Free Delight: Use a high-quality dairy-free white chocolate and your favorite non-dairy milk (coconut milk works beautifully for richness) with the pudding mix.
- “Bunny Bait” Version: Add a tablespoon of smooth peanut butter to the pudding mix with the milk, and fold in crushed pretzel bits for a sweet-and-salty surprise.
From My Kitchen to Yours: Chef’s Notes
This recipe has been through more iterations than I can count! The first version used only one coat of chocolate, and let’s just say we had more “pudding puddles” than pudding bombs. The double-coat method is non-negotiable for structural integrity. I also learned the hard way that liquid food coloring can make chocolate seize up into a grainy mess—hence my love for candy melts. One Easter, I accidentally used a sugar cookie sprinkle mix that had little star shapes in it, and it was such a happy accident; the different shapes made the confetti even more fun. Don’t be afraid to play. The worst that can happen is you have to eat your “mistakes,” which are usually still delicious. These bombs are best enjoyed within 2-3 days, but I doubt they’ll last that long!
Your Questions, Answered: FAQs & Troubleshooting
Q: My chocolate shell cracked when I took it out of the mold! What did I do wrong?
A> This usually means the shell was a bit too thin or it warmed up too quickly. The double-coat method is your best defense. Also, when removing from the mold, if it’s resisting, pop the whole mold back in the freezer for 5 more minutes. Handle the shells quickly and by the edges to avoid melting them with the heat of your hands.
Q: Can I make these ahead of time?
A> Absolutely! You can make the shells up to a week ahead and store them in an airtight container in the fridge. Assemble the bombs the day before you plan to serve them. The filling is best fresh, so I don’t recommend filling them more than 24 hours in advance for optimal texture.
Q: My pudding filling is too runny. How can I fix it?
A> First, ensure you whisked for the full 2 minutes. If it’s still runny, the milk may not have been cold enough, or the pudding just needs more time. Pop it in the fridge for another 30 minutes. As a last resort, you can whisk in a tablespoon of instant dry milk powder or a teaspoon of cornstarch to help thicken it up.
Q: I don’t have Easter egg molds. What can I use instead?
A> No problem! Get creative. You can use small silicone half-sphere molds (like for cake pops), mini muffin tins lined with plastic wrap, or even clean, plastic Easter eggs as a mold (just be sure they are food-safe and give them a very thorough coating of chocolate so they release). The shape changes, but the surprise inside is just as wonderful.
Easter Confetti Pudding Bombs : A No-Bake Surprise in Every Shell
Description
These Easter Confetti Pudding Bombs are playful, colorful, and perfect for spring celebrations. A crisp chocolate shell hides a creamy vanilla pudding center packed with cheerful sprinkles. No oven needed, just a little melting, mixing, and decorating. They’re great for Easter tables, party treats, or a fun kitchen project with family.
Ingredients
Chocolate Shell
-
12 oz white chocolate, finely chopped (best quality bars if possible)
-
2 oz pastel candy melts (optional, for color)
-
2 tbsp confetti sprinkles (for inside shell)
Filling
-
1½ cups cold milk
-
1 (3.4 oz) box instant vanilla pudding mix
-
1 tsp vanilla extract
-
½ cup whipped cream or whipped topping (optional, for fluffier texture)
-
¼ cup confetti sprinkles (jimmies style)
Decoration (Optional)
-
Extra melted chocolate for drizzle
-
Pastel sprinkles or mini candy eggs
Equipment: Silicone egg or half-sphere molds
Instructions
Microwave chopped white chocolate in 30-second bursts, stirring each time until smooth.
If using candy melts for pastel color, stir them in now until fully melted.
Brush or spoon a thick layer of melted chocolate inside each mold cavity.
Sprinkle some confetti sprinkles into the shell and press lightly.
Freeze 15 minutes, then add a second chocolate coat for strength. Freeze again.
Whisk cold milk and pudding mix for 2 minutes until thick.
Stir in vanilla. Fold in whipped cream (if using) and sprinkles.
Refrigerate 10–15 minutes to firm up.
Carefully remove chocolate shells from molds.
Spoon or pipe pudding into half of the shells, leaving a small edge clear.
Rewarm remaining chocolate. Pipe or spread a thin ring around the edge of an empty shell.
Press onto a filled half to seal. Chill 20 minutes to set.
Drizzle with melted chocolate and add pastel sprinkles or candy toppers before it sets.
Keep refrigerated until serving.
Notes
-
Double coat the shells — thin chocolate cracks easily.
-
Use jimmies sprinkles inside — tiny ball sprinkles can bleed color.
-
Cold milk matters for thick pudding.
-
Handle shells by the edges so body heat doesn’t melt them.
-
Silicone molds release easiest and reduce breakage.
Nutritional Information (Per Pudding Bomb, Approximate)
Calories: 280 | Fat: 15g | Saturated Fat: 9g | Carbohydrates: 32g | Sugar: 27g | Protein: 3g | Cholesterol: 10mg | Sodium: 150mg
Note: Nutrition information is an estimate and will vary based on specific ingredients used and any optional additions.
Final Thoughts: More Than a Treat, A Memory
And there you have it—your very own edible Easter magic, ready to bring a wave of wonder to your celebration.
These Easter Confetti Pudding Bombs are so much more than a dessert. They’re a tiny spectacle, a moment of shared delight, and a delicious testament to the joy of playful cooking. In the cracking of the shell and the reveal of the cheerful confetti inside, you’re not just serving a sweet—you’re creating a core memory for your family and friends. It’s the “ooh” and “ahh,” the laughter, the gentle tap of a spoon that turns dessert into an event.
This recipe is for anyone who believes holidays are made brighter with a dash of whimsy. It’s for the parent crafting a magical Easter morning, the friend who brings the most talked-about dish to the potluck, and for you—the one who deserves a little kitchen triumph that’s as fun to make as it is to eat.
So embrace the sprinkles, take your time with the chocolate shells, and don’t worry about perfection. The real beauty is in the handmade charm and the surprise within. When you place that platter on the table, you’re offering more than a treat; you’re offering an experience, a conversation, and a whole lot of happiness.
May your Easter be sweet, bright, and filled with the kind of joy that comes from a delicious, crackable surprise.
Happy creating, and happier eating,
Olivia
Your guide in the kitchen




