
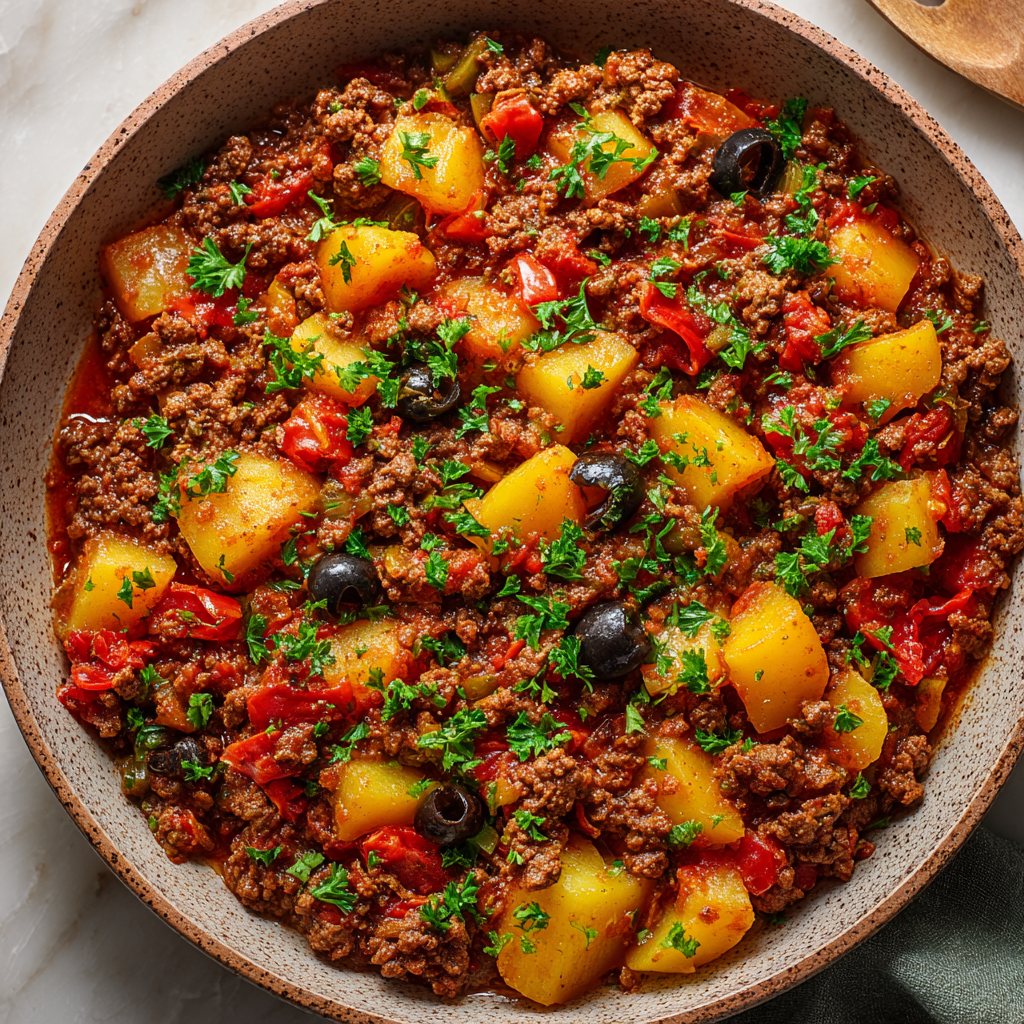
Classic Picadillo Recipe : Easy, Hearty & Full of Flavor
Let’s Make Dinner Magic: My Go-To Classic Picadillo
Hey there, friend! Olivia here, waving from a kitchen that currently smells like warm spices and happy memories. Is there anything better than the sound of something savory simmering on the stove? It’s the universal signal that a cozy, delicious meal is moments away, and that’s exactly the feeling I want to bottle up and share with you today.
We’re diving into one of my all-time favorite, no-fuss, flavor-packed wonders: Classic Picadillo. If you’ve never met picadillo before, get ready for a hug in a bowl. Imagine savory ground beef, tender little cubes of potato, all swimming in a rich, tomatoey sauce that’s been kissed with cumin and paprika. It’s hearty, it’s homestyle, and it has this magical ability to make a Tuesday night feel like a special occasion.
This isn’t a fussy, chef-y recipe. This is the kind of cooking I live for—real, approachable, and utterly satisfying. It’s the dish I make when I want to feed my people something I know will make them smile. Whether you spoon it over a mountain of fluffy rice, scoop it up with warm tortillas, or just eat it straight from the pot (no judgment here!), picadillo is a versatile champion.
So, tie on your apron—the cute one with the stains that prove you know your way around a kitchen. Grab your favorite wooden spoon. We’re about to create something truly special, together. Let’s get that stove fired up and fill your home with the incredible aroma of homemade goodness.
More Than a Recipe: A Bowl Full of Stories
My love affair with picadillo started long before I had my own kitchen. It began in my best friend Maria’s bustling family kitchen when we were teenagers. After school, her abuela, Señora Rosita, would always have a pot of something incredible going. One rainy afternoon, it was picadillo.
I remember watching, mesmerized, as she moved with a calm, sure rhythm—chopping onions with swift precision, toasting the spices until the air itself tasted warm. She let me brown the beef, teaching me to listen for the specific sizzle that meant it was perfectly seared, not steamed. “You build the flavor in layers, mija,” she’d say, her hands guiding mine. “First the onion, then the spice, then the heart.”
That “heart” was the tomatoes and broth, the simmer that brought it all together into a cohesive, comforting whole. We ate it that day wrapped in soft flour tortillas, laughing and talking over each other at the crowded table. In that moment, I understood that this dish was more than food; it was a gathering place. It was simplicity, warmth, and connection, all simmering in one pot. Every time I make it now, that memory—the sound of her laughter, the steam fogging up the windows—comes right back. It’s my reminder that the best recipes are the ones that feed more than just our stomachs.
Gathering Your Flavor Makers
Here’s the beautiful part: the ingredient list is simple and flexible! This is where we get to play. Let’s look at each one, because knowing your ingredients is the first step to feeling confident and making the recipe your own.
- 1 lb ground beef (85/15 or 90/10): This is our hearty base. I like a little fat for flavor, but you can use leaner beef if you prefer—just add a touch more oil to the pan. Chef’s Insight: For a fantastic twist, try ground turkey or a plant-based ground “meat.” The spices carry the flavor beautifully!
- 2 tbsp olive oil: Our cooking fat. It adds a lovely fruitiness and helps sauté our aromatics to perfection.
- 1 small onion, finely chopped: The sweet, savory foundation of so many great dishes. Don’t rush this step—cooking it until soft and translucent builds a deep flavor base.
- 3 cloves garlic, minced: Fragrant, pungent magic. Please, use fresh! It makes a world of difference compared to the jarred stuff.
- 2 medium potatoes, peeled and diced small: They soak up all the delicious sauce and add comforting texture. Substitution Tip: Sweet potatoes are a gorgeous, vitamin-packed alternative here. Or, for a lower-carb option, try diced carrots or even chopped cauliflower.
- 1 can (14 oz) diced tomatoes: Our liquid and tangy backbone. I love the fire-roasted variety for an extra layer of smoky depth.
- 2 tbsp tomato paste: This is our flavor concentrate! It adds a rich, umami depth that balances the acidity of the diced tomatoes. Pro Hack: Sauté it for a minute with the onions and spices to “cook out” any tinny flavor and caramelize its sugars.
- ½ cup beef broth or water: This helps create our saucy consistency. Broth adds more savory notes, but water works perfectly fine in a pinch.
- 1 tsp ground cumin, 1 tsp paprika, ½ tsp oregano: The holy trinity of warmth! Cumin is earthy, paprika adds sweet pepperiness (try smoked paprika for a kick!), and oregano brings a subtle herbal note. This is your spice profile—make it yours!
- Salt and black pepper, to taste: The essential flavor enhancers. Season in layers as you cook.
- Optional: ¼ cup chopped green olives or 2-3 tbsp raisins: This is the fun debate! Olives add a briny, salty punch, while raisins plump up with a sweet contrast. Try one, both, or neither. I love the sweet-savory surprise of raisins!
Let’s Cook: Building Flavor, One Step at a Time
Ready? This is where the magic happens. We’re not just following steps; we’re building layers of flavor. Put on some good music, pour yourself a drink, and let’s cook with joy.
- Heat the oil in a large skillet or Dutch oven over medium heat. I love using my heavy-bottomed Dutch oven because it distributes heat so evenly. Give it a minute to get properly warm—you should see the oil shimmer slightly.
- Add the chopped onion. Cook, stirring occasionally, for 5-7 minutes until soft and translucent. This is your first flavor layer. We’re not looking for color here, just sweetness and tenderness. That gentle sizzle is the sound of flavor developing!
- Stir in the minced garlic and cook for just 30 seconds, until fragrant. Garlic burns fast, so keep it moving! You’ll know it’s ready when that incredible aroma hits you. Ahhh, that’s the good stuff.
- Increase the heat to medium-high. Add the ground beef, breaking it up with your spoon. Cook until browned, about 5-7 minutes. Don’t just gray it—let it get some nice, brown, caramelized bits. That’s called the Maillard reaction, and it’s the secret to deep, meaty flavor. If there’s a lot of excess fat, you can drain some off, but I usually leave a tablespoon or two for richness.
- Now, the spices! Sprinkle in the cumin, paprika, oregano, a good pinch of salt, and a few cracks of black pepper. Stir for 1 minute. Toasting the spices in the heat of the pan wakes them up and makes their flavors bloom. Your kitchen will smell absolutely incredible right now.
- Add the diced potatoes, the entire can of diced tomatoes (juice and all), the tomato paste, and the broth or water. Give everything a really good stir to combine. Make sure the tomato paste is fully dissolved into the liquid and that the potatoes are nestled in. It will look saucy and promising!
- Bring the mixture to a lively bubble, then reduce the heat to low. Cover the pot and let it simmer gently for 20-25 minutes. This is the patient part. The simmer is where everything gets to know each other. The potatoes become tender, the sauce thickens, and the flavors marry into something greater than the sum of their parts. Peek and give it a stir halfway through to prevent sticking.
- After 20 minutes, check a piece of potato with a fork. It should be tender. If you’re using olives or raisins, stir them in now. The olives will warm through and impart their brine, and the raisins will plump up beautifully. Give it a final taste—this is your moment! Does it need more salt? A pinch more cumin? Adjust to your heart’s content.
- Remove from heat and let it sit for 5 minutes before serving. This little rest allows the sauce to settle and the flavors to deepen just a touch more. Perfect time to fluff your rice or warm those tortillas!
How to Serve Your Picadillo Masterpiece
Here’s where you get to be the artist! My absolute favorite way is a big, fluffy mound of white or brown rice with the picadillo spooned generously over the top. The rice soaks up every drop of that glorious sauce. For a fun, hands-on meal, set out a stack of warm flour or corn tortillas and let everyone build their own tacos or soft wraps. Got some creamy avocado? A dollop of cool sour cream or tangy Greek yogurt? A sprinkle of fresh cilantro or chopped white onion? Throw it all on the table and let your crew create their perfect bite. It’s a communal, interactive, and utterly delicious experience.
Make It Your Own: Creative Twists & Swaps
- Picadillo Poblanco: Skip the tomatoes and use a cup of salsa verde (green tomatillo salsa) instead. It’s bright, tangy, and a completely different but amazing vibe.
- Spicy Kick: Add a diced jalapeño or serrano pepper with the onions, and/or a ½ teaspoon of chipotle powder with the other spices for a smoky heat.
- Lentil & Walnut “Picadillo”: Make it vegetarian! Swap the beef for 1 cup of cooked brown lentils and ¾ cup of finely chopped walnuts. You’ll be shocked at the satisfying, meaty texture.
- Breakfast Picadillo: Serve it topped with a fried or poached egg for the ultimate hearty breakfast or brunch. The runny yolk creates the best sauce!
- Stuffed Bell Peppers: Spoon the finished picadillo into hollowed-out bell peppers, top with cheese, and bake at 375°F for 20 minutes for a gorgeous, all-in-one meal.
Olivia’s Kitchen Notes & Stories
This recipe has been my weeknight warrior for years, and it’s evolved with me. The first time I made it alone, I was so nervous I forgot the paprika entirely! It was… fine. But it taught me that recipes are guides, not gospel. Now, I often add a bay leaf during the simmer for an extra aromatic note, and I almost always throw in those sweet raisins—my little homage to Señora Rosita’s version.
One funny fail? I once diced the potatoes way too big in a hurry. Let’s just say we had “rustic, al dente” potatoes that night. The lesson? Small, even dices are key for that perfect, tender bite in the given time. And remember, the picadillo you make will be uniquely yours, and that’s what makes home cooking so beautiful. It’s your story, told in spices and simmering pots.
Your Questions, Answered!
Q: My sauce is too thin/watery. How can I thicken it?
A: No worries! First, make sure you’ve simmered it uncovered for the last 5-10 minutes to allow excess liquid to evaporate. If it’s still too thin, mix 1 tablespoon of cornstarch with 2 tablespoons of cold water to make a slurry. Stir this into the simmering picadillo and cook for another 2-3 minutes until thickened.
Q: Can I make this ahead of time or freeze it?
A: Absolutely! Picadillo tastes even better the next day as the flavors continue to meld. Let it cool completely and store it in an airtight container in the fridge for up to 4 days. It freezes beautifully for up to 3 months. Thaw overnight in the fridge and reheat gently on the stove.
Q: It tastes a little bland. What did I miss?
A: The most common culprit is under-seasoning. Remember to season in layers: salt the onions as they cook, season the beef, and then always do a final taste and adjust at the end. A splash of something acidic can also wake up the flavors—try a squeeze of fresh lime juice or a teaspoon of apple cider vinegar. And don’t be shy with those spices!
Q: Can I use a different meat?
A> 100%! Ground turkey, chicken, pork, or lamb all work wonderfully. For pork or lamb, you might want to bump up the cumin and oregano slightly. Plant-based grounds are also a fantastic, easy swap—just follow the package instructions for browning.
Classic Picadillo Recipe : Easy, Hearty & Full of Flavor
Description
There’s something special about a one-pan meal that fills the kitchen with warm, savory aromas and comes together without stress. Classic Picadillo is exactly that kind of dish—simple, hearty, and full of flavor. It’s made with ground beef, tender potatoes, tomatoes, and cozy spices, and it works perfectly over rice or tucked into warm tortillas. If you want a reliable comfort dinner that tastes like home, this is it.
Ingredients
-
1 lb (450 g) ground beef (85–90% lean)
-
2 tbsp olive oil
-
1 small onion, finely chopped
-
3 cloves garlic, minced
-
2 medium potatoes, peeled and diced small
-
1 can (14 oz / 400 g) diced tomatoes
-
2 tbsp tomato paste
-
1/2 cup beef broth or water
-
1 tsp ground cumin
-
1 tsp paprika
-
1/2 tsp dried oregano
-
Salt and black pepper, to taste
-
Optional: 1/4 cup green olives or 2–3 tbsp raisins
Instructions
-
Sauté aromatics:
Heat olive oil in a large skillet over medium heat. Add onion and cook 5–7 minutes until soft. Stir in garlic and cook 30 seconds. -
Brown the beef:
Add ground beef and cook until well browned, breaking it apart as it cooks. Drain excess fat if needed. -
Add spices:
Stir in cumin, paprika, oregano, salt, and pepper. Cook 1 minute to toast the spices. -
Simmer:
Add diced potatoes, diced tomatoes (with juice), tomato paste, and broth. Stir well. Bring to a gentle boil. -
Cook until tender:
Reduce heat to low, cover, and simmer 20–25 minutes, stirring occasionally, until potatoes are tender and sauce thickens. -
Finish:
Stir in olives or raisins if using. Taste and adjust seasoning. Rest 5 minutes before serving.
Notes
-
Dice potatoes small so they cook evenly and quickly.
-
Brown the beef well — deep color = deeper flavor.
-
Simmer uncovered the last 5 minutes if the sauce is too thin.
-
Make it lighter: swap ground beef for turkey or chicken.
-
Add veggies: peas or diced carrots work great stirred in near the end.
Nutritional Information (Per Serving)
Approximate values, based on 4 servings using 90/10 ground beef and without optional olives/raisins.
Calories: 420 | Total Fat: 24g | Saturated Fat: 8g | Cholesterol: 80mg | Sodium: 450mg | Total Carbohydrates: 25g | Dietary Fiber: 4g | Sugars: 6g | Protein: 28g
Final Thoughts
And there you have it, friend—a pot full of comfort, connection, and pure, unpretentious magic.
As I sit here writing this, my own kitchen has gone quiet. The last spoonful of picadillo has been scraped from the pot, the dishes are drying in the rack, and the only thing lingering is that faint, warm whisper of cumin and garlic that promises tomorrow’s lunch will be just as good as tonight’s dinner. Maybe better.
This is what I want you to carry with you, not the precise measurements or the exact simmer time, but this feeling right here. The feeling of taking simple, honest ingredients and turning them into something that makes people slow down, take a deep breath, and say, “Wow, that smells amazing.” The feeling of knowing that you made that. You.
Because here’s the beautiful secret nobody tells you when you’re just starting out in the kitchen: the magic was never in the recipe. It was always in you.
Señora Rosita taught me that, standing at her stove all those years ago. She wasn’t just teaching a teenage girl how to brown beef and toast spices. She was passing down the understanding that cooking isn’t about perfection—it’s about presence. It’s about showing up, paying attention, and pouring a little bit of your heart into everything you make. The onions will get soft. The meat will brown. The sauce will simmer. And somehow, in that simple, sacred rhythm, you’ll find yourself right where you need to be.
Greek Yogurt Ranch Veggie Cups : Fresh, Fun & Party-Perfect
The Day I Realized Snacking Could Be Both Pretty and Perfect
Picture this: It’s an hour before friends are coming over. You’ve got a beautiful main dish in the oven, but the snack situation is… well, it’s a bowl of chips next to a lonely veggie platter. We’ve all been there. The dip is dwindling, the carrots look sad, and you’re doing that awkward scoop-and-crunch maneuver while trying to hold a conversation. Not exactly the effortless host vibe we’re going for, right?
I used to stress so much about those little details until I had a literal “cup-half-full” moment. I was staring into my fridge, willing it to produce party magic, when my gaze landed on a tub of Greek yogurt and some leftover mason jars from a canning project. Lightbulb. What if we served the snack already assembled? What if every guest got their own perfect, personal portion of creamy ranch and crisp veggies, all in one neat, grab-and-go package?
Friends, that was the birth of these Greek Yogurt Ranch Veggie Cups, and let me tell you, they’ve been a game-changer ever since. They’re not just food; they’re an experience. They’re the conversation starter on your Easter buffet, the hero of your baby shower spread, the superstar in your kid’s lunchbox, and the secret weapon for your own healthy afternoon craving. They prove that eating your veggies doesn’t have to be a chore—it can be fun, beautiful, and wildly delicious. So, tie on your favorite apron (the messy one tells the best stories), and let’s make snacking something to celebrate.
My Ranch Revelation: A Dip That Defined Childhood
My love affair with ranch dressing started in my grandma’s kitchen, a place that always smelled like simmering tomatoes and fresh basil. But amidst all her Italian classics, there was one American icon she always kept in the fridge: a bottle of creamy ranch. To my sister and me, it was liquid gold. We’d dunk everything from pizza crusts to carrot sticks, convinced it made even the most questionable veggie delicious.
Years later, when I started my own cooking journey, I wanted to recreate that creamy, herby flavor but in a way that felt nourishing and grown-up. The bottled stuff just wasn’t cutting it anymore. My “aha” moment came when I swapped the typical mayo and sour cream base for thick, tangy Greek yogurt. Suddenly, the dip had a bright, clean protein punch that made me feel good. I could taste the fresh dill, the punch of garlic, the subtle onion powder. It was the ranch of my childhood dreams, but better—one I could feel great about eating by the spoonful (no judgment here). These veggie cups are my homage to that evolution: all the nostalgic, crave-able flavor, packed into a fresh, modern, and utterly adorable package.
Gathering Your Flavor Toolkit
Here’s the beautiful part: this recipe is less about strict rules and more about building a flavorful foundation. Let’s break down each ingredient and why it’s here. Feel free to make it your own!
- 1½ cups plain Greek yogurt: This is our superstar base. I use full-fat for the creamiest, richest texture, but 2% or 0% works too. The tanginess is key! Chef’s Insight: If you’re dairy-free, a high-quality, unsweetened coconut or almond milk yogurt can work, but be sure to strain it through a cheesecloth for an hour to thicken it up.
- 1 tbsp olive oil: A splash of good olive oil adds a lovely richness and helps carry the fat-soluble flavors of the herbs and spices. It gives the dip a beautiful sheen.
- 1–2 tbsp milk: This is your texture tuner. Start without it! Greek yogurt thickness varies by brand. Only add milk if your dip feels too thick to comfortably coat a veggie. Any milk (dairy or unsweetened plant-based) works.
- 1 tsp garlic powder & 1 tsp onion powder: We’re using powders here, not fresh, for a reason. They distribute flavor evenly without any harsh raw bite and give that classic “ranch” taste. Sub Tip: In a pinch, you can use ¼ tsp of each granulated version.
- 1 tbsp fresh dill or parsley, finely chopped: FRESH IS BEST! It makes all the difference. Dill is my go-to for that iconic flavor, but parsley is wonderful too. Use the stems and all for extra herby goodness.
- Salt & black pepper, to taste: Don’t be shy here. Salt makes the flavors pop. I always do a generous pinch of flaky sea salt and a few cracks of fresh black pepper.
For the Veggie Army: This is where you get to play with color and crunch! My non-negotiables are:
- Baby carrots: Sweet, classic, and no chopping required. A total win.
- Cucumber sticks: Use English/hothouse cukes if you can—they have fewer seeds and hold up better. I leave the peel on for color and nutrients.
- Celery sticks: The ultimate crunch vehicle. A quick run down the ribs with a vegetable peeler can take away any stringy bits.
- Bell pepper strips: Use a mix of red, yellow, and orange for a rainbow effect. They’re sweet and gorgeous.
- Sugar snap peas: That delightful snap and fresh, green flavor is irresistible. A surefire crowd-pleaser.
Other fantastic recruits: Radish slices, cherry tomatoes (add right before serving), blanched broccoli or cauliflower florets, endive spears, or jicama sticks.
Let’s Build Some Snack Magic: Step-by-Step
This is the fun part! We’re going to create layers of flavor and texture that are as pleasing to make as they are to eat.
- The Dip Foundation: In a medium bowl, add your Greek yogurt, olive oil, garlic powder, onion powder, and chopped fresh herbs. Now, take your whisk and go to town! Whisk vigorously for a good 45 seconds to a minute. You’re not just mixing; you’re incorporating air, which makes the dip wonderfully light and creamy. Taste it right off the whisk (chef’s privilege!). Does it need more salt? Another crack of pepper? A squeeze of lemon for brightness? Adjust it until it makes you do a little happy dance. Chef Hack: If you have 10 extra minutes, let this dip sit in the fridge. The flavors get to know each other and deepen beautifully.
- Texture Checkpoint: Grab a baby carrot and dunk it. Does the dip coat it in a lovely, clingy layer, or is it so thick it just sits on top? If it’s the latter, add your milk, one tablespoon at a time, whisking after each addition, until it’s perfectly dippable. Remember, it will thicken slightly once chilled.
- Veggie Prep Party: While your dip chills (or if you’re assembling immediately), wash and cut all your veggies. The goal is uniform “dip-able” sticks. For cucumbers, I slice them in half lengthwise, scoop out the seeds with a spoon, then slice into half-moons or sticks. For bell peppers, I slice off the sides (the “walls”) and then cut those into strips. This avoids the curved, ribby parts. Pro Tip: If prepping more than an hour ahead, you can keep your cut veggies crisp by storing them in a container lined with a damp paper towel in the fridge.
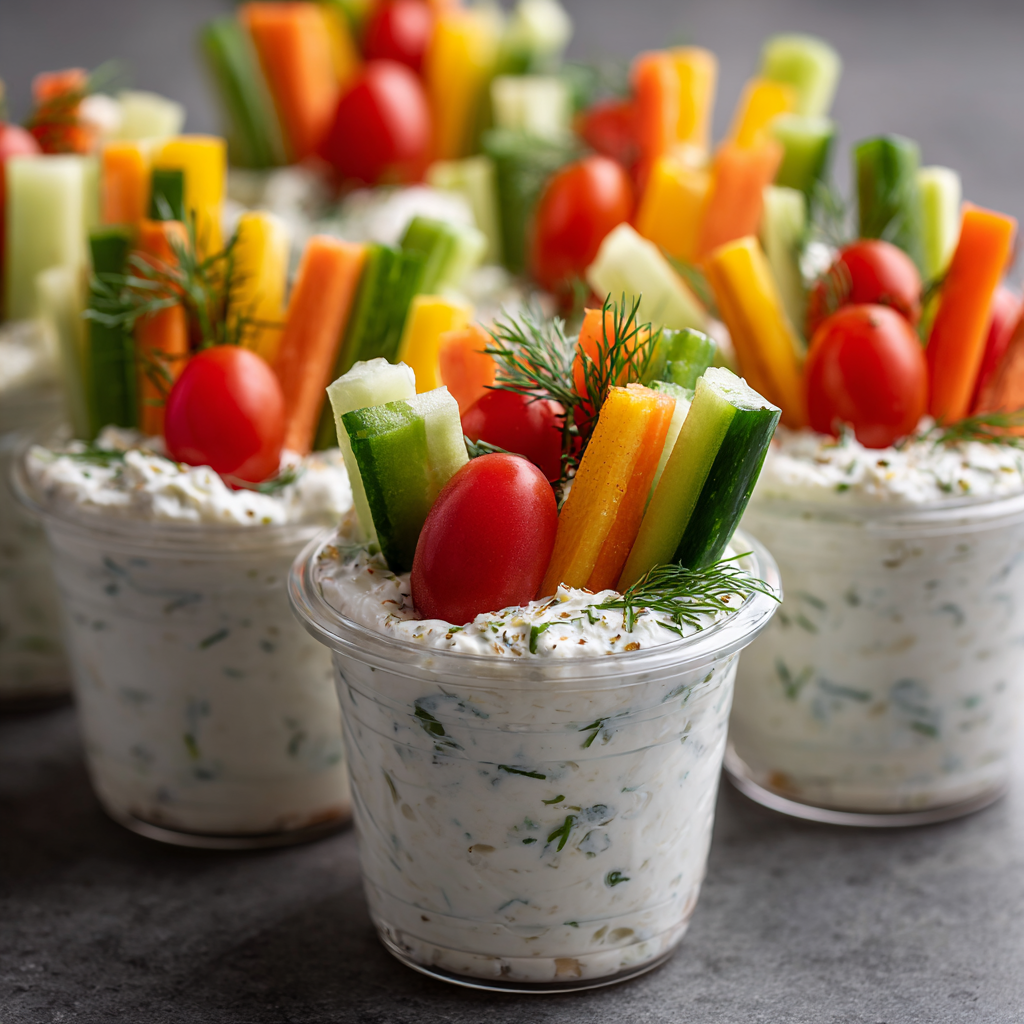
- The Art of Assembly: Get out your clear cups! I love 5-9 oz plastic cups for parties (they’re reusable!) or small mason jars. Using a spoon, portion the ranch dip into the bottom of each cup. Aim for about 2-3 tablespoons, enough for a generous base. For super-neat presentation, you can spoon the dip into a zip-top bag, snip off a corner, and pipe it in. It feels fancy and is oddly satisfying.
- Stand & Deliver: Now, channel your inner artist. Take your assortment of veggie sticks and stand them upright in the dip, like a colorful, edible bouquet. Mix up the colors and textures in each cup—a carrot, a snap pea, a pepper strip, a celery stick. The variation is what makes them so visually appealing. Pack them in snugly so they stay standing tall and proud.
- The Final Touch: If you’re feeling extra, a tiny extra sprinkle of fresh herbs or a twist of black pepper on top of the dip looks gorgeous. Cover the cups with plastic wrap or their lids and refrigerate until you’re ready to serve. They’re best eaten within 4-6 hours of assembly, but the dip itself will last 3-4 days in the fridge.
How to Serve These Little Cups of Joy
Presentation is half the fun! Arrange the cups on a wooden board, a tiered dessert stand, or simply line them up down the center of your table. For a party, I love adding little chalkboard signs that say “Grab & Go Veggie Cups” or tying a sprig of fresh dill around each cup with baker’s twine. They are self-contained, so there’s no need for extra plates or serving utensils—just pure, simple, grab-and-go goodness that leaves everyone’s hands (and your tablecloth) clean.
Make It Your Own: 5 Fun Twists
Once you master the base, the flavor world is your oyster! Here are some of my favorite riffs:
- Everything Bagel Style: Add 2 tablespoons of everything bagel seasoning to the yogurt base. Unbelievably good.
- Spicy Southwest: Mix in 1 tsp smoked paprika, ½ tsp cumin, and a finely chopped chipotle in adobo (start with half!). Swap veggies for jicama sticks, bell peppers, and cherry tomatoes.
- Herb Garden Delight: Swap the dill for a mix of chives, tarragon, and parsley. Bright and very French-feeling.
- Lemon-Zest & Parmesan: Add the zest of one lemon and 3 tbsp of finely grated Parmesan cheese to the base. Elegant and savory.
- “Buffalo Blue” Style: Stir 1-2 tbsp of your favorite buffalo sauce into the dip and crumble a little blue cheese on top before adding veggies. Celery sticks are a must here!
A Few Notes from My Kitchen to Yours
This recipe has become such a staple in my home that it’s evolved in the funniest ways. My husband now requests them for football Sundays (we do the Buffalo Blue version). My niece calls them “flower cups” and insists on arranging the veggies by color. I’ve even started making mini versions in shot glasses for fancy appetizer parties—they’re always the first to go!
The biggest lesson this recipe taught me? Don’t underestimate the power of presentation. Taking five extra minutes to make food beautiful and easy to eat is an act of love. It says, “I thought about your happiness and your possibly-full hands.” And that’s what cooking from the heart is all about. So, have fun with it! Make a mess, taste as you go, and watch these little cups bring a smile to everyone’s face.
Your Questions, Answered!
Q: Can I make these veggie cups the night before?
A: I recommend a “night-before, morning-of” hybrid for the best results. Make the dip and prep/cut your veggies the night before, storing them separately in the fridge. Assemble the cups 1-2 hours before serving. This keeps the veggies super crisp and prevents any potential sogginess or weeping from the cucumbers.
Q: My dip is too runny! What did I do wrong?
A> No worries, this is an easy fix! First, check your yogurt. Some brands are thinner than others. To thicken a runny dip, you can: 1) Strain it through a fine-mesh sieve lined with a coffee filter or paper towel for 15-20 minutes, or 2) Gently stir in a tablespoon of mayonnaise or sour cream, which will help stabilize it and add richness.
Q: Help! My veggies are wilting in the cups.
A> The usual culprits are moisture and time. Ensure your veggies are completely dry after washing. For cucumbers and celery, patting them dry is crucial. Also, don’t assemble too far in advance. If you need to prep way ahead, store your cut veggies in an airtight container with a dry paper towel to absorb excess moisture.
Q: Are there any veggies I should avoid using?
A> I’d steer clear of very watery veggies that don’t hold up well, like standard lettuce or thinly sliced zucchini, as they can get limp quickly. Also, avoid pre-cutting avocado or apple—they’ll brown before you serve. If you want to include them, add a squeeze of lemon to the apple and add both right at the last minute.
Greek Yogurt Ranch Veggie Cups : Fresh, Fun & Party-Perfect
Description
These Greek Yogurt Ranch Veggie Cups turn simple vegetables into a fun, grab-and-go snack or party appetizer. Each cup is layered with creamy, herby ranch dip and crisp veggie sticks, so every guest gets their own perfect portion. They’re fresh, colorful, high in protein, and great for parties, lunchboxes, or afternoon cravings.
Ingredients
Ranch Yogurt Dip
-
1½ cups plain Greek yogurt
-
1 tbsp olive oil
-
1–2 tbsp milk (as needed for thinning)
-
1 tsp garlic powder
-
1 tsp onion powder
-
1 tbsp fresh dill or parsley, finely chopped
-
Salt and black pepper, to taste
-
Optional: 1–2 tsp lemon juice for extra brightness
Veggies (Mix & Match)
-
Baby carrots
-
Cucumber sticks (seeds removed if watery)
-
Celery sticks
-
Bell pepper strips (mixed colors)
-
Sugar snap peas
-
Optional extras: radishes, cherry tomatoes, broccoli florets, cauliflower florets, jicama sticks
For Serving
-
5–9 oz clear cups or small jars
Instructions
1. Make the Ranch Dip
-
In a bowl, whisk together Greek yogurt, olive oil, garlic powder, onion powder, and herbs.
-
Season with salt and pepper.
-
Taste and adjust (add lemon juice if you like it brighter).
-
If too thick, whisk in milk 1 tablespoon at a time until dippable.
-
Chill 10–30 minutes if time allows for better flavor.
2. Prep the Veggies
-
Wash and dry vegetables very well.
-
Cut into even sticks sized to stand inside cups.
-
Keep chilled until assembly.
3. Assemble the Cups
-
Spoon 2–3 tablespoons of dip into the bottom of each cup.
-
Stand veggie sticks upright in the dip, mixing colors and textures.
-
Cover and refrigerate until serving (best within 4–6 hours).
Notes
-
Dry Veggies Well: Extra moisture makes dip watery and veggies limp. Pat dry with paper towels.
-
Make Ahead Smart: Prepare dip and cut veggies a day ahead, but assemble cups shortly before serving.
-
Neat Filling Trick: Pipe the dip into cups using a zip-top bag with the corner snipped.
-
Extra Flavor: Add 1–2 tsp ranch seasoning or everything-bagel seasoning to the dip.
Nutritional Information (Per Cup, Approximate)
This is a general estimate based on using full-fat Greek yogurt and the listed veggies. It will vary with your specific ingredients and portions.
- Calories: 110
- Protein: 7g
- Carbohydrates: 8g
- Fat: 5g
- Fiber: 2g
Highlights: High in protein, calcium, and vitamins from the veggies. A balanced, satisfying snack that fuels you without the crash.
I hope you and your loved ones adore these Greek Yogurt Ranch Veggie Cups as much as we do. They’re proof that a little creativity can turn everyday ingredients into something truly special. If you make them, I’d love to see your creations! Tag me on social @OliviasCozyKitchen or leave a comment below telling me your favorite variation. Happy snacking!
Final Thoughts: More Than Just a Snack
Looking at a tray of these bright, cheerful veggie cups, I’m reminded that the best kitchen creations often come from a simple desire to solve a problem—with a dash of whimsy. These aren’t just a convenient party trick; they’re a tiny manifesto on how I want to eat and live: with intention, color, and joy.
They prove that healthy choices don’t have to be austere, and that a little thoughtful presentation can transform the ordinary into something special. Whether it’s the nostalgic punch of that herby ranch or the satisfying crunch of a perfectly cut pepper, these cups engage all the senses. They’re a quiet way to say, “I care”—whether you’re saying it to your guests, your family, or yourself.
So the next time you’re staring into the fridge an hour before company arrives, or packing yet another predictable lunch, remember this: a little creativity, a few clear cups, and a willingness to play with your food can change everything. Here’s to snacks that are as delightful to make as they are to eat, and to finding small, beautiful solutions in our everyday kitchens.
Now, go make a cup for someone you love—and definitely one for you.
Happy Snacking,
Olivia
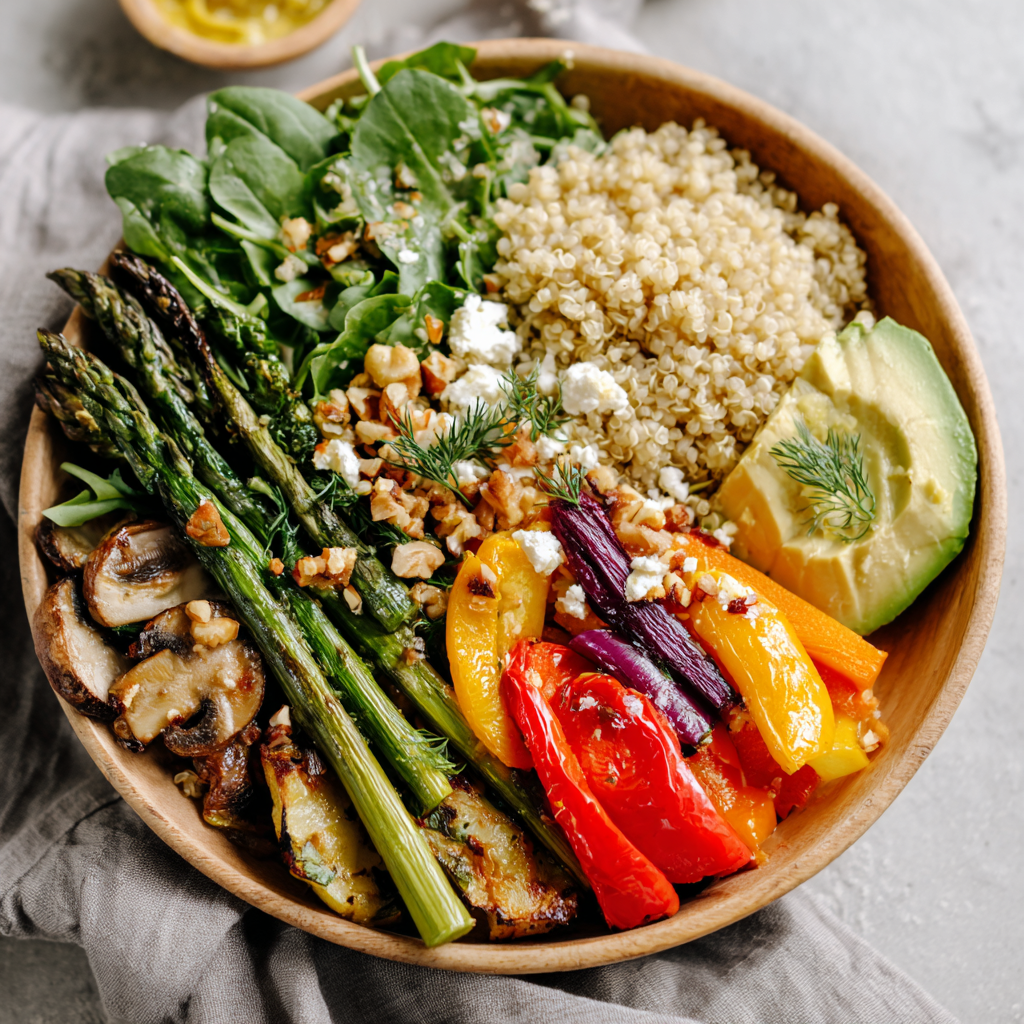
Spring Grain Bowls (Quinoa or Farro with Roasted Veggies & Lemon Vinaigrette)
Welcome Spring to Your Table with Every Vibrant Bite
Hey there, friend! Can you feel it? That little shift in the air, the way the light lingers a bit longer in the evenings, and the sudden, irresistible urge to eat something that tastes as bright and hopeful as the world outside is starting to look. That’s the magic of spring, and it’s my absolute favorite time to reignite my kitchen inspiration after the cozy, heavy comforts of winter.
For me, spring cooking isn’t about complicated techniques or hours chained to the stove. It’s about celebrating simplicity, color, and the incredible flavors that start popping up at the market. It’s about meals that make you feel nourished, light, and energized. And honestly? Nothing does that better than a gorgeous, build-your-own-adventure grain bowl.
Today, I’m so excited to share my blueprint for the ultimate Spring Grain Bowl. We’re talking fluffy quinoa or wonderfully chewy farro as our canvas, a rainbow of roasted seasonal veggies, a bed of crisp greens, and a lemon vinaigrette so zesty and bright it’s basically sunshine in a jar. This isn’t just a recipe; it’s a formula for a feel-good meal that you can make your own every single time. It’s perfect for a quick weeknight dinner, impressive enough for a casual lunch with friends, and a total meal-prep superstar. So, tie on your favorite apron (the messy one tells the best stories, right?), and let’s make something delicious that celebrates the season.
The Bowl That Brings Back Sunny Days
This recipe always takes me back to my grandma’s sun-drenched porch in late April. She wasn’t a “recipe” cook; she was a “what’s-in-the-garden” cook. I’d follow her outside, and she’d hand me a basket, pointing at the first slim spears of asparagus and the tender green tops of fresh radishes. “We’re making a bit of spring,” she’d say with a wink.
Back in her kitchen, there was no fuss. Things got chopped, tossed with glugs of her best olive oil, and roasted until they smelled like earthy, caramelized goodness. She’d always have a pot of something hearty simmering—often barley or farro she called “peasant food” with total reverence. We’d pile the warm grains and hot veggies into big bowls, always over a handful of peppery greens she’d snipped from a planter. The final act was a reckless squeeze of lemon over everything. It wasn’t fancy, but eating that bowl on her porch, with the spring breeze coming in, felt like a ceremony. It tasted like hope, freshness, and the pure joy of a meal made straight from the earth. My version here is just a slightly more structured homage to her brilliant, intuitive cooking—and I think she’d approve.
Gathering Your Rainbow: Ingredients & Insights
Here’s where the fun begins! Think of this list as your playground. I’ll give you my favorite starters, but your mission is to make it yours. Check out what looks good at your local market or what’s hanging out in your fridge’s veggie drawer.
For the Grain Bowl Base
- 1 cup uncooked quinoa or farro (which becomes about 3 cups cooked) – Here’s your foundation! Quinoa cooks faster and gets lovely and fluffy, plus it’s a complete protein. Farro has a satisfying, nutty chew that I absolutely adore. You truly can’t go wrong.
- 1½ pounds of mixed spring vegetables – This is your color palette! My spring go-tos are: asparagus (snap off the woody ends), carrots (cut into coins or batons), zucchini or summer squash, radishes (they become sweet when roasted!), and bell peppers for a pop of red. Aim for a mix of colors and textures.
- 1 tablespoon extra virgin olive oil – For roasting. A good, fruity olive oil makes a difference here!
- Kosher salt and freshly cracked black pepper – The essential flavor boosters. Don’t be shy!
- 2 big handfuls of fresh greens – This adds a fresh, crisp layer. Arugula adds a peppery punch, baby spinach is mild and tender, and a spring mix gives you a little bit of everything.
For the Sunshine Lemon Vinaigrette
- 3 tablespoons extra virgin olive oil – The body of our dressing.
- 1½ tablespoons fresh lemon juice – PLEASE use freshly squeezed! Bottled juice just doesn’t have the same bright, vibrant zip. This is the star of the show.
- 1 teaspoon Dijon mustard – Our secret weapon for emulsification and a subtle depth of flavor. It makes the dressing creamy and helps it cling to every ingredient.
- 1 teaspoon honey or maple syrup – A tiny touch of sweetness balances the sharp lemon perfectly. Maple syrup keeps it vegan.
- Salt and pepper, to taste – Yes, you even season your dressing. Taste as you go!
Optional Toppings (The Finishing Flourishes!)
- Crumbled feta or goat cheese – For creamy, tangy bites.
- Avocado slices – Adds richness and healthy fats.
- Toasted nuts or seeds – Slivered almonds, pepitas (pumpkin seeds), or sunflower seeds add incredible crunch.
- Fresh herbs – A shower of chopped parsley, dill, or mint makes it taste like a professional chef made it. Seriously, herbs are a game-changer.
Let’s Build Your Masterpiece: Step-by-Step
Ready to cook? I’ll walk you through each step with my favorite little hacks to ensure your bowls are nothing short of spectacular.
Step 1: Wake Up Your Oven & Prep Your Veggies
First things first, preheat your oven to 400°F (205°C). This hot temperature is key for getting those beautiful caramelized edges on our veggies without steaming them. While it heats, chop all your vegetables into uniform, bite-sized pieces. This isn’t just for looks—it ensures everything cooks at the same rate. Pile them onto a large baking sheet. Drizzle with the olive oil, a good pinch of salt, and several grinds of black pepper. Now, use your hands to toss everything together. Get in there! Hands are the best kitchen tools for making sure every nook and cranny is coated. Chef’s Hack: Give the baking sheet a quick spritz of cooking spray first. It makes cleanup a dream.
Step 2: Roast to Perfection
Spread the vegetables out in a single, even layer. This is crucial! If you pile them on top of each other, they’ll steam and become soggy instead of roasting. We want tender-inside, crispy-edged goodness. Slide the pan into your hot oven and let them work their magic for 20-25 minutes. You’ll know they’re ready when you can easily pierce a carrot with a fork and the asparagus and zucchini have some gorgeous golden-brown spots. I like to give the pan a shake or a quick stir halfway through for even cooking.
Step 3: Cook Your Grains
While the veggies roast, let’s cook our grain base. If you’re using quinoa, I always rinse it in a fine-mesh sieve under cold water first. It removes a natural coating called saponin that can taste bitter. Cook it according to package directions (usually a 1:2 ratio of quinoa to water, simmer for 15 mins). For farro, check if you have pearled, semi-pearled, or whole. Pearled cooks fastest (about 15-20 mins). I often cook my grains in a light vegetable broth instead of water for an extra layer of flavor. Once cooked, fluff it with a fork and let it sit, covered. Chef’s Hack: After cooking, spread the hot grains on a baking sheet for 5 minutes to dry out slightly. This prevents a mushy bowl!
Step 4: Whisk Up the Sunshine
Time for the vinaigrette! This takes 60 seconds and makes all the difference. In a small bowl or jar, combine the fresh lemon juice, Dijon mustard, and honey or maple syrup. Whisk it together. Now, while whisking constantly, slowly drizzle in the olive oil. It will magically thicken and turn into a beautiful, creamy emulsion. Season with a pinch of salt and pepper. Taste it! Want it more tangy? Add a squeeze more lemon. More mellow? A bit more oil. You’re the boss.
Step 5: The Grand Assembly
This is my favorite part. Grab your favorite bowls—the prettier, the better! Start with a warm base of your fluffy quinoa or chewy farro. Top with a generous handful of those fresh, crisp greens. Then, artfully pile on your gorgeous, hot roasted vegetables. The heat from the grains and veggies will slightly wilt the greens, which is divine. Now, take that jar of sunshine and drizzle that lemon vinaigrette all over everything. Finish with your chosen toppings: a crumbling of cheese, slices of creamy avocado, a big sprinkle of toasted nuts, and a confetti of fresh herbs. Voilà! You just created a restaurant-worthy, nourishing meal at home.
How to Serve Your Spring Creation
These bowls are meant to be served immediately, while the grains and veggies are still warm. I love putting all the components—the big bowl of grains, the sheet pan of veggies, small dishes of toppings, and the vinaigrette—in the middle of the table and letting everyone build their own. It’s interactive, fun, and guarantees everyone gets their perfect combo. They’re also fantastic packed into a lidded container for lunch the next day (just keep the dressing in a separate small container until you’re ready to eat to keep everything crisp).
Make It Your Own: Delicious Twists & Swaps
- Mediterranean Twist: Use chickpeas (toss them with the veggies to roast!), add kalamata olives, cucumbers, and swap the vinaigrette for a lemon-oregano one. Top with crumbled feta.
- Protein Power Bowl: Add grilled shrimp, shredded rotisserie chicken, or pan-seared salmon fillet on top. A perfect complete meal.
- Vegan & Creamy: Skip the cheese and add a big dollop of lemony tahini sauce or vegan pesto instead of (or in addition to) the vinaigrette.
- Different Grain, Different Vibe: Try freekeh, brown rice, or even couscous as your base. Each one brings a new texture.
- Fall/Winter Version: Swap the veggies for roasted sweet potato, Brussels sprouts, and red onion. Use a maple-balsamic vinaigrette instead of lemon.
From My Kitchen to Yours: A Few Parting Thoughts
This recipe has been my springtime constant for years, but it’s never the same twice. I’ve made it for frantic weeknights, for “help, I need to clean out the fridge” nights, and for casual dinner parties where it’s always a hit. The biggest lesson it’s taught me? Don’t stress about precision. No zucchini? Use broccoli. Out of quinoa? Rice works. No fresh lemon? A tablespoon of good white wine vinegar will do in a pinch. The spirit of the bowl—fresh, colorful, balanced—is what matters.
One funny fail I had early on: I got overzealous with the vinaigrette and doubled the mustard. Let’s just say my family politely asked if I was trying to clear their sinuses! Now I taste as I go. Cooking is about learning, laughing, and creating something that brings joy. I hope this bowl becomes your springtime staple, too.
Your Questions, Answered
Q: Can I make this ahead for meal prep?
A: Absolutely! This is a meal prep champion. Cook your grain, roast your veggies, and make the dressing. Store them all separately in airtight containers in the fridge for up to 4 days. When ready to eat, you can enjoy it cold, at room temp, or gently reheat the grains and veggies before assembling over fresh greens.
Q: My roasted vegetables are soggy. What did I do wrong?
A> The most common culprit is overcrowding the pan! If the veggies are piled on top of each other, they release steam and can’t caramelize. Use two baking sheets if needed to give them plenty of space. Also, make sure your oven is fully preheated before they go in.
Q: My vinaigrette won’t emulsify (it stays separated). Help!
A> No worries! The key is adding the oil slowly while whisking vigorously. If it breaks, you can fix it. Put a teaspoon of Dijon mustard in a clean bowl, then slowly whisk in the broken dressing. The fresh mustard will usually grab hold and re-emulsify it. Or, just shake it all up in a jar right before using—it’ll taste the same!
Q: Is farro gluten-free?
A> No, farro is a form of wheat and contains gluten. For a gluten-free bowl, stick with quinoa, certified gluten-free oats, or brown rice.
Spring Grain Bowls (Quinoa or Farro with Roasted Veggies & Lemon Vinaigrette)
Description
Celebrate spring with this vibrant, build-your-own grain bowl! Warm grains, roasted seasonal vegetables, crisp greens, and a zesty lemon vinaigrette make a simple yet stunning meal that’s flexible, colorful, and packed with flavor. Perfect for dinner, lunch, or meal prep.
Ingredients
Grain Base
-
1 cup uncooked quinoa or farro (~3 cups cooked)
Roasted Spring Vegetables
-
1½ lbs mixed vegetables: asparagus (trimmed), carrots (sliced), zucchini/summer squash, radishes, bell peppers
-
1 tbsp extra virgin olive oil
-
Kosher salt and freshly cracked black pepper
Fresh Greens
-
2 large handfuls: arugula, baby spinach, or spring mix
Lemon Vinaigrette
-
3 tbsp extra virgin olive oil
-
1½ tbsp fresh lemon juice
-
1 tsp Dijon mustard
-
1 tsp honey or maple syrup
-
Salt & pepper, to taste
Optional Toppings
-
Crumbled feta or goat cheese
-
Avocado slices
-
Toasted nuts or seeds (almonds, pepitas, sunflower seeds)
-
Fresh herbs (parsley, dill, mint)
Instructions
1. Prep & Roast Vegetables
-
Preheat oven to 400°F (205°C).
-
Chop vegetables into uniform pieces. Toss with olive oil, salt, and pepper. Spread in a single layer on a baking sheet.
-
Roast for 20–25 mins until tender and caramelized, tossing halfway.
2. Cook Grains
-
Quinoa: Rinse, then cook 1:2 with water for 15 mins.
-
Farro: Pearled: 15–20 mins in water or broth.
-
Fluff with a fork; optionally spread on a tray to dry slightly.
3. Make Lemon Vinaigrette
-
Whisk lemon juice, mustard, and honey/maple syrup. Slowly drizzle in olive oil while whisking. Season with salt and pepper.
4. Assemble Bowls
-
Layer warm grains, fresh greens, roasted vegetables.
-
Drizzle vinaigrette over everything.
-
Add optional toppings: cheese, avocado, nuts, herbs.
Notes
-
Soggy Veggies: Don’t overcrowd the pan—use 2 sheets if needed.
-
Broken Vinaigrette: Whisk a teaspoon of mustard in a new bowl, then slowly incorporate the broken dressing to re-emulsify.
-
Make Ahead/Meal Prep: Store grains, veggies, and dressing separately up to 4 days. Reheat grains and veggies if desired.
-
Gluten-Free Option: Use quinoa, GF oats, or brown rice instead of farro.
Nourishment in a Bowl (Approximate per Serving)
- Calories: 380-450
- Protein: 10-14g
- Carbohydrates: 45-55g
- Fat: 14-18g
- Fiber: 8-12g
Note: This is a balanced, nutrient-dense meal packed with fiber, vitamins from the veggies, healthy fats, and plant-based protein. Values can vary based on your specific ingredients and toppings.
Prep Time: 15 mins | Cook Time: 25 mins | Total Time: 40 mins | Serves: 2-3
Final Thoughts: The Bowl That Grows With You
As the last bite of your colorful creation disappears, I hope you feel that same sense of lightness and possibility that inspired it. This Spring Grain Bowl is more than a meal; it’s a mindset. It’s permission to play in the kitchen, to celebrate what’s fresh, and to build something uniquely nourishing for your body and spirit.
The true beauty of this recipe isn’t locked in the ingredients list. It’s in its glorious flexibility. It’s a framework that will hold whatever spring (or any season!) throws at you. It’s a clean-out-the-produce-drawer hero, a dinner-party savior, and a lunchbox game-changer. Mastering this blueprint means you’ve unlocked a lifetime of effortless, feel-good meals.
So, as the days grow longer and the markets brim with color, let this be your culinary companion. Tinker with it. Make it with farro one week and freekeh the next. Toss in the first strawberries of the season or the last of the spring peas. Let it reflect your garden, your farmers’ market haul, or simply your mood.
Because the best kind of cooking doesn’t just feed us—it connects us. To the rhythm of the seasons, to the memory of a sun-drenched porch, and to the simple, profound joy of creating something beautiful and delicious with your own two hands. Here’s to a season of vibrant, wholesome, and utterly satisfying meals. Happy building
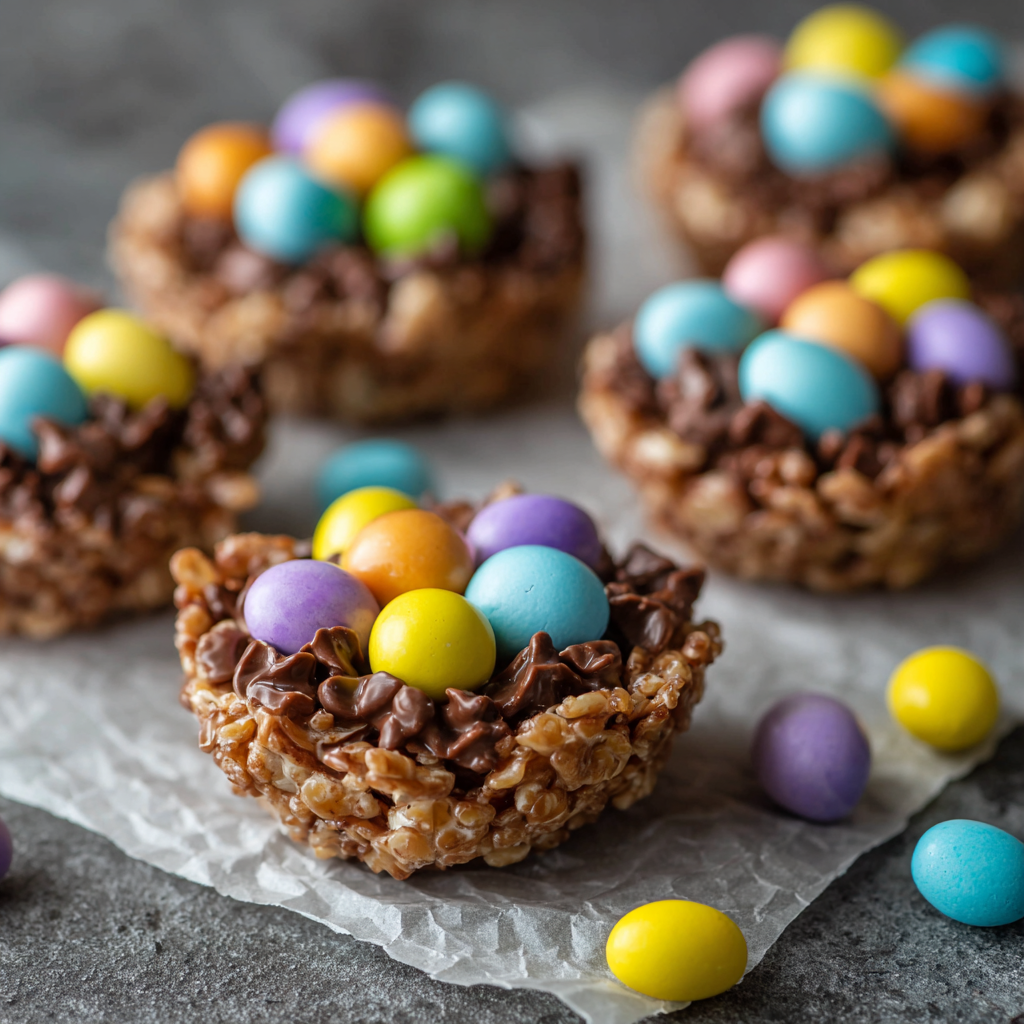
Rice Krispie Easter Nests (No-Bake, Kid-Friendly Treat)
Sweet, Simple, and Oh-So-Springy: Let’s Make Easter Nests!
Hey there, friend! Come on in—apron’s on, the sun is (finally) thinking about shining, and I’ve got a bowl of chocolate melting that smells like pure happiness. Is there anything more delightfully spring than those first little hints of green and the promise of sweet treats? For me, that joy is perfectly captured in a recipe that’s less about precision and more about play: Rice Krispie Easter Nests.
If the thought of baking has you breaking a sweat, take a deep breath. This is your no-stress, no-oven, all-fun ticket to a festive dessert. We’re talking about that magical combo of crispy cereal, melty chocolate, and those adorable candy eggs that just scream “spring is here!” Whether you’re corralling a crew of mini helpers in the kitchen or you just need a last-minute, show-stopping treat for your Easter table, these little nests are the answer. They’re whimsical, they’re delicious, and they’re guaranteed to spark those “oohs” and “aahs” we all love to hear. So, let’s ditch the complicated techniques and lean into the cozy, creative fun. Grab a spatula and let’s make some sweet memories together!
The Messy, Magical Kitchen of My Childhood
This recipe always takes me right back to my grandma’s linoleum-floored kitchen. Easter at her house wasn’t about fancy, perfect desserts. It was about us kids, covered in more chocolate than the treats, with cereal pieces scattered like confetti across the table. She’d melt chocolate in her old double boiler, and my brother and I would fight over who got to stir. The rule was simple: one stir for you, one stir for the treat.
Our “nests” were always hilariously lopsided. Some were giant, ambitious bird homes; others were tiny, overfilled clumps. But when we pressed those pastel candy eggs into the center, it was pure magic. It wasn’t just a dessert; it was our creation. That’s the spirit I want to bring to your kitchen. Perfection is overrated. A little mess, a lot of laughter, and something made with your own two hands (or tiny, eager hands helping you)—that’s the real recipe. These nests are my edible homage to those messy, joyful, sugar-filled afternoons.
What You’ll Need: A Handful of Happy Ingredients
Here’s the beautiful part: you only need a few simple things. I’ll walk you through each one with some tips to make it your own!
- 3 cups Rice Krispies cereal: The star of the show! That iconic *snap, crackle, pop* gives our nests their wonderful structure and airy crunch. Chef’s Insight: Make sure your cereal is fresh and crispy. If the box has been open a while, they can get stale and won’t hold the shape as well.
- 1 cup milk or dark chocolate chips: This is our glue and our flavor. I adore dark chocolate (70% is my go-to) for a richer, less sweet nest. But classic milk chocolate is absolute heaven with the candy eggs and is always a kid-pleaser. Substitution Tip: You can use chopped chocolate bars too! Just avoid chocolate with added wax or stabilizers, as it might not melt as smoothly.
- 1 tbsp butter or coconut oil: A little fat is the secret to a glossy, smooth chocolate that coats every piece beautifully. Butter adds a hint of creamy flavor, while coconut oil keeps it dairy-free and gives a slight tropical note. Chef’s Insight: Don’t skip this! It prevents the chocolate from seizing and makes the mixture easier to work with.
- Mini candy eggs (chocolate or sugar-coated): The jewel-toned finale! You can find these everywhere come spring. The sugar-coated ones are vibrant and classic, while little chocolate eggs add a double chocolate punch. This is where you can really personalize your nests’ look.
Let’s Build Our Nests: Step-by-Step Fun
Ready? This comes together in minutes. I’ll guide you through each step with all my favorite little hacks to ensure success.
- Line a baking sheet or muffin tin with parchment paper. This is your non-stick lifesaver! If you’re using a muffin tin, the cups will give you perfectly uniform nests. For a more rustic, free-form look, a parchment-lined baking sheet is the way to go. I often do a combo—some in the tin for the perfectionists, some on the sheet for the wild, artistic ones.
- Melt the chocolate and butter/coconut oil together. You can use a microwave-safe bowl or a double boiler (a heatproof bowl set over a pot of simmering water). My foolproof microwave method: Combine them in a bowl and microwave on 50% power for 20-second intervals, stirring well in between. This gentle heat prevents the chocolate from burning. Stir until it’s completely silky and smooth. See? No fancy skills required!
- Gently fold in the Rice Krispies. Pour your crispy cereal into the big bowl of melted chocolate. Now, use a flexible spatula and a light touch! We’re “folding,” not stirring aggressively. You want to coat every single piece without crushing all the lovely air out of them. Think of it as gently turning the mixture over onto itself until it’s all a beautiful, chocolaty brown.
- Spoon and shape your nests. This is the fun part! Use a spoon or a cookie scoop to portion out the mixture. Place each mound on your prepared sheet or into the muffin cups. Then, take the back of a small spoon or your thumb (lightly greased with butter helps!) and press into the center of each mound, pushing the mixture up the sides to form a cup or nest shape. Don’t stress about them being identical—variety is charming!
- Add the eggs and let them set. Immediately, while the chocolate is still tacky, place 2-3 mini candy eggs into the center “dip” of each nest. You can be precise or just scatter them in. Then, let them set at room temperature if you’re not in a hurry, or pop the whole tray in the fridge for 15-20 minutes to firm up quickly. The wait is the hardest part!
How to Serve These Little Bites of Joy
Presentation is part of the fun! Arrange your nests on a festive platter or a cake stand lined with a pastel napkin. For a real “spring meadow” vibe, scatter a few extra candy eggs or edible flowers around the plate. They’re perfect as a standalone sweet treat at your Easter brunch, tucked into lunchboxes as a surprise, or packaged in clear cellophane bags tied with ribbon as adorable homemade gifts. However you serve them, get ready for smiles.
Make It Your Own: Fun Twists & Swaps
- Peanut Butter Paradise: Stir ¼ cup of smooth peanut butter into the melted chocolate for a salty-sweet, protein-packed twist. Top with mini peanut butter cups instead of eggs!
- Spring Fling: Add a handful of pastel M&M’s or sprinkles to the cereal mixture before shaping for extra color and crunch inside the nest.
- Gluten-Free & Vegan: Use certified gluten-free crispy rice cereal, dairy-free chocolate chips, and coconut oil. Top with vegan-friendly candy eggs.
- Nutty Crunch: Fold in ½ cup of finely chopped toasted almonds or pecans for a more “grown-up,” textured nest.
- White Chocolate Blossoms: Use white chocolate instead! The nests will look like little snowdrifts. Top with pastel Jordan almonds or freeze-dried raspberries for a stunning look.
A Few More Thoughts From My Kitchen to Yours
This recipe has been my kitchen’s little chameleon. One year, in a pinch, I used cornflakes because I was out of Rice Krispies—and you know what? They were fantastic, with a different, flakier texture! Another time, I added a pinch of sea salt to the dark chocolate, and it was a total game-changer. Don’t be afraid to play.
The best kitchen memory with these? The year my niece decided the nests needed “baby birds.” She made tiny marzipan birds to sit next to the eggs. It was absurdly cute and completely stole the show. That’s the beauty of a simple recipe—it becomes a canvas for creativity and connection. So have fun with it. Your version will be perfect because it’s yours.
Your Questions, Answered!
Q: My chocolate got thick and clumpy when I added the cereal. What happened?
A: Sounds like the chocolate may have gotten too hot or a bit of steam/water got in. This is called “seizing.” To rescue it, try stirring in a teaspoon of very hot water or a bit more melted butter/coconut oil, one drop at a time, until it smooths back out. For next time, melt gently and ensure your bowls and utensils are completely dry.
Q: Can I make these ahead of time?
A> Absolutely! They keep beautifully. Store them in a single layer in an airtight container at room temperature for up to 3 days, or in the fridge for up to a week. The cereal will stay surprisingly crisp!
Q: My nests are falling apart when I pick them up.
A> This usually means you need a bit more “glue.” Next time, try increasing the chocolate by ¼ cup, or make sure you’re really coating every piece well. If they’re currently soft, pressing them more firmly into the muffin tin can help them hold shape as they set.
Q: Can I use other cereals?
A> You bet! Chex, cornflakes, or even slightly crushed shredded wheat biscuits work. Just avoid overly sweetened or heavy cereals, as they can make the nests too dense or overly sweet.

Rice Krispie Easter Nests (No-Bake, Kid-Friendly Treat)
Description
These no-bake Rice Krispie Easter Nests are crispy, chocolaty, and topped with pastel candy eggs—an easy, fun, and festive treat for Easter or any spring celebration. No oven required, just a little chocolate magic and some playful hands!
Ingredients
-
3 cups Rice Krispies cereal
-
1 cup milk or dark chocolate chips
-
1 tbsp butter or coconut oil
-
Mini candy eggs (chocolate or sugar-coated), 2–3 per nest
Optional Fun Twists:
-
¼ cup peanut butter for a salty-sweet version
-
Sprinkles, pastel M&M’s, or chopped nuts for texture and color
-
Gluten-free or vegan swaps: use GF cereal, dairy-free chocolate, and coconut oil
Instructions
1. Prep
-
Line a baking sheet or muffin tin with parchment paper. Muffin cups = uniform nests; baking sheet = rustic charm.
2. Melt Chocolate
-
Combine chocolate chips and butter/coconut oil in a microwave-safe bowl or double boiler.
-
Microwave in 20-second intervals at 50% power, stirring each time, until smooth.
3. Coat the Cereal
-
Gently fold the Rice Krispies into the melted chocolate using a spatula until fully coated. Avoid crushing the cereal.
4. Shape the Nests
-
Spoon portions of the mixture onto your prepared sheet or into muffin cups.
-
Press a shallow well in the center with a spoon or lightly greased thumb to form the nest shape.
5. Add Candy Eggs
-
While chocolate is still tacky, place 2–3 mini candy eggs into each nest.
6. Let Set
-
Allow nests to firm at room temperature or refrigerate for 15–20 minutes until chocolate is completely set.
Notes
-
Chocolate Clumps: If chocolate seizes, stir in a teaspoon of hot water or extra butter/coconut oil, one drop at a time.
-
Nest Falls Apart: Ensure each cereal piece is fully coated; add a little extra chocolate if needed. Press firmly into muffin cups while setting.
-
Other Cereals: Chex, cornflakes, or lightly crushed shredded wheat all work. Avoid overly sweetened or heavy cereals.
-
Make Ahead: Store in a single layer in an airtight container—room temp 3 days, fridge up to 1 week.
Nutritional Information*
*This is an estimate for 1 nest (based on a yield of 12) using milk chocolate and butter. Values will vary based on specific ingredients used.
- Calories: ~155
- Carbohydrates: 20g
- Fat: 8g
- Protein: 2g
- Sugar: 13g
Prep Time: 10 minutes | Chill Time: 20 minutes | Total Time: 30 minutes | Yield: 10-12 nests
Final Thoughts: Your Sweet Springtime Ritual
And there you have it! In the time it takes for a pot of coffee to brew, you’ve created something far more special than just a dessert. You’ve crafted little edible tokens of the season—whimsical, personal, and brimming with charm.
These Rice Krispie Nests are a beautiful reminder that the most memorable kitchen moments aren’t about flawless technique or gourmet ingredients. They’re about the sticky fingers, the shared laughter, and the proud moment of placing that final candy egg. They prove that a handful of simple, honest ingredients and a dash of playful intention can create pure magic.
So whether you’re making these for a festive table, with little helpers by your side, or simply as a sweet gift to yourself, I hope you feel the joy of creating something from the heart. They may be called “nests,” but what you’re really building are sweet, crunchy containers for happiness.
Happy Nesting, and a wonderful, sweet spring to you and yours.
With love and a pocketful of sprinkles,
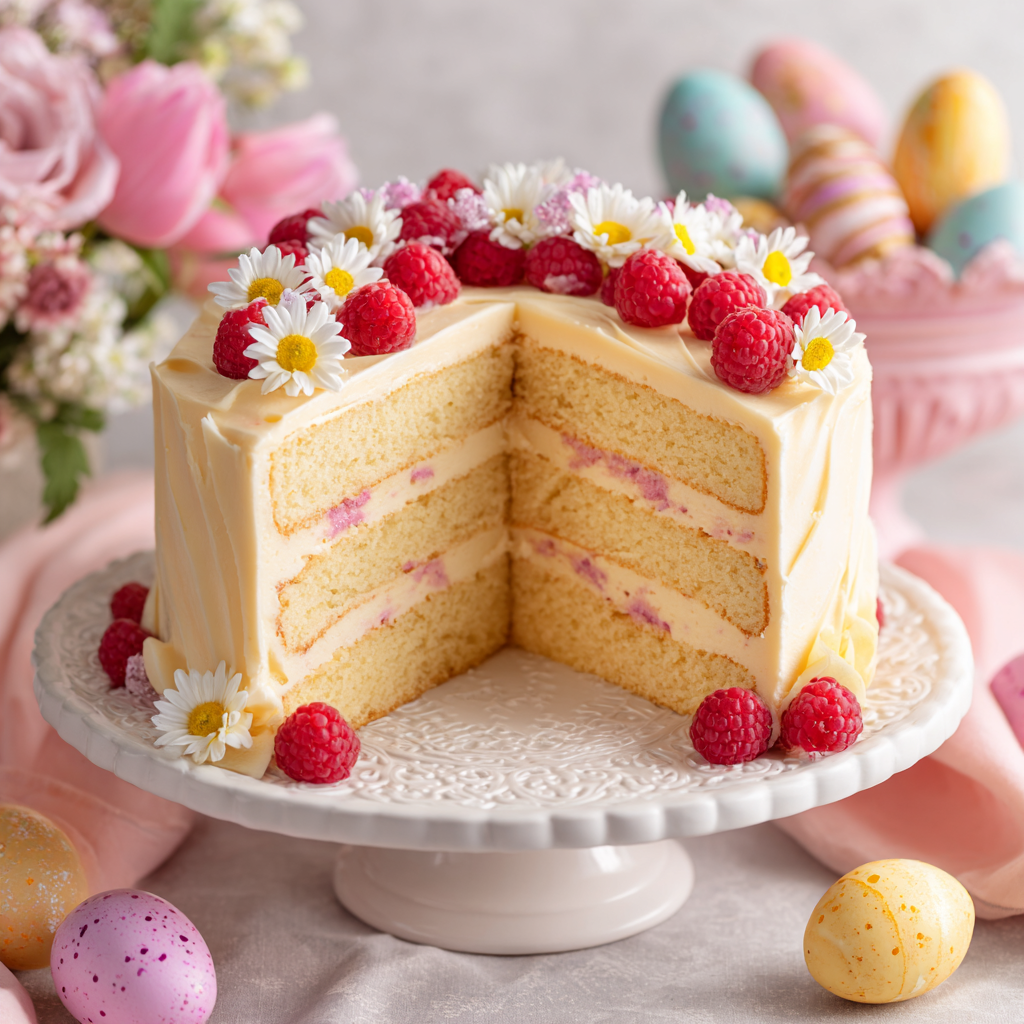
Lemon Raspberry Easter Cake : Light Layers with Pastel Frosting
Lemon Raspberry Easter Cake: A Slice of Sunny Spring
Hey there, friend! Come on in, grab an apron, and let’s bake some sunshine. Is there anything that whispers “spring is here” quite like the bright, cheerful combo of lemon and raspberry? I’m talking about that first whiff of citrus zest hitting the air, the pop of a sweet-tart berry, and the promise of longer, warmer days ahead. This Lemon Raspberry Easter Cake is my love letter to this gorgeous season.
It’s the cake I dream of when I see daffodils pushing through the soil. It’s not a dense, heavy dessert. Oh no. This beauty is all about light, soft layers perfumed with real lemon, a vibrant raspberry filling that sings with freshness, and a swoop of dreamy pastel frosting that looks like a soft sunset. It’s elegant enough for your Easter table but simple enough to make any Sunday feel special. Whether you’re hosting the family, surprising a neighbor, or just treating yourself (because you deserve it!), this cake is about creating a moment of pure, homemade joy. So, preheat that oven, and let’s make something unforgettable together!
The Cake That Sparked a Tradition
This cake has a little bit of my heart baked right into it. Years ago, long before this blog was even a twinkle in my eye, I was tasked with bringing dessert to my family’s Easter lunch. I was so nervous! I wanted to impress my nana, a legendary baker herself. My kitchen was a disaster zone—flour on the ceiling, I’m not kidding—and I was certain I’d created a lemon-scented brick.
But when I pulled those golden layers from the oven and sandwiched them with the ruby-red raspberry jam I’d clumsily simmered, something magical happened. The whole house smelled like spring and hope. At the table, when my nana took her first bite, she didn’t say a word. She just closed her eyes, smiled, and gave me a slow, knowing nod. That silent chef’s approval meant the world. Now, every spring, the making of this cake is my ritual. It’s less about perfection and more about that feeling—the messy, beautiful, love-filled process of creating something to share. Every berry mash and zest sprinkle is a happy little reminder of where it all began.
Gathering Your Sunshine Ingredients
Here’s everything you’ll need to build this spring masterpiece. I’ve added my little chef notes because knowing your ingredients is half the fun (and the secret to great baking)!
For the Lemon Cake Layers:
- 2 ½ cups all-purpose flour: The trusty foundation. For a slightly lighter crumb, you can swap ½ cup with cake flour, but all-purpose works beautifully.
- 2 ½ teaspoons baking powder: Our lift agent! Make sure it’s fresh for maximum rise.
- ½ teaspoon salt: The flavor enhancer. It balances the sweetness and makes the lemon pop.
- 1 cup (2 sticks) unsalted butter, softened: Key word: softened. Leave it out for an hour. It should dent easily when pressed. This is non-negotiable for that light, fluffy texture we crave.
- 1 ¾ cups granulated sugar: Sweetness and structure. We’re creaming it with the butter to create air pockets.
- 4 large eggs, at room temperature: Room temp eggs incorporate so much better! Just place them in a bowl of warm water for 5 minutes if you forgot.
- Zest of 2 lemons: This is where the magic lemon *fragrance* lives. Use a microplane and get just the yellow part, not the bitter white pith.
- ¼ cup fresh lemon juice: About 1-2 lemons. Fresh is best—it gives that bright, authentic tang bottled juice can’t match.
- 1 cup whole milk, at room temperature: Full-fat milk gives the best richness and tenderness.
- 1 teaspoon pure vanilla extract: The cozy background note that makes everything taste more “homemade.”
For the Raspberry Filling:
- 2 cups fresh raspberries: Frozen work perfectly here too! No need to thaw. They break down beautifully.
- 2 tablespoons granulated sugar: Just enough to sweeten the berries’ natural tartness.
- 1 teaspoon lemon juice: A bright little boost to help the berries along.
For the Pastel Frosting & Decoration:
- 1 cup (2 sticks) unsalted butter, softened: Yes, more butter. This is the base for our luscious, silky frosting.
- 3–4 cups powdered sugar: Start with 3 cups and add more to reach your desired sweetness and thickness. Sift it if you hate lumps!
- 2–3 tablespoons milk or heavy cream: Cream makes it extra rich. Add slowly to control consistency.
- 1 teaspoon pure vanilla extract: The perfect pairing for the lemon cake.
- Pastel food coloring (optional): Gel colors are my go-to—they give vibrant color without thinning the frosting. A tiny drop of pink, lavender, or mint green makes it so festive!
- Extra fresh raspberries & lemon slices for decorating: The final, fresh flourish!
Let’s Bake: Step-by-Step Sunshine
Ready? Let’s do this! I’m walking you through each step with all my favorite tips.
Step 1: Prep & Preheat
Preheat your oven to 350°F (175°C). This is crucial for an even bake. Now, grease two 8-inch round cake pans with butter or baking spray. Line the bottoms with parchment paper circles—this is your insurance policy for perfect, stick-free release! I just trace the pan on parchment and cut it out. Set them aside.
Step 2: Mix the Dry Team
In a medium bowl, whisk together the 2 ½ cups flour, 2 ½ tsp baking powder, and ½ tsp salt. Whisking by hand is perfect here—we just want to evenly distribute the baking powder and salt throughout the flour. No need to break out the mixer for this part. Set this “dry team” aside.
Step 3: Cream the Butter & Sugar (The Most Important Step!)
In your stand mixer or a large bowl with a hand mixer, beat the 1 cup of softened butter and 1 ¾ cups sugar together on medium-high speed. Now, don’t rush this! We’re looking for a mixture that is noticeably lighter in color and fluffy, about 3-4 minutes. This step incorporates air, which is what gives our cake its lovely texture. Scrape down the bowl halfway through.
Step 4: Incorporate Eggs & Lemon
With the mixer on medium, add the 4 eggs, one at a time, letting each fully incorporate before adding the next. This prevents the batter from breaking. Now, mix in the lemon zest, ¼ cup lemon juice, and 1 tsp vanilla. It might look a little curdled—that’s the lemon juice reacting. Don’t panic! It will all come together when we add the dry ingredients.
Step 5: Alternate Wet & Dry
Reduce your mixer speed to low. Add about one-third of your dry flour mixture and mix until just combined. Follow with half of the 1 cup milk. Repeat: another third of flour, the rest of the milk, and finally the last of the flour. Mix until *just* combined—a few streaks of flour are okay! Overmixing is the enemy of tender cake. Use a spatula to give one final, gentle fold from the bottom of the bowl.
Step 6: Bake & Cool
Divide the batter evenly between your prepared pans. I like to use a kitchen scale for precision, but eyeballing works too! Smooth the tops. Bake for 25-30 minutes, until the tops are springy to the touch and a toothpick inserted into the center comes out clean. Let the cakes cool in their pans on a wire rack for 10 minutes. Then, run a knife around the edge, invert them, peel off the parchment, and let them cool completely. Patience is key here—frosting a warm cake is a recipe for a melty mess!
Step 7: Make the Raspberry Filling
While the cakes cool, let’s make the simple filling. In a small saucepan, combine the 2 cups raspberries, 2 tbsp sugar, and 1 tsp lemon juice. Cook over medium heat, stirring and mashing the berries with your spoon as they soften. Let it simmer for 8-10 minutes until it thickens to a loose jam consistency. It will thicken more as it cools. Pour it into a bowl and let it cool completely.
Step 8: Whip Up the Pastel Frosting
In a clean bowl, beat the 1 cup of softened butter on medium speed until very smooth. With the mixer on low, gradually add 3 cups of powdered sugar. Once incorporated, add the 1 tsp vanilla and 2 tbsp of milk/cream. Beat on medium-high for a full 2-3 minutes until incredibly light and fluffy. This whipping time is what makes it silky! If it’s too thick, add more milk a teaspoon at a time. Too thin? Add a bit more powdered sugar. If using, add a tiny drop of gel food coloring and beat to combine.
Step 9: Assemble Your Masterpiece!
Place one completely cooled cake layer on your serving plate or cake stand. Spread a thin, even layer of frosting over the top (this creates a “dam” to hold the filling). Then, spoon the cooled raspberry filling in the center, spreading it almost to the edges. Carefully place the second cake layer on top. Apply a thin “crumb coat” of frosting all over the cake—a thin layer that traps any loose crumbs. Pop it in the fridge for 15 minutes to set. Finally, use the remaining frosting to generously and smoothly frost the entire outside of the cake. Have fun with it—swirls, swoops, or a smooth finish are all beautiful!
How to Serve This Spring Showstopper
Presentation is the final act of love! I like to decorate the top with a casual cascade of fresh raspberries and maybe a few thin twists of lemon zest or delicate edible flowers. Let the cake sit at room temperature for about 20 minutes before slicing—this allows the frosting to soften just enough for the perfect, clean cut. Use a sharp knife dipped in hot water and wiped dry between slices. Serve on pretty plates with a cup of tea or coffee, and watch those smiles appear.
Make It Your Own: Fun Variations
This recipe is wonderfully adaptable! Here are a few twists:
- Lemon Blueberry Bliss: Swap the raspberry filling for a blueberry version. Use 2 cups blueberries and simmer with 1 tbsp sugar and a pinch of cinnamon.
- Easter Egg Nest Topping: Frost the cake smoothly. Top with a ring of toasted coconut “grass” and place a few mini chocolate eggs in the center.
- Meyer Lemon Magic: Use sweeter, fragrant Meyer lemons for the zest and juice for a more nuanced citrus flavor.
- Dairy-Free Delight: Use plant-based butter sticks and unsweetened almond or oat milk in both cake and frosting. The filling is naturally dairy-free!
- Layer Cake for a Crowd: Bake the batter in three 6-inch pans for a taller, more dramatic cake. Reduce baking time to 20-25 minutes.
Olivia’s Chef Notes & Kitchen Confessions
This recipe has seen it all in my kitchen! One year, I was so excited I added the lemon juice straight from the bottle without measuring… let’s just say we had a VERY puckery cake. Lesson learned: measure your acids, friends! Over time, I’ve learned that the quality of your zest truly matters. Organic lemons are fantastic if you can, as you’re using the outer skin. And about that “messy apron” I mentioned? It’s almost guaranteed when I make this. Between the berry splatters and the powdered sugar cloud, it’s a glorious, delicious mess. Don’t stress about a picture-perfect frosting job either. A homemade look, with visible swoops and swirls, has so much more heart. It says, “Made with love,” not “Made by a robot.”
Your Questions, Answered!
Can I make this cake ahead of time?
Absolutely! You can bake the cake layers up to 2 days in advance. Let them cool completely, wrap tightly in plastic wrap, and store at room temperature. The raspberry filling can be made 3 days ahead and kept in the fridge. Assemble and frost the cake the day you plan to serve it for the freshest taste and texture.
My cake layers are domed! How do I get them flat?
Ah, the classic cake dome! It happens. First, make sure your baking powder is fresh. You can also try using bake-even strips (those fabric strips you soak and wrap around the pan). My simple hack? Once the cakes are out of the oven and have cooled for 10 minutes, I gently press down on the dome with a clean kitchen towel while it’s still warm and pliable. Or, you can simply slice the dome off with a serrated knife once the cake is completely cool to create a flat surface.
Why is my frosting runny or greasy?
Runny frosting usually means the butter was too warm, or you added too much liquid. Pop the whole bowl into the fridge for 15-20 minutes to firm up the butter, then re-whip. Greasy frosting can happen if the butter was too soft or the cake layers were even slightly warm when you frosted. Always ensure everything is cool! If it’s greasy, beating in an extra ½ to 1 cup of sifted powdered sugar can often rescue it.
Can I use frozen berries for the filling?
Yes, and it’s a fantastic, economical option! Use them straight from the freezer—no need to thaw. They may release a bit more liquid as they cook, so just let the mixture simmer for a couple of extra minutes until it reaches a jammy consistency.
Print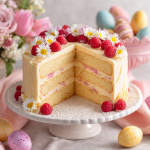
Lemon Raspberry Easter Cake : Light Layers with Pastel Frosting
Description
This Lemon Raspberry Easter Cake is everything you want in a spring dessert: light, fluffy lemon cake layers, sweet-tart raspberry filling, and silky pastel frosting. It’s elegant for Easter or spring gatherings but simple enough to make any day feel special.
Ingredients
Lemon Cake Layers
-
2 ½ cups all-purpose flour
-
2 ½ tsp baking powder
-
½ tsp salt
-
1 cup (2 sticks) unsalted butter, softened
-
1 ¾ cups granulated sugar
-
4 large eggs, room temperature
-
Zest of 2 lemons
-
¼ cup fresh lemon juice (about 1–2 lemons)
-
1 cup whole milk, room temperature
-
1 tsp pure vanilla extract
Raspberry Filling
-
2 cups fresh or frozen raspberries
-
2 tbsp granulated sugar
-
1 tsp lemon juice
Pastel Frosting
-
1 cup (2 sticks) unsalted butter, softened
-
3–4 cups powdered sugar
-
2–3 tbsp milk or heavy cream
-
1 tsp pure vanilla extract
-
Gel food coloring (optional)
Decoration
-
Fresh raspberries and thin lemon slices (optional)
Instructions
1. Prep & Preheat
-
Preheat oven to 350°F (175°C).
-
Grease two 8-inch round cake pans and line with parchment circles.
2. Mix Dry Ingredients
-
Whisk together flour, baking powder, and salt. Set aside.
3. Cream Butter & Sugar
-
Beat butter and sugar 3–4 minutes until light and fluffy.
4. Add Eggs & Lemon
-
Beat in eggs one at a time. Add lemon zest, juice, and vanilla. Mixture may look curdled—this is normal.
5. Alternate Wet & Dry
-
On low speed, add 1/3 of flour, then half the milk, repeat, ending with remaining flour. Fold gently to combine.
6. Bake & Cool
-
Divide batter between pans. Bake 25–30 minutes until tops spring back and toothpick comes out clean.
-
Cool 10 minutes in pans, remove parchment, and cool completely.
7. Make Raspberry Filling
-
Simmer raspberries, sugar, and lemon juice 8–10 minutes until thickened. Cool completely.
8. Make Frosting
-
Beat butter until smooth. Gradually add powdered sugar, vanilla, and milk/cream. Beat 2–3 minutes until light and fluffy. Add gel coloring if desired.
9. Assemble Cake
-
Place one cake layer on a plate. Spread a thin frosting “dam,” then spoon in raspberry filling. Top with second cake layer.
-
Apply crumb coat and chill 15 minutes. Finish with remaining frosting and decorate with berries and lemon slices.
Notes
-
Make Ahead: Cake layers 2 days ahead; raspberry filling 3 days ahead. Frost the day of serving.
-
Flat Layers: Use bake-even strips or trim domes after cooling.
-
Frosting Fix: If runny, chill butter 15–20 min and re-whip. Add extra powdered sugar if greasy.
-
Frozen Berries: Cook a few minutes longer to reach jammy consistency.
Nutritional Info (Per Slice, Approximate)
This is a celebratory treat, so enjoy every bite! Based on a 12-slice yield: Calories: ~420 | Protein: 5g | Carbohydrates: 58g | Fat: 20g.
Final Thoughts
As the last swirl of pastel frosting settles and you nestle those final raspberries into place, take a step back. Look at what you’ve created. This isn’t just a cake; it’s a tangible piece of spring, a labor of love baked into every lemony layer and swirled with joy.
Remember, the true beauty of this cake lies not in flawless perfection, but in the story it tells. It’s the story of flour-dusted counters and the bright scent of zest filling your kitchen. It’s the story of a shared nod of approval that turned into a yearly tradition. Whether this becomes your new Easter centerpiece or a bright spot in an ordinary week, you’ve woven a little bit of your own heart into it.
So when you present it, slice it with pride. Watch as the golden crumb gives way to that vibrant ribbon of ruby red. Listen for the happy sighs and the “Mmm, lemon!” that are sure to follow. You’ve made more than dessert; you’ve made a memory.
Thank you for baking this sunshine with me. May your spring be as sweet, bright, and full of promise as this cake.
With love and a sprinkle of zest,
Olivia
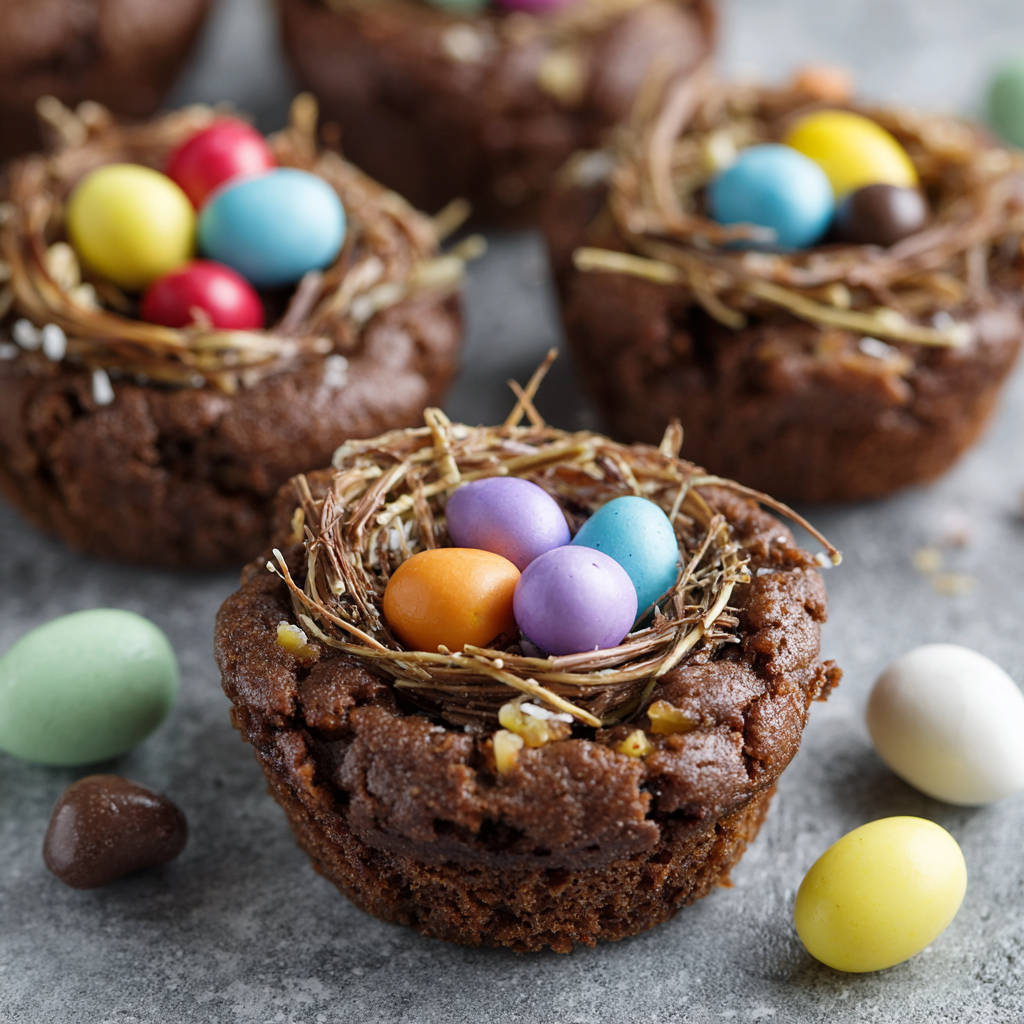
Mini Egg Nest Brownies (Fudgy Easter Brownie Cups)
Mini Egg Nest Brownies: Your New Favorite Easter Tradition
Hey there, friend! Olivia here. Can you feel it? That little hum of excitement in the air? The days are getting longer, there’s a touch of warmth on the breeze, and grocery store aisles are suddenly bursting with the most joyful, colorful little candy eggs. It’s spring, and my baking brain immediately goes to one place: Easter treats that are equal parts delicious and downright delightful.
Now, I love a classic chocolate bunny as much as the next person, but there’s something about a dessert you can *create* that feels so much more special. Something that feels like a hug on a plate. That’s where these Mini Egg Nest Brownies come in. Imagine this: a rich, intensely fudgy brownie, baked into a perfect personal-sized cup. On top, a whimsical nest made of crunchy chocolate and crispy noodles, cradling a trio of those iconic pastel mini eggs. They’re not just a dessert; they’re a conversation starter, a centerpiece, and a guaranteed smile-maker.
The best part? These are what I call a “shortcut superstar.” We’re using a brownie mix as our trusty foundation (no shame in my game!), which means you’re about 15 minutes away from having these in the oven. This recipe is for everyone—the busy parent, the enthusiastic beginner, the seasoned baker who just wants something fun and fast. So, tie on your favorite apron (the messy one tells the best stories), and let’s make some magic together. These little nests are about to become the star of your Easter table, your spring brunch, or just your Tuesday afternoon. Let’s get baking!
The Year of the Lopsided Nest: A Sweet Kitchen Memory
This recipe always takes me back to my very first attempt, years ago. I was hosting my first big Easter lunch for both sides of our family. I wanted to impress, to create a spread that said, “Look! I’m a real adult who can host things!” I had visions of a pristine dessert table with these perfect, magazine-worthy nest brownies.
Reality? My first batch of nests looked… abstract. Let’s be kind. One resembled a bird’s nest after a strong wind. Another was more of a chocolate haystack. My then-five-year-old niece wandered into the kitchen, peered at my tray, and said, “Auntie Liv, did the birds forget how to build?” I burst out laughing. Instead of stressing, we grabbed some extra mini eggs and “helped” the birds by strategically placing eggs to cover the, ahem, architectural flaws. Those wonky, love-filled brownies were the first thing to disappear from the table that day. It taught me a beautiful lesson: food made with joy and a dash of imperfection is always the most memorable. Now, I embrace the unique personality of each nest. Yours will too, and that’s what makes them perfect.
What You’ll Need: A Tour of the Ingredients
Gathering your ingredients is the first act of love in any recipe. Here’s everything you need, plus a few of my favorite insider tips to make these brownie cups uniquely yours.
- 1 Box of Your Favorite Brownie Mix (or homemade batter): This is our fantastic shortcut! I adore a dark chocolate or fudge-style mix for maximum richness. Chef’s Insight: The box size typically labeled “family size” or “9×13 pan size” is perfect. It gives us plenty of batter for generous cups.
- Ingredients listed on the brownie mix box (usually eggs, oil, and water): Follow your box’s directions for “fudgy” brownies if there’s an option. Using an extra egg yolk (in addition to what’s called for) can make them even more decadent!
- 1 cup Milk or Dark Chocolate Chips: This is for our nest magic. I prefer semi-sweet for a balanced sweetness, but milk chocolate is a dream with the candy eggs. Substitution Tip: Chopped chocolate bars melt even smoother than chips! Just avoid white chocolate for the nests, as it sets too soft.
- 1 cup Chow Mein Noodles or Shredded Wheat Cereal: The “twigs” for our nest! Chow mein noodles are classic—they’re light, super crispy, and create that authentic nest look. Substitution Tip: If you can’t find them, broken-up shredded wheat biscuits (the plain kind) are a fantastic, whole-grain alternative. Pretzel sticks broken into tiny pieces also work in a pinch!
- 1 bag of Mini Candy Eggs: The jewel-toned finale! You can use the sugar-shelled ones or the mini chocolate eggs. Chef’s Insight: For a truly stunning look, use a mix of colors. Place them on the nests while the chocolate is still soft so they stick perfectly.
Building Your Brownie Nests: Step-by-Step
Ready? Let’s walk through this together. I’m right here with you, offering all the little hacks I’ve learned along the way to ensure your brownie nests are foolproof and fabulous.
- Prep Your Stage. Preheat your oven to 350°F (175°C). Grab a standard 12-cup muffin tin and give it a really good coat of non-stick spray or butter. Don’t be shy! This ensures our brownie cups pop out easily after their bake. Pro Tip: For ultimate non-stick insurance, you can use paper muffin liners. I sometimes skip them because I love the crisp edges you get from the tin, but liners make cleanup a breeze.
- Mix the Brownie Base. In a large bowl, prepare your brownie batter exactly as the box directs for that fudgy texture. Whisk it until it’s just combined and no dry streaks remain, but don’t over-mix. A few lumps are A-okay! Chef’s Hack: Add a teaspoon of instant espresso powder to the dry mix. It won’t taste like coffee—it just makes the chocolate flavor sing a deeper, richer song.
- Portion with Love. Using a spoon or a cookie scoop, divide the batter evenly among the 12 muffin cups. Fill each one about ⅔ of the way full. This gives them room to rise and create a perfect little cup shape. Watchpoint: If you overfill, they might spill over and be tricky to remove. A little less is better than too much!
- Bake to Fudgy Perfection. Slide the tin into your preheated oven. Bake for 15-18 minutes. Here’s the key: you want the edges to look set and maybe have tiny cracks, but the very center should still look a tiny bit soft and not completely dry. A toothpick inserted near the edge should come out with moist crumbs, not clean batter. Biggest Tip: Do NOT overbake! They continue to set as they cool. Overbaked brownie cups lose that divine fudginess.
- The All-Important Cool Down. Take the tin out and let it cool on a wire rack for a full 10 minutes. Then, gently run a butter knife around the edges of each brownie cup to loosen them. Let them cool completely in the tin before removing. Patience here is vital—if they’re warm, the nests will melt!
- Craft the Chocolate Nests. While the brownies cool, make your nests. Melt the chocolate chips in a microwave-safe bowl in 30-second bursts, stirring well between each, until smooth. Or, use a double boiler. Pour the melted chocolate over your chow mein noodles or shredded wheat in a medium bowl. Gently fold with a spatula until every piece is beautifully coated.
- Assemble with Joy. Place your completely cooled brownie cups on a plate or parchment. Using two forks or spoons, scoop a portion of the chocolate-noodle mixture onto the center of each brownie. Gently shape it into a nest with a slight depression in the middle. This is the fun, artistic part—no two will be identical! Immediately press 3-4 mini eggs into the center of each nest.
- Let Them Set. Allow the nests to set at room temperature until the chocolate is firm, about 30-60 minutes. If you’re in a hurry, you can pop the whole tray in the fridge for 15 minutes. Then, they’re ready to serve and devour!
How to Serve These Little Masterpieces
Presentation is part of the fun! Arrange these brownie nests on a simple cake stand or a platter lined with a pastel napkin for instant Easter vibes. They’re a complete dessert all on their own, but for an extra-special touch, offer them with a side of freshly whipped cream or a scoop of vanilla bean ice cream. The warm-cold contrast is heavenly. They’re perfect for a dessert buffet, as a sweet gift boxed up for neighbors, or as the grand finale to your Easter feast.
Make It Your Own: Fun Variations
Once you’ve mastered the classic, play around! Here are a few of my favorite twists:
- Peanut Butter Paradise: Swirl ¼ cup of peanut butter into the brownie batter before baking. Use peanut butter chips in the nest and top with peanut butter cup mini eggs if you can find them!
- Cookie Crunch Nest: Swap the chow mein noodles for roughly crushed pretzel sticks or even broken-up potato sticks for a salty-sweet crunch.
- Spring Berry Bliss: For a fruit-forward version, skip the candy eggs. Once the nests are set, fill the center with a few fresh raspberries, blueberries, or a drizzle of raspberry sauce.
- “Bird Seed” Nest: Make a gluten-free version by using certified GF crisp rice cereal or roasted sunflower seeds and pepitas for the nest texture.
- Caramel Drizzle: After the nests set, add an extra layer of decadence by lightly drizzling the whole tray with warm salted caramel sauce.
Olivia’s Kitchen Notes & Stories
This recipe has evolved so much since that first lopsided year! I’ve learned that letting the brownie cups cool *completely* is the single most important step for a stable nest. I’ve also started adding a tiny pinch of flaky sea salt on top of the chocolate nests right after assembling—it elevates everything.
One year, I was out of muffin tins (how does that even happen?) and baked the batter in a square pan instead. We cut it into squares and built the nests right on top, turning it into a “brownie nest bark” situation. It was a hilarious and delicious save! The moral is: your kitchen, your rules. Don’t be afraid to adapt. These brownies are about joy, not perfection. Now, I’d love to hear from you! Tag me on social media with your creations—especially the wonderfully wonky ones. They’re my favorite.
Your Questions, Answered
Q: My nests are sliding off the brownies! What did I do wrong?
A: This almost always means the brownie cups were still warm. Chocolate melts when it touches warmth! Ensure they are 100% cooled to room temperature. You can even pop them in the fridge for 10 minutes before assembling for a totally cold, firm base.
Q: Can I make these ahead of time for a party?
A: Absolutely! They are a fantastic make-ahead dessert. Bake and cool the brownie cups the day before. Store them in an airtight container at room temperature. Make the chocolate nests and assemble them the morning of your event. They’ll stay perfect and crisp for several hours at room temp.
Q: The chocolate for my nests is too thick and clumpy. Help!
A: This usually means the chocolate got a little too hot or was stirred too vigorously. If it’s very thick, try stirring in a teaspoon of neutral oil (like vegetable or coconut) to loosen it back up. For next time, melt more gently and fold the noodles in carefully.
Q: Can I use a homemade brownie recipe instead of a mix?
A: Of course! Use your favorite homemade fudgy brownie recipe. Just be sure the batter yield is enough for a 9×13 pan, and follow the same portioning and baking instructions. You may need to adjust bake time by a minute or two, so keep an eye on them.

Mini Egg Nest Brownies (Fudgy Easter Brownie Cups)
Description
These Mini Egg Nest Brownies are the kind of dessert that instantly feels like a tradition. You get rich, fudgy brownie cups topped with crunchy chocolate “nests” and colorful candy eggs. They look adorable on a spring table, but they’re also super simple thanks to a brownie mix shortcut. Perfect for Easter, school parties, or a weekend baking project.
Ingredients
Brownie Base
-
1 box brownie mix (9×13 size)
-
Ingredients listed on the box (usually eggs, oil, water)
Chocolate Nests
-
1 cup chocolate chips (milk, dark, or semi-sweet)
-
1 cup chow mein noodles or shredded wheat cereal, lightly crushed
Topping
-
Mini candy eggs (about 36–48 pieces)
Instructions
-
Heat the oven
Preheat oven to 350°F (175°C). Grease a 12-cup muffin tin or line with paper liners. -
Make the batter
Prepare brownie batter according to the package directions (choose the fudgy option if listed). -
Fill the pan
Divide batter evenly into muffin cups, filling each about ⅔ full. -
Bake
Bake for 15–18 minutes until edges are set and centers are still slightly soft.
Cool in the pan 10 minutes, then loosen edges and let cool completely. -
Make the nests
Melt chocolate chips in the microwave in 30-second bursts, stirring between each, until smooth.
Stir in noodles or cereal until fully coated. -
Shape nests
Spoon a small mound onto each cooled brownie cup. Use two spoons or a fork to shape into a nest with a dip in the center. -
Add eggs
Press 3–4 mini candy eggs into each nest while the chocolate is still soft. -
Set
Let sit at room temperature 30–60 minutes or refrigerate 15 minutes until firm.
Notes
-
✅ Brownies must be fully cooled before adding nests or the chocolate will melt.
-
✅ Don’t overbake — soft centers = fudgier cups.
-
✅ Add a pinch of instant espresso powder to the batter to boost chocolate flavor.
-
✅ Stir 1 teaspoon neutral oil into melted chocolate if it feels too thick.
-
✅ A light sprinkle of flaky salt on top makes the flavor pop.
Nutritional Information (Per Brownie Nest)
Please note: This is an approximate estimate based on the ingredients listed and will vary depending on specific brands used.
- Calories: 240
- Total Carbohydrates: 32g
- Dietary Fiber: 1g
- Sugars: 22g
- Total Fat: 12g
- Protein: 3g
This recipe is vegetarian-friendly. For gluten-free, use a GF brownie mix and GF cereal for the nests.
Final Thoughts: A Tradition in the Making
As I brush the last few chocolate crumbs from the counter, I’m already smiling thinking about who will enjoy these next. There’s something about these Mini Egg Nest Brownies that feels like more than a recipe—it feels like the start of a tradition.
They remind us that the sweetest moments often come from the simplest creations. That a little whimsy, a splash of color, and a shared treat can turn an ordinary day into a celebration. They’re proof that you don’t need to be a pastry chef to make something that looks like it came from a bakery and feels like it came straight from the heart.
Whether your nests are picture-perfect or charmingly rustic, what matters is the joy you pour into them. The laughter shared while assembling. The delight on the faces of those you serve. That’s the real magic.
So here’s to new traditions, to shortcuts that feel special, and to desserts that bring people together. May your spring be sweet, your brownies fudgy, and your nests always full of color.
Happy Easter, happy spring, and happy baking, friend.
With love,
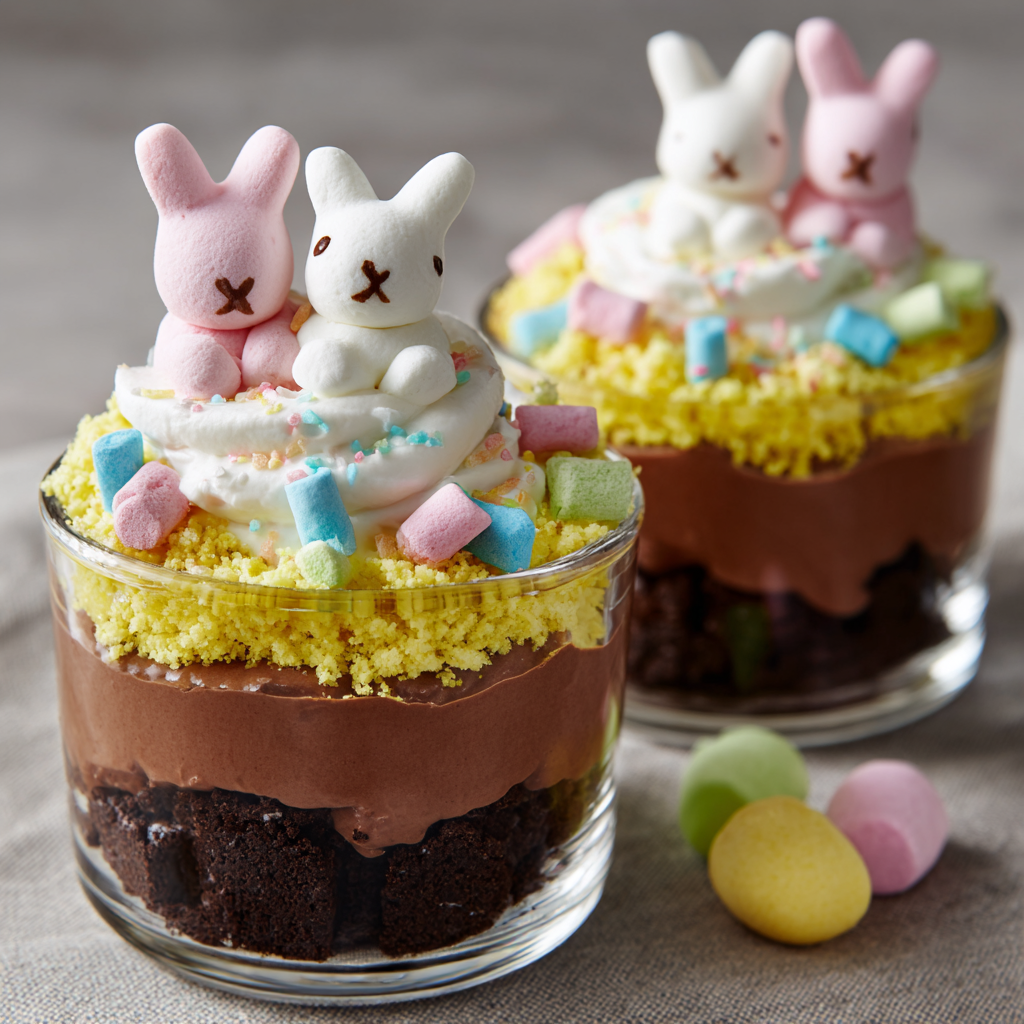
Easter Dirt Cups : Nostalgic No-Bake Spring Dessert
Easter Dirt Cups: The No-Bake Treat That Brings Back the Joy
Hey there, friend! Olivia here, wiping a bit of chocolate from my apron as I type. Can you smell that? It’s the scent of pure, unadulterated joy—and maybe a little bit of crushed cookie. If there’s one thing I believe in (aside from the healing power of a good loaf of bread), it’s that magic in the kitchen doesn’t have to be complicated. Sometimes, the most unforgettable moments come from the simplest, silliest, and most nostalgic recipes. And that’s exactly where our Easter Dirt Cups come waltzing in, marshmallow bunnies in tow.
Picture this: creamy, dreamy chocolate pudding, layers of chocolatey “dirt,” and those adorable pastel marshmallow critters peeking out. It’s a dessert that makes everyone—from the tiniest toddler to the most sophisticated gourmand—break into a grin. This is more than just a no-bake dessert; it’s a playful centerpiece, a conversation starter, and a guaranteed memory-maker. Best of all? You can whip it up in minutes with zero oven time, leaving you free to actually enjoy your own gathering. So, grab your favorite mixing bowl and let’s make a mess (the delicious kind) together. This is the kind of easy, festive cooking that makes my heart sing, and I’m so thrilled to share it with you.
A Sprinkling of Nostalgia: My First “Garden”
My love for these dirt cups is deeply rooted (pun absolutely intended) in my childhood. I must have been seven or eight, and my super-cool aunt was in charge of the kids’ table for Easter dessert. While the adults were sipping coffee and debating pie, she beckoned my cousins and me into the kitchen. She handed out little clay flower pots she’d washed and lined, a bag of chocolate cookies, and told us we were making “edible gardens.” The rule was: the messier, the better.
I remember the sheer, giddy power of pulverizing those cookies in a zip-top bag with a rolling pin. We “planted” gummy worms and later, the then-novel marshmallow Peeps. We felt like culinary wizards, creating something that looked like mud but tasted like heaven. That moment—the laughter, the sticky fingers, the pride of presenting our creations—captured the essence of what I now believe cooking is all about: connection, creativity, and a whole lot of fun. Every time I layer a dirt cup now, I’m not just making dessert; I’m passing on that little spark of kitchen magic.
Gathering Your “Garden” Supplies
Here’s everything you need to create this easy spring spectacle. I’ve added my little chef notes and swaps so you can make this recipe your own!
- 1 (3.9 oz) box instant chocolate pudding mix: The foundation of our creamy “mud.” Instant is key here for its no-cook convenience. Chef’s Insight: For a richer flavor, try a dark chocolate or fudge variety.
- 2 cups cold whole milk: The colder the milk, the quicker and thicker your pudding will set. I don’t recommend skim milk here; the fat in whole or 2% gives the pudding a luscious mouthfeel.
- 1 cup whipped topping or freshly whipped cream: This lightens the pudding into a mousse-like cloud. Whipped topping holds its shape beautifully, but for a from-scratch vibe, whip 1/2 cup of heavy cream with a tablespoon of powdered sugar until stiff peaks form.
- 18–20 chocolate sandwich cookies (like Oreos®): Our glorious “dirt.” You’ll crush the entire cookie—cream filling and all—for the perfect sweet, chocolaty crunch. Pro Sub: Use gluten-free chocolate sandwich cookies for a celiac-friendly version.
- Marshmallow bunnies or chicks: The festive toppers! Peeps are the classic, but any pastel marshmallow shape works.
- Optional Garnishes: Chocolate eggs (candy-coated or foil-wrapped), pastel sprinkles, or even a few gummy worms for an extra dose of playful nostalgia. This is your garden—decorate it how you love!
Let’s Build Some Sweet Dirt Cups!
Ready to play with your food? Let’s do this! The process is as fun as the result.
- Chill Your Bowls & Milk: Before you start, pop your mixing bowl and beaters (if you’re whipping cream) into the freezer for 10 minutes. This ensures everything stays cold for maximum fluffiness. Also, make sure your milk is straight from the fridge. Trust me, this little pre-step makes a world of difference.
- Create the Cookie “Dirt”: Place your chocolate sandwich cookies in a large zip-top bag. Seal it tightly, pressing out the air. Now, the fun part: crush them! Use a rolling pin, a heavy skillet, or even a wine bottle to bash them into a mix of fine crumbs and a few chunky pieces for texture. Chef’s Hack: For ultra-fine, consistent “soil,” pulse them a few times in a food processor. Pour the crumbs into a shallow bowl and set aside.
- Whip Up the Pudding Cloud: In your chilled bowl, whisk the instant pudding mix and the cold milk together vigorously for a full 2 minutes. It will start to thicken beautifully right before your eyes. Now, gently fold in your whipped topping or freshly whipped cream until no white streaks remain. You’re looking for a smooth, airy, and delightfully creamy mixture. Give it a taste—you’ve earned it!
- The Art of Layering: Grab your clear cups, jars, or even those adorable mini flower pots (lined with plastic wrap). Start with a generous spoonful of cookie crumbs to create your “dirt” foundation. Then, add a layer of the chocolate pudding mixture. Repeat! I usually do two layers of each, but feel free to get creative. The final top layer should be cookie crumbs.
- Decorate & Chill: This is where personality shines. Nestle your marshmallow bunnies or chicks into the top “dirt.” Scatter a few chocolate eggs around them or add a rainbow of sprinkles. Once decorated, cover lightly and chill in the refrigerator for at least 20 minutes. This short rest allows the layers to settle and the flavors to marry, giving you the perfect cool, creamy, and crunchy bite.
Presenting Your Easter Masterpiece
Presentation is half the fun with this dessert! I love serving these in clear plastic cups so everyone can admire the layers, or in small mason jars for a rustic-chic feel. Arrange them on a platter or a tray lined with a bed of green shredded paper “grass” for a full-on Easter basket effect. Hand them out directly to your guests with a spoon and watch their faces light up. It’s a personal, playful dessert that makes everyone feel special.
Grow Your Own Flavor Garden: Fun Twists!
- Cookies & Cream Dream: Fold a handful of mini chocolate chips or even finely chopped chocolate sandwich cookies into the pudding mixture itself for extra texture.
- Bunny Bait Pudding: Use vanilla instant pudding instead of chocolate. Mix in pastel M&M’s or Easter sprinkles into the pudding layer for a confetti-filled surprise.
- Dirt Pie Parfait: Turn it into a full pie! Press half the cookie crumbs mixed with a few tablespoons of melted butter into a pie dish to form a crust. Fill with the pudding mixture, top with remaining crumbs, and chill.
- Vegan Spring Garden: Use your favorite plant-based milk, vegan instant pudding mix (Jell-O brand isn’t, but many store brands are), coconut whipped topping, and vegan chocolate cookies. Top with Dandies or other vegan marshmallows.
- Salted Caramel Pretzel Dirt: Replace half the chocolate cookies with crushed pretzels for a sweet-and-salty twist. Drizzle the layers with a little store-bought salted caramel sauce.
Olivia’s Kitchen Chronicles
This recipe has seen more variations in my kitchen than I can count! One year, I accidentally bought butterscotch pudding mix and decided to roll with it, creating a “sandy beach” cup with graham cracker crumbs and blueberry “water” (a little tinted whipped cream). It was a hit! The beauty of this concept is its flexibility. Over time, I’ve learned that the chill time is non-negotiable for the perfect texture—impatience leads to soupier cups. I also once, in a pre-coffee haze, tried to make the pudding with warm milk. Let’s just say we had chocolate soup that day (which my kids happily drank with a straw!). The lesson? Embrace the happy accidents, but keep that milk cold.
Your Dirt Cup Questions, Answered
Q: My pudding didn’t set! What happened?
A: The most common culprit is not using cold enough milk or not whisking for the full 2 minutes. Instant pudding needs that initial shock of cold to activate the thickening agents. If it’s still runny after chilling, you can try folding in a bit more whipped topping to stabilize it, but prevention (cold milk!) is key.
Q: Can I make these ahead of time?
A: Absolutely! You can assemble them completely, cover tightly, and refrigerate for up to 24 hours. I’d add any very soft marshmallow decorations (like Peeps) just before serving, as they can weep and get sticky in the fridge overnight.
Q: What can I use instead of whipped topping?
A> Freshly whipped cream is a fantastic substitute. Whip 1/2 cup of heavy cream with 1 tbsp of powdered sugar and 1/2 tsp of vanilla extract until it holds stiff peaks. Fold it in just as you would the whipped topping. The texture will be slightly lighter and less stable over many hours, but the flavor is divine.
Q: Help! I don’t have clear cups. What else can I use?
A> No problem at all! Use any small bowls, ramekins, or even a large trifle dish to make one big “dirt pile.” The visual of the layers is fun, but the taste is what truly matters. You could also use colorful ceramic mugs for a cozy feel.

Easter Dirt Cups : Nostalgic No-Bake Spring Dessert
Description
These Easter Dirt Cups are one of those desserts that never fail to make people smile. Creamy chocolate pudding, crushed cookie “dirt,” and cute marshmallow toppers come together in a fun layered cup that’s perfect for spring parties and family gatherings. No oven, no stress — just mix, layer, decorate, and chill.
Ingredients
-
1 box (3.9 oz / 110 g) instant chocolate pudding mix
-
2 cups cold milk (whole or 2%)
-
1 cup whipped topping or freshly whipped cream
-
18–20 chocolate sandwich cookies
-
Marshmallow bunnies or chicks (for topping)
Optional Extras
-
Candy chocolate eggs
-
Pastel sprinkles
-
Gummy worms
-
Mini chocolate chips
Instructions
-
Crush the cookies
Place cookies in a zip bag and crush with a rolling pin until you get fine crumbs with a few small chunks. Set aside. -
Make the pudding
In a bowl, whisk pudding mix and cold milk for about 2 minutes until thick. -
Lighten the mixture
Gently fold in the whipped topping or whipped cream until smooth and fluffy. -
Layer the cups
Spoon cookie crumbs into the bottom of each cup.
Add a layer of pudding mixture.
Repeat layers once more, finishing with cookie crumbs on top. -
Decorate
Add marshmallow bunnies or chicks and any extra candies or sprinkles. -
Chill
Refrigerate at least 20–30 minutes before serving.
Notes
-
✅ Use very cold milk so the pudding sets properly.
-
✅ Clear cups or jars show off the layers and look extra festive.
-
✅ A piping bag makes neat pudding layers.
-
✅ Add marshmallow toppers just before serving if making ahead.
-
✅ Want extra crunch? Mix in a few cookie chunks between layers.
Quick Nutrition Snapshot
Prep Time: 15 mins | Chill Time: 20 mins | Total Time: 35 mins | Servings: 6-8
Approximate Nutrition per Serving (1 cup, calculated with whole milk and whipped topping): Calories: 290 | Protein: 4g | Carbohydrates: 38g | Fat: 14g
***
And there you have it—your guide to creating the most joyfully messy, deliciously simple Easter treat. I hope these dirt cups bring as much laughter and sweetness to your table as they have to mine over the years. Happy cooking, happy Easter, and remember: the best kitchens are always a little bit dirty!
With love and a sprinkle of cookie crumbs,
Olivia
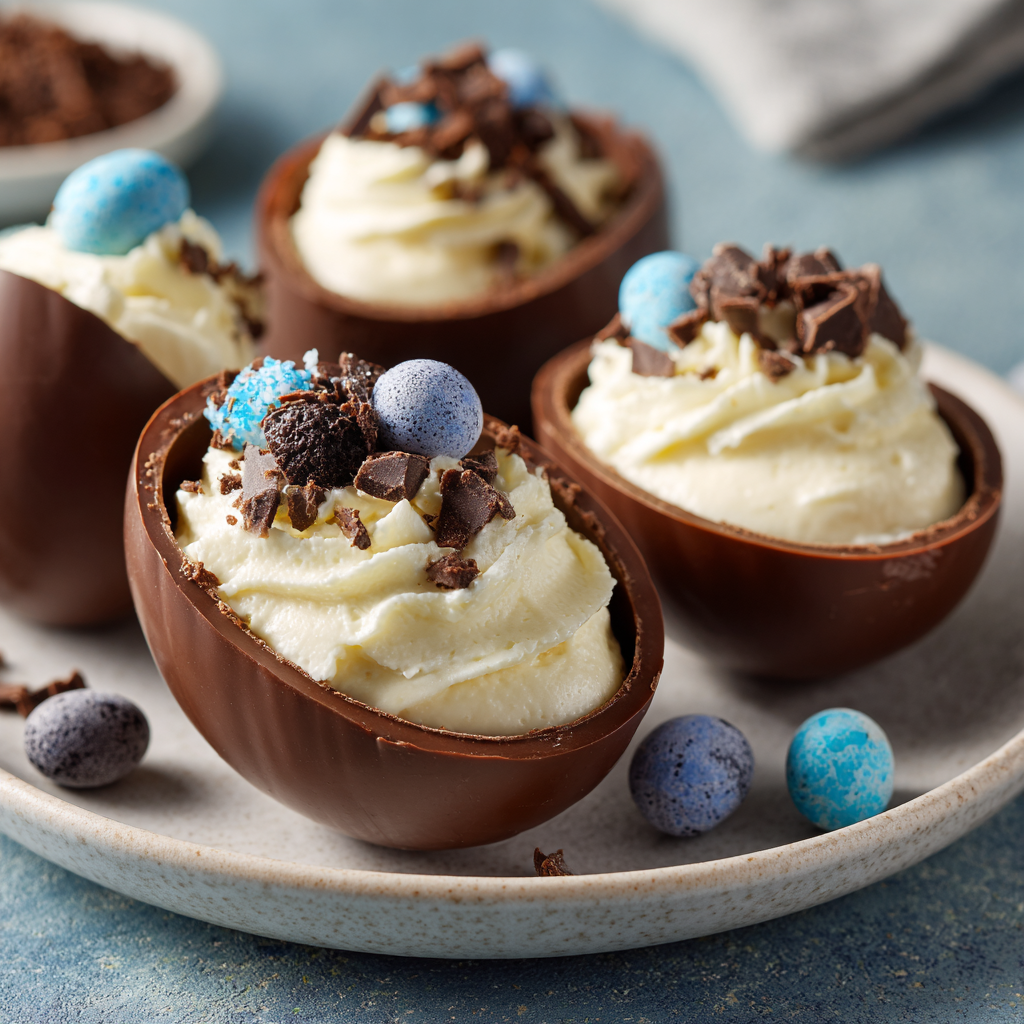
Cheesecake-Filled Chocolate Eggs : No-Bake Easter Dessert
Say Hello to Your New Favorite Easter Treat: No-Bake Cheesecake Eggs!
Hey there, friend! Can you smell that? It’s the sweet, promising scent of spring in the air, mixed with a hint of chocolate and nostalgia. Easter has always been my favorite holiday for one delicious reason: it’s a celebration that happens almost entirely around the table. But between dyeing eggs, prepping a big meal, and hunting for that last hidden chocolate bunny, who has hours to spend baking? That’s exactly why I’m practically bouncing with excitement to share this recipe with you today.
Imagine this: a gorgeous, glossy chocolate egg that cracks open not to a hollow center, but to a cloud of dreamy, tangy, no-bake cheesecake filling. It’s rich, it’s creamy, it’s delightfully decadent, and the best part? You don’t even need to turn on your oven. These Cheesecake-Filled Chocolate Eggs are the ultimate show-stopper for your Easter table, a surefire hit for any spring gathering, and such a fun project to make with loved ones in the kitchen.
We’re talking about a dessert that looks like it came from a fancy chocolatier but is made with simple, joyful steps right in your own home. Whether you’re a seasoned dessert-maker or someone who gets nervous just looking at a springform pan, this recipe is for you. So tie on your favorite apron (the messy one tells the best stories, I always say), and let’s create some magic—and memories—together.
The Easter That Started It All: A Tale of Melted Chocolate & Big Dreams
This recipe didn’t start in a flash of genius. Oh no. It started with a kitchen disaster of the sweetest, stickiest kind. Picture a much younger me, about ten years old, determined to make my Grandma Rose’s famous chocolate truffles for our family Easter. I was ambitious! I melted chocolate, mixed in cream, and ended up with a bowl that looked more like chocolate soup. My little heart sank.
But my grandma, in her infinite kitchen wisdom, didn’t see a failure. She saw a chance to play. “Well, Olivia,” she said, her eyes twinkling, “if it’s too runny for truffles, what else can it fill?” She rummaged in the cupboard and pulled out a bag of those classic, hollow foil-wrapped chocolate eggs. With a careful twist, she popped the two halves apart. “Let’s see what happens,” she whispered, like we were scientists in a lab.
We spooned my “failed” ganache into those little chocolate shells, chilled them, and presented them to the family. The look of surprise and delight when everyone bit into a chocolate egg filled with creamy goodness? That feeling was pure magic. It taught me that the best recipes often come from happy accidents and a willingness to experiment. These Cheesecake-Filled Eggs are the grown-up, perfected version of that messy, wonderful kitchen memory, and every time I make them, I think of her.
Gathering Your Joyful Ingredients
One of my core cooking beliefs is that fantastic food doesn’t need a mile-long ingredient list. We’re keeping things simple and high-quality here. Every component plays a starring role, so let’s break it down. Here’s what you’ll need to create these edible treasures:
For the Chocolate Shells:
- 8–10 Hollow Chocolate Eggs: This is your edible vessel! You can use milk, dark, or white chocolate eggs based on your preference. Chef’s Insight: I often use a mix for a pretty platter! Look for eggs that are a decent size and have a fairly sturdy shell. The classic foil-wrapped ones from the grocery store work perfectly.
For the Luxurious No-Bake Cheesecake Filling:
- 8 oz (one block) Full-Fat Cream Cheese, softened: Full-fat is non-negotiable here for the proper rich, creamy texture and stability. Leave it on the counter for 1-2 hours until it’s soft to the touch. Substitution Tip: For a lighter version, Neufchâtel cheese works, but the filling will be slightly softer.
- 1/4 cup Powdered Sugar: Also called icing sugar or confectioners’ sugar. It dissolves seamlessly into the cream cheese without any graininess. Chef’s Insight: Sift it if it’s lumpy for an ultra-smooth filling.
- 1/2 teaspoon Pure Vanilla Extract: The warm, floral notes of vanilla are the perfect bridge between the tangy cheese and sweet chocolate. For a next-level twist, try vanilla bean paste!
- 1/2 cup Heavy Cream (also called Heavy Whipping Cream), chilled: This is what gives our filling its incredible, light-as-air fluffiness. Make sure it’s cold straight from the fridge—it whips up faster and holds peaks better.
For the Fun Finishes (Optional but Encouraged!):
- Crushed Cookies: Graham cracker crumbs are a classic cheesecake nod! Biscoff or vanilla wafer crumbs are also divine.
- Mini Chocolate Chips: For a delightful little crunch and extra chocolatey punch.
- Sprinkles or Chopped Nuts: Instant color and joy! Pastel sprinkles scream Easter. Toasted pecans or almonds add a lovely sophisticated crunch.
- Fresh Berries: A tiny strawberry slice or a couple of raspberries on top look beautiful and add a pop of freshness.
Let’s Make Some Magic: Step-by-Step Instructions
Ready to play? This is the fun part. We’ll go step-by-step, and I’ll be right here with you with all my best tips and tricks. Put on some happy music, and let’s get started!
Step 1: Prep Your Chocolate Eggs. Gently unwrap your hollow chocolate eggs. Now, we need to create an opening for our filling. My favorite method is to use a small, sharp serrated knife (like a tomato/petty knife) and very gently saw a small “hatch” or opening at the top. You’re aiming for an opening about the size of a quarter. Think of it like you’re opening a little treasure chest! Pro-Tip: If your eggs are the two-halves kind, simply pull them apart—you lucky duck! Place all your prepped egg shells on a plate or small baking sheet. If any break (it happens to the best of us!), consider it a chef’s snack and grab another.
Step 2: Whip the Cream to Soft Peaks. In a clean, cool bowl, pour in your chilled heavy cream. Using a hand mixer or stand mixer with the whisk attachment, beat the cream on medium-high speed until it just holds soft, billowy peaks. This means when you lift the beaters, the peak of cream curls over gently. Don’t go to stiff peaks yet! We’ll whip it a bit more later. Set this aside for a moment.
Step 3: Create the Cream Cheese Base. In a separate, larger bowl, beat your softened cream cheese on medium speed for about 1-2 minutes until it’s completely smooth, creamy, and no lumps remain. Scrape down the sides of the bowl with a spatula. This is crucial for a silky filling! Add the powdered sugar and vanilla extract. Beat again on low at first (to avoid a sugar cloud!), then medium until everything is fully incorporated and smooth.
Step 4: Marry the Creams & Achieve Fluffy Bliss. Here’s the key to a light, mousse-like filling: gentle folding. Add about one-third of your whipped cream to the cream cheese mixture. Use your spatula to gently fold it in—scoop down the side, across the bottom, and up over the top, rotating the bowl. This preserves the air bubbles. Once that’s incorporated, add the remaining whipped cream and fold gently until no white streaks remain. The mixture should be gloriously thick, smooth, and fluffy. Chef’s Hack: If you want to be extra fancy, transfer this filling to a piping bag fitted with a large round tip. It makes filling the eggs incredibly neat and easy!
Step 5: Fill Those Eggs! If you’re using a piping bag, simply insert the tip into the opening of each chocolate egg and pipe until the filling is nearly to the top. If you’re using a spoon, use a small teaspoon to carefully spoon the filling into each shell. Don’t overpack it—leave a tiny bit of room at the top if you’re adding toppings. Wipe away any little smudges with a clean finger.
Step 6: Decorate & Chill. Now for the artistic flair! Sprinkle your chosen toppings over the filled eggs—a pinch of cookie crumbs, a few mini chips, a shower of sprinkles. Then, carefully transfer the tray to your refrigerator. Let them chill for at least 30 minutes, or up to 2-3 hours. This chilling time is essential for the filling to firm up slightly, making them perfect for eating.
Serving Your Edible Masterpieces
Presentation is part of the fun! I love arranging these cheesecake eggs on a beautiful cake stand or a platter lined with pastel parchment paper. Scatter a few extra sprinkles, edible flowers, or even a few loose chocolate eggs around the base for a truly festive look. Serve them straight from the fridge with a smile, and get ready for the “oohs” and “aahs.” The contrast of the crisp chocolate shell giving way to the cool, creamy filling is an experience everyone will love.
Make It Your Own: Delicious Recipe Variations
The beauty of this recipe is how easily it adapts! Here are a few of my favorite twists:
- Lemon Berry Bliss: Add 1 teaspoon of finely grated lemon zest to the filling. Top each filled egg with a tiny dollop of seedless raspberry jam.
- Salted Caramel Pretzel: Drizzle the inside of the chocolate shell with a little salted caramel sauce before filling. Top the cheesecake with a tiny piece of salted pretzel.
- Cookies & Cream: Fold 2 tablespoons of finely crushed Oreo crumbs into the filling. Use a white chocolate egg shell and top with more crumbs.
- Mocha Buzz: Dissolve 1 teaspoon of instant espresso powder into the vanilla extract before adding it. Use a dark chocolate shell.
- Dairy-Free Swap: Use vegan cream cheese and coconut cream (chilled solid part only) whipped in place of heavy cream. Ensure your chocolate eggs are dairy-free.
Olivia’s Chef Notes & Kitchen Stories
This recipe has become my go-to spring signature, but it’s had its evolution! The first time I made the “grown-up” version, I got a bit overzealous with the filling and created what my husband lovingly called “cheesecake volcanoes” when they overflowed. Lesson learned: leave a little breathing room at the top!
I’ve also learned that these are fantastic make-ahead treats. You can assemble them completely the day before your event and just pull them out when you need them. They also travel surprisingly well for a picnic or potluck if kept in a cool, flat container. The best part? Seeing the sheer delight on people’s faces—especially kids—when they discover the surprise inside. It’s a little bite of joy, and that’s what homemade cooking is all about.
Your Questions, Answered: FAQs & Troubleshooting
Q: My chocolate egg cracked a lot when I cut it. What did I do wrong?
A: No worries! Chocolate can be temperamentous. You might have used too much pressure or a knife that wasn’t serrated. Try using a lighter touch and a gentle sawing motion. Warming the knife blade slightly under hot water and drying it can also help make a cleaner cut. If it cracks, just use it as your “taste tester” and grab another!
Q: My filling seems a bit runny. How can I fix it?
A: This usually happens if the cream cheese wasn’t full-fat, if it wasn’t soft enough to blend completely smooth, or if the heavy cream was under-whipped. For future batches, ensure your cream is cold and whip it well. For this batch, all is not lost! Just pop the filled eggs into the freezer for about 20 minutes instead of the fridge. They’ll firm up nicely, though you’ll want to eat them a bit sooner after taking them out.
Q: Can I use Cool Whip instead of whipping my own cream?
A: You absolutely can for a shortcut! Use an 8 oz tub of thawed Cool Whip and gently fold it into your sweetened, vanilla-infused cream cheese base. The texture will be slightly different—lighter and a bit airier—but still delicious.
Q: How long do these last in the fridge?
A: They are best enjoyed within 2-3 days. The chocolate shell may start to soften slightly over time from the moisture in the filling, but they’ll still taste amazing. I do not recommend freezing the assembled eggs, as the texture of the filling can become grainy upon thawing.

Cheesecake-Filled Chocolate Eggs : No-Bake Easter Dessert
Description
These no-bake cheesecake eggs are a fun, festive dessert that looks impressive but is surprisingly easy to make. Hollow chocolate eggs are filled with a fluffy, tangy cheesecake cream and topped with your favorite crunchy or colorful finishes. Perfect for Easter tables, spring parties, or a quick make-ahead treat.
Ingredients
Chocolate Shells
-
8–10 hollow chocolate eggs (milk, dark, or white)
Cheesecake Filling
-
8 oz (225 g) full-fat cream cheese, softened
-
¼ cup powdered sugar
-
½ tsp vanilla extract
-
½ cup cold heavy cream (or whipping cream)
Optional Toppings
-
Graham cracker or cookie crumbs
-
Mini chocolate chips
-
Sprinkles
-
Chopped nuts
-
Fresh berries
Instructions
-
Prepare the eggs
Carefully unwrap the chocolate eggs.
If sealed, gently cut a small opening at the top with a small serrated knife using a light sawing motion. If they come in halves, separate them. -
Whip the cream
In a cold bowl, beat the heavy cream until soft peaks form. Set aside. -
Mix the cheesecake base
In another bowl, beat the softened cream cheese until completely smooth.
Add powdered sugar and vanilla. Beat until creamy. -
Fold together
Gently fold the whipped cream into the cream cheese mixture in two additions until light and fluffy. -
Fill the eggs
Spoon or pipe the filling into each chocolate egg, leaving a little space at the top. -
Decorate
Add crumbs, sprinkles, nuts, or mini chips on top. -
Chill
Refrigerate at least 30 minutes to firm up before serving.
Notes
-
✅ Use full-fat cream cheese for best texture and stability.
-
✅ Make sure cream is cold before whipping.
-
✅ A piping bag makes filling cleaner and faster.
-
✅ If shells crack, use the pieces as crunchy topping.
-
✅ Too soft? Chill longer or freeze 15–20 minutes.
Quick Nutritional Overview
Please note: This is an approximate estimate per cheesecake-filled egg, based on using a standard milk chocolate shell and all listed filling ingredients without toppings. Values may vary based on specific brands and ingredient choices.
- Prep Time: 20 minutes
- Chill Time: 30 minutes
- Total Time: 50 minutes
- Servings: 8-10 eggs
Approximate Nutrition per Egg: Calories: 260 | Protein: 4g | Carbohydrates: 18g | Fat: 20g
Final Thoughts: Crack Open a World of Joy
Well, my friend, there you have it—your ticket to becoming the Easter dessert hero, no oven required. From a childhood kitchen rescue mission to the glossy, filled beauties you’re about to create, this recipe is a celebration of playfulness, nostalgia, and the pure delight of a delicious surprise.
Remember, perfection isn’t the goal here—joy is. Whether your first chocolate shell cracks a little (hello, chef’s snack!), your filling is a tad soft (a quick freezer fix!), or your sprinkles go a bit rogue, it’s all part of the fun. The real magic isn’t just in the eating, but in the making: the shared laughs, the sticky fingers, the proud moment you present your edible treasures.
These Cheesecake-Filled Chocolate Eggs are more than just a treat. They’re a conversation starter, a memory maker, and a beautiful reminder that the most special things often come from simple ingredients and a willing heart. So gather your eggs, your cream cheese, and your favorite people. Let the music play, let the creativity flow, and get ready to hear that wonderful sound: the crisp snap of chocolate giving way to creamy bliss, followed by the happiest silence of all—the sound of everyone enjoying a bite of pure, unadulterated happiness.
Thank you for letting me share this recipe—and a piece of my kitchen story—with you. Now, go make some magic of your own. I have a feeling your table is about to become the happiest place this Easter.
With love and a pocketful of sprinkles,
Olivia
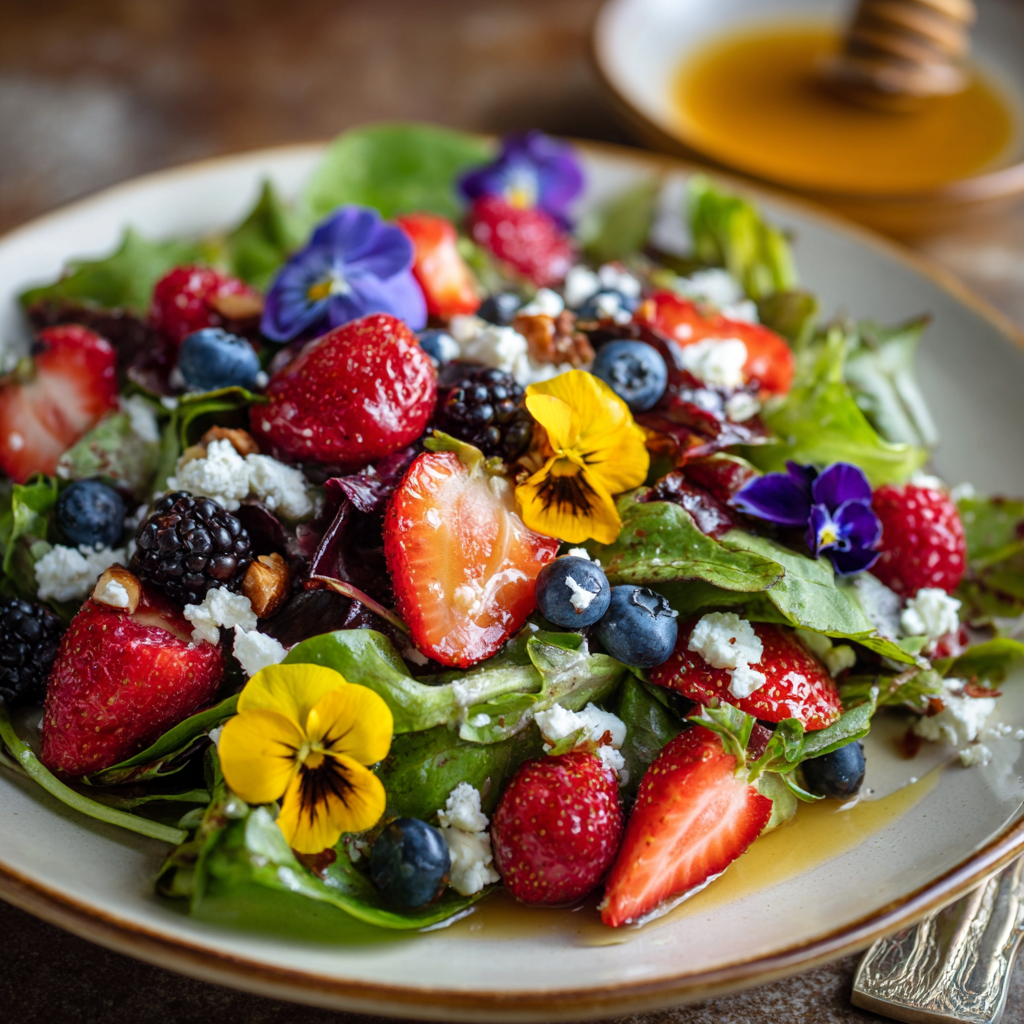
Spring Salad with Edible Flowers (Fresh, Colorful & Light)
Hello, Spring! Let’s Make a Salad That’s a Total Showstopper
Hey there, friend! Can you feel it? That little shift in the air, the extra hour of sunshine, the way the world outside my kitchen window is slowly but surely waking up in a riot of color. Spring isn’t just a season; it’s a feeling. It’s optimism on a plate, and honestly, my soul craves food that matches that energy. Out with the heavy stews (for now!), and in with the bright, the crisp, and the downright joyful.
That’s exactly why I’m practically buzzing to share this recipe with you today. This isn’t just any salad. This is our Spring Salad with Edible Flowers – a confetti explosion of flavor, texture, and pure, unadulterated prettiness. Imagine the most vibrant greens you can find, juicy berries that burst like tiny flavor bombs, tangy crumbles of goat cheese, and the magic touch of edible flowers that makes everyone at the table go, “Wow, you MADE this?!”
The best part? It’s deceptively simple. We’re talking 10 minutes, zero cooking, and maximum impact. This salad is your secret weapon for Easter brunch, a light lunch that doesn’t feel like sacrifice, or the perfect, colorful sidekick to your springtime grilled chicken or fish. It’s for when you want to feel fancy without the fuss. So, tie on your favorite apron (the slightly messy one is always a good sign), and let’s create something beautiful together.
A Lesson in Floral Flavor: From Garden Nibbles to Grown-Up Salads
My love affair with edible flowers started not in a fancy restaurant, but in my grandma’s sprawling, slightly wild backyard garden. To her, every plant had a purpose – even the “weeds.” I’d follow her around as she’d point out bright yellow dandelions (“good for tea, dear”), fragrant lavender, and cheerful, heart-faced violets nestled in the grass.
“Can we eat this one?” I’d ask, my tiny fingers poised to pluck. With a twinkle in her eye, she’d often say yes, and I’d pop a delicate violet petal into my mouth. The flavor was subtle, slightly sweet, and utterly enchanting. It felt like a secret, a tiny bit of magic hidden in plain sight. She taught me that food isn’t just about sustenance; it’s about curiosity, beauty, and connecting with the natural world on your plate.
Years later, when I saw bowls of pristine pansies and spicy nasturtiums at the farmer’s market, that childhood wonder came rushing back. I brought them home, scattered them over a simple green salad, and that was it. The salad transformed from everyday to extraordinary. It was a tribute to my grandma’s wisdom and a reminder that cooking should sometimes be pure, delicious play. Every time I make this, I think of her, and I hope this recipe encourages you to embrace a little playful, floral magic in your own kitchen.
Gathering Your Rainbow: Ingredients & Why They Work
Here’s where the fun begins! This salad is all about quality, fresh ingredients. Let’s break down what you’ll need and why each one is a superstar. Don’t stress about having the *exact* thing—I’ve got swaps for you!
- 4 cups mixed greens (arugula, baby spinach, or spring mix): This is our flavor and texture base. Arugula adds a lovely, peppery punch. Baby spinach is sweet and tender. A pre-washed spring mix gives you variety and convenience. Chef’s Insight: Go for the freshest, crispest greens you can find. Give them a good spin in a salad spinner – dry greens hold dressing way better!
- 1 cup fresh berries (strawberries, blueberries, or raspberries): Spring’s candy! They bring pops of juicy sweetness and vibrant color. Slice strawberries, leave blueberries whole, or gently halve raspberries. Substitution Tip: No fresh berries? A handful of dried cranberries or cherries works in a pinch, offering a chewy, tart contrast.
- ¼ cup crumbled goat cheese: This is our creamy, tangy counterpoint. It mellows out the pepper and fruit. Substitution Tip: Not a goat cheese fan? Try feta for a saltier bite, creamy burrata for decadence, or for a vegan option, a crumbled vegan feta or a handful of rich, toasted pine nuts.
- 2 tbsp edible flowers (pansies, violets, nasturtiums, or calendula): The showstoppers! They add an unparalleled “wow” factor and subtle flavor. Nasturtiums are my fave for a peppery kick. CRUCIAL NOTE: Only use flowers specifically grown for culinary use (from your own garden without pesticides, or a reputable source like a farmer’s market). Never pick from florists or roadside plants!
- Optional: ¼ cup sliced almonds or walnuts for crunch: Toasted nuts take this salad to the next level. They add a satisfying crunch and nutty depth. Chef’s Hack: Toast them in a dry pan for 3-4 minutes until fragrant. It unlocks their oils and makes all the difference!
For the Zesty Lemon Vinaigrette:
- 3 tbsp good extra virgin olive oil: The foundation of our dressing. Use the best you have—it’s the main flavor carrier!
- 1½ tbsp fresh lemon juice: NON-NEGOTIABLY FRESH. Bottled juice just can’t compare to that bright, sunny zing. Roll the lemon on the counter before juicing to get every last drop.
- 1 tsp honey or maple syrup: A tiny touch of sweetness to balance the acidity. Maple syrup keeps it vegan-friendly.
- Salt and black pepper, to taste: Seasoning is key! They elevate every other ingredient in the bowl.
Let’s Build Some Beauty: Step-by-Step Instructions
Ready? This is the easiest, most satisfying 10-minute project you’ll do all day. I’m walking you through each step with my favorite little kitchen hacks.
- Make the Magic Elixir (The Vinaigrette): Grab a small bowl or, my personal favorite, a mason jar with a tight lid. Add the olive oil, fresh lemon juice, honey (or maple syrup), a big pinch of salt, and a few cracks of black pepper. Now, if you’re using a bowl, whisk it like you mean it until the mixture looks smooth and slightly thickened (that’s emulsification, fancy talk for “it’s combined”). If you’re using a jar, screw the lid on tight and give it a vigorous 30-second shake. Taste it! This is your moment. Need more zing? Add a squeeze of lemon. Too sharp? A drizzle more honey. Chef’s Tip: Always dress your salad to your taste. You can make more if you love a heavily dressed salad!
- Create Your Green Canvas: Take your beautifully washed and dried greens and place them in your favorite serving bowl or on a large, pretty platter. I love using a platter because it lets you spread everything out so prettily. Gently fluff them with your hands to create some air and volume. We’re not making a dense snowball here; we’re creating a light, fluffy bed.
- Scatter the Jewels (The Berries): Take your berries and artfully scatter them over the greens. I like to slice strawberries and let the blueberries and raspberries tumble into the nooks and crannies. The goal is delightful bites where you get a little green and a burst of berry in every forkful.
- The First Drizzle: Take about half of your dressing and drizzle it lightly over the greens and berries. Using your (clean!) hands or two large spoons, give the salad a very gentle toss. This initial coat ensures every leaf gets a kiss of flavor and prevents the toppings from just sitting on top of dry greens.
- The Finishing Touches (This is where it gets glamorous): Now, crumble that lovely goat cheese over the top. Sprinkle on your toasted nuts for that essential crunch. Finally, right before you’re ready to serve, gently place your edible flowers over the salad. Don’t toss them in—they’re delicate beauties meant to be seen and savored individually. Chef’s Final Hack: Serve the remaining dressing on the side so folks can add more if they like. It keeps the salad from getting soggy if there are leftovers (though I doubt there will be!).
How to Serve Your Edible Masterpiece
Presentation is part of the joy here! I love serving this salad family-style on a big, white platter or in a wide, shallow bowl so all the colors can shine. For a more formal spring lunch, you can plate individual portions. Place a generous mound of greens in the center of each plate, artfully arrange a few berries and flowers on top, and lean a piece of crusty baguette on the side. It instantly looks like it came from a sweet little bistro. This salad pairs beautifully with a glass of crisp Sauvignon Blanc or Rosé, a pitcher of sparkling water with lemon slices, or simply the sound of good conversation.
Make It Your Own: Delicious Twists & Swaps
Got a different veggie or a dietary need? No problem! This salad is a fantastic template. Here are a few ways to riff on it:
- Add Protein for a Main Course: Top it with grilled shrimp, seared scallops, shredded roast chicken, or flaky smoked salmon to turn it into a satisfying meal.
- Change Up the Cheese: Swap goat cheese for creamy avocado slices (adds healthy fats), salty shavings of Parmesan, or soft chunks of fresh mozzarella.
- Seasonal Fruit Swaps: In summer, use peaches or nectarines. In fall, thin slices of apple or pear with candied walnuts are divine.
- Herb It Up: Add a handful of fresh soft herbs like mint, basil, or dill for an incredible aromatic layer.
- Different Dressing Vibes: Try a white balsamic vinaigrette or a simple drizzle of olive oil and a squeeze of blood orange juice for a different citrus note.
Olivia’s Kitchen Notes & Stories
This recipe has evolved so much since that first flower-scattered experiment! I’ve learned that the type of green really changes the personality of the salad—arugula makes it feel more grown-up and sophisticated, while butter lettuce makes it dreamily delicate. One funny fail: I once got overzealous with nasturtiums (they were just so pretty!). I added a whole cup. Let’s just say the salad was… aggressively peppery. A little goes a long way, my friends! Two tablespoons is the perfect confetti-like amount.
The biggest lesson? Don’t save this “just for company.” Making a beautiful, colorful salad for yourself on a random Tuesday is an act of self-care. It’s a reminder that you deserve joy and beauty in the everyday. So buy those flowers, toast those nuts, and enjoy every vibrant bite.
Your Questions, Answered!
Q: I’m nervous about edible flowers. Where do I find them, and are they really safe to eat?
A. Totally valid question! Safety is priority one. Only eat flowers you can 100% identify as edible and that were grown without pesticides. Your best bets: the herb or produce section of a high-end grocery store, local farmers’ markets (ask the vendor!), or online specialty retailers. You can also grow your own in pots! Common, easy-to-find edible varieties are pansies, violets, nasturtiums, calendula, and chive blossoms. Avoid flowers from florists, garden centers (unless labeled edible), or picked from public parks.
Q: My vinaigrette keeps separating. What am I doing wrong?
A. Separation is totally natural! An emulsion (where oil and water-based liquids stay mixed) is temporary. The key is to re-emulsify right before using. Just give your jar another good shake or whisk it again in the bowl. Using a bit of Dijon mustard (about ½ tsp) in the dressing can help stabilize it longer because it acts as an emulsifier.
Q: Can I make this salad ahead of time for a party?
A. You can do some prep to save time! Wash and dry your greens, store them wrapped in a paper towel in the fridge. Make the dressing and keep it separate. Toast the nuts. Wait to assemble until just before serving, especially adding the flowers and cheese, to keep everything fresh, crisp, and beautiful.
Q: What if I can’t find edible flowers? Does the salad still work?
A. Absolutely! The salad is still incredibly delicious and colorful with the greens, berries, and cheese. The flowers are the gorgeous “wow” factor, but the flavor foundation is rock-solid without them. You could garnish with extra lemon zest or a sprinkle of pretty microgreens instead.
Spring Salad with Edible Flowers (Fresh, Colorful & Light)
Description
This spring salad is bright, crisp, and full of flavor. Fresh greens, sweet berries, creamy goat cheese, and a light lemon vinaigrette come together for a beautiful dish — and edible flowers add a stunning finishing touch. It’s perfect for brunch, light lunches, or as a vibrant side for spring meals. No cooking required, just fresh ingredients and simple assembly.
Ingredients
Salad
-
4 cups mixed greens (spring mix, arugula, or baby spinach)
-
1 cup fresh berries (strawberries sliced, blueberries, or raspberries)
-
¼ cup crumbled goat cheese (or feta)
-
2 tbsp edible flowers (pansies, violets, nasturtiums, or calendula — food-grade only)
-
¼ cup sliced almonds or walnuts (optional, toasted)
Lemon Vinaigrette
-
3 tbsp extra virgin olive oil
-
1½ tbsp fresh lemon juice
-
1 tsp honey or maple syrup
-
Salt and black pepper to taste
Instructions
-
Make the dressing:
In a small bowl or jar, whisk or shake together olive oil, lemon juice, honey (or maple syrup), salt, and pepper until blended. -
Prepare the base:
Place washed and well-dried greens in a large bowl or serving platter. -
Add fruit:
Scatter berries evenly over the greens. -
Dress lightly:
Drizzle about half the dressing over the salad and toss gently to coat. -
Finish the salad:
Sprinkle goat cheese and nuts on top. Add edible flowers last and gently place them so they stay visible. -
Serve:
Offer remaining dressing on the side and serve immediately.
Notes
-
✅ Only use edible, food-grade flowers from safe sources — never florist or roadside flowers.
-
✅ Dry greens thoroughly so dressing sticks instead of sliding off.
-
✅ Toast nuts in a dry pan for 3–4 minutes for better flavor.
-
✅ Add flowers at the very end so they stay fresh and pretty.
-
✅ A pinch of Dijon mustard in the dressing helps it stay mixed longer.
Nutritional Information (Approximate per serving)
This information is an estimate based on the core ingredients without optional nuts. Remember, cooking is about joy and nourishment for the soul, too!
- Calories: ~180-220
- Dietary Notes: Naturally vegetarian and gluten-free. Can easily be made vegan (see swaps above).
- What’s Good: Packed with vitamins from the greens and berries, healthy fats from the olive oil, and a good dose of freshness that just makes you feel good.
Final Thoughts: A Salad to Celebrate the Season
As I look at this finished salad—a vibrant tapestry of green, red, purple, and gold—I’m reminded why I fell in love with cooking in the first place. It’s not just about feeding the body; it’s about feeding a feeling. This Spring Salad with Edible Flowers is a celebration on a plate. It’s the crunch of a toasted almond, the tang of goat cheese melting into a sweet berry, the delicate floral note that makes each bite a small discovery.
More than a recipe, this is an invitation—to play, to create, and to see your kitchen as a place of joy and artistry. It’s proof that a little effort can yield something extraordinary, and that food can be both nourishing and magical.
So whether you’re making this for a festive table, a quiet lunch, or just because you deserve something beautiful today, I hope it brings you as much happiness as it brings me. Here’s to spring, to trying something new, and to meals that feel like a hug for the soul.
Now, go scatter those flowers—and don’t forget to save a little spring for yourself.
With love and a sprinkle of petals,
Olivia
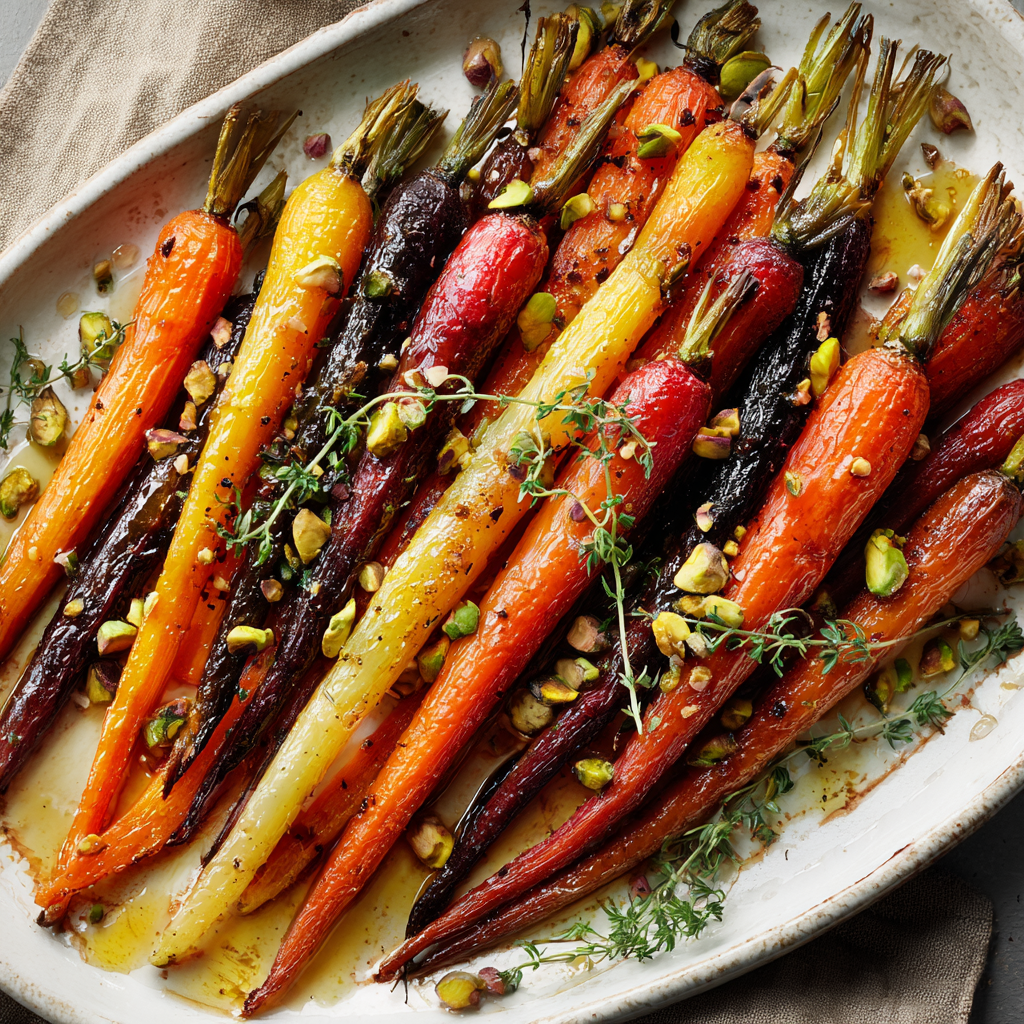
Honey-Roasted Rainbow Carrots with Thyme, Pistachios & Hot Honey
The Simple, Stunning Side Dish That Steals Every Show
Hey there, friend! Come on in, the oven’s warm and there’s something utterly magical happening inside. Can you smell that? It’s the sweet, earthy scent of carrots caramelizing, the faint herbal whisper of thyme, and the toasty, nutty promise of what’s to come. If there’s one thing I believe with my whole heart, it’s that side dishes should never be an afterthought. They have the power to turn a simple weeknight roast chicken into a celebration and to make a holiday table truly unforgettable. And this, right here, is my secret weapon: Honey-Roasted Rainbow Carrots with Thyme, Pistachios & Hot Honey.
This isn’t just a recipe; it’s a bolt of edible sunshine on a plate. We’re taking humble carrots—but not just any carrots, the gloriously hued rainbow ones—and roasting them until their natural sugars sing. Then, we’re taking them on a flavor adventure with fragrant thyme, buttery-crunchy pistachios, and a final, bold drizzle of spicy-sweet hot honey. The result is a dish that balances sweet and savory, tender and crunchy, simple and spectacularly elegant. It looks like you spent hours, but I’ll let you in on the secret: it’s almost embarrassingly easy. Whether you’re trying to impress dinner guests or just want to treat yourself to a veggie that feels special, this is your go-to. So, tie on your apron (the messy one is welcome here!), and let’s make something beautiful together.
A Patch of Color in a Sea of Green
My love for this dish started long before I ever drizzled hot honey on it. It goes back to my grandpa’s garden, a sprawling, slightly chaotic patch of earth where he grew the most extraordinary vegetables. As a kid, I was his official “harvest helper,” which mostly meant getting dirt under my nails and eating more cherry tomatoes than I collected. One fall afternoon, he called me over to a corner I’d never really noticed. “Look at this, Liv,” he said, brushing away soil to reveal not just orange, but deep purple, sunny yellow, and bright red carrots. They were like buried treasure! He explained they all tasted a little different—some sweeter, some earthier. That day, we roasted them simply with a pat of butter and a sprinkle of salt. The vibrant colors on our old farmhouse plate, the way they tasted of the earth and sunshine, it felt like eating a rainbow. This recipe is my grown-up, slightly more dressed-up homage to that moment. Every time I make it, I remember the joy of that discovery and the simple magic that happens when you let incredible ingredients shine.
Gathering Your Rainbow: Ingredients & Why They Matter
Here’s everything you’ll need to create this masterpiece. I’ve added a little “chef’s note” next to each one because knowing your ingredients is the first step to cooking with confidence!
- 1½ lb rainbow carrots, peeled and trimmed – This is your star! Rainbow carrots aren’t just pretty; each color can have a subtle flavor nuance, from the extra-sweet orange to the slightly peppery purple. Chef’s Insight: If you can only find regular orange carrots, that’s perfectly fine! The recipe works beautifully. Just try to pick similar sizes so they cook evenly.
- 2 tablespoons olive oil – Our roasting workhorse. It helps conduct heat and promotes that gorgeous caramelization. Sub Tip: Avocado oil is a great high-heat alternative with a neutral taste.
- 1½ tablespoons honey – This is what gives the carrots their glossy, sweet glaze. Chef’s Insight: Don’t add it all at the beginning! We’ll use it in two stages for maximum flavor impact.
- Salt and black pepper, to taste – The essential flavor enhancers. Season well! Salt brings out the natural sweetness of the carrots.
- 1 teaspoon fresh thyme leaves – Fresh is key here. Thyme’s lemony, woodsy fragrance is a perfect match for sweet root vegetables. Sub Tip: In a pinch, ½ teaspoon of dried thyme works, but fresh really makes a difference.
- ¼ cup pistachios, roughly chopped – Our crunch factor! Pistachios add a buttery, slightly salty element and a fantastic pop of green color. Sub Tip: Walnuts, pecans, or even pepitas would be delicious here.
- 1–2 teaspoons hot honey (to taste) – The grand finale! This adds a spicy-sweet kick that wakes up all the other flavors. Chef’s Insight: You can buy prepared hot honey or easily make your own (I’ll tell you how in the notes!).
Step-by-Step: Let’s Roast That Rainbow!
Ready? Let’s transform these ingredients into something extraordinary. Follow these steps, and don’t skip my little commentary—it’s where all the chefy secrets live!
Step 1: Preheat and Prep. Crank your oven to 425°F (220°C). This high heat is crucial for getting caramelization, not just steaming. While it heats, line a large baking sheet with parchment paper. Little Hack: If you have a cast-iron skillet or a heavy-duty baking sheet, pop it in the oven as it preheats. Starting with a hot surface gives the carrots an even better sear!
Step 2: Carrot TLC. Peel your carrots. For the larger ones, slice them in half lengthwise so everything roasts evenly. The goal is similar thickness, not necessarily identical shapes—this isn’t boot camp! Pat them completely dry with a kitchen towel. This is a sneaky important step; wet veggies steam instead of roast. Pile them onto your baking sheet.
Step 3: First Coat of Flavor. Drizzle the carrots with the olive oil and just ONE tablespoon of the honey. (Hold back that extra ½ tablespoon—trust me!). Season generously with salt and several grinds of black pepper. Now, get your hands in there! Toss everything together until every carrot is glistening and lovingly coated. Spread them out in a single layer, giving them a little personal space. Crowded carrots get soggy.
Step 4: Roast to Perfection. Slide the tray into your hot oven. Set a timer for 15 minutes. When it goes off, pull the tray out (close that oven door quickly!) and use tongs to flip the carrots over. This ensures even browning on all sides. Roast for another 10-15 minutes. You’re looking for tender-crisp carrots with deep, caramelized spots and edges. The honey will have bubbled and glazed them beautifully.
Step 5: The Flavor Finish. The moment the carrots come out of the oven, immediately drizzle them with that remaining ½ tablespoon of regular honey. The residual heat will make it melt into a gorgeous, shiny glaze. Let them cool for just a minute on the tray.
Step 6: Plate and Garnish. Carefully transfer your glazed carrots to a serving platter. I love using a white or dark-colored plate to make those colors really pop. Sprinkle the fresh thyme leaves and chopped pistachios all over the top. Finally, take your hot honey and drizzle it artistically over everything. Start with a teaspoon—you can always add more! This final drizzle adds that “wow” factor of heat, sweetness, and shine.
How to Serve Your Masterpiece
Presentation is part of the fun! Arrange the carrots artfully on a rustic wooden board or a simple, elegant platter. Let those vibrant colors be the star. I like to finish with one last tiny sprinkle of flaky sea salt and maybe a few extra whole thyme sprigs for a rustic touch. This dish is incredibly versatile: serve it alongside a herb-roasted chicken, a juicy pork tenderloin, or a seared salmon fillet. For a vegetarian feast, it’s stunning next to a creamy risotto or a quiche. It’s also a total showstopper on any holiday table—Thanksgiving, Easter, you name it.
Make It Your Own: Creative Twists
- Vegan Version: Swap the honey for pure maple syrup or agave nectar. Use a vegan “hot honey” alternative or simply mix a pinch of chili flakes into your maple syrup.
- Goat Cheese Crumble: For a creamy, tangy element, add crumbles of soft goat cheese over the warm carrots before the pistachios.
- Orange & Herb: Add the zest of one orange to the carrots before roasting, and substitute fresh rosemary or tarragon for the thyme.
- Moroccan-Spiced: Toss the carrots with a teaspoon of ras el hanout or a mix of cumin and coriander along with the oil and honey.
- Make it a Meal: Toss the finished carrots with a bunch of arugula, a lemony vinaigrette, and some cooked farro or quinoa for a fantastic warm salad.
Chef’s Notes: Stories from a Messy Apron
This recipe has seen many iterations in my kitchen! The first time I made it, I got a little… overzealous with the hot honey. Let’s just say I made “fire-breathing dragon carrots.” My lesson learned: you can always add more, but you can’t take it away! Start with a light drizzle. Another time, I was filming a video for the blog and my cat, Miso, decided the sound of chopping pistachios was his personal dinner bell. He launched himself onto the counter mid-shot, sending nuts flying. We had to use walnuts that day—it was still delicious! That’s the beauty of cooking; it’s alive, adaptable, and often hilarious. Over time, I learned that the two-stage honey addition (some before roasting, a little after) creates a more complex flavor. This dish has become my most-requested contribution to friendsgiving, and I wouldn’t have it any other way.
FAQs & Troubleshooting
Q: My carrots didn’t caramelize; they just got soft. What happened?
A: This usually means either the oven wasn’t hot enough, the carrots were too crowded on the pan (steam is the enemy of browning!), or they were too wet when they went in. Next time, preheat your oven well, use two pans if needed, and pat those carrots bone-dry!
Q: I can’t find hot honey. What can I use instead?
A> No problem! You can easily make your own. Gently warm ¼ cup of honey in the microwave for 10-15 seconds, then stir in ½ to 1 teaspoon of crushed red pepper flakes (or a few shakes of cayenne). Let it steep while the carrots roast. Alternatively, drizzle regular honey and add a sprinkle of flaky sea salt and chili flakes on top.
Q: Can I make this ahead of time?
A> You can prep the carrots (peel, trim, halve) and keep them in cold water in the fridge a day ahead. For serving, I recommend roasting fresh. You can roast them about an hour before serving and re-warm them gently in a 300°F oven for 5-10 minutes, then add the final garnishes.
Q: Are the different colored carrots really different?
A> They can be! Purple carrots often have a slight peppery note, yellow and white are often milder and very sweet, and orange are classic. It’s a fun, subtle taste adventure. But if you only have orange, the recipe is just as fantastic.
Honey-Roasted Rainbow Carrots with Thyme, Pistachios & Hot Honey
Description
These honey-roasted rainbow carrots are an easy oven side dish that brings big color and bold flavor to any table. Roasting makes the carrots naturally sweet and tender, while thyme adds freshness, pistachios add crunch, and a drizzle of hot honey gives a gentle sweet-heat finish. Perfect for weeknight dinners or special occasions.
Ingredients
-
1½ lb rainbow carrots (or regular carrots), peeled and trimmed
-
2 tbsp olive oil
-
1½ tbsp honey (divided)
-
Salt and black pepper, to taste
-
1 tsp fresh thyme leaves (or ½ tsp dried)
-
¼ cup pistachios, roughly chopped
-
1–2 tsp hot honey (to taste)
Instructions
-
Preheat oven to 425°F (220°C). Line a baking sheet with parchment paper.
-
Prep carrots:
Slice thicker carrots lengthwise so all pieces are similar in size. Pat dry. -
Season:
Place carrots on the pan. Toss with olive oil, 1 tablespoon honey, salt, and pepper. Spread in a single layer. -
Roast:
Bake 15 minutes, flip, then roast another 10–15 minutes until tender with browned edges. -
Finish glaze:
Remove from oven and drizzle with remaining ½ tablespoon honey while hot. -
Garnish & serve:
Transfer to a platter. Sprinkle with thyme and pistachios. Drizzle lightly with hot honey and serve warm.
Notes
-
✅ Don’t crowd the pan — space = better caramelization.
-
✅ Dry carrots well to avoid steaming.
-
✅ Cut thick carrots in half so they cook evenly.
-
✅ Add hot honey gradually — you can always add more heat.
-
✅ No hot honey? Mix honey with a pinch of chili flakes.
Nutritional Information*
Prep Time: 10 mins | Cook Time: 30 mins | Total Time: 40 mins | Servings: 4
*Approximate values per serving: Calories: 180 | Protein: 3g | Carbohydrates: 22g | Fiber: 5g | Sugar: 14g | Fat: 9g (Saturated Fat: 1g)




