
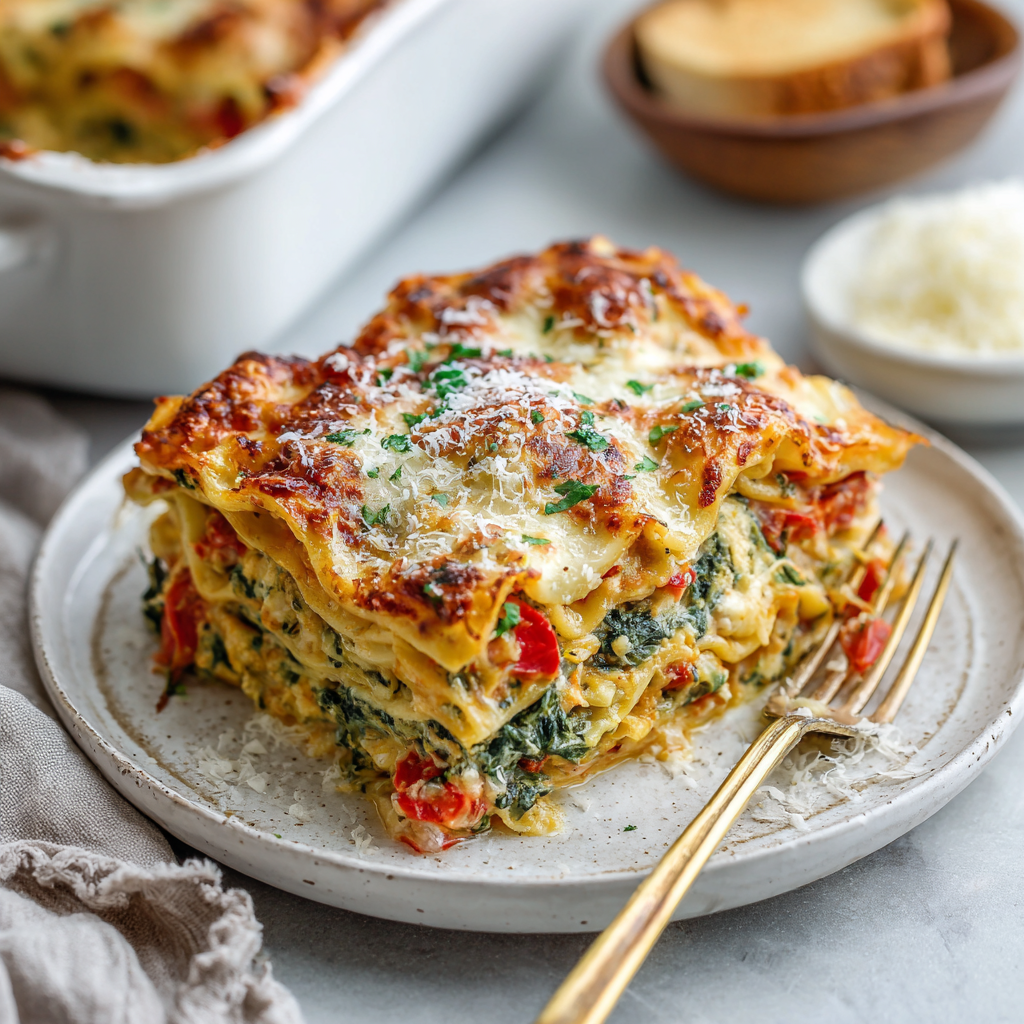
Vegetable Lasagna with Ricotta and Spinach : Comforting, Cheesy & Family-Friendly
Gather ‘Round the Table: Let’s Make a Lasagna That Hugs You Back
Hey there, kitchen friend! Olivia here. Can we talk about that magical moment when you pull a baking dish from the oven, and the smell of bubbling tomato sauce, toasted cheese, and herbs just… wraps around you? It’s an instant mood-lifter, a universal sign that good things (and full bellies) are coming. That’s the exact feeling I want to bottle up and share with you today with this, my all-time favorite Vegetable Lasagna with Ricotta and Spinach.
Now, I know what you might be thinking. “Lasagna? That’s a project.” But trust me, this isn’t a fussy, all-day affair. This is cozy, achievable, heart-warming cooking. We’re talking layers of tender noodles, a creamy, garlicky ricotta-spinach situation, sweet roasted veggies, and just the right amount of gooey, golden cheese. It’s the kind of dish that makes everyone—from the pickiest little eater to the most discerning foodie uncle—light up when they see it on the table.
This recipe is my love letter to nourishing comfort food. It’s packed with colorful vegetables, feels indulgent but balanced, and is built for sharing. Whether you’re feeding your family on a busy Wednesday, prepping meals for the week, or need a stunning centerpiece for a vegetarian holiday spread, this lasagna has your back. So, tie on that apron (messy is totally welcome here), preheat your oven, and let’s build something beautiful together.
The Lasagna That Started It All: A Tale of Two Sisters & One Tiny Apartment
This recipe takes me straight back to my first apartment with my sister, Emma. We were both broke, newly “adulting,” and our culinary skills peaked at boxed mac and cheese. One brutally cold Sunday, homesick and tired of takeout, we decided to tackle a “real” dish. We pooled our cash for ingredients, blasted music, and embarked on our first lasagna adventure with the determination of chefs on a cooking competition.
It was… chaotic. We forgot to salt the pasta water. We may have used a questionable “pizza blend” cheese. Our kitchen was approximately the size of a postage stamp. But as that rich, savory aroma filled our tiny home and we sat on the floor (we didn’t have a table yet) eating steaming squares straight from the pan, something clicked. This wasn’t just food; it was a tangible expression of care, creativity, and shared effort. That lasagna became our celebratory meal for every small win—a new job, a passed exam, just making it through a tough week. This version, refined over years but still holding that same spirit, is the edible hug I want to pass on to you.
Your Cast of Characters: Simple Ingredients, Big Flavor
Here’s everything you’ll need. I’ve added my little notes next to each—why it’s there, swaps you can make, and insider tips to make your lasagna shine!
- 9 lasagna noodles: The foundation! No-boil noodles work brilliantly here and save a step, but traditional work great too. For a gluten-free twist, use your favorite GF noodles—just check the package for layering instructions.
- 2 tbsp olive oil: For sautéing our veggie dream team. Extra virgin gives the best flavor.
- 1 small onion, diced & 2 cloves garlic, minced: The aromatic base that builds so much depth. Chef’s Insight: Let the onion get soft and translucent before adding the garlic—it keeps the garlic from burning and turning bitter.
- 1 zucchini, sliced & 1 red bell pepper, chopped: Our veggie stars! They add sweetness, color, and texture. Feel free to swap in mushrooms, yellow squash, or even some roasted eggplant.
- 2 cups fresh spinach, chopped: It wilts down to almost nothing, packing in nutrients and a lovely, earthy flavor. Frozen thawed and squeezed-dry spinach works in a pinch—use about 1/2 a (10 oz) package.
- 2 cups ricotta cheese: The creamy heart of the layer! For the best texture and flavor, seek out whole-milk ricotta. Pro Tip: Give it a quick stir in its container before measuring—it often separates.
- 1 large egg: Our binding agent. It helps the ricotta layer set up beautifully so you get clean slices.
- 2 cups marinara sauce: The saucy blanket. Use a good-quality jarred sauce you love, or your favorite homemade recipe. You’ll need about 24 ounces.
- 1½ cups shredded mozzarella cheese: For that iconic, stretchy, melty top. I prefer to shred a block myself—pre-shredded bags often have anti-caking agents that can make melting less smooth.
- ½ cup grated Parmesan cheese: The flavor booster! Its salty, nutty punch is essential. Freshly grated Parmigiano-Reggiano is a game-changer.
- 1 tsp dried Italian seasoning: A quick herb blend. No Italian blend? Use 1/2 tsp dried oregano and 1/2 tsp dried basil.
- Salt & black pepper, to taste: Your flavor finishers. Don’t be shy—season each component as you go for a lasagna that sings from the inside out.
Let’s Build Those Beautiful Layers: A Step-by-Step Guide
Ready? Let’s cook with confidence! I’ll walk you through each step with all my favorite hacks to ensure lasagna success.
Step 1: Preheat & Prep. Get that oven going to 375°F (190°C). This is the perfect temperature for cooking everything through and getting a gorgeous, bubbly finish without burning. If using traditional noodles, cook them according to the package directions for al dente—they’ll soften more in the oven. Drain and lay them flat on a sheet of parchment or foil so they don’t stick together. Little Hack: Add a tiny splash of oil to the cooking water to prevent foaming and sticking.
Step 2: Sauté the Veggies. In a large skillet, heat the olive oil over medium heat. Add the onion and cook until soft and fragrant, about 4-5 minutes. Add the garlic and stir for just 30 seconds until you smell that gorgeous aroma. Now, toss in the zucchini and bell pepper. Cook, stirring occasionally, until they’re just tender but still have a little bite, about 6-7 minutes. Finally, stir in the massive pile of spinach in batches—it will wilt down dramatically. Season the whole mixture with a pinch of salt and pepper. Pro Tip: Once cooked, I like to drain the veggie mix in a colander for a few minutes to remove excess liquid. This is your secret weapon against a watery lasagna!
Step 3: Make the Ricotta Mixture. In a medium bowl, combine the ricotta, egg, Italian seasoning, 1/4 tsp of salt, and a few grinds of black pepper. Mix it until it’s smooth and homogenous. This is your “glue” and cream layer—taste it! Does it need more seasoning? Adjust now.
Step 4: Assemble with Love (This is the Fun Part!). Grab your 9×13 inch baking dish. Spread about 1/2 cup of marinara sauce thinly across the bottom. This prevents the first noodle layer from sticking. Now, layer in this order:
- Noodles: Place 3 noodles over the sauce, slightly overlapping.
- Ricotta: Spread half of the ricotta mixture evenly over the noodles. A small offset spatula is fantastic here, but the back of a spoon works perfectly.
- Veggies: Scatter half of your sautéed vegetable mixture over the ricotta.
- Cheese & Sauce: Sprinkle with 1/2 cup of mozzarella, then drizzle about 2/3 cup of sauce over everything.
Repeat these layers one more time: noodles, the remaining ricotta, the remaining veggies, another 1/2 cup of mozzarella, and another 2/3 cup of sauce.
Step 5: The Grand Finale. For the top layer, place your last 3 noodles. Spread the remaining sauce over them (you should have about 1/2 cup left), making sure the noodles are completely covered to prevent drying out. Sprinkle the remaining 1/2 cup of mozzarella and the entire 1/2 cup of Parmesan cheese evenly over the top. Chef’s Secret: That Parmesan on top is what gives you that incredible, crispy, golden-brown crust.
Step 6: Bake to Perfection. Cover the dish tightly with aluminum foil. This creates a steamy environment that cooks the noodles and melds the flavors. Bake for 30 minutes. Then, carefully remove the foil (watch the steam!) and bake for another 15-20 minutes, until the top is beautifully spotted with brown and the edges are bubbling enthusiastically.
Step 7: The Most Important Step—REST! I know, it’s torture. But take the lasagna out and let it sit on the stovetop for a full 10-15 minutes. This allows the layers to set, making it possible to slice clean squares instead of a cheesy lava flow. It’s a non-negotiable step for picture-perfect (and mouth-safe!) portions.
How to Serve Your Masterpiece
Slide a spatula under a generous square and lift it onto a plate. I love serving this with a simple, bright side to cut through the richness. A crisp lemony arugula salad or a classic garlic bread for dipping into any saucy edges are perfect companions. For a full cozy feast, add a bowl of soup! It’s a complete, satisfying meal that turns any dinner into a special occasion.
Make It Your Own: Delicious Twists & Swaps
The beauty of this lasagna is its flexibility! Here are a few ways to play with the recipe:
- “Everything but the Kitchen Sink” Veggie: Add sautéed mushrooms, thinly sliced carrots, or roasted butternut squash to the vegetable layer.
- Protein Power: For a heartier version, brown 1/2 pound of Italian sausage or ground beef and layer it with the veggies. For a plant-based protein, stir a cup of cooked lentils into the marinara.
- Vegan Dream: Use vegan ricotta (or a cashew cream), omit the egg, and swap the cheeses for your favorite plant-based mozzarella and Parmesan. Ensure your noodles are egg-free.
- Fresh Herb Burst: Stir 1/4 cup of chopped fresh basil or parsley into the ricotta mixture for a brighter flavor.
- White Sauce Version: Swap the marinara for a simple béchamel sauce for a creamy, decadent “lasagna bianca.”
Olivia’s Kitchen Notes & Stories
This recipe has been my culinary companion for over a decade, and it’s evolved as I have. The biggest lesson? Season every single layer. I used to be timid with salt, wondering why my finished dish tasted flat. A pinch in the veggies, a pinch in the ricotta—it makes all the difference. Also, don’t fear the “watery veg” step. I learned that the hard way after a particularly soupy lasagna in 2015 (we called it “lasagna stew”). Draining them is a foolproof fix!
And a funny story: I once accidentally used cinnamon instead of Italian seasoning (similar-looking jars in a pre-coffee haze). It was… interesting. Not terrible, but definitely a unique “autumnal” twist I wouldn’t recommend. Now I always smell my spices first!
Your Lasagna Questions, Answered
Q: My lasagna always turns out watery. What am I doing wrong?
A: This is THE most common issue! The culprits are usually watery veggies or ricotta. My top tips: 1) Drain your sautéed veggies in a colander after cooking. 2) Use whole-milk ricotta (lower-fat versions have more water). 3) Don’t over-sauce—stick to the measurements. 4) Let it rest after baking; the liquid gets reabsorbed as it sits.
Q: Can I make this ahead of time?
A: Absolutely! Assemble the entire lasagna, cover tightly, and refrigerate for up to 24 hours before baking. You may need to add 5-10 minutes to the covered baking time since it’s starting cold. You can also freeze the unbaked, assembled lasagna for up to 3 months. Thaw in the fridge overnight before baking.
Q: Do I have to boil the noodles first?
A> Not if you use “no-boil” or “oven-ready” lasagna noodles! Just ensure there’s enough sauce around them. For regular noodles, boiling to al dente is best. You can also try the “soak” method: soak regular noodles in hot tap water for 20 minutes until pliable, but the texture can be less consistent.
Vegetable Lasagna with Ricotta and Spinach : Comforting, Cheesy & Family-Friendly
Description
A comforting, cheesy, and veggie-packed lasagna that hugs you back! Layers of tender noodles, creamy ricotta-spinach, roasted vegetables, and melty cheese make this a weeknight winner or a show-stopping centerpiece.
Ingredients
-
9 lasagna noodles (regular or no-boil)
-
2 tbsp olive oil
-
1 small onion, diced
-
2 cloves garlic, minced
-
1 zucchini, sliced
-
1 red bell pepper, chopped
-
2 cups fresh spinach, chopped (or ½ 10-oz package frozen, thawed & squeezed dry)
-
2 cups ricotta cheese
-
1 large egg
-
2 cups marinara sauce (24 oz)
-
1½ cups shredded mozzarella cheese
-
½ cup grated Parmesan cheese
-
1 tsp dried Italian seasoning (or ½ tsp oregano + ½ tsp basil)
-
Salt & black pepper, to taste
Instructions
-
Preheat oven to 375°F (190°C).
If using regular noodles, boil until al dente. Drain and lay flat to prevent sticking. -
Sauté vegetables
Heat olive oil in a large skillet over medium heat.
Add onion, cook 4–5 min until soft. Add garlic, cook 30 sec.
Toss in zucchini and bell pepper, cook 6–7 min until slightly tender.
Add spinach in batches until wilted. Season with salt & pepper. Drain excess liquid. -
Make ricotta mixture
In a bowl, combine ricotta, egg, Italian seasoning, ¼ tsp salt, and pepper. Mix until smooth. -
Assemble lasagna (first layer)
-
Spread ½ cup marinara on the bottom of a 9×13 pan.
-
Layer 3 noodles.
-
Spread half ricotta mixture.
-
Top with half the veggies.
-
Sprinkle ½ cup mozzarella and drizzle ~⅔ cup sauce.
-
-
Assemble lasagna (second layer)
-
Layer 3 noodles.
-
Spread remaining ricotta mixture.
-
Add remaining veggies.
-
Sprinkle ½ cup mozzarella and drizzle ~⅔ cup sauce.
-
-
Top layer
-
Layer final 3 noodles.
-
Spread remaining sauce (~½ cup).
-
Sprinkle remaining ½ cup mozzarella and all Parmesan cheese.
-
-
Bake
Cover with foil and bake 30 min. Remove foil, bake another 15–20 min until top is golden and bubbly. -
Rest
Let sit 10–15 min before slicing. This helps layers set for clean squares.
Notes
-
Drain sautéed vegetables to prevent watery lasagna.
-
Season each layer for maximum flavor.
-
No-boil noodles save time—just ensure sauce coverage.
-
Make ahead: Assemble and refrigerate up to 24 hours, or freeze unbaked for up to 3 months.
Final Thoughts
Gather ‘Round the Table: Let’s Make a Lasagna That Hugs You Back
The timer has beeped. The foil is off. And there it sits—your very own lasagna, golden and bubbling, sending ribbons of fragrant steam up toward your kitchen ceiling.
Take a moment. Just breathe it in.
That scent—the sweet depth of slow-cooked tomatoes, the earthy whisper of spinach and garlic, the nutty promise of Parmesan crisped to perfection—is older than memory itself. It’s the smell of Sunday suppers and holiday tables. Of someone waiting up with a plate kept warm. Of coming home.
You did this. With your own two hands, a bit of patience, and ingredients that cost far less than takeout for four. You transformed flour, cheese, and vegetables into this. A dish that doesn’t just feed people—it holds them.
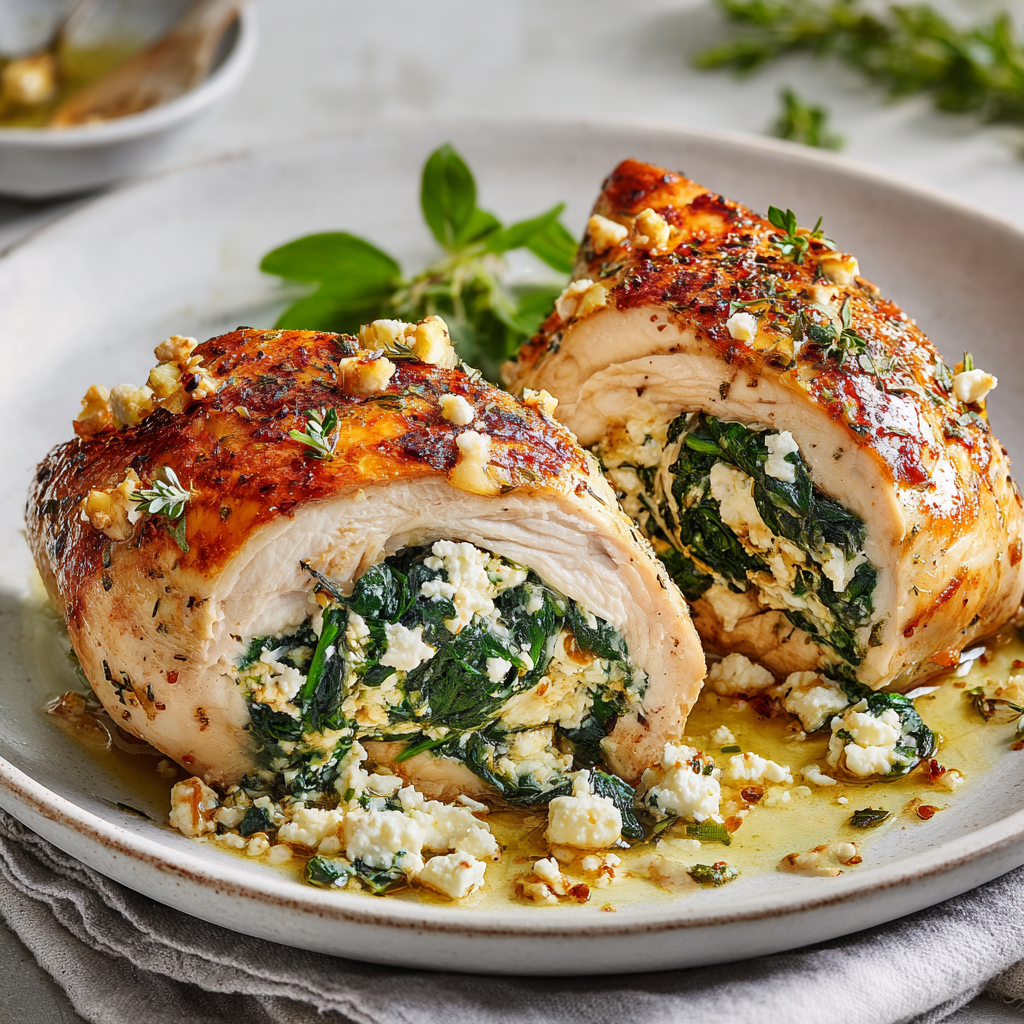
Stuffed Easter Chicken with Spinach and Feta : Juicy, Flavorful Holiday Main
The Easter Centerpiece That’s as Joyful to Make as It Is to Eat
Hey there, friend! Come on in, grab an apron, and let’s get something wonderful simmering. Is there anything better than the buzz of a kitchen before a holiday meal? The chatter, the clinking of glasses, and that incredible aroma that wraps around everyone like a hug. For years, I believed that creating a stunning Easter centerpiece meant hours of complicated prep and a mountain of dishes. I’d watch gorgeous roasts come out of ovens on TV, all golden and glorious, and think, “Maybe next year.”
But here’s the beautiful truth I’ve learned in my messy, joyful kitchen: special doesn’t have to mean complicated. What makes a meal memorable isn’t just the flavor (though that’s crucial!), it’s the feeling it creates. It’s about gathering around the table, sharing stories, and serving something made with genuine love that doesn’t leave the cook exhausted in a corner.
That’s why this Stuffed Easter Chicken with Spinach and Feta has become my absolute go-to. It looks and tastes like you fussed for hours—juicy, herb-kissed chicken with a surprise pocket of garlicky greens and tangy cheese—but it comes together with such ease. It’s light enough for a spring afternoon yet feels wholly celebratory. It’s the main dish that lets you be a guest at your own party, and today, I’m so excited to walk you through every simple, satisfying step. Let’s turn simple ingredients into your new holiday tradition.
The Easter That Almost Wasn’t (And The Recipe That Saved It)
I have to confess, this recipe was born from a near-catastrophe. Picture it: my third Easter hosting our big, loud, wonderful family. I’d ambitiously decided to tackle a legendary, 12-hour braised leg of lamb. You can probably guess where this is going. After a marathon morning of searing, deglazing, and obsessive oven-checking, I opened the pot to find… well, let’s just call it “well-done shoe leather.” My heart sank. The table was set, the family was an hour away, and my grand centerpiece was inedible.
In a panic, I stared into my fridge. Chicken breasts, a bag of spinach that needed using, and a block of feta from a prior Greek salad night. I had nothing to lose. I whipped up this filling, stuffed the chicken, and threw it in the oven with a silent prayer. What came out 30 minutes later was nothing short of a miracle—golden, juicy, and bursting with flavor. The crazy part? Everyone raved about it. My uncle asked for the recipe, my niece declared it her new favorite, and we all laughed about the Great Lamb Disaster of 2018. It was a powerful reminder that sometimes, the best traditions start with a happy accident and that showing up with something heartfelt (and delicious) always beats perfection.
Gathering Your Flavor Makers
Here’s everything you’ll need to create this sunshine-on-a-plate dish. I’ve added my little notes and swaps so you can shop and cook with confidence!
- 4 boneless, skinless chicken breasts: Look for ones that are roughly the same size so they cook evenly. Chef’s Tip: If they are very thick, you can gently pound the thicker end to an even ¾-inch thickness. This helps them cook uniformly and makes stuffing easier!
- 2 cups fresh spinach, chopped: The fresh pop of green is lovely here. Quick Swap: You can use one 10-oz package of frozen chopped spinach, thawed and squeezed very, very dry in a clean kitchen towel. This is a fantastic budget-friendly option!
- ¾ cup crumbled feta cheese: The salty, tangy star! I prefer block feta crumbled by hand for better texture. Flavor Twist: Try a Mediterranean herb-infused feta for an extra layer of flavor. For a milder taste, goat cheese or even a well-drained ricotta would be lovely.
- 2 cloves garlic, minced: Because what’s a cozy dish without garlic? Fresh is best here for that sharp, aromatic punch.
- 2 tbsp olive oil, divided: We’ll use half for sautéing our filling and half for searing. A good extra-virgin olive oil adds a beautiful fruitiness.
- ½ tsp salt & ½ tsp black pepper: The essential flavor enhancers. Always season your chicken well, both inside and out.
- ½ tsp paprika: This adds a subtle sweetness and helps with that gorgeous golden color. Smoked paprika would add a wonderful, warm depth if you have it!
- ½ tsp dried oregano or thyme: I adore oregano here for its classic Greek vibe, but thyme is a wonderfully earthy alternative. Use what you love!
- Toothpicks: Our little kitchen helpers to keep all that yummy stuffing tucked safely inside while baking.
Let’s Get Cooking: Your Foolproof Guide
Ready? Tie your apron, put on some good music, and let’s transform these simple ingredients into something spectacular. I’ll be right here with you for every step.
- Preheat & Prep: Start by preheating your oven to 375°F (190°C). Lightly grease a baking dish with a bit of olive oil or non-stick spray. This simple step prevents any sticking and makes cleanup a dream. Chef’s Hack: While the oven heats, take your chicken breasts out of the fridge. Letting them sit at room temperature for 10-15 minutes helps them cook more evenly from edge to center.
- Wilt the Spinach: In a medium skillet, heat 1 tablespoon of olive oil over medium heat. Add the minced garlic and sauté for just 30 seconds until fragrant—don’t let it brown! Toss in all that fresh spinach. It will look like a mountain, but watch it magically wilt down in minutes. Stir it gently until it’s fully wilted and bright green. Transfer it to a bowl and let it cool for a few minutes. Why we cool it: This keeps the feta from melting into a hot mess when we mix it in!
- Create the Filling: To your slightly cooled spinach, add the crumbled feta cheese. Give it a good stir until the cheese and spinach are beautifully tangled together. Taste it (my favorite part!)—the feta is usually salty enough, but you can add a tiny pinch of pepper here if you like. Set this glorious filling aside.
- Master the Pocket: Lay a chicken breast flat on your cutting board. With a sharp paring knife, carefully cut a horizontal slit along the thicker, long side of the breast. Imagine you’re creating a little cave or pouch inside. Cut deep, but stop about ½ inch from the opposite edge and sides—you don’t want to cut all the way through! Repeat with all breasts. Pro-Tip: If you’re nervous, place your hand flat on top of the breast to steady it. A confident, smooth cut is safer than a hesitant one.
- Season & Stuff: Now, season generously! Sprinkle the salt, pepper, paprika, and dried herbs inside each pocket and all over the outside of the chicken. This builds flavor in every single bite. Next, divide the spinach-feta mixture evenly among the four breasts. Use a spoon to gently press the stuffing into the pocket, but don’t overfill—about 2-3 tablespoons per breast is perfect. Seal each one shut with 2-3 toothpicks. It doesn’t have to be pretty, just secure!
- Sear to Perfection: Heat the remaining 1 tablespoon of olive oil in your skillet over medium-high heat. Once the oil is shimmering, add the stuffed chicken breasts. We’re not cooking them through here, just searing for 2-3 minutes per side to get a gorgeous, golden-brown crust. This step locks in juices and adds incredible flavor and texture. Don’t move them until it’s time to flip for the best sear!
- Bake to Juicy Tenderness: Carefully transfer the seared chicken to your prepared baking dish. Place it in the preheated oven and bake for 20-25 minutes. The cook time depends on the thickness of your breasts. The only way to know for sure is with a meat thermometer. Insert it into the thickest part of the chicken (avoiding the stuffing) – it should read 165°F (74°C).
- The Most Important Step: Rest! Once out of the oven, tent the baking dish loosely with foil and let the chicken rest for 5 full minutes. I know it’s tempting to dive right in, but this allows the juices to redistribute throughout the meat. If you cut it immediately, all those precious juices will run out onto the cutting board, leaving you with dry chicken. Trust me, this wait is worth it!
Plating Your Masterpiece
Now for the fun part—making it look as good as it tastes! Remove the toothpicks carefully. I love to slice each stuffed breast on a slight diagonal, fanning the slices out on a warm platter or individual plates. The reveal of that vibrant green and white filling is always a showstopper. Drizzle any delicious pan juices over the top. Serve it alongside simple roasted spring vegetables (asparagus and baby carrots are perfect), a big, herby rice pilaf, or a crisp salad with a lemony vinaigrette. The bright, savory flavors of the chicken pair beautifully with almost anything!
Make It Your Own: Creative Twists
This recipe is a wonderful canvas for your creativity! Here are a few ways to play with it:
- Sun-Dried Tomato & Kalamata: Add 2 tbsp chopped sun-dried tomatoes and 2 tbsp chopped Kalamata olives to the filling for a Mediterranean punch.
- Mushroom & Swiss: Swap the spinach for sautéed mushrooms and use shredded Swiss or Gruyère cheese.
- Spicy Kick: Add a pinch of red pepper flakes to the spinach while sautéing and use a peppercorn-crusted feta.
- Gluten-Free & Lower-Carb: This recipe is naturally both! Just ensure all your added ingredients (like pre-crumbled cheese) are gluten-free.
- Herb Garden Delight: Stir 2 tablespoons of fresh, chopped herbs (dill, parsley, chives) into the filling right before stuffing.
From My Kitchen to Yours
This recipe has evolved so much since that fateful Easter. I’ve learned that using a meat thermometer is non-negotiable for perfect juiciness every single time. I’ve also had my share of kitchen giggles—like the time I forgot the toothpicks and tried to use uncooked spaghetti strands to seal the chicken (spoiler: it didn’t work). The beauty of this dish is in its flexibility and forgiving nature. Don’t stress about making the “perfect” pocket. Even if a little filling sneaks out during baking, it just gets crispy and delicious. The goal is a happy cook and a happy table. This stuffed chicken has seen me through busy weeknights, last-minute dinner parties, and yes, every Easter since The Lamb Incident. It’s a recipe that feels like a warm hug, and I hope it becomes one for you, too.
Your Questions, Answered!
Q: My stuffing keeps leaking out while baking! What am I doing wrong?
A> Don’t worry, this happens to the best of us! First, make sure you’re not over-stuffing the pocket—leave a little room. Second, ensure your toothpicks are securing the opening well; sometimes crossing them in an “X” helps. Finally, a good sear creates a bit of a “seal” on the outside. If a little leaks, it’s okay! It will taste great either way.
Q: How can I prevent the chicken from drying out?
A> The two guardians of juiciness are not overcooking and resting. Please, I beg you, use a meat thermometer. Oven temperatures and breast sizes vary wildly. Pull it at 165°F and let it rest. Also, the stuffing itself helps insulate and keep the meat moist from the inside!
Q: Can I prepare this ahead of time?
A> Absolutely! You can stuff and secure the chicken breasts, place them on a plate, cover tightly, and refrigerate for up to 24 hours before cooking. Let them sit at room temp for 15 minutes before searing. You can also make the filling 1-2 days ahead.
Q: My chicken didn’t get a good golden sear. Why?
A> The pan probably wasn’t hot enough. Make sure your oil is shimmering before adding the chicken. Also, don’t crowd the pan—cook in batches if needed. And resist the urge to move them around! Let them develop that beautiful crust.
Stuffed Easter Chicken with Spinach and Feta : Juicy, Flavorful Holiday Main
Description
A bright, spring-ready centerpiece that looks impressive but is surprisingly easy. Juicy chicken breasts are filled with garlicky spinach and tangy feta, then seared and baked until golden and tender. Perfect for Easter or any special family meal.
Ingredients
-
4 boneless, skinless chicken breasts
-
2 cups fresh spinach, chopped
(or 1 cup frozen spinach, thawed and squeezed very dry) -
¾ cup crumbled feta cheese
-
2 cloves garlic, minced
-
2 tbsp olive oil, divided
-
½ tsp salt
-
½ tsp black pepper
-
½ tsp paprika
-
½ tsp dried oregano or thyme
-
Toothpicks
Instructions
-
Preheat oven to 375°F (190°C). Lightly grease a baking dish.
-
Cook the spinach
Heat 1 tbsp olive oil in a skillet over medium heat. Add garlic and cook 30 seconds.
Add spinach and cook until wilted (2–3 minutes). Remove from heat and cool slightly. -
Make filling
Stir feta into the cooled spinach. Set aside. -
Cut pockets
Slice a deep pocket into the thick side of each chicken breast without cutting through. -
Season
Mix salt, pepper, paprika, and herbs. Season inside and outside of chicken. -
Stuff
Spoon spinach–feta mixture into each pocket (don’t overfill). Secure with toothpicks. -
Sear
Heat remaining 1 tbsp olive oil in skillet over medium-high heat.
Sear chicken 2–3 minutes per side until golden. -
Bake
Transfer to baking dish and bake 20–25 minutes, until internal temp reaches 165°F (74°C). -
Rest
Let rest 5 minutes. Remove toothpicks, slice, and serve.
Notes
-
Pound very thick breasts slightly for even cooking.
-
Don’t skip the sear — it adds flavor and helps seal the pocket.
-
Use a thermometer for perfectly juicy chicken.
-
Add chopped herbs, sun-dried tomatoes, or olives to the filling for variation.
Nutritional Information (Per Serving, Approximate)
Calories: 320 | Fat: 18g | Saturated Fat: 6g | Carbohydrates: 3g | Fiber: 1g | Sugar: 1g | Protein: 35g | Cholesterol: 115mg | Sodium: 750mg
Note: Nutritional information is an estimate provided for convenience and may vary based on specific ingredients and portion sizes used.
Prep Time: 15 minutes | Cook Time: 30 minutes | Total Time: 45 minutes | Servings: 4
Final Thoughts
Come, pull up a chair. The oven is off, the kitchen is settling into that quiet, satisfied hum, and there it sits—your golden, herb-fragrant Stuffed Easter Chicken resting under its little foil tent. The table isn’t fully set yet. The napkins need folding, the glasses need filling, and somewhere in the other room, someone you love is probably asking, “How much longer?” But right now, in this small pocket of stillness, I want to talk to you.
This is what I want you to remember:
You just made a centerpiece. Not a recipe—a centerpiece. You took simple, humble ingredients—chicken breasts that were probably on sale, a bag of spinach that needed using, a block of feta that wasn’t part of any grand plan—and you turned them into the thing everyone will gather around. The thing they’ll photograph. The thing your niece will request next year, and the year after that, and the year after that, until it’s not “Auntie’s Easter Chicken” anymore but simply the Easter chicken. The one that tastes like home.
I think sometimes we get so caught up in the idea of “holiday cooking” as this grand, stressful performance that we forget what it’s actually supposed to be. It’s not about proving anything. It’s not about impressing anyone. It’s about this: a warm kitchen, good smells drifting through the house, and the quiet satisfaction of making something with your own hands that nourishes the people you love. That’s it. That’s the whole secret.
And here’s the thing about this particular dish—it doesn’t need a holiday. Yes, it was born from an Easter panic and it wears springtime flavors like a sundress, but don’t save it for just one Sunday in April. Make it on a random Wednesday when you need a little brightness. Make it for a dinner party when you want to seem effortlessly impressive. Make it on a night when you’re tired and the week has been long and you just want to eat something that feels like a hug. It will be there for you, every single time, no questions asked.
I meant what I said at the beginning: special doesn’t have to mean complicated. The proof is right there on your counter, golden and glorious, with its secret pocket of greens and cheese. No fancy techniques. No obscure ingredients. No hours of hovering and stressing. Just you, a few good things from your fridge, and the willingness to try.
So go ahead. Finish setting that table. Pour the wine. Let the family gather and ooh and aah over your beautiful creation. And when someone inevitably asks, “How did you make this?”—because they will, they always do—smile and tell them the truth. It was easy. It was joyful. You should make it too.
And then save yourself the best piece, the one with the extra bit of crispy edge and the most stuffing. You earned it.
From my messy, happy kitchen to yours—happy Easter, friend. Or happy Tuesday. Or happy whatever day you decided to make something beautiful.
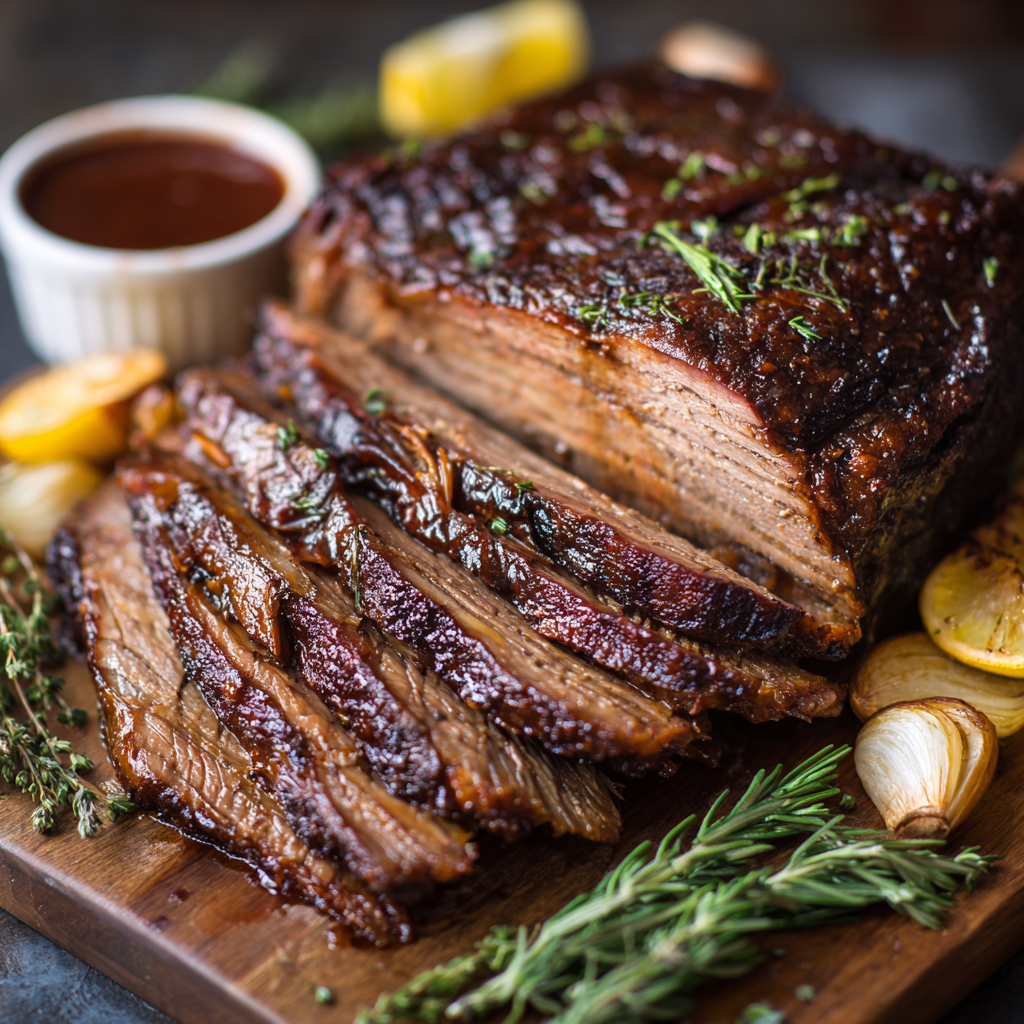
Slow-Roasted Beef Brisket (Tender, Juicy & Holiday-Ready)
The Magic of Slow-Roasted Beef Brisket: Your New Favorite Centerpiece
Hey there, friend! Come on in. Can you smell that? It’s the deep, savory, impossibly good scent of garlic and onions softening into sweetness, mingling with the rich perfume of beef that’s been roasting for hours. It’s the smell of anticipation, of a gathered table, of a meal that says “you are loved.” That, my friend, is the magic of a perfectly slow-roasted beef brisket.
If the idea of cooking a large cut of meat makes you a little nervous, I’m here to give you the biggest virtual hug and tell you: you’ve got this. This isn’t about fancy techniques or constant fussing. This is about patience, a few simple ingredients, and letting low, gentle heat work its transformative power. We’re going to turn a tough cut into something so tender you can practically pull it apart with a fork, with slices that are juicy, flavorful, and utterly impressive.
Whether you’re planning a holiday table for Easter, a cozy Sunday supper, or any gathering where you want a main dish that does all the talking (in the most delicious whisper), this brisket is your answer. So, tie on your apron—the messy ones are the most loved—and let’s create some memories together. This is more than a recipe; it’s an invitation to slow down, savor the process, and deliver pure comfort on a platter.
My First Brisket & The “Trust the Process” Lesson
I have to confess, my first brisket was a leap of faith that felt more like a stumble. It was for a big family Thanksgiving, and I, in my youthful kitchen confidence (read: naivety), decided to go off-book. I cranked the heat, thinking I could outsmart the clock. What emerged hours later was… less than tender. Let’s just say it had character. And required very sharp knives.
But then my grandma, the undisputed queen of comfort food, took me under her wing. She showed me her method: low heat, a tight cover, and time. “Stop poking it, Livvy,” she’d say. “Let it do its thing.” The next one I made under her watchful eye was a revelation. The connective tissue had melted into unctuous, flavor-packed goodness, the meat was yielding, and the pan juices were liquid gold. That experience taught me the core philosophy of my kitchen: respect the ingredients, trust the process, and good things come to those who wait (especially in a 300°F oven). This recipe is that lesson, shared with you.
Gathering Your Flavor Team: Simple Ingredients, Big Impact
Here’s what you’ll need. Don’t be fooled by the short list—each player has a crucial role. I’ve added my notes so you know exactly why it’s there and what you can swap if needed.
- 4–5 lb beef brisket: This is the star! Look for a cut with a nice cap of fat on one side—that’s your flavor and moisture insurance. A “packer cut” is great, but a flat cut works beautifully too. Don’t trim too much fat!
- 2 tbsp olive oil: Our glue for the spice rub and a helper for browning. Any neutral oil like avocado or canola works perfectly.
- 2 tsp salt (preferably kosher): Crucial for seasoning the meat deeply. Kosher salt is less salty by volume than table salt and easier to control. If using fine table salt, start with 1.5 tsp.
- 1 tsp black pepper: Freshly cracked is ideal for the brightest flavor, but pre-ground is just fine in a pinch.
- 2 tsp smoked paprika: This is my secret weapon! It adds a warm, smoky depth that makes the brisket taste like it’s been kissed by a wood fire. Sweet paprika works if it’s all you have.
- 1 tsp garlic powder & 1 tsp onion powder: These pantry heroes create a foundational savory flavor that permeates the meat perfectly. Fresh is great for the braise, but powder sticks to the rub better.
- 1 large onion, sliced: They’ll caramelize and soften into a sweet bed for the brisket, flavoring the juices. Yellow or white onions are perfect.
- 4 garlic cloves, smashed: Smashing, not mincing, lets them release flavor slowly without burning. No need to peel!
- 2 cups beef broth: This creates the steam-braising environment. Use low-sodium if possible, as we’ve already salted the meat. A rich bone broth is a fabulous upgrade.
- 1 tbsp tomato paste (optional): My little “umami booster.” It adds a touch of richness and color to the pan sauce. Don’t worry, it won’t taste like tomatoes!
- Fresh thyme or rosemary (optional): A few sprigs add an aromatic, herby note. Dried herbs (1 tsp) can be sprinkled in with the rub.
Step-by-Step: Your Path to Brisket Bliss
Ready? Let’s walk through this together. I promise it’s more waiting than working.
- Preheat & Prep: Position your oven rack in the lower third and preheat your oven to 300°F (150°C). This low-and-slow temperature is non-negotiable for tenderness. While it heats, pat your brisket very dry with paper towels. This is KEY for the spice rub to stick and for proper browning. Chef’s Tip: A dry surface = a beautiful sear (if you choose to sear) and better bark.
- The Flavor Rub: In a small bowl, mix the salt, pepper, smoked paprika, garlic powder, and onion powder. Drizzle the olive oil all over the brisket, then massage the spice mix onto every surface. Don’t be shy! Get it on all sides. This isn’t just seasoning; it’s creating a flavor crust. Chef’s Tip: You can do this step up to 24 hours ahead, wrap the brisket, and let it marinate in the fridge. The flavor penetration is incredible!
- Build Your Braising Bed: Scatter the sliced onions and smashed garlic cloves in the bottom of a roasting pan or a large, heavy-duty Dutch oven. Place the brisket on top, fat side up. This is important! As the fat renders during the long cook, it will baste the meat continuously, keeping it juicy.
- Add the Liquid: Pour the beef broth around the sides (not over the top, to keep your rub intact). If using, add the tomato paste and whisk it a bit into the broth. Tuck in your fresh herb sprigs. Chef’s Tip: For an extra layer, a splash of red wine or a tablespoon of Worcestershire sauce in the broth is divine.
- The Long, Slow Roast: Cover the pan very tightly with a lid or a double layer of heavy-duty aluminum foil. This traps the steam, creating a braising environment that breaks down the tough fibers. Place it in the oven and… walk away. For at least 3.5 hours. Do not peek! Trust the process. We’re looking for a probe thermometer to read around 200-205°F for “pull-apart” tenderness, or for a fork to slide in and out with zero resistance. This usually takes 4 to 4.5 hours total.
- Uncover & Brown: In the last 30 minutes of cooking, carefully remove the foil. This allows the top to brown and the sauce to reduce slightly. The aroma at this point is your reward for patience.
- The Most Important Step: Rest! Once out of the oven, loosely tent the brisket with foil (not tight) and let it rest on the counter for at least 20-30 minutes. This allows the frantic, hot juices to redistribute throughout the meat. If you slice it right away, all those beautiful juices will run out onto the cutting board. Patience, grasshopper!
- Slice & Serve: Transfer the brisket to a cutting board. Look for the direction of the muscle fibers (the “grain”). Using a sharp knife, slice against the grain (perpendicular to those lines). This shortens the muscle fibers, making each piece melt-in-your-mouth tender. Serve with the strained or simply skimmed, glorious pan juices poured over the top.
How to Serve Your Masterpiece
Presentation is part of the joy! Slice the brisket and fan it out on a large, warm platter. Pour some of those rich, onion-studded pan juices right over the top. Garnish with a few fresh thyme sprigs or a sprinkle of flaky sea salt for a pretty touch. This brisket loves classic, comforting sides: creamy mashed potatoes or parsnip puree to soak up the juice, simple roasted carrots or green beans, a bright, tangy coleslaw for crunch, or a big, buttery dinner roll for mopping. Keep it simple and let the brisket shine.
Make It Your Own: Delicious Variations
Once you master the basic method, the world is your brisket! Here are a few fun twists:
- Texas-Style BBQ: Swap the spice rub for 2 tbsp coarse black pepper, 1 tbsp kosher salt, and 1 tsp garlic powder. Skip the broth and use 1 cup of beef broth mixed with ½ cup of apple cider vinegar. Smoke it if you have a smoker, or roast as directed—the vinegar adds amazing tang.
- Sweet & Sticky Asian-Inspired: For the liquid, use 1 cup beef broth + ½ cup soy sauce (or tamari) + ⅓ cup honey or brown sugar + 2 tbsp rice vinegar. Add a few slices of fresh ginger to the onion bed.
- Set-It & Forget-It (Slow Cooker): After seasoning, follow all steps but place everything in your slow cooker. Cook on LOW for 8-10 hours. For a better texture, transfer to a baking sheet and broil for 3-5 mins after cooking to brown the top.
- Wine-Braised Elegance: Replace 1 cup of the beef broth with a dry red wine like Cabernet Sauvignon. Add a bay leaf. The result is incredibly rich and perfect for a dinner party.
- Keto/Paleo Friendly: This recipe is naturally great! Just ensure your broth has no sugar, skip the optional tomato paste if strict, and serve with cauliflower mash and roasted veggies.
Chef’s Notes: A Few More Things From My Kitchen to Yours
Over the years, this recipe has become my culinary security blanket. It’s the dish I bring to potlucks when I want to hear a collective “Wow!” and the one I make on rainy Sundays just because. It has evolved—sometimes I add a splash of coffee to the braising liquid for depth (sounds weird, tastes amazing!), sometimes I throw in a handful of whole mushrooms.
The biggest evolution? My attitude. I no longer stress the exact hour. I use the fork test as my guide, and if dinner is late because the brisket needed another 30 minutes, so be it. It’s always worth the wait. And the leftovers? Even better the next day. Shredded on tacos, piled high on a sandwich with pickles, or chopped into chili. This recipe is a gift that keeps on giving. Most importantly, remember that the slight mess in your kitchen, the waiting, the gathering—it’s all part of the love you’re cooking into this meal. You’re doing great.
Your Brisket Questions, Answered
Let’s tackle some common hiccups before they happen:
- Q: My brisket seems tough/dry. What went wrong?
A: The two most likely culprits are not cooking it long enough or slicing it with the grain. Brisket needs to reach an internal temp of 200-205°F to break down all the collagen into gelatin. If it’s below that, it can be tough. If it’s dry, it may have been overcooked (past 210°F) or not had enough fat. Always slice against the grain! - Q: Can I sear the brisket before roasting?
A: Absolutely! It adds fantastic flavor. After step 2, heat a skillet with a little oil over medium-high. Sear the brisket for 3-4 minutes per side until deeply browned, then proceed to step 3. You can even sear it right in your Dutch oven if it’s oven-safe. - Q: The fat cap is really thick. Should I trim it?
A: Trim it down to about ¼ inch thickness. You want some fat to render and baste the meat, but a massive cap won’t fully render and can make the dish greasy. A little fat is flavor; a huge slab is just fat. - Q: How do I store and reheat leftovers?
Slow-Roasted Beef Brisket (Tender, Juicy & Holiday-Ready)
Description
A slow-roasted brisket is one of those meals that feels special without requiring complicated techniques. With low heat, simple seasoning, and enough time, a tough cut turns into fork-tender slices packed with rich flavor. It’s perfect for holidays, family dinners, or any day you want a true comfort-food centerpiece.
Ingredients
-
4–5 lb (1.8–2.3 kg) beef brisket
-
2 tbsp olive oil
-
2 tsp kosher salt
-
1 tsp black pepper
-
2 tsp smoked paprika
-
1 tsp garlic powder
-
1 tsp onion powder
-
1 large onion, sliced
-
4 garlic cloves, smashed
-
2 cups beef broth (low sodium preferred)
-
1 tbsp tomato paste (optional)
-
2–3 sprigs thyme or rosemary (optional)
Instructions
-
Preheat oven
Heat to 300°F (150°C). Place rack in lower third. -
Prep the brisket
Pat brisket dry. Rub all over with olive oil. -
Season
Mix salt, pepper, paprika, garlic powder, and onion powder. Coat brisket on all sides. -
Build the pan
Scatter onions and smashed garlic in a roasting pan or Dutch oven. Place brisket on top fat side up. -
Add liquid
Pour broth around (not over) the meat. Stir tomato paste into the liquid if using. Add herbs. -
Cover tightly
Seal with lid or double foil — tight seal is important for tenderizing steam. -
Slow roast
Roast 4–4½ hours without opening often. Brisket is ready when a fork slides in easily or internal temp reaches 200–205°F (93–96°C). -
Uncover to brown
Remove cover for the last 30 minutes to develop color and reduce sauce. -
Rest
Rest loosely tented with foil for 20–30 minutes. -
Slice correctly
Slice against the grain for maximum tenderness. Spoon pan juices over top.
Notes
-
Leave about ¼ inch fat cap — it keeps meat moist.
-
Tight cover = tender brisket. Steam is your friend.
-
Don’t rush the temperature — tenderness comes late.
-
If it’s tough, it likely needs more time, not less.
-
A thermometer removes guesswork.
Final Thoughts
Take a moment. Really. Pause right here, before you dive into slicing or plating or serving eager guests. Just stand at your counter, peek through the oven door, and breathe in that impossibly rich aroma filling your kitchen. This is it. This is the moment patience becomes reward, and simple ingredients become something sacred.
You just made brisket. Brisket. That intimidating, centerpiece-worthy, Sunday-supper-showstopper of a dish. And here’s what I hope you’re realizing: it was never about the meat. It was about the rhythm—the quiet confidence of seasoning by feel, the trust required to close the oven door and walk away, the deep satisfaction of pulling back the foil to reveal something you created, slowly and surely, with your own two hands.
This recipe isn’t really a recipe at all. It’s permission. Permission to stop rushing. Permission to let time do what time does best—transform, tenderize, deepen. Permission to serve a meal that didn’t demand you hover over it, that didn’t leave you frazzled while your guests arrive. While they sip wine and laugh in the other room, your brisket is simply… finishing. Doing its job. Making you look like a hero while you actually enjoy your own party.
And isn’t that the best kind of cooking? The kind that feeds everyone, including the cook?
I think about my grandma often when I make this. Not because I’m recreating her recipe—I’ve tweaked and tested and made it my own over the years—but because I finally understand what she was really doing in that warm, flour-dusted kitchen of hers. She wasn’t just feeding us. She was showing us, bite after tender bite, that some things can’t be rushed. That love, in its purest form, is patience with an apron on.
That’s what this brisket is, friend. It’s patience you can eat.
So tonight, when you set that platter on the table and watch everyone go quiet for that first bite, remember: you didn’t just follow instructions. You paid attention. You trusted yourself. You learned when to act and when to wait—a skill that carries far beyond the kitchen. And if the slices aren’t magazine-perfect? If the sauce is a little thin or the onions stuck to the pan? Not one person at that table will notice or care. They’ll remember how it tasted. How it felt. How you made them feel.
That’s the magic you actually made today.
Now go pour those pan juices over everything. Lick the spoon when no one’s looking. Accept the compliments with a humble smile while secretly knowing exactly how good you are. And tomorrow, when you’re standing in front of the open fridge at noon, staring at those glorious leftovers? Make a sandwich so tall it barely fits in your mouth. Shred some into your eggs. Call it dinner and eat it straight from the container.
You earned every bite.
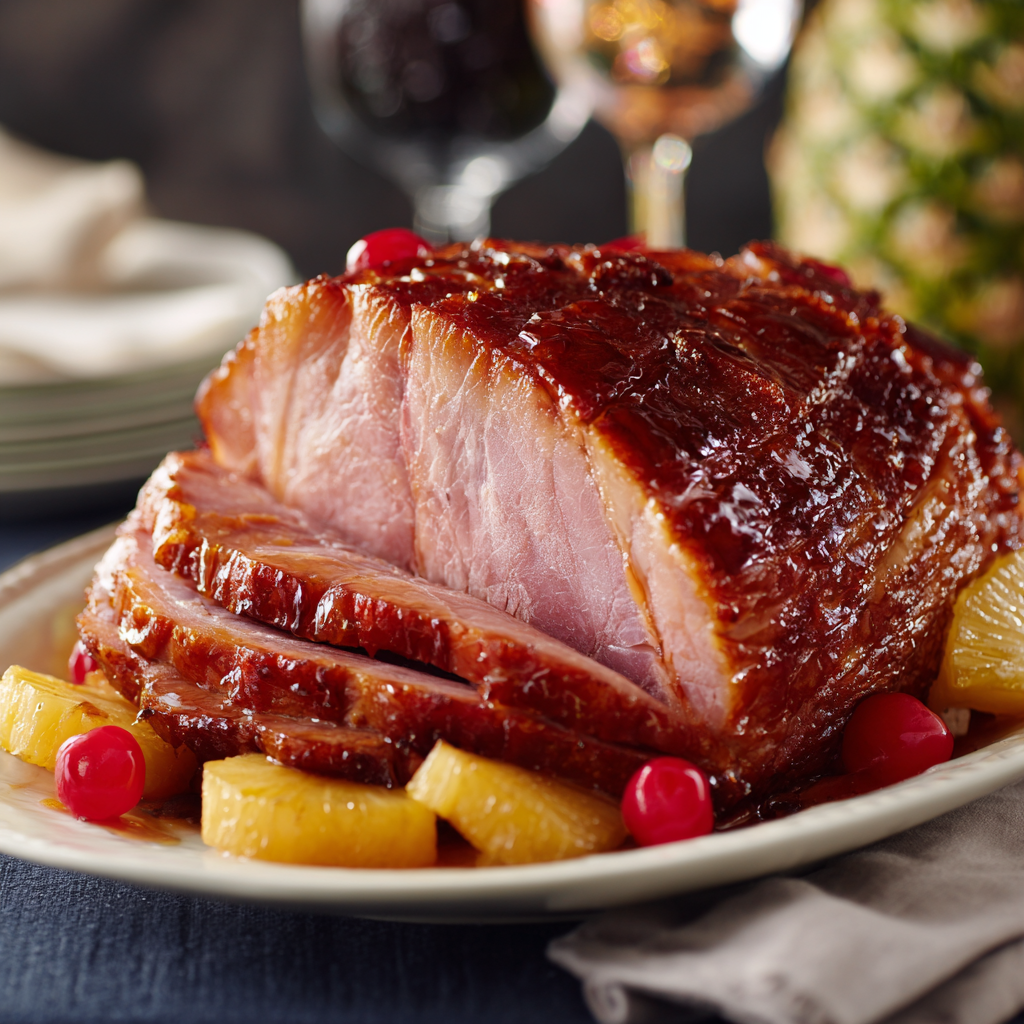
Honey-Glazed Ham with Pineapple (Classic Easter & Holiday Main)
The Heartbeat of the Holiday Table: Your Ultimate Honey-Glazed Ham
Picture this: the oven is humming, the kitchen windows are lightly fogged, and an aroma so profoundly good it feels like a hug is wafting through every room. That smell—the sweet, smoky, savory perfume of a honey-glazed ham baking with pineapple—is the unmistakable soundtrack to so many of my favorite memories. It’s the sound of family arriving, of laughter bubbling over, and of that beautiful, collective sigh of contentment as everyone gathers around the table.
If you’ve ever felt a little flutter of intimidation at the thought of preparing the holiday centerpiece, let me be the first to tell you: you’ve got this. This honey-glazed ham with pineapple isn’t just a recipe; it’s a friendly, forgiving, and fantastically delicious project that promises big rewards. We’re taking a fully cooked ham (the secret to stress-free success!) and transforming it with a simple, shimmering glaze into a showstopper. The pineapple doesn’t just look pretty—it caramelizes into sweet-tart jewels, and its juices mingle with the glaze to create something magical. My goal today is to walk with you, step-by-step, and unlock the secrets to a ham that’s juicy on the inside, gloriously sticky and caramelized on the outside, and absolutely destined to be the star of your celebration. So tie on that apron (messy is totally welcome here), and let’s make some magic together.
Nana’s Apron and the Glaze Pot
My love affair with this ham started long before I ever owned a roasting pan. It began at my grandmother’s house, where I’d stand on a wobbly step stool, peering over the edge of the stove as she stirred the glaze. To me, it was a potion—golden honey, dark brown sugar, and the sharp tang of mustard merging into this glossy, bubbling syrup. She’d let me dip a spoon in to taste, always warning, “Careful, Olivia, it’s hotter than a July sidewalk!” The ritual of scoring the ham felt like an ancient art, and the ceremonial placement of the pineapple rings and cherries was my favorite job. I took it very seriously, ensuring each cherry sat perfectly in the center.
Years later, the roles reversed. I was the one preparing the ham, with Nana now sitting at the kitchen table, offering commentary that ranged from “A bit more glaze on the left, dear!” to “Smells just right.” That dish, for me, is so much more than food. It’s a thread that connects generations—a taste of home, of patience, and of the simple, profound joy that comes from preparing something beautiful for the people you love. Every time I make it, I feel that connection, and I hope this recipe helps you create your own delicious traditions.
Gathering Your Cast of Characters
Here’s everything you’ll need to create your holiday masterpiece. I’ve included some notes and swaps so you can shop and cook with confidence!
- 1 fully cooked bone-in or spiral ham (8–10 lb): This is our superstar! Bone-in hams are my personal favorite—the bone adds incredible flavor and helps keep the meat succulent. A spiral-cut ham is a fantastic time-saver and gives you those perfect, ready-to-serve slices. “Fully cooked” is key; we’re just reheating and flavor-building, so no stress about food safety!
- 1 cup honey: The heart of our glaze. Honey adds a floral, mellow sweetness that browns beautifully. For a deeper flavor, try using a dark honey like buckwheat. In a pinch, pure maple syrup makes a lovely substitute.
- 1/2 cup brown sugar: Team this with the honey, and you get a deeper, almost molasses-like sweetness and that perfect sticky texture. Light or dark brown sugar works—dark will give you a richer flavor.
- 1/4 cup pineapple juice: We’re pulling double duty! Use the juice from the can of pineapple we’ll open for decorating. It adds a bright, acidic note that cuts through the sweetness and keeps the glaze from being one-dimensional. Freshly squeezed works too!
- 2 tbsp Dijon mustard: My secret weapon! Dijon brings a subtle tang and complexity that balances the sugar. It also helps emulsify the glaze into a smooth, brushable consistency. Don’t skip it!
- 1/2 tsp ground cloves (optional): A tiny pinch goes a long way. Cloves give that classic, warm “ham spice” aroma. If you’re not a fan or don’t have any, a pinch of cinnamon or allspice is nice, or you can omit it entirely.
- Pineapple slices or chunks: For that iconic, beautiful presentation. Canned rings are classic and lay flat beautifully. Fresh pineapple works too—just know it may release a little less juice.
- Maraschino cherries (optional): The festive “button” in the center of the pineapple ring! They add a pop of color and a bit of extra sweetness. Totally optional but so cheerful.
Let’s Get Cooking: Your Foolproof Roadmap to Ham Heaven
Ready? Let’s do this. I’ll guide you through each step with all my favorite tips and hacks. Remember, cooking is about feeling, not just following—use your senses!
- Prep & Preheat: Start by positioning your oven rack in the lower third of the oven and preheating to 325°F (165°C). This ensures even cooking without the top getting too dark too fast. Place your ham, cut-side down, in a roasting pan. The cut side down traps juices inside, making every bite moist. Tent the pan very loosely with aluminum foil—you’re creating a little steamy environment to reheat the ham gently without drying it out. Chef’s Hack: If your ham didn’t come with a plastic cap on the bone, cut a small piece of foil to cover just the exposed bone tip so it doesn’t char.
- Craft the Glaze: While the oven heats, let’s make the magic potion! In a small saucepan, combine the honey, brown sugar, pineapple juice, Dijon mustard, and cloves (if using). Whisk it together over medium heat until it comes to a gentle simmer. Let it bubble for 3-5 minutes, stirring often. You’ll see it transform from a separated, grainy mixture into a smooth, glossy, cohesive glaze. It should coat the back of a spoon nicely. Tip: Don’t walk away! Sugar mixtures can go from perfect to burnt in a flash. Once done, remove it from the heat.
- The First Bake (The Warm-Up): Slide your tented ham into the preheated oven. The general rule is to bake for about 15 minutes per pound for a fully cooked ham. For a 10-pound ham, that’s about 2.5 hours total. We’re not just reheating; we’re letting the flavors settle in. About every 30 minutes, carefully open the oven, pull out the rack, and brush the ham generously with your warm glaze. Use those pan drippings too! This layering builds incredible flavor.
- The Grand Finale (Uncover & Caramelize): This is where the beauty happens! During the last 30 minutes of the calculated cooking time, remove the ham from the oven (close the door to keep heat in!). Increase the oven temp to 375°F (190°C). Carefully remove and discard the foil tent. Now, artfully arrange your pineapple slices over the surface of the ham, securing them with toothpicks if you like. Pop a cherry in the center of each ring if using. Brush the entire ham, pineapple and all, with a very generous amount of the remaining glaze. This is your last chance, so be lavish!
- Caramelize & Rest: Return the ham, now uncovered and beautiful, to the hotter oven. Bake for those final 25-30 minutes. Watch it closely—the glaze will bubble, darken, and become gorgeously sticky and caramelized. The pineapple edges will brown slightly. When it looks like a glossy holiday dream, it’s done! Here’s the most crucial step: let it rest. Transfer the ham to a cutting board or platter and tent it loosely with foil for a full 15 minutes. This allows the frantic juices to redistribute throughout the meat, ensuring every slice is juicy and tender, not dry.
Plating Your Masterpiece
Presentation is part of the fun! Transfer the rested ham to a large, clean platter. You can leave the pineapple and cherries in place for a rustic, festive look. For slicing, a sharp, long carving knife is your best friend. For a spiral ham, simply follow the pre-cut lines. For a bone-in ham, slice perpendicular to the bone for beautiful, long slices. Don’t forget to drizzle any of those incredible sticky-sweet pan juices from the roasting pan over the slices on the platter. Serve it right in the center of the table and get ready for the oohs and aahs!
Make It Your Own: Creative Twists
Love the classic but want to play? Here are a few of my favorite riffs:
- Bourbon-Spiked Glaze: Replace 2 tablespoons of the pineapple juice with good bourbon. It adds a wonderful, warm oakiness.
- Citrus & Herb: Swap pineapple juice for orange juice and add a tablespoon of fresh chopped rosemary to the glaze. Use orange slices instead of pineapple for decorating.
- Spicy & Sweet: Add 1-2 teaspoons of sriracha or a pinch of cayenne pepper to the glaze for a delightful sweet-heat kick.
- Maple-Mustard: Use pure maple syrup instead of honey and add an extra tablespoon of whole-grain mustard for texture.
- Pineapple-Chunk Crust: Skip the rings. In the last 30 minutes, toss pineapple chunks in the glaze and scatter them thickly around the ham in the pan to roast and caramelize.
From My Kitchen to Yours
This recipe has been my holiday workhorse for years, and it’s evolved with me. I once, in a pre-coffee haze, used spicy brown mustard instead of Dijon. It was…aggressive. We still ate it, but I learned to label my fridge jars! The biggest lesson? Don’t rush the rest. I’ve carved too early out of excitement, and while it still tastes good, those perfectly juicy slices are worth the wait. I also started saving the ham bone and any pan scrapings—they make the absolute best base for a pot of soul-warming split pea or white bean soup the next day. Nothing goes to waste in this kitchen!
Your Questions, Answered
Q: My glaze isn’t getting sticky and caramelized in the last 30 minutes. What’s wrong?
A: No worries! This usually means the oven temp needs a boost or the glaze needs more sugar content. Make sure you increased the temp to 375°F for the final uncovered bake. If it’s still not browning, you can briefly (and carefully!) use the broiler for the last 2-3 minutes, watching it like a hawk to prevent burning.
Q: Can I make the glaze ahead of time?
A> Absolutely! You can mix and simmer the glaze up to 3 days in advance. Let it cool, store it in a jar in the fridge, and gently reheat it on the stove or in the microwave until it’s fluid again before using.
Q: How do I know for sure the ham is heated through?
A> The safest way is to use a meat thermometer. Insert it into the thickest part of the ham (avoiding the bone). A fully cooked, properly reheated ham should register 140°F (60°C).
Q: I have a lot of glaze left in the pan. What should I do with it?
A> That’s liquid gold! After removing the ham to rest, skim off any excess fat from the pan juices. You can then simmer the remaining glaze and juices on the stovetop for a few minutes to reduce it into a thicker, incredible sauce to serve on the side.

Honey-Glazed Ham with Pineapple (Classic Easter & Holiday Main)
Description
Nothing says celebration like a glossy, caramelized honey-glazed ham coming out of the oven. The good news? It’s far easier than it looks. Starting with a fully cooked ham keeps things simple, and a quick homemade glaze turns it into a sweet-savory centerpiece with almost no stress. Perfect for holidays, big family meals, or anytime you want a show-stopping main dish.
Ingredients
-
1 fully cooked bone-in or spiral ham (8–10 lb / 3.5–4.5 kg)
-
1 cup honey
-
½ cup brown sugar
-
¼ cup pineapple juice (from canned pineapple or fresh)
-
2 tbsp Dijon mustard
-
½ tsp ground cloves (optional)
-
Pineapple slices or chunks
-
Maraschino cherries (optional)
-
Toothpicks (optional, for decorating)
Instructions
-
Preheat oven
Heat oven to 325°F (165°C). Place rack in the lower third. -
Prepare ham
Put ham cut-side down in a roasting pan. Cover loosely with foil to keep moisture in. -
Make the glaze
In a small saucepan combine honey, brown sugar, pineapple juice, Dijon mustard, and cloves.
Simmer over medium heat for 3–5 minutes, stirring, until smooth and slightly thickened. -
Initial bake
Bake ham covered for about 15 minutes per pound, brushing with glaze every 30 minutes. -
Decorate & uncover
During the last 30 minutes, raise oven to 375°F (190°C). Remove foil.
Arrange pineapple and cherries on the ham (secure with toothpicks if needed). Brush generously with remaining glaze. -
Caramelize
Return ham to oven uncovered and bake 25–30 minutes more, until glaze is sticky and golden. -
Rest
Remove from oven and let rest 15 minutes before slicing. Spoon pan juices over slices when serving.
Notes
-
Use a fully cooked ham — you’re reheating and glazing, not cooking from raw.
-
Keep it covered for most of the bake to prevent drying.
-
If glaze browns too fast, loosely tent with foil again.
-
For extra caramelization, broil the ham for 1–2 minutes at the end — watch closely.
-
Save the ham bone for soup or beans later.
Nutritional Information (Per Serving, Approximately)
Please note: This is an estimate based on the ingredients used and can vary depending on specific brands and portion sizes.
Calories: ~380 kcal | Protein: ~28 g | Fat: ~18 g | Carbohydrates: ~24 g | Sugars: ~22 g
Final Thoughts
The ham is resting now. The kitchen has settled into that quiet, expectant hush that comes just before the doorbell starts ringing. Outside, maybe the first few flakes of snow are falling, or maybe it’s just the streetlights flickering on as the afternoon melts into evening. Inside, everything glows. The table is set, the candles are waiting, and there, in the center of it all, sits your ham—darkly caramelized, studded with golden pineapple and bright cherries, glossy as a jewel box.
You did that.
I want you to pause here, just for a moment, before the chaos and the laughter and the “who gets the crispy edge piece” negotiations begin. Take a breath. Look at what your hands have made. That ham isn’t just dinner. It’s the culmination of a thousand small generosities—your grandmother’s whispered advice, your partner’s patient trip to three different stores for the right pineapple rings, your own willingness to stand at the stove and stir until the glaze turned from good to unforgettable.
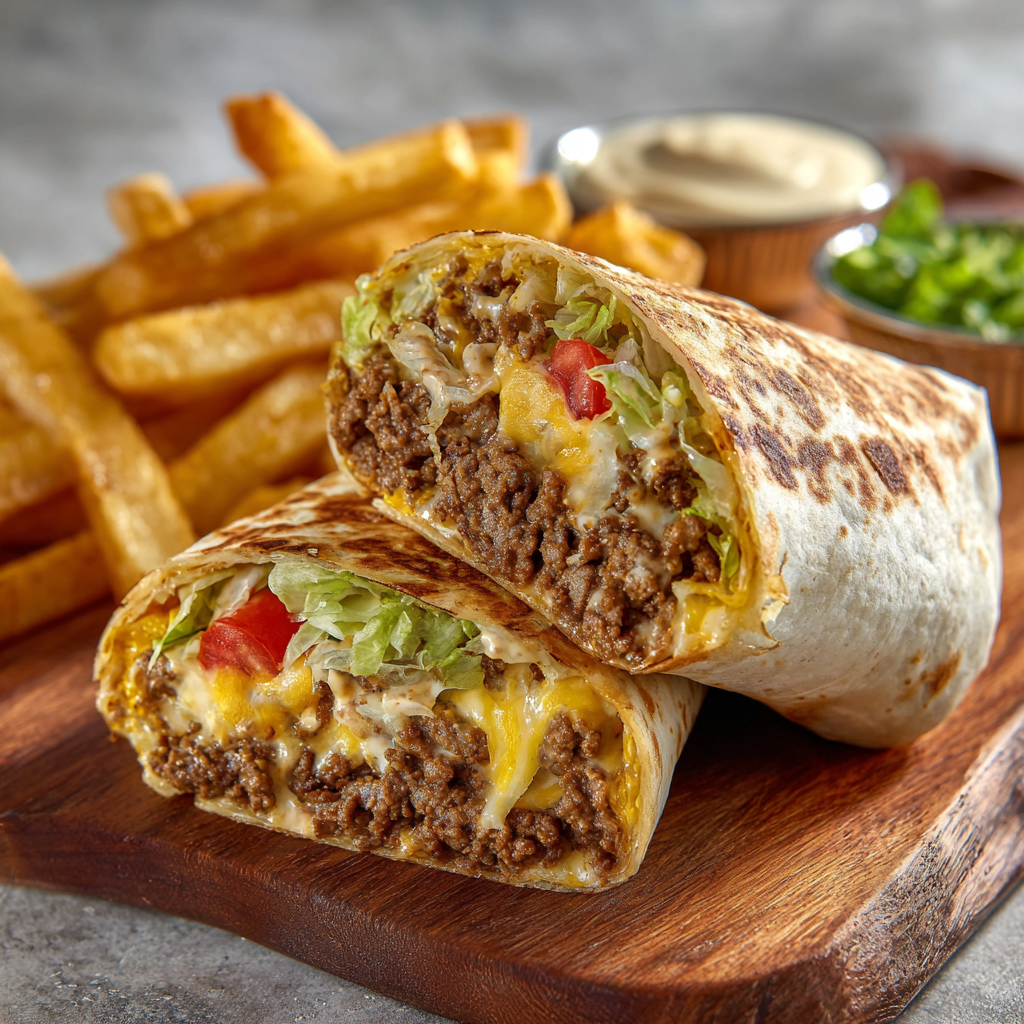
Cheesy Loaded Burger Wrap : Crispy Fries, Beef & Creamy Sauce
The Ultimate Comfort Food Hack: Cheesy Loaded Burger Wraps
Hey there, friend! Can you smell that? That’s the sound of sizzling beef meeting a hot skillet, the whisper of crispy fries straight from the oven, and the glorious, unmistakable scent of cheese getting all melty and perfect. If your stomach just growled in solidarity, you are exactly where you’re supposed to be. Welcome to my kitchen corner, where we turn big, messy burger joint cravings into a handheld, utterly genius dinner that comes together faster than you can say, “Extra sauce, please!”
Today, we’re not just making dinner; we’re creating an experience. We’re talking about my Cheesy Loaded Burger Wrap. Imagine everything you adore about a fully-loaded, drippy, delicious burger and a side of perfect fries… but wrapped up snugly in a golden, toasted tortilla. It’s the best of all worlds—juicy, crunchy, creamy, and oh-so-satisfying. This isn’t fussy food. It’s the kind of meal you make on a busy Wednesday when you need a serious hug from your plate, or on a Saturday game night when you want to hear a chorus of “Oh wow, you MADE these?!” from your friends. So, tie on that apron (messy is encouraged!), grab your favorite spatula, and let’s make something incredibly delicious, together.
The Night That Inspired It All
This recipe was born from a beautiful, chaotic, and very hungry moment. Picture this: It’s a rainy Friday, my friends are piled into my living room for our classic movie night, and the consensus is a unanimous craving for burgers and fries. The problem? One tiny, ancient apartment kitchen, six very impatient people, and the sheer logistics of building and flipping that many burgers felt like a short-order cook’s nightmare.
I stared into my fridge, then at the tortillas on the counter, and had one of those lightbulb moments that feels equal parts “brilliant” and “will this be a disaster?” What if I just… wrapped it all up? I cooked the beef with our favorite burger seasoning, piled in the crispy fries we’d just baked, went overboard with cheese (a cardinal sin I do not believe in), and slathered it all with my version of a special sauce. The first wrap came out of the pan, golden and crisp. I sliced it in half, and a literal cheese pull happened. The room went quiet, then erupted. It was a hit. It was a mess. It was perfect. That night, a kitchen hack turned into a signature dish, all because of a little chaos and a lot of hunger.
Gathering Your Flavor Crew
Here’s what you’ll need to bring this cheesy masterpiece to life. Don’t stress about exact brands—this is about flavor and fun!
- 4 large flour tortillas: The burrito-sized ones are your best friend here. They need to be sturdy enough to hold all that goodness. A quick pro-tip: warm them for 10 seconds in the microwave before assembling to make them more pliable and less likely to crack.
- 1 lb ground beef (80/20 blend is ideal): That bit of fat equals big flavor and juiciness. Feeling adventurous? Swap in ground turkey, chicken, or even a plant-based crumble. The seasoning will make it shine.
- 1½ cups frozen fries, cooked until crispy: This is our crunch factor! Use your favorite style—shoestring, crinkle-cut, or seasoned wedges all work. Bake them until they’re extra crispy so they hold up in the wrap.
- 1½ cups shredded cheddar or mozzarella: Cheddar gives that classic burger sharpness, while mozzarella is the stretchy, melty dream. I often use a blend!
- ½ cup shredded Monterey Jack (optional but recommended): This is my secret for next-level meltiness and a subtle tang. If you don’t have it, just add more of your other cheese.
- ½ cup mayonnaise: The creamy base of our sauce. Use full-fat for the best texture and flavor.
- 2 tbsp ketchup & 1 tbsp mustard: The dynamic duo! They transform plain mayo into that iconic “burger sauce” taste. Yellow mustard is classic, but Dijon or whole-grain add a fantastic zing.
- 1 tsp paprika & ½ tsp garlic powder: Our simple, powerhouse seasoning for the beef. Smoked paprika adds a wonderful depth if you have it.
- Salt & black pepper, to taste: Season confidently! Taste your beef as you cook.
- Butter or oil, for toasting wraps: Butter gives an unbeatable golden-brown color and rich flavor, but a neutral oil like avocado works great too.
Let’s Build Some Magic: Step-by-Step
Ready to cook? Follow these steps, and you’ll be in cheesy, crispy heaven in no time. I’ve packed each one with my favorite little kitchen hacks.
Step 1: The Crispy Fry Foundation. Start by cooking your fries according to the package directions, but aim for them to be a shade crisper than usual. We’re going for texture that stands up to the saucy beef! While they bake, you can multitask on everything else. This is the “get-ahead” move that makes the whole process smooth.
Step 2: Brown & Season That Beef. Heat a large skillet over medium-high heat. Add your ground beef, breaking it up with a spatula. Don’t just gray it—let it get some nice, flavorful browning in spots. When it’s almost cooked through, sprinkle in the paprika, garlic powder, a good pinch of salt, and a few cracks of black pepper. Cook for another minute until fragrant and juicy. Drain any excess grease if you like, but I keep a little for flavor. Transfer the beef to a bowl for a second.
Step 3: Whip Up That “Secret” Sauce. In a small bowl, combine the mayonnaise, ketchup, and mustard. Whisk it until it’s smooth and a beautiful pale orange color. Taste it! Want more tang? Add a splash of pickle juice. More zip? Another dash of mustard. This sauce is your creation. Set it aside.
Step 4: The Art of Assembly. Lay a tortilla flat on your work surface. In the lower third, create a hearty horizontal line of ingredients: a generous scoop of beef, a handful of those crispy fries, and a mountain of the shredded cheeses. The key? Don’t overfill, or wrapping gets tricky. Leave about 2 inches clear on the sides. Now, drizzle that glorious sauce right over the top.
Step 5: Master the Wrap. Fold the sides of the tortilla in over the ends of the filling. Then, lift the bottom edge up and over the filling, tucking it in tightly. Roll it forward, keeping it snug, until you have a sealed, burrito-style package. A perfect wrap is a tight wrap—this keeps everything inside during the toasting stage.
Step 6: Golden, Crispy Perfection. Wipe out the skillet you used for the beef and place it over medium heat. Add a small pat of butter or a drizzle of oil. Place your wrap seam-side down first. This is critical! Cooking it seam-side down first seals the wrap shut. Toast for 2-3 minutes per side, or until each side is beautifully golden brown and you can see the cheese starting to ooze out the sides (the best sign!). Repeat with remaining wraps.
How to Serve These Beauties
Serve these wraps immediately while they’re hot and the cheese is at its peak pull! I love slicing them in half on a sharp diagonal—it shows off all the gorgeous layers inside. Plate them with a little extra sauce on the side for dipping, and maybe a simple, crisp green salad or some pickles to cut through the richness. Have plenty of napkins handy. The glorious mess is part of the fun!
Make It Your Own: Delicious Twists
- BBQ Bacon Ranch: Swap the sauce for BBQ sauce mixed with ranch dressing. Add cooked, crumbled bacon to the filling.
- Breakfast Burger Wrap: Use seasoned breakfast sausage, add a layer of scrambled eggs, and swap the cheese for American. Serve with maple syrup for dipping!
- Spicy Southwest: Add a diced jalapeño to the beef, use pepper Jack cheese, and mix a bit of chipotle powder into the sauce.
- Greek-Style: Use ground lamb or beef seasoned with oregano and mint. Swap the sauce for tzatziki, and add chopped tomato, onion, and feta cheese.
- “California” Veggie: For a meatless version, use black bean or veggie crumbles, and add sliced avocado, sprouts, and a sun-dried tomato aioli.
Olivia’s Chef Notes & Kitchen Confessions
This recipe is a living, breathing thing in my kitchen. I’ve made it probably a hundred times since that first movie night, and I still tweak it. Sometimes I add a handful of thin onion rings inside for an extra crunch. Sometimes I mix a tablespoon of finely minced dill pickle right into the sauce—it’s a game changer! My biggest confession? I once tried to make eight of these for a crowd simultaneously and turned my kitchen into a wrap-toasting assembly line. It was chaotic, cheese was everywhere, and it was the most fun I’ve ever had cooking. The moral: don’t be afraid to double the batch, and always, always make more sauce than you think you’ll need. It has a way of disappearing.
Your Questions, Answered!
Q: My wrap keeps falling apart when I try to toast it! Help!
A: I feel your pain! This usually means one of three things: 1) The tortilla was too cold (warm it up first!), 2) It was overstuffed (show restraint, friend!), or 3) You didn’t start toasting it seam-side down. That initial sear on the seam is your secret weapon for a sealed, stable wrap.
Q: Can I make these ahead of time?
A: You can prep the components ahead! Cook the beef and fries, make the sauce, and shred the cheese. Store them separately in the fridge. When you’re ready, assemble and toast. The wraps themselves are best enjoyed fresh off the pan.
Q: The inside isn’t as hot as I’d like when the outside is perfectly toasted.
A> Great catch! Ensure your beef and fries are still very warm when you assemble. If they’ve cooled, give them a quick reheat before building. Also, toasting over a medium, not screaming hot, heat allows the inside to warm through without burning the tortilla.
Q: Any tips for a lower-carb version?
A> Absolutely! Use a low-carb tortilla or large lettuce leaves (like butter lettuce) for wrapping. You can also swap the fries for roasted cauliflower florets for a veggie-packed crunch.
Cheesy Loaded Burger Wrap : Crispy Fries, Beef & Creamy Sauce
Description
Love burgers and fries but want something faster, crispier, and easier to eat? These Cheesy Loaded Burger Wraps bring all the best burger flavors into one golden, toasted tortilla. Juicy seasoned beef, crispy fries, melty cheese, and creamy burger sauce — all wrapped and pan-toasted until perfectly crunchy. Ideal for busy weeknights or fun casual dinners.
Ingredients
-
4 large flour tortillas (burrito size)
-
1 lb (450 g) ground beef (80/20 preferred)
-
1½ cups cooked crispy fries (frozen or homemade)
-
1½–2 cups shredded cheese (cheddar, mozzarella, or blend)
-
Salt & black pepper to taste
-
1 tsp paprika
-
½ tsp garlic powder
-
Butter or oil for toasting
Burger Sauce
-
½ cup mayonnaise
-
2 tbsp ketchup
-
1 tbsp mustard
Optional Add-Ins
-
Pickles, diced onions, jalapeños, cooked bacon bits
Instructions
-
Cook the fries
Bake or air-fry fries until extra crispy. Set aside warm. -
Brown the beef
Heat a skillet over medium-high heat. Cook beef, breaking it up, until nicely browned. Season with salt, pepper, paprika, and garlic powder. Drain excess grease if needed. -
Make the sauce
Stir mayo, ketchup, and mustard in a small bowl until smooth. -
Assemble wraps
Warm tortillas briefly so they’re flexible. On the lower third of each tortilla add:-
Cooked beef
-
Crispy fries
-
Shredded cheese
-
Spoonful of sauce
-
-
Wrap tightly
Fold in sides, then roll up burrito-style. -
Toast
Heat a clean skillet over medium heat with a little butter or oil. Place wraps seam-side down first. Cook 2–3 minutes per side until golden and crisp and cheese is melted. -
Serve
Slice in half and serve hot with extra sauce for dipping.
Notes
-
Warm tortillas before filling to prevent cracking.
-
Don’t overstuff — tight wraps toast better.
-
Start seam-side down so the wrap seals.
-
Use freshly shredded cheese for smoother melting.
-
Keep fillings hot when assembling so centers get fully warm.
Nutritional Information (Per Wrap, Approximate)
Calories: 680 | Fat: 42g | Saturated Fat: 15g | Carbohydrates: 48g | Fiber: 3g | Sugar: 5g | Protein: 32g
Please note: These are estimates based on the specific ingredients used. Values can vary significantly with substitutions.
Prep Time: 15 minutes | Cook Time: 15 minutes | Total Time: 30 minutes | Servings: 4 wraps
Final Thoughts
And there you have it, friend—the Cheesy Loaded Burger Wrap, born from a cramped apartment kitchen and a serious case of the Friday night munchies.
Here’s the thing about recipes like this one: they’re never really finished. Every time I make these wraps, something shifts. Maybe I swap in pepper Jack because that’s what’s in the fridge. Maybe I accidentally buy waffle fries instead of shoestring and discover they’re even better for crunch. Maybe I forget the sauce entirely and my family barely notices because the cheese pull is just that good. The recipe adapts. It forgives. It works anyway.
That’s what I want you to take away today—not a rigid checklist, but permission.
Permission to use whatever ground meat you have. Permission to sub in that lonely block of cheese hiding in the back of the drawer. Permission to let your five-year-old “help” assemble and end up with beef scattered across the counter and sauce on the ceiling. Permission to stand at the stove, spatula in hand, and feel like you absolutely nailed it.
Because you did.

Easy Tortilla Pizza (4-Ingredient Cheesy Weeknight Dinner)
The 4-Ingredient Miracle: Your New Favorite Weeknight Pizza Is Here!
Hey there, friend! Come on in, grab an apron, and let’s talk about one of life’s great truths: there is never a bad time for pizza. But let’s be real—between work, life, and that ever-growing to-do list, ordering takeout or wrestling with dough isn’t always in the cards. I get it. That’s exactly why I’m practically jumping up and down to share this little kitchen magic trick with you: the Easy Tortilla Pizza.
Imagine this: layers of crispy, golden flour tortillas, acting as the world’s simplest, most forgiving crust. Between each layer, a generous slather of tangy marinara, a snowfall of melty mozzarella, and those irresistible, slightly crispy pepperoni cups. It bakes into a cheesy, pull-apart stack of pure comfort that’s ready in under 30 minutes, start to finish. The best part? You likely have everything you need in your kitchen right this very minute. No fancy skills, no hours of rising, just a straight shot to deliciousness. This recipe is for the busy weeknights, the impromptu movie nights, the “I need something fun and fast” moments. It’s for getting the kids involved in the kitchen and for treating yourself without the hassle. So, let’s ditch the stress and embrace the joy of a homemade pizza night that’s easier than you ever dreamed. Ready to make some magic?
A Stack of Memories: How This Recipe Came to Be
This tortilla pizza isn’t just a recipe; it’s a time machine. It takes me straight back to my first apartment—a charming little box with a kitchen the size of a postage stamp and a budget that made gourmet ingredients a fantasy. My roommate and I lived off of creative concoctions made from tortillas, cheese, and whatever else was lurking in the fridge. One particularly exhausted Thursday, the pizza craving hit hard. We had no dough, no delivery cash, but we did have a half-pack of tortillas and a dream.
What started as a desperate, single-layer “tortilla pizza” evolved over that year. We began stacking them, joking that we were building a “pizza lasagna.” We’d experiment with different sauces, argue over the optimal cheese-to-topping ratio, and always, always burn the edges a little because we were too busy chatting and sipping wine to set a timer. Those stacks became our celebration meal for a good week, our comfort food after a bad day, and the centerpiece of many laugh-filled, messy-kitchen gatherings. This recipe is that spirit in edible form: imperfect, joyful, and utterly satisfying. It’s proof that the best meals aren’t about perfection; they’re about the connection and creativity you stir into the pot.
Gathering Your Flavor Tools: It’s All About Quality & Swaps
Here’s the beautiful part: the foundation is just four simple ingredients. But as with all simple things, the quality and little choices you make can elevate it from “good” to “can I have this every night?” Let’s break it down.
- 9 Medium Flour Tortillas: These are your canvas! I prefer the “soft taco” size (about 8-inch). The key is thickness—go for a brand that feels substantial, not the super thin, almost translucent ones. They hold up to the layers better. Chef’s Insight: For a nuttier, more robust flavor, sub in whole wheat or spinach tortillas. For a gluten-free version, use your favorite GF tortilla, but keep an eye on baking time as they can crisp up faster.
- 1 Jar (about 24 oz) Marinara Sauce: This is your flavor engine. Use a sauce you love to eat on its own! A simple, herb-forward marinara is perfect. Pro Tip: If your sauce is very watery, give it a quick simmer in a saucepan for 5-10 minutes to thicken slightly. This prevents a soggy pizza stack. No marinara? A can of crushed tomatoes seasoned with a pinch of salt, dried oregano, and a garlic clove works wonders.
- 10–12 oz Mozzarella Cheese, Shredded: Melty, stretchy, glorious mozzarella is non-negotiable for that iconic pizza pull. I highly recommend shredding a block yourself. Pre-shredded cheese contains anti-caking agents that can make it less melty. Substitution Love: Mix in some provolone for extra sharpness, or pepper jack for a kick. For a dairy-free version, a good melting vegan mozzarella style shred will do the trick.
- 6 oz Sliced Pepperoni: They add a salty, savory, slightly spicy punch and get delightfully crisp-edged in the oven. Fun Hack: If you have 2 extra minutes, place your pepperoni slices on a paper towel and microwave for 30-45 seconds before building. This renders out some fat, making them extra crispy and preventing a greasy pizza.
Optional Add-Ins (Go Wild!): Fresh basil after baking, sliced jalapeños, sautéed mushrooms, black olives, diced bell peppers, red onion, cooked Italian sausage, or a sprinkle of grated Parmesan or ricotta dollops between layers.
Let’s Build Your Pizza Masterpiece: Step-by-Step
Okay, team! Preheat that oven to 400°F (205°C) and let’s get stacking. This is the fun part—it’s like edible LEGO.
- Prep Your Stage: Line a large baking sheet with parchment paper. This isn’t just for easy cleanup (though, hallelujah for that); it prevents the bottom tortilla from sticking and ensures an even, golden crisp. No parchment? A light grease with olive oil will work.
- Lay the Foundation: Place your first tortilla right in the center of the sheet. Think of this as the sturdy base of your pizza tower. Using a spoon or the back of a ladle, spread about 2-3 tablespoons of marinara over it, leaving just a tiny ¼-inch border around the edge. This bare border acts as a “seal” and gets extra crispy—it’s a textural delight!
- The First Flavor Layer: Now, the artistry begins! Scatter a few pepperoni slices (maybe 5-6) over the sauce. Then, sprinkle a generous handful of cheese over everything. Don’t be shy—the cheese is the glue that holds this beautiful stack together.
- Repeat & Build: Carefully place a second tortilla directly on top. Gently press down so it adheres to the cheesy layer below. Repeat the process: sauce, pepperoni, cheese. Keep going! This rhythm—tortilla, sauce, toppings, cheese—is your meditation. Build until all tortillas are used. I find 9 gives the perfect height for slicing into wedges.
- The Grand Finale (Top Tier): Your top tortilla is the star of the show. Give it a good spread of sauce and an extra generous layer of cheese. This is what will bubble and bronze into that gorgeous, restaurant-quality finish. Feel free to add a few decorative pepperoni on top here.
- Bake to Golden Perfection: Slide your creation into the hot oven. Bake for 15 minutes. You’ll smell the magic happening. Then, turn your oven to BROIL (keep the rack in the middle, not too close to the top element!). Watch it like a hawk for 1-3 minutes, just until the top is spotty golden brown and the cheese is violently bubbly. This broil step is the secret weapon for that professional finish.
- The Hardest Part – Rest & Slice: Remove your masterpiece from the oven. I know, I know, you want to dive in. But let it rest on the sheet for 3-4 minutes. This allows the layers to set just enough so you can slice it without everything sliding apart. Use a sharp chef’s knife or a pizza cutter to slice into wedges, like a cake. Garnish with fresh basil if you’re feeling fancy, and serve immediately while the cheese is at its peak stretch!
How to Serve This Cheesy Wonder
Presentation is part of the fun! I love placing the whole golden stack on a large wooden cutting board or a big platter right in the center of the table. Let everyone admire it for a second before you slice. The wedges are hearty, so one or two per person is usually plenty. Serve it alongside a bright, simple green salad with a lemony vinaigrette to cut through the richness, or some roasted veggies like broccoli or asparagus. For a true “fun night in” vibe, offer small bowls of extra marinara, ranch dressing, or hot honey for dipping those crispy edges. It’s interactive, delicious, and guaranteed to spark smiles.
Make It Your Own: 5 Delicious Twists
The beauty of this format is its versatility. Here are a few ways to play with your food:
- The Supreme: Swap pepperoni for cooked Italian sausage, and add layers with thinly sliced bell peppers, red onions, black olives, and mushrooms.
- Spicy Fiesta: Use a salsa or enchilada sauce instead of marinara. Layer with pepper jack cheese, seasoned ground beef or chicken, pickled jalapeños, and top with fresh cilantro and a dollop of sour cream after baking.
- Veggie Lover’s Dream: Skip the meat and layer with roasted zucchini, spinach (squeezed dry), artichoke hearts, and sun-dried tomatoes. A sprinkle of feta or goat cheese between layers adds a fantastic tang.
- Breakfast Pizza Stack: Use a creamy country gravy as the “sauce.” Layer with cooked breakfast sausage, scrambled eggs, and cheddar cheese. Top with extra cheese and bake. Serve with hot sauce!
- The “Fancy” One: Use a garlic-infused olive oil as your base layer. Top with shredded rotisserie chicken, caramelized onions, and a mix of mozzarella and fontina cheese. Finish with a drizzle of balsamic glaze after baking.
Olivia’s Kitchen Notes & Stories
This recipe has seen some things, let me tell you. The first time I made it for my now-husband, I was so nervous to impress him I accidentally used cinnamon sugar tortillas (they were in a similar package!). We still laugh about the “Dessert Pizza Surprise” and it’s a reminder to always, always check the package label. Over the years, I’ve learned that letting the stack rest before slicing is non-negotiable—my early attempts were delicious but structurally chaotic. I’ve also found that if you’re feeding a crowd, you can make two smaller 5-layer stacks side-by-side on the same sheet pan for easier serving. This recipe has evolved from a pantry scramble to my most-requested weeknight meal by friends. It’s resilient, forgiving, and endlessly customizable—just like we are in the kitchen. Don’t strive for perfection; strive for flavor and fun.
Your Questions, Answered!
Q: My tortilla pizza turned out a bit soggy in the middle. What happened?
A: Sogginess usually comes from too much sauce or a very watery sauce. Next time, measure your sauce (2-3 Tbs per layer is plenty) and consider simmering your marinara for a few minutes to thicken it before building. Also, ensure your oven is fully preheated—a hot oven is key for immediate crisping!
Q: Can I make this ahead of time?
A: You can assemble the entire stack, wrap it tightly in plastic wrap, and refrigerate it for up to 6 hours before baking. You might need to add 2-3 extra minutes to the baking time since it’s going in cold. I don’t recommend freezing the assembled stack, as the tortillas can get gummy.
Q: What’s the best cheese for maximum meltiness?
A: For that iconic stretch, whole-milk, low-moisture mozzarella from a block that you shred yourself is the gold standard. The pre-shredded stuff works in a pinch, but it often contains starches that inhibit melting. Combining mozzarella with a bit of provolone or Monterey Jack also gives you fantastic melt and flavor.
Q: Can I use corn tortillas?
A: I wouldn’t recommend it for this stacked version. Corn tortillas are more brittle and don’t layer as well, plus their distinct flavor competes with the Italian-style toppings. Stick with flour tortillas for the best texture and neutral base.

Easy Tortilla Pizza (4-Ingredient Cheesy Weeknight Dinner)
Description
When you want pizza fast — and I mean really fast — this tortilla pizza stack saves the day. No dough, no rise time, no delivery wait. Just crispy tortillas, sauce, cheese, and your favorite topping baked into a golden, melty, sliceable stack. Perfect for busy weeknights, movie nights, or anytime you want something fun and comforting with almost no prep.
Ingredients
-
9 medium flour tortillas (soft taco size)
-
2–2½ cups marinara sauce (thick-style works best)
-
10–12 oz (280–340 g) mozzarella cheese, shredded
-
6 oz (170 g) sliced pepperoni
Optional: basil, olives, peppers, mushrooms, sausage, jalapeños, parmesan
Instructions
-
Preheat oven to 400°F (205°C). Line a large baking sheet with parchment paper.
-
Start first layer
Place 1 tortilla on the sheet. Spread 2–3 tablespoons marinara, leaving a small border. -
Add toppings
Sprinkle mozzarella and add a few pepperoni slices. -
Build the stack
Add another tortilla on top and repeat: sauce → cheese → pepperoni. Continue until all tortillas are used. -
Top layer
Finish with sauce and a generous layer of cheese and pepperoni. -
Bake
Bake for 15 minutes until hot and melted. -
Broil finish (optional but recommended)
Broil 1–3 minutes until the top is golden and bubbly. Watch closely. -
Rest & slice
Let rest 3–4 minutes, then slice like a cake and serve.
Notes
-
Use thick marinara or simmer it briefly to reduce wateriness.
-
Shred cheese from a block for better melting.
-
Don’t overload each layer — thin layers crisp better.
-
Let it rest before slicing so the stack holds together.
-
For extra crisp edges, lightly brush the bottom tortilla with olive oil.
Quick Nutritional Snapshot
Please note: This is an estimate for 1 serving (1 wedge of a 9-layer stack) based on the core 4 ingredients, using standard grocery store brands. Values will change with substitutions and add-ins.
- Prep Time: 10 mins
- Cook Time: 17 mins
- Total Time: 27 mins
- Servings: 10
- Estimated Per Serving: Calories: ~221 kcal | Carbohydrates: ~18g | Protein: ~15g | Fat: ~9g
Final Thoughts
The 4-Ingredient Miracle: Your New Favorite Weeknight Pizza Is Here!
So here we are, standing over a golden, bubbling tower of cheese and possibility, and I have to ask: wasn’t that easy? No flour-dusted countertops, no temperamental yeast, no delivery wait times—just you, four humble ingredients, and twenty-seven minutes of pure kitchen satisfaction.
This Easy Tortilla Pizza isn’t trying to be authentic Italian pizza. It’s not competing with the wood-fired Neapolitan pies or the legendary slices of New York. What it is—and what I hope you’ve discovered through these pages—is something perhaps even more valuable: a reliable friend in the kitchen. It’s the recipe that says, “I’ve got you” on a Tuesday night when you’re running on fumes. It’s the project that turns a “what’s for dinner?” groan into a “can I help?” moment with your kids. It’s the canvas that transforms whatever sad vegetables are wilting in your crisper drawer into something worth celebrating.
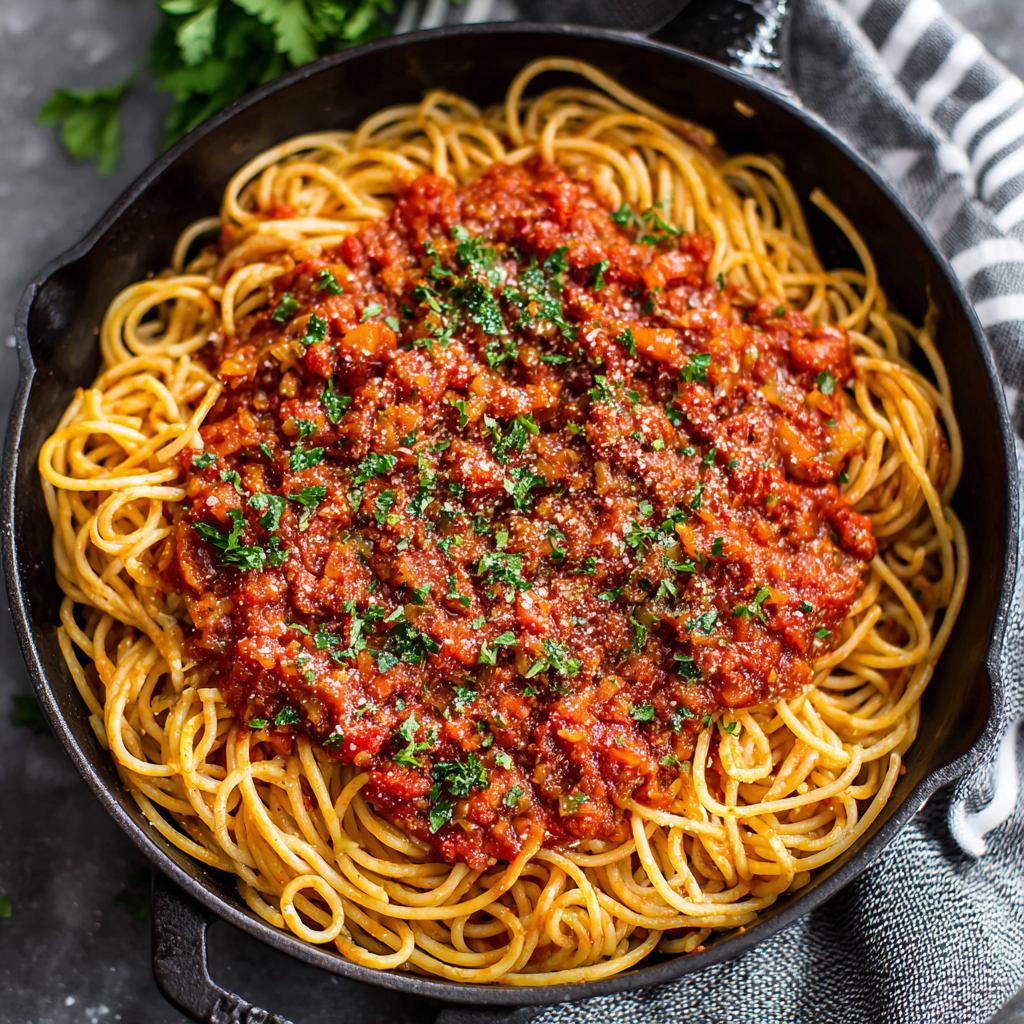
Homemade Spaghetti Sauce : Classic, Healthy & Full of Flavor
Homemade Spaghetti Sauce: The Ultimate Cozy, Flavor-Packed Recipe
Hey friends, Olivia here! Can we just take a moment to appreciate the magic of a truly great spaghetti sauce? That incredible, soul-warming smell that starts with a sizzle of onions and garlic and ends with a pot of rich, ruby-red sauce simmering on your stovetop. It’s the soundtrack to a perfect pasta night, the hero of a weeknight dinner, and the secret handshake of home cooks everywhere.
But let’s be real for a second. For years, I thought the “from scratch” version was a full-day affair, reserved for nonnas and chefs with endless time. I’d reach for a jar, feeling a tiny pang of “I could do better.” And then, one snowy Sunday, I did. I gathered a handful of simple, wholesome ingredients, turned on some music, and gave it a go. What happened in that pot? Pure alchemy. The flavor was so much deeper, brighter, and more real than anything I’d unscrewed from a jar. And the best part? It wasn’t complicated at all.
This recipe is my love letter to that moment. It’s my go-to, my forever sauce, the one I make in big batches so I always have a taste of home in my freezer. It’s classic, healthy, and bursting with flavor, but it’s also incredibly approachable. You don’t need fancy skills or all afternoon. You just need a good pot and a desire to create something wonderful. This sauce turns simple spaghetti into a celebration, a loaf of crusty bread into a vehicle for joy, and your kitchen into the coziest room in the house. So, tie on your apron (messy is encouraged!), and let’s make something unforgettable together.
The Sauce That Started It All: A Kitchen Memory
My obsession with this sauce has roots in a slightly chaotic, utterly perfect childhood memory. Picture me, about eight years old, standing on a wobbly step-stool in my grandma’s kitchen. The counters were a battlefield of tomato-splattered spoons and onion skins. The air was thick with the scent of garlic and dried oregano, a smell I now equate with pure love.
Grandma wasn’t measuring anything. She’d toss a glug of oil into her ancient, well-loved pot, and the dance would begin. “Listen to the onion, Livvy,” she’d say, as they sizzled. “When they get quiet and sweet, they’re ready for the garlic.” She’d let me stir the tomato paste, watching it caramelize and darken, calling it “giving it a little tan.” To my young mind, it was witchcraft. She’d hand me the wooden spoon for the long, lazy simmer, teaching me that patience wasn’t just a virtue—it was the main ingredient.
That sauce wasn’t just dinner; it was the centerpiece of our family Sunday. It meant cousins crowded around the table, laughter bouncing off the walls, and the profound comfort of being fed by someone who loved you. This recipe is my homage to that feeling. It’s streamlined for our busy lives but holds onto that essential, slow-simmered soul. Every time I make it, I’m back on that step-stool, learning that the best food isn’t about perfection. It’s about presence, patience, and sharing the delicious results with the people you love.
Your Flavor Toolkit: Ingredients & Why They Matter
Great flavor starts with understanding your ingredients. Here’s exactly what you’ll need and why each one plays a starring role. I’ve also included my favorite swaps and chef secrets!
- 2 tablespoons extra virgin olive oil: This is our flavor foundation. Extra virgin has a fruitier, more robust taste than regular olive oil, which adds depth right from the start. Chef’s Tip: If you’re out, any neutral oil like avocado or even butter works in a pinch!
- 1 medium onion, finely diced: Onions are the sweet, aromatic base of almost every great sauce. Finely dicing them ensures they melt beautifully into the sauce. Substitution: A large shallot or two works wonderfully for a milder, slightly sweeter flavor.
- 4 cloves garlic, minced: The aromatic heartthrob! Fresh is non-negotiable here—it provides a pungent, fragrant kick that powdered garlic just can’t match. Chef’s Insight: Don’t add it with the onions! Garlic burns fast. We add it later to keep its flavor bright and potent.
- 28 oz can crushed tomatoes: The star of the show! Look for a brand with no added sugar or citric acid—just pure tomatoes. Crushed tomatoes give us the perfect saucy texture straight from the can. Chef’s Secret: I often give the can a good shake or stir before opening to blend any separated liquid.
- 2 tablespoons tomato paste: This is our flavor concentrate. It adds a rich, intense tomatoey depth and helps thicken the sauce. We’ll “cook it out” to mellow its raw taste.
- 1 teaspoon each dried oregano & basil: The classic Italian herb duo. Dried herbs are perfect here because their flavor stands up to and infuses the long simmer. Pro Tip: Rub them between your palms as you add them to wake up their oils!
- ½ teaspoon salt & ¼ teaspoon black pepper: Season as you go! Salt enhances all the other flavors. We start with this amount and adjust at the end.
- Pinch of red pepper flakes (optional): Just a pinch adds a gentle, warming heat in the background. It’s my not-so-secret weapon for a more complex sauce.
- 1 teaspoon sugar or 2 tablespoons grated carrot (optional): This is your “balance” button. If your tomatoes are a bit sharp or acidic, a tiny bit of sugar or the natural sweetness of grated carrot (which melts right in!) can smooth everything out perfectly.
- Fresh basil or parsley, chopped (optional): The finishing flourish! A sprinkle of fresh herbs added right before serving brings a vibrant, garden-fresh aroma that ties the whole dish together.
Let’s Get Cooking: Step-by-Step Instructions
Ready to create some magic? Follow these steps, and you’ll have a sauce that’ll make your house smell like an Italian trattoria.
Step 1: Build Your Flavor Base. Heat the olive oil in a large, heavy-bottomed saucepan or Dutch oven over medium heat. Add the diced onion and a tiny pinch of salt (this helps them sweat). Now, here’s my first big tip: be patient here. Sauté for 4-5 minutes, stirring occasionally, until the onions are soft, translucent, and smell sweet. They shouldn’t brown! We’re coaxing out their natural sugars, not frying them.
Step 2: Wake Up the Aromatics. Push the onions to the side of the pan. Add the minced garlic to the cleared space and let it cook for just 30 seconds to 1 minute. You’ll know it’s ready when that incredible, fragrant smell hits you. Stir it into the onions immediately so it doesn’t burn. Burnt garlic tastes bitter, and we want fragrant and sweet!
Step 3: The Flavor Power-Up. Now, add the tomato paste right into the center of the pan with the onions and garlic. Let it cook for 1-2 minutes, stirring constantly. Watch as it darkens from bright red to a rusty, brick red. This step, called “cooking out” the paste, is a GAME CHANGER. It removes any tinny or raw flavor and gives the sauce an incredible, caramelized depth.
Step 4: Bring It All Together. Pour in the crushed tomatoes. Then, fill the empty can about a quarter full with water, swish it around to get every last bit of tomato, and add that to the pot too. This ensures no flavor is left behind and helps with consistency. Add the dried oregano, basil, salt, pepper, and red pepper flakes (if using). Give everything a big, enthusiastic stir.
Step 5: The Simmer (This is Where the Magic Happens). Bring the sauce to a gentle bubble, then immediately reduce the heat to low. Let it simmer uncovered for at least 25 minutes, but ideally 40 minutes to an hour if you have time. Stir it occasionally to prevent sticking. As it simmers, the sauce will reduce, thicken, and the flavors will marry and intensify. Your kitchen will smell absolutely heavenly. This is the “patience pays off” part!
Step 6: Taste and Balance. After simmering, take a spoonful (let it cool a bit first!). Taste it. Does it need more salt? A grind of pepper? If it tastes a little too sharp or acidic, this is when you add that optional teaspoon of sugar or grated carrot. Stir it in and let it cook for another 5 minutes. Chef’s Hack: For an ultra-smooth, velvety texture, you can use an immersion blender right in the pot for a few pulses.
Step 7: Finish with Flair. Turn off the heat. If you’re using fresh basil or parsley, stir it in now. The residual heat will wilt it perfectly and release its aromatic oils. Your masterpiece is ready!
How to Serve Your Homemade Masterpiece
This sauce is the ultimate versatile star! Of course, toss it with al dente spaghetti for the classic experience. But don’t stop there! I love serving it over thick, tubular rigatoni that catches the sauce in every bite, or swirling it into a dish of creamy polenta. For a next-level meal, use it as the base for a baked ziti or homemade lasagna. No matter how you serve it, remember the golden rule: reserve a cup of the starchy pasta water before you drain your noodles! Adding a splash back when you toss the pasta and sauce helps the sauce cling to every strand beautifully. Finish with a drizzle of good olive oil, a sprinkle of Parmesan or Pecorino cheese, and maybe a few more fresh basil leaves. Perfection.
Make It Your Own: Delicious Recipe Variations
- “Sunday Gravy” Style: Brown ½ lb of Italian sausage or ground beef in the pot before adding the onions. Remove the meat, then proceed. Add it back with the tomatoes for a hearty, meaty sauce.
- Vegan & Rich: Add ¼ cup of rinsed, drained green or brown lentils with the tomatoes. They’ll break down as they simmer, adding incredible body and a meaty texture without any meat!
- Roasted Red Pepper Twist: Blend one jar of roasted red peppers until smooth and stir it in with the crushed tomatoes. It adds a sweet, smoky dimension and a gorgeous color.
- Creamy Vodka Sauce (Quick!): After the sauce is done, stir in ½ cup of heavy cream and 2 tablespoons of vodka (the alcohol cooks off, promise!). Let it simmer for 5 more minutes for a luxurious, pink-hued sauce.
- Puttanesca-Inspired: Love bold flavors? In the last 10 minutes of simmering, stir in 2 tablespoons of rinsed capers, ½ cup chopped Kalamata olives, and a few anchovy fillets (they’ll melt in, adding salty depth, not fishiness!).
Chef Olivia’s Notes & Kitchen Stories
This recipe has been my kitchen companion for years, and it’s evolved with me. The first time I made it, I was so nervous I quadruple-checked every measurement. Now, I make it by heart, often while dancing to 80s hits or listening to an audiobook. It’s my therapy. One hilarious fail? I once thought “simmer” meant “rapid boil.” I walked away and came back to a pot that looked like a tomato volcano had erupted all over my stovetop. Lesson learned: a gentle bubble is your friend!
Over time, I’ve learned to double or triple the batch every time. I freeze it in 2-cup portions in zip-top bags (lay them flat to save space!). Having this homemade sauce at the ready on a busy Tuesday is a gift to my future self. It’s also become my go-to hostess gift or meal for a friend in need. Nothing says “I care about you” like a jar of something made slowly, with love. Remember, cooking is a journey, not a test. Have fun with it, taste as you go, and make it yours.
Your Questions, Answered: FAQs & Troubleshooting
Q: My sauce tastes a bit acidic or sharp. What did I do wrong?
A: You didn’t do anything wrong! Tomatoes vary in acidity based on brand and season. This is totally normal and an easy fix. First, make sure you simmered it long enough (at least 25 mins) to mellow the flavors. If it’s still sharp, stir in that optional 1 tsp of sugar or grated carrot. Start with a little, let it cook for 5 minutes, then taste again. The goal is balance, not sweetness.
Q: Can I use fresh herbs instead of dried?
A> Absolutely, but the timing changes. Dried herbs are added at the beginning to infuse the whole sauce. If using fresh, add sturdier herbs like rosemary or thyme with the onions, but save delicate herbs like fresh basil or parsley to stir in right at the end, off the heat. Use about three times the amount of fresh herbs (so 1 tsp dried = 1 tbsp fresh).
Q: My sauce is too thin! How do I thicken it?
A> No worries! The simplest fix is to just let it simmer uncovered for another 10-15 minutes; the excess liquid will evaporate. If you’re in a rush, make a “slurry”: mix 1 tablespoon of cornstarch with 2 tablespoons of cold water until smooth. Stir this into the simmering sauce and cook for 1-2 minutes until thickened.
Q: How long does this homemade sauce last, and can I freeze it?
A> Stored in an airtight container, it will last in the fridge for 4-5 days. And yes, it freezes beautifully for up to 3 months! Let it cool completely, then portion it into freezer-safe jars (leave headspace) or zip-top bags. Thaw overnight in the fridge or reheat gently from frozen in a saucepan.
Homemade Spaghetti Sauce : Classic, Healthy & Full of Flavor
Description
A cozy, flavor-packed, from-scratch sauce that turns any pasta night into a celebration. Versatile, comforting, and surprisingly easy to make.
Ingredients
-
2 tbsp extra virgin olive oil (or neutral oil/butter)
-
1 medium onion, finely diced (or 2 shallots)
-
4 cloves garlic, minced
-
28 oz can crushed tomatoes
-
2 tbsp tomato paste
-
1 tsp dried oregano
-
1 tsp dried basil
-
½ tsp salt (adjust to taste)
-
¼ tsp black pepper (adjust to taste)
-
Pinch red pepper flakes (optional)
-
1 tsp sugar or 2 tbsp grated carrot (optional, for acidity balance)
-
Fresh basil or parsley, chopped (optional, for garnish)
Optional Variations:
-
½ lb Italian sausage or ground beef (“Sunday Gravy” style)
-
¼ cup cooked lentils for vegan richness
-
1 jar roasted red peppers, blended
-
½ cup heavy cream + 2 tbsp vodka (creamy vodka sauce)
-
2 tbsp capers + ½ cup chopped olives + anchovy fillets (puttanesca-style)
Instructions
-
Build the Flavor Base
-
Heat olive oil in a large saucepan or Dutch oven over medium heat.
-
Add diced onions and a pinch of salt; sauté 4–5 mins until soft and translucent.
-
-
Wake Up the Aromatics
-
Push onions aside; add garlic to the empty space and cook 30 sec–1 min. Stir immediately with onions to prevent burning.
-
-
Cook the Tomato Paste
-
Add tomato paste to the pan; cook 1–2 mins until it darkens to a rusty red. This deepens flavor and removes raw taste.
-
-
Add Tomatoes & Seasonings
-
Pour in crushed tomatoes and a splash of water from the can to capture all the tomato goodness.
-
Add oregano, basil, salt, pepper, and red pepper flakes. Stir well.
-
-
Simmer & Develop Flavor
-
Bring to a gentle bubble, reduce heat to low, and simmer uncovered 25–60 mins, stirring occasionally.
-
-
Taste & Balance
-
Taste the sauce; adjust salt, pepper, or add sugar/grated carrot if too acidic. Simmer 5 more minutes if adjusted. Optional: blend with an immersion blender for a smooth texture.
-
-
Finish with Fresh Herbs
-
Stir in chopped fresh basil or parsley off the heat for aroma and color.
-
Notes
-
Meaty Sunday Gravy: Brown sausage or beef before onions; add back with tomatoes.
-
Vegan/Protein Boost: Stir in lentils while simmering.
-
Smoky Roasted Red Pepper: Blend peppers with sauce for a colorful twist.
-
Creamy Vodka: Stir in cream + vodka at the end, simmer 5 mins.
-
Bold Puttanesca: Add capers, olives, anchovies in the last 10 mins.
Final Thoughts
And so, here we are—standing side by side in our separate kitchens, wooden spoon in hand, the scent of garlic and simmering tomatoes wrapping around us like the warmest hug. This sauce, my friends, is so much more than a recipe. It’s an invitation.
It’s an invitation to slow down, just for a little while. To resist the siren call of convenience and instead give yourself the gift of forty minutes at the stove, stirring, tasting, adjusting. In a world that constantly demands our speed and efficiency, choosing to make something from scratch is a quiet act of rebellion—and a deeply generous one, both to yourself and to the people you’ll feed.
I think about that eight-year-old version of me, wobbling on that step-stool, watching my grandmother’s hands move with the easy confidence of someone who had made this sauce a thousand times before. She wasn’t trying to impress anyone. She wasn’t following a rigid formula. She was simply cooking—with presence, with intuition, with love. And that’s what I want for you, too.
This recipe is your starting line, not your finish. Maybe the first time, you follow it exactly, measuring each teaspoon and setting a timer. The second time, you might find yourself reaching for that pinch of red pepper flake, or remembering you have a Parm rind in the fridge that would be magnificent simmered in there. The third time? You might not need the recipe at all. You’ll know by the smell when the tomato paste has darkened enough. You’ll know by the sound when the onions are ready. The sauce will become yours—inflected with your taste, your rhythm, your story.
That’s the secret handshake of home cooks, by the way. It’s not about having a nonna’s intuition handed down through bloodlines. It’s about showing up, again and again, until the pot recognizes you.
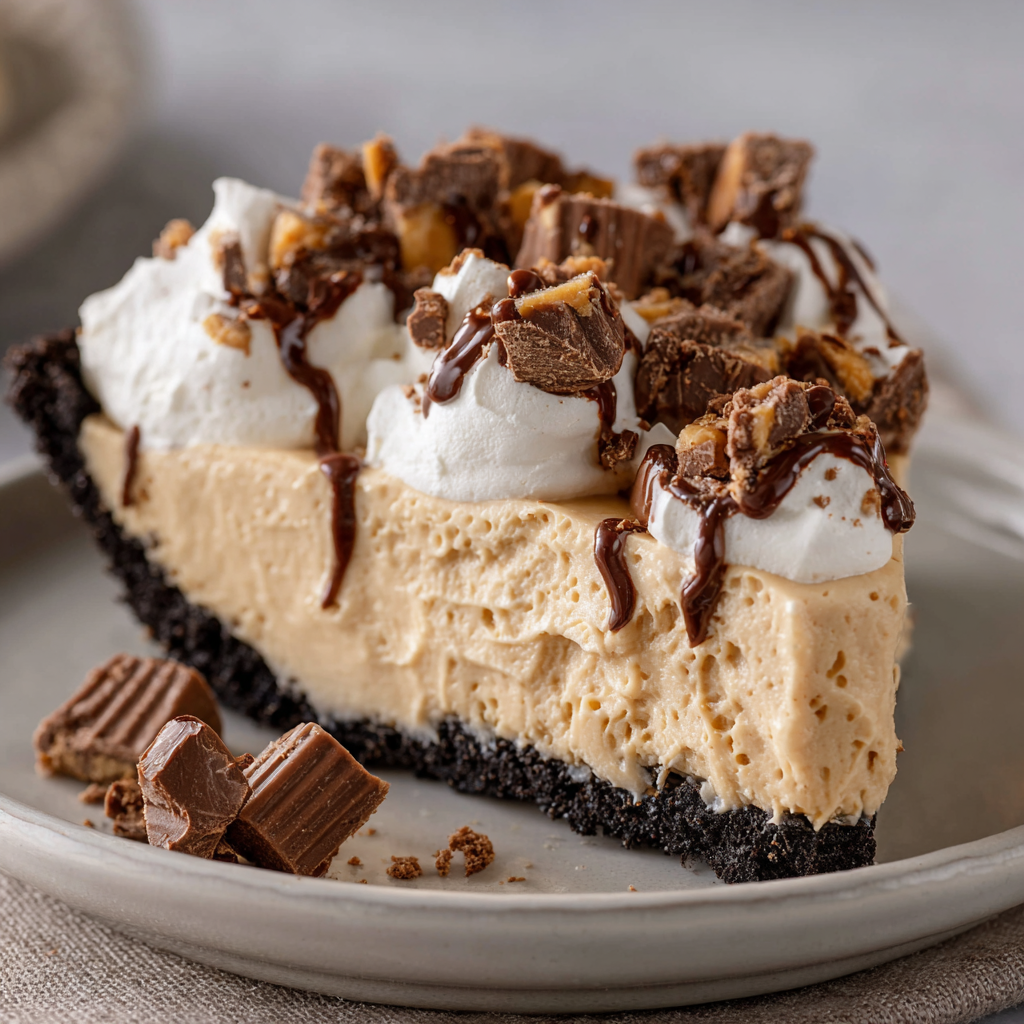
Creamy Peanut Butter Pie (Easy No-Bake Dessert)
The One Pie That Makes Everyone Smile (Seriously, Try It!)
Hey there, friend! Come on in—grab a mug of coffee and pull up a chair. If you’ve ever had one of those days where only something rich, creamy, and peanut-buttery will do, then you and I are already on the same wavelength. Today, we’re not just making dessert; we’re creating a masterpiece of comfort. I’m talking about my legendary No-Bake Creamy Peanut Butter Pie.
Picture this: a velvety, cloud-like peanut butter filling that’s somehow both decadent and light, all nestled into a crisp, chocolatey cookie crust. It’s the dessert that disappears first at every potluck, the one my family requests for birthdays over cake, and my secret weapon for when I need a guaranteed “wow” without spending all day in the kitchen. The best part? You don’t even need to turn on your oven. This is about mixing a few gorgeous ingredients together and letting the fridge do the magic. Whether you’re a seasoned baker or someone who considers boiling water an adventure, this recipe is your ticket to dessert-hero status. So, tie on that (probably already messy) apron, and let’s make something unforgettable!
Why This Pie is My Kitchen Comfort Blanket
This pie holds a special, slightly chaotic place in my heart. Years ago, I volunteered to bring dessert to a big, loud family reunion. I had grand plans for a towering layer cake, but life had other ideas—a broken oven element and a kitchen that looked like a flour bomb went off. With two hours to go and mild panic setting in, I stared into my pantry. There it was: a jar of peanut butter, a brick of cream cheese, and a box of chocolate wafers. I threw them together with a prayer.
What emerged from the fridge later was nothing short of a miracle. That pie was the star of the table. My grumpy uncle had two slices. Cousins I hadn’t seen in years asked for the recipe. It was the moment I truly learned that the best food isn’t about being fancy; it’s about being real, resourceful, and made with a big scoop of love. Now, every time I make it, I remember that chaos-to-triumph feeling and smile. It’s proof that sometimes the simplest things bring the most joy.
Gathering Your Dream Team of Ingredients
Here’s everything you’ll need to create this peanut butter paradise. I’ve included my little chef-y insights to help you understand the “why” behind each item!
- 1 (9-inch) Chocolate Cookie Crust (store-bought or homemade): This is our foundation. I often use a store-bought chocolate graham cracker crust for ultimate ease—no shame in that game! But if you’re feeling fancy, pulse 20 Oreos (filling included) with 5 tbsp melted butter and press into a pie plate. Chef Insight: The bittersweet chocolate notes are the perfect contrast to the sweet, creamy filling.
- 1 cup Creamy Peanut Butter: Use a standard, no-stir kind like Jif or Skippy. The stabilizers in them help the filling set better. Natural, oily peanut butter can make the pie too soft. Sub Tip: For a nut-free version, SunButter works shockingly well and gives a similar color/texture!
- 8 oz Cream Cheese, softened: This is our secret for structure and that luscious tang. Full-fat is non-negotiable here for the right texture. Leave it on the counter for a good 1-2 hours. Chef Hack: If you forget, microwave it unwrapped for 15-second bursts until it yields to a gentle press.
- ¾ cup Powdered Sugar: It sweetens and dissolves seamlessly without graininess. Sift it if it’s lumpy for the smoothest filling possible.
- 1 tsp Pure Vanilla Extract: The flavor amplifier. It rounds out all the other ingredients. Don’t skip it!
- 1 cup Heavy Whipping Cream: This is what gives our pie its ethereal, mousse-like lift. Make sure it’s cold, cold, cold straight from the fridge for the best whip. Chef Insight: The higher the fat content, the more stable and luxurious your whipped cream will be.
For Toppings (Go Wild!): Chocolate shavings, a simple chocolate drizzle (melt ¼ cup chocolate chips with 1 tsp coconut oil), crushed peanut butter cups, or just a dollop of extra whipped cream. It’s your canvas!
Let’s Build Some Magic: Step-by-Step
Follow these steps, and you’ll be a no-bake pie pro in no time. I’m chatting you through each one like you’re right here with me at the counter!
- The Fluffening (aka Beating Cream Cheese & PB): In a large bowl, beat the softened cream cheese and peanut butter with a hand mixer (or stand mixer) on medium-high speed for 2-3 minutes. Stop and scrape down the sides once. We want this supremely smooth and fluffy—no lumps allowed! This aerates the mixture, which is key for a light pie. Chef Hack: If your mixture seems stubbornly stiff, add a single tablespoon of the heavy cream from your carton to loosen it up.
- Sweeten the Deal: Reduce the mixer speed to low and add the powdered sugar and vanilla. Mix until just combined, then scrape the bowl and beat for another 30 seconds on medium. Taste it! This is your moment to adjust—want it a touch sweeter? Add another tablespoon of powdered sugar.
- Whip It Good: In a separate, clean, cool bowl, pour in your cold heavy cream. Whip on medium-high until stiff peaks form. You’ll know they’re stiff when you lift the beaters and the peak stands straight up without flopping over. Pro-Tip: Chill your bowl and beaters in the freezer for 10 minutes beforehand for even faster, more voluminous whipped cream.
- The Gentle Fold: This is the most crucial step for a light texture. Add about 1/3 of the whipped cream to the peanut butter mixture. Use a rubber spatula to fold it in—this means gently cutting through the center, sliding along the bottom, and turning the mixture over itself. Rotate the bowl as you go. Once incorporated, add the remaining whipped cream and fold until no white streaks remain. Be patient and gentle; we’re keeping all that air we just whipped in!
- Fill & Chill: Spoon this dreamy filling into your waiting crust. Smooth the top with an offset spatula or the back of a spoon. Now, the hardest part: walk away. Cover loosely with plastic wrap and refrigerate for at least 4 hours, but overnight is absolute perfection. This chill time lets the flavors marry and the filling firm up to sliceable bliss.
- Garnish & Serve: Just before serving, add your toppings! Drizzle with chocolate, sprinkle with crushed candy, or add rosettes of whipped cream. Run a sharp knife under hot water, wipe it dry, and slice cleanly for beautiful pieces.
How to Serve This Beauty
Presentation is the final fun step! I love serving this on a simple cake stand or a colorful ceramic plate. For a rustic-chic look, sprinkle the toppings just in the center. For individual servings, use a warm knife to get clean slices and plate each piece with a tiny extra pinch of sea salt or a mini peanut butter cup on the side. A cup of strong cold brew or a glass of cold milk is its perfect soulmate. It’s rich, so small slices are totally acceptable (but good luck stopping at one!).
Make It Your Own: Fun Variations
This recipe is a fantastic blueprint for creativity. Here are a few of my favorite twists:
- Chocolate Peanut Butter Cup: Fold ½ cup of mini chocolate chips into the filling before chilling. Top with chopped Reese’s cups.
- Salted Caramel Swirl: Before chilling, drizzle ¼ cup of thick salted caramel sauce over the filled pie and use a knife to swirl it gently into the top layer.
- Vegan Dream: Use vegan cream cheese, a plant-based heavy cream alternative (like Country Crock Plant Cream), and ensure your chocolate crust is vegan. Sweeten with maple syrup to taste (note: this will be a softer set).
- Banana Cream Fusion: Spread a layer of sliced bananas over the crust before adding the peanut butter filling. Top with fresh banana slices and a dusting of cinnamon before serving.
- Cookie Dough Lover’s: Fold in ½ cup of mini chocolate chips and ¼ cup of oat flour or heat-treated all-purpose flour into the filling mixture for a safe-to-eat “cookie dough” vibe.
Olivia’s Chef’s Notes & Kitchen Confessions
This recipe has evolved from my panic-mode original. I used to just mix everything together in one bowl, but I learned that whipping the cream separately and folding is the game-changer for that cloud-like texture. One time, I accidentally used chunky peanut butter, and you know what? The little peanut bits added a fantastic crunch that my dad now insists on! So, feel free to try it.
My biggest kitchen story with this pie involves my dog, Baxter. Let’s just say he has a sixth sense for peanut butter and once managed to gently nose a finished (but unguarded) pie off the counter. The pie was a loss (RIP), but the look of pure, unadulterated guilt on his furry face was priceless. Moral of the story: guard your chilled pie with your life, or at least with a securely placed oven mitt!
Your Questions, Answered!
Q: My filling seems a bit soft/runny after chilling. What happened?
A: This usually means the whipped cream wasn’t whipped to stiff peaks, or the natural peanut butter was used (which is oilier). Don’t worry—it will still taste amazing! Serve it in bowls as a mousse. Next time, ensure your cream is very cold and whip until truly stiff, and use a standard processed peanut butter.
Q: Can I make this ahead of time?
A: Absolutely! That’s one of its best features. It keeps beautifully, covered, in the fridge for up to 3 days. Add any fresh toppings (like whipped cream or candy) right before serving.
Q: Can I freeze the peanut butter pie?
A> You can! Wrap it tightly in plastic wrap and freeze for up to a month. Thaw in the refrigerator overnight. The texture will be slightly denser but still delicious—like a frozen peanut butter cheesecake slice.
Q: My cream cheese was still a bit lumpy when I mixed it. How do I avoid that?
A> Proper softening is key! If you get small lumps, you can press the finished filling through a fine-mesh sieve—a bit fussy but it works. Or, embrace the rustic texture and call it “homestyle.”

Creamy Peanut Butter Pie (Easy No-Bake Dessert)
Description
If you need a guaranteed dessert win, this no-bake peanut butter pie is it. It’s smooth, fluffy, rich, and perfectly balanced with a chocolate cookie crust. No oven, no complicated steps — just simple mixing, chilling, and smiling when everyone asks for seconds. It’s ideal for parties, birthdays, or anytime you want something impressive with minimal effort.
Ingredients
-
1 prepared 9-inch chocolate cookie crust (store-bought or homemade)
-
1 cup creamy peanut butter (regular, not natural-style)
-
8 oz (225 g) cream cheese, softened
-
¾ cup powdered sugar
-
1 tsp vanilla extract
-
1 cup cold heavy whipping cream
Optional Toppings
-
Chocolate drizzle
-
Chocolate shavings
-
Crushed peanut butter cups
-
Extra whipped cream
Instructions
-
Beat peanut butter & cream cheese
In a large bowl, beat softened cream cheese and peanut butter for 2–3 minutes until completely smooth and fluffy. -
Add sugar & vanilla
Mix in powdered sugar and vanilla until fully combined. Scrape the bowl and mix again briefly. -
Whip the cream
In a separate cold bowl, whip heavy cream to stiff peaks (peaks stand straight when beaters lift). -
Fold gently
Fold one-third of the whipped cream into the peanut butter mixture to lighten it. Then gently fold in the remaining whipped cream until smooth and airy. -
Fill the crust
Spoon filling into the crust and smooth the top. -
Chill
Refrigerate at least 4 hours (overnight is best) until firm. -
Decorate & serve
Add toppings just before serving. Slice with a warm knife for clean cuts.
Notes
-
Use regular creamy peanut butter — natural versions can make the pie too soft.
-
Cream cheese must be fully softened to avoid lumps.
-
Cold cream whips better — chill the bowl and beaters if possible.
-
Fold, don’t stir — gentle folding keeps the filling light and mousse-like.
-
Overnight chill = best texture and flavor.
Nutritional Information (Approximate)
Per slice (1/8th of pie, without additional toppings): Calories: ~450 | Fat: 35g | Saturated Fat: 16g | Carbohydrates: 28g | Sugar: 20g | Protein: 9g
Remember, this is a celebratory treat! Enjoy it mindfully and savor every single creamy, peanut-buttery bite.
Final Thoughts
The One Pie That Makes Everyone Smile (Seriously, Try It!)
And here we are, friend—coffee mug empty, apron dusted with powdered sugar, and a gorgeous pie resting peacefully in your fridge. All that’s left is the hardest part: waiting.
But while we wait, let me tell you what I hope you’ve taken from this little kitchen adventure of ours.
This No-Bake Creamy Peanut Butter Pie isn’t just a recipe. It’s permission. Permission to take shortcuts when life gets chaotic. Permission to show up with something simple that still steals the show. Permission to believe that you—yes, you—can create something that makes people close their eyes on the first bite and let out that involuntary little mmmph of pure satisfaction.
I’ve made this pie in a borrowed apartment with a dull butter knife and a whisk that squeaked. I’ve made it at midnight when I couldn’t sleep, the fridge humming its quiet song while I folded cream cheese and peanut butter together like a prayer. I’ve made it for celebrations and for heartbreaks, for potlucks and for no reason at all except that Tuesday needed to be a little better.
And every single time, it works.
Not because I’m a pastry chef or because I own fancy equipment. It works because peanut butter and chocolate are soulmates. It works because cream cheese and whipped cream refuse to let you down. It works because sometimes the most honest, generous thing you can offer someone is something creamy and cold and made just for them.
So go ahead—pull that pie out of the fridge. Run your knife under hot water. Wipe it dry. Slice cleanly through that chocolate crust and into that cloud of peanut butter heaven. Watch the way the fork glides through. Listen to the quiet click against the plate.
And when you take that first bite, the one you’ve been waiting for since you started reading this? I hope you smile. I hope you close your eyes. I hope you think, I made this.
Because you did.
Ultimate Dark Chocolate Cake : Rich, Moist & From Scratch
The Ultimate Dark Chocolate Cake: Your New Go-To for Every Celebration
Hey there, friend! Come on in, grab an apron, and let’s talk about chocolate. I’m not talking about a polite, subtle hint of cocoa. I’m talking about the kind of deep, soul-satisfying, unapologetically rich chocolate experience that makes you close your eyes for a second after the first bite. The kind that turns a regular Tuesday into a celebration and makes a birthday feel truly momentous. If you’ve ever scanned a bakery case, longing for that perfect slice of dark chocolate cake but hesitated at the price tag, I’ve got fantastic news: you can make one that’s even better, right in your own kitchen.
This Ultimate Dark Chocolate Cake is my absolute pride and joy. It’s the recipe I’ve tweaked, tasted, and perfected over years of family birthdays, potluck dinners, and “just because” baking sessions. What makes it so special? It’s incredibly moist with a tender, velvety crumb that stays that way for days. The flavor is intense and complex, not just sweet. And the best part? It comes together in one bowl without any fussy techniques. This isn’t a fussy, temperamental dessert; it’s a reliable, beloved friend. Whether you’re a seasoned baker or someone who gets nervous just preheating the oven, this recipe is for you. We’re going to walk through it together, step-by-step, and by the end, you’ll have a stunning, bakery-worthy cake that’s brimming with homemade love. Let’s bake some magic!
The Birthday Cake That Started It All
This cake has roots in a little kitchen disaster that turned into a sweet tradition. Years ago, for my husband’s birthday, I ambitiously decided to tackle a five-layer chocolate monstrosity from a famous chef’s cookbook. It involved double boilers, separated eggs, and a frosting that demanded a candy thermometer. Let’s just say… it did not go well. The layers were lopsided, the frosting was grainy, and I was nearly in tears as our guests were due to arrive.
In a panic, I scrapped it all. I whisked together the simple, back-to-basics ingredients I always keep on hand—flour, cocoa, sugar, eggs—and poured in a cup of hot coffee on a whim, remembering my grandma’s old trick. What came out of the oven was a miracle: two perfectly domed, incredibly fragrant dark chocolate cakes. They were so moist they practically glistened. I slapped some hastily whipped chocolate frosting between them, piled some berries on top, and served it with a laugh and the full story. It was a smash hit. The simplicity was its genius. Now, it’s the only birthday cake he requests. It taught me that the best recipes aren’t about showing off; they’re about sharing joy, even when it comes from a happy accident.
Gathering Your Ingredients: A Baker’s Blueprint
Here’s everything you’ll need to create this chocolate masterpiece. I’ve added my little notes next to each one—why it’s important, and how you can swap things if needed. Baking is part science, part art, and I want you to feel confident making it your own!
- 1 ¾ cups all-purpose flour: The sturdy backbone of our cake. It gives structure. For a slightly more tender crumb, you can swap in ½ cup cake flour, but all-purpose works beautifully.
- ¾ cup unsweetened cocoa powder (dark or Dutch-processed): This is the star! Dutch-processed cocoa is alkalized, making it darker, less acidic, and richer in flavor. It’s my top choice for this “ultimate” deep flavor. If you only have natural cocoa, that’s okay—the recipe’s baking soda will react with it just fine.
- 2 cups granulated sugar: Sweetens and, importantly, helps retain moisture for that famously tender texture.
- 1 ½ tsp baking powder & 1 ½ tsp baking soda: Our dynamic leavening duo. They work together to give the cake a beautiful, even rise. Make sure yours is fresh for the best lift!
- 1 tsp salt: Never skip the salt in desserts! It’s the secret weapon that enhances and balances all the chocolatey sweetness, preventing it from being one-dimensional.
- 2 large eggs: They bind, enrich, and add to the structure. Bring them to room temperature for easier mixing and a smoother batter.
- 1 cup buttermilk: The key to unbelievable moisture and a subtle tang that makes the chocolate flavor pop. No buttermilk? Make a quick “sour milk”: mix 1 cup regular milk with 1 tablespoon white vinegar or lemon juice. Let it sit for 5 minutes before using.
- ½ cup vegetable oil: Oil keeps the crumb moist longer than butter would. I use a neutral oil like canola or grapeseed.
- 2 tsp vanilla extract: The floral notes of vanilla are chocolate’s best friend. Use pure extract if you can!
- 1 cup hot coffee or hot water: This is the magic trick. The hot liquid “blooms” the cocoa powder, intensifying its flavor. The coffee (don’t worry, you won’t taste it!) simply makes the chocolate taste more chocolatey. If you’re avoiding caffeine, hot water works perfectly.
For the Luxurious Chocolate Frosting (Optional, but Highly Recommended!)
- ½ cup unsalted butter, softened: The base for a rich, spreadable frosting. Unsalted lets you control the salt level.
- ⅔ cup unsweetened cocoa powder: We’re doubling down on that deep chocolate flavor.
- 3 cups powdered sugar: Sifted, if possible, to avoid lumps in your beautifully smooth frosting.
- ⅓ cup heavy cream or milk: Heavy cream will give you a richer, more decadent consistency. Milk works for a slightly lighter version.
- 1 tsp vanilla extract: A must for balancing sweetness.
Step-by-Step: Let’s Build Your Dream Cake
Ready? Let’s do this! I’ll walk you through each step with all my favorite tips and hacks to ensure success.
Step 1: Prep Like a Pro. First, preheat your oven to 350°F (175°C). This is non-negotiable—a properly preheated oven is crucial for the perfect rise. While it heats, grease two 9-inch round cake pans with butter or baking spray. Then, line the bottoms with parchment paper circles. (I just trace the pan on parchment and cut it out!). This guarantees your cakes will release beautifully without a single crumb left behind. Trust me on this one.
Step 2: The One-Bowl Wonder Dry Mix. In a large mixing bowl (you can use a stand mixer, hand mixer, or just a whisk and some elbow grease!), whisk together the flour, cocoa powder, sugar, baking powder, baking soda, and salt. Take a moment to really whisk it well. We want everything evenly distributed so every bite is perfect. You’ll already start to smell that amazing chocolatey aroma.
Step 3: Bring in the Wet Team. To the dry ingredients, add the eggs, buttermilk, vegetable oil, and vanilla extract. Now, beat everything together on medium speed for about 2 minutes. The batter will be thick, creamy, and gloriously shiny. Scrape down the sides of the bowl to make sure no dry pockets are hiding.
Step 4: The Magic Pour. Here comes the fun part! With the mixer on low speed, slowly pour in the hot coffee or hot water. The batter will look thin and almost soupy—this is exactly right! Don’t panic. This liquid is what creates that incredibly moist texture and intensifies the cocoa. Just mix until it’s fully combined, which will only take a minute.
Step 5: Divide and Conquer. Pour the thin batter evenly into your two prepared pans. A kitchen scale is the most precise tool for this, but if you don’t have one, just eyeball it as best you can. A little tilt of the pans will help the batter settle evenly.
Step 6: Bake to Perfection. Slide the pans into the center of your preheated oven. Now, the hardest part: do not open the oven door for at least 25 minutes! Peeking can cause a draft and make your cakes sink. Bake for 30-35 minutes total. You’ll know they’re done when the tops are set and spring back when lightly touched, and a toothpick or skewer inserted into the center comes out with just a few moist crumbs (not wet batter).
Step 7: The Patient Cool-Down. Once baked, let the cakes cool in their pans on a wire rack for exactly 10 minutes. This allows them to firm up a bit. Then, run a knife around the edges, invert the pans onto the rack, and carefully peel off the parchment paper. Let them cool completely before you even *think* about frosting. A warm cake will melt your frosting into a sad puddle. I sometimes pop them in the fridge for 30 minutes to speed things up if I’m impatient!
Step 8: Make the Frosting. While the cakes cool, beat the softened butter until it’s smooth and creamy. Add the cocoa powder and beat again. Gradually add the powdered sugar, alternating with the heavy cream or milk, and beat on medium-high speed. Finish with the vanilla and beat for a final 1-2 minutes until it’s light, fluffy, and spreadable. If it’s too thick, add a splash more cream. Too thin? Add a bit more powdered sugar.
Step 9: Frost & Decorate! Place one cooled cake layer on your serving plate. Spread a generous dollop of frosting over it. Add the second layer on top. Use an offset spatula or butter knife to apply a thin “crumb coat” of frosting all over the cake to seal in any loose crumbs. Chill for 15 minutes, then pile on the rest of the frosting, swirling it beautifully. I love a rustic, swoopy finish—perfection is overrated!
How to Serve This Showstopper
Presentation is the final flourish! For a classic look, simply frost the cake and maybe add a sprinkle of chocolate shavings or a dusting of cocoa powder. To make it extra special, crown it with a pile of fresh raspberries or strawberries—the bright, tart fruit is heavenly with the rich cake. For a party, add some edible gold flakes or chocolate-dipped espresso beans on top. Slice with a sharp knife dipped in hot water for clean, beautiful slices. Serve it at room temperature with a cold glass of milk, a hot cup of coffee, or even a dollop of lightly sweetened whipped cream on the side.
Make It Your Own: Delicious Twists & Swaps
This recipe is a fantastic canvas for creativity! Here are a few of my favorite ways to mix it up:
- Espresso Lovers’ Dream: Use hot, strong espresso instead of coffee for an even deeper, mocha-forward flavor.
- Vegan-Friendly Version: Swap eggs for ½ cup applesauce or commercial egg replacer, use plant-based milk + vinegar for the buttermilk, and use a vegan butter and cream alternative in the frosting.
- Chocolate-Orange Bliss: Add 1 tablespoon of finely grated orange zest to the batter and 1 teaspoon of orange extract to the frosting for a bright, citrusy twist.
- Peppermint Patty Cake: Add 1 teaspoon of peppermint extract to the chocolate frosting. Perfect for the holidays!
- Cupcake Conversion: This batter makes about 24 perfect cupcakes. Fill liners ⅔ full and bake for 18-22 minutes.
Olivia’s Chef Notes & Kitchen Confessions
This cake has been my faithful companion through so many life moments, and I’ve learned a thing or two. First, the batter being thin still surprises me every single time—I have to remind myself it’s correct! Second, I once forgot the baking soda and baking powder entirely (mom brain is real). The result was two dense, sad chocolate frisbees. So, now I always mix my leaveners into the flour first thing to avoid that disaster! Over time, I’ve also started adding a tiny pinch of cinnamon or even a dash of cayenne pepper to the dry ingredients for a mysterious, warm background note that people can never quite place. It’s our little secret. Most importantly, have fun with it. Licking the bowl is mandatory, and a little mess means you’re doing it right.
FAQs & Your Baking Questions, Answered
Q: My cake sunk in the middle! What happened?
A: Oh no, the classic sink! This is usually due to 1) Underbaking (the center wasn’t set yet), 2) Opening the oven door too early before the structure had set, or 3) Expired or mismeasured leavening agents (baking powder/soda). Make sure your oven is fully preheated, don’t peek before 25 minutes, and test for doneness with a toothpick that comes out clean or with dry crumbs.
Q: Can I make this cake ahead of time?
A: Absolutely! In fact, I think it tastes even better the next day. You can bake the layers, let them cool completely, wrap them tightly in plastic wrap, and store at room temperature for one day or freeze for up to 3 months. Thaw before frosting. You can also frost the entire cake and store it, covered, in the fridge for up to 3 days. Let it sit at room temperature for an hour before serving for the best texture and flavor.
Q: My frosting is too runny/grainy. Help!
A: Runny frosting usually means it’s too warm or you added a bit too much liquid. Pop the whole bowl in the fridge for 20 minutes to firm up the butter, then re-whip. Grainy frosting is often from unsifted powdered sugar. You can try beating it for a full 5-7 minutes on high—sometimes that incorporates the sugar fully. If not, next time, sift your sugar and cocoa!
Q: I don’t have two 9-inch pans. Can I use a different pan?
A> Yes! A 9×13-inch rectangular pan works wonderfully—just bake for 35-40 minutes. For a stunning Bundt cake, grease and flour a 10-12 cup Bundt pan extremely well and bake for 45-55 minutes. Always do the toothpick test to be sure.
Ultimate Dark Chocolate Cake : Rich, Moist & From Scratch
Description
If you love bold chocolate flavor, this dark chocolate cake is the one to keep forever. It’s incredibly moist, tender, and intensely chocolatey without being overly sweet. Even better, it’s a simple one-bowl batter that works for birthdays, holidays, and anytime you want a guaranteed crowd-pleaser.
Ingredients
Cake
-
1¾ cups all-purpose flour
-
¾ cup unsweetened cocoa powder (Dutch-process preferred)
-
2 cups granulated sugar
-
1½ tsp baking powder
-
1½ tsp baking soda
-
1 tsp salt
-
2 large eggs (room temperature)
-
1 cup buttermilk (or 1 cup milk + 1 tbsp lemon juice)
-
½ cup vegetable oil
-
2 tsp vanilla extract
-
1 cup hot coffee or hot water
Chocolate Frosting
-
½ cup unsalted butter, softened
-
⅔ cup unsweetened cocoa powder
-
3 cups powdered sugar
-
⅓ cup heavy cream or milk
-
1 tsp vanilla extract
Instructions
-
Prep oven & pans
Preheat oven to 350°F / 175°C. Grease two 9-inch round pans and line bottoms with parchment. -
Mix dry ingredients
In a large bowl, whisk flour, cocoa, sugar, baking powder, baking soda, and salt. -
Add wet ingredients
Add eggs, buttermilk, oil, and vanilla. Beat 2 minutes until smooth. -
Add hot liquid
Slowly mix in hot coffee or water. Batter will be thin — that’s correct. -
Bake
Divide into pans. Bake 30–35 minutes until a toothpick comes out with a few moist crumbs. -
Cool
Cool in pans 10 minutes, then turn out and cool completely before frosting.
Notes
-
Use Dutch-process cocoa for darker color and smoother flavor.
-
Hot coffee boosts chocolate taste without making the cake taste like coffee.
-
Don’t overbake — moist crumbs on the tester are perfect.
-
Chill layers briefly before frosting for cleaner spreading.
-
Make cupcakes: bake 18–22 minutes (makes ~24).
Nutritional Information (Approximate)
Per slice (1/12th of cake with frosting): Calories: ~420 | Total Fat: 18g | Saturated Fat: 8g | Cholesterol: 55mg | Sodium: 380mg | Total Carbohydrates: 66g | Dietary Fiber: 3g | Sugars: 50g | Protein: 5g
Final Thoughts
And here we are, friend—flour-dusted countertops, a sink full of mixing bowls, and the most beautiful dark chocolate cake sitting right there on your kitchen counter. You did it. You.
As I sit down to write these final words, I can’t help but smile at the journey we’ve taken together through these pages. This isn’t really a recipe you’ve just read; it’s an invitation. An invitation to stop waiting for the “right occasion” and start making your own. An invitation to trust your hands, your instincts, and a simple bowl of ingredients that somehow, through a little heat and a lot of heart, transforms into something almost magical.
This cake has been with me through candlelit birthdays and quiet Tuesday nights. It’s traveled to potlucks where it came back with an empty plate and a dozen scribbled requests for the recipe. It’s been the peace offering after a long week, the centerpiece of a “just because” dinner, the late-night snack stolen from the fridge with a fork when no one was watching. And now, it’s yours.
What I hope you’ll take away from this isn’t just a reliable chocolate cake recipe—though it absolutely is that, and I’ll never gatekeep a good thing. What I hope you’ll carry with you is the knowledge that you don’t need professional training, expensive equipment, or a perfectly organized kitchen to create something extraordinary. You just need to show up, be willing to make a mess, and remember that the slightly lopsided cake made with your own two hands will always taste better than the flawless one from the bakery case. Always.
Homemade Tahini Recipe : Creamy, Healthy Sesame Paste
Homemade Tahini Recipe: Your Secret Weapon for Creamy, Dreamy Flavor
Hey there, friend! Come on in, grab an apron, and let’s get something straight: that little jar of tahini hiding in the back of your pantry? The one that’s maybe a little… gritty, or has that weird separated oil pool on top? We’re giving it a graceful retirement. Today, we’re making our own.
I’m a firm believer that some of the most transformative ingredients in cooking are also the simplest to make from scratch. And tahini—that luxuriously smooth, nutty, subtly bitter sesame paste—is the queen of that category. If you’ve only ever experienced it as a humble hummus ingredient, you’re in for a revelation. This homemade version is a universe away. It’s richer, fresher, creamier, and carries a toastiness that sings of quality and care.
The best part? You need exactly one main ingredient and about 10 minutes. That’s it. No fancy skills, no obscure tools. Just you, some sesame seeds, and a trusty blender or food processor. We’re going to turn those tiny seeds into liquid gold that will become your new kitchen obsession. Drizzle it over roasted sweet potatoes, whisk it into a lightning-fast garlic sauce for grilled chicken, fold it into brownie batter, or yes, make the most incredible hummus of your life. This homemade tahini recipe is about to become your flavor secret weapon. Ready to see how truly easy it is? Let’s go.
My Tahini “Aha!” Moment: A Story from a Sunny Market
My love affair with tahini wasn’t love at first sight. For years, I bought the same supermarket brand, dutifully stirring the stubborn oil back into the thick paste, never quite thrilled with the faintly stale, sometimes bitter result. I thought that was just… how tahini was.
Then, on a trip to visit a friend in Jerusalem, we got lost in the maze of the Machane Yehuda market. The air was thick with the scent of spices, frying falafel, and fresh pita. At a tiny stall overflowing with barrels of nuts and seeds, an older vendor with kind eyes offered me a taste of his tahini. He drizzled it straight from a large vat onto a piece of warm pita. I took a bite, and my entire concept of the ingredient shattered.
It was creamy. Like, silken-pudding creamy. It was deeply nutty but also sweet, complex, and impossibly smooth. There was no grit, no harsh bitterness—just a warm, rounded flavor that made me immediately want another bite. “The secret,” he said with a wink, “is to be friends with the sesame seed. Toast it just enough to wake it up, not to scare it.” That philosophy—respecting the ingredient, handling it with intention—stuck with me. I came home determined to recreate that magic. After a few batches (and a very patient food processor), I realized the secret wasn’t a secret at all. It was just freshness, simplicity, and a little bit of patience. And now, I get to share that “aha!” moment with you.
What You’ll Need: Keeping It Simple & Stellar
Here’s the beautiful part. Our ingredient list is gloriously short. Quality is key here, as there’s nowhere for mediocre ingredients to hide.
- 2 cups sesame seeds (hulled): This is our star! Hulled seeds (the kind without the outer bran) will give you the classic, pale beige, ultra-creamy tahini. You can use unhulled for a darker, more robust flavor and extra fiber, but your tahini will be thicker, slightly grainier, and more bitter. For your first time, I highly recommend hulled for that silky-smooth texture we’re after.
- 2-4 tablespoons neutral oil: Our texture magician. I typically use a mild avocado oil or a light olive oil (not extra virgin, its flavor is too strong). For a deeply aromatic, “next-level” tahini, you can use 1-2 tablespoons of toasted sesame oil blended with a neutral oil. Chef’s Insight: Start with 2 tablespoons and add more only as needed. The seeds release their own oils as they blend!
- A generous pinch of salt (optional): Just a pinch! This isn’t for preservation, but for flavor. Salt acts as a flavor enhancer, rounding out the nuttiness and balancing any subtle bitter notes. I never skip it.
Let’s Make It: Your Step-by-Step Guide to Sesame Gold
Ready? This process is almost meditative. Put on some good music, and let’s transform these seeds.
- Toast the Sesame Seeds: Add your sesame seeds to a large, dry skillet (no oil!) over medium heat. Now, channel your inner market vendor and “wake them up, don’t scare them.” Toast them for 3-5 minutes, stirring or shaking the pan constantly. They’ll become fragrant and take on a very light golden hue. The moment you smell that warm, nutty aroma, they’re done! Pro-Tip: Immediately pour them onto a cool plate or baking sheet. They carryover cook in the hot pan, and we want to avoid burning at all costs—burnt seeds make bitter tahini.
- Let Them Cool (The Patience Step): I know, I know. You want to blend! But letting the seeds cool completely is a non-negotiable chef’s hack. Blending warm seeds creates steam, which can make your tahini seize up or become gummy. Give them 10-15 minutes to come to room temperature. Use this time to wash the pan and set up your food processor.
- The First Blend – From Seeds to Crumbs: Add the completely cooled seeds to your food processor or high-powered blender. Secure the lid and let it run! At first, it’ll sound like a sandstorm. After a minute or so, it’ll form a dry, crumbly paste that clumps together. This is perfectly normal. Stop, scrape down the sides and bottom with a spatula.
- The Magic Transformation – Adding the Oil: Here’s where the alchemy happens. Turn the processor back on. With it running, slowly drizzle in your oil through the feed tube. Start with 2 tablespoons. You’ll witness the magic: the dry crumbs will suddenly collapse into a thick, smooth paste. Let the machine run for a full 1-2 minutes. It will get smoother and smoother. Chef’s Hack: If it still seems too thick or grainy after 2 minutes, stop, scrape, and add another ½ tablespoon of oil. Repeat until it’s pourable but still luxuriously thick.
- Season and Finalize: Add your pinch of salt. Process for another 30 seconds to incorporate it fully. Give it a taste on a spoon. Be amazed. That’s it!
- Store with Love: Scrape every last bit into a clean, airtight glass jar. A mason jar is perfect. It will keep in the refrigerator for up to a month. The oil may separate on top—that’s natural! Just give it a good stir before each use.
How to Use Your Liquid Gold: Serving Suggestions
Congratulations! You now have a jar of culinary magic. Beyond the classic hummus, try these simple ideas: Drizzle it over roasted vegetables (cauliflower, broccoli, sweet potatoes) straight from the oven. Thin it with lemon juice, water, and a crushed garlic clove for an instant, heavenly sauce for grilled meats or falafel. Swirl it into morning oatmeal or yogurt with a drizzle of honey. Or, my favorite lazy dinner: a big spoonful whisked into hot pasta water with a squeeze of lemon, chili flakes, and pasta for a creamy, dairy-free sauce in seconds.
Make It Your Own: Fun Recipe Variations
- Roasted Garlic Tahini: Blend in 2-3 cloves of roasted garlic for a mellow, sweet kick. Perfect for dressings.
- Lemon-Zest & Herb: Add the zest of one lemon and a handful of fresh dill or parsley for a bright, herbaceous spread.
- Spiced Tahini: Blend in ½ tsp each of ground cumin and coriander for a Middle Eastern flair.
- Maple-Cinnamon Tahini: For a sweet version, blend in 1 tbsp maple syrup and ½ tsp cinnamon. Incredible on toast or pancakes.
- Oil-Free (Seed-Only) Tahini: In a powerful blender like a Vitamix, you can often achieve a smooth paste with just seeds, though it will be very thick. Add water by the teaspoon to adjust consistency for dressings.
Chef’s Notes & Kitchen Confessions
This recipe has evolved from a “let’s see if this works” experiment to a weekly staple in my kitchen. My first batch? I over-toasted the seeds and my food processor sounded like it was going to launch into orbit. The tahini was… aggressively bitter. Lesson learned! Now, I’m almost obsessive about gentle toasting and letting the seeds cool.
I also used to add all the oil at once. Big mistake. It splattered everywhere and took forever to emulsify. The slow drizzle is a game-changer—it’s the difference between a cohesive sauce and a messy one. And a funny story: I once tried to quadruple the batch for a party. My poor little food processor overheated and shut down for a “cool-down break.” We had to finish blending in two batches. So, if you’re making a big batch, give your machine a breather! Now, you get to learn from my messy-apron mistakes. Enjoy the smooth, easy journey.
Your Tahini Questions, Answered
Q: My tahini is super bitter! What did I do wrong?
A: The most common culprit is over-toasting the sesame seeds. Even a few extra seconds can push them from “nutty” to “burnt and bitter.” Next time, toast just until fragrant and immediately remove from the pan. Using unhulled seeds can also contribute to a more bitter flavor profile.
Q: It’s too thick/crumbly and won’t get smooth, even with more oil. Help!
A: First, ensure you blended the dry seeds long enough before adding oil—let the processor run for a full minute to start breaking them down. Second, your machine might need a break. Processing generates heat. Stop, let it cool for 5-10 minutes, then try again with a bit more oil. A high-powered blender will always get it smoother than a basic food processor.
Q: How long does homemade tahini last, and how do I store it?
A> In an airtight jar in the refrigerator, it will stay fresh and delicious for about a month. The oil will separate—that’s totally normal and a sign of a natural, non-emulsified product. Just stir it back together before using.
Q: Can I use a blender instead of a food processor?
A> Yes, a high-speed blender (like a Vitamix or Blendtec) works brilliantly and often creates an even smoother texture. A standard blender may struggle with the initial dry blend, so you might need to stop and stir more frequently. Be patient and use the tamper if you have one.
Homemade Tahini Recipe : Creamy, Healthy Sesame Paste
Description
Tahini is one of those small ingredients that makes a big difference. Freshly made tahini tastes smoother, nuttier, and less bitter than most jarred versions—and it’s surprisingly easy to make at home. With just sesame seeds, a little oil, and a blender or food processor, you can create a rich, creamy paste perfect for hummus, sauces, dressings, and desserts.
Ingredients
Ingredients (Makes about 1 cup)
-
2 cups hulled sesame seeds
-
2–4 tablespoons neutral oil (avocado oil, light olive oil, or sunflower oil)
-
Pinch of salt (optional)
Instructions
-
Toast the sesame seeds
Place seeds in a dry skillet over medium heat. Toast 3–5 minutes, stirring constantly, until lightly golden and fragrant. Do not let them darken too much. -
Cool completely
Transfer seeds to a plate and let them cool fully (about 10–15 minutes). This helps prevent a gummy texture when blending. -
First blend
Add cooled seeds to a food processor or high-speed blender. Blend 1–2 minutes until they form a dry, crumbly paste. Scrape down sides. -
Add oil slowly
With the machine running, drizzle in 2 tablespoons oil. Blend until smooth and thick. Add more oil a little at a time until you reach a creamy, pourable consistency. -
Season
Add a pinch of salt if desired and blend 20–30 seconds more. -
Store
Transfer to an airtight jar. Refrigerate up to 1 month. Stir before each use if oil separates.
Notes
-
Use hulled seeds for the smoothest, mildest flavor.
-
Light toast only — over-toasting causes bitterness.
-
Be patient while blending — smoothness improves after each minute.
-
Start with less oil and add gradually.
-
If too thick: blend longer or add 1 teaspoon oil at a time.
Nutritional Information (Per 1 Tablespoon)
Approximate values, as oil amount can vary.
Calories: 90 | Fat: 8g | Saturated Fat: 1g | Carbohydrates: 3g | Fiber: 1g | Protein: 3g | Sodium: 5mg
***
There you have it! Your very own jar of homemade, creamy tahini. I’m so excited for you to crack it open and start drizzling, dipping, and dressing your way to more flavorful meals. Tag me on Instagram @OliviasCozyKitchen if you make it—I love seeing your creations! Now, go enjoy that well-earned, nutty, delicious reward.
Final Thoughts
So here we are, standing side by side in your kitchen—flour dusted on the counter, the warm, nutty aroma of toasted sesame still lingering in the air, and a jar of liquid gold cooling on the counter. You did it.
I meant what I said at the beginning: tahini isn’t just an ingredient. It’s an invitation. It’s the bridge between a good meal and one you remember weeks later. And now, tucked away in your fridge, you have something the store could never quite give you. You have your version—made with your hands, your timing, your patience. That slight variance in toastiness, that perfect drizzle of oil you added drop by drop? That’s not imperfection. That’s signature.
What strikes me every single time I make tahini from scratch isn’t just the transformation of seed to silk—it’s how this humble paste quietly elevates everything it touches without demanding credit. It doesn’t shout. It deepens. It rounds out sharp edges, adds body to sauces, brings roasted vegetables into full bloom. It’s the kitchen equivalent of a really good friend: steady, versatile, and always welcome at the table.




