
White Chocolate Raspberry Tiramisu : No-Bake Valentine’s Dessert with Mascarpone
A Love Letter in Layers: White Chocolate Raspberry Tiramisu
Picture this: It’s the evening of February 13th. You want to create a stunning, romantic dessert for tomorrow, but the thought of tempering chocolate or mastering a delicate pastry makes you want to hide under a blanket. Sound familiar? Friend, I’ve been there. That’s exactly why I’m pulling you into my kitchen today to share one of my all-time favorite secrets: the most elegant, show-stopping desserts are often the least complicated to make.
Enter this dreamy White Chocolate Raspberry Tiramisu. Imagine sweet-tart raspberry syrup soaking into delicate ladyfingers, layered with a cloud of mascarpone cream that’s been kissed with white chocolate, all finished with a delicate snowfall of more chocolate on top. It’s a symphony of textures and flavors—creamy, fruity, and just the right amount of sweet—that looks like it came from a fancy patisserie but comes together in your own kitchen, no oven required.
This isn’t just a dessert; it’s a mood. It’s the perfect centerpiece for a Valentine’s Day dinner, a Mother’s Day brunch, or any day you want to treat yourself and your people to something extraordinary. The best part? It must be made ahead of time, which means zero stress on the day you serve it. You get to be the cool, collected host who magically produces a masterpiece from the fridge. So, tie on that apron (the messy one is a badge of honor here), and let’s create some delicious magic together.
The Tiramisu That Started It All
My love affair with tiramisu began not in Italy, but in my tiny first apartment, with a very determined (and slightly clumsy) attempt to impress a date. I attempted a classic coffee version. Let’s just say my “quick dip” of the ladyfingers turned into a tragic, soggy collapse. The result was… a delicious puddle. A tasty, coffee-flavored puddle, but a puddle nonetheless.
That experience, though hilarious in hindsight, taught me the finesse of balance. Years later, for a summer dinner party, I wanted that same luxurious, layered feeling but with a bright, berry-forward twist. I thought of my grandma’s raspberry jam and the white chocolate bar I’d sneak from her pantry. The idea clicked! After a few tweaks (and remembering my earlier puddle lesson), this raspberry version was born. It’s since become my signature “I-care-about-you” dessert. It says “love” and “celebration” in every bite, without any of the pastry-chef pressure. It’s the dessert that proves beautiful things can come from happy little kitchen experiments—even the ones that start as puddles.
Gathering Your Flavor Magic
Here’s what you’ll need to build this masterpiece. Don’t be intimidated by the list—it’s mostly simple things, and I’ll walk you through the why and how of each one.
- 4 cups raspberries (fresh or frozen): The star of our show! Frozen berries are fantastic here—they’re picked at peak ripeness, often cheaper, and work perfectly for the syrup. Chef’s Insight: If using fresh, give them a taste. If they’re a little tart, you might not need to adjust anything. If they’re super sweet, you could reduce the sugar in the syrup by a tablespoon or two.
- ½ cup water & ¾ cup granulated sugar: Our simple syrup base. The water helps the berries break down, and the sugar balances their natural tartness to create a beautiful, glossy syrup.
- 1 tbsp lemon juice: The brightening agent! A little acid makes the raspberry flavor pop and prevents the syrup from being one-dimensionally sweet.
- 1½ cups heavy cream: This is for volume and that dreamy, cloud-like texture in our filling. Make sure it’s very cold—it whips up faster and higher. For a lighter option, you can use whipping cream, but the final cream will be slightly softer.
- 16 oz mascarpone cheese: The heart of any tiramisu. This Italian cream cheese is rich, buttery, and less tangy than American cream cheese. Pro-Tip: Let it sit on the counter for 15-20 minutes before using to take the chill off—it blends much more smoothly and avoids lumps.
- ¾ cup granulated sugar: For sweetening the mascarpone filling. It dissolves into the creamy mixture perfectly.
- 1 tsp vanilla extract: The flavor enhancer. It adds a warm, familiar depth that makes the whole dessert taste more “homemade.”
- 1 (7 oz) package Savoiardi ladyfingers: These are the long, dry, finger-shaped cookies. They’re perfect because they’re sturdy enough to hold their shape when dipped but porous enough to soak up all that gorgeous raspberry flavor. Substitution Tip: In a pinch, you can use soft ladyfingers (like the ones in the bakery section), but don’t dip them—just brush the syrup on lightly, or they’ll turn to mush.
- 1 oz good-quality white chocolate: For that elegant finish. Use a vegetable peeler or a fine grater to create delicate shavings. The better the chocolate, the better the flavor! I look for one with real cocoa butter.
Let’s Build This Beauty, Step-by-Step
Ready? Let’s get layering. I’ll be with you for each step with my best tips to ensure success.
Step 1: Make the Raspberry Syrup. In a medium saucepan, combine the raspberries and water. Cook over medium heat, gently mashing the berries with the back of a spoon or a potato masher. Let it simmer for just about 2 minutes—you just want to break them down and release their juices. Now, here’s the slightly tedious but totally worth it part: strain the mixture through a fine-mesh sieve into a bowl, pressing on the solids to get every last drop of that vibrant juice. Discard the seeds. Pour the beautiful juice back into the pan, add the sugar and lemon juice, and bring it back to a simmer. Let it cook for 4-5 minutes until it thickens just slightly—it should coat the back of a spoon. Pour it into a shallow dish or bowl and pop it in the fridge. We need this completely cold before we assemble! (This is a great do-ahead step.)
Step 2: Whip & Mix the Filling. First, grab a large bowl and your cold heavy cream. Using a hand mixer or stand mixer, whip the cream to stiff peaks. This means when you lift the beaters, the cream stands straight up. Set this bowl aside. In another large bowl, combine the (slightly softened) mascarpone, sugar, ¾ cup of your cooled raspberry syrup, and the vanilla. Beat this on medium speed until it’s completely smooth and creamy, scraping down the sides as needed. Now, the magic move: folding. Add about one-third of the whipped cream to the mascarpone mixture. Using a rubber spatula, gently cut through the center, sweep along the bottom, and fold over the top. Turn the bowl a quarter turn and repeat. This incorporates the cream without deflating all the air you whipped into it. Add the remaining whipped cream and fold gently until no white streaks remain. You should have a gloriously pink, fluffy cloud of filling.
Step 3: The Assembly Line. Grab your 8-inch square dish (a glass one is pretty for showing off the layers!). Take your package of ladyfingers and have your chilled syrup ready. Here is the GOLDEN RULE I learned from my puddle days: Dunk, don’t soak. Working quickly, dip one ladyfinger at a time into the syrup for just 1-2 seconds per side. You want it to be coated and softened but not saturated and falling apart. Immediately place it in your dish. Repeat, lining them up snugly in a single layer. You may need to break a few to fit the ends. Spread half of your magnificent mascarpone filling over the ladyfingers. Use an offset spatula or the back of a spoon to make it nice and even. Grab your white chocolate and grate or shave half of it right over this layer.
Step 4: Repeat & Rest. Create a second layer of quickly-dipped ladyfingers on top of the first cream layer. Gently spread the remaining filling over the top. This is your canvas! You can smooth it perfectly, or create pretty swirls with your spatula. Finish with the rest of the white chocolate shavings, covering the top in a delicate snowfall. Cover the dish tightly with plastic wrap. Now, the hardest part: walk away. You must let it chill in the fridge for at least 6 hours, but overnight is truly best. This waiting time is non-negotiable—it allows the flavors to marry, the ladyfingers to soften perfectly into cake-like layers, and the whole dessert to set so you get clean, beautiful slices.
Presenting Your Masterpiece
When it’s time to serve, I love to lean into the romance. For a clean slice, run a thin knife under hot water, wipe it dry, and then cut. Lift each portion out with a small spatula or pie server. Plate it on a simple, elegant dish. For a final flourish, add a few fresh raspberries on the side, a tiny mint leaf, or even a light dusting of powdered sugar. The contrast of the creamy white and pink layers against a dark plate is absolutely stunning. Serve it with a smile—you’ve just made something incredible!
Make It Your Own: Delicious Twists
Love the base recipe? Try one of these fun variations next time!
- Chocolate Raspberry Dream: Add 1/4 cup of sifted cocoa powder to the mascarpone filling along with the sugar. Use a microplane to grate a little dark chocolate over the top instead of white for a decadent twist.
- Lemon-Raspberry Bliss: Add the zest of one lemon to the mascarpone filling. It brightens everything up beautifully!
- Berry Medley: Use a mix of frozen berries (raspberries, blackberries, blueberries) for the syrup. The flavor will be deeper and more complex.
- Gluten-Free & Alcohol-Free: Use your favorite gluten-free ladyfingers or a thin gluten-free sponge cake sliced into strips. The recipe is naturally alcohol-free, making it great for all guests.
- Individual Portions: Assemble in pretty glasses or mason jars for adorable, ready-to-go desserts. Just break the ladyfingers to fit!
From My Kitchen to Yours: A Few Final Thoughts
This recipe has been my faithful friend for years, and it has never let me down. I’ve made it in a frantic hurry for last-minute guests (the long chill time is a lifesaver) and I’ve made it slowly, savoring the process for a special anniversary. It always feels like a gift. One of my favorite kitchen stories involves making this for a friend’s wedding shower. I doubled the recipe in my biggest trifle bowl, and it was such a hit that I ended up writing the recipe on about twenty napkins for guests! That was the moment I knew I had to start sharing these recipes properly. Over time, I’ve learned that the quality of the mascarpone makes a huge difference—splurge on the good stuff if you can. And remember, the messy apron is part of the fun. A little pink syrup on your sleeve is just a badge of a dessert made with love.
Your Questions, Answered
Q: My filling seems runny/soft. What happened?
A: This usually has two culprits: 1) The mascarpone was too cold when mixed, causing it to seize or not blend smoothly, or the whipped cream was over-beaten and started to separate (butter). Ensure your mascarpone is slightly softened, and stop whipping the cream as soon as stiff peaks form. Also, make sure your raspberry syrup is completely cool before adding it. Don’t worry—even if it’s soft, after the long chill it will still set up and taste amazing.
Q: Can I make this more than a day ahead?
A: Absolutely! You can assemble it up to 48 hours in advance. The flavors will continue to develop and meld. Just keep it tightly covered. I don’t recommend freezing it, as the texture of the creamy filling can become grainy.
Q: I can’t find mascarpone. Is there a substitute?
A: In a true pinch, you can use full-fat, brick-style cream cheese. Let it soften completely, and beat it with 2 tablespoons of sour cream or heavy cream to mimic mascarpone’s richer, looser texture. The flavor will be slightly tangier but still delicious.
Q: My ladyfinger layer seems dry/hard. Help?
A: This means they needed just a touch more time in the syrup. Next time, try a 3-second dip per side. For this batch, no one will notice once they dig into the creamy layers! The moisture from the filling will also continue to seep into them as it chills.
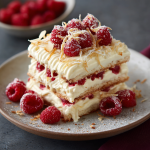
White Chocolate Raspberry Tiramisu : No-Bake Valentine’s Dessert with Mascarpone
Description
This White Chocolate Raspberry Tiramisu is one of those desserts that feels fancy but is secretly easy. It’s layered with raspberry-soaked ladyfingers, fluffy mascarpone cream, and delicate white chocolate, creating a balance of sweet, creamy, and fruity in every bite. Best of all, it’s completely no-bake and actually better when made ahead — perfect for special occasions or stress-free hosting.
Ingredients
Raspberry Syrup
-
4 cups raspberries (fresh or frozen)
-
½ cup water
-
¾ cup granulated sugar
-
1 tbsp lemon juice
Cream Filling
-
1½ cups cold heavy cream
-
16 oz mascarpone cheese, slightly softened
-
¾ cup granulated sugar
-
¾ cup cooled raspberry syrup (from above)
-
1 tsp vanilla extract
Layers & Finish
-
1 package ladyfingers (savoiardi style, about 7 oz)
-
1 oz good-quality white chocolate, finely shaved or grated
-
Optional garnish: fresh raspberries, mint leaves
Instructions
1️⃣ Make the Raspberry Syrup
-
Add raspberries and water to a saucepan over medium heat.
-
Cook 2–3 minutes, mashing berries to release juice.
-
Strain through a fine sieve into a bowl; discard seeds.
-
Return liquid to pan, add sugar and lemon juice.
-
Simmer 4–5 minutes until slightly thickened.
-
Chill completely before using.
2️⃣ Make the Cream Filling
-
In a large bowl, whip cold heavy cream to stiff peaks. Set aside.
-
In another bowl, beat mascarpone, sugar, vanilla, and ¾ cup cooled raspberry syrup until smooth.
-
Gently fold whipped cream into mascarpone mixture in two additions until fluffy and uniform.
3️⃣ Assemble the Tiramisu
-
Quickly dip each ladyfinger in the cold raspberry syrup — 1–2 seconds per side only.
-
Arrange a single layer in an 8-inch square dish.
-
Spread half the cream filling over top.
-
Sprinkle with half the white chocolate.
-
Repeat with another dipped ladyfinger layer and remaining cream.
-
Finish with remaining white chocolate.
4️⃣ Chill
-
Cover and refrigerate at least 6 hours, preferably overnight.
-
This step is essential for clean slices and full flavor.
Notes
-
Cold cream whips better — keep it refrigerated until needed.
-
Room-temp mascarpone blends smoother and prevents lumps.
-
Dip, don’t soak ladyfingers or layers will collapse.
-
Cool the syrup fully before mixing into the cream.
-
For neat slices, cut with a knife dipped in hot water and wiped dry.
Nutritional Information (Per Serving, Approximate)
This information is an estimate based on the specific ingredients used. Servings: 9.
Calories: ~420 | Fat: 28g | Saturated Fat: 17g | Carbohydrates: 38g | Fiber: 2g | Sugar: 27g | Protein: 6g
Final Thoughts
A Love Letter in Layers: White Chocolate Raspberry Tiramisu
As I sit here writing this, a chilled slice of this pink-and-white beauty sits beside me, fork poised for one last bite. The ladyfingers have softened into the most perfect cake-like texture, the mascarpone is cloud-soft and whisper-sweet, and every few bites, a burst of bright raspberry cuts through like a happy surprise. This, right here, is what I hoped to share with you—not just a recipe, but a feeling.
You know, we often reserve desserts like this for “special occasions.” Valentine’s Day. Anniversaries. Dinner parties where we want to impress. But here’s what I’ve learned after making this tiramisu more times than I can count: you are a special occasion. The Tuesday night when you need something beautiful to look forward to after a long day? That counts. The lazy Sunday afternoon when you want to fill your kitchen with something that smells like love? That counts, too.
This recipe has traveled with me through so many seasons of life. It was there for that long-ago puddle-disaster that taught me to laugh at my kitchen mistakes. It was there for summer barbecues and winter birthdays. It was scribbled on napkins at a wedding shower and photographed in golden afternoon light for this very post. And now, it’s here for you.
What I want you to take away from all of this—beyond the technique of the perfect ladyfinger dunk (just 1-2 seconds, friend, I’m serious!) and the magic of folding whipped cream—is this: you are capable of creating something stunning. No culinary degree required. No fancy equipment needed. Just a little patience, a willingness to get a smear of raspberry syrup on your favorite apron, and the desire to make something with your own two hands that says, “I care about you.”
Because at its heart, that’s what food is, isn’t it? It’s love made visible. It’s “I see you” and “you matter” and “let’s sit down together and savor something sweet.” In a world that often feels rushed and disconnected, taking the time to layer ladyfingers and whip cream and grate chocolate over a waiting dessert is a small act of rebellion. It’s choosing presence. It’s choosing to slow down.
So whether you’re making this for a Valentine, a mother, a friend, or just for yourself on a quiet evening—know that the effort, however small, matters. The messy kitchen matters. The anticipation as it chills overnight matters. And that first bite, when all the layers come together in perfect harmony? That matters most of all.
Now go on. Tie on that apron (messy is beautiful, remember?). Gather your raspberries and your mascarpone and your patience. And make something that tastes like love.
I’ll be right here, cheering you on.

Easy Ham, Egg, and Cheese Roll-Ups with Salsa : A Low-Carb Breakfast Favorite
Good Mornings Start Here: Your New Breakfast BFF
Hey there, friend! Let’s talk about mornings. Not the idealized, slow-sipping-coffee-while-the-sun-rises kind (though, don’t we all dream of those?). I’m talking about the real ones. The ones where the alarm blares, your to-do list is already scrolling in your head, and the dreaded question hits: “What’s for breakfast?” If your usual routine involves grabbing a sad granola bar or, worse, skipping it entirely, I’m about to change your game. Today, I’m handing you the keys to a breakfast that is delicious, satisfying, and ready faster than you can scroll through your morning notifications.
I’m talking about my Easy Ham, Egg, and Cheese Roll-Ups with Salsa. Think of them as the love child of a breakfast burrito and a cozy, savory roll-up, but without the carb-heavy wrapper. They are everything I want in a morning meal: they’re packed with protein to keep you full and focused, they’re endlessly customizable, and they deliver that perfect, comforting combination of salty ham, fluffy eggs, melty cheese, and a zesty kick of salsa. The best part? You can go from “I’m hungry” to “Wow, that was amazing” in about 15 minutes flat. This isn’t just a recipe; it’s your new secret weapon for conquering busy mornings with a smile (and a very happy stomach). So, tie on that apron—it’s about to get a little messy and a whole lot tasty in here!
The “Aha!” Moment: How a Messy Fridge Created a Favorite
This recipe honestly started as a happy accident, born from one of those “what-on-earth-is-left-in-the-fridge?” moments. It was a Sunday evening, and I was staring down a busy week. My fridge held the classic remnants: a few slices of deli ham from sandwich-making, a half-used tub of salsa, a block of cheddar, and, of course, eggs. I needed a quick breakfast prep idea that wouldn’t bore me by Wednesday. I remembered my mom making “ham roll-ups” for parties with cream cheese fillings, and a lightbulb went off. What if I filled them with scrambled eggs instead?
I gave it a shot, baking them just until the cheese on top bubbled. When I tried one the next morning, reheated in my toaster oven, it was a total revelation. It felt indulgent and special, like I’d treated myself, but it was made from the simplest, most humble ingredients. It reminded me that the best food doesn’t have to be complicated; it just has to come together in a way that makes sense and brings joy. That little experiment years ago has now turned into a weekly staple in my kitchen, and I get so excited to share it with you. It’s proof that magic often happens when you just start playing with what you’ve got.
Gathering Your Flavor Team: Simple Ingredients, Big Impact
Here’s what you’ll need to create these little bundles of joy. I love breaking down the “why” behind each ingredient—it makes you the chef, not just a follower!
- 1 tablespoon butter: This is our cooking fat for the eggs. Butter adds a rich, nutty flavor that oil just can’t match. Chef’s Insight: If you’re dairy-free, avocado oil or ghee are fantastic substitutes that also have a high smoke point.
- 4 large eggs: The star of the protein show! I always opt for large eggs for consistency. Pro Tip: For the fluffiest scramble, let your eggs sit at room temperature for about 10 minutes before cracking. If you’re watching cholesterol, feel free to swap in 1 cup of liquid egg whites or a plant-based scramble alternative.
- ¾ cup shredded cheddar cheese (divided): We use cheese two ways: mixed into the eggs for creaminess and melted on top for that glorious golden finish. Substitution Tip: Don’t limit yourself! Pepper Jack adds a spicy kick, Monterey Jack is wonderfully mild, and a good Swiss or Gouda would be divine. For a dairy-free version, a melty vegan cheddar works well.
- ¼ cup salsa: This is our flavor booster! It adds moisture, acidity, and a bit of spice. Chef’s Insight: Use your favorite—chunky pico de gallo for texture, a smoky chipotle salsa for depth, or a fresh verde salsa for a brighter note. This is your chance to personalize it!
- 5 slices deli ham: This acts as our handy, edible wrapper. Look for slices that are not paper-thin; a slightly thicker cut holds up better to rolling. Substitution Tip: Roasted turkey slices, thinly-sliced pastrami, or even large slices of prosciutto (use less, it’s saltier!) make excellent alternatives.
Let’s Get Rolling: Your Foolproof Guide
Ready to cook? Follow these steps, and you’ll have perfect roll-ups every single time. I’m chatting you through each one with my best tips!
- Preheat & Prep: First, crank your oven to 450°F (230°C). This high heat is key—it melts the cheese on top quickly and beautifully without drying out the ham. While it’s heating, grab a small skillet and a baking dish. A quick spritz of cooking spray or a light brush of oil in the baking dish will prevent any sticking later. Little Hack: If your oven takes forever to preheat, do this step first thing!
- Scramble Time: Place your skillet over medium heat and add the butter. While it melts, crack your eggs into a bowl. I don’t add milk or water here—I find it makes the eggs too wet for rolling. Once the butter is foaming (that’s the sweet spot!), pour in the eggs. Let them set for a few seconds at the edges, then gently push them around with a spatula for soft, fluffy curds. Chef’s Commentary: Don’t over-scramble! Pull them off the heat just before they look 100% done, as they’ll continue cooking from residual heat and again in the oven.
- Cheesy Eggs: As soon as you take the skillet off the burner, stir in that first ¼ cup of shredded cheddar. The residual heat will melt it into the eggs, creating a wonderfully creamy and cohesive filling. This cheesy “glue” helps everything stay together inside the roll-up.
- The Roll-Up Assembly: Lay your ham slices out on a clean cutting board or plate. Spoon the cheesy scrambled eggs off-center on each slice. You want to leave a small border at the edges. Next, add a teaspoon of your chosen salsa on top of the eggs. Now for the fun part: starting from the side with the filling, snugly roll up the ham slice, tucking it in as you go, just like a tiny enchilada or a mini burrito. Pro Tip: If a little filling sneaks out the ends, just tuck it back in. No stress here—it’s homemade!
- Bake to Bubbly Perfection: Place each roll-up seam-side down in your prepared baking dish. This position keeps them from unraveling. Now, shower them with the remaining ½ cup of cheese. Be generous! Pop the dish into your hot oven for just 3-5 minutes. You’re literally just melting the cheese. Watch for it to become fully melted, bubbly, and maybe even get a few golden spots. Little Hack: If you love a bit of browning, switch your oven to broil for the last 30-60 seconds, but WATCH IT LIKE A HAWK to prevent burning.
Plating Up Your Masterpiece
These roll-ups are gorgeous right out of the oven! I love serving two per person on a warm plate. For a beautiful finish, sprinkle them with a little fresh chopped cilantro or chives and add an extra dollop of salsa or a spoonful of cool sour cream or Greek yogurt on the side. If you’re not strictly low-carb, a side of fresh fruit or avocado slices makes it a perfectly rounded, colorful, and satisfying plate. They also pack beautifully into a meal prep container for an on-the-go breakfast that feels like a treat!
Make It Your Own: Endless Twists
- The Garden Lover: Sauté a handful of spinach, diced bell peppers, or mushrooms with the butter before adding the eggs. Drain any excess liquid well.
- The Southwest Fiesta: Mix a pinch of cumin and chili powder into the eggs. Use pepper jack cheese and top with sliced jalapeños and a drizzle of ranch or avocado crema.
- The Everything Bagel: Stir everything bagel seasoning into the egg mixture and use whipped cream cheese inside instead of cheddar. Top with chives.
- Vegetarian Swap: Replace the ham with large, blanched collard green leaves or lightly steamed large cabbage leaves for a veggie-powered version.
- Italian Style: Use prosciutto, mix sun-dried tomatoes and basil into the eggs, and top with shredded mozzarella and a sprinkle of Italian seasoning.
Olivia’s Kitchen Notebook
Over the years, this recipe has become my culinary Swiss Army knife. I’ve made it for fancy brunches served on a platter and for sleepy Tuesday mornings eaten straight from the baking dish. One of my funniest kitchen fails was the first time I tried to use ultra-thin sliced ham—it tore like tissue paper, and I ended up with more of a “breakfast hash” than roll-ups! Lesson learned: sturdier ham is your friend. I’ve also learned that these freeze amazingly well. After baking and cooling, I pop them in a freezer bag. A quick 60-second zap in the microwave from frozen, and it’s like having a personal breakfast chef on standby. This recipe is truly a reflection of my cooking philosophy: be creative, have fun, and never underestimate the power of a great breakfast.
Your Questions, Answered!
Q: My roll-ups are falling apart! What did I do wrong?
A: This usually comes down to two things: overfilling or using ham that’s too thin. Be conservative with your egg scoop, and make sure you’re buying ham labeled “deli slices” or “sandwich slices,” not “shaved.” Rolling them snugly and placing them seam-side down to bake also helps them hold their shape.
Q: Can I make these ahead of time for meal prep?
A> Absolutely! They are a meal prep superstar. Assemble the roll-ups (without the final cheese topping) and store them covered in the fridge for up to 2 days. When ready, add the cheese and bake as directed, adding an extra minute or two since they’re starting cold. You can also fully cook, cool, and freeze them for up to a month.
Q: The ham got a bit tough/rubbery in the oven. How can I prevent that?
A> The high, quick bake is designed to avoid this, but it can happen if the ham is very lean or baked too long. Stick to the 5-minute maximum. Remember, everything inside is already cooked; you’re just melting the cheese. Using a pre-cooked ham that’s not overly dry to begin with also helps.
Q: What’s the best way to reheat leftovers?
A> The microwave is quick (30-60 seconds), but for the best texture, reheat them in a toaster oven or air fryer at 350°F for 4-5 minutes. This keeps the ham from getting soggy and re-crisps the cheese beautifully.

Easy Ham, Egg, and Cheese Roll-Ups with Salsa : A Low-Carb Breakfast Favorite
Description
Busy mornings don’t need boring breakfasts. These ham, egg, and cheese roll-ups are warm, melty, and satisfying, with a spoonful of salsa for a fresh kick. They’re low in carbs, high in protein, and ready in about 15 minutes. Perfect for school mornings, quick workdays, or make-ahead meal prep.
Ingredients
-
1 tbsp butter (or cooking oil)
-
4 large eggs
-
¾ cup shredded cheddar cheese, divided
-
¼ cup salsa (thick style works best)
-
5 slices deli ham (not too thin)
-
Salt & black pepper, to taste
-
Optional: chopped chives or parsley for topping
Instructions
-
Preheat Oven
Heat oven to 450°F / 230°C. Lightly grease a small baking dish. -
Scramble the Eggs
Melt butter in a skillet over medium heat. Crack in eggs, season lightly with salt and pepper, and gently scramble until just set and fluffy. Remove from heat. -
Add Cheese to Eggs
Stir in ¼ cup of the shredded cheese while eggs are hot so it melts in. -
Assemble Roll-Ups
Lay ham slices flat. Spoon a portion of cheesy eggs onto each slice. Add about 1 teaspoon salsa on top. Roll up snugly. -
Bake
Place roll-ups seam-side down in the dish. Sprinkle remaining ½ cup cheese over the top. Bake 3–5 minutes until cheese is melted and bubbly. -
Serve
Rest 1–2 minutes, then serve warm with extra salsa if desired.
Notes
-
Don’t overcook the eggs — slightly soft eggs stay tender after baking.
-
Use thicker ham slices so they roll without tearing.
-
Keep salsa thick — watery salsa can make roll-ups loose.
-
Want browning? Broil the top for 30–45 seconds at the end (have an adult handle this if you’re younger).
-
Meal prep friendly: Refrigerate up to 2 days or freeze after baking and cooling.
Nutritional Information*
*Please note: This is an estimate for one serving (approx. 2.5 roll-ups) based on the specific ingredients listed. Values will vary with substitutions.
- Calories: 546
- Protein: 38g
- Fat: 41g
- Carbohydrates: 4g
- Fiber: 0.5g
Final Thoughts: More Than Just a Recipe
So, there you have it—your new go-to for mornings that demand both deliciousness and efficiency. These Easy Ham, Egg, and Cheese Roll-Ups with Salsa are more than just a quick meal; they’re a little reminder that taking care of yourself, even on the busiest of days, can be simple and joyful. It’s about trading that forgettable granola bar for a hot, cheesy, protein-packed bite that genuinely makes you look forward to breakfast.
I hope this recipe becomes a staple in your kitchen the way it has in mine. More than that, I hope it inspires you to play with your food, to experiment with what you have, and to find those little moments of culinary magic in your everyday life. Whether you’re feeding your family, meal-prepping for a hectic week, or just treating yourself to a sit-down breakfast, these roll-ups are here for you. Now go on, get in that kitchen, and make some delicious messes. I’m cheering you on!
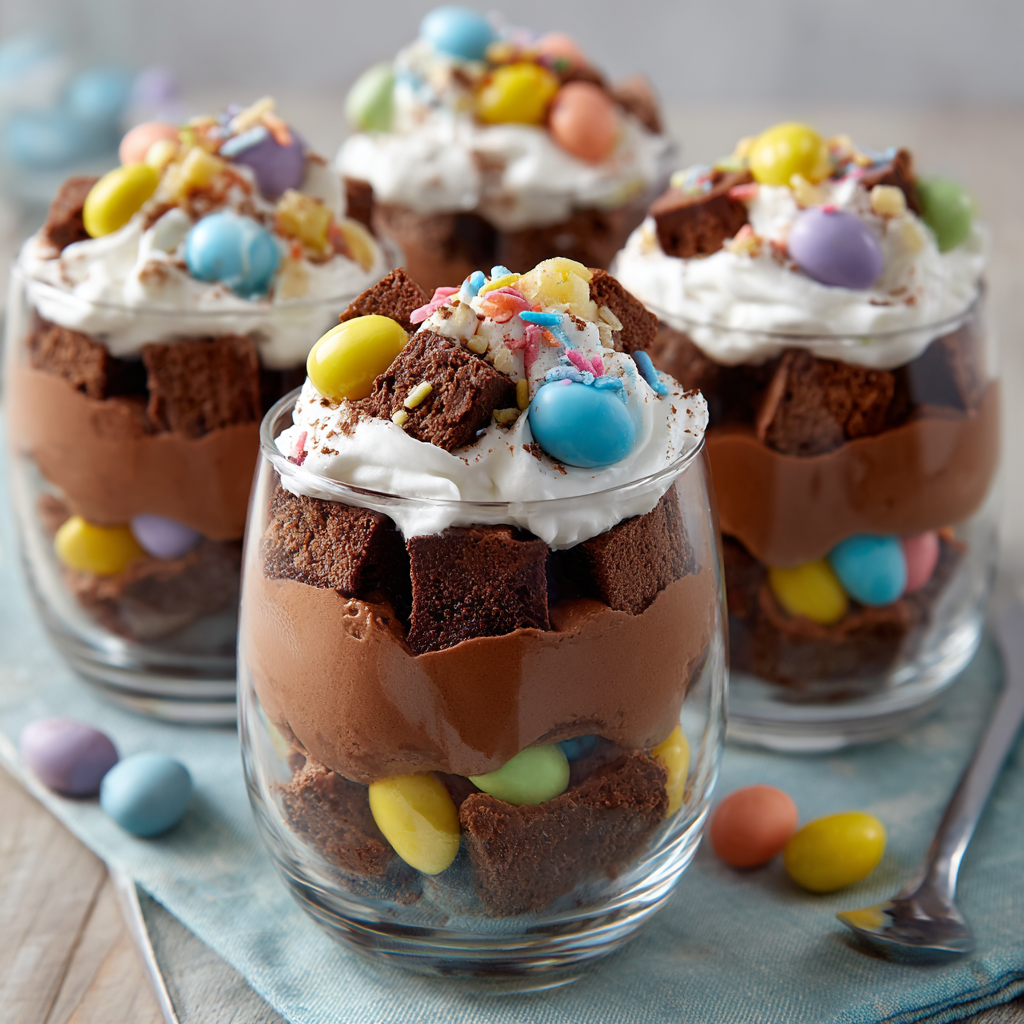
Mini Chocolate Easter Trifles : A Fun and Festive Dessert in a Glass
Mini Chocolate Easter Trifles: The Ultimate Joy-in-a-Glass Dessert!
Hey there, friend! Is there anything better than the moment you slide a dessert across the table and watch everyone’s eyes light up? That little gasp of delight, the immediate reach for a spoon… it’s pure kitchen magic. And when that dessert is as cute, customizable, and downright delicious as these Mini Chocolate Easter Trifles, the magic feels even more special.
Picture this: layers of dreamy chocolate mousse, fudgy brownie chunks, clouds of whipped cream, and the iconic crunch of pastel candy-coated eggs, all stacked up in a clear glass. Every spoonful is a textural party—creamy, rich, soft, and crunchy all at once. It’s a dessert that looks like you fussed for hours, but the beautiful secret is how wonderfully simple it is to assemble. Whether you’re hosting a bustling Easter brunch, need a show-stopper for a spring potluck, or just want to make a regular Tuesday feel celebratory, these individual trifles are your perfect partner in crime. They’re playful, they’re pretty, and they capture the hopeful, joyful spirit of the season in every single bite. So, tie on your favorite apron (the messy one with all the character!), grab your cutest jars or glasses, and let’s create some edible sunshine together.
A Story in Layers: My First “Trifle” Disaster Turned Triumph
Let me take you back to my very first Easter as the “official” holiday host. I was determined to make a grand, traditional English trifle—the kind with layers upon layers, custard from scratch, the works. Ambition, meet reality. Let’s just say my custard decided to become sweet scrambled eggs, and my attempt at homemade sponge cake… well, let’s not speak of it. With guests arriving in an hour, I was in a full-blown kitchen panic.
But then, I looked at the wreckage and my overflowing basket of Cadbury Mini Eggs (my ultimate weakness). I had brownies in the freezer, some store-bought chocolate pudding, and a carton of heavy cream. In a moment of “what do I have to lose?” energy, I started layering everything into my grandma’s old juice glasses. I crushed those mini eggs with a rolling pin, feeling my stress melt away with every whack. What emerged from the fridge wasn’t the dignified trifle I’d imagined—it was something better. It was fun, whimsical, and an instant hit. My uncle said, “Now THIS is a trifle I understand!” That day taught me a invaluable lesson: the best recipes aren’t about perfection; they’re about personality, using what you have, and sharing joy. These Mini Chocolate Easter Trifles are the delicious, stress-free evolution of that happy kitchen save.
Your Treasure Map: Gathering the Trifle Ingredients
Here’s the beautiful part: you can make every component from scratch or use clever shortcuts. It’s all about what feels good for you today. Here’s what you’ll need for about 6 generous servings:
- 1 batch of brownies, baked and cooled: The hearty, fudgy foundation. Use your favorite box mix or a simple homemade recipe. I love a dark chocolate or fudge brownie here for maximum richness. Chef’s Insight: Bake them the day before so they’re completely cool and easier to cube. For a twist, try brownies with a hint of orange zest or a sprinkle of sea salt in the batter!
- 2 cups chocolate mousse or chocolate pudding: The luxurious, creamy layer. Homemade chocolate mousse (I’ll share my easy 5-minute version below) is divine, but a high-quality store-bought pudding or even a chocolate custard works beautifully. Substitution Tip: For a lighter option, swap in chocolate yogurt or a chocolate avocado mousse. For a nutty flavor, try a chocolate-hazelnut spread thinned with a little whipped cream.
- 1 ½ cups whipped cream: The fluffy cloud of delight. Homemade whipped cream (just heavy cream, a touch of powdered sugar, and vanilla) is shockingly easy and tastes miles better. Chef’s Insight: Whip your cream to stiff peaks so it holds its shape beautifully in the layers. A can of real whipped topping is a fine, time-saving shortcut in a pinch.
- 1 cup candy-coated chocolate eggs (like Cadbury Mini Eggs), crushed: The festive, crunchy confetti! This is where the Easter magic lives. Pro Tip: Don’t crush them all into dust! I like to put them in a zip-top bag and give them a few gentle whacks with a rolling pin for a mix of fine pieces and bigger chunks for texture.
- Optional for topping: Extra whole mini eggs, chocolate shavings, a drizzle of caramel or raspberry sauce, pastel sprinkles, or a fresh mint sprig. This is your chance to make them your own!
Let’s Build Some Edible Rainbows: Step-by-Step Instructions
Now for the fun part—the assembly! This is less of a rigid recipe and more of a joyful, creative process. I like to set up all my components in little bowls, like a dessert mise en place station. It makes layering feel like an art project.
Step 1: The Foundation – Prep Your Components.
Cube your cooled brownies into ½-inch to 1-inch chunks. You want pieces small enough to fit in your spoon but big enough to give a satisfying bite. If you’re making homemade mousse or whipped cream, do that now. (Quick Mousse Hack: Melt 1 cup of chocolate chips with 2 tbsp of milk or cream. Let it cool slightly, then gently fold it into 1 ½ cups of already-whipped cream. Voilà! Instant, stable mousse.) Crush your mini eggs as described above.
Step 2: Choose Your Vessel.
Grab your glasses! Clear parfait glasses, mason jars, vintage coupes, or even wide champagne flutes are perfect. The clear sides are key for showing off those gorgeous layers. Give them a quick wipe to ensure they’re sparkly clean.
Step 3: The First Layer – Chocolate Dream.
Start with a generous spoonful of chocolate mousse or pudding. This first layer anchors everything. Use the back of your spoon to spread it evenly. Think of this as the rich, velvety soil from which our dessert garden grows.
Step 4: The Hearty Middle – Brownie Bliss.
Add a layer of those fudgy brownie cubes. Press them gently into the mousse. Here’s a little chef secret: if your brownies are a bit dry (it happens!), you can lightly spritz or brush the cubes with a simple syrup, milk, or even a coffee liqueur to add moisture and flavor.
Step 5: The Crunchy Confetti – Egg-cellent Texture.
Sprinkle a layer of your crushed mini eggs over the brownies. This is where you get that wonderful color and the signature crackle. Don’t be shy!
Step 6: The Fluffy Cloud – Whipped Cream.
Now, add a dollop of whipped cream. You can pipe it for fancy swirls or just spoon it on for a rustic, homespun look. This layer cuts through the richness and adds a light, airy contrast.
Step 7: Repeat and Conquer!
Repeat the layers! Mousse, brownies, eggs, cream. You can usually get two full rotations in a standard glass. The final top layer should be your whipped cream. This is your blank canvas for the grand finale decoration.
Step 8: The Festive Finish – Top It Off!
This is your moment to shine! Garnish the top with a swirl of more whipped cream, a few whole mini eggs, some chocolate shavings, or a sprinkle of gold dust. Let your inner artist out.
Step 9: The Patient Pause – Chill Time.
Cover your trifles lightly with plastic wrap and pop them in the fridge for at least 30 minutes before serving. This brief rest allows the flavors to cozy up together and the layers to set just enough for that perfect spoonful that goes all the way down to the bottom.
Serving with a Smile: Presentation Ideas
Presentation is the final sprinkle of magic. Arrange your finished trifles on a platter or a cute tray lined with a pastel napkin or some fresh spring greenery. For a big gathering, create a “trifle bar” with all the components and let guests build their own—it’s a fantastic activity for kids (and kids at heart!). Offer long-handled spoons or vintage teaspoons for an extra charming touch. These individual desserts are a complete showpiece on their own, needing only the company of good friends and perhaps a cup of coffee or cold milk alongside.
Make It Your Own: Fun Recipe Variations
- Berry Blast: Add layers of fresh raspberries or macerated strawberries between the brownie and mousse for a chocolate-berry sensation.
- Caramel Pretzel Crunch: Swap the crushed mini eggs for a mix of crushed salted pretzels and dulce de leche or caramel sauce drizzled between layers.
- Gluten-Free & Vegan Friendly: Use your favorite GF brownies, a dairy-free chocolate mousse (avocado or silken tofu-based), and coconut whipped cream. Check that your candy eggs are vegan-friendly or use chopped vegan chocolate.
- Peanut Butter Cup: Swirl peanut butter into the chocolate mousse and use chopped peanut butter cups instead of mini eggs. A true crowd-pleaser!
- Lemon Curd Twist: For a less chocolate-forward option, alternate layers of lemon curd and vanilla pudding with vanilla cake cubes, topped with whipped cream and yellow-and-white sprinkles.
From My Kitchen to Yours: Chef’s Notes
Over the years, this recipe has become my edible mood ring. Feeling classic? I stick to the original. Need to use up leftover cake? In it goes! One of my favorite happy accidents was the time I ran out of mini eggs and used a chopped-up chocolate orange instead—the hint of citrus was a revelation. Don’t stress about the layers being perfectly even or symmetrical. The charming, slightly messy, “homemade with love” look is what makes these so special. I always make one extra trifle in a little jar for the chef (that’s me… and you!) to taste-test immediately. Quality control is very important, you understand. The best part is watching people dig in and discover all the different layers. It’s a dessert adventure in a glass.
Your Questions, Answered: FAQs & Troubleshooting
Q: Can I make these trifles ahead of time?
A: Absolutely! You can assemble them fully, cover tightly, and refrigerate for up to 24 hours before serving. I’d recommend adding the final garnish (like whole mini eggs) just before serving so they stay crisp and pretty.
Q: My whipped cream is getting soft and my layers are bleeding together. Help!
A: No worries! The key is making sure your mousse/pudding is completely cool and your whipped cream is whipped to stiff peaks. Also, avoid overfilling the layers. If your kitchen is warm, a longer chilling time (1-2 hours) before serving will help everything firm up beautifully.
Q: I don’t have clear glasses. What else can I use?
A: Get creative! Ramekins, ceramic mugs, small bowls, or even a large trifle dish for a family-style presentation all work. The clear glass is just for the “wow” factor, but the taste is the same in any vessel.
Q: Any tips for crushing the mini eggs without making a huge mess?
A: My tried-and-true method: place them in a sturdy zip-top plastic bag, press out the air, and seal it. Lay it on a cutting board and use a rolling pin or the bottom of a heavy saucepan. Roll or press firmly. The bag contains all the colorful shrapnel perfectly!

Mini Chocolate Easter Trifles : A Fun and Festive Dessert in a Glass
Description
These Mini Chocolate Easter Trifles are pure fun in a glass—layered with brownie chunks, creamy chocolate mousse, fluffy whipped cream, and crunchy candy eggs. They look impressive, taste rich and playful, and are surprisingly simple to assemble. Perfect for Easter gatherings, spring parties, or anytime you want a cheerful make-ahead dessert.
Ingredients
-
1 batch brownies, baked and cooled (or store-bought)
-
2 cups chocolate mousse or thick chocolate pudding
-
1½ cups whipped cream (homemade or ready-made)
-
1 cup crushed candy-coated chocolate eggs (such as **Cadbury Mini Eggs)
-
Optional toppings: extra whole mini eggs, chocolate shavings, sprinkles, or caramel drizzle
Instructions
-
Prep the Brownies
Cut cooled brownies into small bite-size cubes (about 1-inch pieces). -
Crush the Candy Eggs
Place candy eggs in a zip bag and gently crush with a rolling pin. Aim for a mix of small bits and crunchy chunks. -
Start the First Layer
Spoon a layer of chocolate mousse or pudding into the bottom of each glass or jar. -
Add Brownie Layer
Add a layer of brownie cubes. Press gently so they settle into the mousse. -
Add Crunch Layer
Sprinkle crushed candy eggs over the brownies. -
Add Whipped Cream
Top with a layer of whipped cream. -
Repeat Layers
Repeat mousse → brownies → crushed eggs → whipped cream until glasses are filled, finishing with whipped cream on top. -
Decorate
Garnish with whole mini eggs, chocolate curls, or sprinkles. -
Chill
Refrigerate at least 30 minutes before serving so layers set and flavors blend.
Notes
-
Use fully cooled brownies so layers stay neat.
-
Whip cream to stiff peaks so it holds shape between layers.
-
Dry brownies? Lightly brush cubes with milk or chocolate milk.
-
Make ahead friendly: Assemble up to 24 hours ahead; add final toppings just before serving.
-
No clear glasses? Use small bowls or ramekins—the taste is the same.
Approximate Nutritional Info (Per Serving, based on 6 servings)
Please note: This is a rough estimate and can vary greatly based on the specific brands and ingredients you use. For dietary needs, please calculate with your exact ingredients.
Calories: ~400-450 | Fat: ~22g | Saturated Fat: ~12g | Carbohydrates: ~50g | Sugar: ~38g | Protein: ~5g
Final Thoughts: More Than Just a Dessert
As you place the last Mini Egg on top of your final trifle, take a moment to step back and admire your work. Look at those beautiful, distinct layers—the deep, rich chocolate, the snowy white cream, the pops of pastel color. It’s a picture of joy, isn’t it? But the real beauty of this recipe isn’t just in how it looks; it’s in the feeling it creates.
These little glasses hold more than just brownie and mousse. They hold the promise of a shared moment. They hold the laughter that happens when someone digs in and gets a perfect, layered spoonful. They hold the memory of a kitchen “disaster” that turned into a beloved tradition, reminding us that the best things in life are often unplanned and imperfect.
So, as you serve these trifles this Easter, watch closely. Watch for that first smile, the happy sighs, and the friendly competition over the last one in the bowl. In that moment, you’ll know you’ve given a gift far sweeter than sugar. You’ve created a little bit of edible sunshine, a spoonful of spring, and a memory that will linger long after the last crumb is gone.
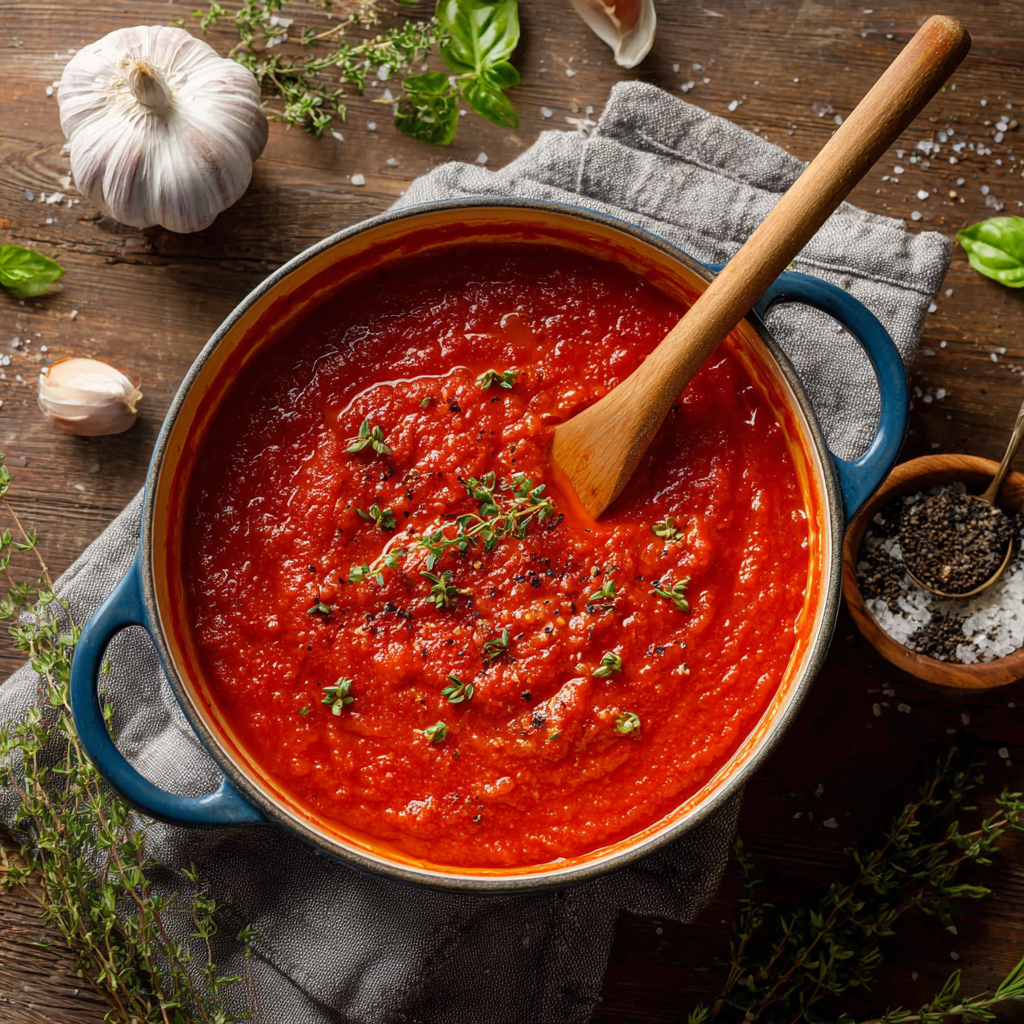
Healthy Tomato Sauce Recipe : Simple, Clean & Homemade
The Sauce That Changed My Kitchen (And My Weeknights!)
Hey there, friend. Can I tell you a secret? For the longest time, I bought my tomato sauce in jars. Yep, Olivia Bennett, self-proclaimed home cook enthusiast, had a pantry shelf dedicated to store-bought marinara. My excuse was always the same: “Who has the time?” But then, I’d look at the ingredient list—the added sugars, the preservatives with names I couldn’t pronounce, the vague “natural flavors”—and feel a tiny pang of kitchen guilt. I knew the tomatoes I bought fresh were gorgeous, so why was the cooked-down version of them so… complicated?
Then, one snowy Sunday when I was stuck inside, I decided to try. Just a pot, some pantry staples, and 30 minutes. Friends, that batch of sauce was a revelation. The kitchen smelled like an Italian grandmother’s hug (the best kind of hug, truly). The flavor was bright, clean, and intensely tomato-y—not masked by sugar or too much dried herb. It tasted… real. And the best part? It was embarrassingly simple.
This healthy tomato sauce recipe is now my weekly warrior. It’s my definition of “simple, clean, and homemade.” It proves that wholesome, from-scratch cooking doesn’t require fancy skills or a whole afternoon. It’s just about letting good ingredients shine. Whether you’re drowning a bowl of pasta, topping a homemade pizza, or giving your zucchini noodles something to cling to, this sauce is your new flavor foundation. Let’s get that pot simmering and fill your kitchen with the coziest smell imaginable.
A Snow Day & The Simmering Pot That Started It All
This sauce’s origin story is one of my favorites. It involves my niece, Sophia, who was about five at the time and the world’s most skeptical eater of anything “red” or “saucy.” On that fateful snow day, she was at my house, her nose pressed against the window, waiting for flakes to pile up. To kill time, I started chopping an onion. She wrinkled her nose. I minced garlic. “Smelly!” she declared. But when I poured those gorgeous crushed tomatoes into the pot and the first bubbles of a simmer started, she drifted over to the stove, pulled up a stool, and just… watched.
“What’s it doing?” she asked. “It’s getting happy,” I told her. “The heat is making all the flavors become friends.” I let her stir (very carefully) and add the pinch of red pepper flakes (“just for a little adventure,” I whispered). For 25 minutes, that pot quietly bubbled away while we played cards. The entire house warmed with the most incredible aroma. When it was time to eat, the skeptical kid who hated “red sauce” asked for “the soup we made.” I tossed it with some pasta, and she devoured it. She called it “Snow Day Magic Sauce.” The name stuck in our family. It taught me that the magic isn’t in complexity; it’s in the process, the smell, and the story you create while it simmers. Now, every time I make it, I think of her, that snowy window, and the power of a patiently simmering pot.
Gathering Your Flavor Friends
Here’s the beautiful part: this is a pantry power play. You likely have most of this already. Let’s walk through why each ingredient is here and how you can swap things if needed!
- 2 tablespoons extra virgin olive oil: Our flavor foundation. A good EVOO adds a fruity, peppery depth you just can’t get from other oils. It’s what we sauté in, and a bit of its flavor stays in the sauce. Chef’s insight: Don’t be tempted to crank the heat too high when you start—we want to infuse, not burn!
- 1 small onion, finely diced: The sweet, savory backbone. When cooked slowly, onions melt into a subtle sweetness that balances the tomatoes’ acidity. Substitution tip: A shallot or two works beautifully for a slightly more delicate flavor.
- 3 cloves garlic, minced: The aromatic heartthrob. We add it after the onion so it doesn’t burn and turn bitter. Chef’s hack: Use a microplane to grate the garlic if you want it to almost dissolve into the sauce seamlessly.
- 28 oz can crushed tomatoes: The STAR. Look for a brand that lists just “tomatoes” and maybe citric acid. Avoid “tomato puree” or anything with added sugar or seasonings. We’re the bosses of flavor here! Insight: San Marzano-style tomatoes are famous for a reason—sweeter, less acidic, with fewer seeds. Worth the splurge for a special batch!
- 1 tablespoon tomato paste (optional): The flavor booster. This isn’t essential, but it adds a rich, concentrated umami depth. I love the little squeeze tubes so I don’t waste a whole can.
- 1 teaspoon dried oregano / ½ tsp dried basil: The herbaceous notes. Dried herbs work great here because they have time to rehydrate and bloom in the simmering sauce. If you have fresh basil, stir in a whole tablespoon, chopped, at the very end for a pop of bright flavor.
- Salt and black pepper, to taste: The essential enhancers. Salt is crucial—it wakes up every other flavor in the pot. Don’t be shy; add in increments and taste.
- Pinch red pepper flakes (optional): The gentle wake-up call. Just a pinch adds a layer of warmth, not heat. It’s my little secret for a sauce that feels more complex.
- 1 teaspoon balsamic vinegar OR 2 tbsp grated carrot (optional): The natural sweeteners. A touch of balsamic adds a gorgeous, subtle sweetness and acidity. The grated carrot is an old Italian nonna trick—it melts into the sauce, adding a natural sugar that cuts acidity without you ever tasting “carrot.”
Let’s Make Some Magic: Step-by-Step
Ready? Tie on your apron (embrace the mess!), and let’s cook. This is less about strict rules and more about building layers of flavor. You’ve got this.
- Build Your Aromatic Base: In a medium saucepan or Dutch oven, heat the olive oil over medium heat. Add the diced onion and a pinch of salt. The salt helps draw out moisture and speeds up the softening. Now, here’s the first chef hack: don’t rush this! Let the onion cook, stirring occasionally, for a good 4-5 minutes. You want them soft, translucent, and sweet, not browned. This patience builds a sweetness that forms the entire foundation of your sauce.
- Wake Up the Garlic: Add the minced garlic and stir constantly. We’re only cooking it for about 30 seconds—just until it becomes incredibly fragrant. If it starts to color even slightly, move quickly to the next step! Burnt garlic is bitter, and we’re all about sweet, mellow vibes here.
- The Tomato Party Starts: Pour in your entire can of crushed tomatoes. It will splutter a bit—that’s okay! Add the tomato paste (if using), dried oregano, basil, a good pinch of salt and pepper, and the red pepper flakes. Stir everything together until the tomato paste is fully dissolved and the herbs are swimming happily.
- The Simmer (Where the Magic Happens): Bring the sauce just to a bubble, then immediately reduce the heat to low. You want a gentle, lazy simmer—just a few bubbles breaking the surface here and there. Let it cook uncovered for 20-30 minutes, stirring every 5-10 minutes to prevent sticking on the bottom. This is non-negotiable downtime. The simmer is reducing the sauce, concentrating the flavors, and mellowing the sharp acidity of the tomatoes. Your kitchen will start to smell incredible.
- Final Flavor Adjustments: After 20 minutes, give it a taste. This is your moment! Need more salt? Add it. Want more herb flavor? Add a pinch more dried oregano. Now is the time to stir in your optional balsamic vinegar or grated carrot if you’re using it. Let it simmer for another 5 minutes to blend.
- Smooth or Chunky? You Decide! For a silky, restaurant-style sauce, use an immersion blender right in the pot (careful of splatters!) or transfer to a standing blender in batches (vent the lid and cover with a towel). I often just give it a few pulses to break it down a bit but leave some texture. Prefer a rustic, chunky sauce? Leave it as is! No wrong answers here.
- Taste, Adjust, and Fall in Love: Give it one final taste. A squeeze of fresh lemon juice can add a last-minute sparkle if it feels a bit flat. A drizzle of fresh olive oil on top when serving? Divine. Your sauce is ready to change the game.
How to Serve Your Homemade Masterpiece
This sauce is the ultimate culinary multi-tool! For classic pasta night, toss it generously with al dente spaghetti or rigatoni, saving a little pasta water to help it cling. Use it as a perfect pizza sauce, spreading a thin layer over your dough. It’s amazing over spiralized zucchini noodles for a low-carb feast, as a base for shakshuka (eggs poached in tomato sauce), or even as a dipping sauce for homemade meatballs or mozzarella sticks. Pour leftovers into a mason jar—it keeps in the fridge for a week or freezes beautifully for up to 3 months.
Make It Your Own: 5 Flavorful Twists
- “Everything But The Kitchen Sink” Veggie: Sauté a diced bell pepper and a handful of sliced mushrooms with the onion for a heartier, chunky vegetable sauce.
- Creamy Vegan Dream: Finish the sauce by stirring in ¼ cup of unsweetened almond milk or a few spoonfuls of raw cashew butter for incredible richness.
- Puttanesca-Inspired Kick: Add 2 tablespoons of rinsed capers and a handful of chopped Kalamata olives with the tomatoes. Anchovy fillets (they’ll melt in) add incredible salty depth.
- Herb Garden Fresh: Skip the dried herbs and stir in a ¼ cup of chopped fresh basil and parsley right at the end.
- Meaty Sunday Gravy Vibe: Brown ½ lb of ground turkey or Italian sausage in the pot before adding the onion. Drain excess fat, then proceed. You’ll have a meaty, robust sauce in no time.
Olivia’s Chef Notes & Kitchen Confessions
This recipe is a living thing in my kitchen! The first time I made it, I was so scared of under-seasoning that I over-salted it. My husband, bless him, drank two full glasses of water with dinner. Lesson learned: season in steps! I’ve also learned that the sauce’s flavor deepens overnight, so making it ahead is always a smart move. One funny fail: I once tried to quadruple the batch in a pot that was way too small. Let’s just say my stovetop looked like a tomato massacre scene. Use a big pot—the sauce likes to bubble and dance as it reduces. Now, I always double the recipe and freeze half. Finding a jar of “Snow Day Magic Sauce” in my freezer on a busy Tuesday is a gift from past Olivia to present, very-hungry Olivia.
Your Questions, Answered!
Q: My sauce tastes a bit acidic or sharp. How can I fix it?
A: This is the most common issue with homemade tomato sauce! Don’t worry, it’s an easy fix. Acidity means it needs balance. Stir in 1 teaspoon of balsamic vinegar, a tablespoon of grated carrot, or even a tiny pinch of sugar. Simmer for another 5 minutes. Often, just cooking it a little longer (another 10-15 minutes on low heat) will also mellow it out beautifully.
Q: Can I use fresh tomatoes instead of canned?
A> Absolutely! You’ll need about 3-4 pounds of fresh Roma or plum tomatoes. Score an “X” on the bottom, blanch them in boiling water for 60 seconds, then plunge into ice water. The skins will peel right off. Chop the flesh and simmer it down (it will take longer, 45-60 minutes) until thickened to your liking.
Q: How can I make this sauce thicker?
A> The simplest way is to let it simmer uncovered for longer. The evaporation will naturally thicken it. If you’re in a rush, you can stir in an extra tablespoon of tomato paste. For a silky thickener, blend 2 tablespoons of the sauce with a few raw cashews or a tablespoon of olive oil until smooth, then stir it back in.
Q: Is it okay to use all fresh herbs instead of dried?
A> Of course! Dried herbs have a more concentrated, earthy flavor that stands up to long cooking. If using fresh, triple the amount (e.g., 1 tablespoon fresh oregano) and add them in the last 5-10 minutes of cooking. Adding them at the very end preserves their bright, fresh color and flavor.
Healthy Tomato Sauce Recipe : Simple, Clean & Homemade
Description
There’s something special about a pot of tomato sauce gently simmering on the stove. This homemade version is fresh, bright, and made with real pantry ingredients—no hidden sugars or hard-to-pronounce additives. It comes together in about 30 minutes and works for pasta, pizza, veggies, or protein bowls. Once you try it, it’s hard to go back to the jar.
Ingredients
-
2 tbsp extra virgin olive oil
-
1 small onion, finely diced
-
3 cloves garlic, minced
-
1 can (28 oz) crushed tomatoes
-
1 tbsp tomato paste (optional, for deeper flavor)
-
1 tsp dried oregano
-
½ tsp dried basil (or 1 tbsp fresh, added at end)
-
Salt and black pepper, to taste
-
Pinch red pepper flakes (optional)
-
1 tsp balsamic vinegar or 2 tbsp finely grated carrot (optional, to balance acidity)
Instructions
-
Sauté the Onion
Heat olive oil in a saucepan over medium heat. Add onion and a pinch of salt. Cook 4–5 minutes until soft and translucent. -
Add Garlic
Stir in garlic and cook about 30 seconds, just until fragrant. Don’t let it brown. -
Add Tomatoes & Seasoning
Pour in crushed tomatoes. Stir in tomato paste (if using), oregano, basil, pepper, chili flakes, and a good pinch of salt. Mix well. -
Simmer Gently
Bring to a light bubble, then reduce heat to low. Simmer uncovered for 20–30 minutes, stirring occasionally, until slightly thickened. -
Balance the Flavor
Taste and adjust salt and pepper. If the sauce tastes sharp, add balsamic vinegar or grated carrot and simmer 5 more minutes. -
Blend (Optional)
Leave chunky, or blend with an immersion blender for a smooth sauce.
Notes
-
Don’t rush the onions — softening them slowly builds natural sweetness.
-
Simmer uncovered so excess water cooks off and flavor concentrates.
-
Too acidic? Add grated carrot or a tiny drizzle of balsamic and keep simmering.
-
Too thin? Cook 10 minutes longer or add 1 extra teaspoon tomato paste.
-
Make a double batch — it freezes well for up to 3 months.
Nutritional Information*
*Approximate values per ½ cup serving. This will vary based on the specific brands of tomatoes and oil you use.
- Calories: 70
- Fat: 4g
- Saturated Fat: 0.5g
- Carbohydrates: 8g
- Fiber: 2g
- Sugar: 5g (naturally occurring from tomatoes)
- Protein: 2g
- Sodium: 180mg
Prep Time: 10 mins | Cook Time: 25 mins | Total Time: 35 mins | Yield: About 3 cups
Final Thoughts
The Sauce That Changed My Kitchen (And My Weeknights!)
Hey there, friend. Can I tell you a secret? For the longest time, I bought my tomato sauce in jars. Yep, Olivia Bennett, self-proclaimed home cook enthusiast, had a pantry shelf dedicated to store-bought marinara. My excuse was always the same: “Who has the time?” But then, I’d look at the ingredient list—the added sugars, the preservatives with names I couldn’t pronounce, the vague “natural flavors”—and feel a tiny pang of kitchen guilt. I knew the tomatoes I bought fresh were gorgeous, so why was the cooked-down version of them so… complicated?
Then, one snowy Sunday when I was stuck inside, I decided to try. Just a pot, some pantry staples, and 30 minutes. Friends, that batch of sauce was a revelation. The kitchen smelled like an Italian grandmother’s hug (the best kind of hug, truly). The flavor was bright, clean, and intensely tomato-y—not masked by sugar or too much dried herb. It tasted… real. And the best part? It was embarrassingly simple.
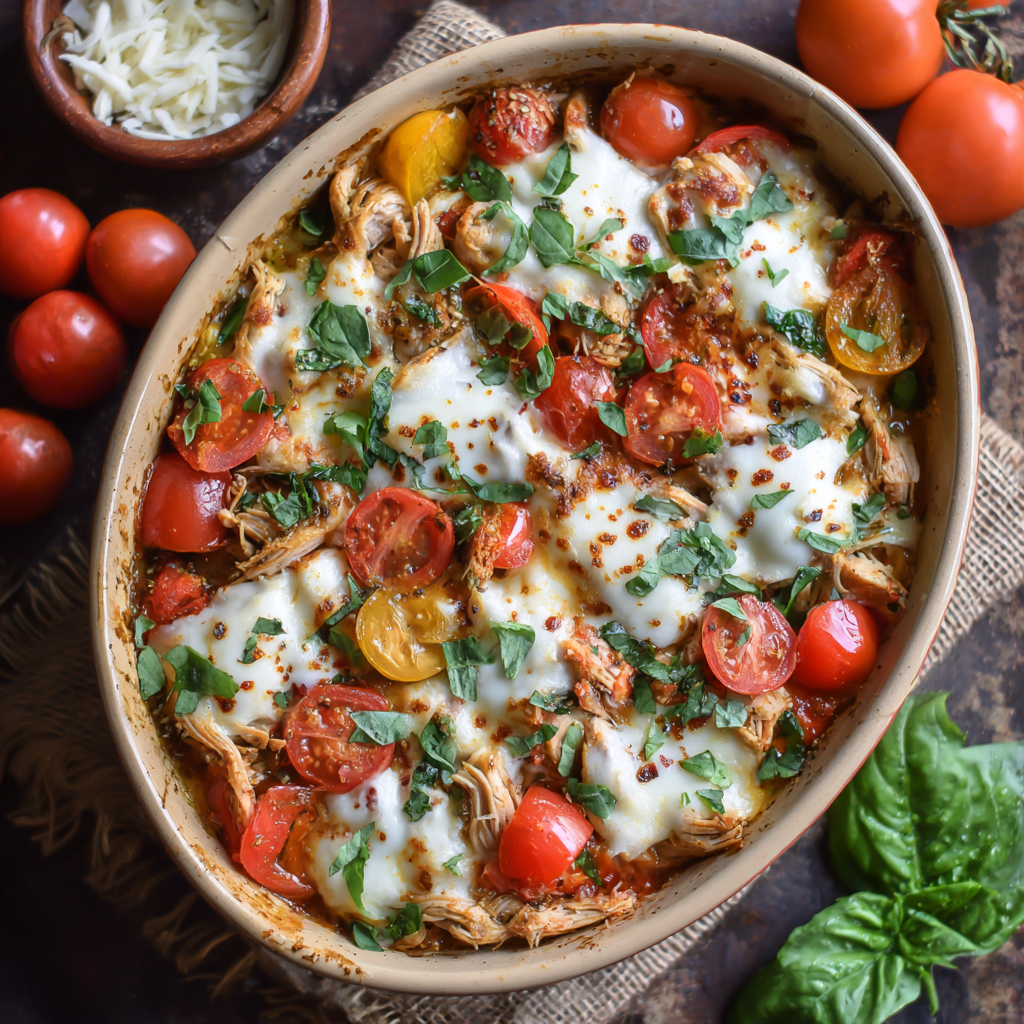
Cheesy Chicken Caprese Casserole (Low Carb & Gluten-Free)
Cheesy Chicken Caprese Casserole: Your New Go-To Comfort Food (Low Carb & Gluten-Free!)
Hey there, friend! Come on in, grab an apron, and let’s get something incredibly delicious bubbling in the oven. If your idea of a perfect dinner involves minimal cleanup, maximum flavor, and that magical moment when melted cheese pulls into a perfect, gooey strand… well, you and I are on the same page today.
This Cheesy Chicken Caprese Casserole is the love child of a classic Italian insalata caprese and the coziest, most satisfying casserole you can imagine. We’re talking juicy shredded chicken, sweet pops of tomato, tender veggies, and not one, not two, but three kinds of glorious cheese, all baked into a dish that’s as wholesome as it is indulgent. It’s naturally gluten-free, low in carbs thanks to a clever veggie swap, and packed with so much bright, fresh flavor from basil and balsamic that you’ll feel like you’re eating sunshine.
I created this recipe for those nights when you want something deeply comforting but also want to feel good after eating it. It’s for busy weeknights, for meal prep that actually excites you, and for feeding a crowd without breaking a sweat. This isn’t just throwing ingredients together; it’s building layers of flavor that sing in harmony. So, preheat that oven, and let’s make a memory—one cheesy, bubbly, unforgettable bite at a time.
A Taste of Summer, Any Day of the Year
This recipe always takes me back to a wildly impromptu dinner party I threw a few summers ago. My garden was exploding with basil and cherry tomatoes, and I had a friend coming over who was trying to eat lower-carb. I wanted to make something that captured the essence of a classic Caprese salad—those perfect, simple flavors of ripe tomato, fresh mozzarella, and basil—but turn it into a hearty main event.
I started pulling things out of the fridge: leftover roasted chicken, some cauliflower rice, an onion. I began layering flavors in my trusty Dutch oven, and before I knew it, the whole kitchen smelled like an Italian trattoria. When I pulled that bubbling, golden dish out of the oven, scattered with halved mozzarella pearls and blistered tomatoes, my friend’s eyes lit up. We ate it straight from the dish, with big green salads on the side, laughing and talking for hours. It was one of those effortless, joyful meals that just worked. That’s the magic I want to share with you—the ability to create a little bit of that summer-garden joy, no matter the season.
Gathering Your Flavor Builders
Here’s everything you’ll need. Don’t stress about being exact—cooking is about intuition! I’ve included my favorite tips and swaps to make this recipe work for you.
Casserole Base
- 1½ lb chicken breasts, cooked and shredded: The star protein! Using pre-cooked chicken (like a rotisserie chicken) is my ultimate weeknight hack. It saves so much time. You can also use thigh meat for more richness.
- 1 tbsp olive oil: Our cooking fat. It adds a fruity depth that butter doesn’t have, which is perfect for Mediterranean flavors.
- 2 yellow onions, diced: The sweet, savory foundation of our sauce. Let them get soft and translucent—this builds a ton of flavor.
- 1 red bell pepper, diced: Adds a sweet crunch and gorgeous color. Don’t skip it!
- 5 cloves garlic, minced: Because more garlic is always the answer. Fresh is best here!
- Salt and black pepper, to taste: Season in layers. Taste as you go!
- 2 tsp Italian seasoning: A quick flavor bomb of oregano, thyme, basil, and rosemary. If you have fresh herbs, use them!
- 1 tsp red chili flakes (optional): Just a hint of warmth in the background. It doesn’t make it spicy, just interesting.
- 3 tbsp tomato paste: This is our secret weapon for a rich, concentrated tomato flavor. Let it cook for a minute with the onions to caramelize slightly.
- 3 cans (15 oz each) diced tomatoes: The body of our sauce. I like the fire-roasted kind for extra smokiness.
- 3 tbsp balsamic vinegar: The magic touch! It adds a sweet-tart complexity that makes the whole dish taste more expensive.
Vegetables & “Grains”
- 4 cups kale, chopped (or spinach): We’re sneaking in greens! Kale holds up beautifully in the bake. If using spinach, stir it in at the very end before baking so it doesn’t vanish.
- 2 cups cooked quinoa: Adds heartiness and a lovely, slightly nutty texture. It also helps soak up the delicious juices. Omit for a stricter low-carb version.
- 4 cups cauliflower rice: Our brilliant low-carb stand-in! It adds bulk and nutrients without weighing you down. You won’t even taste it—it just becomes part of the delicious saucy base.
Cheese & Toppings (The Best Part!)
- 1 cup shredded parmesan cheese: Stirred right into the mix for a salty, umami punch. Use the good stuff from the refrigerated section, not the shelf-stable can.
- 2 cups shredded mozzarella cheese (divided): Half gets mixed in for gooeyness throughout, half gets sprinkled on top for that iconic golden crust.
- 12 oz mozzarella pearls (ciliegine), halved: These little balls of fresh mozzarella are a game-changer. They create irresistible, creamy pockets of cheese throughout the casserole.
- Fresh basil, chopped: Non-negotiable for that true Caprese flavor. Add some before baking and a fresh scatter after for maximum aroma.
- 15 oz cherry or grape tomatoes, halved: The final flourish! They roast and slightly blister in the oven, becoming little bursts of sweet, juicy flavor against the rich, cheesy base.
Let’s Build Some Deliciousness: Step-by-Step
Follow these steps, and you’ll have a masterpiece. I’ve tucked my favorite kitchen hacks right in with each step.
- Preheat and Prep: Fire up your oven to 375°F (190°C). Lightly grease your favorite 9×13 inch (or similar) casserole dish. This is also the perfect time to shred your chicken if you haven’t already. Chef’s Hack: A stand mixer with the paddle attachment can shred cooked chicken breasts in about 30 seconds. Life-changing!
- Sauté the Aromatics: In a large pot or Dutch oven, heat the olive oil over medium heat. Add the diced onions and a pinch of salt. Sauté for 5-7 minutes until they’re soft and turning translucent. Now add the diced red pepper and cook for another 5 minutes, until it’s all starting to smell sweet and wonderful.
- Wake Up the Garlic & Spices: Push the veggies to the side a bit and add the minced garlic to the center of the pot. Let it cook for just 30-60 seconds until incredibly fragrant—don’t let it brown! Then, stir everything together and add the tomato paste, Italian seasoning, salt, pepper, and chili flakes. Stir well and let it cook for another minute. Chef’s Insight: Cooking the tomato paste like this, called “blooming,” deepens its flavor immensely.
- Build Your Sauce: Pour in the cans of diced tomatoes (with their juices) and the balsamic vinegar. Give it a good stir, bring it to a lively simmer, then reduce the heat to medium-low. Let it bubble away for 10-15 minutes, stirring occasionally, until the liquid has reduced by about half. You want a thick, spoonable sauce, not a soup.
- Bring It All Together: To the thickened sauce, add the shredded chicken, chopped kale, cauliflower rice, and cooked quinoa. Stir everything until it’s beautifully combined and heated through. The kale will start to wilt down into the sauce. Remove the pot from the heat—this is crucial!
- The First Cheese Wave: Off the heat, stir in the shredded parmesan and ONE cup of the shredded mozzarella. Mix until the cheese is melted and stringy, creating a wonderfully cohesive filling. Chef’s Tip: Adding cheese off the heat prevents it from seizing up or becoming grainy.
- Assemble for Glory: Transfer the entire saucy, cheesy mixture into your greased casserole dish. Spread it out evenly. Now, for the fun part: scatter the halved mozzarella pearls and the remaining 1 cup of shredded mozzarella over the top. Artfully place the halved cherry tomatoes cut-side up, and sprinkle generously with chopped fresh basil.
- Bake to Perfection: Pop the dish into your preheated oven. Bake for 15-20 minutes, until the cheese is completely melted, bubbly, and has those perfect golden-brown spots. If you want a deeper color, you can broil for the last 1-2 minutes, but WATCH IT LIKE A HAWK.
- The Hardest Part—Rest! Take the casserole out of the oven and let it rest for 5-10 minutes before serving. This allows the flavors to settle and makes it much easier to slice and serve neatly. Use this time to toss a quick salad or set the table!
How to Serve This Beautiful Bake
I love bringing the whole casserole dish straight to the table—it’s rustic and inviting! Use a large spoon or spatula to scoop out generous portions. For a perfect plate, serve it alongside a simple arugula salad dressed with lemon juice and a drizzle of olive oil. The peppery greens cut through the richness of the casserole beautifully. A slice of crusty garlic bread (or a gluten-free alternative) is also a fantastic friend for mopping up any extra sauce. It’s a complete, crowd-pleasing meal all on its own!
Make It Your Own: Fun Variations
This recipe is a fantastic canvas! Here are a few ways to play with it:
- Mediterranean Twist: Swap the chicken for cooked Italian sausage (mild or hot), and add a handful of chopped kalamata olives and artichoke hearts to the mix.
- Zucchini Boat Style: For a fun individual presentation, skip the casserole dish. Scoop the filling into halved, par-baked zucchini boats, top with cheese, and bake until tender.
- Ultra-Creamy Version: Stir in 4 oz of softened cream cheese or ½ cup of ricotta when you add the first round of mozzarella for an even richer, more decadent texture.
- Pesto Swirl: After transferring the mix to the dish, dollop ½ cup of store-bought or homemade pesto on top and use a knife to swirl it lightly before adding the cheese topping.
- Strict Keto: Simply omit the quinoa and double-check that your tomato products have no added sugar. The cauliflower rice keeps it perfectly keto-friendly!
Olivia’s Kitchen Notes
This recipe has become a living, breathing thing in my kitchen. The first time I made it, I completely forgot to add the balsamic vinegar. It was still good, but it was missing that “wow” factor. Now, I won’t make it without it! I’ve also learned that the type of mozzarella pearls matters. The ones packed in water (ciliegine) are superior to the drier, pre-shredded kind for the topping—they melt into creamy pools of heaven.
My biggest kitchen fail with this? Trying to speed up the sauce reduction by cranking the heat to high. I ended up with a splattered stovetop and a slightly scorched bottom layer. Lesson learned: low and slow for a perfect, deep-red sauce. Now, I use that simmering time to clean up and get my toppings ready. It’s all part of the cozy, messy, wonderful process of cooking from the heart.
Your Questions, Answered
Q: Can I make this ahead of time?
A: Absolutely! Assemble the entire casserole (through step 7), cover tightly, and refrigerate for up to 24 hours. When you’re ready, bake it straight from the fridge, adding 5-10 extra minutes to the baking time since it will be cold. You can also freeze the unbaked, assembled casserole for up to 3 months. Thaw overnight in the fridge before baking.
Q: My casserole turned out a bit watery. What happened?
A: This usually means the sauce didn’t reduce enough in step 4, or the vegetables (like fresh spinach or zucchini) released a lot of water. To fix it next time: 1) Really let that tomato sauce simmer and thicken. 2) If using frozen cauliflower rice, thaw it completely and squeeze it in a clean kitchen towel to remove excess moisture. 3) If it’s already baked and watery, you can carefully drain a bit of liquid from the corner of the dish.
Q: I don’t have quinoa. What can I use instead?
A: No problem! You can use an equal amount of cooked rice, farro, or even small pasta like orzo (for a non-gluten-free version). For a pure low-carb/keto version, just leave it out and add an extra cup of cauliflower rice or some chopped zucchini.
Q: Can I use fresh tomatoes instead of canned for the sauce?
A: I don’t recommend it for this specific recipe. Canned tomatoes are picked and packed at peak ripeness, giving a consistent, robust flavor and acidity that’s perfect for a sauce that cooks relatively quickly. Fresh tomatoes would make the sauce too watery unless you cooked it for hours.

Cheesy Chicken Caprese Casserole (Low Carb & Gluten-Free)
Description
If you love cozy, cheesy dinners but still want something balanced and protein-packed, this Cheesy Chicken Caprese Casserole is about to become your new favorite. It brings together tender chicken, juicy tomatoes, basil, and plenty of melty cheese in one easy bake. It’s comforting, colorful, and perfect for busy weeknights, meal prep, or sharing with family. Bonus: it’s naturally low carb and gluten-free.
Ingredients
Base
-
1½ lb cooked chicken breast, shredded or chopped
-
1 tbsp olive oil
-
1 large onion, diced
-
1 red bell pepper, diced
-
4 cloves garlic, minced
-
Salt and black pepper, to taste
-
2 tsp Italian seasoning
-
½–1 tsp chili flakes (optional)
-
3 tbsp tomato paste
-
2 cans (14–15 oz each) diced tomatoes, drained slightly
-
2 tbsp balsamic vinegar
Veggie Bulk (Low-Carb Boost)
-
3 cups cauliflower rice (fresh or thawed & squeezed dry)
-
2 cups chopped kale or spinach
Cheese & Toppings
-
¾ cup grated parmesan
-
2 cups shredded mozzarella, divided
-
8–10 oz fresh mozzarella pearls or chunks
-
1½ cups cherry tomatoes, halved
-
¼ cup fresh basil, chopped
Instructions
-
Preheat Oven
Heat oven to 375°F (190°C). Lightly grease a 9×13-inch casserole dish. -
Sauté Aromatics
Heat olive oil in a large pan over medium heat. Cook onion with a pinch of salt for 4–5 minutes until soft. Add bell pepper and cook 3 more minutes. Stir in garlic for 30 seconds. -
Build Flavor
Add tomato paste, Italian seasoning, pepper, and chili flakes. Cook 1 minute, stirring. Add diced tomatoes and balsamic vinegar. Simmer 8–10 minutes until thickened. -
Combine Filling
Stir in chicken, cauliflower rice, and greens. Cook 2–3 minutes until greens wilt slightly. Remove from heat. -
Add First Cheese Layer
Mix in parmesan and 1 cup shredded mozzarella. Stir until melty and combined. -
Assemble
Transfer mixture to baking dish. Top with remaining shredded mozzarella, mozzarella pearls, and cherry tomatoes. -
Bake
Bake 20–25 minutes until hot and bubbly with golden spots on top. Rest 5–10 minutes before serving. Sprinkle fresh basil over the top.
Notes
-
Use rotisserie chicken to save time.
-
Drain or squeeze cauliflower rice so the casserole isn’t watery.
-
Add cheese off heat when mixing into the filling to keep it smooth.
-
Want extra browning? Broil for 1–2 minutes at the end (have an adult watch closely).
-
Make ahead: Assemble and refrigerate up to 24 hours before baking.
Nutritional Information (Approximate, per serving)
Servings: 8 | Prep Time: 15 mins | Cook Time: 45 mins | Total Time: ~1 hour
Calories: 480 | Protein: 42g | Fat: 22g | Saturated Fat: 10g | Carbohydrates: 24g | Net Carbs: ~17g | Fiber: 7g | Sugar: 10g | Sodium: 780mg
Note: Nutritional info is an estimate calculated with the ingredients listed, including quinoa.
Final Thoughts
And there you have it, friend—a bubbling, golden, impossibly cheesy casserole that proves eating well doesn’t mean sacrificing an ounce of comfort. This Cheesy Chicken Caprese Casserole has quietly become one of my most-requested recipes, and I think I know why. It hits every single note we crave in a truly great meal: it’s satisfying without being heavy, elegant without being fussy, and packed with so much flavor that no one will ever guess it’s low-carb and gluten-free.
What I love most about this dish is how it manages to feel like both a weeknight lifesaver and a dinner party showstopper. On those frantic Tuesday evenings when you’re running on empty, it’s there for you—especially if you’ve been smart enough to stash a pre-assembled version in your freezer. But it also shines when you want to impress, arriving at the table all bronzed and bubbly, with those blistered cherry tomatoes and creamy mozzarella pearls peeking through a blanket of melted cheese. It’s the kind of meal that makes people lean in, spoons ready, asking for the recipe before they’ve even finished their first bite.
I hope as you make this, you’ll take a moment to breathe in that incredible aroma filling your kitchen—the sweetness of simmering tomatoes, the peppery whisper of fresh basil, the unmistakable scent of cheese transforming into something magical. That’s the smell of love, my friend. That’s the smell of nourishment, of slowing down, of gathering around something made with care.
So go ahead, scoop yourself a generous portion. Let those long cheese pulls stretch across the dish and onto your plate. Pair it with something simple—a crisp green salad, maybe a glass of something red and lovely—and settle in. You’ve earned this. You’ve created something truly delicious, and that’s always worth celebrating.
Now I’d love to hear from you! When you make this Cheesy Chicken Caprese Casserole—and I know you will—come back and let me know how it went. Did you try one of the variations? Add your own twist? Burn the garlic and start over like I definitely never have? (Okay, maybe once or twice.) Drop a comment, tag me in your photos, or just send a little note. There’s nothing that makes my day quite like knowing one of my recipes has found a happy home in your kitchen.
Until next time, keep your stove warm and your heart full.
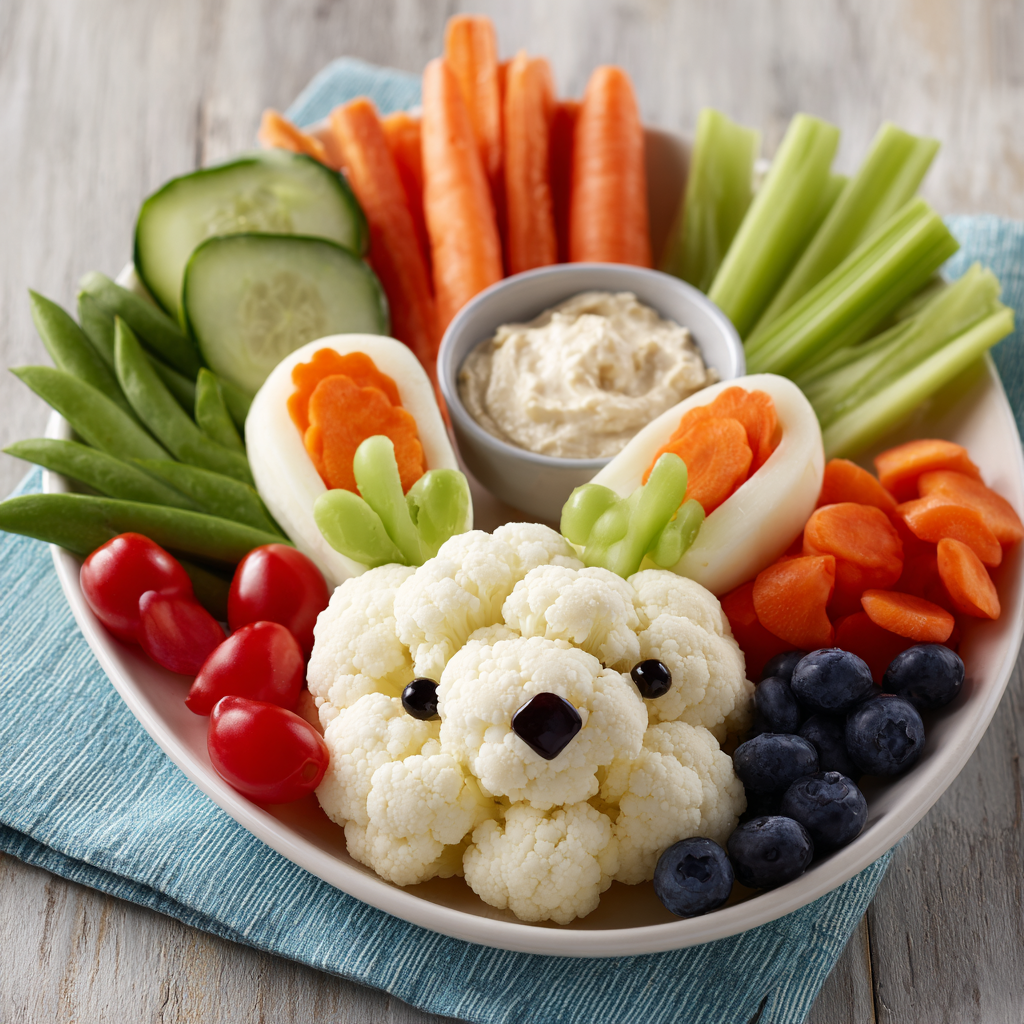
Bunny-Shaped Fruit & Veggie Platters : Fun, Fresh & Kid-Approved
Bring on the Spring Smiles: Your New Favorite Party Trick is Here!
Hey there, friend! Can you feel it? That little shift in the air, the extra hour of sunshine, the first brave daffodils poking through the earth? Spring is whispering, and with it comes a craving for all things fresh, bright, and brimming with life. And let’s be real—it also brings a calendar dotted with gatherings where we want to bring something that says, “I care, and I also have a fun streak a mile wide.” Enter the star of today’s kitchen adventure: the Bunny-Shaped Fruit & Veggie Platter.
This isn’t just another snack plate. This is a centerpiece, a conversation starter, a magic trick that turns “please eat your veggies” into “can I have the bunny’s nose?” I live for recipes like this—the kind that merge effortless beauty with wholesome goodness and a giant dose of joy. You don’t need a culinary degree or fancy tools, just a big platter, a handful of colorful produce, and about 20 minutes of playful arranging. It’s the perfect project to do with little helpers in the kitchen, and the result is a guaranteed smile-maker for Easter brunch, school parties, baby showers, or just a sunny Tuesday that needs a lift. So, tie on your (probably already flour-dusted) apron, and let’s create something unforgettable together!
Why This Bunny Hops Straight to My Heart
This silly, veggie-filled bunny takes me right back to my grandma’s linoleum kitchen floor, sitting cross-legged with my cousin, giggling uncontrollably. Every spring, she’d task us with “building the salad” for Sunday supper. To us, it wasn’t a salad; it was an edible landscape. Cucumber sticks became logs, radish roses were… well, roses, and a lone, perfectly round tomato was always the setting sun. We’d arrange and rearrange, narrating a grand story until the adults called us to the table.
When I set out the ingredients for this platter, that same feeling of playful creativity washes over me. I’m not just prepping food; I’m crafting a moment. I imagine the wide-eyed wonder of a kid seeing a cauliflower bunny for the first time, or the delighted chuckle from a friend who wasn’t expecting a work of art next to the deviled eggs. Food has this incredible power to connect—to stories, to people, to simple happiness. This bunny platter is my edible hug, my way of passing on that kitchen-floor joy. It’s proof that feeding the people you love can be nourishing for the soul, too, and a whole lot of fun in the process.
Gathering Your Garden: What You’ll Need
Here’s the beautiful part: this “recipe” is incredibly forgiving. Think of this list as your inspiration palette—swap colors and textures based on what’s seasonal, what’s on sale, or what your crew loves most. The goal is a vibrant mix of colors, crunch, and sweetness.
- 1 large head of cauliflower: This is our bunny’s fluffy face! Look for one that’s tight, heavy for its size, and creamy white with bright green leaves clinging to the stem. The leaves add a perfect rustic touch. Chef’s Insight: Don’t toss the core! Slice it thinly—it’s crunchy, mild, and perfect for the platter border.
- 2 baby cucumbers or 2 long celery sticks: Our iconic bunny ears. Baby cucumbers are firm and seedless, giving a smooth green look. Celery has fantastic crunch and those classic pale green ribs. Substitution Tip: Trimmed, blanched asparagus spears or even long, thin slices of jicama work beautifully too.
- 1 small bowl of ranch OR hummus: The bunny’s cozy center. Ranch is a classic kid-pleaser, but a creamy roasted red pepper hummus adds amazing color and protein. Chef’s Insight: Place the bowl on the platter first to anchor your design. A little ramekin or even a small teacup works great.
- Cherry or grape tomatoes: Our bunny’s rosy cheeks! I love using a mix of red and yellow for extra sunshine. Pro Tip: Pat them dry with a paper towel so they don’t make the platter watery.
- Baby carrots: These multi-taskers are perfect for the nose, for outlining the bunny, or just filling in as a classic snack. Chef’s Insight: For a more refined look, use “rainbow” baby carrots or peel and slice full-sized carrots into sticks.
- Sugar snap peas or green beans: A burst of the most gorgeous spring green! They’re fantastic for creating a grassy border or outlining the bunny’s shape. Substitution Tip: Broccoli florets or trimmed radishes add a similar pop of color and crunch.
- Strawberries or red grapes: Our accent fruit for sweetness and brilliant color. Sliced strawberries look like little hearts. Chef’s Insight: If using grapes, keep them in small clusters for easy grabbing and a lush, full look.
- 2 black olives or blueberries: The all-important eyes! Pitted whole black olives are easy to place. Blueberries give a sweeter, fruit-focused alternative. Fun Twist: Use two small dollops of cream cheese or a dot of hummus with a single black sesame seed in the center for each eye.
- 1 thin slice of baby carrot: That adorable little pink nose! Just a tiny round is all you need. Use a vegetable peeler to get a perfect, thin slice.
Let’s Build a Bunny: A Step-by-Step Story
Ready to play with your food? Let’s do this! Clear a big space on your counter, grab your largest platter or a clean cutting board, and let’s bring this bunny to life. Remember, there’s no wrong way—just your way.
- Set Your Stage. Place your small bowl of dip slightly below the center of your platter. This isn’t just a dip; it’s the anchor point for our bunny’s head and body. Visualize the bunny’s face floating above it.
- Create the Fluffy Face. Break your cauliflower into medium-sized florets. Start placing them snugly together above the dip bowl to form a roundish, fluffy bunny head. Let some florets overlap and tumble a bit for texture. This is the base of our character! Chef’s Hack: If a floret is too big, use your hands to gently break it into the perfect size. No knife needed!
- Give It Ears. Take your cucumbers or celery and place them angled outward from the top of the cauliflower head. They should look like they’re perked up and listening! For cucumber, you can slice one in half lengthwise for two perfect ears.
- Add the Sweetest Face. Now for the personality! Use your olives or blueberries for eyes, placing them close together near the center-top of the cauliflower face. Right below them, add that tiny carrot round for a nose. Then, flank the dip bowl (or just below the cauliflower) with two cherry tomatoes for cheerful, blushing cheeks.
- Frame and Fill with Color. This is where the party happens. Start arranging your carrots, snap peas, strawberries, and any other veggies in clusters and lines around the bunny. Create a “lawn” at the bottom with sugar snap peas. Use carrot sticks to frame one side. Tuck clusters of grapes or berries into any gaps. There’s no rule—just keep going until the platter looks bountiful and bursting with color. Pro Tip: Work from the outside in, creating a vibrant border that leads the eye to the star of the show: the bunny.
- The Final Flourish. Take a step back. What’s missing? Maybe a few extra pea pods by the ears for greenery? A final strawberry placed just so? Add those last little touches. Then, for a professional, polished look, give any empty spots on the platter a light sprinkle of fresh herbs—chopped dill or parsley adds a whisper of green and makes everything look intentional.
Presenting Your Masterpiece
Carry this platter to the table with pride! Place it right in the center where everyone can see. I love pairing it with other spring favorites—think fluffy quiche, lemonade in mason jars, or a basket of warm rolls. The beauty of this platter is its interactive, communal nature. There’s no careful slicing or serving required; guests can just dig in, creating their own perfect bite of crunch and dip. Watch as the first person spots the bunny and points it out—that’s your moment, chef. You’ve just created more than a snack; you’ve created a happy memory.
Make It Your Own: Endless Bunny Possibilities
- The Fruit Bunny: Swap the cauliflower for a mound of green grapes or broccoli florets. Use pineapple chunks for ears (held with toothpicks) and berries for all the facial features. Perfect for a sweeter tooth!
- Rainbow Swaps: Embrace color! Use purple cauliflower, yellow cherry tomatoes, orange peppers sliced into sticks, and purple grapes. A rainbow bunny is a showstopper.
- Allergy-Friendly/Dairy-Free: The dip is the key. Use a vegan ranch, a black bean dip, guacamole, or a simple olive oil and balsamic drizzle in the center bowl.
- “Fancy” Grown-Up Bunny: Elevate the flavors. Use endive leaves and radishes for crunch, marinated mozzarella balls (ciliegine) for cheeks, and a bowl of sophisticated lemon-herb white bean dip or tzatziki.
- Breakfast Bunny: For an Easter brunch, make a pancake bunny face on a big plate, and use this fruit and veggie platter as the “garden” surrounding it.
Olivia’s Kitchen Notes & Stories
This bunny has evolved more than any recipe in my box! The first time I made it, I was so worried about it being “perfect” that I spent an hour meticulously placing each pea. My husband walked in, grabbed a carrot, and said, “Cute rabbit!” before I’d even finished the eyes. It was a wonderful reminder: the joy is in the gesture, not the precision. Now, I embrace the slightly wonky ear, the cheek tomato that’s a different size. It has character!
My biggest tip? Have a “test snack” while you build. Quality control is essential, right? This platter is meant to be relaxed, fun, and a reflection of the season’s best. If your cauliflower is on the smaller side, make a whole family of baby bunnies on a board! There are no rules, only delicious, colorful results.
Your Questions, Answered!
Q: Can I make this ahead of time?
A: Absolutely! Prep is your best friend. Wash and dry all your produce, cut what needs cutting, and store components separately in airtight containers in the fridge. The cauliflower head can even be broken into florets a day ahead. Assemble the platter no more than 1-2 hours before serving to keep everything crisp and fresh. Add delicate berries last.
Q: The cauliflower florets keep falling everywhere! How do I get them to stay put?
A: Great question! Start with a stable base. Place your dip bowl first, then build the cauliflower around and above it, kind of like you’re building a wall. Nestle the florets tightly together; they’ll hold each other up. If you’re really struggling, you can lightly spread a thin layer of cream cheese or hummus on the platter where the face will go to act as “glue,” but it’s usually not necessary.
Q: My kids are picky. Will they actually eat this?
A: The magic of a platter like this is that it often works better than a plate served just to them. It’s interactive, colorful, and fun. They can choose what they want to try without pressure. Involving them in the building process is the ultimate win—they’re far more likely to eat the carrot nose they placed themselves! I’ve seen the most veggie-skeptical kid go straight for the snap peas because they were part of the “bunny’s garden.”
Q: What’s the best platter to use?
A: A large, round or oval wooden board, a white ceramic platter (makes the colors *pop*!), or even a simple rimmed baking sheet lined with parchment or kale leaves for a natural look. Use what you have—the food is the star.
Bunny-Shaped Fruit & Veggie Platters : Fun, Fresh & Kid-Approved
Description
Spring parties are brighter when the food is playful, colorful, and easy to enjoy. This Bunny-Shaped Fruit & Veggie Platter is a fun, no-cook recipe that turns fresh produce into a cheerful centerpiece. It’s perfect for Easter, school gatherings, or family brunch, and it helps everyone snack on something wholesome while smiling. No special tools needed — just a big plate and a little creativity.
Ingredients
Spring parties are brighter when the food is playful, colorful, and easy to enjoy. This Bunny-Shaped Fruit & Veggie Platter is a fun, no-cook recipe that turns fresh produce into a cheerful centerpiece. It’s perfect for Easter, school gatherings, or family brunch, and it helps everyone snack on something wholesome while smiling. No special tools needed — just a big plate and a little creativity.
Instructions
-
Prepare the Dip
Mix all yogurt dip ingredients in a small bowl if making your own. Place the bowl slightly below the center of a large platter — this helps anchor the bunny design. -
Build the Bunny Face
Arrange cauliflower florets above the dip bowl in a tight circle or oval to form the bunny’s fluffy head. -
Add the Ears
Place cucumber halves or celery sticks at the top of the head, angled outward like bunny ears. -
Create the Face
Add blueberries or olives for eyes. Place a thin carrot slice for the nose and cherry tomatoes for cheeks. -
Make the Garden Border
Arrange the remaining fruits and vegetables around the bunny in colorful clusters. Fill empty spaces so the platter looks full and bright. -
Chill Until Serving
Cover loosely and refrigerate if not serving right away. Best served within 1–2 hours of assembly.
Notes
-
Dry produce well so the platter doesn’t get watery.
-
Cluster, don’t scatter — grouped foods look more abundant.
-
Let kids help place the face pieces — they’ll be more excited to eat it.
-
Use color contrast (red, green, orange, white) to make the bunny pop.
-
Prep ahead: Cut veggies and make dip a day early; assemble later.
A Note on Nourishment
While I’m not a dietitian, I can tell you this platter is a celebration of whole, real foods. It’s packed with fiber from all the veggies and fruits, vitamins like C from the bell peppers and strawberries, and antioxidants from the colorful produce. It’s a fantastic way to add a spectrum of nutrients to any gathering in the most delightful way possible. Remember, healthy eating should be joyful, and this platter is exactly that.
Final Thoughts
Bring on the Spring Smiles: Your New Favorite Party Trick is Here!
Hey there, friend! Can you feel it? That little shift in the air, the extra hour of sunshine, the first brave daffodils poking through the earth? Spring is whispering, and with it comes a craving for all things fresh, bright, and brimming with life. And let’s be real—it also brings a calendar dotted with gatherings where we want to bring something that says, “I care, and I also have a fun streak a mile wide.” Enter the star of today’s kitchen adventure: the Bunny-Shaped Fruit & Veggie Platter.
This isn’t just another snack plate. This is a centerpiece, a conversation starter, a magic trick that turns “please eat your veggies” into “can I have the bunny’s nose?” I live for recipes like this—the kind that merge effortless beauty with wholesome goodness and a giant dose of joy. You don’t need a culinary degree or fancy tools, just a big platter, a handful of colorful produce, and about 20 minutes of playful arranging. It’s the perfect project to do with little helpers in the kitchen, and the result is a guaranteed smile-maker for Easter brunch, school parties, baby showers, or just a sunny Tuesday that needs a lift. So, tie on your (probably already flour-dusted) apron, and let’s create something unforgettable together!
Healthy Easter Snack Board (Fresh, Colorful & Crowd-Friendly)
Your New Easter Tradition: A Healthy, Happy Snack Board Everyone Will Love
Hey there, friend! Olivia here, apron probably already dusted with a little paprika. Can you feel it? That light, hopeful buzz in the air? Spring is officially doing its magic, and Easter is rolling in with all its promise of fresh beginnings, longer days, and, of course, seriously good food. But let’s be real for a second: sometimes holiday eating can feel… heavy. Between the casseroles, the glazed ham, and a truly heroic number of chocolate bunnies, our bodies (and our energy levels) often start pleading for something bright, crunchy, and revitalizing.
That’s exactly why I’m absolutely obsessed with creating this Healthy Easter Snack Board. Think of it as a breath of fresh air on your holiday table. It’s not about restriction; it’s about celebration! Celebration of color, of texture, of the first gorgeous produce of the season. This board is a vibrant, edible centerpiece that invites everyone to gather, graze, and chat. It’s perfect for keeping hangry kids (and adults!) at bay before the big meal, it shines as the star of a light brunch, and it’s the ultimate hostess hack because you can assemble it in 20 minutes flat. No fancy skills required—just a love for beautiful, delicious food that makes people feel good. So, grab your biggest platter or board, and let’s create something unforgettable together.
The Easter Egg Hunt That Inspired a Better Snack Strategy
This recipe was born out of pure, beautiful chaos—specifically, the chaos of my family’s annual Easter egg hunt. Picture it: a swarm of sugar-hyped cousins in pastel dresses and tiny suits, sprinting across my parents’ lawn, while the adults sipped coffee and tried to keep track of who found the golden egg. The aftermath was always the same: a crash landing on the couch, surrounded by a mountain of candy wrappers, with everyone too full of jellybeans to even think about the beautiful spring feast my mom had spent hours preparing.
One year, I decided to stage a little intervention. Before the hunt began, I laid out a huge wooden board on the patio table. I piled it high with crisp sugar snap peas, juicy strawberries, cheerful orange carrot sticks, and a big bowl of herby yogurt dip. I called it the “Bunny Fuel Station.” And you know what? The kids descended on it. They dipped, they crunched, they fueled up on real food. The candy frenzy that followed was a little less frantic, and when we all sat down for dinner later, there were actual appetites at the table. That’s the magic I want for you. This board isn’t just food; it’s a mood. It’s about setting the tone for a day of joyful, balanced celebration.
Gathering Your Rainbow: Ingredients & Chef Insights
Here’s the beautiful part: this isn’t a rigid recipe. It’s a formula for deliciousness. Use this as your guide, and feel free to swap based on what’s fresh at your market or what your people love most. We’re building a canvas of colors, textures, and flavors.
- Fresh Fruit (The Sweet & Juicy Corner):
- Strawberries: Look for vibrant red berries with green caps. They look like little hearts and bring a classic spring sweetness. Chef’s Insight: If they aren’t super sweet, a tiny drizzle of honey over the cluster works wonders.
- Grapes: Red, green, or a mix! They’re easy, no-prep, and their little bursts of juice are so refreshing. Pro Tip: Keep a small bunch intact for a beautiful, cascading effect on the board.
- Pineapple Chunks: Their tropical sunshine flavor is a surprise hit. Substitution: Mandarin orange segments or mango chunks are fabulous too.
- Blueberries or Raspberries: These add a gorgeous deep hue. Blueberries are sturdy, while raspberries are delicate. Place them last to avoid squishing!
- Veggies (The Crunchy & Fresh Squad):
- Baby Carrots: No peeling required! Their natural sweetness is perfect for dipping. Chef’s Hack: For extra flair, use rainbow carrots—the purple and yellow ones are stunning.
- Cucumber Slices: I prefer English cucumbers for fewer seeds. Their cool, watery crunch is essential. Try cutting some into ribbons with a veggie peeler for a fun twist.
- Bell Pepper Strips: Use all the colors—red, yellow, orange. They’re like edible confetti. Insight: Slice them thinly so they’re easy to scoop up dip with.
- Snap Peas: The ultimate snackable veggie. That satisfying *snap* and their bright green color scream spring.
- Protein & Dips (The Heart of the Board):
- Hard-Boiled Eggs, Halved: A non-negotiable for Easter! They’re packed with protein to keep everyone satisfied. Chef’s Secret: For easy peeling, use slightly older eggs and shock them in an ice bath after boiling.
- Hummus: A creamy, dreamy anchor. Classic is great, but don’t be afraid of a roasted red pepper or beet hummus for extra color. Substitution: White bean dip or a whipped feta spread are incredible here.
- Plain Greek Yogurt: The base for our herby dip. Its tang and creaminess are perfect. Why Greek? It’s thicker and higher in protein than regular yogurt.
- Yogurt Dip Add-Ins:
- Lemon Juice: Freshly squeezed, please! It brightens up the whole dip.
- Garlic Powder: Gives a mellow, savory flavor without the sharp bite of raw garlic.
- Salt and Pepper: Season in layers. Taste as you go!
- Fresh Herbs (Dill or Chives): The star of the show. Dill tastes like spring, and chives add a mild oniony punch. Tip: Scissors are your best friend for chopping herbs quickly.
- Extras (The Finishing Touches):
- Mixed Nuts or Almonds: For healthy fats and a satisfying crunch. I love using smoked almonds for a flavor boost.
- Optional: Whole-Grain Crackers or Pita Wedges: For those who want a carb-y vehicle for all that delicious dip. Toasting pita wedges with a sprinkle of za’atar takes it to the next level.
Building Your Edible Masterpiece: Step-by-Step
Ready to play with your food? This is the fun part. We’re not just dumping ingredients on a board; we’re creating little landscapes of flavor. Follow these steps, and you’ll have a board that looks like it came from a gourmet market.
- Prep Your Canvas & Dips First. Pull out your largest board, platter, or even a clean baking sheet lined with parchment. Get your small bowls for dips ready. Now, make the yogurt dip: in a bowl, combine 1 cup of Greek yogurt, a big squeeze of lemon juice (about 1 tbsp), ½ tsp garlic powder, a pinch of salt and pepper, and a hearty handful of chopped fresh dill or chives. Stir, taste, and adjust. Want more zing? Add lemon. More savoriness? More garlic powder. This is your creation! Set the dip and your hummus in their bowls on the board first to act as anchors. Chef’s Hack: Place the bowls on slightly crumpled parchment paper or lettuce leaves to keep them from sliding and to add visual texture.
- Create Your Fruit & Veggie Clusters. Don’t scatter items randomly. Group them! Place all your strawberries in one lush, red pile. Heap the pineapple chunks nearby. Let your grapes spill out of a small bunch. Do the same with the veggies—pile the snap peas together, fan the cucumber slices in a line, make a confetti pile of bell pepper strips. This “clustering” method looks intentional, abundant, and makes it easy for people to find their favorites. Pro Tip: Put wetter items (like cucumber) on a small plate or near the edge to keep the board dry.
- Strategically Place the Protein & Fill Gaps. Take your halved hard-boiled eggs and arrange them in a little sunburst pattern near a dip. Now, step back and look at your board. See any big empty spaces? That’s where your nuts and any crackers come in! Scatter almonds or mixed nuts in little piles to fill gaps. They add wonderful texture and color variation. Tuck a few sprigs of fresh dill or rosemary directly onto the board for a gorgeous, fragrant, spring-ready finish. Chef’s Secret: The final sprinkle of herbs is like putting on jewelry—it pulls the whole look together.
- The Final Touch: Embrace Imperfection! Your board is done when it looks abundant, colorful, and inviting. It doesn’t need to be symmetrical or perfect. In fact, a little rustic charm is what makes it feel homemade and loving. Drizzle a tiny bit of olive oil over the hummus and add one last crack of black pepper. You’ve just created the ultimate centerpiece for connection and joy.
How to Serve & Savor Your Creation
Place your finished board right in the center of the action—on the coffee table, the kitchen island, or the dining table. I love putting out small plates, napkins, and a bunch of cocktail forks or tiny tongs (they make snacking feel extra special). The beauty of this board is that it serves itself! Encourage everyone to dig in, try a bit of everything, and discover their favorite flavor combo. It’s a conversation starter, a work of art, and the most delicious way to kick off your Easter celebration.
Make It Your Own: Delicious Twists & Swaps
The formula is your playground! Here are a few ways to mix it up:
- Mediterranean Twist: Swap the yogurt dip for tzatziki, add kalamata olives, marinated artichoke hearts, and blocks of feta cheese. Use za’atar-spiced pita chips.
- Everything Bagel Board: Flavor the Greek yogurt dip with everything bagel seasoning. Include mini bagels or bagel chips, smoked salmon, capers, and thinly sliced red onion.
- Dairy-Free Delight: Use a vegan yogurt for the dip and a dairy-free pesto or baba ganoush instead of hummus. Ensure your crackers are vegan.
- Sweet-Lover’s Board: Lean into fruit! Add dark chocolate chunks, coconut flakes, almond butter for dipping, and little squares of coffee cake.
- Add a Cheesy Element: A small wheel of brie or some sharp cheddar cubes never hurt anybody. They add richness and make the board feel even more indulgent.
Olivia’s Kitchen Notes & Stories
This board has evolved more than my taste in kitchen towels over the years. It started as a simple veggie platter, but I quickly learned that the magic is in the *abundance* and the *surprises*. The year I added smoked almonds and lemon-herb yogurt dip was a game-changer—people couldn’t stop talking about it! One Easter, my niece decided she only wanted to eat “the green things” (cucumbers, snap peas, and grapes), and it was the easiest win for getting a kid to eat veggies I’ve ever seen.
My biggest tip? Don’t stress. This is supposed to be fun. If your strawberries are a little lopsided, who cares? If you forget the nuts, no one will notice. The goal is to create a feeling of welcoming generosity. The messier the apron, the better the memories, right? Now, go build that board and watch your people gather around it. That’s the whole point.
Your Questions, Answered!
Q: How far in advance can I assemble this board?
A: You can prep all your components 1 day ahead! Wash and chop veggies, store them in airtight containers with a damp paper towel to keep crisp. Make the dips and hard-boil the eggs. The *full assembly* is best done 1-2 hours before serving so nothing gets soggy. Add delicate berries and fresh herbs right before you serve.
Q: My board looks sparse. How do I make it look full and abundant?
A: This is a common worry! The secret is to fill every single inch. Use small bowls for dips to create height. Cluster ingredients tightly and use nuts, herbs, or even edible flowers to fill any remaining gaps. More clusters, less scattering, creates a lush, overflowing look.
Q: What’s the best way to transport a snack board?
A: For road trips or potlucks, I’m a fan of the “travel and assemble” method. Pack all your prepped ingredients in separate containers and a roll of parchment paper. When you arrive, lay the parchment on their table, place your bowls, and build the board fresh in 5 minutes. It stays perfect!
Q: I need to make this nut-free. What can I use instead?
A: Absolutely! Swap the nuts for other crunchy elements like roasted chickpeas, pumpkin seeds (pepitas), sunflower seeds, or even whole-grain pretzel sticks. You’ll still get that satisfying texture.
Healthy Easter Snack Board (Fresh, Colorful & Crowd-Friendly)
Description
Spring gatherings call for something fresh, bright, and easy—and this Healthy Easter Snack Board is exactly that. It’s a no-cook, mix-and-match platter packed with crunchy veggies, juicy fruit, protein-rich eggs, and creamy dips. Perfect as a light appetizer, brunch centerpiece, or “fuel station” before the big meal, it comes together fast and makes everyone happy without feeling heavy.
Ingredients
Fresh Produce
-
1 cup strawberries, halved
-
1 cup grapes
-
1 cup pineapple or mandarin segments
-
1 cup blueberries or raspberries
-
1–2 cucumbers, sliced
-
1 cup baby carrots
-
1 cup snap peas
-
2 bell peppers, sliced into strips
Protein & Dips
-
4 hard-boiled eggs, halved
-
1 cup hummus (any flavor)
-
1 cup plain Greek yogurt
Yogurt Herb Dip Mix-Ins
-
1 tbsp lemon juice
-
½ tsp garlic powder
-
Salt and black pepper to taste
-
2 tbsp chopped fresh herbs (dill or chives)
Crunchy Extras (Optional)
-
½ cup mixed nuts or seeds
-
Whole-grain crackers or pita wedges
Instructions
-
Make the Herb Yogurt Dip
In a small bowl, mix Greek yogurt, lemon juice, garlic powder, salt, pepper, and chopped herbs. Stir well and chill while you prep the board. -
Prepare the Board Base
Place a large platter or board on your counter. Set small bowls of hummus and yogurt dip on the board first—these act as anchors. -
Arrange in Clusters
Add fruits and vegetables in grouped piles rather than spreading them out. Cluster strawberries, grapes, cucumbers, carrots, and peppers separately for a full, colorful look. -
Add Protein
Arrange the halved hard-boiled eggs near the dips. -
Fill the Gaps
Scatter nuts, seeds, or crackers into any open spaces. Garnish with extra herbs if you like. -
Serve Immediately
Keep chilled until serving and enjoy within a couple of hours for best freshness.
Notes
-
Think color: Use at least 4–5 different colors of produce for a festive look.
-
Cut thin: Slim slices make dipping easier and reduce mess.
-
Prep ahead: Chop veggies and make dips up to 1 day in advance; assemble shortly before serving.
-
Nut-free option: Swap nuts for roasted chickpeas or pretzels.
-
Extra fun: Use small cookie cutters to shape cucumbers or cheese into spring shapes.
Nutritional Information*
*Approximate values per serving (based on 8 servings). This is an estimate as your board composition may vary.
- Calories: 220
- Protein: 10g
- Carbohydrates: 22g
- Fat: 11g
- Fiber: 5g
Servings: 6-8 | Prep Time: 20 minutes | Cook Time: 0 minutes
Final Thoughts
Your New Easter Tradition: A Healthy, Happy Snack Board Everyone Will Love
Hey there, friend! Olivia here, apron probably already dusted with a little paprika. Can you feel it? That light, hopeful buzz in the air? Spring is officially doing its magic, and Easter is rolling in with all its promise of fresh beginnings, longer days, and, of course, seriously good food. But let’s be real for a second: sometimes holiday eating can feel… heavy. Between the casseroles, the glazed ham, and a truly heroic number of chocolate bunnies, our bodies (and our energy levels) often start pleading for something bright, crunchy, and revitalizing.
That’s exactly why I’m absolutely obsessed with creating this Healthy Easter Snack Board. Think of it as a breath of fresh air on your holiday table. It’s not about restriction; it’s about celebration! Celebration of color, of texture, of the first gorgeous produce of the season. This board is a vibrant, edible centerpiece that invites everyone to gather, graze, and chat. It’s perfect for keeping hangry kids (and adults!) at bay before the big meal, it shines as the star of a light brunch, and it’s the ultimate hostess hack because you can assemble it in 20 minutes flat. No fancy skills required—just a love for beautiful, delicious food that makes people feel good.
As we wrap up this little journey together, I want you to take a deep breath. The pressure to create something “perfect” for holiday gatherings is real, but here’s my secret: perfection is wildly overrated, but connection? That’s everything. This board isn’t about impressing anyone with culinary gymnastics—it’s about creating a moment. A moment where cousins gather around and actually talk instead of staring at screens. A moment where someone discovers they actually love snap peas dipped in herby yogurt. A moment where the kids are happily munching on real food, leaving room for exactly one well-deserved chocolate bunny ear later.
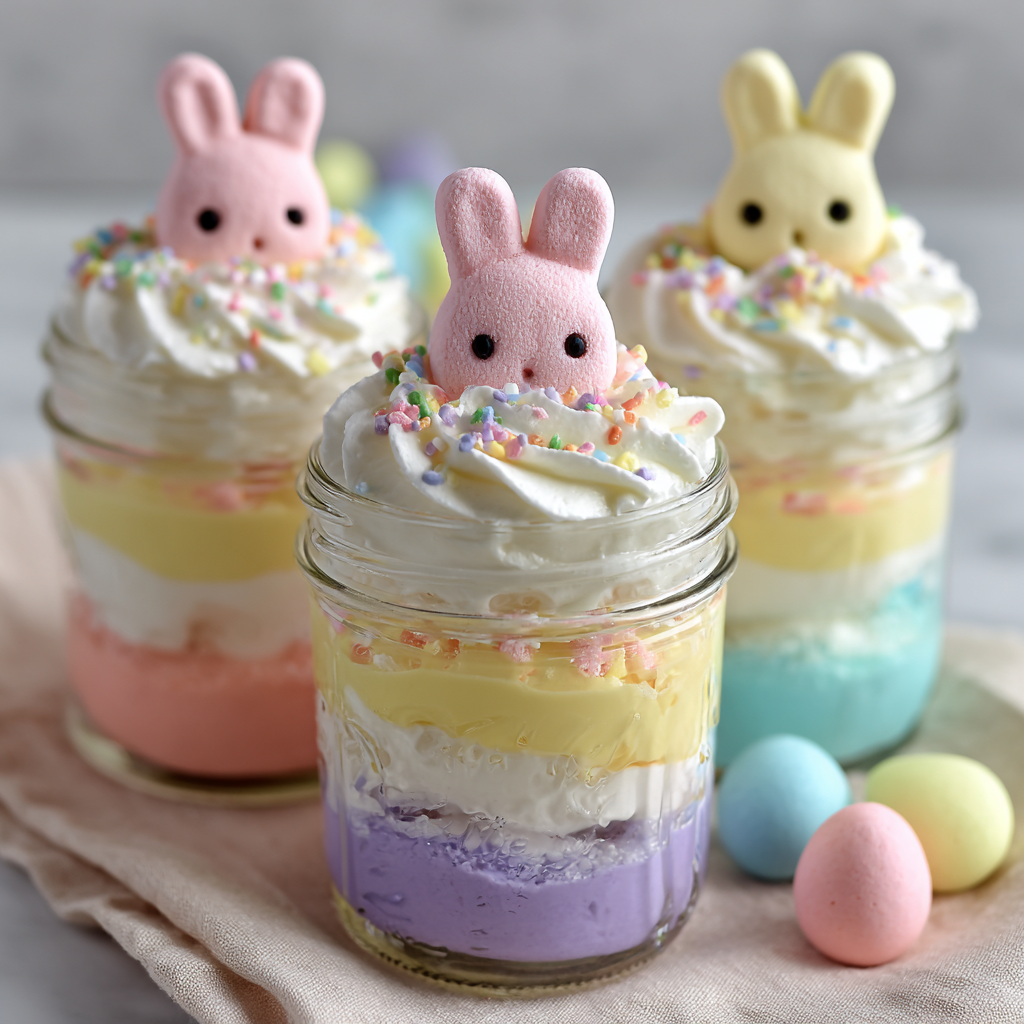
Easter Bunny Jello Parfait in a Jar : Easy No-Bake Mason Jar Dessert (Gluten Free)
Easter Bunny Jello Parfaits: Your New Favorite No-Bake Holiday Magic
Hey there, friend! Olivia here. Can you feel it? That little hum of excitement in the air? Spring is peeking through, daffodils are nodding in the breeze, and my kitchen is officially buzzing with holiday energy. I absolutely live for this time of year—the planning, the gathering, the sheer joy of a table full of loved ones. But let’s be real for a hot second: as much as I love a from-scratch masterpiece, sometimes you need a showstopper that doesn’t require you to be chained to the oven all day.
Enter my absolute favorite trick for effortless Easter entertaining: the Easter Bunny Jello Parfait. Imagine layers of fluffy, cloud-like pastel gelatin mousse, stacked high in a cute mason jar, and crowned with a whimsical bunny Peep and a shower of sprinkles. It’s a dessert that looks like you fussed for hours, but the secret is that it’s gloriously no-bake, surprisingly simple, and 100% gluten-free. These parfaits are pure, edible joy. They make kids (and let’s be honest, adults too) light up with delight. They’re portable, portion-perfect, and add that Pinterest-worthy pop of color to your Easter brunch or dinner table without any of the stress. So, tie on your favorite apron (the cute one with the pockets!), and let’s make some holiday magic that’s as fun to create as it is to eat.
A Spoonful of Nostalgia: My Jelly Journey
This recipe always takes me right back to my grandma’s linoleum-floored kitchen. Easter at her house meant two things: a lace tablecloth heavy with food, and her famous “ribbon jelly salad” wiggling proudly in a giant cut-glass bowl. To me, that shimmering tower of red, green, and yellow was the height of sophistication. I’d watch, mesmerized, as she carefully poured each layer, the whole process wrapped in the quiet patience that only grandmas possess.
My version is a little less patient (hello, instant gratification!) and a lot more playful. I’ve traded the formal salad for individual jars you can hold in your hand, swapped solid jelly for a fluffy mousse, and added a bunny on top because—why not? It’s a happy nod to those cherished memories, but with a modern, Instagram-ready twist. It captures that same sense of wonder and celebration, proving that sometimes, the best new traditions are just old ones dressed up in a pastel party dress.
Gathering Your Pastel Palette: Ingredients & Insights
Here’s everything you’ll need to build these edible rainbows. The beauty of this recipe is its flexibility—I’ll give you all my best tips and swaps!
- Strawberry, Grape, Lemon, & Berry Blue Gelatin (½ a 3 oz package each): This is our color story! Using four different flavors gives each layer its own unique, fruity personality. Chef’s Insight: You can absolutely use sugar-free gelatin here with fantastic results. Feel like mixing up the colors? Lime, orange, or raspberry are all fabulous choices!
- Boiling Water (3 cups total) & Cold Water (1⅓ cups total): The hot water dissolves the powder perfectly, and the cold water helps it start to cool down and set. Always use freshly boiled water for the clearest, smoothest gelatin.
- Whipped Topping (16 oz, thawed): This is the magic ingredient that transforms firm jelly into a light, moussey cloud. Make sure it’s fully thawed so it folds in smoothly. Substitution Tip: For a richer flavor, you can use an equal amount of freshly whipped heavy cream sweetened with a tablespoon or two of powdered sugar. For a dairy-free version, a non-dairy whipped topping works great.
- Whipped Cream, Pastel Sprinkles, & Bunny Peeps: The grand finale! The extra whipped cream adds height, the sprinkles give a festive crunch, and the Peep is the star of the show. Fun Swap: Try a chick Peep, a chocolate bunny, or even a homemade piped buttercream bunny for a totally custom look.
- 5 (8-ounce) Mason Jars: Our edible canvas. The clear glass shows off every beautiful layer. Don’t have jars? Clear plastic cups or even pretty glasses work in a pinch!
Let’s Layer! Your Step-by-Step Guide to Parfait Perfection
Ready? Let’s do this. I’ll walk you through each step with all my favorite kitchen hacks to ensure your parfaits are flawless.
- Dissolve the Gelatin: Grab four medium mixing bowls. Add ½ a package of each gelatin flavor to its own bowl. Now, carefully pour ¾ cup of boiling water into each bowl. Whisk, whisk, whisk until every last granule has vanished. This is key for a smooth texture. Then, stir in ⅓ cup of cold water into each bowl. Little Chef Hack: Set these bowls on a kitchen towel in the fridge—it prevents any sliding and makes for easy transport.
- The First Chill: Pop all four bowls into the refrigerator. We’re not looking for a full set here, just a slight thickening. Think “syrupy” or like raw egg whites. This should take about 20-30 minutes. Do not skip this step! It’s what allows the whipped topping to blend in evenly instead of just melting.
- Create the Mousse: Once slightly thickened, pull out one bowl at a time. Gently fold in about 1 cup of the thawed whipped topping. Use a spatula and a light hand—we’re incorporating air, not beating it out. Fold until you have a beautifully smooth, homogenous, and fluffy pastel mousse. Repeat with each color. Pro Tip: If your mixture seems a bit lumpy, a quick whisk can smooth it out, but be gentle.
- Set to Perfection: Return all four bowls to the fridge. Now we let the mousse firm up enough to pipe and hold sharp layers. This takes 1 to 1.5 hours. It should be thick and spoonable, like softly set pudding. Patience is your friend here!
- The Art of Layering: This is the fun part! Spoon each color into a separate piping bag fitted with a large round tip (or just snip the corner off a zip-top bag). Starting with your bottom color (I love purple!), pipe about a 1-inch layer into each jar. Gently tap the jar on the counter to settle and smooth the layer. Repeat with the next color, tapping again. Continue until all four colors are stacked. My Secret: Tapping is non-negotiable! It removes air bubbles and gives you those clean, restaurant-quality lines.
- The Final Chill: Cover the jars loosely with lids or plastic wrap and refrigerate for at least 4 hours, or ideally overnight. This long chill ensures every layer is perfectly set and the flavors have time to mellow and meld beautifully.
- Dress to Impress: Just before serving, pipe or dollop a little fresh whipped cream on top, add a generous pinch of pastel sprinkles, and lovingly nestle a bunny Peep right on top. Ta-da! You’ve just created edible happiness.
Serving Up the Smiles
Presentation is everything with these little gems! I love lining them up down the center of my Easter table as a edible centerpiece. You can also set them on a tray garnished with a few scattered jelly beans or fresh spring flowers. Provide long-handled spoons so everyone can dive all the way down to the bottom layer in one glorious scoop. Watch as they turn the jar, admiring the layers before that first sweet, fluffy bite.
Make It Your Own: Delicious Twists & Swaps
The fun doesn’t stop here! This recipe is a fantastic base for creativity.
- Tropical Bunny: Use pineapple, lime, mango, and berry blue gelatin. Top with a toasted coconut flake and a pineapple chunk.
- Sherbet Dream: Mix ½ cup of blended raspberries or strawberries into the corresponding gelatin layer before adding the whipped topping for a fresh fruit swirl.
- “Bunny Bait” Crunch: Add a thin layer of crushed vanilla wafers or gluten-free graham crackers between the mousse layers for a fun textural surprise.
- Adult Elegance: For a sophisticated twist, replace 2 tablespoons of the cold water in each flavor with a corresponding liqueur (like Chambord for berry, limoncello for lemon).
- Vegan/DF Adaptation: Use agar-agar flakes (prepare according to package directions for a mousse) and your favorite brand of non-dairy whipped topping. Check that your sprinkles and Peeps are vegan-friendly (many brands are!).
Olivia’s Kitchen Notes & Stories
This recipe has seen some… interesting… experiments in my kitchen. The first time I made it, I was so impatient I tried to layer it before the mousse was set. Let’s just say we ended up with “Easter Bunny Jello Soup in a Jar.” Not the look I was going for! I’ve also learned the hard way that gelatine sets faster than you think. I once answered a phone call mid-process and came back to a bowl of rubber. Now, I set a timer for everything and treat it like a sacred meditation. Over the years, I’ve streamlined the process (piping bags are a game-changer!) and learned that making them the night before is not just convenient, it actually makes them taste better. The flavors become friends overnight. So, embrace the make-ahead magic—your future, less-stressed holiday self will thank you.
Your Questions, Answered!
Q: My layers are blending together, not staying separate! What did I do wrong?
A: This almost always means the mousse wasn’t chilled long enough before layering. Each layer needs to be thick enough to support the weight of the next one. If it’s still too runny, just pop the bowl back in the fridge for another 15-20 minutes and test again. Also, always tap the jar firmly to settle each layer flat before adding the next.
Q: Can I make these more than a day ahead?
A: Absolutely! They keep beautifully for 2-3 days in the fridge. Just wait to add the final whipped cream, sprinkles, and Peep until right before you serve, so the toppings stay fresh and the Peep doesn’t dry out or bleed color.
Q: Help! My gelatin didn’t set at all.
A: Oh no! This is usually a ratio issue. Did you accidentally add too much liquid? Or perhaps the water wasn’t boiling hot enough to fully dissolve the powder? If it’s still soupy after the full chilling time, you can try re-melting it gently (microwave in short bursts) and starting the process again, ensuring your measurements are precise.
Q: I can’t find the exact gelatin flavors. What should I do?
A: No problem at all! Use what you can find. Any four pastel colors will look stunning. You can even use two packages of the same flavor divided in half to make two different colored layers by adding a drop or two of natural food coloring to one portion. Get creative with your palette!

Easter Bunny Jello Parfait in a Jar : Easy No-Bake Mason Jar Dessert (Gluten Free)
Description
A pastel, no-bake, layered treat that’s whimsical, colorful, and perfect for Easter. Gluten-free, fun, and surprisingly simple to make!
Ingredients
-
½ package each (3 oz) strawberry, grape, lemon, and berry blue gelatin
-
3 cups boiling water (divided)
-
1⅓ cups cold water (divided)
-
16 oz thawed whipped topping (or sweetened whipped cream)
-
Whipped cream, pastel sprinkles, and Bunny Peeps for garnish
-
5 (8-oz) mason jars or clear cups
Instructions
-
Dissolve Gelatin
-
Divide each gelatin flavor into 4 bowls. Add ¾ cup boiling water to each; whisk until fully dissolved. Stir in ⅓ cup cold water per bowl.
-
-
Slightly Chill
-
Refrigerate each bowl for 20–30 minutes until the mixture thickens slightly, like syrup.
-
-
Create the Mousse
-
Fold in about 1 cup whipped topping into each gelatin bowl, gently combining to keep it airy and smooth.
-
-
Chill for Layering
-
Return to fridge 1–1.5 hours until thick and spoonable.
-
-
Layer the Parfaits
-
Use piping bags (or a zip-top bag with the corner snipped). Pipe 1-inch layers into jars in your desired order, tapping jars gently after each layer to remove air bubbles.
-
-
Final Chill
-
Cover jars loosely and refrigerate at least 4 hours or overnight.
-
-
Garnish & Serve
-
Top with whipped cream, sprinkles, and a bunny Peep before serving.
-
Notes
-
Tropical Bunny: Pineapple, lime, mango, berry blue gelatin; top with toasted coconut and a pineapple chunk.
-
Sherbet Dream: Fold blended raspberries or strawberries into the corresponding gelatin layer.
-
Bunny Bait Crunch: Add crushed vanilla wafers or graham crackers between layers.
-
Adult Elegance: Replace 2 tbsp cold water per layer with liqueur (Chambord, limoncello).
-
Vegan/DF: Use agar-agar and non-dairy whipped topping; ensure toppings are vegan-friendly.
Nutritional Info (Per 1 Jar)
Please note: This is an approximate calculation based on the specific ingredients listed and can vary significantly with substitutions, especially using sugar-free or dairy-free alternatives.
- Calories: 311
- Fat: 23g
- Carbohydrates: 23g
- Sugar: 22g
- Protein: 4g
**Yield:** 5 servings | **Prep Time:** 10 minutes | **Chill Time:** 6 hours | **Total Time:** 6 hours 10 minutes
Final Thoughts: A Little Jar Full of Easter Magic
And there you have it, sweet friend—five little jars, each one a tiny tower of pastel joy, topped with a marshmallow bunny who looks almost as pleased to be there as you should feel right now.
Here’s the truth about recipes like this one: they’re not really about the gelatin.
Oh, sure, the layers are pretty. The colors photograph beautifully, and the Peep on top gets all the Instagram love. But that’s not why you made these. You made them because Easter morning should feel special. Because you wanted to put something on the table that makes the kids gasp and the grandparents pull out their phones. Because somewhere in the back of your mind, you remember what it felt like to be small and see something magical waiting just for you.
These parfaits carry that same energy—the energy of a holiday that believes in pastel colors and marshmallow bunnies and dessert before 10 a.m. because why not?
So here’s my final piece of advice, wrapped up with a bow:
Don’t stress about perfectly straight layers. The slightly wobbly ones have more personality.
Don’t panic if you drop a sprinkle or two on the floor. That’s just a gift for the Easter cleaning fairy.
And for heaven’s sake, save one jar for yourself. Sit down somewhere quiet, take that first spoonful all the way to the bottom, and let the soft, sweet, nostalgic cloud of it remind you why we do this whole holiday thing in the first place.
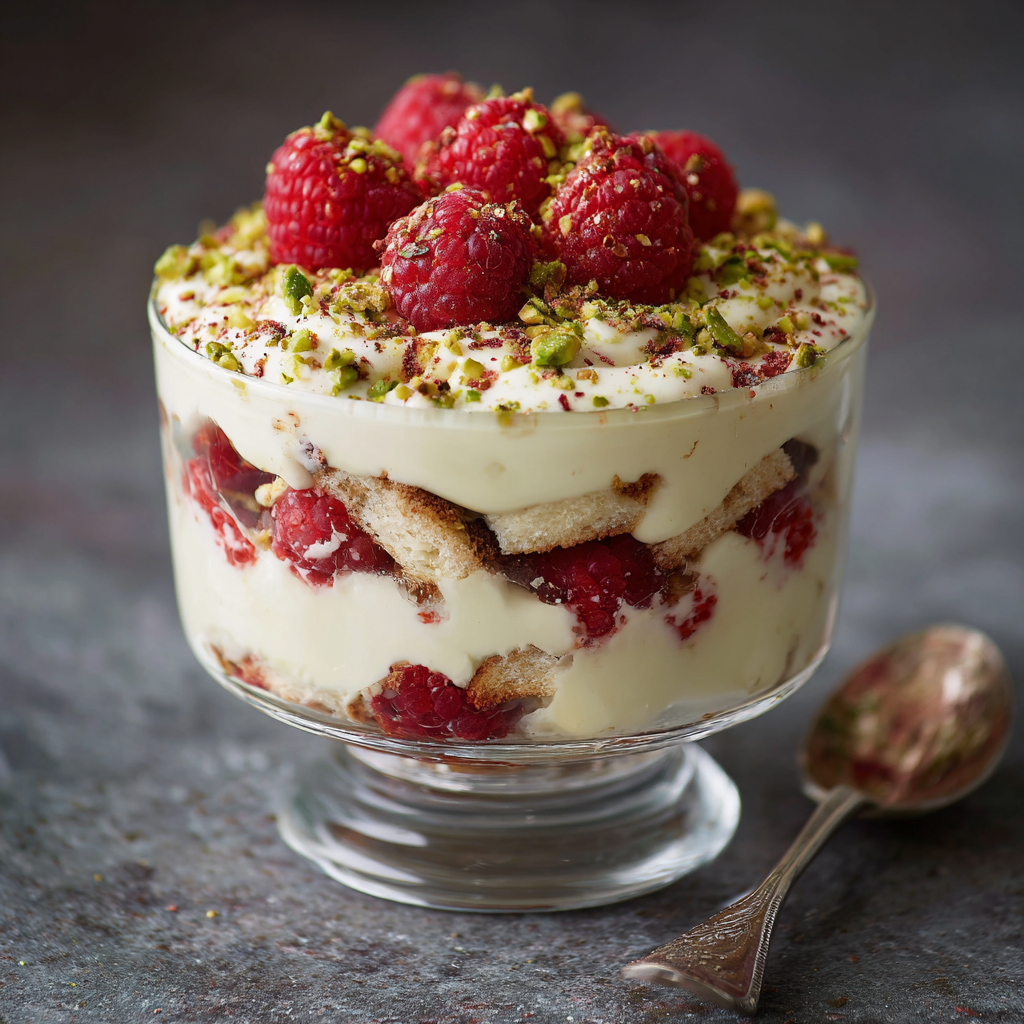
White Chocolate, Raspberry & Pistachio Tiramisu : A Stunning No-Bake Dessert to Impress
White Chocolate, Raspberry & Pistachio Tiramisu: Your New Go-To Showstopper Dessert
Hey there, friend! Come on in, pull up a stool. Can you smell that? It’s the warm, nutty scent of toasted pistachios mingling with the rich aroma of espresso. That, my friend, is the sound of a regular Tuesday about to get a whole lot more delicious. If you’ve ever thought that making an impressive, restaurant-worthy dessert was out of your league, I’m here to tell you—with a wink and a whisk—that you are so very wrong. Today, we’re throwing out the rulebook on traditional tiramisu and building something truly magical, layer by gorgeous layer.
This White Chocolate, Raspberry & Pistachio Tiramisu is my love letter to no-bake desserts. It’s for the host who wants to wow their guests without being stuck in the kitchen all day. It’s for the home cook who craves a project that feels fancy but is secretly a breeze. We’re talking clouds of mascarpone cream kissed with melted white chocolate, tart bursts of raspberry, the satisfying crunch of pistachios, and all of it nestled between coffee-kissed ladyfingers. It’s a symphony of textures and flavors that looks like it came from a patisserie window but comes straight from your heart (and fridge!). So, tie on that apron—the messy one is always the best—and let’s create something unforgettable together.
The Dessert That Stole the Show (And My Heart)
This recipe wasn’t born in a flash of genius, but in a mild panic! A few summers ago, I was asked to bring a dessert to my best friend’s bridal shower. The July heat was sweltering, the theme was “elegant garden party,” and my oven was firmly OFF. I needed something stunning, cool, and that could feed a crowd. I stared into my fridge, saw mascarpone and berries, and thought, “What if…?”
I started layering, tasting, and tweaking. The classic tiramisu was my template, but I wanted brighter, fruitier, more… *summer*. I folded white chocolate into the cream for a subtle sweetness, smashed some raspberries for a tangy swirl, and grabbed pistachios for that gorgeous green crunch. When I arrived at the party, I placed it on the table next to a towering cake, thinking it was just a nice little side dish. Reader, it vanished first. The combo of cool, creamy, crunchy, and tangy was an instant hit. Now, it’s my most requested dessert for any gathering. It proves that the best recipes often come from a little kitchen chaos and a lot of love.
Gathering Your Flavor Symphony: Ingredients & Insights
Here’s where the magic starts. Each ingredient plays a crucial role, and knowing your “whys” makes you a more confident cook. Let’s break it down:
- 8 oz mascarpone cheese: This is the star. It’s rich, velvety, and less tangy than cream cheese. For the best texture, let it sit at room temperature for 20-30 minutes before using. Chef’s Insight: If you’re in a pinch, full-fat cream cheese can work, but the flavor will be tangier and the texture denser.
- 1 cup heavy whipping cream: This whips up to give our filling its dreamy, cloud-like body. Make sure it’s very cold for the best volume.
- ½ cup powdered sugar: It dissolves instantly, preventing graininess in our cream. No substitutions here!
- 1 teaspoon vanilla extract: Our flavor enhancer. Use the real stuff—it makes a difference.
- 4 oz white chocolate, melted: Look for a good quality baking bar, not chips (they have stabilizers that can seize). We’re adding a delicate sweetness and silkiness. Chef’s Insight: Melt it slowly! A double boiler or 15-second bursts in the microwave, stirring between each, is the key.
- 1 cup fresh raspberries + extra for garnish: Their bright, tart pop cuts through all the richness. Frozen can work in a pinch, but thaw and drain them very well to avoid a soggy dessert.
- ½ cup pistachios, shelled and chopped: They bring that incredible crunch and a beautiful, subtle saltiness. Toast them in a dry pan for a few minutes to unlock their full, nutty aroma.
- 1 cup brewed espresso or strong coffee, cooled: The foundation of any tiramisu! Strong coffee works, but espresso has the intense, robust flavor that holds up to the other ingredients.
- ¼ cup coffee liqueur (optional, but glorious): Like Kahlúa or Tia Maria. It deepens the coffee flavor. For an alcohol-free version, just use more espresso or a splash of coffee extract.
- 1 package (about 24) ladyfingers (Savoiardi): These dry, sponge-like cookies are perfect for soaking. You’ll find them in the international aisle.
Let’s Build This Beauty: Step-by-Step with Chef’s Tips
Ready? Let’s get layering. I’ll walk you through each step with all my favorite hacks so you feel like a pro.
Step 1: The Dreamy White Chocolate Cream. In a large, chilled bowl (this helps the cream whip faster!), combine the room-temperature mascarpone, heavy cream, powdered sugar, and vanilla. Using a hand mixer or stand mixer, whip on medium-high until you get soft, billowy peaks. This means when you lift the beaters, the peak folds over gently. Don’t overwhip! Now, take your slightly cooled, melted white chocolate. With a rubber spatula, gently fold it into the cream mixture. Think of it as gently scooping from the bottom and folding over—you want to keep all that air you just whipped in. Set this heavenly cream aside.
Step 2: The Coffee Bath & Pistachio Prep. In a shallow bowl or pie dish, mix your cooled espresso and coffee liqueur (if using). Set it near your assembly station. Grab your pistachios—if you haven’t already, give them a rough chop. I like some finer bits and some bigger pieces for varied texture.
Step 3: The Art of the Dip. This is the only place you can go wrong, so listen up! Take a ladyfinger and quickly dip it into the coffee mixture. We’re talking a one-second dip, flip, one-second dip on the other side. You want it moistened and flavored, not saturated and soggy. It should still have some structural integrity. If it starts to fall apart in your fingers, you’ve gone too far. Practice on one—it’s your sacrificial cookie!
Step 4: Layering Like a Boss. You can use a 9×9 dish, a trifle bowl, or individual glasses. I love glasses because you can see all the beautiful layers! Start with a single layer of dipped ladyfingers, breaking them to fit if needed. Spoon or pipe a generous layer of the white chocolate cream over them. Now, scatter a handful of fresh raspberries and a sprinkle of chopped pistachios. Repeat! Ladyfingers, cream, berries, nuts. Always finish with a beautiful top layer of the cream. This is your canvas for garnish later.
Step 5: The Patience Game (The Hardest Part!). Cover your tiramisu tightly with plastic wrap. This is non-negotiable—it prevents fridge smells and a skin from forming. Now, walk away. Let it chill for at least 4 hours, but honestly, overnight is magic. This waiting time allows the flavors to marry, the coffee to mellow, and the cream to set up perfectly so every slice is clean and gorgeous.
Presenting Your Masterpiece
Just before serving, it’s glamour time! Pile the extra fresh raspberries on top, sprinkle with the remaining toasted pistachios, and for a final touch, you can dust it with a little cocoa powder or powdered sugar. I love serving it in the dish with a big spoon for family-style comfort, or in those individual glasses for a plated restaurant feel. A sprig of mint adds a lovely fresh touch. Serve it straight from the fridge—that cool, creamy bite is everything.
Make It Your Own: Delicious Twists & Swaps
- Berry Bliss: Swap raspberries for fresh blackberries or a mix of summer berries. Frozen mixed berries, thawed and well-drained, work great year-round.
- Chocolate Lover’s Dream: Use dark chocolate instead of white chocolate in the cream, and garnish with dark chocolate shavings and a few cacao nibs for crunch.
- Nut-Free & Fabulous: Omit the pistachios and use toasted coconut flakes instead. The texture is still amazing!
- Citrus Zing: Add the zest of one orange or lemon to the cream mixture, and use a citrus liqueur like Grand Marnier in place of the coffee liqueur for a bright twist.
- Decaf/Dairy Modifications: Use decaf espresso. For a dairy-free version, use coconut cream and a plant-based mascarpone alternative (just note, the texture will vary).
Olivia’s Notebook: Extra Bits & Bobs
This recipe has evolved so much since that first bridal shower! I’ve learned that toasting the pistachios is a game-changer—it takes them from “nice” to “WOW.” I’ve also started sometimes smashing a few of the raspberries and swirling them into the cream for a beautiful marbled effect. And a funny story: I once accidentally used salted pistachios. Everyone raved about the “salted caramel” note they tasted! It was a happy accident that proved a little salt in dessert is always a good idea. Don’t be afraid to play. The base recipe is your trusty friend; the variations are where your personality shines.
Your Questions, Answered!
Q: My cream mixture looks runny/grainy after adding the white chocolate. What happened?
A: This usually means your white chocolate was too hot when folded in, or it seized. If it’s runny, just pop the whole bowl back in the fridge for 20 minutes, then re-whip briefly. If it’s grainy from seized chocolate, there’s no fixing it, but it will still taste delicious! Next time, ensure your melted chocolate is just warm to the touch, not hot.
Q: Can I make this ahead of time?
A: Absolutely! That’s one of its best features. It needs that long chill anyway. You can assemble it fully 24-48 hours in advance. Just hold off on the final garnish until right before serving.
Q: My ladyfingers got too soggy and the layers collapsed. Help!
A: Ah, the classic dip-and-drown. It happens! Remember, it’s a *dip*, not a swim. If they’re too wet, they can’t support the layers. For your next batch, be more quick-wristed. For this batch? Call it a “deconstructed tiramisu parfait” and serve it in bowls with a smile. It will taste just as good.
Q: I can’t find mascarpone. What’s the best substitute?
A: A mix of 8 oz full-fat cream cheese (softened) and 1/4 cup sour cream or full-fat Greek yogurt can mimic the tang and richness in a pinch. Whip it all together with the cream.
White Chocolate, Raspberry & Pistachio Tiramisu : A Stunning No-Bake Dessert to Impress
Description
White Chocolate, Raspberry & Pistachio Tiramisu
A no-bake, show-stopping dessert that’s creamy, fruity, and nutty—perfect for impressing guests without spending all day in the kitchen.
Ingredients
-
8 oz mascarpone cheese, room temperature
-
1 cup heavy whipping cream, cold
-
½ cup powdered sugar
-
1 tsp vanilla extract
-
4 oz white chocolate, melted & slightly cooled
-
1 cup fresh raspberries (plus extra for garnish)
-
½ cup pistachios, shelled & chopped (toasted for best flavor)
-
1 cup brewed espresso or strong coffee, cooled
-
¼ cup coffee liqueur (optional, like Kahlúa; or extra espresso for alcohol-free)
-
1 package ladyfingers (about 24 Savoiardi cookies)
Instructions
-
Make the White Chocolate Cream
-
In a large, chilled bowl, whip mascarpone, heavy cream, powdered sugar, and vanilla until soft peaks form.
-
Gently fold in the slightly cooled melted white chocolate, keeping the mixture light and airy.
-
-
Prep Coffee & Nuts
-
Combine espresso and coffee liqueur in a shallow dish.
-
Roughly chop toasted pistachios; set aside.
-
-
Dip the Ladyfingers
-
Quickly dip each ladyfinger in the coffee mixture—1 second per side—so they’re moistened but not soggy.
-
-
Layer the Tiramisu
-
Use a 9×9 dish, trifle bowl, or individual glasses.
-
Layer: ladyfingers → white chocolate cream → raspberries → chopped pistachios.
-
Repeat layers, finishing with a top layer of cream.
-
-
Chill
-
Cover tightly with plastic wrap.
-
Refrigerate at least 4 hours, ideally overnight, to let flavors meld and cream set.
-
-
Garnish & Serve
-
Top with extra raspberries, toasted pistachios, and optional cocoa powder or powdered sugar.
-
Serve chilled, straight from the fridge.
-
Notes
-
Berry Swap: Blackberries or a mix of summer berries.
-
Chocolate Twist: Use dark chocolate instead of white; garnish with shavings or cacao nibs.
-
Nut-Free: Omit pistachios; try toasted coconut flakes instead.
-
Citrus Zing: Add orange or lemon zest to the cream; use Grand Marnier instead of coffee liqueur.
-
Dairy-Free: Substitute coconut cream and plant-based mascarpone.
Nutritional Information*
*Approximate values per serving (1 of 8):
Calories: ~350 | Fat: 22g | Saturated Fat: 13g | Carbohydrates: 32g | Sugar: 20g | Protein: 6g
Well, that’s it, my friend! You’ve got everything you need to create a dessert that’s as joyful to make as it is to eat. I can’t wait for you to share it, savor it, and make some messy, happy memories of your own. Now, go forth and impress! Don’t forget to tag me if you share a photo—seeing your creations is my favorite part. Until next time, happy cooking!
Final Thoughts
White Chocolate, Raspberry & Pistachio Tiramisu: Your New Go-To Showstopper Dessert
And just like that, with a gentle dusting of powdered snow and a scatter of emerald pistachios, you’ve done it. You’ve transformed simple pantry ingredients—ladyfingers, cream, chocolate, berries—into something that looks and tastes like it belongs in the glass case of a Venetian café. But here’s the secret you now carry with you: it wasn’t complicated. It was just love, layered with intention.
This White Chocolate Raspberry Pistachio Tiramisu is more than a dessert. It’s a promise you keep to yourself and the people around your table. The promise that you don’t need a pastry degree to create beauty. That feeding people well doesn’t require all day in a hot kitchen. That some of the most memorable meals end not with a store-bought carton, but with a spoon you hold out and say, “Here—I made this. Taste.”
I hope this recipe becomes one of your signature dishes. The one friends request for birthdays. The one that elicits texts the morning after a dinner party: “Can I have that tiramisu recipe? Please?” The one you make just for yourself on a quiet Sunday, because you deserve a slice of something exquisite. I hope it teaches you that no-bake isn’t “cheating”—it’s smart, it’s intentional, and it’s often more elegant than its oven-baked cousins.
What I love most about this tiramisu is how it holds both luxury and humility in the same bite. White chocolate whispers elegance; raspberries burst with everyday brightness. The pistachios? They’re the crunch of reality—imperfect, varied, utterly themselves. That’s what homemade dessert should be: not flawless, but full of character. Not fussy, but made with care.
So the next time you need a showstopper—for a holiday table, a potluck, a dinner party, or just a Tuesday that feels like it deserves more—remember this stack of coffee-kissed cookies and cloud-soft cream. Remember that you already have everything you need: ingredients, intuition, and the willingness to try.
Now close the refrigerator door, let that tiramisu rest and transform, and wash your whisk with satisfaction. The hardest part—the waiting—is the only thing left. And when you finally pull back that plastic wrap and cut into those perfect layers, know that somewhere, in her own little kitchen, another home cook is doing the same thing. Learning, layering, loving. That’s what this recipe is, really. Not just dessert. Connection.
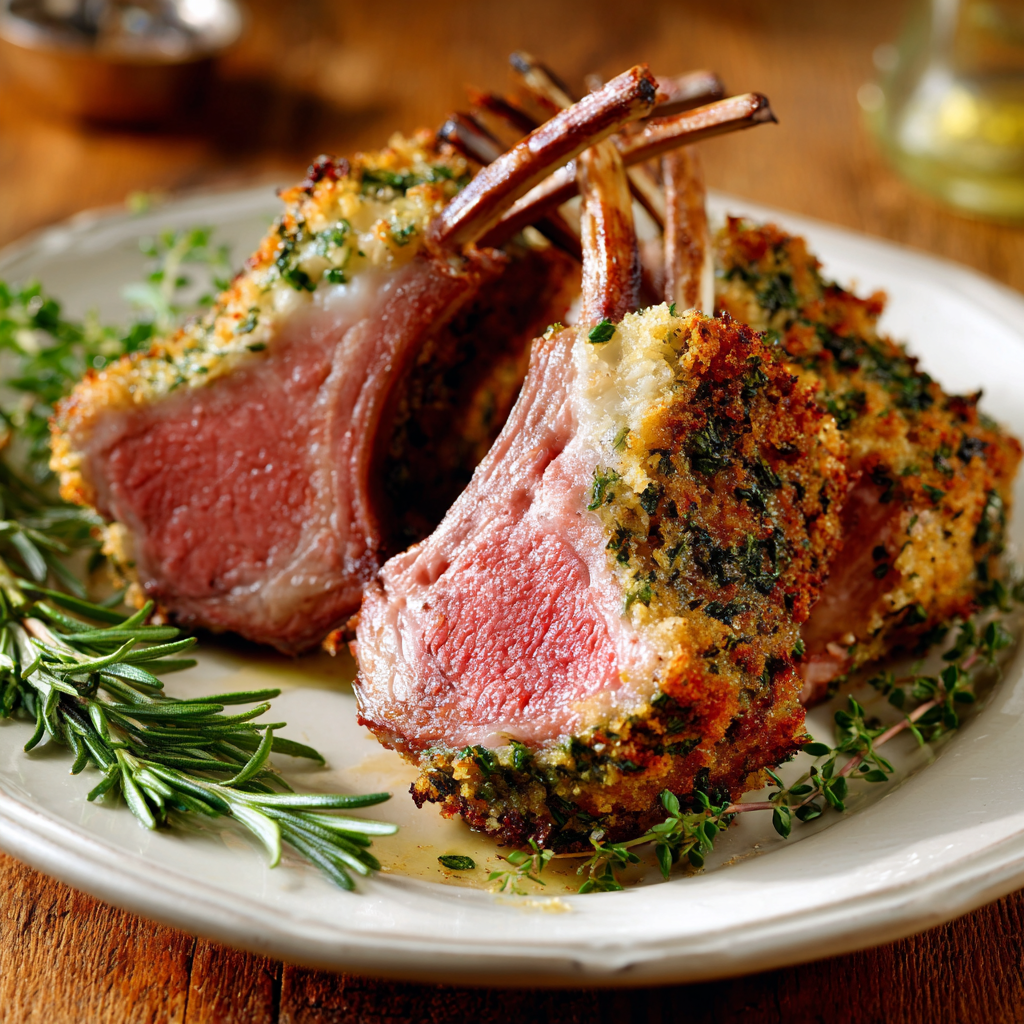
Herb-Crusted Rack of Lamb (Elegant Easter & Holiday Main)
The Herb-Crusted Rack of Lamb That Steals Every Holiday Show
Picture this: the kitchen is buzzing with happy chatter, the oven is humming, and that incredible, savory aroma of garlic and rosemary has everyone drifting in from the living room, asking, “Is it ready yet?” That, my friends, is the magic of a perfectly roasted herb-crusted rack of lamb. It’s the star of the table—the dish that makes an occasion feel special without requiring you to have a culinary degree.
If the thought of cooking lamb feels a little fancy or intimidating, I’m here to tell you to take a deep breath and grab your apron. We’re going to walk through this together, step-by-step. This recipe is my go-to for Easter, intimate dinner parties, or any time I want to turn a regular Sunday into a celebration. It looks absolutely stunning (hello, those elegant, frenched bones!), but the process is surprisingly simple. The secret is in the sear, the flavorful crust, and trusting a simple timer. We’re aiming for tender, juicy, pink-perfect lamb every single time. So, let’s roll up our sleeves, make a little mess, and create something unforgettable. Your table (and your guests) will thank you.
A Lamb Lesson & A Grandmother’s Smile
My love for this dish started in my Nana’s kitchen, though it wasn’t exactly a success story at first. I was about sixteen, determined to impress her by cooking Easter dinner. I chose a rack of lamb from a magazine, feeling very sophisticated. I seared it… a bit too enthusiastically. Let’s just say the smoke alarm became an uninvited guest, and the crust went from “golden” to “decidedly charred.” I was mortified, but Nana just chuckled, opened a window, and said, “Sweetheart, flavor hides a multitude of sins.” She showed me how to gently scrape off the worst of the burnt bits, whip up a quick new herb paste, and roast it anyway.
That lamb, patched up with love and laughter, was still delicious. More than that, it was a lesson I carry with me every time I cook: don’t fear the mistakes, because often, dinner (and joy) is more resilient than we think. Now, whenever the scent of rosemary and garlic hits a hot pan, I think of her. Cooking this dish feels like honoring that spirit—creating something beautiful and sharing it, imperfectly perfect, with the people you love.
Gathering Your Flavor Arsenal
Here’s everything you’ll need to build this masterpiece. I’ve added my little notes and swaps so you can shop and cook with confidence!
- 2 racks of lamb (about 1.5–2 lbs total), frenched: Ask your butcher to “french” the racks—this means cleaning the meat off the ends of the rib bones. It makes for a gorgeous presentation and makes slicing easier. No butcher? Some high-end grocery stores sell them pre-frenched. Chef Insight: Look for racks with a nice, thick layer of fat on top (this is flavor!) and a good amount of meat on the loin.
- 2 tbsp olive oil: Our cooking fat and binder for the crust. A good, robust extra virgin olive oil adds depth.
- 3 garlic cloves, minced: Non-negotiable for that foundational aroma. For a milder flavor, you can grate it instead of mincing.
- 2 tbsp fresh rosemary, finely chopped: Lamb’s best friend! Fresh is key here—dried rosemary can be woody and harsh. If you must sub, use 2 tsp dried, but crush it finely in your palm first.
- 1 tbsp fresh thyme, chopped: Adds an earthy, slightly floral note.
- 1 tbsp fresh parsley, chopped: Brings a fresh, green brightness that balances the richer herbs.
- 1/2 cup breadcrumbs (or panko): Panko gives a lighter, crispier texture, while regular breadcrumbs make a more traditional, tighter crust. Gluten-free? Use your favorite GF panko—it works perfectly.
- 1 tsp Dijon mustard: This is our “glue”! It helps the crust adhere and adds a wonderful tangy background note that cuts through the richness.
- 1 tsp salt & 1/2 tsp black pepper: Seasoning is everything. Don’t be shy with the salt on the meat itself.
- Optional: lemon zest for brightness: A little zest (about 1/2 a lemon’s worth) stirred into the herb mix is my secret weapon. It doesn’t make the dish lemony, just wonderfully vibrant.
Step-by-Step: From Pan to Perfection
Let’s break this down. Follow these steps, and you’ll have a restaurant-quality main dish that’s deceptively easy.
Step 1: Prep & Preheat. Take your lamb out of the fridge about 30 minutes before cooking. This lets it come to room temperature, which is the #1 trick for even cooking. Pat the racks very dry with paper towels—this is crucial for a good sear! While it’s resting, preheat your oven to a hot 400°F (205°C).
Step 2: The Golden Sear. Heat a large, heavy-bottomed skillet (cast iron is my hero here) over medium-high heat. Season the lamb racks generously all over with salt and pepper. Once the pan is hot, place the racks in, fat-side down. You should hear a confident sizzle. Sear for 2-3 minutes until that fat cap is deeply golden and crisp. Don’t move it! Let it develop that beautiful crust. Sear the meaty side for just 1 minute to get some color. Remove from the pan and set aside on a plate. Chef Hack: If there’s a lot of rendered fat in the pan, pour most of it out, but save a tablespoon or two. You can mix it into your herb paste for extra lamb-y flavor!
Step 3: Build That Fragrant Crust. In a medium bowl, combine the olive oil, minced garlic, chopped rosemary, thyme, parsley, breadcrumbs, Dijon mustard, and lemon zest (if using). Mix it well until it looks like a cohesive, fragrant paste. If it seems a bit dry, add another tiny drizzle of olive oil.
Step 4: Crust & Assemble. Brush the top (meaty side, not the bones) of each seared rack with a thin layer of Dijon mustard. This is your edible glue. Then, firmly press the herb-breadcrumb mixture onto the mustard, packing it into an even, generous layer. Don’t be gentle—you want it to stick!
Step 5: The Roast & The Rest. Place the racks, herb-crust side up, on a roasting pan or rimmed baking sheet lined with foil or parchment for easy cleanup. For medium-rare, which is ideal for lamb, roast for 18-22 minutes. The best way to know for sure? Use a meat thermometer! Pull the lamb when the internal temperature reads 130°F (54°C) for medium-rare. Remember: The temperature will rise about 5-10 degrees while resting. Speaking of which… once out of the oven, transfer the racks to a cutting board, tent loosely with foil, and let them rest for a full 10 minutes. This is non-negotiable! It allows the juices to redistribute, ensuring every slice is juicy, not dry.
Step 6: Slice & Serve. Using a very sharp knife, slice between the ribs to create individual chops. Arrange them on a platter, maybe with some fresh herbs for garnish, and prepare for the applause.
Plating Your Masterpiece
Presentation is part of the fun! I love to slice the rack completely and fan the chops out on a large wooden board or a beautiful white platter. Scatter some extra fresh rosemary sprigs, thyme, or even edible flowers around for a pop of color. For a more family-style feel, you can place the whole, unsliced racks on the platter and let someone do the honors at the table—it’s a great little moment. Serve immediately while the crust is crisp and the lamb is warm.
Make It Your Own: Flavor Twists & Swaps
- Mediterranean Twist: Add 2 tbsp of finely chopped sun-dried tomatoes and a pinch of red pepper flakes to the herb paste. Swap parsley for fresh oregano.
- Mustard & Herb Deluxe: Use a mix of whole grain mustard and Dijon for the “glue,” and add 1 tbsp of chopped fresh tarragon to the crust.
- Nutty Crunch: Replace half the breadcrumbs with finely chopped pistachios or walnuts for incredible texture and flavor.
- Spring Herb Garden: Use equal parts fresh mint, parsley, and chives along with the rosemary for a lighter, brighter crust perfect for Easter.
- Garlic Lover’s Dream: Roast a whole head of garlic and squeeze the sweet, soft cloves into the herb paste instead of using raw minced garlic.
Chef’s Notes: Lessons from a Messy Apron
This recipe is my old faithful, but it’s evolved. I used to be terrified of undercooking lamb, which led to… well-done lamb. Not ideal. Investing in a simple digital meat thermometer gave me the confidence to cook it perfectly pink every time. It’s the best $15 you’ll spend for your kitchen confidence.
Another funny thing: I once, in a pre-coffee haze, used Italian-seasoned breadcrumbs. It was… not terrible, but it tasted oddly like lamb meatballs! Stick to plain breadcrumbs or panko so you control the seasoning. Finally, don’t skip the sear. That initial step builds a flavor foundation you just can’t get from the oven alone. Embrace the sizzle!
FAQs & Kitchen Rescue Tips
Q: My herb crust is falling off! What did I do wrong?
A: The most common culprit is not patting the lamb dry before searing, or not using the mustard “glue.” Make sure the meaty side is dry before brushing on the mustard, and really press that crust on firmly. If a little falls off during slicing, just sprinkle it back over the plated chops—no one will know!
Q: Can I prepare this ahead of time?
A> Absolutely! You can sear the lamb and make the herb paste a few hours ahead. Keep them separate in the fridge. Let the lamb sit out for 20-30 minutes before you plan to cook, then apply the crust and roast. Don’t apply the crust hours ahead, as the breadcrumbs can get soggy.
Q: What side dishes do you recommend?
A> This lamb pairs beautifully with creamy, dreamy sides. Think parmesan risotto, whipped goat cheese mashed potatoes, or roasted asparagus with hollandaise. For something lighter, a crisp arugula salad with shaved fennel and a lemon vinaigrette is fantastic.
Q: I don’t have a meat thermometer. How do I know it’s done?
A> The “touch test” can help: press the center of the meaty part gently. For medium-rare, it should feel like the fleshy part of your palm when you touch your thumb and middle finger together. But honestly, for a special cut like this, a thermometer is your best friend for guaranteed results.
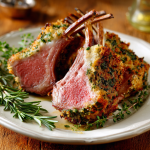
Herb-Crusted Rack of Lamb (Elegant Easter & Holiday Main)
Description
A show-stopping centerpiece that’s tender, juicy, and full of flavor! Perfect for Easter, holidays, or any dinner you want to feel special.
Ingredients
-
2 racks of lamb (1.5–2 lbs total), frenched
-
2 tbsp olive oil
-
3 garlic cloves, minced
-
2 tbsp fresh rosemary, finely chopped
-
1 tbsp fresh thyme, chopped
-
1 tbsp fresh parsley, chopped
-
½ cup breadcrumbs (or panko)
-
1 tsp Dijon mustard
-
1 tsp salt
-
½ tsp black pepper
-
Optional: ½ tsp lemon zest
Instructions
-
Prep & Preheat
-
Remove lamb from fridge 30 min before cooking.
-
Pat dry with paper towels.
-
Preheat oven to 400°F (205°C).
-
-
Sear the Lamb
-
Heat a heavy skillet over medium-high.
-
Season lamb with salt & pepper.
-
Place fat-side down in skillet; sear 2–3 min until golden.
-
Sear meaty side 1 min. Remove and set aside.
-
-
Make Herb Crust
-
Combine olive oil, garlic, rosemary, thyme, parsley, breadcrumbs, Dijon mustard, and lemon zest (if using) into a paste.
-
-
Apply Crust
-
Brush seared lamb with mustard.
-
Press herb-breadcrumb mixture evenly on top.
-
-
Roast & Rest
-
Place lamb on a roasting pan, crust-side up.
-
Roast 18–22 min for medium-rare (130°F/54°C internal).
-
Tent with foil and rest 10 min.
-
-
Slice & Serve
-
Slice between ribs into individual chops.
-
Arrange on a platter and garnish with fresh herbs.
-
Notes
-
Pat lamb dry for a crispy crust.
-
Press the crust firmly; mustard acts as glue.
-
Meat thermometer = best friend for perfect doneness.
-
Can prep herb paste and sear lamb ahead; apply crust just before roasting.
Serving Suggestions
-
Parmesan risotto or whipped goat cheese mashed potatoes.
-
Roasted asparagus, hollandaise, or a crisp arugula salad with lemon vinaigrette.
Nutritional Information*
Prep Time: 20 minutes | Cook Time: 20 minutes | Total Time: 50 minutes (including rest) | Servings: 4
*Estimated per serving: Calories: ~520 kcal | Protein: ~34g | Fat: ~40g | Carbohydrates: ~6g
Note: Nutritional information is an estimate based on the ingredients listed and can vary based on specific products used.
Final Thoughts
And there it is—your rack of lamb, glorious and golden, resting on a cutting board while the kitchen settles into that satisfied hush that follows a job well done. The crust is fragrant with rosemary and garlic, the bones are elegantly clean, and somewhere in the distance, your guests are pulling corks and setting out plates. This moment? This is what we cook for.
I think about that sixteen-year-old version of myself, standing in my Nana’s smoke-filled kitchen, convinced I’d ruined Easter. The lamb was too dark, the smoke alarm was still beeping apologetically, and I was this close to bursting into tears. But Nana didn’t panic. She didn’t scold. She just reached for a knife, scraped away the char, and said something I’ve never forgotten: “The only ruined dinner is the one nobody shares.”
That lamb was served. It was eaten. It was loved—not because it was perfect, but because it was made with intention, rescued with grace, and placed on a table surrounded by people who didn’t care about a slightly overzealous sear. They cared that we were together.
So here’s what I want you to take away from this recipe, beyond the temperatures and timing, beyond the herb ratios and the crucial importance of resting: You are more than capable of this.
I know lamb can feel like a “special occasion” ingredient, the kind of thing you order at restaurants but hesitate to attempt at home. It carries this aura of formality, of needing permission. But here’s the truth: a rack of lamb is just a beautiful cut of meat. It wants the same things a good steak wants—high heat, bold seasoning, and someone paying attention. It doesn’t require a culinary degree or a fancy French upbringing. It requires confidence, which you now have, and maybe a meat thermometer, which I hope you’ll finally buy yourself.
And if something goes sideways? If the crust slips or the lamb comes out more medium than medium-rare? So what. Flavor hides a multitude of sins. A little extra rosemary never hurt anyone. And honestly? Your guests aren’t sitting there with a doneness chart; they’re sitting there grateful, hungry, and charmed by the fact that you cooked for them at all.
This dish has a way of making people feel celebrated. There’s something about those elegantly frenched bones, that fragrant, crackling crust, that rosy-pink interior that says, Tonight is special. You are special. And the beautiful, secret irony is that you didn’t have to spend all day in the kitchen to create that feeling. You seared, you crusted, you roasted, you rested. Forty-five minutes, start to finish. And now here you are, the person who made the thing everyone’s photographing.
So go ahead. Carry that platter to the table. Let the “oohs” and “ahhs” wash over you. Watch someone take that first bite and close their eyes involuntarily—that’s the good stuff, the culinary equivalent of a deep sigh. Pour the wine, pass the mint sauce, soak up the warmth of a table full of people you love.
This is the meal you’ll make for anniversaries and Easters, for New Year’s Eve and for no reason at all except that Tuesday felt like it needed a little elevation. This is the recipe your friends will text you about afterward: “Okay, I need that lamb recipe. Immediately.” This is the dish that, years from now, someone will request when they come home for the holidays.
And when they do, you’ll think of this moment. The warmth of the oven. The scent of rosemary still clinging to your sweater. The satisfying heft of a well-seasoned cast iron pan. Maybe even a little smoke alarm that didn’t go off this time.
Because you practiced. Because you trusted yourself. Because you showed up.
Now go make something unforgettable.




