
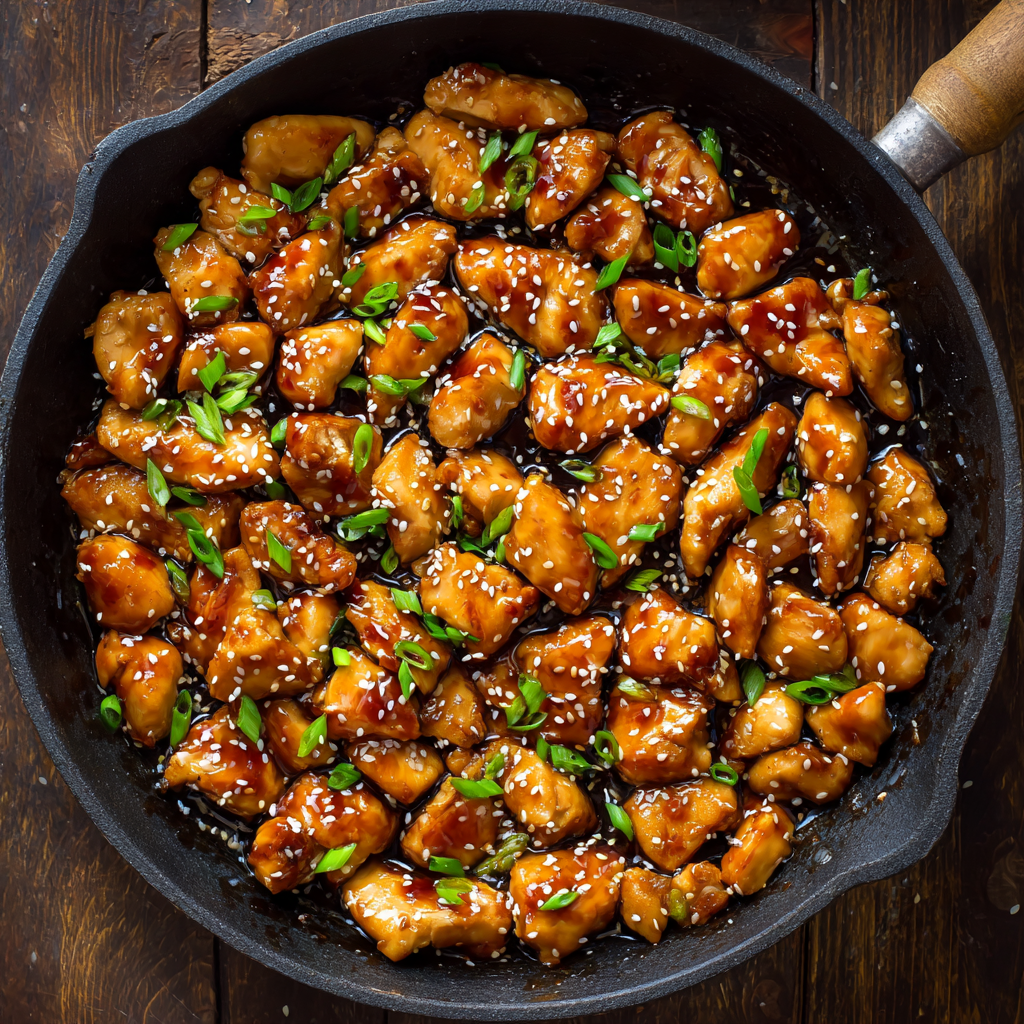
3-Ingredient Teriyaki Chicken
Why 3-Ingredient Teriyaki Chicken Is My Weeknight Hero
Hey there, kitchen friends! Olivia here, apron slightly flour-dusted and heart full of excitement because today? We’re talking about pure weeknight magic. You know those evenings when time evaporates, hunger growls like a bear, and the siren call of takeout feels impossible to ignore? I’ve been there more times than I can count—probably balancing a toddler on one hip while frantically scanning the fridge. That’s exactly why this 3-Ingredient Teriyaki Chicken has become my forever MVP. Seriously, just soy sauce, brown sugar, and chicken thighs transform into a glossy, sticky-sweet masterpiece that tastes like you spent hours, not minutes. It’s the culinary equivalent of a cozy hug!
What I adore about this recipe (besides its sheer laziness-friendly genius) is how it proves that big flavor doesn’t need complexity. No fancy techniques, no obscure pantry items—just honest, bold ingredients doing a flavor tango in your skillet. It’s the kind of dish that makes you feel like a rockstar when you slide it onto the table, watching eyes light up as that caramelized sauce glistens. Whether you’re a new cook finding your confidence or a seasoned pro craving simplicity, this teriyaki is your ticket to easy wins. So grab your favorite skillet, and let’s turn “I have nothing to cook” into “Wow, I MADE this?!” 🍗✨
The Midnight Snack That Started It All
Picture this: It’s 2 a.m. during my college years. My roommate Jess and I are ravenous after cramming for finals, but our wallets are as empty as our energy reserves. We raid our tiny shared kitchen—just a pack of chicken thighs, a half-empty soy sauce bottle, and some sad brown sugar crystals clinging to the bag. Desperation (and hunger) breeds creativity. We cubed the chicken, dumped everything into a rusty pan, and crossed our fingers. Twenty minutes later? Pure alchemy. That haphazard, sticky-sweet chicken over instant rice felt like a Michelin-star feast in our dimly lit dorm. We called it “Broke Student Teriyaki” and swore it was our secret weapon.
Years later, when my now-husband Dan was wooing me, he recreated that exact dish on our third date—complete with a dramatic retelling of Jess’s sauce-stained textbook. That messy, sweet moment sealed the deal. Now, every time I make this teriyaki, it’s a delicious reminder that the best memories often simmer in the simplest pots. Food isn’t just fuel; it’s time travel with flavor.
Your Tiny-but-Mighty Ingredient Squad
Here’s the beautiful part: only three core ingredients stand between you and teriyaki bliss. But let’s chat about why each one matters and how to finesse them!
- 2 lbs boneless, skinless chicken thighs, cubed → Why thighs? They’re juicier and more forgiving than breasts, staying tender even if you overcook them slightly. Chef hack: Pat them SUPER dry before cubing—this helps the sauce cling and caramelize. Sub with chicken breasts if you prefer (reduce cook time by 3-5 mins), or tofu for veggie pals!
- 1 cup soy sauce → This is your flavor backbone! Insider tip: Use regular soy sauce (not low-sodium) for balanced depth. Tamari is a stellar gluten-free swap. Feeling fancy? Substitute ¼ cup with coconut aminos for a hint of sweetness.
- ½ cup packed brown sugar → The magic glaze-maker! Why packed? It ensures the right syrupy consistency. Dark brown sugar adds molasses richness, but light works too. Honey or maple syrup? Yes—but reduce to ⅓ cup as they’re sweeter. Pro move: Add 1 tsp grated ginger to the sugar for a zingy twist!
Wait, Olivia—what about oil or thickeners? Nope! The chicken renders its own fat, and the sugar reduces into that iconic sticky glaze. Trust the process!
Let’s Make Magic Happen: Step-by-Step
Ready? Channel your inner weeknight wizard—this is easier than folding laundry (and way more rewarding).
- Marinate Like a Boss: In a large bowl, combine soy sauce and brown sugar. Stir vigorously for 1-2 minutes until the sugar mostly dissolves (a few granules are fine—they’ll melt while cooking). Chef hack: Warm the soy sauce for 10 seconds in the microwave first to speed up dissolving! Add your cubed chicken thighs and toss until every piece is happily coated. Cover and let it marinate at room temp for 30 minutes (or refrigerate overnight for deeper flavor penetration). Why room temp? It helps the chicken cook evenly later!
- Skillet Sizzle Time: Grab a large, heavy-bottomed skillet or non-stick pan. No need for oil—just dump in the chicken AND all the marinade. Safety note: Yes, we’re using the marinade—it boils! Turn heat to medium. Once it starts bubbling, set a timer for 15 minutes. Stir occasionally, letting the sauce reduce and bubble like a savory volcano.
- Glaze Glory: Around the 10-minute mark, you’ll see the magic—the sauce thickens into a shiny, lacquered glaze. Keep stirring! At 15 minutes, check chicken doneness (internal temp 165°F or no pink inside). If the sauce isn’t sticky enough, crank heat to medium-high for 1-2 mins, stirring constantly. Watch it like a hawk—sugar burns fast! Done? Remove from heat immediately. The glaze will keep thickening as it cools.
Hot tip: For extra caramelization, spread chicken in a single layer after 10 mins and let it sear undisturbed for 1-2 minutes per side. Hello, crispy edges!
Why This Recipe Works for Every Skill Level
One of the most beautiful things about this 3-ingredient teriyaki chicken is its universal appeal—whether you’re a kitchen newbie or a seasoned cook. For beginners, it’s a confidence-builder. There’s no intimidating knife work (just cubing chicken thighs), no finicky techniques, and no risk of overcomplicating things. The recipe is forgiving: even if you overcook the chicken slightly, the thighs’ higher fat content keeps them tender, and the sauce’s sweetness masks minor mistakes. It’s the kind of dish that makes you think, “Hey, I can actually cook!”
For intermediate cooks, this recipe is a canvas for creativity. Once you’ve mastered the base, you can riff on it endlessly—add garlic, ginger, or a splash of mirin for complexity. The simplicity of the original formula also teaches foundational skills: how to reduce a sauce properly, how to balance sweet and salty flavors, and how to build depth with minimal ingredients. It’s a reminder that great cooking doesn’t require 20 spices or sous-vide gadgets.
Advanced cooks? They’ll appreciate the efficiency. On busy nights, even culinary pros don’t want to fuss. This dish is a study in minimalism, proving that restraint can yield bold results. It’s also a great template for experimenting with umami boosters—like a dash of fish sauce or a sprinkle of bonito flakes—without losing the soul of the dish.
And let’s talk about time. The active cook time is just 15 minutes, with minimal prep. Unlike elaborate recipes that dirty every bowl in your kitchen, this one uses a single skillet. For parents, students, or anyone juggling a hectic schedule, that’s a game-changer. The short marinating window (or even skipping it in a pinch) means you can go from “I’m starving” to “Dinner’s ready” faster than delivery could arrive.
Lastly, the recipe scales effortlessly. Need to feed a crowd? Double or triple the ingredients without adjusting technique. Meal prepping? It reheats like a dream. The versatility extends to dietary needs, too—swap soy sauce for tamari (gluten-free) or coconut aminos (soy-free), and the dish still shines. In a world of complicated recipes and niche ingredients, this teriyaki chicken is a democratic delight—no elitism, just good food.
The Science Behind the Simplicity
At first glance, three ingredients seem too basic to create something extraordinary. But there’s serious culinary science at work here. Let’s break it down:
1. The Maillard Reaction + Caramelization
When the chicken hits the hot pan, the proteins and sugars in the marinade undergo the Maillard reaction—the same chemical process that gives seared steaks and toasted bread their depth. The brown sugar’s molasses content accelerates this, creating complex, savory-sweet notes. As the sauce reduces, the sugar caramelizes, thickening into that glossy glaze we love.
2. Soy Sauce’s Umami Power
Soy sauce is a umami bomb, packed with glutamates that enhance savoriness. When reduced, it intensifies, balancing the sugar’s sweetness. Fun fact: The fermentation process in soy sauce breaks down proteins into amino acids, which react with heat to create even more flavor. That’s why the sauce tastes richer after simmering!
3. Chicken Thighs’ Fat Content
Unlike lean breasts, thighs have more collagen and fat, which melt during cooking. This keeps the meat juicy and adds body to the sauce. The fat also carries flavor, ensuring every bite is infused with teriyaki goodness.
4. The Magic of Reduction
Reducing the marinade does two things: It concentrates flavors (evaporating water leaves behind a thicker, more potent sauce) and ensures food safety (boiling kills any bacteria from the raw chicken). The sugar’s hygroscopic nature (it attracts water) helps the sauce cling to the chicken, creating that irresistible sticky coating.
Why Room-Temp Marinating Works
Marinating at room temp for 30 minutes lets the soy sauce’s salt penetrate the chicken slightly, seasoning it from within. Cold marinades slow this process—overnight fridge marinating is great, but room temp delivers 80% of the flavor in a fraction of the time.
Pro Tip: Acid’s Role (or Lack Thereof)
Traditional teriyaki might include vinegar or mirin for brightness, but this recipe skips it. Why? The sugar’s caramelization and soy’s saltiness create balance without acidity. Adding ginger or pineapple (in the riffs) reintroduces a hint of tang, but the base recipe proves it’s not essential.
Understanding these principles empowers you to tweak the recipe intelligently—like knowing that adding honey (which burns faster than sugar) means lowering the heat. Or that overcrowding the pan steams the chicken instead of searing it. Science isn’t just for lab coats; it’s for weeknight warriors too!
The Emotional Resonance of a Simple Dish
Food is never just about sustenance—it’s a tapestry of memories, comfort, and identity. This teriyaki chicken, for all its simplicity, carries emotional weight. For me, it’s a time machine to college dorm rooms and early dates with Dan. For others, it might become the “signature dish” their kids request after soccer practice or the meal they associate with solo nights of self-care.
There’s something profoundly reassuring about a recipe that never fails you. In a world of constant change, knowing you can whip up a satisfying dinner with pantry staples is a small but powerful anchor. It’s the culinary equivalent of your favorite sweatpants—unpretentious, reliable, and deeply comforting.
This dish also embodies hospitality. I’ve served it to last-minute guests with steamed rice and a bagged salad, and it always feels like I’ve put in more effort than I did. Food doesn’t need to be elaborate to convey care; sometimes, the humblest meals are the most generous.
And let’s talk about pride. There’s a quiet joy in mastering a recipe so simple yet so impressive. When my son declared it “fancy chicken,” it reminded me that wonder lives in the ordinary. Kids don’t care about Michelin stars—they care about flavor and the love behind the meal.
Finally, this recipe is a testament to resourcefulness. Born from dorm-room desperation, it’s a reminder that constraints breed creativity. Whether you’re cooking on a budget, with limited time, or for picky eaters, this teriyaki chicken meets you where you are. In a culture obsessed with “more” (more ingredients, more steps, more gear), it’s a celebration of enough.
Plate It Pretty (Or Just Dive In!)
This teriyaki chicken is a social butterfly—it plays well with everything! For a classic vibe, pile it over fluffy jasmine rice (the sauce soaks in gloriously). Craving crunch? Serve with stir-fried broccoli or snap peas. Noodle lovers, toss it with udon or soba for a slurp-worthy bowl. Garnish with sesame seeds or sliced green onions for a pop of color and nutty freshness. My favorite way? Stuff it into lettuce cups with shredded carrots—low-carb, high-deliciousness! 🥬✨
Shake It Up: 5 Tasty Twists
Love the base? Try these riffs to keep things exciting:
- Spicy Kick: Add 1-2 tsp sriracha or red pepper flakes to the marinade.
- Pineapple Sunshine: Stir in ½ cup fresh pineapple chunks during the last 5 minutes of cooking.
- Garlic-Ginger Boost: Sauté 1 tbsp minced garlic + 1 tsp grated ginger in the skillet before adding chicken.
- Honey-Lime: Swap brown sugar for ⅓ cup honey + zest of 1 lime.
- Teriyaki Bowls: Layer chicken with avocado, edamame, cucumber, and pickled ginger!
Olivia’s Extra Nuggets of Wisdom
Over the years, this recipe has seen it all—including the time I accidentally used powdered sugar instead of brown sugar (don’t ask, it was a pantry emergency). The result? A weirdly sweet paste. Lesson learned! Now, I always double-check labels before marinating. Another evolution: I often double the batch for meal prep. It reheats beautifully! Just add a splash of water when microwaving to revive the glaze. Store leftovers in an airtight container for up to 4 days, or freeze for 3 months. Funny story: My 5-year-old now calls this “Mom’s Fancy Chicken” and insists we eat it with chopsticks. If only he knew how un-fancy it really is! 😂
Your Teriyaki Questions, Answered!
Q: Can I use chicken breasts instead?
A: Absolutely! Cube them smaller (1-inch pieces) and reduce cook time to 12-15 mins. They cook faster but can dry out, so don’t skip the marinade!
Q: Why won’t my sauce thicken?
A: Two culprits: 1) Heat’s too low—sauce needs a steady simmer. 2) Crowded pan—if chicken releases too much liquid, remove pieces with a slotted spoon and reduce sauce alone for 3-4 mins. Pro tip: A cornstarch slurry (1 tsp cornstarch + 1 tbsp water) can rescue thin sauce—add it in the last 2 mins!
Q: Is marinating essential?
A> Short answer: No, but YES for flavor! 30 mins adds sweetness; overnight infuses savory depth. If you’re in a rush, just cook it—it’ll still taste great.
Q: Can I bake this instead?
A: Sure! Spread marinated chicken on a parchment-lined sheet pan. Bake at 400°F for 20 mins, stirring halfway. Broil 2 mins for caramelization. Sauce won’t be as thick—simmer it separately on the stove.
3-Ingredient Teriyaki Chicken
- Total Time: 30 min
Description
What started as a late-night college experiment turned into a go-to dinner with a love story twist. This dish reminds me that some of the best meals come from the humblest beginnings—and now it’s a dinnertime regular in our home. Juicy chicken, a sweet-salty glaze, and only one pan? It’s weeknight gold.
Ingredients
-
2 lbs boneless, skinless chicken thighs, cubed
-
1 cup soy sauce (regular or tamari for gluten-free)
-
½ cup packed brown sugar (light or dark)
Instructions
-
Mix: Stir soy sauce and brown sugar in a bowl until mostly dissolved. Add cubed chicken, toss to coat, and marinate 30 mins (room temp) or overnight (fridge).
-
Cook: Pour chicken and marinade into a large skillet. Bring to a simmer over medium heat.
-
Simmer & Glaze: Cook 15 mins, stirring occasionally. Sauce will thicken. For stickier glaze, raise heat in the last 2 mins, stirring constantly.
-
Finish: Remove from heat once sauce is glossy and chicken is fully cooked (165°F). Let rest 5 mins—it thickens more as it cools.
Notes
-
Pat chicken dry for better caramelization.
-
Sauce not thickening? Simmer uncovered, or add a cornstarch slurry.
-
Chicken breasts work too—just reduce cook time slightly.
- Prep Time: 5 min
- Cook Time: 15 min
Nutrition
- Calories: 300 per serving
- Fat: 10g
- Carbohydrates: 15g
- Protein: 35g
Nutritional Snapshot (Per Serving)
Calories: ~300 | Protein: ~35g | Carbs: ~15g | Fat: ~10g
Note: Values are estimates. Using low-sodium soy sauce reduces sodium by ~30%.
Final Thoughts
This 3-ingredient teriyaki chicken isn’t just a recipe—it’s a philosophy. It’s proof that great cooking doesn’t require complexity, that joy can simmer in a single skillet, and that the best meals are often the ones that leave you with time to savor life beyond the kitchen.
Whether you’re cooking for one, feeding a family, or meal-prepping for the week, this dish meets the moment. It’s adaptable enough for creativity but reliable enough for chaos. It’s food that nourishes both body and soul, without demanding perfection.
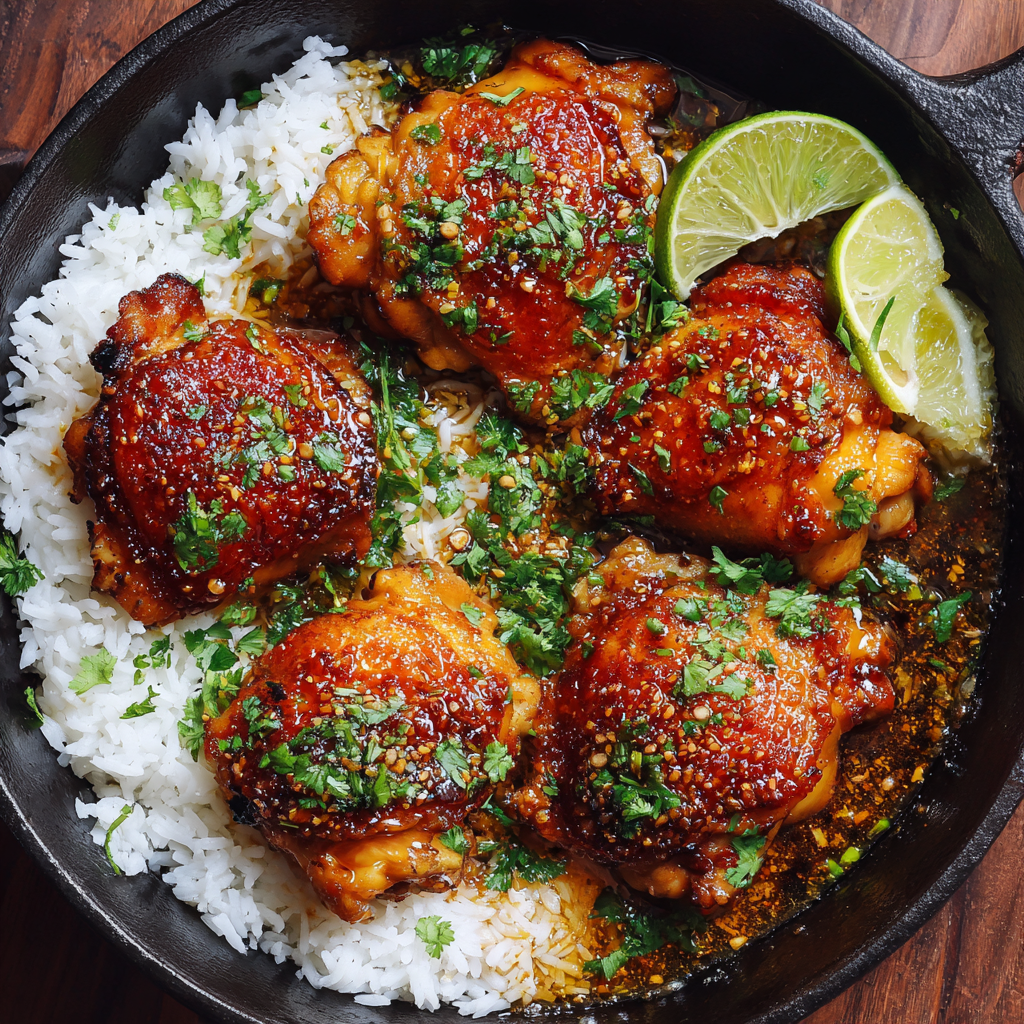
30- Minutes Thai Sticky Chicken Thighs
Welcome to My Flavor Adventure: Thai Sticky Chicken Thighs!
Hey there, kitchen friend! Olivia Bennett here, apron slightly splattered with today’s experiment. If your heart races at the sizzle of chicken hitting a hot pan or your mouth waters just *thinking* about sweet-spicy glaze, you’ve landed in the right corner of the internet. Today, we’re diving into a crowd-pleasing masterpiece: Thai Sticky Chicken Thighs. Imagine tender, juicy chicken thighs swimming in a glossy, lip-tingling sauce that’s equal parts sweet, tangy, and spicy—finished with a confetti of fresh cilantro. It’s the kind of dish that turns Wednesday dinners into mini-celebrations and makes guests beg for your secret. Best part? You don’t need chef-level skills. Just a skillet, a few pantry staples, and that gorgeous appetite of yours. Let’s create some saucy magic together!
This recipe serves 8 (perfect for gatherings!), but guess what? Leftovers taste even better tomorrow. I’ll walk you through every step, spill my favorite kitchen hacks, and share why this dish has a permanent spot in my “emergency wow-factor meals” roster. Ready to make your kitchen smell like a Bangkok street food stall? Let’s go!
Why This Dish Tastes Like a Hug
Picture this: It’s my best friend’s potluck wedding shower, and I’m frantically juggling three dishes in my tiny apartment kitchen. My original plan? Fancy canapés. Reality? A near-cooking disaster. With 45 minutes left, I spotted bone-in chicken thighs and a motley crew of Asian condiments. In a “what’s the worst that could happen?” moment, I whisked them together, seared the chicken like my life depended on it, and let it bubble into sticky glory. The result? A scratched serving dish licked clean by 20 guests, two recipe requests from strangers, and a lesson: sometimes, the best memories (and meals!) come from happy accidents. Now, this dish is my go-to for birthdays, breakups, or “just because” nights. It’s saucy therapy in a bowl!
Gather Your Flavor Squad
For the Sauce:
- 1 cup Sweet Thai Chili Sauce: The sweet backbone! Look for brands without high-fructose corn syrup. Swap tip: If you’re out, mix ¾ cup apricot jam + 1 tbsp rice vinegar + ½ tsp red pepper flakes.
- 4 tbsp Soy Sauce: Salty depth. Chef insight: Use low-sodium if you’re sensitive—we’ll balance flavor later!
- 4 tbsp Rice Vinegar: Bright tang. Swap tip: Apple cider vinegar works too—just add ½ tsp extra honey.
- 2 tbsp Honey: Sticky caramelization magic. Vegan? Maple syrup is your friend.
- 1 tbsp Fresh Ginger, minced: Warm zing. Chef hack: Freeze ginger knobs and grate them frozen—no peeling!
- 1 tbsp Sriracha: Adjustable heat! Start with 1 tsp if you’re spice-shy.
- 2 tsp Lemongrass Paste: Citrusy aroma. Swap tip: 1 stalk fresh lemongrass (bruised) simmered in sauce, then removed.
- Juice of 1 Lime: Freshness booster. Chef must: Roll limes on the counter before juicing—you’ll get double!
- 2 Large Garlic Cloves, minced: Savory punch. Insight: Pressing garlic releases more oil than mincing—use a garlic press for intense flavor.
For the Chicken:
- 8 Bone-in, Skin-on Chicken Thighs: Skin = crispy heaven! Swap tip: Boneless thighs work (cook 5 mins less), but bones add richness.
- 2 tbsp Coconut Oil: Tropical searing power. Swap tip: Avocado or canola oil works, but coconut adds subtle sweetness.
- Salt & Pepper, to taste: Season like you mean it!
- Chopped Cilantro, for garnish: Color and freshness. Hate cilantro? Thai basil or mint!
Let’s Cook: Saucy, Sticky Perfection in 4 Steps
- Make the Sauce: Grab a medium bowl and whisk EVERY sauce ingredient together. Taste it! Chef hack: Dip a spoon—if it’s too sweet? Add vinegar. Too tangy? Honey to the rescue. Set this liquid gold aside. Time-saver: Make this 2 days ahead—it marries flavors beautifully!
- Brown the Chicken: Heat coconut oil in a large skillet or Dutch oven over medium-high. Pat thighs dry with paper towels (golden rule: dry chicken = crispy skin!). Season with salt and pepper. Place skin-side down—don’t crowd! Sear 5–6 mins until skin is GBD (golden brown delicious). Flip and cook 2–3 mins more. Chef tip: Render fat slowly—if skin sticks, it’s not ready to flip!
- Simmer in Sauce: Reduce heat to medium-low. Pour sauce over chicken—it should sizzle excitedly! Cover and simmer 20–25 mins, flipping halfway. Uncover and cook 5–10 mins more until sauce clings to the spoon. Watch closely: Uncovered simmer thickens glaze. Stir gently to avoid tearing skin!
- Garnish & Serve: Kill the heat. Sprinkle cilantro over the sticky beauties. Pro move: Let chicken rest 5 mins—sauce thickens further!
How to Serve & Shine
Slide those thighs onto a platter and drizzle extra glaze from the pan—people fight for it! Pair with jasmine rice (it soaks up sauce like a dream) or rice noodles. Add quick-pickled cucumbers (sliced cukes + rice vinegar + salt, 10 mins) for crunch. For color, scatter extra cilantro and lime wedges. Family-style is best—plonk the skillet right on the table and watch hands reach in!
The Science of Sticky: Why This Recipe Works
Let’s geek out on the culinary magic behind this dish! Every element—from the sear to the glaze—has a delicious purpose.
1. The Maillard Reaction x Caramelization:
When chicken skin hits the hot coconut oil (smoke point: 350°F), the Maillard reaction creates hundreds of new flavor compounds. That golden crust isn’t just pretty—it’s packed with umami. Meanwhile, the honey and chili sauce’s sugars caramelize into complex notes. Pro tip: Acid (rice vinegar + lime) prevents the glaze from becoming cloying by breaking down sweetness.
2. Collagen Breakdown = Silky Texture:
Bone-in thighs are rich in collagen, which melts into gelatin during simmering. This gives the sauce its luxurious mouthfeel. Boneless thighs lack this magic—hence the shorter cook time!
3. Flavor Layering:
-
Sweet (chili sauce/honey): Balances heat and triggers dopamine.
-
Umami (soy sauce/garlic): Deepens savoriness via glutamates.
-
Heat (sriracha): Capsaicin literally makes your brain happy.
-
Brightness (lime/ginger): Cuts through richness with citral and zingerone compounds.
4. Sticky Sauce Physics:
Reducing the sauce uncovered allows water to evaporate, concentrating sugars. The honey’s fructose (a monosaccharide) thickens faster than table sugar, giving that glossy cling. For extra stickiness, the sauce’s pH (thanks to vinegar) affects how pectin in the chili sauce sets.
Pro Hack: For next-level crispiness, salt thighs 1 hour ahead and refrigerate uncovered. This dry-brine draws out moisture, yielding crackling skin.
Global Twists: Thai Sticky Chicken Around the World
This recipe is a passport! Try these international riffs:
1. Korean Fire Chicken (Buldak Style)
Swap the sauce for:
-
½ cup gochujang
-
¼ cup mirin
-
2 tbsp honey
-
1 tbsp grated pear (tenderizes!)
Top with melted mozzarella and sesame seeds. Serve with tteokbokki (rice cakes).
2. Caribbean Sunshine
-
Replace soy sauce with 3 tbsp tamarind paste
-
Add 1 scotch bonnet pepper (seeded!)
-
Simmer with 1 cup fresh mango chunks
Garnish with toasted coconut.
3. Middle Eastern Za’atar Twist
-
Skip sriracha; add 2 tbsp za’atar to sauce
-
Use pomegranate molasses instead of honey
-
Finish with pistachios and pomegranate arils
4. Italian-Inspired
-
Substitute balsamic glaze for rice vinegar
-
Add 1 tbsp chopped rosemary
-
Serve over polenta with blistered tomatoes
5. Japanese Teriyaki Hybrid
-
Use mirin instead of rice vinegar
-
Add 1 tsp grated ginger
-
Glaze with 1 tbsp toasted sesame oil at the end
Ingredient Spotlight: Lemongrass
Contains citral (also found in lemon myrtle), which has anti-inflammatory properties. Bruising the stalk (or using paste) releases its essential oils for maximum aroma!
Reader Success Stories & Creative Adaptations
This recipe has sparked kitchen adventures worldwide! Here are my favorite reader twists:
1. The “Clean-Out-the-Fridge” Version
Submitted by Diego, Mexico City:
“No chili sauce? I used chipotle peppers in adobo + orange marmalade. Topped with crushed chicharrónes—¡increíble!“
2. The 10-Minute Air Fryer Hack
From nurse practitioner Leah:
“Air fry chicken at 380°F for 12 mins, glaze, then 3 more mins. Crispy in half the time!”
3. The Vegan Showstopper
Food blogger Priya’s take:
“Used king oyster mushrooms ‘scallops’—seared and glazed. Served with black rice for drama!”
4. The Paleo Power Bowl
CrossFit coach Jake’s riff:
“Subbed coconut aminos for soy sauce, served over roasted kabocha squash. Meal prep MVP!”
5. The Spicy Surprise
Texan firefighter Carlos’s secret:
“Added a shot of cold brew coffee to the glaze. Sounds weird, but the bitterness plays nice with sweet heat!”
Your Turn!
Tag #OliviasStickyChicken on Instagram. Each month, I feature one reader’s creation in my newsletter—winner gets a custom spice blend!
Mix It Up: 5 Tasty Twists
- Pineapple Punch: Add 1 cup fresh pineapple chunks with the sauce—caramelizes into jammy goodness.
- Keto-Friendly: Swap honey for 1 tbsp monk fruit sweetener + extra lime. Serve with cauliflower rice.
- Extra Creamy: Stir ¼ cup coconut milk into sauce for luscious texture.
- Firecracker Shrimp: Use jumbo shrimp instead! Sear 2 mins/side, simmer in sauce 5 mins.
- Garden Power: Toss bell peppers and snap peas into the skillet last 5 mins of cooking.
Olivia’s Behind-the-Scenes Scoop
This recipe evolved from my “panic potluck” moment (see story above!). Originally, I used bottled teriyaki—but after testing 27 batches (my dog now flees at chili sauce smells), the homemade combo sings. Funny fail: Once, I subbed fish sauce for soy sauce. DO NOT TRY THIS. My kitchen smelled like low tide for days! Now, I double the sauce—it’s killer on grilled tofu or roasted veggies. Last tip: If your glaze isn’t sticky enough, mix 1 tsp cornstarch with 1 tbsp water, stir in, and simmer 2 mins extra. You’ve got this!
Your Questions, Answered!
Q: Can I use chicken breasts?
A: You can, but thighs are juicier! If using breasts, sear 4 mins/side, then simmer covered 15 mins. Check temp early—they dry out faster.
Q: Sauce too thin? Help!
A: Uncover and simmer longer—sauce thickens as water evaporates. If rushed, use the cornstarch hack above. Also, ensure you’re using bone-in thighs—they release collagen that thickens naturally!
Q: Can I make this ahead?
A: Absolutely! Cook fully, cool, and refrigerate up to 3 days. Reheat gently on the stove with a splash of water. Freezes beautifully (sauce and all) for 2 months.
Q: Skin turned soggy. What went wrong?
A: Two culprits: overcrowding the pan (steam softens skin) or flipping too early. Pat chicken dry, leave space, and wait for that crispy “release” from the pan!

30- Minutes Thai Sticky Chicken Thighs
- Total Time: 40 mins
Description
Hey there, kitchen friend! Olivia Bennett here, apron slightly splattered with today’s experiment. If your heart races at the sizzle of chicken hitting a hot pan or your mouth waters just thinking about sweet-spicy glaze, you’re in the right spot. Today we’re making Thai Sticky Chicken Thighs — juicy, tender chicken swimming in a glossy, lip-tingling sauce that’s sweet, tangy, and spicy all at once, finished with a sprinkle of fresh cilantro. Perfect for weeknights or celebrations, and zero fancy skills needed!
Ingredients
For the Sauce:
-
1 cup sweet Thai chili sauce (choose one without high-fructose corn syrup)
-
4 tbsp soy sauce (low-sodium if preferred)
-
4 tbsp rice vinegar (or apple cider vinegar + ½ tsp honey)
-
2 tbsp honey (maple syrup for vegan)
-
1 tbsp fresh ginger, minced (try grating frozen ginger)
-
1 tbsp sriracha (start with 1 tsp if spice-shy)
-
2 tsp lemongrass paste (or bruised stalk simmered then removed)
-
Juice of 1 lime (roll it first for max juice!)
-
2 large garlic cloves, minced (use a garlic press for more flavor)
For the Chicken:
-
8 bone-in, skin-on chicken thighs (skin = crispy magic!)
-
2 tbsp coconut oil (avocado or canola oil work too)
-
Salt & pepper, to taste
-
Chopped cilantro, for garnish (or Thai basil/mint if you prefer)
Instructions
In a medium bowl, whisk all sauce ingredients together. Taste and adjust — too sweet? Add more vinegar. Too tangy? Honey it up. Set aside or make up to 2 days ahead.
Heat coconut oil in a large skillet or Dutch oven over medium-high heat. Pat chicken dry (dry skin crisps best!). Season with salt and pepper. Place skin-side down without crowding. Sear 5–6 minutes until golden and crispy, then flip and cook 2–3 minutes more.
Reduce heat to medium-low. Pour sauce over chicken—it should sizzle! Cover and simmer 20–25 minutes, flipping halfway. Uncover and simmer another 5–10 minutes until sauce thickens and clings to the chicken. Stir gently to avoid tearing skin.
Turn off heat and sprinkle chopped cilantro over the chicken. Let rest 5 minutes—sauce will thicken further. Serve with jasmine rice or rice noodles, quick-pickled cucumbers, lime wedges, and extra cilantro.
Notes
-
Pineapple Punch: Add 1 cup pineapple chunks with the sauce for a tropical kick.
-
Keto-Friendly: Swap honey for monk fruit sweetener and serve with cauliflower rice.
-
Extra Creamy: Stir ¼ cup coconut milk into the sauce for richness.
-
Firecracker Shrimp: Swap chicken for jumbo shrimp—sear 2 minutes per side, simmer 5 minutes.
-
Garden Fresh: Toss in bell peppers and snap peas last 5 minutes of cooking.
- Prep Time: 10 mins
- Cook Time: 30 mins
Nutrition
- Calories: 420 cal Per Serving
- Fat: 22g
- Carbohydrates: 18g
- Protein: 32g
Nutritional Info (Per Serving)
Calories: ~420 | Fat: 22g | Carbs: 18g | Protein: 32g | Prep Time: 10 mins | Cook Time: 30 mins | Total Time: 40 mins
Note: Values are estimates. For exact counts, use an app like MyFitnessPal with your specific brands.
Final Thoughts: Sauce-Stained Memories
This dish isn’t just about sticky fingers and empty plates—it’s about the stories we create while cooking. Maybe it’s the meal you make after a tough day, when the sizzle of chicken drowns out the noise. Or the dish your kid requests every birthday. Perhaps it’s your “I-just-nailed-it” moment when guests lick the platter clean.
Whatever the occasion, remember: The best recipes aren’t about perfection. Burnt the glaze? Call it “caramelized.” Forgot the cilantro? Your dish is “minimalist.” The real secret ingredient is always joy.
Now, go forth and make a glorious, saucy mess! And when life gives you leftovers? Toss them into a fried rice or taco filling—waste not, want not.
Craving more global flavors? Try my Miso-Honey Glazed Eggplant next—it’s umami heaven on a plate!
With a sprinkle of sesame seeds and a whole lot of gusto,
Olivia Bennett
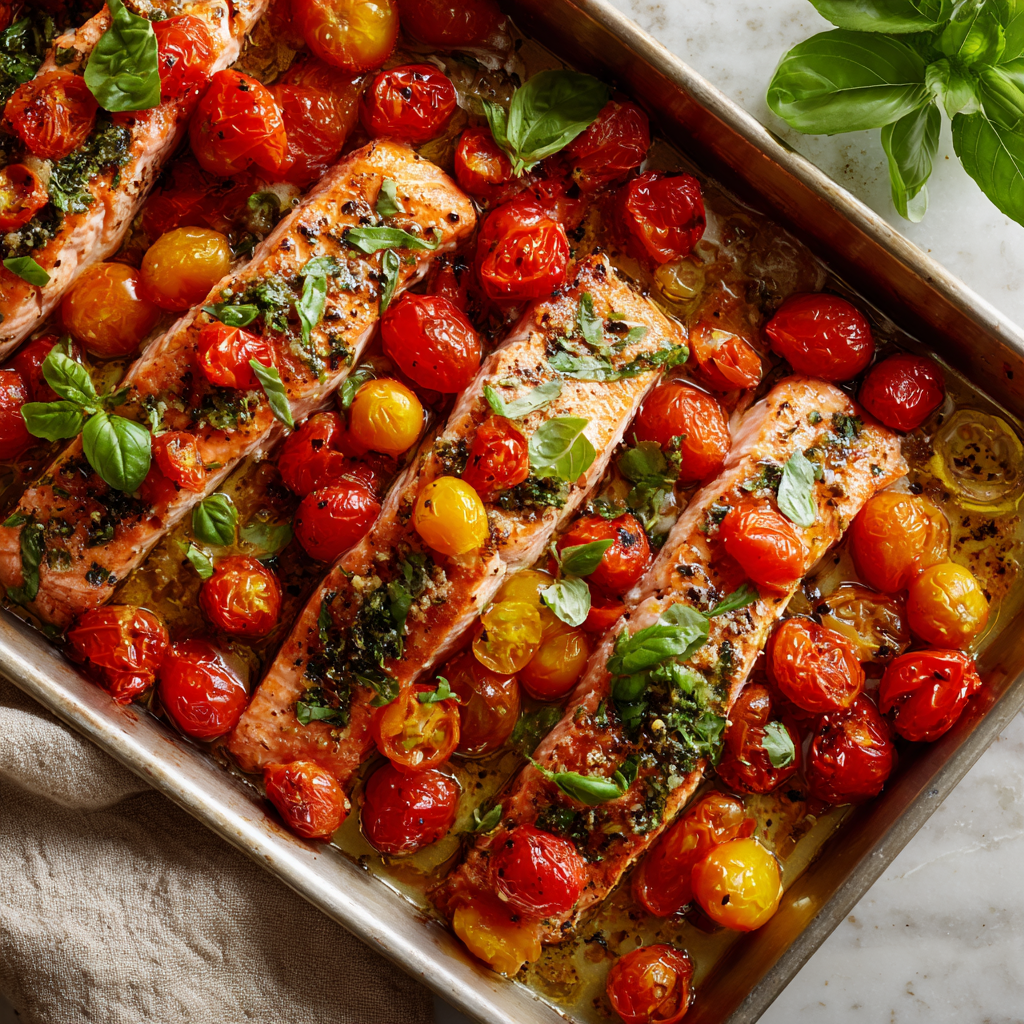
30-Minute Baked Salmon and Tomatoes
Why This Salmon Recipe Is My Weeknight Hero (And Yours Too!)
Hey friend! Olivia here, waving from my tomato-splattered apron. You know that glorious moment when dinner practically cooks itself while you sip wine and pretend you’re in a coastal Italian village? That’s exactly what this Mediterranean baked salmon gives you. In under 30 minutes, we’re transforming six simple ingredients into a vibrant, restaurant-worthy meal that’ll make your crew think you’re a culinary wizard. No fancy skills required – just a baking dish and that joyful “I’ve got this!” feeling.
Picture this: plump cherry tomatoes bursting into jammy sweetness, garlic melting into golden perfume, and salmon fillets turning impossibly tender while bathing in all those glorious juices. It’s sunshine on a plate, my friend! Whether you’re wrangling hungry kids or hosting last-minute guests, this dish is your secret weapon. It’s healthy-ish (hello, omega-3s!), impossibly elegant, and tastes like lazy summer evenings. So tie on that apron – let’s create some magic without the messy cleanup!
The Dinner Disaster That Birthed My Go-To Savior
Okay, real talk: this recipe saved me during the Great Pasta Flood of 2018. Picture it – my in-laws were arriving in 45 minutes, and I’d just knocked an entire pot of bolognese onto my white rug (RIP, rug). Cue panic sweats! I frantically yanked salmon fillets from the freezer, grabbed cherry tomatoes destined for salad, and threw everything into a baking dish with garlic and olive oil. As that heavenly smell filled the kitchen, my panic melted faster than the tomatoes. When my father-in-law took his first bite? “Olivia, this is incredible!” he murmured. Joke’s on him – it was pure desperation cooking! Now, it’s my emotional-support dinner. Every bite takes me back to that chaotic, tomato-stained victory.
Your Simple Shopping List (With Chef Secrets!)
- 6 Salmon Fillets (6 oz each): Skin-on for extra flavor & protection! Chef hack: Pat SUPER dry with paper towels – crispy edges await! Frozen? Thaw overnight in fridge.
- 4½ tbsp Extra-Virgin Olive Oil: The GOOD stuff! It’s not just for cooking – it becomes part of the sauce. Sub: Avocado oil if you’re searing first.
- 1½ pints Cherry Tomatoes, halved: Halving = more jammy goodness! Swap: Grape tomatoes work, but avoid big beefsteaks – they’re too watery.
- 6 Garlic Cloves, smashed: Smash ’em with your knife’s side! Releases oils gently without burning. Insider tip: No peeling needed – they soften into sweet nuggets.
- 3 Sprigs Fresh Basil: Stems add herbaceous depth while baking! Emergency sub: 1 tsp dried Italian herbs (add halfway).
- Coarse Salt & Freshly Ground Black Pepper: Flakey salt for texture, fresh pepper for punch! Pro move: Season tomatoes MORE than you think – they carry the sauce.
Let’s Bake Some Magic: Step-by-Step
- Preheat Oven to 400°F (200°C). Why this temp? Hot enough to blister tomatoes and cook salmon fast, but not so hot the garlic burns. No need to wait for perfection – start prepping while it heats!
- Toss Tomatoes, Garlic & Basil. In your prettiest ceramic or glass baking dish (metal makes tomatoes acidic!), combine halved tomatoes, smashed garlic, basil sprigs, and 3 tbsp olive oil. Secret weapon: Massage everything with your hands – you’ll feel when it’s perfectly coated! Season generously – tomatoes should taste almost too salty raw (they mellow while baking).
- Nestle Salmon Skin-Side Down. Arrange fillets like happy little islands in a tomato sea. Drizzle remaining 1.5 tbsp oil over salmon. Critical tip: Leave space between fillets! Crowding = steamed salmon (sad face). Season salmon lightly – remember those well-salted tomatoes below!
- Bake Uncovered 15-18 Minutes. Timing is EVERYTHING: Set that timer! At 15 min, check for doneness – salmon should flake easily but still look juicy. Carryover cooking happens! Hack: If tomatoes aren’t burst-y enough, broil 1-2 min (watch like a hawk!).
- Spoon & Serve! Lift salmon gently with a fish spatula. Scoop those glorious tomato-garlic juices over top. Chef’s flourish: Tear fresh basil over everything – the heat wakes up its fragrance!
Making It Pretty (Because We Eat With Our Eyes!)
Slide each salmon fillet onto warm plates (cold plates = sad, lukewarm fish). Spoon tomatoes and allll those fragrant juices generously over and around. For “fancy but lazy” vibes, scatter extra torn basil and maybe a lemon wedge. My go-to pairings? Fluffy quinoa to soak up sauce or crusty bread for dragging through tomato gold. Add a crisp green salad with lemon vinaigrette – the brightness cuts the richness. For date night? Light candles and pretend you’re seaside!
The Science of Perfect Salmon – Why This Method Works Every Time
Let’s geek out for a sec! This recipe isn’t just easy—it’s engineered for foolproof results. Here’s why the Mediterranean bake method is a game-changer:
-
Tomatoes: The Natural Moisture Regulators
-
Cherry tomatoes are 94% water, but halving them releases juices slowly during baking, creating a self-basting effect for the salmon. The sugars caramelize at 400°F, balancing acidity with jammy sweetness.
-
Pro Tip: Salt draws out moisture early—that’s why we season aggressively! The tomatoes reduce into a sauce while preventing the salmon from drying out.
-
-
Garlic’s Two-Stage Magic
-
Smashed cloves (not minced!) release allicin gently, avoiding bitter burnt notes. As they roast, their cell walls break down into creamy, sweet nuggets that melt into the sauce.
-
Fun Fact: The basil stems contain concentrated essential oils that infuse the oil as they bake—free flavor boost!
-
-
Salmon’s Fat Content = Built-In Safety Net
-
Farmed Atlantic salmon has a higher fat content than wild, making it forgiving if slightly overcooked. The skin acts as a protective barrier, crisping while the flesh stays moist.
-
Temp Hack: Pull salmon at 135°F (57°C)—carryover cooking will take it to the FDA-safe 145°F (63°C) as it rests.
-
Bonus: The olive oil isn’t just for cooking—its polyphenols are preserved at this baking temp, adding anti-inflammatory benefits to all those omega-3s!
Global Twists – How to Tour the Mediterranean Without Leaving Your Kitchen
This recipe is a passport! Here’s how to adapt it across the region with pantry staples:
1. Greek Islands Style
-
Add ½ cup pitted Kalamata olives + 1 tsp dried oregano to tomatoes.
-
Crumble feta over the dish post-bake.
-
Serve with lemon wedges and a drizzle of tsipouro (or ouzo) for an adult kick.
2. Provençal Sunshine
-
Swap basil for herbes de Provence + add 1 sliced fennel bulb.
-
Garnish with niçoise olives and a pinch of saffron threads.
3. Sicilian Citrus Splash
-
Layer lemon slices under the salmon fillets.
-
Stir 2 tbsp toasted pine nuts and ¼ cup golden raisins into the baked tomatoes.
4. Middle Eastern Zing
-
Mix 1 tbsp za’atar into the olive oil before coating tomatoes.
-
Top with tahini-yogurt sauce and pomegranate seeds.
Why It Works: The base formula (acidic fruit + fatty fish + aromatic herbs) is universal in Mediterranean cooking. Each tweak tells a different coastal story!
The Psychology of Effortless Elegance – Why This Meal Feels Like Self-Care
Beyond nutrition, this dish delivers emotional nourishment:
-
The “Lazy Gourmet” Effect
-
Studies show that meals with visual appeal (hello, ruby-red tomatoes!) increase perceived flavor by 20%. The vibrant colors trick your brain into thinking you’ve put in more effort than you did.
-
-
Aromatherapy in Action
-
As garlic and basil bake, they release linalool—a compound shown to reduce stress hormones. Your kitchen becomes a spa!
-
-
The 30-Minute Time Illusion
-
Active prep is just 10 minutes; the oven does the rest. This creates psychological breathing room—the holy grail for weeknights.
-
Pro Tip: Double the tomato mix and freeze half. Future-you will have “instant fancy dinner” waiting!
5 Delicious Twists To Keep It Exciting
- Lemon Lover’s: Add 1 sliced lemon to the tomato mix + zest over salmon pre-bake.
- Olive & Caper Fiesta: Toss ½ cup Kalamata olives + 2 tbsp capers in with tomatoes.
- Creamy Dreamy: Dollop 4 oz goat cheese or feta over tomatoes in the last 5 minutes of baking.
- Spicy Arrabbiata Style: Add ½ tsp red pepper flakes to tomatoes + finish with parsley.
- Pescatarian Feast: Swap salmon for thick white fish (cod/halibut) – bake 12-14 min max.
Confessions From My Tomato-Stained Apron
This recipe started as a lazy “dump dinner” but evolved into my most-requested dish! Early versions used diced onions (too watery!) and dried basil (too dusty!). The breakthrough? SMASHING garlic cloves instead of mincing – no bitter bites! One hilarious fail involved using parchment paper (tomato acids ate through it – sauce avalanche!). Now I go bare dish for maximum fond. Funny story: My toddler calls it “pink fish with lava rocks” (bless his heart). Pro tip: Leftover tomato-garlic sludge? Blitz it into next day’s pasta sauce – chef’s kiss!
Your Salmon SOS Station
Q: My salmon came out dry! What did I do wrong?
A: Overcooking is the usual culprit! Salmon cooks FAST. Check at 15 min – it should flake but still look slightly translucent in the very center. Residual heat finishes it! Also, ensure fillets are similar thickness (ask your fishmonger!).
Q: Can I use frozen salmon without thawing?
A: Technically yes, but texture suffers. Thaw overnight in the fridge for best results. In a pinch? Seal frozen fillets in a bag, submerge in cold water 30 mins, then pat VERY dry.
Q: Tomatoes too watery?
A: Three fixes! 1) Halve EVERY tomato. 2) Salt them well pre-bake (draws out moisture). 3) If still soupy, remove salmon when done and broil tomatoes 3-4 min to concentrate.
Q: How do I know it’s cooked safely?
A: Internal temp should hit 145°F (63°C). No thermometer? Gently press the top – it should feel slightly firm but spring back. Raw salmon looks deep orange/translucent; cooked is light pink/opaque.
30-Minute Baked Salmon and Tomatoes
- Total Time: 18 minute
Description
Hey friend! This Mediterranean baked salmon is exactly what you need on busy weeknights. In under 30 minutes, six simple ingredients come together to create a vibrant, healthy, and delicious meal that feels fancy but is totally easy. Think tender salmon bathed in garlicky, juicy cherry tomatoes with fresh basil — it’s like a little vacation on your plate! Perfect for family dinners or impressing guests without the stress.
Ingredients
-
6 salmon fillets (6 oz each), skin-on
-
1½ pints cherry tomatoes, halved
-
6 garlic cloves, smashed (no peeling needed!)
-
3 sprigs fresh basil (or 1 tsp dried Italian herbs)
-
4½ tbsp extra-virgin olive oil
-
Coarse salt and freshly ground black pepper
Instructions
-
Preheat oven to 400°F (200°C).
-
In a glass or ceramic baking dish, toss halved cherry tomatoes, smashed garlic, basil sprigs, and 3 tbsp olive oil. Massage gently with your hands to coat everything evenly. Season the tomatoes generously with salt and pepper — they carry the sauce!
-
Nestle the salmon fillets skin-side down in the tomato mixture, spacing them apart to avoid steaming. Drizzle the remaining 1½ tbsp olive oil over the salmon. Lightly season the fillets with salt and pepper.
-
Bake uncovered for 15–18 minutes. Check at 15 minutes: salmon should flake easily but still be juicy. If tomatoes aren’t bursting enough, broil for 1–2 minutes — watch closely!
-
Serve salmon with spoonfuls of tomato-garlic sauce and fresh torn basil on top.
Notes
-
Dry your salmon well before baking for crispier edges.
-
Don’t crowd the fillets — give them breathing room for perfect texture.
-
Smashed garlic softens into sweet, tender bites — no peeling means less fuss!
-
Halve your tomatoes to concentrate their sweetness and reduce watery sauce.
-
Want a twist? Try adding lemon slices, olives, or a sprinkle of feta before baking!
-
If salmon gets dry, check your oven temp and cook time — it cooks fast!
- Prep Time: 10 minutes
- Cook Time: 15–18 minutes
Nutrition
- Calories: 360 cal Per Serving
- Fat: 22g
- Carbohydrates: 5g
- Protein: 35g
Nutrition Per Serving (Because Knowledge is Power!)
Calories: ~360 | Fat: 22g (Healthy Omega-3s!) | Carbs: 5g (Mostly from tomatoes!) | Protein: 35g
Note: Values are estimates. Using less oil? Values decrease slightly.
Final Thoughts: More Than Dinner, A Mindset Shift
This salmon isn’t just a meal—it’s permission to prioritize joy over perfection. It’s the crispy-skinned, tomato-stained proof that nourishment doesn’t mean complicated. Whether you’re salvaging a rug (RIP), impressing in-laws, or simply reminding yourself that you’re worth 30 minutes of care, this dish meets you where you are.
So tonight, when the world feels heavy, remember: salmon + tomatoes + a brave splash of olive oil = edible sunshine. And if you forget the basil? Call it “rustic”
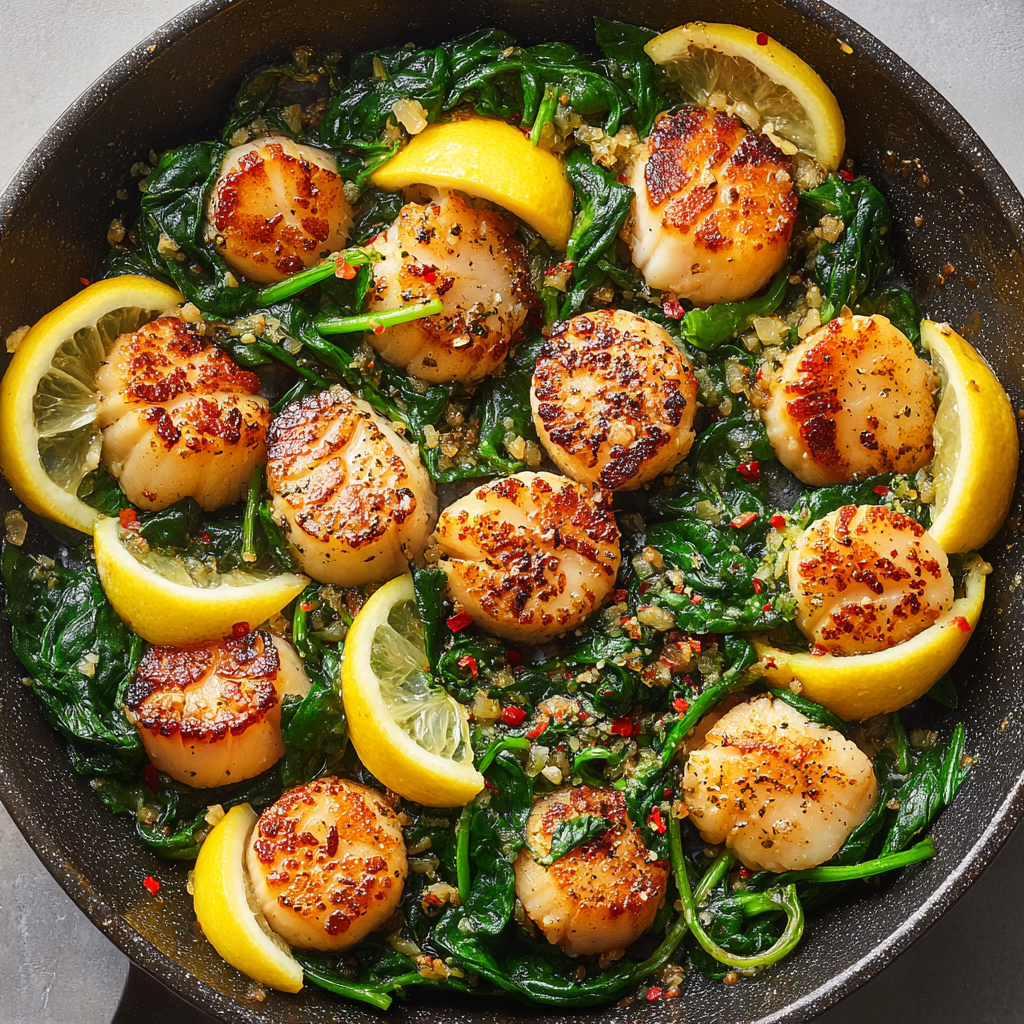
30-Minute Seared Scallops with Spinach
30-Minute Seared Scallops with Spinach: Your New Crowd-Pleaser!
Hey there, kitchen friend! Olivia here, apron slightly flour-dusted and heart full of excitement because today? We’re turning simple into spectacular. Picture this: plump, golden-seared scallops resting on a cloud of garlicky spinach, brightened with lemon and just a whisper of heat. All on the table in 30 minutes flat—even for eight hungry souls. Whether you’re hosting a last-minute dinner party or craving a “treat yourself” moment, this dish is your secret weapon. It’s elegant enough for date night, speedy enough for Tuesday chaos, and packed with flavors that’ll make everyone think you slaved for hours. No fancy skills required—just a hot pan, fresh ingredients, and that gorgeous enthusiasm of yours. Ready to make magic? Let’s dive in!
That One Rainy Night & a Scallop Savior
Okay, story time! Years ago, my husband surprised me with an impromptu “friendsgiving” for eight—just as a thunderstorm knocked out our oven. Chaos! I stood in my dim kitchen, fridge wide open, panicking until I spotted a bag of scallops and a mountain of spinach. Scallops sear fast, spinach wilts faster… 25 minutes later, we were laughing around candlelight, mopping up garlicky lemon juices with crusty bread. No turkey? No problem. That humble dish became our little legend—the night fancy felt effortless, and cozy won. Now, every time I sear scallops, I smile remembering how cooking’s best moments aren’t about perfection, but joy shared. Let’s make your version!
Gather Your Flavor Squad
Here’s what you’ll need (Serves 8):
- 4 lbs Scallops: Go for “dry-packed” if possible—they sear better! Insider Tip: If they’re wet-packed (soaked in preservatives), rinse and pat EXTRA dry. Frozen? Thaw overnight in the fridge. Swap with shrimp or firm white fish in a pinch!
- Salt & Pepper, to taste: Kosher salt sticks better; freshly cracked black pepper adds floral notes. Don’t be shy—scallops love seasoning!
- 4 tsp Butter + 2 tsp Olive Oil: Butter = richness, olive oil = high-heat stability. Chef Hack: Unsalted butter lets you control salt levels. Dairy-free? Use all olive oil or ghee.
- 4 Garlic Cloves, minced: Fresh is non-negotiable! Pre-minced jars lack punch. Fun Fact: Sizzling garlic too long makes it bitter—we’ll keep it quick!
- 4 Bunches Spinach (about 10-12 oz each): Looks like a mountain—it wilts to nothing! Swap: Baby spinach saves prep time; kale works but needs longer cooking.
- Juice of 2 Fresh Lemons: Brightens everything! Pro Move: Zest one lemon first for garnish—it’s flavor confetti.
- Crushed Red Pepper Flakes (optional): Just a pinch wakes up the dish. Omit for mild vibes, or add Calabrian chili paste for smoky heat.
Let’s Cook: Fast, Fearless & Full of Flavor!
Prep Scallops (5 mins): Pat scallops bone-dry with paper towels (crucial for that golden crust!). Season both sides generously with salt and pepper. Chef Whisper: Leave them uncovered in the fridge while prepping other ingredients—this firms them up!
Sear Scallops (12 mins): Heat a large stainless steel or cast-iron skillet over medium-high. Add 2 tsp butter and 1 tsp olive oil—it should sizzle instantly. Working in batches (don’t crowd!), add scallops. Sear undisturbed 2–3 mins per side until deeply golden and just opaque. Golden Rule: They’ll release naturally when ready—if they stick, wait! Transfer to a plate, tent loosely with foil. Repeat with remaining butter/oil and scallops. Hack: Keep heat high but not smoking—scallops should caramelize, not steam.
Sauté Garlic & Spinach (8 mins): In the same pan (hello, flavor-packed bits!), melt remaining butter. Add garlic—sizzle 30 seconds until fragrant but not brown. Add spinach in handfuls, stirring as it wilts. Tip: Use tongs! It’ll seem overflowing, but spinach shrinks fast. Season with salt, pepper, lemon juice, and chili flakes (if using). Cook just until tender—about 2 mins. Secret: Undercook slightly; residual heat softens it more.
Serve (2 mins): Divide spinach among plates. Top with scallops, drizzle with any pan juices, and garnish with lemon wedges. Ta-da!
Plating Like a Pro (Minimal Effort, Max Wow)
Spoon that garlicky spinach into a wide, shallow bowl or plate—create a lush “nest.” Artfully arrange scallops on top (I like a little overlap for drama). Drizzle everything with those gorgeous pan juices. Finish with extra lemon zest, a crack of pepper, and maybe microgreens for color. Pairing Perfection: Serve with crusty bread to swipe up juices, and a crisp Sauvignon Blanc or sparkling water with lemon slices. Keep sides simple—roasted baby potatoes or a quinoa salad let the scallops shine!
The Science of the Perfect Sear: Why Dry & Hot Matter
That golden crust on your scallops isn’t just for looks—it’s a chemical symphony! Here’s what’s happening in your pan:
-
The Maillard Reaction:
When scallops hit a hot surface (ideally 375°F+), amino acids and sugars react to create hundreds of new flavor compounds. This is why properly seared scallops taste nutty, savory, and complex—not just “fishy.” Key factors:-
Dry surface moisture: Water lowers the pan temp, causing scallops to steam instead of sear. That’s why aggressive patting is non-negotiable.
-
High smoke point fat: Butter alone burns; mixing it with olive oil lets you sear hotter without bitterness.
-
-
The “Don’t Touch Me” Rule:
Poking scallops tears the delicate crust. Wait until they release naturally—a sign the proteins have caramelized enough to unstick. Pro tip: Listen for a sizzle that sounds like applause! -
Size Matters:
Choose uniform “U10” scallops (fewer than 10 per pound). Smaller ones overcook before browning; larger ones risk a raw center.
Fun experiment: Try searing one scallop at three different heats—low, medium, and smoking hot. Taste the difference!
Spinach Secrets: From Soggy to Sublime
That mountain of greens wilting into silky perfection? There’s art in the wilt:
Why Baby Spinach vs. Mature?
-
Baby spinach: Tender stems, mild flavor, wilts in seconds. Ideal for quick dishes.
-
Mature bunches: Earthier taste, thicker stems (remove them!). Requires longer cooking but holds up better in sauces.
The Dryness Factor:
Wet spinach = watery dish. After washing, either:
-
Spin in a salad spinner
-
Lay between kitchen towels and roll like a yoga mat
-
Toss with a pinch of salt, wait 5 mins, then squeeze out moisture
Garlic Timing:
Adding garlic too early makes it bitter. For sweet, fragrant garlic:
-
Cook spinach first until halfway wilted
-
Push to the pan’s edges
-
Add garlic to the center for 30 seconds
-
Mix everything and finish cooking
Flavor Boosters:
-
A pinch of nutmeg (classic with greens!)
-
Anchovy paste (melts in, adds umami)
-
Lemon zest added at the end for brightness
Scallop Sustainability: Buying Without Guilt
Not all scallops are created equal. Here’s how to shop responsibly:
Wild vs. Farmed:
-
Wild (e.g., Atlantic sea scallops): Diver-harvested, minimal ecosystem impact. Look for MSC certification.
-
Farmed (e.g., bay scallops): Often raised in suspended nets. Choose brands like Maine Sea Farms that avoid dredging.
“Dry-Packed” vs. “Wet-Packed”:
-
Dry: No additives, better sear, pricier. Worth it!
-
Wet: Soaked in STP (sodium tripolyphosphate) to retain water. You pay for water weight, and they steam instead of sear.
Ask Your Fishmonger:
-
“Are these dayboat scallops?” (Freshly caught, not stored on boats for days)
-
“Can I smell them?” They should smell like the ocean—not fishy or ammonia-like.
Freezer Hack:
Flash-frozen-at-sea scallops are often fresher than “fresh” ones that sat in transit. Thaw overnight in a fridge colander to drain excess liquid.
Mix It Up! 5 Delicious Twists
1. Mediterranean: Stir 1/4 cup chopped sun-dried tomatoes and kalamata olives into spinach. Top scallops with feta crumbles.
2. Creamy Dream: After wilting spinach, stir in 1/2 cup coconut milk or heavy cream + a pinch of nutmeg. Luxe!
3. Asian-Inspired: Swap lemon for lime + 1 tbsp soy sauce. Garnish with sesame seeds and cilantro.
4. Pescatarian Protein Swap: Use large shrimp or halved sea scallops. Cook time same!
5. Bacon Lover’s: Cook 4 chopped bacon strips first, then use bacon fat to sear scallops. Crumble bacon over the top—game over.
Olivia’s Kitchen Confessions
This recipe? My ride-or-die! I’ve made it for bridal showers, fussy toddlers (sans chili flakes!), and even my cat’s birthday (don’t ask). Over time, I learned: dry scallops are non-negotiable—once, I rushed it and ended up with rubbery pebbles. Sad! Also, doubling the garlic is ALWAYS a good idea. Funny story: My niece once mistook red pepper flakes for sprinkles and dumped in 2 tbsp… we called it “Dragon Scallops” and served it with extra yogurt. Now it’s a family inside joke. Moral? Embrace the messy, make it yours, and always have extra lemon on standby.
Your Questions, Answered!
Q: Why won’t my scallops get that restaurant-style crust?
A: Three culprits! 1) Not dry enough—pat, pat, pat! 2) Pan wasn’t hot enough—wait for butter to foam. 3) Overcrowding lowers the pan temp. Give ’em space!
Q: Can I prep any part ahead?
A: Yes! Wash/dry spinach, mince garlic, and juice lemons up to 24 hours ahead. Keep chilled. But sear scallops LAST MINUTE—they toughen if reheated.
Q: How do I know scallops are cooked through?
A: They turn opaque and feel slightly firm (not hard!) when pressed. Cut one test scallop—it should be moist, not translucent. Overcooked = bouncy rubber balls. Sad!
Q: Spinach turned watery. Help?
A: You might’ve added salt too early or overcooked. Salt draws out water—season at the end. Also, ensure spinach is thoroughly dried after washing!
30-Minute Seared Scallops with Spinach
- Total Time: 30 mins
Description
Elegant, fast, and full of flavor—this 30-minute showstopper brings golden scallops and lemony spinach together for a cozy, crowd-pleasing meal. Whether it’s a special dinner or a weeknight upgrade, this one-pan wonder delivers restaurant vibes with zero stress.
Ingredients
-
4 lbs dry-packed scallops
-
Salt & pepper, to taste
-
4 tsp butter + 2 tsp olive oil
-
4 garlic cloves, minced
-
4 bunches spinach (10–12 oz each)
-
Juice of 2 lemons
-
Crushed red pepper flakes (optional)
-
Lemon zest & wedges, for garnish
Instructions
-
Prep scallops: Pat dry, season generously.
-
Sear: In batches, sear scallops in hot butter/oil mix, 2–3 mins per side. Don’t overcrowd! Transfer to plate.
-
Spinach time: In same pan, melt remaining butter, add garlic (30 secs), then stir in spinach until wilted.
-
Finish: Season with salt, pepper, lemon juice, and red pepper flakes. Divide spinach onto plates, top with scallops.
-
Garnish: Add zest, wedges, and a crack of pepper.
Notes
-
Dry scallops = perfect sear
-
Sear in batches for golden crust
-
Use tongs for easy spinach toss
-
Keep pan juices for drizzling
- Prep Time: 10 mins
- Cook Time: 20 mins
Nutrition
- Calories: 250 cal Per Serving
- Fat: 10g
- Carbohydrates: 4g
- Protein: 30g
Nutrition Per Serving (Approx)
Calories: 250 | Fat: 10g | Carbs: 4g | Protein: 30g
Note: Values include butter/oil. For lower fat, reduce butter by half and use more oil.
Final Thoughts: Elegance Without Effort
This dish proves that fancy doesn’t mean fussy. It’s a lesson in trusting simple ingredients, high heat, and the magic of last-minute assembly. Those scallops? They’re little edible trophies celebrating your courage to try something quick and luxurious.
And when you set that plate down—scallops gleaming like seared gold atop emerald greens, lemon juice still sizzling in the pan—you’re not just serving dinner. You’re serving confidence, joy, and the quiet thrill of knowing you did this.
Now go forth and sear. And remember: The best meals aren’t measured in hours, but in heartbeats.
30-Minute Seared Scallops with Spinach
30-Minute Seared Scallops with Spinach: Your New Crowd-Pleaser!
Hey there, kitchen friend! Olivia here, apron slightly flour-dusted and heart full of excitement because today? We’re turning simple into spectacular. Picture this: plump, golden-seared scallops resting on a cloud of garlicky spinach, brightened with lemon and just a whisper of heat. All on the table in 30 minutes flat—even for eight hungry souls. Whether you’re hosting a last-minute dinner party or craving a “treat yourself” moment, this dish is your secret weapon. It’s elegant enough for date night, speedy enough for Tuesday chaos, and packed with flavors that’ll make everyone think you slaved for hours. No fancy skills required—just a hot pan, fresh ingredients, and that gorgeous enthusiasm of yours. Ready to make magic? Let’s dive in!
That One Rainy Night & a Scallop Savior
Okay, story time! Years ago, my husband surprised me with an impromptu “friendsgiving” for eight—just as a thunderstorm knocked out our oven. Chaos! I stood in my dim kitchen, fridge wide open, panicking until I spotted a bag of scallops and a mountain of spinach. Scallops sear fast, spinach wilts faster… 25 minutes later, we were laughing around candlelight, mopping up garlicky lemon juices with crusty bread. No turkey? No problem. That humble dish became our little legend—the night fancy felt effortless, and cozy won. Now, every time I sear scallops, I smile remembering how cooking’s best moments aren’t about perfection, but joy shared. Let’s make your version!
Gather Your Flavor Squad
Here’s what you’ll need (Serves 8):
- 4 lbs Scallops: Go for “dry-packed” if possible—they sear better! Insider Tip: If they’re wet-packed (soaked in preservatives), rinse and pat EXTRA dry. Frozen? Thaw overnight in the fridge. Swap with shrimp or firm white fish in a pinch!
- Salt & Pepper, to taste: Kosher salt sticks better; freshly cracked black pepper adds floral notes. Don’t be shy—scallops love seasoning!
- 4 tsp Butter + 2 tsp Olive Oil: Butter = richness, olive oil = high-heat stability. Chef Hack: Unsalted butter lets you control salt levels. Dairy-free? Use all olive oil or ghee.
- 4 Garlic Cloves, minced: Fresh is non-negotiable! Pre-minced jars lack punch. Fun Fact: Sizzling garlic too long makes it bitter—we’ll keep it quick!
- 4 Bunches Spinach (about 10-12 oz each): Looks like a mountain—it wilts to nothing! Swap: Baby spinach saves prep time; kale works but needs longer cooking.
- Juice of 2 Fresh Lemons: Brightens everything! Pro Move: Zest one lemon first for garnish—it’s flavor confetti.
- Crushed Red Pepper Flakes (optional): Just a pinch wakes up the dish. Omit for mild vibes, or add Calabrian chili paste for smoky heat.
Let’s Cook: Fast, Fearless & Full of Flavor!
Prep Scallops (5 mins): Pat scallops bone-dry with paper towels (crucial for that golden crust!). Season both sides generously with salt and pepper. Chef Whisper: Leave them uncovered in the fridge while prepping other ingredients—this firms them up!
Sear Scallops (12 mins): Heat a large stainless steel or cast-iron skillet over medium-high. Add 2 tsp butter and 1 tsp olive oil—it should sizzle instantly. Working in batches (don’t crowd!), add scallops. Sear undisturbed 2–3 mins per side until deeply golden and just opaque. Golden Rule: They’ll release naturally when ready—if they stick, wait! Transfer to a plate, tent loosely with foil. Repeat with remaining butter/oil and scallops. Hack: Keep heat high but not smoking—scallops should caramelize, not steam.
Sauté Garlic & Spinach (8 mins): In the same pan (hello, flavor-packed bits!), melt remaining butter. Add garlic—sizzle 30 seconds until fragrant but not brown. Add spinach in handfuls, stirring as it wilts. Tip: Use tongs! It’ll seem overflowing, but spinach shrinks fast. Season with salt, pepper, lemon juice, and chili flakes (if using). Cook just until tender—about 2 mins. Secret: Undercook slightly; residual heat softens it more.
Serve (2 mins): Divide spinach among plates. Top with scallops, drizzle with any pan juices, and garnish with lemon wedges. Ta-da!
Plating Like a Pro (Minimal Effort, Max Wow)
Spoon that garlicky spinach into a wide, shallow bowl or plate—create a lush “nest.” Artfully arrange scallops on top (I like a little overlap for drama). Drizzle everything with those gorgeous pan juices. Finish with extra lemon zest, a crack of pepper, and maybe microgreens for color. Pairing Perfection: Serve with crusty bread to swipe up juices, and a crisp Sauvignon Blanc or sparkling water with lemon slices. Keep sides simple—roasted baby potatoes or a quinoa salad let the scallops shine!
The Science of the Perfect Sear: Why Dry & Hot Matter
That golden crust on your scallops isn’t just for looks—it’s a chemical symphony! Here’s what’s happening in your pan:
-
The Maillard Reaction:
When scallops hit a hot surface (ideally 375°F+), amino acids and sugars react to create hundreds of new flavor compounds. This is why properly seared scallops taste nutty, savory, and complex—not just “fishy.” Key factors:-
Dry surface moisture: Water lowers the pan temp, causing scallops to steam instead of sear. That’s why aggressive patting is non-negotiable.
-
High smoke point fat: Butter alone burns; mixing it with olive oil lets you sear hotter without bitterness.
-
-
The “Don’t Touch Me” Rule:
Poking scallops tears the delicate crust. Wait until they release naturally—a sign the proteins have caramelized enough to unstick. Pro tip: Listen for a sizzle that sounds like applause! -
Size Matters:
Choose uniform “U10” scallops (fewer than 10 per pound). Smaller ones overcook before browning; larger ones risk a raw center.
Fun experiment: Try searing one scallop at three different heats—low, medium, and smoking hot. Taste the difference!
Spinach Secrets: From Soggy to Sublime
That mountain of greens wilting into silky perfection? There’s art in the wilt:
Why Baby Spinach vs. Mature?
-
Baby spinach: Tender stems, mild flavor, wilts in seconds. Ideal for quick dishes.
-
Mature bunches: Earthier taste, thicker stems (remove them!). Requires longer cooking but holds up better in sauces.
The Dryness Factor:
Wet spinach = watery dish. After washing, either:
-
Spin in a salad spinner
-
Lay between kitchen towels and roll like a yoga mat
-
Toss with a pinch of salt, wait 5 mins, then squeeze out moisture
Garlic Timing:
Adding garlic too early makes it bitter. For sweet, fragrant garlic:
-
Cook spinach first until halfway wilted
-
Push to the pan’s edges
-
Add garlic to the center for 30 seconds
-
Mix everything and finish cooking
Flavor Boosters:
-
A pinch of nutmeg (classic with greens!)
-
Anchovy paste (melts in, adds umami)
-
Lemon zest added at the end for brightness
Scallop Sustainability: Buying Without Guilt
Not all scallops are created equal. Here’s how to shop responsibly:
Wild vs. Farmed:
-
Wild (e.g., Atlantic sea scallops): Diver-harvested, minimal ecosystem impact. Look for MSC certification.
-
Farmed (e.g., bay scallops): Often raised in suspended nets. Choose brands like Maine Sea Farms that avoid dredging.
“Dry-Packed” vs. “Wet-Packed”:
-
Dry: No additives, better sear, pricier. Worth it!
-
Wet: Soaked in STP (sodium tripolyphosphate) to retain water. You pay for water weight, and they steam instead of sear.
Ask Your Fishmonger:
-
“Are these dayboat scallops?” (Freshly caught, not stored on boats for days)
-
“Can I smell them?” They should smell like the ocean—not fishy or ammonia-like.
Freezer Hack:
Flash-frozen-at-sea scallops are often fresher than “fresh” ones that sat in transit. Thaw overnight in a fridge colander to drain excess liquid.
Mix It Up! 5 Delicious Twists
1. Mediterranean: Stir 1/4 cup chopped sun-dried tomatoes and kalamata olives into spinach. Top scallops with feta crumbles.
2. Creamy Dream: After wilting spinach, stir in 1/2 cup coconut milk or heavy cream + a pinch of nutmeg. Luxe!
3. Asian-Inspired: Swap lemon for lime + 1 tbsp soy sauce. Garnish with sesame seeds and cilantro.
4. Pescatarian Protein Swap: Use large shrimp or halved sea scallops. Cook time same!
5. Bacon Lover’s: Cook 4 chopped bacon strips first, then use bacon fat to sear scallops. Crumble bacon over the top—game over.
Olivia’s Kitchen Confessions
This recipe? My ride-or-die! I’ve made it for bridal showers, fussy toddlers (sans chili flakes!), and even my cat’s birthday (don’t ask). Over time, I learned: dry scallops are non-negotiable—once, I rushed it and ended up with rubbery pebbles. Sad! Also, doubling the garlic is ALWAYS a good idea. Funny story: My niece once mistook red pepper flakes for sprinkles and dumped in 2 tbsp… we called it “Dragon Scallops” and served it with extra yogurt. Now it’s a family inside joke. Moral? Embrace the messy, make it yours, and always have extra lemon on standby.
Your Questions, Answered!
Q: Why won’t my scallops get that restaurant-style crust?
A: Three culprits! 1) Not dry enough—pat, pat, pat! 2) Pan wasn’t hot enough—wait for butter to foam. 3) Overcrowding lowers the pan temp. Give ’em space!
Q: Can I prep any part ahead?
A: Yes! Wash/dry spinach, mince garlic, and juice lemons up to 24 hours ahead. Keep chilled. But sear scallops LAST MINUTE—they toughen if reheated.
Q: How do I know scallops are cooked through?
A: They turn opaque and feel slightly firm (not hard!) when pressed. Cut one test scallop—it should be moist, not translucent. Overcooked = bouncy rubber balls. Sad!
Q: Spinach turned watery. Help?
A: You might’ve added salt too early or overcooked. Salt draws out water—season at the end. Also, ensure spinach is thoroughly dried after washing!
30-Minute Seared Scallops with Spinach
- Total Time: 30 mins
Description
Elegant, fast, and full of flavor—this 30-minute showstopper brings golden scallops and lemony spinach together for a cozy, crowd-pleasing meal. Whether it’s a special dinner or a weeknight upgrade, this one-pan wonder delivers restaurant vibes with zero stress.
Ingredients
-
4 lbs dry-packed scallops
-
Salt & pepper, to taste
-
4 tsp butter + 2 tsp olive oil
-
4 garlic cloves, minced
-
4 bunches spinach (10–12 oz each)
-
Juice of 2 lemons
-
Crushed red pepper flakes (optional)
-
Lemon zest & wedges, for garnish
Instructions
-
Prep scallops: Pat dry, season generously.
-
Sear: In batches, sear scallops in hot butter/oil mix, 2–3 mins per side. Don’t overcrowd! Transfer to plate.
-
Spinach time: In same pan, melt remaining butter, add garlic (30 secs), then stir in spinach until wilted.
-
Finish: Season with salt, pepper, lemon juice, and red pepper flakes. Divide spinach onto plates, top with scallops.
-
Garnish: Add zest, wedges, and a crack of pepper.
Notes
-
Dry scallops = perfect sear
-
Sear in batches for golden crust
-
Use tongs for easy spinach toss
-
Keep pan juices for drizzling
- Prep Time: 10 mins
- Cook Time: 20 mins
Nutrition
- Calories: 250 cal Per Serving
- Fat: 10g
- Carbohydrates: 4g
- Protein: 30g
Nutrition Per Serving (Approx)
Calories: 250 | Fat: 10g | Carbs: 4g | Protein: 30g
Note: Values include butter/oil. For lower fat, reduce butter by half and use more oil.
Final Thoughts: Elegance Without Effort
This dish proves that fancy doesn’t mean fussy. It’s a lesson in trusting simple ingredients, high heat, and the magic of last-minute assembly. Those scallops? They’re little edible trophies celebrating your courage to try something quick and luxurious.
And when you set that plate down—scallops gleaming like seared gold atop emerald greens, lemon juice still sizzling in the pan—you’re not just serving dinner. You’re serving confidence, joy, and the quiet thrill of knowing you did this.
Now go forth and sear. And remember: The best meals aren’t measured in hours, but in heartbeats.
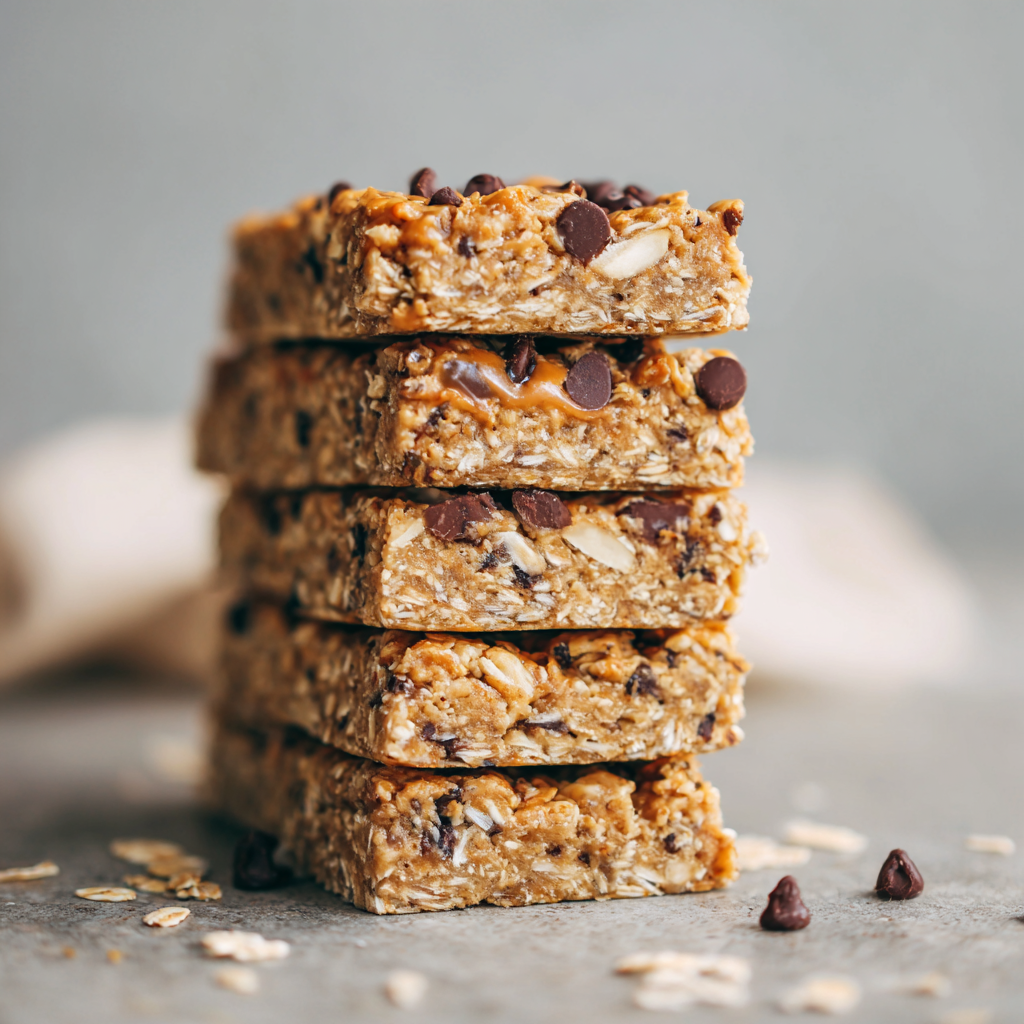
5-Ingredient No-Bake Granola Bars : Simple, Protein-Packed, and Totally Addictive
Your New Go-To Snack is Just 5 Minutes Away
Hey there, friend! Can you hear it? It’s the 3 PM slump calling. Your stomach is rumbling, your energy is dipping, and you’re staring into the pantry abyss, hoping something magical and satisfying will appear. We’ve all been there. You reach for a packaged granola bar, but the ingredient list reads like a science experiment—full of unpronounceable additives and a sugar content that’ll send you on a rollercoaster. Sound familiar?
Well, my fellow flavor enthusiast, I’m here to change that narrative for good. What if I told you that the most delicious, wholesome, and protein-packed snack could be yours in just five minutes of hands-on time? No oven, no fuss, no mystery ingredients. Just real, honest food that makes you feel incredible.
Today, we’re making my legendary 5-Ingredient No-Bake Granola Bars. These little bars are my kitchen superheroes. They’re chewy, a little sweet, deeply satisfying, and they stick with you through that afternoon meeting, school pick-up, or pre-workout session. They are the ultimate proof that “simple” doesn’t mean “boring.” In fact, simple is often the most delicious of all. So, tie on your favorite apron (messy stains are a badge of honor here!), and let’s create something wonderful together.
A Sweet Slice of Kitchen Memory
This recipe takes me right back to my grandma’s sun-drenched kitchen. She wasn’t a fancy chef, but she was a wizard with simple, good ingredients. She always had a tin of something homemade waiting for us—usually her famous “kitchen sink” cookies or a pan of her own version of these bars.
I remember one sweltering summer afternoon when the last thing anyone wanted to do was turn on the oven. My cousin and I were begging for a sweet treat. With a twinkle in her eye, Grandma pulled out her big yellow mixing bowl. In what seemed like mere moments, she had created a thick, sticky mixture, pressed it into a pan, and popped it into the fridge. “Patience is a virtue,” she’d say as we hovered nearby. That first cool, chewy, peanut-buttery bite was a revelation. It felt like love, condensed into a perfect, handheld bar. This recipe is my homage to her—to the magic of no-bake treats and the powerful, simple joy of feeding the people you love.
Gathering Your Dream Team: Just 5 Simple Ingredients
Here’s the beautiful part: we only need five core ingredients to make magic happen. Each one plays a starring role, and I’ll give you the inside scoop on why they work so well together.
- 1½ cups Rolled Oats (gluten-free if needed): This is our base, our foundation. Rolled oats (or old-fashioned oats) give these bars their wonderful chewy texture and heartiness. Chef’s Insight: Avoid using quick oats if you can, as they can make the bars a bit mushy. The sturdy texture of rolled oats holds up perfectly! If you need these to be gluten-free, just make sure your oats are certified GF.
- 1 cup Natural Peanut Butter or Almond Butter: This is our glue and our flavor powerhouse! It binds everything together and provides healthy fats and protein. Substitution Tip: You MUST use a natural, drippy peanut butter for this. The kind that’s just peanuts and maybe salt. The oily kinds with hydrogenated oils won’t bind correctly. Feel free to swap in almond butter, cashew butter, or even sunflower seed butter for a nut-free version!
- 1/2 cup Maple Syrup or Agave Nectar: Our natural sweetener and second binding agent. The maple syrup adds a subtle, warm flavor that pairs beautifully with the peanut butter. Substitution Tip: Agave works perfectly, and honey is a great option if you’re not strictly plant-based. Just note that honey will make the flavor a bit stronger.
- 1/2 cup Plant-Based Protein Powder (vanilla or unflavored): This is our secret weapon for a major protein boost, making these bars incredibly satiating. Chef’s Insight: The type of protein powder matters! I find that pea or brown rice protein blends work best for texture. If you don’t have protein powder, you can substitute with an additional ½ cup of oats and 2 tablespoons of ground flaxseed, though the protein content will be lower.
- 1/4 cup Mini Dairy-Free Chocolate Chips (optional, but highly recommended!): Because joy is a non-negotiable ingredient! The mini chips distribute little pockets of melty chocolate throughout every bite. Substitution Tip: No mini chips? Chop up a dark chocolate bar, or use dried fruit like cranberries or raisins for a different kind of sweet pop.
Let’s Get Mixing: Your Foolproof Guide to Perfect Bars
Ready for the easiest “cooking” you’ll do all week? Let’s do this! I’ll walk you through every step with my favorite chef hacks to ensure success.
- Combine the Wet Ingredients. Grab a large mixing bowl and add your peanut butter and maple syrup. Now, here’s a little chef hack: if your nut butter is straight from the fridge and a little stiff, pop the open jar in the microwave for 15-20 seconds to loosen it up. This makes it so much easier to mix! Stir, stir, stir until the two are completely smooth and beautifully combined. You should have a glossy, thick, and irresistible-looking mixture. (Yes, tasting a tiny spoonful at this stage is practically mandatory.)
- Incorporate the Dry Team. Now, dump in your rolled oats and protein powder. If you’re using the chocolate chips, hold off on them for just a second! Use a sturdy spatula or even your hands to mix everything together. You’ll notice the mixture will start to thicken up significantly. This is a good sign! Pro Tip: If you add the chocolate chips now, they might melt from the residual heat and moisture. By letting the oat mixture cool down for a minute, you’ll keep those chips intact.
- Fold in the Fun. Once the oat mixture is well-combined and has cooled slightly, now is the time to gently fold in those mini chocolate chips. This ensures you get distinct little chocolatey gems in every single bar, rather than a swirly, muddy-looking bar.
- Press, Don’t Pat. Line an 8×8-inch baking pan with parchment paper, leaving some overhang on two sides. This is your “sling” that will make removing the whole slab of bars a breeze later. Transfer the mixture into the pan. Now, for the most important step: PRESS. Don’t just pat it down. Use the bottom of a flat measuring cup, a glass, or your hands to press the mixture down as firmly and evenly as you possibly can. Apply some real muscle here! This compacts the bars, ensuring they hold together later and don’t crumble when you slice them.
- The Chill-Out Session. Pop the pan into the refrigerator for at least 30 minutes, or until the bars are completely firm. This chilling time is non-negotiable—it’s what allows the bars to set up and become sliceable. I sometimes let mine go for a full hour if I have the time. Patience, just like Grandma said!
- Slice and Celebrate! Once firm, use the parchment paper sling to lift the entire block of granola out of the pan. Place it on a cutting board and use a sharp knife to slice it into 10 rectangular bars (or 12 smaller ones, if you prefer). And just like that, you’re a snack-making superstar!
How to Serve Up Your Homemade Goodness
These bars are perfect straight from the fridge, all cool and firm. I love wrapping them individually in a little parchment paper and tying them with baker’s twine for a cute, grab-and-go treat. Toss one in your lunchbox, your gym bag, or your purse for a guaranteed happy moment later. They also make a fantastic, wholesome dessert alongside a cup of coffee or a cold glass of almond milk. However you serve them, do it with pride—you made this!
Mix It Up! 5 Delicious Twists on the Classic
The beauty of this base recipe is its incredible versatility. Once you’ve mastered the classic, get creative! Here are a few of my favorite variations:
- Tropical Vibes: Swap the peanut butter for almond butter, and mix in ¼ cup of chopped dried mango and 2 tablespoons of unsweetened shredded coconut.
- Trail Mix Bar: Replace the chocolate chips with a mix of 2 tablespoons each of dried cranberries, chopped almonds, and pumpkin seeds.
- Double Chocolate Craver: Use chocolate protein powder and swap the chocolate chips for cacao nibs for a deep, rich, less-sweet chocolate fix.
- Apple Pie Bar: Add 1 teaspoon of cinnamon and ¼ cup of finely chopped dried apples to the mixture. It tastes like fall in every bite!
- Nut-Free & Seed-Tastic: Use sunflower seed butter and swap the chocolate chips for sunflower seeds and a handful of dried cherries.
Olivia’s Kitchen Notes & Stories
This recipe has been a living, evolving thing in my kitchen for years. The first time I made them, I was so impatient that I tried to slice them after only 15 minutes in the fridge. Let’s just say I ended up with a delicious, albeit slightly crumbly, “granola bark” instead of bars! It was still devoured, but it taught me the importance of that firm chill.
I’ve also learned that the brand of protein powder can make a difference. Some absorb more moisture than others. If your mixture seems too dry and isn’t sticking together, don’t panic! Just add another tablespoon of maple syrup or nut butter. If it seems too wet and sticky, add another tablespoon or two of oats. Trust your instincts—you’ve got this!
These bars are a testament to my core cooking philosophy: good food doesn’t have to be complicated. It’s about using a handful of quality ingredients to create something that nourishes both body and soul. I hope this recipe becomes a trusted friend in your kitchen, just like it is in mine.
Your Questions, Answered!
I’ve gotten so many wonderful questions about these bars over the years. Here are the most common ones to help you on your no-bake journey!
Q: My bars are too crumbly and falling apart! What did I do wrong?
A: This is the #1 question, and it almost always comes down to two things: not enough binding agent or not enough pressure. First, make sure you’re using a natural, oily nut butter and enough maple syrup. Second, and this is crucial, you MUST press the mixture into the pan with serious force. Really compact it! If you’ve done both and they’re still crumbly, try adding an extra tablespoon of nut butter next time.
Q: Can I make these without protein powder?
A: Absolutely! As mentioned in the ingredients, you can substitute the ½ cup of protein powder with ½ cup of additional rolled oats and 2 tablespoons of ground flaxseed or chia seeds. The texture will be slightly different, but they’ll still be delicious and hold together well.
Q: How long do these bars last, and how should I store them?
A> Because they are no-bake and contain perishable ingredients, they need to be stored in an airtight container in the refrigerator. They will stay fresh and firm for up to 1 week. You can also freeze them for up to 3 months! Just layer them between parchment paper in a freezer bag and thaw in the fridge or at room temperature when you’re ready to enjoy.
Q: My mixture was too sticky to handle. How can I fix this?
A> This can happen if your nut butter was particularly runny or if your protein powder is a brand that doesn’t absorb much liquid. Don’t worry! Just gradually add more rolled oats, a tablespoon at a time, until the mixture becomes thick and less sticky to the touch.
5-Ingredient No-Bake Granola Bars : Simple, Protein-Packed, and Totally Addictive
Description
Say goodbye to store-bought snacks and hello to your new favorite homemade treat! These 5-Ingredient No-Bake Granola Bars are chewy, naturally sweet, and packed with real ingredients that actually fuel you. Made with oats, nut butter, and a touch of maple syrup, they’re the perfect grab-and-go snack for busy mornings, post-workout fuel, or that 3 PM craving. Simple, satisfying, and endlessly customizable—snacking just got a whole lot smarter (and tastier).
Ingredients
-
1½ cups rolled oats (GF if needed)
-
1 cup natural peanut or almond butter
-
½ cup maple syrup or agave nectar
-
½ cup vanilla or unflavored plant-based protein powder
-
¼ cup mini chocolate chips (optional, but highly recommended!)
Instructions
-
Mix Wet Ingredients: In a large bowl, combine peanut butter and maple syrup until smooth.
-
Add Dry Ingredients: Stir in oats and protein powder until thick and well blended. Let cool slightly, then fold in chocolate chips.
-
Press Firmly: Line an 8×8-inch pan with parchment. Transfer the mixture and press down firmly with a flat cup or your hands to compact.
-
Chill: Refrigerate for at least 30 minutes (1 hour for best results).
-
Slice & Enjoy: Lift out using parchment, slice into 10 bars, and store in the fridge.
Notes
-
Too crumbly? Add an extra spoonful of nut butter or syrup.
-
Too sticky? Stir in a bit more oats.
-
Store in the fridge for 1 week or freeze up to 3 months.
Nutrition
- Calories: 210 cal Per Bar
- Fat: 10g
- Carbohydrates: 18g
- Fiber: 3g
- Protein: 9g
Quick Nutrition Breakdown (Per Bar)
Please note: This is an estimate and can vary based on the specific brands of ingredients you use.
- Calories: ~210
- Protein: 9g
- Fat: 10g
- Carbohydrates: 18g
- Fiber: 3g
- Sugar: 7g
Love This Recipe? Save It For Later!
Your 5-Minute Snack Revolution Awaits
And there you have it—your ticket out of the 3 PM slump and into a world of wholesome, delicious energy. You’re no longer at the mercy of the pantry abyss; you are its master.
In just five minutes of active time, you can create a snack that’s not only a triumph of flavor and texture but a small act of self-care. These bars are more than just oats and peanut butter; they’re a promise to yourself that good food can be simple, and that you are worth those few extra minutes of preparation.
So, go on. Embrace the simple joy of creating something with your own hands. Wrap up a bar, tuck it into your bag, and face your day with the confident knowledge that a little piece of homemade goodness is waiting for you.
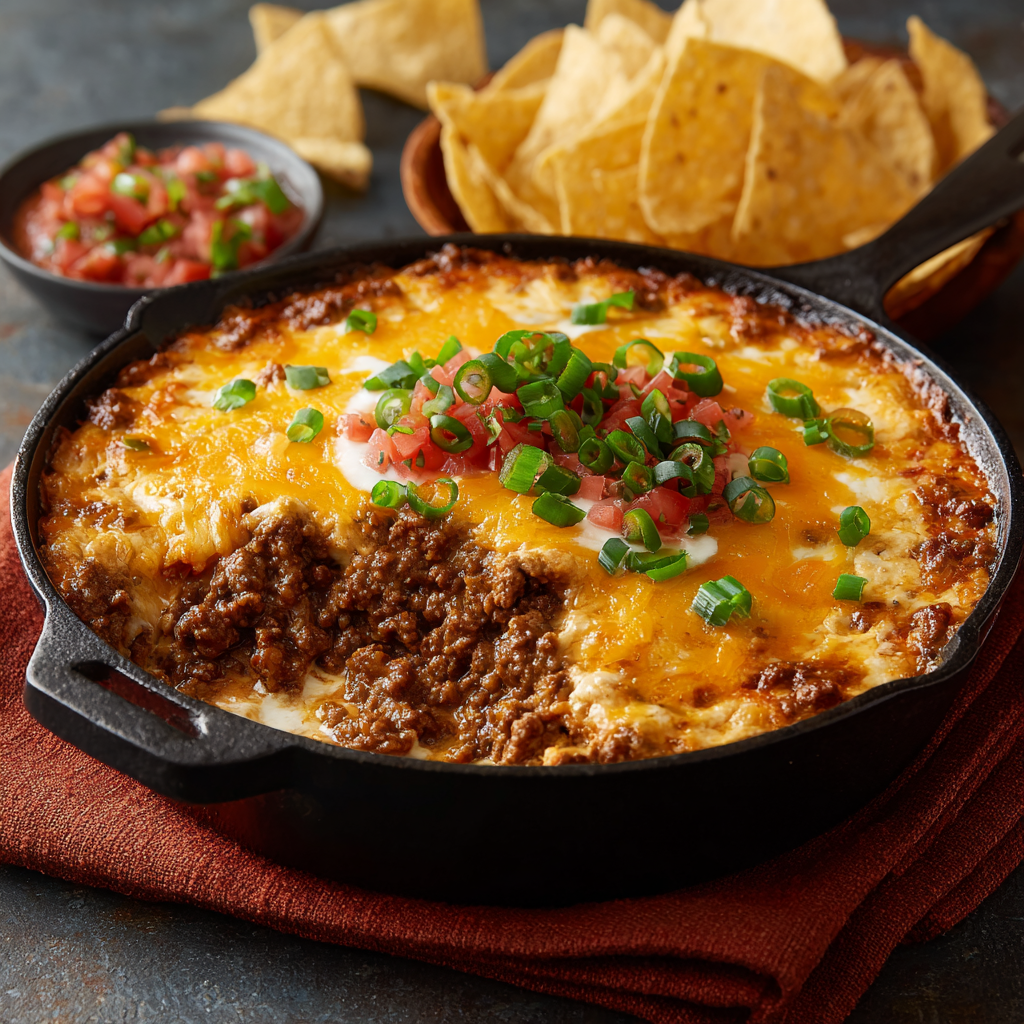
5-Ingredient Football Dip : Meaty, Cheesy & Made for Game Day
Easy 5-Ingredient Football Dip with Ground Beef and Cheddar
Your New Go-To Game Day Hero
Hey there, friend! Can you feel it? That electric buzz in the air on a Sunday afternoon? The sound of a roaring crowd on the TV, the friendly banter between plays, and the one, non-negotiable centerpiece of it all: the snack table. If you’re hosting this year’s big game watch, I see you. I know the pressure is on to deliver something epic, something that has everyone gathered around, scooping with abandon and giving you those wide-eyed, “this is incredible” nods.
But I also know you don’t want to be stuck in the kitchen all day. You want to be right there in the middle of the fun, not chained to the stove. That’s exactly why I’m so excited to share this recipe with you today. This 5-Ingredient Football Dip is my absolute MVP when it comes to feeding a hungry crowd with minimal fuss and maximum flavor. We’re talking layers of savory, seasoned beef, tangy cream cheese, zesty salsa, and a blanket of bubbly, golden cheddar. It’s hearty, it’s cheesy, and it bakes into a glorious, shareable masterpiece that disappears faster than a Hail Mary pass. So, grab your favorite baking dish and let’s make a dip that’s guaranteed to score a touchdown with your fans!
More Than Just a Dip: A Family Tradition
This dip holds a special place in my heart, and it all started in my dad’s chaotic, fun-filled “man cave.” Every football season, our basement transformed into the official Bennett Family Stadium. My dad would be in his element, wearing his lucky jersey, and the rule was simple: you don’t talk during a crucial play, and you always bring your appetite. One year, my mom, the brilliant woman she is, threw this dip together with what we had in the fridge. I remember pulling it out of the oven, its cheesy surface bubbling like a geyser, and the entire room fell silent for a moment—not because of the game, but because of the smell. It became an instant legend. Now, I can’t imagine a game day without it. It’s the taste of family, of friendly rivalry, and of knowing that the simplest things often create the best memories.
Gather Your All-Star Lineup
Here’s the beautiful part: you only need five key players to make this dip a star. I love keeping things simple, but I’ll also give you a little chef’s insight on each one to help you build the very best flavor.
- 2 lbs Lean Ground Beef (90/10): This is our hearty, protein-packed base. Using a leaner beef means less grease to drain, giving you a richer dip without the oil slick. Chef’s Tip: For a different twist, you can easily swap this for ground turkey, chicken, or even a plant-based ground “meat” crumble!
- 2 tbsp Taco Seasoning: This little packet is a powerhouse of flavor, instantly giving our beef that south-of-the-border zest. Chef’s Insight: If you have a few extra minutes, making your own blend with chili powder, cumin, garlic powder, and a pinch of paprika is a game-changer for freshness.
- 2 (8 oz) Packages Cream Cheese, Softened: This is the secret to that luxuriously creamy, cool layer at the bottom. Pro Tip: Remember to take the cream cheese out of the fridge at least 30 minutes before you start. Softened cream cheese spreads like a dream, while cold cream cheese will tear and clump.
- 2 (8 oz) Jars Salsa: This brings the tang, the moisture, and a customizable kick! Substitution Tip: This is where you control the heat. Use a mild salsa for a crowd-pleaser, a medium for a little zing, or a hot or chipotle salsa if your crew likes it fiery. I’m a medium girl, myself!
- 3 cups Shredded Sharp Cheddar Cheese: The glorious, melty, golden-brown crown! Chef’s Secret: Always, always shred your own cheese from a block. Pre-shredded bags contain anti-caking agents that can prevent it from melting as smoothly and beautifully. Trust me on this one—the extra minute of effort is 100% worth it.
Let’s Build the Ultimate Dip
Ready to see some kitchen magic happen? This process is as easy as 1-2-3 (and 4-5-6-7)! I’ll walk you through each step with my favorite little hacks to ensure dip perfection.
- Preheat Oven to 375°F (190°C). Getting your oven nice and hot before you start is key for that instant, bubbling bake. It’s like preheating the field before the players run on!
- In a skillet, cook ground beef over medium heat until browned. Drain any excess grease. I like to use a wooden spoon to break the beef up into nice, small crumbles as it cooks. This ensures every single scoop gets a perfect bite of beef. Once it’s no longer pink, I drain it in a colander to get rid of any extra fat. A leaner dip is a happier dip!
- Stir in taco seasoning and cook for 1–2 more minutes. This is where the flavor truly blooms! Toasting the seasoning with the beef for just a minute or two wakes up all those delicious spices and makes your whole kitchen smell incredible.
- In a 9-inch pie dish or baking dish, spread the cream cheese evenly on the bottom. Now for the fun part—layering! Take your softened cream cheese and use a spatula or the back of a spoon to spread it into a smooth, even layer. This is going to be our cool, creamy foundation. If it’s sticking a bit, a quick spritz of cooking spray on the dish first can help.
- Layer salsa over the cream cheese, then add the seasoned beef. Spoon the salsa over the cream cheese layer and gently spread it out. Don’t worry about mixing them; the distinct layers are part of the charm! Then, carefully spoon your beautifully seasoned beef over the salsa and press it down lightly into an even layer.
- Top with shredded cheddar cheese. The grand finale! Take that mountain of freshly shredded sharp cheddar and blanket the entire dip. Get it all the way to the edges for the perfect cheesy crust. This is what’s going to turn golden and gorgeous in the oven.
- Bake uncovered for 20–25 minutes, until bubbly and golden on top. Pop your masterpiece into the preheated oven and let the magic happen. You’re looking for the edges to be actively bubbling and the cheese on top to be melted, with those perfect golden-brown spots. If you have one, switching to the broiler for the last minute can give you an extra-crispy top—just don’t walk away!
How to Serve This Crowd-Pleaser
Presentation is part of the fun! I love serving this dip right in the warm baking dish placed on a trivet in the middle of the coffee table. Surround it with a vibrant array of dippers: sturdy, salty tortilla chips are a must, but don’t forget buttery crackers, crispy baguette slices, or even a platter of fresh veggie sticks like bell peppers and celery for a cool, crunchy contrast. Provide a few sturdy spoons for scooping and watch as your creation brings everyone together.
Get Creative! Fun Flavor Twists
Once you’ve mastered the classic, feel free to get creative and make it your own! Here are a few of my favorite twists:
- Spicy Fiesta: Mix a can of diced green chiles or fresh diced jalapeños into the beef layer, and top with a blend of Pepper Jack and cheddar cheese.
- Taco Supreme Style: After baking, scatter a handful of shredded lettuce, diced tomatoes, and sliced black olives over the top for a fresh, cool crunch.
- Creamy Ranch: Before spreading, mix one packet of dry ranch seasoning into the softened cream cheese for a herby, tangy base layer.
- Breakfast for the Big Game: Swap the ground beef for a layer of cooked, crumbled breakfast sausage and use a chunky salsa. Serve with hash browns for the ultimate morning game!
Olivia’s Chef Notes & Kitchen Confessions
This recipe has been a work-in-progress for years, and it’s evolved in the best ways. I used to just mix everything together in a pot, but I found that the beautiful, distinct layers not only look more impressive but also create a more dynamic eating experience. One of my funniest kitchen fails with this dip was the time I was chatting with a friend and accidentally used a tablespoon of cinnamon instead of chili powder in my homemade taco seasoning. Let me tell you, a “Cinnamon Beef Dip” is NOT a winner! We laughed it off and ordered pizza, but it was a great reminder to always double-check your spice jars.
This dip is also incredibly forgiving. If you only have one package of cream cheese, it will still be delicious. If you want to use a mix of mozzarella and cheddar for that epic cheese pull, go for it! Make it your own. The goal is to create something delicious that gets you out of the kitchen and back to your guests.
Your Questions, Answered!
I’ve gotten so many wonderful questions about this dip over the years. Here are the most common ones to help you out!
- Can I make this dip ahead of time? Absolutely! You are a game-day genius for asking. You can assemble the entire dip (through step 6), cover it tightly with plastic wrap, and refrigerate it for up to 24 hours. When you’re ready, just pop it in the preheated oven. You may need to add 5-10 minutes to the bake time since it’s going in cold.
- My dip is a bit greasy on top. How can I prevent that? This usually happens if the ground beef was higher in fat. The key is to drain the beef very, very well after browning. I even sometimes pat it gently with a paper towel to soak up any lingering grease before adding the seasoning. Using a leaner beef (90/10 or 93/7) is your best bet.
- What’s the best way to reheat leftovers? While the microwave works in a pinch, it can make the texture a bit rubbery. To restore its former glory, reheat it in a 350°F oven for 10-15 minutes, or until warmed through. It won’t be quite as perfect as the first bake, but it’s still mighty tasty!
- Can I make this in a slow cooker? You bet! This is a fantastic slow-cooker recipe for keeping the dip warm throughout the entire game. Simply brown and season the beef as directed, then layer it in your slow cooker: cream cheese, salsa, beef, cheddar. Cook on LOW for 2-3 hours, stirring occasionally once the cheese has melted.

5-Ingredient Football Dip : Meaty, Cheesy & Made for Game Day
Description
This recipe lives deep in my heart. It began years ago in my dad’s chaotic, big-energy “man cave,” where every Sunday our basement transformed into the Bennett Family Stadium. My dad wore his lucky jersey, the rule was you never talked during a crucial play, and you always showed up hungry.
Ingredients
1. 2 lbs Lean Ground Beef (90/10)
The hearty, protein-packed base.
Tip: Lean beef means less grease and a cleaner dip. You can sub turkey, chicken, or plant-based crumbles.
2. 2 tbsp Taco Seasoning
Instant, reliable flavor.
Tip: Make your own with chili powder, cumin, garlic powder, paprika, and salt for a fresher kick.
3. Two 8 oz Packages Cream Cheese, Softened
Your cool, rich, creamy foundation layer.
Tip: Let it sit out 30 minutes so it spreads smoothly.
4. Two 8 oz Jars Salsa
Adds tang, moisture, and adjustable heat.
Tip: Choose mild, medium, or hot — whatever your crowd prefers.
5. 3 cups Shredded Sharp Cheddar Cheese
Your golden, melty crown.
Chef’s Secret: Always shred from a block. Pre-shredded cheese contains anti-caking agents that prevent smooth melting.
Instructions
A hot oven = instant bubbling magic.
Cook over medium heat, breaking it into small crumbles. Drain thoroughly.
Tip: I sometimes pat it with a paper towel to remove extra grease.
Cook 1–2 minutes to toast the spices and deepen flavor.
Use a spatula to create a smooth, even base.
Tip: Lightly spray the dish first for easier spreading.
Spread evenly over the cream cheese. Keep the layers separate — that’s part of the magic.
Spoon it on gently and press into an even layer.
Cover edge to edge for the perfect golden crust.
You’re looking for bubbling edges and lightly golden cheese.
Optional: Broil 1 minute at the end for extra crispiness — but don’t walk away!
Notes
This dip has evolved over years of game days and kitchen mishaps. At first, I mixed everything together in one pot — but the layered version tastes better and looks 10x more impressive.
One of my biggest fails? Accidentally grabbing cinnamon instead of chili powder while chatting with a friend. “Cinnamon Beef Dip” was… an experience. We laughed, grabbed pizza, and vowed to double-check spice jars forever.
The beauty of this dip is its forgiving nature. Only have one cream cheese block? Still delicious. Want to mix cheddar and mozzarella for a cheese pull? Go for it. The goal is to feed your crowd with minimal stress.
Quick Nutrition Facts
Please note: This is an estimate and can vary based on specific ingredients used.
Prep Time: 10 minutes | Cook Time: 25 minutes | Total Time: 35 minutes | Servings: 16
Per Serving (estimated): Calories: 275 | Fat: 21g | Carbs: 4g | Protein: 15g | Sodium: 430mg
Final Thoughts: Your Game-Day Victory Lap
Well, there you have it—your ticket to becoming the MVP of game day hosting. This 5-Ingredient Football Dip with Ground Beef and Cheddar is more than just a recipe; it’s your secret weapon. It proves that you don’t need a complicated playbook or hours in the kitchen to create something truly memorable. With just a handful of humble ingredients and a few simple steps, you can deliver a warm, hearty, and irresistibly cheesy centerpiece that will have your guests cheering.
Remember, the magic of this dip lies in its beautiful simplicity and its incredible versatility. Stick to the classic layers for a guaranteed crowd-pleaser, or get creative with one of the fun twists to make it your own signature dish. Whether you’re serving it straight from the oven in a pie dish or keeping it warm in a slow cooker all game long, it’s built for sharing, for gathering, and for creating those loud, happy, finger-licking moments that define the best watch parties.
So, as you preheat your oven and gather your “all-star lineup,” know that you’re about to do more than just make a snack. You’re crafting an experience. You’re setting the stage for laughter, for debate over a referee’s call, and for that satisfied silence that falls over a room when everyone is too busy enjoying something delicious to talk.
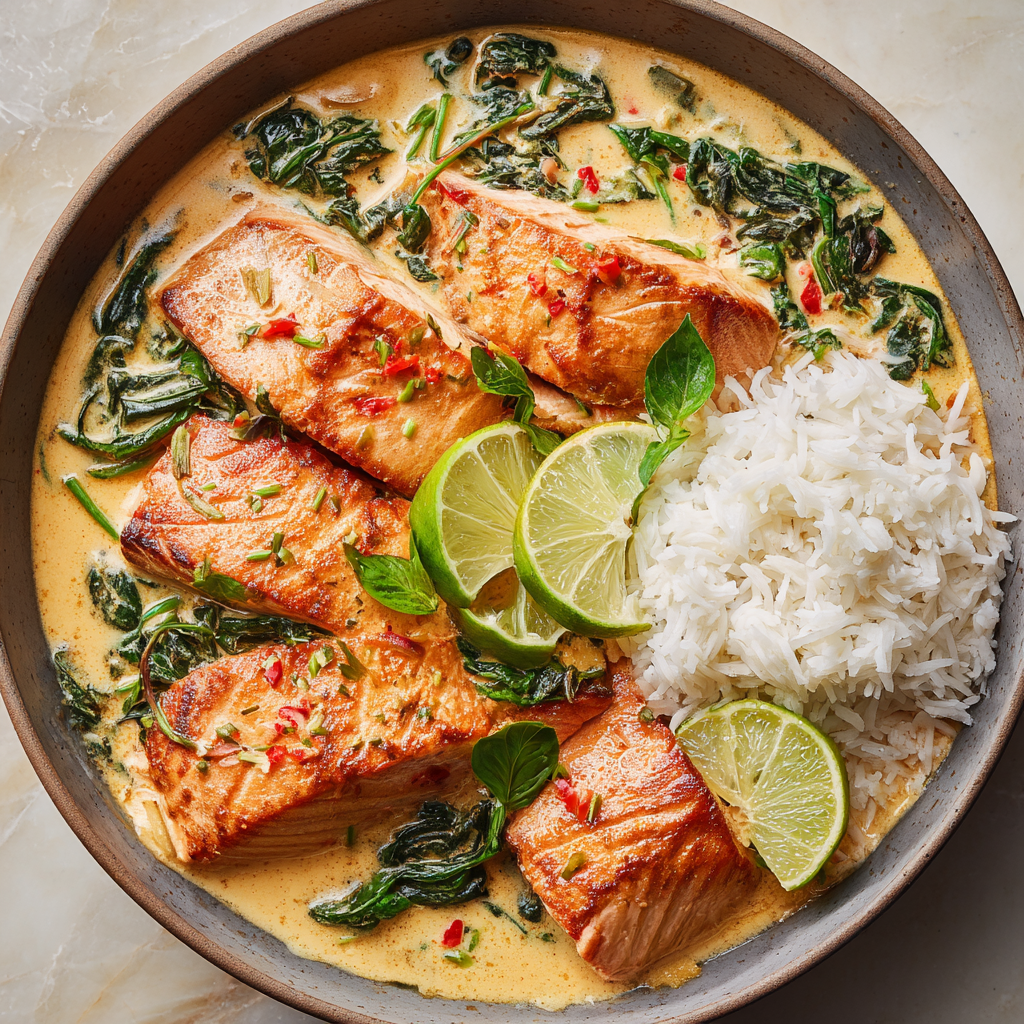
30-Minute Salmon Coconut Curry
Double the Comfort, Double the Flavor: Your New Crowd-Pleaser
Hey there, kitchen friend! Olivia here, apron slightly dusted with curry powder and a big smile on my face. There’s something magical about watching faces light up when you bring a steaming pot to the table, isn’t there? That’s exactly why I’m over-the-moon excited to share this 30-Minute Salmon Coconut Curry scaled up for EIGHT glorious servings. Imagine: tender salmon fillets swimming in a creamy, fragrant coconut sauce kissed with Thai spices and pops of fresh basil. It’s the kind of dish that turns Tuesday dinners into mini-celebrations and makes weekend hosting feel effortless.
We’ve all been there – scrambling when extra friends show up, or simply wanting leftovers that actually excite you on day three (confession: I’ve been known to hide a portion in the back of the fridge!). This recipe solves it all. It keeps everything we adore about salmon curry – the luxurious texture, the bold-but-balanced flavors, that incredible aroma – but in a generous batch designed for sharing or savoring all week. No fancy skills required, just one pot (or two if doubling up pans!), simple ingredients, and half an hour. Let’s turn up the heat on comfort food and make something unforgettable together!
That One Time I Fed an Unexpected Crowd
Picture this: It was a chilly Seattle Sunday, meant for just me and my husband. I’d picked up a single salmon fillet at the market, dreaming of a quiet curry night. Then the texts started rolling in – friends stranded nearby with a flat tire! Before I knew it, our cozy table for two needed to stretch for six hungry, slightly damp humans. Panic? Briefly. Then my “scale it up” instincts kicked in. I raided the pantry – extra coconut milk, that big tub of spinach threatening to wilt, a double scoop of trusty red curry paste. What felt like kitchen chaos transformed into pure magic. The smell alone had everyone huddled around the stove, and the sight of that massive pot brimming with vibrant curry and flaky salmon? Pure joy. Watching friends go back for seconds, scraping the pot clean with crusty bread, laughing in our tiny kitchen… that’s the moment this scaled-up version was born. It taught me that doubling comfort is the best kind of math!
Gathering Your Flavor Arsenal
Here’s your dream team of ingredients – the building blocks for maximum flavor with minimal fuss. Don’t stress about perfection; cooking is an adventure!
- 8 Fresh Salmon Fillets (about 6 oz each): The star! Look for center-cut fillets with vibrant color and firm flesh. Chef’s Tip: Skin-on adds flavor and holds the fish together beautifully during searing. Swap: Arctic char or even thick cod fillets work in a pinch!
- Salt & Pepper, to taste: The essential flavor enhancers. Season generously – salmon loves it!
- 2 tbsp Olive Oil + 2 tbsp Butter: Our dynamic searing duo. The oil handles high heat, the butter adds richness and helps achieve that gorgeous golden crust. Insight: This combo creates the flavorful fond (those tasty brown bits) that becomes the base of our incredible sauce.
- 4 Garlic Cloves, minced: Fragrant, pungent goodness. Hack: Use a microplane for super-fine mincing that melts into the sauce.
- 4 heaping tbsp Thai Red Curry Paste: Flavor BOMB alert! This is where the magic starts. Key: Use a good quality paste (like Mae Ploy or Thai Kitchen). “Heaping” is crucial for that bold flavor in a big batch. Note: Spice levels vary – taste yours first!
- 2 (13.5 oz) Cans Full-Fat Coconut Milk: Creaminess central! Full-fat is non-negotiable for that luscious texture and rich flavor. Light coconut milk will leave the sauce thin and sad. Shake the cans well before opening!
- 1 tsp Brown Sugar: Our secret harmonizer. Just a touch balances acidity and heat, rounding out the flavors without making it sweet. Swap: Coconut sugar or palm sugar work great.
- 2 tsp Lime Juice: The bright, fresh finish! Adds crucial acidity to cut through the richness. Always use fresh – bottled just doesn’t compare.
- 4 tbsp Fresh Basil, torn or chopped: The aromatic crown jewel! Thai basil is ideal (slightly licorice-y), but sweet basil works too. Tear, don’t chop finely, to release maximum oils. Add at the VERY end!
- 2 (16 oz) Bags Fresh Spinach: Our green powerhouse adding nutrients, color, and volume. It wilts down dramatically. Chef’s Insight: Adding it in batches makes it easier to manage in a large pot.
Let’s Get Cooking: Your Step-by-Step Journey
Ready to create some magic? Grab your largest skillet (a 12-inch minimum!) or have two large pans ready if needed. Let’s dive in!
- Sear the Salmon (Flavor Foundation!): Pat those salmon fillets very dry with paper towels – this is CRUCIAL for getting a golden sear, not steamed fish! Season generously all over with salt and pepper. Heat the olive oil and butter in your large skillet(s) over medium-high heat. Once the butter is melted and sizzling (but not burning!), carefully add the salmon fillets, skin-side down if they have skin. CHEF’S HACK: Don’t overcrowd the pan! Give them space. If using one pan, sear in batches, adding a touch more oil/butter if needed. Let them cook undisturbed for 3-4 minutes – resist the urge to peek too early! You want a beautiful golden crust. Flip carefully and sear the other side for another 3 minutes. The salmon won’t be cooked through yet – perfect! Transfer them to a clean plate. Those gorgeous brown bits left behind? Liquid gold for your sauce!
- Build the Sauce (Aroma Explosion!): Reduce the heat to medium. Add the minced garlic to the pan drippings. Stir constantly for about 30 seconds – just until fragrant! Don’t let it burn. Now, add those glorious 4 heaping tablespoons of Thai red curry paste. Stir it constantly into the garlic and drippings, letting it cook for a full minute. This “blooms” the spices, releasing their incredible aroma and depth of flavor. Your kitchen should smell amazing right now!
- Simmer (Creamy Dream Unfolds): Pour in both cans of full-fat coconut milk, scraping the bottom of the pan to dissolve all that flavorful fond. Add the brown sugar and lime juice. Give it a good whisk to combine everything smoothly. Bring the mixture to a gentle simmer – not a rolling boil. Let it bubble happily for 3-5 minutes. You’ll see it thicken slightly and the oils start to shimmer on the surface. Taste it! This is your moment to adjust – need a pinch more salt? A tiny bit more lime? Go for it!
- Add Spinach & Salmon (Bringing it Home!): Now for the greens! Add the fresh spinach – it will look like a MOUNTAIN, but don’t panic. Stir it in batches as it wilts down dramatically. This takes just a couple of minutes. Once the spinach is wilted and incorporated, gently nestle the seared salmon fillets back into the simmering sauce. Spoon that luscious sauce over the top of each fillet. Let everything simmer gently together for another 5 minutes. This gently finishes cooking the salmon through – it should flake easily with a fork but still be moist and tender inside. WATCHFUL EYE TIP: Avoid vigorous boiling now to keep the salmon perfect.
- Finish & Serve (The Grand Finale!): Remove the pan from the heat. This is key! Sprinkle the torn fresh basil over the top. Stirring it in off the heat preserves its vibrant color and fresh flavor. Give one final gentle stir to incorporate the basil. That’s it! Your magnificent, crowd-feeding salmon coconut curry is ready to shine.
Serving with Style
Presentation is part of the fun! Ladle generous portions of that creamy, spinach-flecked curry and a salmon fillet into shallow bowls. I love serving this family-style – plop that big, beautiful skillet (if it’s presentable!) right in the middle of the table on a trivet. Must-Have Sides: Fluffy jasmine rice is the classic, perfect companion for soaking up every drop of sauce. Rice noodles are a fantastic gluten-free alternative. For a fresh counterpoint, add a simple cucumber salad with rice vinegar or a plate of lime wedges for extra zing. Don’t forget extra basil sprigs for garnish! The vibrant green against the orange-red curry is pure eye candy.
Make It Your Own: Delicious Twists
This curry is your canvas! Play with these tasty variations:
- Veggie Powerhouse: Swap salmon for 2 cans (drained) chickpeas or 2 blocks of cubed extra-firm tofu (press and pan-fry first!). Add 2 cups chopped bell peppers or broccoli florets with the spinach.
- Green Curry Love: Use Thai green curry paste instead of red for a brighter, slightly herbaceous flavor. Add a handful of green beans with the spinach.
- Spice Seeker: Kick up the heat! Add 1-2 thinly sliced Thai chilies or ½ tsp red pepper flakes when cooking the curry paste.
- Thai Basil Boost: Find Thai basil? Use it! Its unique anise note is divine. Add an extra handful stirred in at the end.
- Creamy Coconut Lime: Stir in 1 tsp lime zest with the lime juice and finish with a drizzle of coconut cream (the thick part from the top of the can) when serving.
Chef’s Notes: From My Apron to Yours
This recipe has become my ultimate “feed the people” lifesaver, evolving from that frantic Sunday years ago. I used to worry about overcooking the salmon in the sauce, but searing first creates a barrier and the gentle simmer is key. The biggest game-changer? Using TWO large skillets when I’m making this for a big gathering – searing salmon in one while starting the sauce in another, then combining them. Saves time and sanity! One slightly disastrous (but funny) early attempt involved forgetting to shake the coconut milk – we ended up with weird, separated clumps floating in thin liquid. Lesson learned: SHAKE THOSE CANS! Now, the smell of this curry simmering instantly transports me back to laughter-filled kitchens and shared meals. That’s the real magic – it’s not just dinner, it’s connection in a bowl.
FAQs & Troubleshooting: Your Curry Questions, Answered
Q: My sauce seems thin! How can I thicken it?
A: Don’t panic! First, ensure you used full-fat coconut milk. If it’s still thin after simmering, let it bubble gently uncovered for a few extra minutes to reduce. A super quick fix: mix 1 tsp cornstarch with 1 tbsp cold water to make a slurry, then whisk it into the simmering sauce (before adding salmon back) for 1-2 minutes until thickened.
Q: Can I use frozen salmon?
A: Absolutely! Thaw it COMPLETELY in the fridge overnight first. Pat it incredibly dry – frozen fish releases more water – to ensure a good sear. Cook times might be slightly shorter, so keep an eye on it.
Q: My curry paste is way too spicy! Help!
A: Taste your paste first next time! To rescue it now: Stir in an extra ½ can of coconut milk and a squeeze more lime juice. A teaspoon of honey or maple syrup can also help counterbalance heat more effectively than sugar. Serve with extra rice to dilute each bite.
Q: Can I make this ahead?
A: Yes, but with a caveat. The sauce (without basil) can be made 1 day ahead. Store covered in the fridge. Reheat gently, then add the salmon and simmer until cooked through (fresh salmon is best cooked just before serving). Add the fresh basil right before serving. Pre-cooked salmon reheated in the sauce can become dry.
30-Minute Salmon Coconut Curry
- Total Time: 30 mins
Description
Rich, fragrant, and gloriously comforting, this 30-minute Salmon Coconut Curry is made for sharing. With tender salmon fillets nestled in a velvety Thai-spiced coconut sauce and brightened with fresh basil and lime, this dish turns everyday ingredients into a soul-satisfying experience. Whether you’re hosting guests or meal-prepping for the week, this crowd-pleaser delivers bold flavor, warm hugs, and leftovers worth fighting over.
Ingredients
-
8 salmon fillets (6 oz each, skin-on preferred)
-
Salt & pepper, to taste
-
2 tbsp olive oil + 2 tbsp butter
-
4 garlic cloves, minced
-
4 heaping tbsp Thai red curry paste
-
2 (13.5 oz) cans full-fat coconut milk
-
1 tsp brown sugar
-
2 tsp fresh lime juice
-
2 (16 oz) bags fresh spinach
-
4 tbsp fresh basil, torn
-
Optional: Lime wedges, jasmine rice for serving
Instructions
-
Sear Salmon: Pat fillets dry, season well. Heat oil + butter in large skillet(s), sear salmon 3–4 mins per side until golden. Set aside.
-
Make Sauce: In same pan, sauté garlic for 30 secs. Add curry paste, cook 1 min. Stir in coconut milk, brown sugar, and lime juice. Simmer 3–5 mins.
-
Add Spinach: Stir in spinach in batches until wilted.
-
Finish: Return salmon to skillet, spoon sauce over top. Simmer gently 5 mins until salmon is just cooked. Remove from heat, stir in basil.
Notes
-
Use two skillets to speed up cooking for a crowd
-
Shake coconut milk cans well before using
-
Don’t skip searing—it locks in flavor and texture
-
Add basil off heat to preserve aroma
- Prep Time: 10 mins
- Cook Time: 20 mins
Nutrition
- Calories: 480 cal Per Serving
- Fat: 35g
- Carbohydrates: 7g
- Protein: 30g
Nutritional Info (Per Serving, Makes 8)
Calories: ~480 | Fat: 35g | Carbs: 7g | Protein: 30g
Note: Estimates include salmon and sauce served with rice/noodles calculated separately. Values can vary based on specific ingredients used.
Final Thoughts: More Than Just a Recipe
This 30-Minute Salmon Coconut Curry for Eight isn’t just about feeding a crowd—it’s about creating moments. The aroma alone draws people into the kitchen, and the first bite feels like a hug.
Why This Dish Stands Out:
✅ Flexible – Adapts to tofu, veggies, or different proteins.
✅ Forgiving – Even if the salmon isn’t perfectly seared, the sauce saves the day.
✅ Memorable – The blend of spicy, creamy, and fresh flavors leaves an impression.
Last Tip: Make extra rice. Someone will ask for seconds.
Now, grab that big pot and get cooking—your next gathering just got tastier! 🍛
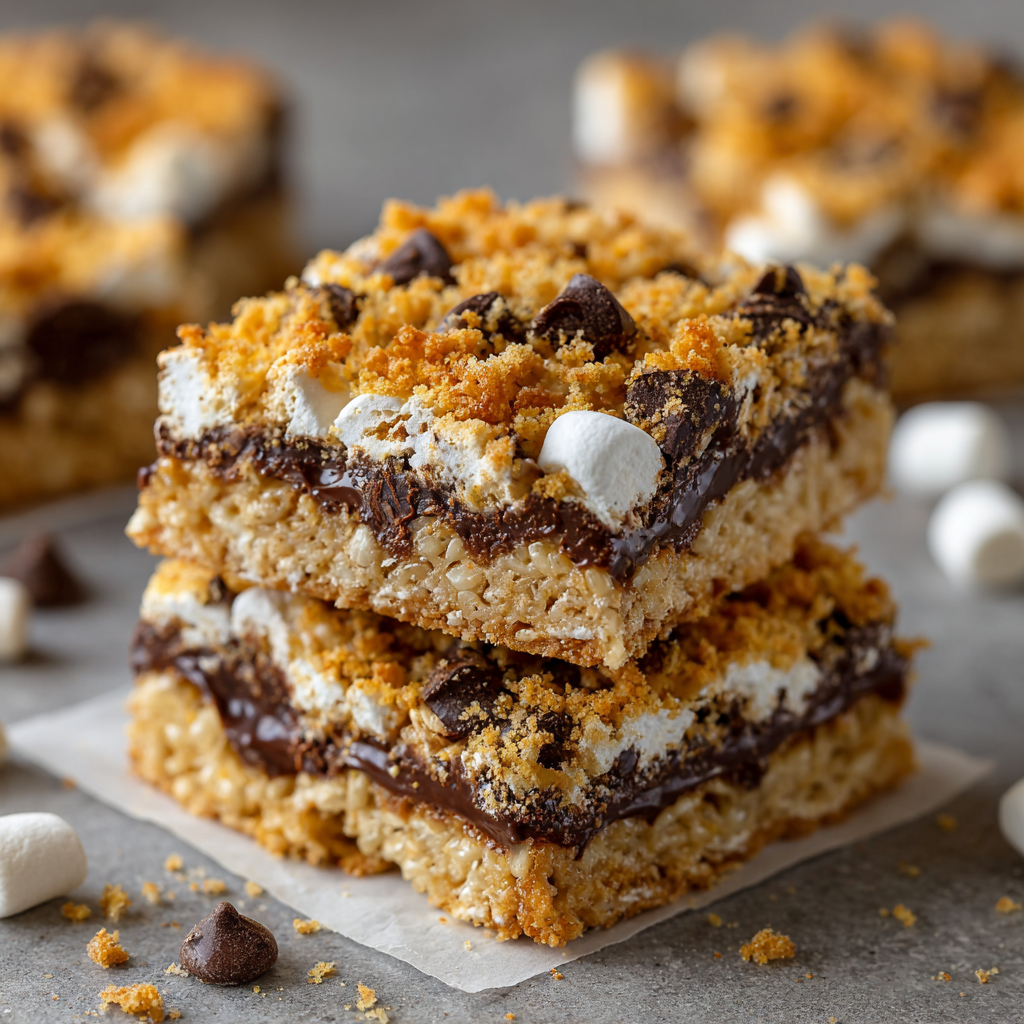
5-Layer Crispy S’mores Bars
When a S’more and a Magic Bar Fall in Love: Meet Your New Favorite Dessert
Hey there, friend! Come on in, grab an apron, and get ready for your kitchen to smell like a happy campfire meets a cozy bakery. I’m so excited to share this recipe with you today because it’s one of those legendary, “please-can-I-have-the-recipe” kind of treats. We’re talking about my 5-Layer Crispy S’mores Bars.
You know that feeling when you’re craving something sweet, but you don’t want to fuss with creaming butter and sugar, chilling dough, or any of that fancy pastry chef business? Yeah, me too. Some days, you just need a dessert that delivers maximum joy with minimal effort. That’s exactly what these bars are all about.
Imagine this: a crunchy, buttery base made from Rice Krispies (yes, you read that right!), a pillow-soft layer of toasted mini marshmallows, a river of melted chocolate chips, the nostalgic crunch of graham crackers, and the whole glorious mess is held together by a golden, caramel-like drizzle of sweetened condensed milk. It bakes up into this incredible mosaic of textures—crispy, chewy, gooey, and downright magical.
This is the kind of dessert that disappears before it even has a chance to cool completely. It’s a guaranteed hit at potlucks, the perfect peace offering for a bake sale, and the ultimate “I-love-you” for your family on a random Tuesday. So, let’s make a little magic together, shall we?
The Campfire That Started It All
This recipe always takes me back to my grandparents’ backyard. Every summer, my grandpa would build a proper fire pit, and we’d have s’mores night. I was the kid who would patiently roast my marshmallow to a perfect golden brown, only to immediately ruin the technique by shoving a giant, too-big piece of chocolate and a crumbly graham cracker into the mix. I’d end up with more marshmallow on my cheeks than in my mouth, but oh, was it worth it.
One rainy evening, the campfire plans were cancelled, and my little heart was shattered. My grandma, the ultimate kitchen wizard, saw my pout and declared, “No fire? No problem!” She ushered me into the kitchen, pulled out a box of cereal, a bag of marshmallows, and a can of that magical sweet milk. We layered everything into a pan, popped it in the oven, and created an indoor s’more that was even better than the original. It was our secret recipe for years. Today’s version is a loving nod to her—a little more structured, but with the same beautiful, chaotic, gooey soul. It’s proof that the best memories often find a way into our recipes.
Gathering Your Gooey, Crunchy, Chocolatey Crew
Here’s the beautiful part: you probably have most of this in your pantry right now! No fancy trips to the store required. Let’s break down our all-star cast of characters.
- 6 cups Rice Krispies cereal: This is our genius base! It gives a light, crispy texture that’s so much fun compared to a traditional flour base. Chef’s Insight: Make sure your cereal is fresh for the best crunch. A stale box will make for a sad, soft base.
- 1/2 cup melted butter or margarine: This gets drizzled right over the cereal, toasting it and giving it a rich, buttery flavor. Substitution Tip: You can use salted or unsalted butter here. I often use salted because I love that sweet-and-salty kick! For a dairy-free version, a plant-based butter works wonderfully.
- 2 cups mini marshmallows: The smaller the marshmallow, the more evenly they melt and distribute their pillowy goodness. Chef’s Insight: Don’t pack them down! Let them sit loosely so the sweetened condensed milk can seep through.
- 1 cup semi-sweet chocolate chips: The classic s’mores chocolate. Substitution Tip: Feel free to mix it up! Milk chocolate chips will make it sweeter, dark chocolate chips will add a sophisticated bitterness, or even peanut butter chips would be a delicious twist.
- 1/2 package graham crackers, crushed: This is our top-layer crunch! It gives you that authentic graham cracker flavor and a wonderful texture. Chef’s Insight: You can crush them in a bag with a rolling pin for a rustic look, or pulse them in a food processor for a more even crumb. I like a mix of fine powder and a few bigger chunks for texture.
- 1 can (14 oz) sweetened condensed milk: The glue, the magic, the golden ribbon that holds it all together! It caramelizes in the oven, binding every layer into one cohesive, gooey bar. Important Note: Do NOT use evaporated milk—it’s not the same thing and won’t work here.
Let’s Build Some Magic: The Step-by-Step Guide
Okay, team. This is where the fun begins. We’re not mixing, we’re layering. It’s like edible arts and crafts. Get your pan ready, and let’s dive in!
- Preheat & Prep: First things first, get that oven preheating to a toasty 350°F (175°C). Now, grab your 9×13 inch glass baking dish. Pro-Tip: Lining it with parchment paper is a game-changer. Leave a little overhang on two sides, and you’ll have a built-in sling to lift the entire batch of bars out for pristine, crumb-free slicing later. Trust me on this one!
- The Crispy Base: Pour all 6 cups of Rice Krispies cereal right into your prepared dish. Gently shake the dish or use your hands to spread them into one even, lovely layer. We’re building a foundation here, so we want it to be nice and uniform.
- The Buttery Drizzle: Take your melted butter and, using a spoon, drizzle it back and forth over the entire surface of the cereal. Little Chef Hack: Try to get it as even as possible. This buttery bath is what’s going to toast our cereal and give it that incredible flavor, so we don’t want any dry spots!
- Pillowy Marshmallow Clouds: Now for the fun part—sprinkle those 2 cups of mini marshmallows all over the top. Just scatter them with abandon! Don’t press them down. Let them stay light and fluffy so they can do their melty magic in the oven.
- The Chocolate River: Next up, the chocolate chips! Sprinkle them evenly over the marshmallows. I like to get right up close and personal, scattering them from a height so they fall into all the nooks and crannies between the marshmallows.
- Graham Cracker Crunch: Time for our graham cracker crumbs. Take your crushed crackers and scatter them across the top. This creates a beautiful, sandy-textured layer that will get wonderfully crisp in the oven.
- The Golden Glue: Here comes the star of the show—the sweetened condensed milk. Open the can and slowly, slowly pour it in a thin, steady stream over the entire dish. Pro-Tip: Try to make a zig-zag or a spiral pattern to ensure every single square inch gets a touch of that sweet, caramelizing goodness. This is what binds our five layers into one epic bar.
- Bake to Perfection: Carefully slide your masterpiece into the preheated oven. Bake for 25-30 minutes. You’re looking for a beautifully golden brown top, with bubbles happily puffing up around the edges. Your whole house will smell absolutely divine.
- The Hardest Part: The Wait: I know, I know. This is the ultimate test of willpower. But you must let the pan cool completely on a wire rack before you even think about slicing. I’m talking a few hours, or even popping it in the fridge to speed things up. If you cut into it warm, it will be a delicious, but soupy, mess. The cooling time is when the sweetened condensed milk sets up and creates the perfect bar texture.
How to Serve These Gooey Masterpieces
Once your bars are completely cool, use the parchment paper sling to lift the whole block onto a cutting board. A sharp chef’s knife or a bench scraper is your best friend here. For super clean cuts, you can even wipe the blade clean between slices. These bars are rich, so I usually cut them into 12 generous squares, but you can easily get 16 smaller, two-bite pieces for a party. Serve them on a big platter, maybe with a little extra sprinkle of graham cracker crumbs on top for a fancy touch. They’re perfect with a tall glass of cold milk, a hot coffee, or just eaten standing over the kitchen sink in a moment of pure bliss—no judgment here!
Get Creative! Fun Flavor Twists
Once you’ve mastered the classic, the world is your oyster! Here are a few of my favorite ways to mix it up:
- Salty-Sweet Supreme: Sprinkle 1/2 cup of crushed pretzels in with the graham cracker layer. The saltiness is a phenomenal contrast to the sweet.
- Tropical Escape: Swap the chocolate chips for 1 cup of white chocolate chips and add 1/2 cup of shredded coconut with the marshmallows. It’s like a s’more went on vacation!
- Peanut Butter Paradise: Drizzle 1/2 cup of warm peanut butter over the cereal layer *before* adding the marshmallows. You’re welcome.
- “Rocky Road” Rendezvous: Add 1/2 cup of chopped walnuts or pecans with the chocolate chips for a delightful crunch.
- “Everything but the Pantry” Bar: Toss in a handful of butterscotch chips, toffee bits, or even crushed potato chips for the ultimate Franken-dessert.
Olivia’s Kitchen Confidential
This recipe has been through so many iterations in my kitchen! I once tried to make it “healthier” by using a sugar-free cereal and low-fat condensed milk. Let’s just say it was a noble failure. Some recipes are meant to be indulgent, and this is one of them. Embrace the butter and sugar, friends!
Another funny story: I brought these to a neighborhood BBQ once, and a very serious foodie spent ten minutes trying to guess the “secret ingredient” in the crust. He was convinced it was some exotic nut or a special shortbread. The look on his face when I said “Rice Krispies” was priceless. It’s the ultimate humblebrag dessert—it looks and tastes incredibly complex, but the secret is wonderfully simple.
Over time, I’ve learned that the parchment paper sling is non-negotiable for pretty bars, and that letting them cool is the true mark of a patient baker. This recipe is a testament to my grandma’s no-fuss, big-flavor philosophy, and I hope it becomes a beloved staple in your home, too.
Your Questions, Answered!
I’ve made these bars more times than I can count, and I’ve heard all your brilliant questions. Here are the answers to the most common ones!
Q: My bars are way too gooey and fall apart when I cut them. What happened?
A: The number one culprit is not letting them cool completely! I promise, the wait is essential for the structure. The second most common issue is not using enough sweetened condensed milk or not distributing it evenly. Make sure you’re using the full 14-ounce can and pouring it in a slow, steady stream to cover everything. If you’re in a hurry, pop the pan in the fridge for an hour to set.
Q: Can I make these gluten-free?
A> Absolutely! Just ensure your Rice Krispies cereal is a gluten-free brand (many are, but always check the box!), and use certified gluten-free graham crackers. All the other ingredients are naturally gluten-free, so it’s a super easy swap.
Q: My marshmallows on top got really dark/burnt. How can I prevent that?
A> Great question! Ovens can vary, and the sugars in the marshmallows can brown quickly. If you notice the top getting too dark before the 25-minute mark, simply lay a loose piece of aluminum foil over the top of the pan for the remainder of the baking time. This will act as a shield and prevent over-browning.
Q: Can I use a different pan size?
A> You can, but it will change the texture. A 9×13 is ideal. If you use a smaller pan (like an 8×8), the bars will be much thicker and will need a longer baking time. A larger pan will make thinner, more fragile bars that bake faster. Stick with the 9×13 for your first try!

5-Layer Crispy S’mores Bars
Description
Imagine a campfire in your kitchen: crunchy Rice Krispies, pillowy marshmallows, gooey chocolate, graham cracker crunch, and sweetened condensed milk holding it all together. These 5-layer bars are quick to make, irresistibly gooey, and perfect for parties, bake sales, or just indulging at home. Minimal fuss, maximum magic.
Ingredients
Bars:
-
6 cups Rice Krispies cereal
-
½ cup melted butter or margarine
-
2 cups mini marshmallows
-
1 cup semi-sweet chocolate chips
-
½ package graham crackers, crushed
-
1 can (14 oz) sweetened condensed milk
Instructions
-
Preheat & Prep: Preheat oven to 350°F (175°C). Line a 9×13-inch baking dish with parchment paper, leaving an overhang on two sides.
-
Crispy Base: Spread Rice Krispies evenly in the dish.
-
Buttery Drizzle: Drizzle melted butter evenly over the cereal.
-
Marshmallow Layer: Sprinkle mini marshmallows on top—do not press down.
-
Chocolate Layer: Evenly scatter chocolate chips over the marshmallows.
-
Graham Cracker Layer: Sprinkle crushed graham crackers on top.
-
Sweetened Condensed Milk: Pour in a thin, even stream of sweetened condensed milk over the top.
-
Bake: Bake 25–30 minutes until the top is golden and bubbly. Cover with foil if marshmallows brown too quickly.
-
Cool Completely: Let the bars cool completely in the pan (or refrigerate for faster setting) before slicing. Use the parchment sling to lift out and cut into 12–16 squares.
Notes
-
Salty-Sweet: Add ½ cup crushed pretzels with the graham crackers.
-
Tropical: Swap chocolate chips for white chocolate and add ½ cup shredded coconut.
-
Peanut Butter: Drizzle ½ cup peanut butter over the cereal layer before marshmallows.
-
Nutty Crunch: Add ½ cup chopped walnuts or pecans with chocolate chips.
-
Gluten-Free: Use gluten-free Rice Krispies and graham cracker
Nutrition
- Calories: 350cal Per Serving
- Fat: 15g
- Carbohydrates: 50g
- Fiber: 2 g
- Protein: 4g
Nutritional Information*
*Please note: These are estimates generated by an online calculator and will vary based on your specific ingredients and portion sizes.
Prep Time: 10 minutes | Cook Time: 30 minutes | Total Time: 40 minutes + cooling | Servings: 12 bars
Per Bar: Calories: 320 | Fat: 15g | Carbohydrates: 44g | Sugar: 28g | Protein: 4g | Fiber: 1g | Sodium: 160mg
Final Thoughts: More Than Just a Dessert
So there you have it—the dessert that bridges the gap between a campfire’s crackle and a bakery’s warmth. These 5-Layer Crispy S’mores Bars are more than just a list of ingredients; they’re a vessel for memory, a testament to kitchen creativity, and a guaranteed smile-maker.
Whether you’re making them to cure a rainy-day disappointment, to impress your friends, or simply to treat yourself, I hope this recipe brings as much joy to your kitchen as it has to mine. It’s a little piece of my family’s story, and I’m so thrilled to share it with you. Now, go forth and bake up some magic of your own. Don’t forget the milk!
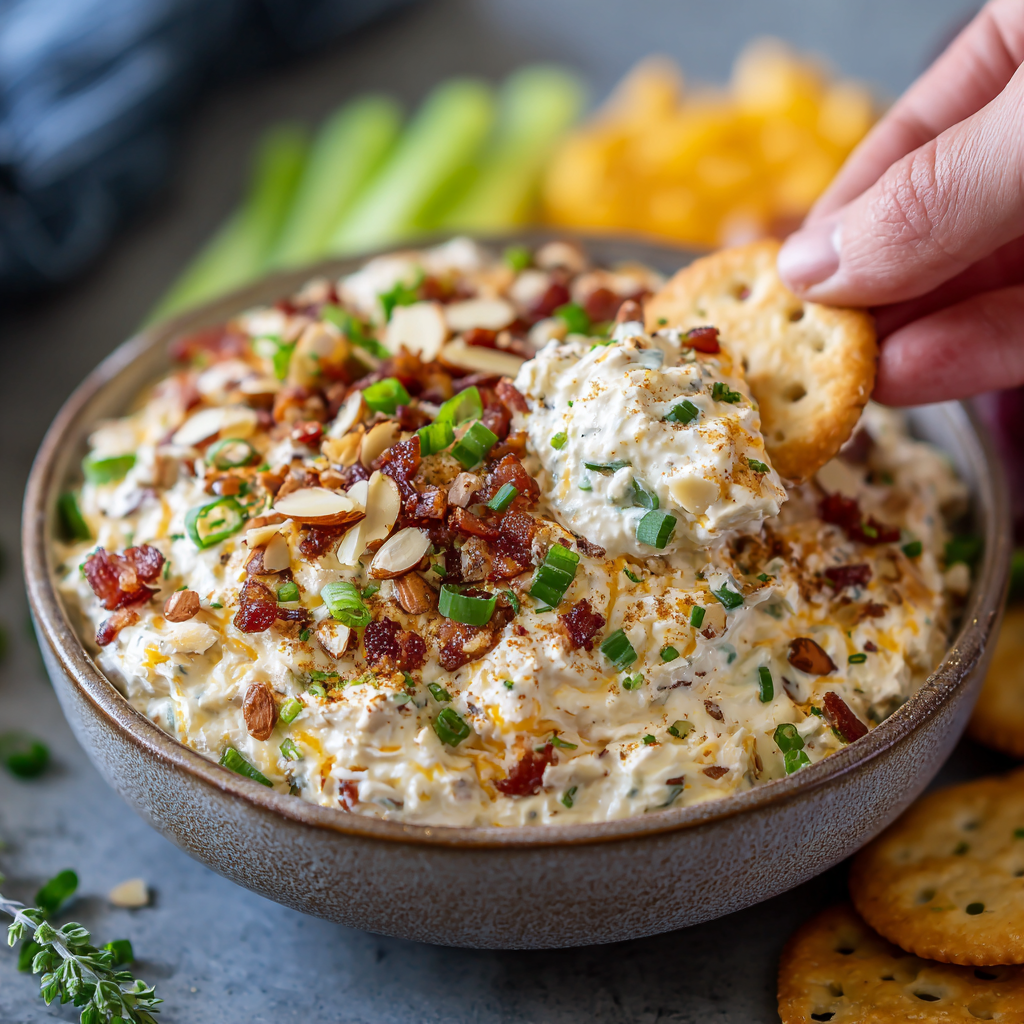
5-Minute Million Dollar Dip (Creamy, Cheesy, Crowd-Favorite!)
Your New Party Secret: The 5-Minute Dip That Tastes Like a Million Bucks
Hey there, friend! Come on in, pull up a stool. Can you smell that? It’s the unmistakable scent of good times about to happen—a little salty, a little cheesy, and 100% guaranteed to make people gather around the kitchen island. I’m talking about the kind of recipe that’s less of a formula and more of a social event catalyst: the legendary Million Dollar Dip.
We’ve all been there. You get a last-minute text: “Game night at our place!” or “Just dropping by with the kids!” Your heart does that little happy-skip because you love a spontaneous gathering, but your brain immediately goes to the fridge. What can you whip up that feels special, indulgent, and requires absolutely zero fuss? Something that says, “I’m a culinary genius who has it all together,” while secretly only taking five minutes and one bowl? This, my friend, is your answer.
This isn’t just a dip. It’s a creamy, crunchy, savory phenomenon. It’s the dish that vanishes before the main course even makes it to the table, the one that has guests casually (and not-so-casually) hovering near the serving plate with a cracker at the ready. The “million dollar” name isn’t just catchy—it’s a promise. Every single bite feels decadent, rich, and worth its weight in gold (or at least in happy taste buds). And the best part? You likely have most, if not all, of the ingredients sitting in your fridge and pantry right now. So, tie on that apron (messy is totally welcome here), and let’s make some magic.
Why This Dip Feels Like Home: A Little Story
This dip always takes me right back to my aunt Sharon’s sun-drenched kitchen on a lazy summer afternoon. She was the queen of effortless hosting. You’d show up, and without seeming to break a sweat, she’d have a spread that could feed a small army appear. One day, I was “helping” (which, at age 10, meant mostly sneaking shreds of cheese), and I watched her make this. She didn’t measure a thing—just dolloped, poured, and stirred. “The secret,” she whispered with a wink, “is that it’s supposed to look like you didn’t try at all. But the flavor? That’s where you shout ‘I love you’ without saying a word.”
She plopped the bowl in the middle of the patio table next to a sleeve of Ritz crackers. What happened next was pure comedy. My uncles, deep in a debate about baseball, slowly stopped talking. One would scoop, crunch, and go quiet. Then another. Within minutes, the bowl was the center of the universe, and we were all just laughing, dipping, and being together. That’s the real power of a recipe like this. It’s not about perfection; it’s about connection. It creates a pause, a shared “Mmmmm,” a moment of pure, uncomplicated joy. Every time I make it, I get a little of that sunshine and laughter back. And now, I’m so excited to pass that feeling on to you.
Gathering Your Treasure: The Ingredients (& Why They Work)
Let’s break down this simple treasure map. Each ingredient plays a crucial role in the symphony of flavor and texture. Here’s what you’ll need:
- 1 cup mayonnaise – This is the lush, creamy foundation. It brings everything together into that dreamy, dippable texture. Chef’s Insight: Use a good-quality, full-fat mayo for the richest flavor and texture. For a tangier, lighter twist, you can swap half or all of it with full-fat Greek yogurt or sour cream!
- 1 cup shredded sharp cheddar cheese – The star of the show! Sharp cheddar gives that punchy, cheesy backbone. Chef’s Insight: For the love of all that is melty and good, PLEASE shred your own cheese from a block. Pre-shredded cheese is coated to prevent clumping, which also prevents it from blending as smoothly into the dip. The extra two minutes make a world of difference in creaminess.
- 1/2 cup chopped green onions – These little green gems are your flavor brighteners. They add a necessary pop of freshness and a mild oniony zing that cuts through the richness. Sub Tip: Don’t have green onions? A couple of tablespoons of very finely minced red onion or shallot will work in a pinch (soak them in cold water for 5 mins first to mellow the bite).
- 1/2 cup real bacon bits or chopped cooked bacon – This is the salty, smoky, umami bomb. It’s what makes the dip irrestistible. Chef’s Commandment: Avoid the jarred “bac-o” style bits if you can. Cooking 4-6 strips of bacon until crisp and chopping them yourself is the ultimate upgrade. The flavor is deeper and the texture is superior. (But no judgment—I keep a bag of real cooked bacon pieces in my freezer for emergencies!).
- 1/4 cup slivered almonds (optional, but highly recommended) – The surprise MVP! These add the most delightful, subtle crunch in every bite, making the texture truly “million dollar.” Sub Tip: Not a fan of almonds? Try chopped pecans, sunflower seeds, or even a handful of French-fried onions for a different kind of crunch.
- Salt and freshly cracked black pepper to taste – Don’t skip the taste at the end! The bacon and cheese are salty, so you may not need much, but a few cracks of black pepper add a lovely warmth.
Let’s Make Magic: The Foolproof, 5-Minute Method
See? I told you it was easy. But let’s walk through it together with a few of my favorite kitchen hacks to make it absolutely perfect.
- The Great Shred. First, grab your block of sharp cheddar and your box grater. Shred it all into a nice, fluffy pile. Chef’s Hack: If your kitchen is warm and the cheese is getting sticky, pop the block in the freezer for 10-15 minutes before shredding. It makes the job cleaner and faster!
- Chop & Chat. Wash your green onions and slice them thinly, using all of the white and most of the green parts. If you’re using homemade bacon, give it a rough chop. Get those almonds measured out. This is the “prep” part, and it’s over in a flash.
- The Grand Unification. Grab your favorite medium-sized mixing bowl—something with a little room to stir comfortably. Plop in the mayonnaise, the glorious pile of freshly shredded cheddar, the green onions, bacon, and almonds. Chef’s Commentary: I love using a flexible silicone spatula for this. It gets into the corners of the bowl and folds everything together gently.
- Mix with Love (But Not Too Much). Now, stir! Fold everything together until it’s just combined and every ingredient is coated in that creamy mayo. You want it homogenous, but don’t over-mix into a paste. A few streaks are fine. Pro Tip: Taste it now. This is your moment. Need a pinch of salt? More pepper? A little more smoky bacon? Adjust to your heart’s content.
- The Patience Payoff (If You Can Wait!). You can absolutely serve this dip right away—it will be delicious. BUT, if you can manage it, cover the bowl with plastic wrap and tuck it into the fridge for 30 minutes to an hour. Why This Matters: This chill time allows the flavors to get to know each other, mingle, and deepen. The textures also settle, making it the perfect, scoopable consistency. It’s worth the wait, I promise.
How to Serve Your Culinary Gold
Presentation is part of the fun! I love serving this in a shallow, wide bowl so everyone can easily access the goods. Garnish with an extra sprinkle of cheese, a few extra bacon pieces, and a final scatter of sliced green onions. It looks profesh with zero effort. For dippers, go classic with Ritz crackers (that buttery flavor is a match made in heaven), sturdy pretzel chips, or tortilla chips. For a fresh contrast, offer a platter of sliced bell peppers, cucumber rounds, carrot sticks, or crisp celery. Watch and smile as your creation disappears.
Make It Your Own: Fun Twists & Swaps
- The “Everything Bagel” Twist: Swap the almonds for everything bagel seasoning and add a teaspoon of dried minced garlic. Serve with everything bagel chips!
- Southwestern Fiesta: Use a Mexican-blend cheese, add a 4oz can of diced green chiles (drained), and swap the bacon for chopped chorizo. A dash of smoked paprika is killer here.
- Lighter & Brighter: Use full-fat Greek yogurt instead of mayo, and swap in turkey bacon. It’s still incredibly flavorful but feels a bit lighter.
- Hot & Bubbly Bake: Feeling fancy? Spread the mixed dip into a small oven-safe dish, top with a little extra cheese, and bake at 375°F for 15-20 minutes until bubbly and golden. A whole new warm, gooey experience!
- Dill Pickle Delight: Add 1/4 cup of finely chopped dill pickles and a tablespoon of pickle juice for a briny, tangy punch. So good!
From My Kitchen to Yours: A Few Final Thoughts
Over the years, this recipe has become my culinary security blanket. I’ve made it for fancy holiday parties served in a crystal bowl, and I’ve eaten it straight from the Tupperware with a spoon after a long day (no shame!). The recipe itself hasn’t changed much since Aunt Sharon’s day, but my confidence in it has. I now know it’s virtually foolproof. I’ve learned that doubling the batch is always a good idea, and that the leftovers (if they exist) make an insane baked potato topping or sandwich spread the next day. One time, I even used it as a filling for stuffed mushrooms—bonus recipe idea for you! The point is, this dip is more than a list of ingredients; it’s a starting point for your own kitchen stories. Make it, share it, and enjoy the little moment of togetherness it creates.
Your Questions, Answered: Dip Wisdom
Q: Can I make this dip ahead of time?
A: Absolutely! In fact, I encourage it. You can make it up to 24 hours in advance. Just keep it tightly covered in the fridge. The flavors will be even more amazing. Give it a quick stir before serving to reincorporate any separation.
Q: My dip seems a bit too thick. What can I do?
A: No problem! This is easily fixed. Stir in a teaspoon or two of milk, buttermilk, or even the liquid from the jar of bacon bits (if you used real ones) to loosen it up to your preferred dippable consistency.
Q: Help! I’m serving someone with a nut allergy. What’s a good almond substitute?
A: The almonds are optional for a reason! You can simply leave them out for a perfectly creamy dip. For crunch without nuts, try toasted sunflower seeds, pumpkin seeds (pepitas), or my lazy-day favorite: crushed plain potato chips folded in right before serving.
Q: What’s the best way to store leftovers?
A: Cover the bowl tightly or transfer to an airtight container. It will keep happily in the refrigerator for 3-4 days. The green onions may soften a bit, but the flavor will still be fantastic.
5-Minute Million Dollar Dip (Creamy, Cheesy, Crowd-Favorite!)
Description
Hey there, friend! Olivia here. This is the dip I make when guests are walking up the driveway and I need something that looks impressive, tastes indulgent, and takes almost no effort. Million Dollar Dip is creamy, crunchy, salty, and downright addictive—the kind of appetizer that gathers people around the bowl and keeps them there.
Ingredients
-
1 cup mayonnaise
-
1 cup sharp cheddar cheese, freshly shredded
-
½ cup chopped green onions
-
½ cup cooked bacon, finely chopped
-
¼ cup slivered almonds (optional but highly recommended)
- Salt & freshly cracked black pepper, to taste
Instructions
-
Shred & Prep
Shred the cheddar, slice the green onions, chop the bacon, and measure the almonds. -
Mix It All Together
In a medium bowl, add mayonnaise, cheddar, green onions, bacon, and almonds.
Gently fold until everything is evenly coated and creamy. -
Season to Taste
Add black pepper and a small pinch of salt if needed (bacon and cheese are already salty). -
Chill (Optional but Worth It)
Serve immediately, or cover and refrigerate for 30–60 minutes to let the flavors meld.
Notes
-
Shred your own cheese for the creamiest texture
-
Add sesame-sized bacon pieces so every bite gets some crunch
-
Don’t overmix—fold gently to keep texture intact
- Taste before salting—bacon does a lot of the work
Quick Nutritional Snapshot*
*Please note: This is a rough estimate based on the original ingredients using homemade bacon and full-fat mayo. Values will change with substitutions.
- Serving Size: About 1/4 cup
- Calories: ~200
- Protein: ~5g
- Prep Time: 5 minutes (+ optional chilling)
- Cook Time: 0 minutes!
So there you have it! The ultimate no-fuss, all-flavor party hero. I can’t wait for you to try it and hear your stories. Now go forth, dip, and delight!
Final Thoughts: The Story Starts With You
And that’s everything you need! From the why to the how, and all the little tips in between, you’re now armed with more than a recipe—you have a tool for creating your own simple, delicious moments.
The best part? This story is just beginning. Your version, with your chosen twists, served at your table, is what makes it truly special. I’ve shared my aunt Sharon’s sunshine; now I can’t wait to hear about the memories you create with it.
Thank you for letting me share one of my favorite kitchen treasures with you. However you make it, and wherever you enjoy it, I hope it brings you and yours a whole lot of joy.
Happy dipping, friend.
Warmly,
Olivia




