

Creamed Corn – Easy Cheesy Easter Side Dish (Ready in 20 Minutes)
Forget Everything You Think You Know About Creamed Corn
Hey there, friend! Olivia here. Can we talk about that one dish that magically appears on every holiday table, sometimes hiding in a humble casserole dish, other times shining proudly in a fancy serving bowl? I’m talking about creamed corn. Now, before you picture that gloppy, overly sweet stuff from a can, hit the brakes. We’re doing a total 180 today.
I’m about to show you a version that’s so luxuriously creamy, so perfectly balanced between sweet and savory, and so downright simple that it might just become your new secret weapon. This is the side dish that gets whispered about after dinner: “Who made the corn? I need that recipe.” Imagine sweet corn kernels swimming in a velvety, buttery sauce with just a hint of garlic, finished with a subtle, melty cheese pull. It’s comfort in a spoon, elegance on a plate, and pure joy for your taste buds.
The best part? This isn’t a “slave-over-the-stove-for-hours” situation. Nope. We’re talking 20 minutes, one skillet, and minimal fuss. It’s the perfect solution for Easter Sunday when you’re juggling a glazed ham, scalloped potatoes, and a dozen deviled eggs. You deserve a show-stopping side that doesn’t add to your stress, and this, my friend, is it. So, tie on your favorite apron (the messy one tells the best stories), and let’s make a creamed corn that will absolutely steal the spotlight.
More Than a Side Dish: A Buttery, Yellow Thread of Memory
This recipe isn’t just about technique; it’s woven with a little golden thread of memory for me. My earliest, coziest kitchen memory isn’t of a grand feast, but of standing on a wobbly step-stool next to my grandmother, “helping” her make creamed corn for a simple Tuesday supper. Her version was straightforward – corn, cream, butter, salt, pepper – but to me, it was magic. She’d let me pour the heavy cream, watching with wide eyes as the pure white river swirled around the sunny yellow kernels.
The kitchen would fill with that unmistakable, nutty scent of butter meeting heat, and then the sweet, milky perfume of corn and cream marrying in the pan. We’d eat it straight from the stove, blowing on steaming spoonfuls, burning our tongues just a little because we couldn’t wait. It was never fancy, but it was always made with love and shared in a moment of quiet togetherness. That’s the spirit I want to bring to your table. This recipe is my homage to her – a slightly fancied-up version with garlic and cheese (she’d raise an eyebrow, then ask for seconds) that still holds onto that soul-warming, simple goodness. Every time I make it, I’m right back on that step-stool, and that’s the kind of food magic I live for.
Your Kitchen Allies: Gathering the Goods
Here’s everything you’ll need to create this little bowl of sunshine. I’ve included my chef-y insights and swaps so you can make this your own, no matter what’s in your pantry.
- 4 cups corn kernels: The star! Fresh, frozen, or canned (drained) all work beautifully. Fresh off the cob in summer is sublime, but frozen is my year-round go-to for sweetness and convenience – no thawing needed! Canned is fine in a pinch; just rinse and drain well to avoid a tinny taste.
- 2 tbsp unsalted butter: Our flavor foundation. Unsalted lets you control the seasoning. For a richer, nuttier depth, try browning the butter first until it smells toasty and has little brown bits.
- 2 cloves garlic, minced: The secret savory whisper. It shouldn’t scream “GARLIC!” but just add a beautiful background note. If you’re out, a pinch of garlic powder works.
- 1 cup heavy cream (or half-and-half): This is what gives us that luxurious, decadent body. Half-and-half lightens it up slightly but is still delicious. For a dairy-free version, full-fat coconut cream is a shockingly good substitute.
- ½ cup whole milk: Thins the cream just enough for the perfect saucy consistency. Any milk you have works, but whole milk gives the best richness.
- ½ cup shredded cheddar cheese (optional but HIGHLY recommended): My “fancy” twist. It adds a salty, tangy dimension and glorious creaminess. Sharp white cheddar, gruyère, or even pepper jack are fantastic swaps.
- 1 tbsp cream cheese: My little “chef hack” for unbelievable silkiness and a touch of tang. It acts as a natural emulsifier, making the sauce impossibly smooth.
- 1 tsp sugar (optional): A tiny pinch can enhance the natural sweetness of the corn, especially if your kernels aren’t at peak season. Taste first – you might not need it!
- Salt & black pepper to taste: Season in layers! A little at the beginning, then again at the end. Freshly cracked pepper is a must.
- 1 tbsp flour or cornstarch (optional, for thicker texture): Only needed if you like a very thick, almost casserole-style consistency. I prefer it without, but the power is yours! Make a slurry with a tablespoon of cold milk first to prevent lumps.
- Fresh parsley or chives for garnish: Don’t skip the green! It adds a pop of color and a fresh, bright flavor that cuts the richness perfectly.
Let’s Get Cooking: Your Foolproof Roadmap to Creamy Bliss
Ready? This is where the fun happens. We’re building flavor in one pan, and it’s as easy as 1-2-3 (and 4-5-6-7!).
Step 1: The Aromatic Foundation. Grab a large skillet (I love my trusty cast iron for this) and place it over medium heat. Add the butter and let it melt, swirling the pan until it’s foamy and fragrant. Now, add the minced garlic. Here’s a tip: don’t let it brown! We just want to wake it up and soften it – about 30 seconds of gentle sizzling is perfect. You’ll know it’s ready when you get that first irresistible whiff that makes your stomach growl.
Step 2: Toast the Corn. Dump in all that beautiful corn! Stir it well so every kernel gets coated in that glorious buttery garlic essence. Let it cook for 3-4 minutes. We’re not just heating it through; we’re toasting it slightly. You might hear a few cheerful little pops – that’s the sound of flavor developing! This step concentrates the corn’s natural sugars and gives the final dish a more complex taste.
Step 3: Create the Creamy Bath. Slowly pour in the heavy cream and milk. It will look very liquidy at first – that’s okay! Bring it to a gentle simmer (that’s just bubbles breaking along the edges, not a rolling boil). Let it bubble happily for 5-7 minutes. This is where the magic happens: the liquid reduces slightly, thickens naturally, and the corn becomes plump and tender. Stir it occasionally to make sure nothing sticks.
Step 4: Thicken It Up (If You Want). Prefer a thicker, spoon-standing-up consistency? Now’s the time. Take your tablespoon of flour or cornstarch and mix it with an equal amount of COLD milk or water in a small bowl until smooth (this is your “slurry”). Drizzle it into the simmering corn while stirring constantly. Within 1-2 minutes, you’ll see the sauce transform into a luscious, gravy-like texture. If you’re happy with a saucier creamed corn, just skip right ahead!
Step 5: The Cheese Pull (The Best Part). Reduce the heat to low. Add the tablespoon of cream cheese and the shredded cheddar. Stir slowly and patiently until everything melts into a smooth, cohesive, cheesy dream. No stringy bits left behind! The cream cheese is the secret agent here, ensuring everything is velvety and lump-free.
Step 6: Season to Perfection. This is crucial. Turn off the heat. Now, taste it! Does it need a pinch more salt to make the flavors sing? A few cracks of black pepper for a gentle heat? A tiny sprinkle of sugar to balance everything? Adjust now. Remember, you can always add, but you can’t take away.
Step 7: Garnish and Serve with Love. Transfer your masterpiece to a warm serving bowl. Immediately sprinkle with a handful of finely chopped fresh parsley or chives. That pop of green isn’t just for looks – it adds a necessary fresh note. Serve it warm and watch it disappear!
Setting the Stage: How to Serve Your Masterpiece
Presentation is the final act of love! For a casual family meal, a simple ceramic bowl does the trick. For Easter or a dinner party, I love using a warm, shallow serving dish to show off that creamy texture. Spoon it gently, letting the sauce pool invitingly. That final sprinkle of fresh herbs is non-negotiable—it’s like putting a bow on a gift. This corn is the ultimate team player. It’s spectacular next to a honey-glazed ham, a juicy roast turkey, or simple weeknight roasted chicken. Don’t forget a big, slotted spoon so your guests can get every last bit of that delicious sauce!
Make It Your Own: Endless Delicious Twists
Once you’ve mastered the base, the world is your oyster (or, well, your corn field!). Here are a few of my favorite riffs:
-
- Herb & Bacon: Stir in ½ cup of cooked, crumbled bacon and 2 tbsp of fresh thyme at the end.
- Southwest Fiesta: Add a diced jalapeño (seeds removed for less heat) with the garlic. Use pepper jack cheese and finish with a squeeze of lime and cilantro.
Lightened-Up: Swap the heavy cream for half-and-half or even whole milk, and skip the cheese. It’s still wonderfully creamy!
- “Everything” Creamed Corn: Finish with a sprinkle of “Everything Bagel” seasoning for a crazy-good savory crunch.
- Dairy-Free Dream: Use vegan butter, full-fat coconut cream instead of dairy cream, and your favorite melty vegan cheese shreds.
Olivia’s Corner: Notes from a Messy Apron
This recipe has been my trusty sidekick for years, and it’s evolved in the best way. The cream cheese trick? That came from a happy accident when I was trying to thicken a batch without flour and just grabbed what was in the fridge. It was a revelation! I also learned the hard way that pre-shredded bagged cheese doesn’t melt as smoothly because of anti-caking agents. For the silkiest sauce, take the extra minute to shred a block yourself – I promise you’ll taste the difference. And one funny story: I once made a double batch for a big potluck and, in my hurry, used a full *cup* of garlic instead of two cloves. Let’s just say it was… potent. We called it “Vampire-Repellent Creamed Corn.” Learn from my garlicky mistake! The version here is perfectly balanced, I swear.
Your Questions, Answered (Let’s Troubleshoot!)
Q: My sauce looks too thin/watery. What did I do wrong?
A: No panic! First, make sure you let it simmer for the full 5-7 minutes to reduce. If it’s still too thin, create a quick slurry (1 tbsp cornstarch + 1 tbsp cold water/milk) and stir it in over simmering heat for 1-2 minutes. Also, using frozen corn can sometimes release more water; just cook it a few minutes longer to evaporate the excess.
Q: Can I make this ahead of time for my holiday dinner?
A: Absolutely! Prepare the recipe completely, but hold the final garnish. Let it cool, then store it covered in the fridge for up to 2 days. Reheat it gently on the stovetop over low heat, adding a small splash of milk or cream to loosen it up if needed. Garnish fresh right before serving.
Q: The cheese is clumping and not melting smoothly. Help!
A> This usually happens if the heat is too high. Cheese likes low, gentle heat. Make sure you’ve reduced the heat to low before adding it. Also, shredding your own cheese from a block (instead of using pre-shredded) guarantees a smoother melt because it doesn’t contain starches.
Q: Is there a way to make this without dairy?
A> You bet! Use a high-quality vegan butter, substitute the heavy cream with full-fat coconut cream (it adds a very slight coconut flavor that works surprisingly well with corn), and use your favorite brand of vegan cheddar-style shreds. The technique remains exactly the same.

Creamed Corn – Easy Cheesy Easter Side Dish (Ready in 20 Minutes)
Description
The Best Homemade Creamed Corn (Ready in 20 Minutes)
If you think creamed corn only comes from a can, this recipe will completely change your mind. This version is rich, creamy, slightly sweet, and perfectly savory — made in just one skillet in about 20 minutes.
It’s simple enough for a weeknight dinner but special enough for holidays like Easter or Thanksgiving. The balance of butter, cream, garlic, and just a touch of cheese makes it comforting without being heavy or overly sweet.
Ingredients
-
4 cups corn kernels (fresh, frozen, or canned & drained)
-
2 tablespoons unsalted butter
-
2 cloves garlic, minced
-
1 cup heavy cream (or half-and-half)
-
½ cup whole milk
-
½ cup shredded cheddar cheese (optional but recommended)
-
1 tablespoon cream cheese
-
1 teaspoon sugar (optional, to enhance sweetness)
-
Salt and black pepper, to taste
-
1 tablespoon flour or cornstarch (optional, for thicker texture)
-
Fresh parsley or chives, for garnish
Instructions
In a large skillet over medium heat, melt the butter.
Add the minced garlic and cook for about 30 seconds, just until fragrant. Do not let it brown.
Add the corn to the skillet and stir to coat in the butter.
Cook for 3–4 minutes, allowing the corn to heat through and slightly toast for deeper flavor.
Pour in the heavy cream and milk. Stir well.
Bring to a gentle simmer and cook for 5–7 minutes, stirring occasionally, until slightly thickened.
If you prefer thicker creamed corn, mix 1 tablespoon flour or cornstarch with 1 tablespoon cold milk to form a smooth slurry.
Stir it into the simmering corn and cook for 1–2 minutes until thickened.
Reduce heat to low.
Stir in the cream cheese and shredded cheddar until melted and smooth.
Taste and adjust with salt, black pepper, and sugar (if needed).
Remove from heat and garnish with fresh parsley or chives.
Serve warm.
Notes
-
Frozen corn works great and does not need to be thawed first.
-
Shred your own cheese for smoother melting.
-
Simmer gently — boiling can cause the dairy to separate.
-
For extra richness, brown the butter before adding garlic.
-
To reheat, warm gently on the stove and add a splash of milk if needed.
Nutritional Information (Per Serving, Approximately)
Disclaimer: This is an estimate based on the standard ingredients. Values will vary with specific products and substitutions used.
- Calories: ~240 kcal
- Fat: 18g
- Carbohydrates: 18g
- Protein: 6g
- Serves: 6
- Total Time: 20 minutes
Final Thoughts
And there you have it—a creamed corn recipe that defies every canned, gloppy expectation and delivers pure, buttery magic in under 20 minutes.
As you stand over that skillet, watching the cream swirl around those golden kernels and breathing in that nutty, sweet aroma, I hope you feel what I feel every single time: that cooking isn’t about perfection. It’s about presence. It’s about the steam fogging your glasses, the first taste test that burns your tongue anyway, and the way something so simple can make everyone at the table go quiet in that “this is really good” kind of way.
This recipe is my grandmother’s legacy with a little of my own curiosity stirred in—the garlic she’d side-eye, the cream cheese she’d secretly love. But more than that, it’s an invitation. An invitation to stop overcomplicating dinner. To trust that a handful of everyday ingredients, treated with a little patience and a lot of love, can become something worth remembering.
So whether you’re making this for Easter Sunday with the good china, a Tuesday night when you need a hug in a bowl, or just because you’re staring at a bag of corn and wondering what’s possible—I hope you make it yours. Taste as you go. Add the bacon if you’re feeling bold. Leave out the cheese if that’s not your thing. Burn your tongue a little. Laugh at your mistakes (we’ve all made vampire-repellent corn once).
That’s the messy, beautiful heart of home cooking. And this dish? It’s ready to become part of your story, too.
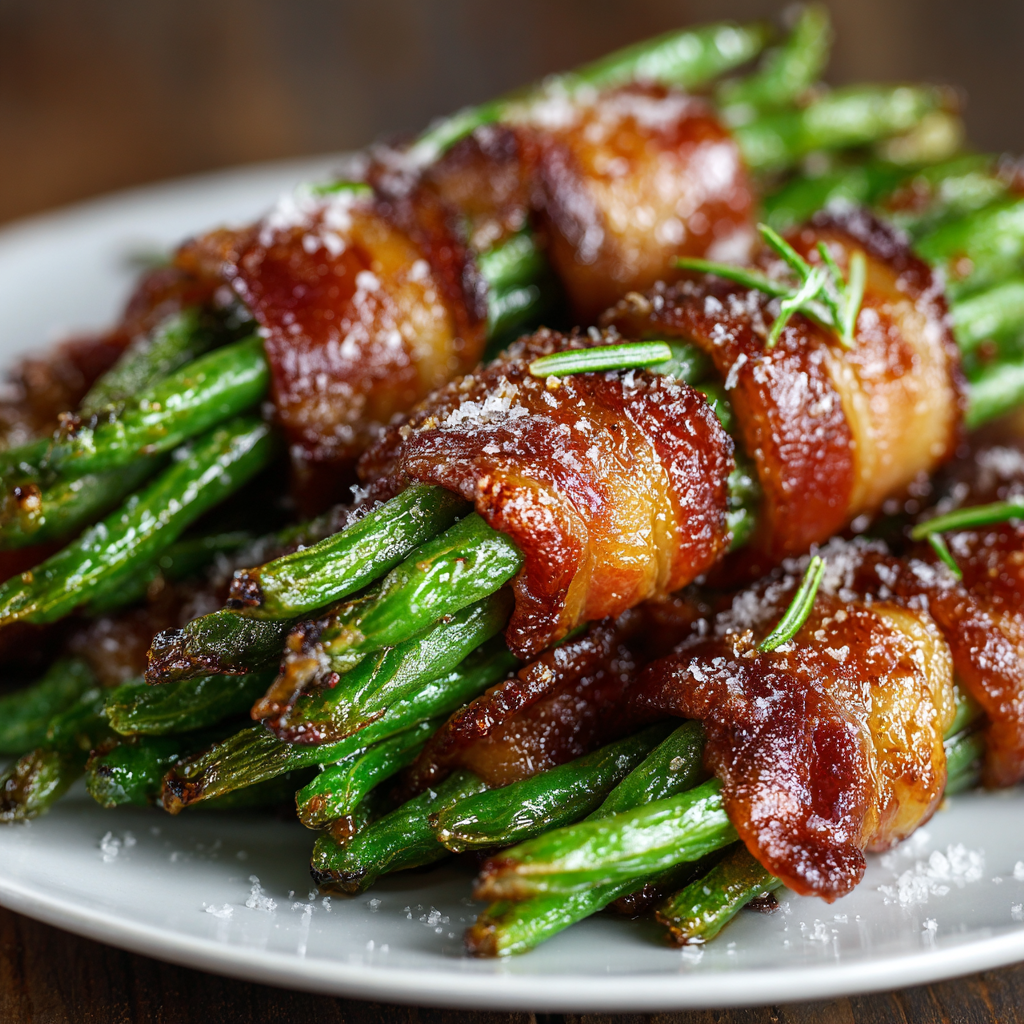
Brown Sugar Bacon Wrapped Green Bean Bundles (Easy Easter Side Dish)
The Ultimate Sweet & Savory Easter Side: Brown Sugar Bacon Wrapped Green Bean Bundles
Hey there, friend! Come on in, the oven’s preheating and I’ve got a story to tell you. You know that magical moment during a holiday meal when one dish arrives at the table and a hush falls over the crowd? Followed by a collective, “Ooooh, what is *that*?” That’s the exact reaction we’re aiming for today, and I’ve got the secret weapon: Brown Sugar Bacon Wrapped Green Bean Bundles.
Picture this: crisp-tender green beans, all snuggled up in a cozy blanket of smoky bacon, then glistening with a sticky, savory-sweet brown sugar glaze that caramelizes into pure magic in the oven. It’s a flavor and texture party in every single bite. Sweet meets salty, crispy meets tender, and fancy-pants meets secretly-easy. This isn’t just a side dish; it’s a conversation starter, a plate-cleaner, and quite possibly the reason your guests ask for the recipe before they’ve even had dessert.
I love this recipe for Easter because it plays so beautifully with the classic glazed ham or a juicy roast chicken, adding that perfect pop of color and an irresistible finger-food vibe (because everything tastes better when you can pick it up, right?). But the best part? You don’t need to be a pro to pull it off. In about 30 minutes, with simple ingredients and a whole lot of heart, you can create a side dish that looks and tastes like you fussed for hours. So, tie on your favorite apron, and let’s turn simple ingredients into something unforgettable together.
A Bundle of Memories: Why This Dish Feels Like Home
This recipe always takes me straight back to my grandma’s bustling kitchen on Easter Sunday. The air would be thick with the scent of baking ham and yeast rolls, and us kids would be “helping” by sneaking chocolate eggs from the decorative bowl. But my favorite job was always with my grandma at the counter, assembling what she called her “Green Bean Firecrackers.”
She’d let me bundle the cool, blanched beans—my small hands struggling to make them neat—while she expertly wrapped them in bacon, her movements quick and sure. She never measured the brown sugar for the glaze; she’d just scoop a hearty spoonful from the ceramic jar and say, “Just enough to make it sing, Liv.” When they came out of the oven, sizzling and caramelized, we’d have to test one (or three) for “quality control.” That first bite, the crunch of the salty bacon giving way to the sweet glaze and the fresh bean, was my childhood definition of a holiday flavor explosion. It taught me that the most memorable dishes aren’t about complexity; they’re about contrast, joy, and the love you wrap them in. Now, every time I make these, that smell flooding my kitchen feels like a hug from her.
Gathering Your Flavor Arsenal: Ingredients & Why They Matter
One of my core kitchen beliefs is that great food starts with understanding your ingredients. Each one here plays a specific role in our symphony of sweet, salty, and savory. Here’s exactly what you’ll need and my best chef-y insights for each.
- 600g (about 1.3 lbs) Fresh Green Beans, trimmed – This is our star vegetable! I’m a firm advocate for fresh over frozen here, as they hold their shape and satisfying snap beautifully. Look for beans that are firm, bright green, and snap easily. Chef’s Tip: To trim a whole pile quickly, line them up on your cutting board and slice off the stem ends all at once!
- 12 Slices Bacon – Our savory, crispy wrapper. Standard-cut bacon is perfect—thick-cut can be too chewy, and thin-cut might cook too fast. The fat renders and bastes the beans, making them incredibly flavorful. Substitution Tip: For a different twist, try applewood-smoked bacon for a sweeter smoke, or even turkey bacon for a leaner option (just watch the cooking time).
- 3 Tablespoons Unsalted Butter, melted – The rich, glossy base of our glaze. It helps the sugar cling to the bundles and promotes that gorgeous caramelization. Using unsalted lets you control the salt level, especially since bacon is salty.
- 3 Tablespoons Brown Sugar – The source of our sweet, molasses-y magic! The deep flavor of brown sugar is key. Chef’s Insight: Light or dark brown sugar works—dark will give a deeper, more caramel-like flavor. In a pinch, you could use pure maple syrup, but reduce it to 2 tablespoons as it’s sweeter and more liquid.
- 1 Teaspoon Garlic Powder – Our secret savory backbone. It dissolves perfectly into the glaze, distributing a warm, aromatic garlic flavor without any risk of burning that minced garlic might have.
- ½ Teaspoon Black Pepper – A little sharp, earthy bite to balance the sweetness. Freshly cracked is always best!
- Pinch of Salt (optional) – Taste your bacon after crisping a tiny piece. If it’s very salty, you can skip extra salt. If using a lower-sodium bacon, a small pinch in the glaze helps all the flavors pop.
Let’s Get Bundling! Your Foolproof Step-by-Step Guide
Ready to create some magic? Follow these steps, and lean in for my little kitchen hacks along the way. We’ve got this!
- Preheat & Prep Your Stage.First things first, crank that oven to 200°C (400°F). This high heat is crucial for getting our bacon crispy and our glaze bubbling. Now, line a large, rimmed baking sheet with parchment paper. Why parchment? It’s our cleanup superhero. That sugary glaze will drip and harden, and parchment paper means you can just toss it and your pan is practically clean. No scrubbing caramelized sugar tonight!
- Blanch the Beans (The Green Trick).Bring a large pot of salted water to a rolling boil. While it heats, prep your beans by trimming the ends. Once boiling, add all the beans and set a timer for 3-4 minutes. We’re not cooking them through—just blanching to set that vibrant green color and take off the raw edge. As soon as the timer goes, drain them and immediately give them an ice-cold shower in a colander or plunge them into a bowl of ice water. This “shocks” them, stopping the cooking so they stay perfectly crisp-tender. Pat them very dry with a kitchen towel. Dry beans = crispy bacon. This is non-negotiable!
- Whisk Up the Glaze.In a small bowl, combine your melted butter, brown sugar, garlic powder, and black pepper. Whisk it until it looks like a smooth, caramel sauce. Give it a little taste—it should be boldly sweet and savory. Remember, it’s going to mellow and coat a lot of beans and bacon.
- Bundle & Wrap with Love.Time for the fun part! Divide your dried green beans into 12 small bundles. I aim for 6-8 beans per bundle—enough to feel substantial but not so thick the bacon can’t wrap around. Now, take one slice of bacon and wrap it snugly around the middle of a bean bundle. The bacon slice should overlap just enough to stick to itself. Place the bundle seam-side down on your prepared baking sheet. The weight of the bundle will keep the bacon end tucked underneath while it cooks. If you’re worried about unraveling, you can secure it with a soaked toothpick (soaked so it doesn’t burn!), but I find it’s usually not necessary.
- Brush on the Good Stuff.Using a pastry brush (or even just a spoon), generously brush the brown sugar glaze over the top and sides of each bundle. Don’t be shy! This is what creates that irresistible, crackly, caramelized coating. I like to use almost all the glaze before baking, saving just a tiny bit for a final brush after they come out of the oven for extra shine.
- Bake to Crispy, Caramelized Perfection.Slide your tray into the hot oven and bake for 20-25 minutes. You’re looking for the bacon to be fully cooked, crispy at the edges, and the glaze to be bubbling and dark golden. Ovens vary, so peek at the 20-minute mark. Want that extra crisp factor? In the last 2-3 minutes, turn your oven to broil (grill) and watch them CLOSELY. The sugar can go from caramelized to burnt in seconds, but a quick broil gives the bacon an incredible final crunch.
- The Grand Finale: Serve!Let the bundles cool on the sheet for just 2-3 minutes—they’ll be molten-lava hot inside. Then, transfer them to a serving platter with any of those delicious sticky pan drippings spooned over the top. Serve immediately and get ready for the compliments to roll in!
How to Serve These Show-Stopping Bundles
Presentation is part of the fun! I love arranging these bundles on a long, rectangular platter, perhaps on a bed of simple, fresh parsley or kale leaves for a pop of green. They’re meant to be shared, so place them right in the center of the table. They are the absolute perfect partner for your Easter glazed ham, cutting through the richness with their savory note. They also shine next to a roast chicken, a juicy turkey breast, or even a fancy quiche for a brunch spread. For a complete Easter plate, pair them with creamy mashed potatoes, a bright citrus salad, and a fluffy dinner roll for soaking up every last bit of glaze.
Make It Your Own: Fun Recipe Twists
Once you’ve mastered the classic, get creative! Here are a few ways to play with the formula:
- Spicy & Sweet: Add ¼ teaspoon of cayenne pepper or a few shakes of hot sauce to the glaze. The subtle heat playing with the sugar is incredible.
- Maple-Dijon Glaze: Swap the brown sugar for 2 tablespoons of pure maple syrup and add 1 tablespoon of whole-grain Dijon mustard to the butter mixture. A tangy, complex delight!
- “Everything” Style: After glazing, sprinkle the bundles with a bit of “Everything Bagel” seasoning before baking. Sesame, garlic, onion, poppy seeds—yes, please!
- Cheesy Finish: In the last 5 minutes of baking, sprinkle a little grated Parmesan or sharp cheddar over each bundle and let it melt into the glaze.
- Veggie Swap: Not a green bean fan? Try this with asparagus spears! Just adjust the blanching time to 1-2 minutes for thin spears.
Chef’s Notes: Lessons from My (Sometimes Messy) Kitchen
This recipe has been a staple in my holiday playbook for years, and it’s evolved with every Easter, Thanksgiving, and potluck. I’ve learned a few things! Originally, I’d skip the blanching, thinking it was an extra step. Big mistake. The beans stayed too crunchy and the bacon was done before they were tender. Blanching is the key to harmony!
I also used to drown them in glaze, which led to a sticky, burned mess on the pan (and a very long soak for my baking sheet). A generous but controlled brush is the way. The funniest disaster? The time I used toothpicks but forgot to mention it to my guests. Let’s just say we had a very careful eater that day! Now, I either skip them or use the fancy colorful ones that are impossible to miss. Cooking is all about learning, laughing, and making it better (and safer!) next time.
FAQs & Troubleshooting: Your Questions, Answered
Q: Can I make these ahead of time?
A: You can absolutely do some prep ahead! Blanch and dry your green beans, wrap them in the bacon, and arrange them on the baking sheet. Cover tightly and refrigerate for up to 24 hours. Make the glaze separately and store it at room temperature. When ready to bake, brush on the glaze and add a few extra minutes to the baking time since everything is starting from cold.
Q: My bacon isn’t getting crispy. What did I do wrong?
A: The most common culprits are: 1) Wet beans. Make sure you pat them bone-dry after blanching. 2) Overcrowding the pan. If the bundles are too close, they steam instead of roast. Give them a little space. 3) Oven temperature. Use an oven thermometer to check it’s truly at 400°F. If all else fails, that final 2-3 minute broil is your best friend for crispy edges.
Q: The glaze is burning before the bacon is done. Help!
A: This means your oven might be running hot, or your rack is too high. Next time, try baking at 375°F (190°C) and placing the rack in the center of the oven. You can also tent the tray loosely with foil for the first 15 minutes of baking, then remove it for the last 5-10 to let the bacon crisp up.
Q: Can I use frozen green beans?
A: You can, but the texture won’t be as good. Thaw frozen green beans completely and pat them extremely dry. You can skip the blanching step. They’ll be softer but still tasty in a pinch.

Brown Sugar Bacon Wrapped Green Bean Bundles (Easy Easter Side Dish)
Description
If you want a side dish that feels festive but is actually simple to make, these brown sugar bacon wrapped green bean bundles are the perfect choice. They combine crisp green beans, smoky bacon, and a sweet-savory glaze that caramelizes beautifully in the oven.
Ingredients
-
600g (about 1.3 lbs) fresh green beans, trimmed
-
12 slices regular-cut bacon
-
3 tablespoons unsalted butter, melted
-
3 tablespoons brown sugar (light or dark)
-
1 teaspoon garlic powder
-
½ teaspoon black pepper
-
Pinch of salt (optional)
Instructions
1. Preheat the Oven
Preheat your oven to 400°F (200°C).
Line a large baking sheet with parchment paper for easy cleanup.
2. Blanch the Green Beans
Bring a large pot of salted water to a boil.
Add the green beans and cook for 3–4 minutes until bright green and slightly tender.
Drain immediately and rinse under cold water (or place in ice water) to stop the cooking.
Pat completely dry with a kitchen towel. This step helps the bacon crisp properly.
3. Make the Glaze
In a small bowl, mix together:
-
Melted butter
-
Brown sugar
-
Garlic powder
-
Black pepper
Stir until smooth and well combined.
4. Assemble the Bundles
Divide the green beans into 12 small bundles (about 6–8 beans per bundle).
Wrap one slice of bacon around the center of each bundle and place seam-side down on the baking sheet.
Brush the brown sugar glaze generously over each bundle.
5. Bake
Bake for 20–25 minutes, or until the bacon is cooked and slightly crispy and the glaze is bubbling.
For extra crispiness, broil for the last 2–3 minutes — watch carefully to prevent burning.
6. Serve
Let cool for a few minutes, then transfer to a serving platter. Spoon any caramelized glaze from the pan over the top and serve warm.
Notes
-
Dry the beans thoroughly after blanching — moisture prevents crispy bacon.
-
Do not overcrowd the pan — space allows proper roasting.
-
Use regular-cut bacon for best texture (thick-cut may not crisp in time).
-
Make ahead option: Assemble bundles and refrigerate up to 24 hours before baking.
-
For extra flavor: Add a pinch of cayenne for heat or a teaspoon of Dijon mustard to the glaze.
Nutritional Info (Per Serving, Approximate)
This info is an estimate based on the specific ingredients used. Makes 6 servings (2 bundles per person).
Calories: ~240 kcal | Protein: 8g | Carbohydrates: 10g | Fat: 18g | Saturated Fat: 7g | Fiber: 2g | Sugar: 7g
Prep Time: 10 mins | Cook Time: 20 mins | Total Time: 30 mins
Final Thoughts
The Ultimate Sweet & Savory Easter Side: Brown Sugar Bacon Wrapped Green Bean Bundles
Hey there, friend! Come on in, the oven’s preheating and I’ve got a story to tell you. You know that magical moment during a holiday meal when one dish arrives at the table and a hush falls over the crowd? Followed by a collective, “Ooooh, what is that?” That’s the exact reaction we’re aiming for today, and I’ve got the secret weapon: Brown Sugar Bacon Wrapped Green Bean Bundles.
Picture this: crisp-tender green beans, all snuggled up in a cozy blanket of smoky bacon, then glistening with a sticky, savory-sweet brown sugar glaze that caramelizes into pure magic in the oven. It’s a flavor and texture party in every single bite. Sweet meets salty, crispy meets tender, and fancy-pants meets secretly-easy. This isn’t just a side dish; it’s a conversation starter, a plate-cleaner, and quite possibly the reason your guests ask for the recipe before they’ve even had dessert.

Twice Baked Potato Recipe – Loaded & Cheesy Easter Side Dish
The Ultimate Twice Baked Potato Recipe: Your New Easter Showstopper
Hey there, friend! Come on in, the kitchen’s warm and there’s a faint, magical smell of baking potatoes in the air. Can you smell it? That’s the smell of crispy skins about to give way to clouds of fluffy, cheesy, bacon-studded perfection. If you’re looking for that one side dish that makes everyone’s eyes light up, that gets whispered about after the holiday meal, and that somehow, miraculously, vanishes from the platter first… you’ve just found it.
Today, we’re making my legendary Loaded Twice Baked Potatoes. This isn’t just a recipe; it’s a celebration on a plate. We’re taking humble russet potatoes on a glorious journey, transforming them into individual vessels of creamy, savory joy. Imagine: a crispy, salty shell cradling a filling so luxuriously smooth and packed with sharp cheddar, rich sour cream, smoky bacon, and fresh green onions that it’s practically a hug for your taste buds.
I’m telling you, these potatoes are the secret weapon for your Easter table (or any gathering, really). They sit proudly beside the glazed ham or roast lamb, holding their own and often stealing the spotlight. The best part? They’re deceptively simple to make. No fancy skills required—just a love for good, honest, comfort food. So, tie on your favorite apron (the messy one tells the best stories), preheat that oven, and let’s create something unforgettable together. This is the kind of food that builds traditions, and I’m so excited you’re here to make it with me.
Why These Potatoes Taste Like a Holiday Hug
Every family has those iconic dishes that must appear on the holiday table, or it just doesn’t feel right. For my crew, it’s these twice baked potatoes. My earliest memory of them isn’t even from my own kitchen—it’s from my Grandma Elaine’s. She was a no-nonsense cook, but her holiday table was an event. I remember being barely tall enough to peek over the counter, watching her meticulously scoop out potato flesh, her hands moving with a rhythm born of decades of practice.
She’d let me sprinkle the cheese on top, a responsibility I took with deadly seriousness. When they came out of the oven the second time, golden and bubbling, the whole house would smell like a promise of the feast to come. We’d carry them to the table, and without fail, my uncle would say, “Elaine, you’ve outdone yourself with these potatoes again.” It was the one dish everyone unanimously raved about. They represented more than just food; they were the centerpiece of connection, the dish that made us all slow down, savor, and laugh a little louder. When I started my own holiday traditions, this was the first recipe I called her for. Now, every time I bake them, that cloud of savory steam carries me right back to her kitchen, filled with love and the clatter of a family coming together.
Gathering Your Potato Dreams (Ingredients & Insights)
Here’s everything you need to create these little masterpieces. I’ve added my chef-y notes and swaps so you can shop and cook with confidence!
- 4 large russet potatoes: Russets are the MVP here. Their thick, starchy skin gets beautifully crispy, and their fluffy, dry interior makes for the perfect mashed filling. Give them a good scrub—we want to eat that delicious skin!
- 2 tbsp olive oil & Salt for rubbing: This dynamic duo is the secret to that crackly, restaurant-style skin. The oil conducts heat, and the salt draws out moisture, creating the ultimate texture contrast to the creamy filling.
- 4 tbsp unsalted butter, softened: Room-temperature butter blends seamlessly into the warm potato flesh, creating a rich, silky base. Using unsalted lets you control the final seasoning perfectly.
- ½ cup sour cream: This is our tangy, creamy superstar. It adds moisture and a delightful zing that balances the richness. For a lighter twist, full-fat Greek yogurt works wonderfully!
- ¼ cup milk or heavy cream: A splash of liquid brings it all together. Milk keeps it classic, but heavy cream (or even half-and-half) sends the luxury factor into the stratosphere. Use what you have!
- 1½ cups shredded cheddar cheese, divided: We’re using sharp cheddar for a flavor that really pops. Shred it yourself from a block—it melts so much creamier than the pre-shredded stuff (which has anti-caking agents). We stir most of it in and save a glorious handful for that molten top layer.
- 4 slices bacon, cooked and crumbled: SMOKY, salty, crunchy bacon bits. They’re the irresistible “confetti” in every bite. For a shortcut, use good-quality pre-cooked bacon. Want to go veggie? Skip it or try sautéed, chopped mushrooms for umami.
- 2 green onions, finely sliced: Don’t underestimate the power of this fresh, peppery finish! It cuts through the richness beautifully. Use both the green and white parts.
- Salt & black pepper to taste: Season in layers! Taste your filling before it goes back in the shells—it should be boldly seasoned.
- Optional Flavor Boosters: A pinch of garlic powder, a whisper of smoked paprika, or a tablespoon of cream cheese blended in are all fabulous ways to make these your own.
Let’s Build Some Magic: Step-by-Step Guide
Ready? Let’s turn these ingredients into the star of your table. Follow these steps, and you’ll be a twice-baked potato pro in no time.
- Preheat & Prep: Crank your oven to 400°F (200°C). This high heat is key for that perfect baked potato texture. While it heats, give your potatoes a spa treatment under cold running water, scrubbing off any dirt. Pat them completely dry with a kitchen towel—this is crucial for crispy skin! Drizzle them with the olive oil, roll them around to coat, then give each one a generous sprinkle of kosher salt. Think of it as a salt crust waiting to happen.
- Bake to Perfection: Place the potatoes directly on the oven rack, no pan needed. This allows hot air to circulate all around them for even cooking. Let them bake for 60-70 minutes. You’ll know they’re done when you can easily pierce them with a fork and they feel soft and yielding. That fluffy interior is your canvas!
- The Great Cool Down & Split: Resist the urge to cut them open immediately! Let them cool for 10-15 minutes just until you can handle them. This stops them from steaming out all their precious moisture. Then, with a sharp knife, slice each potato in half lengthwise. You’re creating your edible potato “boats.”
- Scoop with Care: This is the only slightly tricky part, but you’ve got this! Take a spoon and gently scoop the fluffy potato flesh into a large mixing bowl, leaving a ¼-inch thick shell all the way around. Be gentle—you don’t want to tear the skin. Those sturdy shells are your serving vessels!
- The Big Mash & Mix: To the bowl of warm potato, add the softened butter, sour cream, and milk/cream. Use a potato masher or a sturdy fork to mash it all together until it’s mostly smooth. Now, fold in 1 cup of the cheddar cheese, most of the crumbled bacon (save some for garnish!), most of the green onions, and a big pinch of salt and pepper. Taste it! This is your moment to adjust. Need more tang? A dollop more sour cream. More savoriness? A pinch of garlic powder. Make it yours.
- Fill ‘Em Up & Top ‘Em Off: Using the same spoon, generously pile the creamy filling back into the waiting potato shells. Mound it up high—this is no time to be shy! Smooth the tops, then crown each one with a shower of the remaining cheese. The cheese blanket will melt into a gorgeous, golden lid.
- The Second Bake (The Grand Finale!): Place your loaded potatoes on a baking sheet (for easy handling) and pop them back into the oven. Bake for 15-20 minutes, just until the cheese is completely melted, bubbly, and maybe even has a few golden-brown spots. Your kitchen will smell absolutely insane.
- Garnish & Serve with Love: Take them out and immediately sprinkle with the reserved bacon and green onions. That hit of fresh color and cool crunch against the hot, creamy potato is everything. Serve them warm and watch the smiles appear.
How to Serve These Golden Beauties
Presentation is part of the fun! Arrange these potatoes on a big, beautiful platter or a rustic wooden board. Tuck a few extra sprigs of green onion or even some fresh parsley around them for a pop of color. They are the quintessential Easter side dish, holding their own next to baked ham, spring lamb, or a glazed turkey. But honestly, they’re so rich and satisfying that serving two halves alongside a bright, simple green salad makes for the most glorious comfort-food dinner. Don’t forget the sour cream on the side for those who want an extra creamy bite!
Make It Your Own: Delicious Twists & Swaps
- The Ranch Lover: Stir in 2 tablespoons of dry ranch seasoning mix into the filling. Top with Monterey Jack cheese and extra chives.
- Loaded Tex-Mex: Swap cheddar for pepper jack cheese. Add a ¼ cup of drained, diced green chiles and 2 tablespoons of chopped cilantro to the filling. Top with a dollop of salsa and avocado after baking.
- Buffalo Chicken: Fold in 1 cup of shredded cooked chicken tossed in ¼ cup of buffalo sauce. Use a blue cheese and cheddar blend, and garnish with a drizzle of blue cheese dressing.
- Vegetarian Garden: Omit bacon. Add ½ cup of sautéed finely chopped broccoli florets and red bell pepper to the filling. A sprinkle of smoked paprika adds that smoky depth.
- Ultra-Luxury: Substitute the milk with an equal amount of warmed cream cheese blended until smooth. Fold in ¼ cup of crisp, fried shallots for an incredible texture.
Olivia’s Kitchen Notes & Stories
This recipe has been my trusty friend for years, and like any good friend, it’s evolved. There was the infamous “Great Cheese Avalanche of 2018” where I piled the filling so high the cheese slid right off in the oven—delicious, but messy! Now I know to mound it firmly. I’ve also learned that these are the ultimate make-ahead dish. You can complete all the steps up through filling and topping them, then cover and refrigerate for up to 24 hours. Just add 5-10 minutes to the second bake time if they’re going in cold. They freeze beautifully, too (see FAQs!). The real magic, though, is in sharing them. I’ve never met a person who didn’t go back for a second half. They’re my edible proof that simple, heartfelt food is the best kind of love language.
Your Questions, Answered!
Can I make these ahead of time?
Absolutely, and I highly recommend it for stress-free entertaining! Prepare the potatoes completely through Step 6 (filling and topping them). Cover the baking sheet tightly with plastic wrap and refrigerate for up to a day. When you’re ready, bake them straight from the fridge, adding an extra 5-10 minutes to the baking time until they’re heated through and bubbly.
Why are my potato skins not crispy?
The two most common culprits are not drying the potatoes thoroughly after washing (trapped steam = soggy skin) or not using enough oil. Make sure they’re bone-dry, give them a good rub with that olive oil, and don’t skip the salt rub! Baking them directly on the rack, not on a pan, is also key for air circulation.
Can I freeze twice baked potatoes?
Yes! They freeze wonderfully for up to 2 months. After filling and topping, place the unbaked potatoes on a baking sheet and flash-freeze until solid (about 2 hours). Then, transfer them to a heavy-duty freezer bag. To cook, bake from frozen on a parchment-lined sheet at 400°F for 25-35 minutes, until thoroughly heated.
My filling is too runny/gummy. What happened?
This usually means the potato flesh was too wet. Russets are naturally less watery, but if you use another variety (like Yukon Golds), they can hold more moisture. The fix? After scooping, you can let the potato flesh sit in the bowl for a minute—the steam will escape. Also, mash before adding your wet ingredients so you can control the consistency. If it’s already too wet, a tablespoon of instant potato flakes can help absorb excess moisture without affecting flavor.
Print
Twice Baked Potato Recipe – Loaded & Cheesy Easter Side Dish
Description
The Ultimate Twice Baked Potato Recipe: Your New Easter Showstopper
If you’re looking for a side dish that feels special but is surprisingly simple to make, these loaded twice baked potatoes are it. Crispy on the outside, creamy and cheesy on the inside, and packed with savory bacon and green onions, they’re the kind of comfort food that disappears fast from the table.
Ingredients
-
4 large russet potatoes
-
2 tablespoons olive oil
-
Salt (for rubbing skins)
-
4 tablespoons unsalted butter, softened
-
½ cup sour cream
-
¼ cup milk or heavy cream
-
1½ cups shredded sharp cheddar cheese, divided
-
4 slices bacon, cooked and crumbled
-
2 green onions, finely sliced
-
Salt and black pepper, to taste
Optional: garlic powder, smoked paprika, or a spoonful of cream cheese for extra richness.
Instructions
1. Bake the Potatoes
Preheat your oven to 400°F (200°C).
Scrub the potatoes clean and pat them completely dry. Rub each potato with olive oil and sprinkle generously with salt.
Place them directly on the oven rack and bake for 60–70 minutes, until fork-tender.
2. Scoop the Filling
Let the potatoes cool for about 10–15 minutes. Slice each one in half lengthwise.
Carefully scoop out the inside into a large bowl, leaving about a ¼-inch border so the skins hold their shape.
3. Make the Creamy Filling
Mash the warm potato with butter, sour cream, and milk until smooth.
Stir in:
-
1 cup of cheddar cheese
-
Most of the bacon (save some for topping)
-
Most of the green onions
-
Salt and pepper to taste
Mix until creamy and well combined.
4. Fill and Bake Again
Spoon the mixture back into the potato shells, mounding it slightly.
Top with the remaining cheddar cheese.
Place on a baking sheet and bake for 15–20 minutes, until heated through and the cheese is melted and bubbly.
5. Garnish and Serve
Sprinkle with the reserved bacon and green onions. Serve warm and enjoy!
Notes
-
Dry the skins well before oiling to ensure crispiness.
-
Use russet potatoes — they have the perfect fluffy texture for mashing.
-
Taste the filling before stuffing so you can adjust seasoning.
-
Make ahead: Prepare through stuffing, refrigerate up to 24 hours, and bake when ready.
-
For extra creamy filling: Add 1–2 tablespoons cream cheese.
Nutritional Information (Per Serving – 1 half)
Please note: This is an estimate for one loaded potato half. Values can vary based on specific ingredients and brands used.
- Calories: ~320 kcal
- Fat: 18g
- Carbohydrates: 28g
- Protein: 10g
- Sodium: ~350mg
Final Thoughts: More Than Just a Side Dish
And there you have it. From a simple russet potato to a golden, cheesy, utterly irresistible masterpiece. As you pull that baking sheet out of the oven and that cloud of bacon-and-cheddar-scented air hits you, I hope you feel a little burst of pride. You didn’t just make a side dish; you created a moment. You built the kind of food that makes people pause, close their eyes, and say “Mmm,” the kind that sparks second helpings and happy sighs around the table.
These twice-baked potatoes are my love letter to holiday cooking—food that’s meant to be shared, savored, and remembered. They carry the warmth of my grandma’s kitchen and the joy of my own family gatherings, and now, they’re a part of yours, too. Whether they’re gracing your Easter table, accompanying a simple weeknight steak, or just serving as a very good reason to stay in on a Sunday, my hope is that they bring you and your loved ones the same cozy, connected feeling they’ve always brought me.
So, go ahead and take that first bite. Taste the crispy skin, the creamy, tangy filling, the smoky bursts of bacon. That, my friend, is the taste of a tradition in the making.
Now it’s your turn! I’d absolutely love to hear how they turned out. Did your family love them? Did you try one of the fun twists like the Buffalo Chicken or Tex-Mex version? Drop a comment below and tell me all about it—your stories are the reason I keep sharing these recipes. And if you snapped a photo, tag me on social media; there’s nothing I love more than seeing your beautiful creations!
Total Time: 1 hour 40 minutes | Active Time: 30 minutes | Servings: 8 halves

Frozen Greek Yogurt Peanut Butter Bites
Frozen Greek Yogurt Peanut Butter Bites: A Flavorful Treat to Savor
Hey, beautiful souls! Welcome back to my cozy corner of the internet, where kitchen magic happens daily! Today, I’m super excited to dive into a recipe that combines two of my favorite things: creamy Greek yogurt and rich peanut butter. You guessed it; we’re whipping up Frozen Greek Yogurt Peanut Butter Bites! Think of these little morsels as the perfect snack to satisfy your sweet tooth while keeping things healthy and delightful. Whether you’re looking for that late-night treat or a midday pick-me-up, these bites have got you covered.
What I love about these Greek yogurt peanut butter bites is how effortlessly they come together. No fancy skills or endless prep time required—just a handful of ingredients and a bit of patience while they freeze. Plus, they’re versatile enough for anyone to enjoy! You can share them with your kids, take them along for a cozy movie night, or even make them your go-to snack for outdoor adventures.
Freezing Greek yogurt into adorable little bites makes for not only a fun treat but also a great way to enjoy a creamy, protein-packed snack without any added guilt. Did I mention they are perfectly poppable? Once you try them, I promise they’ll become a staple in your freezer! So grab your apron, and let the fun begin as we get into this super simple recipe that will leave you craving more!
Personal Story
Every time I make these Frozen Greek Yogurt Peanut Butter Bites, I can’t help but think back to those lazy summer afternoons at my grandma’s house. She had this simple, old-school kitchen where the sun poured in through the floral curtains, gracefully illuminating her small collection of cookbooks. I remember whipping up all kinds of deliciousness with her, but one thing we often made was a creamy peanut butter dip that we’d enjoy with fresh fruit.
Those carefree sessions are ingrained in my memory; the joy of mixing, blending, and taste testing created a bond between us that I cherish. We would steal bites straight from the spoon, giggling and sneaking little treats into our mouths! It was all about the flavor, the laughter, and the warmth of family. This simple recipe echoes those joyful days, transforming that same creamy peanut butter flavor into something fun and wholesome. As I make these bites now, I still feel that connection with my grandma, reminding me that food is not just sustenance—it’s love, memories, and a way to bring people together.
Ingredients
Let’s get into our ingredient list, shall we? Here’s what you’ll need to create these delightful frozen bites:
-
Greek Yogurt: This creamy base is packed with protein and brings a tangy flavor! Look for plain, unsweetened yogurt for a healthier treat. If you’re lactose intolerant, try a plant-based yogurt, but do check for a thick consistency.
-
Peanut Butter: The star of the show! Any kind works—creamy or crunchy, just choose your favorite. For nut allergies, almond or sunflower butter are fantastic substitutions, imparting just about the same creamy essence.
-
Honey: A natural sweetener that not only adds flavor but also helps bind everything together. If you’re looking for a vegan option, agave syrup or maple syrup work beautifully.
-
Vanilla Extract: Just a splash adds delightful depth to the overall flavor. In a pinch? Feel free to swap it out for almond extract for a unique twist!
-
Mini Chocolate Chips (optional): For those who can’t resist a touch of chocolate! You can use dark chocolate chips for a healthier option or even sprinkle some cacao nibs for extra crunch.
These ingredients come together harmoniously, and the preparation is as easy as pie (or should I say, bites?). It’s all about elevating ordinary ingredients into something extraordinary, and I can’t wait for you to experience it!
Step-by-Step Instructions
Now that we have our ingredients ready, let’s get down to business! Follow these step-by-step instructions to create your own Frozen Greek Yogurt Peanut Butter Bites that will have you hooked from the very first taste.
-
Combine the Ingredients: Start by adding your 2 cups of Greek yogurt into a mixing bowl. Next, scoop in 1 cup of peanut butter. For a more decadent flavor, you can adjust this by adding a little extra peanut butter if you’re feeling adventurous. Then, drizzle in 1–2 tablespoons of honey or maple syrup, depending on your desired sweetness level. And last but not least, add in 1 teaspoon of vanilla extract.
Tip: Use a rubber spatula to scrape the sides of your bowl to ensure that everything is well combined.
-
Mix It Up: Using a whisk or a wooden spoon, blend everything together until smooth. You’ll want to ensure that the yogurt and peanut butter are perfectly integrated with no lumps. If you like a bit of crunch, fold in ½ cup of mini chocolate chips at this point!
Chef Hack: Warming your peanut butter slightly in the microwave (10-15 seconds) can make it easier to blend smoothly with the yogurt.
-
Prepare Your Bite Tray: Line a mini muffin tin or silicone mold with cupcake liners for easy removal. If you don’t have either, simply line a baking sheet with parchment paper—this will work just as well!
-
Fill Your Molds: Using a spoon or small ice-cream scooper, fill each mold with your delicious mixture, leaving a little space at the top as they will expand slightly while freezing. If you’re using a baking sheet, scoop small dollops, spaced apart, as they won’t stick together.
Pro Tip: Wetting the spoon or scooper slightly with warm water can help the mixture slide out more easily!
-
Freeze: Pop your tin or sheet into the freezer and let those bites chill for at least 4 hours—or until they are completely firm and frozen. (Overnight if you can wait!)
-
Remove and Enjoy: Once they’ve set, gently peel them out of the molds. Your bites should pop out easily, especially with silicone molds. If you used a baking sheet, just break them into bite-sized pieces!
Chef’s Note: Don’t forget to taste one of these bites while they’re fresh from the freezer—so creamy and utterly divine!
Serving Suggestions
These Frozen Greek Yogurt Peanut Butter Bites are perfect for a quick grab-and-go snack. Serve them as a delightful treat during movie nights, or pack them in lunchboxes for a healthy twist on dessert! You can also serve them on a platter with fresh fruits like strawberries or banana slices for a colorful presentation.
For an extra special touch, drizzle a little melted dark chocolate over the top right before serving, creating a beautiful contrast and an irresistible taste sensation!
Recipe Variations
-
Fruit Frenzy: Add finely chopped fruits like strawberries, blueberries, or bananas directly into the mixture for a fruity explosion and natural sweetness!
-
Nutty Overload: Mix in crushed nuts (almonds, walnuts, or hazelnuts) for extra crunch and nutrition.
-
Spiced Up: Try adding a dash of cinnamon or a pinch of sea salt to elevate those flavors further.
-
Vegan Delight: Replace Greek yogurt with coconut yogurt and use maple syrup as your sweetener for a completely vegan treat!
-
Matcha Magic: Substitute a tablespoon of peanut butter with matcha powder for a unique flavor and a vibrant green bite—so fun!
Chef’s Notes
These Frozen Greek Yogurt Peanut Butter Bites have been an evolution in my kitchen. Originally, they started as a quick fix for my late-night cravings. It’s funny how something so simple became a household favorite! Sometimes I experiment by adding different flavors and ingredients, which keeps it fresh and fun each time.
I can’t help but chuckle when I think about the first time my partner decided to take a batch to a gathering. Let’s just say most of the bites came home with him, thanks to their popularity amongst the guests! It’s a delightful reminder that food truly brings people together, and sharing these bites always leaves everyone smiling.
FAQs and Troubleshooting
Q: Can I use flavored Greek yogurt instead?
Definitely! Using flavored Greek yogurt can add a fun twist to your bites, but make sure to adjust the amount of honey you add to prevent them from becoming overly sweet.
Q: How long will these last in the freezer?
These delicious bites can last up to three months in the freezer if stored in a well-sealed container. Just don’t be surprised if they vanish before that!
Q: Why are my bites not coming out of the mold easily?
If you encounter this issue, try running warm water over the outside of the mold to help loosen them up. Alternatively, using silicone molds can often make for easier release!
Q: Can I adjust the sweetness level?
Absolutely! Everyone’s palate is different. Start with less honey and taste as you go. You can always add more, but you can’t take it away!
Nutritional Info
Please note that the nutritional values may vary depending on specific brands used and serving sizes.
- Serving Size: 2 bites
- Calories: Approx. 100 per serving
- Total Fat: 7g
- Saturated Fat: 1g
- Cholesterol: 0mg
- Sodium: 50mg
- Total Carbohydrates: 9g
- Dietary Fiber: 1g
- Total Sugars: 4g
- Protein: 3g
And there you have it, my lovely food enthusiasts! A delightful recipe for Frozen Greek Yogurt Peanut Butter Bites that not only nourishes the body but also warms the heart with each delicious bite. I hope you enjoy making these as much as I do! Remember, cooking is about having fun and sharing joy in every dish you create. So get in that kitchen, let the laughter flow, and make magic happen! Happy cooking! 🍽️✨
Print
Frozen Greek Yogurt Peanut Butter Bites
- Total Time: 250 minutes
- Yield: 12 servings 1x
- Diet: Vegetarian
Description
A delightful and healthy treat combining creamy Greek yogurt and rich peanut butter, perfect for satisfying your sweet tooth.
Ingredients
- 2 cups Greek yogurt
- 1 cup peanut butter
- 1–2 tablespoons honey or maple syrup
- 1 teaspoon vanilla extract
- ½ cup mini chocolate chips (optional)
Instructions
- Combine the ingredients: Start by adding your Greek yogurt into a mixing bowl. Next, scoop in peanut butter, drizzle in honey, and add vanilla extract.
- Mix it up: Blend everything together until smooth, folding in mini chocolate chips if desired.
- Prepare your bite tray: Line a muffin tin or a baking sheet with parchment paper.
- Fill your molds: Use a spoon to fill each mold with the mixture, leaving a little space at the top.
- Freeze: Place in the freezer for at least 4 hours until completely firm.
- Remove and enjoy: Peel out of molds and indulge in your delicious bites!
Notes
For extra flavor, add fruits, nuts, or spices like cinnamon. These bites can last up to three months in the freezer.
- Prep Time: 10 minutes
- Cook Time: 240 minutes
- Category: Snack
- Method: Freezing
- Cuisine: American
Nutrition
- Serving Size: 2 bites
- Calories: 100
- Sugar: 4g
- Sodium: 50mg
- Fat: 7g
- Saturated Fat: 1g
- Unsaturated Fat: 6g
- Trans Fat: 0g
- Carbohydrates: 9g
- Fiber: 1g
- Protein: 3g
- Cholesterol: 0mg
Keywords: frozen bites, Greek yogurt, peanut butter, healthy snack, dessert
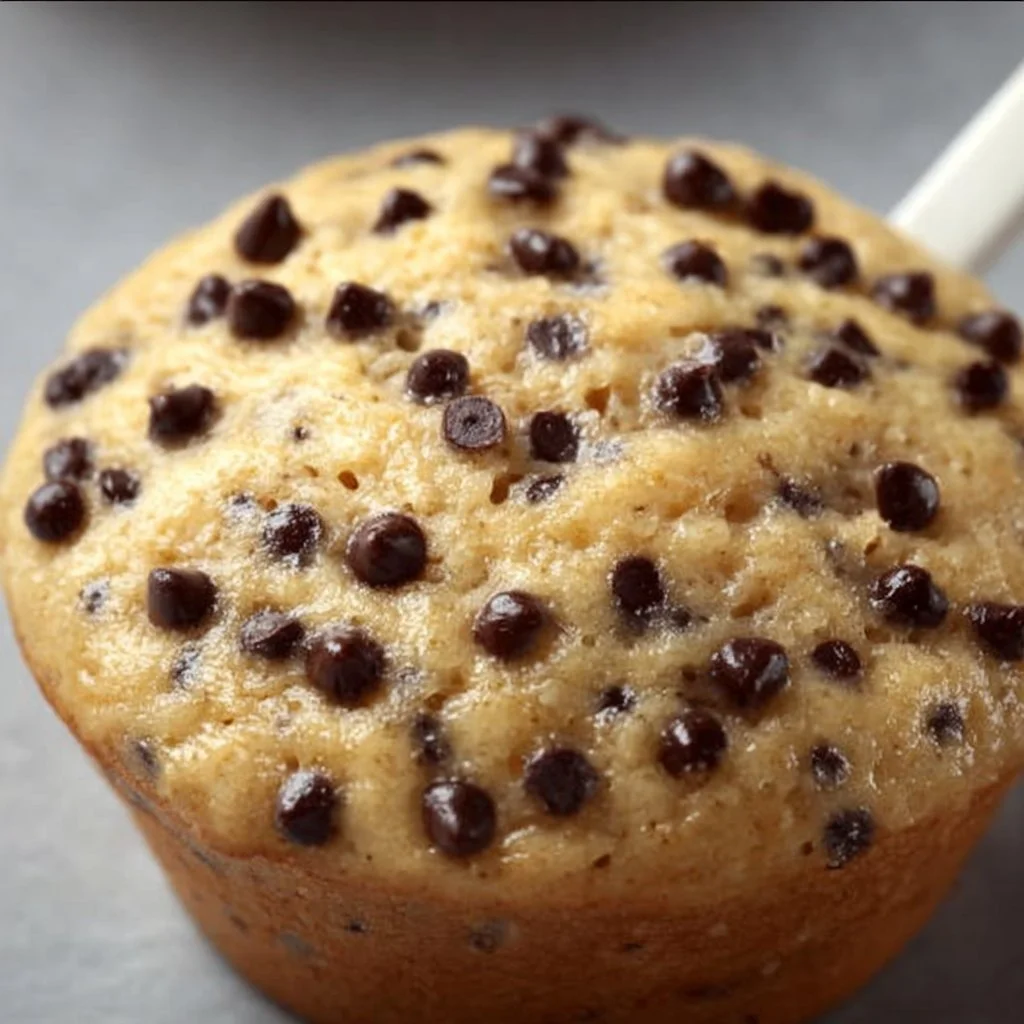
Banana Chocolate Chip Muffins
Banana Chocolate Chip Muffins: The Ultimate Cozy Treat
Welcome to my kitchen, fellow foodies! Today, we’re diving into the delightful world of Banana Chocolate Chip Muffins—an all-time favorite that fills my home with sweet aromas and warm memories. Seriously, nothing beats the smell of these muffins baking in the oven; it’s like a hug in the air. Whether you’re preparing them for a weekend brunch, a snack on the go, or just because you want something comforting, these muffins are here to make your day just a smidge brighter.
A Sweetly Nostalgic Journey
Let me take you on a little trip down memory lane. It was a rainy Saturday morning, and the pitter-patter of raindrops against our kitchen window set the perfect backdrop for some quality baking time. There I was, just a kid with flour-dusted cheeks, ready to dive into one of my favorite activities—cooking with my mom!
We’d woken up to a nursery of sleepy sounds, but she always managed to bring excitement into mundane days. She pulled out the overripe bananas from the counter, insisting they were perfect for baking. I remember thinking, “Eww, brown bananas?!” But mom knew better. With a few simple ingredients and a robust dose of love, those bananas transformed into the fluffiest, most chocolate-studded muffins I’d ever tasted. As we filled our small kitchen with laughter and the scent of baked goodness, I learned that creativity and joy can flourish even on the cloudiest of days.
Now, every time I whip up a batch of Banana Chocolate Chip Muffins, I’m reminded of those sweet moments with my mom—how we discovered flavors, textures, and a sense of togetherness through simple ingredients. And today, I want to pass that joy onto you. Let’s start baking!
Ingredients
To whip up these mouthwatering Banana Chocolate Chip Muffins, here’s what you’ll need:
-
3 ripe bananas
The key to moist muffins! Look for bananas with lots of brown spots; they bring the natural sweetness and flavor. -
1/3 cup melted butter
For richness! If you’re feeling a bit healthier, coconut oil or unsweetened applesauce can work as a substitute. -
3/4 cup sugar
You can use white sugar or brown sugar for a deeper flavor. Feel free to reduce the sugar if you prefer less sweetness. -
1 large egg
Eggs help bind the muffins together. If you’re avoiding eggs, use a flaxseed egg (1 tablespoon ground flaxseed mixed with 2.5 tablespoons water). -
1 teaspoon vanilla extract
Adds a lovely aroma and flavor. For a twist, try almond extract for a different depth of flavor. -
1 teaspoon baking soda
This is your rising agent! Ensure it’s fresh for a perfect rise. If you can’t find baking soda, you can use baking powder, but adjust the quantities. -
Pinch of salt
Balances the sweetness. Don’t skip this—salt enhances all the flavors nicely! -
1 1/2 cups all-purpose flour
The backbone of your muffins. You can use whole wheat flour for a healthier option, but the texture may vary slightly. -
1 cup chocolate chips
They melt beautifully and add sweetness. Semi-sweet or dark chocolate work best; feel free to swap with nuts for a different texture. -
Optional: 1 teaspoon cinnamon
Love a hint of spice? Cinnamon adds warmth. Try nutmeg for a different twist if you want something unique!
Step-by-Step Instructions
Okay, now that we have all our ingredients lined up, it’s time to get down to business and create some magic!
-
Preheat Your Oven
Preheat your oven to 375°F (190°C). This will be the cozy warmth your muffins need to rise perfectly! -
Prepare Your Muffin Tin
Grease a muffin tin or line it with paper liners. This prevents a sticky situation and makes cleanup a breeze. I often use non-stick spray for added assurance! -
Mash Those Bananas
In a large mixing bowl, mash the ripe bananas with a fork until smooth. Don’t be afraid of it being a bit lumpy—that’s the desired texture. -
Mix in the Wet Ingredients
Stir in the melted butter. Once it’s mixed, add in the sugar, egg, and vanilla extract. Mix until well combined. Don’t fret if it looks a bit grainy; it will all come together! -
Combine Dry Ingredients
In a separate bowl, combine the flour, baking soda, salt, and cinnamon (if using). Mix them gently! Just like with your relationships, you don’t want to overmix and create an awkward gluggy texture. -
Combine Wet and Dry
Gradually stir the dry mixture into the wet mixture. Use a spatula and fold it gently until just combined. It’s okay if a few flour streaks remain—over-mixing can lead to tough muffins! -
Add Chocolate Chips
Now, fold in those glorious chocolate chips. Feel free to reserve a few to sprinkle on top before baking for that extra touch of bliss! -
Fill the Muffin Tin
Spoon the muffin batter into your prepared tin, filling each cup about 3/4 way full. Trust me; they’ll rise beautifully. -
Bake
Pop your muffin tin in the oven and bake for 18-20 minutes, or until golden and a toothpick inserted in the center comes out clean. You’ll know they’re done when your kitchen smells like a cozy café! -
Cool Down
Once out of the oven, let the muffins sit in the pan for about 5 minutes before transferring them to a wire rack. This helps them finish cooking while preventing a soggy bottom.
Serving Suggestions
When it comes to serving your Banana Chocolate Chip Muffins, the possibilities are endless! You can enjoy them warm right out of the oven, or let them cool completely and serve them with a slather of butter or a drizzle of honey. They also make fantastic breakfast treats served alongside your favorite coffee or tea or even a dollop of yogurt for a wholesome twist.
Top this off with a sprinkle of powdered sugar for that professional bakery look, and you’ve just transformed your home into a cozy café!
Recipe Variations
Want to mix it up? Here are a few variations you can try:
-
Nutty Banana Muffins: Toss in a cup of chopped walnuts or pecans for that delightful crunch.
-
Tropical Twist: Add 1/2 cup of shredded coconut and a handful of dried pineapple for a fun tropical vibe.
-
Double Chocolate: Swap 1/2 cup flour for cocoa powder to get chocolaty goodness inside and out!
-
Gluten-Free Option: Use a 1:1 gluten-free baking mix for a flawless substitute.
-
Vegan Delight: Use almond or oat milk in place of the egg, and substitute regular butter with vegan butter or coconut oil.
Chef’s Notes
Over the years, my Banana Chocolate Chip Muffins have gone through quite a few iterations. Initially, I followed my mom’s classic recipe to the letter, but I’ve dabbled with flavors and textures. Adding spices, using different types of chocolate, and even experimenting with health-conscious swaps have all been part of my culinary journey. You know what they say—kitchens are meant for creativity and experimentation.
Oh, and I have to share a funny story! One time, I completely forgot to add sugar while making my muffins—it was a baking disaster until I added a bit of sweet syrup post-baking, which turned out to be a surprisingly enjoyable, albeit accidental, innovation. That’s the beauty of cooking: sometimes, mistakes lead to delicious surprises!
FAQs and Troubleshooting
-
My muffins came out dense. What happened?
This usually happens when the batter is overmixed. Ensure you mix just until combined, and don’t worry about leaving a few lumps! -
How can I tell when they’re done?
When a toothpick inserted in the center comes out with a few moist crumbs (not wet batter), they’re ready! -
Can I freeze these muffins?
Absolutely! Once cooled, wrap them tightly in plastic wrap and store in an airtight container. They’ll keep in the freezer for up to three months—perfect for a quick snack on busy days! -
Mine turned out too sweet. What should I do?
You can try reducing sugar in the recipe next time. Additionally, pairing them with something salty or tangy (like cream cheese) can help balance the sweetness.
Nutritional Info (Optional)
If you’re tracking your nutrition, here’s a rough estimate per muffin (without added toppings):
- Calories: 180
- Protein: 3g
- Total Fat: 7g
- Saturated Fat: 4g
- Carbohydrates: 26g
- Sugar: 10g
- Fiber: 1g
And there you have it, my friends! Your very own batch of Banana Chocolate Chip Muffins—filled with memories, creativity, and, most importantly, deliciousness! I can’t wait for you to enjoy these tasty treats. Happy baking! 🍌💖
Print
Banana Chocolate Chip Muffins
- Total Time: 35 minutes
- Yield: 12 servings 1x
- Diet: Vegetarian
Description
Delicious, fluffy muffins filled with ripe bananas and chocolate chips, perfect for any occasion.
Ingredients
- 3 ripe bananas
- 1/3 cup melted butter
- 3/4 cup sugar
- 1 large egg
- 1 teaspoon vanilla extract
- 1 teaspoon baking soda
- Pinch of salt
- 1 1/2 cups all-purpose flour
- 1 cup chocolate chips
- Optional: 1 teaspoon cinnamon
Instructions
- Preheat your oven to 375°F (190°C).
- Prepare your muffin tin by greasing or lining it with paper liners.
- Mash the ripe bananas with a fork until smooth.
- Mix in the melted butter, then add sugar, egg, and vanilla extract.
- Combine the flour, baking soda, salt, and cinnamon in a separate bowl.
- Gradually stir the dry mixture into the wet mixture until just combined.
- Add the chocolate chips and fold gently.
- Fill each muffin cup about 3/4 full with batter.
- Bake for 18-20 minutes, or until a toothpick inserted comes out clean.
- Cool the muffins in the pan for 5 minutes before transferring them to a wire rack.
Notes
Enjoy the muffins warm or let them cool completely. Pair them with butter or honey for a treat!
- Prep Time: 15 minutes
- Cook Time: 20 minutes
- Category: Dessert
- Method: Baking
- Cuisine: American
Nutrition
- Serving Size: 1 muffin
- Calories: 180
- Sugar: 10g
- Sodium: 150mg
- Fat: 7g
- Saturated Fat: 4g
- Unsaturated Fat: 2g
- Trans Fat: 0g
- Carbohydrates: 26g
- Fiber: 1g
- Protein: 3g
- Cholesterol: 30mg
Keywords: banana muffins, chocolate chip, baking recipe
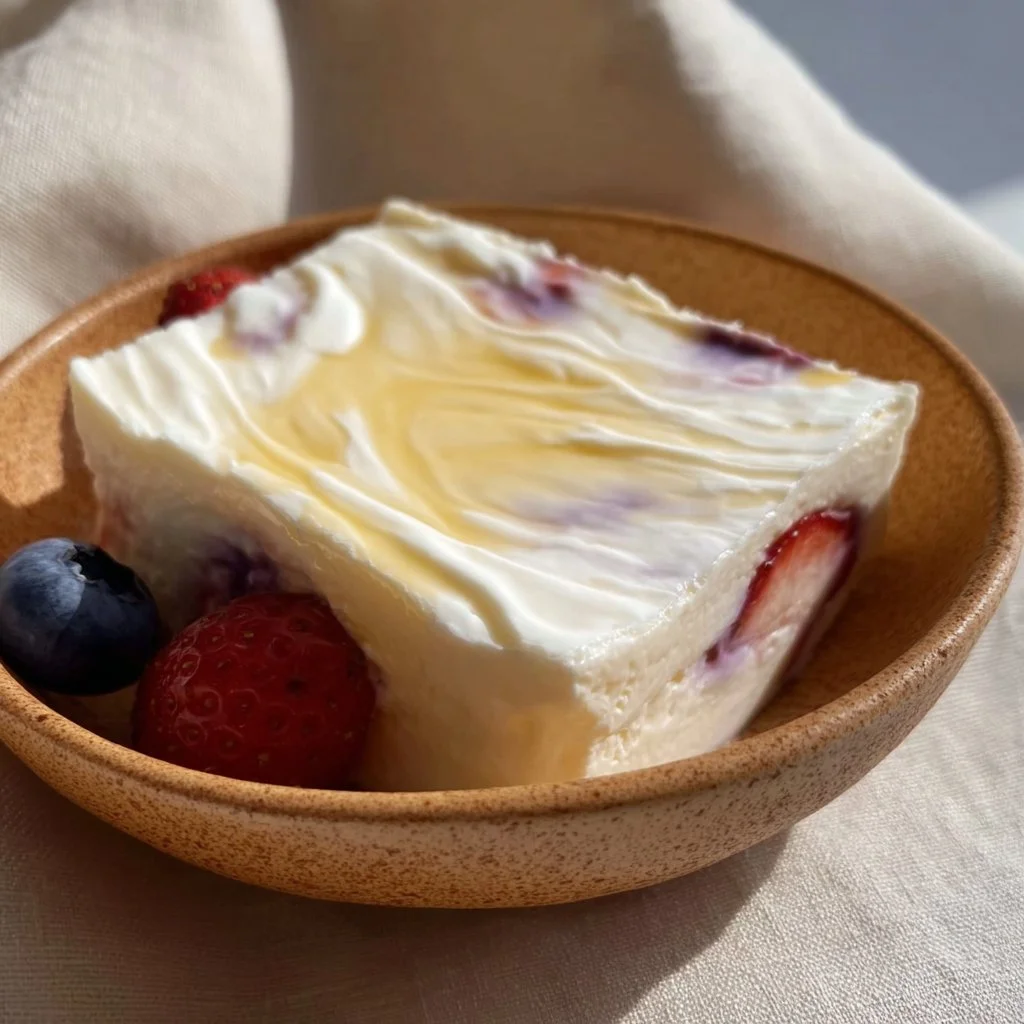
Baked Yogurt
The Creamy Delight of Baked Yogurt: A Recipe to Warm Your Heart
Welcome to my cozy little corner of the culinary universe! Today, I’m excited to share a recipe that’s near and dear to my heart: Baked Yogurt. If you’ve never tried this delightful dish before, you’re in for a treat! Imagine a creamy, rich base made from yogurt, gently baked until it transforms into a luscious custard-like texture, all while maintaining that tangy goodness. Perfect as a light dessert or a comforting snack, this dish wraps you in warmth and nostalgia, just like your favorite blanket on a chilly day.
Growing up in a home filled with the aromas of baking and the chatter of family, I often found myself in the kitchen, helping my mom whip up simple yet satisfying dishes. One of my fondest memories revolves around the first time I tasted baked yogurt — it was creamy, airy, and oh-so-delicious! Mom would surprise us by transforming plain yogurt into something magical with just a few ingredients and a little love. This dish represents everything I adore about cooking: the ability to take humble ingredients and transform them into something extraordinary that brings people together.
So, whether you’re looking for a new dessert to impress or simply want to indulge your creamy yogurt cravings, let’s dive into this delicious recipe together!
The Memories Behind Baked Yogurt
I still remember the warm glow of our kitchen on those lazy Sunday afternoons when the scent of baked yogurt wafted through the air. It was my mom’s go-to when we had family gatherings or when she wanted to treat us after a long week. She’d line up small ramekins on the kitchen counter and fill them with a luscious blend of yogurt, sugar, and vanilla extract, sending us running to the oven, eagerly anticipating the sweet satisfaction to come.
After the magical transformation in the oven, she would top each serving with a sprinkle of cinnamon and a handful of fresh berries, and we would gather around the table, giggles echoing as we dug into our tiny bowls of joy. It wasn’t just the taste that made it special; it was the feeling of togetherness that accompanied each scoop, the joy of sharing homemade goodness, and the warmth of family bonds strengthened over sweet bites.
Now, I’m thrilled to bring this beloved recipe to your kitchen, filled with love and a pinch of nostalgia.
Ingredients
Gathering ingredients is half the fun! Here’s what you’ll need to whip up this creamy baked yogurt:
-
2 cups plain yogurt
Choose a good quality, thick yogurt for the best results. Greek yogurt works beautifully here too! If you’re dairy-free, opt for coconut yogurt or almond yogurt, but just ensure it’s thick enough to hold its shape. -
1/2 cup sugar
Adjust the sweetness to your taste! You can use coconut sugar, honey, or maple syrup for a more natural option. Just keep in mind the flavor change. -
1 teaspoon vanilla extract
This adds a lovely depth of flavor. Feel free to use vanilla bean paste for an even richer experience or substitute with almond extract for a different twist. -
3 large eggs
Eggs help bind everything together and provide that custard-like consistency. For a vegan option, try using flax eggs (1 tablespoon ground flaxseed mixed with 2.5 tablespoons water per egg). -
Pinch of salt
A little hint of salt balances the sweetness and enhances the overall flavor. Don’t skip on this! -
Toppings (optional)
Fresh fruits, nuts, honey, or even a drizzle of caramel sauce can take this dish to the next level! Customize your toppings to suit your mood or what you have on hand.
Step-by-Step Instructions
Now that you have all your ingredients, let’s get cooking! Here’s how to make the most delightful baked yogurt:
Step 1: Preheat the Oven
Preheat your oven to 350°F (175°C). This is key! The goal is to slowly bake the yogurt mixture to achieve that creamy texture without curdling. Make sure it’s nice and hot before you pop in your dish.
Step 2: Prepare Your Ramekins
Lightly grease your ramekins or a baking dish with a touch of butter or non-stick spray. This ensures your baked yogurt won’t stick, making serving a breeze. If you’re feeling fancy, you could even sprinkle a bit of sugar inside to create a lovely caramelized crust.
Step 3: Whisk the Yogurt Mixture
In a mixing bowl, combine the yogurt, sugar, and vanilla extract. Use a whisk to blend them until smooth and creamy. Here’s where the fun begins! Feel free to sneak a taste; it’s delicious!
Step 4: Add the Eggs
Crack the eggs into the bowl, one at a time, whisking gently until fully combined. Don’t overmix — just enough to incorporate them. This will help achieve that dreamy custard effect!
Step 5: A Dash of Salt
Don’t forget the pinch of salt! It’s a tiny addition but makes a world of difference. Just a little sprinkle will help heighten the flavors and tie everything together.
Step 6: Pour and Bake
Now, carefully pour the mixture into your prepared ramekins or baking dish. If you’re using multiple ramekins, place them in a large baking pan filled with about an inch of hot water. This water bath ensures even baking and prevents the edges from getting too brown.
Bake for about 30-35 minutes or until the edges are set but the center gently jiggles. Keep an eye on them — every oven is a little different!
Step 7: Cool Down
Once they’re done, remove them from the oven and the water bath. Allow them to cool for about 10-15 minutes at room temperature. Then, transfer them to the refrigerator to chill for at least an hour. The chilling time helps achieve that perfect creamy texture we’re looking for.
Step 8: Serve it Up
When you’re ready to serve, it’s time to get creative! Top each portion with your favorite fruits, a sprinkle of cinnamon, or a drizzle of honey. The contrast of the cool yogurt with warm toppings is absolute bliss!
Serving Suggestions
Baked yogurt can be served warm or cold, depending on your preference. A beautiful way to present it is in individual ramekins, garnished with a vibrant medley of berries, a sprinkle of chopped nuts, or a drizzle of honey or caramel sauce. Remember, food is not just about taste — it’s also about aesthetics!
Recipe Variations
Looking to switch things up? Here are a few delicious variations to consider:
-
Scented Spices: Add a pinch of cardamom or nutmeg to the yogurt mixture for an aromatic twist.
-
Citrus Zest: Infuse some zest from lemons, limes, or oranges into the mixture for a refreshing zing.
-
Chocolate Delight: Fold in a few tablespoons of cocoa powder for a chocolate version that’s absolute heaven!
-
Nutty Crunch: Incorporate finely chopped nuts into the mixture before baking, creating added texture.
-
Fruit Fusion: Swirl in fresh or frozen fruit puree (like raspberry or mango) into the yogurt before baking for a fruity kick!
Chef’s Notes
I must confess, this baked yogurt has evolved a bit since my early kitchen adventures! Initially, I relied heavily on my mom’s recipe, but as I grew comfortable with different flavors, I began experimenting. I vividly remember one instance where I reached into the pantry and added a scoop of peanut butter to the yogurt mixture — absolute flavor explosion!
It’s these delightful kitchen experiments that make cooking so rewarding. Don’t be afraid to play around with flavors and have fun in your kitchen!
FAQs and Troubleshooting
Q1: My baked yogurt cracked. What went wrong?
Cracking generally happens if the oven temperature is too high. Ensuring a gentle baking environment using a water bath can help prevent this.
Q2: Why is my yogurt watery?
You may have used a yogurt with too much liquid. Opt for a thicker yogurt or strain your yogurt for a bit before using it.
Q3: How can I sweeten it without sugar?
You can easily substitute with honey, maple syrup, or agave syrup. Just adjust the quantities to your taste as they might require different measurements than granulated sugar.
Q4: Can I make it ahead of time?
Absolutely! Baked yogurt can be made a day in advance. Just keep it covered in the refrigerator until you’re ready to serve.
Nutritional Info (per serving)
- Calories: Approximately 150
- Protein: 8g
- Fat: 6g
- Carbohydrates: 20g
- Sugars: 12g
- Fiber: 1g
So there you have it! A simple, comforting baked yogurt recipe that’s sure to fill your home with warmth and love. Cooking should be an adventure, and I hope this recipe ignites your passion for creating cozy, flavorful dishes! Happy cooking, and remember: every great recipe starts with a pinch of love!
Print
Baked Yogurt
- Total Time: 50 minutes
- Yield: 4 servings 1x
- Diet: Vegetarian
Description
A creamy and delightful baked yogurt recipe that transforms plain yogurt into a luscious custard-like dessert.
Ingredients
- 2 cups plain yogurt
- 1/2 cup sugar
- 1 teaspoon vanilla extract
- 3 large eggs
- Pinch of salt
- Toppings (optional): Fresh fruits, nuts, honey, or caramel sauce
Instructions
- Preheat your oven to 350°F (175°C).
- Prepare your ramekins by greasing them lightly.
- Whisk the yogurt, sugar, and vanilla extract until smooth.
- Add the eggs one at a time, whisking gently.
- Include a pinch of salt.
- Pour the mixture into prepared ramekins and place in a water bath.
- Bake for about 30-35 minutes until set but jiggly in the center.
- Cool for 10-15 minutes at room temperature, then chill in the refrigerator for at least an hour.
- Serve topped with your favorite additions.
Notes
You can make this ahead of time and store it in the refrigerator until ready to serve. Experiment with various toppings for added flavor.
- Prep Time: 15 minutes
- Cook Time: 35 minutes
- Category: Dessert
- Method: Baking
- Cuisine: Global
Nutrition
- Serving Size: 1 serving
- Calories: 150
- Sugar: 12g
- Sodium: 50mg
- Fat: 6g
- Saturated Fat: 3g
- Unsaturated Fat: 3g
- Trans Fat: 0g
- Carbohydrates: 20g
- Fiber: 1g
- Protein: 8g
- Cholesterol: 185mg
Keywords: baked yogurt, dessert, creamy dessert, yogurt recipes, comfort food
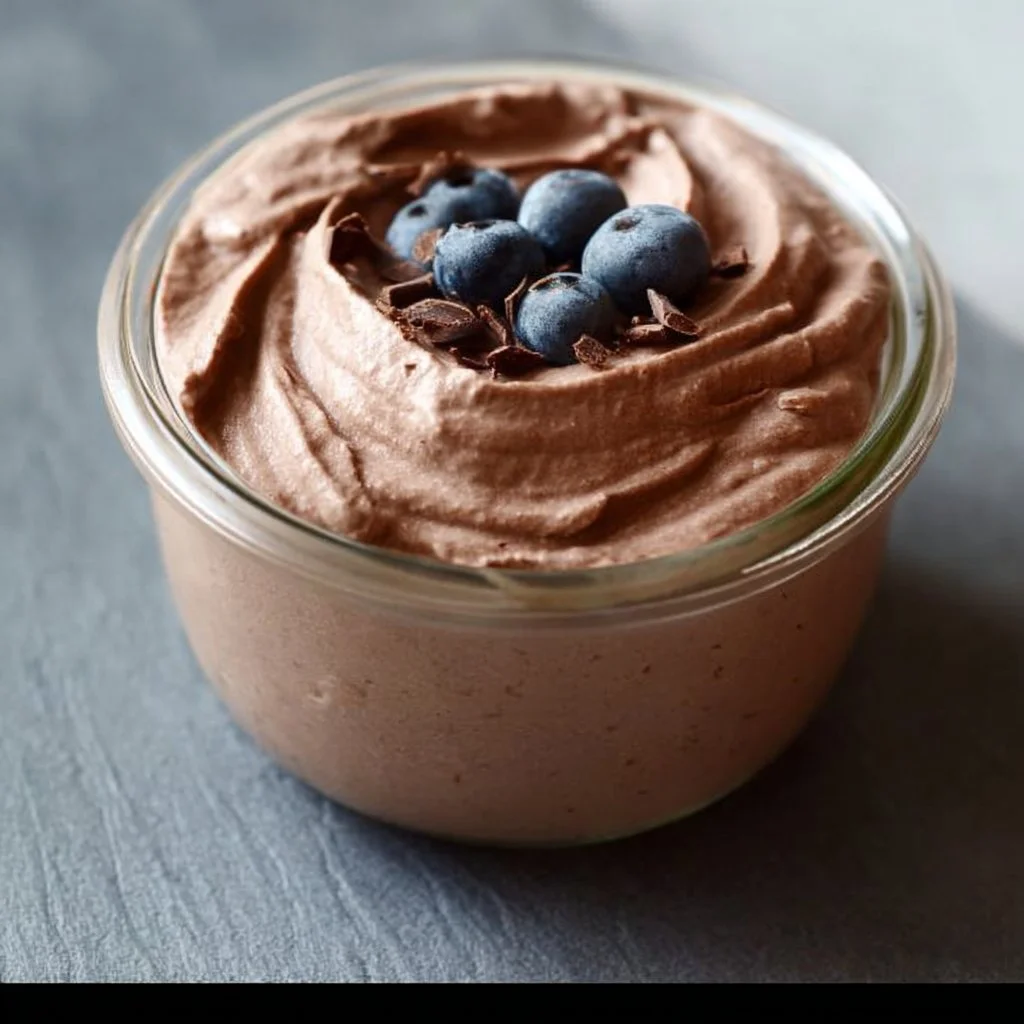
Chocolate Greek Yogurt Mousse
Whip Up Some Happiness with Chocolate Greek Yogurt Mousse!
Welcome, lovely food enthusiasts! Today, we’re diving into the delicious world of Chocolate Greek Yogurt Mousse. If you haven’t had the pleasure of tasting this velvety delight yet, buckle up because it’s about to become your new favorite dessert! Imagine this: luscious chocolate, creamy yogurt, and a hint of sweetness—all coming together in a light, airy mousse that feels indulgent but is secretly packed with protein. Yes, you heard that right! We’re making a dessert that not only satisfies your chocolate cravings but also feels a little healthier, thanks to Greek yogurt.
I’ve always been passionate about creating recipes that combine flavor and comfort, and this mousse is the perfect example. It’s a light yet rich dessert that’s fantastic for gatherings or a cozy night in with your favorite book. This chocolate mousse has been a delightful staple in my kitchen for years, and I can’t wait to share all the tips and tricks I’ve discovered along the way.
Now, get ready for a little chocolate magic! While the simplicity of this recipe makes it achievable for kitchen novices, the tantalizing flavor will have your friends and family thinking you spent hours crafting this treat. Whether you’re preparing a romantic dinner for two or impressing guests at a dinner party, this mousse is sure to steal the spotlight. Plus, with only a handful of ingredients, you’ll be in and out of the kitchen in no time!
Let’s put on our aprons and dive into the wonderful world of whipping up Chocolate Greek Yogurt Mousse together.
Personal Story
Ah, chocolate mousse—a dessert that instantly transports me back to my childhood. I recall evenings spent in my grandmother’s kitchen, the sweet scent of chocolate wafting through the air as she whipped up her famous dessert. I would sneak in to watch her every move, mesmerized by how effortlessly she seemed to create magic. She always insisted on using the best ingredients, and the joy on her face when serving up that silky mousse was contagious.
Fast forward to my adult years, I remember hosting my first dinner party in my tiny apartment—excited, nervous, and ready to impress! Of course, I decided to recreate my grandmother’s mousse, although I wanted to give it a twist by adding Greek yogurt for a healthier spin. The moment my guests took their first bite, I knew I had succeeded. The smiles on their faces mirrored the joy I felt watching my grandmother years ago. This Chocolate Greek Yogurt Mousse became a part of my own kitchen legacy, a delightful reminder of family gatherings, laughter, and the magic of shared meals.
Ingredients
Let’s gather a few ingredients to get us started! Each one plays a crucial role in crafting this dreamy mousse:
-
Greek Yogurt (2 cups)
A great source of protein and creaminess! I love using whole-milk Greek yogurt for a richer taste, but feel free to swap it for low-fat yogurt if you prefer. Just know that the mousse might be a bit less decadent. -
Semi-Sweet Chocolate (6 oz)
The star of the show! I recommend using high-quality chocolate for the best flavor. If you’re feeling adventurous, you can also try dark chocolate for a more intense experience or milk chocolate for a sweeter twist. -
Honey or Maple Syrup (1/4 cup)
A natural sweetener to add just the right amount of sweetness. If you prefer to keep it refined sugar-free, maple syrup is a lovely alternative. Adjust the amount according to your taste! -
Vanilla Extract (1 teaspoon)
A dash of vanilla enhances the flavors beautifully. You can substitute it with almond extract for a different taste, but use it sparingly as it can be quite potent. -
Whipped Cream (1 cup, for serving)
To top off your mousse! While homemade whipped cream is fantastic, you can also use store-bought for convenience. This step is optional, of course, but a dollop elevates the whole dessert!
Step-by-Step Instructions
Ready to whip up this mousse? Follow these simple steps for creamy perfection!
-
Melt the Chocolate
Start by breaking your semi-sweet chocolate into small pieces and placing them in a heatproof bowl. Get a pot of water simmering below—this is called a double boiler, and it’s perfect for melting chocolate evenly. Place the bowl over the pot, making sure the bottom doesn’t touch the water. Stir occasionally until the chocolate is fully melted and glossy. Chef Tip: If you’re short on time, you can melt the chocolate in the microwave in 30-second intervals, stirring in between. Just be careful not to burn it! -
Cool the Chocolate
Once melted, remove the bowl from the heat and set it aside to cool slightly. You don’t want to add hot chocolate to the yogurt, as it can compromise the texture of your mousse. -
Combine Yogurt and Sweetener
In a separate mixing bowl, scoop in the Greek yogurt and drizzle in your choice of honey or maple syrup. Use a whisk or electric mixer to blend well until creamy and smooth. Chef Hack: Add the vanilla extract at this stage so the flavor melds beautifully. -
Fold in the Chocolate
Once the chocolate has cooled (but is still pourable), slowly pour it into the yogurt mixture. Gently fold the chocolate into the yogurt using a spatula. Be careful not to overmix; you want to keep that airy feel! Fun Trick: You could also reserve a small amount of melted chocolate to drizzle on top later for a decorative touch. -
Chill the Mousse
After folding, spoon the mousse mixture into serving bowls or glasses. Cover them with plastic wrap and refrigerate for at least 2 hours (or overnight if you can resist!). This allows it to set and develop deeper flavors. -
Serve and Enjoy
When you’re ready to serve, top with a generous dollop of whipped cream and maybe even some chocolate shavings or fresh berries for garnish. Trust me, your guests will rave about how indulgent this mousse tastes, especially knowing it’s made with Greek yogurt!
Serving Suggestions
For a lovely presentation, consider serving your Chocolate Greek Yogurt Mousse in cute ramekins or elegant glassware that showcases the rich, dark color of the mousse. Top with a dollop of freshly whipped cream, a sprinkle of cocoa powder, or even some fresh raspberries for a pop of color! And if you’re feeling fancy, drizzle with a bit of melted chocolate or caramel sauce for an extra decadent touch.
Recipe Variations
Feeling adventurous? Here are a few fun twists to try on your Chocolate Greek Yogurt Mousse:
-
Mint Chocolate Mousse: Add a few drops of peppermint extract for a refreshing minty twist that pairs perfectly with chocolate.
-
Peanut Butter Swirl: Swirl in some creamy peanut butter before chilling for a deliciously nutty version.
-
Espresso Infusion: Add 1-2 teaspoons of instant espresso powder to the melted chocolate for a delightful mocha flavor.
-
Fruit Fusion: Mix in some pureed fruits like strawberries or avocados for a unique and vibrant flavor profile.
-
Nutty Delight: Fold in crushed nuts such as hazelnuts or almonds for a delightful crunch.
Chef’s Notes
I’ve made this mousse so many times over the years, and I always find a way to play with it. One of my funniest kitchen moments was when I misread the recipe and added a full cup of cocoa powder instead of just a couple of tablespoons. The result? A very intense chocolate experience! My friends were generous with their compliments, but I could tell they were slightly intimidated. Lesson learned: always double-check your measurements!
Remember, this recipe is all about having fun. Don’t hesitate to experiment with flavors and ingredients. Maybe try adding a pinch of sea salt on top for a delightful contrast! Over time, it’s evolved from my grandmother’s classic dessert to something that reflects my personal culinary journey.
FAQs and Troubleshooting
1. Why didn’t my mousse set properly?
If your mousse isn’t setting, it could be due to the yogurt you used. Make sure you’re using full-fat Greek yogurt for the best results. Also, ensure that the chocolate mixture cooled sufficiently before folding it into the yogurt.
2. Can I make this mousse ahead of time?
Absolutely! In fact, this mousse is perfect for making ahead. Just store it in the fridge for up to 3 days before serving.
3. Can I freeze the mousse?
While you can freeze chocolate mousse, it will lose its fluffy texture upon thawing. If you’re desperate for leftovers, I recommend freezing individual portions in airtight containers.
4. How can I make it dairy-free?
You can substitute Greek yogurt with a dairy-free alternative like coconut yogurt, and use dairy-free chocolate for a creamy, non-dairy version of this mousse!
Nutritional Info
This Chocolate Greek Yogurt Mousse is a delightful, guilt-free treat! Each serving (assuming 6 servings from the recipe) contains approximately:
- Calories: 160
- Protein: 6g
- Fat: 9g
- Carbohydrates: 15g
- Fiber: 1g
- Sugar: 10g
And there you have it, my friends! Chocolate Greek Yogurt Mousse that’s not only easy to make but absolutely divine. Whether you’re celebrating a special occasion or just indulging after a long day, I hope this dessert brings you as much joy as it does to me. So grab those ingredients, roll up your sleeves, and let’s get cooking! Happy whisking! 🍫✨
Print
Chocolate Greek Yogurt Mousse
- Total Time: 30 minutes
- Yield: 6 servings 1x
- Diet: Vegetarian
Description
A light yet indulgent chocolate mousse made with Greek yogurt, perfect for satisfying your sweet tooth while being packed with protein.
Ingredients
- 2 cups Greek Yogurt
- 6 oz Semi-Sweet Chocolate
- 1/4 cup Honey or Maple Syrup
- 1 teaspoon Vanilla Extract
- 1 cup Whipped Cream (for serving)
Instructions
- Melt the chocolate in a double boiler or microwave until glossy.
- Cool the chocolate slightly before combining.
- Combine the Greek yogurt with honey or maple syrup and whisk until smooth.
- Fold in the cooled chocolate gently to maintain the airy texture.
- Chill the mousse in the refrigerator for at least 2 hours.
- Serve with whipped cream and optional toppings like chocolate shavings.
Notes
Feel free to experiment with flavors by adding mint extract or peanut butter. Always use full-fat Greek yogurt for best results.
- Prep Time: 15 minutes
- Cook Time: 15 minutes
- Category: Dessert
- Method: Chilling
- Cuisine: American
Nutrition
- Serving Size: 1 serving
- Calories: 160
- Sugar: 10g
- Sodium: 60mg
- Fat: 9g
- Saturated Fat: 5g
- Unsaturated Fat: 4g
- Trans Fat: 0g
- Carbohydrates: 15g
- Fiber: 1g
- Protein: 6g
- Cholesterol: 20mg
Keywords: chocolate mousse, Greek yogurt dessert, healthy dessert, quick dessert, protein-rich dessert
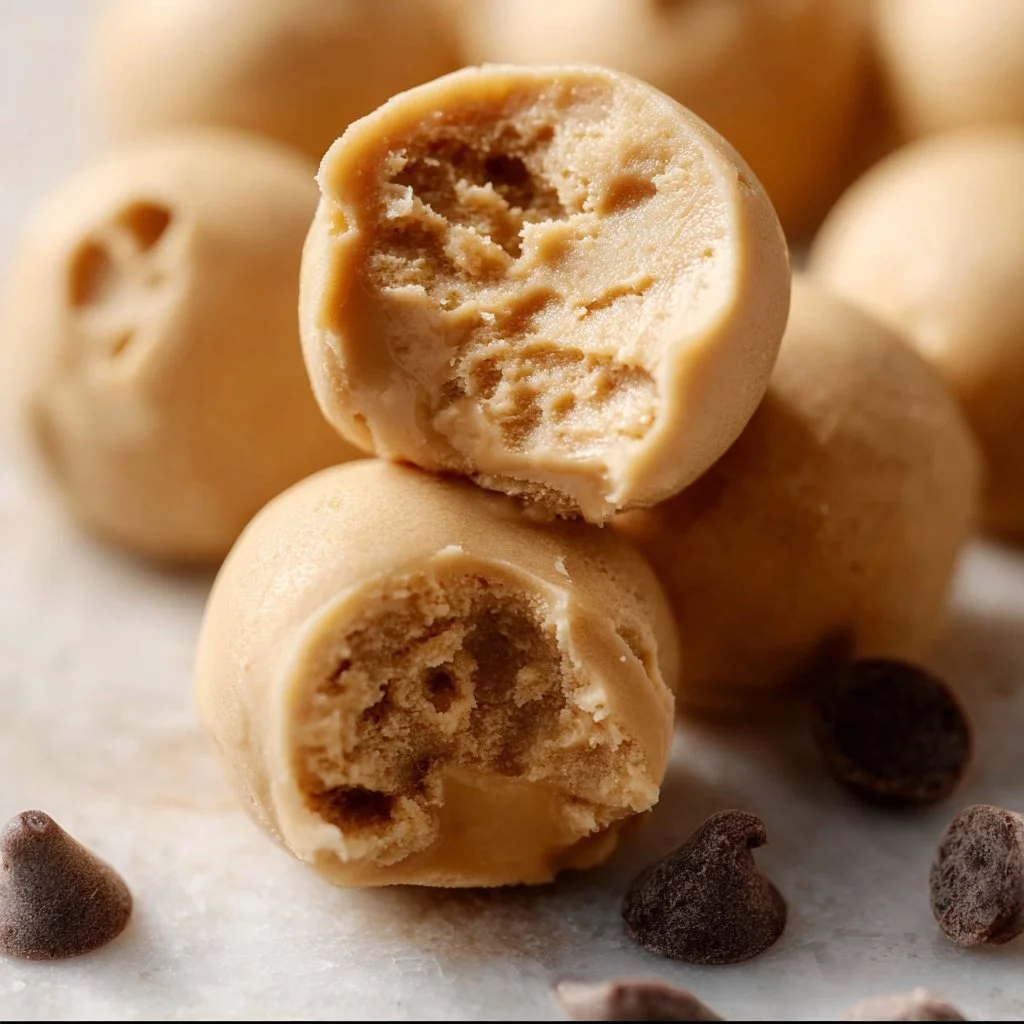
Frozen Greek Yogurt Peanut Butter Bites
Frozen Greek Yogurt Peanut Butter Bites: A Sweet and Simple Treat!
Welcome back to my cozy kitchen, food enthusiasts! Today, I’m bringing you a delightful treat that marries the creamy goodness of Greek yogurt with the rich, nutty flavor of peanut butter. Frozen Greek Yogurt Peanut Butter Bites are your new best friend when you’re craving something sweet but also want a healthier option. These little bites are not only easy to whip up, but they also satisfy that sweet tooth while providing a boost of protein and calcium. Who knew healthy could taste this good?
Let me tell you, there’s something magical about the combination of Greek yogurt and peanut butter. It’s like a hug in food form! The creamy yogurt balances perfectly with the smooth, nutty peanut butter—creating a luxurious, indulgent flavor without the guilt. And let’s be honest, who doesn’t love a snack that you can pop in your mouth whenever you want? These bites are ideal for busy afternoons, a sweet snack for kids, or even a late-night dessert when you’re feeling a little naughty but not too naughty.
Now, not to get too sentimental, but these bites bring me back to simpler times—snack times with friends, making memories in the kitchen with family, and the joy of sharing something delicious that’s also good for you. By the end of this post, you’ll not only have a recipe in hand but also a cozy story to go along with it! So, let’s roll up our sleeves and dive in!
Personal Story
There’s a vivid memory I hold close to my heart that involves a summer spent in my grandmother’s kitchen. She was a master at turning ordinary ingredients into pure magic. One particularly hot afternoon, as we were looking for something cool and tasty, she introduced me to the world of frozen treats made from yogurt. We didn’t have fancy gadgets back then—just a simple mixing bowl, a spatula, and lots of love!
She would whip up yogurt mixtures infused with peanut butter, vanilla, and whatever fruits we had on hand. I remember impatiently waiting for those little bites to freeze, sneaking tastes of the mixture before it made its way to the freezer. It became our little ritual: making scrumptious frozen bites while sharing stories and giggles. Every summer since, I’ve felt the urge to recreate those lovely afternoons, and my Frozen Greek Yogurt Peanut Butter Bites are my homage to her legacy. Now, let’s bring a taste of that nostalgia into your kitchen!
Ingredients
Here’s what you’ll need to create your own frozen delights. Each ingredient plays a crucial role in building that yummy flavor we’re after!
-
Greek Yogurt (Plain or Vanilla): This creamy base is packed with protein and probiotics. Plain yogurt gives you more control over the sweetness, while vanilla adds a lovely flavor boost. If you’re not a fan of Greek yogurt, regular yogurt will work too, but it may give a slightly different texture.
-
Peanut Butter (Creamy or Crunchy): Smooth peanut butter will create a velvety finish, while crunchy offers a delightful texture. If you’re allergic to peanuts or want a twist, try almond butter or sun butter.
-
Honey or Maple Syrup: This natural sweetener balances out the tanginess of the yogurt. For a lower-sugar option, you can use stevia or monk fruit; just adjust to your taste!
-
Mini Chocolate Chips (Optional): Because who doesn’t appreciate a bit of chocolate? Feel free to skip these, or replace them with dried fruit or nuts for a different crunch.
-
Vanilla Extract: A splash of this will elevate your bites to a whole new level of deliciousness, adding warmth and depth. If you’re out of vanilla, a hint of almond extract can do the trick!
-
Pinch of Salt: A tiny bit of salt enhances all the other flavors, making everything pop! Don’t skip it; it’s like the secret handshake between flavors!
Step-by-Step Instructions
Now that we’ve got our ingredients prepped, it’s time to get cooking… or, should I say, mixing! Here’s how to put it all together:
-
Gather Your Equipment: Grab a mixing bowl, a spatula, a measuring cup, and a mini muffin tin or silicone mold (the season’s hottest molds—because they make everything more fun!).
-
Mix the Yogurt and Peanut Butter: In the mixing bowl, add 1 cup of Greek yogurt and ½ cup of peanut butter. Use your spatula and mix until the two ingredients are fully combined. You want it creamy and smooth without any streaks (think of this as a workout for your arms!).
-
Sweeten the Deal: Next, drizzle in about 2 tablespoons of honey or maple syrup (or to taste). Mix again until beautifully blended. Remember, you can always start with less and add more, depending on your sweet tooth!
-
Add the Vanilla and Salt: Pour in ½ teaspoon of vanilla extract and add a pinch of salt. This step is crucial for enhancing the overall flavor profile! Stir everything together until smooth and well incorporated.
-
Fold in Chocolate Chips: If you’re using mini chocolate chips, gently fold them in at this step. This part is so satisfying—imagine each chip being a pocket of joy waiting to burst in your mouth!
-
Scoop and Freeze: Using a spoon or an ice cream scoop, fill your muffin tin or silicone mold with the mixture. Press it down gently for even pops. Leave a little room at the top as they might expand slightly while freezing.
-
Freeze Blissfully: Pop your filled molds into the freezer and let them chill for at least 2 hours, or until solid. This is the hardest part (waiting!), but trust me, the end result is worth it.
-
Enjoy Your Treats: Once they’re frozen solid, pop them out of the molds. You can store them in an airtight container in the freezer for up to a month—if they last that long!
Serving Suggestions
When it comes to serving, the world is your oyster! These bites are fabulous as-is, but you could also do a little extra magic by drizzling some melted chocolate on top or dusting them with a sprinkle of crushed nuts. Serve them in colorful cupcake liners for a festive touch at gatherings, or present them on a pretty platter at your next movie night. They’re perfect alongside fresh fruit or nutty granola, making for a fun DIY yogurt parfait!
Recipe Variations
Y’all know I love a twist! Here are a few fun ideas to switch up your Frozen Greek Yogurt Peanut Butter Bites:
-
Nutty Banana Bliss: Add a mashed ripe banana to the yogurt mixture for a fruity twist. It pairs beautifully with peanut butter!
-
Berry Delicious: Fold in fresh or frozen berries alongside or instead of the chocolate chips for an antioxidant-packed treat.
-
Coconut Craze: Mix in unsweetened shredded coconut for that tropical flair! Pair it with macadamia nut butter for an extra layer of flavor.
-
Spicy Kick: For those who love a little heat, consider adding a small pinch of cayenne or cinnamon. It adds an unexpected zing that’s delightful!
-
Dairy-Free Delight: Substitute the Greek yogurt with a dairy-free yogurt alternative (almond, coconut, or cashew) and use a plant-based peanut butter for a vegan-friendly treat!
Chef’s Notes
Every recipe tells a story, and this one has evolved over the years! I first started making these bites as a healthy after-school snack for my kids. As we began experimenting, the flavors developed, and soon they became a staple in our home. I have even found myself making versions that are more indulgent for parties and gatherings. One of my funniest kitchen mishaps involved misreading the quantities—a bit too much peanut butter led to some delicious peanut butter ice cream instead of bites! Ah, the chaos of creativity!
FAQs and Troubleshooting
-
Why are my bites not freezing properly?
If your bites aren’t freezing well, it may be due to too much peanut butter or yogurt. Try adjusting the ratios slightly. Adding more yogurt can create a firmer texture! -
Can I reuse the molds after making these?
Absolutely! Just give them a good wash to remove any residue, and you’re good to go for your next batch. -
How do I store my Frozen Greek Yogurt Peanut Butter Bites?
Store them in an airtight container in the freezer. You can separate layers with parchment paper to ensure they don’t stick together! -
What if I don’t have mini muffin tins?
No worries! You can use ice cube trays or even silicone molds in fun shapes! The bites will still taste fantastic!
Nutritional Info
While I’m not one to count every calorie, here’s a quick overview of what you can expect per serving (this is an estimate and can vary based on specific brands):
- Calories: Approximately 100
- Protein: 5g
- Fat: 6g
- Carbohydrates: 8g
- Fiber: 1g
- Sugar: 4g (depends on the sweetness of yogurt and added sweetener)
And there you have it, my lovely foodies! Your very own Frozen Greek Yogurt Peanut Butter Bites recipe is ready to delight! Whether you whip these up for a snack, dessert, or a cozy gathering, I hope they bring you just as much joy as they have brought to my kitchen. Remember, cooking is about sharing love and joy, so go ahead, make a batch, and feel that good vibe! Happy cooking!
Print
Frozen Greek Yogurt Peanut Butter Bites
- Total Time: 135 minutes
- Yield: 12 servings 1x
- Diet: Vegetarian
Description
A sweet and simple treat that combines Greek yogurt and peanut butter for a healthy, protein-packed snack.
Ingredients
- 1 cup Greek Yogurt (Plain or Vanilla)
- ½ cup Peanut Butter (Creamy or Crunchy)
- 2 tablespoons Honey or Maple Syrup
- ½ teaspoon Vanilla Extract
- Pinch of Salt
- Mini Chocolate Chips (Optional)
Instructions
- Gather your equipment: Grab a mixing bowl, a spatula, a measuring cup, and a mini muffin tin or silicone mold.
- Mix the yogurt and peanut butter in the mixing bowl until creamy and smooth.
- Sweeten the deal by drizzling in honey or maple syrup and mixing again.
- Add the vanilla extract and salt, stirring until smooth.
- Fold in the chocolate chips if using.
- Scoop the mixture into the muffin tin or mold, pressing down gently.
- Freeze for at least 2 hours until solid.
- Enjoy your treats and store in an airtight container in the freezer.
Notes
For variations, consider adding fruits, coconut, or spices to customize your bites.
- Prep Time: 15 minutes
- Cook Time: 120 minutes
- Category: Dessert
- Method: Freezing
- Cuisine: American
Nutrition
- Serving Size: 1 bite
- Calories: 100
- Sugar: 4g
- Sodium: 80mg
- Fat: 6g
- Saturated Fat: 1g
- Unsaturated Fat: 3g
- Trans Fat: 0g
- Carbohydrates: 8g
- Fiber: 1g
- Protein: 5g
- Cholesterol: 0mg
Keywords: frozen yogurt, peanut butter bites, healthy treat, snack, dessert

Simple 2 Ingredient Greek Yogurt Naan
Simple 2-Ingredient Greek Yogurt Naan: Your New Favorite Flatbread
Welcome back to my cozy kitchen, friends! Today, I’m bursting with excitement to share one of the simplest—and most delicious—recipes that I’ve been absolutely obsessed with lately: 2-Ingredient Greek Yogurt Naan. Yes, you heard that right! Just two ingredients! If you’re someone who loves fresh bread but thinks making it is reserved for professional bakers or involves endless kneading and rising—get ready for a delightful surprise.
Imagine this: a warm, pillowy naan, straight off the skillet, ready to be slathered in butter, wrapped around your favorite fillings, or used to scoop up that creamy curry you’ve been savoring. The best part is, you can whip this up in no time, even on a busy weeknight!
I’ve spent years experimenting with bread-making, and let me tell you—this recipe is a game changer. It’s a quick fix to satisfy those carb cravings and impress your family and friends, all without breaking a sweat. Whether you’re grabbing a quick bite or having a weekend gathering, this naan comes to the rescue.
So, roll up your sleeves and let’s dive into this fabulous recipe that will have you channeling your inner home baker in no time. Ready? Let’s get started!
Personal Story
Every time I make this naan, I’m reminded of those carefree summer evenings from my childhood. My grandma, who used to make bread from scratch, would invite the whole family over for dinner, and the smell of her dough rising would fill the air as soon as you stepped through the door. We’d gather in the kitchen, her laughter mixing with the sounds of dough being rolled and flattened.
She always said that the secret ingredient to good bread is love, and though I wholeheartedly agree, I found out that sometimes, it can be as simple as yogurt and flour! This 2-ingredient naan is a culmination of simplicity and nostalgia, capturing the warmth of cozy family gatherings. Just like my grandma, I want to bring people together around good food, a table set with laughter, and stories waiting to be shared.
Ingredients
To create your delicious naan, you only need these two primary ingredients:
-
Self-Rising Flour
- Why it’s essential: This flour contains baking powder and salt, which helps the naan rise and become airy and soft.
- Substitution tip: If you can’t find self-rising flour, you can easily make your own by combining all-purpose flour (1 cup) with 1 ½ teaspoons of baking powder and a pinch of salt.
-
Greek Yogurt
- Why it’s essential: Yogurt adds moisture and a delightful tanginess to the naan, making it super soft.
- Substitution tip: You can use plain regular yogurt if you don’t have Greek yogurt on hand. If you’re looking for a dairy-free option, go for coconut yogurt; just be mindful it may alter the flavor slightly.
And that’s it! These two humble ingredients come together to create the flatbread that will transform your meals into something incredibly special.
Step-by-Step Instructions
Step 1: Gather Your Ingredients
Start by measuring out 1 cup of self-rising flour and 1 cup of Greek yogurt. Make sure you have them handy because the magic happens quickly!
Step 2: Mix It Up
In a large mixing bowl, add the flour first. Then, scoop in the yogurt. Using a fork or your hands, mix until the dough starts to come together. It might seem a bit crumbly at first, but don’t worry—it will come together beautifully.
Step 3: Knead a Little
Lightly dust your countertop with flour. Transfer your dough onto the floured surface and knead it gently for about 1 minute. You want a soft, slightly sticky dough, so don’t over-knead; just the right amount will ensure it stays tender.
Step 4: Roll It Out
Divide the dough into equal-sized balls—about golf ball size works great. Take one ball, flatten it slightly with your hands, and then roll it out with a rolling pin until it reaches about ¼-inch thickness.
Step 5: Heat the Pan
Preheat a non-stick skillet or cast-iron pan over medium-high heat. You can sprinkle a little flour on the bottom to prevent sticking, but typically, there’s no need for oil.
Step 6: Cook Your Naan
Once the skillet is hot, place your rolled naan in the pan. Cook for about 1-2 minutes on one side until bubbles start to form, then flip it over and cook for another minute or so, until golden brown.
Step 7: Repeat!
Remove the naan from the pan and keep it warm under a kitchen towel while you repeat the process with the remaining dough.
Step 8: Enjoy!
Once all your naan is cooked, brush it with a little melted butter or ghee for extra flavor. Serve warm with your favorite dip or as a side to your meals!
Don’t hesitate to experiment with different shapes—oval, round, or even heart-shaped if you’re feeling extra fun!
Serving Suggestions
You can serve this naan alongside your favorite curries, as a base for homemade wraps, or with simple spreads like hummus or tzatziki. For a fun twist, slice it up and serve it with marinara sauce for a quick dipping appetizer—think of it as your homemade flatbread twist on traditional pizza bites!
Recipe Variations
- Flavor Infusions: Add chopped herbs like cilantro, rosemary, or dill to the dough for a fresh spin.
- Seasoned Naan: Before cooking, sprinkle garlic powder or za’atar on the rolled-out dough for a flavor boost.
- Whole Grain Option: Substitute whole wheat flour for half of the self-rising flour for a heartier version.
- Cheesy Naan: Wrap small pieces of cheese like mozzarella inside the flattened dough before cooking—hello, gooey goodness!
- Sweet Naan: Incorporate a tablespoon of honey or maple syrup into the dough for a slightly sweet version that’s perfect for breakfast.
Chef’s Notes
This 2-ingredient naan has become a staple in my kitchen. It’s the kind of recipe you can modify to your heart’s content, and it never lets me down! Plus, I absolutely love that it takes me back to those cherished family moments spent baking with loved ones.
Fun fact: One evening, I got a bit too adventurous and decided to throw in some cinnamon and nutmeg to the dough, thinking it would make some divine sweet naan. Let’s just say it turned out to be a bit of a disaster! But that’s the joy of cooking—it’s all about learning and having fun along the way.
FAQs and Troubleshooting
-
Why is my naan tough?
- This can happen if you knead it too much or roll it out too thin. Keep it gentle and avoid overworking the dough.
-
Can I prep the dough ahead of time?
- Absolutely! You can prepare the dough up to a day in advance and store it in the fridge. Just let it come to room temperature before rolling.
-
My naan is not puffing up. What should I do?
- Ensure your skillet is hot enough before adding the naan. If it’s not hot enough, the naan won’t puff. Also, use a lid if possible to trap steam, which can help with puffiness.
-
Can I freeze naan?
- Yes indeed! Once cooled, stack the naan with parchment paper between them in a freezer-safe bag. Reheat in the oven or a skillet when you’re ready to enjoy!
Nutritional Info (Optional)
This recipe yields approximately 4 servings, featuring:
- Calories: ~150 per naan.
- Protein: 5g (from Greek yogurt).
- Carbohydrates: 25g.
- Fats: 2g (without added butter/ghee).
And there you have it, folks! A cozy, homestyle recipe for 2-Ingredient Greek Yogurt Naan that is sure to become a new favorite in your kitchen! Whether you’re dipping, wrapping, or simply enjoying it warm, this naan will bring a smile to your face and warmth to your heart. Happy cooking!
Print
Simple 2-Ingredient Greek Yogurt Naan
- Total Time: 20 minutes
- Yield: 4 servings 1x
- Diet: Vegetarian
Description
A quick and easy recipe for soft and pillowy naan using just two ingredients: self-rising flour and Greek yogurt.
Ingredients
- 1 cup Self-Rising Flour
- 1 cup Greek Yogurt
Instructions
- Gather Your Ingredients
- Mix It Up
- Knead a Little
- Roll It Out
- Heat the Pan
- Cook Your Naan
- Repeat!
- Enjoy!
Notes
Serve with your favorite curries or dips. Can be modified with various herbs or spices for added flavor.
- Prep Time: 5 minutes
- Cook Time: 15 minutes
- Category: Bread
- Method: Cooking
- Cuisine: Indian
Nutrition
- Serving Size: 1 naan
- Calories: 150
- Sugar: 1g
- Sodium: 0mg
- Fat: 2g
- Saturated Fat: 1g
- Unsaturated Fat: 1g
- Trans Fat: 0g
- Carbohydrates: 25g
- Fiber: 1g
- Protein: 5g
- Cholesterol: 0mg
Keywords: naan, flatbread, easy recipe, Greek yogurt, bread recipe
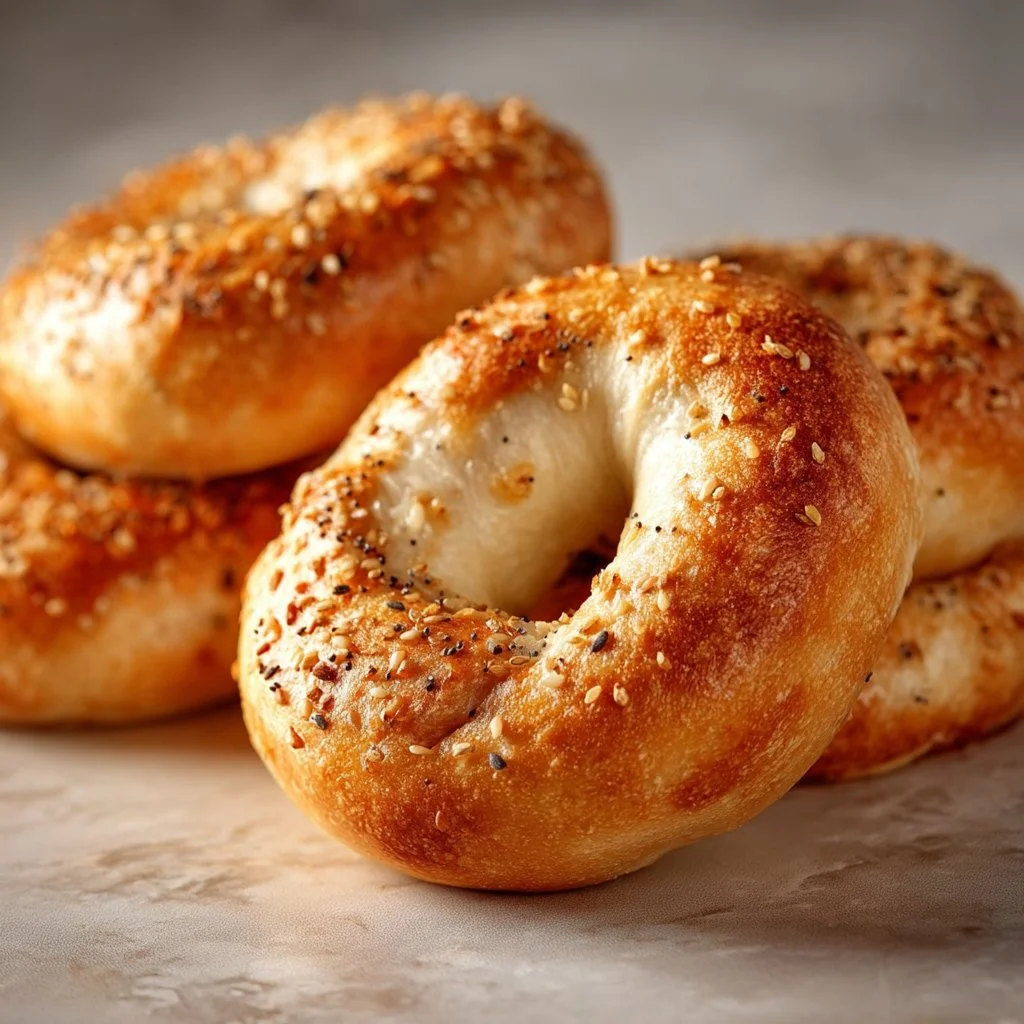
Greek Yogurt Bagels
The Delight of Homemade Greek Yogurt Bagels
Welcome to my cozy kitchen, friends! Today, I’m utterly thrilled to share with you a recipe that’s not only incredibly simple but also downright delightful—Greek Yogurt Bagels! If you’ve ever been tempted by the idea of freshly baked bagels wafting through your home, but felt intimidated by the process, fear not! These bagels come together in a breeze, using just a handful of ingredients.
Picture this: the aroma of warm bread filling your kitchen, the satisfaction of creating something from scratch, and then indulging in those golden, chewy bagels slathered with cream cheese or your favorite toppings. It’s like having a little bakery right in your home! Plus, these bagels have a unique twist: they’re made with Greek yogurt, which gives them a wonderfully fluffy texture and a subtle tang. They’re perfect for breakfast, brunch, or a cozy snack any time of the day.
Now, you may be wondering, “Why Greek yogurt?” Well, my friends, not only does it enhance the flavor, but it also means you can skip the long proofing times traditionally associated with bagel-making. So tuck in your apron and roll up your sleeves—let’s whip up a batch of these delicious homemade Greek Yogurt Bagels! Trust me; once you get the hang of it, your friends and family will be hounding you for more.
Personal Story
Ah, bagels. When I think back to my childhood, I vividly recall Saturday mornings spent at my grandmother’s house in the bustling heart of our little neighborhood. The delightful smell of freshly baked bagels mingled with the aroma of her secret-recipe coffee, creating a warm, inviting blanket that wrapped around everyone who visited. My grandma was known for her homemade bagels, and she would often have a gathering of family to nibble on her creations while sharing stories and laughter.
One sunny morning, I stood beside her, eager to learn the bagel-making secrets she had perfected over the years. She guided me patiently, measuring flour with a lighthearted approach that filled the kitchen with joy. It was more than just the act of cooking; it was about togetherness and the love that comes from sharing good food. As we shaped dough together, she would tell tales from her childhood, weaving together memories and flavors. Those bagels were more than just food; they represented family stories, connections, and a legacy of love that I carry with me today.
With these Greek Yogurt Bagels, I hope to evoke those same feelings of warmth and connection in your kitchen. So let’s get baking, shall we?
Ingredients
Here’s what you’ll need to whip up your own batch of Greek Yogurt Bagels:
-
2 cups all-purpose flour
For the best results, use a good-quality all-purpose flour. If you’re looking for a healthier option, you can substitute half with whole wheat flour for a nutty flavor. -
1 cup Greek yogurt
Choose plain, unsweetened Greek yogurt. This is the star of our show, giving our bagels a fluffy texture that’s also rich in protein! For a dairy-free alternative, look for coconut or almond-based Greek yogurt. -
1 tablespoon baking powder
This is our leavening agent! Baking powder creates those lovely air pockets that make our bagels light and fluffy. -
1 teaspoon salt
A pinch of salt goes a long way, enhancing the flavors of our bagels. Feel free to experiment with flavored salts for a unique twist! -
Optional toppings (such as sesame seeds, everything bagel seasoning, or poppy seeds)
Add your personal flair by sprinkling these toppings on the bagels before baking. This is where you can really let your creativity shine!
Step-by-Step Instructions
Step 1: Preheat the Oven
First things first, let’s get that oven preheated to 375°F (190°C). This will ensure our bagels bake evenly.
Step 2: Combine Ingredients
In a mixing bowl, combine the flour, baking powder, and salt. Give it a quick whisk to incorporate everything. In another bowl, add the Greek yogurt. Now for the fun part! Gradually add the dry ingredients to the yogurt, mixing until it starts to come together into a shaggy dough.
Step 3: Knead the Dough
Once it’s mixed, dust your countertop with a little flour and transfer the dough onto the surface. Knead it gently for about 2-3 minutes until it’s just smooth. Since this dough is relatively low in gluten, don’t overdo it. You want it to be tender, not tough!
Step 4: Shape the Bagels
Now comes the exciting part—shaping your bagels! Divide the dough into 6-8 equal pieces (depending on how large you want your bagels to be). Roll each piece into a ball, then poke a hole in the center with your finger and gently stretch to form a ring. Remember, the hole will expand a bit while baking, so don’t worry if it looks small initially.
Step 5: Prepare for Baking
Line a baking sheet with parchment paper. If you’re using toppings, now’s your chance! Brush each bagel lightly with water and sprinkle your desired toppings on top.
Step 6: Bake
Pop those beauties into your preheated oven and let them bake for 25-30 minutes or until they’re golden brown. You’ll want to rotate your baking sheet halfway through so they cook evenly—trust me; you won’t want to pull burnt bagels out of the oven!
Step 7: Cool and Enjoy!
Once they’re perfectly baked, remove them from the oven and let them cool on a wire rack. I recommend letting them cool slightly before diving in because the steam will help to develop that chewy texture we all adore.
Serving Suggestions
These Greek Yogurt Bagels are best enjoyed warm! Slice them open and add your favorite spreads—cream cheese, avocado, or even a dollop of homemade jam. For an extra special treat, try making a breakfast sandwich with eggs and your favorite cheese. The toppings are endless, but remember, the best additions are the ones you love most!
Recipe Variations
-
Herb-Infused Bagels: Add herbs like rosemary, thyme, or dill to the dough for a fragrant twist.
-
Sweet Touch: Mix in a tablespoon of honey or maple syrup for a hint of sweetness; perfect for a breakfast bagel.
-
Cheese Lover’s Delight: Incorporate shredded cheese into the dough or sprinkle it on top before baking for a cheesy crust.
-
Spicy Bagels: Add a pinch of cayenne pepper or red pepper flakes to the dough for a kick of heat.
-
Seasonal Favorites: Incorporate seasonal ingredients like pumpkin puree in the fall or blueberries in the summer for a refreshing change.
Chef’s Notes
Making bagels has always been a joyous occasion for me; it’s not just about the food but also the memories. Since my grandmother’s days, I’ve played with this recipe, tweaking it for simplicity while keeping that nostalgic warmth. You can even make a batch ahead of time and freeze them. Seriously! Just thaw them and pop them in the toaster when you’re ready to indulge. I like to make double batches so I always have some on hand—trust, it saves me from those last-minute breakfast dashes!
FAQs and Troubleshooting
Q: My bagels came out too dense. What happened?
A: If your bagels turned out dense, it might be because the dough was over-kneaded or the flour was packed tightly. Remember to knead gently!
Q: Can I make the dough ahead of time?
A: Absolutely! You can prepare the dough, shape the bagels, and store them in the fridge for a few hours or overnight before baking. Just let them come to room temperature for about 30 minutes before popping them in the oven.
Q: What if I don’t have Greek yogurt?
A: No worries! You can substitute with regular yogurt, but the texture might be a little different. Alternatively, you can try sour cream for a similar tanginess.
Q: How do I store leftover bagels?
A: Keep any leftover bagels in an airtight container at room temperature for up to three days, or wrap them in plastic wrap and freeze for up to two months.
Nutritional Info (Optional)
While I usually focus more on flavor than numbers, it’s good to be aware! Each bagel roughly contains:
- Calories: ~180
- Protein: 8g
- Carbohydrates: 32g
- Fat: 1g
Feel free to adjust based on the toppings you choose!
So there you have it, my friend! A delicious, guilt-free recipe for Greek Yogurt Bagels that’s bound to spark joy in your kitchen and tantalize your taste buds. Happy baking, and may your kitchen be forever filled with warmth, love, and deliciousness!
Print
Greek Yogurt Bagels
- Total Time: 40 minutes
- Yield: 6-8 servings 1x
- Diet: Vegetarian
Description
Delightfully fluffy bagels made with Greek yogurt, perfect for breakfast or anytime snacking.
Ingredients
- 2 cups all-purpose flour
- 1 cup Greek yogurt
- 1 tablespoon baking powder
- 1 teaspoon salt
- Optional toppings (such as sesame seeds, everything bagel seasoning, or poppy seeds)
Instructions
- Preheat the oven to 375°F (190°C).
- Combine the flour, baking powder, and salt in one bowl; in another bowl, add the Greek yogurt. Gradually mix dry ingredients into the yogurt until shaggy dough forms.
- Knead the dough on a floured surface for 2-3 minutes until smooth.
- Shape the dough into 6-8 balls, poke holes in the center, and stretch to form bagel shapes.
- Prepare a baking sheet with parchment paper, brush bagels with water, and add toppings if desired.
- Bake for 25-30 minutes until golden brown, rotating the sheet halfway.
- Cool on a wire rack before enjoying!
Notes
These bagels are best enjoyed warm with your favorite spreads. Feel free to add herbs or cheese to the dough for variations.
- Prep Time: 10 minutes
- Cook Time: 30 minutes
- Category: Breakfast
- Method: Baking
- Cuisine: American
Nutrition
- Serving Size: 1 bagel
- Calories: 180
- Sugar: 1g
- Sodium: 250mg
- Fat: 1g
- Saturated Fat: 0g
- Unsaturated Fat: 1g
- Trans Fat: 0g
- Carbohydrates: 32g
- Fiber: 2g
- Protein: 8g
- Cholesterol: 0mg
Keywords: bagels, Greek yogurt, breakfast, homemade, easy recipe




