
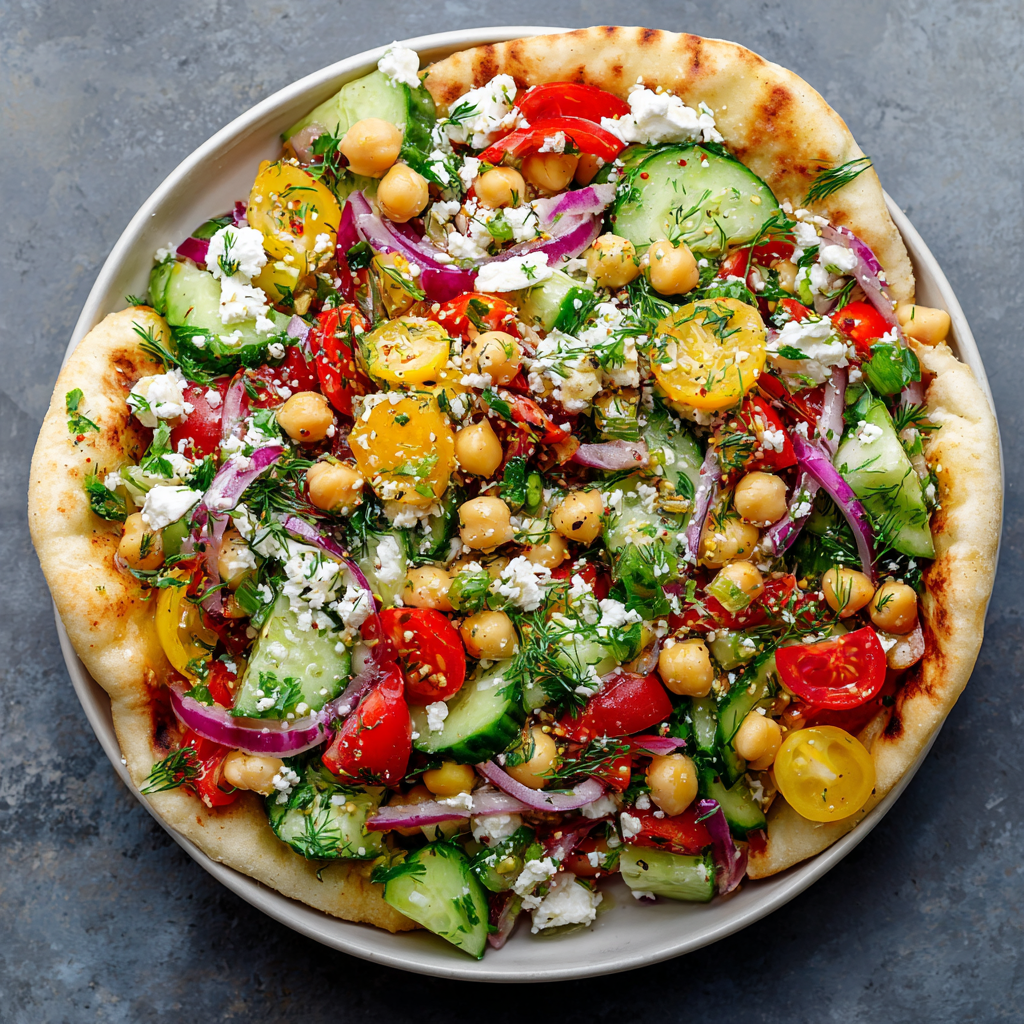
Mediterranean Chopped Salad Pitas
Sunshine in Your Pocket: My Mediterranean Chopped Salad Pitas
Hey there, friend! Come on in, pull up a stool. Can you smell that? It’s the bright, clean scent of lemon zest and fresh herbs, and it means something incredibly delicious is about to happen. If you’ve ever stood in front of the fridge at lunchtime feeling that familiar “meh” about another boring sandwich, or if you’ve needed a dinner solution that’s faster than takeout but tastes like a vacation, I am so thrilled you’re here. Today, we’re making my absolute go-to: Mediterranean Chopped Salad Pitas.
This isn’t just a recipe; it’s a flavor explosion waiting to happen right in your kitchen. Imagine all the vibrant, sun-drenched tastes of the Mediterranean—juicy tomatoes, crisp cucumbers, creamy feta, and hearty chickpeas—all chopped up, tossed in a zippy lemon dressing, and lovingly stuffed into a warm, soft pita pocket. It’s fresh, it’s satisfying, and it honestly feels like you’re doing something good for your body and your soul with every single bite.
The best part? You don’t need any fancy skills or hours of time. In about 15 minutes, you can have a meal that’s colorful, packed with plant-based protein, and guaranteed to bring a little joy to your day. Whether you’re meal-prepping for the week, needing a lunch that actually excites you, or putting together a spread for a casual dinner with friends, these stuffed pitas are your new secret weapon. So, tie on your apron (embrace the mess, I always do!), and let’s make something wonderful together.
The Athens Alleyway That Inspired It All
This recipe has a very special place in my heart because it’s a direct copycat of a core memory. A few years back, I was wandering the labyrinthine streets of Athens, utterly lost in the best way possible. The sun was hot, my feet were tired, and my stomach was giving very clear lunchtime signals. I ducked into a tiny, unassuming alleyway shop that was basically just a counter and a smiling older woman who spoke no English. I pointed at what looked good—a glorious, overflowing pita she was assembling for another customer.
She handed it to me wrapped in paper, already slightly damp with the glorious juices from within. I took my first bite right there on the street corner. It was a revelation. The crunch of the vegetables, the briny punch of the feta, the herbaceous freshness, and that soft, warm pita holding it all together… it was pure perfection. It wasn’t a fancy restaurant meal; it was honest, vibrant street food made with care. I must have gone back three times that week. When I got home, recreating that taste became my mission. This recipe is my tribute to that Athens alleyway and the beautiful, simple truth that the best food often comes from the most unexpected places, packed with love and served with a smile.
Gathering Your Mediterranean Sunshine
Here’s everything you’ll need to bring this bright, flavorful dish to life. I’ve added my little chef notes next to each one because knowing your ingredients is the first step to cooking with confidence!
- 4 pita breads: Look for pocket pitas that are pliable, not the super thin, flatbread style. My pro tip? Give them a quick warm-up in a dry skillet—it makes them soft, toasty, and way less likely to tear when you stuff them.
- 1 (15 oz) can chickpeas, drained and rinsed: Our plant-powered protein star! Rinsing them well gets rid of that canned liquid (aquafaba) and gives you a cleaner, firmer bean. For a next-level touch, pat them *very* dry with a paper towel – this helps the dressing cling better.
- 1 cup chopped romaine lettuce: Adds that essential crisp, watery crunch. You can swap this for chopped kale (massage it with a bit of dressing first to soften) or even fresh spinach.
- 1 cup diced cucumber: I prefer English or Persian cucumbers for their thinner skin and fewer seeds. If using a regular cucumber, consider seeding it first to prevent extra moisture in your salad.
- 1 cup diced tomatoes: Grape or cherry tomatoes are my year-round heroes—they’re reliably sweet and less watery. Chop them into quarters or halves. In summer, a juicy heirloom tomato is divine!
- ½ red bell pepper, diced: A pop of sweet color and vitamin C. Yellow or orange bell pepper works just as beautifully here.
- ¼ cup finely chopped red onion: It provides a sharp, pungent kick. If raw onion is too intense for you, soak the chopped pieces in ice water for 10 minutes. It tames the bite perfectly!
- ½ cup crumbled feta cheese: The salty, creamy backbone of the flavor profile. For a vegan twist, a good quality vegan feta or even some creamy, mashed avocado works wonders.
- 2 tbsp chopped fresh parsley & 2 tbsp chopped fresh dill (optional): DON’T SKIP THE HERBS! They are non-negotiable for that authentic, bright flavor. Dill is optional but highly recommended—it tastes like sunshine. In a pinch, 1 tsp dried oregano in the dressing can sub for the fresh herbs.
- For the Lemon Dressing:
- 3 tbsp extra virgin olive oil: Use the good stuff here—it’s the base of your dressing.
- 2 tbsp fresh lemon juice: Please, for the love of flavor, squeeze a real lemon! Bottled juice just can’t compare in brightness.
- 1 small garlic clove, minced: A tiny flavor powerhouse. Grate it on a microplane for a finer, more integrated garlic punch.
- ½ tsp dried oregano: Crush it between your palms as you add it to wake up the oils.
- Salt and black pepper to taste: Season confidently! Feta is salty, so taste after adding it to the salad before going overboard.
Let’s Build Some Flavor Pockets! (Step-by-Step)
Ready to get your hands deliciously involved? Follow these simple steps, and I’ll walk you through every chef hack I’ve learned along the way.
Step 1: Wake Up Your Dressing (2 minutes)
Grab a small bowl or, my favorite, a mason jar with a lid. Add the olive oil, freshly squeezed lemon juice, minced (or grated!) garlic, dried oregano, a big pinch of salt, and a few cracks of black pepper. Whisk it vigorously or shake that jar like you mean it until the mixture looks creamy and emulsified. Give it a taste on a lettuce leaf—it should make your taste buds sing! Adjust salt or lemon as needed. Chef’s Hack: Making the dressing first lets the flavors marry while you chop, and it gives the raw garlic a minute to mellow out.
Step 2: The Chopped Salad Symphony (5-7 minutes)
Take your large mixing bowl—this is where the party happens. Add your well-rinsed and dried chickpeas, the chopped romaine, cucumber, tomatoes, bell pepper, and red onion. Now, sprinkle over that glorious crumbled feta and all your chopped fresh herbs. Chef’s Insight: I like to keep my veggie chop relatively uniform, about a ½-inch dice. It ensures you get a bit of everything in every single bite and makes stuffing the pita much easier.
Step 3: The Grand Toss
Drizzle that beautiful lemon dressing right over the top of your colorful bowl. Using two large spoons or clean hands, toss everything together gently but thoroughly. You want every nook and cranny of those chickpeas and veggies to get coated in that bright, herby dressing. Important Tip: Don’t overdress! You can always add more, but you can’t take it away. Start with ¾ of the dressing, toss, and add more if it needs it.
Step 4: Warm & Prep Your Pitas (2 minutes)
While the salad rests for a minute (letting the flavors get to know each other), warm your pitas. You can do this in a dry skillet over medium heat for about 30-60 seconds per side until soft and pliable with a few toasty spots. Or, wrap them in a damp paper towel and microwave for 15-20 seconds. Game-Changer Hack: Warming isn’t just optional—it’s essential! A warm pita is flexible, welcoming, and infinitely more delicious than a stiff, cold one straight from the bag.
Step 5: The Art of the Stuff (1 minute)
Lay a warmed pita flat on your cutting board. Using a sharp knife, carefully slice about 1 inch off the top to create an opening, or simply cut it in half to reveal the pocket. Gently open it up with your fingers. Using a large spoon, generously stuff the pita pocket with the chopped salad mixture. Don’t be shy! Press it in gently, but don’t overfill to the point of bursting. Fun Story: The first time I made these, I was so excited I overstuffed mine and it became a fork-and-knife situation. Still delicious, but less portable! Learn from my messy, joyful mistake.
How to Serve & Shine
These pitas are stars all on their own, but I love to serve them immediately while the pita is still warm and the veggies are crisp. Place them on a big, colorful platter for a casual dinner. For a true feast, add a side of tangy Kalamata olives, a scoop of creamy hummus for dipping any escaping bits, and maybe some crispy baked falafel or lemon-herb grilled chicken skewers for the meat-eaters. It’s the ultimate easy, shareable meal that makes everyone feel like they’re at a sunny seaside café.
Make It Your Own! (5 Fun Twists)
- Protein Power-Up: Add grilled shrimp, shredded rotisserie chicken, or sliced steak strips for a more filling meal.
- Greek Goddess Bowl: Skip the pita! Serve the chopped salad over a bed of quinoa or brown rice for a fantastic grain bowl.
- Vegan Delight: Omit the feta and add creamy avocado chunks and a sprinkle of nutritional yeast or a vegan feta alternative.
- Spicy Kick: Add a pinch of red pepper flakes to the dressing or toss in some chopped pepperoncini peppers.
- “Everything But” Version: Raid your fridge! Throw in some chopped artichoke hearts, roasted red peppers, or even a handful of toasted pine nuts for crunch.
Olivia’s Kitchen Notes & Stories
This recipe has evolved so much from my first attempt! Initially, I’d just chop everything roughly and call it a day. But I’ve learned that taking an extra minute to dice everything neatly makes the texture and eating experience so much better. Also, my family has a funny tradition now: whoever is on “pita warming duty” has to do a little dance while they’re at the stove. It’s silly, but it makes me smile every time.
The biggest lesson? This salad is incredibly forgiving. No dill? Use more parsley or some mint. No red onion? A few sliced green onions will do. It’s a blueprint for freshness. I often double the salad part and keep it in a sealed container (dressing on the side if prepping for more than a day) for the ultimate healthy fast food all week long. It’s a recipe that truly grows with you.
Your Questions, Answered!
Q: My pita keeps tearing when I try to stuff it! Help!
A: This is the #1 issue! First, ensure you’re WARMING the pita—it makes it pliable. Second, don’t cut all the way through; just slice off the top or cut halfway around the edge to create a wide pocket. Third, use your fingers to gently open and separate the inside layers before you start stuffing. Go slow and don’t force it!
Q: Can I make this ahead of time for meal prep?
A: Absolutely, but with a strategy! Keep the components separate: store the undressed chopped salad (minus the herbs) in one container, the dressing in a small jar, and keep the pitas sealed. Chop fresh herbs and add them when you assemble. Assemble your pita just before eating to avoid sogginess. The dressed salad itself will keep for about a day in the fridge.
Q: The salad got watery after sitting. What did I do wrong?
A: Veggies, especially tomatoes and cucumbers, release water. To prevent this, you can salt your chopped cucumbers lightly and let them drain in a colander for 10 minutes before adding. Also, avoid dressing the salad until you’re ready to serve. If prepping ahead, store tomatoes separately and add them last.
Q: I don’t have chickpeas. What else can I use?
A: No problem! Canned white beans (cannellini or great Northern), butter beans, or even lentils would be fantastic. The goal is that creamy, hearty legume texture.
Mediterranean Chopped Salad Pitas
Description
Sunshine in Your Pocket: Mediterranean Chopped Salad Pitas
Bright, fresh, and ready in 15 minutes, these Mediterranean Chopped Salad Pitas are like a little vacation in your lunchbox. Juicy tomatoes, crisp cucumbers, creamy feta, and hearty chickpeas tossed in a zesty lemon dressing—all stuffed into warm, soft pitas.
Ingredients
Salad:
-
1 (15 oz) can chickpeas, drained & rinsed
-
1 cup chopped romaine lettuce (or kale/spinach)
-
1 cup diced cucumber (English/Persian preferred)
-
1 cup diced tomatoes (grape, cherry, or heirloom)
-
½ red bell pepper, diced
-
¼ cup finely chopped red onion (optional: soak 10 min in ice water)
-
½ cup crumbled feta (or vegan alternative/avocado)
-
2 tbsp chopped fresh parsley
-
2 tbsp chopped fresh dill (optional)
Pitas:
-
4 pocket pitas, warmed
Lemon Dressing:
-
3 tbsp extra virgin olive oil
-
2 tbsp fresh lemon juice
-
1 small garlic clove, minced
-
½ tsp dried oregano
-
Salt & black pepper to taste
Instructions
Whisk or shake together olive oil, lemon juice, garlic, oregano, salt, and pepper until emulsified. Taste and adjust.
In a large bowl, combine chickpeas, lettuce, cucumber, tomatoes, bell pepper, red onion, feta, parsley, and dill.
Drizzle about ¾ of the dressing over the salad. Toss gently to coat everything. Add more dressing if needed.
Heat in a dry skillet or microwave until soft and pliable. This prevents tearing and makes them extra delicious.
Cut pitas to create an opening, gently open the pocket, and spoon in the chopped salad. Press lightly, but don’t overfill.
Notes
-
Pitas tearing? Warm them first, slice carefully, and gently open the pocket.
-
Meal prep: Keep salad undressed, store dressing separately, add herbs at assembly.
-
Watery salad: Salt and drain cucumbers, add tomatoes last, dress right before eating.
-
No chickpeas? White beans, butter beans, or lentils work perfectly.
Nutritional Information*
Yield: 4 stuffed pitas | Prep Time: 15 minutes | Total Time: 15 minutes
*Estimated per serving (1 stuffed pita): Calories: 380 | Protein: 14g | Carbohydrates: 48g | Dietary Fiber: 8g | Sugars: 6g | Fat: 15g (Saturated Fat: 4g) | Sodium: 580mg
Note: Nutritional information is an estimate provided for convenience and may vary based on specific ingredients used and portion sizes.
Final Thoughts
Sunshine in Your Pocket: My Mediterranean Chopped Salad Pitas
Hey there, friend! Come on in, pull up a stool. Can you smell that? It’s the bright, clean scent of lemon zest and fresh herbs, and it means something incredibly delicious is about to happen. If you’ve ever stood in front of the fridge at lunchtime feeling that familiar “meh” about another boring sandwich, or if you’ve needed a dinner solution that’s faster than takeout but tastes like a vacation, I am so thrilled you’re here. Today, we’re making my absolute go-to: Mediterranean Chopped Salad Pitas.
This isn’t just a recipe; it’s a flavor explosion waiting to happen right in your kitchen. Imagine all the vibrant, sun-drenched tastes of the Mediterranean—juicy tomatoes, crisp cucumbers, creamy feta, and hearty chickpeas—all chopped up, tossed in a zippy lemon dressing, and lovingly stuffed into a warm, soft pita pocket. It’s fresh, it’s satisfying, and it honestly feels like you’re doing something good for your body and your soul with every single bite.
The best part? You don’t need any fancy skills or hours of time. In about 15 minutes, you can have a meal that’s colorful, packed with plant-based protein, and guaranteed to bring a little joy to your day. Whether you’re meal-prepping for the week, needing a lunch that actually excites you, or putting together a spread for a casual dinner with friends, these stuffed pitas are your new secret weapon. So, tie on your apron (embrace the mess, I always do!), and let’s make something wonderful together.
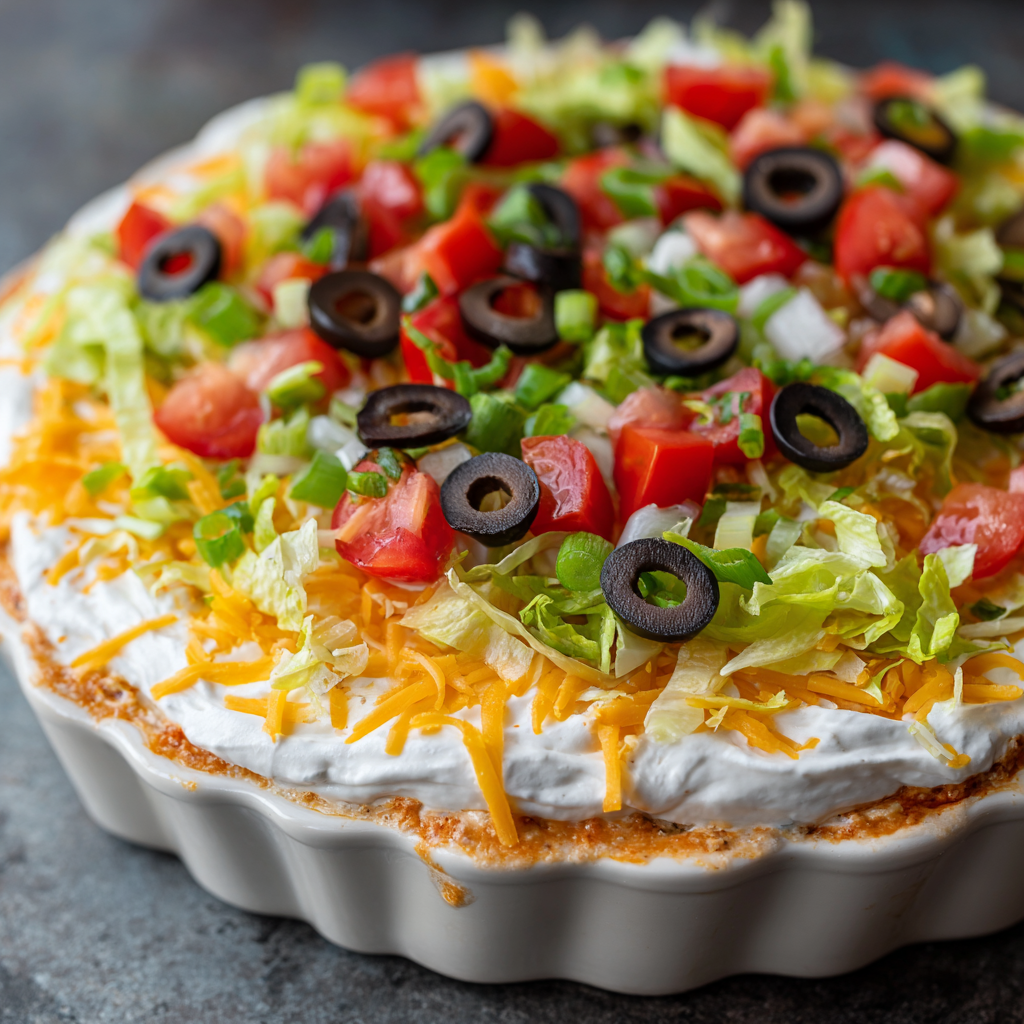
Easy Taco Dip with Sour Cream (Creamy, Cheesy Party Favorite)
The Dip That Makes the Party: An Ode to the Ultimate Creamy Taco Dip
Hey there, friend! Come on in, the kitchen’s warm, and I’ve got a bowl of chips waiting. Tell me, can you hear it? That distant roar of a crowd, the buzz of a dozen overlapping conversations, the happy clinking of glasses? That’s the sound of a gathering about to get a whole lot tastier, and it’s almost always punctuated by a collective, hungry sigh when someone unveils The Dip.
You know the one I mean. That beautiful, layered masterpiece of creamy, cheesy, fresh, and crunchy that disappears faster than you can say “kickoff.” It’s the culinary equivalent of your favorite cozy sweater—reliable, comforting, and makes everyone feel happy. Today, we’re making that legend: my go-to, no-fail, crowd-adoring Easy Taco Dip with Sour Cream.
This isn’t just a recipe; it’s a party-starting strategy. It’s the appetizer you bring when you want to be the hero, without spending your whole afternoon in the kitchen. We’re talking creamy, tangy sour cream and cream cheese hugged by bold taco spices, then piled high with all the fresh, crunchy toppings your heart desires. It’s cool, it’s flavorful, and it has this magical ability to make people hover around the snack table, bonding over the last perfect chip-scoop. So, tie on that apron (messy is totally welcome here), and let’s make something unforgettable together.
My First Dip and the Fumble That Started It All
I have to confess, my love affair with this dip began with a minor kitchen disaster. Picture a much younger me, hosting my first-ever “big” football watch party in a tiny apartment. I was determined to impress and decided to tackle a complicated, layered Mexican dip from a fancy cookbook. Seven layers in, my “artistic” presentation looked more like a culinary landslide, and I was sweating more than the quarterback on the screen.
My mom, who had come to “supervise” (bless her), saw my panic. She gently pushed me aside, scraped my complicated mess into a bowl, stirred it all together with a giant dollop of sour cream and a packet of taco seasoning, and threw some cheese on top. “Honey,” she said, “flavor first, fuss later.” She baked it until it was bubbly, and it was the first dish emptied that day. That lesson stuck: great food is about joy, not perfection. This recipe is the polished, perfected, but still wonderfully simple version of that save. It’s my reminder that the best memories are often born from a little mess and a lot of heart.
Gathering Your Flavor Dream Team
Here’s what you’ll need to create this creamy, crunchy symphony. The beauty is in its simplicity and the power of each layer!
- 8 oz Cream Cheese, softened: This is our rich, luscious foundation. Pro-Tip: Let it sit on the counter for a good hour. Truly soft cream cheese blends seamlessly, creating a silky base without any lumps. In a pinch? Pop it in the microwave for 15-second intervals until pliable.
- 1 cup Sour Cream: The tangy superstar! It lightens the cream cheese and adds that classic, cool flavor we all crave. For a lighter twist, full-fat Greek yogurt works beautifully and adds a protein kick.
- 1 packet Taco Seasoning (about 2 tbsp): Our instant flavor bomb. It’s a perfect blend of chili powder, cumin, garlic, and paprika. Feel free to use a low-sodium version, or make your own mix if you’re feeling chef-y!
- 1 cup Shredded Cheddar or Mexican Blend Cheese: Melty, salty, cheesy goodness. I love a sharp cheddar for punch, but a pre-shredded “Fiesta” blend is so convenient and colorful.
- 1 cup Shredded Lettuce: For that essential fresh, crisp contrast. I prefer romaine or iceberg for their crunch. Shred it thin so it’s easy to scoop!
- 1 cup Diced Tomatoes, drained: Juicy, sweet acidity. Key step: Drain them on a paper towel after dicing! This keeps our dip from getting watery. Roma or plum tomatoes are less seedy.
- 1/4 cup Sliced Black Olives: Their briny, savory note is a classic. Not an olive fan? Simply leave them out.
- 1/4 cup Sliced Green Onions: A pop of color and a mild, oniony bite. They’re the perfect fresh finish.
Optional MVPs: Diced avocado (sprinkle with lime juice to prevent browning), pickled jalapeño slices for heat, a drizzle of salsa, or a can of drained black beans or seasoned ground beef for a heartier layer!
Let’s Build That Beautiful Dip, Step-by-Step
See? I told you this was easy. We’re just creating layers of happiness, one spoonful at a time.
- Conquer the Creamy Base: Grab a medium bowl and your beautifully softened cream cheese. Using a hand mixer (or some serious elbow grease with a spatula), beat it until it’s completely smooth and whipped. No lumps allowed! This is the secret to a luxuriously spreadable base.
- Season to Perfection: Now, plop in your full cup of sour cream and that entire packet of taco seasoning. Mix it all together on medium speed until it’s one gloriously creamy, orange-hued, flavor-packed wonder. Taste it! Isn’t that good? This is where the magic happens.
- The Foundation Spread: Take a 9-inch pie plate, a shallow serving dish, or even a square baking pan. Spread your creamy mixture evenly across the bottom, going all the way to the edges. Use the back of a spoon or a small offset spatula to make it nice and smooth. This is your canvas.
- Cheese, Please: Sprinkle your shredded cheese evenly over the entire creamy layer. This creates a protective, melty barrier that keeps the base cool and distinct from the fresh veggies above. It’s both practical and delicious.
- The Fresh Layer Rainbow: Now for the colorful, crunchy confetti! Layer on your shredded lettuce, followed by your well-drained diced tomatoes. Scatter the sliced olives and finish with a vibrant sprinkle of green onions. I like to press each layer down gently so the toppings don’t go flying on the first scoop.
- The Patient Chill: This might be the hardest step: walk away. Cover the dip with plastic wrap and let it chill in the fridge for at least 30 minutes. This resting time lets the flavors get to know each other and firm up the base, making it the perfect scoopable consistency. Trust me, it’s worth the wait.
- The Grand Reveal: Uncover your masterpiece, place a big bowl of sturdy tortilla chips (or veggie sticks!) right beside it, and present it with pride. Watch it become the center of attention.
How to Serve It Like a Pro
Presentation is part of the fun! I love serving this dip right in the dish I made it in—less cleanup! For a bigger crowd, double the recipe and use a 9×13 inch pan. Place it in the center of a large platter and surround it with a mountain of sturdy tortilla chips (the scoops are awesome for this), crisp bell pepper strips, cucumber rounds, or even sturdy pita chips. Add a festive spoon for serving and maybe a little side bowl of extra salsa or hot sauce for the brave ones. It’s all about creating an inviting, dig-in-and-enjoy vibe.
Make It Your Own: Delicious Twists & Swaps
- Seven-Layer Fiesta: Add a layer of seasoned, drained black beans and a layer of guacamole between the cheese and the lettuce.
- Hot & Bubbly Bake: Skip the fresh toppings. Spread the cream cheese mix in a pie plate, top with cheese, and bake at 350°F for 20 mins until bubbly. Then add your cold toppings.
- Protein Power-Up: Brown ½ lb of ground beef or turkey with a little onion, drain, and mix with a bit of taco seasoning. Cool it, then add it as a layer between the base and the cheese.
- Lighter & Brighter: Swap the cream cheese for whipped cottage cheese or more Greek yogurt, and use a light cheese blend. It’s still incredibly flavorful!
- Fully Loaded: Go all out with diced avocado, pickled jalapeños, a drizzle of cilantro-lime crema, and a sprinkle of crispy bacon or tortilla strips on top.
Olivia’s Chef Notes & Kitchen Chatter
This recipe has been my loyal plus-one to everything from backyard barbecues to potluck baby showers. It’s evolved from my mom’s quick-fix version to this layered beauty, but the soul is the same. One funny note: I once accidentally used cinnamon instead of paprika in my homemade taco seasoning. Let’s just say I created a “Taco Dip Dessert Edition” that was… interesting. Always label your spice jars, folks!
The biggest lesson? This dip is incredibly forgiving. A little more cheese, a missing olive, a last-minute swap—it all works. Cooking should feel like a hug, not a high-wire act. So have fun with it!
Your Questions, Answered (Because We’ve All Been There!)
Q: My dip turned out a bit watery after sitting out. How can I prevent this?
A: The usual culprit is tomato juice! Draining your diced tomatoes on a paper towel is the #1 trick. Also, make sure your lettuce is very dry after washing. Serving the dip on a bed of ice at a long party can help keep everything crisp and cool.
Q: Can I make this ahead of time?
A> Absolutely! You can prepare the creamy base up to 2 days in advance and store it covered in the fridge. Assemble the full dip with toppings up to 3-4 hours before serving. Any longer and the lettuce might wilt. The base itself is a fantastic make-ahead star.
Q: I don’t have a hand mixer. Is this a problem?
A> Not at all! Just ensure your cream cheese is *very* soft. Use a sturdy spatula and a determined arm to smash and stir it smooth before adding the other ingredients. It’s a great arm workout!
Q: What are the best chips for scooping?
A> You need a chip with integrity! I love thick, restaurant-style tortilla chips or the Fritos Scoops. For a healthier option, thick-cut carrot chips or bell pepper strips are fantastic vessels for all that creamy goodness.
Easy Taco Dip with Sour Cream (Creamy, Cheesy Party Favorite)
Description
The Dip That Steals the Show: Easy Creamy Taco Dip
Hey friend! Ready to become the hero of your next gathering? This Easy Taco Dip with Sour Cream is creamy, cheesy, tangy, and loaded with fresh crunch. It’s the kind of appetizer that disappears before you even get a taste—so let’s make it unforgettable.
Ingredients
Creamy Base:
-
8 oz cream cheese, softened
-
1 cup sour cream (or full-fat Greek yogurt for a protein boost)
-
1 packet taco seasoning (~2 tbsp)
Cheesy Layer:
-
1 cup shredded cheddar or Mexican blend cheese
Fresh & Crunchy Toppings:
-
1 cup shredded lettuce (romaine or iceberg)
-
1 cup diced tomatoes, drained
-
¼ cup sliced black olives
-
¼ cup sliced green onions
Optional Add-Ons:
-
Diced avocado (squeeze with lime juice)
-
Pickled jalapeños
-
Salsa drizzle
-
Drained black beans or seasoned ground beef for extra heartiness
Chef’s Tip: Softened cream cheese is key for a smooth, lump-free base.
Instructions
Beat the softened cream cheese until smooth. Add sour cream and taco seasoning, mix until well combined and creamy. Taste—it should be a tangy, spicy delight.
Use a 9-inch pie plate, shallow dish, or small square pan. Smooth the creamy mixture evenly across the bottom—this is your canvas.
Sprinkle shredded cheese evenly over the base. It melts slightly against the cream, keeping your layers distinct.
Add shredded lettuce, drained tomatoes, black olives, and green onions. Press gently to keep toppings in place.
Cover with plastic wrap and refrigerate at least 30 minutes. This lets flavors meld and firms the base for perfect chip scoops.
Bring the dip to the table with a bowl of sturdy tortilla chips, veggie sticks, or pita chips. Optional: add extra salsa, hot sauce, or a sprinkle of fresh cilantro on top.
Notes
-
Watery dip? Drain tomatoes and lettuce well; serve on a chilled plate if needed.
-
Make ahead: Creamy base can be prepped 2 days in advance. Assemble 3–4 hours before serving.
-
No mixer? Mash cream cheese with a sturdy spatula—arm workout included!
-
Best chips for scooping: Thick tortilla chips or Fritos Scoops. Veggie sticks like carrots or bell peppers also work great.
Nutritional Info (Because Knowledge is Power!)
Approximate values per serving (based on 10 servings, using full-fat dairy):
Calories: 210 | Protein: 5g | Carbohydrates: 5g | Fat: 18g | Saturated Fat: 10g | Cholesterol: 50mg | Sodium: 350mg (varies with seasoning) | Fiber: 1g | Sugar: 3g
Remember, these are estimates. For specific dietary needs, using light dairy products, low-sodium seasoning, and loading up on veggie dippers can alter these numbers significantly.
Loved this recipe? Save it for later!
Final Thoughts
The last chip is gone. The platter sits there, empty but triumphant, scattered with a few stray olive slices and a dusting of cheese that marks the battlefield of a successful gathering. And honestly? That empty dish might be my favorite sight in the world.
There’s something deeply satisfying about watching people gather around food you’ve made. The way conversations pause mid-sentence for that first bite. The inevitable “Who made this?!” called across the room. The strategic hovering—you know the move—where someone positions themselves near the dip, pretending to chat while mentally mapping their next scoop. We’ve all been there. No judgment. Great dip brings out our most primal instincts.
This recipe has traveled with me through so many seasons of life. It’s been there for Super Bowls and birthday parties, for impromptu girls’ nights and holiday gatherings where I needed one less thing to stress about. It’s been the dish I bring to new neighbors and the one I make when I’m the one being welcomed. And every single time, without fail, it works its magic.
What I love most about this dip—beyond the creamy, tangy, crunchy perfection of it—is what it represents. It’s permission to not overcomplicate things. In a world that often tells us we need to do more, be more, impress more, this simple bowl of layered deliciousness whispers something different: You are enough. This is enough. Let’s just be together and enjoy.
Because really, isn’t that what we’re all craving? Not just good food, but the moments that good food creates. The laughter shared over a particularly daring chip-loading attempt. The inside jokes formed while fighting over the last scoop. The warmth of a kitchen filled with people who feel like home.
So the next time you’re staring down a party invitation, a holiday gathering, or just a Tuesday that needs perking up, remember this dip. Remember that sometimes the simplest things become the most beloved. Remember that you don’t need a dozen complicated dishes to be the hero—you just need one thing made with care and a whole lot of heart.
Now go on. Make a mess. Lick the spoon. Double-dip when no one’s looking (I won’t tell). And when that dish comes back empty, take a moment to smile. You did that. You brought people together. You made the party.
With chip crumbs on my sweater and a full heart,
Olivia
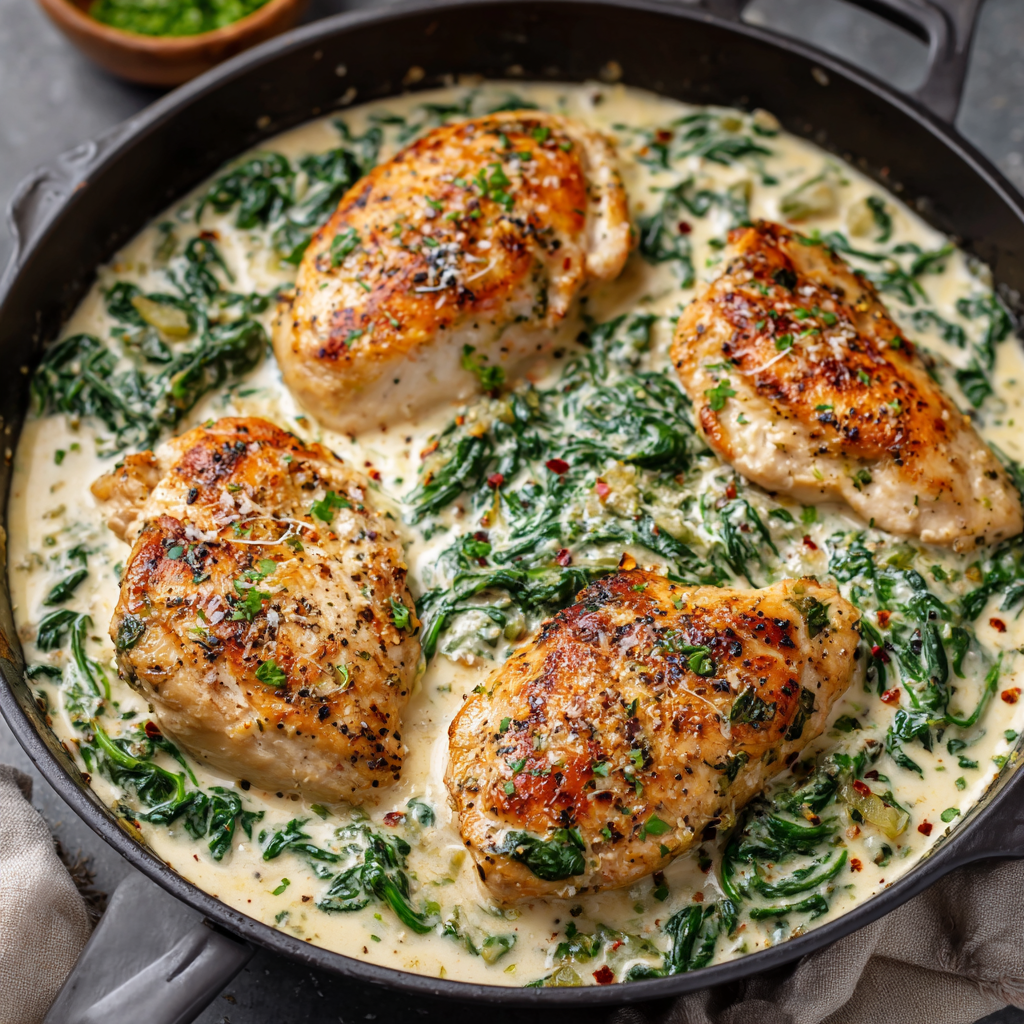
Creamy Chicken Florentine Recipe (Easy One-Pan Spinach Chicken)
The Cozy Magic of Creamy Chicken Florentine (And Why It’s My Go-To “Feels Fancy” Dinner)
Hey there, friend! Come on in, grab an apron, and let’s get something wonderful simmering on the stove. If you’ve ever craved a dinner that feels like a warm hug but looks like you fussed for hours, you’re about to fall head-over-heels for this recipe. Today, we’re making my absolute favorite Creamy Chicken Florentine—a stunning one-pan wonder where golden, pan-seared chicken breasts swim in a velvety garlic Parmesan sauce, all tangled up with vibrant, wilted spinach.
This dish is the definition of my cooking philosophy: maximum flavor, minimum fuss, and one pan to wash. It’s the recipe I turn to when I want to impress a date night without stress, feed my family something nourishing and delicious, or simply treat myself to a restaurant-quality meal in my comfiest pants. The sauce alone—rich, creamy, speckled with garlic and nutty Parmesan—is something you’ll want to drink with a spoon. And the best part? It comes together in about 30 minutes, using mostly pantry staples.
So, whether you’re a seasoned home cook or just starting to find your footing in the kitchen, this Chicken Florentine is for you. It’s forgiving, flexible, and guaranteed to make you feel like a rockstar. Let’s create some magic (and probably make your kitchen smell incredible).
A Tuscan Sunset and My First Taste of “Florentine”
My love affair with this dish started not in a fancy restaurant, but at a wobbly wooden table under a string of lights in a tiny hill town in Tuscany. I was traveling after college, living on a budget of dreams and breadsticks, and stumbled into a family-run trattoria where the nonna, seeing my slightly lost expression, simply pointed to a item on the menu and said, “Per te. For you.”
What arrived was a simple plate of pasta with chicken and spinach in a creamy, herb-flecked sauce. It was humble, rustic, and utterly transformative. It tasted of the countryside—earthy, rich, and profoundly comforting. That meal taught me that elegance isn’t about complexity; it’s about the harmony of a few good ingredients cooked with care. When I got home, I spent weeks trying to recreate that feeling in my own kitchen, eventually landing on this one-pan version. Now, every time I make it, I’m transported back to that warm Italian evening, reminded that the best meals are about more than food—they’re about connection, generosity, and the joy of sharing something made with heart.
Gathering Your Florentine Flavor Team
Here’s everything you’ll need to make this creamy dream come true. I’ve included my little chef insights and swap ideas so you can make it your own!
- 4 boneless, skinless chicken breasts: The star of our show! Look for breasts that are similar in size so they cook evenly. Chef’s Tip: If yours are super thick, place them between plastic wrap and gently pound them to an even ½-inch thickness. This ensures quick, even cooking and prevents dryness. Swap: Chicken thighs are fantastic here for even more juicy, forgiving flavor.
- Salt and black pepper, to taste: Your foundational flavor builders. Don’t be shy—season that chicken well!
- 1 teaspoon Italian seasoning: A quick flavor shortcut! This little blend of dried herbs (usually oregano, basil, thyme, rosemary) adds an instant Mediterranean vibe. Swap: ½ tsp dried oregano + ½ tsp dried thyme.
- 2 tablespoons olive oil: For searing. Its high smoke point is perfect for getting that beautiful golden crust on the chicken.
- 3 cloves garlic, minced: The aromatic soul of the sauce. Fresh is best here for that bright, pungent kick!
- 1 cup chicken broth: This deglazes the pan, lifting all those delicious browned bits (the “fond”) into our sauce. It adds a layer of savory depth you just can’t skip. Use low-sodium if you’re watching salt.
- 1 cup heavy cream: The key to that luscious, velvety texture. It creates a sauce that clings to the chicken and pasta beautifully. For a lighter version, half-and-half works, but the sauce will be thinner.
- 1/2 cup freshly grated Parmesan cheese: Please, I beg you, grab a block and grate it yourself! Pre-grated cheese often contains anti-caking agents that can make your sauce grainy. Freshly grated melts into silky, salty perfection.
- 3 cups fresh spinach: The “Florentine” part! It wilts down dramatically, adding pops of color and a mild, earthy sweetness. Don’t worry—it’s not overwhelming.
- 1 tablespoon butter: Stirred in at the end with the garlic, it adds a final layer of rich, rounded flavor. Unsalted is my go-to.
- Optional: red pepper flakes, squeeze of lemon: My secret weapons! A pinch of red pepper flakes adds a subtle warmth, and a quick squeeze of fresh lemon juice at the end brightens the entire dish, cutting through the richness.
Let’s Cook! Your Step-by-Step Guide to Creamy Perfection
Ready? Let’s turn these simple ingredients into a show-stopping dinner. Follow these steps, and you really can’t go wrong.
- Season & Sear the Chicken: Pat your chicken breasts completely dry with a paper towel—this is the #1 trick for a good sear! Season them generously on both sides with salt, pepper, and the Italian seasoning. Heat the olive oil in a large skillet over medium-high heat. Once the oil is shimmering, add the chicken. Don’t touch it! Let it sear for 4-5 minutes until you see a gorgeous golden-brown crust form. Flip and cook for another 4-5 minutes, or until cooked through (165°F internal temp). Transfer to a plate and tent with foil. Chef’s Hack: That browned stuff left in the pan? That’s liquid gold (fond). We’re using it next!
- Build the Flavor Base: Reduce the heat to medium. Add the butter and minced garlic to the same skillet. Sauté for just about 30 seconds until incredibly fragrant—be careful not to let the garlic burn, or it will turn bitter. This quick step infuses the entire pan with garlicky goodness.
- Deglaze & Simmer: Pour in the chicken broth. As it heats up, use a wooden spoon to scrape up all those delicious browned bits from the bottom of the pan. This is called deglazing, and it’s where we capture all the flavor from the chicken. Let it simmer for 2-3 minutes to reduce slightly.
- Create the Velvety Sauce: Lower the heat to medium-low. Stir in the heavy cream and your freshly grated Parmesan cheese. Keep stirring until the cheese is fully melted and the sauce is smooth. Let it simmer gently for 3-5 minutes. You’ll see it start to thicken and coat the back of a spoon beautifully. Chef’s Note: If your sauce seems too thin, let it simmer a minute or two longer. If it seems too thick, add a splash more broth or cream.
- Wilt the Spinach & Bring It All Home: Now, toss in all that fresh spinach! It might look like a mountain, but it wilts down in just a minute or two. Stir it into the warm sauce until it’s just wilted and vibrant green. Finally, return the seared chicken breasts (and any accumulated juices) to the skillet. Spoon that glorious sauce over the top and let everything simmer together for another 3-4 minutes, so the chicken reheats and soaks up the sauce.
How to Serve Your Chicken Florentine Like a Pro
Presentation is part of the fun! I love plating this family-style for maximum “wow” factor. Spoon a generous pool of the creamy spinach sauce onto a warm platter or individual plates. Place the chicken breasts right on top, then drizzle with a little more sauce. The finishing touch? An extra sprinkle of Parmesan and maybe some fresh chopped parsley or basil for a pop of color. Now, for the crucial sidekick: you need something to soak up that sauce. My top picks are a heap of fettuccine or angel hair pasta, a pile of creamy mashed potatoes, a simple side of rice, or a loaf of crusty, warmed bread for tearing and dipping. Don’t forget a simple green salad to balance the richness!
Make It Your Own: Delicious Twists & Swaps
- Sun-Dried Tomato & Artichoke: Add ½ cup chopped sun-dried tomatoes (oil-packed, drained) and a cup of quartered artichoke hearts with the spinach for a vibrant, tangy twist.
- Mushroom Lovers’ Dream: Sear 8 oz of sliced cremini mushrooms after the chicken is removed, then proceed with the garlic. They add a wonderful umami, earthy depth.
- Lighter Version: Swap the heavy cream for full-fat coconut milk for a dairy-free option, or use half-and-half for a lighter (though slightly less thick) sauce. Use nutritional yeast in place of Parmesan for a vegan-friendly version.
- “Creamy” without Cream: For a lighter yet still creamy texture, blend 1 cup of low-sodium chicken broth with ½ cup of raw cashews until perfectly smooth, and use this in place of the heavy cream.
- Seafood Swap: Use large shrimp or scallops instead of chicken! Sear them quickly (they cook in 1-2 minutes per side), remove, and add back at the very end just to heat through.
Olivia’s Kitchen Notes & Stories
This recipe has been my trusty sidekick for years, and it’s evolved with me. The first time I made it, I was so nervous about the sauce breaking that I stood over the pan whispering encouragement to it. (It worked!). I’ve learned that the secret to a silky sauce is gentle heat—don’t let it boil vigorously after adding the cream and cheese. A steady, low simmer is your friend.
One of my favorite memories is of my niece, who claimed to “hate green things,” devouring this and asking for seconds because the spinach was “hidden in the yummy sauce.” It’s now her requested birthday dinner. That’s the power of a good recipe—it becomes part of your story. Don’t be afraid to play with it, add your favorite herbs, or double the garlic (I often do!). The messy apron is optional, but highly recommended.
Your Questions, Answered!
Q: My sauce turned out too thin. How can I thicken it?
A: No worries! The simplest fix is to let it simmer for a few more minutes to reduce. If you’re still in a rush, make a quick slurry by mixing 1 teaspoon of cornstarch with 1 tablespoon of cold water or broth. Whisk it into the simmering sauce and cook for another minute until thickened.
Q: My chicken breasts are cooking unevenly/thick in the middle and thin at the edges. Help!
A: This is super common! The pro trick is to “butterfly” or pound them to an even thickness (about ½-inch) before seasoning. Just place them between two pieces of plastic wrap and gently pound with a rolling pin, meat mallet, or even a heavy pan. This ensures they cook through quickly and evenly.
Q: Can I make this ahead of time?
A: You can! The flavors actually deepen wonderfully. Cook the recipe completely, let it cool, and store it in an airtight container in the fridge for up to 2 days. Reheat gently on the stovetop over low heat, adding a splash of broth or cream to loosen the sauce if needed.
Q: Why did my sauce look grainy or separate?
A: This usually happens if the heat was too high when adding the dairy, causing the sauce to “break.” Gentle heat is key. If it happens, remove the pan from heat and vigorously whisk in a tablespoon of cold broth or cream. It should come back together.

Creamy Chicken Florentine Recipe (Easy One-Pan Spinach Chicken)
Description
The Cozy Magic of Creamy Chicken Florentine
Hey friend! Let’s pull up a chair and make a dinner that’s cozy, elegant, and comes together in about 30 minutes. Creamy Chicken Florentine is one of my all-time favorites—a golden, pan-seared chicken breast swimming in a silky garlic Parmesan sauce, tangled with vibrant spinach. Minimal fuss, maximum flavor, and one pan to wash.
Ingredients
-
4 boneless, skinless chicken breasts (pounded to ~½-inch thick if needed)
-
Salt and black pepper, to taste
-
1 tsp Italian seasoning (or ½ tsp oregano + ½ tsp thyme)
-
2 tbsp olive oil
-
3 cloves garlic, minced
-
1 cup chicken broth (low-sodium recommended)
-
1 cup heavy cream (or half-and-half for a lighter version)
-
½ cup freshly grated Parmesan cheese
-
3 cups fresh spinach
-
1 tbsp butter
-
Optional: red pepper flakes, fresh lemon juice, chopped parsley/basil for garnish
Chef’s Insight: Evenly sized chicken breasts cook faster and stay juicy. Thick breasts? Gently pound them before cooking.
Instructions
Pat chicken dry. Season both sides with salt, pepper, and Italian seasoning.
Heat olive oil in a large skillet over medium-high heat.
Add chicken; don’t touch! Sear 4–5 minutes per side until golden and cooked through (165°F). Transfer to a plate, tent with foil.
Pro Tip: Those brown bits left in the pan? Flavor gold.
Reduce heat to medium. Add butter and minced garlic. Sauté ~30 seconds until fragrant. Don’t let it burn.
Pour in chicken broth. Scrape the skillet to lift all browned bits. Let it simmer 2–3 minutes to reduce slightly.
Lower heat to medium-low. Stir in heavy cream and Parmesan until smooth.
Simmer gently 3–5 minutes until thickened enough to coat a spoon.
Tip: Too thin? Simmer a little longer. Too thick? Splash in more broth or cream.
Add fresh spinach—will wilt quickly. Stir until just tender and vibrant.
Return chicken (with juices) to the skillet, spoon sauce over top, and simmer 3–4 more minutes to reheat.
Notes
Sauce too thin? Simmer longer or whisk in cornstarch slurry (1 tsp cornstarch + 1 tbsp cold liquid).
Uneven chicken thickness? Pound to ½-inch before cooking.
Grainy/separated sauce? Heat too high—remove from pan and whisk in a splash of cold broth or cream.
Nutritional Information*
*This is an approximate estimate for 1 chicken breast with sauce, calculated using the listed ingredients without optional additions or sides.
- Prep Time: 10 minutes
- Cook Time: 20 minutes
- Total Time: 30 minutes
- Yield: 4 servings
Per Serving: Calories: 480 | Protein: 42g | Carbohydrates: 6g | Fat: 32g | Saturated Fat: 15g | Cholesterol: 175mg | Sodium: 750mg | Fiber: 1g | Sugar: 2g
Final Thoughts: The Cozy Magic of Creamy Chicken Florentine
And just like that, dinner is done—but somehow, the kitchen still feels alive. Maybe it’s the last wisps of garlic-scented steam curling toward the ceiling. Maybe it’s the happy clatter of forks against plates, or the satisfied silence that follows that first bite of velvety sauce-soaked chicken. Or maybe it’s just you, standing there with a wooden spoon in your hand and a smear of Parmesan on your apron, realizing that you—yes, you—just created something genuinely beautiful.
This is what I hope you carry with you long after the last dish is dried and put away: that feeling of quiet triumph that comes from transforming simple ingredients into something that nourishes both body and soul. That chicken breast? It was just chicken. That spinach? Just leaves. But in your hands, with a little patience and a lot of love, they became Florentine. They became the kind of meal that makes people close their eyes when they take a bite. The kind that prompts texts the next morning: “Hey, that chicken thing you made? Can we have it again next week?”
I’ve made this dish on rushed weeknights when takeout was tempting. I’ve made it for first dates and anniversary dinners. I’ve made it with a fussy toddler on my hip and a sink full of dirty dishes glaring at me. And every single time, it delivers. Not because the recipe is foolproof (though it’s pretty close), but because it reminds me—and now, I hope, you—that cooking for people is one of the purest forms of love there is. You don’t need a culinary degree or a pantry full of exotic ingredients. You just need to show up, pay attention, and stir with intention.
So here’s my final wish for you: Make this dish on a night when you need a little magic. Serve it to people who matter. Lick the spoon when no one’s looking. And when someone inevitably asks, “Wow, what’s in this sauce?”—smile, shrug, and say, “Oh, you know. A little love, a little butter, and a whole lot of garlic.”
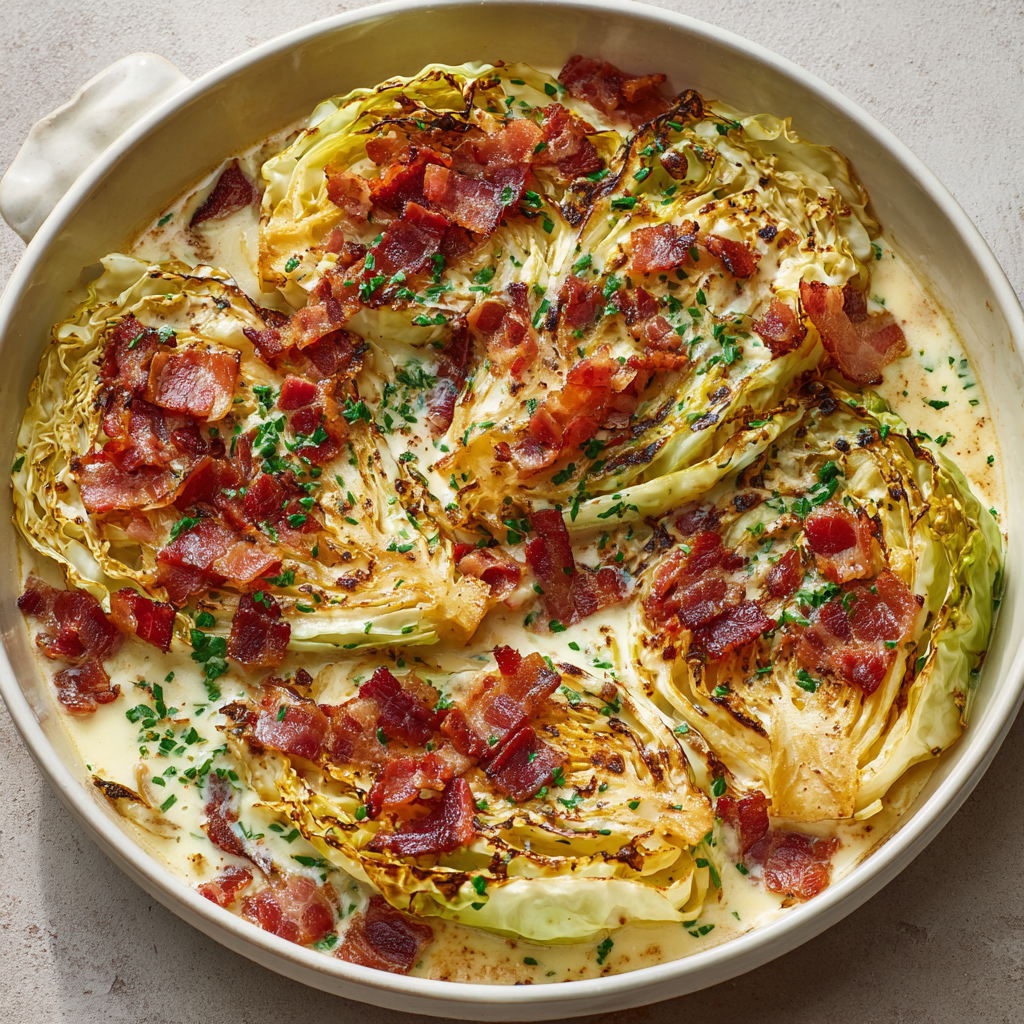
Creamy Baked Cabbage with Crispy Bacon (Easy Comfort Food Side Dish)
Turn Your Cabbage Expectations Upside Down
Hey there, friend! Come on in, pull up a stool, and let’s talk about one of the most underrated, humble heroes of the vegetable world: the cabbage. I know, I know. It might not sound like the star of the show. Maybe you’re thinking of it as that crunchy filler in coleslaw or the quiet leaf in your soup. But what if I told you that with a little cream, some smoky bacon, and a hot oven, this unassuming veggie transforms into the coziest, most decadent, crowd-pleasing side dish you’ll make all season?
This Creamy Baked Cabbage with Crispy Bacon is my secret weapon. It’s the dish I make when I want my kitchen to smell like a hug. It’s the one I bring to potlucks when I want to watch people’s eyes widen with surprise and delight. It’s rustic, it’s elegant in its simplicity, and it proves that the best food isn’t about fancy techniques—it’s about treating simple ingredients with a whole lot of love.
Imagine this: thick wedges of cabbage, seared until their edges are golden and sweet, then nestled into a skillet and blanketed with rich cream and nutty Gruyère. As it bakes, the cream reduces into a luscious sauce that caramelizes around the edges, the cheese bubbles into a perfect golden crust, and the crispy bacon bits on top add that essential smoky, salty crunch in every bite. It’s comfort food that feels special, and I am so excited to guide you through it. Let’s turn that cabbage into something unforgettable!
The Cabbage That Won Over a Skeptic
This recipe has a special place in my heart because it’s the dish that officially made my niece, Lily, a vegetable believer. She was (and still can be) a fiercely opinionated 8-year-old when it comes to food. “Green things are suspicious,” she’d declare, eyeing her plate. One chilly Sunday, she was helping me in the kitchen, her nose wrinkled as I pulled the cabbage from the fridge. “We’re eating that?” she asked, skepticism dripping from every word.
But something magical happened when we seared those wedges. The sizzle, the caramelized smell that filled the kitchen… she was intrigued. Then came the cream and the cheese. “Okay, now it looks interesting,” she conceded. When it came out of the oven, bubbling and gorgeous, she agreed to try “just one bite.” That one bite turned into two, then a whole wedge. “It’s like… creamy, salty, and the cabbage is sweet! It doesn’t taste like cabbage!” she announced triumphantly. Mission accomplished. Now, she asks for “Aunt Liv’s fancy cabbage” whenever she comes over. It’s a reminder that sometimes, all a vegetable needs is a little cream, cheese, and a chance to shine.
Gathering Your Flavor Allies
Here’s what you’ll need to create this cozy masterpiece. Don’t stress about perfection—cooking is about feeling, not just following!
- 1 medium head green cabbage: Look for one that feels heavy for its size with crisp, tightly packed leaves. This is our canvas! Chef’s Insight: The sear is crucial here—it builds a foundation of deep, sweet flavor that steamed cabbage just can’t achieve.
- ½ tsp salt & ¼ tsp black pepper: Seasoning layers! We start here, but always taste at the end. Freshly ground pepper makes a world of difference.
- 4 oz smoked bacon, chopped: This is our flavor bomb. Smoked bacon adds a deep, savory backbone. Substitution Tip: For a pork-free version, use thick-sliced smoked mushrooms or a teaspoon of smoked paprika sautéed in olive oil for that smoky essence.
- ¾ cup heavy cream: The luxurious base of our sauce. It reduces and thickens beautifully in the oven. Chef’s Insight: Don’t sub for half-and-half here; the fat content in heavy cream is what prevents it from curdling and gives us that dreamy texture.
- ¾ cup grated Gruyère cheese: My favorite for its superb melting quality and gentle, nutty flavor. Substitution Tip: Swiss, Fontina, or even a sharp white cheddar would be delicious friends if Gruyère is playing hard to get.
- ½ tsp fresh thyme leaves (optional): A tiny herbaceous whisper. If you have it, it’s lovely. If not, no worries. Dried thyme works too—use just ¼ tsp.
- 1 tsp butter (optional): Sometimes, after cooking the bacon, I’ll add just a pat of butter to the drippings for searing. It adds a lovely richness, but the bacon fat alone is fantastic.
Let’s Build Some Deliciousness, Step-by-Step
Ready? Apron on, oven preheating, let’s get cooking. This process is as satisfying as the final dish!
- Preheat & Prep: Fire up your oven to 400°F (200°C). Grab a cast-iron skillet or a 9×13 inch baking dish and give it a very light greasing. Chef’s Hack: I’m team cast-iron for this because you can go from stovetop to oven seamlessly, and it gives the cabbage incredible color.
- Crisp the Bacon: In your skillet over medium heat, cook the chopped bacon. We’re looking for lightly crisp and rendered, not rock-hard. Use a slotted spoon to transfer the bacon to a paper-towel-lined plate. Here’s the gold: reserve about one teaspoon of that beautiful bacon fat in the pan. The rest you can save (in a jar in your fridge!) for roasting potatoes tomorrow.
- Sear the Cabbage: This is the flavor-making step! Place your cabbage wedges cut-side down into the skillet with the bacon fat. Don’t crowd them. Let them sear, untouched, for 4-5 minutes, until you get a gorgeous, deep golden-brown char. Flip and sear the other flat side. Chef’s Commentary: Hear that sizzle? That’s the sound of flavor developing. Don’t rush this. A good sear equals sweet, caramelized cabbage.
- Create the Creamy Bath: Once your wedges are nicely colored, arrange them evenly in the skillet. Slowly pour the heavy cream all around and over them. It will look like a lot, but trust the process—it will reduce and coat everything beautifully. Season everything with the salt and pepper right now.
- The Flavorful Toppings: Scatter the crispy bacon bits over the top. Sprinkle on the thyme if you’re using it. Now, shower everything with that glorious grated Gruyère. Chef’s Hack: Grate your own cheese! Pre-shredded cheese has anti-caking agents that can make your sauce a bit grainy. Freshly grated melts like a dream.
- Bake to Bubbly Perfection: Carefully transfer the skillet to your preheated oven. Bake, uncovered, for 18-20 minutes. You’re waiting for a symphony of bubbles: the cabbage should be fork-tender, the cream thickened and bubbling around the edges, and the cheese fully melted with maybe a few golden-brown spots.
- The Most Important Step: Let it rest! Pull it out of the oven and let it sit for 5-7 minutes. This allows the creamy sauce to settle and thicken a bit more, making serving so much easier and preventing a scorched tongue! The wait is absolutely worth it.
How to Serve This Cozy Masterpiece
Presentation is part of the fun! I like to serve this right from the cast-iron skillet at the table—it’s rustic and inviting. Use a sturdy spatula to lift out each creamy cabbage wedge, making sure to drizzle plenty of that luscious sauce from the bottom of the pan over the top. A final crack of black pepper and maybe one more tiny sprinkle of fresh thyme makes it look chef’s-kiss perfect. It’s the ultimate sidekick to a simple roast chicken, seared pork chops, or herb-crusted salmon. Honestly, with a green salad and a crusty loaf of bread to mop up the sauce, it could easily be the main event.
Make It Your Own: Delicious Twists
Once you’ve mastered the basic melody, feel free to play with the harmony! Here are a few of my favorite riffs:
- Caraway & Apple: Add 1 tsp caraway seeds to the bacon fat before searing the cabbage. Top the dish with a layer of very thin apple slices under the cheese for a sweet, aromatic twist.
- Vegetarian “Carbonara” Style: Omit the bacon. Sear the cabbage in olive oil and butter. Add a clove of minced garlic to the cream, and finish with a handful of grated Parmesan and lots of black pepper.
- Spicy Kick: Love heat? Add a big pinch of red pepper flakes or a dash of hot sauce to the cream before pouring it over. A drizzle of chili crisp on top after baking is incredible.
- Mushroom Lover’s Dream: Swap the bacon for 8 oz of sliced cremini mushrooms. Sauté them until deeply brown and use their flavorful juices to sear the cabbage.
- Mustardy Cream: Whisk 1-2 tablespoons of whole grain Dijon mustard into the heavy cream before pouring. It adds a wonderful tangy depth.
From My Kitchen to Yours: A Few Final Thoughts
This recipe has evolved from a “clean-out-the-fridge” experiment into a requested staple. The first time I made it, I was dubious—would it be too watery? Too bland? But that first bite was a revelation. Over time, I’ve learned that the type of cabbage matters (green is perfect, but Savoy works in a pinch for a more delicate texture), and that letting it rest after baking is non-negotiable for the perfect sauce consistency.
A funny kitchen story? I once was so eager to serve it at a dinner party that I skipped the resting step. I went to lift a wedge and… creamy sauce waterfall all over my stove! It still tasted amazing, but we had to serve it with spoons to scoop up the pooled sauce. My guests didn’t mind one bit, but I learned my lesson. Good food, and good company, is always about embracing the little messes along the way.
Your Questions, Answered
Q: My cabbage seems watery after baking. What happened?
A: This usually means the cabbage wasn’t seared enough. Searing not only adds flavor but also helps seal the cut surfaces, reducing how much liquid the cabbage releases. Make sure your pan is hot and you get a good, deep color. Also, using heavy cream (not milk or half-and-half) is key, as it’s stable and reduces instead of separating.
Q: Can I make this ahead of time?
A: You can do some prep! You can sear the cabbage wedges and cook the bacon up to a day ahead. Store them separately in the fridge. When ready, let the cabbage come to room temp for 20 minutes, assemble with the cold cream and cheese, and bake. You may need to add 3-5 extra minutes to the bake time.
Q: What’s the best way to cut the cabbage into wedges?
A: Place the cabbage on its core. Cut it in half straight through the core. Then, place each half cut-side down and cut into quarters, again cutting through the core. The core is what holds the wedges together, so don’t remove it until after baking!
Q: My cheese browned too fast/burned. Help!
A: Ovens can have hot spots! If you see the cheese getting too dark too quickly, simply lay a loose piece of aluminum foil over the top for the remainder of the baking time. Also, ensure your rack is in the middle of the oven, not too close to the top heating element.
Creamy Baked Cabbage with Crispy Bacon (Easy Comfort Food Side Dish)
Description
Turn Your Cabbage Expectations Upside Down
Hey there, friend. Pull up a stool — we’re about to give cabbage the glow-up it deserves.
If cabbage has only ever shown up as coleslaw filler or soup support in your life, prepare to be pleasantly shocked. Because when you pair it with smoky bacon, rich cream, and nutty melted cheese, something magical happens.
This Creamy Baked Cabbage with Crispy Bacon is cozy, caramelized, and unapologetically indulgent. It’s rustic comfort food that feels dinner-party worthy. And it just might convert a few cabbage skeptics along the way.
Ingredients
-
1 medium head green cabbage
-
½ tsp salt
-
¼ tsp black pepper
-
4 oz smoked bacon, chopped
-
¾ cup heavy cream
-
¾ cup grated Gruyère cheese
-
½ tsp fresh thyme (optional)
-
1 tsp butter (optional, for searing boost)
Instructions
1️⃣ Preheat & Prep
Preheat oven to 400°F (200°C).
Lightly grease a cast-iron skillet or baking dish.
Cut cabbage:
-
Slice in half through the core
-
Cut each half into wedges (keep core intact to hold them together)
2️⃣ Crisp the Bacon
In your skillet over medium heat:
Cook chopped bacon until lightly crisp and fat is rendered.
Remove bacon to paper towel.
Leave about 1 teaspoon bacon fat in the pan.
(That fat = flavor foundation.)
3️⃣ Sear the Cabbage (Don’t Skip This!)
Place cabbage wedges cut-side down in the skillet.
Sear undisturbed for 4–5 minutes until deeply golden.
Flip and sear the other flat side.
This step caramelizes natural sugars and builds sweetness.
4️⃣ Add the Creamy Magic
Arrange wedges evenly in skillet.
Slowly pour heavy cream around and slightly over the cabbage.
Season with salt and pepper.
Scatter crispy bacon on top.
Add thyme if using.
Finish with a generous layer of grated Gruyère.
5️⃣ Bake Until Bubbly
Transfer skillet to oven.
Bake 18–20 minutes, uncovered, until:
-
Cabbage is fork-tender
-
Cream is bubbling and thickened
-
Cheese is melted and lightly golden
6️⃣ Let It Rest
Rest 5–7 minutes before serving.
This thickens the sauce and prevents a molten cheese situation.
Notes
-
Straight from the skillet (rustic + gorgeous)
-
With roast chicken
-
Alongside pork chops
-
Next to herb-crusted salmon
-
Or as a vegetarian main with crusty bread + green salad
Spoon extra sauce over each wedge when plating.
Nutritional Information*
*Please note: This is an approximate estimate calculated using online tools and is intended for informational purposes only.
Per Serving (1 wedge with sauce): Calories: ~320 | Protein: 10g | Carbohydrates: 8g | Dietary Fiber: 3g | Sugar: 4g | Fat: 28g (Saturated Fat: 15g)
This dish is rich, cozy, and satisfying. The cabbage provides a great source of Vitamin C and K, and the fats from the cream and cheese help your body absorb those fat-soluble vitamins. Enjoy it as part of a balanced meal!
Final Thoughts: The Cabbage You’ll Actually Crave
Well, friend, we’ve done it. We’ve taken that humble, often-overlooked head of cabbage and transformed it into something that feels downright luxurious. As you pull that skillet from the oven—bubbling, golden, fragrant with bacon and thyme—I hope you feel a little surge of pride. You made that. From a vegetable that usually hides in the shadows, you’ve created the dish that’ll have people reaching across the table for “just one more bite.”
This recipe is proof of something I believe with my whole heart: the best food doesn’t come from fancy ingredients or complicated techniques. It comes from paying attention. From taking the time to sear those edges until they’re caramelized and sweet. From choosing good cream and real cheese. From trusting that a little patience and a lot of love can turn the most ordinary things into something extraordinary.
Maybe you came here looking for a new side dish for Easter dinner or a way to use up that cabbage rolling around in your crisper drawer. But I hope you’re leaving with something more—a little reminder that cooking is allowed to be simple. That your kitchen doesn’t need to be pristine or your techniques perfect. That burned cheese, a little too much bacon (is there such a thing?), and forgetting to let it rest before serving are all part of the story. Those “mistakes” are what make a recipe yours.
The next time someone raises an eyebrow at cabbage, you’ll know something they don’t. You’ll know that beneath those tight green leaves is a vegetable just waiting for its moment—a little heat, a little cream, a little cheese, and suddenly it’s the star of the show. It’s creamy, it’s smoky, it’s indulgent, and it’s vegetables.
So make this for your holiday table. Make it for a random Tuesday when you need something warm and cozy. Make it for your skeptical niece, your cabbage-doubting partner, or just for yourself with a good book and a glass of wine. However you make it, make it with the knowledge that you’re carrying on the best tradition of home cooking: taking simple things and making them beautiful.
Now go on—preheat that oven, crisp that bacon, and get ready to watch some cabbage expectations get turned completely upside down.
I’ll be right here in my kitchen, cheering you on.
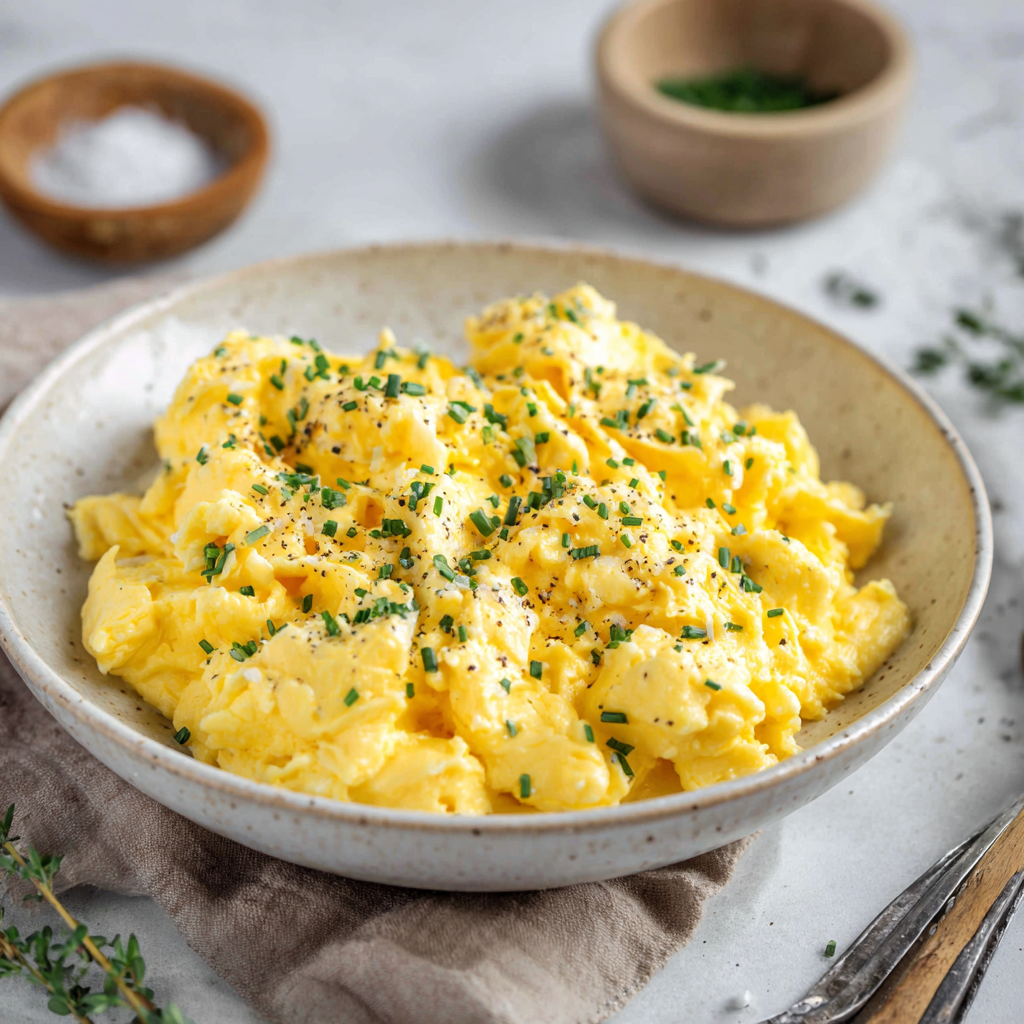
High Protein Scrambled Eggs (Fluffy, Creamy & 25g Protein Breakfast)
Good Morning, Protein-Packed Perfection: The Fluffiest Scrambled Eggs You’ll Ever Make
Hey there, friend! Come on in, the coffee’s on and I’ve got the skillet warming. Can we talk about breakfast for a second? Not just any breakfast, but that breakfast. The one that’s supposed to be quick, easy, and keep you powered until lunch without a grumbling stomach in sight. But so often, our go-to scramble can feel a little… lackluster. A bit flat, a bit rubbery, and leaving you hungry again by 10 AM.
Sound familiar? I’ve been there too. For years, my morning scramble was a rushed affair – a couple of eggs cracked hastily into a pan, swirled around, and plopped on a plate. It did the job, but it didn’t spark joy. And it certainly didn’t fuel my busy days of recipe testing, photographing, and chasing after my very energetic dog, Biscuit.
That all changed when I cracked the code (pun totally intended) to scrambled eggs that are not just a vehicle for hot sauce, but a destination in themselves. I’m talking clouds-on-a-plate fluffy. Luxuriously creamy without a splash of heavy cream in sight. And packed with a whopping 25 grams of protein per serving to truly conquer your day.
The secret isn’t a fancy technique or a hard-to-find ingredient. It’s a brilliant little trio: whole eggs for rich flavor, liquid egg whites for incredible fluff and added protein, and my not-so-secret weapon, cottage cheese. Before you scrunch your nose, hear me out! When whisked in and cooked slowly, it melts into utter creaminess, adding a massive protein boost and keeping the eggs incredibly moist. You won’t taste “cottage cheese;” you’ll just taste the best, most satisfying scrambled eggs of your life.
This recipe is for anyone who’s ever stared into the fridge on a busy morning and wished for something both speedy and substantial. It’s for the post-workout warrior needing refueling, the parent juggling a million things before 9 AM, and for anyone who believes breakfast should be something you genuinely look forward to. So, tie on your apron (the messier, the better!), grab your favorite spatula, and let’s make a morning masterpiece together.
The Scramble That Started It All: A Grandmother’s Gentle Lesson
My love for scrambled eggs is deeply rooted in my grandmother’s sunny kitchen. Every Saturday morning, without fail, the smell of butter melting in her cast-iron skillet would waft upstairs. It was my personal alarm clock. I’d pad down in my pajamas to find her at the stove, a look of serene concentration on her face, gently coaxing golden curds from a simple bowl of eggs.
She never rushed. That was her magic. While my kid-self bounced with impatience, she’d stir with a wooden spoon, telling stories, letting the eggs cook low and slow. “Patience, Livvy,” she’d say. “Good things come to those who wait, especially at the stove.” Her eggs were always, always perfect – tender, soft, and pooled slightly on the toast. They were a lesson in care, wrapped in comfort.
This high-protein version is my modern, hungry-woman homage to her classic. I’ve taken her foundational wisdom – the low heat, the gentle touch – and supercharged it for the life I lead now. Where she used a splash of milk, I blend in cottage cheese for staying power. Where she used two eggs, I add egg whites for sky-high volume. It’s still that same act of morning love, just built to fuel bigger dreams and busier days. Every time I make this scramble, I hear her voice reminding me to slow down, even just for five minutes, and cook with my heart. And I think she’d absolutely approve of the extra protein punch, too.
Gathering Your A-Team: Simple Ingredients, Big Impact
Here’s everything you need to create this protein powerhouse. I’ve included why each ingredient is a star player and how you can swap things based on what’s in your fridge!
- 4 large eggs: The flavor foundation. The yolks bring richness, healthy fats, and vitamins. For the brightest yellow color, look for pasture-raised eggs if you can!
- 1/2 cup liquid egg whites: Our fluff-factor MVP! This is a pure, convenient protein boost that aerates the mixture, giving you those dreamy, cloud-like curds without diluting flavor. It’s the secret to massive volume. Chef’s Insight: If you don’t have carton egg whites, you can separate 3-4 large eggs yourself. Save the yolks for a custard or hollandaise later!
- 1/2 cup cottage cheese: Don’t skip this! Full-fat will give you the ultimate creaminess and satiety, but low-fat works great too. When whisked and cooked, it completely integrates, adding a tangy moisture and a huge protein lift. Substitution Tip: If you’re truly cottage-cheese-averse, try an equal amount of ricotta cheese or even 1/4 cup of full-fat plain Greek yogurt. The texture will be slightly different but still delicious.
- 1 tablespoon butter or olive oil: Butter equals flavor town. It gives the eggs a gorgeous, rich taste and helps create those beautiful, delicate curds. Olive oil is a great dairy-free alternative with its own lovely, fruity notes. Chef’s Insight: For the best of both worlds, I sometimes use 1/2 tbsp of each!
- Salt and black pepper, to taste: Seasoning is key! I prefer to add a pinch of salt to the mixture before cooking to season it throughout, then finish with flaky sea salt and fresh cracked pepper at the end.
- Optional add-ins (get creative!): A handful of chopped chives or spinach stirred in at the end, a sprinkle of shredded cheddar or pepper jack cheese, or a dash of hot sauce or smoked paprika.
Let’s Get Fluffy: Your Step-by-Step Roadmap to Perfect Eggs
This isn’t a race. Embrace the low-and-slow method for truly transcendent eggs. You’ll be rewarded with a texture that’s unforgettable.
- The Whisk: In a medium bowl, combine your whole eggs, liquid egg whites, and cottage cheese. Now, whisk with enthusiasm! You want this completely homogenous – no large blobs of cottage cheese remaining. A few tiny specks are fine. This aeration is the first step to fluff. Chef’s Hack: I use a fork and really get my wrist into it for about 60 seconds. It’s a great little arm warm-up for the day!
- The Heat: Place your best nonstick skillet over medium-low heat. Add your butter or oil and let it melt/heat until it shimmers gently. If the fat immediately sizzles and browns, your pan is too hot. Dial it back! The right temperature is crucial. Chef’s Commentary: This is where my grandma’s voice rings in my ears. Low heat is non-negotiable for creamy, not rubbery, eggs.
- The Pour & The Pause: Pour your egg mixture into the center of the pan. Now, here’s a test of willpower: let it sit, untouched, for 20-30 seconds. You’ll see the edges just beginning to set. This initial set creates a stable structure.
- The Gentle Push: Using a silicone spatula or a flat wooden spoon, gently push the set edges toward the center. Tilt the pan slightly so the uncooked, runny egg fills the space you just cleared. You’re not aggressively scrambling here; you’re folding and guiding.
- The Patient Fold: Continue this gentle process: let it sit for another 15-20 seconds, then push/fold again. You’ll see large, soft curds beginning to form. If things seem to be cooking too fast, simply lift the pan off the heat for 15 seconds to cool it down, then return it. Biggest Tip: Your eggs are done in the pan when they are mostly set but still look slightly wet and glossy. They will continue to cook from residual heat once you take them off the stove (this is called “carryover cooking”).
- The Finish: Immediately transfer the eggs to waiting plates! This stops the cooking process right where you want it. Now, season generously with salt and pepper. The final seasoning on top makes all the difference.
Plating Your Power Breakfast
These eggs are so gorgeous they deserve a great stage! I love serving them simply on a warm plate with a side of buttery whole-wheat toast for scooping up every last creamy bit. For a low-carb option, pair them with sliced avocado and a handful of cherry tomatoes. Or, go all out and create a breakfast bowl: start with a base of sautéed kale or roasted sweet potato, pile the fluffy eggs high, and add toppings like sliced jalapeño, a dollop of salsa, and a sprinkle of cilantro. However you serve them, do it immediately – they are at their peak fluffiness straight from the pan!
Make It Your Own: 5 Flavor Twists & Swaps
Once you’ve mastered the basic fluffy method, the world is your oyster (or, well, your omelet). Here are some of my favorite ways to mix it up:
- The “Everything Bagel”: Stir 1 tablespoon of everything bagel seasoning into the egg mixture before cooking. Top with extra everything spice and a schmear of cream cheese on the side.
- Green Goddess: Fold in a huge handful of fresh spinach and 2 tbsp of chopped herbs (dill, chives, parsley) in the last minute of cooking. Feels fresh and vibrant!
- Southwest Fiesta: Add a pinch of cumin and chili powder to the eggs. Once plated, top with pico de gallo, sliced avocado, and a sprinkle of cotija cheese.
- Dairy-Free Delight: Swap the cottage cheese for 1/4 cup of unsweetened, unflavored plant-based yogurt (like Kite Hill almond milk yogurt). Use olive oil instead of butter.
- Ultimate Cheesy Comfort: After removing from heat, gently fold in 1/3 cup of shredded sharp cheddar or gruyere until just melted. Pure, protein-packed indulgence.
From My Kitchen to Yours: A Few Parting Thoughts
This recipe has become my absolute breakfast bedrock, but it didn’t start out perfect. My first attempt? I had the heat on too high and stirred too aggressively, resulting in what can only be described as “protein-rich pebbles.” Lesson learned! The evolution was all about embracing slowness and trusting the process.
I also used to blend the cottage cheese until smooth, but I’ve found a few small lumps actually create lovely little pockets of extra creaminess in the final scramble. Embrace the imperfection! Some mornings, I’ll double the batch and stash a portion in the fridge for a quick reheat – they’re still great the next day, making meal prep a breeze.
Most importantly, this recipe is a reminder that “healthy” doesn’t have to mean complicated or bland. It’s about taking a simple, beloved classic and tweaking it to love you back a little harder. Now, go forth and scramble! And if you get a moment, snap a picture and tag me – nothing makes me happier than seeing your kitchen victories.
Your Questions, Answered!
Q: My eggs turned out watery/rubbery. What went wrong?
A: Wateriness usually means the heat was too low for too long, causing the eggs to steam and release moisture. Rubberiness is the classic sign of heat that’s too high, cooking the proteins too fast and squeezing out moisture. The sweet spot is a consistent medium-low. If you see liquid pooling in the pan, turn the heat up a tiny notch. If the eggs are setting instantly into small, tough curds, turn it down.
Q: Can I make these without a nonstick skillet?
A: You can, but you’ll need to be extra diligent with your fat and temperature. Use a well-seasoned cast iron or carbon steel pan and make sure your butter or oil is fully coating the surface before adding the eggs. The cottage cheese mixture can be slightly more prone to sticking than plain eggs.
Q: I don’t have liquid egg whites. Can I just use more whole eggs?
A: Absolutely! Using 6-7 whole eggs will give you a similar volume and protein content (about 24-28g per serving), but the texture will be denser and richer, not quite as ethereally fluffy. Still delicious, just a different vibe!
Q: How can I add more veggies to this?
A: I love sautéing finely chopped veggies like bell peppers, onions, or mushrooms in the pan with the butter/oil for 3-4 minutes before adding the egg mixture. Just make sure they’re tender and any released liquid has evaporated, so you don’t make the eggs wet. Then pour the eggs right over them and proceed.
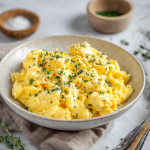
High Protein Scrambled Eggs (Fluffy, Creamy & 25g Protein Breakfast)
Description
Hey there, friend. The coffee’s hot, the skillet’s warming, and we’re about to transform your morning routine.
Let’s be honest — scrambled eggs have a reputation. Quick? Yes. Reliable? Sure. But fluffy, luxurious, protein-loaded perfection? Not always.
If you’ve ever ended up with rubbery curds or eggs that left you hungry by 10 AM, this is your upgrade.
Ingredients
-
4 large eggs
-
½ cup liquid egg whites
-
½ cup cottage cheese (full-fat or low-fat)
-
1 tbsp butter or olive oil
-
Salt & black pepper, to taste
Optional add-ins:
-
Chopped chives or spinach
-
Shredded cheddar or pepper jack
-
Hot sauce or smoked paprika
Instructions
1️⃣ Whisk Like You Mean It
In a medium bowl, combine:
-
Whole eggs
-
Liquid egg whites
-
Cottage cheese
Whisk vigorously for about 60 seconds until mostly smooth. Tiny curds are fine — they melt beautifully during cooking.
This aeration = fluff factor.
2️⃣ Low & Slow Is Law
Heat a nonstick skillet over medium-low.
Add butter or oil and let it melt gently.
If it sizzles aggressively, your heat is too high.
Patience makes creamy eggs.
3️⃣ Pour & Pause
Pour the egg mixture into the center of the pan.
Let it sit untouched for 20–30 seconds until edges begin to set.
Resist stirring immediately.
4️⃣ Gentle Folding
Using a silicone spatula:
-
Push the set edges toward the center
-
Tilt the pan so uncooked egg flows into empty space
Repeat every 15–20 seconds.
Think: folding, not scrambling.
If cooking too fast? Lift pan off heat briefly.
5️⃣ Pull Early
Remove from heat when eggs are:
-
Mostly set
-
Slightly glossy
-
Still a little soft
They’ll finish cooking from residual heat.
Immediately transfer to plates.
Season with salt and fresh cracked pepper.
Notes
-
Rubbery eggs?
Heat too high.Watery eggs?
Heat too low for too long OR over-stirring.Too dense?
Whisk longer to incorporate more air.
Nutritional Information*
Per Serving (1/2 of the recipe, without optional add-ins):
Calories: ~280 | Protein: 25g | Carbohydrates: 4g | Fat: 18g | Saturated Fat: 7g | Cholesterol: 380mg | Sodium: 480mg
*Note: These are estimates based on using full-fat cottage cheese and butter. Values will vary with specific brands and ingredient substitutions.
Final Thoughts
Hey there, friend! Come on in, the coffee’s on and I’ve got the skillet warming. Can we talk about breakfast for a second? Not just any breakfast, but that breakfast. The one that’s supposed to be quick, easy, and keep you powered until lunch without a grumbling stomach in sight. But so often, our go-to scramble can feel a little… lackluster. A bit flat, a bit rubbery, and leaving you hungry again by 10 AM.
Sound familiar? I’ve been there too. For years, my morning scramble was a rushed affair – a couple of eggs cracked hastily into a pan, swirled around, and plopped on a plate. It did the job, but it didn’t spark joy. And it certainly didn’t fuel my busy days of recipe testing, photographing, and chasing after my very energetic dog, Biscuit.
That all changed when I cracked the code (pun totally intended) to scrambled eggs that are not just a vehicle for hot sauce, but a destination in themselves. I’m talking clouds-on-a-plate fluffy. Luxuriously creamy without a splash of heavy cream in sight. And packed with a whopping 25 grams of protein per serving to truly conquer your day.
The secret isn’t a fancy technique or a hard-to-find ingredient. It’s a brilliant little trio: whole eggs for rich flavor, liquid egg whites for incredible fluff and added protein, and my not-so-secret weapon, cottage cheese. Before you scrunch your nose, hear me out! When whisked in and cooked slowly, it melts into utter creaminess, adding a massive protein boost and keeping the eggs incredibly moist. You won’t taste “cottage cheese;” you’ll just taste the best, most satisfying scrambled eggs of your life.
This recipe is for anyone who’s ever stared into the fridge on a busy morning and wished for something both speedy and substantial. It’s for the post-workout warrior needing refueling, the parent juggling a million things before 9 AM, and for anyone who believes breakfast should be something you genuinely look forward to. So, tie on your apron (the messier, the better!), grab your favorite spatula, and let’s make a morning masterpiece together.
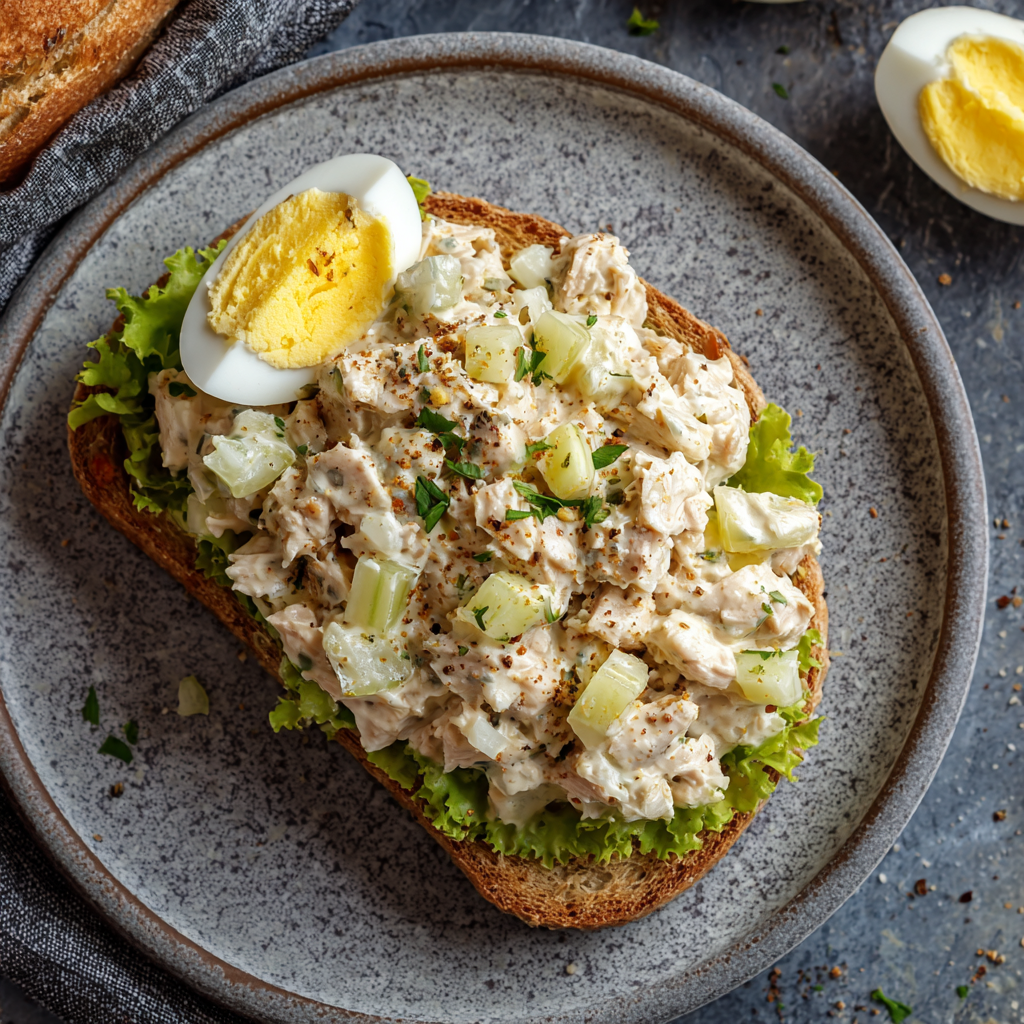
Classic Tuna Egg Salad (Creamy, Protein-Packed & Easy)
The Humble Hero: Why This Tuna Egg Salad Deserves a Standing Ovation
Hey there, friend! Come on in, pull up a stool. Can you smell that? It’s the warm, toasty scent of bread browning in the pan, mixed with the bright, zingy aroma of lemon juice hitting a bowl. That, my friend, is the sound of lunch calling. Today, we’re not chasing culinary trophies or decoding fussy techniques. We’re celebrating something far more powerful: the perfect, simple, utterly satisfying lunch. We’re making my Classic Tuna Egg Salad.
Let’s be real. We all have that one recipe we can make with our eyes closed, the one we turn to when we need something reliable, delicious, and genuinely nourishing. The kind of food that feels like a hug from the inside out. For me, that’s this salad. It’s not *just* tuna and eggs. It’s a creamy, crunchy, protein-packed masterpiece that’s equally happy stuffed in a crusty baguette, piled on a bed of greens, or scooped straight from the bowl with a suspiciously large spoon (I won’t tell).
This recipe is the culinary equivalent of your favorite cozy sweater. It’s unpretentious, always fits, and makes everything feel better. Whether you’re meal-prepping for a hectic week, throwing together a last-minute picnic, or just craving a lunch that actually tastes good and keeps you full, you’ve landed in the right spot. So, tie on your apron (messy is welcome here!), and let’s make something special from the simplest of ingredients. Trust me, this is the tuna egg salad recipe that will finally kick all other versions out of your rotation.
Sunshine, Sandwiches, and Grandma’s Checkered Tablecloth
My love for this salad is deeply rooted in memory. Picture this: It’s the mid-90s, I’m about eight years old, and my family is packed into our station wagon for the two-hour drive to my grandparents’ lakeside cottage. The air smells like pine needles and sunscreen. The moment we’d burst through the screen door, the first thing I’d see was my grandma, beaming, with a massive yellow bowl already on the red-checkered kitchen table.
“Lunch is ready, kiddos!” she’d announce. Inside that bowl was her legendary tuna egg salad, always mixed with extra love (and, I suspect, an extra dollop of mayo). We’d pile it onto soft white bread, the crusts meticulously trimmed for us grandkids, and eat on the porch while planning our afternoon swim. It wasn’t fancy. It was pure, unadulterated joy. It tasted like summer vacation, like laughter echoing over the water, like being cared for. That’s the magic I try to channel every time I make it—the feeling that you’re about to feed not just a body, but a heart. This recipe is my homage to those sunny afternoons and to the powerful truth that the best meals are often the simplest ones shared with people you love.
Gathering Your Flavor Crew: Ingredients & Insights
Here’s the beautiful part: this recipe is an exercise in pantry glory. Let’s break down each player and why they’re here. Feel empowered to swap and tweak based on what’s in your fridge!
- 2 (5 oz) cans tuna, drained well: I prefer solid white albacore packed in water for its firm texture and mild flavor, but chunk light tuna in oil works beautifully too and adds extra richness. Chef’s Tip: Really press that tuna dry with a fork or in a fine-mesh strainer. Excess liquid is the enemy of a perfectly creamy salad!
- 4 hard-boiled eggs, chopped: The other half of our protein powerhouse. They add a wonderful richness and body. For easy-peel eggs, steam them! Place a steamer basket in a pot with an inch of water, steam for 12 minutes, then plunge into ice water. Shells slide right off.
- 1/3 cup mayonnaise (adjust to taste): The creamy glue that brings the party together. Use full-fat for the best flavor and texture, or a high-quality avocado oil mayo for a lighter twist. Start with 1/3 cup and add more after mixing if you like it creamier.
- 1 Tbsp Dijon mustard: This is our flavor secret weapon! Dijon adds a subtle tang and depth that plain yellow mustard can’t match. It cuts through the richness perfectly.
- 1 Tbsp lemon juice: FRESH SQUEEZED, please! This little bit of acidity is non-negotiable. It brightens every single flavor and keeps the salad from tasting heavy.
- 1/4 cup celery, finely diced: Our crucial CRUNCH factor. It provides a refreshing, watery contrast to the creamy base. No celery? Try a finely diced cucumber or a handful of chopped snap peas.
- 2 Tbsp red onion, finely minced: A tiny bit of pungent bite. If raw onion is too strong for you, soak the minced pieces in cold water for 10 minutes and drain. It mellows them out wonderfully.
- 1 Tbsp fresh parsley, chopped (optional): A pop of color and a whisper of freshness. Don’t stress if you don’t have it, but it’s a lovely finishing touch. Dill or chives are fantastic alternatives.
- Salt and black pepper, to taste: Season in layers! Taste, season, taste again. You’ll be amazed at the difference proper seasoning makes.
Let’s Get Mixing: Your Foolproof Step-by-Step Guide
Ready? This is less of a rigid procedure and more of a relaxed kitchen dance. Let’s do it.
- Flake Your Tuna: Grab your medium bowl and dump in those well-drained tuna cans. Take a fork and go to town, pressing and flaking until you have consistent, lovely shreds. This isn’t just about breaking it up; it’s creating the ideal texture to hold onto our dressing. Chef’s Hack: If you want an even finer, almost “spread-like” texture for sandwiches, give the tuna a few quick pulses in a food processor before adding anything else.
- Introduce the Eggs & Crunch: Now, gently fold in your chopped hard-boiled eggs, the diced celery, and the minced red onion. I say “fold” because we want to maintain some of those distinct egg pieces for texture. No aggressive mashing just yet! This is where the salad starts to look beautiful and colorful.
- Whip Up the Dressing: In a small separate bowl (or right on top of the tuna if you’re feeling efficient), dollop the mayonnaise, add the Dijon mustard, and squeeze that glorious lemon juice. Use a fork or small whisk to blend these three into a smooth, unified dressing. This ensures no one gets a mouthful of pure mustard!
- The Grand Unification: Pour your dressing over the tuna and egg mixture. Now, using a large spoon or rubber spatula, mix everything together until it’s just combined. You want every flake and chunk to be lightly dressed. Chef’s Commentary: This is the moment of truth. Look at that transformation! See how the creamy dressing coats everything? Magic.
- Season with Soul: Now, taste. Seriously, grab a spoon. Does it need a pinch of salt to make the flavors pop? A few cracks of black pepper for a warm bite? This is your creation—season it until it sings to you. Mix one final time.
- The Patient Pause (Highly Recommended): Cover the bowl with plastic wrap and tuck it into the fridge for at least 30 minutes. I know, waiting is hard! But this chill time allows the flavors to get to know each other, mellow, and marry into something even greater. The salad firms up slightly, making it perfect for scooping or spreading.
How to Serve Your Masterpiece
The fun part! This salad is the ultimate culinary chameleon. For the classic comfort move, pile it high on toasted sourdough or a buttered, grilled croissant. Going light and fresh? Spoon it into crisp butter lettuce or romaine cups. Need a portable lunch? Roll it up in a spinach or sun-dried tomato tortilla wrap. Feeling fancy? Halve an avocado, remove the pit, and fill the well with a generous scoop of salad for a stunning, nutrient-dense meal. The possibilities are endless!
Make It Your Own: Delicious Twists & Swaps
Got the base recipe down? Let’s play! Here are a few of my favorite riffs:
- The “Everything Bagel” Vibe: Add 1 tbsp of everything bagel seasoning to the mix and swap the parsley for fresh dill. Serve on an everything bagel, obviously.
- Mediterranean Sunshine: Omit the Dijon. Add 2 tbsp of crumbled feta, 1/4 cup of chopped Kalamata olives, and a pinch of dried oregano. Use red wine vinegar instead of lemon juice.
- Avocado Cream Dream (Mayo-Free): Mash one ripe avocado with the lemon juice and Dijon to replace the mayo. It’s luxuriously creamy and packed with good fats. Best eaten immediately.
- Sweet & Crunchy: Add 1/4 cup of finely chopped apple (like Honeycrisp or Granny Smith) and 2 tbsp of chopped toasted walnuts or almonds.
- Spicy Sriracha Kick: Add 1-2 teaspoons of Sriracha (or to taste) to the dressing for a sweet heat that’s utterly addictive.
Olivia’s Kitchen Notes & Stories
This recipe has been my loyal lunch companion for over a decade, and it’s evolved with me. In my college days, it was strictly tuna-from-a-pouch and pre-chopped celery, mixed in the same bowl I’d eat it from. These days, I might splurge on jarred tuna or add those fancy capers I have in the door of the fridge. The core, though, remains unchanged: simple, satisfying, soul-filling food.
A funny confession: I once accidentally used mango chutney instead of Dijon mustard in a sleepy morning haze. It was… interesting. Not terrible, but a stark reminder to always check the label before you dollop! The salad is forgiving, but even it has its limits. My biggest lesson? Don’t skip the chill time. It truly makes all the difference, transforming it from “mixed ingredients” to a cohesive, flavorful dish. It’s a recipe that asks for so little and gives back so, so much.
Your Questions, Answered!
Q: My salad sometimes turns out a bit wet/soggy. What am I doing wrong?
A: The usual culprit is insufficiently drained tuna or wet veggies! Be ruthless when draining the tuna. For the celery and onion, you can even pat them dry with a paper towel after dicing. Also, if you add salt directly to veggies, it draws out water—so it’s best to salt the final mixture.
Q: Can I make this ahead of time? How long does it last in the fridge?
A: Absolutely! In fact, I encourage it. The flavors get better. Store it in an airtight container in the refrigerator for up to 3 days. If making for meal prep, keep any bread/toast separate until just before eating to avoid sogginess.
Q: I’m not a mayo fan. What can I use instead?
A> No problem! Plain Greek yogurt is a fantastic, tangy substitute. For a dairy-free option, try a vegan mayo or the avocado mash variation I mentioned above. The texture will be slightly different but still delicious.
Q: What’s your foolproof method for hard-boiling eggs without that grey ring?
A> My sworn method is STEAMING! Put an inch of water in a pot, insert a steamer basket, bring to a boil. Add cold eggs, cover, and steam for 12 minutes for perfect fully-set yolks. Immediately transfer to an ice bath for at least 5 minutes. The shells peel easily and you get zero grey sulfide rings. Promise!
Classic Tuna Egg Salad (Creamy, Protein-Packed & Easy)
Description
The Humble Hero: Classic Tuna Egg Salad
Some recipes don’t need fireworks — they just quietly deliver every single time. This Tuna Egg Salad is creamy, crunchy, protein-packed comfort. It’s the lunch you make when you want something fast… but also genuinely satisfying.
Simple ingredients. Big flavor. Zero fuss.
Let’s make it.
Ingredients
-
2 (5 oz) cans tuna, drained very well
-
4 hard-boiled eggs, chopped
-
⅓ cup mayonnaise (adjust to taste)
-
1 tbsp Dijon mustard
-
1 tbsp fresh lemon juice
-
¼ cup celery, finely diced
-
2 tbsp red onion, finely minced
-
1 tbsp fresh parsley, chopped (optional)
-
Salt & black pepper, to taste
Instructions
1️⃣ Flake the Tuna
Add well-drained tuna to a bowl.
Use a fork to flake into even pieces.
(Pro tip: press out excess liquid — soggy tuna = soggy salad.)
2️⃣ Add the Texture
Gently fold in:
-
Chopped eggs
-
Celery
-
Red onion
Keep some egg texture — no aggressive mashing.
3️⃣ Make the Dressing
In a small bowl, mix:
-
Mayo
-
Dijon
-
Lemon juice
Stir until smooth.
4️⃣ Combine
Pour dressing over tuna mixture.
Fold gently until evenly coated.
5️⃣ Season & Chill
Add salt and black pepper to taste.
Cover and refrigerate 30 minutes (highly recommended).
This helps flavors meld and texture firm up.
Notes
Salad too wet?
Drain tuna thoroughly. Pat veggies dry.
Too bland?
Add a pinch more salt or a squeeze of lemon.
No mayo?
Use Greek yogurt or mashed avocado.
Nutritional Snapshot (Per Serving)
Please note: This is an estimate based on standard ingredients and will vary with specific brands and substitutions.
Servings: 4 | Prep Time: 15 mins | Chill Time: 30 mins (opt) | Total Time: 45 mins
Estimated per serving: Calories: 310 | Protein: 25g | Carbohydrates: 3g | Fat: 22g | Saturated Fat: 4g | Cholesterol: 220mg | Sodium: 480mg
Final Thoughts: A Little Bowl of Sunshine
And just like that, with a few simple stirs of a spoon, you’ve done it. You’ve turned humble pantry staples into a bowl of pure, golden comfort. As you take that first bite—whether it’s perched on a cracker, stuffed into a sandwich, or enjoyed straight from the bowl—I hope you taste more than just tuna and egg. I hope you taste the simplicity of a summer afternoon, the warmth of a grandmother’s kitchen, and the quiet satisfaction of making something truly good for yourself.
This salad is my little reminder that we don’t need a special occasion or a complicated recipe to create a moment of joy. Sometimes, the most profound meals are the ones we make on a random Tuesday, the ones that fuel a busy week, or the ones we throw together for a last-minute picnic in the park. It’s proof that a little bit of care—a squeeze of fresh lemon, a pinch of salt, a moment to let the flavors meld—can turn the ordinary into the extraordinary.
So here’s to the humble heroes of the kitchen. Here’s to Grandma’s checkered tablecloth, to lazy summer lunches, and to you, for keeping the tradition of real, honest food alive.
Now, I want to hear from you! Did this recipe bring back any food memories of your own? Did you try one of the fun twists, like the Mediterranean version or the Avocado Cream Dream? Drop a comment below and tell me all about it—I read every single one and they absolutely make my day. And if you snapped a photo of your beautiful creation, tag me on social media! There’s nothing I love more than seeing this little bowl of sunshine brightening your kitchen, too.

Easter Cake Pops (Cute & Easy Spring Party Treats)
Easter Cake Pops: Your New Favorite Spring Tradition
Hey there, friend! Come on in and grab an apron. Can you smell that? It’s the warm, sweet scent of vanilla cake baking in the oven, mixed with the faint, hopeful hint of spring flowers drifting through the window. There’s a certain magic in the air around Easter, isn’t there? It’s all about bright colors, playful shapes, and that wonderful feeling of sharing something homemade and joyful.
If the thought of elaborate Easter desserts makes you a little nervous, I’m right there with you. I’ve had my share of lopsided layer cakes and runny frosting. But what if I told you the cutest, most crowd-pleasing treat on your holiday table is also one of the simplest and most fun to make? Enter: Easter Cake Pops. These adorable, bite-sized bundles of joy are my secret weapon for spring celebrations. They’re perfect for parties, absolutely magical for kids (and kids-at-heart!), and they bring a smile to every face.
Today, I’m sharing my go-to, foolproof recipe for the most delightful Easter Cake Pops. We’re talking moist cake centers, a creamy binding hug of frosting, all dipped in a shiny pastel coat and dressed up as mini Easter eggs, little bunnies, or even cute chick faces. The best part? You don’t need to be a pastry chef. You just need a willingness to get your hands a little messy and have a whole lot of fun. So, let’s turn up the music, clear some counter space, and create something wonderfully sweet together.
The Messy Magic of First Attempts
My love affair with cake pops started not with a triumph, but with a hilarious, sticky disaster. Picture this: me, a decade ago, utterly determined to make “the most beautiful Easter treats ever” for my family gathering. I had watched the tutorials, bought all the supplies, and felt supremely confident. What could go wrong?
Well, everything. I didn’t chill the cake balls long enough. My first dip into the melted candy coating resulted in a cascade of cake crumbs turning the pastel pink into a murky, lumpy beige. Cake balls slid off sticks like they were on a water slide. My kitchen looked like a confectionery crime scene, and I was covered in chocolate. I nearly gave up. But then, my youngest niece peeked in. She pointed at a particularly lopsided, sprinkle-encrusted pop and gasped, “Auntie Liv, it’s a funny bunny! I love it!”
That was the moment it clicked. It wasn’t about perfection. It was about the laughter, the shared mess, and the pure joy of creating something together. We spent the next hour salvaging the “funny bunnies,” and they were the hit of the party. That’s the spirit I want to bring to your kitchen today. Embrace the quirks! A slightly crooked ear or an extra-thick coat of sprinkles just adds character. Let’s make some memories, not just cake pops.
Gathering Your Happy Ingredients
Here’s the beautiful part: you likely have most of this in your pantry already. This recipe is wonderfully forgiving and customizable. Here’s what you’ll need to make about 18-20 pops of happiness.
Cake Base
- 1 baked 9-inch cake (vanilla or chocolate), completely cooled: This is your blank canvas! I love using a simple vanilla box mix for ease and consistent texture—it crumbles perfectly. Bake it according to package directions and let it cool COMPLETELY. A warm cake will turn into mush. Feeling homemade? Your favorite from-scratch recipe works beautifully too.
- 1/2 cup frosting (store-bought or homemade): This is the “glue.” Cream cheese or vanilla frosting are my top picks for flavor. A pro tip: Start with 1/3 cup and add more as needed. You want the mixture to hold together when pinched, not be greasy. If you accidentally add too much frosting and the mix is sticky, a sprinkle of powdered sugar can help firm it up.
Coating & Decoration
- 12 oz white or pastel candy melts: Also called candy wafers, these are formulated to melt smoothly and set firm without tempering. They’re a cake pop lifesaver! You can find them in pastel colors for Easter. If you only have white, we can tint them (see below).
- Food coloring (if tinting white chocolate): Use oil-based food coloring only! Water-based (the standard liquid kind) will cause your chocolate to seize up into a grainy mess. Gel food coloring can sometimes work, but oil-based is the guaranteed safe bet.
- Sprinkles, sanding sugar, or drizzle icing: This is where personality shines! Pastel jimmies, flower-shaped sprinkles, or even pastel nonpareils are perfect. Have fun with it!
- Lollipop sticks: You can find these at any craft or baking store. Poke a test hole in your chilled cake ball with a stick before dipping to prevent cracking.
- Optional: Shredded coconut (for a nest look), mini candy eggs: For a super festive “bird’s nest” pop, roll the coated pop in toasted coconut and press in a few mini candy eggs while wet. Instant spring scene!
Let’s Make Some Magic: Step-by-Step
Okay, team. Let’s do this! Read through all the steps once, then put on your favorite playlist and dive in.
- Crumble & Combine: Take your completely cooled cake and crumble it into a large mixing bowl. You want fine, even crumbs—no big chunks. I use my fingers (so therapeutic!) but two forks work great. Now, add about half of your frosting. Use a spatula or your hands to mix it in. Keep adding frosting a spoonful at a time until the mixture holds together when you squeeze a bit in your palm. It should feel like soft, moldable dough, not like wet sand. Chef’s Hack: If you’re unsure, roll one test ball. If it holds its shape and doesn’t crack, you’re golden. If it’s crumbly, add a touch more frosting. If it’s sticky, you can add a tiny bit of powdered sugar.
- Roll & Chill (Part 1): Scoop out portions (about 1 tablespoon each) and roll them into smooth, tight balls. Place them on a parchment or wax paper-lined baking sheet. Once all rolled, pop the tray into the freezer for about 15 minutes. This short chill makes them firmer and easier to handle for the next step.
- Stick ‘Em Up: Melt a small amount of your candy melts (about 1/4 cup) in a microwave-safe bowl. Take your cake balls out of the freezer. Dip the tip of a lollipop stick about 1/2 inch into the melted candy, then immediately insert it straight into a cake ball, pushing it about 3/4 of the way through. The melted candy acts like edible cement, securing the stick so your cake ball doesn’t take a swim later. Place the pops back on the tray and transfer to the freezer for another 15-20 minutes. They should be firm but not frozen solid.
- Melt & Dip: While the pops chill, melt the rest of your candy melts. Do this slowly! Microwave in 30-second bursts, stirring vigorously between each, until completely smooth. If you’re tinting white candy melts, stir in the oil-based coloring now. Pour the melted candy into a tall, narrow cup or glass—this gives you the depth needed for a clean dip. Take a few cake pops out of the freezer at a time (keeping the rest cold). Holding the stick, dip the cake ball straight down into the coating until submerged. Gently lift it out and, without turning it upside down, tap your wrist lightly while rotating the stick to let the excess coating drip off. Biggest Tip Here: Patience with the tapping! Too much coating = heavy pops that can slide off the stick. A thinner coat sets better and looks more professional.
- Decorate & Set: This is the fun, fast part! Immediately after dipping, while the coating is still wet, add your sprinkles or decorations. If you’re doing a drizzle, let the base coat dry completely first. To dry, stand the pops upright. I use a block of styrofoam, but an upside-down egg carton or a box with holes poked in it works perfectly. Let them set at room temperature until the coating is completely hard. Do not refrigerate to set, as this can cause condensation and make the coating sticky.
Presenting Your Masterpieces
Displaying these cuties is half the fun! Stick them in a vase filled with pastel Easter grass or granulated sugar for a stunning centerpiece. For a party favor, let each pop dry, then wrap them individually in clear cellophane bags tied with a pretty ribbon. Arrange them on a cake stand layered with more sprinkles or edible flowers for your dessert table. They’re not just a treat; they’re part of the decoration!
Mix It Up! Fun Variations
- Carrot Cake Pops: Use carrot cake and cream cheese frosting! Add a pinch of cinnamon to the cake crumbs. Coat in orange candy melts and use green icing to pipe little carrot tops on top.
- Bunny Butt Pops: Shape the cake ball into a slight oval. After dipping in white coating, immediately attach a pink candy melt for the foot pad and two white candy melts for the bunny feet. Use a dab of icing to add tiny edible pearl sprinkles for toes.
- Chick Pops: Coat in yellow candy melts. Before it sets, add two mini chocolate chips for eyes and an orange sprinkle or piece of candy for the beak. So sweet!
- “Dirt” Nest Pops: Use chocolate cake and frosting. Coat in chocolate, then immediately roll in crushed chocolate cookie crumbs (the “dirt”). Press in a few jelly bean “eggs.”
- Gluten-Free/Dairy-Free: Use your favorite GF cake mix and frosting. Ensure your candy melts are dairy-free (many are!), or use a dairy-free chocolate bar chopped finely and mixed with a teaspoon of coconut oil for dipping.
Olivia’s Chef Notes & Kitchen Confessions
This recipe has evolved from that first sticky disaster into my reliable happy-place project. I now deliberately make a double batch of cake so I can freeze half the un-dipped cake balls for a future “I need a treat NOW” moment—they keep for months! My biggest evolution? I stopped aiming for bakery-perfect and started aiming for joy-perfect. The pop that got a little extra sprinkle love from my nephew is my favorite one.
A funny story: Last year, I was so focused on documenting the process for the blog that I accidentally used an entire jar of sprinkles on one pop. It looked like a glitter bomb exploded on it. We named it “The Party Animal” and gave it pride of place. It was the first one eaten. The moral? Don’t sweat the small stuff. The love and fun you bake into them are the most important ingredients. Now, go make a beautiful, happy mess!
Your Questions, Answered!
Q: My cake balls keep cracking when I dip them! What am I doing wrong?
A: This is usually a temperature issue. If the cake ball is too cold (frozen solid) and the coating is too hot, the thermal shock causes cracks. Let your frozen cake balls sit at room temp for 5 minutes before dipping. Also, ensure your coating isn’t too hot—it should be fluid but just warm to the touch.
Q: Why is my coating so thick and clumpy?
A: Candy melts can seize if overheated or if a tiny bit of water gets in. Always melt slowly and use completely dry tools. If it’s thick, you can add a teaspoon of solid vegetable shortening or paramount crystals (made for this purpose) to thin it to a dipping consistency. Do not add butter or milk.
Q: Can I make these ahead of time?
A> Absolutely! Undipped cake balls can be frozen for up to 2 months. Fully finished cake pops are best eaten within 3-4 days. Store them in a single layer in an airtight container at cool room temperature. Avoid the fridge due to humidity.
Q: My cake pops keep falling off the stick! Help!
A> Two key reasons: 1) You didn’t use the “glue” step of dipping the stick in melted coating first. 2) The cake ball is too heavy from too much frosting or too thick a coating. Next time, use less frosting and tap off more excess coating. You can also try inserting the stick at a slight upward angle, which can provide more support.

Easter Cake Pops (Cute & Easy Spring Party Treats)
Description
Easter Cake Pops
Your New Favorite Spring Tradition
If spring had a dessert mascot, it would absolutely be these Easter Cake Pops. They’re colorful, joyful, perfectly portioned, and secretly one of the easiest “wow” desserts you can make.
Moist cake + creamy frosting + a pastel candy shell = pure Easter magic.
And the best part? Perfection is not required. Personality is encouraged.
Ingredients
Cake Base
-
1 baked 9-inch cake (vanilla or chocolate), completely cooled
-
⅓–½ cup frosting (vanilla or cream cheese work beautifully)
Coating & Decorating
-
12 oz candy melts (white or pastel colors)
-
Oil-based food coloring (if tinting white melts)
-
Sprinkles, sanding sugar, or drizzle icing
-
Lollipop sticks
Optional:
-
Shredded coconut (for nest pops)
-
Mini candy eggs
-
Mini chocolate chips (for chick faces)
Instructions
1️⃣ Crumble & Mix
Crumble cooled cake into fine crumbs in a large bowl.
Add frosting gradually (start with ⅓ cup).
Mix until it holds together when squeezed — like soft dough, not sticky paste.
Test: Roll one ball. If it cracks → add a bit more frosting.
If it’s greasy/sticky → add a spoonful of powdered sugar.
2️⃣ Roll & Chill (Round 1)
Roll into 1-tablespoon-sized balls.
Place on parchment-lined tray.
Freeze 15 minutes (firm, not rock solid).
3️⃣ Secure the Sticks
Melt a small amount of candy melts.
Dip stick tip about ½ inch into melted candy.
Insert into cake ball (¾ of the way in).
Return to freezer 15–20 minutes.
This step prevents “cake pop collapse.”
4️⃣ Melt & Dip
Melt remaining candy melts slowly in microwave:
-
30-second intervals
-
Stir between each
Pour into a tall cup for easy dipping.
Remove a few pops at a time from freezer.
Dip straight down, fully submerge.
Lift and gently tap wrist while rotating to remove excess coating.
Thin coat = better hold.
5️⃣ Decorate Immediately
While coating is wet:
-
Add sprinkles
-
Attach decorations
-
Roll in coconut
Let dry standing upright in:
-
Styrofoam block
-
Upside-down egg carton
-
Box with holes poked in it
Let set at room temperature (avoid fridge to prevent condensation).
Notes
Cracking coating?
Cake balls too cold. Let sit 5 minutes before dipping.
Coating too thick?
Add 1 teaspoon vegetable shortening.
Never add water.
Pops falling off stick?
Always use the melted candy “glue” step.
Avoid too much frosting or overly thick coating.
A Quick Nutritional Note
Let’s be real—these are a celebratory treat! While they’re portion-controlled (one pop is plenty sweet), here’s a general idea per cake pop (approximate): Calories: 170, Protein: 2g, Carbohydrates: 24g, Fat: 7g. The joy and memories you create while making them, however, are calorie-free and infinitely enriching.
Final Thoughts
As you stand back and admire your tray of finished Easter cake pops—a cheerful army of pastel eggs, winking chicks, and maybe a few “party animals” covered in an avalanche of sprinkles—I hope you feel what I feel every time I make them: pure, unfiltered joy.
These little treats have taught me something important over the years. Perfection is overrated. Connection is everything. That first disastrous attempt a decade ago, the one that left me covered in melted candy and questioning my life choices? It became my favorite baking memory precisely because it was imperfect. It brought my niece into the kitchen. It turned a solo project into a shared laugh. It reminded me that the best recipes aren’t just about the food—they’re about the moments they create.
So as you package these up for an Easter egg hunt, arrange them on a platter for Sunday dinner, or simply sneak one off the tray before anyone else sees (I won’t tell), know that you’ve done something special. You’ve taken simple ingredients—cake, frosting, a little color—and turned them into edible happiness. You’ve continued a tradition of making things with your hands and sharing them with people you love.
And here’s the beautiful secret: now that you know how easy they are, you’ll start seeing cake pops everywhere. Birthdays. Baby showers. Random Tuesday afternoons when you need a creative pick-me-up. The method stays the same; only the decorations change. You’ve just added a genuinely useful skill to your kitchen repertoire.
Thank you for spending this time with me today. For trusting my recipe, reading my stories, and bringing a little spring sweetness into your home. Now go ahead—pick up the wonkiest cake pop on the tray, the one with the slightly crooked eyes or the extra-heavy sprinkle situation. Take a bite. Taste the love, the laughter, and the beautiful mess of making something yourself.
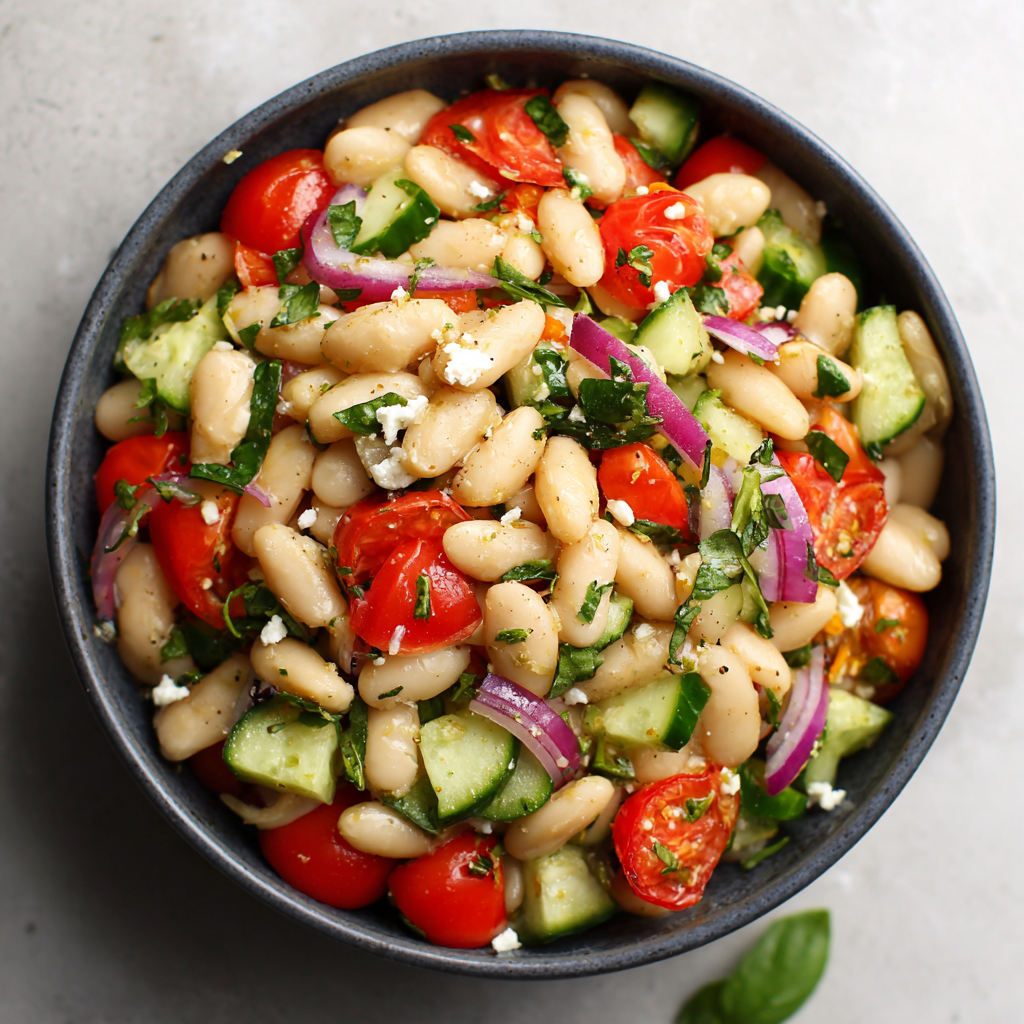
Mediterranean White Bean Salad (Fresh, Protein-Packed & Easy)
The Salad That Sparked a Thousand Dinners: My Go-To Mediterranean Marvel
Hey there, friend! Come on in, grab an apron, and pull up a stool. Can you smell that? It’s the bright, sun-drenched scent of lemon and fresh herbs, and it’s whispering promises of a meal that’s both effortless and spectacularly delicious. If your weeknights are begging for a hero, or your lunchbox is tired of the same sad sandwich, I have just the thing for you.
Today, we’re diving fork-first into my absolute Mediterranean White Bean Salad. This isn’t just a “salad.” This is a celebration in a bowl. We’re talking creamy, protein-packed white beans, juicy cherry tomatoes that burst with sweetness, and a confetti of crisp veggies, all doing a happy dance in a garlicky lemon vinaigrette. It’s the kind of recipe that proves “healthy” and “deeply satisfying” aren’t just compatible—they’re best friends.
I make this salad almost weekly, and for good reason. It’s my culinary Swiss Army knife. Need a stunning side for grilled chicken? Done. A robust, make-ahead lunch that actually excites you at noon? You got it. A no-cook dinner that feels like a hug after a long day? Absolutely. It comes together faster than you can scroll through takeout menus, and it’s packed with flavors that sing. So, let’s turn those simple cans and fresh finds into something unforgettable. Trust me, this is about to become your new kitchen anthem.
A Sunlit Table & The Salad That Started It All
This recipe takes me straight back to a hazy, golden afternoon on my aunt’s terrace in Sicily. I was maybe fourteen, jet-lagged but wide-eyed, watching a whirlwind of aunts and cousins prepare a lunch that seemed to materialize from the garden itself. There was no recipe card, just hands flying—chopping tomatoes, tearing basil, glugging glorious green olive oil from a dusty bottle.
At the center of it all was a huge, rough-hewn ceramic bowl filled with what I now know as this salad. Back then, it was just magic. I remember the clink of the spoon as my cousin mixed it, the way the beans soaked up the lemon and oil, and the sheer, uncomplicated joy of eating it with thick slices of crusty bread, mopping up every last bit. That meal wasn’t about fancy techniques; it was about abundance, community, and the profound truth that the best food often comes from the humblest ingredients, prepared with love. Every time I make this salad, I’m trying to capture a little bit of that sunlit-table feeling and bring it right to your kitchen.
Gathering Your Sunshine: Ingredients & Chef Insights
Here’s your shopping list for joy! I’ve added my little chef notes because knowing the why behind an ingredient makes you a more confident, creative cook.
- 2 (15 oz) cans white beans (cannellini or great northern): Our creamy, protein-packed base. Chef’s Insight: Cannellini are slightly larger and creamier, while Great Northern are a bit firmer. Both are fantastic. Draining and rinsing is non-negotiable—it washes away the starchy canning liquid and gives you a cleaner, fresher flavor and better texture.
- 1 cup cherry tomatoes, halved: Little bursts of juicy sweetness. Chef’s Tip: If you have the time, halve them and let them sit on a paper towel for 10 minutes. This draws out a tiny bit of excess moisture, preventing a watery salad.
- 1/2 cup diced cucumber: For that essential cool, crisp crunch. Substitution Tip: English or Persian cucumbers have fewer seeds and thinner skin, so you don’t need to peel them. If using a regular cucumber, I’d recommend seeding and peeling for the best texture.
- 1/4 cup finely diced red onion: Provides a sharp, peppery kick. Chef’s Hack: To mellow that raw onion bite, soak the diced pieces in a small bowl of ice water for 10 minutes. Drain and pat dry—it works wonders!
- 1/4 cup chopped fresh parsley: The fresh, grassy backbone of the herb flavor. Don’t skip it! Flat-leaf (Italian) parsley has a smoother flavor than curly.
- 2 tablespoons chopped fresh basil (optional but highly encouraged): This is the aromatic sunshine. If you have it, add it! It brings a whole new layer of fragrant, sweet herbiness.
- 2 tablespoons extra virgin olive oil: The soul of the dressing. Use the best you can afford for this, as its flavor shines. This is not the time for light olive oil.
- Juice of 1 lemon: Our bright, tangy catalyst. Chef’s Insight: Always zest the lemon first before juicing it! A teaspoon of fine lemon zest whisked into the dressing adds an incredible perfume.
- 1/2 teaspoon salt (or to taste) & 1/4 teaspoon black pepper: Seasoning superheroes. We’ll start here and always adjust at the end.
- 1 small clove garlic, minced (my secret add-in!): Not in the original brief, but I add it 99% of the time. A tiny bit of raw garlic in the dressing adds a pungent depth that is *chef’s kiss*.
- Optional: 1/4 cup crumbled feta cheese: For a salty, tangy, creamy finish. Dairy-free? A handful of pitted, chopped Kalamata olives are a brilliant swap.
Let’s Build Some Flavor: Your Step-by-Step Roadmap
Ready? Let’s turn these beautiful ingredients into your new favorite meal. Follow these steps, and you really can’t go wrong.
- Prep Your Beans: Drain those cans of beans into a colander and give them a thorough rinse under cold water. This washes away the cloudy canning liquid and any excess sodium. Let them drain well, then gently pat them dry with a clean kitchen towel or paper towels. Why? Dry beans mean your dressing will cling to them beautifully instead of sliding off into a puddle at the bottom of the bowl.
- Chop & Combine the Veggies: While the beans drain, halve your tomatoes, dice the cucumber, and finely dice the red onion (remember that ice water bath if you want a milder bite!). Chop your parsley and basil. Add all of these, along with the now-dry beans, to a large, spacious mixing bowl. Chef’s Tip: Use a bowl bigger than you think you need. This gives you room to toss everything together gently without making a mess.
- Whisk the Magic Dressing: In a small bowl or jar, combine the extra virgin olive oil, lemon juice (and zest, if using!), minced garlic, salt, and pepper. Whisk vigorously until the mixture looks creamy and emulsified, or shake the jar like you’re making a cocktail. Little Hack: Taste your dressing on a piece of bean or lettuce. It should taste vibrant and a bit too strong on its own—that’s perfect! It will mellow and season the whole salad perfectly.
- The Grand Toss: Pour your vibrant dressing over the bean and vegetable mixture. Now, using a large spoon or your hands (the best tools!), toss everything together with a gentle folding motion. You want every bean and veggie piece to get lightly kissed by the dressing, not smashed or bruised.
- The Finishing Touch & The Patient Wait: If you’re using feta or olives, fold them in now. Here’s the most important step: Walk away. Let the salad sit at room temperature for 15-20 minutes before serving. Why this matters: This resting time is when the alchemy happens. The beans drink in the lemony dressing, the flavors marry and deepen, and the whole salad transforms from a collection of parts into a harmonious, incredible dish.
How to Serve Your Masterpiece
This salad is a star in any setting! For a stunning presentation, spoon it into a wide, shallow bowl. Garnish with an extra sprinkle of fresh herbs and a tiny drizzle of olive oil. It’s fabulous all on its own with some warm, crusty bread for dipping. For a heartier meal, serve it over a bed of peppery arugula, alongside grilled shrimp or salmon, or stuffed into a pita pocket with a swipe of hummus. It’s also the ultimate potluck champion—it travels beautifully and everyone always asks for the recipe.
Make It Your Own: Delicious Twists & Swaps
- The Italian Stallion: Add 1/4 cup of chopped pepperoncini and a tablespoon of their brine to the dressing. Swap basil for oregano, and add some diced salami or prosciutto.
- Greens & Grains: Bulk it up by mixing in 2 cups of cooked quinoa, farro, or couscous. It becomes a complete, packable meal.
- Vegan Feta Fix: Skip the dairy and use a vegan feta alternative, or add creamy richness with 1/2 an avocado, diced, right before serving.
- Herb Garden Explosion: Use whatever fresh herbs you have! Dill, mint, chives, or tarragon would all be divine additions or substitutions.
- Spicy & Smoky: Add a pinch of red pepper flakes to the dressing and garnish with chopped, oil-packed sun-dried tomatoes for a deep, smoky note.
Olivia’s Kitchen Notebook
This recipe has been my faithful companion for years, and it’s evolved with me. I once made a triple batch for a beach picnic and forgot the lemon juice at home. Desperate, I used the lime wedges meant for our drinks—and a new favorite variation was born! The beauty of this salad is its flexibility. It forgives mistakes and invites play. Don’t have parsley? Use more basil. Out of red onion? A finely sliced shallot is gorgeous. The first time I made it, I was so impatient I ate it immediately and wondered why it tasted “good, but not amazing.” I learned the hard way that the resting time is NOT a suggestion—it’s the secret ingredient. Now, I use those 20 minutes to set the table, pour a drink, and relax, knowing the salad is getting better with every passing second.
Your Questions, Answered!
Q: My salad turned out a bit watery. What happened?
A: This usually comes from excess moisture on the beans or veggies. Be diligent about patting the rinsed beans dry, and consider salting the tomatoes and cucumbers lightly and letting them drain in a colander for 10 minutes before adding them to the bowl. Also, don’t skip the resting time—the beans will absorb some of the dressing, tightening everything up.
Q: Can I make this ahead of time for meal prep?
A: Absolutely! It’s a meal prep dream. Store it in an airtight container in the fridge for up to 4 days. The flavors get even better! If possible, add delicate herbs like fresh basil right before eating. The beans may soak up the dressing, so have a little extra lemon juice and olive oil on hand to refresh it.
Q: The flavors taste flat. How can I fix it?
A: This almost always needs a hit of acid and salt at the end. Squeeze a little more fresh lemon juice over the top and add another pinch of flaky sea salt. Taste and adjust. Brightness is key!
Q: Can I use dry beans instead of canned?
A> Of course! Cook 1 cup of dry white beans according to package directions until tender but not mushy (usually 1.5 to 2 hours). You’ll end up with about 3 cups cooked beans. This is a fantastic, cost-effective option and lets you control the texture perfectly.
Mediterranean White Bean Salad (Fresh, Protein-Packed & Easy)
Description
Hey friend — if your kitchen needs something bright, fresh, and wildly satisfying (without turning on the oven), this is it. This Mediterranean White Bean Salad is creamy, zesty, herb-packed, and ready in about 25 minutes. It’s the kind of recipe that quietly becomes a weekly habit.
Ingredients
For the Salad
-
2 (15 oz) cans white beans (cannellini or great northern), drained and rinsed
-
1 cup cherry tomatoes, halved
-
½ cup diced cucumber
-
¼ cup finely diced red onion
-
¼ cup chopped fresh parsley
-
2 tbsp chopped fresh basil (optional but lovely)
-
¼ cup crumbled feta (optional)
For the Lemon Vinaigrette
-
2 tbsp extra virgin olive oil
-
Juice of 1 lemon
-
1 tsp lemon zest (optional but recommended)
-
1 small clove garlic, minced
-
½ tsp salt (to taste)
-
¼ tsp black pepper
Instructions
1️⃣ Prep the Beans
Drain and rinse the beans thoroughly.
Pat dry with paper towels — this helps the dressing cling instead of pooling.
2️⃣ Chop & Combine
In a large mixing bowl, combine:
-
Beans
-
Tomatoes
-
Cucumber
-
Red onion
-
Parsley
-
Basil (if using)
3️⃣ Make the Dressing
In a small bowl or jar, whisk together:
-
Olive oil
-
Lemon juice
-
Lemon zest
-
Garlic
-
Salt & pepper
Whisk until lightly creamy and emulsified.
Taste — it should be bright and slightly punchy.
4️⃣ Toss Gently
Pour dressing over salad.
Fold gently until everything is evenly coated.
If using feta, fold it in last.
5️⃣ Let It Rest (Important!)
Let the salad sit at room temperature for 15–20 minutes before serving.
This allows the beans to absorb the dressing and the flavors to deepen beautifully.
Notes
Italian Style: Add chopped pepperoncini + oregano.
Grain Boost: Stir in cooked quinoa, farro, or couscous.
Vegan Swap: Skip feta and add olives or diced avocado.
Herb Explosion: Try dill, mint, or chives.
Spicy Kick: Add red pepper flakes or sun-dried tomatoes.
Nutritional Notes (Per Serving, without feta)
This salad is as nourishing as it is delicious! One generous serving packs about 230 calories, a solid 10g of plant-based protein from the beans, and 8g of fiber to keep you feeling full and satisfied. It’s a fantastic source of vitamins from all those fresh veggies and heart-healthy fats from the olive oil. It’s naturally gluten-free and easily made vegan.
Prep Time: 10 minutes | Rest Time: 15 minutes | Total Time: 25 minutes | Yield: 4 servings
Final Thoughts
The Salad That Sparked a Thousand Dinners: My Go-To Mediterranean Marvel
Hey there, friend! Come on in, grab an apron, and pull up a stool. Can you smell that? It’s the bright, sun-drenched scent of lemon and fresh herbs, and it’s whispering promises of a meal that’s both effortless and spectacularly delicious. If your weeknights are begging for a hero, or your lunchbox is tired of the same sad sandwich, I have just the thing for you.
Today, we’re diving fork-first into my absolute Mediterranean White Bean Salad. This isn’t just a “salad.” This is a celebration in a bowl. We’re talking creamy, protein-packed white beans, juicy cherry tomatoes that burst with sweetness, and a confetti of crisp veggies, all doing a happy dance in a garlicky lemon vinaigrette. It’s the kind of recipe that proves “healthy” and “deeply satisfying” aren’t just compatible—they’re best friends.
I make this salad almost weekly, and for good reason. It’s my culinary Swiss Army knife. Need a stunning side for grilled chicken? Done. A robust, make-ahead lunch that actually excites you at noon? You got it. A no-cook dinner that feels like a hug after a long day? Absolutely. It comes together faster than you can scroll through takeout menus, and it’s packed with flavors that sing. So, let’s turn those simple cans and fresh finds into something unforgettable. Trust me, this is about to become your new kitchen anthem.
“`
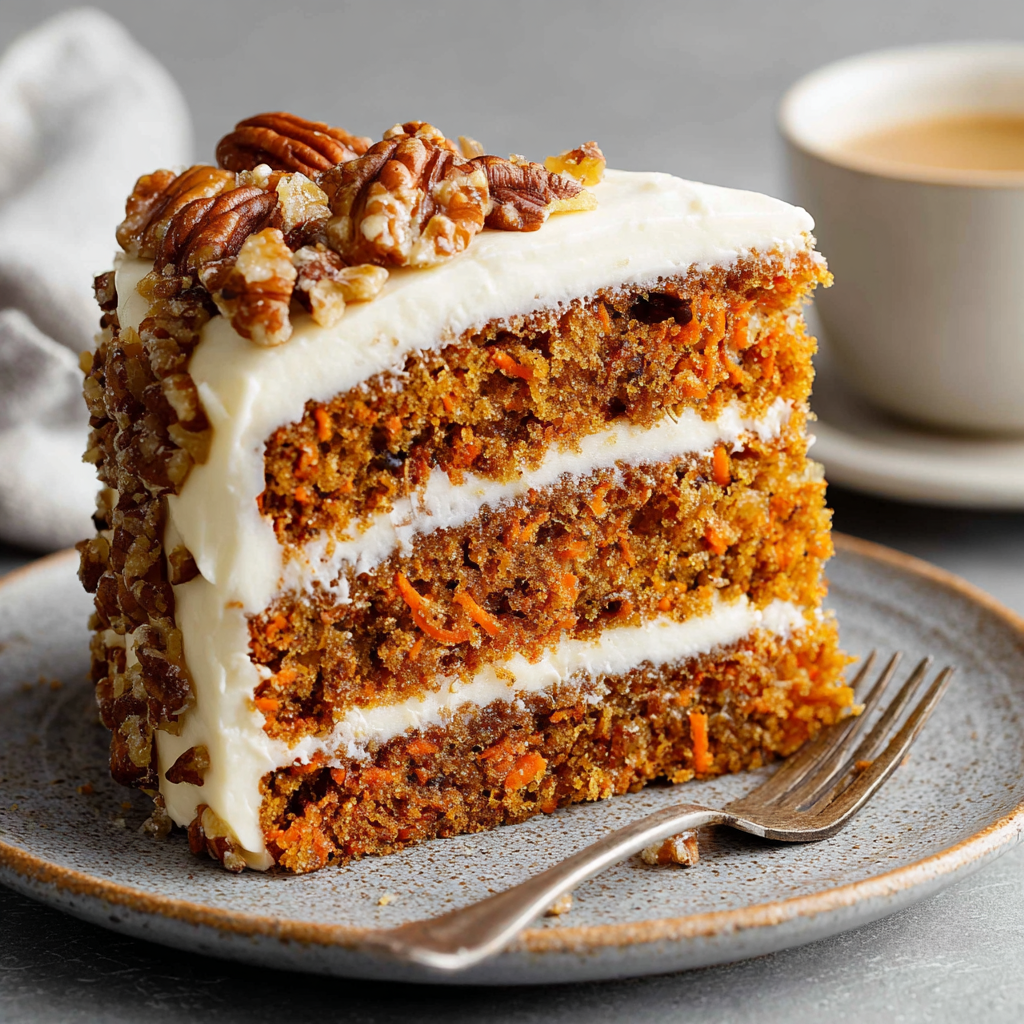
The BEST Carrot Cake Recipe – Ultra Moist with Cream Cheese Frosting
Welcome to My Kitchen Table: Let’s Bake Magic!
Hey there, friend! Come on in, grab an apron, and let’s get a little flour on our hands. There’s something almost magical about the moment a carrot cake comes out of the oven, isn’t there? That warm, cinnamon-spiced aroma that fills every corner of your home, promising something cozy and spectacular is on the way. It’s the smell of celebration, of family gathered around the table, of pure, simple joy. And today, we’re making the absolute BEST version of that classic.
This isn’t just any carrot cake. This is the ultra-moist, incredibly tender, perfectly spiced masterpiece that has become my most requested recipe for every birthday, potluck, and “just because” Tuesday. It’s the cake that turns carrot cake skeptics into believers and has friends begging for the recipe. What’s the secret? It’s all about balance: the right blend of warm spices, the hidden hint of pineapple for unbelievable moisture, and a cloud of dreamy, tangy cream cheese frosting that’s so good you’ll want to eat it with a spoon (no judgment here!).
I promise you, you don’t need to be a professional baker to pull this off. We’re going to walk through every step together, with all my favorite chef hacks and reassuring tips. By the end, you’ll have a show-stopping, heart-warming cake that proves the best things in life really are homemade. Ready to bake something unforgettable? Let’s do this!
The Cake That Stole the Show (and My Heart)
This cake has a history in my kitchen. It all started years ago, before this blog was even a twinkle in my eye. I was tasked with bringing dessert to my future in-laws’ Easter dinner for the very first time. Talk about pressure! I wanted to make something impressive but homey, special but not fussy. I landed on carrot cake, tweaking my grandmother’s old recipe, adding a bit of this, a pinch of that, crossing my fingers the whole time.
I’ll never forget carrying that cake, with its slightly wobbly frosting swirls, into their house. The moment it was sliced, the conversation just… stopped. Then came the “Mmmms,” the “Oh my goodness,” and my now father-in-law asking for a second slice before he’d even finished his first. That cake did all the talking for me. It said, “I care,” and “I’m happy to be here,” without me having to utter a word. It became our tradition, the non-negotiable centerpiece of every spring gathering. It taught me that food is more than fuel; it’s a language of love, a creator of memories. Every time I bake it, I’m back at that table, surrounded by laughter and the people I love most.
Gathering Your Flavor Friends
Here’s where the magic begins! Let’s meet our ingredients. I like to think of them as a team of flavor friends, each playing a crucial role. Using quality ingredients makes a difference, but I’ve also got plenty of swaps if you need them!
For the Carrot Cake:
- 2 cups all-purpose flour: The trusty foundation. For a slightly denser, nuttier cake, you can swap 1 cup for whole wheat pastry flour.
- 2 tsp baking powder & 1 tsp baking soda: Our leavening dream team. They work together to give this dense batter a beautiful, tender rise. Make sure they’re fresh for the best lift!
- 1½ tsp ground cinnamon & ¼ tsp ground nutmeg: The warm, cozy soul of the cake. I adore cinnamon, so I’m generous with it. For a more complex spice profile, add a tiny pinch of ground ginger or cloves.
- ½ tsp salt: The flavor enhancer! It makes all the sweet and spicy notes sing louder. Never skip it.
- 1 cup vegetable oil: The key to ultra-moist cake. Oil creates a more tender crumb than butter. I use a neutral oil like canola or grapeseed. Melted coconut oil works too for a subtle hint of flavor.
- 1 cup brown sugar & ½ cup granulated sugar: Brown sugar adds deep molasses notes and extra moisture, while white sugar gives structure and sweetness. For a deeper flavor, use all brown sugar!
- 4 large eggs: Our binders and builders. They provide structure and richness. Bring them to room temperature so they incorporate smoothly.
- 2 tsp vanilla extract: The aromatic glue that ties everything together. Use the real stuff if you can!
- 2 cups finely grated carrots: The star! Use the small holes on your box grater. Pre-shredded bagged carrots are too thick and dry—fresh is best here.
- ½ cup crushed pineapple, well drained (optional but HIGHLY recommended): My secret weapon! It adds incredible moisture and a subtle sweetness that no one can quite place. It’s the reason this cake stays soft for days. Squeeze it in a clean towel to remove excess juice.
- ½ cup chopped pecans or walnuts (optional): For lovely texture and a toasty flavor. I like to toast them lightly in a dry pan first for maximum impact.
For the Cream Cheese Frosting:
- 8 oz (one block) full-fat cream cheese, softened: Full-fat is non-negotiable for the perfect creamy, stable texture. Low-fat will make your frosting runny.
- ½ cup unsalted butter, softened: Butter adds structure and a luxurious richness. Unsalted lets you control the salt level.
- 2½–3 cups powdered sugar: We start with 2.5 cups and add more as needed for desired sweetness and thickness. Sift it to avoid lumps!
- 1 tsp vanilla extract: A must for rounding out the flavor.
- Pinch of salt: This cuts the sweetness and makes the frosting taste more complex. Trust me.
Let’s Bake: Step-by-Step with Chef Olivia
Okay, team! Preheat that oven to 350°F (175°C). Grease two 9-inch round cake pans with butter or non-stick spray, then line the bottoms with parchment paper circles. This guarantees a flawless release every single time—no cake left behind!
- Mix the Dry Team. In a medium bowl, whisk together the flour, baking powder, baking soda, cinnamon, nutmeg, and salt. Whisking by hand (instead of just stirring) aerates the flour and ensures the leaveners are evenly distributed. No one wants a bite with all the baking soda! Set this bowl aside.
- Create the Wet Mixture. In a large mixing bowl, combine the vegetable oil, brown sugar, and granulated sugar. Whisk them vigorously for a good minute. You’re not just mixing; you’re helping the sugar start to dissolve into the oil. Add the eggs one at a time, whisking well after each addition until the mixture is smooth and slightly paler. Stir in the vanilla. See how it’s already looking glossy and promising?
- Incorporate the Carrots & Pineapple. Switch to a sturdy spatula. Fold in the finely grated carrots and the well-drained crushed pineapple. The batter will become more colorful and vibrant immediately!
- Combine Wet & Dry. Add the dry ingredients to the wet mixture in two or three additions. Gently fold with your spatula until just combined and you see no more dry flour streaks. Do not overmix! Overworking the flour develops gluten, which leads to a tough cake. A few small lumps are perfectly fine. If using nuts, fold them in now.
- Bake to Perfection. Divide the batter evenly between your prepared pans. I like to use a kitchen scale for precision, but eyeballing it works too. Smooth the tops. Bake for 30-35 minutes. The cakes are done when they spring back lightly when touched in the center, and a toothpick inserted comes out clean or with just a few moist crumbs. Chef’s Hack: Rotate the pans halfway through baking for even browning.
- The Critical Cool-Down. Let the cakes cool in their pans on a wire rack for 15 minutes. Then, run a knife around the edges, invert them onto the rack, peel off the parchment, and let them cool completely. I mean it—completely cold! Attempting to frost a warm cake is a recipe for frosting meltdown (literally).
- Make the Dreamy Frosting. While the cakes cool, beat the softened cream cheese and butter together in a large bowl with an electric mixer (or a stand mixer fitted with the paddle) until completely smooth, creamy, and lump-free. Gradually add 2.5 cups of sifted powdered sugar, beating on low at first to avoid a sugar cloud, then on medium until incorporated. Add the vanilla and pinch of salt. Beat on medium-high for 1-2 minutes until light and fluffy. Add more powdered sugar if you want a stiffer frosting for piping.
- Frost & Decorate. Place one cake layer on your serving plate. Spread a generous, even layer of frosting over the top. Carefully place the second layer on top. Apply a thin “crumb coat” of frosting over the entire cake to seal in crumbs, then chill for 15 minutes. This step is a game-changer for a clean, professional look! Finally, pile on the remaining frosting and swirl it beautifully with an offset spatula or the back of a spoon. For a rustic look, I love leaving the sides slightly exposed.
- The Final Wait (The Hardest Part!). For the cleanest slices, pop the frosted cake in the fridge for at least 30-60 minutes to let the frosting set. Then, slice, serve, and prepare for the compliments!
How to Serve Your Masterpiece
Presentation is part of the fun! I love placing this cake on a simple cake stand to give it the spotlight it deserves. For serving, a warm cup of coffee or a glass of cold milk are its perfect partners. Garnish is optional but pretty: a ring of extra toasted chopped nuts around the top edge, a few delicate carrot curls made with a peeler, or even a light sprinkle of cinnamon. Remember, the beauty is in its homemade charm—imperfect swirls have more character!
Make It Your Own: Creative Twists
- Add-In Adventure: Fold in ½ cup of raisins, dried cranberries, or even shredded coconut along with the nuts.
- Spice It Up: Add ¼ tsp of ground ginger and a pinch of cardamom to the dry ingredients for a more complex spice profile.
- Muffin Mode: Turn these into incredible carrot cake muffins! Divide batter into lined muffin tins and bake for 18-22 minutes. Frost with a dollop of cream cheese frosting or a simple glaze.
- Gluten-Free: Swap the all-purpose flour for a 1:1 gluten-free baking blend. The pineapple and oil will help keep it moist.
- Dairy-Free Frosting: Use vegan cream cheese and plant-based butter sticks (the kind made for baking) for a delicious dairy-free frosting option.
Olivia’s Notebook: Extra Thoughts & Stories
This recipe is a living thing in my kitchen! Over the years, the pineapple became a permanent resident after I discovered its moisture-locking powers. I’ve also learned that grating the carrots myself, even though it’s an extra step, makes a huge difference in texture. One funny fail? I once accidentally used salted butter in the frosting and forgot to omit the added salt. It was… aggressively salty. We scraped it off and started over, laughing the whole time. It’s a good reminder that even kitchen mishaps make for the best stories. This cake also tastes even better on day two, as the flavors fully meld. If you can resist, bake it a day ahead—it’s the ultimate make-ahead dessert!
Your Questions, Answered!
Q: My cake is dense and didn’t rise much. What happened?
A: The most common culprits are old baking powder/soda (check the expiration date!), overmixing the batter (stop as soon as the flour disappears), or incorrectly measuring the flour. Spoon flour into your measuring cup and level it off; don’t scoop directly from the bag.
Q: Why is my cream cheese frosting runny or soupy?
A> This usually means the cream cheese and/or butter were too warm, or you used low-fat cream cheese. Everything must be properly softened (cool to the touch, not warm and melty) and full-fat. If it’s runny, chill the whole bowl in the fridge for 20 minutes, then re-whip. You can also add a bit more sifted powdered sugar to thicken it.
Q: Can I make this as a sheet cake or cupcakes?
A> Absolutely! For a 9×13 sheet pan, bake for 35-40 minutes. For cupcakes, fill liners 2/3 full and bake for 18-22 minutes. The recipe makes about 24 cupcakes.
Q: How do I store this cake, and how long does it last?
A> Because of the cream cheese frosting, it must be refrigerated. Store it in an airtight container or cake carrier in the fridge for up to 5 days. Let slices come to room temperature for 20 minutes before serving for the best texture and flavor.
The BEST Carrot Cake Recipe – Ultra Moist with Cream Cheese Frosting
Description
Welcome to the coziest corner of the kitchen! If there’s one cake that feels like a warm hug wrapped in cinnamon and topped with clouds of tangy sweetness, it’s carrot cake. This version is ultra-moist, perfectly spiced, and layered with dreamy cream cheese frosting — the kind that makes people close their eyes on the first bite.
Instructions
1️⃣ Prep
Preheat oven to 350°F (175°C).
Grease and line two 9-inch round cake pans with parchment paper.
2️⃣ Mix Dry Ingredients
Whisk together flour, baking powder, baking soda, cinnamon, nutmeg, and salt. Set aside.
3️⃣ Mix Wet Ingredients
In a large bowl, whisk oil, brown sugar, and granulated sugar until well combined.
Add eggs one at a time, mixing well after each.
Stir in vanilla extract.
4️⃣ Add Carrots & Pineapple
Fold in grated carrots and well-drained pineapple.
5️⃣ Combine
Add dry ingredients in 2–3 additions, folding gently until just combined.
Do not overmix.
Fold in nuts if using.
6️⃣ Bake
Divide batter evenly between pans.
Bake 30–35 minutes, until:
-
A toothpick comes out clean or with a few moist crumbs
-
The center springs back lightly when touched
Cool in pans 15 minutes, then transfer to a wire rack to cool completely.
Notes
✔ Use freshly grated carrots (pre-shredded are too dry).
✔ Drain pineapple very well.
✔ Don’t overmix the batter.
✔ Frost only when cake is completely cool.
✔ For best flavor, chill cake 30–60 minutes before slicing.
Nutritional Information*
*Estimated values per slice, based on 12 slices, including frosting and optional nuts.
Calories: ~520 kcal | Fat: 30g | Carbohydrates: 58g | Protein: 6g
There you have it, friend! The ultimate carrot cake that’s sure to create its own wonderful memories in your kitchen. I can’t wait for you to try it. Happy baking, and don’t forget to tag me if you share a photo—it makes my day!
With love and a full oven,
Olivia
Final Thoughts
As I sit here writing this, pulling my sweater a little tighter against the evening chill, there’s a slice of this very cake sitting on the table beside me. The kitchen is quiet now—the mixer is washed and put away, the last flour dusting wiped from the counter. But the aroma? That beautiful, cinnamon-kissed scent still lingers in the air like a warm hug you don’t want to end.
You know, I’ve baked this carrot cake dozens of times. Dozens! And yet, every single time I pull those golden layers from the oven, I feel that same flutter of anticipation. Will the texture be just right? Will the cream cheese frosting swirl beautifully? Will the people I love taste what I’m trying to say with my hands—you matter, this moment matters, you are worth the time it took to make this?
Food has this incredible way of saying what words sometimes cannot. A birthday celebrated. A hard week soothed. A new neighbor welcomed. A Tuesday made extraordinary for no reason at all. This cake has been my messenger for all of it.
What I hope you take away from this little kitchen chat isn’t just a recipe—though I promise it’s a darn good one. I hope you carry forward the understanding that baking doesn’t require perfection. It requires presence. It’s not about flawless frosting swirls or magazine-cover presentation (though if yours turns out that way, send me a photo!). It’s about the act itself: measuring, mixing, waiting, and finally—finally—watching someone’s face light up at the very first bite.
That’s the magic. Right there in that moment.
So whether you’re baking this for a crowd or just for you (because you absolutely deserve a whole cake, my friend), know that you’re participating in something ancient and wonderful. You’re carrying forward the tradition of feeding the people we love, of gathering around tables, of making ordinary days feel special.
I’d love nothing more than to hear how it goes. Did you add the pineapple? Toast your nuts? Did someone ask for the recipe? Tag me, leave a comment, send a carrier pigeon—whatever feels right. There’s a whole community of us here, aprons on, ovens preheated, ready to cheer you on.
Now go on. Get baking. Make a mess. Lick the spatula. And remember—the best thing you’ll ever bring to the table is the love baked right in.
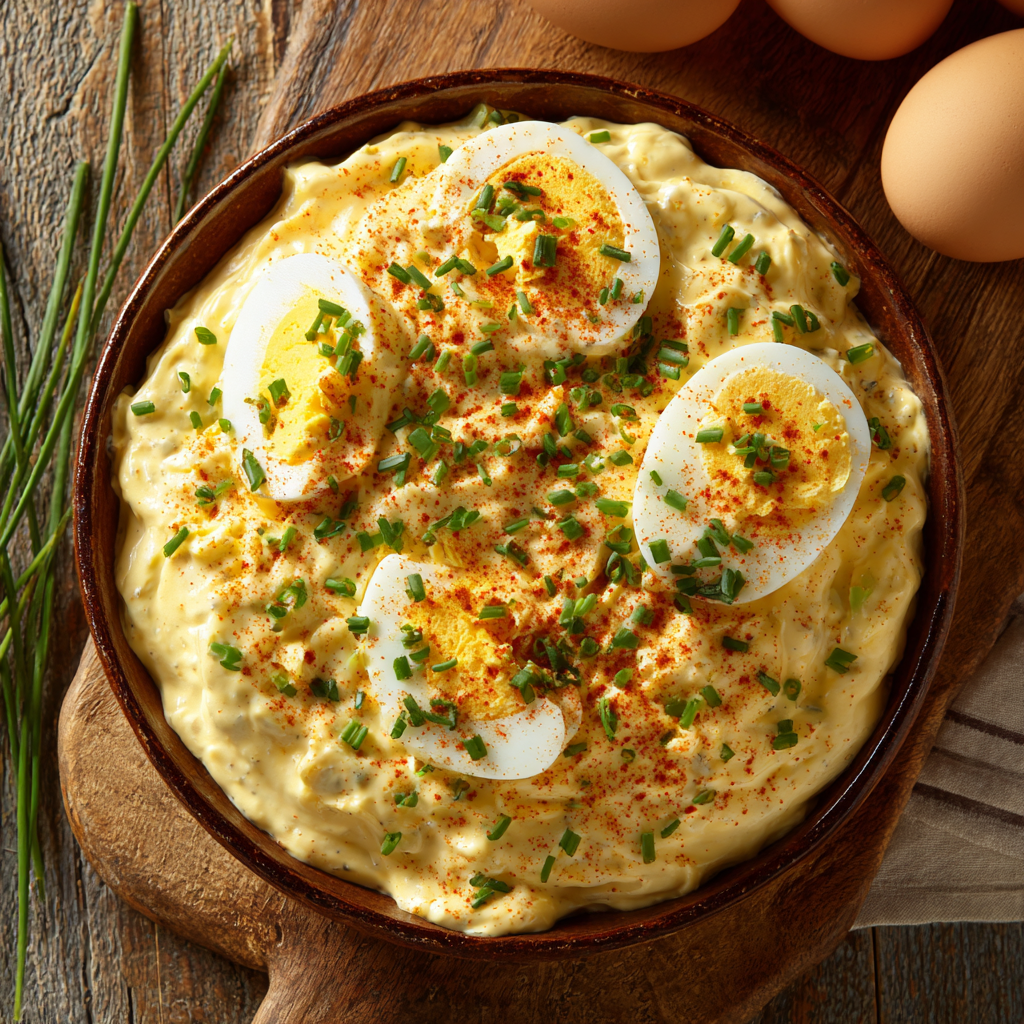
Deviled Eggs Dip with Chives and Paprika – Creamy Party Appetizer
Deviled Eggs, But Make It Dip: Your New Go-To Party Hero
Hey there, friend! Come on in, grab an apron, and pull up a stool. Can you smell that? It’s the warm, comforting scent of hard-boiled eggs just out of the pot, mixed with the sharp, tangy promise of mustard and paprika. It’s the smell of family gatherings, sunny picnics, and that moment of “oh wow, what IS this?” at a party. Today, we’re taking everything we adore about classic deviled eggs—the creamy filling, the tangy kick, that gorgeous paprika dusting—and we’re turning it into the ultimate, scoopable, shareable, downright irresistible Deviled Eggs Dip.
Let’s be real: peeling deviled eggs can be a fickle task, and arranging them on a platter just so can eat up precious time. This dip is the brilliant, flavor-packed solution. It’s all the soul of the original, whipped into a luxuriously smooth, fluffy cloud of deliciousness. Imagine the creamiest, most savory dip you’ve ever had, loaded with the familiar, beloved flavors of your grandma’s best deviled eggs. It’s a guaranteed conversation starter, a potluck champion, and quite possibly the easiest way to become the most popular person at any gathering. Whether it’s game day, a holiday spread, or just because-it’s-Tuesday night, this dip is about to become your secret weapon. So, let’s make a little magic—and maybe a little mess—together.
A Tale of Two Trays: My Deviled Eggs Epiphany
This recipe was born from a classic kitchen “oops” that turned into a “heck yes!” It was Easter a few years back, and I was in charge of apps. I’d meticulously piped two dozen beautiful deviled eggs, feeling very chef-y indeed. As I went to transfer the gorgeous platter from my kitchen island to the fridge, my elbow caught the edge… and you can guess the rest. Eggs went flying, creamy filling splattered like abstract art on my floor, and I was left with a tray of sad, empty white halves and a heart full of frustration.
But a hungry crowd was arriving soon, and I had a bowl of that delicious filling left. In a moment of defiant inspiration, I dumped all the remaining filling and the intact egg halves into my food processor, gave it a whirl, poured it into a bowl, and dusted it with a hopeful shower of paprika and chives. I served it with a shrug, saying, “We’re having deconstructed… or maybe reconstructed… deviled eggs?” Friends, it disappeared faster than any perfect platter I’d ever made. They raved about the creaminess, the ease of scooping, and the bold flavor in every bite. That happy accident taught me a beautiful lesson: sometimes, the best recipes aren’t about perfection; they’re about flavor, fun, and sharing the joy, even when it’s a little messy. Now, I skip the piping bag entirely and start with the dip!
Gathering Your Flavor Crew: Ingredients & Insights
Here’s your shopping list for creamy, tangy bliss. I’ve added my little chef notes to help you understand the “why” behind each item—and how to swap things if you need to!
- 8 large eggs: The star of the show! They provide the rich, substantial base. For easiest peeling, I like to use eggs that are a week or so old (check the date!). Fresh eggs are stubborn. Pro tip: If you’re in a pinch, you can find pre-peeled hard-boiled eggs in many grocery stores—a fantastic shortcut!
- ½ cup mayonnaise: This is our magic creamifier. Use a good-quality mayo you love—it’s a primary flavor carrier. For a tangier twist, try using half mayo and half Greek yogurt or sour cream.
- 1 tbsp Dijon mustard: This adds a complex, sharp, and slightly wine-like tang. It’s non-negotiable for depth of flavor.
- 1 tsp yellow mustard (optional): The classic “ballpark” mustard flavor we all associate with deviled eggs. It brings a brighter, vinegar-based punch. If you only have one type of mustard, just use what you’ve got and taste as you go!
- 1 tbsp pickle juice or white vinegar: The acidity here is CRUCIAL. It cuts through the richness and makes all the flavors pop. I adore the extra dimension pickle juice (from dill pickles!) gives. Lemon juice also works in a pinch.
- ¼ tsp garlic powder: We use powder instead of fresh here to distribute a subtle, sweet garlic essence without any harsh raw bite. Onion powder is a great friend here too.
- Salt & black pepper to taste: Season in layers! Don’t be shy. The salt will wake up every other ingredient.
- 1 tbsp fresh chives, finely chopped: Fresh herbs make it sing! Chives have a mild, oniony freshness. If you can’t find them, a tiny bit of very finely minced green onion (green parts only) or even a sprinkle of dried chives will do.
- Paprika, for garnish: The iconic finishing touch. Use sweet, smoked, or hot paprika—each tells a different flavor story. Smoked paprika is my personal favorite for a subtle, campfire warmth.
- Optional: chopped pickles or relish for extra tang: If you’re a “pickle lover,” fold in a tablespoon of finely chopped dill pickles or a teaspoon of sweet relish at the end for little bursts of texture and flavor.
Let’s Get Whipping: Simple Steps to Dip Heaven
Ready? This is the fun, easy part. Follow these steps, and you’ll have a flawless dip in no time.
- Perfectly Cook & Cool Your Eggs: Gently place your eggs in a single layer in a saucepan. Cover them with cold water by about an inch. Bring the pot to a full, rolling boil over high heat. As soon as it’s boiling, turn off the heat, cover the pot tightly, and set your timer for 12 minutes. This “off the heat” method prevents the dreaded green ring around the yolk and ensures tender, not rubbery, eggs. While they sit, prepare an ice bath—a big bowl of ice and water. When the timer dings, use a slotted spoon to immediately transfer the eggs to the ice bath. Let them chill completely, about 10-15 minutes. This shock stops the cooking and makes peeling a dream.
- The Peeling Ritual: Tap each cooled egg gently on the counter to crackle the shell all over. Start peeling from the wider end (where there’s usually an air pocket) under a tiny trickle of running water. The water helps loosen the membrane and makes the shell slide right off. Give yourself a little patience medal here—it’s the most hands-on part of the job!
- Blitz & Blend: Pop your peeled eggs into the bowl of a food processor. (A high-powered blender works too, but you may need to scrape down the sides more). Pulse 5-7 times until you have fine, uniform crumbs. No big chunks! This is our dip’s foundation.
- Create the Creamy Dream: To the crumbled eggs, add the mayonnaise, both mustards, pickle juice, garlic powder, a good pinch of salt, and a few cracks of black pepper. Now, secure the lid and let her rip! Blend on high for 30-60 seconds, stopping to scrape down the sides once, until the mixture is utterly smooth, pale, and creamy. Think: fluffy cloud. This is where the magic happens—it transforms from egg salad to elegant dip.
- The Taste Test (The Most Important Step!): Grab a clean spoon and taste your creation. This is your moment to be the boss. Need more tang? Add a splash more pickle juice. More sharpness? A bit more Dijon. Does it need more “zip” overall? Probably a pinch more salt. Adjust until it makes your taste buds do a happy dance.
- Chill & Garnish: Spoon the beautiful, creamy dip into your serving bowl. Use the back of the spoon to swirl the top nicely. Now, for the classic finishing touch: sprinkle a generous, even layer of paprika over the entire surface. Follow with the bright green, chopped chives. Cover and refrigerate for at least 30 minutes. This chill time lets the flavors cozy up and marry, and it firms up the dip to the perfect scoopable consistency.
How to Serve Your Masterpiece
Presentation is part of the fun! I love using a wide, shallow bowl or a classic dip crock. Arrange an abundant array of dippers around it like a glorious sunburst. Think texture and flavor contrasts: sturdy ridged potato chips or crispy pita chips for saltiness, buttery crackers or sliced baguette for classic vibes, and a rainbow of fresh veggie sticks (celery, bell peppers, carrots, cucumber) for a crunchy, fresh counterpoint. Don’t forget a couple of cute spoons or small spreading knives! The goal is to make it inviting, abundant, and effortlessly easy for guests to dive in.
Make It Your Own: Fun Flavor Twists
Once you’ve mastered the classic, the playground is open! Here are a few ways to riff on this versatile dip:
- Everything Bagel Style: Omit the paprika garnish. Top the finished dip with a heavy sprinkle of Everything Bagel Seasoning and extra chopped chives.
- Bacon & Cheddar: Fold in 1/3 cup of finely shredded sharp cheddar and 3 tablespoons of finely chopped, crispy cooked bacon after blending. Garnish with more bacon.
- Spicy Sriracha: Add 1-2 teaspoons of Sriracha (or your favorite hot sauce) to the food processor. Garnish with a drizzle of more Sriracha and sliced jalapeños.
- Herb Garden: Increase the fresh herbs! Add a tablespoon each of finely chopped fresh dill and parsley along with the chives for a super-fresh, garden-party feel.
- Lower-Carb / Keto: It’s already low-carb! Just serve it with cucumber rounds, endive leaves, or flaxseed crackers for a perfect keto-friendly snack.
Olivia’s Kitchen Notes & Stories
Over the years, this dip has become my culinary security blanket. I’ve made it in a blender during a beach house vacation (with a toddler hanging on my leg), and I’ve doubled it for a 50-person graduation party where it was the first thing to vanish. The recipe is forgiving. Too thick? A tiny splash of milk or more mayo will loosen it. Too tangy? A little more mayo will mellow it out. I once even used all yellow mustard when I realized my Dijon was empty, and you know what? It was still fantastic. The spirit of this dish is about ease and joy. It’s the recipe I text to friends who are panicking about what to bring to a gathering. My only hard rule? Do NOT skip the chill time. It makes all the difference in the world, letting the flavors deepen and the texture set. Trust me on this one!
Your Questions, Answered!
Q: My dip turned out a bit runny. What happened and how can I fix it?
A: This usually happens if the eggs were still a bit warm when blended, or if you added a touch too much liquid (pickle juice/mayo). Don’t worry! The fix is easy. Just cover the dip and pop it in the fridge for an extra 30-60 minutes. The chilling process will significantly thicken it up. For future batches, ensure your eggs are completely cold, and measure your pickle juice precisely.
Q: Can I make this ahead of time? How long does it last in the fridge?
A> Absolutely! This dip is a MAKE-AHEAD DREAM. You can prepare it completely, garnish and all, cover tightly, and refrigerate for up to 2 days. The flavors get even better as they meld. I often make it the night before a party. Just give it a quick stir before serving if any liquid has separated (a quick whisk will fix it).
Q: I don’t have a food processor. Can I still make this?
A> Yes! You have options. 1) Use a blender, though you may need to stop and scrape down the sides more frequently. 2) Go old-school: use a potato masher to mash the eggs extremely well in a bowl, then switch to a hand mixer or a sturdy whisk to beat in the remaining ingredients until as smooth as possible. It might have a slightly more rustic texture, but the flavor will be 100% there.
Q: Help! My eggs are impossible to peel cleanly. Any pro tips?
A> This is the universal struggle! First, don’t use super-fresh eggs. Slightly older ones peel better. Second, the ice bath shock is non-negotiable. Third, try adding a tablespoon of baking soda or white vinegar to the boiling water—it can help loosen the shell. And finally, peel them under a thin stream of cold running water; it helps wash away tiny shell bits and separates the membrane.
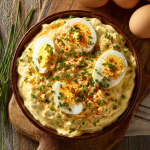
Deviled Eggs Dip with Chives and Paprika – Creamy Party Appetizer
Description
Deviled Eggs Dip (All the Flavor, None of the Fuss)
Love deviled eggs but don’t love peeling, piping, and arranging them? This Deviled Eggs Dip gives you all the creamy, tangy, classic flavor — in an easy, scoopable form.
It’s smooth, rich, slightly tangy, and topped with that signature paprika sprinkle. Perfect for parties, holidays, game day, or anytime you need a quick crowd-pleaser.
Best of all? It comes together in about 20 minutes (plus chill time).
Ingredients
-
8 large eggs
-
½ cup mayonnaise
-
1 tablespoon Dijon mustard
-
1 teaspoon yellow mustard (optional)
-
1 tablespoon pickle juice or white vinegar
-
¼ teaspoon garlic powder
-
Salt and black pepper, to taste
-
1 tablespoon fresh chives, finely chopped
-
Paprika, for garnish
Optional add-ins:
-
1 tablespoon finely chopped pickles or relish
-
1–2 teaspoons hot sauce (for heat)
Instructions
1. Hard-Boil the Eggs
Place eggs in a saucepan and cover with cold water.
Bring to a full boil. Once boiling, turn off the heat, cover, and let sit for 12 minutes.
Transfer immediately to an ice bath and cool for 10–15 minutes. Peel once completely cooled.
2. Blend the Base
Add peeled eggs to a food processor.
Pulse until finely crumbled.
3. Add the Creamy Ingredients
Add:
-
Mayonnaise
-
Dijon mustard
-
Yellow mustard (if using)
-
Pickle juice or vinegar
-
Garlic powder
-
Salt and pepper
Blend until completely smooth and creamy, scraping down the sides as needed.
4. Taste and Adjust
Taste the dip and adjust:
-
More salt for balance
-
More pickle juice for tang
-
More mustard for sharpness
Fold in chopped pickles if using.
5. Chill
Transfer to a serving bowl and smooth the top.
Sprinkle generously with paprika and chopped chives.
Refrigerate for at least 30 minutes before serving to allow flavors to develop and the dip to firm up.
Notes
-
Cool eggs completely before blending to prevent a runny dip.
-
Use good-quality mayo — it makes a big flavor difference.
-
Don’t skip the chill time — it thickens and improves flavor.
-
No food processor? Mash eggs very finely, then mix with a hand mixer until smooth.
Nutritional Information*
*This is an estimated breakdown for informational purposes. Values will vary based on specific ingredients used.
Per Serving (approx. 1/8th of recipe):
Calories: ~180 kcal | Protein: 7g | Fat: 15g | Saturated Fat: 3g | Carbohydrates: 1g | Fiber: 0g | Sugar: 0.5g | Sodium: 220mg
This dip is naturally low-carb, gluten-free, and packed with protein, making it a satisfying choice.
Final Thoughts: Deviled Eggs, But Make It Dip
As we wrap up our time together in the kitchen—you with a spoon in one hand and this recipe in the other—I hope you’re already imagining the places this little dip will go. Maybe it’s nestled on a Thanksgiving appetizer table between the cheese ball and the shrimp platter. Perhaps it’s the surprise star of your next book club meeting, the dish everyone asks for by name from now on. Or maybe it’s simply Tuesday night, and you’re standing in front of the open fridge, dipping a celery stick into a bowl of pure creamy nostalgia, and thinking, “Why didn’t I discover this sooner?”
That’s the beautiful thing about recipes born from happy accidents: they remind us that perfection is overrated. That platter of meticulously piped deviled eggs I mourned on my kitchen floor all those years ago? It led me here—to a recipe that’s not just easier, but somehow more. More shareable. More adaptable. More forgiving. More fun.
This dip captures everything we love about tradition while gently nudging us to let go of the fuss. It honors Grandma’s deviled eggs (and yes, you should absolutely bring this to the next family gathering—watch the stories unfold) while giving us permission to show up with something that sparkles with its own kind of effortless charm.
So here’s my final encouragement: Make this dip your own. Taste as you go. Add a little extra pickle juice if that’s your thing. Sprinkle on the smoked paprika because it makes you happy. Double the batch because you know it’ll disappear. Share it with people you love, and watch how something so simple can create connection—one scoop at a time.
Now go on—get that bowl chilling in the fridge, wipe the paprika dust off your counter, and pat yourself on the back. You’ve just added a new hero to your recipe collection. And between us? Your party guests are about to be very, very happy




