
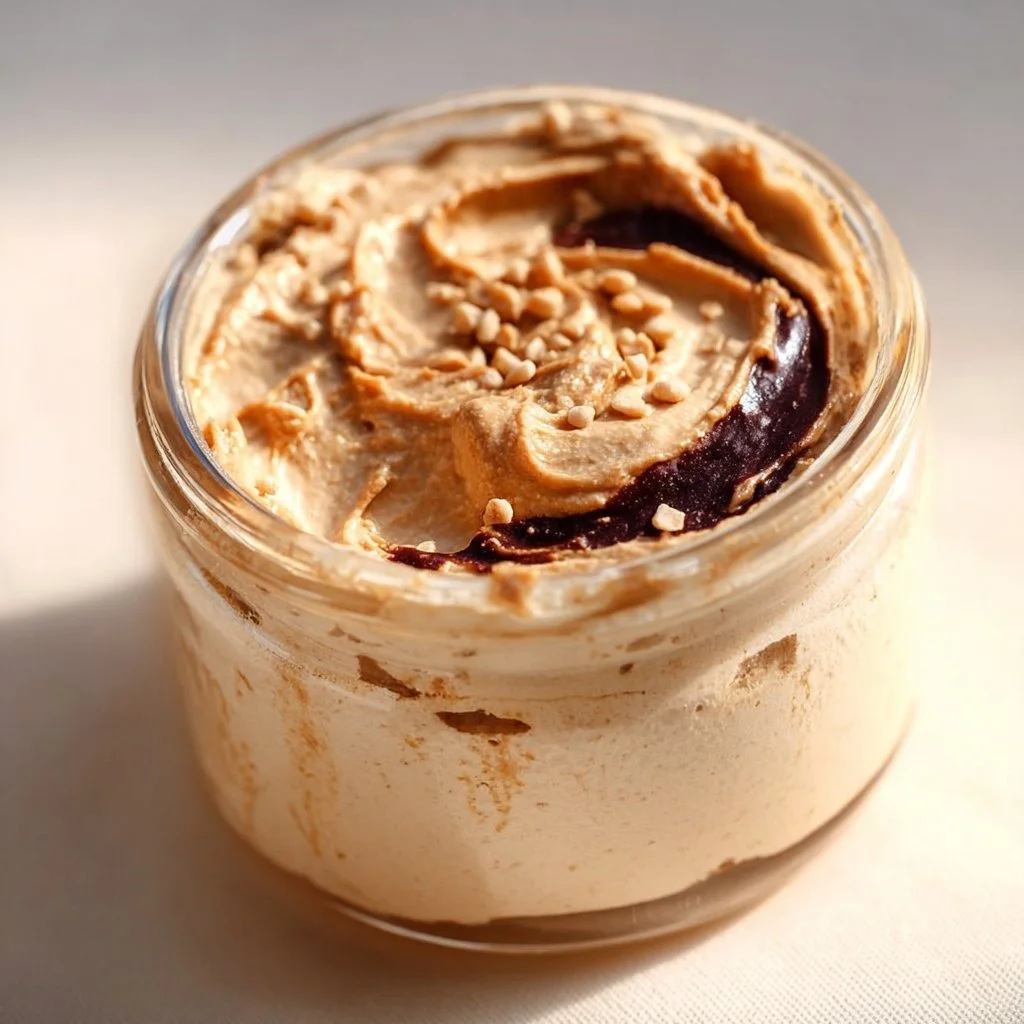
Cottage Cheese Peanut Butter Mousse
# Irresistibly Creamy Cottage Cheese Peanut Butter Mousse

**Introduction**

Welcome back, fellow food lovers! Today, we’re diving into a deliciously satisfying dessert that perfectly balances indulgence and nutrition—Cottage Cheese Peanut Butter Mousse. Think creamy, dreamy, and oh-so-satisfying, this mousse features a surprise ingredient that packs a punch in the protein department while still giving you that decadent dessert experience.

If you've ever craved a sweet treat but wanted something that won't leave you feeling sluggish afterwards, you’re going to love this recipe. Cottage cheese may not be the first ingredient that comes to mind when you think of desserts, but trust me on this one; it’s incredibly versatile! The smooth texture and high protein content of cottage cheese make it an excellent base for a dessert that doesn’t shirk on flavor.

Now, let me set the mood for our cooking adventure today with a little personal story. When I was a child, I loved sneaking spoonfuls of peanut butter while my mom baked cookies. The smell of freshly baked goods always filled our home, and it became a tradition for my family to gather around the kitchen after school, sharing stories and laughter, all while devouring our creations. And what were my favorites? Anything with peanut butter!

So, I’ve decided to combine my childhood love for peanut butter with a wholesome twist using cottage cheese, creating a mousse that not only satisfies the sweet tooth but also provides a boost of protein. Buckle up, friends; this mousse is going to become a new favorite!

---

**Personal Story**

I can still remember the first time I experimented with cottage cheese in a dessert. It was a rainy afternoon, and the boredom was creeping in. I rummaged through my fridge and spotted a tub of cottage cheese. Let’s just say, my inner kitchen scientist sparked into action! I mixed it with chocolate and a touch of honey, and voila! While my first attempt turned out a tad bit lumpy, it didn't stop me from enjoying it.

Fast forward to today, combining cottage cheese with peanut butter for this mousse feels like taking a trip down memory lane, only this time, everything is blended to creamy perfection! The lightness of the mousse coupled with the rich flavor of peanut butter brings a smile to my face—just like the one I wore as a kid, stealing bites from the cookie dough. This mousse is not just a dessert; it's a celebration of flavor, nostalgia, and a reminder that experimenting in the kitchen can lead to delightful surprises!

---

**Ingredients**

To whip up this Cottage Cheese Peanut Butter Mousse, you'll need the following ingredients. Don't worry; they're simple and wholesome!

- **Cottage Cheese (1 cup)**
  - This creamy dairy product is the star of our mousse. It’s rich in protein and gives the dessert a light and airy texture. For a smoother finish, opt for low-fat or full-fat cottage cheese. If you need a dairy-free option, try silken tofu as a substitute!

- **Peanut Butter (1/3 cup)**
  - Natural peanut butter brings a rich, nutty flavor that enhances the creaminess of the mousse. If you’re allergic to peanuts, almond butter or even sunflower seed butter work beautifully!

- **Maple Syrup or Honey (1/4 cup)**
  - Sweetness adds depth to our mousse. You can adjust the sweetness according to your taste. For a sugar-free version, consider using stevia or erythritol.

- **Vanilla Extract (1 teaspoon)**
  - This ingredient is like the fairy dust of baking! It elevates the flavor and adds a lovely aroma. Use pure vanilla extract for the best taste, but imitation vanilla will work in a pinch!

- **Cocoa Powder (optional, 2 tablespoons)**
  - If you’re feeling adventurous, cocoa powder can transform this mousse into a chocolate lover’s dream. It’s optional, but I highly recommend the chocolate twist!

- **Salt (a pinch)**
  - Just a tiny pinch will enhance all the flavors, bringing a beautiful balance to the dish.

---

**Step-by-Step Instructions**

Let’s get down to the fun part—making this luscious Cottage Cheese Peanut Butter Mousse! Follow these steps, and you’ll have dessert ready in no time.

1. **Blend the Cottage Cheese:**
   - Grab your blender or food processor and add the cottage cheese. Blend on medium-high speed until smooth and creamy. This is where you want to make it as silky as possible. If you find it too thick, add a splash of milk or dairy-free milk to help loosen it up.

2. **Add Peanut Butter and Sweetener:**
   - Next, add the peanut butter and maple syrup (or honey) to the cottage cheese. Blend until all the ingredients are well incorporated and lightened in color. This step is crucial; the better you blend, the creamier your mousse will be!

3. **Incorporate Vanilla and Cocoa Powder:**
   - Toss in the vanilla extract, and if you're going for a chocolatey version, add the cocoa powder too! Blend once more until everything is perfectly mixed. You should have a beautiful, luscious mousse at this point.

4. **Taste and Adjust:**
   - Don’t be shy! Taste your mousse at this stage. If you feel it needs a bit more sweetness, go ahead and add a touch more maple syrup or honey and blend again. Remember, the flavors will mellow in the fridge, so don’t over-sweeten!

5. **Add a Pinch of Salt:**
   - Finally, add a pinch of salt to elevate those flavors. Blend for a few seconds until fully incorporated.

6. **Chill and Serve:**
   - Transfer the mousse to a serving bowl or individual cups. Cover with plastic wrap or a lid and refrigerate for at least an hour. This chilling step is crucial; it allows the flavors to meld and the mousse to set!

7. **Garnish and Enjoy:**
   - Once chilled, serve it up! You can garnish it with whipped cream, crushed nuts, or a drizzle of your favorite syrup—creativity is key here!

---

**Serving Suggestions**

When the time comes to serve your Cottage Cheese Peanut Butter Mousse, here’s how to make it pop! Use clear dessert cups to show off that beautiful texture. A dollop of freshly whipped cream on top adds elegance, while a sprinkle of crushed peanuts gives it a nice crunch. For an added visual treat, you can also drizzle some extra peanut butter or melted chocolate on top. Your friends and family will be wowed by both the presentation and flavor of this creamy delight!

---

**Recipe Variations**

Looking to shake things up? Here are a few delicious variations you can try:

1. **Chocolate Hazelnut Delight:** Swap the peanut butter for chocolate hazelnut spread for a nutty, chocolatey twist.

2. **Berry Bliss:** Add a handful of blended berries (like strawberries or raspberries) to the mix for a fruity explosion!

3. **Coconut Dream:** Incorporate shredded coconut into the mousse for tropical vibes.

4. **Spicy Kick:** Add a dash of cinnamon or even a pinch of cayenne pepper for a surprising kick!

5. **Nut-Free Version:** Simply use sunflower seed butter instead of peanut butter for a nut-free option!

---

**Chef’s Notes**

This recipe is near and dear to my heart, and I love how it has evolved over time. What started as a mad scientist moment in my kitchen transformed into a go-to dessert for gatherings and family dinners. It's always fascinating to see people's reactions when they learn it’s got cottage cheese in it! They expect something heavy and indulgent, but instead, they're met with a light, airy mousse that just melts in their mouths.

I also love to use this base recipe and adapt it to whatever flavors I’m feeling at the moment. Every time I make it, I get to relive those childhood memories of sneaking peanut butter from the jar, and it brings a smile to my face!

---

**FAQs and Troubleshooting**

**1. Can I make this mousse ahead of time?**
- Absolutely! In fact, making it a few hours in advance allows the flavors to meld beautifully. Just cover it well in the fridge, and you’re good to go!

**2. What if my mousse is too thick?**
- If your mousse turns out thicker than expected, simply blend in a little bit of milk or dairy-free milk until you reach your desired consistency. Remember, blending is your friend!

**3. How long will this mousse last?**
- In the fridge, it should stay fresh for about 3-4 days. Just make sure it’s stored in an airtight container.

**4. Can I freeze this mousse?**
- I wouldn't recommend freezing it, as the texture may change once thawed. It’s best enjoyed fresh from the fridge for optimal creaminess!

---

**Nutritional Info (optional)**

While everyone's dietary needs are different, here’s a quick glance at the nutritional benefits of this delightful Cottage Cheese Peanut Butter Mousse (per serving):

- Calories: Approximately 150
- Protein: 10g
- Fat: 8g
- Carbohydrates: 12g
- Fiber: 2g
- Sugar: 6g

---

And there you have it—a creamy, dreamy Cottage Cheese Peanut Butter Mousse that’s not just delicious but also nutritious! I hope you enjoy making and savoring this treat as much as I do. Happy cooking, and may your kitchen be filled with warm memories and flavorful adventures!
Irresistibly Creamy Cottage Cheese Peanut Butter Mousse
- Total Time: 60 minutes
- Yield: 4 servings 1x
- Diet: Vegetarian
Description
A delicious and nutritious dessert that combines cottage cheese and peanut butter for a creamy, protein-packed mousse.
Ingredients
- 1 cup Cottage Cheese
- 1/3 cup Peanut Butter
- 1/4 cup Maple Syrup or Honey
- 1 teaspoon Vanilla Extract
- 2 tablespoons Cocoa Powder (optional)
- a pinch of Salt
Instructions
- Blend the cottage cheese until smooth and creamy.
- Add peanut butter and sweetener, then blend until well combined.
- Incorporate the vanilla extract and cocoa powder, and blend again until mixed.
- Taste and adjust sweetness if necessary, blending again.
- Add a pinch of salt and blend until incorporated.
- Chill the mousse in the refrigerator for at least an hour.
- Garnish and serve, adding whipped cream or crushed nuts if desired.
Notes
For a smoother mousse, use low-fat cottage cheese. This recipe can be adjusted for different flavors by adding fruit or different nut butters.
- Prep Time: 15 minutes
- Cook Time: 0 minutes
- Category: Dessert
- Method: Blending
- Cuisine: American
Nutrition
- Serving Size: 1 serving
- Calories: 150
- Sugar: 6g
- Sodium: 200mg
- Fat: 8g
- Saturated Fat: 2g
- Unsaturated Fat: 6g
- Trans Fat: 0g
- Carbohydrates: 12g
- Fiber: 2g
- Protein: 10g
- Cholesterol: 10mg
Keywords: mousse, cottage cheese, peanut butter, dessert, healthy recipe, protein
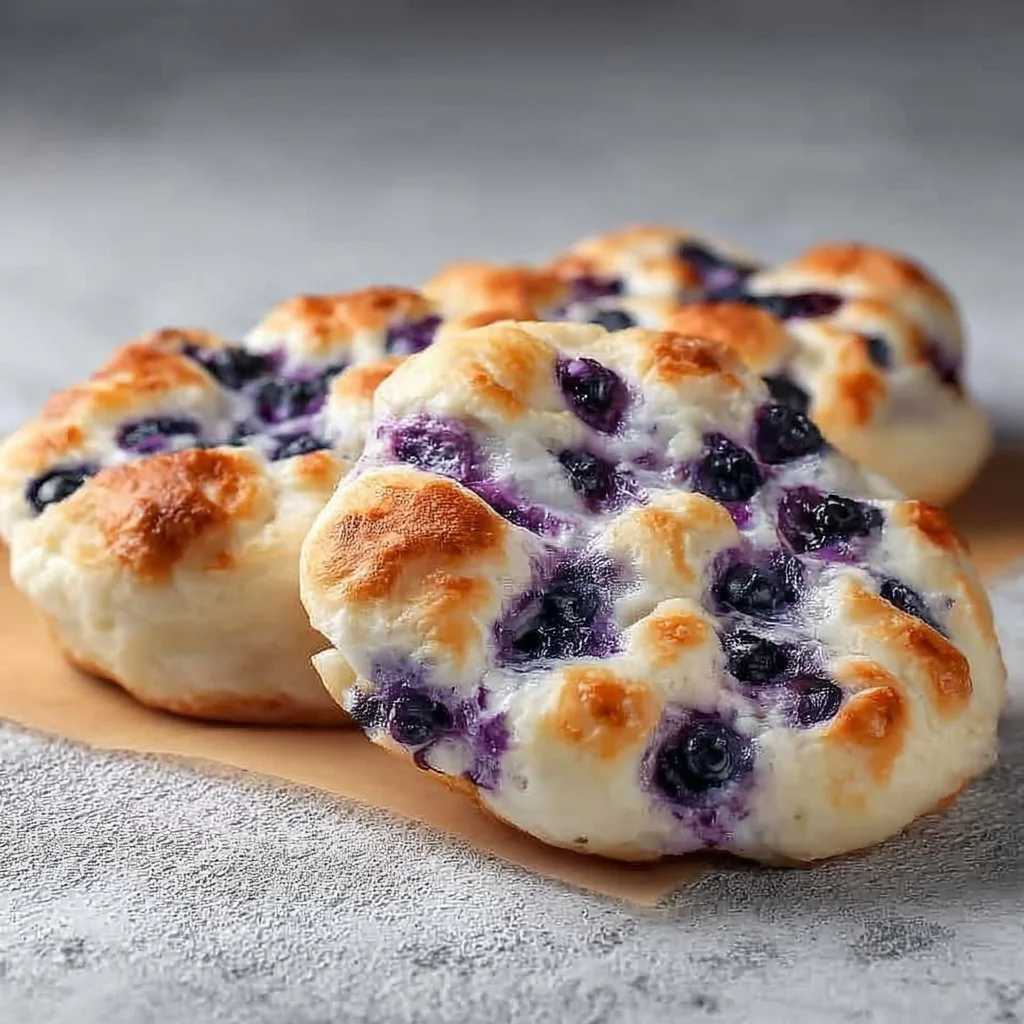
Cottage Cheese Blueberry Cloud Bread
Cottage Cheese Blueberry Cloud Bread: A Soft and Dreamy Delight
Welcome to my cozy corner of the culinary world! Today, I’m thrilled to share a delightful recipe that marries simplicity with scrumptiousness — Cottage Cheese Blueberry Cloud Bread. This airy, fluffy bread is perfect for breakfast or as a sweet snack throughout the day. If you’ve ever wanted to float away on a cloud of deliciousness, this bread will do just that!
Now, let me tell you a little something: if there’s one thing I love more than cooking, it’s creating dishes that bring back memories. The soft texture of this bread takes me back to lazy Sunday mornings spent at my grandparents’ house. Picture it: the smell of fresh blueberry muffins wafting through the air as my grandma stirred her big mixing bowl, her apron dusted with flour. Those were blissful moments that danced in my heart.
While this recipe is a modern twist, incorporating nutritious cottage cheese and fresh blueberries, it still carries that heartwarming essence of those long-ago mornings. Cloud bread is naturally gluten-free and low in carbs, making it an excellent option for a lighter treat. Plus, it’s ridiculously easy to whip up! Whether you’re a seasoned baker or a novice just starting, this recipe will have you floating on air.
So, grab your apron, preheat that oven, and let’s dive into making this heavenly treat together! With each fluffy bite, I hope you’ll feel the love and joy I poured into creating this recipe.
Personal Story
Let me take you back to one particularly hot summer day when I was a kid. My friends and I were playing outside, and my grandma promised us a refreshing treat. I remember running into her kitchen, hastily washing my hands, and the excitement bubbling inside me. She had this magical ability to turn simple ingredients into little pieces of joy.
On that day, she surprised us with blueberry something — I can’t quite remember what it was, but I do remember it being soft, light, and bursting with the sweet, tangy flavor of the fruit. While our hearts raced from playing hide and seek, our taste buds danced with every delicious bite. That memory has lodged itself in my mind and inspired many of my own creations in the kitchen.
When I discovered the concept of cloud bread — fluffy, lighter-than-air bread using cottage cheese — I couldn’t help but reminisce. Incorporating delicious blueberries was a no-brainer. Each bite feels like a hug from Grandma, blending that nostalgic essence with a modern, healthy twist. And now, here I am, sharing this joyful recipe with you. Let’s create some kitchen magic!
Ingredients
Here’s what you’ll need to whip up your Cottage Cheese Blueberry Cloud Bread:
-
1 cup cottage cheese
A rich source of protein that adds moisture and a hint of tang. Swap it for Greek yogurt if you want a tangy alternative or need a dairy-free option — just keep in mind it might change the texture a bit! -
4 large eggs
These are your binding agents and help create that fluffy structure. For vegans, use flax eggs (1 tablespoon of ground flaxseed mixed with 3 tablespoons of water per egg) for a similar effect. -
1/2 cup almond flour
This adds a nice flavor and texture. You can also use coconut flour; however, be aware that it’s more absorbent, so you might need to adjust the liquid in the recipe. -
1/4 teaspoon baking powder
This is your secret little helper to lift the bread up to cloud-like heights! -
1 cup fresh blueberries
Nature’s candy! And if you’re in a pinch, frozen blueberries work just fine. Just fold them in gently to avoid turning your batter a lovely shade of purple. -
1 teaspoon vanilla extract
This elevates the flavor to heavenly realms. Don’t have vanilla? Almond extract makes a delightful substitute with a different, lovely flavor profile. -
A pinch of salt
This is crucial! It enhances all the flavors and balances the sweetness of the blueberries.
Chef Insight: High-quality ingredients yield the best results! I always recommend using farm-fresh eggs and organic blueberries when possible. They naturally make your cloud bread even more flavorful and vibrant.
Step-by-Step Instructions
Let’s get those pans ready and dive right into cooking! Follow along closely, and I’ll hold your hand through the process.
-
Preheat Your Oven:
Crank it up to 325°F (165°C). Grease a baking sheet or line it with parchment paper to prevent sticking. -
Whisk the Eggs:
In a mixing bowl, crack the eggs open and whisk them until they are lovely and frothy. This step is crucial because light, airy eggs will set the stage for your cloud bread’s texture. About 3-5 minutes of whisking should do the trick. Chef Tip: If you have a hand mixer, that’ll speed things up nicely! -
Incorporate Cottage Cheese and Vanilla:
Add in your cottage cheese and vanilla extract, gently mixing until it’s well-combined. This creamy mixture serves as the base of your cloud bread and contributes to its moisture. -
Mix Dry Ingredients:
In another bowl, combine almond flour, baking powder, and salt. Whisk them together so that everything is evenly distributed. This prevents any clumps in your bread and helps it rise evenly. -
Combine Wet and Dry Ingredients:
Carefully fold the dry ingredients into the wet ingredients. Use a spatula and be gentle! You want to keep as much air in your mixture as possible; this helps create that cloud-like texture we’re going for. Don’t overmix here! -
Fold in Blueberries:
Now, the fun part! Carefully fold in the blueberries, ensuring they’re spread right through the batter but not squished. If they burst, that’s fine; a little color is always welcome! -
Pour and Spread:
Pour your beautifully mixed batter onto the prepared baking sheet. Use a spatula to even it out so it bakes uniformly. Try to form a rectangular shape for even cooking. -
Bake:
Slide the pan into your preheated oven and let it bake for about 25-30 minutes. While it bakes, the aroma will fill your kitchen — and trust me, you’ll want to dive right in once it’s ready! Suddenly, your kitchen will feel like a bakery. -
Check for Doneness:
To check, insert a toothpick in the center. If it comes out clean or with just a few moist crumbs, it’s done! -
Cool and Slice:
Remove it from the oven and let it cool for about 10 minutes before carefully transferring it to a wire rack. If you cut it hot, it might crumble a bit; let it rest for that perfect slice!
Chef Hack: When the bread is cool, use a serrated knife for cleaner slices—trust me, it makes a world of difference!
Serving Suggestions
Serving your Cottage Cheese Blueberry Cloud Bread is just as fun as making it! You can enjoy it with a dollop of Greek yogurt on top, a sprinkle of powdered sugar, or even a drizzle of honey or maple syrup. For an extra fruity touch, pair it with sliced bananas or strawberries. And let’s not forget — it makes an incredible base for a breakfast sandwich, too! Add a slice of avocado and an egg for some added protein.
Recipe Variations
Want to change things up a bit? Here are a few fun variations to consider:
-
Lemon Zest: Add the zest of one lemon to the batter for a bright, fresh flavor. It pairs wonderfully with blueberries!
-
Chocolate Chip Cloud Bread: Fold in some mini chocolate chips instead of blueberries for a decadent twist.
-
Spiced Up: Stir in some cinnamon or nutmeg for that warm, cozy flavor—just what you need on a chilly day.
-
Nutty Banana Cloud Bread: Swap out half of the blueberries for mashed bananas for a naturally sweet treat with a touch of nuttiness.
-
Savory Version: Try omitting the sweet elements and adding herbs like chives or thyme for a fantastic savory option.
Chef’s Notes
Oh, where do I begin? This recipe has evolved through many trials in my kitchen. I initially tried introducing different fruits, but blueberries held their ground as the favorite! I once included a hint of lavender, which was stunning; however, not everyone loved the floral note. So, I dialed it back to keep it simple and celebrate those juicy blueberries we all adore.
Making this bread is therapeutic for me. I often find myself singing along to my favorite tunes while whipping it up. It’s communal; each loaf becomes a conversation starter when shared with friends, sparking stories and nostalgia, just as my grandmother’s cooking did. Sometimes I think the true magic lies in the love you pour into it, and trust me — it’s a game-changer.
FAQs and Troubleshooting
1. Why did my cloud bread turn out dense?
- Overmixing the batter or not whisking the eggs enough can lead to a dense texture. Be gentle with folding ingredients, and ensure your eggs are well-aerated!
2. Can I freeze this cloud bread?
- Absolutely! Allow the bread to cool completely, slice it, and wrap the pieces or entire loaf in plastic wrap, then store them in a ziplock bag. It can last for up to three months in the freezer.
3. What if I don’t have all the ingredients?
- No worries! As mentioned earlier, with a few simple substitutions, you can still create a delightful bread. Just ensure to keep the ratio of wet and dry ingredients balanced.
4. Why did my blueberries sink?
- This can happen if the blueberries are too heavy and not coated in flour. A little stash of flour to dust them before folding into the batter can help them stay suspended.
Nutritional Info
Per slice (based on a 12-slice loaf)
- Calories: ~100 kcal
- Protein: ~7g
- Carbohydrates: ~8g
- Fat: ~4g
- Fiber: ~2g
And there you have it, my dear foodie friend! Your Cottage Cheese Blueberry Cloud Bread is ready for devouring. I hope it fills your kitchen with cozy vibes and mouthwatering scents, just like it does for me. Now, go forth and bake, and remember to share the love—because good food is meant to be enjoyed together! Happy cooking!
Print
Cottage Cheese Blueberry Cloud Bread
- Total Time: 40 minutes
- Yield: 12 slices 1x
- Diet: Low Carb, Gluten Free
Description
A soft and dreamy cloud bread made with cottage cheese and fresh blueberries, perfect for breakfast or a sweet snack.
Ingredients
- 1 cup cottage cheese
- 4 large eggs
- 1/2 cup almond flour
- 1/4 teaspoon baking powder
- 1 cup fresh blueberries
- 1 teaspoon vanilla extract
- A pinch of salt
Instructions
- Preheat your oven to 325°F (165°C) and grease a baking sheet or line it with parchment paper.
- Whisk the eggs in a mixing bowl until frothy, about 3-5 minutes.
- Incorporate the cottage cheese and vanilla extract, mixing until well-combined.
- Mix the almond flour, baking powder, and salt in another bowl.
- Combine the dry ingredients into the wet ingredients, folding gently to maintain airiness.
- Fold in the blueberries carefully, ensuring they’re well-distributed.
- Pour the batter onto the prepared baking sheet and spread it evenly.
- Bake for about 25-30 minutes until done, checking with a toothpick.
- Cool for 10 minutes before slicing and enjoying!
Notes
Enjoy with Greek yogurt, honey, or as a base for a breakfast sandwich. Best when served fresh!
- Prep Time: 10 minutes
- Cook Time: 30 minutes
- Category: Breakfast
- Method: Baking
- Cuisine: American
Nutrition
- Serving Size: 1 slice
- Calories: 100
- Sugar: 5g
- Sodium: 150mg
- Fat: 4g
- Saturated Fat: 1g
- Unsaturated Fat: 3g
- Trans Fat: 0g
- Carbohydrates: 8g
- Fiber: 2g
- Protein: 7g
- Cholesterol: 90mg
Keywords: cloud bread, cottage cheese, blueberry bread, gluten-free bread, healthy snack
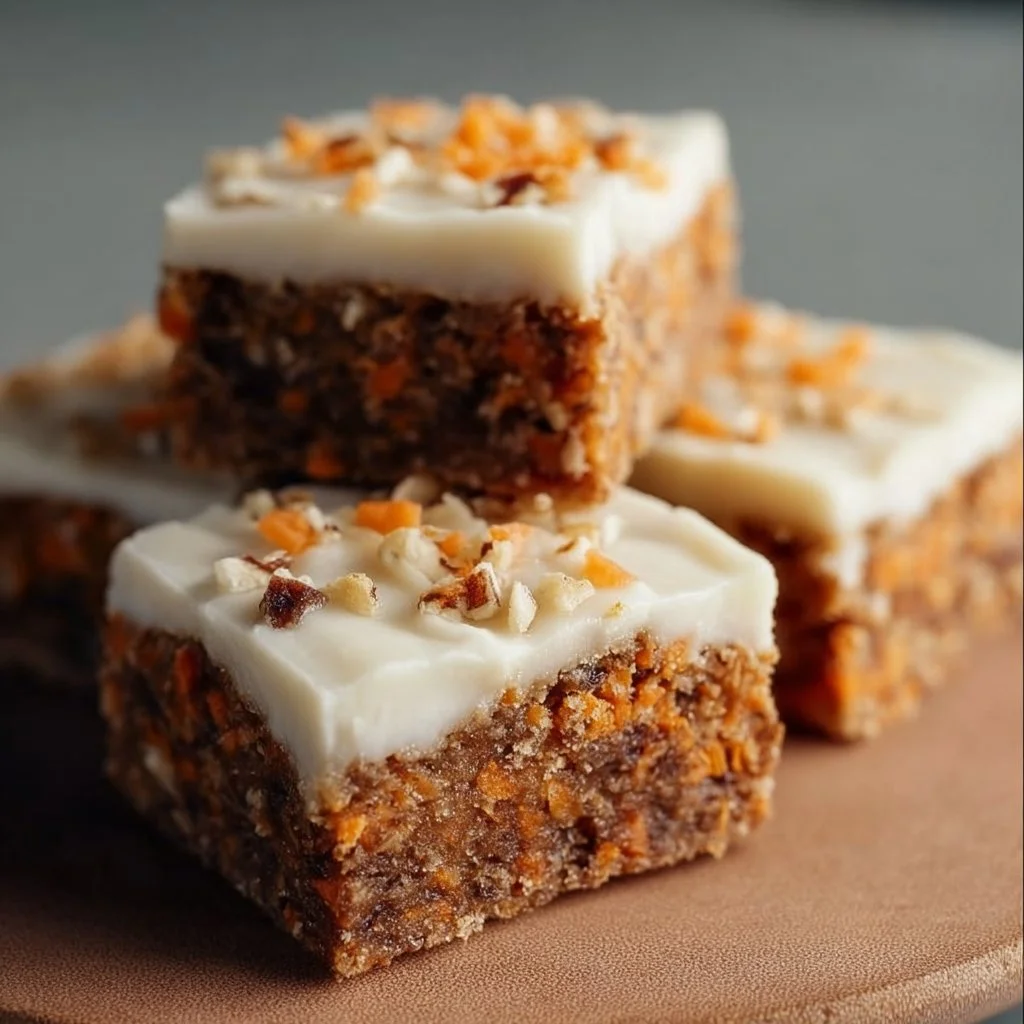
No Sugar Cottage Cheese Carrot Cake Bars
No Sugar Cottage Cheese Carrot Cake Bars: A Sweet Treat Worth Baking!
Welcome to my kitchen! I’m so glad you’re here. I’m Olivia Bennett, your friendly neighborhood chef, delighted to share a recipe that’s close to my heart. Today, we’re whipping up a delightfully moist and flavorful dessert that’s as comforting as a cozy Sunday morning — No Sugar Cottage Cheese Carrot Cake Bars!
Let me tell you, these bars are not just any dessert. They’re a harmonious blend of earthy carrots, warm spices, and creamy cottage cheese, transforming the traditional carrot cake into a health-conscious treat without sacrificing flavor. Imagine walking into your home, the inviting aroma of freshly baked goods wafting through the air, and knowing you’re about to enjoy a guilt-free indulgence.
In a world filled with over-the-top sugary treats, it can be challenging to find a sweet that satisfies without sending your blood sugar on a rollercoaster ride. That’s why I created these bars! They’re simple to make, delightful to share, and best of all, they’re perfect for anyone looking to enjoy a delicious dessert while keeping a finger on their health pulse. Plus, they’re perfect for breakfast or a snack on-the-go! Whether you’re looking for a post-workout treat, a lunchbox surprise, or something special to share at your next gathering, these bars have got you covered. Ready to get started? Let’s dive in!
A Sweet Memory
Growing up, my family had a tradition of baking together every Sunday afternoon. My siblings and I would gather in the kitchen with our aprons on, battle it out to see who could stir the batter the fastest (spoiler alert: we always ended up in flour fights!). One Sunday, my mom decided to surprise us with a healthier twist on our usual carrot cake. Using cottage cheese instead of oil and sugar sounded wild to my young taste buds, but as soon as those fragrant bars came out of the oven, my skepticism vanished.
What I remember most vividly is watching our family friend, Mrs. Jenkins, take her first bite. Her eyes lit up with delight, and she proclaimed them the best carrot cake she had ever tasted. That moment solidified my love for baking — the joy of creating something that brings everyone together and creates lasting memories. These bars remind me of those warm afternoons in the kitchen, filled with laughter, love, and a whole lot of carrot cake goodness. Now, every time I bake them, I feel that same warmth and joy.
Ingredients
Here’s what you’ll need to whip up these scrumptious No Sugar Cottage Cheese Carrot Cake Bars:
-
2 cups grated carrots
Freshly grated carrots provide sweetness and moisture while being loaded with vitamin A. You can substitute with pre-grated carrots, but fresh is best for flavor! -
1 cup cottage cheese
This creamy ingredient adds richness without added sugars. You can also opt for ricotta if you want a slightly different flavor profile. -
1/2 cup unsweetened applesauce
Applesauce keeps the bars moist and helps to naturally sweeten them. You can swap this out for pureed bananas or pumpkin puree for a fun twist! -
2 large eggs
Eggs provide structure and stability. If you’re vegan or egg-free, you can use flax eggs (1 tbsp ground flaxseed mixed with 2.5 tbsp water for each egg) for a similar effect. -
1 teaspoon vanilla extract
Vanilla is the magic ingredient that enhances the dessert’s flavors. Make sure to use pure vanilla extract for the best results! -
1 teaspoon baking soda
This leavener helps the bars rise and become fluffy. You can substitute with baking powder in a pinch — just use 3 teaspoons baking powder for every teaspoon of baking soda. -
1 teaspoon ground cinnamon
A warm spice that pairs beautifully with carrots, giving them a cozy, homey flavor. Feel free to substitute with nutmeg or pumpkin spice if you’re feeling adventurous! -
1 cup whole wheat flour
Whole wheat flour adds fiber and a nutty flavor. For a gluten-free option, you can use almond flour or a gluten-free blend. -
Optional mix-ins
Chopped nuts (like walnuts or pecans), raisins, or shredded coconut can be added for a delightful crunch and variation.
Step-by-Step Instructions
Ready to bake? Let’s roll up those sleeves and get started!
-
Preheat Your Oven: Preheat your oven to 350°F (175°C). While it warms up, gather your ingredients and prepare your baking pan. Line an 8×8 inch square baking dish with parchment paper, leaving some overhang on the sides to easily lift the bars out later.
-
Mix the Wet Ingredients: In a large bowl, combine the cottage cheese, applesauce, grated carrots, eggs, and vanilla extract. Use a whisk or fork to beat everything together until well incorporated. The texture might be a bit lumpy, but don’t worry! That’s completely normal.
-
Combine the Dry Ingredients: In another bowl, whisk together the whole wheat flour, baking soda, cinnamon, and any additional spices you want to include. Mixing the dry ingredients separately ensures even distribution of the baking soda and spices in your batter.
-
Blend Wet and Dry Ingredients: Gradually add the dry mixture to the wet mixture, folding gently until combined. Avoid overmixing! You want to see a few lumps — this keeps the bars nice and tender.
-
Add the Fun Stuff: If you’re including any mix-ins—now’s the time! Gently fold in your nuts, raisins, or coconut until evenly distributed throughout the batter.
-
Pour and Spread: Pour the batter into your prepared baking dish, smoothing it out with a spatula to ensure even baking.
-
Bake: Place the dish in the preheated oven and bake for about 25-30 minutes, or until a toothpick inserted into the center comes out clean. The edges should be lightly golden, and the center will spring back gently when touched.
-
Cool Time: Let the bars cool in the pan for about 10-15 minutes, then use the parchment paper to lift them out of the pan and onto a wire rack to cool completely.
-
Slice and Enjoy: Once the bars are fully cooled, slice them into squares, and serve them up! You can enjoy them as-is or with a dollop of Greek yogurt or a drizzle of honey if you’re feeling indulgent.
Serving Suggestions
These bars are incredibly versatile for serving! You can plate them as a lovely afternoon snack or even for breakfast alongside fresh fruit and yogurt. For a cozy gathering, arrange them on a rustic wooden board, garnished with some shredded coconut and a sprinkle of cinnamon. They look beautiful and taste amazing!
Recipe Variations
Looking to shake things up? Try these fun twists on my original recipe:
-
Spiced Pumpkin Carrot Bars: Add 1/2 cup of pumpkin puree to the batter, reducing the applesauce to 1/4 cup for a festive fall flavor.
-
Tropical Coconut Carrot Bars: Substitute 1/2 cup of the flour for shredded coconut and add pineapple chunks for a tropical-inspired treat!
-
Chocolate Chip Carrot Bars: Fold in 1/2 cup of dark chocolate chips for a sweet surprise in every bite.
-
Nuts and Seeds: Add a handful of chia seeds or sunflower seeds for added crunch and nutrition.
-
Fruit-Forward Bars: Incorporate crushed pineapple or diced apples for a fruity twist!
Chef’s Notes
As I’ve experimented with this recipe over the years, I’ve learned that the best part is making it your own! Feel free to adjust spices and switch up ingredients based on what you’ve got on hand. I’ve had countless laughs in the kitchen with friends while trying out new variations — like the time I mistakenly grabbed paprika instead of cinnamon, which turned out to be an unexpected (but surprisingly delightful) twist!
I also love sharing these bars with my family during holiday gatherings. They disappear quickly! It warms my heart to see how a simple recipe can spark joy and indulgence without the heavy sugars. The memories we create around food are truly special!
FAQs and Troubleshooting
1. Can I freeze these bars?
Absolutely! These carrot cake bars freeze beautifully. Once completely cooled, wrap them tightly in plastic wrap and store them in an airtight container. They can last up to three months in the freezer. Just thaw them in the fridge overnight before enjoying.
2. My bars came out too dry. What went wrong?
Ah, the classic baking dilemma! Overbaking is often the culprit for dry bars. Make sure to keep an eye on them during the baking process, as every oven is different. Start checking for doneness a few minutes early!
3. Can I use regular flour instead of whole wheat?
Yes! If you prefer all-purpose flour, go right ahead. The texture might be a bit lighter, but they will still taste fantastic.
4. Why did my bars sink in the middle?
This can happen if the batter is overmixed or if you open the oven door too early while baking. Make sure to handle the batter gently, and only open the oven door when needed!
Nutritional Info (Optional)
Each serving of these No Sugar Cottage Cheese Carrot Cake Bars contains approximately:
- Calories: 180
- Protein: 6g
- Carbohydrates: 30g
- Fat: 5g
- Fiber: 3g
(Note: Nutritional information will vary based on the exact ingredients used and portion sizes.)
Thank you for joining me in the kitchen today! I hope you’re as excited about baking these No Sugar Cottage Cheese Carrot Cake Bars as I am. They’re a labor of love that’s sure to please both your taste buds and your health goals. Remember, cooking is all about enjoyment and sharing, so bake a batch for yourself and also for the special people in your life. Happy baking! 🍰
Print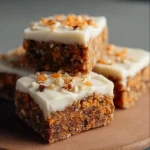
No Sugar Cottage Cheese Carrot Cake Bars
- Total Time: 45 minutes
- Yield: 16 servings 1x
- Diet: Vegetarian
Description
Delightfully moist and flavorful carrot cake bars made healthier with cottage cheese and no added sugars.
Ingredients
- 2 cups grated carrots
- 1 cup cottage cheese
- 1/2 cup unsweetened applesauce
- 2 large eggs
- 1 teaspoon vanilla extract
- 1 teaspoon baking soda
- 1 teaspoon ground cinnamon
- 1 cup whole wheat flour
- Optional mix-ins: Chopped nuts, raisins, or shredded coconut
Instructions
- Preheat your oven to 350°F (175°C) and prepare an 8×8 inch baking dish with parchment paper.
- Mix the cottage cheese, applesauce, grated carrots, eggs, and vanilla extract until well combined.
- Combine the whole wheat flour, baking soda, and cinnamon in a separate bowl.
- Blend the dry ingredients into the wet mixture until just combined, avoiding overmixing.
- Add any optional mix-ins like nuts or raisins into the batter.
- Pour the batter into the prepared baking dish and smooth it out.
- Bake for 25-30 minutes, or until a toothpick comes out clean.
- Cool in the pan for 10-15 minutes, then transfer to a wire rack.
- Slice into squares and serve with Greek yogurt or a drizzle of honey if desired.
Notes
These bars can be frozen for up to three months. Thaw in the fridge overnight before serving.
- Prep Time: 15 minutes
- Cook Time: 30 minutes
- Category: Dessert
- Method: Baking
- Cuisine: American
Nutrition
- Serving Size: 1 bar
- Calories: 180
- Sugar: 5g
- Sodium: 200mg
- Fat: 5g
- Saturated Fat: 2g
- Unsaturated Fat: 3g
- Trans Fat: 0g
- Carbohydrates: 30g
- Fiber: 3g
- Protein: 6g
- Cholesterol: 30mg
Keywords: carrot cake, healthy dessert, no sugar, cottage cheese, baking
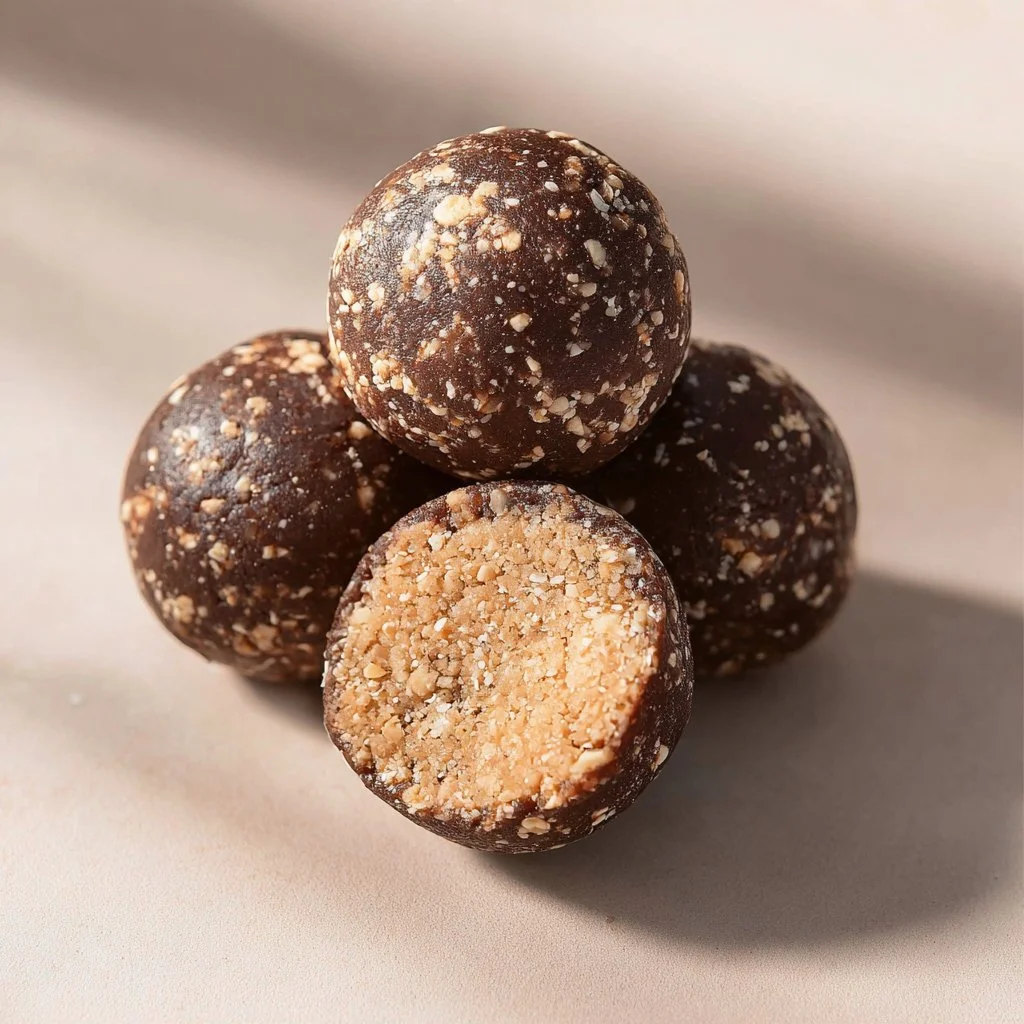
Healthy Sweet Protein Bites
Healthy Sweet Protein Bites: A Delicious Snack to Fuel Your Day!
Welcome to my kitchen! I’m Olivia Bennett, and today we’re diving into a delightful recipe that’s perfect for anyone craving a wholesome snack that’s both satisfying and energizing. I present to you: Healthy Sweet Protein Bites! Whether you need a quick pick-me-up before a workout, a treat to help you power through your afternoon slump, or simply a nibble while chasing after kids, these bites are the perfect solution. So, roll up your sleeves and let’s embark on this delectable journey together!
There’s something magical about snacks that you can make in just a few minutes but still feel like a treat you’d buy from a fancy café. These Healthy Sweet Protein Bites are not only easy to whip up but they also hit that sweet spot without any guilt. They’re packed with protein, fiber, and natural sweetness, making them an ideal companion for your busy lifestyle.
Imagine this: you’re at home after a long day, maybe you’ve just finished a workout or chased your little ones around the park. You open the fridge, hoping for some inspiration, and there they are—your delicious homemade snack bites! Just pop one in your mouth, and you’re greeted with a burst of flavors and textures that instantly lifts your mood. That’s the magic of these bites!
In this recipe, we’ll use ingredients that are full of health benefits without compromising on taste. Picture oats that provide enough fiber to keep you feeling full, nut butter packed with healthy fats, and a hint of honey or maple syrup for a lovely sweet touch. Let’s get cozy and start creating these delightful bites that are sure to impress anyone who tastes them!
Personal Story
I still remember the first time I made these Protein Bites. It was a rainy Sunday afternoon, and I found myself rummaging through my pantry. I had just finished a recipe testing session and realized I was out of my go-to granola bar stash. That’s when I remembered a recipe I’d seen online for energy bites—a simple blend of oats, nut butter, and honey. With a sprinkle of creativity, I threw in some chocolate chips and dried fruit, and I was instantly in love with the result!
The moment my husband took a bite, his eyes lit up like someone had just handed him chocolate cake. “You need to make these again, like, all the time!” He urged me. And just like that, I found my new kitchen staple! Over the years, I’ve adapted and modified the recipe to include different mix-ins and flavors, transforming them from a simple snack to a versatile, healthy bite that can change with the seasons—or my pantry!
Ingredients
Here’s what you’ll need to make these delicious Healthy Sweet Protein Bites. Each ingredient plays a significant role, so let’s break it down:
-
Rolled Oats (2 cups): Oats are a fantastic source of complex carbohydrates and fiber. This will keep you feeling full longer. If you’re gluten-free, make sure to use certified gluten-free oats!
-
Nut Butter (1 cup): Peanut butter, almond butter, or sunflower seed butter—all are excellent choices. Nut butters add healthy fats and protein. If you’re allergic to nuts, sunflower seed butter is a perfect substitute!
-
Honey or Maple Syrup (⅓ cup): Use honey for a classic sweetness, or maple syrup for a vegan alternative. Both help bind the ingredients together while offering a natural sweet flavor.
-
Protein Powder (½ cup): Choose your favorite! Whey, pea, or hemp protein are all great options. This adds a protein punch to help you power through your day.
-
Chia Seeds (2 tablespoons): These little seeds are packed with omega-3 fatty acids, protein, and fiber. They also help add a nice crunch to the bites!
-
Dark Chocolate Chips (½ cup): Who doesn’t love a little chocolate? Use dairy-free chocolate chips if you want a vegan option!
-
Dried Fruit (½ cup): Think cranberries, apricots, or raisins. They add natural sweetness and a chewy texture. If you prefer fresh fruit, just make sure to adjust moisture levels to keep the right texture!
Step-by-Step Instructions
Now that we have our ingredients lined up, let’s get to the fun part: making our Healthy Sweet Protein Bites! Follow these steps, and you’ll have a delicious batch ready to go:
-
Gather Your Equipment: You’ll need a large mixing bowl, a spatula (or wooden spoon), and a baking sheet or plate covered with parchment paper for chilling the bites. You might also want to grab an apron—it can get a little messy but very worth it!
-
Mix Dry Ingredients: In your large mixing bowl, combine the rolled oats, protein powder, and chia seeds. Give it a good stir to evenly mix everything together. This helps ensure that the protein powder doesn’t clump together later.
-
Incorporate Nut Butter: If your nut butter is on the thicker side, pop it in the microwave for about 15-20 seconds to make it easier to mix. Add the nut butter to the bowl along with the honey or maple syrup. Stir together until well combined. It might seem a bit sticky, but that’s just what you want!
-
Add Chocolate and Dried Fruit: Gently fold in the chocolate chips and dried fruit of your choice. You can get creative here—if you’ve got some shredded coconut hanging around or seeds you want to add, now’s the time to toss them in!
-
Form the Bites: Using your hands, scoop a tablespoon of the mixture and roll it into a ball. If the mixture is too sticky, dampen your hands slightly with water to make rolling easier. Place the balls onto your prepared baking sheet or plate, ensuring they have a little space to breathe.
-
Chill Out: Pop those beauties in the fridge for at least 30 minutes. This helps them set properly and makes the bites easier to enjoy later.
-
Taste Test: Once they’re chilled, grab one (or two—I won’t judge!) and enjoy the fruits of your labor. Take a moment to savor the blend of flavors and textures; it’s pure joy in a bite!
Serving Suggestions
These Healthy Sweet Protein Bites can be served in numerous enjoyable ways. You can plate them artistically on a pretty dish to impress your guests or simply keep them in an airtight container in your fridge for on-the-go snacks. Consider presenting them with a side of fresh fruit or a dollop of yogurt for a well-rounded treat. Perfect for a breakfast on the run or a snack at your desk!
Recipe Variations
You’ll love these bites as they are, but the beauty of the recipe is its versatility! Here are some fun twists to ignite your creativity:
-
Cinnamon Raisin: Add 1 teaspoon of cinnamon and swap the dried fruit for raisins.
-
Double Chocolate: Substitute cacao powder for ¼ cup of protein powder and use chocolate chips—we’re going full indulgent!
-
Tropical Paradise: Mix in dried pineapple and coconut flakes for a sweet island escape.
-
Savory Spin: Use tahini instead of nut butter and mix in some sunflower seeds for a unique savory take.
-
Nut-free Delight: Use sunbutter or pumpkin seed butter for a completely nut-free version, ideal for schools and nut-free zones!
Chef’s Notes
These bites have truly evolved over time and become a staple in my household. I love experimenting with new flavor combinations depending on what I have on hand. One time, I even added matcha powder for a green boost! The most rewarding aspect has been sharing them with friends and family; I always encourage them to get creative! It’s amazing how a simple recipe can turn into a fun cooking adventure.
Oh, and a little funny story: I once forgot to add the honey and only realized it after I had rolled them into balls. Instead of tossing the mixture, I shaped the bites like tiny burger patties and stuffed them with some yogurt dip. My husband now lovingly calls them "Olivia’s surprise bites!"
FAQs and Troubleshooting
Q1: My protein bites are too dry; what did I do wrong?
A: This can happen if the mixture is too dry or if you used too much protein powder. Adding a little extra nut butter or honey can help moisten them. Alternatively, adding a splash of milk can help reach your desired consistency!
Q2: How long can I store these bites?
A: These bites can be kept in an airtight container in the fridge for up to a week. If you want to make a big batch and save some for later, they freeze well too! Just place them in a freezer bag and they’ll keep for up to three months.
Q3: Can I use a different type of sweetener?
A: Absolutely! You can experiment with substitutes like agave nectar, brown rice syrup, or even stevia, but keep in mind the moisture content may vary, so adjust accordingly.
Q4: Can I add fresh fruit to the mix?
A: Fresh fruit can add moisture and change the texture, but if you’d like to try, just make sure to reduce the amount of nut butter to balance it out. Dried fruits work best in this recipe.
Nutritional Info (if applicable)
While I don’t provide specific nutritional values, I can tell you this: each bite is packed with wholesome goodness, balancing protein, healthy fats, and complex carbs, making them a nutritious option to fuel your body.
And there you have it—a delicious and wholesome snack in just a few simple steps! I hope you enjoy making these Healthy Sweet Protein Bites as much as I do. Remember, the most important ingredient in any recipe is your love and creativity. Happy cooking!
Print
Healthy Sweet Protein Bites
- Total Time: 45 minutes
- Yield: 12 servings 1x
- Diet: Vegetarian
Description
A wholesome snack packed with protein, fiber, and natural sweetness, perfect for fueling your day.
Ingredients
- 2 cups Rolled Oats
- 1 cup Nut Butter (peanut, almond, or sunflower seed)
- ⅓ cup Honey or Maple Syrup
- ½ cup Protein Powder (whey, pea, or hemp)
- 2 tablespoons Chia Seeds
- ½ cup Dark Chocolate Chips
- ½ cup Dried Fruit (cranberries, apricots, or raisins)
Instructions
- Gather Your Equipment: You’ll need a mixing bowl, spatula, and baking sheet with parchment paper.
- Mix Dry Ingredients: Combine oats, protein powder, and chia seeds in a bowl.
- Incorporate Nut Butter: Warm nut butter if thick, then mix it with honey or maple syrup.
- Add Chocolate and Dried Fruit: Fold in chocolate chips and dried fruit.
- Form the Bites: Roll tablespoon-sized amounts of mixture into balls.
- Chill Out: Refrigerate bites for at least 30 minutes.
- Taste Test: Enjoy your delicious bites after chilling!
Notes
These bites can be varied with different mix-ins and flavors to suit your tastes. Consider adding spices or using different nut butters for variety.
- Prep Time: 15 minutes
- Cook Time: 0 minutes
- Category: Snack
- Method: Mixing
- Cuisine: American
Nutrition
- Serving Size: 1 bite
- Calories: 120
- Sugar: 7g
- Sodium: 50mg
- Fat: 6g
- Saturated Fat: 1g
- Unsaturated Fat: 5g
- Trans Fat: 0g
- Carbohydrates: 12g
- Fiber: 2g
- Protein: 4g
- Cholesterol: 0mg
Keywords: protein bites, healthy snacks, energy bites, vegan snacks, no-bake recipes
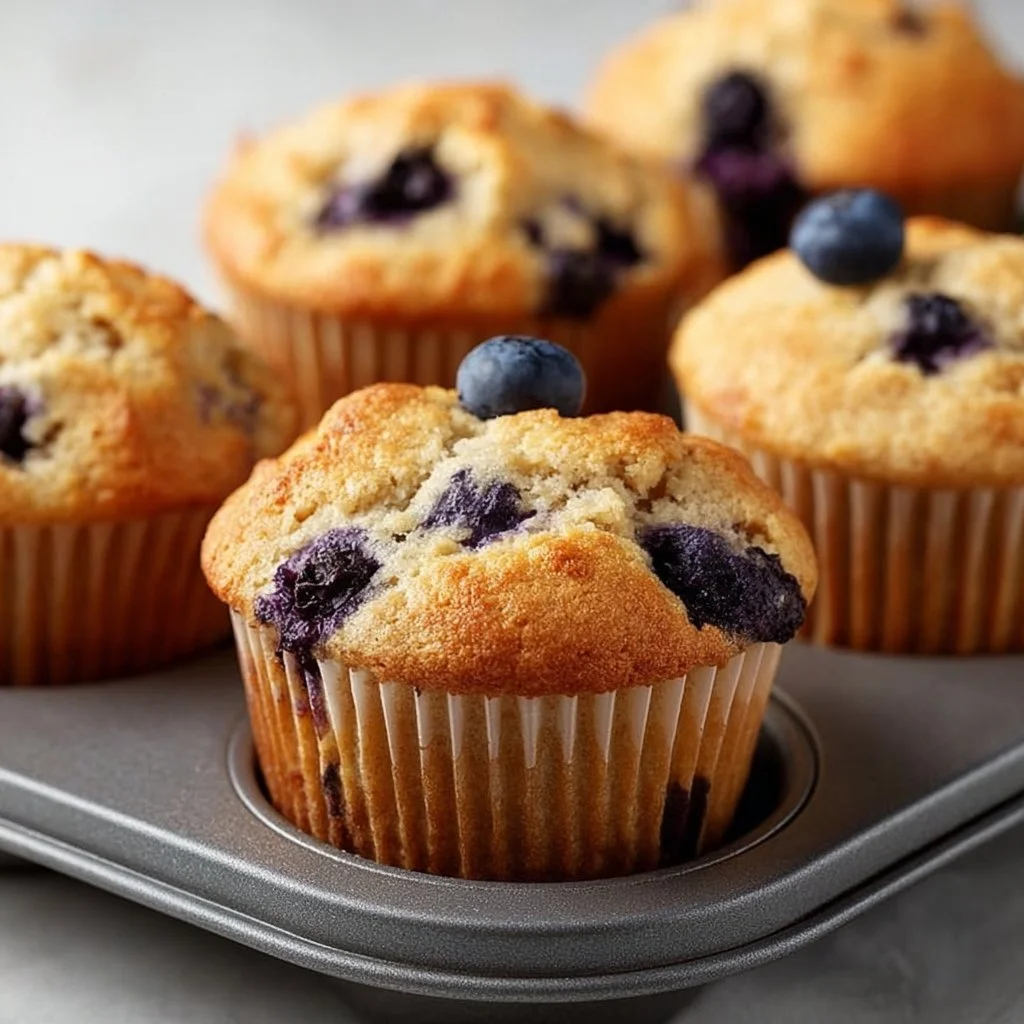
Hearty Blueberry Protein Muffins
Hearty Blueberry Protein Muffins: A Cozy Kitchen Adventure
Hey there, fellow food lovers! Welcome back to my little corner of the internet — my cozy kitchen filled with warmth, aromas, and a pinch of chaos! Today, I’m thrilled to share a recipe that has a special place in my heart: Hearty Blueberry Protein Muffins. These aren’t just any muffins; they’re fluffy, bursting with juicy blueberries, and packed with wholesome ingredients that make them a perfect snack for any time of day. Whether you need a quick breakfast on-the-go, a pre-workout boost, or a delightful afternoon treat, these muffins check all the boxes!
The best part? Making muffins is incredibly rewarding. Imagine the smell of freshly baked muffins wafting through your home. It’s like a warm hug on a chilly day! I can’t help but feel nostalgic when I whip up a batch. Muffin-making was a frequent family activity when I was growing up. My mom and I would spend lazy Saturday mornings measuring flour, cracking eggs, and laughing as we experimented with flavors. There were flour fights, fruit-strewn countertops, and moments of pure joy that I cherish to this day.
Blueberries have always been a favorite of mine — vibrant, sweet, and full of antioxidants — but they also remind me of summer afternoons spent picking berries with my family. We’d pluck them right from the bush, their juices staining our fingers in the most delightful way. The idea of turning those ripe, plump blueberries into muffins still excites me! So, grab your apron, and let’s dive into the delicious world of Hearty Blueberry Protein Muffins!
Personal Story
One of my fondest kitchen memories is the summer my family decided to take a weekend trip to a local blueberry farm. The sun was shining, and we were all armed with tiny buckets, eagerly racing to see who could fill theirs first! I still remember the joy of plucking those deep indigo gems off the bushes, tasting their sweetness right on the spot.
When it came time to bake our bounty, I wanted to make something special that not only celebrated those freshly picked blueberries but also catered to my active lifestyle. And voila! My Hearty Blueberry Protein Muffins were born. I still recall the excitement of watching those muffins rise in the oven, the anticipation growing as the aroma filled our home. It’s that shared experience, the laughter, and the love that make this recipe so meaningful to me. Now, it’s your turn to create those lasting memories in your kitchen!
Ingredients
Let’s gather the stars of our muffin masterpiece! Here’s what you’ll need:
-
Whole Wheat Flour (1 cup)
A wholesome choice loaded with fiber, whole wheat flour gives these muffins a hearty texture. If you’re gluten-free, feel free to swap this for a gluten-free all-purpose blend. -
Rolled Oats (1/2 cup)
These not only add fiber and texture but also keep you feeling full longer. Use quick oats for a softer muffin or old-fashioned for more chew. -
Vanilla Protein Powder (1/2 cup)
This is what gives the muffins their protein boost! Choose your favorite flavor, or even better — use unflavored to let the blueberries shine. If you prefer plant-based protein, that works wonderfully too! -
Baking Powder (1 tablespoon)
This is our magical leavening agent, ensuring fluffy muffins! Feel free to adjust for altitude baking. -
Salt (1/4 teaspoon)
A pinch of salt balances sweetness and enhances flavor; don’t skip it! -
Honey or Maple Syrup (1/3 cup)
This natural sweetener adds moistness and a delightful hint of flavor. For a lower-calorie option, use a sugar substitute like Stevia. -
Unsweetened Applesauce (1/2 cup)
A fabulous substitute for oil, it provides moisture with fewer calories. Alternatively, use Greek yogurt for an extra protein punch! -
Eggs (2 large)
Eggs bind everything together and give structure to the muffins. For a vegan option, try flax eggs (mix 1 tablespoon ground flaxseed with 3 tablespoons water) per egg! -
Milk (1/3 cup)
Use your choice of milk (dairy or plant-based). This adds moisture; almond or coconut milk works nicely for a dairy-free alternative. -
Fresh or Frozen Blueberries (1 cup)
Bursting with flavor and that pop of sweetness, these are essential! If using frozen, do not thaw — this keeps them from bleeding into the batter.
Step-by-Step Instructions
Now let’s get our hands dirty and bring those blueberries to life! Here’s how to craft the perfect batch of Hearty Blueberry Protein Muffins:
-
Preheat Your Oven:
First things first, preheat your oven to 375°F (190°C). This ensures your muffins bake evenly and rise beautifully. While that’s heating up, line your muffin tin with paper liners or coat them with non-stick cooking spray. -
Mix Dry Ingredients:
In a large mixing bowl, whisk together the whole wheat flour, rolled oats, protein powder, baking powder, and salt. This crucial step ensures that the leavening agent distributes evenly throughout the batter, helping your muffins rise more uniformly. Quick chef hack: sift the dry ingredients to prevent clumping and create a lighter texture! -
Combine Wet Ingredients:
In another bowl, whisk together the honey (or maple syrup), applesauce, eggs, and milk until smooth. This will create a lovely base for your muffin batter. If you’re using a liquid sweetener, it helps to mix it with the wet before combining everything for a more cohesive mixture. -
Combine Wet and Dry Ingredients:
Pour the wet ingredients into the dry ingredients and gently mix. Don’t overmix! A few lumps are totally okay — we want light, fluffy muffins, not dense hockey pucks. -
Fold in Blueberries:
Carefully add the fresh or frozen blueberries to the batter and fold them in gently. Try not to break them up too much; those juicy bursts of blueberry are the stars of this show! If you’re using frozen blueberries, toss them in a bit of flour first to minimize bleeding into the batter. -
Scoop into Muffin Tin:
Using a large spoon or cookie scoop, fill each muffin cup about 3/4 full. This gives your muffins room to rise without overflowing. For an extra touch, add a few blueberry halves on top for a pop of color! -
Bake:
Place your muffin tray in the preheated oven and bake for 18-20 minutes, or until a toothpick inserted in the center comes out clean. Keep an eye on them as ovens can vary! -
Cool and Enjoy:
Once baked, let the muffins cool in the tin for a few minutes before transferring them to a wire rack. This helps maintain that delicious, fluffy texture!
Serving Suggestions
These Hearty Blueberry Protein Muffins are fantastic freshly baked, but they also hold up well in an airtight container for a few days. Enjoy them warm with a dollop of Greek yogurt or cream cheese for a delightful brunch. For a fun presentation, serve them on a rustic wooden board alongside fresh fruit and a drizzle of honey — trust me, your guests will be impressed!
Recipe Variations
Feeling adventurous? Here are some creative twists to make these muffins even more exciting:
- Lemon Zest: Add the zest of one lemon to the batter for a fresh, bright flavor.
- Nuts or Seeds: Mix in a handful of chopped walnuts or chia seeds for added texture and nutrients.
- Other Fruits: Try replacing blueberries with raspberries, diced apples, or even chocolate chips if you’re looking for a sweeter treat!
- Spices: Experiment with adding cinnamon or nutmeg for a warm, fragrant touch.
- Savory Twist: Reduce the honey and add herbs like rosemary or thyme for a savory muffin that’s perfect with soup or salad.
Chef’s Notes
As a home cook, I can tell you that recipes are living things — they evolve over time! This recipe has gone through its fair share of transformations, from overly sweet to perfectly balanced. There was even a phase where I added a sprinkle of sea salt on top before baking, which was a game-changer! I love sharing these muffins with friends and family, and hearing their tweaks has inspired so much of what I do in the kitchen.
Also, you can totally freeze these muffins and pop them in the microwave for a quick treat anytime you crave something cozy. Don’t be surprised if you find yourself making multiple batches — they disappear fast!
FAQs and Troubleshooting
-
Why did my muffins sink in the middle?
Overmixing the batter can cause this, so try to mix just until combined. Additionally, ensure your baking powder is fresh! -
Can I use frozen blueberries?
Absolutely! Frozen blueberries work well. Just add them directly to the batter without thawing to prevent bleeding. -
What if I don’t have protein powder?
You can leave it out, but consider adding an extra tablespoon of flour or using Greek yogurt for added protein. -
How do I store these muffins?
Keep them in an airtight container at room temperature for up to three days, or freeze them for later enjoyment!
Nutritional Info (Optional)
Servings: 12 muffins
Calories: Approximately 160 per muffin (varies based on substitutions)
Protein: 6g | Carbs: 24g | Fat: 3g | Fiber: 3g
And there you have it! The recipe for Hearty Blueberry Protein Muffins is now yours to explore and enjoy. Bake a batch, share them with your loved ones, and create memories that will last a lifetime. Happy cooking, friends!
Print
Hearty Blueberry Protein Muffins
- Total Time: 35 minutes
- Yield: 12 muffins 1x
- Diet: Vegetarian
Description
Fluffy muffins bursting with juicy blueberries, packed with wholesome ingredients perfect for any time of day.
Ingredients
- 1 cup Whole Wheat Flour
- 1/2 cup Rolled Oats
- 1/2 cup Vanilla Protein Powder
- 1 tablespoon Baking Powder
- 1/4 teaspoon Salt
- 1/3 cup Honey or Maple Syrup
- 1/2 cup Unsweetened Applesauce
- 2 large Eggs
- 1/3 cup Milk
- 1 cup Fresh or Frozen Blueberries
Instructions
- Preheat your oven to 375°F (190°C).
- Mix dry ingredients in a bowl: whole wheat flour, rolled oats, protein powder, baking powder, and salt.
- Combine wet ingredients separately: honey (or maple syrup), applesauce, eggs, and milk.
- Pour the wet mixture into the dry ingredients and gently mix.
- Fold in blueberries carefully, avoiding breakage.
- Scoop the batter into muffin tins about 3/4 full.
- Bake for 18-20 minutes until a toothpick comes out clean.
- Cool in the tin for a few minutes before transferring to a wire rack.
Notes
These muffins freeze well and can be heated in the microwave for a quick treat anytime.
- Prep Time: 15 minutes
- Cook Time: 20 minutes
- Category: Snack
- Method: Baking
- Cuisine: American
Nutrition
- Serving Size: 1 muffin
- Calories: 160
- Sugar: 10g
- Sodium: 150mg
- Fat: 3g
- Saturated Fat: 0.5g
- Unsaturated Fat: 2g
- Trans Fat: 0g
- Carbohydrates: 24g
- Fiber: 3g
- Protein: 6g
- Cholesterol: 40mg
Keywords: blueberry muffins, protein muffins, healthy snacks
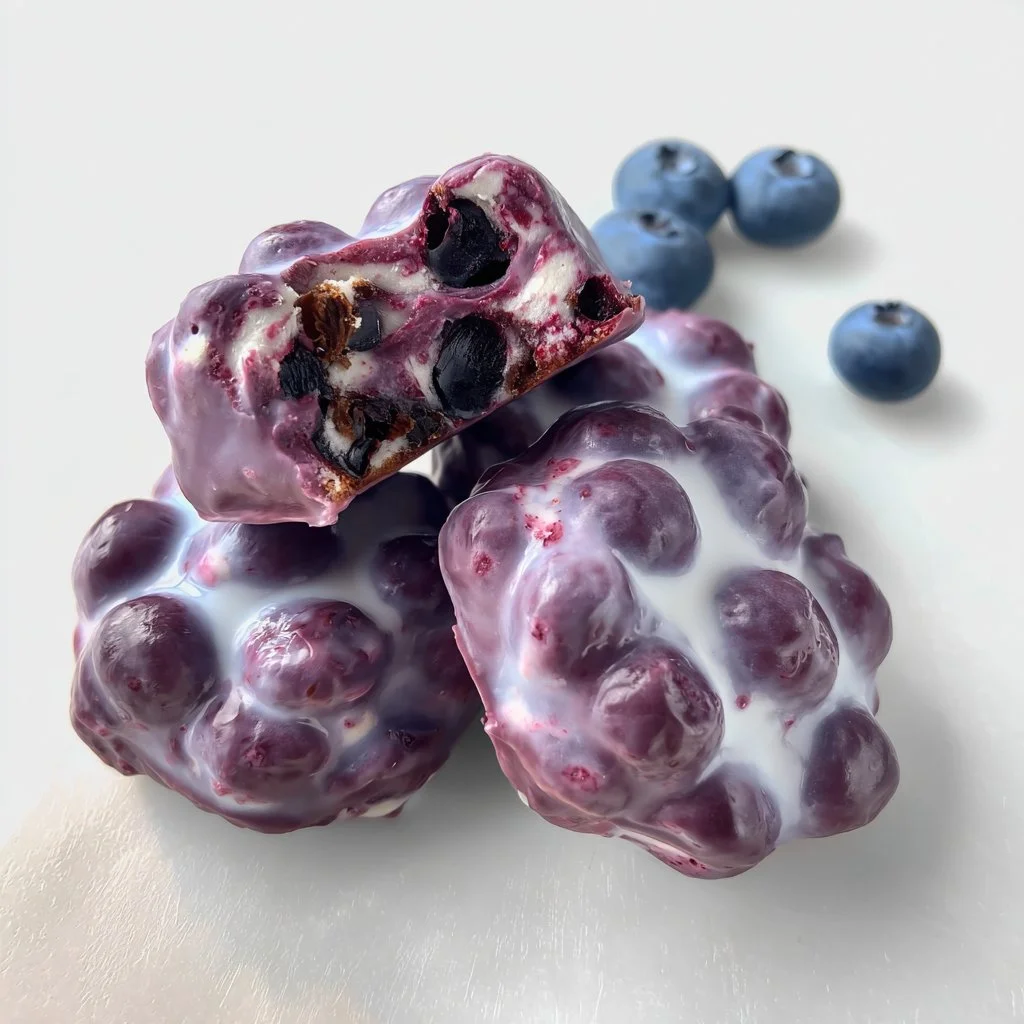
Blueberry Yogurt Clusters
Blueberry Yogurt Clusters: A Wholesome Treat for Every Occasion
Welcome back to my cozy corner of the kitchen, my fellow food lovers! Today, I’m thrilled to take you on a delightful journey as we whip up some Blueberry Yogurt Clusters. If there’s one thing I truly adore, it’s creating something that not only brightens up a room but also packs a nutritious punch! These little gems are perfect for snacking, breakfasting, or just indulging in when that sweet craving hits.
Imagine the delightful combination of luscious blueberries enveloped in creamy yogurt, all frozen into perfectly bite-sized clusters. It’s like nature’s candy, but made even better, because you’re in control of the sweetness! Plus, they’re a fantastic way to use up any fresh blueberries you have on hand, and you know I’m all about celebrating seasons and fresh ingredients.
Now, I understand you might have concerns about what it takes to create these tasty bites. Fear not! These clusters are incredibly easy to make, and I promise you’ll be snacking on them in no time. No fancy kitchen gadgets or skills are required – just your lovely self and a dash of enthusiasm! Perfect for enjoying solo while binge-watching your favorite show, or for impressing guests at your next brunch get-together, these Blueberry Yogurt Clusters will have everyone singing your culinary praises.
So, roll up those sleeves and let’s dive into a recipe that’s not only scrumptious but also a joy to create. From kitchen mishaps to moments of pure culinary magic, I’ll be here to guide you every step of the way. Let’s get started, my friends!
Personal Story
The first time I came across the idea of yogurt clusters was during my summer break in the mountains a few years ago. My aunt, a vibrant, free-spirited woman with an infectious laugh and culinary energy, had brought a bowl of these tasty delights to our family picnic. As we lounged in the shade, she insisted we all try a cluster—or three—before I knew it, a friendly competition sparked to see who could dive into the bowl the fastest!
The taste was divine; the creamy yogurt balanced the tartness of the blueberries perfectly. But what truly made the experience unforgettable were the stories she shared, reminiscing about her childhood summers spent indulging in similar treats with her own grandmother by the lakeside. That day turned into not just a feast for the taste buds but also a heartwarming connection between generations. I left that picnic with a happy belly and a newfound appreciation for simple treats. Ever since then, I’ve been on a mission to create my own versions at home, adding my own twists to craft a recipe that’s packed with nostalgia, love, and of course, flavor!
Ingredients
Here’s what you’ll need to bring these Blueberry Yogurt Clusters to life:
-
Fresh Blueberries (2 cups)
Juicy, plump blueberries are the star of the show here! Their natural sweetness and vibrant color make them irresistible. If fresh blueberries aren’t available, you can use frozen ones, just make sure to thaw and drain excess moisture to avoid a soggy mix. -
Plain Greek Yogurt (2 cups)
The creamy base for our clusters! Greek yogurt adds a great protein boost and a thickness that holds everything together. Feel free to swap with any flavored yogurt for added sweetness, or try plant-based yogurt for a dairy-free option. -
Honey or Maple Syrup (2 tablespoons)
A touch of sweetness to complement the tartness of the berries. You can adjust the sweetness to your preference. For a different flavor, consider agave syrup or even coconut sugar. -
Vanilla Extract (1 teaspoon)
Simply enhances the taste of the yogurt and adds an aromatic flair. If you’re out of vanilla, try almond extract for a nutty twist! -
Pinch of Salt
Just enough to balance the sweetness and enhance all the flavors. -
Chopped Nuts or Granola (optional, for garnish)
Adds a nice crunch to your clusters! Use your favorite type of nuts or granola, or leave it out for a more straightforward berry experience.
Step-by-Step Instructions
-
Prep Your Blueberries
Rinse the fresh blueberries thoroughly under cold water and gently pat them dry with a paper towel or clean cloth. This ensures your clusters aren’t waterlogged. Holding each berry up one by one, you might even hear whispers of “I’m going to be delicious!” -
Mix the Yogurt Base
In a mixing bowl, combine the Greek yogurt, honey or maple syrup, vanilla extract, and a pinch of salt. Use a whisk or spatula to blend until it’s smooth and creamy—think of it as giving the yogurt a cozy, sweet hug! -
Gently Fold in the Blueberries
Carefully add in the blueberries and fold them into the yogurt mixture using a spatula. Go slow here to keep those lovely berries whole and plump; their juicy goodness will burst in your mouth later! -
Create the Clusters
Now it’s time for the fun part! Using a spoon or a small ice cream scoop, scoop out a heaping tablespoon of the blueberry-yogurt mixture and drop it onto a parchment-lined baking sheet. Aim for small mounds that will hold their shape during freezing. If you’re feeling fancy, sprinkle a few chopped nuts or granola on top for added texture and flavor. -
Freeze The Clusters
Once your clusters are formed, pop the baking sheet into the freezer for about 2-3 hours, or until the yogurt is completely firm. You can try sneaking one before they’re fully frozen, but I suggest you let them set for the best result! -
Enjoy or Store
When they’re ready, remove the clusters from the freezer and transfer them to an airtight container, separating layers with parchment paper if you’re making a big batch. You can keep them in the freezer for up to a month, but I doubt they’ll last that long once your friends and family get a taste!
Serving Suggestions
To plate these delightful Blueberry Yogurt Clusters, simply arrange them on a pretty serving platter or in a charming bowl. I love to add a sprig of fresh mint for a pop of color and fresh aroma—perfect for impressing guests at breakfast or brunch! You can also serve them with extra yogurt or a drizzle of honey on the side for dipping. Trust me; they look as good as they taste!
Recipe Variations
-
Choco-Nut Delight: Add mini chocolate chips to your yogurt mixture for a delicious chocolatey twist that kids will adore and adults will secretly love too.
-
Berry Medley: Swap blueberries for other berries like raspberries, strawberries, or blackberries, or mix multiple types of berries for more fun!
-
Yogurt Flavors: Experiment with flavored yogurts like strawberry or vanilla bean to create unique clusters without any added sweeteners.
-
Tropical Twist: Incorporate shredded coconut or chopped pineapple to evoke a sunny beach vibe in every bite!
-
Spice It Up: Add a sprinkle of cinnamon or nutmeg into your yogurt mixture for a warm spice flavor that adds seasonal cheer, especially in the fall!
Chef’s Notes
These Blueberry Yogurt Clusters are one of those beautiful recipes that evolve based on what’s in season and what flavors inspire me at the moment. I often change up the yogurt to reflect the berry I’m using or add whatever nuts I have left from previous baking sessions (no waste in this kitchen!). One time, I even turned them into a smoothie bowl topping, just crumbling a few on top for extra crunch—a fun way to enjoy them!
And remember, the first batch is always a taste-testing opportunity, which usually means extra enthusiasm and a few dirtied spoons along the way!
FAQs and Troubleshooting
Q: Can I use frozen blueberries?
Absolutely! Just let them thaw and drain the excess liquid before mixing them into your yogurt. This way, you won’t end up with soggy clusters.
Q: What if my yogurt mixture is too runny?
If your yogurt is too runny, it may be due to the type of yogurt used. You can add a bit more plain yogurt to thicken it up or even a touch of cornstarch for a quick fix!
Q: Can I make these clusters ahead of time?
Yes! These are perfect for meal prep. Make your clusters ahead of time and store them in an airtight container in the freezer for up to a month. You’ll have snacks ready to go anytime!
Q: A few of my clusters melted and fell apart; what went wrong?
This can happen if they’re stored for too long at a warmer temperature in the freezer or if they’ve been sitting out too long before serving. Keep them frozen until you’re ready to enjoy for the best results!
Nutritional Info
(approximate per serving):
- Calories: 80
- Protein: 4g
- Fat: 1g
- Carbohydrates: 14g
- Fiber: 2g
Thank you for joining me in the kitchen today! I hope you’re feeling inspired to create these Blueberry Yogurt Clusters at home. Share your stories, variations, or anything else you’d like to chat about in the comments below – I can’t wait to hear your culinary adventures! Happy cooking!
Print
Blueberry Yogurt Clusters
- Total Time: 180 minutes
- Yield: 4 servings 1x
- Diet: Vegetarian
Description
Delightful Blueberry Yogurt Clusters, a nutritious and easy treat perfect for snacking or breakfasting.
Ingredients
- 2 cups Fresh Blueberries
- 2 cups Plain Greek Yogurt
- 2 tablespoons Honey or Maple Syrup
- 1 teaspoon Vanilla Extract
- Pinch of Salt
- Chopped Nuts or Granola (optional, for garnish)
Instructions
- Prep your blueberries by rinsing them thoroughly under cold water and patting them dry.
- Mix the Greek yogurt, honey or maple syrup, vanilla extract, and a pinch of salt in a mixing bowl until smooth and creamy.
- Gently fold in the blueberries, being careful to keep them whole.
- Create small mounds on a parchment-lined baking sheet using a spoon or small ice cream scoop.
- Freeze the clusters for about 2-3 hours, or until firm.
- Enjoy or store them in an airtight container in the freezer.
Notes
These yogurt clusters can be customized with other berries, yogurt flavors, or additional toppings.
- Prep Time: 15 minutes
- Cook Time: 0 minutes
- Category: Snack
- Method: Freezing
- Cuisine: American
Nutrition
- Serving Size: 1 serving
- Calories: 80
- Sugar: 7g
- Sodium: 50mg
- Fat: 1g
- Saturated Fat: 0.5g
- Unsaturated Fat: 0.5g
- Trans Fat: 0g
- Carbohydrates: 14g
- Fiber: 2g
- Protein: 4g
- Cholesterol: 5mg
Keywords: blueberry, yogurt, healthy snack, frozen treat, easy recipe
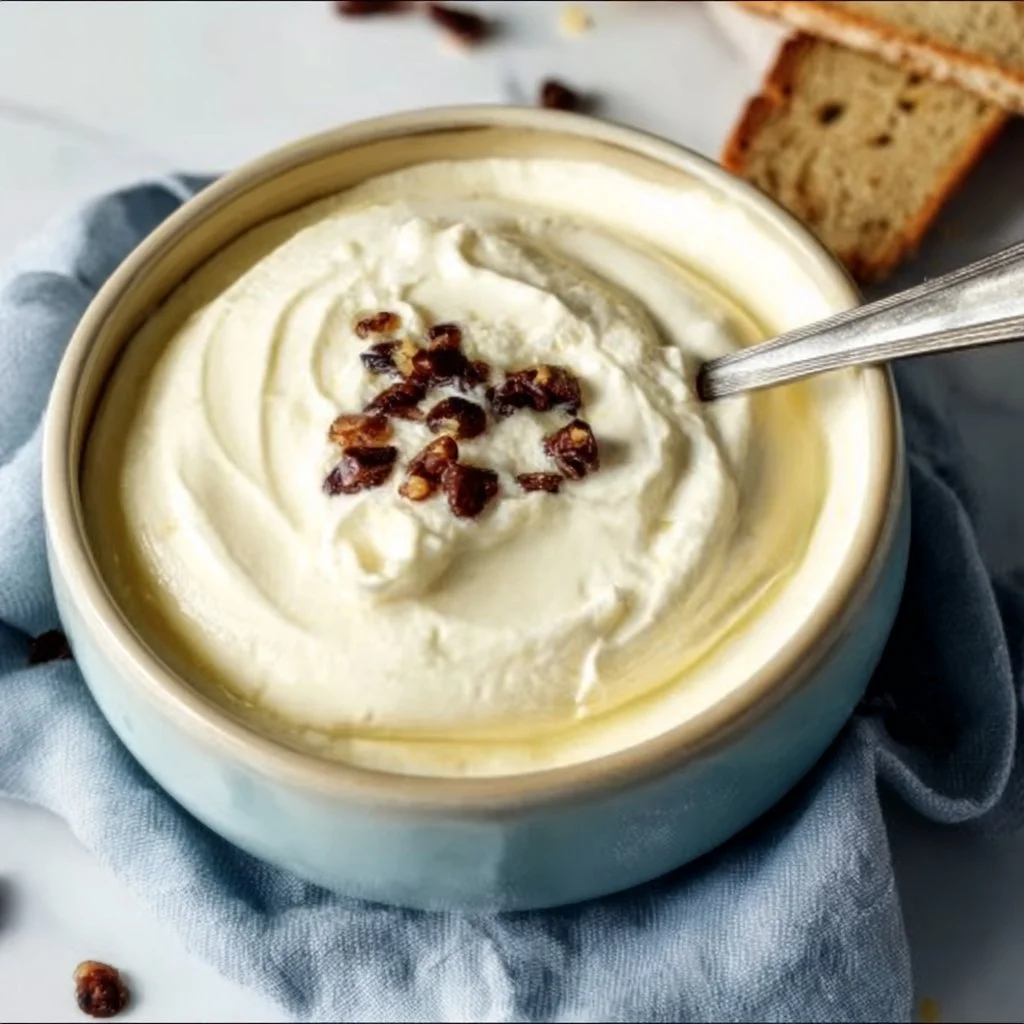
Baked Greek Yogurt: Quick, Healthy Protein Packed Breakfast
# Baked Greek Yogurt: Quick, Healthy, Protein-Packed Breakfast

## Introduction

Welcome to my cozy kitchen, friends! Today, we're diving into a delightful breakfast that will change the way you think about starting your day. Say goodbye to the mundane bowl of cereal and hello to Baked Greek Yogurt. Yes, you heard me right! This recipe not only packs a punch of protein but also offers a warm, comforting twist that will make you want to leap out of bed.

Baked Greek yogurt is a simple yet satisfying dish that brings joy to your morning routine. Picture this: you open your oven to reveal a golden-brown, fluffy delight topped with your favorite fruits and a drizzle of honey. It’s like a hug in breakfast form! And the best part? You can personalize it to match your mood or the season.

Let’s not forget the health benefits – Greek yogurt is a powerhouse of protein and probiotics, perfect for getting your digestion in check while also keeping you full and energized. Whether you’re rushing to work or enjoying a lazy weekend brunch with family, this dish effortlessly fits into any scenario. Plus, it’s quick to whip up on busy mornings, making breakfast a breeze!

So, grab your favorite apron and let’s get baking! This recipe is about to become your new breakfast superstar. It’s time to transform a simple ingredient into something that feels like a special treat. Ready? Let’s jump in!

## Personal Story

Growing up, breakfast was a big deal in our house. My mom had a knack for turning simple ingredients into unforgettable meals, and one of my absolute favorites was her baked yogurt. I can still remember waking up to the sweet aroma wafting through the house; it was always a delightful surprise to discover what flavor she had whipped up that morning.

I fondly remember one winter morning when it was snowing outside, and the warmth of the kitchen was heavenly. My mom made baked Greek yogurt topped with warm cinnamon apples, and we all gathered around the table, cozy in our pajamas. Our laughter filled the space as we enjoyed every spoonful while listening to soft music in the background. Those moments ignited my passion for cooking and my deep love for sharing food with friends and family.

Today, I’m excited to recreate that experience and share it with you. A little nostalgia goes a long way in our kitchens, and I hope this recipe brings as much joy to your mornings as it did to mine.

## Ingredients

Here’s what you’ll need to create this mouthwatering Baked Greek Yogurt:

- **2 cups Greek yogurt**
  - **Insight**: Opt for plain unsweetened to control the sweetness. It’s creamy, rich, and full of protein.

- **2 large eggs**
  - **Substitution Tip**: To make this recipe vegan, use flaxseed meal (1 tablespoon mixed with 2.5 tablespoons of water) for each egg.

- **1/4 cup honey or maple syrup**
  - **Insight**: Adjust sweetness according to your taste! You could also try agave nectar or coconut sugar for a different flavor.

- **1 teaspoon vanilla extract**
  - **Chef Tip**: Using pure vanilla extract elevates the flavor. Homemade vanilla extract is even better!

- **1/2 teaspoon baking powder**
  - **Insight**: This helps your yogurt bake up light and fluffy. Don’t skip it!

- **Toppings**: Your choice! Fruits, nuts, granola, or a sprinkle of cinnamon.
  - **Insight**: Fresh berries are fantastic in the summer, while roasted apples or pears work wonders in the fall.

## Step-by-Step Instructions

### Step 1: Preheat Your Oven
First things first, preheat your oven to 350°F (175°C). This step sets the stage for a perfectly baked yogurt.

### Step 2: Mix the Ingredients
In a large mixing bowl, combine the Greek yogurt, eggs, honey (or maple syrup), vanilla extract, and baking powder. Mix with a whisk until all ingredients are thoroughly blended. Don’t worry if it looks a little lumpy at this stage; it will smooth out beautifully as it bakes!

### Step 3: Prepare a Baking Dish
Lightly grease an 8x8-inch baking dish or a medium-sized cast-iron skillet with cooking spray or a little olive oil. This prevents any sticking and helps achieve a gorgeous color on the edges.

### Step 4: Pour and Spread
Pour the yogurt mixture into the greased baking dish. Use a spatula to spread it evenly, smoothing the top for a lovely finish.

### Step 5: Get Creative with Toppings
Here’s where you can have some fun! Sprinkle your choice of toppings over the yogurt mixture. I love using a mix of fresh sliced strawberries and a handful of crunchy granola. But feel free to experiment with what’s in season or what you have on hand.

### Step 6: Bake it Up
Place your dish in the preheated oven and bake for 25-30 minutes. Keep an eye on it as it bakes – you’re looking for a light golden top and a slight jiggle in the center. The edges should be puffed and set, while the middle might still be a touch soft.

### Step 7: Cool & Serve
Once it’s done baking, remove it from the oven and let it cool for about 5-10 minutes. This allows it to firm up just enough for easy serving. You can cut it into squares or serve it right from the dish.

## Serving Suggestions

Serve your baked Greek yogurt warm, straight from the oven, or let it cool slightly and plate it up with a drizzle of honey or a dollop of yogurt on top. It’s delightful with a side of fresh fruit or a sprinkle of nuts for crunch – perfect for elevating your breakfast experience!

## Recipe Variations

- **Berry Blast**: Add a blend of fresh or frozen berries mixed into the yogurt for a fruity twist.
- **Tropical Escape**: Mix in crushed pineapple and coconut flakes for a summery vibe.
- **Chocolate Delight**: Stir in some cocoa powder or chocolate chips for a rich, indulgent breakfast treat.
- **Nutty Banana**: Top with sliced banana and a drizzle of peanut butter for an extra protein boost.
- **Savory Twist**: Consider adding herbs like rosemary or thyme and topping with sautéed mushrooms or spinach for a savory breakfast version.

## Chef's Notes

This recipe has been a staple in my kitchen for years! I love how easy it is to tweak depending on what’s in the fridge or the season. Plus, I have to confess, I've had my share of “kitchen disasters” – like the time I forgot to add the eggs and ended up with a yogurt pudding instead. But hey, they say every great chef has their stories, right? Embrace the mess, enjoy the journey, and remember that every mishap is just a delicious learning experience!

## FAQs and Troubleshooting

**1. Can I make this ahead of time?**
Yes! You can prepare the mixture the night before and refrigerate it. Just bake it in the morning when you're ready to enjoy.

**2. It turned out too runny — what happened?**
If your yogurt mixture ends up too runny, it might be due to underbaking. Make sure it’s set and not too jiggly in the center before removing it from the oven.

**3. Can I add protein powder to this recipe?**
Absolutely! Just replace a portion of the Greek yogurt with protein powder, but you may need to add a bit more liquid to maintain the right consistency.

**4. How do I store leftovers?**
Store any leftovers in an airtight container in the refrigerator for up to 3 days. You can reheat it in the microwave for a quick breakfast!

## Nutritional Info

- **Calories**: Approximately 150 per serving (based on 8 servings)
- **Protein**: 10g
- **Carbohydrates**: 15g
- **Fat**: 6g

With this Baked Greek Yogurt recipe, you’re not just making breakfast; you’re creating memories, sharing joy, and enjoying all the goodness that comes from cooking. Each bite brings warmth and smiles, making every morning a little brighter. Happy baking, foodies! 🍽️
Baked Greek Yogurt
- Total Time: 40 minutes
- Yield: 4 servings 1x
- Diet: Vegetarian
Description
A warm, protein-packed baked yogurt delight, perfect for breakfast.
Ingredients
- 2 cups Greek yogurt (plain, unsweetened)
- 2 large eggs
- 1/4 cup honey or maple syrup
- 1 teaspoon vanilla extract
- 1/2 teaspoon baking powder
- Toppings: fruits, nuts, or granola of your choice
Instructions
- Preheat your oven to 350°F (175°C).
- Mix the Greek yogurt, eggs, honey (or maple syrup), vanilla extract, and baking powder in a large bowl.
- Prepare an 8×8-inch baking dish or cast-iron skillet by greasing it lightly.
- Pour the yogurt mixture into the greased dish and smooth the top with a spatula.
- Get creative by adding your favorite toppings on top.
- Bake for 25-30 minutes until lightly golden and set around the edges.
- Cool for 5-10 minutes, then serve warm.
Notes
Feel free to personalize with seasonal fruits or favorite toppings.
- Prep Time: 10 minutes
- Cook Time: 30 minutes
- Category: Breakfast
- Method: Baking
- Cuisine: Mediterranean
Nutrition
- Serving Size: 1 serving
- Calories: 150
- Sugar: 10g
- Sodium: 80mg
- Fat: 6g
- Saturated Fat: 2g
- Unsaturated Fat: 2g
- Trans Fat: 0g
- Carbohydrates: 15g
- Fiber: 1g
- Protein: 10g
- Cholesterol: 50mg
Keywords: baked yogurt, healthy breakfast, quick breakfast, protein-packed breakfast
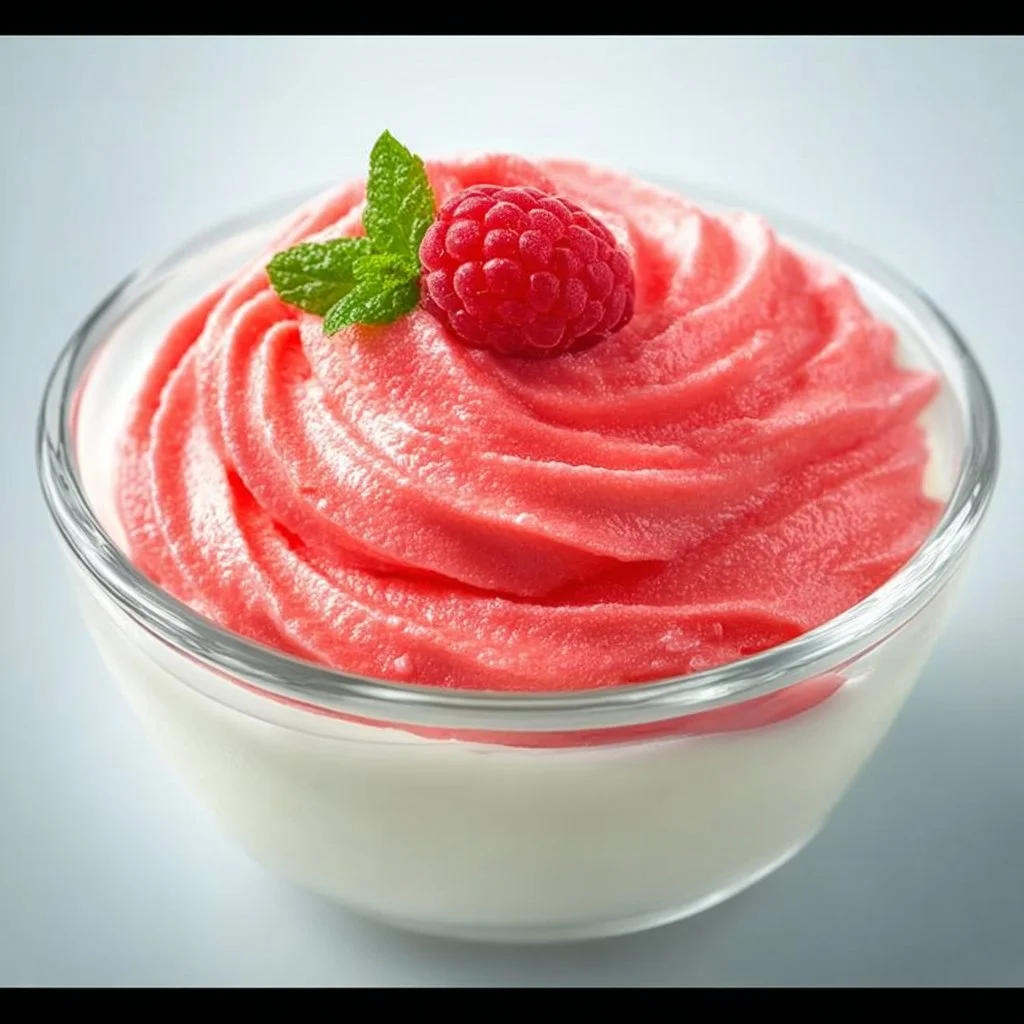
Greek Yogurt Jello Mousse
A Twist on Tradition: Greek Yogurt Jello Mousse
Welcome to my kitchen! Today I’m thrilled to share a delightful recipe that brings together my passion for flavors and comfort food. Get ready for the very enticing Greek Yogurt Jello Mousse— a dessert that’s light, refreshing, and oh-so-easy to make. If you find joy in creating sweet treats that not only satisfy your sweet tooth but also keep things light, this recipe is just for you!
As the weather warms, my thoughts turn towards the sun, freshness, and, of course, vibrant flavors. I love a dessert that can become a crowd-pleaser and conversation starter at any gathering. This Greek Yogurt Jello Mousse not only fits the bill but can be whipped up in no time—perfect for those spontaneous gatherings or weekend brunches.
To me, cooking is all about connection. It’s about the happy whispers of flavors coming together in harmony. Whether you’re enjoying it on a sunny afternoon with friends or sneaking a spoonful in the quiet of your busy day, this dessert is bound to bring a smile to your face.
So grab your aprons, and let’s dive in!
A Sweet Memory: The First Taste of Mousse
I can’t help but smile when I think about the first time I tasted mousse. I was in my grandmother’s kitchen, her warm and inviting oasis filled with the comforting aromas of caramel and chocolate. She would make all sorts of desserts, but mousse was a standout for me. Its light, airy texture and rich flavors were like a hug from the inside. I remember sneaking spoonfuls straight from the bowl, giggling with my cousins about how indulgent we felt, even if it was just a little taste.
Years later, I found a way to adapt this classic delight into something guilt-free yet equally satisfying using Greek yogurt as the base. This Greek Yogurt Jello Mousse has become one of my favorite desserts to make and share because it marries that nostalgic memory of mousse with a healthier twist.
Ingredients You’ll Need
Here’s what you’ll need to whip up this delightful Greek Yogurt Jello Mousse.
-
Greek Yogurt (2 cups)
This thick, creamy yogurt is the star of our show! It adds protein and a wonderful tanginess. You can substitute with any strained yogurt if you’re looking for an option that still captures that creamy essence. -
Jello Powder (1 package, any flavor you like)
Flavored gelatin, or Jello, is what gives this mousse its color and sweetness. Feel free to experiment with different flavors—strawberry, raspberry, or even lemon for a zesty kick! -
Hot Water (1 cup)
You’ll need this to dissolve the Jello powder. Don’t worry; just boiling water will do the trick! -
Cold Water (1/2 cup)
This is used to help cool the mixture after you dissolve the Jello—keeping things light and fluffy! -
Whipped Cream (1 cup, optional)
For that extra touch of decadence! You can use store-bought or make your own. If you want a lower calorie option, skip this entirely or use a whipped topping instead. -
Fresh Berries (for garnish)
Berries add a beautiful pop of color and fresh flavor. Blueberries, strawberries, or raspberries work beautifully!
Step-by-Step Instructions
Now that we have all our ingredients, let’s get started on creating this delicious dessert.
Step 1: Prepare the Jello
- Dissolve the Jello Powder: In a medium-sized bowl, add your Jello powder to 1 cup of hot water. Stir well until completely dissolved. (Tip: Be patient here; lumps are not what we want in our mousse, so ensure it’s fully mixed).
Step 2: Combine Jello with Yogurt
-
Mix in Cold Water: Once the Jello is dissolved, add in the 1/2 cup of cold water and mix it thoroughly. This will help cool the mixture down.
-
Incorporate the Greek Yogurt: Now, using a spatula or a mixer, gently fold in the Greek yogurt. (Tip: If using a mixer, be careful not to overwhip it; we want that airy texture.)
Step 3: Chill and Whip
-
Chill in the Fridge: Pour the mixture into individual serving dishes or a large bowl. Cover with plastic wrap and refrigerate for about 1-2 hours, or until set.
-
(Optional) Make the Whipped Cream: If you’re using whipped cream, whip it up during the last 15 minutes of the chilling process so it’s freshly prepared. In a chilled bowl, whip your cream until soft peaks form, adding a bit of sugar or vanilla if desired.
Step 4: Serve and Enjoy
- Serve with Flair: Once set, top with a dollop of whipped cream and a handful of fresh berries for decoration. Trust me—this touch ups the visual appeal!
Serving Suggestions
This Greek Yogurt Jello Mousse is quite versatile. You can serve it in elegant glassware for a refined dinner party or in colorful bowls for a fun casual gathering. Don’t forget to add those vibrant berries on top; they’re not only nutritious but also elevate the dish to a beautifully balanced creation.
Recipe Variations
-
Fruit Cocktail Mousse: Replace some of the yogurt with puréed fruit like mango or banana for an extra refreshing taste.
-
Choco-berry Delight: Use chocolate flavored Jello and mix in cocoa powder for a chocolate mousse variation!
-
Vegan Option: Substitute Greek yogurt with a plant-based yogurt (like coconut or almond yogurt) and use agar-agar instead of Jello for a completely vegan dessert.
-
Nutty Addition: Toss in some chopped nuts or nut butter to add a crunchy texture to the light mousse.
-
Herb-infused Jello: Crazy, right? Infuse your water with herbs like mint or basil before mixing it with the Jello for a unique twist.
Chef’s Notes
One of my favorite things about this recipe is how adaptable it is. I love playing with different flavors, especially during the summer when fresh fruit is bursting with sweetness! It’s always fun to see how the recipe evolves and gets passed around in my family. Someone once told me that they loved adding a splash of their favorite liqueur to turn it into a fancy adult dessert. (Note: If you go this route, just adjust the water accordingly!)
Also, this recipe is perfect for those days when you’re pressed for time but want something special that won’t feel too heavy.
FAQs and Troubleshooting
-
Why is my mousse not setting?
- Ensure that your Jello is fully dissolved and the proportions of hot and cold water are accurate. If it still doesn’t set, it may need more time in the fridge.
-
Can I use fresh Jello instead of powdered?
- Absolutely! Just ensure you follow the reconstitution instructions accordingly, as fresh versions can vary.
-
What can I do with leftover mousse?
- Store it in the fridge in an airtight container! Leftovers typically keep for 2-3 days but are best enjoyed fresh.
-
Why does my mousse taste too tangy?
- This can be common if you’re using a strong Greek yogurt. You may want to consider sweetening it with honey or sugar to balance the tanginess.
Nutritional Info (if applicable)
While precise nutrition will depend on your specific ingredients, a general serving of Greek Yogurt Jello Mousse has roughly:
- Calories: 150-200 (without whipped cream)
- Protein: 10-12 grams
- Carbohydrates: 20 grams
- Sugar: varies based on Jello flavor
This dessert not only satisfies your sweet tooth but also provides a good dose of protein from the yogurt. It’s a fun dessert that fits right into a balanced meal!
And there you have it—a delicious, light, and flavorful Greek Yogurt Jello Mousse that anyone can make! I hope this recipe fills your kitchen with warmth and joy, just as my grandmother’s did for me. Happy cooking, and don’t forget to share your creations! Remember, cooking is all about having fun and making memories along the way. Enjoy!
Print
Greek Yogurt Jello Mousse
- Total Time: 120 minutes
- Yield: 4 servings
- Diet: Gluten-Free
Description
A light and refreshing dessert that combines Greek yogurt with Jello for a delightful treat.
Ingredients
- Greek Yogurt (2 cups)
- Jello Powder (1 package, any flavor)
- Hot Water (1 cup)
- Cold Water (1/2 cup)
- Whipped Cream (1 cup, optional)
- Fresh Berries (for garnish)
Instructions
- Dissolve the Jello Powder in 1 cup of hot water, stirring until completely dissolved.
- Add the cold water and mix thoroughly.
- Fold in the Greek yogurt gently using a spatula or mixer.
- Pour the mixture into serving dishes and refrigerate for 1-2 hours until set.
- Whip the cream, if using, in the last 15 minutes of chilling.
- Serve topped with whipped cream and fresh berries.
Notes
Feel free to experiment with different Jello flavors and add-ins like puréed fruit or nuts for variation.
- Prep Time: 15 minutes
- Cook Time: 0 minutes
- Category: Dessert
- Method: Chilling
- Cuisine: Greek
Nutrition
- Serving Size: 1 serving
- Calories: 175
- Sugar: 15g
- Sodium: 80mg
- Fat: 7g
- Saturated Fat: 4g
- Unsaturated Fat: 3g
- Trans Fat: 0g
- Carbohydrates: 20g
- Fiber: 0g
- Protein: 10g
- Cholesterol: 20mg
Keywords: Greek Yogurt, Jello, Mousse, Dessert, Light Dessert, Quick Recipe
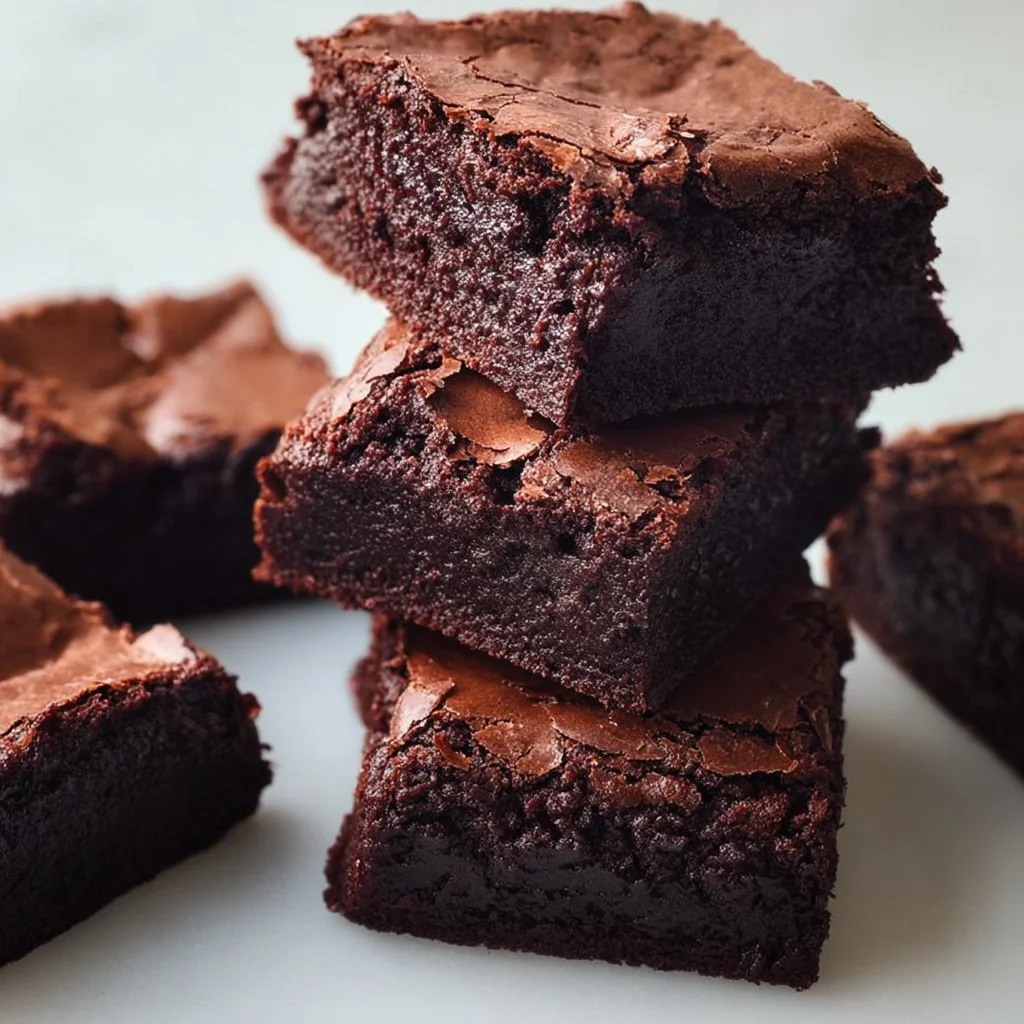
Greek Yogurt Brownies Recipe
Indulge in Guilt-Free Bliss: The Ultimate Greek Yogurt Brownies Recipe!
Welcome to my cozy kitchen! I’m so excited to share something absolutely delicious and a little surprising today: Greek Yogurt Brownies! As someone who adores the rich, decadent taste of brownies—but also believes in striking a balance—this recipe has become a cherished favorite of mine. Using Greek yogurt brings moisture and a lovely texture while cutting back on some of that guilt that can come with traditional brownies. Trust me; these fudgy delights will have your friends and family begging for more!
Baking, for me, is all about creating moments. Whether it’s the comforting aroma wafting through the house or the excitement of watching the confection rise in the oven, there’s a certain magic in the air. I remember the first time I ever made brownies on my own. I was in high school, and my friends had gathered for a little movie night. I had just discovered a simple brownie recipe in a dusty cookbook and was eager to impress. Surprisingly, they turned out wonderfully, and we devoured every last crumb while laughing and sharing silly stories. That night sparked my love for cooking and the joy of sharing with others, which is what this blog is all about!
So, shall we put on our favorite aprons and get started? Grab your favorite whisk, a mixing bowl, and let’s make some mouthwatering Greek Yogurt Brownies that will leave everyone (including you!) wanting just one more indulgent bite.
Personal Story
I remember the joy of my first brownie-making adventure fondly, but I want to take you to the moment I decided to jazz up that classic recipe with a healthy twist. It all started during a health kick a few years back, where I had mostly swapped out comfort food for salads and smoothies. One day, I was craving something sweet, especially the brownies I used to make. They just brought me so much happiness! So, I rummaged through my pantry and came across a tub of Greek yogurt that had been living there for a while. The light bulb moment hit me: what if I could create a brownie that wouldn’t derail my healthy eating goals?
The first batch came out of the oven with a hint of skepticism in the air. I took a bite, and—to my delight—they were every bit as fudgy and rich as the traditional version, yet light enough that I didn’t feel like an instant sugar crash was just around the corner. I shared them with friends who were on their own health journeys, and they were amazed at the delicious surprise. From that day on, my Greek Yogurt Brownies became a staple in my kitchen—and I think they’ll become a favorite in yours, too!
Ingredients
Here’s what you’ll need to whip up these delightful Greek Yogurt Brownies:
-
1 cup Greek yogurt
Choose plain, unsweetened Greek yogurt for the best results. This ingredient helps keep these brownies moist while adding some protein! If you don’t have Greek yogurt, regular yogurt can be used, but swap it out for ¾ cup and adjust baking time. -
½ cup unsweetened cocoa powder
Cocoa powder is your key to achieving that decadent chocolate flavor. Use high-quality cocoa for a richer taste. You can also substitute half with dark chocolate for an intense flavor boost! -
½ cup granulated sugar
Feel free to use coconut sugar or brown sugar for a hint of caramel flavor. You can also reduce the sugar to ⅓ cup if you want a less sweet brownie or try using a sugar substitute like Stevia. -
1 cup all-purpose flour
All-purpose flour provides the necessary texture, but you can use whole wheat flour for a healthier option. Just keep in mind that the texture will change slightly. -
½ teaspoon baking powder
This is essential; it gives the brownies a lovely rise and fluffy texture. If you’re feeling adventurous, try adding a hint of baking soda for an even fluffier finish! -
2 large eggs
Eggs bind the brownies together! For a vegan alternative, you can substitute with flaxseed eggs (2 tablespoons ground flaxseed mixed with 6 tablespoons water) and let it sit for a few minutes until it thickens. -
1 teaspoon vanilla extract
This adds depth to the flavor profile. You can even experiment with almond extract for a unique twist! -
1/2 cup chocolate chips (optional)
You can’t go wrong with chocolate! Use semi-sweet or dark chocolate chips, or even swap them for nuts or dried fruit for added texture!
Step-by-Step Instructions
Now, let’s break down the steps to creating these luscious Greek Yogurt Brownies. Follow along, and I promise you’ll have an amazing batch of brownies ready to devour in no time!
Step 1: Preheat Your Oven
Start by preheating your oven to 350°F (175°C) and greasing or lining an 8×8-inch baking pan with parchment paper. This ensures easy removal after baking!
Step 2: Mix the Wet Ingredients
In a medium mixing bowl, combine the Greek yogurt, eggs, sugar, and vanilla extract. Use a whisk to mix it all together until you achieve a smooth, creamy consistency. The yogurt should integrate well with the eggs, creating a luscious base.
Step 3: Sift in the Dry Ingredients
Now, in another bowl, sift together the cocoa powder, flour, and baking powder. Sifting helps avoid clumps and ensures an even distribution of the dry ingredients. Once sifted, gently fold it into the wet mixture until just combined. Don’t over-mix; you want a luscious brownie batter that’s rich and thick!
Step 4: Add Chocolate Chips
If you’re using them, this is where you fold in the chocolate chips for an extra decadent touch! Gently mix them into the batter, making sure they’re evenly distributed.
Step 5: Pour and Spread
Pour the brownie batter into your prepared pan and use a spatula to spread the mixture evenly. This step is key to achieving that beautiful, consistent bake!
Step 6: Bake
Pop the brownies into your preheated oven and bake for 20-25 minutes. The smell will be incredible! To check for doneness, insert a toothpick into the center; it should come out with a few moist crumbs, not wet batter.
Step 7: Cool and Slice
Once baked, remove the pan from the oven and let the brownies cool in the pan for about 10-15 minutes before transferring them to a cooling rack. Once they’re completely cool, slice them into squares and prepare for the oohs and ahhs!
Serving Suggestions
When it comes to serving these delightful brownies, you can keep it simple. A dusting of powdered sugar is always a classic touch, or plate them warm with a scoop of vanilla ice cream for a truly indulgent dessert. Serve them alongside fresh berries for a refreshing contrast—whatever your heart desires!
Recipe Variations
Ready for some fun twists on these Greek Yogurt Brownies? Here are a few ideas:
- Nutty Surprise: Fold in a half-cup of walnuts or pecans for a delightful crunch.
- Peppermint Twist: Add a few drops of peppermint extract to the batter and top with crushed candy canes for a festive treat!
- Dried Fruit Delight: Mix in dried cherries or cranberries for a sweet and tart flavor combination.
- Spicy Kick: Incorporate a pinch of cayenne pepper in the batter for a surprising warm finish!
- Gluten-Free Option: Swap out the all-purpose flour for almond flour or a gluten-free baking blend.
Chef’s Notes
These Greek Yogurt Brownies have not only become a staple but also a canvas for my creativity. The original recipe has gone through many iterations, often inspired by what I have on hand in my kitchen. One memorable time, I swapped in pumpkin puree instead of Greek yogurt for a fall twist, and let me tell you, it led to the most incredible pumpkin spice brownies! The beauty of this recipe is in its flexibility. Don’t be afraid to play around with it and make it yours!
FAQs and Troubleshooting
1. Why are my brownies dry?
Dry brownies can occur if they’re overbaked or if there’s an incorrect measurement of flour. Make sure to check your brownies a couple of minutes before the recommended baking time!
2. Can I store these brownies?
Absolutely! Store them in an airtight container at room temperature for up to 3 days, or in the fridge for about a week. You can even freeze them for up to three months. Just make sure to wrap them tightly!
3. Can I use non-dairy yogurt?
Definitely! Non-dairy yogurt works well too! Just make sure to choose a thicker variety to keep the same texture.
4. What if I want even more chocolaty goodness?
You can increase the cocoa powder to ¾ cup for a richer brownie! Also, don’t forget those chocolate chips for that extra hit of chocolate flavor!
Nutritional Info (Optional)
Each brownie (based on 16 servings) contains approximately:
- Calories: 135
- Protein: 4g
- Carbohydrates: 20g
- Fat: 5g
- Sugar: 6g
And there you have it, my friends! A delightful, easy-to-make, guilt-free Greek Yogurt Brownies recipe that’ll satisfy your sweet tooth without the heavy feeling afterward. Now, it’s your turn to grab those mixing bowls and start creating delicious memories in your kitchen. I can’t wait to see how your brownies turn out—be sure to share your creations with me! Happy baking!
Print
Greek Yogurt Brownies
- Total Time: 40 minutes
- Yield: 16 servings 1x
- Diet: Vegetarian
Description
Indulge in these moist and fudgy Greek Yogurt Brownies that are a healthier twist on a classic treat. Perfect for satisfying your sweet tooth without the guilt!
Ingredients
- 1 cup Greek yogurt
- ½ cup unsweetened cocoa powder
- ½ cup granulated sugar
- 1 cup all-purpose flour
- ½ teaspoon baking powder
- 2 large eggs
- 1 teaspoon vanilla extract
- ½ cup chocolate chips (optional)
Instructions
- Preheat your oven to 350°F (175°C) and grease or line an 8×8-inch baking pan with parchment paper.
- Mix the Greek yogurt, eggs, sugar, and vanilla extract together in a medium mixing bowl until smooth.
- Sift together the cocoa powder, flour, and baking powder in another bowl. Gradually fold it into the wet mixture until just combined.
- Add in the chocolate chips, if using, mixing gently into the batter.
- Pour the brownie batter into your prepared pan and spread evenly.
- Bake for 20-25 minutes, checking for doneness with a toothpick.
- Cool in the pan for 10-15 minutes before transferring to a cooling rack. Once cool, slice into squares.
Notes
For a healthier option, substitute half of the cocoa with dark chocolate or use coconut sugar for sweetness. Experiment with adding nuts, dried fruits, or different extracts for variety.
- Prep Time: 15 minutes
- Cook Time: 25 minutes
- Category: Dessert
- Method: Baking
- Cuisine: American
Nutrition
- Serving Size: 1 brownie
- Calories: 135
- Sugar: 6g
- Sodium: 50mg
- Fat: 5g
- Saturated Fat: 2g
- Unsaturated Fat: 3g
- Trans Fat: 0g
- Carbohydrates: 20g
- Fiber: 2g
- Protein: 4g
- Cholesterol: 30mg
Keywords: brownies, healthy dessert, Greek yogurt, chocolate, baking
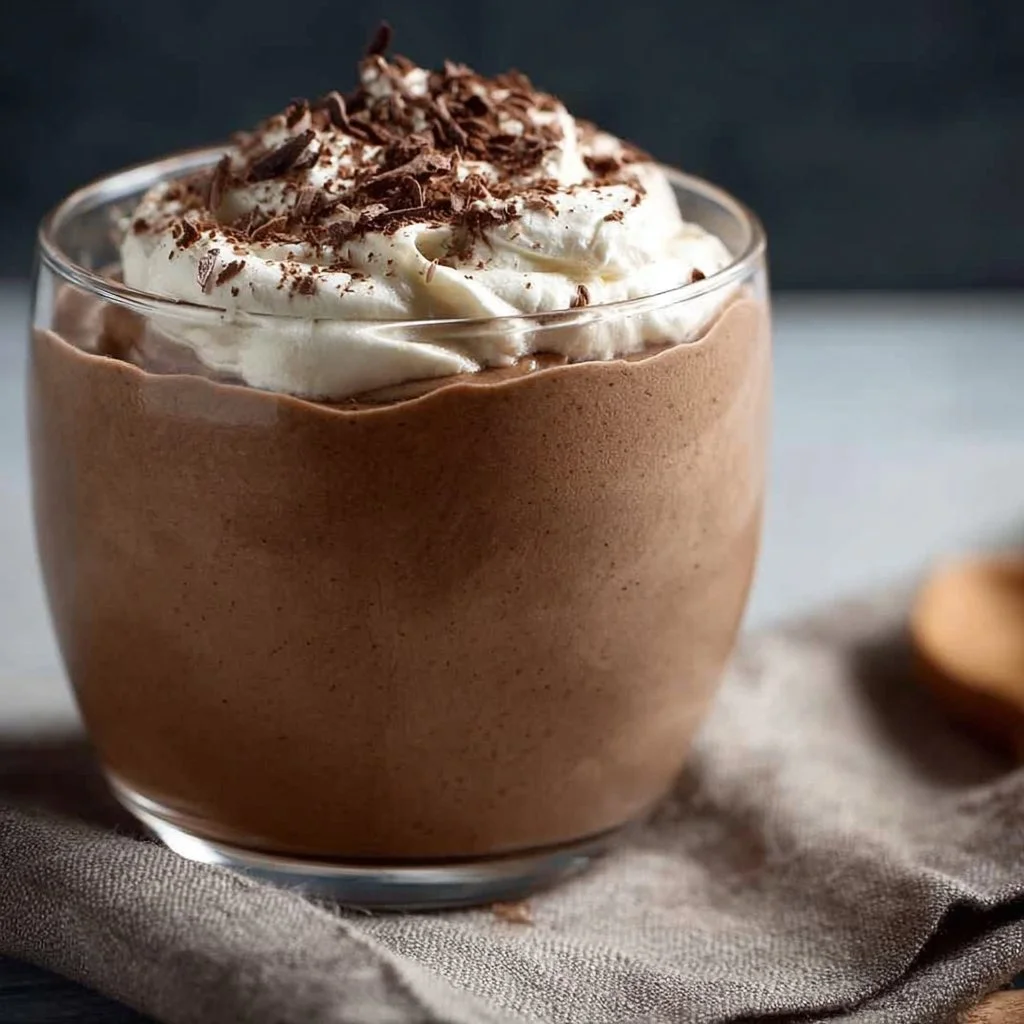
Greek Yogurt Chocolate Mousse
Easy Greek Yogurt Chocolate Mousse: Indulgence without Guilt!
Introduction: A Little Chocolate Luxury
Welcome, fellow food lovers! I’m thrilled to have you here in my cozy kitchen as we whip up something truly special today—Creamy Greek Yogurt Chocolate Mousse! This dessert is everything you crave—rich, silky, and oh-so-chocolaty—yet we’re sneaking in some health benefits thanks to our star ingredient: Greek yogurt.
You see, there was a time when I thought indulging in chocolate meant suffering the consequences. But that’s when I stumbled upon the creamy goodness of Greek yogurt! This delightful treat has transformed the way I view dessert. I can enjoy something luxurious without the guilt clinging to my conscience—now that’s a win-win!
Imagine cozying up with your loved ones, a spoonful of this luscious mousse in hand, and all your worries melting away with each bite. I believe desserts are all about sharing love, laughter, and a little warmth, and this mousse perfectly encapsulates that spirit. So grab your mixing bowl, and let’s dive into a recipe that will make your heart flutter and your taste buds dance!
Personal Story: A Sweet Childhood Memory
Let me take you back to my childhood for a moment, where it all began. One of my favorite memories is sneaking into the kitchen while my mom was baking. She often whipped up chocolate treats that filled our home with that irresistibly comforting aroma. Between the flour clouds and the chocolate smudges, I learned that cooking isn’t just a task; it’s an invitation to create memories.
One day, as we crafted a classic chocolate mousse, my little hands struggled to mix the thick chocolate and cream together. My mom chuckled and said, "We might need a magic wand for this one!" While a magic wand wasn’t available, she deftly introduced Greek yogurt to the mix for a boost of creaminess and protein. I sat there, in awe of her magical ability to transform a simple dessert into something healthier yet delicious. Since then, I’ve loved experimenting with recipes and making them my own, but I always cherish that laughter and love we shared during those kitchen adventures.
Ingredients: What’s in Our Mousse?
Let’s gather our ingredients, shall we? Here’s what you’ll need to create this delightful treat:
Main Ingredients
-
1 cup Greek yogurt
Greek yogurt is our creamy base, and it provides both texture and tang! For a lighter option, you can use non-fat yogurt, but whole-fat yogurt will give you that rich mouthfeel. -
1 cup semi-sweet chocolate chips
Choose high-quality chocolate for the best flavor. If you prefer dark chocolate or want to reduce sugar, opt for bittersweet chocolate instead. -
2 tablespoons honey or maple syrup
This natural sweetener will enhance the chocolate flavor. Feel free to adjust the sweetness level based on your taste! -
1 teaspoon vanilla extract
Vanilla is the secret ingredient that elevates the flavor. If you’re feeling adventurous, try adding a splash of espresso or almond extract! -
A pinch of sea salt
Just a little salt will balance the sweetness and amplify the chocolate taste! -
Optional toppings: whipped cream, berries, or nuts
These can take your mousse to the next level, adding texture and color!
Step-by-Step Instructions: Crafting Your Mousse Masterpiece
Alright, let’s get our hands a little chocolaty! Here’s how to make this decadent Greek Yogurt Chocolate Mousse step by step:
Step 1: Melt the Chocolate
In a microwave-safe bowl, heat your chocolate chips for about 30 seconds. Stir, then heat in 15-second intervals until melted. Make sure to stir thoroughly to prevent burning. Don’t skimp on this step—good chocolate is key to a blissful mousse!
Step 2: Prepare the Yogurt Mixture
While your chocolate is melting, grab a mixing bowl and combine the Greek yogurt, honey (or maple syrup), vanilla extract, and a pinch of sea salt. Use a whisk or electric mixer to blend until it’s silky and creamy. This is the part where you want to show off your whisking skills—get that muscle working!
Step 3: Combine Chocolate and Yogurt
Once the chocolate has cooled slightly (we don’t want to cook the yogurt!), pour it into the yogurt mixture. Gently fold the two together using a spatula, being careful not to overmix. We want to keep that light, airy texture. It’s like a cozy hug for your mousse!
Step 4: Taste Test
A chef’s secret? Always taste your creation! Use a clean spoon to dip into the bowl and assess the flavor. Adjust the sweetness if you need to—maybe a little more honey if you’ve got a sweet tooth!
Step 5: Portion and Chill
Spoon the mousse into individual serving glasses or bowls. I love to use pretty glassware to show off those beautiful layers. Cover with plastic wrap or a lid and let the mousse chill in the fridge for at least 30 minutes to firm up. Trust me; it’ll be worth the wait!
Step 6: Serve with Flair
Once chilled and set, it’s time for the fun part—garnishing! Top each mousse with a dollop of whipped cream, a few fresh berries, or a sprinkle of crushed nuts. Get creative! This is your chance to personalize each serving.
Serving Suggestions: Time to Serve Up Some Love
When it comes to serving this mousse, keep it simple yet elegant. Layering your mousse in clear glasses not only showcases its rich texture but adds an element of sophistication to your dessert. You can pair it with a side of fresh fruit or serve it alongside cookies for that classic cookie-and-mousse pairing. Either way, your guests will be singing your praises!
Recipe Variations: Get Creative in the Kitchen
Want to make this mousse your own? Here are a few creative twists you can try:
- Fruit-Flavored Mousse: Fold in fresh fruit purée, such as raspberry or mango, to infuse vibrant flavors.
- Nutty Chocolate Mousse: Stir in a tablespoon of almond or hazelnut butter for added richness.
- Spicy Kick: Add a pinch of cayenne or cinnamon for a warm, spicy note that balances the chocolate.
- Nut-Free Option: Use coconut yogurt and dairy-free chocolate for a vegan twist.
- Layered Mousse: Create layers of chocolate and fruit mousse for an eye-catching, colorful dessert.
Chef’s Notes: A Sweet Journey of Discovery
One of the things I love most about cooking is how recipes can evolve over time. This Greek Yogurt Chocolate Mousse is no exception! Initially a basic chocolate mousse, I began experimenting with healthier alternatives, and introducing Greek yogurt was a game changer.
It not only lightened the dessert but also gave me that feeling of indulgence without the guilt. Every time I make this mousse, I’m transported to those joyful kitchen moments with my mom, and it reminds me of how important it is to share these experiences with others. So don’t hesitate to put your spin on it—every creation is a reflection of your story.
FAQs and Troubleshooting: Let’s Tackle Those Kitchen Queries!
1. Can I use Greek-style yogurt instead of traditional Greek yogurt?
Absolutely! Just ensure it has a thick consistency for the best texture.
2. My mousse turned out too runny. How can I fix it?
If the mousse doesn’t set well, it might need a bit more chilling time. You can also add a tad more Greek yogurt to balance the consistency.
3. Is it possible to make this mousse ahead of time?
Definitely! This mousse keeps well in the fridge for up to three days. Just add the toppings right before serving.
4. Can I freeze the mousse?
While it’s best enjoyed fresh, you can freeze it for up to a month. When ready to eat, let it thaw in the fridge overnight for that creamy texture!
Nutritional Info
While I won’t bore you with specifics, rest assured this mousse is packed with protein from the Greek yogurt and filled with luscious chocolate goodness. It’s a delightful compromise between health and indulgence, making it an ideal treat!
So there you have it—a recipe that’s not just beautifully delicious but also holds a piece of my heart. I can’t wait for you to try this Greek Yogurt Chocolate Mousse and create your special moments around it. Remember, cooking is about joy, love, and sharing the flavors of life with those you care about. Happy cooking, friends!
Print
Easy Greek Yogurt Chocolate Mousse
- Total Time: 50 minutes
- Yield: 4 servings 1x
- Diet: Vegetarian
Description
Indulge in this rich and silky Greek Yogurt Chocolate Mousse that combines luxury with health benefits.
Ingredients
- 1 cup Greek yogurt
- 1 cup semi-sweet chocolate chips
- 2 tablespoons honey or maple syrup
- 1 teaspoon vanilla extract
- A pinch of sea salt
- Optional toppings: whipped cream, berries, or nuts
Instructions
- Melt the chocolate by heating chocolate chips in a microwave-safe bowl for 30 seconds, stirring and continuing in 15-second intervals until fully melted.
- Prepare the yogurt mixture by combining Greek yogurt, honey (or maple syrup), vanilla extract, and sea salt in a mixing bowl, whisking until creamy.
- Combine the melted chocolate with the yogurt mixture gently using a spatula.
- Taste the mixture and adjust sweetness if needed.
- Portion the mousse into serving glasses and chill in the fridge for at least 30 minutes.
- Serve with your choice of toppings like whipped cream, berries, or nuts.
Notes
For a lighter mousse, use non-fat Greek yogurt. You can also add flavors like fruit purée or nut butter.
- Prep Time: 15 minutes
- Cook Time: 5 minutes
- Category: Dessert
- Method: Chilling
- Cuisine: Greek
Nutrition
- Serving Size: 1 serving
- Calories: 250
- Sugar: 15g
- Sodium: 60mg
- Fat: 10g
- Saturated Fat: 5g
- Unsaturated Fat: 5g
- Trans Fat: 0g
- Carbohydrates: 32g
- Fiber: 2g
- Protein: 8g
- Cholesterol: 10mg
Keywords: chocolate mousse, Greek yogurt dessert, healthy chocolate recipe, indulgent dessert, guilt-free dessert




