
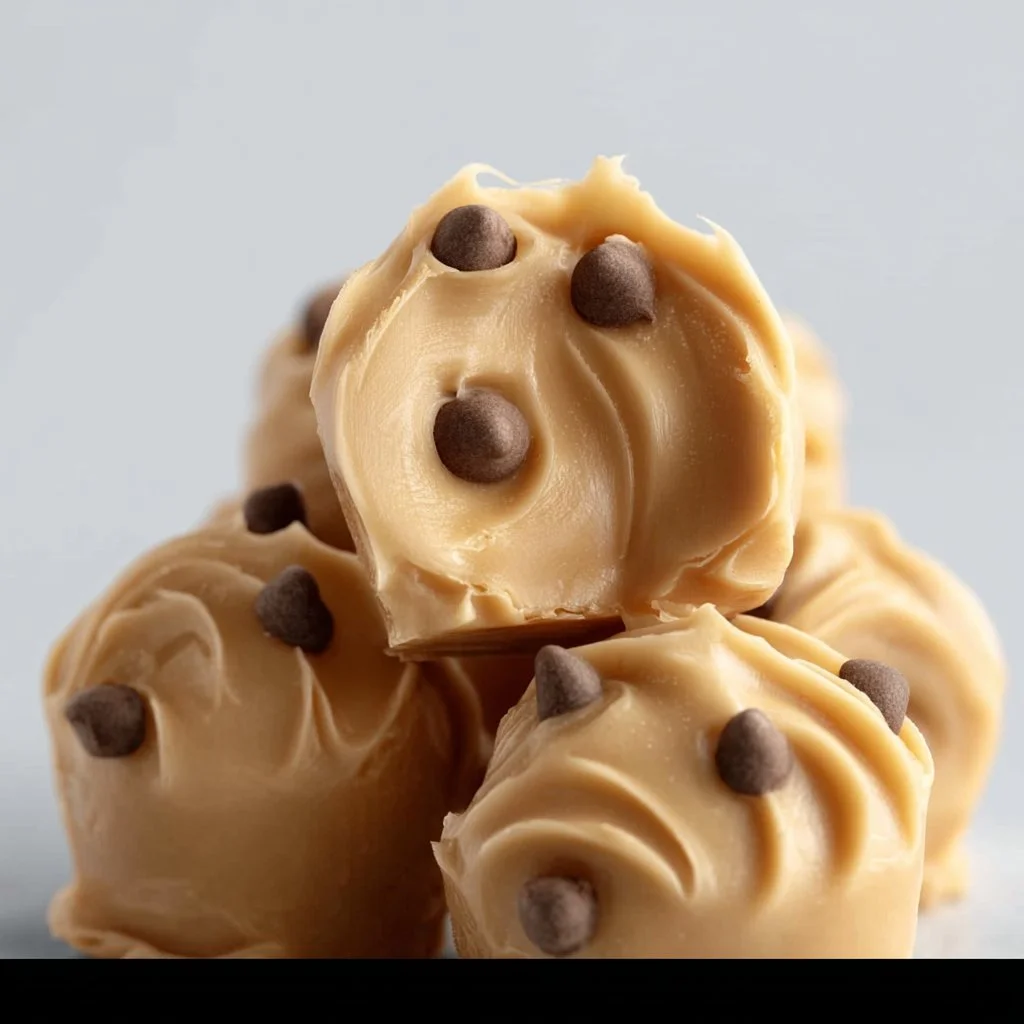
Frozen Greek Yogurt Peanut Butter Bites
Frozen Greek Yogurt Peanut Butter Bites: The Perfect Cool Treat
Welcome to my kitchen! I’m so glad you’re here and ready to whip up something delicious. Today, we’re diving into a fun, easy, and oh-so-creamy treat: Frozen Greek Yogurt Peanut Butter Bites. If you’re looking for a sweet snack that feels indulgent without the guilt, you’ve stumbled upon a gem. Let’s get cozy, shall we?
These little bites are not just a dessert; they’re a burst of flavor that combines the creaminess of Greek yogurt with the rich, nutty goodness of peanut butter. Plus, they’re frozen, so they’re a refreshing treat for warm days or anytime you want a quick and healthy snack. All it takes is a few simple ingredients and a little bit of time, but trust me—the smiles they’ll bring are worth every minute!
As the summer heat rolls in and we find ourselves craving something cool and refreshing, these bites become the perfect antidote. Imagine biting into a sweet, creamy, and slightly frozen treat while lounging in the sun. Ahh, bliss! So grab your apron, and let’s get cooking—well, freezing—in the most delicious way possible!
My Peanut Butter Love Story
Ah, peanut butter. The mere thought of it takes me back to my childhood. I can vividly recall those lazy summer afternoons at my grandma’s house in the countryside. She had this magical kitchen where amazing smells wafted through the air, and her pantry was stocked full of goodies, including a giant jar of peanut butter that always had a spoon resting nearby. I remember sneaking spoonfuls whenever I could, occasionally getting caught red-handed and met with her warm giggles.
It wasn’t long before I started getting adventurous and combining that creamy indulgence with Greek yogurt to make my own delicious concoctions. That first attempt at a peanut butter yogurt treat was a happy accident—I’d meant to make smoothies, but I realized I had a jar of yogurt that needed using. Fast-forward a few years, and here we are, creating these delightful Frozen Greek Yogurt Peanut Butter Bites! They remind me of simpler times while allowing me to enjoy the flavors I fell in love with as a child.
Ingredients
To make these creamy bites of happiness, you need just a handful of ingredients:
-
Greek Yogurt: (2 cups) This is the star of the show! Creamy and rich in protein, Greek yogurt is the perfect base. Opt for plain, full-fat yogurt for a thicker consistency, or use low-fat if you prefer.
-
Peanut Butter: (¾ cup) Whether you want creamy or chunky, this adds that nutty flavor we crave. For a healthier twist, try natural peanut butter with no added sugars.
-
Honey or Maple Syrup: (2-4 tablespoons) This sweetener balances the tangy yogurt. Adjust the sweetness to your taste, or swap it with agave syrup for a vegan alternative.
-
Vanilla Extract: (1 teaspoon) Just a dash transforms the flavor, giving it a lovely roundness. Don’t skimp on this – it makes a world of difference!
-
Chocolate Chips (optional): (½ cup) Fold in some mini chocolate chips for extra indulgence or swap for dried fruits or nuts for a different crunch!
Chef Insight:
Feel free to get creative with these ingredients! For example, if you want protein-packed bites, toss in some chia seeds or flaxseeds for added nutrition. And don’t fret if you’re out of one thing—it’s all about using what you have!
Step-by-Step Instructions
Step 1: Gather and Prep (10 minutes)
Before we start mixing, let’s gather all of our ingredients. Lay out bowls and measuring cups so everything is at arm’s reach. This helps ensure a smooth cooking experience. Tip: If you’re a fan of multitasking, fill your sink with warm soapy water to wash your mixing tools as you go!
Step 2: Mix the Base (5 minutes)
In a mixing bowl, combine the Greek yogurt and peanut butter. Chef Hack: Use a hand mixer (or whisk for a workout) to blend until smooth and creamy. This will create a nice fluffy texture that makes the bites extra delightful!
Step 3: Sweeten It Up (3 minutes)
Add in the honey or maple syrup along with the vanilla extract. Stir until it’s completely combined. Insider Tip: Give it a little taste test; if it’s not sweet enough for your liking, add a touch more! Remember that you can customize it to suit your palate.
Step 4: Chocolate Love (Optional, 2 minutes)
If you’re choosing to use chocolate chips, fold them into the mixture now. If you’re feeling cheeky, you can also add a handful of crushed nuts or dried fruit for an added crunch!
Step 5: Shape the Bites (15 minutes)
Line a baking sheet with parchment paper. Using a tablespoon, scoop out the mixture and roll it into small balls. Think of them like tiny, delightful energy bites! Place them evenly spaced on the baking sheet. Chef Tip: If the mixture is sticky, wet your hands slightly to help roll the bites more easily.
Step 6: Freeze It (3 hours)
Pop the baking sheet into the freezer and let them sit for about 3 hours, or until firm. This is the hardest part—waiting! You can always stick around for a couple of "test bites" before shaking them for the final freeze.
Step 7: Store and Enjoy!
Once frozen, you can keep them in a freezer-safe bag or container, layering parchment paper between the layers to avoid sticking. They should last a couple of weeks—if you can resist devouring them all at once!
Serving Suggestions
To serve these Frozen Greek Yogurt Peanut Butter Bites, simply take them out of the freezer and let them sit at room temperature for a couple of minutes before enjoying. This makes them slightly softer and easier to eat. You can also plate them with a drizzle of chocolate sauce or a sprinkle of crushed nuts for an elegant touch!
Recipe Variations
-
Nut-Butter Bliss: Swap out peanut butter for almond, cashew, or sunflower seed butter for an allergy-friendly option.
-
Berry Infusion: Mix in some mashed berries like strawberries or blueberries into the yogurt for a fruity twist.
-
Spiced Flavor: Add a pinch of cinnamon or nutmeg to the mixture for a hint of warmth and spice.
-
Cacao Crunch: Use cacao nibs instead of chocolate chips for a healthier chocolate fix packed with antioxidants.
-
Mocha Delight: Stir in a bit of instant coffee granules for a delicious mocha flavor.
Chef’s Notes
Cooking is a journey of discovery, and this recipe has certainly evolved over time. I started by experimenting with different textures and flavors, and each batch was better than the last! Funny enough, my first attempt resulted in sticky blobs — not quite the eye-catching treat I envisioned. But hey, that’s what makes cooking exciting! Embrace the messiness, and you’ll find some real gems—like these bites.
I often find myself making these for gatherings or even as a quick breakfast option, tossing them in my bag on busy mornings. The joy they bring to friends and family is unparalleled!
FAQs and Troubleshooting
Q: Can I use non-dairy yogurt?
Absolutely! Coconut, almond, or soy yogurt can be great options for a dairy-free version.
Q: What do I do if my mixture is too runny?
If your mixture is too runny, you can add a bit more Greek yogurt or even some powdered peanut butter to thicken it up.
Q: How long do these bites last in the freezer?
When properly stored, these bites can last up to two weeks. But I doubt they will survive that long!
Q: Can I add other ingredients?
For sure! Feel free to get creative—add spices, fruits, or mix in some protein powder. The sky’s the limit!
Nutritional Info (approx. per bite, recipe yields about 20 bites)
- Calories: 80
- Protein: 3g
- Fat: 5g
- Carbohydrates: 7g
- Sugar: 3g
And there you have it! Your guide to whipping up Frozen Greek Yogurt Peanut Butter Bites that are delicious, nutritious, and downright irresistible. I hope you enjoy making these as much as I do! Remember, every good kitchen story begins with a little bit of creativity and a whole lot of love. Happy cooking!
Print
Frozen Greek Yogurt Peanut Butter Bites
- Total Time: 180 minutes
- Yield: 20 bites 1x
- Diet: Vegetarian
Description
A creamy and delicious frozen treat combining Greek yogurt and peanut butter, perfect for a guilt-free snack on warm days.
Ingredients
- 2 cups Greek Yogurt
- ¾ cup Peanut Butter
- 2–4 tablespoons Honey or Maple Syrup
- 1 teaspoon Vanilla Extract
- ½ cup Chocolate Chips (optional)
Instructions
- Gather and Prep
- Mix the Base
- Sweeten It Up
- Chocolate Love (Optional)
- Shape the Bites
- Freeze It
- Store and Enjoy!
Notes
Feel free to get creative with ingredients like adding chia seeds or flaxseeds for additional nutrition.
- Prep Time: 10 minutes
- Cook Time: 0 minutes
- Category: Snack
- Method: Freezing
- Cuisine: American
Nutrition
- Serving Size: 1 bite
- Calories: 80
- Sugar: 3g
- Sodium: 30mg
- Fat: 5g
- Saturated Fat: 1g
- Unsaturated Fat: 4g
- Trans Fat: 0g
- Carbohydrates: 7g
- Fiber: 1g
- Protein: 3g
- Cholesterol: 0mg
Keywords: frozen treat, Greek yogurt, peanut butter, healthy snack, dessert
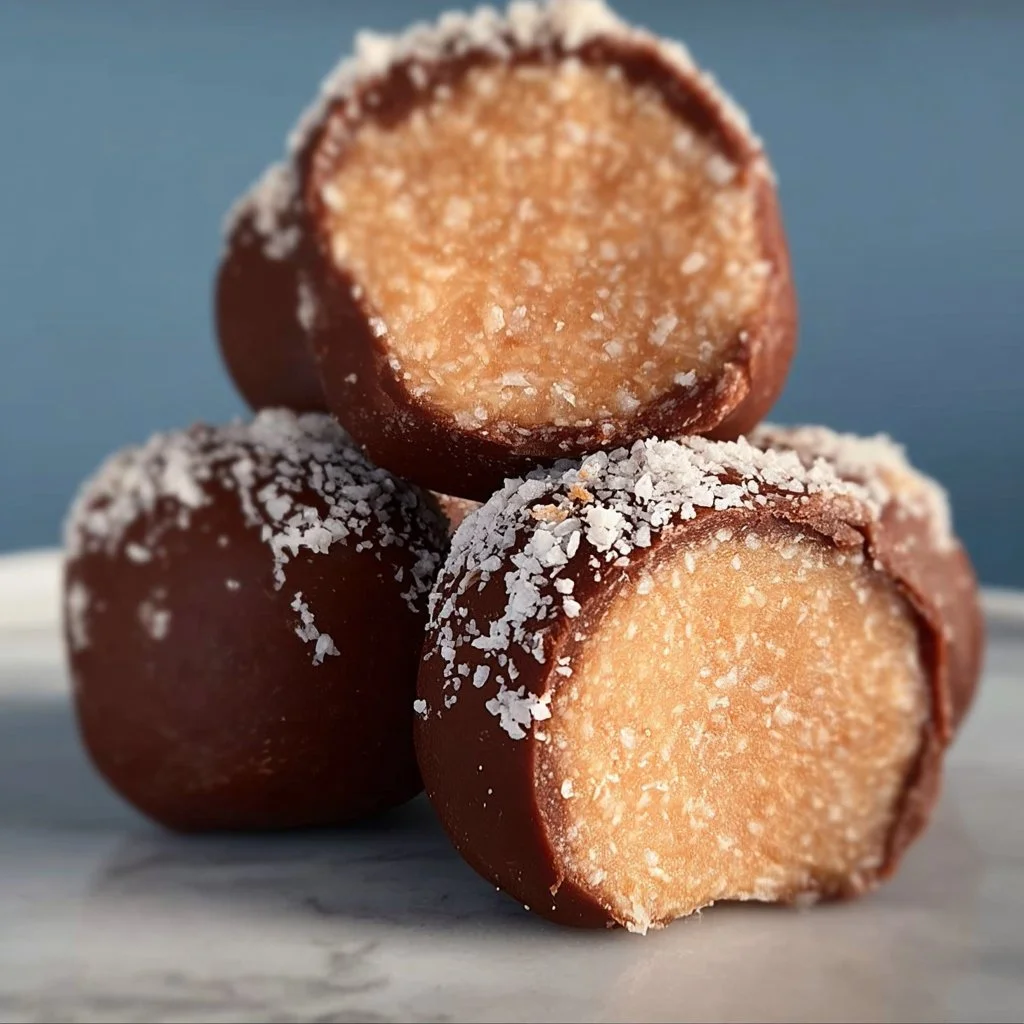
Healthier Sweet Bites
Healthier Sweet Bites: Indulgence Without the Guilt!
Welcome back to my cozy kitchen, fellow foodies! I’m Olivia Bennett, and today we’re diving into the delightful world of healthier sweet bites. If you’re anything like me, nothing quite compares to the joy of savoring something sweet. Those little moments of indulgence can brighten up your day, but who says sweet treats have to be filled with guilty ingredients? Today, we’re crafting recipes to satisfy our sweet tooth while keeping our health goals in mind.
As I flick through old family recipe books, I often find sugary delights that spark fond memories of laughter-filled kitchen adventures. Treats made with love and shared around the table remind us that food isn’t just sustenance; it’s connection! While I adore those classic recipes, I’ve learned that we can enjoy sweet moments without compromising our health. That’s where these healthier alternatives come in!
These bites are not only nutritious but also bursting with flavors that will make your taste buds dance! Picture this: rich chocolate chip cookies made with whole grains and natural sweeteners, or scrumptious energy balls packed with nuts, seeds, and dried fruits. Whether you’re prepping for a cozy movie night, hosting a gathering, or simply treating yourself, my healthier sweet bites are designed to satisfy cravings and nourish your body.
So, roll up your sleeves, put on that adorable apron, and let’s get to work. Sweetness awaits, and trust me; after this, you’ll feel like a healthier dessert wizard ready to enchant your family and friends with delightful bites they’ll adore!
Personal Story
Ah, the sweet aroma of freshly baked cookies wafting through the house! One of my fondest memories involves my grandma, who crafted her legendary chocolate chip cookies every Sunday. I would scamper into the kitchen, flour dusting the air like magic as we giggled over spilled sugar and fought over who could sneak the most chocolate chips. The best part? Grandma taught me a little secret—substituting some ingredients to create lighter, yet equally delectable treats.
Fast forward to today, and I still carry that cherished recipe in my heart. However, I’ve put my own twist on it by incorporating healthier options that don’t compromise the tastes and textures. Every time I make these healthier sweet bites, I feel like I’m bridging that beautiful gap between the nostalgia of my childhood and a modern, health-conscious lifestyle. The result is always the same: love and warmth served up in bite-sized portions. Let’s bring that same joy to your kitchen as you create your own sweet memories.
Ingredients
Here’s what you’ll need to whip up these delicious healthier sweet bites, along with some handy chef insights to guide you along the way.
-
Oats:
- A wonderful whole grain that adds fiber and can help to keep you satiated. Consider steel-cut oats or rolled oats for that perfect chewy texture. If you want a gluten-free option, you can easily find certified gluten-free oats!
-
Nut Butter (Almond or Peanut):
- Great for adding healthy fats and protein to your bites. Almond butter has a lovely, delicate flavor, while peanut butter brings a delightful nuttiness. You can substitute with sunflower seed butter for a nut-free version!
-
Honey or Maple Syrup:
- Both natural sweeteners provide sweetness without the processed sugars, and they also add moisture to your sweet bites. Swap in agave nectar if you prefer a lower glycemic index!
-
Dark Chocolate Chips (or Cacao Nibs):
- Dark chocolate is rich in antioxidants and adds a luscious flavor that satisfies your sweet cravings. Choose chocolate with at least 70% cacao for a health boost, or swap with cacao nibs for a more intense chocolate experience.
-
Vanilla Extract:
- A splash of vanilla extract elevates any dessert with its warm aroma. Always opt for pure vanilla extract over imitation for that authentic flavor!
-
Chia Seeds or Flaxseeds:
- Packed with omega-3 fatty acids, fiber, and protein, these little seeds are a powerhouse! When mixed with water, they create a gel-like consistency that can act as a binder or egg substitute in vegan recipes.
-
Nuts (Almonds, Walnuts, or Pecans):
- These provide a delightful crunch and a generous dose of nutrients. Feel free to toast them lightly for an added depth of flavor!
Together, these ingredients combine in such a beautiful way to create sweet bites that feel indulgent yet are indeed good for you. It’s all about finding that balance!
Step-by-Step Instructions
Now that we have our ingredients ready, let’s get cooking! Here’s a simple step-by-step guide to whip up these delicious healthier sweet bites:
-
Preheat Your Oven:
Preheat your oven to 350°F (175°C). This step is essential for achieving that perfect texture. While you wait, take a moment to appreciate the kitchen aromas—nothing beats the warm smell of an impending bake session! -
Combine the Dry Ingredients:
In a large mixing bowl, combine 2 cups of oats, 1/2 cup of chia or flaxseeds, and 1/2 cup of dark chocolate chips. Stir these together to ensure an even distribution of all your dry ingredients. A quick tip: To prevent chocolate chips from sinking during baking, toss them in a little bit of flour. -
Mix the Wet Ingredients:
In a separate bowl, mix together 1/2 cup of nut butter, 1/3 cup of honey (or maple syrup), and a teaspoon of vanilla extract until smooth and creamy. Should you prefer a more decadent texture, microwave the nut butter for about 10-15 seconds—this makes it easier to mix! -
Combine Wet and Dry Ingredients:
Pour the wet mixture into the dry bowl. Stir everything together until fully combined, making sure you reach the bottom of the bowl for that even cohesiveness. If the mix is a little crumbly, don’t worry—trust the process! A few extra splashes of water or almond milk will do the trick. -
Shape Your Bites:
Using clean hands or a spoon, scoop out about a tablespoon of the mixture and roll it into a ball. Place each ball on a parchment-lined baking sheet, leaving about an inch of space between them to allow for slight expansion. -
Bake to Perfection:
Pop them into the preheated oven and let them bake for about 10-12 minutes. Keep an eye on them; they’re done when they’re lightly golden and fragrant! You’ll know it’s time to pull them out of the oven when you can hardly resist their tempting aroma. -
Cool and Enjoy:
Let the sweet bites cool on the baking sheet for about 10 minutes before transferring them to a wire rack. As they cool, they’ll become firmer and retain a delightful chewy quality. Store them in an airtight container for up to a week (if they last that long!).
Enjoy these bites as pre-workout energy boosters, satisfying afternoon snacks, or simply as a delightful dessert after dinner.
Serving Suggestions
When it comes to serving these warmer-than-hugging treats, presentation is key! Stack a few of these boomingly delicious bits on a cute plate or in a glass jar for a rustic touch. Dust with a sprinkle of cocoa powder or drizzle a little extra chocolate over the top for that “wow” factor. Pair them with a cup of herbal tea or a cozy hot chocolate to elevate your experience. These babies are sure to become a household favorite!
Recipe Variations
Let’s get creative! Here are a few fun variations to spark your imagination:
-
Coconut Macaroon Twist: Add shredded coconut to the mixture for a tropical flavor that transports you to paradise.
-
Nut-Free Energy Bites: Substitute nut butter with sunflower seed butter, swapping chocolate chips for dried cranberries or raisins for a sweet, nut-free treat.
-
Spiced Pumpkin Bites: Add in some pumpkin puree and pumpkin spice seasoning for a fall-inspired treat that’s perfect for cozy gatherings.
-
Protein-Packed Bites: Mix in protein powder for that pre- or post-workout boost without compromising taste.
-
Fruit Fusion: Toss in your favorite fresh fruits like bananas or apple pieces to add an exciting twist to your sweet bites.
Feel free to mix and match these variations according to your taste buds!
Chef’s Notes
Baking is a form of art—sometimes, the best creations come from experimentation! Over the years, I’ve whispered my own stories into these healthier sweet bite recipes, tailoring them to fit my family’s preferences. My kids love adding a pinch of sea salt on top, creating a beautiful sweet-salty contrast.
One time, while trying to sneak in some more vegetables, I added grated zucchini into the mix, and guess what? It turned into a hit! Sometimes, the kitchen can surprise us in the best possible ways when we let our creativity flow. Trust your instincts, embrace the mess, and always remember: cooking is about joy, and that’s what makes every dish special.
FAQs and Troubleshooting
1. My bites didn’t hold together. What went wrong?
Sometimes the mixture might seem dry. If this happens, add a bit more nut butter or a splash of almond milk to bind the ingredients together better.
2. Can I store these sweet bites, and for how long?
Absolutely! They store wonderfully in an airtight container for up to one week at room temperature. Alternatively, they freeze beautifully for up to three months—perfect for busy weeks!
3. I like my treats sweeter. Can I add more sweetener?
Of course! Feel free to adjust the sweetener to your taste. Remember, the type of sweetener you use can influence the final texture, so just add gradually until you reach your desired sweetness.
4. Can I use regular flour instead of oats?
If you decide to use flour instead, make sure you reduce the amount accordingly, as flour is more concentrated than oats. Alternatively, try using almond flour or coconut flour for a lovely spin!
Nutritional Info (optional)
While I generally favor the joy of cooking over strict nutritional guidelines, these bites are relatively low in sugar, high in fiber, and packed with vitamins and healthy fats thanks to the oats and nut butter. For exact values, make sure to calculate based on the ingredients you’re using.
And there you have it! A delightful journey through the world of healthier sweet bites filled with warmth, laughter, and endless possibilities. The best part? You’ve unlocked the magic of creating healthier indulgences that you can share with your loved ones! Happy cooking, everyone! 🍪❤️
Print
Healthier Sweet Bites
- Total Time: 27 minutes
- Yield: 12 servings 1x
- Diet: Vegetarian
Description
Indulgent yet healthy sweet bites crafted to satisfy cravings without guilt.
Ingredients
- 2 cups oats
- 1/2 cup chia seeds or flaxseeds
- 1/2 cup dark chocolate chips
- 1/2 cup nut butter (almond or peanut)
- 1/3 cup honey or maple syrup
- 1 tsp vanilla extract
- 1/2 cup nuts (almonds, walnuts, or pecans)
Instructions
- Preheat your oven to 350°F (175°C).
- Combine the dry ingredients in a large mixing bowl.
- Mix the wet ingredients in a separate bowl until smooth.
- Pour the wet mixture into the dry bowl and stir until combined.
- Using clean hands or a spoon, scoop out a tablespoon of the mixture and roll it into a ball.
- Place the balls on a parchment-lined baking sheet, leaving space between them.
- Pop them into the oven and bake for 10-12 minutes.
- Let the sweet bites cool on the baking sheet for 10 minutes before transferring them to a wire rack.
Notes
Enjoy these bites as snacks, desserts, or energy boosters. Store in an airtight container for up to one week.
- Prep Time: 15 minutes
- Cook Time: 12 minutes
- Category: Snack
- Method: Baking
- Cuisine: American
Nutrition
- Serving Size: 1 bite
- Calories: 120
- Sugar: 5g
- Sodium: 50mg
- Fat: 7g
- Saturated Fat: 1g
- Unsaturated Fat: 5g
- Trans Fat: 0g
- Carbohydrates: 15g
- Fiber: 3g
- Protein: 4g
- Cholesterol: 0mg
Keywords: healthy snacks, sweet bites, guilt-free desserts
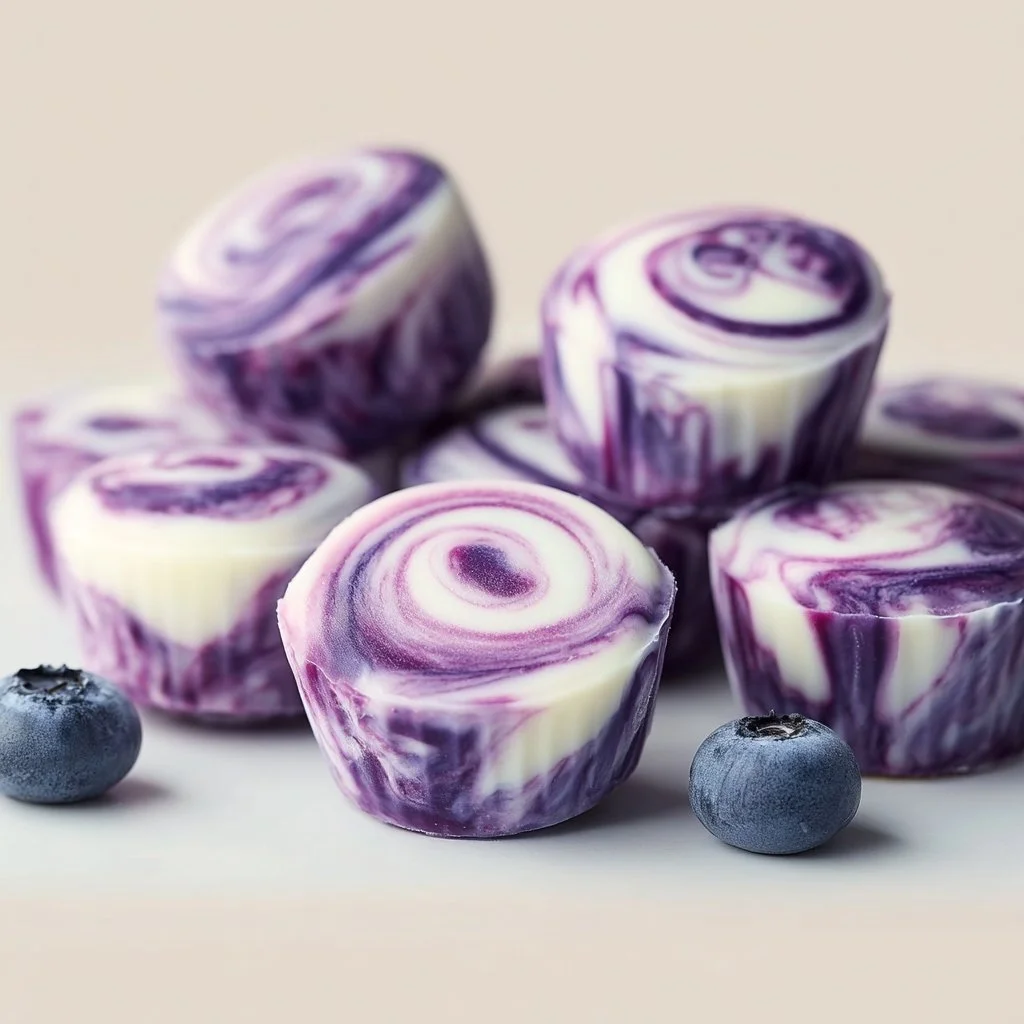
Blueberry Swirl Yogurt Bites
Blueberry Swirl Yogurt Bites: A Delightful Treat for Every Occasion
Hey there, fellow foodies! I’m Olivia, and today we’re diving into a recipe that’s not only delicious but also bursting with nostalgia—Blueberry Swirl Yogurt Bites! If you’re anything like me, there’s nothing better than creating a refreshing, sweet snack that you can enjoy anytime. Whether you’re looking for a midday pick-me-up, an after-school treat for the kids, or an elegant addition to your next brunch, these yogurt bites are the perfect answer.
Just thinking about those juicy blueberries swirled into creamy yogurt makes my taste buds dance! The best part? They’re simple to make and feel like a little gourmet treat that you can whip up in no time. I still remember the first time I experimented with yogurt bites; it was a warm summer afternoon, and my kids were running around the house, asking for something to beat the heat. I wanted something that was both fun and healthy, so I grabbed a tub of yogurt and a basket of fresh blueberries. The result was a hit, and we’ve been making them ever since!
Plus, this recipe is packed with benefits. Greek yogurt gives you that protein punch while blueberries are full of antioxidants and vitamins. So, not only are we indulging our taste buds, but we’re also popping in a bit of goodness. Are you ready to create something that will wow your friends and family? Let’s roll up our sleeves, grab our aprons, and let’s make these irresistible Blueberry Swirl Yogurt Bites together!
Personal Story
Thinking back to my childhood, one of the fondest memories I have is of summer mornings at my grandmother’s house. We’d wake up to the sound of birds chirping and the delightful smell of fresh pancakes wafting through the air. But what really made those mornings shine was my grandma’s famous blueberry pancake recipe. Each plate was piled high with fluffy pancakes topped with sweet, juicy blueberries that she’d always insist we pick together from her backyard.
We’d spend hours together, laughing and savoring the taste of the season while her garden was bursting with vibrant fruits. Inspired by those memories, I wanted to evoke that feeling of happiness and sunshine in these Blueberry Swirl Yogurt Bites. Just like Grandma’s pancakes, these bites bring a special kind of warmth and joy, and they’re a lovely way to include the taste of fresh blueberries in a fun, refreshing snack!
Ingredients
Here’s what you’ll need for these delightful Blueberry Swirl Yogurt Bites:
-
2 cups Greek yogurt: The heart of our bites! Greek yogurt is thick and creamy, giving a luscious texture. You can substitute with regular yogurt, but it will be a tad runnier.
-
1 cup fresh blueberries: Bursting with flavor! Fresh blueberries are best, but if you’re out of season, frozen works, too—just be sure to thaw and drain excess liquid.
-
2-3 tablespoons honey or maple syrup: For sweetness! You can adjust the sweetness based on your preference. Use agave syrup or a sugar substitute if you need to keep it lower-calorie or vegan.
-
1 teaspoon vanilla extract: Adds warmth and depth to the yogurt. Feel free to use almond extract for a different flavor twist!
-
Optional toppings: Granola, coconut flakes, or chopped nuts add crunch if you like some texture.
With this list, you’re all set to create a delicious, no-fuss snack that’s not only simple but also super flexible. Feel free to experiment—there’s no wrong way to make these bites your own!
Step-by-Step Instructions
Step 1: Make the Blueberry Swirl
-
Wash Your Blueberries: Start by rinsing the blueberries under cool water. Pat them dry with a paper towel. If you’re using frozen ones, thaw them until soft.
-
Blend the Berries: In a small blender (or you can use a fork!), blend about half of the blueberries until you form a chunky puree. Chef’s tip: If you want a bit of texture, don’t over-blend—leave some small bits for bursts of flavor!
-
Sweeten the Puree: Taste your blueberry puree. If desired, add a splash of honey or maple syrup to sweeten it. Set aside.
Step 2: Mix the Yogurt Base
-
Combine Yogurt and Add-Ins: In a mixing bowl, combine the Greek yogurt, honey (or maple syrup), and vanilla extract. Stir until everything is smooth and well-combined. Chef’s insight: Use a whisk for a fluffier texture!
-
Taste Test: Give it a quick taste and adjust sweetness if necessary. Remember, the blueberry swirl will add sweetness too!
Step 3: Assemble the Bites
-
Prepare Your Mold: Grab a silicone ice cube tray or muffin tin. If you’re using a metal tray, lightly grease it with non-stick spray.
-
Layer the Yogurt: Spoon some yogurt into each cavity, filling it about halfway. Use a tablespoon to create an even layer.
-
Add the Blueberry Swirl: Drop a small spoonful of your blueberry puree into each yogurt-filled cavity. With a toothpick or skewer, gently swirl the puree into the yogurt to create pretty marbled patterns. Chef’s hack: Don’t overmix! You want those lovely swirls to show.
Step 4: Freeze
- Freeze the Bites: Pop the tray into the freezer for about 3-4 hours until they’re completely solid. Bonus tip: For easier removal, leave them in the freezer overnight!
Step 5: Enjoy!
- Unmold and Serve: Once frozen, gently pop out the yogurt bites. Enjoy them immediately or store them in a glass container for later. They can be kept frozen for up to a month (but trust me, they won’t last that long!).
Serving Suggestions
These Blueberry Swirl Yogurt Bites are not just a snack; they’re a versatile addition to any gathering! Serve them on a cute platter for guests at brunch, pop them in a bowl for a fun treat at your next picnic, or enjoy them straight from the freezer during a hot summer day. Pair them with fresh mint leaves for a lovely pop of color—a feast for the eyes and the taste buds!
Recipe Variations
-
Berry Bliss: Swap the blueberries for other berries like raspberries, strawberries, or blackberries for a colorful twist!
-
Yogurt Flavor Fusion: Use flavored yogurt (like vanilla or berry) for a different depth of flavor.
-
Nutty Delight: Mix in some chopped almonds or walnuts directly into the yogurt for added crunch.
-
Chocolate Drizzle: Drizzle melted dark chocolate over the frozen bites for a decadent finish.
-
Dairy-Free Option: Use coconut yogurt or almond yogurt for a dairy-free alternative!
Chef’s Notes
Oh, how this recipe has evolved over the years! I remember using whatever fruits were on hand—peaches, strawberries, you name it. Each batch taught me something new! When I had my friends over, we’d host a “Yogurt Bite Day,” where we’d experiment with different toppings and flavors. One of my friends once tried adding a sprinkle of cinnamon, and we were hooked! Most importantly, I’ve had so much fun watching my kids get creative with their toppings. The best part is that no matter how they look, they always taste divine! Embrace the messiness; cooking should always be a joyful experience!
FAQs and Troubleshooting
-
Q: What if my yogurt isn’t stiff enough?
- A: If your yogurt isn’t thick enough, try using full-fat Greek yogurt, or let it drain in a cheesecloth for a couple of hours to get that perfect texture.
-
Q: Can I use other fruits besides blueberries?
- A: Absolutely! Experiment with any berries or fruits you love—just be aware that some fruits may require adjustments in sweetness or pairing.
-
Q: How do I store leftovers?
- A: Keep them in an airtight container in the freezer. Just be sure to separate them with parchment paper if you crowd them together, so they don’t freeze into one big lump!
-
Q: Can I make them vegan?
- A: Yes! Substitute Greek yogurt with coconut or almond yogurt and switch out honey for maple syrup.
Nutritional Info
These Blueberry Swirl Yogurt Bites are not only delicious but also nutritious. Here’s an approximate breakdown per serving (assuming the recipe yields 12 bites):
- Calories: 60
- Protein: 4g
- Total Fat: 1.5g
- Carbohydrates: 9g
- Sugar: 3.5g
- Fiber: 1g
(Note: Nutritional info will vary based on specific ingredients used.)
So there you have it, lovely friends—a fierce yet simple recipe for Blueberry Swirl Yogurt Bites that brings a sprinkle of joy to your day! Whether you’re indulging solo or sharing with others, these bites are sure to bring smiles and delicious moments all around. Happy cooking!
Print
Blueberry Swirl Yogurt Bites
- Total Time: 240 minutes
- Yield: 12 bites 1x
- Diet: Vegetarian
Description
A delightful treat that combines creamy Greek yogurt with fresh blueberries, these yogurt bites are perfect for snacking any time of the day.
Ingredients
- 2 cups Greek yogurt
- 1 cup fresh blueberries
- 2–3 tablespoons honey or maple syrup
- 1 teaspoon vanilla extract
- Optional toppings: Granola, coconut flakes, or chopped nuts
Instructions
- Wash the blueberries under cool water and pat dry.
- Blend half of the blueberries to make a chunky puree.
- Sweeten the puree with honey or maple syrup to taste.
- Combine the Greek yogurt, honey (or maple syrup), and vanilla extract in a mixing bowl.
- Taste the yogurt mixture and adjust sweetness if necessary.
- Prepare your silicone ice cube tray or muffin tin.
- Layer yogurt into each cavity, filling them halfway.
- Add a spoonful of blueberry puree to each yogurt cavity and swirl gently.
- Freeze for 3-4 hours or until solid.
- Unmold the yogurt bites and enjoy immediately or store in a glass container.
Notes
These bites can be stored in the freezer for up to a month. Feel free to experiment with different fruits and toppings.
- Prep Time: 15 minutes
- Cook Time: 0 minutes
- Category: Snack
- Method: Freezing
- Cuisine: American
Nutrition
- Serving Size: 1 serving
- Calories: 60
- Sugar: 3.5g
- Sodium: 50mg
- Fat: 1.5g
- Saturated Fat: 0.5g
- Unsaturated Fat: 1g
- Trans Fat: 0g
- Carbohydrates: 9g
- Fiber: 1g
- Protein: 4g
- Cholesterol: 5mg
Keywords: yogurt bites, blueberry snack, healthy treat, frozen yogurt, kids snacks
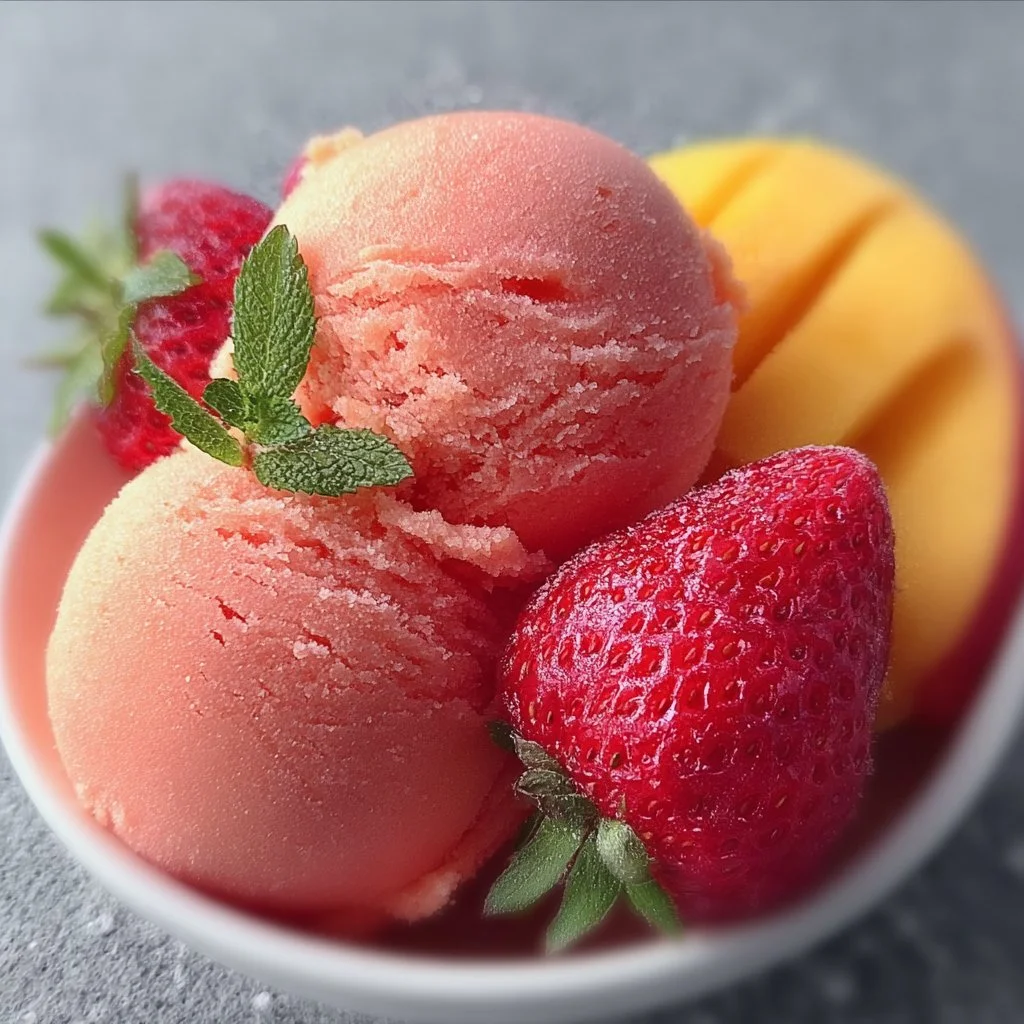
Mango Strawberry Sorbet
Sweet and Tangy Mango Strawberry Sorbet: A Refreshing Treat for Any Day
Welcome back to my cozy corner of the kitchen! Today, I’m super excited to share one of my all-time favorite recipes that’s just bursting with tropical sunshine and fruity goodness: Mango Strawberry Sorbet! Picture this: you’ve just come in from a long day, and the sun is setting, casting a golden glow over everything. The air is warm, and all you want is a refreshing treat that not only chills you out but also tickles your taste buds. This sorbet is the perfect solution!
Not only is it a delightful way to indulge in the rich flavors of summer, but it’s also surprisingly simple to whip up. Best of all, you don’t need any fancy equipment—just a blender and a freezer! Whether you’re throwing a last-minute gathering or simply craving something cool for yourself, this sorbet will do the trick. It’s an excellent way to impress your friends and family—it seems fancy, but I promise it’s incredibly easy!
Plus, it’s versatile! Swap ingredients or adjust the sweetness to your heart’s content. I’m all about making cooking enjoyable and accessible, so let’s dive into this fruity adventure together. Grab your aprons, and let’s get ready to bring the vibrant world of flavors into your kitchen. Are you ready to transform fresh fruits into a dreamy dessert? Let’s go!
Personal Story
I’ll never forget the first time I tasted a sorbet. It was at my grandmother’s garden picnic, surrounded by wildflowers and laughter. She made the most incredible strawberry sorbet using berries freshly picked from her backyard. I can still picture the sun sparkling in the sky as I held that little cup of vibrant pink delight in my hand. The moment I took that first bite, it was as though summer itself danced on my taste buds. I was hooked!
That memory has stuck with me through the years, inspiring me to recreate and innovate my own versions of sorbet. Fast forward to today, and I often find myself experimenting with different fruit combinations at home, but the mango-strawberry combo remains a cherished favorite. It encapsulates the perfect balance between sweet and tangy, and every scoop takes me right back to that carefree afternoon in my grandmother’s garden. So, let’s carry on that joyful tradition and make some tropical magic in our kitchens!
Ingredients
Here’s what you’ll need to create this delightful Mango Strawberry Sorbet. Each ingredient plays a crucial role in achieving that magical flavor and texture:
-
2 cups ripe mango, diced
- Chef Insight: Make sure your mangoes are sweet and fragrant! If you can’t find ripe mangoes, frozen mango works great. Just let them thaw slightly before blending.
-
2 cups fresh strawberries, hulled
- Substitution Tip: If strawberries aren’t in season, feel free to use frozen ones—just ensure they’re unsweetened for the best flavor.
-
1/2 cup sugar (adjust to taste)
- Sweetness Note: Use more sugar if your fruits are slightly tart. You can replace granulated sugar with honey or agave syrup for a healthier option.
-
1 tablespoon lemon juice
- Quick Chef Insight: This little splash brightens the flavors and helps balance the sweetness. You can also use lime juice for a fun twist!
-
1/2 cup water
- Substitution Tip: If you’re feeling adventurous, sparkle things up with coconut water for a tropical twist!
Once you’ve gathered all your ingredients, you’re just a blender away from crafting a refreshing treat. Let’s get started!
Step-by-Step Instructions
-
Prep the Fruits
- Begin by peeling and dicing the mango. It’s best to select mangoes that yield slightly to pressure—this means they’re fresh and ripe! The strawberries should also be hulled and rinsed under cold water to ensure they’re clean and ready to blend.
-
Blend Your Base
- Toss the mango pieces, hulled strawberries, sugar, lemon juice, and water into your blender. Tip: If you’re using frozen fruit, you may need to add an extra splash of water to get things moving. Blend until smooth, pulsing to scrape down the sides as needed.
-
Taste Test
- Give your mixture a little taste. This is where you can adjust the sweetness! If it’s too tart, add a little more sugar or honey, and blend again for a few seconds. It should be fruity with a hint of tang—delicious!
-
Chill Out
- Pour the sorbet mixture into a shallow dish or a loaf pan. This allows it to freeze evenly. Cover with plastic wrap and pop it in the freezer for about an hour.
-
Fluff It Up
- After an hour, take it out and use a fork to stir it up—this helps create that light, fluffy texture that’s oh-so-important in sorbet. Pop it back in the freezer for another 2-3 hours, or until firm.
-
Final Touches
- Once it’s frozen to your desired consistency, use an ice cream scoop or a spoon to serve it up! If it’s too hard, let it sit at room temperature for a few minutes before scooping.
Chef Hack: For an elegant presentation, freeze your sorbet mixture in an ice cube tray for bite-sized bits of frozen fruity goodness!
Serving Suggestions
To serve your Mango Strawberry Sorbet, consider placing a generous scoop into a cocktail glass or a pretty dessert bowl. Garnish it with a few fresh mint leaves or a sprinkle of lime zest for a pop of color and freshness. You could even pair it with a homemade fruit salsa or drizzle a little melted dark chocolate over the top for a delicious contrast.
Serve it on a warm summer evening while watching the sunset, and you’ll create a moment that’s nearly magical. Your guests will be raving about it long after the last scoop is gone!
Recipe Variations
-
Tropical Twist: Substitute half the mango with pineapple for a different flavor profile that’s equally refreshing!
-
Berry Blast: Replace strawberries with blueberries or raspberries for a colorful spin.
-
Creamy Delight: Add a splash of coconut milk to the mixture before blending for a creamier texture and a tropical vibe.
-
Herb Infusion: Incorporate a few fresh basil leaves into the blend for a unique flavor twist that enhances the fruity notes.
-
Zesty Sorbet: Add zest from a lime or lemon to deepen the flavor and enhance the freshness!
Chef’s Notes
Creating this Mango Strawberry Sorbet has become more than just a summer treat for me; it’s a celebration of family, laughter, and sunny days. I’ve played around with various flavor combinations and techniques over the years, but there’s something about the classic mango-strawberry duet that resonates.
If you find yourself with leftover sorbet (which is rare in my house!), simply store it in an airtight container for a few weeks. You can also repurpose it into smoothies or use it as a fruity topping for your yogurt or pancakes.
Remember, cooking should be fun, so don’t hesitate to make this recipe your own!
FAQs and Troubleshooting
1. My sorbet is too hard; what can I do?
If you’ve frozen your sorbet for longer than specified, it might be a little icy. Just let it sit out for a few minutes before scooping. You can also blend it again if you’re looking for a creamier texture.
2. How long does the sorbet last in the freezer?
Typically, it’ll last up to 2 weeks in the freezer. Just make sure it’s stored in an airtight container to prevent freezer burn.
3. Can I use other fruits?
Absolutely! This recipe is versatile. Feel free to swap out the mango or strawberries for whatever fruits are in season or what you have on hand!
4. Can I make it without sugar?
Yes! You can substitute the sugar with natural sweeteners like agave syrup, honey, or even just skip it if your fruits are sweet enough.
Nutritional Info
While I won’t bore you with a full nutritional breakdown, I can tell you that this sorbet is dairy-free, gluten-free, and packed with vitamins from the mango and strawberries! It’s a guilt-free treat that you can feel great about indulging in!
And there you have it—a simple, flavorful, and utterly refreshing Mango Strawberry Sorbet that’s bound to bring smiles to your kitchen! Whether you’re serving it at a summer gathering or treating yourself on a quiet evening, this sorbet encapsulates the warmth of sunny days and the joy of home cooking. So, grab those mangoes and strawberries, and let’s get blending! Happy cooking!
Print
Sweet and Tangy Mango Strawberry Sorbet
- Total Time: 75 minutes
- Yield: 4 servings 1x
- Diet: Vegan
Description
A refreshing and simple sorbet bursting with tropical flavors, perfect for warm days.
Ingredients
- 2 cups ripe mango, diced
- 2 cups fresh strawberries, hulled
- 1/2 cup sugar (adjust to taste)
- 1 tablespoon lemon juice
- 1/2 cup water
Instructions
- Prep the fruits by peeling and dicing the mango and hulling the strawberries.
- Blend the mango, strawberries, sugar, lemon juice, and water in a blender until smooth.
- Taste the mixture and adjust sweetness if needed.
- Chill the sorbet mixture in a shallow dish or a loaf pan, covered, in the freezer for about 60 minutes.
- Fluff the sorbet with a fork after an hour, then return to the freezer for another 120-180 minutes until firm.
- Serve the sorbet using an ice cream scoop or spoon after letting it sit at room temperature briefly if too hard.
Notes
For an elegant presentation, freeze the mixture in an ice cube tray for bite-sized pieces.
- Prep Time: 15 minutes
- Cook Time: 0 minutes
- Category: Dessert
- Method: Blending and Freezing
- Cuisine: International
Nutrition
- Serving Size: 1 serving
- Calories: 120
- Sugar: 25g
- Sodium: 5mg
- Fat: 0g
- Saturated Fat: 0g
- Unsaturated Fat: 0g
- Trans Fat: 0g
- Carbohydrates: 31g
- Fiber: 2g
- Protein: 1g
- Cholesterol: 0mg
Keywords: sorbet, mango, strawberry, dessert, refreshing, summer treats
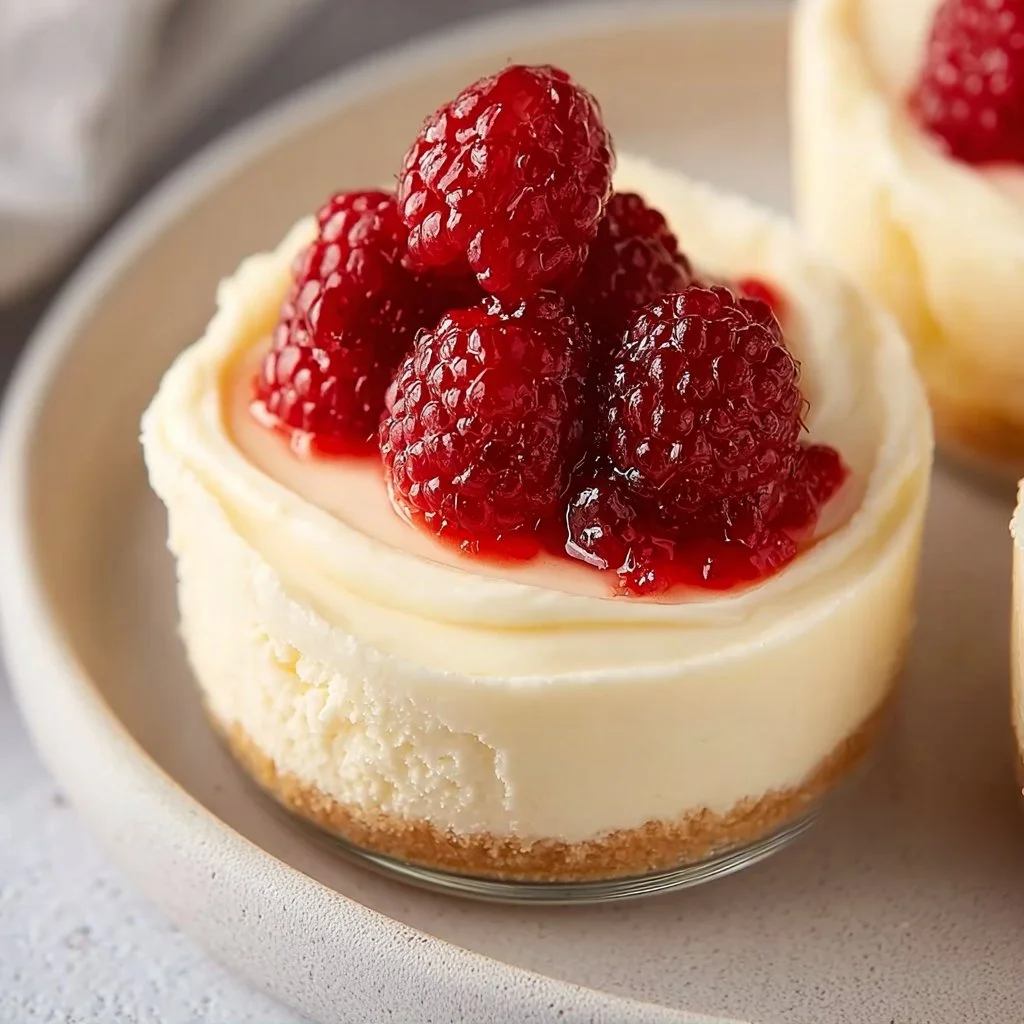
Quick Greek Yogurt Jello Cheesecake
A Slice of Heaven: Quick Greek Yogurt Jello Cheesecake
Introduction
Welcome back to my cozy corner of the kitchen! Today, we’re diving into a delightful treat that not only satisfies your sweet tooth but also brings a playful twist to traditional cheesecake. Enter the Quick Greek Yogurt Jello Cheesecake! This dessert is the perfect blend of creamy richness and fruity brightness, making it a family favorite at my house and the showstopper of every gathering.
I remember my first encounter with Greek yogurt cheesecake. It was a hot summer afternoon, and my good friend Mia invited me over for a potluck. As soon as I walked in, I was hit with the sweet scent of strawberries and cream. There, sitting proudly on the dining table, was a vibrant cheesecake adorned with colorful jelly. My heart raced as I took that first bite—the creamy texture, the fruity glaze, and the pleasant tang of Greek yogurt all danced together in perfect harmony. That day, I knew I had to recreate the magic at home!
Fast forward to today, and I’ve experimented with this recipe countless times. Each iteration is more exciting than the last, with flavors and toppings that reflect my mood and the seasons. Whether you’re feeding a crowd or treating yourself to a cozy night in, this Quick Greek Yogurt Jello Cheesecake will certainly impress. Plus, it’s easy, quick, and guilt-free enough to enjoy without any hesitation. Let’s roll up our sleeves and create this masterpiece together!
Personal Story
The inspiration for my Quick Greek Yogurt Jello Cheesecake came from my childhood summers spent at my grandparents’ house. Every Saturday, they would host what we called "Dessert Saturdays." The entire family would gather around, and my grandma would pull out her vintage cookbook filled with colorful pages of recipes, each one hand-written in her beautiful cursive.
One week, she decided to experiment with a new recipe that combined her love for cheesecake with my grandpa’s obsession with jello. She used light cream cheese and topped the cake with bright, gelatinous fruit that looked like a rainbow on a plate. I remember watching her whip the ingredients together, the kitchen filled with laughter, chatter, and the comfortable clanking of mixing bowls. We all eagerly awaited that first slice, and when it finally arrived, it became an instant family legend!
This Quick Greek Yogurt Jello Cheesecake is my homage to those joyful Saturdays, merging fun flavors while creating new memories. Without further ado, let’s gather our ingredients and bring this beautiful dessert to life!
Ingredients
Here’s what you’ll need to whip up your very own Quick Greek Yogurt Jello Cheesecake:
-
16 oz Greek Yogurt (Plain or Vanilla)
- Tip: Use full-fat for creamier results or non-fat for a lighter option. Greek yogurt gives that rich texture while providing a protein boost!
-
8 oz Cream Cheese (Softened)
- Substitution: You can swap it with a dairy-free cream cheese if needed. Softening is crucial; otherwise, you risk lumps.
-
½ cup Sugar (Adjust to taste)
- Chef Insight: Feel free to substitute with honey, maple syrup, or a sweetener if you’re looking to reduce sugar.
-
1 tsp Vanilla Extract
- Tip: Pure vanilla extract is always best, but imitation works in a pinch. It adds that warm flavor familiar in dessert classics!
-
1 packet (3 oz) Jello Powder (Your favorite flavor)
- Chef Insight: The choice of flavor is where you can get creative! Strawberry, raspberry, or lemon are big hits, but feel free to experiment!
-
1 cup Boiling Water
- Quick Tip: Stirring the jello powder in boiling water helps it dissolve completely, giving a smooth finish.
-
1 cup Graham Cracker Crumbs
- Substitution: Gluten-free or any cookie crumbs work well here, too! This will be the crunchy base of your cheesecake.
-
½ cup Unsalted Butter (Melted)
- Tip: Ensure the butter is cooled slightly before mixing, so it doesn’t melt the crumbs.
-
Fresh Fruit (for garnish, optional)
- Chef Insight: Strawberries, blueberries, or kiwis not only look stunning but add fruity freshness that balances the sweetness.
Step-by-Step Instructions
-
Prepare the Crust:
- In a medium bowl, combine the Graham cracker crumbs and melted butter. Mix until the crumbs are evenly coated and resemble wet sand. This is a fantastic way to get that satisfying crunch!
-
Press Crust into Pan:
- Firmly press the crumb mixture into the bottom of a 9-inch springform pan or a pie dish. Use the back of a measuring cup for evenness and to pack it tightly. This will give your cheesecake a great foundation!
-
Make the Jello:
- Pour 1 cup boiling water into a mixing bowl, then add your Jello powder. Stir until completely dissolved. This step is super crucial! If there are any chunks remaining, they will show up in your final product.
-
Cream the Cheese:
- In another bowl, combine the softened cream cheese, Greek yogurt, sugar, and vanilla extract. Using a hand mixer (or stand mixer) on medium speed, whip until the mixture is creamy and there are no lumps.
-
Incorporate the Jello:
- Once the jello mixture has cooled slightly (but is still liquid), slowly pour it into the cream cheese mixture while mixing. This combination adds a stunning zest that takes your cheesecake to the next level!
-
Combine and Chill:
- Gently pour the filling over your crust in the springform pan. Smooth the top with a spatula for a gorgeous finish. Cover with plastic wrap and refrigerate for at least 4 hours, or until set. Overnight chilling is ideal for a firmer texture!
-
Garnish and Serve:
- When you’re ready to serve, remove the cheesecake from the pan. Top with fresh fruit, if desired, and slice away! It’s always rewarding to see your creation take center stage!
Serving Suggestions
When it comes to presenting this jewel of a dessert, simplicity is key. A classic way to serve is to slice it into wedges, then elegantly arrange them on a colorful plate. If you want to impress a crowd, consider adding a drizzle of honey or chocolate sauce over the top, or a sprinkle of crushed nuts for added texture. Remember, a beautiful cheesecake doesn’t need much to shine!
Recipe Variations
Here are some fun twists you can play with to make this cheesecake your own:
-
Berries Delight: Swirl in a berry puree (like raspberries or blueberries) into the filling before it sets for a burst of flavor.
-
Chocolate Lover’s: Add cocoa powder to the cream cheese filling or pour some melted chocolate over the top.
-
Spiced Pumpkin: With fall vibes, replace the jello with pumpkin puree and add cinnamon and nutmeg for a seasonal treat!
-
Nutty Crunch: Mix in some finely crushed nuts like pecans or almonds into the crust for added texture.
-
Matcha Twist: Stir some matcha powder into the Greek yogurt layer for an earthy flavor and vibrant color!
Chef’s Notes
As I reflect on my journey with this Quick Greek Yogurt Jello Cheesecake, I realize how it has evolved, much like my cooking journey. Initially, I would follow recipes to the letter, afraid to deviate. But now, this cheesecake is a canvas for creativity! It showcases how playful cooking can be—each time I make it, I infuse it with a little bit of my mood and the season.
And here’s a funny little secret: the first time I attempted this recipe, I accidentally grabbed the chili powder instead of cinnamon! Not my proudest moment—I wouldn’t recommend it! Safe to say, that mishap led to a brief, fiery adventure, during which we had a hearty laugh and a lot of water!
FAQs and Troubleshooting
-
Why is my cheesecake too watery?
- Ensure the jello is fully dissolved before mixing. If it sits too long before setting, it could lead to a watery consistency. Patience is key!
-
Can I skip the jello?
- Of course! You can make a classic Greek yogurt cheesecake by skipping the jello. Just substitute it with some fresh fruit or even a fruit compote atop the cheesecake instead.
-
How long does it last in the fridge?
- This cheesecake stays fresh for about 5 days in the fridge. Just keep it covered to maintain its texture.
-
I accidentally added too much sugar, how can I fix it?
- If it’s too sweet, you can add some extra Greek yogurt and cream cheese to balance it out. Another option is to brighten it with a splash of lemon juice!
Nutritional Info (Optional)
While I encourage indulgence in desserts, it’s good to have an idea of what we’re serving! Here’s an approximate nutritional breakdown per slice (based on 12 servings):
- Calories: 200
- Protein: 5g
- Carbohydrates: 25g
- Fat: 9g
- Sugar: 12g
And there you have it! A delightful journey through the creation of a Quick Greek Yogurt Jello Cheesecake. I hope this recipe inspires you to embrace your inner chef and fill your home with delicious aromas and joyful laughter. Happy baking! 🍰✨
Print
Quick Greek Yogurt Jello Cheesecake
- Total Time: 240 minutes
- Yield: 12 servings 1x
- Diet: Vegetarian
Description
A creamy and fruity cheesecake made with Greek yogurt and topped with colorful jello, perfect for any gathering.
Ingredients
- 16 oz Greek Yogurt (Plain or Vanilla)
- 8 oz Cream Cheese (Softened)
- ½ cup Sugar (Adjust to taste)
- 1 tsp Vanilla Extract
- 1 packet (3 oz) Jello Powder (Your favorite flavor)
- 1 cup Boiling Water
- 1 cup Graham Cracker Crumbs
- ½ cup Unsalted Butter (Melted)
- Fresh Fruit (for garnish, optional)
Instructions
- Prepare the Crust: In a medium bowl, combine the Graham cracker crumbs and melted butter. Mix until the crumbs are evenly coated and resemble wet sand.
- Press Crust into Pan: Firmly press the crumb mixture into the bottom of a 9-inch springform pan or a pie dish.
- Make the Jello: Pour 1 cup boiling water into a mixing bowl, then add your Jello powder. Stir until completely dissolved.
- Cream the Cheese: In another bowl, combine the softened cream cheese, Greek yogurt, sugar, and vanilla extract. Whip until creamy and smooth.
- Incorporate the Jello: Slowly pour the cooled jello mixture into the cream cheese mixture while mixing.
- Combine and Chill: Pour the filling over your crust. Smooth the top and refrigerate for at least 4 hours, or until set.
- Garnish and Serve: Remove the cheesecake from the pan, top with fresh fruit, and slice to serve.
Notes
Serve with a drizzle of honey or chocolate sauce for an extra touch.
- Prep Time: 30 minutes
- Cook Time: 0 minutes
- Category: Dessert
- Method: Chilling
- Cuisine: Greek
Nutrition
- Serving Size: 1 slice
- Calories: 200
- Sugar: 12g
- Sodium: 200mg
- Fat: 9g
- Saturated Fat: 5g
- Unsaturated Fat: 4g
- Trans Fat: 0g
- Carbohydrates: 25g
- Fiber: 0g
- Protein: 5g
- Cholesterol: 30mg
Keywords: cheesecake, dessert, Greek yogurt, jello, refreshing
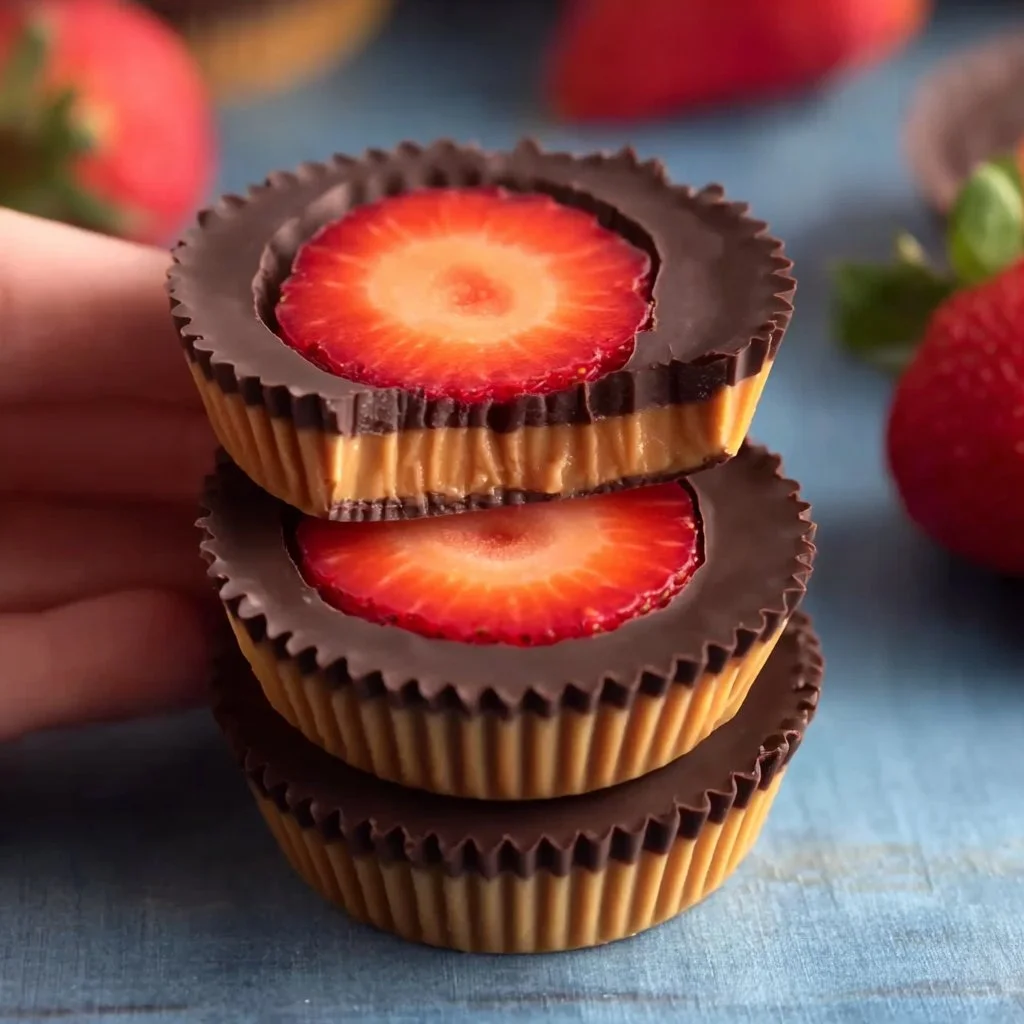
Healthy Strawberry Peanut Butter Cups
Healthy Strawberry Peanut Butter Cups: A Delightfully Sweet Indulgence
Welcome to my kitchen! This week, I’m thrilled to share a recipe that perfectly marries sweetness with wholesome ingredients: Healthy Strawberry Peanut Butter Cups. Picture this: luscious strawberries sandwiched between creamy peanut butter and a silky chocolate coat. Yes, please! These little gems are not just a treat for your taste buds but also a guilt-free indulgence you can feel great about. Grab your apron and let’s dive into the delicious world of strawberry peanut butter cups — it’s about to get cozy in here!
A Delightful Memory
Let me take you back to a sun-soaked summer afternoon at my grandmother’s house. I was about ten years old, and the kitchen was filled with the aroma of freshly picked strawberries simmering on the stove. My grandmother believed that every fruit deserved a little magic, and her specialty was combining sweet and savory flavors. That day, she decided to make peanut butter and strawberry sandwiches, but not in the traditional way — oh no! She transformed them into delightful little cups, using chocolate that melted my heart (and made my taste buds sing).
We spent the afternoon creating these delicious treats together, carefully layering peanut butter and strawberries in chocolate molds. It was messy, sticky, and absolutely perfect! As we licked our fingers clean, I realized the joyful beauty of cooking and the cherished moments we create in the kitchen. Those blissful peanut butter cups became an emblem of not just a recipe, but a deep, nostalgic love for cooking, family, and a sprinkle of magic in everyday moments.
Ingredients
Now that you’ve got a taste of the story behind this recipe, let’s gather our ingredients. Here’s what you’ll need to whip up your own batch of Healthy Strawberry Peanut Butter Cups:
-
Fresh Strawberries
Fresh strawberries are the star of the show here! Look for bright, red berries with no blemishes. If fresh strawberries aren’t in season, frozen ones can work too; just make sure to thaw them beforehand. -
Natural Peanut Butter
Choose a natural peanut butter without added sugar or oils. It adds rich flavor and creamy texture. If you’re allergic or prefer something different, sunflower seed butter makes an excellent substitute. -
Dark Chocolate Chips (or Cocoa Powder)
For the chocolate coating, go for high-quality dark chocolate chips (70% cocoa or higher). If you want to keep it dairy-free, dark dairy-free chocolate works wonders! Alternatively, you can use cocoa powder mixed with a little coconut oil for a lighter version. -
Honey or Maple Syrup (optional)
A drizzle of honey or maple syrup can add a touch of sweetness. If you’re vegan, maple syrup is the way to go. If you’re looking for a sugar-free option, consider using stevia or monk fruit sweetener. -
Sea Salt
Just a pinch! Sea salt balances the sweetness of the strawberries and chocolate beautifully, elevating the flavors.
Step-by-Step Instructions
Ready to make some magic happen? Here’s how to prepare these heavenly Healthy Strawberry Peanut Butter Cups:
Step 1: Prep Your Strawberries
First things first, wash your fresh strawberries under cool water and gently pat them dry with a clean kitchen towel. Hull the strawberries by removing the green tops and any white parts left behind. If you’re using larger strawberries, you might want to slice them in half for easy layering.
Step 2: Melt the Chocolate
In a microwave-safe bowl, add your dark chocolate chips. Microwave them in 30-second increments, stirring in between until they are fully melted and smooth. If you prefer, you can melt the chocolate using a double boiler — simply fill a pot with water, bring it to a simmer, and place a heatproof bowl on top. Once melted, stir in a sprinkle of sea salt for that chocolatey perfection.
Step 3: Assemble Your Cups
Grab a muffin tin or silicone mold for this part. Spoon a small amount of melted chocolate into each cup, just enough to cover the bottom (about 1 tablespoon). Use a pastry brush or the back of a spoon to spread the chocolate up the sides a bit, creating a little “cup.” Place the muffin tin in the freezer for about 10-15 minutes until the chocolate is set.
Step 4: Layer the Goodness
Once the chocolate has set, it’s time to add your peanut butter. Spoon a generous dollop of peanut butter into each chocolate cup. Add the strawberry slices on top, stacking them if you’d like. Feel free to sprinkle a pinch of salt on top of the strawberries for that sweet-savory balance.
Step 5: Final Chocolate Coating
Now comes the fun part! Pour more melted chocolate on top of the strawberries and peanut butter until they are covered completely. Tap the muffin tin gently on the counter to eliminate any air bubbles and allow the chocolate to settle.
Step 6: Chill and Serve
Pop your cups back into the freezer for another 30 minutes to set the chocolate completely. Once done, carefully peel the chocolate cups out of the muffin tin or mold. They might break apart a bit, but don’t worry — they’ll still be deliciously delightful!
Serving Suggestions
Serve these delectable strawberry peanut butter cups on a beautiful platter. They make a fabulous centerpiece for a brunch spread or a sweet treat at a picnic! Drizzle a bit of melted chocolate or a dusting of cocoa powder on top for a touch of elegance. If you love presentation, feel free to sprinkle some crushed nuts or coconut flakes for added flair!
Recipe Variations
Here are a few fun twists on the classic Healthy Strawberry Peanut Butter Cups:
-
Nuts About It
Mix in some chopped nuts or seeds (like almonds or chia seeds) into the peanut butter for added crunch. -
Extra Fruity
Use diced bananas or raspberries in addition to or instead of strawberries. The flavor combinations are endless! -
Nut-Free Version
Swap out peanut butter for almond butter or tahini for a nut-free alternative. Cream cheese can also be a delightful twist! -
Flavor Infusion
Add a splash of vanilla extract to the peanut butter for extra flavor, or a pinch of cinnamon for warmth. -
Vegan Delight
Make them completely dairy-free by using vegan chocolate and sweetening with maple syrup instead of honey.
Chef’s Notes
These Healthy Strawberry Peanut Butter Cups hold a special place in my heart. They’re not just a nostalgic treat from my childhood; they’ve evolved over time. Initially, I made them for my family, and now they’ve become a go-to recipe for celebrations and special gatherings. My friends often ask me to whip them up for parties, and I always happily oblige — who can resist a little homemade sweetness?
I’ve also found that they’re incredibly forgiving! Want a darker chocolate? No problem! Not a fan of strawberries? Use your favorite fruit instead. This flexibility allows everyone to put their own spin on them while keeping the heart of the recipe intact. Just remember, cooking is about creativity and joy, so feel free to experiment!
FAQs and Troubleshooting
1. What if my chocolate is too thick or chunky?
If your chocolate isn’t melting smoothly, try adding a tiny bit of coconut oil to help it emulsify. Just a teaspoon should do the trick!
2. My cups are breaking apart when I remove them from the molds. Help!
If the chocolate is too cold when you try to remove it, it can become brittle. Let them sit at room temperature for a few minutes for easier removal. Using silicone molds can also help with peeling them out.
3. Can I store these cups, and how long do they last?
Absolutely! Store them in an airtight container in the fridge for up to a week. You can also freeze them for up to three months. Just let them soften for a few minutes at room temperature before enjoying!
4. Can I use white chocolate instead?
You sure can, but keep in mind that white chocolate is sweeter and may alter the flavor balance. Consider adding a pinch of salt to counteract the sweetness!
Now you’re ready to create your own Healthy Strawberry Peanut Butter Cups! Remember, cooking is all about sharing love through food, and these little delights are perfect for sharing with friends, family, or simply indulging in yourself. Happy cooking, and I can’t wait to hear about your kitchen adventures!
Print
Healthy Strawberry Peanut Butter Cups
- Total Time: 30 minutes
- Yield: 12 servings 1x
- Diet: Vegetarian
Description
A delightful blend of strawberries, creamy peanut butter, and silky dark chocolate make these Healthy Strawberry Peanut Butter Cups a guilt-free indulgence.
Ingredients
- 1 cup Fresh Strawberries
- 1/2 cup Natural Peanut Butter
- 1 cup Dark Chocolate Chips (or Cocoa Powder)
- 2 tablespoons Honey or Maple Syrup (optional)
- 1/4 teaspoon Sea Salt
Instructions
- Prep your strawberries: wash and hull them, and slice larger ones in half.
- Melt the chocolate in a microwave-safe bowl in 30-second increments, stirring until smooth.
- Assemble your cups by spooning melted chocolate into muffin tins, and spreading it up the sides.
- Layer the peanut butter and strawberries in the chocolate cups.
- Cover the layers with more melted chocolate until fully sealed.
- Chill the cups in the freezer for 30 minutes to set before serving.
Notes
These cups are versatile and can be made with different fruits or nut butters. They can also be kept in the fridge for up to a week or frozen for three months.
- Prep Time: 15 minutes
- Cook Time: 15 minutes
- Category: Dessert
- Method: No-Cook
- Cuisine: American
Nutrition
- Serving Size: 1 cup
- Calories: 200
- Sugar: 10g
- Sodium: 150mg
- Fat: 12g
- Saturated Fat: 3g
- Unsaturated Fat: 9g
- Trans Fat: 0g
- Carbohydrates: 20g
- Fiber: 3g
- Protein: 4g
- Cholesterol: 0mg
Keywords: strawberry, peanut butter, chocolate, dessert, healthy
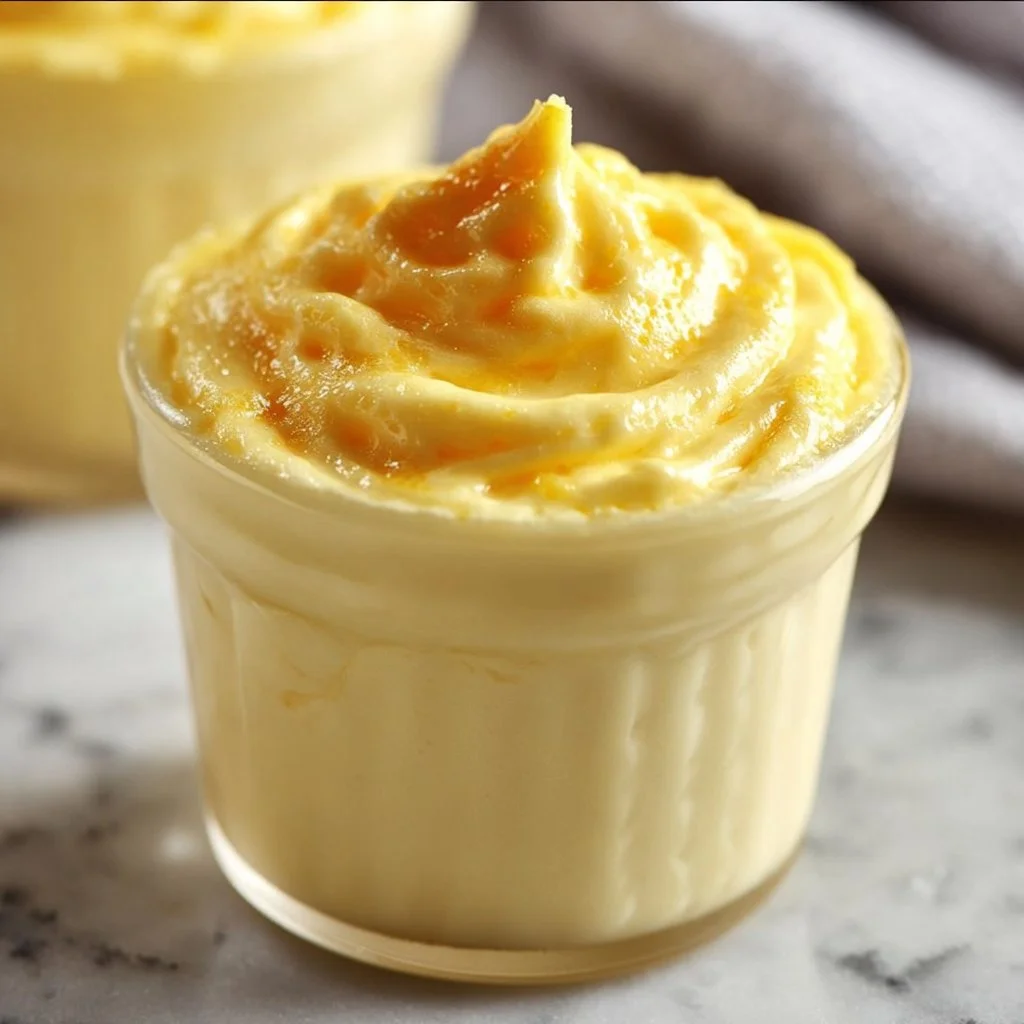
Lemon Cottage Cheese Pudding
The Zesty Delight of Lemon Cottage Cheese Pudding: A Sweet Escape
Hey there, fellow food lovers! Welcome back to my kitchen. Today, we’re diving into a delightful little dessert that’s not only bursting with flavor but also carries a silky, creamy texture that will have your taste buds dancing: Lemon Cottage Cheese Pudding. Yes, you heard it right! This is not just any pudding; it’s a luscious blend of tangy lemon and smooth cottage cheese that will remind you of sunny days and happy gatherings.
Every time I whip up this simple yet inventive dish, I’m taken back to lazy summer afternoons spent in my grandmother’s sunlit kitchen. The zest of fresh lemons filled the air as we mixed our ingredients, and laughter echoed around us. This recipe holds so much nostalgia for me—it’s the perfect blend of comfort and brightness. And guess what? It’s a breeze to make!
Whether you’re hosting a brunch, treating your sweet tooth after a long day, or just trying to impress your friends with a unique dessert, this pudding is your new best friend. Filled with protein and made with wholesome ingredients, it’s a sweet escape that feels indulgent without packing on the guilt. Ready to take a trip down memory lane and create some new delicious moments? Let’s get started!
Personal Story: A Sweet Memory
My journey with lemon pudding began when I was a little girl standing on a stool, precariously reaching for the mixing bowl on the counter. My grandmother, a culinary wizard in her own right, was teaching me the art of balance—life and flavor. Lemon Cottage Cheese Pudding was our go-to dish for family get-togethers.
I can still picture her vibrant yellow apron, flour dust swirling in the air as she squeezed fresh lemons while sharing stories of her childhood. Each bite of that pudding was like a burst of sunshine! We often served it chilled with a sprinkle of crushed graham crackers on top, giving it that perfect contrast of textures.
The flavors and memories melded into one perfect bite, sparking joy not just for us but for everyone who got to enjoy it! As I got older, I carried on this tradition, adapting the recipe here and there while staying true to the fundamental charm it had in my grandmother’s kitchen. Today, I’m excited to share this beloved recipe with you, along with some personal twists I’ve designed to make it your own.
Ingredients
Let’s gather our ingredients to create this delectable lemon cottage cheese pudding! Here’s what you’ll need:
-
Cottage Cheese (2 cups): The backbone of our pudding! It adds creaminess and a delightful flavor. If you’re after a smoother texture, opt for small or blended cottage cheese. You can substitute with Greek yogurt for a tangier kick.
-
Fresh Lemons (2 large): Using fresh lemons adds vibrant flavor and zest to the pudding. If you’re in a pinch, bottled lemon juice works, but fresh is always best!
-
Granulated Sugar (½ cup): This sweetens the tartness of the lemon. For a twist, consider using honey or maple syrup as a natural sweetener!
-
Vanilla Extract (1 teaspoon): A hint of vanilla elevates the flavor profile. Feel free to swap in almond extract for a nutty undertone!
-
Cornstarch (2 tablespoons): This helps set the pudding and give it that delightful pudding-like consistency. If you’re in need of a gluten-free alternative, arrowroot powder works great!
-
Milk (½ cup): A splash of milk helps blend everything smoothly. You can use almond milk, oat milk, or any dairy-free alternative for a vegan version.
-
Salt (a pinch): Don’t forget this! It balances the sweetness and enhances the overall flavor.
Ready to create some magic? Let’s jump into the cooking process!
Step-by-Step Instructions
Step 1: Prep Your Ingredients
Start by gathering all your ingredients so they’re within arm’s reach. Take a moment to slice your lemons and extract their juice—aim for about ¼ cup of fresh lemon juice. Zesting a lemon can add an extra zing, so don’t shy away from that colorful yellow skin!
Step 2: Blend the Cottage Cheese
In a blender or food processor, toss in the cottage cheese along with the lemon juice, zest, vanilla extract, and sugar. Blend until you achieve a smooth, creamy consistency. This will be your flavorful base! If you find the mixture a bit thick, add a splash more milk until it’s silky.
Chef’s Tip: Taste the mixture before moving on! Adjust the sweetness or tartness to your liking. Want more lemon? Squeeze it in!
Step 3: Prepare the Pudding Mixture
In a small saucepan over medium heat, combine the blended cottage cheese mixture with cornstarch and a pinch of salt. Stir continuously until the mixture begins to thicken, about 5-7 minutes. Be careful not to let it boil; you’re looking for a gently steaming mix!
Chef Hack: Whisking is your best friend here! It helps incorporate air, giving the pudding a lightness while eliminating any lumps.
Step 4: Chill the Pudding
Once it’s thickened up nicely, remove it from heat and transfer it to serving cups or a large bowl. Cover with plastic wrap, pressing it directly onto the pudding’s surface to prevent a skin from forming, and let it chill in the fridge for at least 2 hours (or overnight for the best flavor).
Chef Insight: This pudding is great for meal prep! Make it a day in advance, and let those flavors meld together in the fridge.
Step 5: Serve and Enjoy
When you’re ready to serve, remove the pudding from the fridge and give it a quick stir. Optionally, you can garnish with fresh berries, crushed graham crackers, or even a sprig of mint for that extra pop!
Serving Suggestions
To plate your Lemon Cottage Cheese Pudding, scoop it into individual servings for a lovely presentation. Top with a sprinkling of lemon zest and fresh fruit, or even a dollop of whipped cream—if you’re feeling indulgent! This way, each bite is a refreshing explosion of flavor and creaminess.
You can also serve it as part of a brunch spread or alongside a delicious handmade cake for a delightful dessert platter!
Recipe Variations
Want to shake things up a bit? Here are some creative variations to consider:
-
Berry Bliss: Fold in fresh strawberries, blueberries, or raspberries for a fruity twist. You can even create a berry compote to drizzle on top!
-
Chocolate Lover’s Delight: Add a tablespoon of cocoa powder for a chocolatey version, or fold in mini chocolate chips.
-
Coconut Classic: Mix in shredded coconut and a splash of coconut milk for a tropical flair.
-
Herbal Infusion: Consider blending in some fresh chopped herbs like basil or mint for a unique, refreshing touch.
-
Spice It Up: A dash of cinnamon or nutmeg can provide unexpected warmth to your pudding!
Chef’s Notes
This recipe has traveled with me through many kitchen adventures! I’ve swapped ingredients, played with flavors, and even made it for various dietary needs. It started as a simple family recipe, and over the years, it has become a crowd favorite at gatherings.
One of my favorite moments was when I hosted a potluck and someone insisted it wasn’t cottage cheese in the dessert. Pleasingly surprised, they left with the recipe—You’d be amazed at how many people are turned off by cottage cheese until they give it a try!
FAQs and Troubleshooting
Q: Can I use low-fat cottage cheese for this recipe?
Yes, you can! Just keep in mind that the pudding may have a slightly different texture, but it will still be delicious.
Q: How long does this pudding keep in the fridge?
Stored properly in an airtight container, this pudding can keep for about 3-5 days. Just remember to give it a stir before serving if it thickens!
Q: Can I freeze the pudding?
While you technically can freeze it, the texture might change once thawed. It’s best enjoyed fresh!
Q: What if my pudding didn’t thicken?
If your pudding doesn’t thicken, it might be due to not cooking long enough or not enough cornstarch. Next time, ensure to stir continuously and follow the cooking time closely. You can always whisk a bit more cornstarch in a little milk and bring it back to the heat.
Nutritional Info (optional)
While the exact nutritional content can vary based on your ingredient choices, here’s a rough estimate for one serving (makes about 4):
- Calories: 120
- Protein: 10g
- Fat: 5g
- Carbohydrates: 12g
- Sugar: 7g
And there you have it! Lemon Cottage Cheese Pudding is not just a dessert; it’s a celebration of flavors and memories. I hope you enjoy making it as much as I do. Feel free to improvise and make it your own, turning it into a memorable treat for you and your loved ones. Let me know how it turns out, and happy cooking!
Print
Lemon Cottage Cheese Pudding
- Total Time: 120 minutes
- Yield: 4 servings 1x
- Diet: Vegetarian
Description
A delightful lemon cottage cheese pudding that combines tangy lemon with creamy cottage cheese for a refreshing dessert.
Ingredients
- 2 cups Cottage Cheese
- 2 large Fresh Lemons
- ½ cup Granulated Sugar
- 1 teaspoon Vanilla Extract
- 2 tablespoons Cornstarch
- ½ cup Milk
- a pinch Salt
Instructions
- Prep your ingredients by slicing the lemons and extracting the juice.
- Blend the cottage cheese, lemon juice, zest, vanilla extract, and sugar until smooth.
- Prepare the pudding mixture by combining the blended mixture with cornstarch and salt in a saucepan and heat until thickened.
- Chill the pudding in the fridge for at least 2 hours.
- Serve the pudding in cups, garnished with fresh fruit or crushed graham crackers.
Notes
Feel free to experiment by adding fresh fruit, chocolate, or spices to the pudding.
- Prep Time: 15 minutes
- Cook Time: 7 minutes
- Category: Dessert
- Method: Chilling
- Cuisine: American
Nutrition
- Serving Size: 1 serving
- Calories: 120
- Sugar: 7g
- Sodium: 200mg
- Fat: 5g
- Saturated Fat: 2g
- Unsaturated Fat: 3g
- Trans Fat: 0g
- Carbohydrates: 12g
- Fiber: 0g
- Protein: 10g
- Cholesterol: 15mg
Keywords: dessert, lemon pudding, cottage cheese, refreshing dessert, summer treat
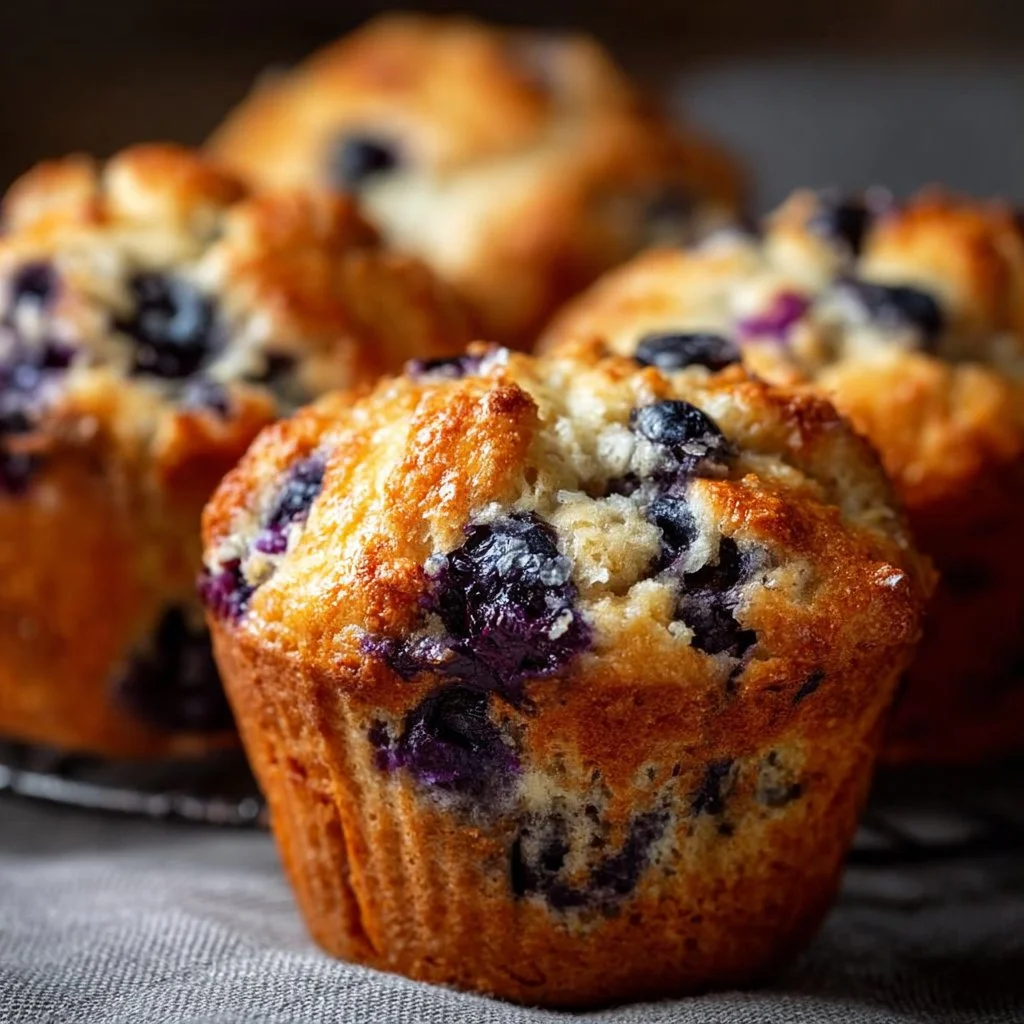
Protein Cottage Cheese Blueberry Muffins
Protein Cottage Cheese Blueberry Muffins: A Cozy Kitchen Delight
Hello, fellow food lovers! 💖 Welcome back to my cozy corner of the kitchen, where deliciousness is just waiting to be explored. Today, we’re diving into a delightful treat that perfectly balances health and indulgence: Protein Cottage Cheese Blueberry Muffins. These muffins are not just a breakfast staple; they make a fantastic snack and even dessert! What’s not to love?
If you’ve ever craved something flavorful that won’t leave you with a guilty conscience, you’re in for a treat. Picture this: warm, fluffy muffins bursting with juicy blueberries, and that delightful hint of protein from cottage cheese that’ll keep you feeling satisfied all morning long. Whether you’re fueling your workout or just enjoying a lazy Sunday brunch, these muffins tick all the boxes.
But wait! Before we get our hands doughy, let me take you down memory lane a bit. I can still recall the first time I discovered the magic of cottage cheese in baked goods. It was during my college years, and the kitchen was a bubbling cauldron of experimentation (mostly the good kind!). I was trying to create a guilt-free treat, and voilà—a muffin recipe was born. These muffins not only tasted fantastic but also provided a light yet filling option for those hectic mornings. Can you picture it? Me, with flour-speckled cheeks and a charmingly chaotic kitchen!
So grab your aprons, unwind, and let’s fill the air with the delicious aroma of these protein-packed muffins. I’ll guide you through each step, sharing my tips and tricks along the way. Let’s bake something extraordinary together, shall we?
Personal Story
Ah, nostalgia! It sure has a way of warming the heart, doesn’t it? I remember one rainy Saturday afternoon, stuck indoors with nothing but a craving for something sweet and wholesome. I rummaged through my fridge, finding a forgotten tub of cottage cheese. Suddenly, inspiration struck! I had been experimenting with healthier baking alternatives, and the cottage cheese was begging to join the party. After some mixing, measuring, and a touch of trial and error, I whipped up my very first batch of blueberry muffins.
Those muffins turned out to be delightfully soft, bursting with blueberries and cradled in a lovely golden brown exterior. They became a regular feature in my kitchen, often shared with friends at brunches filled with laughter. This recipe didn’t just fill bellies; it filled hearts and sparked conversations about wholesome cooking.
Every time I make these muffins, I’m transported back to that rainy afternoon. I can still hear the faint patter of raindrops on the window while I pulled those little treats from the oven. Each bite is like a delicious hug, reminding me that food is meant to be shared and celebrated. And now, I’ll be sharing this cherished recipe with you, so let’s get to the fun part—making these muffins!
Ingredients
Here’s what you’ll need to whip up these delightful Protein Cottage Cheese Blueberry Muffins.
-
1 cup cottage cheese
- Texture and protein boost! Use low-fat or full-fat, depending on your preference. Greek yogurt can be a great alternative if you need non-dairy options.
-
2 large eggs
- Binding magic! These add moisture and structure to our muffins. If you want a vegan version, you can swap these for 1/4 cup unsweetened applesauce or a flax egg (1 tablespoon flaxseed meal + 2.5 tablespoons water).
-
1/4 cup pure maple syrup or honey
- Natural sweetness! You could adjust this to taste or even use a sugar substitute if you prefer something lower-calorie.
-
1 teaspoon vanilla extract
- A flavor enhancer! Opt for pure vanilla for the best taste. If you want something different, try using almond extract for a unique twist.
-
1 ½ cups whole wheat flour
- Fiber-rich goodness! Feel free to substitute with all-purpose flour or a gluten-free flour blend if needed.
-
2 teaspoons baking powder
- Leavening hero! This helps our muffins rise and stay fluffy.
-
1/2 teaspoon baking soda
- Extra lift! Combined with the acid from the cottage cheese, this will create a light texture.
-
1/2 teaspoon salt
- Flavor booster! Enhances all the other flavors in the muffins.
-
1-2 cups fresh or frozen blueberries
- Bursting with flavor! Frozen blueberries are convenient and work just as wonderfully—just toss them in the flour first to avoid sinking.
-
Optional: 1/2 teaspoon cinnamon or lemon zest
- For a fragrant twist! Both add a touch of warmth and brightness to your muffins.
Step-by-Step Instructions
Alright, my fabulous home cooks, let’s get those ovens preheated and start mixing up some muffin magic! Preheat your oven to 350°F (175°C), and grab your muffin tin—trust me, you’re going to want to have these muffins ready to go!
-
Prepare the Muffin Tin: Line a 12-cup muffin tin with paper liners or give it a good spray with non-stick cooking spray. Don’t skip this step—nobody wants to fight with muffin-destroying disasters when that golden muffin emerges!
-
Mix the Wet Ingredients: In a large bowl, add 1 cup of cottage cheese, 2 large eggs, 1/4 cup of maple syrup (or honey), and 1 teaspoon of vanilla extract. Whisk these together until well-combined; the mixture should be creamy and mouthwateringly fragrant. The cottage cheese may be lumpy, but don’t worry—this will only add texture to your muffins!
-
Combine the Dry Ingredients: In another bowl, whisk together 1 ½ cups of whole wheat flour, 2 teaspoons of baking powder, 1/2 teaspoon of baking soda, and 1/2 teaspoon of salt. If you’re feeling adventurous, toss in 1/2 teaspoon of cinnamon or some lemon zest for that pop of flavor.
-
Bring it Together: Gradually add the dry mixture to the wet ingredients. Use a spatula to fold everything together gently, being careful not to overmix! A few flour streaks are okay—over-mixing can lead to dense muffins, and we want them light as air.
-
Blueberry Burst: Now, for the star of the show! Gently fold in 1-2 cups of blueberries. If using frozen blueberries, dust them with a bit of flour first to keep them from sinking to the bottom. You want these beauties dotted throughout your muffins!
-
Scoop and Bake: Using a cookie scoop or spoon, fill each muffin cup about 2/3 full. Pop them into the oven and bake for about 20-25 minutes. Keep an eye on them—the muffins should be lightly golden and a toothpick inserted into the center should come out clean.
-
Cool and Enjoy: Once they’re done, remove them from the oven and let them cool in the tin for about 5 minutes before transferring them to a wire rack. The aroma wafting through your kitchen will be irresistible, I promise you that! Enjoy these warm, or let them cool completely for later—if you can resist the urge!
Serving Suggestions
To elevate your muffin experience, consider serving your Protein Cottage Cheese Blueberry Muffins with a dollop of Greek yogurt on top and a drizzle of honey. They’re also fabulous with a sprinkle of chopped nuts for that added crunch. You can present them on a charming plate, surrounded by fresh berries, for a lovely brunch spread. Add a hot cup of coffee or herbal tea, and voilà! You’ve set the stage for a delightful morning or afternoon treat.
Recipe Variations
Now, let’s talk about customization! Here are a few creative twists you can try with this muffin base:
- Nutty Delight: Add 1/2 cup of chopped walnuts or pecans for a crunchy texture and nutty flavor.
- Vegan-Friendly: Replace the eggs with flax eggs and the cottage cheese with dairy-free yogurt for a plant-based version.
- Chocolate Chip Bliss: Swap out half of the blueberries with dark chocolate chips for a sweet indulgence.
- Tropical Twist: Incorporate shredded coconut and chi-chi, using pineapple instead of blueberries for a tropical flavor.
- Cinnamon Swirl: Mix in a cinnamon sugar swirl by combining 1 tablespoon of cinnamon with 2 tablespoons of sugar, folding it into the batter before baking.
Chef’s Notes
Every recipe has a story, and this one’s no exception. As I mentioned earlier, these Protein Cottage Cheese Blueberry Muffins originated from a little kitchen experimentation that morphed into a family favorite. Over the years, I’ve played around with the ratios and added ingredients, but the essence remains the same: simplicity with a lovely flavor punch.
I often chuckle at how my kitchen was once a chaotic workshop, full of laughter, mishaps, and taste tests. It’s worse than some cooking shows, I tell you! Each time I took a bite of these muffins, I was reminded that cooking is not about perfection; it’s about connection, exploration, and delightful surprises wrapped in warmth. Feel free to get messy and have fun, my friend!
FAQs and Troubleshooting
1. Why are my muffins dense?
Overmixing your batter can lead to dense muffins. Mix until the flour is just incorporated, and don’t worry about the lumps!
2. Can I use other fruits?
Absolutely! Raspberries, cranberries, or chopped strawberries would all be delicious substitutes.
3. How should I store leftover muffins?
Once they’re completely cooled, store your muffins in an airtight container at room temperature for up to three days, or freeze them for up to three months. They’re perfect for a quick breakfast on the go!
4. How do I know when my muffins are done baking?
Insert a toothpick into the center of one of the muffins. If it comes out clean or with a few moist crumbs, they’re ready to come out. If it comes out sticky, give them a few more minutes in the oven!
Nutritional Info
(For one muffin, approximate values depending on variations and ingredients used)
- Calories: 150
- Protein: 6g
- Carbohydrates: 24g
- Fat: 3.5g
- Fiber: 3g
And there you have it, my lovely food enthusiasts! A recipe that brings warmth, nourishment, and smiles to your table. Make sure to share your muffin adventures with family and friends, and don’t hesitate to reach out if you have questions or stories of your own. Happy baking! 🧁💓
Print
Protein Cottage Cheese Blueberry Muffins
- Total Time: 40 minutes
- Yield: 12 muffins 1x
- Diet: Vegetarian
Description
Delightful, fluffy muffins packed with protein from cottage cheese and bursting with juicy blueberries. A perfect guilt-free treat for breakfast or snack time!
Ingredients
- 1 cup cottage cheese
- 2 large eggs
- 1/4 cup pure maple syrup or honey
- 1 teaspoon vanilla extract
- 1 ½ cups whole wheat flour
- 2 teaspoons baking powder
- 1/2 teaspoon baking soda
- 1/2 teaspoon salt
- 1–2 cups fresh or frozen blueberries
- Optional: 1/2 teaspoon cinnamon or lemon zest
Instructions
- Preheat your oven to 350°F (175°C) and prepare a muffin tin with liners or non-stick spray.
- Mix the wet ingredients in a large bowl: cottage cheese, eggs, maple syrup, and vanilla until well-combined.
- Combine the dry ingredients in another bowl: whole wheat flour, baking powder, baking soda, and salt. Add cinnamon or lemon zest if desired.
- Bring it all together by gradually adding the dry mixture to the wet ingredients, folding gently.
- Fold in the blueberries, ensuring they are evenly distributed.
- Scoop the batter into the muffin tin, filling each cup about 2/3 full.
- Bake for about 20-25 minutes, or until a toothpick comes out clean.
- Cool for 5 minutes in the tin before transferring to a wire rack.
Notes
For a vegan version, substitute eggs with flax eggs and cottage cheese with dairy-free yogurt. These muffins are also great with added nuts or chocolate chips.
- Prep Time: 15 minutes
- Cook Time: 25 minutes
- Category: Breakfast
- Method: Baking
- Cuisine: American
Nutrition
- Serving Size: 1 muffin
- Calories: 150
- Sugar: 7g
- Sodium: 200mg
- Fat: 3.5g
- Saturated Fat: 1g
- Unsaturated Fat: 2g
- Trans Fat: 0g
- Carbohydrates: 24g
- Fiber: 3g
- Protein: 6g
- Cholesterol: 30mg
Keywords: muffins, blueberry muffins, cottage cheese recipes, healthy desserts, protein muffins
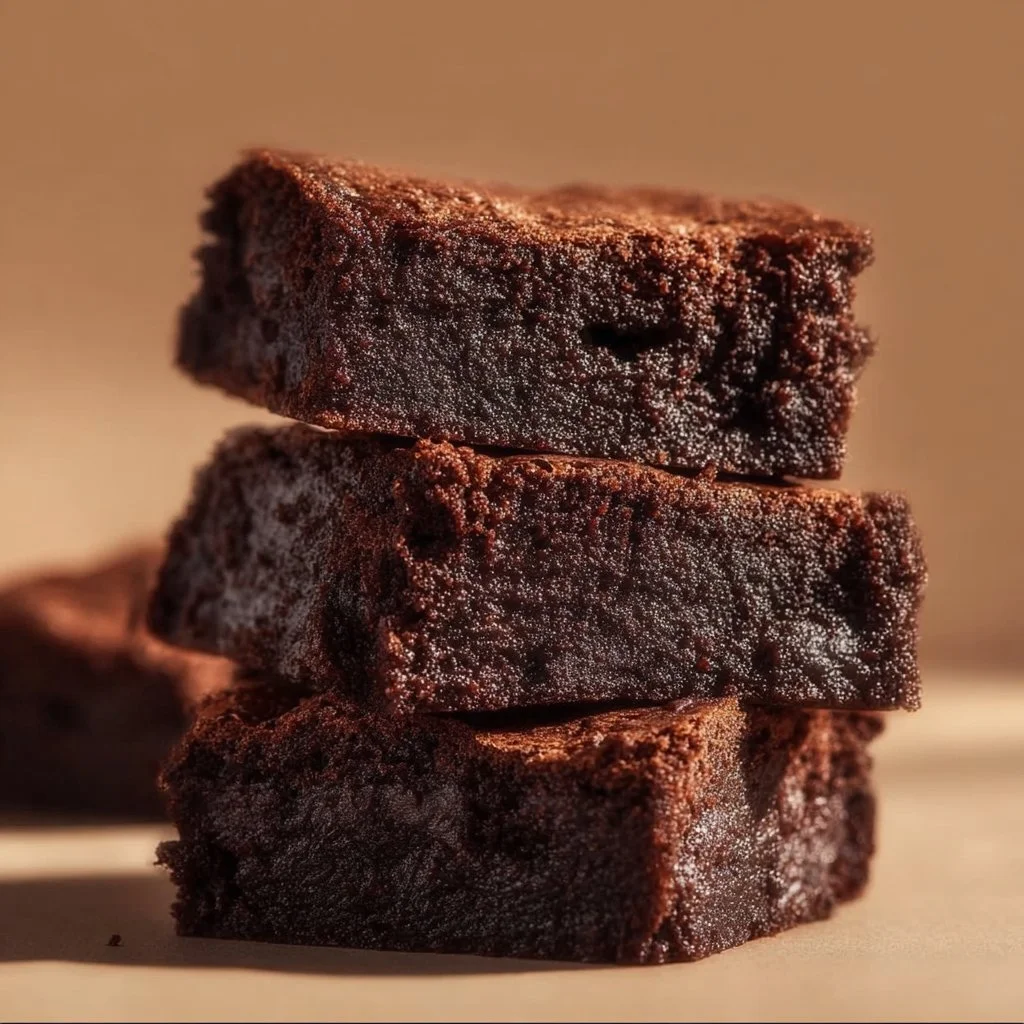
High-Protein Brownies
High-Protein Brownies that Pack a Punch: A Delightful Blend of Indulgence and Nutrition
Hello, fellow food lovers! I’m Olivia Bennett, and today I’m bubbling over with excitement to share a recipe that marries indulgence with nutrition: High-Protein Brownies! These delightful treats are perfect for satisfying your chocolate cravings while giving your body a healthy boost. I mean, who doesn’t love a good brownie? Soft, fudgy, and rich with chocolatey goodness, these brownies also happen to be packed with protein. So, whether you’re a busy professional craving a post-work snack, a fitness enthusiast looking for a healthy treat, or a parent wanting to sneak in some goodness for the kids, this recipe is your new best friend.
Picture this: It’s a rainy Sunday afternoon, and you’re cozied up in the kitchen, a warm cup of coffee on hand, and the sweet aroma of chocolate wafting through the air. You don’t just want to bake; you want to indulge without the guilt, right? By incorporating high-protein ingredients, these brownies not only satisfy your sweet tooth but also offer a nutritious boost, making it easier to stick to your health goals—all while enjoying one of life’s most delightful treats.
Now, I know what you might be thinking: “Healthy brownies? Will they really taste good?” Trust me, my friends, these beauties are an absolute game-changer! They deliver the decadence you crave while also being a smart choice for your snack repertoire. So grab your apron, turn on your favorite tunes, and let’s get whisking!
Personal Story
Let me take you back to a warm summer evening that’s forever etched in my memory. It was my best friend’s birthday, and she had invited a small group of us over for a backyard celebration. Just as golden hour began to paint the sky with shades of pink and orange, her mom—or should I say, my second mom—brought out a tray of warm brownies. Oh, the enchanting aroma that danced through the air! Each brownie was rich and fudgy, melting luxuriously in your mouth.
Now, the magic wasn’t just in the taste; it was in the laughter and stories we shared while devouring those treats. We spent the evening reminiscing about our childhood, laughing at our goofy moments, and making new memories. Those brownies became a symbol of the love and warmth that filled our homes and hearts. That day, I made a promise to myself: I would one day make a brownie recipe that’s just as memorable, but with a healthy twist that everyone could enjoy. Fast-forward years later, and here we are, ready to whip up a batch of High-Protein Brownies that will create their own beautiful memories!
Ingredients
Here’s what you’ll need to create these delightful High-Protein Brownies:
- 1 cup black beans (drained and rinsed): These powerhouses pack a protein punch while keeping the brownies moist. If you’re not a fan of black beans, you can substitute them with pureed chickpeas or a can of pumpkin—yes, I said pumpkin!
- 2 ripe bananas: These provide natural sweetness and help bind everything together. Can’t find ripe bananas? Use applesauce or even a cup of mashed avocado for an extra creamy texture!
- 1/2 cup cocoa powder: Use unsweetened cocoa for that rich chocolate flavor. If you prefer a sweeter taste, opt for Dutch-processed cocoa, as it tends to be milder.
- 1/4 cup protein powder (your choice, plant-based or whey): This is the star ingredient that elevates these brownies. If you want to keep it nut-free, look for a pea protein.
- 1/4 cup honey or maple syrup: Natural sweeteners add a touch of sweetness without refined sugars. For a vegan option, maple syrup is the way to go!
- 1/4 cup almond butter (or any nut/seed butter): This creamy goodness increases the brownie’s protein content and adds a lovely texture. Run out of almond butter? Peanut butter or sunflower seed butter work perfectly too.
- 1 teaspoon vanilla extract: Vanilla enhances the flavors beautifully. For a unique twist, try adding a splash of almond extract!
- 1/2 teaspoon baking soda: This helps our brownies rise ever so slightly and keeps them light. Make sure it’s fresh, or your brownies might bite the dust!
- A pinch of salt: A little salt enhances the chocolate flavor, so don’t skip it, even if you’re on a low-sodium diet!
Step-by-Step Instructions
Alright, let’s get down to business and bring these High-Protein Brownies to life!
-
Preheat the Oven: Begin by preheating your oven to 350°F (175°C). This step is crucial to ensure that your brownies bake evenly and become perfectly fudgy.
-
Blend the Ingredients: In a food processor or high-speed blender, combine the black beans, ripe bananas, cocoa powder, protein powder, honey (or maple syrup), almond butter, vanilla extract, baking soda, and a pinch of salt. Blend until you achieve a smooth, velvety batter. Trust me, you’ll want to taste this batter. It’s divine!
Chef Tip: If you’re using a blender, pause occasionally to scrape down the sides. You want everything fully incorporated for that dreamy, fudgy texture.
-
Prepare the Baking Pan: Lightly grease an 8×8-inch baking pan or line it with parchment paper for easy removal. I find that using parchment paper prolongs the freshness!
-
Pour the Batter: Transfer the brownie batter to your prepared pan, smoothing it out evenly.
Chef Hack: For a more decadent brownie, fold in some dark chocolate chips or chopped nuts at this stage. The melty chocolate bits make each bite extra special!
-
Bake: Place the pan in the preheated oven and bake for 20-25 minutes. You want the edges to look set while the center remains slightly soft.
Chef Tip: To test for doneness, insert a toothpick in the center. If it comes out with a few moist crumbs, you’re golden! If it’s wet and gooey, it needs a few more minutes.
-
Cool: Once baked, remove the brownies from the oven and let them cool in the pan for about 10-15 minutes. After that, you can transfer them to a wire rack to cool completely. Patience is key for perfect brownies!
-
Slice and Serve: Once cooled, slice into squares or rectangles—whichever shape makes your heart flutter!
Chef Tips: Running a knife through warm water before slicing makes for neat, clean edges. And who doesn’t love aesthetics, right?
Serving Suggestions
These High-Protein Brownies are delicious on their own, but they can also be dressed up a little! Try serving them warm with a scoop of vanilla or chocolate ice cream on top for a decadent dessert experience. Drizzle some melted dark chocolate or peanut butter over them for an extra special treat. And don’t forget a dusting of powdered sugar or a sprinkle of sea salt to finish!
Recipe Variations
Feeling adventurous? Here are some fun twists and turns you can take with this recipe:
-
Mint Chocolate Chip: Add a few drops of peppermint extract to the batter and fold in chocolate mint chips for a refreshing twist.
-
Nutty Banana Swirl: Top the batter with sliced bananas and a drizzle of almond butter before baking for a delightful flavor explosion.
-
Fudge-like Brownies: Reduce the baking time slightly for ultra-fudgy brownies. Just keep an eye on them to avoid overcooking!
-
Coconut Delight: Stir in unsweetened shredded coconut for a tropical vibe—hello, coconut brownie paradise!
-
Peanut Butter Heaven: Substitute half of the almond butter with peanut butter for a nutty and delightful flavor combo.
Chef’s Notes
I can’t tell you how many iterations it took to find the perfect balance of moisture, flavor, and protein in these brownies. The first few attempts were… let’s just say, they weren’t my finest culinary moments! But every mishap turned into a learning opportunity—I experimented with different beans, grains, and sweeteners trying to find that sweet spot.
The moment these came out of the oven just right, I was over the moon! And trust me, the smiles on my friends’ faces each time I serve them are worth every moment I spent tinkering in the kitchen. The evolution of this recipe has become a testament to the beauty of cooking—it’s not just about food; it’s about sharing joy and health!
FAQs and Troubleshooting
Q: What if my brownies turn out too dry?
A: Resist the urge to bake them longer! Remember, they’ll continue to cook slightly as they cool. If they’re dry, it might be a sign you overbaked them. Try reducing the baking time next time.
Q: Can I use a different type of flour?
A: Absolutely! If you’re looking for a gluten-free option, try almond flour or a gluten-free flour blend. Just make sure to adjust the quantity as needed.
Q: How can I make these vegan?
A: Swap the honey for maple syrup and use your favorite plant-based protein powder. Ensure you’re using a nut/seed butter that’s dairy-free too!
Q: Can I freeze these brownies?
A: Yes! They freeze wonderfully. Just place them in an airtight container, and they’ll stay fresh for up to three months.
Nutritional Info
While I always encourage enjoying treats in moderation, here’s a quick breakdown per brownie (assuming you get 12 brownies from the batch):
- Calories: ~120
- Protein: ~5g
- Carbohydrates: ~15g
- Fats: ~5g
- Fiber: ~3g
With these stats, you can enjoy a rich brownie without straying too far from your nutritional goals!
And there you have it—High-Protein Brownies that not only satisfy your cravings but also make you feel good about your choices. I can’t wait to hear how yours turn out! Share your thoughts in the comments and let’s keep this cozy kitchen vibe going. Remember, cooking is all about love, experimentation, and connection. Keep bonding over brownies, and until next time, happy cooking!
Print
High-Protein Brownies
- Total Time: 35 minutes
- Yield: 12 servings 1x
- Diet: Vegetarian
Description
Delightful High-Protein Brownies that marry indulgence with nutrition, perfect for satisfying chocolate cravings while boosting health.
Ingredients
- 1 cup black beans (drained and rinsed)
- 2 ripe bananas
- 1/2 cup cocoa powder
- 1/4 cup protein powder
- 1/4 cup honey or maple syrup
- 1/4 cup almond butter
- 1 teaspoon vanilla extract
- 1/2 teaspoon baking soda
- A pinch of salt
Instructions
- Preheat the oven to 350°F (175°C).
- Blend the black beans, ripe bananas, cocoa powder, protein powder, honey (or maple syrup), almond butter, vanilla extract, baking soda, and salt until smooth.
- Prepare an 8×8-inch baking pan by lightly greasing it or lining it with parchment paper.
- Pour the batter into the prepared pan, smoothing it out evenly.
- Bake for 20-25 minutes, until edges look set and center is slightly soft.
- Cool the brownies in the pan for 10-15 minutes before transferring to a wire rack.
- Slice into squares or rectangles.
Notes
For added richness, fold in chocolate chips or nuts. Serve warm with ice cream or a drizzle of chocolate.
- Prep Time: 10 minutes
- Cook Time: 25 minutes
- Category: Dessert
- Method: Baking
- Cuisine: American
Nutrition
- Serving Size: 1 brownie
- Calories: 120
- Sugar: 8g
- Sodium: 180mg
- Fat: 5g
- Saturated Fat: 1g
- Unsaturated Fat: 4g
- Trans Fat: 0g
- Carbohydrates: 15g
- Fiber: 3g
- Protein: 5g
- Cholesterol: 0mg
Keywords: high-protein, brownies, healthy dessert, chocolate, nutrition, indulgence
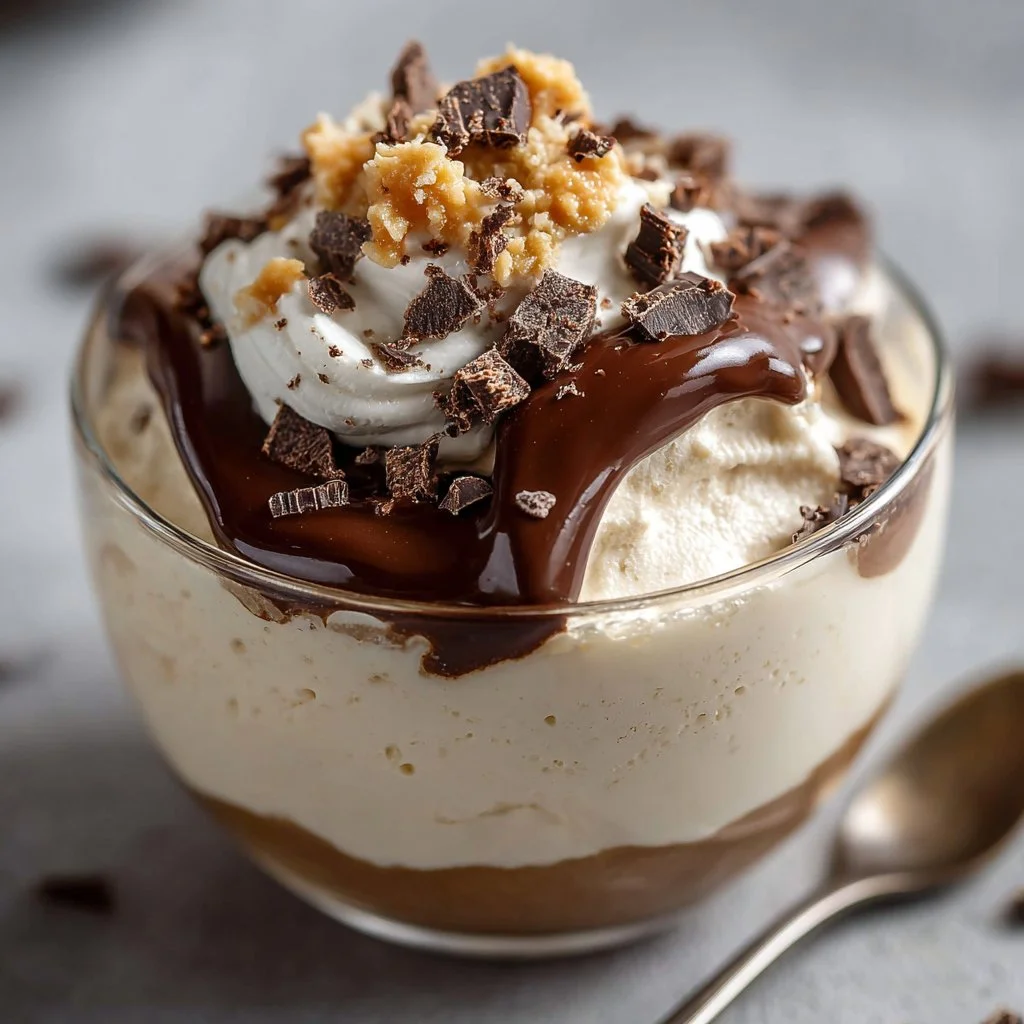
Indulge Guilt-Free: Peanut Butter Cup Cottage Cheese Mousse
Indulge Guilt-Free: Peanut Butter Cup Cottage Cheese Mousse
Introduction
Hey there, fellow food lovers! Welcome to my cozy corner of the kitchen, where we create delicious dishes that bring a little joy into our everyday lives. Today, I’m thrilled to share a fantastic recipe that has been a delicious secret in my family—Peanut Butter Cup Cottage Cheese Mousse. Yes, you read that right! This delightful dessert gives you all the creamy, dreamy goodness you crave without the guilt.
Imagine this: you’re sitting down for a well-deserved treat after a long day. You want something truly decadent, but also healthy enough to keep you feeling good about your choices. This mousse ticks all the boxes. It’s light, fluffy, and utterly irresistible, making it the perfect indulgence for any occasion. Plus, if you have little helpers—perhaps your kids or friends—they will love getting involved, helping you whip it up in no time.
I’ll take you through the steps to make this beautiful dessert, and even share some of my warm kitchen stories that make this dish even more special. So, let’s roll up our sleeves and dive into this wonderfully yummy world of flavors!
Personal Story
Many years ago, I hosted a cozy gathering for a group of friends. We laughed, shared stories, and reminisced about our favorite desserts from childhood. That evening, my friend Sarah shared her obsession with peanut butter cups, while I gushed over the heavenly texture of mousse. As the night wore on, an idea blossomed: why not combine our favorites?
Armed with a tub of cottage cheese (don’t roll your eyes just yet!), I set out to create a guilt-free dessert that satisfied our sweet cravings without leaving us feeling weighed down. To my delight, it turned into a hit! As we savored the lightness of the mousse paired with the rich peanut buttery goodness, our laughter filled the kitchen, and I knew I had stumbled onto something magical.
Years later, this Peanut Butter Cup Cottage Cheese Mousse remains a staple at my gatherings, reminding me of friendship, laughter, and the joy of cooking. Plus, it’s incredibly versatile and can easily be adapted for any sweet tooth!
Ingredients
Here’s what you’ll need to create this delectable Peanut Butter Cup Cottage Cheese Mousse:
-
Cottage Cheese (1 cup)
- A creamy base that adds protein and a light texture. Opt for low-fat or full-fat, depending on your preference. For a dairy-free option, try silken tofu!
-
Natural Peanut Butter (½ cup)
- Choose a good-quality, unsweetened peanut butter for the best flavor. You can substitute it with almond butter or sunflower seed butter if allergies are a concern.
-
Honey or Maple Syrup (¼ cup)
- These natural sweeteners provide just the right amount of sweetness. Feel free to adjust to taste or use a sugar substitute like stevia if you want to cut down on the sugars.
-
Vanilla Extract (1 teaspoon)
- Adds a warm floral note to your mousse. Always use pure vanilla extract for a richer flavor.
-
Cocoa Powder (2 tablespoons)
- This will give you that chocolatey element, evoking the classic flavor of peanut butter cups. For a richer taste, opt for dark cocoa powder.
-
Greek Yogurt (¼ cup, optional)
- Adds extra creaminess and a tangy flavor kick. Feel free to leave this out if you want a lighter mousse.
-
Whipped Cream (for topping, optional)
- A dollop on top makes this dessert feel truly indulgent! You can whip up some coconut cream for a dairy-free version.
Step-by-Step Instructions
Ready to whip up this delightful dessert? Let’s get cooking!
-
Prep Your Ingredients
Start by gathering all your ingredients and measuring them out. This ensures a smooth cooking process. Plus, it’s a lot more fun to have everything ready to go! -
Blend the Cottage Cheese
Add the cottage cheese to a food processor or blender. This step is essential! Blend until the cottage cheese is silky and smooth—about 1-2 minutes. This ensures no lumps and a mousse-like texture. -
Incorporate the Peanut Butter
Once your cottage cheese is nice and creamy, add in the natural peanut butter. Blend again until the mixture is fully combined. You should get a luscious peanut butter cream that will make your KitchenAid swoon! -
Sweeten It Up
Now, add in the honey or maple syrup, vanilla extract, and cocoa powder. Blend until everything is well mixed. Give it a taste! Don’t be shy—feel free to adjust the sweetness to your liking. -
Optional Upgrades
If you’re feeling extra adventurous, mix in the Greek yogurt at this stage. It’ll give your mousse a slight tang and an even creamier texture. Blend once more until you achieve that beautiful mousse consistency! -
Chill the Mousse
Transfer your mousse into serving bowls or glasses. Pop them in the fridge for at least an hour to help set and chill. Trust me, this step makes a difference, allowing the flavors to meld beautifully! -
Serve and Enjoy
Once chilled, it’s time to garnish! You can top your mousse with whipped cream, a sprinkle of cocoa powder, or even a drizzle of melted chocolate for an extra touch of elegance.
Serving Suggestions
Presentation is key! Serve your peanut butter cup mousse in clear bowls or glasses to showcase its beautiful colors. You can add a few crushed peanuts or chocolate shavings on top for that extra flair. It’s honestly so simple yet oh-so-elegant. If you’re hosting, consider pairing it with fresh fruit like strawberries or banana slices on the side for a pop of color!
Recipe Variations
Now, let’s get creative! Here are some fun twists to try:
-
Add a Fruit Twist: Incorporate a layer of your favorite fruit puree, like banana or raspberry, at the bottom of your serving glasses before adding the mousse.
-
Choco-Peanut Butter Swirl: Simply fold in some melted dark chocolate into the mousse for a richer flavor.
-
Nutty Crunch: Mix in chopped nuts or granola for a delightful crunch!
-
Dairy-Free Delight: Swap cottage cheese with silken tofu and use coconut cream for topping to make it dairy-free and vegan-friendly.
-
Spicy Kick: Add a pinch of cayenne pepper or a dash of cinnamon for a surprising heat that pairs beautifully with peanut butter!
Chef’s Notes
One of my favorite things about cooking is that it’s always evolving. This recipe came together as a means to satisfy those late-night cravings without the guilt, and it has since become a go-to treat for me. I still remember the first time I brought it to a potluck, and everyone was surprised to learn it was made with cottage cheese. Their reactions were priceless!
Cooking should be fun and experimental, so don’t hesitate to play around with this recipe and make it your own. You may even come up with a twist that becomes your signature dish!
FAQs and Troubleshooting
Q: Can I use non-dairy alternatives?
Absolutely! You can use silken tofu instead of cottage cheese and coconut cream for whipped topping to keep it dairy-free.
Q: The mousse isn’t thickening. What did I do wrong?
It should thicken up in the fridge as it chills. If it’s still not to your liking, consider blending in a bit of gelatin (for non-vegan) or chia seeds to help it set.
Q: How long will leftovers last?
Stored in an airtight container in the fridge, this mousse should last about 3-5 days. Just give it a quick stir before serving!
Q: Can I freeze this mousse?
While it’s best enjoyed fresh, you can freeze it for up to a month. Just be aware that the texture may change slightly upon thawing.
Nutritional Info
Per serving (without optional toppings):
- Calories: ~210
- Protein: 12g
- Fat: 10g
- Carbohydrates: 20g (with natural sugars)
- Fiber: 2g (varies based on ingredients)
And there you have it! A guilt-free indulgence perfect for any occasion, packed with rich flavors and delightful textures. I hope you enjoy making this Peanut Butter Cup Cottage Cheese Mousse as much as I do. Happy cooking, and don’t forget to share your creations with me!
Print
Peanut Butter Cup Cottage Cheese Mousse
- Total Time: 70 minutes
- Yield: 4 servings 1x
- Diet: Gluten-Free, Vegetarian
Description
A light and creamy mousse made with cottage cheese and peanut butter, perfect for a guilt-free indulgence.
Ingredients
- 1 cup Cottage Cheese
- ½ cup Natural Peanut Butter
- ¼ cup Honey or Maple Syrup
- 1 teaspoon Vanilla Extract
- 2 tablespoons Cocoa Powder
- ¼ cup Greek Yogurt (optional)
- Whipped Cream (for topping, optional)
Instructions
- Prep your ingredients by gathering and measuring them out.
- Blend the cottage cheese in a food processor until silky and smooth.
- Incorporate the peanut butter and blend until fully combined.
- Sweeten it up by adding honey or maple syrup, vanilla extract, and cocoa powder, then blend until mixed.
- Optional upgrades: mix in Greek yogurt for extra creaminess and blend again.
- Chill the mousse in the fridge for at least an hour to set.
- Serve and enjoy with toppings like whipped cream or cocoa powder.
Notes
This recipe can be easily adapted to be dairy-free by using silken tofu and coconut cream. Experiment with flavors and toppings!
- Prep Time: 10 minutes
- Cook Time: 0 minutes
- Category: Dessert
- Method: No-Cook
- Cuisine: American
Nutrition
- Serving Size: 1 serving
- Calories: 210
- Sugar: 12g
- Sodium: 130mg
- Fat: 10g
- Saturated Fat: 2.5g
- Unsaturated Fat: 7.5g
- Trans Fat: 0g
- Carbohydrates: 20g
- Fiber: 2g
- Protein: 12g
- Cholesterol: 10mg
Keywords: peanut butter, mousse, cottage cheese, dessert, healthy dessert, guilt-free dessert, no-bake dessert




