
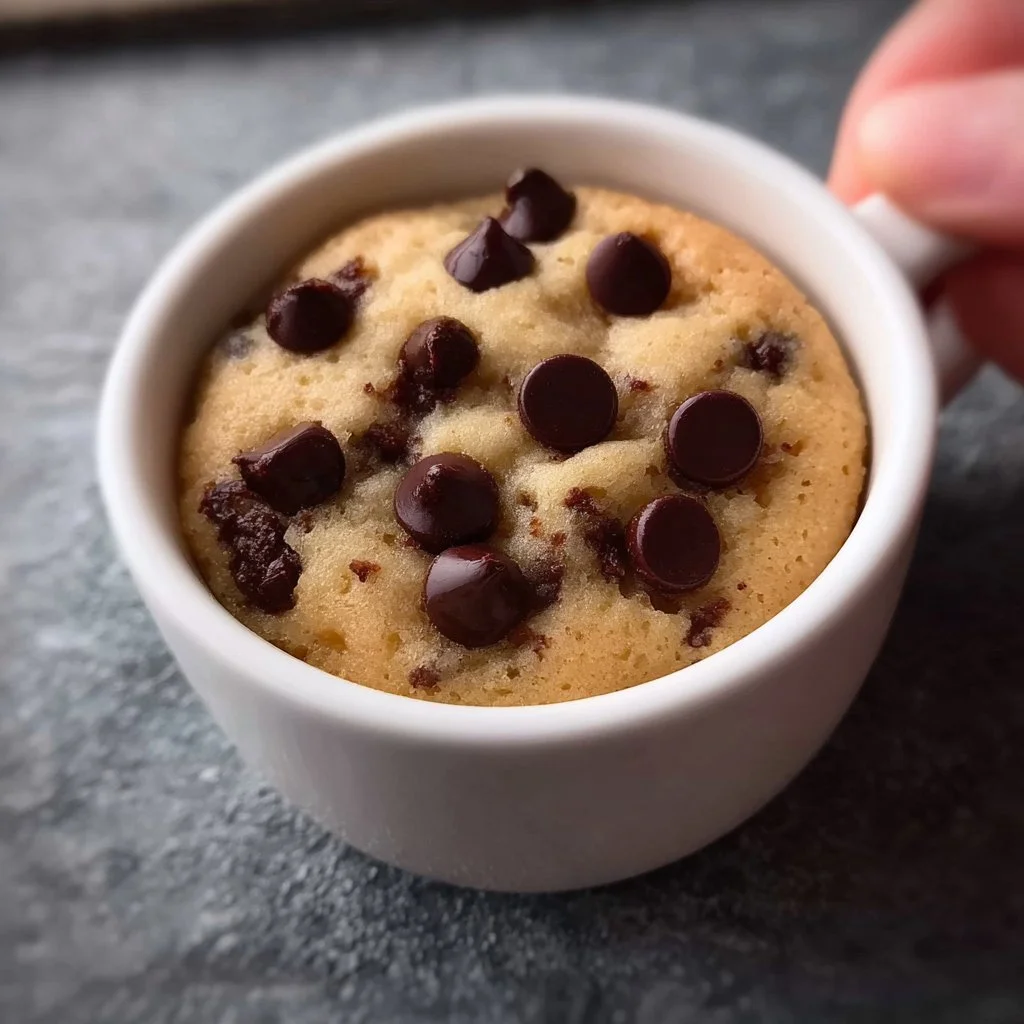
Microwave Chocolate Chip Mug Cookie
Microwave Chocolate Chip Mug Cookie: The Ultimate Treat for the Busy Foodie
Hey there, fellow foodies! Welcome back to my cozy kitchen, where the sweet aroma of freshly baked goodies fills the air and the laughter is as rich as the chocolate in the treats we make. Today, I’m excited to share a recipe that not only satisfies your sweet tooth but also fits right into the whirlwind of our hectic lives: the microwave chocolate chip mug cookie. Yes, you heard me right – a cookie you can whip up in just a couple of minutes with simple ingredients you probably already have at home.
This is one of those recipes that is perfect for late-night cravings, unexpected guests, or even just a little self-indulgence after a long day. Imagine this: it’s midnight; you’re in your PJs, browsing through social media, and suddenly the craving hits—something warm, sweet, and oh-so-chocolatey. Instead of reaching for that store-bought snack, you can have a delicious cookie in just a minute or two!
Why a mug cookie, you ask? Well, here’s the beauty of it: the mug acts as both your mixing bowl and your baking dish, which means minimal cleanup (yay for that!). Plus, there’s just something fun and nostalgic about making a personalized treat just for you—it’s like a tiny celebration in a cup. So, roll up those sleeves, grab your favorite mug, and let’s create something sweet together!
Personal Story
You know, one of my most cherished memories in the kitchen revolves around cookies. As a kid, I would hover around my mom, watching her whip up giant batches of chocolate chip cookies every Saturday. The sounds of creaming butter and sugar, the joyful clatter of mixing bowls, and the sweet cocoon of vanilla and chocolate wafting through the house are etched into my heart.
One particular Saturday, I remember wanting to help my mom so badly. She handed me a mug and told me to mix my own little concoction. It became a ritual; I would measure ingredients as best I could, and while my attempts were a tad messy (chocolate chips on the floor, anyone?), the thrill of creating my treat made each week feel like a special occasion.
Fast forward to today, and I’ve tried to recreate those childhood memories. This microwave chocolate chip mug cookie embodies that nostalgia—taking the essence of those carefree weekends and simplifying it for our modern, fast-paced lives. Enjoying a warm cookie right from the microwave is a comforting reminder that sometimes, the simplest things bring us the most joy.
Ingredients
Here’s what you’ll need to make your very own microwave chocolate chip mug cookie:
-
2 tablespoons unsalted butter
- Chef Insight: Butter is where the magic happens! Before adding, melt it slightly in the microwave—this gives the cookie a nice chewiness. If you want to lighten things up, you can substitute with coconut oil.
-
1 tablespoon granulated sugar
- Substitution Tip: If you’re after a less sweet treat, reduce the sugar to 2 teaspoons. Coconut sugar can also be a great alternative for a caramel hint.
-
1 tablespoon brown sugar
- Chef Insight: This adds depth and moisture to your cookie. Dark brown sugar will give you a richer flavor. No brown sugar? Just replace it with more granulated sugar.
-
1/4 teaspoon vanilla extract
- Substitution Tip: Pure vanilla extract offers the best flavor, but vanilla essence will do in a pinch—or even a nut extract like almond if you’re feeling adventurous!
-
1 egg yolk (discard the white or save for another recipe)
- Chef Insight: The yolk adds richness and moisture. If you’re egg-free, 1 tablespoon of applesauce can work as a replacement.
-
4 tablespoons all-purpose flour
- Substitution Tip: For a gluten-free version, try oat flour or almond flour, but keep in mind the texture may differ slightly.
-
1/4 teaspoon baking soda
- Chef Insight: This little magic ingredient acts as a leavening agent, helping to give your cookie a delightful lift. Don’t skip it!
-
2 tablespoons chocolate chips
- Substitution Tip: Use dark, milk, or even white chocolate chips! You can also add a sprinkle of sea salt atop the chocolate chips for a gourmet finish.
Step-by-Step Instructions
Ready to dive into the fun part? Here’s how to make your microwave chocolate chip mug cookie step by step:
-
Melt the Butter: In your favorite microwave-safe mug, place 2 tablespoons of unsalted butter. Heat it in the microwave for about 15-20 seconds, until it’s just melted. Be careful not to overheat; you want it warm, not bubbling!
-
Mix in the Sugars: After the butter has melted, add 1 tablespoon of granulated sugar and 1 tablespoon of brown sugar to the mug. Using a fork or a small whisk, combine the mixture until it’s creamy and smooth. This step is all about incorporating air into the butter, making your cookie lighter.
-
Add Vanilla and Egg Yolk: Stir in 1/4 teaspoon of vanilla extract and the egg yolk. Mix until everything is well combined. I just love the smell of vanilla here—it’s like a hug in a mug!
-
Incorporate the Dry Ingredients: Add 4 tablespoons of all-purpose flour and 1/4 teaspoon baking soda into the mug. Stir gently until just combined; be careful not to overmix. Overmixing can lead to a dense cookie, and we want it divine and soft.
-
Final Touch: Chocolate Chips: Fold in those yummy chocolate chips—but save a few to sprinkle on top to make it look extra delicious. The great thing about this recipe is that you can customize it to your taste, so if you have nuts or dried fruit on hand, feel free to toss them in!
-
Microwave Time: Place the mug in the microwave and heat it on high for about 40 to 60 seconds. Start checking at the 40-second mark. The cookie should look set but slightly gooey in the middle. Remember, microwaves vary, so you may need to adjust the timing slightly.
-
Cool and Enjoy: Let your mug cookie cool for a minute (unless you can’t resist and want to dig in right away!). It will be super hot, so be careful. If you want to take it up a notch, serve it warm with a scoop of ice cream on top. Heaven in a mug!
Serving Suggestions
Serving a mug cookie is an art in itself! You can simply devour it directly from the mug for a cozy and casual experience, or you can get a little fancy. Here’s how:
-
Plating: If you’re feeling extra special, transfer your cookie onto a small plate. Add a scoop of vanilla ice cream or a dollop of whipped cream on top. Drizzle some chocolate sauce or caramel for that gourmet touch.
-
Garnishing: Finish with a sprinkle of sea salt and a few extra chocolate chips on top for presentation and texture—a true treat for the eyes as well as the stomach!
Recipe Variations
Let’s talk about how to keep this recipe fresh and exciting! Here are a few creative twists you can try:
-
Nutty Delight: Add a tablespoon of chopped nuts like walnuts or pecans for a crunchy texture.
-
Double Chocolate: Swap half of the flour for cocoa powder to create a rich chocolate base.
-
Peanut Butter Swirl: Before microwaving, add a spoonful of peanut butter into the center of the dough for a delightful surprise.
-
Seasonal Spice: Mix in a pinch of cinnamon or even pumpkin spice during the fall for a festive flavor.
Chef’s Notes
This microwave chocolate chip mug cookie is a game-changer! It’s one of those recipes that has evolved over the years. Initially, I was skeptical about mug cookies—the idea of baking a real cookie in the microwave seemed too good to be true. But after a few tweaks, I found the perfect balance of texture and flavor.
And here’s a little kitchen story: one time, I decided to whip one of these up for a friend who had stopped by for a chat. I got so excited that I used an oversized mug, doubling the ingredients thinking I’d create a mega cookie! Well, it overflowed in the microwave, and the gooey mess was more laughable than tasty, but hey, I learned!
So, either stick to standard measurements or get adventurous like I did—just be prepared for the consequences!
FAQs and Troubleshooting
-
Why did my mug cookie turn out dry?
- Overcooking is usually the culprit. Make sure to keep an eye on the time and remember that the residual heat will continue to cook your cookie after pulling it out.
-
Can I make this cookie vegan?
- Absolutely! Substitute the butter for coconut oil or vegan butter, use a flax egg (1 tablespoon ground flaxseed mixed with 2.5 tablespoons water), and make sure the chocolate chips are dairy-free.
-
What if my cookie is too gooey?
- If the middle is still raw after the initial cooking time, pop it back in the microwave for an additional 10 seconds. Just be cautious to avoid overdoing it.
-
Can I store leftover cookie dough?
- While this recipe is best enjoyed fresh, you can prepare the dry ingredients ahead of time and store them in a jar. Just add the wet ingredients when you’re ready for a quick treat!
Nutritional Info (Optional)
If you’re curious about the nutritional aspect of your delicious creation, a usual serving of this microwave chocolate chip mug cookie has approximately:
- Calories: 300
- Protein: 4g
- Fat: 16g
- Carbohydrates: 38g
- Sugar: 18g
Adjust the recipe’s ingredients according to your dietary needs for healthier alternatives!
And there you have it, a delightful and quick recipe for a cozy night in or a midday pick-me-up—your new go-to for satisfying sweet cravings. Remember, cooking is all about having fun and experimenting. So go ahead, get creative, and enjoy every crumb of your mug cookie! Happy baking!
Print
Microwave Chocolate Chip Mug Cookie
- Total Time: 6 minutes
- Yield: 1 serving 1x
- Diet: Vegetarian
Description
A quick and easy microwave recipe for a delicious chocolate chip mug cookie that satisfies your sweet cravings in just minutes.
Ingredients
- 2 tablespoons unsalted butter
- 1 tablespoon granulated sugar
- 1 tablespoon brown sugar
- 1/4 teaspoon vanilla extract
- 1 egg yolk
- 4 tablespoons all-purpose flour
- 1/4 teaspoon baking soda
- 2 tablespoons chocolate chips
Instructions
- Melt the butter in a microwave-safe mug for 15-20 seconds.
- Mix in the granulated and brown sugars until creamy.
- Add the vanilla extract and egg yolk, stirring until combined.
- Incorporate the flour and baking soda, mixing gently.
- Fold in the chocolate chips and save a few for topping.
- Microwave on high for 40-60 seconds until set but gooey in the middle.
- Cool for a minute and enjoy!
Notes
Serve warm with ice cream for a delightful treat!
- Prep Time: 5 minutes
- Cook Time: 1 minute
- Category: Dessert
- Method: Microwaving
- Cuisine: American
Nutrition
- Serving Size: 1 cookie
- Calories: 300
- Sugar: 18g
- Sodium: 150mg
- Fat: 16g
- Saturated Fat: 8g
- Unsaturated Fat: 6g
- Trans Fat: 0g
- Carbohydrates: 38g
- Fiber: 1g
- Protein: 4g
- Cholesterol: 30mg
Keywords: mug cookie, chocolate chip, quick dessert, easy recipe, microwave
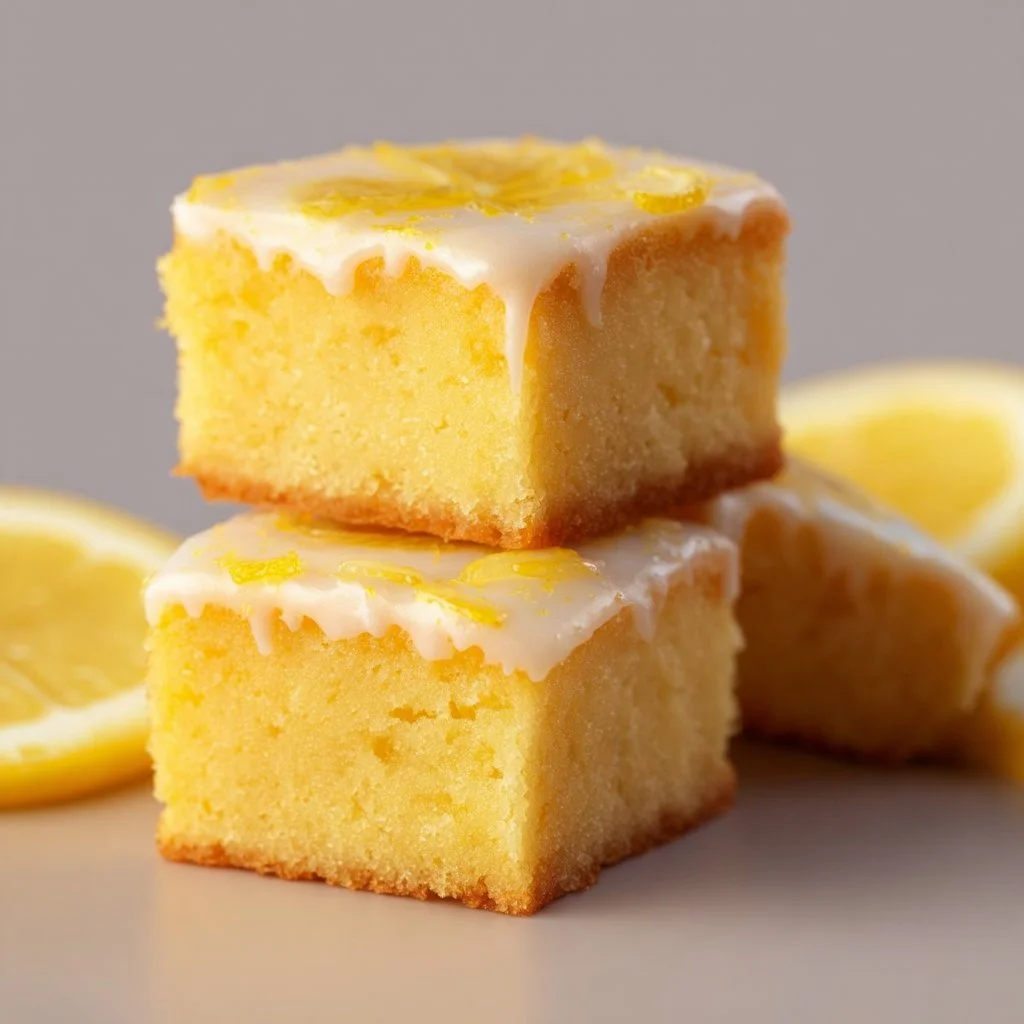
Lemon Brownies
Sweet Sunshine on a Plate: The Ultimate Lemon Brownies Recipe
Welcome to my kitchen! Today, we’re diving into a delightful treat that’s perfect for those times when you’re craving something sweet yet refreshing — Lemon Brownies! You might be wondering, “What on earth are Lemon Brownies?” Well, let me tell you, they are a delightful twist on traditional brownies, infusing zesty lemon flavor into a chewy, rich base that’s simply irresistible.
Imagine biting into a soft, fudgy square with a bright citrus kick that dances across your taste buds. It’s like springtime in your mouth, and it will have you pressing repeat faster than you can say “lemon zest!” These Lemon Brownies are the perfect blend of sweet and tangy, and I promise they’ll make your kitchen smell heavenly.
In this post, I’ll share my cherished Lemon Brownies recipe that combines comfort with a splash of sunshine, along with tips and tricks to make them extra special. Whether you’re baking for a crowd or simply indulging in a treat for yourself, these brownies are sure to bring joy to your day. So, roll up your sleeves, grab your apron (a little messiness is part of the fun), and let’s get baking!
Personal Story
I can never think of Lemon Brownies without recalling a charming afternoon spent in my grandmother’s kitchen. Each spring, as the days grew longer and warmer, she would invite me over to help her bake. The sun would beam through the windows, casting a golden glow on the countertops, and that’s where the magic happened.
One day, we decided to try our hand at something new. Instead of her usual chocolate brownies, she pulled out a tattered cookbook and flipped to a recipe for something called Lemon Brownies. I was skeptical; after all, chocolate was her signature! But as we mixed the ingredients, the bright scent of lemon filled the air, and my doubts began to melt away.
When they came out of the oven, they didn’t look like the brownies I was used to, but the moment we took a bite, I fell in love. Each square was a burst of sunshine, and it felt like a celebration of spring right at home. The best part? Sharing them with family, bringing smiles and laughter around the dining table. That day solidified my passion for baking, and every time I make Lemon Brownies, I’m transported back to that cozy kitchen with my grandmother, laughing and creating something beautiful.
Ingredients
Here’s what you’ll need to whip up these delightful Lemon Brownies:
-
1 cup unsalted butter, melted
This provides a rich, buttery base. You can substitute it with coconut oil for a dairy-free option, but it may alter the flavor slightly. -
2 cups granulated sugar
Sweetness is key! You can reduce the sugar slightly for a less sweet brownie or use a sugar substitute like coconut sugar for a different flavor profile. -
4 large eggs
Eggs add structure and moisture. For an egg-free version, consider using a flax egg (1 tablespoon of ground flaxseed mixed with 3 tablespoons of water per egg). -
1 tablespoon lemon zest
The zest is where the flavor magic happens! Don’t skip it. You can use lime zest for a fun twist. -
1 cup fresh lemon juice (about 4-5 lemons)
Fresh juice gives the best flavor! Bottled juice lacks the vibrant zing, but if you must use it, opt for a quality one. -
2 cups all-purpose flour
This is the backbone of the brownie. For a gluten-free version, use a 1:1 gluten-free baking mix. -
1 teaspoon baking powder
A must to make the brownies rise! If you’re out, you can use baking soda, but adjust the quantity accordingly. -
1/2 teaspoon salt
Balances the sweetness! You can use sea salt or kosher salt. -
Powdered sugar (for dusting)
Adds a lovely finish! If you’re looking for a health-conscious option, try using a sugar-free powdered alternative.
Step-by-Step Instructions
Ready to get baking? Let’s break this down into simple steps. Get your ingredients ready, and let’s embark on this lemony journey!
Step 1: Preheat Your Oven
Preheat your oven to 350°F (175°C). This may seem like a small step, but it’s super important! A properly preheated oven ensures even baking, so don’t skip it.
Step 2: Prepare Your Baking Pan
Grease a 9×13 inch baking pan with a little butter or line it with parchment paper. If you’re using parchment, leave some overhanging for easy removal later. That’ll save you from any brownie warfare during the extraction!
Step 3: Melt the Butter
In a large mixing bowl, melt the butter. You can do this in the microwave or on the stovetop. Just be sure not to overheat it to prevent it from cooking the eggs later!
Step 4: Mix the Sugar and Butter
Add the granulated sugar to the melted butter and whisk until combined. You’re looking for that silky, smooth texture! This mixture should be glossy, and the sugar will start dissolving.
Step 5: Add the Eggs
Crack your eggs into the butter-sugar mixture, one at a time. Whisk well after each addition. The mixture will turn frothy and pale — this is what we want! It’s like magic happening in your bowl.
Step 6: Infuse with Lemon
Now, it’s time to amp up the flavor! Add in the lemon zest and fresh lemon juice, and give it a good stir. Close your eyes as you do it — that bright scent is pure bliss!
Step 7: Add Dry Ingredients
In a separate bowl, mix the flour, baking powder, and salt. Gradually add this to the wet mixture. Gently fold everything together with a spatula until just combined. Be careful not to overmix! You want those chewy brownie bites, not tough cookies.
Step 8: Pour and Bake
Pour the brownie batter into your prepared pan and spread it evenly. Pop it into the oven and bake for about 25-30 minutes. You’ll know they’re done when a toothpick inserted in the center comes out with a few moist crumbs but not raw batter. Those little crumbs are key; they mean you’ve got that perfect brownie texture!
Step 9: Cool
Once baked, remove the brownies from the oven and let them cool in the pan for about 15-20 minutes. If you’re too impatient, you can slide them into the fridge to speed up the cooling process!
Step 10: Dust with Powdered Sugar
Once cooled, remove the brownies from the pan using the parchment (if you used it), and dust the top with powdered sugar for that elegant finish. Slice them into squares, and you’re ready to serve!
Serving Suggestions
These Lemon Brownies are fabulous served as is, but you can elevate the experience by pairing them with a dollop of whipped cream or a scoop of vanilla ice cream for a party on your plate. For those hot summer days, consider serving them with fresh berries on the side — they complement the lemon flavor perfectly and add a pop of color!
Recipe Variations
Feel like getting creative? Here are a few fun variations you can try:
- Lemon Blueberry Brownies: Fold in a cup of fresh or frozen blueberries for an extra fruity twist.
- Lemon Poppy Seed Brownies: Add 2 tablespoons of poppy seeds to the batter for that delightful crunch!
- Lemon Cream Cheese Brownies: Swirl in a cream cheese filling made with softened cream cheese, sugar, and an egg before baking.
- Gluten-Free Option: Swap the all-purpose flour for a gluten-free blend for everyone to enjoy.
- Lemon Coconut Brownies: Add shredded unsweetened coconut to the batter for a tropical flavor.
Chef’s Notes
As I reflect on this recipe, I can’t help but smile thinking of all the times I’ve served these Lemon Brownies at gatherings, picnics, and even just as a simple treat after a long day! Each batch brings back cherished memories and has evolved a little each time I made it. Sometimes I’ll get creative and top them with a lemon glaze or drizzle (mix powdered sugar with lemon juice), adding that extra zesty flair.
And let’s be real, no kitchen adventure is without its hiccups. I once mistook salt for sugar, and let’s say the face of my poor sister when she took a bite of those brownies was one I won’t forget! Just a friendly reminder to always double-check your ingredients!
FAQs and Troubleshooting
Q: What if my brownies come out too dry?
A: Overbaking is often the culprit! Keep an eye on them towards the end and do the toothpick test. If they’re dry, reduce your baking time next time around.
Q: Can I use bottled lemon juice?
A: Absolutely! But fresh lemons will give you a more vibrant flavor. If using bottled, opt for a high-quality brand for the best taste.
Q: How should I store my brownies?
A: Store them in an airtight container at room temperature for 3-4 days. You can also refrigerate them if you prefer a denser brownie texture.
Q: Can I freeze Lemon Brownies?
A: Yes! Wrap them tightly in plastic wrap, then in aluminum foil, and they can be frozen for up to 3 months. Just thaw at room temperature before enjoying.
Nutritional Info
(Note: Nutritional values are estimated and can vary based on ingredients used.)
- Serving Size: 1 Brownie
- Calories: 180
- Total Fat: 8g
- Saturated Fat: 5g
- Cholesterol: 50mg
- Sodium: 100mg
- Total Carbohydrates: 26g
- Dietary Fiber: 1g
- Sugars: 18g
- Protein: 2g
There you have it! A little sunshine on your plate and a delightful way to bring a taste of spring into your kitchen, no matter the season. Enjoy the baking process, and don’t forget to share your creations with those you love! Happy baking! 🍋✨
Print
Sweet Sunshine on a Plate: The Ultimate Lemon Brownies Recipe
- Total Time: 45 minutes
- Yield: 12 servings 1x
- Diet: Vegetarian
Description
Delightful Lemon Brownies combining sweet and tangy flavors in a fudgy, rich base, perfect for any occasion.
Ingredients
- 1 cup unsalted butter, melted
- 2 cups granulated sugar
- 4 large eggs
- 1 tablespoon lemon zest
- 1 cup fresh lemon juice (about 4–5 lemons)
- 2 cups all-purpose flour
- 1 teaspoon baking powder
- 1/2 teaspoon salt
- Powdered sugar (for dusting)
Instructions
- Preheat your oven to 350°F (175°C).
- Prepare a 9×13 inch baking pan by greasing it or lining with parchment paper.
- Melt the butter in a large mixing bowl.
- Add the granulated sugar to the melted butter and whisk until combined.
- Add the eggs into the butter-sugar mixture, whisking well after each addition.
- Infuse with lemon by adding lemon zest and fresh lemon juice, stirring well.
- Mix the flour, baking powder, and salt in a separate bowl, then gradually add to the wet mixture.
- Pour the batter into the prepared pan and spread evenly.
- Bake for about 25-30 minutes or until a toothpick comes out with a few moist crumbs.
- Cool in the pan for about 15-20 minutes before dusting with powdered sugar and slicing into squares.
Notes
Serve with whipped cream or a scoop of vanilla ice cream for an elevated dessert experience.
- Prep Time: 15 minutes
- Cook Time: 30 minutes
- Category: Dessert
- Method: Baking
- Cuisine: American
Nutrition
- Serving Size: 1 brownie
- Calories: 180
- Sugar: 18g
- Sodium: 100mg
- Fat: 8g
- Saturated Fat: 5g
- Unsaturated Fat: 2g
- Trans Fat: 0g
- Carbohydrates: 26g
- Fiber: 1g
- Protein: 2g
- Cholesterol: 50mg
Keywords: Lemon Brownies, Dessert, Spring Dessert, Citrus Desserts, Baking
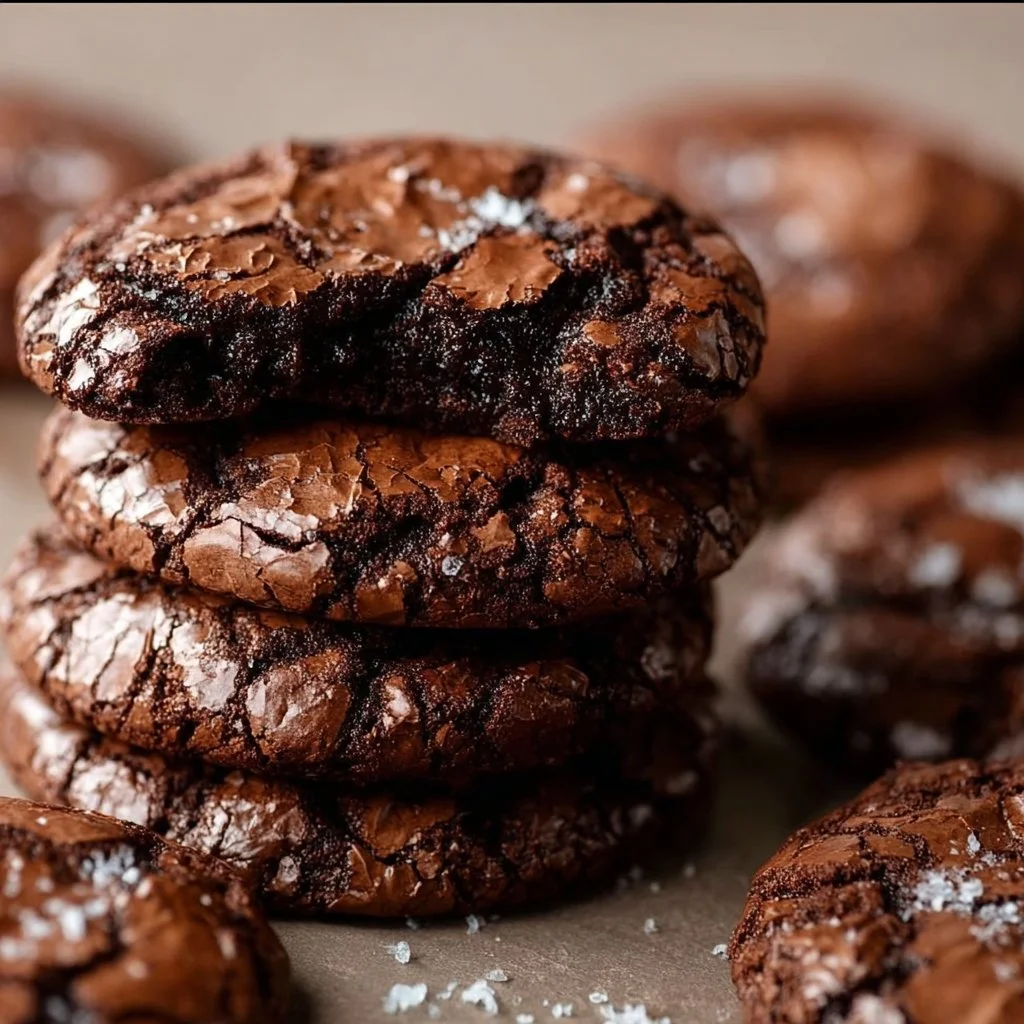
Gourmet Brownie Cookies
Gourmet Brownie Cookies: The Perfect Fusion of Brownies and Cookies!
Welcome back to my cozy kitchen, my fellow food enthusiasts! Today, we’re diving into a recipe that’s sure to steal the show at your next gathering—Gourmet Brownie Cookies! These little delights boast all the rich, fudgy decadence of brownies combined with the delightful chewiness of cookies. Imagine biting into a deeply chocolatey cookie that’s crisp on the edges and gooey in the middle—a slice of heaven right here on Earth!
I’ve always believed that some of the best memories are made in the kitchen, especially when it comes to baking. The aroma of chocolate melting, sugar whisking, and a sprinkle of flour dusting the countertops takes me on a nostalgic trip back to my childhood. I remember my grandma’s kitchen filled with laughter and warmth as she’d gather all of us around her. Making cookies felt like a sacred ritual, and though we often ended up with a flour fight, the joy of baking together was always worth it.
Whether you’re whipping these up for a family gathering or just because it’s a Tuesday, these gourmet brownie cookies are sure to impress. What’s more? They’re surprisingly easy to make! So gather your ingredients and let’s embark on this chocolatey adventure together.
Personal Story
Oh, let me take you back to a sunny Saturday morning at my grandma’s house. The whole family was buzzing with excitement as the smell of something chocolatey wafted through the air. Grandma was making her signature brownie cookie recipe, and you know what that meant—each of us had a specific job. My sister and I would race to measure the flour and cocoa powder, while our cousins fought over who got to crack the eggs. We’d find ourselves peeking into the oven, eyes wide with anticipation, as the cookies baked to a beautiful, glossy finish.
It was during one of those kitchen adventures that I learned the importance of patience—fighting the urge to devour them straight from the oven and waiting just a few minutes for them to cool. Little did I know, this recipe would become a cherished tradition in my life. It holds memories of laughter, love, and, the occasional chocolate-covered disaster. I revisit this recipe from time to time, not just for its rich flavor but for the connection it builds. Now, it’s my turn to share this love with you!
Ingredients
Here’s what you’ll need to create these heavenly treats:
For the Cookies:
-
1 cup (2 sticks) unsalted butter
- Why? The butter adds richness and flavor.
- Substitution: You can use coconut oil or a dairy-free butter alternative for a vegan version.
-
1 ½ cups granulated sugar
- Why? This helps your cookies spread out beautifully while keeping them chewy.
-
1 cup brown sugar, packed
- Why? The molasses in brown sugar adds depth and a chewy texture.
-
2 large eggs
- Why? Eggs help bind the cookies together.
- Tip: If you’re vegan, you can replace each egg with 1/4 cup unsweetened applesauce.
-
2 teaspoons vanilla extract
- Why? Pure vanilla takes the flavor from good to great!
-
1 cup all-purpose flour
- Why? This gives your cookies structure.
- Substitution: For a gluten-free option, substitute with a 1:1 gluten-free flour blend.
-
1 cup unsweetened cocoa powder
- Why? Essential for that brownie taste!
- Tip: Use Dutch-processed cocoa for a deeper flavor.
-
1 teaspoon baking powder
- Why? Helps the cookies rise just a tad without losing that chewy brownie-like texture.
-
1/2 teaspoon salt
- Why? A touch of salt amplifies sweetness and balances flavors.
-
2 cups semi-sweet chocolate chips or chunks
- Why? Melty chocolate bits in each bite—need I say more?
- Variation: Swap for dark chocolate or even white chocolate chips for a unique twist!
Step-by-Step Instructions
Now that we have our ingredients prepped, let’s get rolling on these delicious brownie cookies!
Step 1: Preheat Your Oven
Preheat your oven to 350°F (175°C). This step is crucial because we want those cookies to bake evenly and help them achieve that perfect chewy texture.
Step 2: Cream the Butters and Sugars
In a large mixing bowl, beat the unsalted butter, granulated sugar, and brown sugar together until light and fluffy. This should take about 2-3 minutes. You can use a handheld mixer or a stand mixer. Pro tip: allow your butter to sit at room temperature for about 30 minutes before using it. This will give you that creamy texture we’re after!
Step 3: Incorporate Eggs and Vanilla
Next, add in the eggs (one at a time) and the vanilla extract. Beat until everything is combined. You want that batter to be smooth—trust me, this is going to make it all come together beautifully!
Step 4: Mix the Dry Ingredients
In a separate bowl, whisk together the flour, cocoa powder, baking powder, and salt. Now, this step is important—sifting the cocoa powder before adding it to the mixture ensures there are no lumps and keeps our batter silky smooth. Once combined, gradually add this dry mixture into the wet ingredients. Mix until just combined—overmixing could lead to dry cookies!
Step 5: Fold in the Chocolate Chips
Here comes the fun part! Fold in the chocolate chips or chunks gently into your dough. You might want to save a few to sprinkle on top right before baking for that professional touch!
Step 6: Scoop and Bake
Using a cookie scoop or two tablespoons, drop heaping amounts of dough onto a baking sheet lined with parchment paper, spacing them about 2 inches apart to allow for spreading. Pop them into the preheated oven and bake for 10-12 minutes. Keep an eye on them—the edges should be set while the centers will look slightly underbaked (trust me, they’ll firm up as they cool).
Step 7: Cool
Remove the cookies from the oven and let them rest on the baking sheet for about 5 minutes. This helps them set up before transferring them to a wire rack to cool completely. Don’t skip this step—this is where that gooey center magic happens!
Enjoy Your Cookies
Wait for them to cool a bit before diving in. I know it’s hard, but those few minutes will reward you with a fudgy, melty, chocolate-filled experience!
Serving Suggestions
These gourmet brownie cookies can be served on a beautiful platter, perhaps garnished with a dusting of powdered sugar or a drizzle of chocolate sauce for that eye-catching finish. Pair them with a tall glass of milk or a scoop of vanilla ice cream for an irresistible treat that nobody will be able to resist. ❤️ They also make fantastic gifts in cute cookie tins—just try not to eat them all before you get a chance to give them away!
Recipe Variations
If you’re feeling adventurous or catering to specific dietary preferences, here are a few ideas to switch up this recipe:
- Nutty Addition: Fold in 1 cup of your favorite nuts, such as walnuts or pecans, for a delightful crunch.
- Minty Fresh: Add a few drops of peppermint extract for a chocolate-mint flair that’s perfect during the holidays.
- Spicy Kick: Incorporate a pinch of cayenne pepper into the dry ingredients for a subtle kick that enhances the chocolate flavor.
- Flourless Option: Go for a gluten-free version by omitting the flour entirely and using ground almonds instead, yielding ultra-fudgy cookies.
Chef’s Notes
Over the years, this brownie cookie recipe has become a staple in my home, and I can’t help but tweak it each time I make it! Lately, I’ve been experimenting with adding a hint of espresso powder to the mix, which enhances that chocolate flavor even more! One of my funniest kitchen memories was when I accidentally used salt instead of sugar—I had a room full of disappointed taste testers whose faces were priceless! Remember to check your ingredients before diving in, friends!
FAQs and Troubleshooting
1. My cookies are too cakey! What went wrong?
This could happen if you overmixed the dough or added too much flour. Make sure to measure accurately and mix until just combined to maintain that chewy texture.
2. Why are my cookies spreading too much?
Chilling your dough for at least 30 minutes can help the cookies maintain their shape while baking, as well as keeping your ingredients cool.
3. My cookies didn’t turn out gooey!
If they were left in the oven for too long, they might dry out. Remember, they’ll continue to cook on the baking sheet after being pulled from the oven, so take them out while they still look slightly underbaked.
4. Can I freeze the dough?
Absolutely! You can scoop the dough into balls and freeze them on a baking sheet. Once frozen, transfer them to a zip-top bag and pop them in the freezer. When you’re ready, bake directly from frozen, adding an extra minute or two to the bake time.
Nutritional Information (optional)
Caloric Content: Each cookie is approximately 150 calories.
Health Tip: These cookies are rich in antioxidants from the cocoa but should be consumed in moderation due to their sugar content.
Now, are you ready to transform your kitchen into a chocolatey wonderland? Collect your ingredients, turn on those ovens, and let’s get baking! Share your creations with me—there’s nothing better than the joy of homemade goodies shared with love. Happy baking! 🍪❤️
Print
Gourmet Brownie Cookies
- Total Time: 27 minutes
- Yield: 24 cookies 1x
- Diet: Vegetarian
Description
Delicious gourmet brownie cookies that combine the fudgy richness of brownies with the chewy texture of cookies. Perfect for any gathering!
Ingredients
- 1 cup (2 sticks) unsalted butter
- 1 ½ cups granulated sugar
- 1 cup brown sugar, packed
- 2 large eggs
- 2 teaspoons vanilla extract
- 1 cup all-purpose flour
- 1 cup unsweetened cocoa powder
- 1 teaspoon baking powder
- 1/2 teaspoon salt
- 2 cups semi-sweet chocolate chips or chunks
Instructions
- Preheat your oven to 350°F (175°C).
- Cream the unsalted butter, granulated sugar, and brown sugar in a large mixing bowl until light and fluffy.
- Incorporate the eggs and vanilla extract, beating until combined.
- Mix the flour, cocoa powder, baking powder, and salt in a separate bowl.
- Gradually add the dry mixture into the wet ingredients, mixing until just combined.
- Fold in the chocolate chips or chunks.
- Scoop heaping amounts of dough onto a parchment-lined baking sheet, spacing them 2 inches apart.
- Bake for 10-12 minutes until edges are set and centers are slightly underbaked.
- Cool on the baking sheet for 5 minutes before transferring to a wire rack.
Notes
For variations, consider adding nuts, peppermint extract, or a pinch of cayenne. These cookies can also be frozen in dough form for later baking.
- Prep Time: 15 minutes
- Cook Time: 12 minutes
- Category: Dessert
- Method: Baking
- Cuisine: American
Nutrition
- Serving Size: 1 cookie
- Calories: 150
- Sugar: 15g
- Sodium: 150mg
- Fat: 7g
- Saturated Fat: 4g
- Unsaturated Fat: 3g
- Trans Fat: 0g
- Carbohydrates: 23g
- Fiber: 2g
- Protein: 2g
- Cholesterol: 30mg
Keywords: brownies, cookies, chocolate, dessert, baking
Sugar-Free Sex In A Pan
Sugar-Free Sex In A Pan: A Deliciously Decadent Dessert Recipe
Welcome, fellow foodies! Today, we’re diving into a recipe that’s as cheeky as its name — Sugar-Free Sex In A Pan. Now, before you raise your eyebrows or giggle behind your hands, let me clarify! This dessert is not just a playful title; it’s a delightful, layered creation that’s bound to impress your guests and fill your kitchen with the sweet scent of love and happiness.
Imagine a dessert that captivates with its rich creamy layers, chocolatey goodness, and the best part? It’s entirely sugar-free! Yes, you read that right! With the right ingredients, you can have all the indulgence without the guilt. I’ve designed this dessert to cater to various dietary needs, while still delivering on flavor. It’s perfect for those of us looking to indulge without compromising our healthy lifestyles or giving in to a sugar crash!
What makes Sugar-Free Sex In A Pan so special? It’s the perfect blend of textures and flavors: a silky cream cheese filling, a decadent chocolate layer, and a satisfying crust that ties it all together. It’s the kind of dessert that makes you melt, both in terms of flavor and in the warm, cozy vibe it brings to any gathering.
So roll up those sleeves, preheat that oven, and let’s create some magic together. Whether it’s a special occasion or just a cozy night in, this dessert will make your kitchen feel like a warm hug. Are you ready? Let’s jump right in!
Personal Story
Let’s rewind to my childhood for a moment. I vividly remember my grandmother, dressed in her flowery apron and with flour dusted on her cheek, creating her own version of layered desserts. Every Sunday, she’d whip up something delicious, and we kids would eagerly gather ’round the kitchen table, our eyes wide with anticipation, just waiting to hear the story behind each treat.
One particular Sunday, she introduced us to a dish that would become a family favorite — a decadent layered dessert in a pan, rich with chocolate and cream. As she prepared it, she’d weave tales of her own childhood, and we’d all revel in the warmth and love that filled the room. That dessert, which I later learned was affectionately dubbed “Sex In A Pan” by some, left an indelible mark on my heart (and taste buds!).
Years later, when I embarked on my journey as a home cook, I wanted to recreate that sense of warmth but with a healthier twist. That’s how this sugar-free version was born! It carries all the delightful memories and flavors of my grandmother’s cooking while being something I can enjoy guilt-free. Now, I’m excited to share it with all of you!
Ingredients
To create your very own Sugar-Free Sex In A Pan, you’ll need some simple yet impactful ingredients. Let’s break them down:
For the Crust:
- Almond Flour (1 ½ cups)
A great base for a gluten-free crust! If you’re not a fan of almond flour, you can substitute it with coconut flour, but make sure to reduce the quantity, as coconut flour is more absorbent. - Unsweetened Cocoa Powder (¼ cup)
This adds a rich chocolate flavor. Look for high-quality cocoa powder for the best taste! If you want to keep it lighter, you can use carob powder for a different but delightful flavor. - Salt (½ teaspoon)
Just a pinch to enhance all the flavors. A little salt goes a long way in balanced baked goods! - Sugar-Free Granulated Sweetener (½ cup)
This is your sugar substitute. I recommend erythritol or a stevia blend for a zero-calorie option. If you prefer something with a bit more flavor, coconut sugar can also work, but it’s not entirely sugar-free! - Unsalted Butter, melted (½ cup)
This binds the crust together beautifully. If you’re opting for a dairy-free version, coconut oil works wonderfully too!
For the Cream Cheese Layer:
- Cream Cheese (8 oz, softened)
Always make sure your cream cheese is at room temperature for the creamiest texture. Vegan cream cheese can be a great substitution if you need a dairy-free option! - Vanilla Extract (1 teaspoon)
This adds a lovely depth of flavor. Use pure vanilla extract if possible for an authentic taste! - More Sugar-Free Granulated Sweetener (½ cup)
Your go-to sweetener here again! Adjust according to your preferred sweetness!
For the Chocolate Layer:
- Sugar-Free Chocolate Pudding Mix (1 box, prepared according to package instructions)
A quick and easy way to add a chocolatey layer. If homemade pudding is your thing, go ahead and make it from scratch! (Just keep it sugar-free!) - Milk (2 cups, or any dairy-free milk of your choice)
This is used to prepare the pudding. You can also use almond milk or coconut milk for a different creaminess.
Topping:
- Whipped Cream (for garnish)
Use any kind you like, whether store-bought or homemade! For a dairy-free option, coconut whipped cream is a luscious choice!
Step-by-Step Instructions
Now that we’ve gathered our ingredients, let’s get down to the fun part — making this fabulous dessert!
Step 1: Prepare the Crust
- Preheat Your Oven: Preheat your oven to 350°F (175°C). This allows the crust to bake evenly.
- Mix the Dry Ingredients: In a large mixing bowl, combine the almond flour, cocoa powder, salt, and sweetener. Don’t skimp on mixing! You want everything to be well-integrated for a consistent crust.
- Add the Wet Ingredients: Pour in the melted butter and mix until your dough holds together. The texture should be slightly crumbly, but it should stick when pressed.
- Press into the Pan: Grease a 9×13 inch pan and evenly press the crust mixture into the bottom. Aim for an even layer, and don’t forget to press down firmly!
- Bake: Pop it into the oven for about 10-12 minutes, or until it’s set. Let it cool completely before adding the next layers. A little patience goes a long way here!
Step 2: Create the Cream Cheese Layer
- Cream the Cheese: In a medium bowl, beat the softened cream cheese until smooth. You can use a hand mixer or a whisk—whatever you have on hand!
- Add Sweetener and Vanilla: Gradually add in the sugar-free sweetener and vanilla extract, mixing until fully incorporated. The mixture should be smooth and creamy.
- Spread the Layer: Once the crust is cooled, spread the cream cheese mixture evenly over it. Don’t worry if it seems thick; just use a spatula to smooth it out!
Step 3: Make the Chocolate Layer
- Prepare the Pudding: Follow the instructions on your sugar-free pudding mix. Whisk with your milk of choice until it reaches the desired pudding-like consistency, which usually takes a few minutes.
- Spread Over Cream Cheese: Once the pudding is ready, pour it over the cream cheese layer, carefully spreading it to avoid disturbing the layer beneath.
- Chill: Cover the pan with plastic wrap and refrigerate for at least 4 hours (or overnight if you can wait!). This helps the layers to set beautifully!
Step 4: Serve Time!
- Top with Whipped Cream: Right before serving, generously dollop whipped cream on top. The lightness of the cream offsets the rich layers below, creating a perfect balance!
- Garnish (optional): Sprinkle a little cocoa powder or some shaved dark chocolate on top for an extra touch of elegance.
- Cut and Serve: Slice into squares (or rectangles if you’re feeling rebellious) and serve to your lucky guests. They won’t believe it’s sugar-free!
Serving Suggestions
To make your presentation even more special, serve Sugar-Free Sex In A Pan with fresh berries on the side or drizzle some unsweetened chocolate sauce for added flair. Consider garnishing with mint leaves for that extra touch — it’s all about making your dessert look as delightful as it tastes!
Recipe Variations
- Flavored Cream Cheese Layer: Add some lemon or orange zest into the cream cheese layer for a fresh twist!
- Nutty Crust: Mix in some chopped nuts like pecans or walnuts into the crust for an extra crunch.
- Boozy Chocolate: For the adults, add a splash of coffee liqueur to the chocolate pudding for an irresistibly rich flavor!
- Fruit Layer: Layer in some sliced strawberries or raspberries between the cream cheese and pudding layers for a fruity touch!
Chef’s Notes
One of my favorite things about this recipe is how easy it is to assemble and customize! Whenever I have friends over, this dessert is my go-to. I even remember one time I experimented with adding a hint of hazelnut flavor to the chocolate layer, and oh my goodness, it was a game changer!
Also, don’t be shy about inviting your friends into the kitchen to help. Cooking together not only makes the process more fun but also gives you the chance to create new memories, just like I did with my grandmother!
FAQs and Troubleshooting
Q1: My crust came out too crumbly. What went wrong?
Don’t lose hope! If your crust isn’t holding together, it might be due to too much dry ingredient or not enough binding from the butter. Add a splash of water or a bit more melted butter to help it come together in the future.
Q2: How do I know if the cream cheese layer is set enough?
It should feel firm to the touch and not jiggle when you lightly shake the pan! If you’re unsure, let it chill for a bit longer.
Q3: My pudding layer isn’t thickening. What can I do?
Ensure you’ve mixed it well with the proper amount of milk. If it’s still runny, you might want to refrigerate it for a little while longer until it sets.
Q4: Can I make this dessert dairy-free?
Absolutely! Substitute the cream cheese with a dairy-free or nut-based cream cheese and opt for plant-based milk for the pudding as well.
Nutritional Info
This delightful dessert is not only indulgent but also a guilt-free treat. Assuming a yield of 16 squares, here’s an approximate breakdown per square (without toppings):
- Calories: 160
- Protein: 4g
- Fat: 12g
- Carbohydrates: 8g
- Sugar: 2g (from sugar-free sweeteners)
Well, there you have it! A delectable, sugar-free dessert that’s sure to tantalize the taste buds and warm the heart. I hope you enjoy making and sharing this Sugar-Free Sex In A Pan as much as I have. Happy cooking, friends!
PrintSugar-Free Sex In A Pan
- Total Time: 240 minutes
- Yield: 16 servings 1x
- Diet: Sugar-Free
Description
A deliciously decadent dessert that features rich creamy layers and chocolatey goodness, all without the guilt of sugar.
Ingredients
- 1 ½ cups Almond Flour
- ¼ cup Unsweetened Cocoa Powder
- ½ teaspoon Salt
- ½ cup Sugar-Free Granulated Sweetener
- ½ cup Unsalted Butter, melted
- 8 oz Cream Cheese, softened
- 1 teaspoon Vanilla Extract
- ½ cup More Sugar-Free Granulated Sweetener
- 1 box Sugar-Free Chocolate Pudding Mix, prepared according to package instructions
- 2 cups Milk (or any dairy-free milk)
- Whipped Cream (for garnish)
Instructions
- Preheat your oven to 350°F (175°C).
- Mix the dry ingredients: Combine almond flour, cocoa powder, salt, and sweetener.
- Add the wet ingredients: Pour melted butter and mix until the dough holds together.
- Press the mixture into a greased 9×13 inch pan.
- Bake for 10-12 minutes, and let it cool completely.
- Cream the cream cheese until smooth.
- Add sweetener and vanilla, mixing until creamy.
- Spread the cream cheese layer over the cooled crust.
- Prepare the pudding according to the package instructions.
- Spread the pudding over the cream cheese layer.
- Chill in the fridge for at least 4 hours.
- Top with whipped cream before serving.
- Cut into squares and serve.
Notes
Feel free to customize with different flavors or toppings. This dessert is also fully dairy-free if you use the right substitutes!
- Prep Time: 15 minutes
- Cook Time: 12 minutes
- Category: Dessert
- Method: Baking
- Cuisine: American
Nutrition
- Serving Size: 1 serving
- Calories: 160
- Sugar: 2g
- Sodium: 200mg
- Fat: 12g
- Saturated Fat: 7g
- Unsaturated Fat: 5g
- Trans Fat: 0g
- Carbohydrates: 8g
- Fiber: 3g
- Protein: 4g
- Cholesterol: 40mg
Keywords: sugar-free dessert, layered dessert, creamy dessert, chocolate dessert, healthy dessert
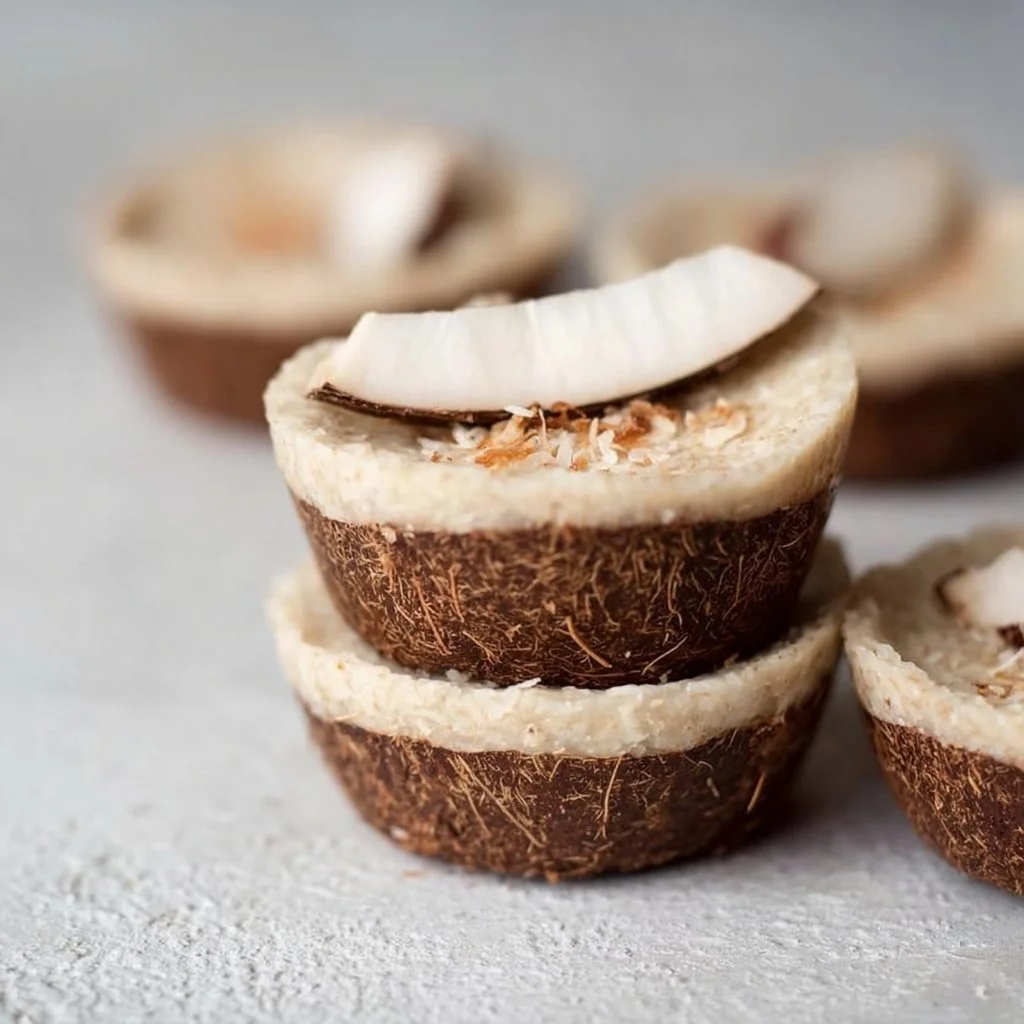
No-bake Vegan Coconut Cups
No-Bake Vegan Coconut Cups: A Sweet Escape to Paradise
Welcome back to my cozy corner of the internet, foodies! Today, we’re diving into a scrumptious treat that’s not only easy to whip up but also a delightful taste of tropical paradise: No-Bake Vegan Coconut Cups. I mean, who doesn’t love a dessert that makes you feel like you’re lounging on a sun-soaked beach? These little gems are the perfect blend of creamy coconut, sweet maple syrup, and luscious nuts, bringing together a medley of flavors that is sure to light up your taste buds.
Now, I know we’re all busy, juggling life, work, and everything in between. That’s why I adore no-bake recipes—they give you all the satisfaction of homemade goodness without tethering you to the oven for hours! Just a few simple steps, and you’ll have delightful coconut cups to share (or not, I won’t judge if you want to keep them all to yourself). What I love about these treats is their versatility. They’re fantastic for any occasion—whether it’s a potluck, a cozy night in, or a fun brunch with friends.
But wait, before we get our hands sticky, let’s talk about why these coconut cups are not just delicious but also a more health-conscious option. They’re vegan, naturally sweetened, and can easily be made gluten-free. Plus, coconut is packed with fiber and healthy fats that provide quick energy—perfect for an afternoon pick-me-up!
So grab your mixing bowls, and let’s get ready to create these delightful No-Bake Vegan Coconut Cups that are as fun to make as they are to eat!
Personal Story
As I sit here thinking about coconut, I can’t help but reminisce about my childhood summers spent at my grandma’s small beach house. The air was always rich with the smell of saltwater and sun-kissed coconut palms, and finding a mug of coconut cream pie or coconut cookies waiting for me was the highlight of my day. Grandma would whip up treats that reminded her of her childhood in the Caribbean, and I’d sit on the patio soaking in both the sun and the flavors.
Every bite took me back to those carefree summers, where the only worries were whether to build sandcastles or collect seashells. That nostalgia inspired these No-Bake Vegan Coconut Cups! They are a tribute not only to grandma’s love for coconut but also to those lazy beach days that seemed endless. Each cup is like a little bite of summer, and I hope making these brings you just as much joy as those sunny memories brought me.
Ingredients
Let’s gather all the goodness we need! Below is a list of ingredients you’ll need to create these delectable coconut cups, along with some handy notes and substitution tips.
-
Unsweetened Shredded Coconut (2 cups): The star of the show! This adds incredible flavor and texture. You can opt for sweetened shredded coconut, but keep in mind it will change the sweetness of your cups.
-
Coconut Cream (1 cup): For that luscious, decadent texture. If you can’t find coconut cream, a can of full-fat coconut milk works just fine—just scoop out the cream from the top after it’s been chilled overnight.
-
Maple Syrup (1/3 cup): This natural sweetener adds a warm, rich quality. You can replace it with agave syrup or date syrup for a different flavor profile.
-
Almond Flour (1/2 cup): It provides a nice nutty undertone. If you have nut allergies, feel free to substitute with oat flour or even all-purpose flour.
-
Vanilla Extract (1 teaspoon): This enhances all the flavors. Pure vanilla extract is best, but if you need to, you could use vanilla essence.
-
Pinch of Sea Salt: Don’t skip this! A little salt enhances sweetness and brings everything together.
-
Dark Chocolate (for drizzling, optional): This adds a rich finish. You can use vegan chocolate chips or even melted cacao for a healthier option.
With this lineup, we’re ready to create something that feels indulgent yet is genuinely wholesome.
Step-by-Step Instructions
Alright, it’s time to get our hands moving! Here’s how to make these delightful No-Bake Vegan Coconut Cups.
-
Prepare Your Muffin Tin: Line a standard 12-cup muffin tin with paper liners or lightly grease with coconut oil. This will ensure an easy release once your cups are set.
-
Mix the Coconut Base: In a large mixing bowl, combine shredded coconut, almond flour, and a small pinch of sea salt. Use a spatula or your hands (get ready for a bit of stickiness!) to mix until well combined. This will be the crusty base that holds all that coconut goodness together!
-
Add Creamy Ingredients: Next, pour in the coconut cream and maple syrup into the dry coconut mix. Stir until it becomes a thick, sticky mass. This is where the magic happens! Make sure everything is well coated—the consistency should be moldable, similar to cookie dough. Pro Tip: If you find it too sticky, add a little more almond flour to absorb some moisture.
-
Form Your Cups: Using a cookie scoop or a tablespoon, portion out the mixture into your muffin tin. Press it down firmly to create a well-formed cup shape; the denser, the better! Make sure it’s packed tightly so it doesn’t fall apart later.
-
Chill: Place your muffin tin in the refrigerator for about 30-60 minutes. This helps the cups firm up nicely, ensuring they’ll hold their shape when you take them out.
-
Optional Chocolate Drizzle: While they chill, melt your dark chocolate in a microwave-safe bowl, using 30-second intervals to avoid burning. Once your coconut cups have set, take them out and drizzle the melted chocolate over each one. This is the glamorous finishing touch that’s sure to impress!
-
Serve and Enjoy: Allow the chocolate to set for a few more minutes, then serve straight from the muffin tin or plate them up for your guests.
These no-bake delights will have you feeling like a kitchen guru in no time!
Serving Suggestions
When it comes to serving these coconut cups, the presentation is key! You can serve them straight from the muffin tin with a colorful napkin underneath for a casual vibe. For a more elegant touch, try placing them on a decorative serving platter with a sprinkle of extra shredded coconut or a few fresh mint leaves for a pop of color. They also pair wonderfully with a fresh fruit salad or a scoop of coconut sorbet on the side for a refreshing contrast.
Recipe Variations
The beauty of these No-Bake Vegan Coconut Cups lies in their versatility. Here are a few fun twists you can try:
-
Chocolate Coconut Cups: Incorporate cocoa powder into the coconut mixture for a chocolatey flair. Simply use 1/4 to 1/2 cup of cocoa powder in place of the almond flour.
-
Nutty Twist: Fold in some chopped nuts such as walnuts or pecans for a satisfying crunch.
-
Fruit Infusion: Add a tablespoon of your favorite jam inside the cups before refrigerating for a sweet surprise!
-
Citrus Zing: Grate some orange or lime zest into the coconut mixture to brighten the flavors.
-
Spiced Coconut Cups: Mix in a bit of cinnamon or nutmeg for a warm, cozy vibe, perfect for cooler months!
Chef’s Notes
You know what’s funny? I used to be a bit of a baking snob, thinking everything needed to be baked to be delicious. But the moment I embraced no-bake treats, my world expanded! These coconut cups have become a go-to for last-minute gatherings or when I want to whip up something sweet without the heat. They’re so easy to customize, and every variation seems like a new adventure.
Another funny kitchen story: the first time I made these, I got so excited about the chocolate drizzle that I may have overdone it. My kitchen looked like a chocolate bomb went off, but the results were totally worth it! Each cup was a little work of art, and seeing friends’ faces light up made it all worth the mess.
FAQs and Troubleshooting
1. Why are my coconut cups too crumbly?
If your cups are falling apart, it might be that they aren’t packed tightly enough or didn’t have enough coconut cream. Next time, make sure to really press them down when forming the cups, and add a splash more coconut cream if needed.
2. How long will these coconut cups last?
Stored in an airtight container in the refrigerator, they can last about a week. But trust me, they’ll be gone long before that!
3. Can I freeze them?
Absolutely! These coconut cups freeze beautifully. Just separate layers with parchment paper and store in a freezer-safe bag. When you’re ready to indulge, let them thaw in the fridge overnight.
4. Can I make these chocolate-covered?
Yes! Just dip each coconut cup into melted chocolate instead of drizzling. This gives them an indulgent chocolatey shell that complements the coconut perfectly.
Nutritional Info (Optional)
While the specific nutritional information can vary based on ingredient brands and quantities, here’s a rough idea of what you’re looking at per coconut cup:
- Calories: ~150
- Protein: 2g
- Fat: 10g
- Carbohydrates: 14g
- Fiber: 3g
- Sugar: 5g
These No-Bake Vegan Coconut Cups are not just a sweet treat; they’re a little reminder of the joys of cooking from the heart. So, roll up your sleeves, get creative, and most importantly, have fun! Here’s to many more kitchen adventures together—you’ve got this, and your taste buds will thank you! Happy cooking!
Print
No-Bake Vegan Coconut Cups
- Total Time: 60 minutes
- Yield: 12 servings 1x
- Diet: Vegan
Description
A delightful treat that combines creamy coconut, sweet maple syrup, and luscious nuts, perfect for any occasion.
Ingredients
- 2 cups Unsweetened Shredded Coconut
- 1 cup Coconut Cream
- 1/3 cup Maple Syrup
- 1/2 cup Almond Flour
- 1 teaspoon Vanilla Extract
- Pinch of Sea Salt
- Dark Chocolate (for drizzling, optional)
Instructions
- Prepare Your Muffin Tin: Line a standard 12-cup muffin tin with paper liners or lightly grease with coconut oil.
- Mix the Coconut Base: In a large mixing bowl, combine shredded coconut, almond flour, and salt; mix until well combined.
- Add Creamy Ingredients: Pour in coconut cream and maple syrup; stir until a thick, sticky mass forms.
- Form Your Cups: Portion out the mixture into muffin tin, pressing down firmly to create a cup shape.
- Chill: Place muffin tin in the refrigerator for 30-60 minutes to firm up the cups.
- Optional Chocolate Drizzle: Melt dark chocolate and drizzle over the set coconut cups.
- Serve and Enjoy: Serve straight from the muffin tin or plate them up for guests.
Notes
These coconut cups can be stored in an airtight container in the refrigerator for up to a week. They also freeze beautifully!
- Prep Time: 15 minutes
- Cook Time: 0 minutes
- Category: Dessert
- Method: No-Bake
- Cuisine: Vegan
Nutrition
- Serving Size: 1 cup
- Calories: 150
- Sugar: 5g
- Sodium: 10mg
- Fat: 10g
- Saturated Fat: 9g
- Unsaturated Fat: 1g
- Trans Fat: 0g
- Carbohydrates: 14g
- Fiber: 3g
- Protein: 2g
- Cholesterol: 0mg
Keywords: no-bake, vegan, coconut, dessert, healthy treat
Strawberry Oatmeal Bars
Strawberry Oatmeal Bars: A Cozy Delight for Every Occasion
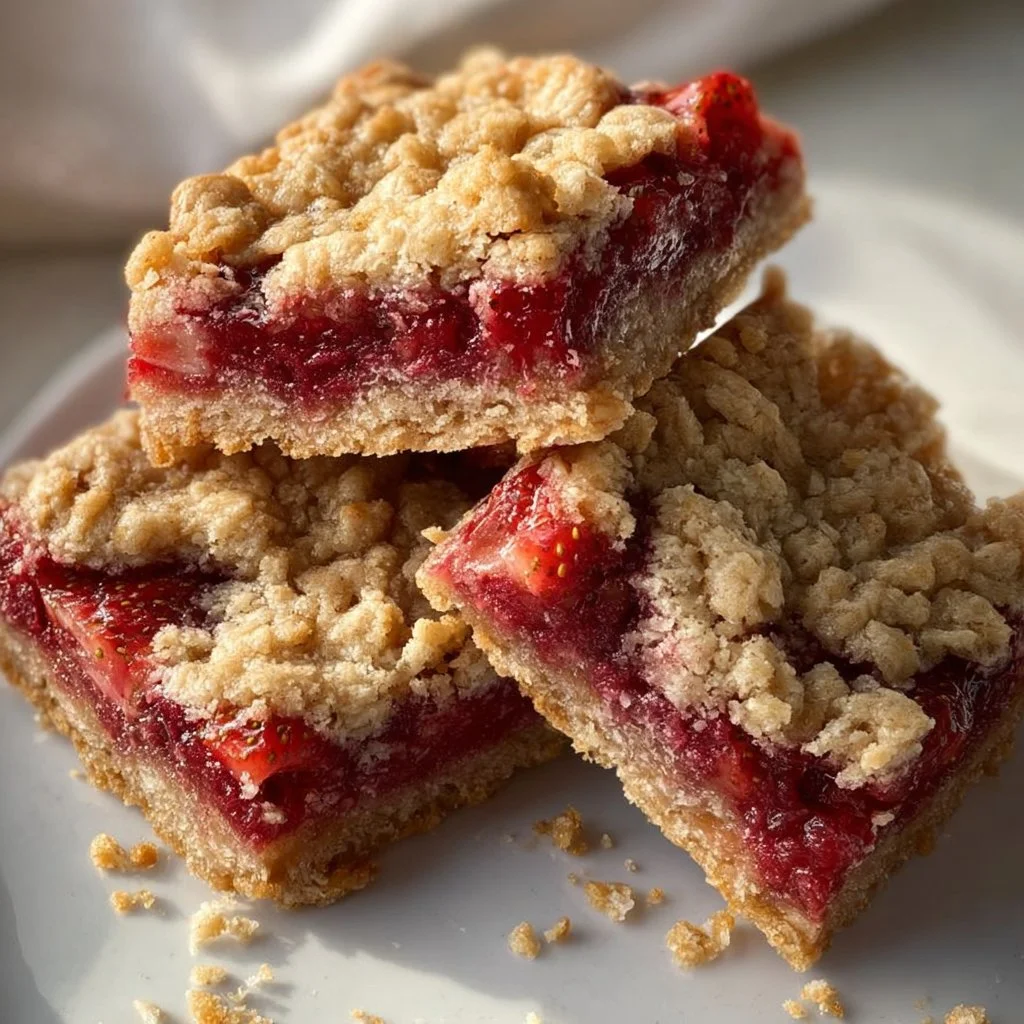
Welcome back to my kitchen! Today, we’re embarking on a flavor-packed journey where sweet strawberries meet chewy oatmeal — and I couldn’t be more excited to share my cherished recipe for Strawberry Oatmeal Bars. These aren’t just any ordinary bars; they are the perfect blend of sweet and wholesome, ideal for breakfast, snack time, or dessert. Plus, they’re super easy to whip up, making them a favorite for both novice and seasoned cooks alike.
Soon, you’ll be able to pull a tray of these delightful bars from your oven, and the aroma of baked strawberries and toasted oats will have you nostalgic for summer picnics and carefree days. Picture this: a stack of these bars sitting on a picnic blanket, laughter filling the air, and sunshine warming your skin. Doesn’t that sound dreamy? Let’s dive into this delicious recipe!
A Cozy Memory
Every time I make Strawberry Oatmeal Bars, I’m transported back to my childhood summers spent at my grandmother’s house. She had a little garden bursting with strawberries, and I can still picture myself running through the rows, plucking the ripest ones and popping them straight into my mouth. After a morning of berry picking, my grandmother would whip up her famous oatmeal bars. The kitchen would soon fill with the warm scent of butter, oats, and freshly baked strawberries.
Those bars were always a hit, and to this day, I can’t think of summer without picturing those golden treats cooling on the kitchen counter. Her secret? A pinch of love sprinkled into the batter and plenty of juicy strawberries. Inspired by her recipe, I knew I had to create my own version that decks out the goodness of strawberries with the heartiness of oats while keeping that nostalgic flair alive.
Now, whenever I bake these bars, I feel like I’m carrying forward that same love my grandmother shared with me, hoping it brings the same joy to your shared moments.
Ingredients
Let’s gather our ingredients! This recipe is simple, yet it packs a punch in flavor. Here’s what you’ll need:
-
2 cups rolled oats
The heart of our bars! Rolled oats give them a chewy texture. If you need a gluten-free option, use certified gluten-free oats. -
1 cup all-purpose flour
This helps bind everything together. You can substitute with whole wheat flour or almond flour for a nuttier flavor. -
¾ cup brown sugar
Adds moisture and depth of flavor. Coconut sugar or maple syrup can work as alternatives if you’re looking for a healthier option. -
½ cup unsalted butter, melted
Brings richness to the bars. For a vegan option, you might try coconut oil or vegan butter. -
1 teaspoon vanilla extract
This is the magic ingredient that enhances sweetness. Feel free to experiment with almond extract for a different flavor profile! -
½ teaspoon baking powder
This helps give the bars some rise. If you’re out of baking powder, baking soda can be used—just remember to balance it with an acid, like vinegar or lemon juice! -
¼ teaspoon salt
Enhances all the flavors. You won’t even notice it, but it’s essential for that tasty balance. -
2 cups fresh strawberries (sliced)
The star of the show! Use ripe, juicy strawberries for the best flavor. Frozen berries can work too; just be sure to thaw and drain them first.
Step-by-Step Instructions
Let’s get cooking! Follow these steps, and soon you’ll have your own tray of scrumptious Strawberry Oatmeal Bars.
-
Preheat the Oven
Begin by preheating your oven to 350°F (175°C). Greasing your baking pan beforehand is a must! Use an 8×8 or 9×9-inch pan, lining it with parchment paper for easy removal later. -
Mix the Dry Ingredients
In a large bowl, whisk together the rolled oats, flour, brown sugar, baking powder, and salt until well combined. This ensures that every bite is perfectly balanced. A little chef tip: use the back of the whisk to break up any clumps of brown sugar. -
Incorporate the Butter and Vanilla
Melt your butter and let it cool slightly. Then, add it to the dry ingredient mixture, along with the vanilla extract. Stir with a spatula until everything is well combined and a crumbly dough forms. It should resemble wet sand—this means you’re on the right track! -
Prepare the Strawberry Filling
While mixing the base, slice your strawberries. If you want a little extra sweetness, sprinkle them with a teaspoon of sugar and let them sit for about 10 minutes. This releases their juices and makes for a luscious filling. -
Spread the Base Into the Pan
Now, take half of your oat mixture and press it firmly into the bottom of the greased pan. You want a nice, even layer—this will hold your strawberries. -
Layer the Strawberries
Spoon the strawberries an even layer over the oat base. If you want to get a little adventurous, sprinkle a dash of cinnamon or lemon zest over the strawberries for an added zing! -
Top with Remaining Oat Mixture
Crumble the rest of the oat mixture on top of the strawberries. It doesn’t have to cover every inch—some strawberry peeking through is perfectly fine! It will create that lovely, rustic look. -
Bake
Pop your pan into the oven and let the magic happen. Bake for 25-30 minutes or until the top is golden brown and the strawberries are bubbling slightly. Your kitchen will start to smell divine—trust me! -
Cool and Cut
Once out of the oven, let it cool in the pan for about 10 minutes, then carefully lift it out using the parchment paper. Transfer to a wire rack and let it cool completely before slicing. Patience is key here; you want them perfectly set! -
Serve and Enjoy
Once cool, cut your bars into squares or rectangles. Serve them warm or at room temperature—either way, they’ll be a hit!
Serving Suggestions
These bars can be served in a variety of delightful ways. Dust them with a light sprinkle of powdered sugar for a touch of elegance, or serve them alongside a scoop of vanilla ice cream for a comforting dessert. I also love pairing them with a cup of freshly brewed coffee or tea for a perfect afternoon snack.
They make fantastic additions to a picnic basket or can be wrapped up with a beautiful bow as a thoughtful gift for a friend. Your family and friends will definitely come back asking for more!
Recipe Variations
Getting creative with your Strawberry Oatmeal Bars is all part of the fun! Here are a few variations to consider:
- Berry Medley: Swap out strawberries for blueberries, raspberries, or even a mix of all three for a fruity explosion!
- Nutty Twist: Add ½ cup of chopped nuts—like almonds or walnuts—into the oat mixture for added crunch and flavor.
- Coconut Delight: Mix in shredded coconut for a tropical vibe that pairs perfectly with the strawberries.
- Chocolate Chip Indulgence: Stir in some chocolate chips—because who doesn’t love a little chocolate with fruit?
- Spiced Up: Add a sprinkle of cinnamon or nutmeg to the oat base for a warm, spiced flavor that works beautifully with the fruit.
Chef’s Notes
These Strawberry Oatmeal Bars have evolved over the years to feature all my favorite tweaks and turns. My first attempts were quite different! I didn’t quite figure out the balance of sweetness to tartness, and let me tell you, I had a few kitchen disasters (thank goodness for trash cans!).
But short of some minor mishaps, baking is all about experimentation; each batch teaches you something new and helps refine the technique. I’ll never forget the time I accidentally mistook salt for sugar—it was a salty disaster, but we all laughed over it, and those are the moments that remind us that cooking is about joy, not perfection.
FAQs and Troubleshooting
-
Why did my bars crumble apart when cutting?
This can happen if the bars are not cooled completely before slicing. They need to set to hold together nicely. Try waiting a bit longer next time! -
Can I use frozen strawberries?
Yes! Just make sure to thaw and drain any excess moisture from them to avoid a soggy filling. -
My bars are too sweet. What went wrong?
Sometimes the sweetness can vary based on the specific brand of brown sugar used. If you’re concerned, you can reduce the sugar in future batches. -
Can I make these ahead of time?
Absolutely! They store well in an airtight container for up to a week — just be sure to layer them with parchment if stacking to avoid sticking.
Nutritional Info
Per serving (1 bar, roughly 24 bars total):
- Calories: 180
- Protein: 2g
- Carbohydrates: 27g
- Fat: 7g
- Sugar: 6g
- Fiber: 2g
Now that you have this lovely recipe for Strawberry Oatmeal Bars, it’s time to gather your ingredients and get baking! Whether you’re enjoying them solo or sharing with loved ones, I hope these bars bring you as much joy as they’ve brought me. Happy baking and bon appétit! 🍓
Print
Strawberry Oatmeal Bars
- Total Time: 45 minutes
- Yield: 24 bars 1x
- Diet: Vegetarian
Description
A wholesome blend of sweet strawberries and chewy oatmeal, perfect for breakfast, snack time, or dessert.
Ingredients
- 2 cups rolled oats
- 1 cup all-purpose flour
- ¾ cup brown sugar
- ½ cup unsalted butter, melted
- 1 teaspoon vanilla extract
- ½ teaspoon baking powder
- ¼ teaspoon salt
- 2 cups fresh strawberries, sliced
Instructions
- Preheat the oven to 350°F (175°C) and grease your baking pan.
- Mix the dry ingredients: rolled oats, flour, brown sugar, baking powder, and salt in a large bowl.
- Incorporate the melted butter and vanilla into the dry mixture until crumbly.
- Prepare the strawberries by slicing them and optionally sprinkling with sugar.
- Spread half of the oat mixture into the bottom of the greased pan.
- Layer the sliced strawberries over the oat base.
- Top with the remaining oat mixture in a crumbled layer.
- Bake for 25-30 minutes until golden brown and bubbly.
- Cool in the pan for 10 minutes, then transfer to a wire rack to cool completely before slicing.
- Serve and enjoy warm or at room temperature.
Notes
These bars can be adapted with various fruits, nuts, or spices for different flavors.
- Prep Time: 15 minutes
- Cook Time: 30 minutes
- Category: Dessert
- Method: Baking
- Cuisine: American
Nutrition
- Serving Size: 1 bar
- Calories: 180
- Sugar: 6g
- Sodium: 100mg
- Fat: 7g
- Saturated Fat: 4g
- Unsaturated Fat: 3g
- Trans Fat: 0g
- Carbohydrates: 27g
- Fiber: 2g
- Protein: 2g
- Cholesterol: 15mg
Keywords: strawberry, oatmeal, bars, dessert, baking
Vegan Raspberry Coconut Fudge
Indulge in Heaven: Vegan Raspberry Coconut Fudge
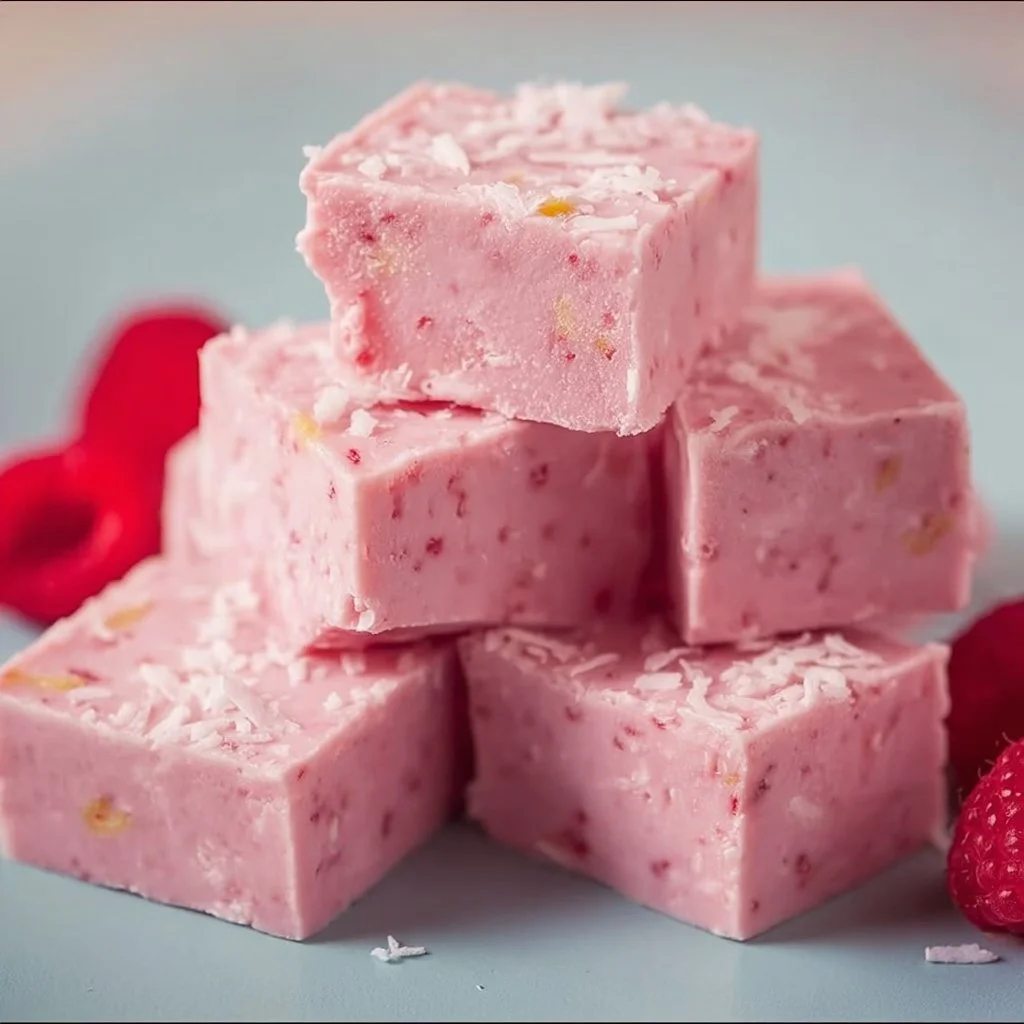
Hello, dear food friends! Welcome back to my cozy kitchen where the sweetness lingers just as much as the laughter. Today, we’re diving into a recipe that feels like biting into a cloud of happiness – Vegan Raspberry Coconut Fudge. Yes, you heard it right! This delightful treat is not only vegan but packed with flavors that dance on your palate and give a warm hug to your heart.
I’m particularly excited to share this fudge because it embodies everything I adore about cooking: creativity, joy, and that rare ability to bring people together. Picture this: you walk into your home after a long day, and the air is filled with the sweet aroma of melting chocolate, coconut, and fresh raspberries. It’s enough to make anyone’s day. And the best part? This recipe is super straightforward and fun to whip up, whether you’re an experienced chef or just learning the ropes (or should I say, the spatula)!
Raspberry and coconut is a classic duo that never fails to impress. The tartness of the raspberries complements the rich creaminess of coconut cream and the smooth, indulgent chocolate. This fudge is perfect for any occasion. Whether you’re looking to spruce up a party, bring a little something to a potluck, or enjoy a guilt-free dessert after a long meal, this recipe will happily fulfill your cravings.
So, grab your apron, clear some countertop space, and let’s get ready to create something fabulous! Because let’s be honest: who doesn’t love a treat that not only tastes amazing but also makes you feel great about what you’re eating? Your taste buds are in for a party, and I can’t wait for you to join in!
Personal Story
I remember the first time I made this Vegan Raspberry Coconut Fudge. It was a sunny afternoon in late summer, and my niece Lily had come over to help me in the kitchen. She was around eight at the time, with big bright eyes that sparkled whenever she spotted the chocolate chips in my pantry. I had been inspired by an abundance of fresh raspberries from our garden, and I wanted to create something special that we could share with the family later that evening.
As we melted the chocolate and combined it with the luscious coconut cream, we giggled and swapped stories about our favorite summer treats. I still chuckle when I think of Lily trying to “taste test” each layer before it even cooled. The look on her face was pure joy when we poured in the vibrant raspberries, making everything swirl into the dreamiest concoction.
After we let it set in the fridge, we couldn’t resist trying a piece ourselves. The moment the fudge melted in her mouth, her eyes widened, and she exclaimed, “Aunt Olivia, this is the best candy ever!” And honestly? She was right! It was a simple and beautiful moment that perfectly encapsulated why I love cooking—it’s about sharing love, laughter, and creating delicious memories that linger long after the last bite.
Ingredients
Here’s what you’ll need for crafting this velvety Vegan Raspberry Coconut Fudge:
-
Vegan Dark Chocolate:
Opt for quality dark chocolate (around 60-70% cocoa). It’s rich and tends to have fewer additives. Not a dark chocolate fan? You can swap it with dairy-free milk chocolate for a sweeter taste! -
Coconut Cream:
This is the creamy star of the show! Look for coconut cream in a can (not the light version). You can substitute with full-fat coconut milk if needed, but the texture won’t be as rich. -
Pure Maple Syrup:
This natural sweetener enhances the fudge’s richness and adds a gentle caramel flavor. Agave nectar or raw brown sugar can be used if maple syrup isn’t in your pantry. -
Fresh Raspberries:
Bright and tangy, they add a burst of freshness. Frozen raspberries can be used if fresh ones aren’t available—just thaw and drain them first. -
Vanilla Extract:
Adds a depth of flavor to the fudge. Feel free to use almond extract for a nutty twist—but just a few drops! -
Pinch of Sea Salt:
This little touch helps enhance all the flavors. A sprinkle of flaky sea salt on top before cutting into squares can elevate this treat even more.
Together, these ingredients create a sumptuous sweet that will leave your taste buds dancing!
Step-by-Step Instructions
Now, let’s get down to the fun part. Here’s how to whip up this Vegan Raspberry Coconut Fudge, step by step:
1. Gather Your Ingredients
Make sure you have all your ingredients lined up. This little preparation will save you hunting around for that vanilla extract while the chocolate is melting.
2. Melt the Chocolate
In a double boiler (or a heatproof bowl set over a pot of simmering water), add your dark chocolate. Stir gently until it’s completely melted and glossy. If you’re using a microwave, heat it in 30-second intervals, stirring in between to prevent burning. Chef tip: Adding a tiny pinch of coconut oil helps to make your chocolate smoother!
3. Mix in Coconut Cream
Once the chocolate is melted, remove it from the heat and add the coconut cream. Stir until it’s fully integrated. The mixture should be rich and creamy with a beautiful sheen. Don’t rush this step—take your time to mix! Chef Hack: If you’re worried about lumps, whisk vigorously until it’s silky smooth.
4. Sweeten It Up
Pour in the maple syrup and add a pinch of sea salt, mixing everything together until smooth. Taste it! Adjust the sweetness to your preference. Remember, a little sweet goes a long way when you add those tart raspberries later on.
5. Add Vanilla Extract
Drizzle in the vanilla extract and fold gently. This is where the magic deepens. Note: If you want your fudge to have a slight nutty undertone, go ahead and add that almond extract instead.
6. Fold in the Raspberries
Gently fold in your fresh raspberries, being careful not to break them apart entirely. You want to keep that gorgeous red color contrasting with the dark chocolate!
7. Pour Into a Pan
Line an 8×8 inch square baking dish with parchment paper, letting the edges hang over for easy removal. Pour the fudge mixture into the dish, spreading it evenly. Use a spatula to smooth the top.
8. Chill in the Fridge
Cover the fudge and place it in the fridge for at least 2 hours, or until set. More time equals a firmer fudge—feel free to let it chill overnight if you can wait!
9. Cut and Serve
Once set, lift the fudge out of the dish using the parchment paper. Use a sharp knife to cut it into squares. Watch out; these bite-sized pieces can disappear quickly!
Let me tell you, the moment you cut into it, the beautiful swirl of chocolate and raspberry will have everyone rushing into the kitchen. I recommend serving this delight with a refreshing glass of plant-based milk or a cup of herbal tea for a cozy wind down at the end of the day.
Serving Suggestions
When it comes to serving, have fun with it! Place your fudge squares neatly on a decorative platter. A drizzle of melted dark chocolate or a sprinkle of shredded coconut can add a little flair. If you’re feeling fancy, serve it alongside fresh raspberries and a dollop of whipped coconut cream. Trust me, presentation is everything, and this fudge will have your guests raving!
Recipe Variations
If you’re feeling adventurous, here are a few fun variations you could try:
- Nutty Coconut Fudge: Add in some crushed nuts (like pecans or walnuts) for a delightful crunch.
- Minty Raspberry Fudge: Stir in peppermint extract for a refreshing twist in honor of your favorite mint chocolate treats.
- Coconut Chocolate Swirl: Reserve some melted coconut cream on the side and swirl it through the fudge before it sets for a marbled effect!
- Tropical Treat: Use dried tropical fruits, like mango or pineapple, as a mix-in alongside raspberries to transport your taste buds to an island paradise.
- Different Berries: Experiment with blueberries or strawberries – both fruits pair beautifully with the chocolate and coconut!
Chef’s Notes
As every good cook knows, recipes evolve! When I first began playing with flavors, I experimented quite a bit before landing on this winning combination. One disaster (which still brings laughter) involved trying to make fudge with coconut flakes instead of cream—talk about a chewy mess! But it taught me that passion leads the way, even through kitchen failures.
Cooking is all about trial and error, and even small adjustments can lead to spectacular results. This recipe has become a favorite over the years, and I love how much joy it brings to friends and family gatherings. Plus, it’s a great conversation starter—who wouldn’t get excited talking about such a luscious treat?
FAQs and Troubleshooting
1. My fudge turned out too soft; why?
If your fudge is too soft, it likely needs more chilling time. Give it a few more hours in the fridge, or you can even pop it into the freezer for about 30 minutes before serving.
2. Can I substitute the raspberries?
Absolutely! Feel free to swap them for other berries, like strawberries or cherries. Each fruit will lend a different flavor profile that’s equally delicious.
3. How do I store the fudge?
Keep your fudge in an airtight container in the fridge. It can last for up to a week, but trust me, it won’t last that long!
4. Can I use white chocolate instead?
Yes, you can! Just make sure to use a good quality vegan white chocolate, and keep an eye on the sweetness as it can be notably sweeter than dark chocolate.
Nutritional Info
This vegan treat is not only delicious but also a healthier indulgence. The fudge is rich in antioxidants from the dark chocolate, while the coconut cream adds healthy fats that help you feel satisfied. Fresh raspberries offer a punch of vitamins, fiber, and a burst of flavor!
So there you go! Your guide to making Vegan Raspberry Coconut Fudge that’s bound to bring warmth, joy, and lots of smiles to the table. It’s all about the love and memories we create in the kitchen, and I can’t wait for you to experience these flavors. If you try this recipe, I’d love to hear about your kitchen adventures! Happy cooking!
Print
Vegan Raspberry Coconut Fudge
- Total Time: 120 minutes
- Yield: 16 servings 1x
- Diet: Vegan
Description
A delightful vegan fudge made with rich dark chocolate, creamy coconut, and fresh raspberries.
Ingredients
- 1 cup Vegan Dark Chocolate
- 1 cup Coconut Cream
- 1/3 cup Pure Maple Syrup
- 1 cup Fresh Raspberries
- 1 teaspoon Vanilla Extract
- Pinch of Sea Salt
Instructions
- Gather Your Ingredients
- Melt the Chocolate
- Mix in Coconut Cream
- Sweeten It Up
- Add Vanilla Extract
- Fold in the Raspberries
- Pour Into a Pan
- Chill in the Fridge
- Cut and Serve
Notes
Feel free to experiment with different berries or nuts for unique variations!
- Prep Time: 15 minutes
- Cook Time: 10 minutes
- Category: Dessert
- Method: Chilling
- Cuisine: Vegan
Nutrition
- Serving Size: 1 square
- Calories: 180
- Sugar: 10g
- Sodium: 20mg
- Fat: 9g
- Saturated Fat: 8g
- Unsaturated Fat: 1g
- Trans Fat: 0g
- Carbohydrates: 23g
- Fiber: 2g
- Protein: 2g
- Cholesterol: 0mg
Keywords: vegan fudge, raspberry coconut, chocolate dessert
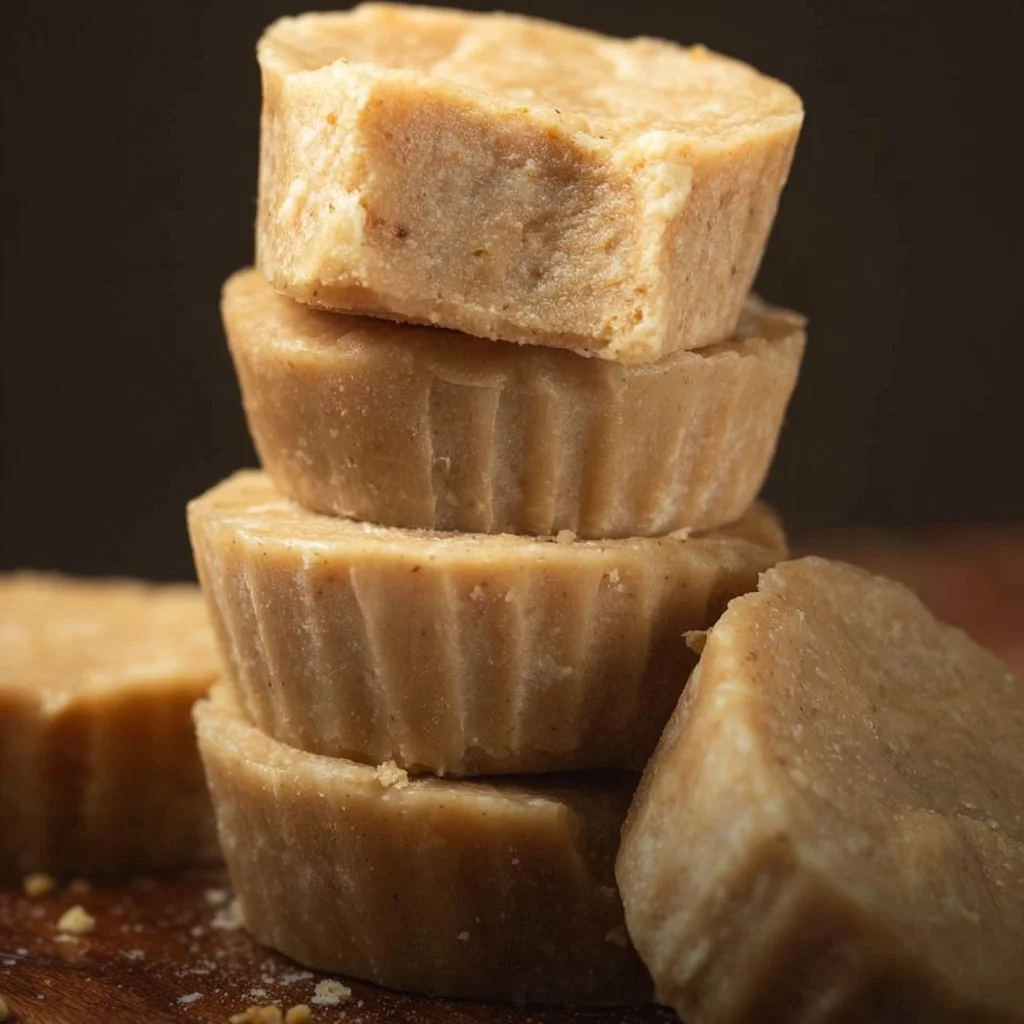
3 Ingredient Banana Fudge
The Ultimate 3-Ingredient Banana Fudge Recipe – Your New Favorite Treat!
Welcome to my kitchen, friend! I’m thrilled you’re joining me today because we’re about to embark on a simple yet delectable journey into the world of flavors with my quick and easy 3-ingredient banana fudge. Not only is this recipe bursting with chocolatey goodness and the natural sweetness of bananas, but it’s also so easy that even the most novice of bakers can whip it up with confidence. Plus, who doesn’t love a dessert that requires minimal effort and delivers maximum happiness?
Now, let’s talk a little about what makes this dish so special. This banana fudge is a perfect example of how simplicity can lead to extraordinary flavors. With just three humble ingredients, we’ll transform your ripe bananas into a heavenly treat that’s perfect for snacking, sharing, or indulging after a long day. It’s one of those recipes that’ll make you wonder how something so ridiculously easy can taste so darn good.
But enough intro—let’s dive into the sweet, sweet world of banana fudge! By the time we’re done here, you’ll have a delightful treat that will impress your friends and family, all while making your kitchen smell like a dreamy, chocolatey paradise. I can’t wait for you to try this!
A Nostalgic Moment in the Kitchen
Growing up, my kitchen was a buzzing hub of activity, laughter, and, of course, incredible smells. One of my fondest memories is helping my mom whip up homemade fudge during the summer. The fun started with melting chocolate chips on the stovetop, and I, being a curious little chef, was always there to taste-test. While we stirred the chocolate, we would share stories, and I loved how my mom’s face lit up when the fudge turned out perfectly.
Years later, vermilion-hued memories of those kitchen escapades inspired me to experiment with my favorite flavors. That’s when this 3-ingredient banana fudge recipe was born. It felt so fitting to combine the simplicity of childhood joys with the flavors I adore. Now, instead of traditional fudge, we’re making it banana-style, and believe me, it’s been a game changer! Picture this: smooth and creamy, every square of fudge melts in your mouth, delivering sweet banana goodness with a hint of chocolate. It’ll make you feel like a kid in a candy shop all over again!
Ingredients You’ll Need
Let’s gather our ingredients, shall we? Here’s what we need to make this delightful banana fudge:
-
Ripe Bananas (2 large): The stars of our show! Choose bananas that have plenty of brown spots for maximum sweetness. If you have overripe bananas lying around, now is the perfect time to use them! A great substitute would be mashed avocado for a healthier twist.
-
Chocolate Chips (1 cup): I prefer semi-sweet or dark chocolate chips for a richer flavor, but feel free to switch it up with milk chocolate or even white chocolate if you’d like! For a dairy-free option, go for vegan chocolate chips.
-
Nut Butter (1/2 cup): I love natural peanut butter, but almond or sunflower seed butter works beautifully too. This will add creaminess to our fudge and give it a nutty flavor. If you’re looking for a nut-free version, you can try coconut cream instead, but note that it will change the texture a bit.
Chef Insight
- When selecting bananas, the more speckles, the better! These spots indicate ripeness and sweetness, two essential components for delicious fudge!
Step-by-Step Instructions
Now, let’s get to the fun part—making the banana fudge! Grab your apron and let’s get cooking!
Step 1: Prepare YourBananas
First, peel your ripe bananas and slice them into chunks. Then, place them in a mixing bowl. Use a fork or potato masher to mash them until they’re smooth and creamy, with just a few small lumps for texture. This is where the banana flavor really shines through! Tip: If you ever feel like you’re spending too much time mashing, let me tell you a secret—get a handheld immersion blender! It’ll make the process super fast.
Step 2: Melt the Chocolate Chips
In a microwave-safe bowl, add your chocolate chips. Microwave them in 30-second intervals, stirring in between until melted and smooth. Make sure not to overheat the chocolate, as it can seize up! Chef Hack: If you prefer the stovetop method, melt the chocolate in a double boiler for a more controlled heat.
Step 3: Mix in the Nut Butter
Once your chocolate is ready and perfectly gooey, stir in the nut butter. The combination of the warm chocolate and nut butter will create an irresistible, silky texture. Pro Tip: If your nut butter is too thick, microwave it for a few seconds to soften it up.
Step 4: Combine Everything
Pour the mashed bananas into the melted chocolate and nut butter mixture. Stir it all together until you achieve a smooth, uniform blend. The key here is to incorporate all the flavors well! It should look rich and inviting.
Step 5: Set the Fudge
Line a square baking dish (about 8×8 inches) with parchment paper, leaving a little overhang for easy removal later. Pour the fudge mixture into the dish and gently press it down to create an even layer. Tip: For added texture and flavor, consider sprinkling some chopped nuts or sea salt on top.
Step 6: Chill
Pop your fudge into the refrigerator for about 2-3 hours or until it’s set. This step is essential for creating the perfect fudge consistency. Chef’s Secret: Don’t rush this step; it’s all about patience for that perfect slice later!
Step 7: Slice and Serve
Once the fudge is set, remove it from the dish using the parchment paper overhang and cut it into squares. Place the fudge on a fun serving plate—don’t forget to take a few beautiful photos for your Instagram!
Serving Suggestions
These delightful banana fudge squares are perfect for sharing! You can serve them as a decadent dessert, a fun treat for gatherings, or simply keep them for late-night snack sessions. If you want a little extra flair, serve them on a rustic wooden board garnished with fresh banana slices or a sprinkle of flaky sea salt. A dollop of whipped cream or a scoop of vanilla ice cream alongside wouldn’t hurt either!
Recipe Variations
Feeling adventurous? Here are a few fun twists on the classic banana fudge:
- Add Some Spice: Mix in a pinch of cinnamon or a dash of vanilla extract to elevate the flavors.
- Nutty Delight: Fold in some chopped nuts for added crunch and richness. Walnuts or pecans work wonderfully.
- Fruit Burst: Incorporate chopped dried fruits like cranberries or apricots for a sweet-tart twist.
- Minty Fresh: Add a few drops of peppermint extract for a refreshing mint-chocolate combo!
- Caramel Swirl: Drizzle some caramel sauce on top before chilling for a sweet surprise.
Chef’s Notes
It’s amazing how just three ingredients can create something so delicious and comforting! I’ve experimented with this base recipe over the years, tweaking it a bit here and there. However, the beauty of this fudge is in its adaptability. After years of making these for myself and friends, I discovered that it’s not just a treat; it’s a canvas for creativity! Every batch tends to have its own personality, thanks to the addition of different nut butters or toppings. In the end, it always brings a smile to my face—and a satisfied one at that!
FAQs and Troubleshooting
Q: How do I store the leftovers?
A: Keep the fudge in an airtight container in the refrigerator for up to a week. You can also freeze it for longer storage!
Q: Can I use frozen bananas?
A: Absolutely! Just make sure to thaw them and drain any excess liquid before mashing.
Q: Why did my fudge turn out too soft?
A: If the fudge is too soft, it might need some extra chilling time. Ensure the mixture is completely set before cutting.
Q: Can I make it vegan?
A: Yes! Simply use dairy-free chocolate chips and any nut or seed butter that’s plant-based!
Nutritional Info (Optional)
While I believe in indulging freely, it can be helpful to know what you’re munching on. Each square of this fabulous fudge is packed with protein, healthy fats, and natural sugars from the bananas—definitely a guilt-free treat for your sweet tooth!
And there you have it—your comprehensive guide to making this mouthwatering 3-ingredient banana fudge! I hope this recipe brings back nostalgia and creates new memories in your kitchen. Happy cooking and even happier eating!
Print
3-Ingredient Banana Fudge
- Total Time: 180 minutes
- Yield: 12 squares 1x
- Diet: Vegan
Description
A quick and easy recipe for delicious banana fudge made with just three ingredients.
Ingredients
- 2 large Ripe Bananas
- 1 cup Chocolate Chips
- 1/2 cup Nut Butter
Instructions
- Prepare your bananas by peeling and slicing them into chunks, then mash until smooth.
- Melt the chocolate chips in a microwave-safe bowl in 30-second intervals.
- Mix in the nut butter until combined with the melted chocolate.
- Combine the mashed bananas with the chocolate mixture until smooth.
- Set the mixture in a lined baking dish, pressing down to create an even layer.
- Chill in the refrigerator for 2-3 hours until set.
- Slice into squares and serve.
Notes
Use overripe bananas for maximum sweetness. Consider adding chopped nuts or sea salt for added texture.
- Prep Time: 10 minutes
- Cook Time: 0 minutes
- Category: Dessert
- Method: Chilling
- Cuisine: American
Nutrition
- Serving Size: 1 square
- Calories: 150
- Sugar: 8g
- Sodium: 5mg
- Fat: 7g
- Saturated Fat: 1g
- Unsaturated Fat: 6g
- Trans Fat: 0g
- Carbohydrates: 20g
- Fiber: 2g
- Protein: 3g
- Cholesterol: 0mg
Keywords: banana fudge, vegan dessert, easy recipes, quick treats, chocolate
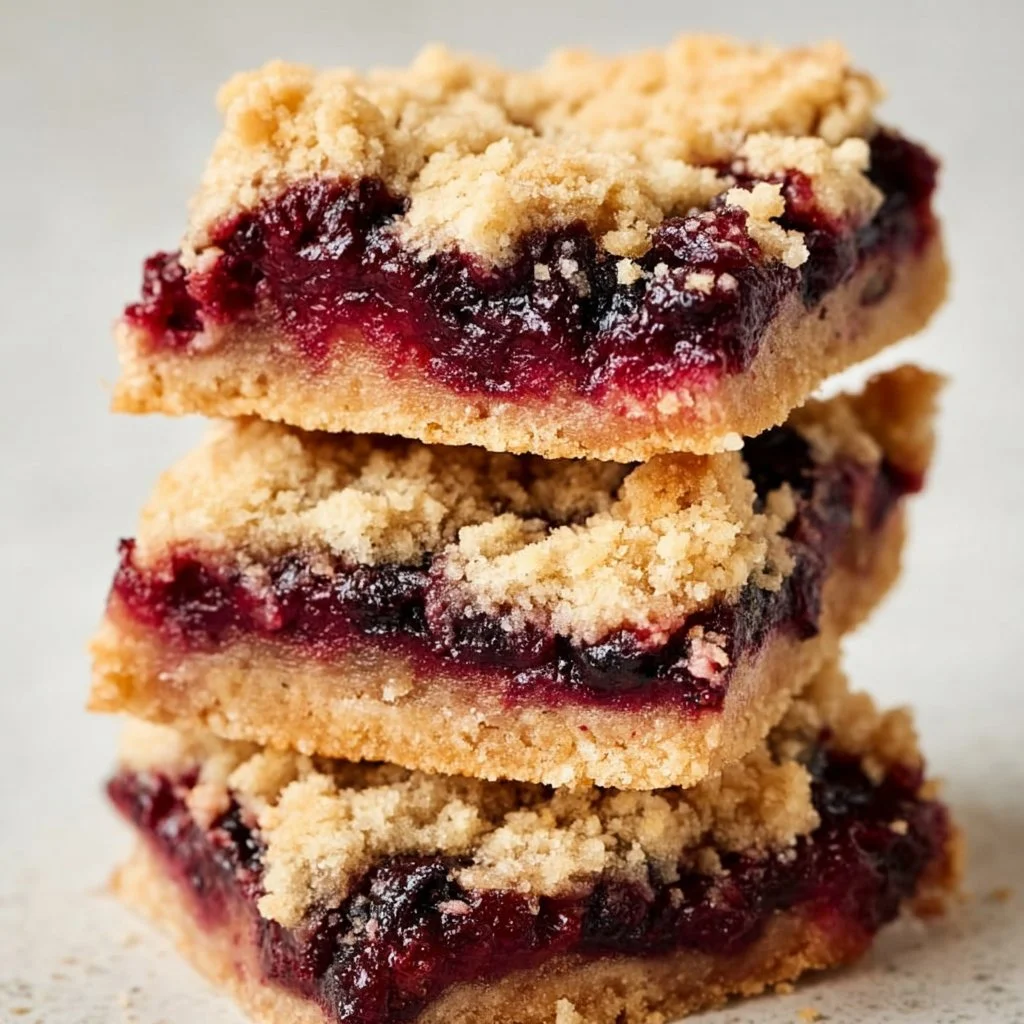
Vegan Berry Crumble Bars
Vegan Berry Crumble Bars: A Sweet Slice of Nostalgia
Hello, fellow food lovers! 🌟 I’m so excited to welcome you back to my cozy kitchen, where the aromas of deliciousness dance through the air like a joyful, chubby little fairy. Today, I’m sharing one of my absolute favorite recipes, one that combines simplicity with a mountain of flavor — Vegan Berry Crumble Bars. These bars are whether you’re savoring a slice with your morning coffee or serving them at your next gathering, these delectable treats are bound to steal the show (and your heart!).
Now, I don’t know about you, but there’s something utterly magical about a dessert that has a crumbly topping. It reminds me of cozy afternoons spent in my grandmother’s kitchen, her laughter spilling out as generously as the flour from the bag that she always managed to spill. Maybe it’s the combination of tart berries and sweet oats, or perhaps it’s the way each bite is warm, inviting, and just a touch rustic. Either way, these Vegan Berry Crumble Bars represent everything I love about cooking: the ability to bring people together, create cherished memories, and delight our taste buds.
The best part? You don’t need to be a master chef to whip up these delightful bars. You can make them with ingredients you likely already have in your kitchen, and I’m here to guide you every step of the way. So, if you’re ready to turn your kitchen into a little bakery, grab your apron, and let’s dive into the joyful world of Vegan Berry Crumble Bars!
Personal Story
Let me take you back to a sun-drenched afternoon in my childhood home. I was no more than 10 years old, on summer break, and I had just gotten my hands on a large basket of fresh-picked berries from our family garden. They were plump, juicy, and bursting with color, and I could hardly wait to turn them into something unique.
My grandma, sensing my excitement, pulled out a well-worn recipe box from the shelf. That’s when I learned about the magic of combining fruit with a crunchy crumble topping. We spent the afternoon fumbling with ingredients, laughter bubbling over, flour dusting our noses, and our hands stained with berry juice. As we pulled the pan out of the oven, the kitchen was filled with a sweet aroma that made my heart smile.
To this day, those cream-colored bars with golden-brown tops evoke so many warm memories. The joy of sharing those bars with family around the table was priceless, and now, I get to recreate that nostalgia with a vegan twist! Each time I make these Vegan Berry Crumble Bars, I’m reminded of love, laughter, and the beauty of simple, delicious cooking.
Ingredients
Here’s what you’ll need to create your own batch of Vegan Berry Crumble Bars:
-
Rolled Oats (2 cups)
- Perfect for the crumbly topping and base, they provide fiber and substance. If you’re looking for a gluten-free option, simply swap them for gluten-free rolled oats!
-
Almond Flour (1 cup)
- Gives a lovely nutty flavor. You can use any nut flour you like or even whole wheat flour for a heartier option!
-
Maple Syrup (½ cup)
- This sweetener is a vegan favorite! It lends a delightful, rich sweetness to your crumble. If you’re out of maple syrup, agave nectar works as a delicious substitute.
-
Coconut Oil (⅓ cup, melted)
- Adds fat and moisture, helping bind the ingredients. You could easily replace this with vegan butter or unsweetened applesauce if you’re after a lower-fat option.
-
Fresh Berries (2 cups)
- Strawberries, blueberries, raspberries, or a berry mix are all fantastic. Feel free to swap in frozen berries if fresh ones aren’t available; just be sure to thaw and drain them first!
-
Cornstarch (2 tablespoons)
- This little power booster helps thicken the berry mixture and keeps it from becoming too runny. If you’re looking for a quick substitute, arrowroot flour can do the trick.
-
Cinnamon (1 teaspoon)
- For a hint of warmth and spice! Adjust the amount to suit your taste. If you’re feeling adventurous, nutmeg can add a lovely twist.
Step-by-Step Instructions
Ready to bring these delightful bars to life? Let’s get started!
-
Preheat Your Oven: Start by preheating your oven to 350°F (175°C). This is crucial, folks! You want your bars to come out warm but not too warm, just like a cozy hug.
-
Prepare Your Baking Dish: Grease a 9×9-inch square baking dish or line it with parchment paper for easy removal. A little oil or cooking spray makes for simple cleanup!
-
Mix the Base & Topping:
- In a large mixing bowl, combine the rolled oats, almond flour, cinnamon, and maple syrup. Drizzle in the melted coconut oil, and with your hands or a spatula, combine until it resembles a crumbly texture. Remember, it’s supposed to be messy—embrace it!
-
Reserve Some Crumbs: Take about 1 cup of this mixture and set it aside. This will be your crunchy topping that makes everyone go, "Yum!"
-
Prepare the Berry Filling:
- In another bowl, toss your fresh (or thawed) berries with cornstarch. This helps soak up any juices for the perfect texture in your bars. Gently mix and let it sit for a few minutes while the flavors meld.
-
Assemble: Spread the remaining oat mixture evenly into the bottom of your prepared dish. Press down firmly, creating a solid base for your berry filling. Pour the berry mixture over the base, spreading it out evenly. Finally, sprinkle the reserved crumb topping on top. Channel your inner artist with this layer!
-
Bake Time: Pop the dish in the preheated oven and let those flavors meld for about 30-35 minutes. Keep an eye out for a golden-brown topping that looks like a sweet masterpiece!
-
Cool It Down: Once out of the oven, allow them to cool in the pan for at least 15-20 minutes. Patience is key here; this step makes for easier slicing, and in the meantime, your kitchen will smell heavenly.
-
Slice and Serve: Once cooled, slice into squares (or rectangles, no judgment here!). Dust with powdered sugar if you’re feeling fancy. Serve these scrumptious bars warm or at room temperature, and watch them disappear!
Serving Suggestions
To elevate your serving game, consider presenting these Vegan Berry Crumble Bars on a rustic wooden board. Add a side of vegan vanilla ice cream or fresh whipped coconut cream for an indulgent touch! A sprinkle of fresh mint leaves can add a pop of color and a hint of freshness!
Recipe Variations
Want to shake things up a bit? Here are some creative variations:
- Cocoa Crumble: Add ¼ cup of cocoa powder to the oat mixture for a chocolatey twist.
- Mixed Fruit Medley: Substitute berries with diced peaches or cherries for a unique flavor.
- Nutty Crunch: Fold in some chopped walnuts or pecans into the crumb topping for extra crunch.
- Spiced Crumble: Experiment with different spices—cardamom or ginger could offer a lovely warm note.
- Oat-Free Option: For a nut-free version, replace oats with quinoa flakes as a base.
Chef’s Notes
This recipe has come a long way! Originally, it was just a simple berry crumble topped with a sugar-heavy crumble. I’ve transformed it into this plant-based delight over time, proving that you can indeed swap out ingredients for healthier ones without losing any flavor or comfort.
Oh, and a fun little kitchen story—one time, I got overly ambitious with my mixing and ended up with berry juice splattered all over the ceiling. Not a proud moment, but a hilarious one! Now I make sure to wear an apron that can handle the mess and slow down a bit when I’m mixing.
FAQs and Troubleshooting
-
Q: Why did my crumble bars turn out too soggy?
- A: Soggy bars often indicate that there were too many juicy berries or not enough cornstarch. Make sure to measure accurately, and remember, if using frozen berries, thaw and drain well!
-
Q: Can I substitute the maple syrup?
- A: Absolutely! You can swap maple syrup with agave nectar, brown sugar, or even a ripe banana for a natural sweetness, but be mindful of adjusting the moisture levels.
-
Q: How do I store my crumble bars?
- A: Once completely cooled, store them in an airtight container in the fridge for up to a week. These bars also freeze well, so feel free to stash away leftovers for a sweet treat later!
-
Q: Can I use different fruits?
- A: Yes, indeed! Apples, peaches, or even mangoes could work beautifully. Just be sure to adjust the cornstarch accordingly based on the moisture content of the fruits you choose.
Nutritional Info
Here’s a quick glance at the nutritional benefits of your Vegan Berry Crumble Bars (per serving, assuming 12 servings):
- Calories: ~150 calories
- Protein: 3g
- Fat: 7g
- Carbohydrates: 21g
- Fiber: 3g
- Sugar: 5g
There you have it, my friends! A delightful journey through the world of Vegan Berry Crumble Bars, filled with warmth, flavor, and lots of love. I hope you feel inspired to head into your kitchen and create your own memories with this recipe. Remember, it’s not just about the food; it’s about bringing people together and sharing joy. Happy cooking! 🍓❤️
Print
Vegan Berry Crumble Bars
- Total Time: 50 minutes
- Yield: 12 servings 1x
- Diet: Vegan
Description
Delight in these Vegan Berry Crumble Bars that combine tart berries with a crunchy crumble topping, creating a nostalgic, warm treat perfect for any occasion.
Ingredients
- 2 cups Rolled Oats
- 1 cup Almond Flour
- ½ cup Maple Syrup
- ⅓ cup Coconut Oil, melted
- 2 cups Fresh Berries (strawberries, blueberries, raspberries)
- 2 tablespoons Cornstarch
- 1 teaspoon Cinnamon
Instructions
- Preheat your oven to 350°F (175°C).
- Prepare a 9×9-inch square baking dish by greasing or lining it with parchment paper.
- Mix the rolled oats, almond flour, cinnamon, and maple syrup in a mixing bowl. Drizzle in the melted coconut oil and combine until crumbly.
- Reserve about 1 cup of the mixture for topping.
- Prepare the berry filling by tossing fresh or thawed berries with cornstarch.
- Assemble by spreading the remaining oat mixture in the baking dish, pressing down firmly. Pour the berry mixture on top and sprinkle reserved crumbs.
- Bake for 30-35 minutes until the topping is golden brown.
- Cool for 15-20 minutes before slicing into squares.
- Serve warm or at room temperature, optionally dusted with powdered sugar.
Notes
For varied flavors, try adding cocoa powder, different fruits, or nuts to the topping. Store in an airtight container for up to a week.
- Prep Time: 15 minutes
- Cook Time: 35 minutes
- Category: Dessert
- Method: Baking
- Cuisine: Vegan
Nutrition
- Serving Size: 1 serving
- Calories: 150
- Sugar: 5g
- Sodium: 12mg
- Fat: 7g
- Saturated Fat: 6g
- Unsaturated Fat: 1g
- Trans Fat: 0g
- Carbohydrates: 21g
- Fiber: 3g
- Protein: 3g
- Cholesterol: 0mg
Keywords: vegan dessert, berry bars, healthy snacks, crumble bars
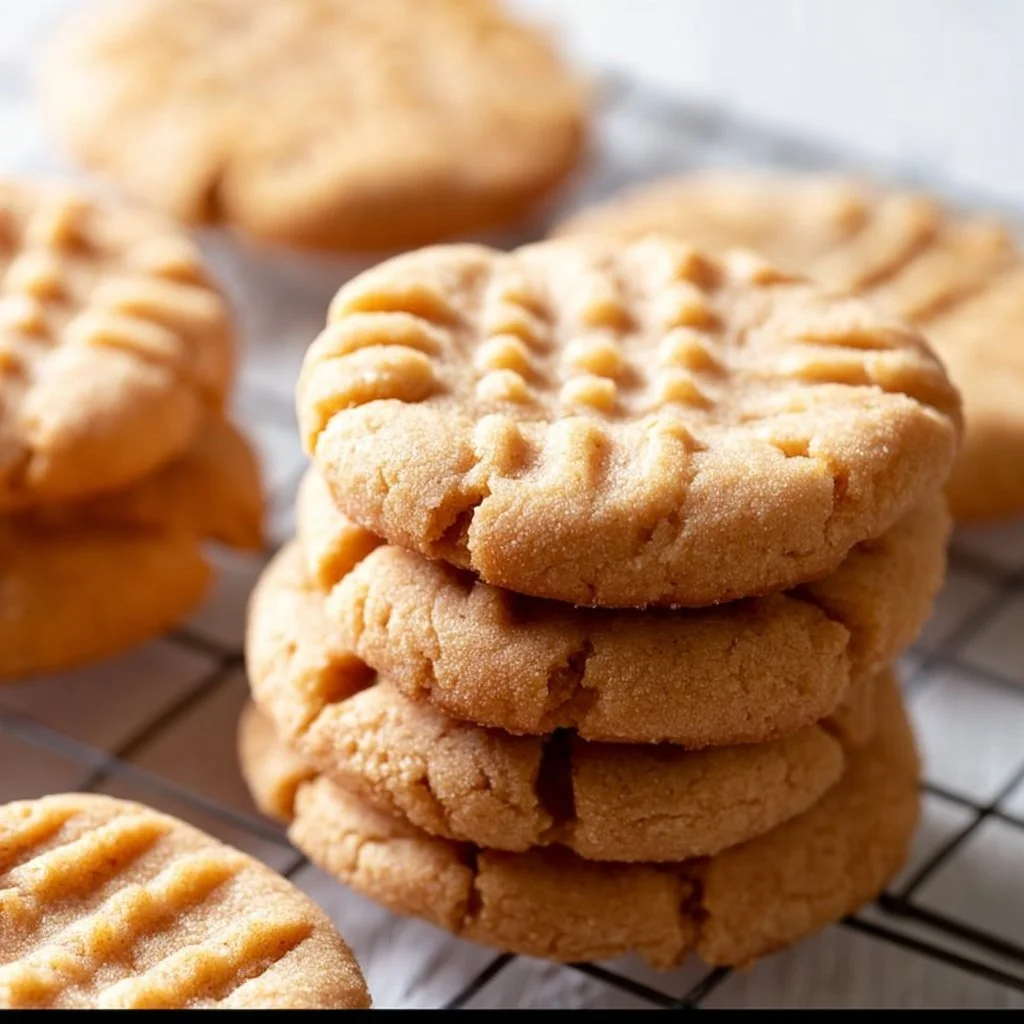
Sugar Free Peanut Butter Cookies
Sugar-Free Peanut Butter Cookies: A Guilt-Free Delight!
Welcome, fellow food lovers, to my cozy kitchen! I’m Olivia Bennett, and today we’re diving into a delightful batch of cookies that’ll satisfy your sweet tooth without a hint of refined sugar. That’s right—I’m talking about Sugar-Free Peanut Butter Cookies! These treats are not only scrumptious but also easy to whip up, perfect for when you need a little indulgence that aligns with your health goals.
Why sugar-free, you ask? Well, like most home cooks, I’ve had my fair share of sugar-laden desserts that leave me feeling sluggish and heavy. A few years ago, I decided to cut back on sugar but didn’t want to give up my favorite goodies. After countless experiments and taste tests (oh, the joy of tasting!), I finally perfected the ultimate recipe for sugar-free peanut butter cookies that are chewy, rich, and oh-so-delicious.
These cookies take me back to my childhood, when my mom would bake batches of peanut butter cookies during chilly winter evenings. The aroma would fill our home, wrapping us in a warm embrace, and I remember the joy of sneaking one (or two!) before dinner. Today, I want to share that nostalgic comfort with you, all while keeping things healthy and delightful!
In this blog post, you’ll discover everything you need to know about making these fabulous cookies—from the ingredients that make them shine to hints on serving and some tasty variations. So roll up your sleeves, grab your apron, and let’s get baking!
Personal Story
In my family, cookies were always a form of love. For my birthday every year, my mom would bake my favorite peanut butter cookies, and I’d be there, perched on a kitchen stool, ready to help with the mixing. I’d measure out the creamy peanut butter and watch with excitement as she melted the butter on the stove. As soon as those cookies were in the oven, the sweet scent would envelop us, and my heart would race with anticipation.
One particular year, I decided to “surprise” my mom by making the cookies all on my own. I followed her handwritten recipe, scribbled in her perfect, looping cursive. Unfortunately, I accidentally reached for salt instead of sugar! To my dismay, the cookies turned out incredibly salty—definitely not what I had hoped for! But rather than disappointment, we ended up with a good laugh and a new family memory.
That salty mishap taught me a valuable lesson: it’s the love in cooking that counts. Now, I’ve taken that lesson to heart and transformed my family’s favorite recipe into this sugar-free version, ensuring that you can enjoy a treat that tastes just as good without the guilt.
Ingredients
Here’s what you’ll need to make these delicious sugar-free peanut butter cookies:
-
Natural Peanut Butter: Use 100% peanut butter made from just peanuts (and maybe salt). Avoid brands that add sugar or oils. If you’re looking for a substitution, almond butter or sunflower seed butter works beautifully too!
-
Sugar-Free Sweetener: You can use monk fruit sweetener, erythritol, or stevia. Each has a different sweetness level, so check the packaging for the equivalent measurements to replace the sugar.
-
Egg: This binds the cookies together and adds a bit of richness. If you’re vegan, you can mix 1 tablespoon of flaxseed meal with 2.5 tablespoons of water to create a "flax egg" for a perfect substitute.
-
Vanilla Extract: A splash of pure vanilla extract enhances the flavor. You could also toss in some almond extract for a nutty twist!
-
Baking Soda: This helps the cookies puff up nicely as they bake. You can replace it with baking powder if you’re out, but keep in mind they may not be as chewy.
-
Salt: Just a pinch! If you’re using salted peanut butter, you might want to skip additional salt.
With these simple ingredients, you’ll craft cookies that are nothing short of spectacular! There’s something incredibly satisfying about creating a delicious treat with minimal components—and the flavor becomes even more pronounced.
Step-by-Step Instructions
Now, let’s get into the heart of the matter—making these irresistible sugar-free peanut butter cookies! Follow along, and I promise you’ll have delicious cookies popping out of your oven in no time.
Step 1: Preheat Your Oven
Preheat your oven to 350°F (175°C). This is an essential step; it ensures that your cookies bake evenly. While you’re at it, line a baking sheet with parchment paper or a silicone baking mat to prevent sticking.
Step 2: Mix with Love
In a mixing bowl, combine 1 cup of natural peanut butter with 1/2 cup of your chosen sugar-free sweetener. Use a whisk or a spatula to mix until well incorporated. You’re aiming for a nice, creamy consistency here. Don’t be afraid to channel your inner chef and give it some elbow grease!
Step 3: Add in the Goodness
Next, crack an egg into the bowl and pour in a teaspoon of vanilla extract. Mix again until everything is well blended. The egg will give your cookies that delightful chewiness, and the vanilla… oh, the vanilla! It adds warmth and depth to the overall flavor.
Step 4: Sprinkle in the Dry Ingredients
Now, sprinkle in 1 teaspoon of baking soda and a pinch of salt. Fold the dry ingredients into the peanut butter mixture gently. You don’t want to overmix—the goal is to just combine everything until it forms a dough. A little bit of texture is perfectly fine!
Step 5: Form the Cookies
Using a tablespoon or a cookie scoop, portion out your dough and roll it into balls. Don’t worry about making them perfect; cookies that have character are the best kind! Place them on the prepared baking sheet, leaving about 2 inches of space between each ball.
Step 6: The Perfect Fork Press
Here comes a classic move! Take a fork and gently press down on each cookie dough ball to create a crisscross pattern. This not only flattens the cookies but gives them that signature homemade look. Plus, who doesn’t love a little aesthetic in their baking?
Step 7: Bake to Perfection
Pop your baking sheet into the preheated oven and let those cookies bake for about 8-10 minutes. Keep an eye on them! You’ll know they’re done when the edges look set and the centers are just slightly soft. When they come out of the oven, they’ll poof up a bit but settle down as they cool.
Step 8: Cool and Enjoy
Let the cookies cool on the baking sheet for about 5 minutes before transferring them to a wire rack to cool completely. This step is crucial; they’re super soft when they come out of the oven, and they need a little time to firm up. Once cooled, it’s time to dig in—and trust me, they won’t last long!
Serving Suggestions
These sugar-free peanut butter cookies are delightful on their own, but if you’re feeling fancy, you can serve them with a dollop of homemade sugar-free chocolate spread or alongside a glass of almond milk for that classic cookie-and-milk moment! Stack them high for a beautiful presentation or pair them with fresh fruit for a refreshing contrast. The options are endless, and your guests will be raving!
Recipe Variations
Looking to mix things up? Here are a few creative variations to try:
-
Chocolate Chip Twist: Fold in sugar-free chocolate chips for a gooey, indulgent treat! Dark chocolate chunks add depth without the sugar.
-
Nutty Add-Ins: Toss in chopped nuts like almonds or walnuts to give your cookies an extra crunch.
-
Spiced Version: Add a teaspoon of cinnamon for a warm, inviting flavor—perfect for the cooler months.
-
Coconut Delight: Mix in unsweetened shredded coconut for a chewy, tropical treat!
-
Fruit Fusion: Incorporate some dried fruit, like apricots or cranberries, for a chewy surprise with each bite.
Chef’s Notes
Before I wrap up, let me share a little secret: I consider my kitchen a playground. Every recipe is an opportunity to experiment. This sugar-free peanut butter cookie recipe evolved over years of tweaks, flops, and successes. I remember the time I tried to replace the peanut butter with pumpkin puree—let’s just say it was a “unique” experience. While that batch didn’t hit the sweet spot, it taught me the importance of knowing when to embrace classic flavors. So don’t hesitate to make this recipe your own, and don’t take it too seriously! Baking should be fun, lighthearted, and creative.
FAQs and Troubleshooting
-
Why are my cookies crumbling?
- If your cookies are falling apart, you might need to add a tad more peanut butter or use slightly more egg. The dough should hold together yet remain pliable.
-
Can I make these cookies vegan?
- Absolutely! Simply use a flax egg instead of a regular egg, and they’ll still come out yummy.
-
Can I use crunchy peanut butter?
- Yes! Crunchy peanut butter will add delightful texture to your cookies, making for a fun experience with each bite.
-
What if I want to make a bigger batch?
- Just double the ingredients! These cookies freeze well, so you can bake a big batch and save some for later by storing them in an airtight container.
Nutritional Info (Per Cookie)
(Optional and based on typical ingredients)
- Calories: ~90
- Total Fat: 7g
- Saturated Fat: 1g
- Carbohydrates: 5g
- Fiber: 1g
- Sugars: 0g (naturally)
Now you have a trusty resource for making delicious, sugar-free peanut butter cookies that bring joy to your kitchen and your taste buds. As you take your first bite, remember this: whether it’s the aroma that fills your home or the smiles on your friends and family’s faces, it’s all about creating memories filled with love. Happy baking!
Print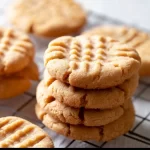
Sugar-Free Peanut Butter Cookies
- Total Time: 20 minutes
- Yield: 12 servings 1x
- Diet: Vegan
Description
Delightful sugar-free peanut butter cookies that satisfy your sweet tooth without refined sugar.
Ingredients
- 1 cup natural peanut butter
- 1/2 cup sugar-free sweetener
- 1 egg (or 1 flax egg for vegan)
- 1 teaspoon vanilla extract
- 1 teaspoon baking soda
- Pinch of salt
Instructions
- Preheat your oven to 350°F (175°C) and line a baking sheet with parchment paper.
- Mix together the peanut butter and sugar-free sweetener until creamy.
- Add the egg and vanilla extract, mixing until well combined.
- Sprinkle in the baking soda and salt, folding them into the mixture gently.
- Form dough balls using a tablespoon and place them on the baking sheet.
- Press each cookie dough ball with a fork to create a crisscross pattern.
- Bake for about 8-10 minutes until edges are set and centers slightly soft.
- Cool on the baking sheet for 5 minutes, then transfer to a wire rack to cool completely.
Notes
Experiment with adding sugar-free chocolate chips or nuts for variations.
- Prep Time: 10 minutes
- Cook Time: 10 minutes
- Category: Dessert
- Method: Baking
- Cuisine: American
Nutrition
- Serving Size: 1 cookie
- Calories: 90
- Sugar: 0g
- Sodium: 100mg
- Fat: 7g
- Saturated Fat: 1g
- Unsaturated Fat: 4g
- Trans Fat: 0g
- Carbohydrates: 5g
- Fiber: 1g
- Protein: 3g
- Cholesterol: 20mg
Keywords: sugar-free, peanut butter cookies, healthy dessert, vegan cookies, easy baking




