
Grab-and-Go Breakfast Cookies
Rise, Shine, and Grab a Cookie!
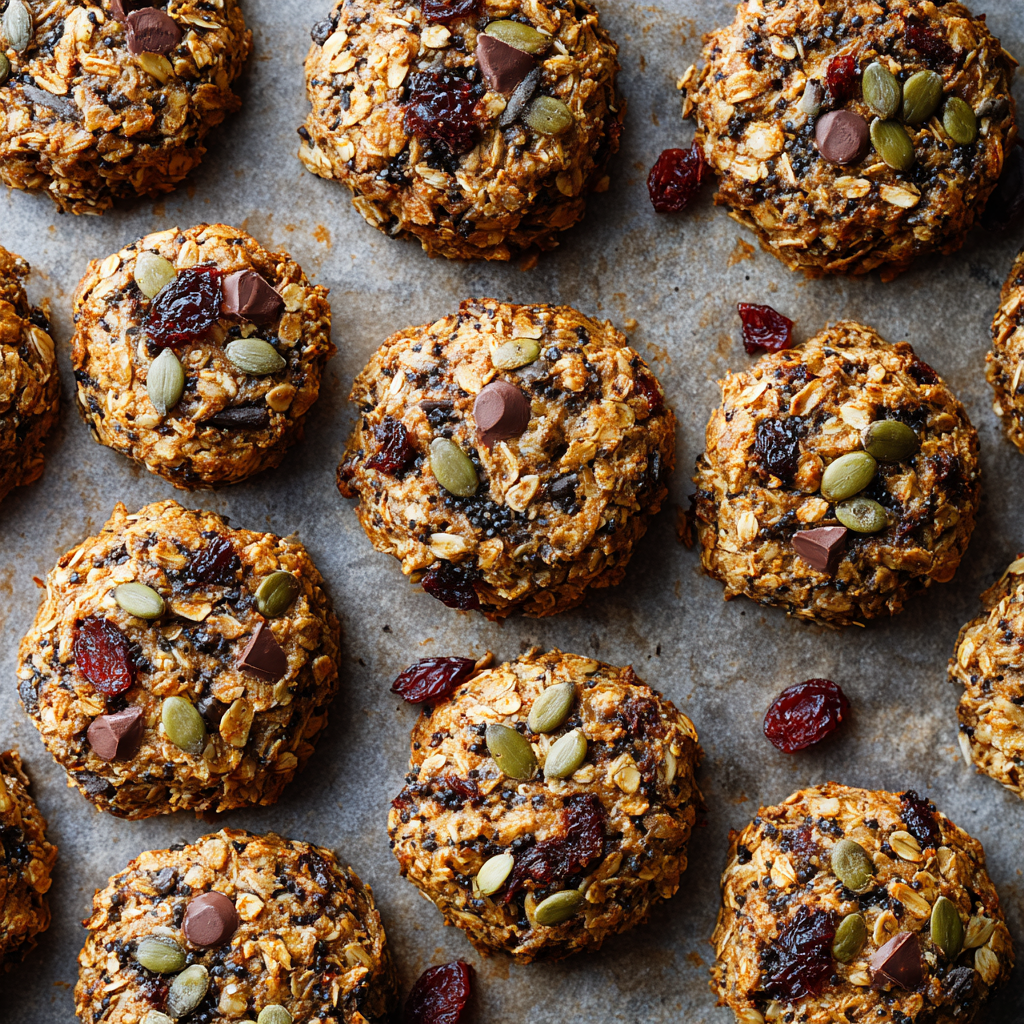
Good morning, sleepyhead! If your mornings feel like a chaotic race against the clock (hand raised over here!), I’ve got your new breakfast soulmate: Grab-and-Go Breakfast Cookies. Picture this: wholesome oats, sticky-sweet raisins, crunchy seeds, and melty chocolate chips all hugged together in a portable, no-fuss package. No more sad desk breakfasts or frantic toast burns while scrambling for keys! These little powerhouses are your golden ticket to savoring a homemade breakfast—even when you’re sprinting out the door. They’re vegan-friendly (naturally!), gluten-free adaptable, and packed with real-food energy. Best part? They come together in one bowl in 10 minutes flat. Consider this your permission slip to eat cookies for breakfast, guilt-free. Let’s bake joy into your busy mornings!
The Cookie That Saved My Sanity (and My Kid’s Lunchbox)
Flashback to 2018: My daughter started kindergarten, and our peaceful mornings imploded into sock-finding emergencies and “I forgot my backpack!” panic. One Tuesday, after scraping charred waffles off the pan (again!), I spotted sad bananas on the counter and thought: What if I bake all our breakfast favorites into one hand-held miracle? I tossed oats, almond butter, and those bananas into a bowl like a woman possessed. The result? These chunky, chewy cookies—barely cooled before my kiddo shoved two into her tiny fists and bolted for the bus. She yelled, “Bye, cookie mom!” over her shoulder, and a tradition was born. Now, every Sunday, we bake a batch while dancing to Disney songs. It’s our messy, sticky love language—and proof that sometimes the best solutions are born from pure kitchen chaos.
Your Breakfast Cookie Toolkit 🌟
- ½ cup mashed banana – Your natural sweetener + binder! Chef’s tip: Extra-ripe bananas add caramel notes. No bananas? Swap pumpkin purée or applesauce.
- ¾ cup almond butter – Creamy richness + healthy fats. Allergy-friendly: Use sunflower seed butter or peanut butter.
- ⅓ cup honey – Golden sweetness that binds. Vegan? Sub maple syrup.
- 1 tsp vanilla – The flavor booster! Always use pure vanilla—imitation tastes sad.
- 2½ cups rolled oats – Hearty base! Gluten-free? Ensure certified GF oats. Don’t use instant oats—they turn mushy.
- 1 tsp cinnamon – Warmth that whispers “morning hug.” Add a pinch of nutmeg for extra coziness.
- ½ tsp baking powder – Lifts cookies slightly. Not for fluffiness—just structure!
- ½ tsp salt – Balances sweetness. Use flaky sea salt if you’re fancy.
- ½ cup raisins – Chewy pops of fruity joy. Hate raisins? Try dried cranberries or chopped apricots.
- ½ cup dark chocolate chips – Non-negotiable joy sparklers! Use at least 70% cacao for grown-up vibes.
- ¼ cup pepitas (pumpkin seeds) – Crunch + magnesium boost. Sub sunflower seeds or chopped almonds.
- 2 tbsp flax seeds – Omega-3 powerhouse! Grind them for better nutrient absorption.
Pro insight: This dough is a “choose your adventure” canvas! See variations below for more fun spins.
Let’s Bake Magic: Step-by-Step
- Preheat oven to 350°F (175°C). Line a baking sheet with parchment paper. Why parchment? Zero sticking, zero cleanup rage! No parchment? Lightly grease the pan.
- Mix wet ingredients: In a large bowl, combine mashed banana, almond butter, honey, and vanilla. Stir until smooth and glossy. Chef’s hack: Warm the almond butter for 10 seconds if it’s stiff—it blends like a dream!
- Add dry ingredients: Dump in oats, cinnamon, baking powder, salt, raisins, chocolate chips, pepitas, and flax seeds. Fold gently! Critical tip: Overmixing = tough cookies. Stop when no dry spots remain. Dough will be thick—like edible Play-Doh!
- Shape cookies: Scoop ¼-cup mounds (I use an ice cream scoop!) onto the sheet. Flatten slightly to ½-inch thick. Why flatten? They won’t spread much, so this ensures even baking. Space them 1 inch apart—they’re polite and won’t touch.
- Bake 12–15 minutes until edges turn golden and centers look set. Doneness test: They’ll feel soft but spring back lightly when touched. Underbake slightly for ultra-chewy cookies!
- Cool completely on the baking sheet. Patience pays: They firm up as they cool! Transferring warm cookies = crumbly tragedy.
Time-saver: Freeze unbaked dough balls for “fresh bake” mornings! Just add 2 minutes to bake time.
How to Serve (Besides Straight from the Jar!)
Slide a cookie into a napkin for an instant car-breakfast, or stack two on a cute plate with Greek yogurt and berries for a “I have my life together” moment. Pack them in lunchboxes with an apple, or crumble one over oatmeal (cookie-ception!). For brunch? Arrange cookies on a rustic board with fresh fruit and coffee—watch guests swoon. Pro tip: Dunk in cold almond milk. You’re welcome.
Why Breakfast Cookies Are a Game-Changer for Busy Mornings
Let’s be real—mornings are chaotic. Between lost shoes, half-empty coffee mugs, and last-minute lunch packing, sitting down for a proper breakfast feels like a luxury. That’s where Grab-and-Go Breakfast Cookies come in.
The Science Behind a Balanced Breakfast Cookie
Unlike sugary cereal bars or store-bought muffins (which are basically cake in disguise), these cookies are designed to keep you full and energized thanks to:
-
Slow-digesting carbs (oats) for steady energy.
-
Healthy fats (nut butter, seeds) to curb cravings.
-
Natural sweetness (banana, honey) without a sugar crash.
Pro Tip: The flax seeds add fiber and omega-3s, making these cookies gut-friendly too!
Who Needs These Cookies?
✔ Parents – No more “I forgot to eat!” meltdowns.
✔ Students & Office Warriors – A real breakfast at your desk.
✔ Meal Preppers – Make a batch Sunday, enjoy all week.
✔ Athletes – Perfect pre- or post-workout fuel.
Fun Fact: Studies show that eating breakfast improves focus and mood—so these cookies might just make your mornings happier!
Storage, Freezing & Make-Ahead Hacks
How to Keep Breakfast Cookies Fresh
-
Room Temp (5 days): Store in an airtight container with a slice of bread (absorbs moisture, keeping them soft!).
-
Fridge (2 weeks): Great if you prefer a firmer texture.
-
Freezer (3 months): Wrap individually in foil for instant thaw-and-go mornings.
Brilliant Make-Ahead Tricks
-
Freeze Dough Balls – Scoop onto a tray, freeze solid, then transfer to a bag. Bake straight from frozen (+2 mins).
-
Pre-Pack Singles – Wrap cookies in parchment for grab-and-go convenience.
-
DIY Breakfast Cookie Kits – Pre-measure dry ingredients in jars for instant mixing.
Pro Move: If you’re microwaving a frozen cookie, 15 seconds makes it taste fresh-baked!
Customizing Your Perfect Breakfast Cookie
Dietary Swaps for Every Need
| Ingredient | Substitute | Best For |
|---|---|---|
| Almond Butter | Sunflower seed butter | Nut-free |
| Honey | Maple syrup | Vegan |
| Rolled Oats | Certified GF oats | Gluten-free |
| Banana | Applesauce or pumpkin purée | Lower sugar |
| Chocolate Chips | Cacao nibs | Sugar-free |
Flavor Boost Combos
-
PB&J Style – Peanut butter + dried strawberries.
-
Tropical Vibes – Coconut flakes + dried pineapple.
-
Chai Spiced – Add cardamom + ginger.
-
Savory-Sweet – Swap chocolate for cheddar + rosemary.
Pro Tip: For extra protein, stir in collagen powder or pea protein!
Mix It Up! 5 Delicious Twists
- Tropical Escape: Swap raisins for chopped dried mango + 2 tbsp shredded coconut. Add macadamia nuts if you’re feeling luxe.
- Pumpkin Spice: Replace banana with ½ cup pumpkin purée + ½ tsp pumpkin pie spice.
- Protein Power: Stir in 2 scoops vanilla protein powder + extra splash of almond milk if dough feels dry.
- Nut-Free: Use sunflower seed butter and omit pepitas. Add extra chocolate chips for joy!
- Berry Blast: Fold in ⅓ cup freeze-dried raspberries instead of raisins—they won’t bleed color!
Olivia’s Extra Crumbs of Wisdom
These cookies evolved from my “kitchen sink” experiments! Batch #1 was so crumbly, we ate it with spoons like granola (still delicious). Batch #5 added flax for binding—game changer! Now, I keep dough balls in the freezer for emergency snacks or last-minute playdates. Funny story: My husband once hid a stash in his toolbox “for emergencies.” Men. 😂 Store cookies in an airtight container for 5 days, or freeze for 3 months. They never last that long though—my neighbor texts me when she smells them baking!
Your Questions, Answered!
Q: Why are my cookies falling apart?
A: Three culprits: 1) Under-ripe bananas (use spotty ones!), 2) Not enough binder (add 1 extra tbsp nut butter), or 3) Skipped cooling time (they firm up as they cool!).
Q: Can I use quick oats instead of rolled oats?
A: I don’t recommend it—quick oats absorb more liquid, making cookies gummy. Rolled oats give that perfect hearty chew!
Q: How do I make these sugar-free?
A: Swap honey for mashed dates or sugar-free maple syrup. Note: Texture will be denser, and chocolate chips will add some sugar unless you use unsweetened chunks.
Q: Can I add an egg for more protein?
A: Absolutely! Add 1 beaten egg with wet ingredients for cakier texture. Reduce banana to ⅓ cup to balance moisture.

Grab-and-Go Breakfast Cookies
Description
Say goodbye to burnt toast and sad granola bars—these wholesome, chewy cookies are your new morning rescue squad. Packed with oats, nut butter, bananas, seeds, raisins, and just enough chocolate chips to make breakfast exciting, they’re the perfect balance of nourishing and indulgent. Mix everything in one bowl, bake in 15 minutes, and you’ve got a week’s worth of grab-and-go fuel. Breakfast just got a whole lot happier (and tastier)!
Ingredients
-
½ cup mashed ripe banana (or pumpkin/applesauce)
-
¾ cup almond butter (or sunflower seed/peanut butter)
-
⅓ cup honey (or maple syrup for vegan)
-
1 tsp vanilla extract
-
2½ cups rolled oats (certified GF if needed)
-
1 tsp cinnamon
-
½ tsp baking powder
-
½ tsp salt
-
½ cup raisins (or dried cranberries/apricots)
-
½ cup dark chocolate chips
-
¼ cup pepitas (pumpkin seeds)
-
2 tbsp flax seeds (ground for max nutrients)
Instructions
-
Preheat oven to 350°F (175°C). Line a baking sheet with parchment.
-
In a large bowl, stir mashed banana, nut butter, honey, and vanilla until smooth.
-
Add oats, cinnamon, baking powder, salt, raisins, chocolate chips, pepitas, and flax. Mix gently until no dry spots remain.
-
Scoop ¼-cup portions, flatten slightly (½-inch thick), and place 1 inch apart.
-
Bake 12–15 mins until edges are golden. Cool completely on the pan to set.
Notes
-
Use super-ripe bananas for sweetness + binding.
-
Freeze dough balls for “bake fresh” mornings (add 2 mins to bake).
-
They don’t spread—flatten before baking!
Nutrition
- Calories: 180 cal Per Serving
- Sugar: 12g
- Fat: 8g
- Carbohydrates: 25g
- Fiber: 3g
- Protein: 4g
Nutrition Per Cookie (approx):
Calories: 180 | Fat: 8g (Saturated: 2g) | Carbs: 25g (Fiber: 3g, Sugar: 12g) | Protein: 4g
Note: Values vary based on ingredient brands/substitutions.
Final Thoughts: The Joy of Breakfast Cookies
These cookies aren’t just food—they’re a tiny act of self-care in a hectic world. Whether you’re rushing to work, packing lunches, or just craving a wholesome snack, they prove that eating well doesn’t have to be complicated.
So go ahead—bake a batch, stash them everywhere (yes, even your toolbox), and reclaim your mornings. Because life’s too short for sad breakfasts.

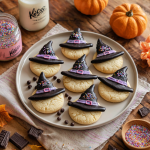
Witch Hat Sugar Cookies
Spellbinding Sweetness: Your Kitchen’s Next Magic Trick!
Hey there, fellow kitchen conjurer! Olivia here, apron dusted with flour and eyes sparkling like Halloween fairy lights. Is there anything more delightfully witchy than turning simple pantry staples into edible magic? That’s exactly what we’re doing today with these Witch Hat Sugar Cookies – the kind of treat that makes kids gasp and adults sneak seconds when they think no one’s looking. Picture this: buttery sugar cookies transformed into miniature witch hats with a Hershey’s Kiss peak and a chocolate “brim” sparkling with sprinkles. They’re playful, adorable, and secretly SO easy that you’ll feel like you’ve cast a simplicity spell! Whether you’re prepping for a spooky soiree, hosting a monster-themed bake sale, or just craving a dose of whimsy with your afternoon coffee, these little hats deliver pure, unadulterated joy. Forget complicated fondant or finicky piping bags; our magic lies in clever shortcuts and the kind of messy, hands-on fun that makes baking memories. So grab your favorite mixing bowl (mine’s slightly chipped and utterly beloved), crank up those Halloween tunes, and let’s turn your kitchen into the most enchanting bakery in town. Trust me, one bite of these charming creations, and you’ll be hooked – they’re the edible equivalent of a warm, spooky hug!
Why These Hats Hold a Special Place in My Cauldron
These cookies whisk me straight back to my niece Lily’s first “real” Halloween. She was four, obsessed with all things witchy, and determined to be “Glinda the Good Witch… but with a BLACK hat, Aunt Livvy!” Trying to find a treat worthy of her grand costume debut felt monumental. Store-bought cupcakes felt too generic, and intricate cakes felt beyond my frazzled auntie abilities. Then, I stumbled on the idea for witch hat cookies – simple sugar cookie bases crowned with chocolate kisses. That first batch was… chaotic. Sprinkles ended up *everywhere* (think fairy dust explosion), melted chocolate adorned my elbows more than the cookies, and my “hat brims” looked more like chocolate puddles. But Lily? She took one look, her eyes wide as saucers, and whispered, “You made REAL magic, Aunt Livvy.” She carefully arranged them on a plastic cauldron platter, declaring them “witch fuel.” Seeing pure, unbridled wonder on her face – and the sticky chocolate grin she wore after devouring two – cemented these cookies as my forever Halloween tradition. They remind me that kitchen magic isn’t about perfection; it’s about the messy, joyful, sprinkle-covered moments that create the sweetest memories.
Gathering Your Magical Components
Here’s your spellbook shopping list! Don’t stress about exactitude – baking is an art, not alchemy (well, mostly!).
- 1 cup (225g) unsalted butter, softened – The potion’s foundation! Softened (think cool room temp, not melty) creates that dreamy, light texture. Chef’s Tip: No unsalted? Use salted butter but skip the added salt later. Vegan? Swap in a high-quality plant-based stick butter.
- 1 cup (200g) granulated sugar – Sweetness incarnate. Insight: Standard white sugar gives that classic crisp edge. For deeper flavor, try swapping half with light brown sugar!
- 1 large egg – Our binding charm. Substitution Spell: Flax egg (1 tbsp ground flax + 2.5 tbsp water, sit 5 mins) works beautifully for an egg-free cauldron.
- 1½ tsp vanilla extract – The aromatic soul. Level Up: Try almond extract for half the vanilla for a mysterious twist!
- 2½ cups (315g) all-purpose flour – The structural spell. Pro Hack: Spoon & level flour into your cup! Scooping packs it down and leads to dry cookies. Gluten-free? Use a 1:1 GF blend (like Bob’s Red Mill).
- ½ tsp baking powder – Our little lift charm.
- ¼ tsp salt – The essential flavor enhancer. Balances the sweet!
- 24 Hershey’s Kisses (unwrapped) – The iconic hat peak! Unwrap Early! Do this first to avoid frantic unwrapping mid-bake. Alternatives? Mini Reese’s Cups or Rolos for different hat styles!
- ½ cup chocolate chips (melted) – The magical “glue” and brim. Chef’s Secret: Semi-sweet is classic, but dark or milk chocolate works wonders. Melt slowly (microwave 30-sec bursts) to avoid seizing.
- Colorful sprinkles or decorative sugar – Your personality potion! Think purple & green, classic orange/black, or iridescent for fairy witch vibes.
- Optional: pre-made royal icing or candy melts for piping – For extra-detailed brims or buckles. Time-Saver: Melted chocolate in a tiny zip-top bag (snip the corner!) works perfectly too.
Conjuring Your Cookie Hats: The Magic Ritual
Ready to brew some deliciousness? Follow these steps – I’ll whisper my best kitchen secrets along the way!
- The Butter-Sugar Alchemy: Grab your trusty mixer (or strong arm and whisk!). Cream the softened butter and granulated sugar together on medium speed for a solid 3-4 minutes. Why this matters? We’re not just mixing; we’re incorporating air! This makes the cookies beautifully light, not dense. You want it pale and fluffy – like sweet witchy clouds! Tip: Scrape down the bowl halfway through to ensure no butter lumps are hiding.
- Egg & Essence Infusion: Beat in the egg and vanilla extract until just combined. Watch closely: Over-beating here can make cookies tough. A smooth, slightly glossy mixture is the goal. Hack: Crack the egg into a small bowl first! Saves you from fishing out shell fragments mid-magic.
- Dry Ingredient Enchantment: In a separate bowl, whisk together the flour, baking powder, and salt. Whisking = Distribution! This prevents clumps of baking powder. Gradually add the dry mix to the wet ingredients on low speed. Golden Rule: Mix ONLY until the flour disappears. Over-mixing = tough cookie witches! The dough will be soft but not sticky.
- Shaping the Hat Base: Preheat your oven to 350°F (175°C). Line baking sheets with parchment paper (lifesaver for easy cleanup!). Roll dough into smooth 1-inch balls (a small cookie scoop is my MVP here!). Place them 2 inches apart on the sheets. Gently flatten each ball just slightly with your palm or the bottom of a glass. Why flatten? This gives the kiss a stable base and prevents lopsided hats!
- Baking the Golden Discs: Bake for 10-12 minutes. Timing is Key: They’re done when the edges are set and have the faintest golden hue – the centers will still look soft. DO NOT OVERBAKE! They firm up as they cool. Pro Move: Rotate the pans halfway through for even baking. Let the cookies cool completely on the sheets. Patience, young wizard! Warm cookies make melty chocolate hats.
- Summoning the Chocolate Peak: Melt your chocolate chips carefully. Dip the flat bottom of a Hershey’s Kiss into the melted chocolate – just enough to coat it lightly. This acts as glue! Immediately press it firmly (but gently!) onto the center of a cooled cookie. Hold for a few seconds. Repeat for all cookies. Hack: Work in batches of 6-8 to keep the chocolate warm and dippable.
- Casting the Decorative Spell (The Brim!): Now, the fun part! Pour remaining melted chocolate into a small piping bag or zip-top bag. Snip a TINY hole in the corner. Pipe a circle of chocolate around the base of each Kiss, creating the hat’s brim. Go wild! Make it wavy, smooth, or jagged – imperfection adds charm! IMMEDIATELY shower with sprinkles before the chocolate sets. Tip: Place cookies on a cooling rack over parchment before piping. Catch the sprinkle fallout for reuse!
Presenting Your Edible Enchantments
These little hats practically beg for a dramatic entrance! Skip the boring plate and lean into the magic. Arrange them on a bed of crinkled black or purple tissue paper inside a cauldron (real or decorative!). For a spooky-elegant vibe, place them on a tiered cake stand draped with cobweb lace. Scatter a few plastic spiders or bats nearby for giggles. Serving at a party? Stick a miniature paper witch broomstick (find them at craft stores!) beside each cookie on a serving platter. They pair perfectly with a steaming mug of “Witch’s Brew” (hot apple cider with cinnamon sticks) or a frosty glass of chocolate milk. The key? Have fun and let their inherent whimsy shine!
Brew Up Your Own Signature Spell!
One recipe, endless magical possibilities! Here’s how to tweak your witch hats:
- Chocolate Coven: Add ¼ cup cocoa powder to the dry ingredients for chocolate sugar cookie bases. Pair with dark chocolate kisses and orange sprinkles!
- Gluten-Free & Vegan Familiars: Use a gluten-free 1:1 flour blend, plant-based butter, flax egg, and dairy-free chocolate. Ensure sprinkles are vegan-friendly!
- Fruity Witch Vibes: Swap the vanilla for orange or raspberry extract in the dough. Use matching colored sanding sugar for the brims!
- Peanut Butter Cauldron: Use a peanut butter cookie dough base. Press a mini Reese’s Cup (pointy side up!) into the center instead of a Kiss. Pipe a chocolate brim.
- Mummy Hats (Post-Halloween Twist!): Skip the brim. After attaching the kiss, pipe thin white chocolate “bandages” criss-crossing over it. Add candy eyes!
Olivia’s Cauldron Chronicles & Wisdom
Oh, the tales these cookies could tell! That first year Lily dubbed them “witch fuel,” I also learned a crucial lesson: unwrapping Kisses while the cookies bake is a recipe for chaos! Seriously, unwrap them *before* you start mixing. Trust me. Over the years, I’ve streamlined the process – the parchment paper is non-negotiable, and melting chocolate in a bowl set over simmering water (a double boiler) is foolproof if your microwave is temperamental. The biggest evolution? Embracing the “messy brim.” My early attempts were painstakingly neat, but Lily declared the wobbly, sprinkle-heavy ones “the most magic.” She was right! The charm is in the homemade imperfection. These cookies have traveled to school parties, book clubs pretending to be “Witches Monthly” meetings, and even a few grown-up Halloween dinners where they vanished faster than a ghost. They’re my edible reminder that joy doesn’t need to be complicated – just sweet, a little silly, and shared with love.
Your Witch Hat Wisdom: Solved!
Let’s tackle those pesky potion problems before they bubble up!
- Q: Help! My Kisses keep sliding off! What did I do wrong?
A: Ah, the Great Hat Slide! Two likely culprits: 1) Your cookies were still warm when you attached the Kiss. Chocolate melts, glue fails. Patience is key – let cookies cool COMPLETELY. 2) Not enough “glue” chocolate on the Kiss base. Dip it generously! If disaster strikes, re-melt a tiny bit of chocolate and “re-glue.” - Q: My cookie bases spread too much and became flat witches! How do I prevent that?
A> Flat hats are usually a butter issue! Ensure your butter is *softened*, not melted or greasy. Chilling the dough balls for 15-20 minutes before baking helps immensely. Also, double-check your flour measurement – spooning and leveling is crucial. Too little flour = spread city! - Q: Can I make these ahead of time? How do I store the magical hats?
A: Absolutely! Bake the cookie bases up to 3 days ahead; store cooled in an airtight container at room temp. Assemble the hats (attach Kisses and decorate) within a day of serving for best freshness and crunch. Store assembled hats in a single layer in an airtight container at room temp for 2-3 days. Avoid the fridge – it can make the cookies soggy and the chocolate sweat! - Q: My melted chocolate seized up and became lumpy! Can I salvage it?
A> Chocolate gremlins! Seizing happens from even a drop of water or overheating. Try rescuing it: Stir in a teaspoon of vegetable oil or shortening (not butter!) until smooth. If it’s truly scorched, sadly, start fresh. Remember: low heat and dry utensils are your best defense!
Witch Hat Sugar Cookies
Description
Butter, sugar, chocolate, and sprinkles—just a few pantry staples, and suddenly you’re a kitchen sorceress whipping up edible hats fit for every witchy gathering! These whimsical cookies transform simple sugar cookie bases into pointy chocolate-topped hats crowned with sprinkles. They’re charming, playful, and almost too cute to eat (almost).
Ingredients
Cookie Base
-
1 cup (225g) unsalted butter, softened
-
1 cup (200g) granulated sugar
-
1 large egg (or flax egg for vegan)
-
1½ tsp vanilla extract (or swap half with almond extract)
-
2½ cups (315g) all-purpose flour (or GF 1:1 blend)
-
½ tsp baking powder
-
¼ tsp salt
Toppings & Assembly
-
24 Hershey’s Kisses, unwrapped (or Rolos/mini Reese’s for variations)
-
½ cup chocolate chips, melted (semi-sweet recommended)
-
Colorful sprinkles or decorative sugar
-
Optional: Royal icing or candy melts for hat “buckles”
Instructions
-
Mix Dough – Cream butter + sugar until fluffy (3–4 min). Beat in egg + vanilla. In another bowl, whisk flour, baking powder, and salt. Add dry mix to wet, stir just until combined.
-
Shape & Bake – Roll dough into 1-inch balls, place on lined trays, flatten slightly. Bake at 350°F (175°C) for 10–12 mins until edges are set but centers still soft. Cool completely.
-
Attach Peaks – Dip flat bottoms of Kisses into melted chocolate, press onto cooled cookies. Hold briefly to set.
-
Create Brims – Pipe a circle of melted chocolate around the Kiss base, sprinkle generously before chocolate sets. Let firm up fully.
Notes
-
No Hat Slides: Always cool cookies completely before attaching Kisses.
-
Perfect Brims: Messy = magical. Wobbly lines + heavy sprinkles only add charm.
-
Time-Saver: Unwrap all Kisses before baking to avoid mid-spell chaos.
-
Storage: Keep in a single layer, airtight, at room temp for 2–3 days.
Nutrition
- Calories: 150 cal Per cookie
- Fat: 8g
- Carbohydrates: 18g
- Protein: 2g
Magical Morsel Info (Approximate)
Per Cookie: ~150 calories | 8g fat | 18g carbs | 2g protein
*Remember: Magic calories don’t count on Halloween! (Okay, maybe they do, but these are worth it!).
Final Thoughts: The Real Magic
The true enchantment of these Witch Hat Sugar Cookies isn’t in their adorable shape or even their buttery taste—it’s in the moments they create. The messy countertops, the sprinkle-covered giggles, the way a plate of these can turn an ordinary afternoon into a memory. They’re a reminder that baking is alchemy, transforming simple ingredients into joy. Whether you’re a seasoned baker or a first-time spellcaster, these cookies promise a little wonder. So preheat that oven, summon your inner kitchen witch, and remember: the best magic is always shared.
Now, go forth and bake mischief!

Sugar Skull Cookies
Let’s Bake Some Joy: Sugar Skull Cookies for Día de los Muertos!
Hey there, kitchen friend! Olivia here, apron dusted with powdered sugar and heart full of excitement. If your soul does a happy dance when vibrant colors meet buttery dough, you’re about to fall head over heels for today’s project. We’re making sugar skull cookies – those stunning edible artworks that transform kitchens into joyful studios during Día de los Muertos. This isn’t just baking; it’s a celebration of life, memory, and creativity that tastes like vanilla-kissed sunshine.
Now, I know intricate designs might seem intimidating, but here’s my chef-to-friend secret: these are easier than they look! With my step-by-step guidance and a “no perfection required” mindset, we’ll create cookies that honor tradition while making your taste buds sing. Whether you’re building an ofrenda for loved ones or simply craving a creative baking adventure, these skulls are your edible canvas. So grab your favorite mixing bowl, channel your inner artist, and let’s turn simple ingredients into a feast of color, flavor, and meaning. Trust me – your kitchen’s about to become the happiest place in the house!
Abuela’s Kitchen & My First Sugar Skull Fiasco
My love affair with these cookies started years ago during a trip to Oaxaca. I’d wandered into a bustling mercado, utterly mesmerized by tables piled high with candy skulls gleaming like edible jewels. Fast forward to my tiny Brooklyn kitchen, where I attempted my first batch for a friend’s Día de los Muertos gathering. Picture this: royal icing EVERYWHERE (including my cat’s tail), lopsided skulls that looked more like surprised potatoes, and pink dye stubbornly staining my fingertips for days. But when I brought them to the party? Magic happened.
People didn’t just eat them – they gathered around, pointing out designs, sharing stories about loved ones, and laughing at my “abstract” skulls. A sweet abuela even patted my hand saying, “Mija, the mess means you put your soul in them.” That’s when it clicked: perfection isn’t the point. These cookies are about connection – to tradition, to people we cherish (here and beyond), and to the playful joy of creating something beautiful with our own hands. Now, every sprinkle of colored sugar feels like a love letter to that moment.
Your Sugar Skull Toolkit: Ingredients & Smart Swaps
For the Cookies:
- 1 cup unsalted butter, softened – The flavor foundation! Chef insight: Leave it out for 30 minutes before starting. Too cold? Cookies get tough. Too warm? They spread. Substitution: Vegan butter works beautifully.
- 1 cup granulated sugar – Creates that classic crisp-yet-tender bite. Chef tip: For extra sparkle, use superfine sugar!
- 1 egg – Binds everything together. Substitution: Flax egg (1 tbsp ground flax + 3 tbsp water) for vegan friends.
- 1½ tsp vanilla extract – Warm, aromatic depth. Chef upgrade: Try Mexican vanilla for floral notes!
- ½ tsp almond extract (optional) – My secret weapon! Adds complexity. Allergy swap: Omit or use lemon extract.
- 2¾ cups all-purpose flour – Structure without toughness. Gluten-free: Use a 1:1 GF blend (add 1 tsp xanthan gum).
- ½ tsp baking powder – Lifts cookies slightly for perfect decorating surface.
- ½ tsp salt – Balances sweetness. Chef must: Never skip this flavor enhancer!
For the Royal Icing & Decorating:
- 2½ cups powdered sugar – The blank canvas. Sift it! Lumps clog piping tips.
- 2 tbsp meringue powder – Gives icing structure without raw egg whites. Substitution: 2 pasteurized egg whites.
- 3–4 tbsp water – Add gradually! Icing thickness is crucial.
- Gel food coloring – Chef essential: Gels (not liquids!) deliver vibrant hues without thinning icing.
- Piping bags + #1 or #2 tips – Precision tools for outlining. Hack: Use ziplock bags with tiny corner snips if needed!
Step-by-Step: Baking & Decorating Magic
1. Make Dough: In a large bowl, cream butter and sugar with a hand mixer until fluffy and pale (about 3 minutes). Beat in egg, vanilla, and almond extract. In a separate bowl, whisk flour, baking powder, and salt. Gradually add dry ingredients to wet, mixing just until combined. Chef hack: Scrape bowl sides often! Overmixing = tough cookies.
2. Chill & Shape: Divide dough into 2 discs, wrap in plastic, and chill 30 minutes. Roll out to ¼-inch thickness on a floured surface. Cut skull shapes. Pro tip: Dip cutter in flour between cuts to prevent sticking. Reroll scraps once.
3. Bake: Preheat oven to 350°F (175°C). Place cookies 1 inch apart on parchment-lined sheets. Bake 8-10 minutes until edges are *barely* golden. Critical step: They’ll look underdone – that’s perfect! Cool 5 minutes on sheet, then transfer to wire rack. MUST cool completely before icing!
4. Prepare Icing: Whisk powdered sugar and meringue powder. Add water 1 tbsp at a time. Beat 5-7 minutes until stiff peaks form. Consistency test: Drag a knife through icing; the line should hold for 15 seconds. Separate into bowls. Color with gels. Thin some portions with drops of water for “flood” icing (should flow like honey).
5. Decorate: Outline skulls with thick icing using a piping bag. Fill (“flood”) centers with thinner icing using a squeeze bottle or spoon. Let dry 1 hour. Pipe colorful designs! Designer tricks: Start with white base, add flowers on temples, swirls on forehead, dots along jawline. Keep a damp toothpick handy to fix mistakes. Breathe and have fun!
6. Dry: Let cookies dry untouched 6-8 hours (or overnight). Chef warning: Rushing = smudged masterpieces!
Sharing the Sweetness: Serving Your Sugar Skulls
Presentation is part of the magic! Arrange cookies on a vibrant Mexican Talavera platter or a simple wooden board lined with marigold petals. For an ofrenda, nestle them beside photos, candles, and pan de muerto. Package in clear cellophane bags tied with ribbon as heartfelt gifts. Pro tip: Add a tiny label sharing the name of a loved one each cookie honors. Serve with Mexican hot chocolate or spiced coffee – the warmth contrasts beautifully with the crisp cookies!
Make Them Your Own: Creative Twists!
- Spiced Dough: Add 1 tsp cinnamon + ½ tsp orange zest to dough for warm autumnal notes.
- Chocolate Base: Swap ½ cup flour for cocoa powder. Decorate with bright icing – stunning contrast!
- Vegan/Dairy-Free: Use vegan butter, flax egg, and aquafaba (3 tbsp whipped = 1 egg white) in icing.
- Kid-Friendly Shortcut: Skip piping! Flood cookies with one color, then immediately sprinkle with colored sanding sugar.
- Floral Fiesta: Focus designs entirely on marigolds, roses, and dahlias using edible gold dust accents.
Olivia’s Extra Pinches of Wisdom
Over the years, these cookies have become my edible diary. One batch featured teal skulls after my daughter’s “mermaid phase.” Another year, I accidentally used salt instead of sugar (disaster averted by re-rolling!). My biggest evolution? Letting go of “perfect.” Traditional sugar skulls are whimsical folk art – wobbly lines and asymmetrical dots add charm! I now keep a “practice cookie” for testing colors and laughing at blobs. Pro tip: Double the dough but bake in batches. Undecorated cookies freeze beautifully for 3 months! Most importantly: Play music, sip something yummy, and embrace the joyful mess. These aren’t just cookies; they’re edible hugs for the soul.
Your Sugar Skull Queries Solved!
Q: My icing is too runny/thick! Help!
A: Don’t panic! Too runny? Add powdered sugar 1 tbsp at a time. Too thick? Add water drop by drop. The “10-second rule” is key: Drag a knife through icing; if it flattens in 10 seconds, it’s perfect for flooding.
Q: Why did my cookies spread or lose shape?
A> Usually two culprits: 1) Dough wasn’t chilled enough (warm butter spreads). 2) Over-creaming butter/sugar. Mix just until combined after adding flour! If spreading persists, add 2 tbsp extra flour next batch.
Q: Can I make these ahead?
A> Absolutely! Bake cookies 1-2 days ahead; store airtight at room temp. Decorate 1 day before serving. Iced cookies keep 1 week in a single layer (not stacked!). Freeze UNdecorated cookies for 3 months.
Q: My food coloring bleeds! How to prevent?
A> Always let the base “flood” layer dry COMPLETELY (1 hour minimum) before adding details. Use gel colors (liquid causes bleeding). In humid climates, add 1 tsp corn syrup to icing to help set colors.

Sugar Skull Cookies
- Total Time: 20 minute
Description
Bright, bold, and joyfully sweet—these sugar skull cookies bring the spirit of Día de los Muertos to life in edible form. With buttery vanilla dough as the canvas and vibrant royal icing as the paint, each cookie becomes a tribute to love, memory, and creativity. They’re not just treats; they’re edible works of art that spark conversation, laughter, and connection. Perfect for an ofrenda, a gathering with friends, or simply a creative kitchen adventure.
Ingredients
For the Cookies
-
1 cup unsalted butter, softened
-
1 cup granulated sugar
-
1 egg (or flax egg for vegan)
-
1½ tsp vanilla extract (try Mexican vanilla for floral depth)
-
½ tsp almond extract (optional)
-
2¾ cups all-purpose flour (1:1 GF blend works)
-
½ tsp baking powder
-
½ tsp salt
For the Royal Icing
-
2½ cups powdered sugar (sifted)
-
2 tbsp meringue powder (or 2 pasteurized egg whites)
-
3–4 tbsp water (add slowly)
-
Gel food coloring (for bold, non-runny colors)
Decorating Tools
-
Piping bags with fine tips (#1 or #2)
-
Toothpicks (to fix details and pop bubbles)
Instructions
-
Make Dough: Cream butter + sugar until fluffy (3 mins). Add egg and extracts. In another bowl, whisk flour, baking powder, and salt. Mix dry into wet just until combined.
-
Chill & Cut: Divide dough, wrap, and chill 30 mins. Roll to ¼-inch thick, cut skull shapes, place on lined trays. Freeze 10 mins for sharp edges.
-
Bake: Bake at 350°F (175°C) for 8–10 mins until edges are barely golden. Cool fully on racks.
-
Mix Icing: Beat powdered sugar + meringue powder with water until stiff peaks (5–7 mins). Adjust consistency: thick for outlines, thinner for flooding. Divide into bowls, color with gels.
-
Decorate: Outline skulls with thick icing, flood centers with thin icing. Add swirls, flowers, and dots in bright colors once base layer sets. Use toothpicks for precision.
-
Dry: Let dry uncovered 6–8 hrs (or overnight) before stacking.
Notes
Día de los Muertos sugar skulls are folk art—wobbly lines and mismatched dots only add charm. Let go of perfection and let each cookie tell a story.
- Prep Time: 40 mins (plus chilling/decorating)
- Cook Time: 8–10 mins per batch
Nutrition
- Calories: 140–160 cal Per cookie
- Fat: 5g
- Carbohydrates: 18g
- Protein: 1g
Nutritional Nibbles (Per Cookie, Estimated)
Calories: 140-160 | Fat: 5g | Carbs: 18g | Protein: 1g
Final Thoughts: More Than Just a Cookie
Baking sugar skulls taught me that food is never just food. It’s a bridge—between generations, cultures, and even the living and the dead. One year, I made cookies with my neighbor Rosa, who shared stories of her late husband while piping tiny guitars (his favorite instrument) onto each skull. Another time, a child at a workshop asked if her dog, “who crossed the rainbow bridge,” could have a bone-shaped skull. That’s the magic of this tradition: it meets you where you are.
So whether you’re baking for an ofrenda, a Halloween party, or just because, remember: perfection is overrated. A lopsided grin on your skull? That’s character. Icing drips? Call it “modern art.” The goal isn’t Instagram-worthy cookies—it’s the laughter when your piping tip clogs, the quiet moment decorating in the kitchen at midnight, or the stories shared when someone asks, “Why did you add those tiny glasses?”
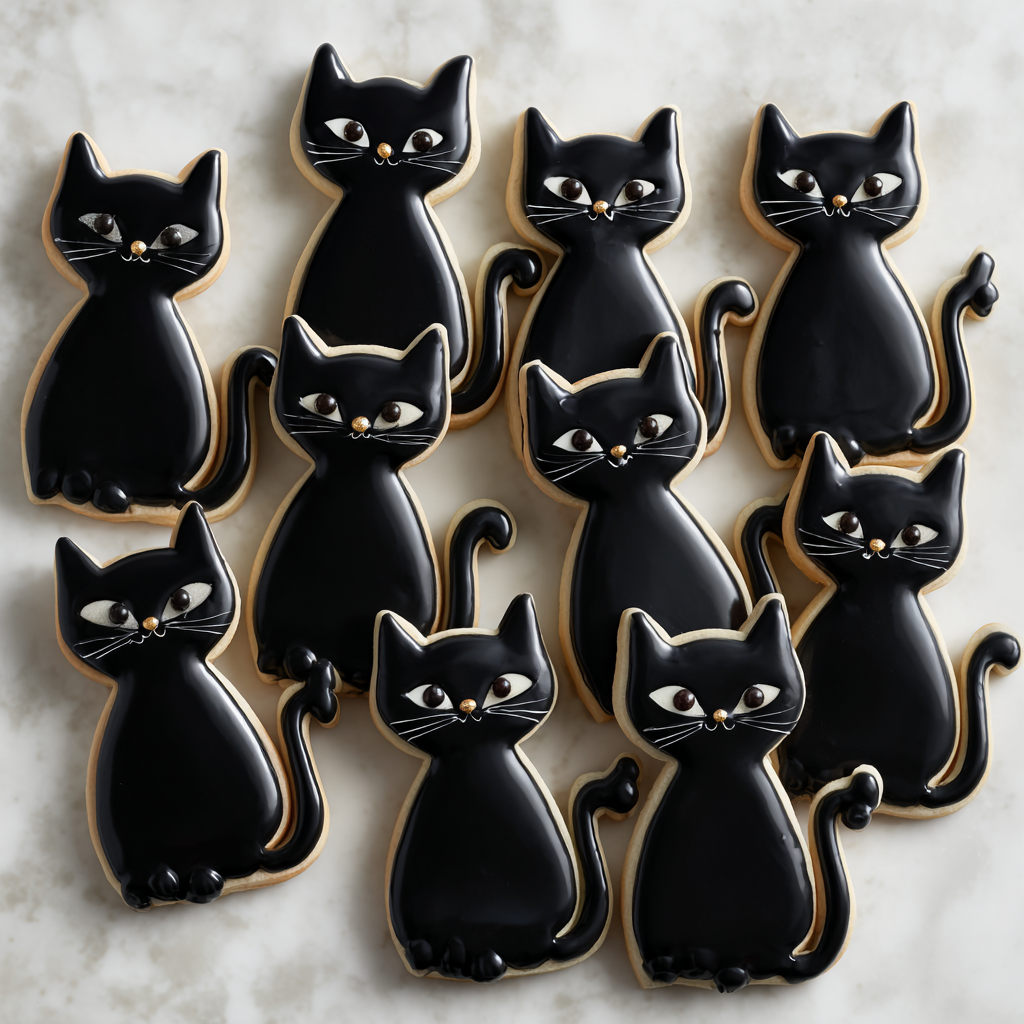
Black Cat Cookies
Welcome to My Spooky Kitchen!
Hey there, fellow flavor adventurer! Olivia Bennett here, your apron-clad guide to all things deliciously cozy. Can you smell that? It’s the scent of vanilla and mischief swirling through the air – Halloween’s just around the corner, and I’ve got a cookie that’ll make your dessert table meow with delight. Picture this: crisp sugar cookies transformed into sleek feline silhouettes, draped in velvety black icing so dark it’d make midnight jealous. These aren’t just cookies; they’re edible art for anyone who believes Halloween treats should be equal parts spooky and stunning.
Now, I know royal icing can feel intimidating – trust me, my first batch looked more like blobby ghosts than elegant kitties! But after years of tweaking (and a few hilarious kitchen disasters), I’ve cracked the code for stress-free decorating. Whether you’re a piping pro or a newbie with a dream, these black cat cookies are your ticket to wow-worthy results. So grab your favorite mug of cider, dust off that rolling pin, and let’s make magic happen. Because nothing says “spooky season” like biting the head off a chocolate-eyed cat… cookie, that is!
When Cookie Cats Saved Halloween
Rewind to my very first Halloween party as a newlywed. I’d ambitiously promised “gourmet treats,” but my pumpkin pie collapsed, and my “eerie eyeball” cake pops resembled… well, let’s not go there. At 9 PM, with guests arriving in 12 hours, I spotted my cat Luna napping in a perfect crescent shape. Inspiration struck! I whipped up my grandma’s sugar cookie dough, grabbed a knife (no fancy cutters then!), and carved jagged cat shapes. The icing? A frantic mix of powdered sugar and black food dye that stained my fingers for days.
Those lopsided kitties stole the show! My friend’s toddler hugged one like a stuffed toy, and my rockstar neighbor asked for the recipe. That night taught me two things: 1) Imperfect cookies with personality > “perfect” desserts, and 2) Black cats aren’t bad luck – they’re delicious luck! Now, Luna supervises every batch from her kitchen throne (aka the warm spot by the oven).
Your Cookie Toolkit: Simple Ingredients, Big Magic
For the Cookies:
- 1 cup unsalted butter, softened – The cozy hug of cookie dough! Chef’s hack: Cube cold butter, then microwave at 20% power in 10-sec bursts until slightly yielding. Too soft? Cookies spread.
- 1 cup granulated sugar – Not just sweetener! Sugar creates crisp edges. For deeper flavor, swap ¼ cup with brown sugar.
- 1 egg – Your binding superstar. Room temp blends smoother! Vegan? Use flax eggs.
- 1½ tsp vanilla extract – Pure vanilla > imitation. It’s worth the splurge!
- ½ tsp almond extract (optional) – My secret weapon! Adds sophistication. Hate almond? Skip it or use lemon zest.
- 2¾ cups all-purpose flour – Spoon flour into cups, don’t scoop! Packed flour = tough cookies.
- ½ tsp baking powder – Lifts cookies gently. Check expiry dates – old powder won’t puff.
- ½ tsp salt – Balances sweetness. Use fine sea salt to avoid crunchy bits.
For the Black Royal Icing:
- 2 cups powdered sugar – Sift it! Lumps clog piping tips.
- 1½ tbsp meringue powder – The edible glue that hardens icing. Find it in baking aisles or online.
- 3–4 tbsp water – Add slowly! Too much = runny icing. Too little = cement.
- Black gel food coloring – Key insight: Gel > liquid for intense color without dilution. Start with 1 tsp!
- Optional: edible shimmer, gold luster dust, or royal icing eyes – For glam kitties! I love gold-painted ears.
Let’s Bake Some Magic: Step-by-Step
Step 1: Make Dough (The Foundation)
Cream butter and sugar until fluffy (3 mins!). This incorporates air – your cookies’ “rise secret.” Add egg and extracts; mix until satiny. Whisk dry ingredients separately, then add gradually. Chef’s hack: Stop mixing when flour disappears. Overworked dough = tough cats!
Step 2: Chill & Cut (Patience Pays!)
Flatten dough into a 1-inch thick disc. Wrap in plastic; chill 30 mins. Why? Cold butter = less spread. Roll dough between parchment paper to ¼-inch thick. Cut cats! Re-roll scraps once. Pro tip: Freeze cutouts 10 mins before baking for sharper edges.
Step 3: Bake (Golden Purrfection)
Bake at 350°F (175°C) on parchment-lined sheets. Rotate pans at 5 mins. Cookies are done when edges blush gold (8–10 mins). Watch closely! They burn fast. Cool 5 mins on pan, then transfer to wire rack. Must be fully cool before icing!
Step 4: Mix Icing (Black Magic)
Whisk powdered sugar and meringue powder. Add water 1 tbsp at a time. Aim for “soft peak” consistency: icing should drizzle off spoon but vanish back into itself in 15 secs. Add black gel – be bold! It deepens as it sits. Cover with damp cloth to prevent crusting.
Step 5: Decorate (Channel Your Inner Picasso)
Use piping bags or squeeze bottles. Outline cat shapes first, then “flood” with thinner icing (add drops of water if needed). Pop air bubbles with a toothpick. Add shimmer or eyes while wet. Fun twist: Pipe white whiskers or moon-shaped pupils!
Step 6: Dry (The Final Countdown)
Let cookies dry uncovered 12–24 hours. Humidity enemy! I stash mine in the oven (off!) with the light on.
Presenting Your Feline Masterpieces
Arrange cookies on a slate board with dried lavender for a moody vibe, or pile them high on a vintage cake stand for playful charm. Tuck them beside pumpkin-spiced lattes at brunch, or box them in clear cellophane with orange ribbon for gifting. Pair with blood-red raspberry macarons for a color pop! Pro tip: Add mini name tags saying “Meet my familiar” for witchy humor.
The Science Behind the Perfect Sugar Cookie – Why Texture & Consistency Matter
Ever wonder why some sugar cookies spread into shapeless blobs while others hold their crisp feline form? It all comes down to science! Understanding the chemistry behind baking ensures your black cat cookies stay perfectly spooky.
The Role of Butter: Cold vs. Soft
Butter is the backbone of sugar cookies, but its temperature makes all the difference:
-
Too soft? Cookies spread too much because the fat melts before the dough sets.
-
Too cold? The dough won’t cream properly, leading to dense cookies.
-
Just right? Softened (but not melted) butter traps air when creamed with sugar, giving cookies a slight rise and tender crumb.
Pro Tip: If your butter gets too soft, pop it in the fridge for 10 minutes before mixing.
Sugar: More Than Just Sweetness
Sugar doesn’t just add sweetness—it affects texture and spread:
-
Granulated sugar encourages crisp edges.
-
Brown sugar adds moisture and chewiness (swap ¼ cup in this recipe for a deeper flavor).
-
Too much sugar? Cookies spread excessively.
Flour: The Structure Keeper
-
Over-measuring flour = dry, tough cookies. Always spoon flour into your measuring cup, then level it off.
-
Under-measuring? Cookies spread too thin.
-
Gluten development: Mix just until combined—overmixing makes cookies tough.
Chilling the Dough: The Secret to Sharp Edges
Chilling the dough solidifies the butter, preventing cookies from spreading too fast in the oven. It also allows the flour to hydrate evenly, improving texture.
Bonus Trick: For ultra-sharp edges, freeze cut-out cookies for 10 minutes before baking!
Decorating Like a Pro – Mastering Royal Icing for Stunning Cookies
Royal icing is the holy grail of cookie decorating—it dries smooth, hard, and glossy, making it perfect for intricate designs. But it can be tricky! Here’s how to nail it every time.
Consistency is Key: Flood vs. Outline Icing
-
Outline consistency (thicker): Holds its shape for piping borders.
-
Flood consistency (thinner): Flows smoothly to fill in designs.
How to Adjust:
-
Too thick? Add water drop by drop.
-
Too thin? Add more powdered sugar.
Getting True Black Icing (Without It Tasting Bitter)
Black icing is notorious for requiring tons of dye, which can leave a bitter aftertaste. Here’s the fix:
-
Start with chocolate-based icing (add cocoa powder to your recipe).
-
Use gel food coloring (not liquid!).
-
Let the icing sit for 30 minutes—it darkens as it oxidizes.
-
Add a tiny bit of purple or blue to neutralize brown undertones.
Piping Techniques for Feline Finesse
-
Outline first: Pipe the cat’s shape, then fill with flood icing.
-
Toothpick trick: Use a toothpick to guide icing into corners.
-
Avoid air bubbles: Gently tap the cookie after flooding.
Adding Details: Eyes, Whiskers & Shimmer
-
Edible glitter or luster dust gives a magical touch.
-
White icing can create glowing eyes or tiny fangs.
-
Edible markers are great for last-minute details.
Pro Tip: If you mess up, let the icing dry, then scrape it off and start over!
Creative Twists: Make Them Your Own!
1. Chocolate Chai Cats: Swap ½ cup flour with cocoa powder + add 1 tsp chai spice to dough.
2. Gluten-Free Ghosts: Use 1:1 GF flour + swap cats for ghost shapes with white icing.
3. Cheesecake Stuffed: Sandwich two cookies with cream cheese frosting!
4. Salty Caramel Eyes: Pipe caramel dots instead of icing eyes. Sprinkle flaky salt.
5. Vegan Vampires: Use plant butter + aquafaba icing (whipped chickpea brine!).
Olivia’s Kitchen Confessions
These cookies evolved from my “knife-carved catastrophe” years ago! I now add a pinch of cinnamon to the dough for warmth, and use Americolor Super Black gel – it’s the only dye that gives true noir without bitterness. One Halloween, I accidentally used salt instead of sugar (yikes!). My tip? Label your containers! And if your icing looks gray? Don’t panic – add a dot of purple gel to neutralize brown undertones. True story: My husband once ate 6 “test” cats before dinner. I took it as a compliment!
Your Questions, Answered!
Q: Why gel food coloring? Liquid made my icing runny!
A: Liquid dye adds moisture, thinning your icing. Gel is concentrated pigment – start with a pea-sized amount! For true black, let tinted icing rest 20 mins; it darkens as it oxidizes.
Q: My cats spread into blobs! Help?
A: Three culprits: 1) Butter too warm – dough must be chilled. 2) Over-creaming – stop when just combined. 3) Hot baking sheets – always cool between batches.
Q: Can I freeze these?
A: Yes! Freeze undecorated cookies for 3 months. Thaw before icing. Decorated cookies last 1 week airtight – but they’ll vanish faster!
Q: Icing won’t dry shiny. What went wrong?
A: Humidity is the enemy! Add ½ tsp corn syrup to icing for gloss, or run a fan nearby. Avoid stacking until fully set.
Black Cat Cookies
- Total Time: 10 minute
Description
These aren’t just cookies—they’re spooky little showstoppers that bring elegance and fun to your Halloween table. Crisp, buttery sugar cookies get a haunting makeover with sleek black royal icing, turning every bite into a mix of cozy vanilla comfort and wickedly chic flair. Whether you’re baking for a party, trick-or-treat platter, or just a night in with cider and candles, these kitties guarantee smiles (and maybe a playful shiver).
Ingredients
Sugar Cookies
-
1 cup unsalted butter, softened
-
1 cup granulated sugar
-
1 egg (room temp)
-
1½ tsp vanilla extract
-
½ tsp almond extract (optional)
-
2¾ cups all-purpose flour
-
½ tsp baking powder
-
½ tsp salt
Black Royal Icing
-
2 cups powdered sugar (sifted)
-
1½ tbsp meringue powder
-
3–4 tbsp water (add gradually)
-
Black gel food coloring (not liquid!)
Optional Decorations
-
Edible shimmer or luster dust
-
Candy eyes or gold-painted accents
Instructions
-
Make Dough: Cream butter + sugar until fluffy (3 mins). Beat in egg + extracts. In a separate bowl, whisk flour, baking powder, and salt. Add gradually until just combined.
-
Chill & Cut: Wrap dough in plastic, chill 30 mins. Roll to ¼-inch thick, cut cat shapes (cookie cutter or freehand). Freeze cutouts 10 mins before baking.
-
Bake: Place on parchment-lined trays, bake at 350°F (175°C) for 8–10 mins until edges turn pale gold. Cool fully.
-
Icing: Whisk powdered sugar + meringue powder, then slowly add water until icing is smooth, 15-second consistency. Tint with black gel; let rest to deepen color.
-
Decorate: Outline cookies with thick icing, then flood with thinner icing. Pop air bubbles with a toothpick. Add shimmer or candy eyes while wet.
-
Dry: Let cookies dry uncovered 12–24 hrs before stacking.
Notes
For the deepest black icing, start with dark cocoa powder in your icing base before adding gel color—less dye, richer taste, and no bitter aftertaste.
- Prep Time: 30 mins (plus chilling/drying)
- Cook Time: 8–10 mins per batch
Nutrition
- Calories: 150 cal Per cookie
- Fat: 6g
- Carbohydrates: 22g
Nutritional Nibbles (Per Cookie)
Calories: 150 | Fat: 6g | Carbs: 22g | Protein: 1g
Note: Values estimated. Substitutions change nutrition.
Final Thoughts: Embrace the Imperfections & Have Fun!
Baking should be joyful, not stressful. So what if your first batch of black cat cookies looks more like abstract art than elegant felines? Some of my earliest attempts were downright haunting (and not in a good way). But that’s the beauty of homemade treats—they have character!
Halloween is all about creativity, laughter, and a little bit of spookiness. Whether you’re baking these cookies for a party, a gift, or just because, remember: the best recipes are the ones made with love (and maybe a few mishaps along the way).

Mini Pumpkin Mousse Pies
Mini Pumpkin Mousse Pies: Your New Fall Obsession
Hey there, kitchen friends! Olivia here, and I’m practically doing a happy dance because we’re diving into one of my all-time favorite fall treats today: Mini Pumpkin Mousse Pies. Imagine if classic pumpkin pie took a cloud-like, no-bake vacation and came back wearing a party hat – that’s exactly what these cuties are! Perfect for Thanksgiving, Friendsgiving, or just because Tuesday deserves dessert, these individual pies are silky, spiced, and seriously simple. No fancy equipment needed – just a bowl, a whisk, and your favorite cozy playlist. They’re the ultimate crowd-pleaser that lets you skip the oven drama while still soaking up all those warm autumn flavors. Seriously, watching your crew’s eyes light up when you pull these from the fridge? Pure magic. Let’s make some edible sunshine together!
My Pumpkin Pie Epiphany
Picture this: It’s 2018, and I’m hosting my first big Friendsgiving. I’d spent HOURS baking a gorgeous traditional pumpkin pie… only to trip while carrying it to the table. Cue the slow-motion “NOOO!” as it slid right off the plate onto my (thankfully clean) floor. Total pie tragedy! With guests arriving in 20 minutes, I frantically whipped up a quick pumpkin mousse from pantry staples, layered it in mini graham cracker cups, and topped it with whatever I could find. The result? My friends declared it BETTER than the original pie! Now, these mini mousse pies are my go-to for every autumn gathering – a happy accident that turned into a beloved tradition. Moral of the story? Sometimes kitchen flops lead to your greatest hits.
Gather Your Autumn Toolkit
For the Crust:
- 1 cup graham cracker crumbs – Pro tip: Smash them in a ziplock with a rolling pin for stress relief! For gluten-free pals, gluten-free grahams work perfectly.
- 3 tbsp sugar – Balances the crumbs’ earthiness. Brown sugar adds caramel notes if you’re feeling fancy!
- 4 tbsp melted butter – The glue! Salted butter gives a sweet-salty vibe, but unsalted works too. Vegan? Coconut oil solidifies beautifully.
- 6 mini tart pans or muffin liners – I use 4-inch removable-bottom tins for pretty edges, but cupcake liners in a muffin tin are genius for easy transport!
For the Pumpkin Mousse:
- 1 cup pumpkin purée – MUST be pure pumpkin (not pie filling!). Canned is perfect – just drain any liquid first with a paper towel.
- 1/2 cup powdered sugar – Dissolves smoothly. Maple syrup (1/4 cup) works for refined sugar-free – just reduce other liquids.
- 1 tsp pumpkin pie spice – Your autumn MVP! Make your own with 1/2 tsp cinnamon + 1/4 tsp ginger + 1/4 tsp nutmeg + pinch cloves.
- 1/2 tsp vanilla extract – The flavor enhancer. Try bourbon vanilla for depth!
- 1 cup heavy whipping cream (chilled) – NON-NEGOTIABLY cold! For dairy-free, full-fat coconut cream (chilled overnight) whips up dreamily.
Optional Toppings:
- Whipped cream – Cloud-like perfection.
- Crushed gingersnaps or pecans – Adds crunch and festive flair!
- Cinnamon dusting – Because pretty.
Let’s Build Some Mini Masterpieces!
Step 1: Make the Crusts (5 mins hands-on)
Grab a medium bowl and toss in your graham crumbs, sugar, and melted butter. Stir until it looks like wet sand – you should be able to squeeze a clump that holds its shape. Now, divide this gloriousness evenly among your 6 mini pans or liners. Pro hack: Use a small glass or measuring cup to press the crumbs firmly and evenly (this prevents crumbly disasters later!). Pop them in the freezer for 15-20 minutes while you make the mousse. Chilling = sturdy crust!
Step 2: Whip Up the Pumpkin Mousse (10 mins)
In a large bowl, whisk together the pumpkin purée, powdered sugar, pumpkin pie spice, and vanilla until smooth and dreamy. Taste it! Want more spice? Add a pinch. Now, in a SEPARATE bowl (super important!), beat your ice-cold heavy cream with a hand mixer or whisk until stiff peaks form. Watch closely: Stiff peaks mean the cream holds its shape when you lift the beaters – don’t go past this or it’ll turn grainy. Gently fold the whipped cream into the pumpkin mixture in 3 additions. Folding secret: Use a spatula and cut down through the center, then sweep around the bowl. Stop when just combined – overmixing deflates the fluff!
Step 3: Fill & Chill (2+ hours)
Spoon or pipe the pumpkin mousse into your chilled crusts. Smooth the tops with the back of a spoon. Chef’s trick: Tap the pans gently on the counter to settle the mousse and remove air bubbles. Cover loosely with plastic wrap (don’t let it touch the mousse) and refrigerate for at least 2 hours, but overnight is even better. Patience, grasshopper – this sets the texture into silky perfection!
Step 4: Garnish & Serve (5 mins)
The grand finale! Top each mini pie with a dollop of whipped cream, a sprinkle of crushed gingersnaps or toasted pecans, and a fairy dusting of cinnamon. Presentation tip: Run a warm knife around removable tart pan edges before releasing for flawless sides!
Serving Up the Cozy
These minis are little showstoppers all on their own! Arrange them on a rustic wooden board or vintage cake stand for serious “oohs” and “aahs.” Pair with hot apple cider, spiked coffee, or a crisp Riesling. For extra fun, set up a DIY topping bar with caramel sauce, chocolate shavings, and candied pepitas – let guests customize! They’re perfect as a light dessert finale after a hearty fall feast.
Hosting Hacks: How to Serve Mini Pumpkin Mousse Pies Like a Pro
Impress your guests with presentation flair and pairing tips that elevate these mini pies from cute to unforgettable.
Styling Secrets
-
Rustic Elegance: Arrange pies on a slate board with scattered cinnamon sticks and mini pumpkins.
-
Individual Charm: Serve each on a vintage saucer with a gold fork tied with twine.
-
Glass Appeal: Layer mousse and crumbs in clear cups for a parfait effect—great for large crowds.
Beverage Pairings
-
Coffee & Tea: A spiced chai latte or espresso martini complements the pie’s warmth.
-
Wine Pairings: Try a late-harvest Riesling (sweet) or Pinot Noir (earthy).
-
Boozy Upgrades: Top with bourbon-spiked whipped cream or drizzle with rum caramel.
Topping Bar Ideas
Set up a DIY station with:
-
Crunch: Toasted pecans, crushed Biscoff cookies, or candied bacon.
-
Creamy: Vanilla bean whipped cream, mascarpone, or coconut yogurt.
-
Drizzles: Salted caramel, dark chocolate ganache, or apple cider reduction.
Leftover Love
-
Pie for Breakfast: Crumble leftovers over Greek yogurt.
-
Ice Cream Mix-In: Freeze mousse and swirl into vanilla ice cream.
-
Trifle Layers: Alternate with gingerbread cubes and whipped cream
Make It Your Own!
- Chocolate Lover’s Twist: Swap graham crumbs for crushed chocolate cookies (Oreo filling scraped out). Add 2 tbsp cocoa powder to the mousse.
- Vegan Delight: Use coconut oil crust & coconut cream mousse. Sweeten with maple syrup. Top with coconut whip!
- Salty-Sweet Dream: Sprinkle crust with flaky sea salt. Swirl 2 tbsp salted caramel into the mousse before filling.
- Espresso Kick: Add 1 tsp instant espresso powder to the pumpkin mixture for a mocha-pumpkin vibe.
- Cheesecake Fusion: Fold 4 oz softened cream cheese into the pumpkin mixture before adding whipped cream.
Olivia’s Extra Scoop
This recipe is my kitchen’s happy place! Over the years, I’ve learned a few things: First, draining the pumpkin is non-negotiable – watery puree = sad, loose mousse. Second, cold cream is your religion – I even chill my mixing bowl sometimes! Third, the folding technique makes or breaks the fluff. And my favorite evolution? Swirling in a spoonful of bourbon-spiked whipped cream just before serving. The best part? These minis are FOOLPROOF for new cooks but feel gourmet. One reader even told me her toddler “helped” make them by dumping spice everywhere… and they still turned out amazing!
Your Questions, Solved!
Q: Can I make these ahead?
A: Absolutely! They’re perfect make-ahead magic. Assemble completely (without fresh whipped cream topping), cover, and refrigerate up to 2 days. Add toppings right before serving.
Q: Why is my mousse runny?
A: Three likely culprits: 1) Pumpkin purée wasn’t drained, 2) Cream wasn’t cold enough or was over/under whipped, 3) Mousse wasn’t chilled long enough. If it happens, pop them back in the fridge for another hour – they usually firm up!
Q: Can I freeze them?
A: Yes! Freeze UNTOPPED pies solid on a tray, then wrap individually. Thaw overnight in the fridge. The texture stays creamy, but the crust softens slightly.
Q: Help! I over-whipped my cream. Can I fix it?
A: Don’t panic! Gently fold in 1-2 tbsp of fresh, unwhipped cream to smooth it out. It might be slightly less fluffy but still delicious.
Mini Pumpkin Mousse Pies
- Total Time: 2 hrs 25 mins
Description
Silky, spiced pumpkin mousse nestled in buttery graham crusts—these no-bake minis are fall magic in bite-sized form. They’re light, fluffy, and way easier than traditional pumpkin pie, but still deliver all the cozy autumn vibes. Perfect for Thanksgiving, Friendsgiving, or anytime you want a make-ahead treat that looks fancy but takes minimal effort.
Ingredients
Crust
-
1 cup graham cracker crumbs
-
3 tbsp sugar (brown or white)
-
4 tbsp melted butter
-
6 mini tart pans or muffin liners
Pumpkin Mousse
-
1 cup pumpkin purée (drained)
-
½ cup powdered sugar (or ¼ cup maple syrup)
-
1 tsp pumpkin pie spice
-
½ tsp vanilla extract
-
1 cup cold heavy whipping cream (or chilled coconut cream)
Optional Toppings
-
Whipped cream
-
Crushed gingersnaps or pecans
-
Cinnamon dusting
Instructions
-
Crusts: Mix crumbs, sugar, and melted butter until sandy. Press firmly into mini tart pans or muffin liners. Freeze 15–20 mins to set.
-
Pumpkin Mousse: Whisk pumpkin, sugar, spice, and vanilla until smooth. In a separate chilled bowl, whip cream to stiff peaks. Fold gently into pumpkin mix in 3 additions.
-
Assemble: Spoon mousse into chilled crusts, smoothing tops. Cover loosely and refrigerate at least 2 hrs (overnight = best texture).
-
Finish: Garnish with whipped cream, crushed cookies/nuts, and a sprinkle of cinnamon before serving.
Notes
Always drain canned pumpkin on paper towels before using—extra moisture makes mousse too soft. Cold cream is key to fluffy success!
- Prep Time: 25 mins
Nutrition
- Calories: 260 cal Per Serving
- Sugar: 14g
- Fat: 18g
- Carbohydrates: 22g
- Protein: 3g
Nutritional Notes
Prep: 25 mins | Chill: 2 hours | Servings: 6
Per Serving: ~260 kcal | 3g protein | 18g fat (11g saturated) | 22g carbs (2g fiber, 14g sugar)
Note: Nutrition includes crust and mousse without toppings. Using coconut options reduces saturated fat.
Final Thoughts: Why These Mini Pies Will Steal the Season
These Mini Pumpkin Mousse Pies aren’t just dessert—they’re a celebration of autumn’s coziest flavors with none of the stress. They’re forgiving for beginners yet impressive enough for seasoned bakers, adaptable to dietary needs, and guaranteed to spark joy with every creamy, spiced bite. Whether you’re salvaging a pie disaster (like Olivia’s 2018 fumble) or simply craving a no-fuss treat, this recipe proves that the best kitchen creations often come from happy accidents. So grab that can of pumpkin, crank up the fall playlist, and whip up a batch of edible sunshine. Happy baking (or rather, no-baking)!
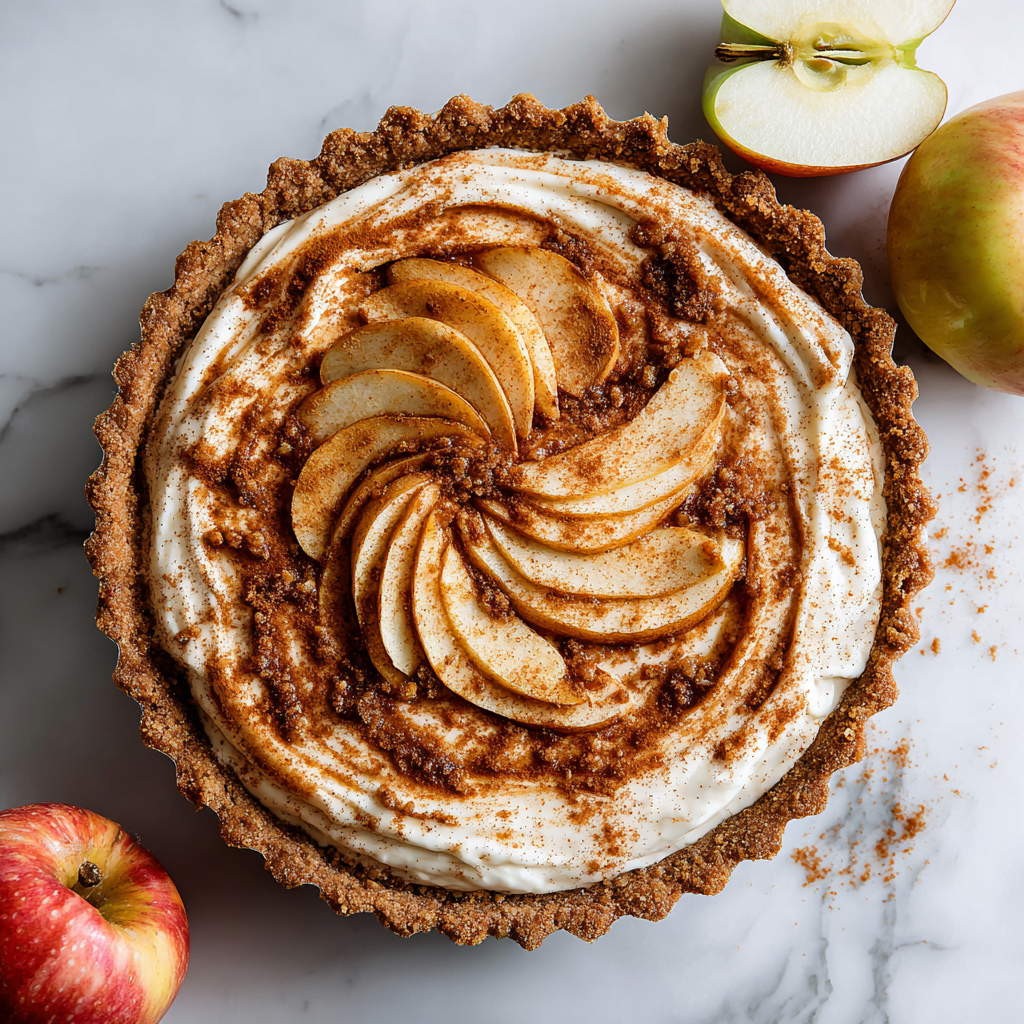
Apple Butter Cream Cheese Tart
Welcome to My Cozy Kitchen: Let’s Bake Some Magic!
Hey there, friend! Olivia here, wiping flour off my apron as I type. Is there anything more comforting than the scent of baked apples and warm spices swirling through your kitchen? That’s exactly what we’re conjuring up today with this showstopping Apple Butter Cream Cheese Tart. Imagine: a crisp graham cracker crust hugging a cloud of vanilla-kissed cream cheese, all crowned with a glossy layer of spiced apple butter. It’s like autumn captured in a tart pan—equal parts elegant and homey, fancy enough for your holiday table but simple enough for a Tuesday treat with coffee. Whether you’re a seasoned baker or just dipping your toes into the world of pastry, this recipe is your golden ticket. No fancy techniques, no obscure ingredients—just pure, uncomplicated deliciousness that’ll make your kitchen smell like a cider mill. So grab your favorite mixing bowl (the one with the little chip on the rim, you know the one), and let’s turn simple ingredients into something unforgettable!
The Apple Orchard Epiphany: Where This Tart Was Born
Picture this: It’s my first fall living in Vermont, and I’m completely overwhelmed by apple season. My tiny kitchen counter is buried under a mountain of Honeycrisps after a weekend orchard trip. I’m drowning in applesauce and pies when my neighbor Margot—a feisty 80-year-old with legendary baking skills—tosses me a jar of her homemade apple butter. “Stop fussing, girl,” she says. “Just swirl this into something lazy.” Challenge accepted! I whipped up a basic cream cheese filling, pressed a graham crust into my grandma’s tart pan, and swirled in Margot’s magic potion. What emerged from the oven was pure alchemy—the tangy cream cheese perfectly offsetting the deep, caramelized apple butter, all held by that buttery crunch. Margot took one bite, winked, and declared: “Now that’s how you respect an apple.” Every time I make it, I’m back in that leaf-strewn Vermont kitchen, learning that sometimes the best recipes aren’t complicated—they’re just heartfelt.
Your Grocery List: Simple Stars, Big Flavor
Here’s the beautiful part: every ingredient plays a specific role, and I’ve got tips to make this your own. Pro tip: measure everything before you start—we call this mise en place (fancy for “get organized!”).
- Graham Cracker Crumbs (1¼ cups): The cozy campfire of crusts! They bring honeyed warmth and that essential crunch. Chef’s Swap: No grahams? Digestive biscuits or vanilla wafers work beautifully.
- Sugar (¼ cup + ¼ cup): Divided between crust and filling. It’s our sweet backbone! Chef’s Insight: In the filling, superfine sugar dissolves faster for a silkier texture.
- Melted Butter (6 tbsp): The glue for our crust. Salted butter adds depth, but unsalted works too (just add a pinch of salt to crumbs). Pro Tip: Melted, not softened—this ensures every crumb gets coated for perfect cohesion.
- Cream Cheese (8 oz, softened): Our filling’s lush foundation. Non-Negotiable: FULL FAT. Light cream cheese weeps during baking. And please soften it properly—leave it on the counter for 2 hours! Cold cheese = lumpy filling.
- Egg (1 large): The binding agent that gives structure. Chef’s Secret: Crack it into a separate bowl first to avoid shell surprises in your filling!
- Vanilla Extract (½ tsp): The quiet harmony-maker. Splurge on pure extract—imitation can taste medicinal.
- Apple Butter (½ cup): The autumnal superstar! Key Insight: Use thick, spiced apple butter—homemade or quality store-bought (look for apples as first ingredient). Runny applesauce won’t work!
- Garnishes (optional): Thin apple slices (tossed in lemon juice to prevent browning), cinnamon dusting, toasted pecans. Presentation Power: A few strategically placed pecans make it look bakery-worthy!
Let’s Build This Beauty: Step-by-Step with Chef Cheers!
Ready? Tie that apron, preheat your oven to 350°F (175°C), and let’s create layers of joy. I’ll walk you through every step with my favorite kitchen hacks!
- Make the Crust: In a medium bowl, combine graham crumbs and ¼ cup sugar. Drizzle in melted butter and stir until it resembles wet sand. Chef’s Hack: Test cohesion by squeezing a handful—it should hold its shape without crumbling. Pour into a 9-inch tart pan with removable bottom. Use a flat-bottomed glass or measuring cup to press firmly into an even layer, climbing slightly up the sides. Why it matters: Uneven crust = uneven baking! Bake for 8-10 minutes until fragrant. Let cool on a rack—NO filling goes into a hot crust! Cool Trick: Speed up cooling by placing the pan on a chilled baking sheet.
- Whip Up the Filling: In a large bowl, beat softened cream cheese and ¼ cup sugar with a hand mixer (or stand mixer) on medium until completely smooth—about 2 minutes. Stop Scraping? Nope! Scrape bowl sides constantly. Add egg and vanilla. Beat on LOW just until incorporated (30 seconds max). Critical Tip: Overbeating after adding the egg incorporates air, causing puffing then cracking. We want satin, not soufflé! Pour into cooled crust, smoothing the top.
- Swirl the Apple Butter: Dollop apple butter over cream cheese layer in spoonfuls. Use a knife or toothpick to gently swirl—don’t overmix! Artistic Advice: Think “marble,” not “mud.” Leave some distinct cream cheese patches. For a cleaner look, gently spread apple butter almost to the edges.
- Bake to Perfection: Bake 20-25 minutes. Doneness Test: Edges should be slightly puffed, center should jiggle like Jell-O when nudged—it sets while cooling. Oven Hack: Place tart pan on a preheated baking sheet for even heat distribution. Overbaking causes cracks and rubberiness!
- Chill Out (Seriously): Cool completely at room temperature (about 1 hour), then refrigerate UNCOVERED for at least 2 hours (4 is better). Science Lesson: Covering it while warm creates condensation, making the crust soggy. Chilling firms everything for clean slices.
Showtime: Serving Your Masterpiece
Slide a knife around the tart pan’s edge, then gently lift out the removable bottom. Place on a cake stand or plate. For gorgeous slices: run a sharp knife under hot water, wipe dry, and cut with confident downward presses—repeat between slices. Garnish with a fan of paper-thin apple slices (brushed with maple syrup for shine), a snowfall of cinnamon, or toasted pecans. Serve chilled! Pair it with strong coffee, a drizzle of salted caramel, or a dollop of barely-sweetened whipped cream. It’s stunning solo, but for brunch? Add crispy bacon on the side—sweet-salty heaven!
Make It Your Own: Delicious Twists
This tart is a fantastic canvas! Here are my favorite riffs:
- Pumpkin Spiced: Swap apple butter for pumpkin butter + ½ tsp pumpkin spice in filling.
- Maple Pecan: Add ¼ cup finely chopped toasted pecans to crust + replace sugar in filling with pure maple syrup.
- Ginger Snap Crust: Use gingersnap crumbs instead of grahams for a spicy kick.
- Gluten-Free: Use certified GF graham crackers or almond flour (1¼ cups almond flour + 2 tbsp sugar + 5 tbsp melted butter).
- Bourbon Kissed: Stir 1 tbsp bourbon into apple butter before swirling.
From My Heart (and Messy Counter) to Yours
This tart has evolved from my frantic apple-overload days! My first version used a fussy pastry crust (never again—graham is quicker and sturdier). I also learned the hard way about over-swirling: one Thanksgiving, I got overzealous and created a murky brown layer instead of pretty swirls—my brother lovingly called it “mud pie.” Now I embrace imperfect swoops! I always double the recipe in fall—one for now, one frozen (unbaked filling on unbaked crust, wrap tightly) for surprise guests. Thaw overnight in fridge, then bake. It’s become my edible hello card for new neighbors. Remember: baking is about joy, not perfection. If your crust crumbles a little? Call it “rustic” and add extra pecans!
Your Questions, Answered!
Let’s tackle common tart-tastrophes before they happen:
Q: Can I use a springform pan instead of a tart pan?
A: Absolutely! Use a 9-inch springform. Press crust 1.5 inches up sides. Baking time may increase by 5 minutes.
Q: Why did my filling crack? 😭
A: Three likely culprits: 1) Overbeating after adding the egg (creates air bubbles), 2) Overbaking (center should wobble slightly!), or 3) Cooling too fast (avoid drafts!). Good news: cracks taste delicious! Cover them with garnishes.
Q: Can I make this ahead?
A: YES! It’s actually better on day 2. Bake, cool, chill covered after the initial 2 hours. Add garnishes within 1 hour of serving. Stays fabulous refrigerated for 4 days.
Q: My crust is soggy! What went wrong?
A: Did you add filling to a warm crust? Always cool completely first. Also, ensure your apple butter is thick—excess liquid seeps down. Pressing the crust firmly creates a moisture barrier too!
Apple Butter Cream Cheese Tart
- Total Time: 3 hrs 40 mins
Description
Warm, spiced apple butter meets tangy cream cheese on a buttery graham crust—it’s autumn in every bite. This tart is elegant enough for the holidays yet simple enough for a midweek treat. No pastry skills required—just a little mixing, swirling, and chilling, and you’ve got a bakery-worthy showstopper.
Ingredients
Crust
-
1 ¼ cups graham cracker crumbs
-
¼ cup sugar
-
6 tbsp melted butter
Filling
-
8 oz cream cheese, softened (full fat)
-
¼ cup sugar
-
1 egg
-
½ tsp vanilla extract
-
½ cup thick apple butter
Optional Garnishes
-
Thin apple slices (tossed in lemon juice)
-
Cinnamon dusting
-
Toasted pecans
Instructions
-
Make the crust: Mix crumbs, sugar, and butter until it resembles wet sand. Press into 9” tart pan. Bake at 350°F (175°C) for 8–10 mins. Cool fully.
-
Prepare filling: Beat cream cheese + sugar until smooth (2 mins). Add egg + vanilla, beat on low just until blended. Pour into cooled crust.
-
Swirl apple butter: Dollop apple butter, swirl gently with knife. Leave distinct streaks for a marbled look.
-
Bake: 20–25 mins at 350°F, until edges puff and center jiggles slightly.
-
Chill: Cool 1 hr at room temp, then refrigerate at least 2 hrs before serving.
-
Serve: Garnish with apple slices, pecans, or cinnamon. Slice with a warm knife for clean cuts.
Notes
Don’t over-swirl the apple butter—distinct marbling makes it stunning. This tart tastes even better the next day once the flavors meld!
- Prep Time: 15 mins
Nutrition
- Calories: 310 cal Per slice
- Fat: 20g
- Saturated Fat: 12g
- Carbohydrates: 28g
- Protein: 4g
Nutritional Notes (Approximate Per Serving)
Slice (1/8th of tart): ~310 kcal | 4g protein | 20g fat (12g saturated) | 28g carbs (20g sugars) | 1g fiber. Remember: This is a treat meant to be savored slowly with good company!
Final Thoughts: More Than a Tart—A Story in Every Slice
This Apple Butter Cream Cheese Tart is more than a dessert—it’s a scrapbook of my culinary journey, from Vermont orchards to your kitchen. What I love most is how it adapts: swap the crust for gluten-free friends, dial down sugar for a subtler treat, or dress it up with edible gold leaf for celebrations.
But the real magic? The way it gathers people. There’s something about slicing into that glossy, spice-specked surface that makes guests lean in, forks at the ready. It’s a recipe that says “stay awhile”—whether you’re serving it on paper plates at a picnic or china at a dinner party.
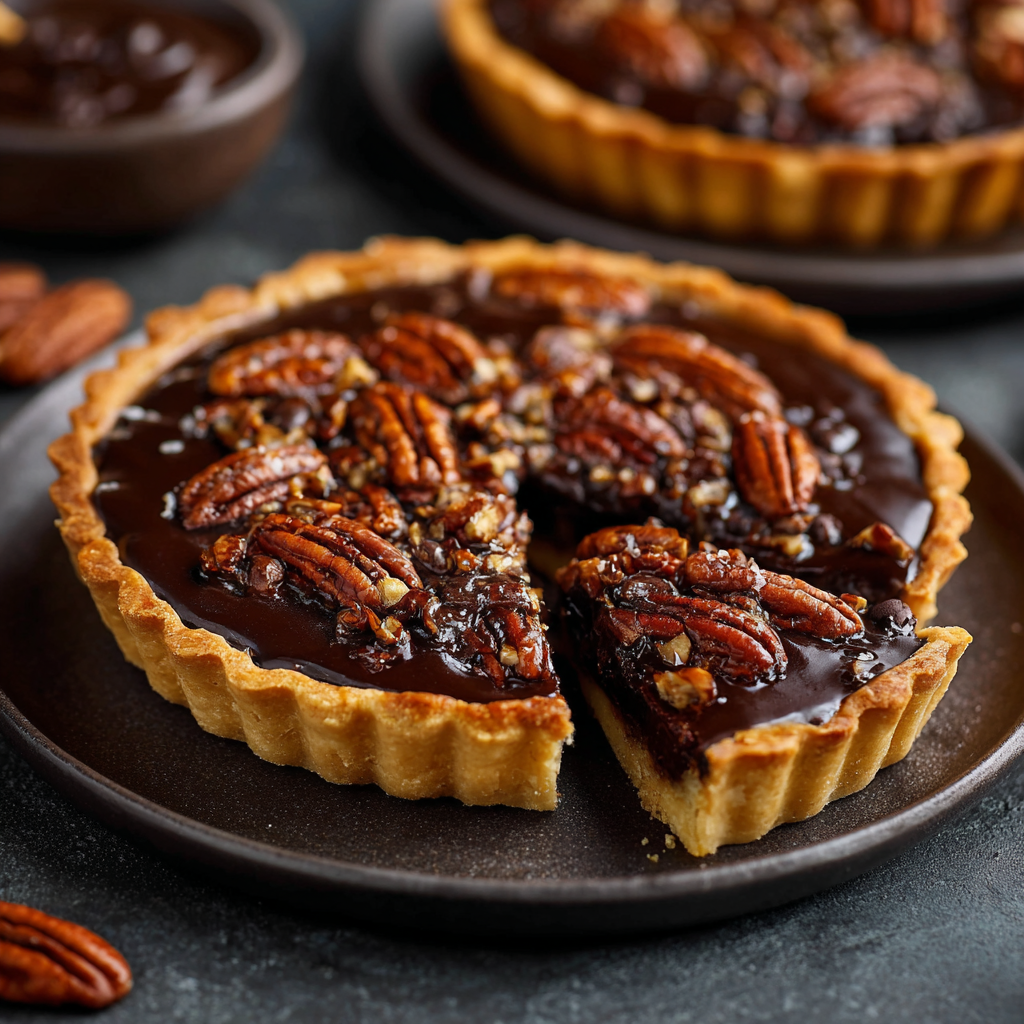
Chocolate Pecan Tart
Welcome to My Favorite Slice of Bliss: Chocolate Pecan Tart
Hey there, friend! Olivia here, apron dusted with flour and heart full of excitement. Can you smell that? It’s the warm, buttery aroma of pastry mingling with deep, molten chocolate and toasty pecans—a scent that instantly feels like a hug. If you’ve ever craved a dessert that’s equal parts elegant and cozy, you’re in for a treat. Today, we’re diving into my Chocolate Pecan Tart, the showstopper that turns “just dessert” into a memory-maker.
Picture this: a crisp, crumbly crust hugging a pool of glossy dark chocolate so velvety it practically whispers. Crowned with golden pecan halves, it’s a textural dream—crisp, gooey, and nutty all at once. No fancy techniques, no obscure ingredients, and zero alcohol (just pure, uncomplicated joy). Whether you’re hosting a holiday feast or surprising your neighbor with a “just because” gift, this tart is your secret weapon. It’s the recipe I reach for when I want eyes to light up, forks to clink, and someone to whisper, “You made this?” Spoiler: You absolutely can. So preheat that oven, grab your favorite mixing bowl, and let’s bake some magic together!
Why This Tart Tastes Like Home
This tart isn’t just dessert—it’s a time machine. The first time I made it was for my grandma’s 80th birthday. Nana Bennett, the queen of practical advice (“Olivia, never skimp on butter!”), had always adored pecan pie but found traditional versions too sweet. I wanted to surprise her with something richer, more sophisticated… but still full of heart. Cue the chocolate pecan tart experiment!
I remember standing in her sun-drenched kitchen, nervously pressing the crust into her dented tart pan (the one she’d owned since the ’70s). When I pulled it from the oven, the filling shimmered like dark silk, and the pecans glistened. Nana took one bite, closed her eyes, and did her signature happy wiggle. “Now this,” she declared, “is how you do dessert.” We spent the afternoon sipping tea, sharing slices, and laughing as chocolate smudged our fingertips. That tart became our tradition—every birthday, every snowy Sunday. Now, when I bake it, I still hear her voice: “More vanilla, dear. Always more vanilla.” It’s a reminder that the best recipes aren’t just about flavor; they’re love, handed down one slice at a time.
Your Grocery List: Simple Stars, Big Impact
Gather these easy finds! I’ve added tips to make swaps or upgrades a breeze. Pro insight: Quality chocolate and fresh pecans make all the difference here.
For the Crust:
- 1 1/4 cups all-purpose flour – The foundation! For extra tenderness, swap 1/4 cup with almond flour.
- 1/4 cup powdered sugar – Lends a melt-in-your-mouth texture. Cornstarch in the sugar prevents toughness.
- 1/2 cup cold butter, cubed – Cold is key! Unsalted lets you control salt levels. Vegan butter works too—just keep it chilled.
- 1–2 tbsp cold water – Add just enough to bind. Ice water prevents butter from melting.
For the Filling:
- 1 cup semisweet or dark chocolate chips (60–70%) – My gold standard! Chips melt evenly, but chopped bars work. Use dairy-free if needed.
- 1/2 cup heavy cream – Creates that luxurious silkiness. Full-fat coconut cream is a stellar dairy-free sub.
- 2 tbsp butter – Adds richness. Salted butter? Skip the pinch of salt later.
- 1/4 cup brown sugar – For caramel depth. Light or dark works—dark adds more molasses warmth.
- 1 egg – Binds the filling. Room temp blends smoother!
- 1 1/2 cups pecan halves – Toast them first! It amplifies their nutty magic. Walnuts or hazelnuts? Go for it.
- Pinch of salt – Balances sweetness. Flaky sea salt? Yes, please.
- 1/2 tsp vanilla extract – My “Nana-approved” must. Use pure vanilla for the best aroma.
Let’s Bake: Your Foolproof Roadmap
Don’t rush—this is meditative baking! I’ve packed each step with my tested hacks to ensure success.
Make the Crust
Step 1: In a large bowl, combine flour and powdered sugar. Whisk ’em together like you’re making snow angels! This distributes the sugar evenly so your crust bakes uniformly. Chef hack: Sift if your sugar is lumpy—it’s worth the extra minute.
Step 2: Cut in cold, cubed butter using a pastry cutter or your fingertips. Stop when it looks like chunky breadcrumbs with pea-sized butter bits. Why cold butter? Those bits steam in the oven, creating flaky layers. Hot hands? Pulse in a food processor, then transfer to a bowl.
Step 3: Drizzle in 1 tbsp cold water. Gently mix with a fork. If it doesn’t clump when squeezed, add another 1/2–1 tbsp. Don’t overwork it! Over-mixing = tough crust. It should look shaggy, not smooth.
Step 4: Chill the dough 30 minutes. Wrap it in plastic or pop the bowl in the fridge. This relaxes the gluten and firms the butter. Use this time to toast pecans! Spread them on a tray and bake at 350°F for 5–7 minutes until fragrant.
Step 5: Roll out dough between parchment paper to 1/4-inch thickness. Press it into a 9-inch tart pan (with removable bottom!). Trim excess, then freeze for 10 minutes. No rolling pin? Press dough directly into the pan with your fingers—it’s rustic!
Step 6: Blind bake at 350°F (175°C) for 12–15 minutes. Line the crust with parchment, fill with pie weights (or dried beans!), and bake until edges are golden. Why blind bake? It prevents a soggy bottom. No weights? Prick the base with a fork 10 times.
Make the Filling
Step 1: In a saucepan, heat cream and butter over medium-low until steaming (tiny bubbles at edges). Don’t boil! Boiled cream can curdle the chocolate.
Step 2: Remove from heat and stir in chocolate until melted and glossy. Let it cool 5 minutes. Chef hack: If chocolate seizes, add 1 tsp warm cream and stir gently.
Step 3: Whisk in brown sugar, egg, vanilla, and salt. Whisk vigorously! This emulsifies the filling so it sets smooth, not grainy. Cooled chocolate is key—if too hot, it’ll scramble the egg.
Assemble & Bake
Step 1: Pour filling into the pre-baked crust. It should flow like satin. Tap the pan gently to level it.
Step 2: Top with toasted pecans in concentric circles or artful chaos! Press them lightly so they’re half-submerged.
Step 3: Bake at 350°F for 20–25 minutes. It’s done when the edges puff slightly but the center jiggles like Jell-O when nudged. Overbaking = cracks!
Step 4: Cool completely in the pan on a wire rack (2+ hours). Patience, grasshopper! Slicing warm tart = chocolate lava puddle (tasty, but messy).
Serving Your Masterpiece
Slide the tart out of its pan onto a cake stand—that golden crust and glossy top deserve applause! Slice with a warm knife (dip in hot water, dry quickly) for clean edges. Keep it elegant with a dusting of powdered sugar, or go full indulgence: top slices with a dollop of barely-sweetened whipped cream or a scoop of vanilla bean ice cream. For a dinner party? Pair it with espresso or spiced cherry compote. Pro tip: This tart shines at room temperature, but I adore it slightly warmed (10 seconds in the microwave) so the chocolate oozes like a hug.
Make It Your Own: 5 Tasty Twists
Play with flavors! This tart is a canvas. Try:
- Salty-Sweet Surprise: Sprinkle flaky sea salt over the filling before baking.
- Caramel Swirl: Drizzle 1/4 cup warm caramel sauce over the chocolate filling, then swirl with a knife before adding pecans.
- Spiced Upgrade: Add 1/2 tsp cinnamon or a pinch of cayenne to the filling for warmth.
- Gluten-Free Bliss: Swap crust flour for a 1:1 GF blend and use GF chocolate.
- Mini Magic: Press dough into muffin tins! Bake crusts 10 minutes, fill, then bake 12–15 minutes.
Olivia’s Extra Crumb of Wisdom
This tart evolved from a near-disaster! My first attempt? I used hot filling in a warm crust… and ended up with “chocolate pecan soup.” Lesson learned: cool everything. Now, I make the crust a day ahead—it’s sturdier! Over time, I’ve embraced imperfections too. Cracked filling? Call it “artisan.” Crooked pecans? “Rustic charm.” Baking’s about joy, not perfection. One snowy night, my cat jumped on the counter mid-assembly, and we had a pecan avalanche. We still ate it (minus the cat-touched bits)—and laughed all evening. So if things go sideways, pour cocoa, call a friend, and remember: even “ugly” tarts taste incredible.
Your Questions, Answered
Q: Can I use a store-bought crust?
A: Absolutely! A shortbread or graham cracker crust works in a pinch. Pre-bake it according to package directions first. (But homemade is next-level—promise!)
Q: My filling cracked! What did I do wrong?
A: Likely overbaking or rapid cooling. Next time, pull the tart when the center jiggles slightly. Cool it gradually: turn off the oven, crack the door, and leave it inside for 15 minutes first. Cracks? Dust with powdered sugar—it’s a stylish cover-up!
Q: Can I make this ahead?
A: Yes! Bake the tart up to 2 days ahead. Store covered at room temp. Freeze whole (unbaked or baked) for 1 month. Thaw overnight in the fridge.
Q: My crust shrank! Help?
A: Overworking the dough or not chilling enough can cause this. Always chill before baking, and avoid stretching the dough when pressing into the pan. Freezing before blind baking helps too!

Chocolate Pecan Tart
- Total Time: 3 hrs 30 mins
Description
Golden pecans, silky chocolate, and a buttery crust—this tart is the definition of cozy elegance. It’s rich without being cloying, impressive without being complicated, and guaranteed to steal the spotlight at any gathering. Whether it’s for a holiday table or a quiet Sunday treat, one slice feels like a warm hug shared with someone you love.
Ingredients
For the crust:
-
1 ¼ cups all-purpose flour (swap ¼ with almond flour for tenderness)
-
¼ cup powdered sugar
-
½ cup cold unsalted butter, cubed
-
1–2 tbsp cold water
For the filling:
-
1 cup semisweet/dark chocolate chips (60–70%)
-
½ cup heavy cream (or full-fat coconut cream)
-
2 tbsp butter
-
¼ cup brown sugar
-
1 egg, room temp
-
1 ½ cups pecan halves (toasted)
-
Pinch of salt
-
½ tsp vanilla extract
Instructions
Crust
-
Mix flour + sugar. Cut in cold butter until crumbly.
-
Add cold water gradually until dough clumps. Wrap, chill 30 mins.
-
Roll dough, press into 9″ tart pan. Trim edges, freeze 10 mins.
-
Blind bake at 350°F (175°C) for 12–15 mins with parchment + weights.
Filling
-
Warm cream + butter until steaming. Remove from heat, stir in chocolate until glossy. Cool 5 mins.
-
Whisk in sugar, egg, vanilla, and salt.
Assemble & Bake
-
Pour filling into crust, tap to level.
-
Arrange pecans on top, pressing slightly.
-
Bake at 350°F for 20–25 mins, until edges puff but center jiggles.
-
Cool completely before slicing (2+ hrs).
Notes
Bake a day ahead—the flavors deepen beautifully overnight. For a dinner party, serve with espresso or a drizzle of caramel for extra wow factor.
- Prep Time: 25 mins
- Cook Time: 35–40 mins
Nutrition
- Calories: 390cal Per slice
- Fat: 28g
- Saturated Fat: 14g
- Carbohydrates: 30g
- Fiber: 2g
- Protein: 5g
Nutritional Nibbles (Per Serving)
Makes 8 slices: ~390 kcal | 5g protein | 28g fat (14g saturated) | 30g carbs (2g fiber, 18g sugar). Note: For a lighter version, try almond milk creamer in the filling and reduce sugar by 1 tbsp.
Final Thoughts: More Than Just a Tart
This Chocolate Pecan Tart isn’t just a dessert—it’s a story in every bite. From the science of baking to the history of its ingredients, every element has a purpose. Whether you’re making it for a special occasion or just because, it’s a reminder that food connects us—to tradition, to loved ones, and to simple, soul-warming joy.
So go ahead, take that first bite. Let the crisp crust give way to the luscious chocolate, the pecans adding their buttery crunch. Share it with someone you love, or savor it quietly with a cup of tea. Because some recipes aren’t just about taste—they’re about creating moments worth remembering.
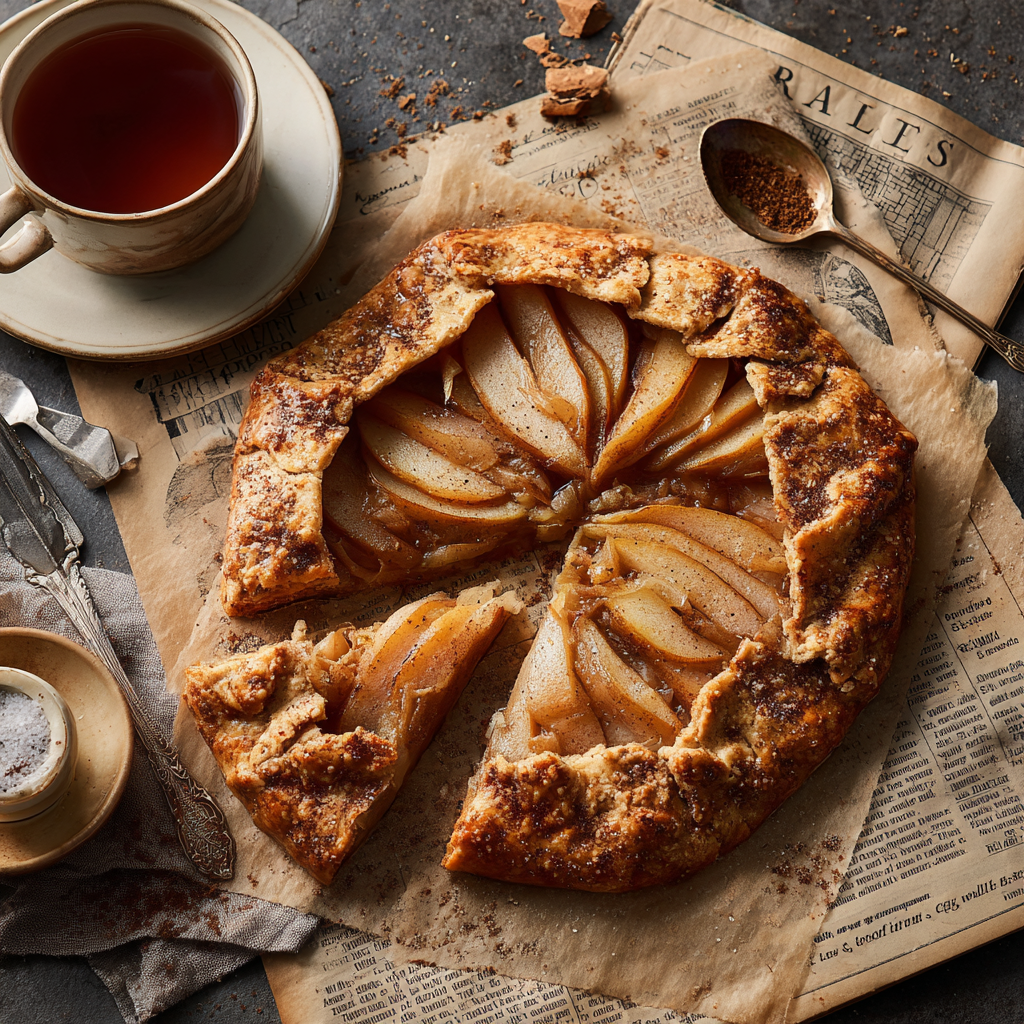
Chai-Spiced Pear Galette
Welcome to My Cozy Kitchen: Let’s Bake Magic!
Hey there, friend! Olivia here, waving from my flour-dusted countertop. Can you smell it? That intoxicating blend of caramelizing pears, cinnamon whispering secrets, and cardamom doing a happy dance? It’s Chai-Spiced Pear Galette day in my kitchen, and I’m practically buzzing with excitement to share this with you. If you’ve ever craved a dessert that feels like a warm hug on a crisp autumn day—something effortlessly beautiful but gloriously unfussy—you’ve found your match. This free-form tart is my love letter to rustic elegance: juicy pears tucked into a flaky, buttery crust, kissed with chai spices that’ll make your kitchen smell like a Parisian patisserie crossed with a spice bazaar. No fancy pastry skills required—just pure, cozy joy. Whether you’re a seasoned baker or someone who thinks “galette” sounds intimidating (spoiler: it’s not!), we’re in this together. So tie on your favorite apron, grab a mug of chai, and let’s turn simple ingredients into a showstopper that’ll have everyone begging for seconds!
The Spice Accident That Started It All
Picture this: It’s Thanksgiving 2018, and I’m frantically rummaging through my spice drawer for cinnamon. Instead, I knock over my entire chai tea blend—cardamom, cloves, pepper—all cascading onto my pear tart filling. Cue panic! But stubborn me refused to waste those gorgeous pears, so I rolled with it. Best. Mistake. Ever. That accidental galette became the star of the table—my grandma, who’d never tried cardamom in desserts, took two slices and whispered, “This tastes like my childhood in Delhi.” Turns out, those warm, complex spices elevated humble pears into something mystical. Now, every time I bake this galette, I think of her wide-eyed delight and how beauty often blooms from happy little kitchen disasters. It’s become my go-to for potlucks, rainy Sundays, and “I need comfort” evenings—a delicious reminder that imperfection is where magic happens.
Your Grocery List: Simple Stars, Big Flavor
Gather these goodies! Pro tip: Use ripe-but-firm pears (like Bosc or Anjou)—they hold shape while getting jammy. Cold butter is non-negotiable for that flaky crust!
- All-purpose flour (1 1/4 cups): The foundation! For a tender crust, spoon flour into your cup—don’t pack it. Gluten-free? Swap 1:1 with GF flour blend.
- Cold unsalted butter (1/2 cup, cubed): Freeze it for 10 mins first! Butter chunks create steam pockets = flaky layers. Salted butter works in a pinch—just skip added salt.
- Ice water (3-4 tbsp): Add 1 tbsp at a time. Too much water = tough crust; stop when dough looks shaggy but holds when squeezed.
- Ripe pears (3): Thin slices = even cooking. No pears? Apples or quince are fabulous too!
- Brown sugar (1/4 cup): Deep molasses notes > white sugar. Maple sugar works for refined-sugar-free vibes.
- Chai spices (cinnamon, ginger, cardamom, cloves, black pepper): Freshly ground cardamom pods? Chef’s kiss! No cloves? A pinch of nutmeg fills in.
- Egg (for wash): Makes crust golden. Vegan? Use almond milk + maple syrup.
- Coarse sugar & honey: Sparkle and shine! Turbinado sugar adds crunch; local honey leans into autumn.
Let’s Build Your Masterpiece: Step-by-Step
Ready? Channel your inner artist—galettes thrive on rustic charm!
- Make the dough: Pulse flour and salt in a food processor. Add butter; pulse until pea-sized crumbs form. Chef hack: Grate frozen butter for faster blending! Drizzle ice water, 1 tbsp at a time, pulsing just until dough clumps when pressed. Turn onto plastic wrap, shape into a disc, and chill 30 mins. Why chill? Relaxed gluten = tender crust.
- Prep pears: Toss slices with brown sugar, flour, vanilla, and spices. Insider tip: Let this sit 10 mins—sugar draws out juices, creating a luscious syrup!
- Roll & fill: On floured parchment, roll dough into a ~12” circle (no ruler needed—embrace wobbles!). Pile pears in center, leaving a 2” border. Fold edges over filling, pleating as you go. Secret: Overlap slices slightly—they shrink while baking!
- Bake to glory: Brush crust with beaten egg, sprinkle with coarse sugar. Bake at 400°F (200°C) for 35-40 mins until crust is golden and pears bubble. Watch for steam pockets—that’s flakiness happening! If edges brown too fast, tent with foil.
Pro move: Slide parchment onto a baking sheet—no messy transfers!
Plating: Easy Elegance
Let the galette cool 15 mins—those pear juices need to thicken! Drizzle generously with warm honey or maple syrup. Slice into wedges and serve slightly warm with a cloud of freshly whipped cream or melting vanilla ice cream. For brunch? Pair with masala chai. Presentation tip: Scatter edible flowers or candied ginger on top—it’s Insta-worthy with zero effort!
The Art of the Rustic Crust – Why Imperfection is Perfection
There’s something magical about a galette’s crust—it doesn’t demand precision, yet it always delivers. Unlike a fussy pie that requires crimping and lattice work, a galette thrives on its free-form beauty. If your edges are uneven or your folds are messy, congratulations—you’ve nailed it!
Why a Galette Crust is Forgiving (and Flaky)
The secret to this crust lies in two things: cold butter and minimal handling. When cold butter melts in the oven, it creates steam pockets, resulting in those irresistible flaky layers. Overworking the dough? That’s the enemy. The second the dough holds together, stop mixing—those visible butter bits are your golden ticket to texture heaven.
Troubleshooting Common Crust Woes
-
Too crumbly? You might need a touch more ice water—just a teaspoon at a time.
-
Too sticky? Dust with flour, but don’t overdo it—tough crusts happen when there’s too much flour.
-
Shrinks while baking? Chill the dough longer (up to an hour) to relax the gluten.
Flavor Boosters for Your Crust
Want to take it up a notch? Try these twists:
-
Brown butter crust – Cook butter until nutty before chilling and using.
-
Spiced sugar sprinkle – Mix coarse sugar with a pinch of cinnamon before dusting the crust.
-
Cheesy edge – Fold grated Parmesan into the dough for a savory-sweet hybrid.
The best part? No one will notice if your galette isn’t a perfect circle—they’ll be too busy devouring it.
The Filling – Pears, Spices, and Endless Variations
Pears are the quiet stars of this galette—they caramelize beautifully but hold their shape, unlike apples that can turn mushy. But the real magic? The chai spice blend. It’s not just cinnamon and sugar—it’s an orchestra of warmth.
Choosing the Right Pears
-
Bosc pears – Firm and slightly grainy, they hold up best.
-
Anjou pears – Sweeter and juicier, but still sturdy.
-
Avoid Bartletts – Too soft when baked (save them for eating fresh).
The Chai Spice Breakdown
Each spice plays a role:
-
Cinnamon – The comforting base note.
-
Cardamom – Floral and citrusy (grind fresh pods if possible).
-
Ginger – A peppery kick.
-
Cloves – Deep, earthy sweetness (use sparingly—they’re potent!).
-
Black pepper – The surprise star, adding a subtle heat.
Beyond Pears: Filling Swaps
-
Apples + orange zest – A bright twist.
-
Stone fruits – Peaches or plums in summer (reduce sugar—they’re sweeter).
-
Savory-sweet – Caramelized onions + pears + blue cheese.
Pro tip: Toss fruit with a splash of bourbon or rum for extra depth.
Baking, Serving, and Storing Like a Pro
The Golden Rules of Baking
-
Hot oven (400°F/200°C) – Ensures a crisp bottom.
-
Bake on parchment paper – No sticking, easy cleanup.
-
Egg wash = shine – For extra sparkle, sprinkle turbinado sugar before baking.
How to Know It’s Done
-
Juices bubble thickly – Not watery.
-
Crust is deep golden – Pale crust = underbaked.
-
Bottom sounds hollow – Tap lightly—if it’s firm, it’s ready.
Serving Ideas
-
Warm with ice cream – The classic.
-
With whipped mascarpone – Adds tangy richness.
-
Drizzled with salted caramel – Because why not?
Storing & Reheating
-
Room temp (2 days) – Cover loosely with foil.
-
Freeze unbaked – Wrap tightly, bake from frozen (+10 mins).
-
Revive leftovers – Warm in a 350°F oven for 5 minutes.
Mix It Up: Your Galette, Your Rules
- Savory-Sweet Twist: Add crumbled blue cheese or goat cheese to pears before baking—salty tang meets spicy-sweet!
- Nutty Crunch: Sprinkle toasted pecans or pistachios over filling pre-bake.
- Vegan Delight: Use coconut oil in crust + flax egg wash. Skip honey—maple syrup shines!
- Spice Explorer: Swap chai blend for pumpkin spice or add orange zest.
- Mini Galettes: Divide dough into 4 small rounds—perfect for single servings!
Olivia’s Extra Scoop: From Messy Apron to Your Table
This recipe’s evolved like a good friendship—started simple, got bolder with time! Early versions had timid spice levels; now I double the black pepper for that addictive warmth. Confession: I once forgot the flour in the filling (oops!), resulting in a juicy flood. Salvaged it with a slotted spoon—lesson learned! Now I keep filling flour front-and-center. Funny how this “fancy” tart became my stress-buster—when life feels chaotic, folding that buttery crust is therapy. Pro tip: Freeze unbaked galettes! Wrap tightly in plastic; bake straight from frozen (add 10 mins). Perfect for surprise guests or Tuesday treat-yo-self moments.
Your Questions, Answered!
Q: My crust tore while folding! Help?
A: No sweat—patch it like a quilt! Wet your finger, dab torn spots, press dough scraps on top. Rustic charm covers all sins.
Q: Filling’s too runny after baking.
A: Let it rest 20+ mins—juices thicken as it cools. Next time, add 1 extra tbsp flour to filling or drain excess liquid pre-bake.
Q: Can I use store-bought crust?
A: Absolutely! Unroll refrigerated pie dough on parchment. Homemade tastes better, but convenience wins some days!
Q: Spices too strong?
A: Start with half the spices next time. Black pepper can be divisive—reduce to 1/8 tsp or omit.

Chai-Spiced Pear Galette
- Total Time: 1 hr 30 mins
Description
Golden, flaky, and bursting with warm spice—this rustic galette is your shortcut to baking magic without the fuss of perfect pie crusts. Juicy pears cozy up in a buttery shell kissed with chai spices, making it the ultimate autumn dessert (or breakfast treat, no judgment!). Grab your apron and let’s turn simple ingredients into a sweet showstopper.
Ingredients
-
1 ¼ cups all-purpose flour
-
½ cup cold unsalted butter, cubed
-
3–4 tbsp ice water
-
3 ripe pears (Bosc or Anjou, thinly sliced)
-
¼ cup brown sugar
-
1 tsp chai spice mix (cinnamon, ginger, cardamom, cloves, black pepper)
-
1 tbsp flour (for filling)
-
1 egg (for wash)
-
1 tbsp coarse sugar
-
Honey or maple syrup, for drizzle
Tip: Freeze butter cubes for 10 minutes—flakier crust guaranteed!
Instructions
-
Make the dough: Blend flour, salt, and butter until crumbly. Add ice water gradually until dough clumps. Wrap, chill 30 mins.
-
Prep pears: Toss slices with brown sugar, spices, and flour. Rest 10 mins to release juices.
-
Roll & fill: Roll dough into a rough 12” circle. Layer pears in center, leaving 2” border. Fold edges inward, pleating naturally.
-
Bake: Brush crust with egg wash, sprinkle coarse sugar. Bake at 400°F (200°C) for 35–40 mins until golden and bubbling.
-
Finish: Cool 15 mins, drizzle honey or maple syrup. Serve with whipped cream or ice cream.
Rustic charm = perfection. Don’t stress about neat edges!
Notes
Double the recipe, freeze one unbaked galette, and bake straight from frozen (+10 mins). Comfort on demand!
- Prep Time: 20 mins
- Cook Time: 35–40 mins
Nutrition
- Calories: 300 cal Per slice
- Fat: 15g
- Carbohydrates: 40g
- Protein: 3g
Nutritional Nibbles (Per Serving)
Calories: ~300 | Protein: 3g | Fat: 15g | Carbs: 40g
Note: Values are estimates. Using less sugar or vegan swaps adjusts counts.
Final Thoughts: Why This Galette is More Than a Dessert
This chai-spiced pear galette isn’t just a recipe—it’s a mindset. It’s about embracing imperfections, playing with flavors, and finding joy in the process. Whether you’re baking for a crowd or just for yourself, it’s a reminder that the best things in life are often the simplest.
So go ahead—make it your own. Burn the edges a little? Call it “artisanal.” Spill the filling? “Deconstructed elegance.” At the end of the day, it’s all about that first bite: buttery, spicy, sweet, and utterly unforgettable.

Cranberry-Apple Slab Pie
Welcome to My Cozy Kitchen, Pie Lovers!
Hey there, friend! Olivia here, apron dusted with flour and heart full of excitement. Can you smell that? It’s the warm, buttery perfume of nostalgia mixed with tart cranberries and sweet apples—your kitchen’s about to become the heart of every gathering. If you’ve ever stared down a holiday crowd and thought, “How do I feed everyone without losing my mind?”, this Cranberry-Apple Slab Pie is your golden ticket. Forget fussy round pies—this is a big, beautiful rectangle of rustic joy, baked on a simple sheet pan and sliced into squares like a hug on a plate. It’s got that perfect sweet-tart balance, a crackly sugar-dusted crust, and enough servings to make your squad swoon. Best part? We’re keeping it real—no pastry degrees required. Whether you’re a newbie or a seasoned spoon-licker, we’ll walk through this together, step by step, with plenty of chef secrets and giggles along the way. Ready to bake memories? Let’s dive in!
The Pie That Started a Thanksgiving Tradition
Picture this: my tiny Brooklyn apartment, Thanksgiving 2018. I’d ambitiously invited 12 friends, only to realize my oven was the size of a shoebox. Panic set in—how would I bake dessert for everyone? Then, I remembered my grandma’s apple slab pie, scribbled on a notecard. I swapped in cranberries for color and zing, rolled the crust straight onto a baking sheet, and held my breath. When it emerged, golden and bubbling, my friend Marco (a self-proclaimed “pie skeptic”) took one bite and shouted, “This is the MVP of desserts!”. We ate it warm, standing shoulder-to-shoulder in the kitchen, forks clinking. No fancy plating, just pure, sticky-fingered joy. That pie became our yearly ritual—a reminder that the messiest moments often taste the sweetest. Every time I bake it now, I still hear Marco’s laugh and feel that cozy chaos. Food isn’t just fuel; it’s the glue that holds our favorite stories together.
Your Grocery List: Simple Stars, Big Flavor
Gather these goodies! Pro tip: use what you have—I’ll share swaps for every ingredient. Measurements matter, but flexibility is your friend.
For the Filling
- 4 cups peeled, sliced apples (Granny Smith or Honeycrisp) – Granny Smith brings tangy structure, Honeycrisp adds honeyed softness. Swap: Try firm pears or a mix!
- 2 cups fresh or frozen cranberries – Frozen work great year-round! No need to thaw. Chef insight: Their pucker cuts through sweetness—don’t skip!
- 3/4 cup sugar – Balances tartness. Swap: Coconut sugar for caramel notes.
- 1/4 cup brown sugar – Adds depth. Tip: Pack it tight in your measuring cup!
- 1/4 cup flour – Thickens juices. Swap: Cornstarch or tapioca flour for gluten-free.
- 1 tsp cinnamon + 1/4 tsp nutmeg – Warm spice magic. Chef hack: Grate fresh nutmeg—it’s life-changing!
- 1 tbsp lemon juice – Brightens everything. No lemons? Use apple cider vinegar.
- Pinch of salt – Makes flavors pop! Sea salt or kosher both work.
For the Crust
- 2 refrigerated pie crusts – Total time-saver! Swap: Homemade crust if you’re feeling fancy (I’ll cheer you on!).
- 1 egg + 1 tbsp milk (for egg wash) – Creates that glossy, golden top. Vegan? Use almond milk + maple syrup.
- Coarse sugar for sprinkling – Optional but oh-so-pretty. Tip: Turbinado sugar adds crunch!
Let’s Bake! Your Foolproof Blueprint
Follow these steps—I’ve tucked in pro hacks to keep things smooth. Remember: imperfect pies taste best!
- Preheat Oven to 400°F (200°C) – Chef secret: Slide a baking sheet onto the lowest rack while preheating—it’ll catch drips and prevent a smoky kitchen!
- Mix the Filling – In a large bowl, combine apples, cranberries, both sugars, flour, spices, lemon juice, and salt. Toss gently with your hands (clean ones, please!). Hack: Let it sit 10 minutes—the sugar draws out juices for a saucier pie!
- Assemble the Pie – Unroll one crust onto a 9×13-inch rimmed baking sheet. Press it into corners (it’ll shrink—just nudge it back!). Add filling. Top with second crust or weave a lattice (my fave—it’s easier than it looks!). Crimp edges with a fork. Hot tip: If the dough tears, patch it with scraps + a dab of water!
- Bake – Whisk egg + milk, brush over crust. Sprinkle sugar. Cut 4-5 slits in the top (steam escape routes!). Bake 35-45 minutes until golden and bubbly. Watchdog move: Shield edges with foil at 25 minutes if they brown too fast!
- Cool & Slice – Let it rest 30 minutes (this prevents a fruit lava explosion!). Cut into squares with a sharp knife. Bonus: Wipe knife between cuts for clean edges.
Serving Up the Cozy
This pie shines brightest when served family-style. Slide the whole baking sheet onto a rustic wooden board (checkered towel optional but adorable!). Let guests grab squares with their hands—no forks needed! For extra magic, top warm pieces with a scoop of vanilla ice cream (hello, melty bliss!) or a dollop of cinnamon-spiked whipped cream. Pair with hot mulled cider or coffee for the ultimate fall moment. Remember: stains on shirts = success stories!
The Secret to Perfect Pie Crust: Butter vs. Shortening vs. Lard
Nothing makes or breaks a slab pie like the crust. Should you use butter for flavor, shortening for flakiness, or lard for tradition? Let’s break it down.
Butter: The Flavor King
-
Pros: Rich, golden, and unmistakably delicious. Butter’s water content creates steam pockets, yielding a tender, layered crust.
-
Cons: Can be trickier to handle—softens quickly, leading to tough dough if overworked.
-
Pro Tip: Freeze butter, then grate it into flour for even distribution without overmixing.
Shortening: The Flaky Contender
-
Pros: Higher melting point = easier handling and ultra-flaky layers. No browning, so crust stays pale and crisp.
-
Cons: Lacks buttery depth. Some brands contain trans fats (opt for non-hydrogenated!).
-
Pro Tip: Use a 50/50 butter-shortening blend for best of both worlds.
Lard: The Old-School Secret
-
Pros: Creates an unbeatably tender, slightly crumbly texture. Traditional in Southern and Amish baking.
-
Cons: Harder to find (look for leaf lard, the premium kind). Mild porky taste may surprise some.
-
Pro Tip: Chill lard until firm, then cut like butter.
Verdict: For this slab pie, butter wins for flavor, but blend in 1–2 tbsp shortening if you’re nervous about handling. And if you’re feeling adventurous? Try lard—your great-grandma would approve.
Cranberries: The Unsung Hero of Fall Baking
Why do cranberries deserve a standing ovation in this pie? Let’s geek out on these ruby gems.
Tartness Balance
Cranberries bring a necessary pucker to cut through the sweetness of apples and sugar. Without them, the pie risks being cloying.
Natural Pectin Power
Unlike apples alone, cranberries release pectin as they cook, helping the filling thicken without gloopy cornstarch clumps.
Color Drama
Those bursts of crimson against golden crust? Instagram gold. Pro tip: Toss frozen cranberries in flour before mixing—they bleed less, keeping vibrant streaks.
Health Perks (Bonus!)
-
Packed with vitamin C and antioxidants.
-
Linked to urinary tract health (thanks, proanthocyanidins!).
Fun Fact: Native Americans used cranberries in pemmican (dried meat mixes). Your pie’s ancestors were survival food!
Slab Pie vs. Traditional Pie: Why Size Matters
Why Slab Pie Rules for Crowds
-
Feeds More, Faster: One slab pie = 12–16 servings vs. 8 from a round pie.
-
No Soggy Bottoms: Thin layer of filling + more surface area = evenly baked crust.
-
Portable Perfection: Squares are picnic- and potluck-friendly—no slicing disasters.
Texture Differences
-
Filling-to-Crust Ratio: Slab pie offers more crispy edges (the best part!) per bite.
-
Fruit Behavior: Apples and cranberries cook faster in a thin layer, staying tender, not mushy.
When to Stick with Traditional Pie
-
For deep-dish fruit pies (like cherry or peach).
-
If you’re after that dramatic, towering slice aesthetic.
Verdict: Slab pie is the MVP of stress-free entertaining. Save round pies for intimate dinners.
Mix It Up! 5 Delicious Twists
This recipe is your playground. Try these riffs:
- Nutty Crunch – Add 1/2 cup toasted pecans or walnuts to the filling.
- Ginger Zing – Swap nutmeg for 1 tsp grated fresh ginger.
- Vegan Vibes – Use plant-based crust and coconut oil instead of egg wash.
- Berry Bonanza – Replace 1 cup cranberries with blackberries or raspberries.
- Savory-Sweet Edge – Add 1/4 cup sharp cheddar to the crust dough!
Olivia’s Extra Pinch of Love
Over the years, this pie has seen it all—like the time I subbed cardamom for cinnamon and my brother declared it “weirdly amazing.” Or when my niece used cookie cutters to make star-shaped vents! The crust has evolved too: sometimes I add orange zest to the dough for a sunny kick. Biggest lesson? Don’t stress the aesthetics. If your lattice looks like abstract art, own it! One year, my top crust ripped—I patched it with cranberries, and it became a “rustic fruit window.” Guests raved. So embrace the wobbly edges and juicy spills. That’s where the magic lives. Pro tip: Bake an extra for the freezer—it reheats beautifully for surprise guests!
Your Pie Queries, Solved!
Let’s tackle common hiccups—you’ve got this!
- Q: My filling is watery! What went wrong?
A: Likely under-thickened or under-baked. Next time, add 1 extra tbsp flour to filling. If it’s already baked, drain excess liquid with a spoon—it’ll still taste amazing! - Q: Can I make this ahead?
A: Absolutely! Assemble the pie (unbaked), wrap tightly, and freeze for up to 1 month. Bake straight from frozen—add 10-15 extra minutes. - Q: Bottom crust soggy? Help!
A: Two tricks: 1) Preheat that baking sheet (see Step 1!). 2) Brush the bottom crust with egg wash before adding filling—it creates a barrier! - Q: Cranberries too tart for my crew?
A: Sweeten the deal! Add an extra 1/4 cup sugar, or toss in 1/2 cup dried cherries or raisins.
Cranberry-Apple Slab Pie
- Total Time: 1 hour 5 minutes
Description
Cranberry-Apple Slab Pie
Welcome to My Cozy Kitchen, Pie Lovers!
Ingredients
For the Filling:
-
4 cups peeled, sliced apples (Granny Smith or Honeycrisp)
-
2 cups fresh or frozen cranberries
-
¾ cup sugar (or coconut sugar)
-
¼ cup brown sugar
-
¼ cup flour (or cornstarch/tapioca for gluten-free)
-
1 tsp cinnamon
-
¼ tsp nutmeg
-
1 tbsp lemon juice
-
Pinch of salt
For the Crust:
-
2 refrigerated pie crusts (or homemade if you prefer)
-
1 egg + 1 tbsp milk (for egg wash; or almond milk + maple syrup for vegan)
-
Coarse sugar for sprinkling (optional)
Instructions
-
Preheat Oven:
Preheat to 400°F (200°C). Chef secret: slide a baking sheet onto the lowest rack while preheating—it catches drips and prevents a smoky kitchen! -
Mix the Filling:
In a large bowl, combine apples, cranberries, both sugars, flour, cinnamon, nutmeg, lemon juice, and salt. Toss gently. Hack: Let it sit 10 minutes—the sugar draws out juices for a saucier pie! -
Assemble the Pie:
-
Unroll one crust onto a 9×13-inch rimmed baking sheet. Press into corners (it’ll shrink—just nudge it back!).
-
Add filling.
-
Top with the second crust, or weave a lattice (easier than it looks!).
-
Crimp edges with a fork. Tip: Patch any tears with dough scraps + water.
-
-
Egg Wash & Sugar:
Whisk egg + milk, brush over crust, sprinkle coarse sugar, and cut 4–5 slits in the top for steam. -
Bake:
Bake 35–45 minutes until golden and bubbling. Watchdog move: Shield edges with foil at 25 minutes if browning too fast! -
Cool & Slice:
Let rest 30 minutes to prevent fruit lava. Cut into squares with a sharp knife; wipe knife between cuts for clean edges.
Notes
-
Nutty Crunch: Add ½ cup toasted pecans or walnuts to the filling.
-
Ginger Zing: Swap nutmeg for 1 tsp grated fresh ginger.
-
Vegan Vibes: Use plant-based crust and coconut oil instead of egg wash.
-
Berry Bonanza: Replace 1 cup cranberries with blackberries or raspberries.
-
Savory-Sweet Edge: Add ¼ cup sharp cheddar to the crust dough!
- Prep Time: 25 mins
- Cook Time: 40 mins
Nutrition
- Calories: 260 cal Per Serving
- Fat: 10g
- Carbohydrates: 40g
- Protein: 3g
Nutritional Nibbles (Because Balance!)
Prep Time: 25 mins | Cook Time: 40 mins | Servings: 12–16 squares
Per Serving: ~260 kcal | 3g protein | 10g fat | 40g carbs
Note: Stats include crust and sugars. For lighter versions, see swaps in Ingredients!
Final Thoughts: Pie as a Love Language
This Cranberry-Apple Slab Pie isn’t just dessert—it’s a shorthand for comfort, a way to say “I made this for you” without words. Whether you’re feeding a rowdy Friendsgiving crowd or treating yourself to a midnight square (no judgment), remember:
-
Imperfections = Character. Lopsided crust? Call it “artisanal.”
-
Warmth > Perfection. Nobody remembers flawless lattices, but they’ll never forget the joy of eating pie straight from the pan.
-
Leftovers Are a Myth. (But if they happen, day-two pie for breakfast is a sacred right.)
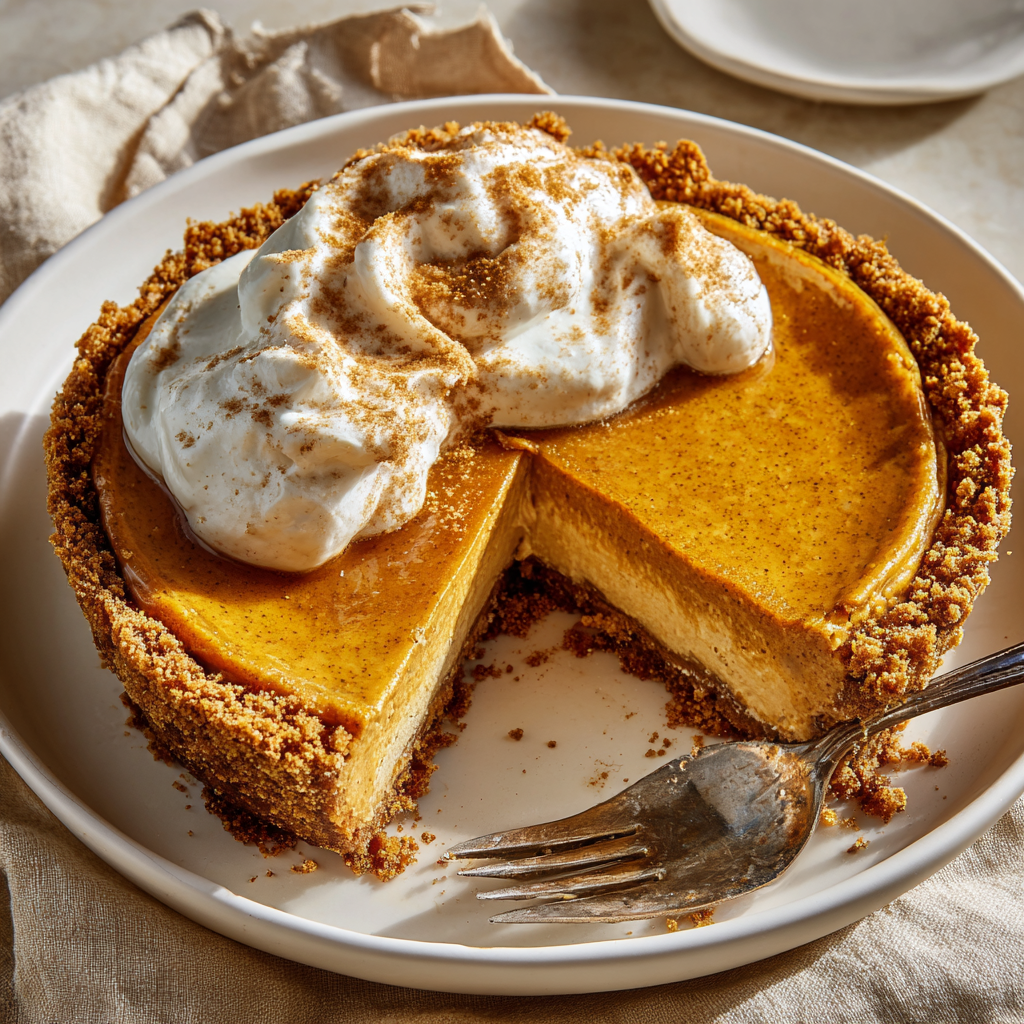
Maple Pumpkin Cheesecake Pie
The Coziest Dessert Marriage: Maple Pumpkin Cheesecake Pie
Hey there, kitchen friend! Olivia here, waving from my flour-dusted countertop. Can we just take a moment to appreciate that magical moment when autumn slams into your senses? That first whiff of woodsmoke, the crunch of leaves under your boots, and the way golden afternoon light makes everything look like it’s been dipped in honey. Now, imagine bottling that exact feeling… and turning it into a dessert. That’s what we’re doing today with this Maple Pumpkin Cheesecake Pie – your new holiday MVP.
This isn’t just pie. It’s not just cheesecake. It’s the lovechild of your favorite fall traditions – silky pumpkin spice meets lush cheesecake richness, all snuggled in a buttery graham cracker crust and kissed with real maple syrup. The kind of dessert that makes people hover around the kitchen island, shamelessly “testing” whipped cream straight from the can. Whether you’re a seasoned baker or someone who considers scrambling eggs a culinary triumph, I promise: this beauty is totally doable. We’re talking 20 minutes of active prep, friends. So tie on that apron (embrace the mess!), preheat that oven, and let’s make your kitchen smell like a Vermont cabin in October. Trust me, your people are gonna lose their minds over this one.
That One Pie That Started It All
This pie recipe? It’s got history. Picture this: my tiny first apartment kitchen circa 2015. I was hosting Friendsgiving for 12 people in a space barely big enough for two. My grand plan? Impress everyone with separate pumpkin pie AND cheesecake. Ambition, meet reality. The cheesecake cracked like the Grand Canyon, and the pumpkin pie filling decided to stage a dramatic bubble-over eruption in the oven. Cue panic, smoke alarms, and me frantically fanning the detector with a dish towel while my friends laughed (lovingly, I hope!) from the living room.
In a desperate, flour-covered Hail Mary, I scraped both fillings into one graham crust – pumpkin on the bottom, cheesecake swirled on top. I dubbed it my “Thanksgiving Salvage Surprise.” Guess what? It vanished faster than the cranberry sauce. That glorious, accidental Franken-dessert taught me the best kitchen lesson: sometimes perfection is overrated, but flavor? Never. This Maple Pumpkin Cheesecake Pie is the polished, perfected, intentionally delicious version of that happy kitchen disaster. It’s proof that the best recipes often start with a little chaos and a whole lot of heart.
Your Flavor Toolkit: Ingredients & Why They Rock
- 1 1/2 cups graham cracker crumbs: The cozy campfire hug for our pie! Use store-bought crumbs or smash 10-12 full sheets. Chef’s Swap: Digestive biscuits or gingersnaps add a spicy twist!
- 1/4 cup brown sugar: Deepens the crust’s caramel notes. Pack it tight in your measuring cup!
- 6 tbsp melted butter: The glue! Unsalted is best so we control saltiness. Pro Insight: Brown your butter for 2 minutes first – nutty magic happens!
- 8 oz cream cheese, softened: Full-fat for ultimate silkiness. MUST be room temp! Cold cream cheese = lumpy filling. Leave it out for 2 hours.
- 1 cup pumpkin purée: NOT pumpkin pie filling! Canned pure pumpkin (Libby’s is my ride-or-die). Squeeze excess water out in a paper towel for a denser texture.
- 1/2 cup pure maple syrup: Grade A Amber for balanced flavor. Please, no pancake syrup! This is the autumnal soul of our pie.
- 1/4 cup brown sugar: Doubles down on that molasses warmth alongside the maple.
- 2 large eggs: Room temp! They incorporate smoother. Crack ’em into a bowl first to avoid shell surprises.
- Spices (1/2 tsp cinnamon, 1/4 tsp nutmeg, 1/4 tsp ginger): The holy trinity! Freshly grated nutmeg? *Chef’s kiss*.
- Pinch of salt: Balances sweetness and makes flavors pop. Sea salt or kosher, please!
- 1/2 tsp vanilla extract: Pure vanilla only! It rounds out the maple beautifully.
Let’s Bake: Your Foolproof Pie Journey
- Preheat & Prep: Crank your oven to 350°F (175°C). Grab a 9-inch pie dish – glass or ceramic works best for even baking. Tip: Place a baking sheet on the lower oven rack now – it catches drips later!
- Crust Magic: In a bowl, stir graham crumbs and brown sugar. Drizzle in melted butter and mix until it resembles wet sand. Pour into your pie dish. Use a flat-bottomed cup or measuring cup to press it FIRMLY up the sides and bottom. Hack: Chill the crust for 10 minutes before baking – prevents slumping!
- Bake & Cool Crust: Bake the crust for 8-10 minutes until fragrant and slightly darker. Let it cool on a rack for 15 minutes. Watch: It burns fast! Set a timer.
- Cream Cheese Victory: Beat softened cream cheese in a large bowl with a hand mixer (or stand mixer) on medium until completely smooth and lump-free, about 1 minute. Key: Scrape the bowl sides! Hidden lumps love to hide there.
- Pumpkin Party: Add pumpkin purée, maple syrup, brown sugar, eggs, spices, salt, and vanilla. Beat on medium-low until JUST combined and creamy, about 1 minute. Critical: Don’t overbeat! Too much air causes cracks.
- Fill & Bake: Pour filling into the slightly cooled crust. Gently tap the dish on the counter 2-3 times to release air bubbles. Place on the preheated baking sheet (catches spills!). Bake 40-45 minutes. Doneness Test: The center should jiggle like set Jell-O when nudged, not look liquidy. Edges will be slightly puffed.
- The Chill Factor: Let the pie cool COMPLETELY on a wire rack (about 2 hours). Then, cover loosely and refrigerate for at least 4 hours, preferably overnight. Patience Pays: This sets the texture! Slicing warm = sad soup pie.
Showtime: Serving Your Masterpiece
This pie deserves a grand entrance! Slide a thin knife under hot water, dry it, and slice for clean cuts. Wipe the knife between slices. Plate each piece simply – its beauty speaks for itself. Now, the fun: toppings! A dollop of fresh whipped cream (sweetened with a whisper of maple syrup) is classic. For crunch, sprinkle candied pecans or toasted pumpkin seeds. Feeling extra? Drizzle a little extra maple syrup right before serving. Serve chilled straight from the fridge – that creamy, cool texture is pure bliss against the warm spices. Pair with strong coffee or a glass of ice-cold milk!
Make It Your Own: Delicious Twists
- Chocolate Swirl: Melt 1/2 cup chocolate chips with 1 tbsp cream. Dollop onto filled pie and swirl with a knife before baking.
- Ginger Snap Crust: Swap graham crumbs for gingersnap crumbs! Adds spicy zing.
- Bourbon Maple: Add 1 tbsp good bourbon to the filling with the vanilla. *Adulting approved*.
- Dairy-Free Delight: Use plant-based cream cheese and butter (Miyoko’s works great!). Ensure maple syrup is vegan.
- Individual Jars: Layer crust and filling in 8 oz mason jars. Bake 25-30 mins. Perfect for gifting!
Olivia’s Pie-Perfecting Secrets
This recipe has evolved more than my taste in kitchen aprons! The biggest game-changer? Squeezing excess water from the pumpkin purée – goodbye weepy filling! And that accidental crust-chilling hack? Lifesaver. I once tried adding orange zest… let’s just say it tasted like pumpkin cleaning product. Lesson learned! Spice blends are sacred. The funniest fail? Forgetting the sugar entirely once (blame toddler distractions). My husband bravely said it tasted “savory… interesting?” Now, I taste the filling pre-eggs. Always. This pie’s become my Thanksgiving non-negotiable. It travels surprisingly well, too – just chill it solid, wrap well, and pack in a cooler. Seeing friends’ eyes light up at that first creamy, spiced bite? That’s my happy place.
Your Pie Questions, Answered!
Q: Help! My filling cracked! What did I do wrong?
A: Don’t stress! Cracks happen, often from overmixing (too much air) or rapid cooling. Prevention: Don’t overbeat after adding eggs. Let the pie cool gradually in the oven (turn oven off, crack door open for 1 hour) before moving to the counter. Hide any cracks with whipped cream!
Q: Can I use fresh pumpkin instead of canned?
A: Absolutely! Roast a sugar pumpkin, puree the flesh, and drain it VERY well in a fine mesh strainer overnight in the fridge. Canned is more consistent, but homemade tastes amazing. Just ensure it’s thick!
Q: Why is my pie center still jiggly after 45 minutes?
A: Ovens vary! It likely needs 5-10 more minutes. The center should jiggle *slightly* but look set, not liquid. If edges brown too fast, tent loosely with foil. Use an oven thermometer – accuracy is key!
Q: Can I freeze this pie?
A: Yes! Wrap the *completely chilled* pie tightly in plastic wrap, then foil. Freeze up to 1 month. Thaw overnight in the fridge. Texture stays dreamy!

Maple Pumpkin Cheesecake Pie
- Total Time: 0 minute
Description
Imagine golden autumn light, maple leaves swirling outside, and your kitchen smelling like a Vermont cabin. This Maple Pumpkin Cheesecake Pie blends silky pumpkin spice with creamy cheesecake in a buttery graham cracker crust, kissed with real maple syrup. It’s the dessert that makes forks race and plates magically empty—perfect for Thanksgiving, Friendsgiving, or any chilly day in need of a sweet hug.
Ingredients
-
1 ½ cups graham cracker crumbs (or gingersnaps for spice)
-
¼ cup brown sugar (for crust)
-
6 tbsp melted unsalted butter
-
8 oz cream cheese, softened
-
1 cup pumpkin purée (drained if watery)
-
½ cup pure maple syrup
-
¼ cup brown sugar (for filling)
-
2 large eggs, room temp
-
½ tsp cinnamon
-
¼ tsp nutmeg
-
¼ tsp ginger
-
Pinch of salt
-
½ tsp vanilla extract
Instructions
-
Preheat oven to 350°F (175°C). Place a baking sheet on lower rack.
-
Make Crust: Mix crumbs, ¼ cup brown sugar, and butter until like wet sand. Press firmly into a 9-inch pie dish. Chill 10 min, bake 8–10 min. Cool slightly.
-
Filling: Beat cream cheese smooth (scraping bowl). Add pumpkin, maple syrup, ¼ cup brown sugar, eggs, spices, salt, and vanilla. Beat until just combined—don’t overmix.
-
Assemble & Bake: Pour filling into crust, tap gently to release bubbles. Bake 40–45 min until edges are set and center jiggles slightly.
-
Cool & Chill: Cool 2 hrs on rack, then refrigerate at least 4 hrs (overnight best).
Serving Magic
Serve chilled with maple-sweetened whipped cream, candied pecans, or a drizzle of warm maple syrup. Strong coffee or cold milk makes it sing.
- Prep Time: 20 min
- Cook Time: 40–45 min
Nutrition
- Calories: 330cal Per Slice
- Fat: 18g
- Carbohydrates: 35g
- Fiber: 1g
- Protein: 6g
Nutritional Notes (Approximate Per Slice)
Calories: ~330 | Protein: 6g | Fat: 18g (Saturated: 10g) | Carbohydrates: 35g | Fiber: 1g | Sugar: 25g | Sodium: 250mg
*Remember: This is a celebratory treat! Savor every cozy bite.*
Final Thoughts: Why This Pie Becomes a Tradition
Beyond its deliciousness, this recipe succeeds because it:
-
Feels special but approachable – No water baths or fancy techniques
-
Balances nostalgia and novelty – Familiar flavors with a luxurious twist
-
Gets better with time – The overnight chill allows spices to harmonize
-
Tells a story – That visible swirl pattern invites “How’d you make this?!”
Most importantly, it carries the secret ingredient every great holiday dessert needs: the permission to be imperfect. Those little cracks? Proof it’s homemade. That uneven whipped cream? Charm. After all, the best food memories aren’t about flawless execution – they’re about the joy shared around the table. Now go forth and bake (and maybe hide a slice for yourself before serving!).
Recent Posts
- Thai Shrimp Lettuce Wraps : Fresh, Flavorful & Ready in 20 Minutes

- Easy Hawaiian Pineapple Cake with Cream Cheese Frosting

- Strawberry Rhubarb Pie : A Sweet & Tangy Classic with a Flaky Crust

- Crispy Seafood Egg Rolls : Golden, Crunchy & Loaded with Flavor

- Chocolate Dump Cake : Rich, Gooey, and Amazingly Easy
