
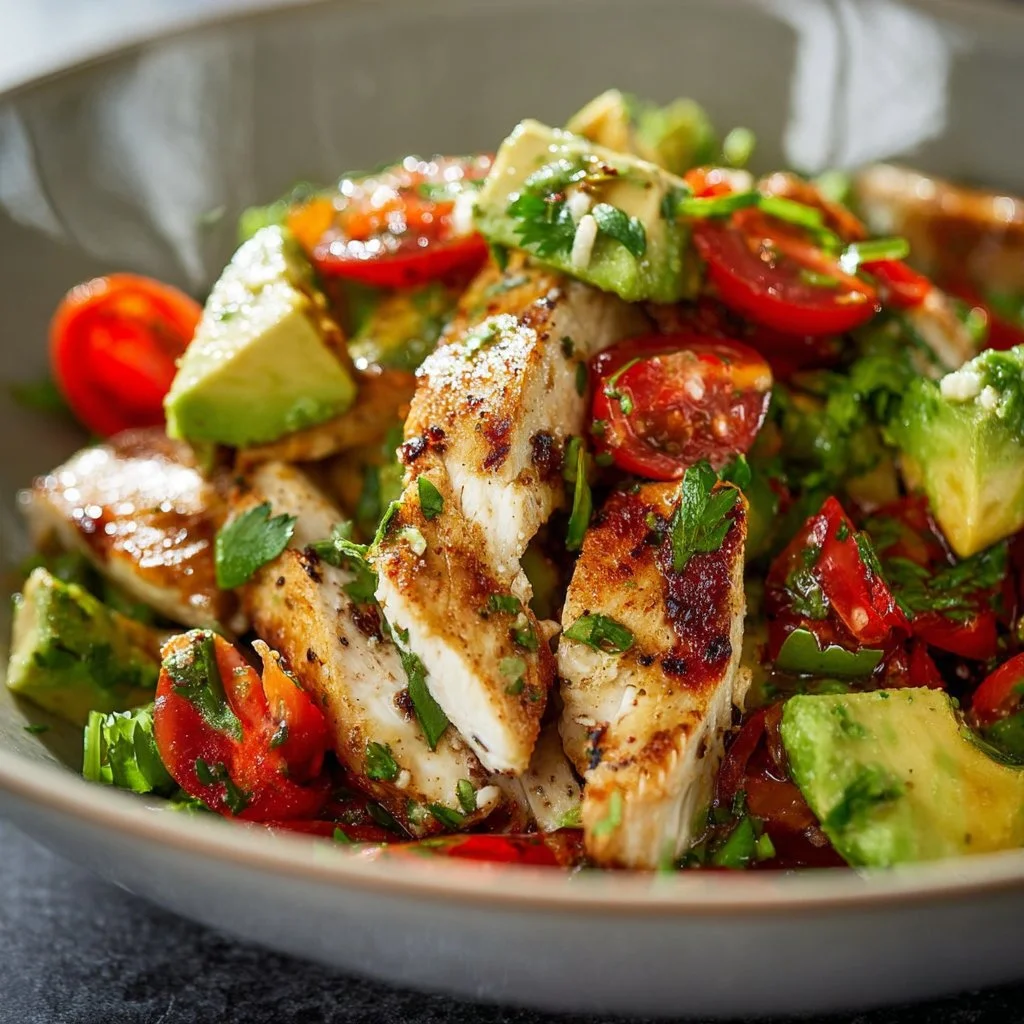
Healthy Avocado Chicken Salad
Wholesome and Hearty: Healthy Avocado Chicken Salad
Welcome to my kitchen, dear food lovers! Today, we’re diving into a dish that brings together freshness, flavor, and a dash of nostalgia — Healthy Avocado Chicken Salad. You see, this isn’t just any salad; it’s a delightful medley of creamy avocados, tender chicken, and zesty herbs that remind me of sunny afternoons spent cooking with friends and family. Whether you’re prepping a simple weeknight dinner or planning a delightful summer picnic, this salad is sure to enchant your taste buds and make your heart sing.
As someone who’s always on the lookout for perfect balance in flavors while being health-conscious, I can’t tell you how much I love this dish! It’s packed with healthy fats, lean protein, and vibrant vegetables — basically, everything you need for a nourishing meal that still feels indulgent. Plus, it’s a breeze to whip up. Just grab your ingredients, throw them together, and voilà! You have a colorful, satisfying meal ready in no time.
The beauty of this avocado chicken salad is that it’s incredibly versatile. You can enjoy it on its own, load it onto a bed of greens, or even scoop it up with some crunchy whole-grain crackers. Now, grab your apron, roll up your sleeves, and let’s take a culinary journey into the world of healthy eating that celebrates bold flavors and unites loved ones at the table!
A Bit of Nostalgia
Let me take you back in time to a sun-drenched summer afternoon in my grandmother’s kitchen. She had a knack for turning simple ingredients into magic, and her chicken salad was a staple during family gatherings. I still remember the scent of roasted chicken emanating from the oven, mixing with the freshness of her garden herbs and the rich creaminess of ripe avocados.
We’d all gather around the kitchen table, my siblings and cousins eagerly awaiting our turns to stir, taste, and share giggles as we mixed everything together. It was a blend of flavors and laughter, happiness infused into every bite. My grandmother would tell stories about her cooking adventures, all while crafting this incredible salad that would be a center-point in our family meals. Eventually, I took her traditional recipe and gave it a fresh, healthy twist to suit my lifestyle, but those cherished moments remain etched in my heart, inspiring me to recreate this deliciousness for fellow foodies.
Ingredients
Let’s dive right into the star ingredients for our Healthy Avocado Chicken Salad! Here’s what you’ll need:
-
Cooked Chicken Breast (about 2 cups, shredded)
- Chef Insight: Opt for skinless chicken breasts for a lean protein boost. You can use leftovers, rotisserie chicken from the grocery store, or even poach chicken for a fresh flavor.
-
Ripe Avocados (2 medium)
- Substitution Tip: If you’re short on avocados or looking for variety, consider mashed white beans for creaminess or Greek yogurt for tang without sacrificing nutrition.
-
Cherry Tomatoes (1 cup, halved)
- Flavor Insight: Use colorful varieties for a visually appealing salad; they pack a punch of freshness and sweetness!
-
Red Onion (1/4 cup, finely chopped)
- Chef Hack: Soak chopped onion in cold water for about 10 minutes to mellow its sharpness, making it more palatable for sensitive taste buds.
-
Fresh Cilantro (1/4 cup, roughly chopped)
- Variability: If cilantro isn’t your thing, fresh dill or parsley offers a delightful herbal touch without overpowering the dish.
-
Lime Juice (from 2 fresh limes)
- Culinary Tip: Lime juice doesn’t just add tang; it helps prevent the avocados from browning and gives a refreshing zing that ties everything together beautifully.
-
Salt and Pepper (to taste)
- Essential Reminder: Always taste! Start with a pinch and adjust based on your preferences.
-
Olive Oil (2 tablespoons, optional)
- Health Twist: Using high-quality extra virgin olive oil enhances flavor while adding heart-healthy fats. You can also experiment with avocado oil for a buttery finish!
Step-by-Step Instructions
Now that we have our ingredients ready, let’s get cooking! Follow these steps for a delightful avocado chicken salad:
-
Shred the Chicken: If you haven’t prepped your chicken yet, now’s the time! Using two forks, shred the cooked chicken breast into bite-sized pieces. This step may seem straightforward, but taking your time will ensure that the chicken is tender and easy to mix with the other ingredients.
-
Prep the Avocados: Slice the avocados in half, remove the pit, and scoop out the green goodness into a bowl. Give them a gentle mash with a fork — you want a creamy texture but still some chunks for that delicious bite!
-
Combine the Ingredients: In a large mixing bowl, add shredded chicken, mashed avocados, halved cherry tomatoes, and chopped red onion. The vibrant colors should already catch your eye! It’s important to stir gently here; we want to keep that beautiful avocado intact while blending flavors.
-
Add the Fresh Herbs: Toss in the chopped cilantro and squeeze lime juice over the mixture. The citrus will brighten up the flavors and mix beautifully with the creamy avocado. A secret tip? Squeeze the lime from different angles to get the maximum juice out!
-
Season it Right: Sprinkle salt and pepper to taste. This is where you can elevate your salad! Mixing in some garlic powder or smoked paprika can bring in new flavor dimensions. Taste as you go — remember, you’re the chef, and we want this salad just right for you.
-
Drizzle Olive Oil (Optional): If you choose to, drizzle in the olive oil at this stage to enhance the creaminess while adding that wonderful richness. Toss gently again to combine.
-
Let It Rest (Optional but Recommended): If you have a moment, let the salad sit for about 10-15 minutes before serving. This will allow all those amazing flavors to meld together, creating a harmonious dish that’ll make everyone smile.
Serving Suggestions
When it’s time to serve, get creative! For a delightful presentation, pile the avocado chicken salad into an avocado half, or serve it over a bed of fresh greens like spinach or arugula. For added crunch, scoop it up with whole-grain crackers or serve it inside a whole-wheat wrap with additional veggies for a hearty meal. You could even make mini lettuce wraps for a fun finger-food option at your next gathering!
Recipe Variations
Now let’s mix things up! Here are a few fun variations you can try within this avocado chicken salad recipe:
-
Spicy Kick: Add diced jalapeños or a pinch of cayenne pepper for a zesty kick that’ll wake up your taste buds!
-
Mediterranean Twist: Toss in some kalamata olives and feta cheese, and substitute the cilantro for fresh mint. This Greek-inspired version is refreshing and flavorful.
-
Crunchy & Nutty: Stir in some toasted walnuts or sunflower seeds for an added crunch and nutty flavor, making it a more filling dish.
-
Sweet & Savory: Add diced apples or grapes for a touch of sweetness that pairs so beautifully with the savory elements in the salad.
-
Vegan Delight: Swap chicken for chickpeas or cooked quinoa for a plant-based version while maintaining that satisfying protein punch.
Chef’s Notes
This healthy avocado chicken salad has become a staple in my home. I love how easy it is to adjust the ingredients based on what I have on hand or my mood. The original memories from my grandma’s kitchen shine through, but over the years, I’ve played with various flavors and combinations to keep it fresh and exciting. One time, I added a bit of honey and Dijon mustard to the mix, transforming the dish into a sweet-savory sensation that my friends raved about!
Remember, cooking is all about experimenting and finding what works for you, so don’t be afraid to modify this recipe as you see fit.
FAQs and Troubleshooting
1. How can I store leftovers?
Leftover avocado chicken salad can be stored in an airtight container in the refrigerator for up to 2 days. However, the avocados may brown slightly. To minimize oxidation, press plastic wrap directly onto the surface of the salad before sealing the container.
2. What if my avocado is mushy?
Mushy avocados can still be used in this recipe; just be sure to taste for ripeness as flavors may be altered. If they’re overripe, mixing in a squeeze more lime juice can help lift the flavors.
3. Can I prep this ahead of time?
You sure can! You can cook and shred the chicken, chop the veggies, and blend the dressing the night before. Just wait to mix in the avocados until you’re ready to serve to keep them fresh and vibrant.
4. Is this dish good for meal prep?
Absolutely! This salad is perfect for meal prep — just pack it in individual containers for easy grab-and-go lunches throughout the week.
Nutritional Info
A typical serving of Healthy Avocado Chicken Salad (about 1 cup) contains approximately:
- Calories: 350-400 (varies based on specific ingredients)
- Protein: 30g
- Carbohydrates: 15g
- Healthy Fats: 20g
- Fiber: 8g
And there you have it! Your kitchen is now armed with a recipe that brings flavor, health, and joy in every bite. I hope you enjoy making this Healthy Avocado Chicken Salad as much as I do. Remember, cooking is a journey best shared, so invite your loved ones into your kitchen and create those cherished memories together. Happy cooking! 🍽️
Print
Healthy Avocado Chicken Salad
- Total Time: 15 minutes
- Yield: 4 servings 1x
- Diet: Gluten-Free
Description
A delightful medley of creamy avocados, tender chicken, and zesty herbs, this Healthy Avocado Chicken Salad is perfect for a simple weeknight dinner or a refreshing summer picnic.
Ingredients
- 2 cups cooked chicken breast, shredded
- 2 medium ripe avocados
- 1 cup cherry tomatoes, halved
- 1/4 cup red onion, finely chopped
- 1/4 cup fresh cilantro, roughly chopped
- Juice of 2 fresh limes
- Salt and pepper, to taste
- 2 tablespoons olive oil (optional)
Instructions
- Shred the chicken: If you haven’t prepped your chicken yet, now’s the time! Using two forks, shred the cooked chicken breast into bite-sized pieces.
- Prep the avocados: Slice the avocados in half, remove the pit, and scoop out the green goodness into a bowl. Mash with a fork to achieve a creamy texture with some chunks.
- Combine the ingredients: In a large mixing bowl, add shredded chicken, mashed avocados, halved cherry tomatoes, and chopped red onion.
- Add the fresh herbs: Toss in the chopped cilantro and squeeze lime juice over the mixture.
- Season it right: Sprinkle salt and pepper to taste.
- Drizzle olive oil (optional): If you choose to, drizzle in the olive oil at this stage and toss gently again.
- Let it rest (optional but recommended): Allow the salad to sit for about 10-15 minutes before serving for enhanced flavors.
Notes
This salad can be stored in an airtight container in the refrigerator for up to 2 days. To minimize oxidation, press plastic wrap directly onto the surface before sealing.
- Prep Time: 15 minutes
- Cook Time: 0 minutes
- Category: Main Course
- Method: Mixing
- Cuisine: American
Nutrition
- Serving Size: 1 serving
- Calories: 375
- Sugar: 3g
- Sodium: 150mg
- Fat: 20g
- Saturated Fat: 3g
- Unsaturated Fat: 10g
- Trans Fat: 0g
- Carbohydrates: 25g
- Fiber: 8g
- Protein: 30g
- Cholesterol: 70mg
Keywords: salad, avocado, chicken, healthy, quick meal
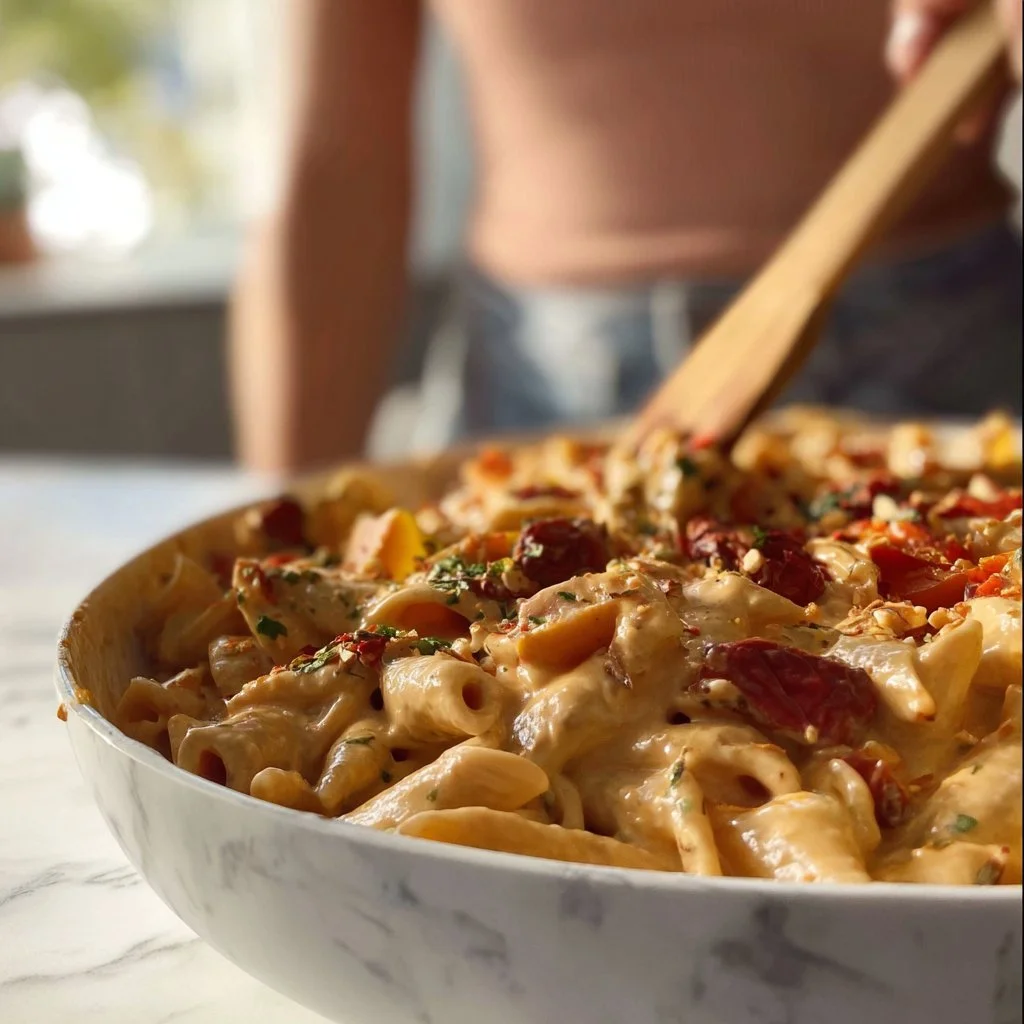
High-Protein Vegan Marry Me Pasta
High-Protein Vegan "Marry Me" Pasta: The Dish That Seals the Deal
Hello, fellow food lovers! I’m so thrilled you’ve stepped into my kitchen today. If you don’t know me yet, I’m Olivia, your friendly neighborhood kitchen enthusiast, and today we’re going to whip up something truly magical—a High-Protein Vegan "Marry Me" Pasta. Now, why the dramatic name, you ask? Well, this dish is packed with luscious flavors and hearty ingredients that leave palates swooning and hearts racing—essentially, it’s a meal that has the power to inspire declarations of love (or at least passionate compliments at the dinner table!).
Picture this: you’re cooking for that special someone, and the aroma of garlic, fresh basil, and roasted cherry tomatoes wafts through your home. As the pasta dances in the pot, you can’t help but feel that magic in the air! Trust me, I know how cooking can create romantic moments, and this dish is no exception. With its creamy texture and high-protein goodness, even the most discerning pasta lover will find it hard to resist. Whether you’re Vegan or just looking to impress, this recipe is a must-have!
So grab your apron (messy or not—I love a good splatter!), roll up those sleeves, and let’s get cooking. This High-Protein Vegan “Marry Me” Pasta is about to become your new go-to dish for cozy nights, dinner parties, or just when you need that extra dash of culinary love in your life!
Personal Story
One of my happiest kitchen memories revolves around pasta nights with my best friend, Mia. Every Friday, we transformed her tiny apartment kitchen into our very own Italian bistro, complete with Italian music and a smattering of flour everywhere (sorry, Mia’s landlord!). She had the knack for cooking that made every moment feel like a celebration, and we experimented with all sorts of flavors and ingredients.
One fateful evening, we landed on a creamy roasted tomato pasta dish that was so delicious that we actually toyed with the idea of starting a cooking blog together. We called it our “Marry Me” Pasta because we joked that it would woo anyone who tasted it! Fast forward years later, along with a few twists and adjustments, I’ve concocted this high-protein vegan version that’s not only guilt-free but bursting with flavor. The spirit of those lively kitchen gatherings still ignites me whenever I make it, reminding me that food is all about connection, love, and (of course) a whole lot of fun!
Ingredients
Let’s take a look at the stars of our show—our ingredients! Here’s what you’ll need to create your High-Protein Vegan “Marry Me” Pasta.
-
Whole Wheat Pasta (12 oz): Choose any shape you like! Whole wheat provides more fiber and protein than regular pasta. If you need a gluten-free option, go for chickpea pasta for an additional protein kick.
-
Cherry Tomatoes (2 cups): These sweet little gems caramelize beautifully in the oven. You can swap them for diced regular tomatoes or sun-dried tomatoes for a more intense flavor.
-
Garlic (6 cloves): The aromatic base of this dish! Use fresh garlic for the best taste, but feel free to simplify with garlic powder if that’s what you have on hand.
-
Coconut Milk (1 can, full-fat): This creamy delight gives the sauce its luscious texture. Unsweetened almond or cashew milk can work too; just add a tablespoon of nut butter for creaminess.
-
Nutritional Yeast (1/4 cup): This is the secret ingredient for that cheese-like flavor while also packing in the protein. If you can’t find it, you could use grated vegan cheese, but check for protein content.
-
Fresh Basil (1/2 cup, chopped): This fragrant herb brings freshness and brightness! If you’re missing it out, dried basil works in a pinch (just use about a tablespoon).
-
Lemon Juice (2 tablespoons): A splash of acidity balances the dish perfectly! If you don’t have lemon on hand, lime juice can be a delightful alternative.
-
Red Pepper Flakes (to taste): A hint of heat to kick things up! If spice isn’t your thing, feel free to skip it or use a pinch of smoked paprika instead.
-
Olive Oil (2 tablespoons): For roasting the tomatoes. Avocado oil is an excellent substitution if you want a higher smoke point.
-
Salt and Pepper (to taste): Always seasoning is key. Remember, great food starts with proper seasoning!
Step-by-Step Instructions
Now that we have our ingredients lined up, it’s time to get a little bit hands-on! Let’s break this down into easy-peasy steps.
Step 1: Roast the Tomatoes
Preheat your oven to 400°F (200°C). Spread the cherry tomatoes on a baking sheet, drizzle with 1 tablespoon of olive oil, and sprinkle a pinch of salt and pepper. Give them a gentle toss to coat. Pop them in the oven and roast for about 20-25 minutes until they burst and caramelize. Can you already smell that? Heaven!
Step 2: Boil Your Pasta
While your tomatoes are getting all cozy in the oven, bring a large pot of salted water to a boil. Add your whole wheat pasta and cook according to package directions until al dente. Remember to save about a cup of pasta water before draining — this liquid gold helps create a luscious sauce later.
Step 3: Create the Sauce
In a blender (or using an immersion blender right in the pot), combine the coconut milk, nutritional yeast, garlic, lemon juice, and remaining tablespoon of olive oil. Blitz until creamy and smooth. If you’re like me and love a garlicky kick, feel free to add an extra clove!
Step 4: Combine Everything
Once your pasta is cooked and drained, return it to the pot on low heat. Add in those glorious roasted tomatoes. Now pour the creamy sauce over the pasta and give everything a good stir. If your sauce seems too thick, add in some reserved pasta water, a little at a time, until you reach your desired consistency. It should be silky and beautiful!
Step 5: Add Greens and Season
Toss in the chopped fresh basil and red pepper flakes. This is where the magic happens, my friends! Mix thoroughly to combine, and don’t forget to taste-test. Adjust the seasoning with salt and pepper as desired.
Step 6: Serve It Up!
Plate your High-Protein Vegan “Marry Me” Pasta in generous bowls, garnish with extra basil and a dash of nutritional yeast for a touch of elegance. And voilà—you’ve created a dish that will have your guests (or that special someone) swooning for seconds!
Serving Suggestions
When it comes to plating, I love to keep it simple and rustic. Serve the pasta in large bowls with extra sprigs of fresh basil on top, perhaps a sprinkle of nutritional yeast, and a side of garlic bread or a crisp green salad dressed lightly with olive oil and lemon. This meal is perfect for a cozy dinner for two, a friendly get-together, or even a family feast. Don’t forget a nice bottle of vegan-friendly wine to make it all the more special!
Recipe Variations
Feeling adventurous? Here are some creative twists you can try with your High-Protein Vegan “Marry Me” Pasta:
-
Add Veggies: Toss in some sautéed spinach or kale for extra color and nutrition. Peas can add sweetness, while roasted bell peppers can complement those tomatoes beautifully.
-
Protein Boost: Throw in some cooked lentils or chickpeas for an even bigger protein punch and a heartier dish.
-
Creamy Dream: For a richer taste, blend in some soaked cashews when blending the sauce.
-
Different Cheeses: Use a variety of vegan cheeses to create a more complex flavor profile—think smoked gouda or herb-infused varieties.
-
Pasta Shapes: Change it up with different shapes—penne, farfalle, or even spiralized zucchini for a low-carb version!
Chef’s Notes
This recipe holds a special place in my heart, not only for the memories associated but because it has evolved over time. When I first started experimenting with vegan cooking, I had no idea how to create a creamy texture without dairy. But hey, practice makes perfect! Now, combining different plant-based ingredients has led to this delightful creation that doesn’t make you miss anything at all. And let’s be real—there’s always some kind of kitchen mishap! Do you remember that time I thought adding too much garlic would be a bad idea? Spoiler alert: it wasn’t! Embrace your culinary creativity and make your kitchen a flavorful playground.
FAQs and Troubleshooting
Q: What if my sauce is too thick?
A: No problem! Just stir in a bit of the reserved pasta water until you achieve your desired creaminess.
Q: Can I make this in advance?
A: Absolutely! The sauce can be prepared a day ahead. Just store it separately and then mix with freshly cooked pasta when you’re ready to serve!
Q: How can I store leftovers?
A: Store leftover pasta in an airtight container in the fridge for up to 3 days. Reheat with a splash of water or vegetable broth for best results.
Q: What are some good side dishes to pair with this?
A: A lovely arugula salad drizzled with balsamic dressing or some crispy garlic bread make fantastic companions to this pasta dish!
Nutritional Info (Optional)
This hearty dish boasts a significant protein boost, making it perfect for those looking for a nutritious meal without sacrificing flavor. Per serving, you can expect approximately:
- Calories: 400
- Protein: 20g
- Fat: 15g
- Carbohydrates: 55g
I hope you’re just as excited as I am to dive into this High-Protein Vegan “Marry Me” Pasta! Remember, cooking should always be about enjoyment and creativity. Gather your ingredients, invite your loved ones, and enjoy every moment in your kitchen. Who knows? You just might find your next great love story unfolding over a plate of delicious pasta! Happy cooking! 🍝❤️
Print
High-Protein Vegan ‘Marry Me’ Pasta
- Total Time: 45 minutes
- Yield: 4 servings
- Diet: Vegan
Description
A delightful high-protein vegan pasta dish that combines luscious flavors and hearty ingredients, perfect for impressing your loved ones.
Ingredients
- Whole Wheat Pasta (12 oz)
- Cherry Tomatoes (2 cups)
- Garlic (6 cloves)
- Coconut Milk (1 can, full-fat)
- Nutritional Yeast (1/4 cup)
- Fresh Basil (1/2 cup, chopped)
- Lemon Juice (2 tablespoons)
- Red Pepper Flakes (to taste)
- Olive Oil (2 tablespoons)
- Salt and Pepper (to taste)
Instructions
- Preheat your oven to 400°F (200°C). Spread the cherry tomatoes on a baking sheet, drizzle with 1 tablespoon of olive oil, and sprinkle with salt and pepper. Roast for about 20-25 minutes.
- Boil a large pot of salted water. Add the whole wheat pasta and cook according to package directions until al dente.
- Combine the coconut milk, nutritional yeast, garlic, lemon juice, and remaining tablespoon of olive oil in a blender and blitz until creamy.
- Add the roasted tomatoes to the cooked pasta, pour the creamy sauce, and stir. Use reserved pasta water if needed.
- Toss in the chopped fresh basil and red pepper flakes, adjusting seasoning as desired.
- Plate the pasta in bowls, garnish with basil and nutritional yeast, and serve.
Notes
For added protein, consider mixing in lentils or chickpeas. This dish is perfect for cozy dinner nights or entertaining guests.
- Prep Time: 15 minutes
- Cook Time: 30 minutes
- Category: Main Course
- Method: Baking
- Cuisine: Italian
Nutrition
- Serving Size: 1 serving
- Calories: 400
- Sugar: 6g
- Sodium: 400mg
- Fat: 15g
- Saturated Fat: 7g
- Unsaturated Fat: 8g
- Trans Fat: 0g
- Carbohydrates: 55g
- Fiber: 7g
- Protein: 20g
- Cholesterol: 0mg
Keywords: vegan, high-protein, pasta, Italian, comfort food, romantic dinner
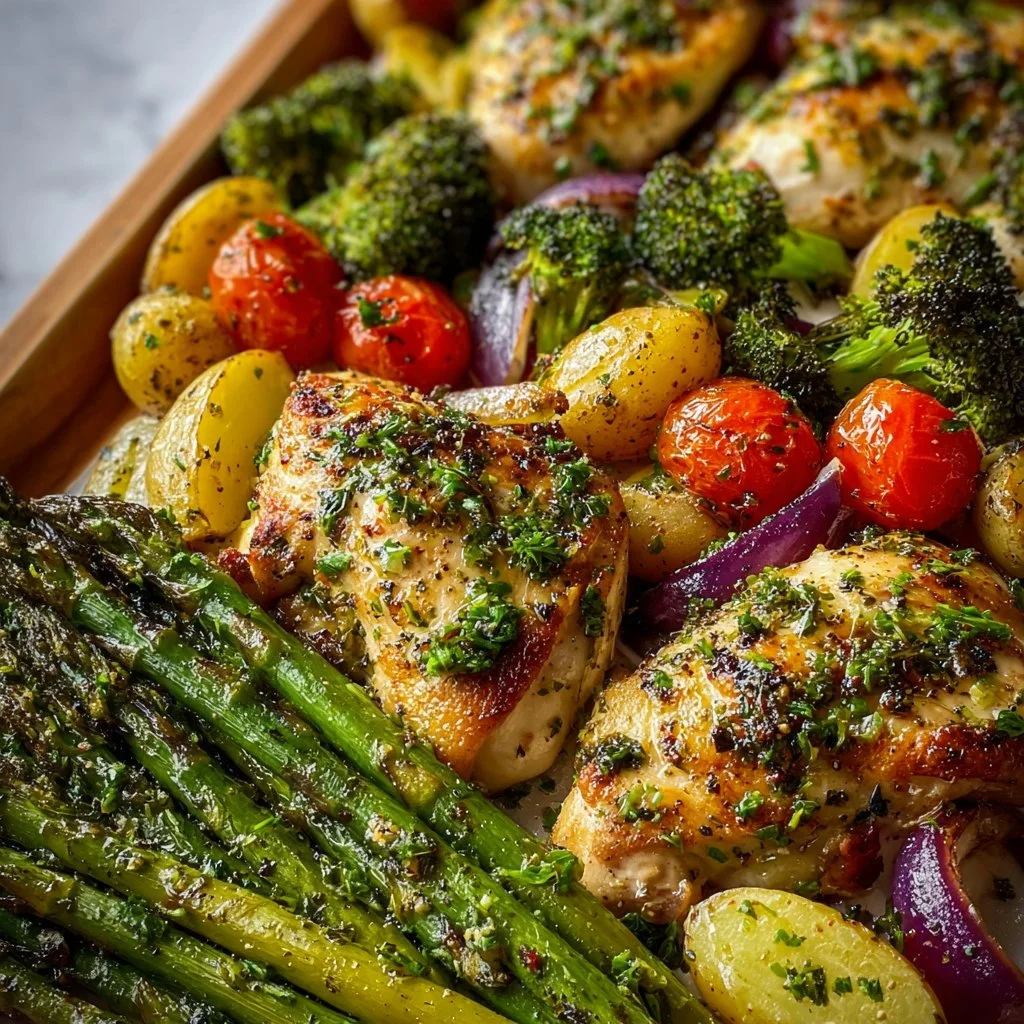
Sheet Pan Garlic Butter Chicken and Veggies
Sheet Pan Garlic Butter Chicken and Veggies: A Simple, Delicious Meal that Brings Joy to Your Table
Welcome back to my cozy kitchen! Today, I’m thrilled to share one of my all-time favorite recipes: Sheet Pan Garlic Butter Chicken and Veggies. If you’re anything like me, you love a meal that’s not only mouthwatering but also simple to prepare and clean up. And let me tell you, this dish checks all those boxes!
What’s not to love about succulent chicken thighs bathed in a rich garlic butter sauce, paired with vibrant seasonal veggies? This meal is perfect for those busy weeknights when you want something delicious without spending hours slaving over the stove. Plus, with everything cooked on a single sheet pan, you’ll have fewer dishes to wash—seriously, a win-win!
Around my kitchen table, food is not just sustenance; it’s love, laughter, and togetherness. I believe that cooking should be fun and approachable! This recipe encapsulates that spirit. You can customize it based on your family’s preferences or whatever you have on hand, making it as versatile as your imagination. So grab your apron and let’s dive into the delightful world of garlic butter chicken!
Personal Story
I still remember the first time I made this dish. It was a chilly autumn evening a few years ago, and I had invited a few friends over for dinner. I wanted to impress them without going too far out of my comfort zone. After scouring my kitchen and rummaging through my pantry, I stumbled upon chicken thighs, a couple of bags of colorful veggies, and a forgotten stick of butter in the fridge.
In that moment, I decided to whip up this Sheet Pan Garlic Butter Chicken. The intoxicating aroma of garlic wafting through my kitchen set the stage for a cozy night filled with warmth and laughter. I’ll never forget the smiles on my friends’ faces as they dug into their plates and savored the first bite. It wasn’t just a meal; it was a shared experience that brought us closer together. Ever since that night, this recipe has become a staple in my household, reminding me that the best memories are often created around the dinner table—no matter how simple the meal.
Ingredients
Here’s what you’ll need to whip up this flavorful dish:
For the Chicken:
- Chicken Thighs: Juicy and flavorful, chicken thighs are ideal for roasting because they stay moist and tender. You can substitute with chicken breasts or drumsticks if preferred, but keep in mind that cooking times may vary.
- Butter: A rich base that provides depth of flavor. For a healthier option, you can use olive oil or ghee for a dairy-free version.
For the Garlic Butter:
- Garlic: Fresh garlic is a must! It gives that delicious, aromatic flavor. If you’re in a pinch, you can use garlic powder, but the fresh stuff packs so much more punch!
- Parsley: Fresh parsley adds a pop of color and freshness. You could substitute with thyme or rosemary for a different herbal note.
For the Veggies:
- Carrots: Sweet and colorful, they add a nice crunch. You can also swap them for sweet potatoes or parsnips for a twist.
- Bell Peppers: These add vibrant color and a hint of sweetness. Feel free to use any color you prefer (red, green, or yellow!).
- Zucchini: Tender and mild, zucchini cooks quickly and absorbs flavors beautifully. You could replace this with asparagus or broccoli, depending on your preference.
Seasoning:
- Salt and Black Pepper: The essentials! Adjust to your taste.
- Paprika: Adds a warm, smoky flavor. You could also try smoked paprika for an extra kick.
Bonus:
- Lemon Juice (optional): A squeeze of lemon at the end brightens the dish and takes it to the next level.
Step-by-Step Instructions
Now that we’ve gathered all our ingredients, let’s get cooking! Follow these simple steps, and you’ll have a delicious dinner on the table in no time.
-
Preheat Your Oven:
Preheat your oven to 425°F (220°C). A hot oven is key for achieving that beautiful, crispy skin on the chicken and caramelization on the veggies. -
Prepare the Veggies:
Chop your veggies into bite-sized pieces for even cooking. This is also a great chance to involve your kids or friends in the prep! When everyone pitches in, it’s not just cooking; it becomes a fun activity. -
Make the Garlic Butter:
In a small saucepan over low heat, melt the butter. Add the minced garlic and cook for about 1-2 minutes until fragrant, making sure not to burn it. The smell will be heavenly! Once fragrant, remove from heat and mix in the chopped parsley, salt, pepper, and paprika. Set aside. -
Season the Chicken:
Pat the chicken thighs dry with paper towels—this helps achieve that lovely crispy skin. Season both sides generously with salt, pepper, and a sprinkle of paprika for that extra oomph. -
Assemble the Sheet Pan:
Line a large baking sheet with parchment paper for easy cleanup (trust me, you’ll thank me later!). Arrange the chicken thighs in the center of the sheet pan and scatter your prepared veggies around them. Drizzle everything with that melt-in-your-mouth garlic butter sauce. Use a brush or spoon to coat the chicken and veggies evenly. -
Roast:
Pop the sheet pan into the preheated oven and roast for 25-30 minutes, or until the chicken is cooked through and reaches an internal temperature of 165°F (75°C) and the veggies are tender and slightly caramelized. You might want to flip the veggies halfway through for even roasting, but it’s not strictly necessary! -
Finishing Touches:
Once cooked, remove the sheet pan from the oven and give everything a good toss. For a burst of freshness, squeeze a bit of lemon juice over the top before serving. Isn’t it amazing how such a simple touch can elevate a dish?
Serving Suggestions
When it comes to serving, the beauty of this dish lies in its rustic, hearty presentation. You can serve it family-style right from the sheet pan—let everyone dig in! For a more refined plate, you could arrange the chicken and veggies on a platter, garnish with fresh parsley, and maybe even add a lemon wedge for that extra touch of elegance. Pair it with some crusty bread or a simple green salad to round out the meal.
Recipe Variations
Feeling adventurous? Here are a few creative twists to make this dish even more exciting:
- Herb Variations: Swap out the fresh parsley for fresh dill or basil for a fresh twist.
- Add Heat: If you love spice, consider adding red pepper flakes to the garlic butter for some heat.
- Different Proteins: Switch the chicken for shrimp or fish. They will cook faster, so keep an eye on them!
- Veggie Medley: Use whatever veggies you have on hand—broccoli, cauliflower, or Brussels sprouts work wonderfully, too!
- Citrus Kick: Try adding orange zest and juice for a bright, citrusy flavor.
Chef’s Notes
One of the things I love most about this recipe is its adaptability. I’ve made it countless times, and every time it comes out delicious—sometimes by design, and other times, purely by accident! One time, I completely forgot to add the garlic butter. Can you believe it? I was in a frenzy trying to get dinner ready and it slipped my mind. Surprisingly, my friends loved the plain roasted chicken and veggies so much that they suggested I offer it as a “light option” in the future. Cooking, after all, is as much about experimenting and having fun as it is about following a recipe!
FAQs and Troubleshooting
1. My chicken skin didn’t crisp up! What happened?
Make sure your oven is fully preheated before putting in the chicken. Pat the chicken dry to remove excess moisture and ensure that the skin crisps up nicely.
2. Can I use frozen chicken?
While you can use frozen chicken, it’s best to thaw it first to ensure even cooking. Planning ahead will yield the best results!
3. What if my veggies are cooking too quickly?
If your veggies are cooking faster than the chicken, you can remove them from the oven earlier and just let the chicken finish roasting.
4. How do I store leftovers?
Store any leftovers in an airtight container in the refrigerator for up to 3 days. Reheat them in the oven for the best results or in the microwave for a quick meal.
Nutritional Info
(If you would like, I can provide an estimated nutritional breakdown, but it varies based on your specific ingredients and serving sizes!)
And there you have it! A delightful and approachable recipe for Sheet Pan Garlic Butter Chicken and Veggies that will surely bring joy to your table. Remember, cooking is not just about the food—it’s about the moments you create and the love you share. Happy cooking, friends! ✨
Print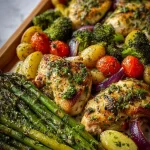
Sheet Pan Garlic Butter Chicken and Veggies
- Total Time: 45 minutes
- Yield: 4 servings 1x
- Diet: Gluten-Free
Description
A simple and delicious meal featuring succulent chicken thighs bathed in garlic butter sauce, paired with vibrant seasonal vegetables.
Ingredients
- 1.5 lbs Chicken Thighs
- 1 stick Butter
- 4 cloves Garlic, minced
- 1/4 cup Fresh Parsley, chopped
- 2 Carrots, chopped
- 2 Bell Peppers, chopped
- 1 Zucchini, chopped
- 1 tsp Salt
- 1 tsp Black Pepper
- 1 tsp Paprika
- 1 tbsp Lemon Juice (optional)
Instructions
- Preheat your oven to 425°F (220°C).
- Chop your veggies into bite-sized pieces for even cooking.
- In a small saucepan over low heat, melt the butter. Add the minced garlic and cook for about 1-2 minutes until fragrant.
- Pat the chicken thighs dry with paper towels and season both sides with salt, pepper, and paprika.
- Line a large baking sheet with parchment paper and arrange the chicken thighs in the center, scattering the veggies around them.
- Drizzle everything with the garlic butter sauce and coat evenly.
- Pop the sheet pan into the oven and roast for 25-30 minutes, until the chicken is cooked through and the veggies are tender.
- Once cooked, remove from the oven and toss everything. Squeeze lemon juice over before serving.
Notes
You can customize the recipe with your favorite vegetables or protein. Always ensure to pat the chicken dry for crispier skin.
- Prep Time: 15 minutes
- Cook Time: 30 minutes
- Category: Main Course
- Method: Baking
- Cuisine: American
Nutrition
- Serving Size: 1 serving
- Calories: 450
- Sugar: 6g
- Sodium: 420mg
- Fat: 22g
- Saturated Fat: 10g
- Unsaturated Fat: 10g
- Trans Fat: 0g
- Carbohydrates: 30g
- Fiber: 4g
- Protein: 25g
- Cholesterol: 80mg
Keywords: garlic butter chicken, sheet pan dinner, easy chicken recipe, one pan meal, quick dinner
Low Carb Cheesy Garlic Chicken Wraps
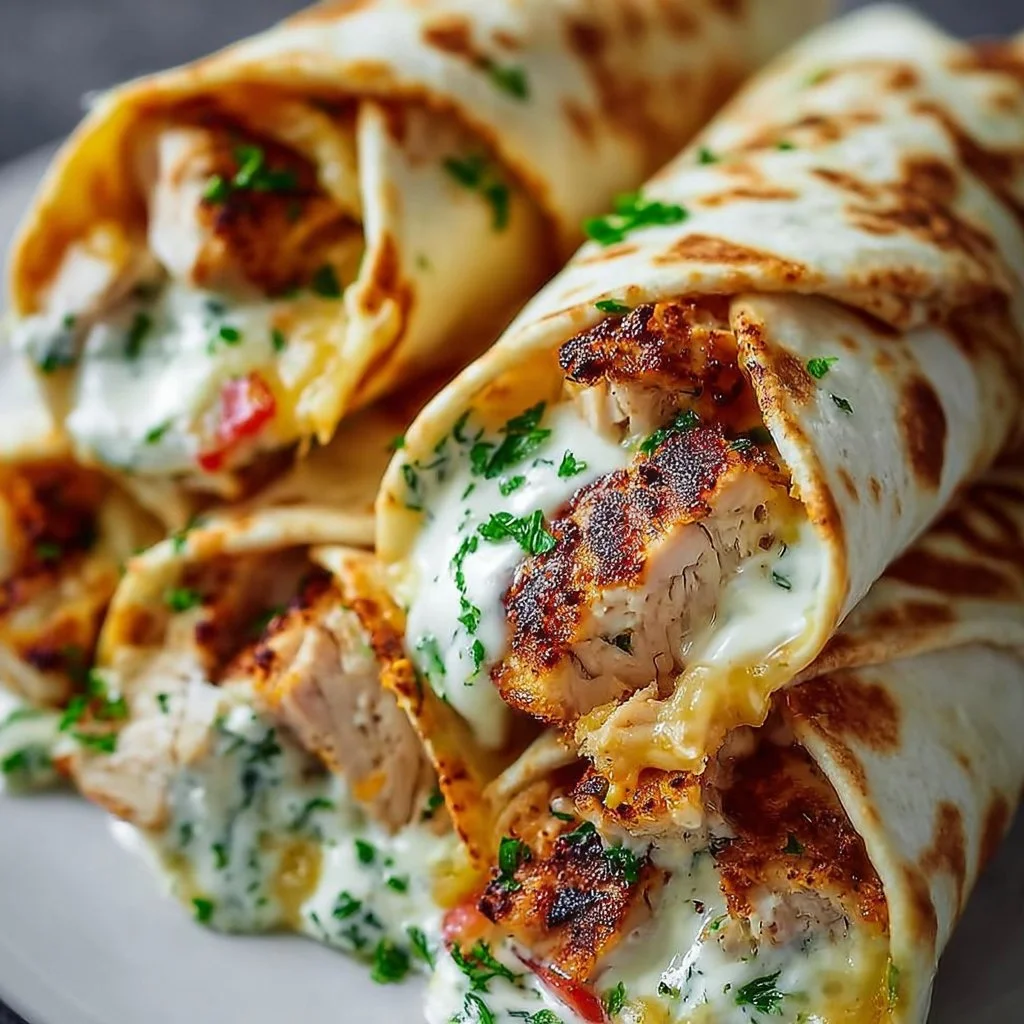
Low Carb Cheesy Garlic Chicken Wraps: A Hearty, Flavorful Delight
Hey there, food lovers! Welcome back to my cozy kitchen — where the spices are always at hand, and the oven is my trusted partner in culinary crime. Today, I’m thrilled to share a recipe that is near and dear to my heart: Low Carb Cheesy Garlic Chicken Wraps. If you’ve ever found yourself craving something delicious yet guilt-free, this dish is for you! These wraps are not just low on carbs; they’re bursting with flavors that will make your taste buds sing.
Now, I know what you’re thinking: low carb often means sacrificing flavor, but that is so not the case here! Picture tender chicken enveloped in ooey-gooey cheese, harmoniously blended with aromatic garlic and crispy vegetables, all wrapped up in a delightful low-carb tortilla. It’s comfort food at its finest, and trust me, your family and friends won’t even realize they’re indulging in a healthier option.
Cooking has always been a passion for me, and I find that sharing recipes sparks joy, brings people together, and creates unforgettable memories around the table. Whether you’re a seasoned home cook or just stepping into the kitchen, I promise that this recipe is easy enough for everyone to tackle, and it’ll make you feel like a culinary superstar!
So grab your apron, clear some space on your counter, and let’s dive into the mouthwatering world of cheesy, garlicky goodness. Here’s everything you need to know!
Personal Story
Growing up, weekends in my family were all about cooking together. My mom would whip up delicious dinners, and my siblings and I would hustle around, trying hard to help. One unforgettable Saturday, we decided to make a family favorite: cheesy chicken wraps. The kitchen was filled with laughter and the savory scent of garlic sautéing in olive oil, and I remember my mom saying that the secret ingredient was love. It’s funny how those moments stick with you, isn’t it?
Fast forward a few years, and the family dinners have become family traditions filled with recipes that keep evolving. When I first started experimenting with low carb recipes, I thought of those wraps. Instead of using traditional wraps, I substituted them with low-carb tortillas, creating a dish that honored my childhood but also aligned with a healthier lifestyle. The smiles around the table remained the same, and that’s what fuels my passion—bringing joy and comfort to others through food.
Ingredients
Here’s what you’ll need to whip up these delightful Low Carb Cheesy Garlic Chicken Wraps:
-
2 cups cooked chicken, shredded or diced
- Tip: You can use rotisserie chicken for convenience or cook your chicken breast with a bit of seasoning for added flavor.
-
1 cup shredded cheese (cheddar or mozzarella)
- Substitution: Feel free to mix and match cheeses; pepper jack adds a nice spicy kick!
-
3 cloves garlic, minced
- Insight: Fresh minced garlic adds a wonderful aroma and flavor that garlic powder just can’t match.
-
1 tablespoon olive oil
- Tip: Use extra virgin olive oil for a more robust flavor.
-
1 bell pepper, sliced (any color)
- Substitution: Zucchini or mushrooms can be a great low-carb alternative if you want something different.
-
1 small onion, sliced
- Chef’s Insight: Caramelizing the onion slightly in the olive oil before adding the garlic gives an amazing depth of flavor.
-
Low-carb tortillas (2-4, depending on how hungry you are!)
- Tip: Check labels for the carb count — be sure to choose one that’s made with almond or coconut flour.
-
Salt and pepper to taste
- Quick Note: Always season your dishes; it’s the difference between bland and oh-my-goodness flavor explosion!
-
Optional: Fresh herbs (basil or cilantro) for garnish
- Serving Tip: Fresh herbs brighten up the dish and add visual appeal, making it even more irresistible.
Step-by-Step Instructions
Now that we’ve gathered our ingredients, let’s get cooking! Follow these steps for a cozy, delicious wrap experience:
-
Heat Things Up!
In a large skillet, heat the olive oil over medium heat. Once shimmering, add the sliced onions. Sauté them for about 3–4 minutes until they’re translucent. The aroma? Simply divine. -
Garlic Goodness
Add the minced garlic to the pan with the onions. Sauté for an additional minute until fragrant. Keep your eyes on it; burnt garlic can turn bitter quickly! -
Veggie Time
Toss in the bell peppers and cook for another 3-4 minutes until they soften yet retain a bit of crunch. This balance of textures is key to your wraps! -
Chicken Love
Now, add your shredded chicken to the skillet. Stir everything together and let it heat through, about 2-3 minutes. Season with salt and pepper to taste. -
Cheesy Delight
Sprinkle the shredded cheese over the chicken mixture in the skillet, allowing it to melt slowly. Mix gently to incorporate all those gooey cheese pockets. Oh man, you’re going to want to jump right in! -
Wrap It Up
Lay your low-carb tortilla flat and spoon a generous portion of the cheesy chicken mixture in the center. Fold it over, tucking in the sides, and rolling it up tight. Repeat with the remaining tortillas. -
Final Toast
Wipe down your skillet and return it to the heat, adding a little more olive oil if needed. Place each wrap seam-side down in the skillet, pressing lightly to ensure it sticks together. Cook for 2-3 minutes on each side until golden brown and crispy. -
Slice and Serve
Once they’re perfectly toasted, remove from the skillet and let them cool slightly before slicing in half. This is the moment you’ve been waiting for!
Serving Suggestions
Now that your Low Carb Cheesy Garlic Chicken Wraps are ready, let’s talk presentation! Serve them with a side of fresh salad or slow-simmered gazpacho for a refreshing complement. Drizzle a little extra melted cheese or a dollop of sour cream on the side for dipping. Trust me; the cheesy goodness will take this wrap from good to incredible. Garnish with freshly chopped herbs to add that vibrant pop and impress your guests!
Recipe Variations
Why stop at one delicious version? Here are some fun twists you can try:
- Buffalo Chicken Wraps: Mix in some buffalo sauce for a spicy kick before adding cheese.
- Veggie-Loaded Wraps: Toss in some spinach, zucchini, or even artichokes for a heartier veggie version.
- Italian Flare: Add diced sun-dried tomatoes and Italian seasoning for a twist that screams Mediterranean.
- Creamy Avocado: Spread a layer of mashed avocado on the tortilla before adding the chicken mixture for extra creaminess.
- Tex-Mex Fun: Include taco seasoning and black beans for a south-of-the-border flair.
Chef’s Notes
Cooking is all about experimenting and loving the journey! I initially came up with this recipe as a way to recreate my childhood wraps with a healthier twist. I remember the first time I made them with low-carb tortillas — I was nervous but so eager to impress my family. Watching their faces light up as they bit into those cheesy, flavorful wraps reminded me that cooking is about connection. Plus, I’ve had many laughable kitchen fails along the way — like the time I mistook cinnamon for garlic. Not a great combo! But that’s what makes cooking fun and exciting, right?
FAQs and Troubleshooting
-
Why are my tortillas falling apart?
- Make sure you’re not overstuffing them! And a quick warm-up in the microwave (10-15 seconds) can make them more pliable.
-
Can I freeze these wraps?
- Absolutely! Just wrap them individually in foil and keep in the freezer. When you’re ready to eat, pop them in the oven until heated through.
-
How can I make it dairy-free?
- Use dairy-free cheese alternatives or nutritional yeast for a cheesy flavor without the dairy.
-
What can I do if my chicken turns out dry?
- Try using thighs instead of breasts, as they’re generally juicier. Also, cook them gently and avoid overcooking!
Nutritional Info
(Approximate per wrap)
- Calories: 350
- Protein: 30g
- Fat: 20g
- Carbohydrates: 7g
- Fiber: 4g
And there you have it, my friends! A scrumptious, comforting, and oh-so-delicious recipe that’s bound to impress. Cook from the heart, savor the process, and enjoy every bite! Remember, you’re not just making a meal; you’re creating memories. Happy cooking!
Print
Low Carb Cheesy Garlic Chicken Wraps
- Total Time: 30 minutes
- Yield: 4 servings 1x
- Diet: Low Carb
Description
These Low Carb Cheesy Garlic Chicken Wraps are bursting with flavor, featuring tender chicken, gooey cheese, and aromatic garlic wrapped in a low-carb tortilla.
Ingredients
- 2 cups cooked chicken, shredded or diced
- 1 cup shredded cheese (cheddar or mozzarella)
- 3 cloves garlic, minced
- 1 tablespoon olive oil
- 1 bell pepper, sliced (any color)
- 1 small onion, sliced
- Low-carb tortillas (2-4, depending on how hungry you are!)
- Salt and pepper to taste
- Optional: Fresh herbs (basil or cilantro) for garnish
Instructions
- Heat the olive oil in a large skillet over medium heat. Add the sliced onions and sauté for about 3–4 minutes until they’re translucent.
- Add the minced garlic to the pan and sauté for an additional minute until fragrant.
- Toss in the bell peppers and cook for another 3-4 minutes until they soften yet retain a bit of crunch.
- Add the shredded chicken to the skillet, stir everything together and let it heat through for about 2-3 minutes. Season with salt and pepper to taste.
- Sprinkle the shredded cheese over the chicken mixture, allowing it to melt slowly, and mix gently.
- Lay a low-carb tortilla flat, spoon a generous portion of the cheesy chicken mixture in the center, and fold it over tightly.
- Return the skillet to heat, add more olive oil if needed, and place each wrap seam-side down. Cook for 2-3 minutes on each side until golden brown and crispy.
- Remove the wraps from the skillet, let them cool slightly, and then slice in half.
Notes
Serve with a side of fresh salad or slow-simmered gazpacho. Drizzle melted cheese or a dollop of sour cream for dipping.
- Prep Time: 15 minutes
- Cook Time: 15 minutes
- Category: Main Course
- Method: Skillet
- Cuisine: American
Nutrition
- Serving Size: 1 wrap
- Calories: 350
- Sugar: 2g
- Sodium: 400mg
- Fat: 20g
- Saturated Fat: 8g
- Unsaturated Fat: 12g
- Trans Fat: 0g
- Carbohydrates: 7g
- Fiber: 4g
- Protein: 30g
- Cholesterol: 70mg
Keywords: low carb, chicken wraps, cheesy garlic, healthy recipe, quick meal
Lemon Garlic Chicken Meal Prep
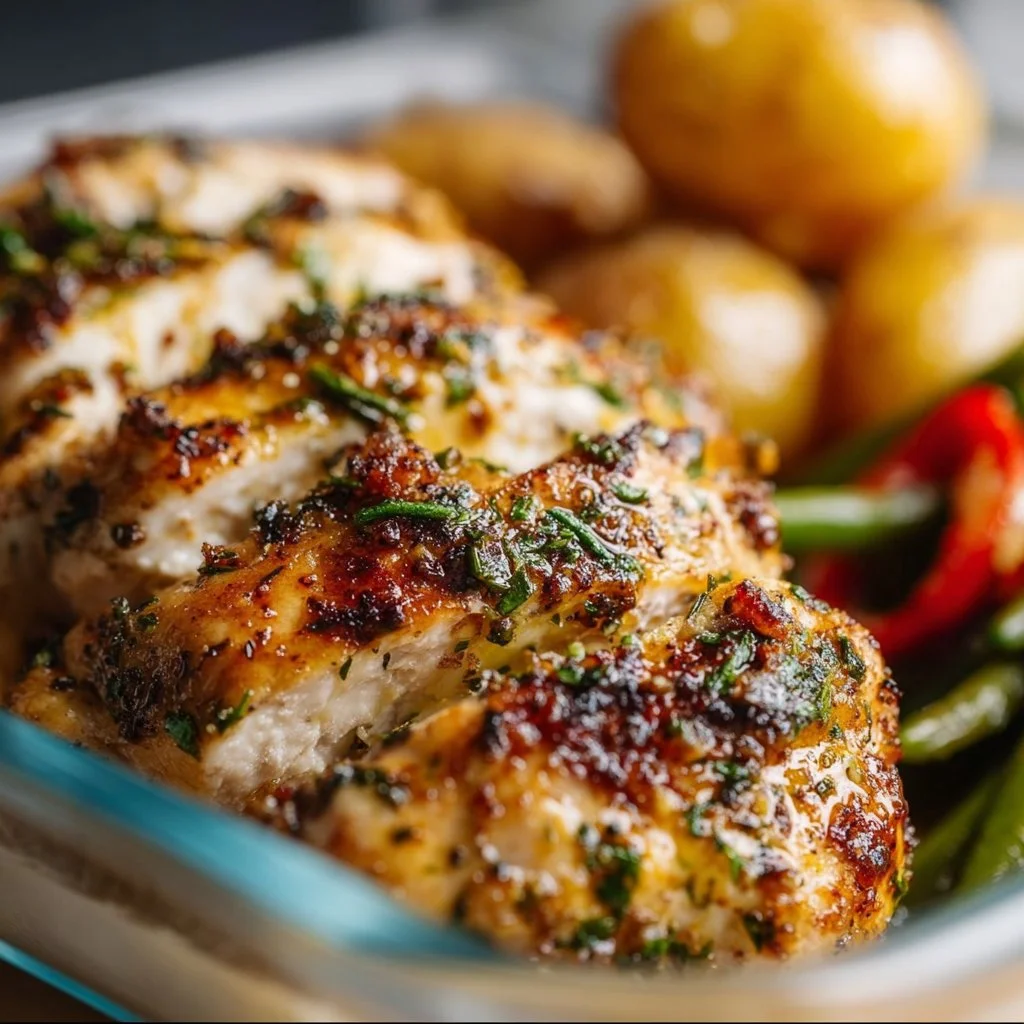
Lemon Garlic Chicken Meal Prep: A Bright and Zesty Delight!
Welcome to my kitchen, friends! Today, we’re embarking on a flavorful journey that’s all about convenience, freshness, and, of course, a burst of citrus love! If you’re someone who juggles a busy schedule but still craves delicious homemade meals, you’ll adore this Lemon Garlic Chicken Meal Prep. With the perfect balance of zesty lemon, aromatic garlic, and a hint of herbs, this dish is anything but boring—a fantastic way to elevate your weekly meal prep game.
In our fast-paced lives, it’s all too easy to resort to takeout or pre-packaged meals that lack the soul and flavor we all crave. But cooking doesn’t have to be a huge commitment! I created this recipe specifically with the busy home cook in mind. Each bite of the tender, marinated chicken paired with colorful veggies will make your week feel special, and the best part? You can whip up this entire meal in under an hour!
Imagine opening your fridge on a busy Monday evening and finding a delightful container of Lemon Garlic Chicken waiting for you. You can mix and match the sides to suit your taste or dietary needs, all while knowing you’ve already done the hard work of cooking. It’s not just a meal; it’s a way to embrace healthier habits that make you feel good! So grab your apron, and let’s get cooking!
A Bright Memory from My Kitchen
The smell of sizzling garlic and fresh lemon reminds me of my childhood summers spent at my Grandma Mary’s cozy kitchen. Each year, my family would gather at her house for a week-long feast of grilled dishes and garden-fresh salads. She was a master of simplicity and knew how to make even a single lemon shine in her recipes.
I vividly remember one weekend when my cousins and I were tasked with prep work. With our small hands, we squeezed countless lemons and peeled what seemed like an endless number of garlic cloves. The kitchen was alive with laughter and chatter as my Grandma guided us through creating her famous Lemon Garlic Chicken. It was a messy, flavor-packed adventure that brought our family together. Each bite was a celebration, filled with memories of joy and love.
This recipe pays homage to those sun-drenched days of summer, where fresh flavors and family antics filled the air. It’s not just chicken; it’s a piece of my fondest kitchen memories—and now, you can create your own moments with it!
Ingredients
Here’s what you’ll need to bring this delicious dish to life:
-
Chicken Breasts (4 pieces)
Lean, protein-packed chicken breasts are perfect for meal prep. Feel free to substitute with thighs for more richness; they won’t dry out as quickly! -
Fresh Lemons (2-3)
Fresh is best! The zing of freshly squeezed lemon juice and zest will elevate the dish. You can substitute with bottled lemon juice in a pinch, but fresh lemons provide the brightest flavor. -
Garlic (6 cloves)
A must for flavor! Mince or slice fresh garlic for a robust aromatic kick. If you’re not a fan of garlic, shallots can be a lovely alternative. -
Olive Oil (1/4 cup)
This healthy fat adds richness and helps the chicken stay juicy. Avocado oil is a great substitution if you need something with a higher smoke point. -
Fresh Herbs (parsley, thyme, or rosemary)
I love chopped fresh parsley for a pop of color. Dried herbs can work too, but fresh herbs give a vibrant lift. -
Salt and Pepper (to taste)
Essential for boosting flavors! Don’t shy away; seasoning is your friend. -
Vegetable Medley (bell peppers, zucchini, broccoli, or whatever you like! 2-3 cups chopped)
Mix and match your favorites! These are the colors and textures that’ll make your meal fun and nutritious.
These ingredients not only create a symphony of flavors but also allow for flexibility and creativity. The versatility means you can switch things around depending on what you have on hand or your taste preferences. So, let’s get into making this scrumptious Lemon Garlic Chicken!
Step-by-Step Instructions
-
Marinating the Chicken
In a large bowl, combine the juice and zest of 2-3 lemons, minced garlic, olive oil, salt, and pepper. Use a whisk to blend everything until it’s well mixed. Add your chicken breasts to the mixture, making sure they’re fully coated. Massage the marinade into the chicken for about 2-3 minutes—this step is key for flavor infusion! Cover the bowl with plastic wrap and place it in the fridge to marinate for at least 30 minutes. Tip: The longer the chicken marinates, the juicier and more flavorful it becomes. If you have time, let it sit for a few hours! -
Preparing the Veggies
While your chicken is marinating, it’s the perfect time to prep your veggies. Chop a colorful mix of your favorites—bell peppers, zucchini, and broccoli always work well. Drizzle them lightly with olive oil, and sprinkle with salt and pepper. This will enhance their natural flavors while they roast. Chef hack: You can roast the veggies simultaneously with your chicken in the oven for easy cleanup! -
Cooking the Chicken
Preheat your oven to 400°F (200°C). Place your marinated chicken breasts on a lined baking sheet. Make sure there’s space between each piece to promote even cooking. If you have leftover marinade, drizzle a little over the chicken for an extra kick. Pop it in the oven and bake for about 20-25 minutes, or until the internal temperature reaches 165°F (75°C). Tip: Flip the chicken halfway through cooking for even browning! -
Roasting the Veggies
Right after you place the chicken in the oven, add the veggie medley to another baking sheet. Roast them alongside the chicken for about 15-20 minutes or until tender and slightly caramelized. This technique adds depth and natural sweetness to the dish. Pro tip: If you want a little char, turn the oven to broil for the last few minutes! -
Let It Rest
Once cooked, remove the chicken from the oven and let it rest for 5-7 minutes before slicing. This step ensures it remains juicy and delicious. It’s a little time, but trust me, it’s worth the wait! -
Serving Up the Goodness
Now it’s time to plate! You can slice your chicken into strips or serve it whole, depending on how you like it. Pair it with your colorful roasted veggies for a vibrant presentation. Remember, we eat with our eyes first, so make it look as good as it tastes!
Serving Suggestions
Serve your Lemon Garlic Chicken Meal Prep in meal prep containers to easily grab and go. A simple side of quinoa or brown rice can elevate the meal, pairing well with the citrusy chicken. Drizzle a touch of balsamic glaze or additional lemon juice over your veggies for an extra layer of flavor. And don’t forget to sprinkle on some fresh herbs for that beautiful touch! Turning your meal into a visually appealing plate helps to make the experience more enjoyable.
Recipe Variations
Get creative with these ideas to make the recipe your own!
- Citrus Medley: Use a mixture of lemon, lime, and orange juice for a zesty twist.
- Spicy Kick: Add a pinch of crushed red pepper flakes to the marinade for an extra heat.
- Herb Swap: Experiment with different herbs like cilantro or basil for distinct flavor profiles.
- Grilled Version: Take it outdoors! Marinate and grill the chicken and veggies instead of baking.
- Low-Carb Option: Serve with a shining garlic lemon cauliflower rice instead of traditional grains.
Chef’s Notes
This Lemon Garlic Chicken recipe has undergone a delightful evolution in my kitchen over the years. It started off as a simple dinner idea but quickly transformed into a staple for gatherings and meal prep. I remember the first time I served it to friends at a picnic—the approval was instant! Their smiles and compliments encouraged me to keep creating vibrant and fresh meals and share them with the world.
Oh! How could I forget? I once attempted to impress my date with a fancy dinner using this recipe. In true “Olivia” fashion, I ended up using way too much garlic. So, tip for the future: always taste as you go! It turned into a hilarious evening filled with laughter, and while I didn’t score any romance points that night, I did earn the title of “Garlic Queen” So, that’s a win, right?
FAQs and Troubleshooting
-
Q: What if my chicken is dry?
A: Overcooking is often the culprit! Use a meat thermometer to keep an eye on the internal temperature. Remember, chicken is best at 165°F. -
Q: Can I freeze the leftovers?
A: Absolutely! After the chicken and veggies have cooled, divide them into airtight containers and freeze for up to three months. Thaw and reheat when you’re ready to enjoy! -
Q: How long can I keep it in the fridge?
A: This meal is best consumed within 4-5 days when stored in the fridge. Just reheat and enjoy! -
Q: How do I get the chicken crispy?
A: Try searing it in a hot skillet before baking or use a broiler for a few minutes at the end of cooking to achieve that crisp, golden crust!
Nutritional Info (Optional)
While I don’t usually focus on specific numbers, here’s a rough estimate per serving of Lemon Garlic Chicken with roasted vegetables:
- Calories: 350
- Protein: 30g
- Fat: 20g
- Carbohydrates: 8g
- Fiber: 3g
Remember, nutrition can vary based on ingredients and portion sizes, so adjust as needed to fit into your dietary goals!
With this Lemon Garlic Chicken Meal Prep, you’ll not only nourish your body but also indulge your taste buds, all while bringing a bit of sunshine into your kitchen. So, what are you waiting for? Get cooking, and let’s make some amazing memories together! Happy cooking! 🌟
Print
Lemon Garlic Chicken Meal Prep
- Total Time: 45 minutes
- Yield: 4 servings 1x
- Diet: Paleo
Description
A delicious and convenient meal prep recipe featuring flavorful marinated chicken breasts paired with colorful roasted veggies, perfect for busy schedules.
Ingredients
- 4 pieces Chicken Breasts
- 2–3 Fresh Lemons
- 6 cloves Garlic
- 1/4 cup Olive Oil
- Fresh Herbs (parsley, thyme, or rosemary)
- Salt and Pepper (to taste)
- 2–3 cups chopped Vegetable Medley (bell peppers, zucchini, broccoli, etc.)
Instructions
- Combine the juice and zest of 2-3 lemons, minced garlic, olive oil, salt, and pepper in a large bowl and whisk until mixed.
- Add the chicken breasts, ensuring they are coated. Massage the marinade in for 2-3 minutes, then cover and refrigerate for at least 30 minutes.
- Chop your vegetable medley, drizzle with olive oil, and sprinkle with salt and pepper.
- Preheat the oven to 400°F (200°C).
- Place marinated chicken on a lined baking sheet with space between pieces. Drizzle leftover marinade over chicken.
- Bake for 20-25 minutes until the internal temperature reaches 165°F (75°C).
- Add the veggie medley to a separate baking sheet and roast alongside chicken for 15-20 minutes.
- Let the chicken rest for 5-7 minutes before slicing and serving with colorful roasted veggies.
Notes
This recipe can be customized with different veggies and herbs to suit your taste. Enjoy with quinoa or brown rice for a complete meal.
- Prep Time: 15 minutes
- Cook Time: 30 minutes
- Category: Main Course
- Method: Baking
- Cuisine: American
Nutrition
- Serving Size: 1 serving
- Calories: 350
- Sugar: 5g
- Sodium: 400mg
- Fat: 20g
- Saturated Fat: 3g
- Unsaturated Fat: 15g
- Trans Fat: 0g
- Carbohydrates: 8g
- Fiber: 3g
- Protein: 30g
- Cholesterol: 70mg
Keywords: meal prep, lemon chicken, garlic chicken, healthy dinner, easy recipe
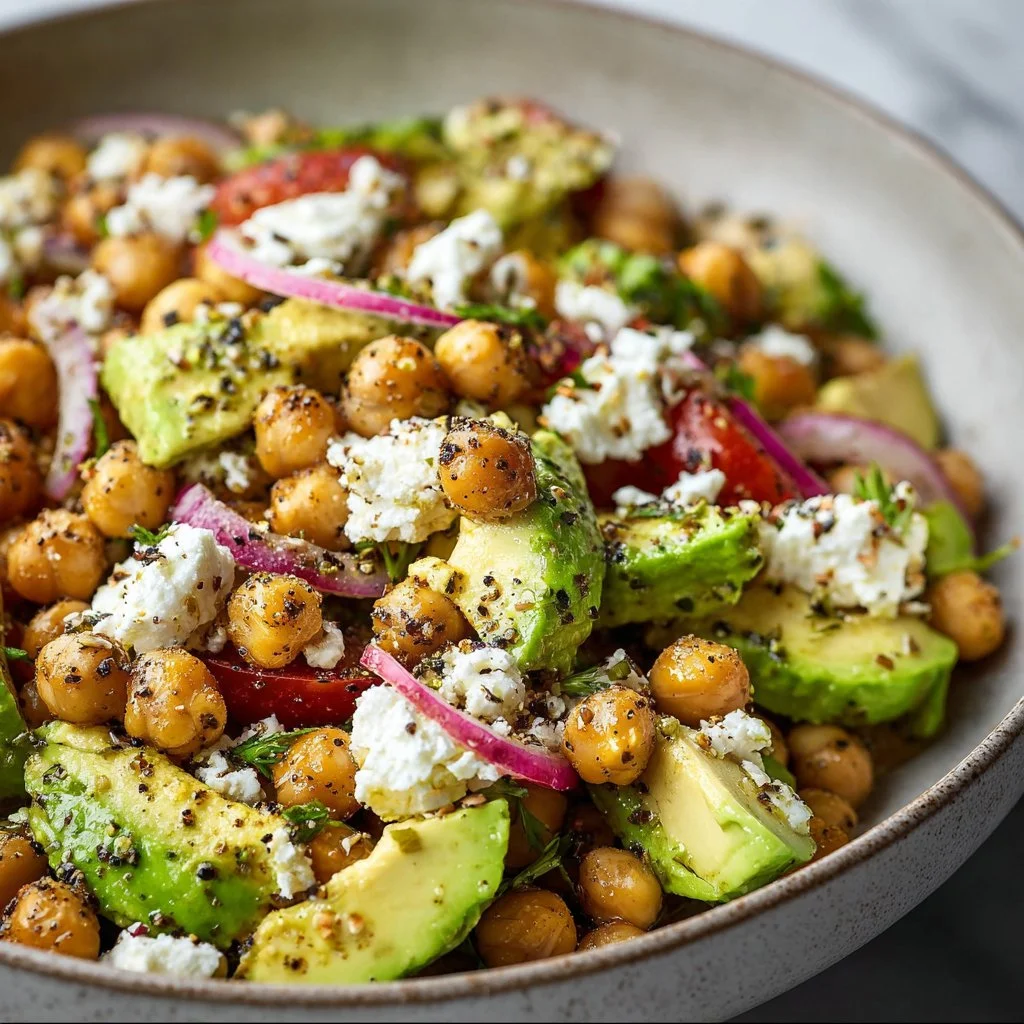
Chickpea Feta Avocado Salad
The Ultimate Chickpea Feta Avocado Salad: A Flavor-Packed Journey
Hey there, fellow food lovers! I’m excited you’ve popped into my cozy kitchen today because we’re about to whip up something absolutely delicious — a Chickpea Feta Avocado Salad that will make your taste buds sing, and your heart warm. This salad is not just an appetizer; it’s a celebration of flavor, texture, and the joy that cooking and sharing food can bring.
Imagine this: a bowl brimming with tender chickpeas, creamy avocado, and tantalizing feta cheese, all tossed together in a light and zesty dressing. Whether you’re tossing together a quick lunch, prepping for a summer picnic, or impressing friends at a dinner party, this salad has you covered! Plus, it’s super easy to make and packed full of nutrients, making it the perfect companion for any season. And don’t worry if you’re a kitchen novice; I’ll guide you step by step. So, grab your apron (I know you have a messy one just like mine!) and let’s dive right in!
But wait—it’s not just about the flavors; it’s about the connections we make over our meals. Cooking is like a love language, and with every chop, stir, and sprinkle, we create stories. Now, let me share a little backstory about why this particular dish holds a special place in my heart!
Personal Story
One sunny afternoon a few summers ago, I found myself in the kitchen with my best friend, Clara. We had just finished a long day of gardening, and our newly grown veggies were calling to be transformed into something fabulous. As we brainstormed recipes, Clara’s eyes lit up at the mention of chickpeas. “What about a salad?” she suggested.
Her enthusiasm was infectious, and before I knew it, we were tossing ideas back and forth like seasoned chefs. We chopped, mixed, and laughed, trying not to spill the cornucopia of ingredients we had laid out before us. It was a joyful mess filled with the aroma of fresh herbs and zesty dressing.
As the sun began to set, we laid our salad out on the porch, accompanied by some homemade bread and chilled lemonade. Those moments—enjoying food under the golden hour, wrapped in laughter and nostalgia—are what led me to create this Chickpea Feta Avocado Salad. It’s a dish that brings me back to those blissful summer days, and I hope it can create lovely memories for you too!
Ingredients
Gather your ingredients for this mouthwatering Chickpea Feta Avocado Salad! Here’s what you’ll need:
-
Chickpeas (2 cans, drained and rinsed)
These little legumes are not only rich in protein and fiber, but they’re also a great base for salads. If you prefer, you can use dried chickpeas — just soak and cook them beforehand! -
Fresh Avocado (1 large, diced)
Creamy and rich, avocado adds the perfect texture to this salad. If you’re not a fan of avocados or can’t find ripe ones, try substituting with diced cucumber or even some roasted sweet potatoes for a twist. -
Feta Cheese (½ cup, crumbled)
Tangy feta brings a burst of flavor. If you’re dairy-free, you can substitute with a plant-based feta or even nutritional yeast for a cheesy flavor. -
Cherry Tomatoes (1 cup, halved)
Juicy tomatoes not only add color but a sweet juiciness that complements the nuttiness of chickpeas. You can choose any variety—grape tomatoes work great too! -
Red Bell Pepper (1, diced)
Crunchy and sweet, this pepper adds a delightful crunch. Feel free to swap with any color bell pepper or even diced cucumbers for added freshness. -
Red Onion (¼ cup, finely chopped)
Onions add a fantastic zing! If raw onion is too strong for you, try soaking the chopped pieces in cold water for 10 minutes to mellow out the flavor. -
Fresh Parsley (¼ cup, chopped)
Bright and herby, parsley adds a lovely finish. If you’re not a fan, mint or cilantro can also bring a fresh twist to the dish. -
Olive Oil (3 tablespoons)
A drizzle of good olive oil ties everything together. You can opt for avocado oil or any light oil if you prefer a different flavor. -
Lemon Juice (from 1 large lemon)
Freshly squeezed lemon juice adds brightness and tang. Lime juice works as an excellent substitute if you’re in a pinch! -
Salt and Pepper (to taste)
Always essential for enhancing flavors! Feel free to experiment with your favorite spices too—paprika or chili flakes can add a delightful kick!
Step-by-Step Instructions
-
Prep Your Veggies:
Start by washing all your fresh produce. Cut the cherry tomatoes in half (or quarters if they’re large) and dice the red bell pepper into bite-sized pieces. -
Get Those Chickpeas Ready:
In a large mixing bowl, add the drained and rinsed chickpeas. If you like a creamier salad, you can lightly mash a portion of the chickpeas with a fork before mixing. This will create a lovely texture. -
Toss In Your Veggies:
Add in the avocado, cherry tomatoes, red bell pepper, and red onion. Be gentle with the avocado to keep it intact; we want those lovely chunks that lend creaminess to the salad. -
Crumbled Feta and Parsley:
Now, sprinkle the crumbled feta cheese and chopped parsley over the heap of fresh ingredients. The feta adds a wonderful salty tang that plays so well with the other flavors! -
Whisk the Dressing:
In a small bowl, whisk together the olive oil, lemon juice, salt, and pepper. You can add a pinch of dried herbs like oregano or basil for an extra flavor kick! -
Combine Everything:
Drizzle the dressing over your salad and gently toss everything together until well combined. Make sure every piece is coated nicely to ensure a burst of flavor with every bite! -
Taste and Adjust:
Here’s where you get to play chef! Taste your salad and adjust the seasoning if needed—maybe a little more salt or a splash more lemon juice—whatever your heart desires! -
Let It Chill:
If you have time, let the salad sit for about 20-30 minutes before serving. This allows the flavors to meld beautifully!
Serving Suggestions
When it comes to serving this Chickpea Feta Avocado Salad, keep it simple yet delightful! Present it in a large, vibrant bowl and let the colors shine. For an elegant touch, garnish with an extra sprig of parsley and a drizzle of olive oil right before serving. You can enjoy it as a refreshing standalone dish or as a side to grilled chicken, fish, or even a hearty grain like quinoa.
Recipe Variations
Here are a few creative twists to keep things exciting:
-
Mediterranean Twist: Add some pitted olives and sun-dried tomatoes for a more Mediterranean vibe.
-
Spicy Kick: Toss in some diced jalapeños or sprinkle some red pepper flakes for added heat.
-
Grain Booster: For a more filling option, mix in cooked quinoa or farro for a hearty salad.
-
Herb Garden: Swap the parsley for fresh dill or basil for a completely different flavor profile.
-
Nutty Crunch: Toss in a handful of toasted nuts or seeds for an extra crunch and healthy fats!
Chef’s Notes
This Chickpea Feta Avocado Salad has become one of my go-to recipes for every occasion. I love how versatile it is—you can adjust the ingredients based on what you have on hand or what’s in season. I remember the first time I attempted to make it for a potluck and accidentally added too much lemon juice. Oh boy, did it turn into a zesty disaster! But with a bit of tossing and a sprinkle of sugar, it transformed into a beloved hit!
Cooking is all about learning and experimenting. So don’t be afraid to make your version of this salad, and remember: things don’t always have to be perfect to be delicious!
FAQs and Troubleshooting
1. Why did my avocado turn brown so quickly?
Avocado browning is completely normal due to oxidation. To slow this process, make sure to toss the avocado with lemon juice immediately after dicing it; this will help preserve its vibrant green color for longer!
2. Can I make this salad ahead of time?
Yes! You can prep your veggies and chickpeas ahead of time, but I suggest adding the avocado and dressing just before serving to keep everything fresh and delicious.
3. It’s too salty—help!
If your salad ends up too salty from the feta, you can balance it by adding extra chickpeas or veggies. A small drizzle of honey can also help counteract excessive saltiness!
4. How long can I store leftovers?
The salad will typically last 2-3 days in an airtight container in the fridge. However, if the avocado begins to brown, it may not look as appealing, so try to eat it fresh!
Nutritional Info
(Per serving, makes approximately four servings)
- Calories: 300
- Protein: 10g
- Carbohydrates: 35g
- Fat: 15g
- Fiber: 9g
There you have it! A delightful Chickpea Feta Avocado Salad that’s not only packed with flavor but also a story to tell. I hope you enjoy making and sharing this recipe as much as I do. Happy cooking, and may your kitchen always be filled with warmth and laughter!
Print
Chickpea Feta Avocado Salad
- Total Time: 15 minutes
- Yield: 4 servings 1x
- Diet: Vegetarian
Description
A flavorful and nutritious Chickpea Feta Avocado Salad packed with fresh ingredients and vibrant tastes, perfect for any occasion.
Ingredients
- 2 cans Chickpeas, drained and rinsed
- 1 large Fresh Avocado, diced
- ½ cup Feta Cheese, crumbled
- 1 cup Cherry Tomatoes, halved
- 1 Red Bell Pepper, diced
- ¼ cup Red Onion, finely chopped
- ¼ cup Fresh Parsley, chopped
- 3 tablespoons Olive Oil
- Juice from 1 large Lemon
- Salt and Pepper, to taste
Instructions
- Prep your veggies: Start by washing all your fresh produce. Cut the cherry tomatoes in half (or quarters if they’re large) and dice the red bell pepper into bite-sized pieces.
- Get those chickpeas ready: In a large mixing bowl, add the drained and rinsed chickpeas. You can lightly mash a portion of the chickpeas with a fork if you like a creamier salad.
- Toss in your veggies: Add in the avocado, cherry tomatoes, red bell pepper, and red onion. Be gentle with the avocado to keep it intact.
- Sprinkle the crumbled feta cheese and chopped parsley over the heap of fresh ingredients.
- Whisk the dressing: In a small bowl, whisk together the olive oil, lemon juice, salt, and pepper.
- Combine everything: Drizzle the dressing over your salad and gently toss until well combined.
- Taste and adjust: Taste your salad and adjust the seasoning if needed.
- Let it chill: If you have time, let the salad sit for about 20-30 minutes before serving.
Notes
Enjoy it as a refreshing standalone dish or as a side to grilled chicken, fish, or hearty grains like quinoa. You can prepare the veggies and chickpeas ahead of time but add the avocado just before serving.
- Prep Time: 15 minutes
- Cook Time: 0 minutes
- Category: Salad
- Method: Mixing
- Cuisine: Mediterranean
Nutrition
- Serving Size: 1 serving
- Calories: 300
- Sugar: 3g
- Sodium: 400mg
- Fat: 15g
- Saturated Fat: 4g
- Unsaturated Fat: 8g
- Trans Fat: 0g
- Carbohydrates: 35g
- Fiber: 9g
- Protein: 10g
- Cholesterol: 20mg
Keywords: chickpea salad, avocado salad, Mediterranean salad, healthy recipe, vegetarian recipe
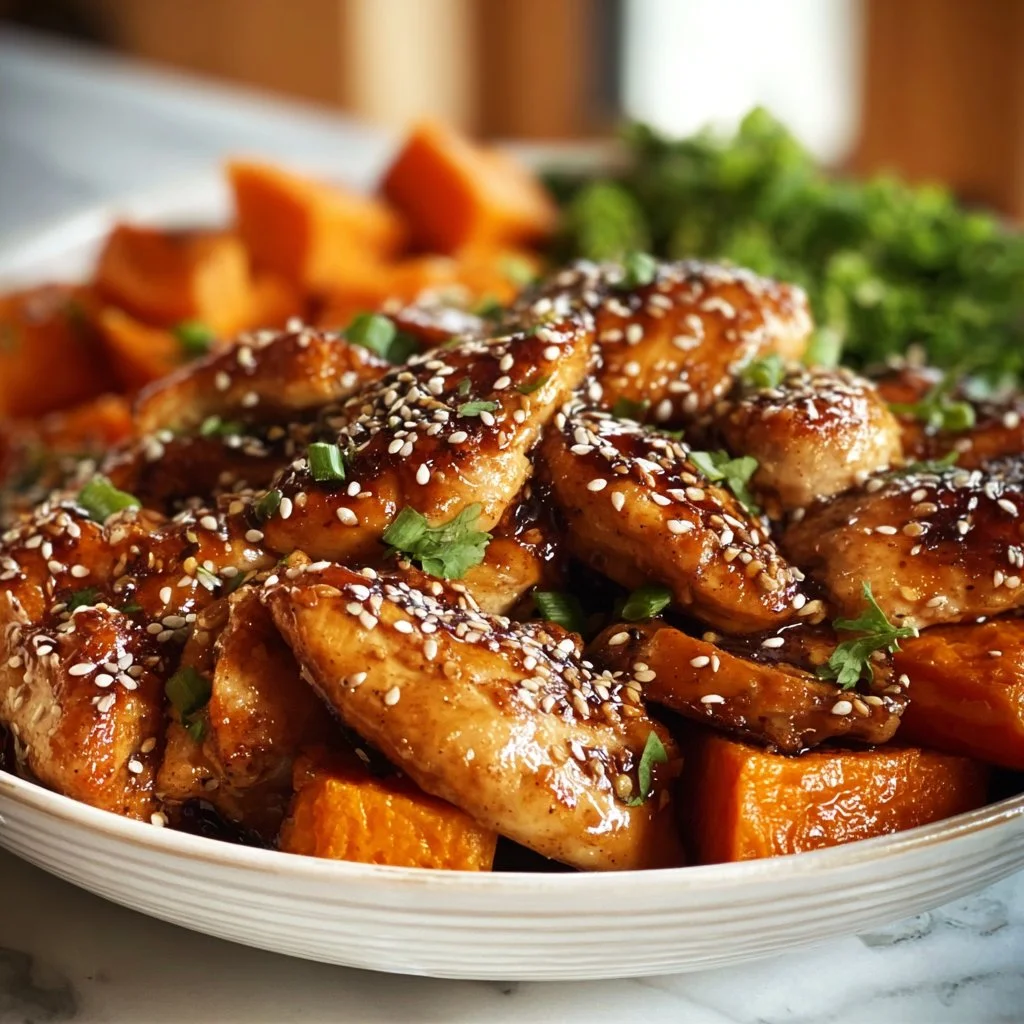
Discover the Best Honey Garlic Chicken and Sweet Potato Recipe for a Quick and Delicious Dinner
# Discover the Best Honey Garlic Chicken and Sweet Potato Recipe for a Quick and Delicious Dinner

## Introduction

Hey there, fellow food lovers! Welcome back to my cozy corner of the kitchen! Today, I’m excited to share with you a recipe that’s not just quick but also bursting with flavors that will make your taste buds dance. I’m talking about Honey Garlic Chicken and Sweet Potatoes—an irresistible combination of tender chicken, sweet potatoes, and a zesty honey-garlic glaze that’s so good it’ll have you coming back for more.

Life gets busy, and sometimes the last thing we want to think about is dinner. But fear not! This dish is perfect for those hectic weeknights when you want something homemade but don’t have hours to spend in the kitchen. It’s the type of meal that’ll make your kitchen smell incredible, creating a comforting ambiance that’s perfect for reconnecting with family or simply indulging in some well-deserved “me time”.

What I love most about this dish is that it’s incredibly versatile. The sweet and savory combination is perfect for all ages, making it an instant crowd-pleaser. Whether you're cooking for your partner, your kids, or your friends, this Honey Garlic Chicken is sure to shine on the dinner table. Plus, it’s packed with nutrients from the sweet potatoes, making it not just delicious, but nutritious too!

So, roll up your sleeves, tie on that apron, and let’s dive into making this delightful dinner that will have everyone raving, “What’s the secret?!” Spoiler alert: it’s all about balancing flavors and a few simple ingredients. Sounds fun, right? Let’s get cooking!

## Personal Story

Let me take you back to when I was a kid, eagerly waiting for my mom to return from the grocery store. Every Saturday, she would whip up her signature dish: Honey Garlic Chicken. The aroma would fill our home, and my siblings and I would rush to set the table, vying for the spot closest to the oven. It was a family affair—dancing around the kitchen while we caught stories about our week, all punctuated by laughter and the occasional kitchen mishap.

One evening, in a rush to get dinner on the table, my mom accidentally doubled the honey in the marinade! By some divine intervention (or sheer luck), it turned out to be the best batch of Honey Garlic Chicken we ever had. We ended up nicknaming it “Sweet Victory Chicken.” From that day on, we embraced the idea that mistakes can lead to delightful surprises in cooking! And that’s the spirit I want to keep alive in our kitchen—explore, experiment, and most importantly, enjoy the process.

## Ingredients

Here’s what you’ll need to create this mouthwatering meal:

- **Chicken Thighs (or Breast)**:
  - This recipe calls for juicy chicken thighs for maximum flavor, but if you prefer leaner meat, chicken breasts work just as well. Just keep an eye on cooking time, as breasts might cook faster.

- **Sweet Potatoes**:
  - Sweet potatoes add a natural sweetness that pairs perfectly with the savory garlic. You can substitute with other root vegetables like carrots or butternut squash for a twist.

- **Honey**:
  - The star of the dish! Honey adds that delightful glaze, giving the chicken a beautiful caramelization. For a healthier alternative, you can use maple syrup or agave nectar.

- **Garlic**:
  - Fresh minced garlic is a must for that aromatic kick. If you’re in a pinch, garlic powder can be used, although the flavor won’t be quite as bold.

- **Soy Sauce**:
  - This adds a depth of umami flavor. Look for low-sodium soy sauce if you’re watching your salt intake, or use tamari for a gluten-free option.

- **Olive Oil**:
  - Essential for drizzling over the sweet potatoes to help them roast to perfection. Feel free to substitute with avocado oil or melted coconut oil.

- **Salt and Pepper**:
  - Simple seasoning that enhances the natural flavors of our ingredients. Always season to taste and adjust based on your preference.

- **Optional Garnish: Fresh Parsley or Green Onions**:
  - A sprinkle of these fresh herbs adds a lovely pop of color and freshness to the final dish. They can elevate the presentation and brighten up the flavors!

## Step-by-Step Instructions

### Step 1: Prepping the Ingredients
First things first—let’s get our ingredients prepped! Preheat your oven to 400°F (200°C). While that warms up, peel and chop your sweet potatoes into bite-sized cubes. Aim for uniform pieces so they cook evenly. I like to toss them in a little olive oil, salt, and pepper for flavor. Spread them out on a baking sheet lined with parchment paper—this will keep them from sticking and make cleanup a breeze!

### Step 2: Make the Sauce
Now, let’s whip up the delicious honey garlic sauce! In a bowl, combine 1/4 cup honey, 1/4 cup soy sauce (or tamari), and 3-4 cloves of minced garlic. Whisk until combined. The magic happens here; you’ll notice the honey creating a lovely blend with the soy sauce, and the fragrance of garlic is going to make your kitchen feel like a culinary oasis.

### Step 3: Marinate the Chicken
Place your chicken thighs in a large zip-lock bag or a mixing bowl. Pour half of the honey garlic mixture over the chicken, reserving the other half for later. Seal the bag (or cover the bowl) and give it a gentle shake or mix to ensure all the chicken is coated in that delicious glaze. Let it marinate while you tackle the next steps—10 to 20 minutes is ideal, but even a short time will infuse the flavors.

### Step 4: Roast Time
Once your sweet potatoes are prepped and your chicken is marinated, it’s time to bring it all together! In a separate baking dish, arrange the chicken thighs skin-side up (if using skin-on) and place it alongside your sweet potatoes. Don’t crowd the pan; give everything a little room if you have space. Drizzle any leftover olive oil over the sweet potatoes.

### Step 5: Bake It All Together
Pop both the chicken and sweet potatoes into the preheated oven. Bake for about 25-30 minutes or until the chicken is cooked through (internal temperature should reach 165°F/75°C) and the sweet potatoes are tender and golden around the edges. You might want to baste the chicken with the reserved honey garlic sauce halfway through baking for an extra layer of flavor and that gorgeous glaze.

### Step 6: Finish and Rest
When everything is perfectly baked, remove it from the oven and allow it to rest for about 5 minutes. This step is especially important to let the juices settle back into the chicken, keeping it extra moist!

## Serving Suggestions

Now, let’s plate up this sumptuous dish! Once the chicken has rested, serve it alongside a generous helping of those caramelized sweet potatoes. Drizzle any remaining honey garlic sauce over the top for an added flavor boost, then sprinkle with fresh parsley or chopped green onions for that beautiful finish. Don’t forget to bring everyone to the table because this meal is meant to be shared!

## Recipe Variations

Feeling adventurous? Here are a few fun variations to try out:

1. **Spicy Kick**: Add a teaspoon of red pepper flakes to the honey garlic sauce if you like a little heat in your dish.

2. **Citrus Twist**: Squeeze a bit of fresh orange juice into the marinade for an added zesty flavor that brightens up the sweetness.

3. **Veggie Delight**: Toss in some brussels sprouts, broccoli, or bell peppers with the sweet potatoes for additional nutrients and flavors!

4. **Herb Roasted**: Add fresh herbs like rosemary or thyme into the roasting pan, which will infuse the dish with fragrant herby goodness.

5. **One-Pan Wonder**: If you’re short on time, toss everything into a single pan for easy cleanup. Just layer the sweet potatoes and chicken together on one sheet tray.

## Chef’s Notes

Cooking is all about learning, and I’ve had my fair share of kitchen adventures. I remember the first time I made this dish for friends — my excitement got the better of me, and I added too much soy sauce! But instead of panic, I creatively added coconut milk to balance it out. It turned out to be one of the best meals we’ve had! This recipe has come a long way since then, adapting to my growing collection of flavors and techniques. Remember, cooking is a journey; mistakes can lead to delicious discoveries, so don’t be afraid to experiment!

## FAQs and Troubleshooting

**1. What if my chicken turns out dry?**
If your chicken ever ends up dry, it could be due to overcooking. Always use a meat thermometer, and remember that chicken thighs are more forgiving than breasts due to their fat content. If you’re using breasts, check them at the 20-minute mark.

**2. Can I make this dish in advance?**
Absolutely! You can marinate the chicken the night before and simply pop it in the oven when you’re ready to cook. This can even enhance the flavors!

**3. What can I serve with this?**
While it’s delightful on its own, a simple mixed green salad or some steamed veggies are excellent accompaniments for a complete meal.

**4. What if I don't have honey? Can I skip it?**
Don’t skip it! For a substitute, consider maple syrup or a combination of brown sugar and water for that caramelized sweetness.

## Nutritional Info (if applicable)
While I’m not a nutritionist, I love keeping things balanced. This Honey Garlic Chicken with Sweet Potatoes provides a great mix of protein, healthy carbs, and vitamins. A serving typically contains around 350-450 calories, depending on portion sizes and specific ingredients used.

---

I hope you enjoy making this Honey Garlic Chicken and Sweet Potatoes as much as I do! Remember, the best part of cooking is sharing it with others—don’t forget to snap and share your creations with me! Happy cooking, and until next time, stay hungry for flavor!
Honey Garlic Chicken and Sweet Potatoes
- Total Time: 45 minutes
- Yield: 4 servings 1x
- Diet: Gluten-Free
Description
A quick and delicious recipe for Honey Garlic Chicken served with sweet potatoes, coated in a tasty honey-garlic glaze.
Ingredients
- 4 Chicken Thighs (or Breasts)
- 2 Sweet Potatoes, peeled and cubed
- 1/4 cup Honey
- 1/4 cup Soy Sauce (or Tamari)
- 3–4 cloves Garlic, minced
- 2 tablespoons Olive Oil
- Salt and Pepper, to taste
- Optional Garnish: Fresh Parsley or Green Onions
Instructions
- Preheat your oven to 400°F (200°C). While that warms up, peel and chop your sweet potatoes into bite-sized cubes.
- Toss the sweet potatoes in olive oil, salt, and pepper, and spread them out on a baking sheet lined with parchment paper.
- In a bowl, combine honey, soy sauce, and minced garlic. Whisk until combined.
- Place chicken thighs in a zip-lock bag or bowl, pour half of the honey garlic mixture over the chicken, and let it marinate for 10-20 minutes.
- Arrange the marinated chicken in a baking dish alongside the sweet potatoes and drizzle any leftover olive oil over the sweet potatoes.
- Bake both the chicken and sweet potatoes for about 25-30 minutes or until done. Baste the chicken with the reserved honey garlic sauce halfway through baking.
- Remove from oven and let it rest for about 5 minutes before serving.
Notes
Feel free to experiment with additional vegetables or spices to customize the dish to your liking.
- Prep Time: 15 minutes
- Cook Time: 30 minutes
- Category: Main Course
- Method: Baking
- Cuisine: American
Nutrition
- Serving Size: 1 serving
- Calories: 400
- Sugar: 8g
- Sodium: 600mg
- Fat: 15g
- Saturated Fat: 2g
- Unsaturated Fat: 10g
- Trans Fat: 0g
- Carbohydrates: 50g
- Fiber: 6g
- Protein: 25g
- Cholesterol: 80mg
Keywords: Honey Garlic Chicken, Sweet Potatoes, Quick Dinner, Easy Recipe, Gluten-Free

Cheesy Garlic Chicken Wraps
Cheesy Garlic Chicken Wraps: A Cozy Kitchen Adventure
Welcome back to the kitchen, my food-loving friends! Today, I’m thrilled to share a recipe that has become a staple in my culinary repertoire: Cheesy Garlic Chicken Wraps. Imagine the aroma of sizzling chicken, melting cheese, and fragrant garlic wafting through your space, wrapping around you like a warm hug. These wraps aren’t just a dish; they’re an experience—a beautiful mix of flavors that can bring joy to a casual weeknight dinner or serve as a show-stopping crowd-pleaser for your next get-together.
Cooking has a way of connecting us, doesn’t it? Whether we’re gathering round the table with loved ones or diving into a solo cooking session, each bite tells a story and evokes memories. That’s exactly what these wraps do for me, and I hope they will for you too! With simple ingredients and a few steps, you’ll create a meal that feels like a cozy embrace. Plus, you don’t need to be a culinary expert to whip these up; whether you’re a kitchen novice or a seasoned gourmet, I promise these wraps will grace your plate beautifully.
So, roll up those sleeves, pour yourself a glass of your favorite drink, and let’s dive into the magic of Cheesy Garlic Chicken Wraps. Trust me, once you embrace the warm, cheesy goodness of these wraps, they might just become your new favorite recipe to share with friends and family!
Personal Story
Every great dish has a story, and for these cheesy garlic chicken wraps, my story begins with my grandmother, Maude, who was the queen of comfort food. I fondly remember spending countless afternoons in her bustling kitchen, the air thick with the warm scent of garlic butter sizzling in a pan. One special Saturday, she decided to teach me how to make her famous chicken wraps.
As a child, I was fascinated by how she could turn simple ingredients into something delicious. The memory of her giggling as we tried to roll the wraps tightly—only to have cheese ooze out the sides—still brings a smile to my face. It wasn’t just the food; it was the laughter, the shared stories, and the camaraderie that came with cooking together. Those wraps created a bridge of love between us, uniting family and friends around the table.
Today, I’ve taken that nostalgic recipe and added my own twist with lots of cheese and a subtle kick of flavor to create Cheesy Garlic Chicken Wraps. So, as we cook together, I hope you feel that same warmth and connection in your kitchen, just like I did all those years ago!
Ingredients
Here’s what you’ll need to make these delightful wraps:
-
2 cups cooked chicken breast (shredded or diced)
- Chef Insight: You can use rotisserie chicken to save time or grill your own chicken for a smoky flavor.
-
1 cup shredded mozzarella cheese
- Substitution Tip: Feel free to replace with any melty cheese like Monterey Jack or cheddar for a different twist.
-
2 tablespoons garlic (minced)
- Quick Tip: Use fresh garlic for a punchy flavor, but jarred minced garlic works just fine in a pinch.
-
1 tablespoon olive oil
- Substitution: Melted butter can be used for a richer taste, or choose an oil of your liking for sautéing.
-
4 large tortillas (flour or whole wheat)
- Chef’s Insight: Experiment with flavored tortillas to add an extra kick, like spinach or sun-dried tomato!
-
1/2 cup fresh spinach (optional)
- Health Boost: This is a fantastic way to sneak in some greens! You can substitute with other greens like arugula or kale if you prefer.
-
Salt and pepper to taste
- Chef Secret: A pinch of smoked paprika can beautifully enhance the flavor profile and add depth.
Step-by-Step Instructions
-
Prep the Ingredients:
Start by gathering all your ingredients. It’s always easier to cook when everything is in reach! If you haven’t cooked the chicken yet, simply dice it up and either grill or sauté it in olive oil until cooked through. This step usually takes about 8-10 minutes on medium heat. Don’t forget to season with salt and pepper! -
Sauté the Garlic:
In a large skillet, warm 1 tablespoon of olive oil over medium heat. Once hot, add the minced garlic and sauté for about 1-2 minutes until fragrant. Do not let it brown—burnt garlic is not friendly! -
Combine Chicken, Cheese, and Spinach:
Add the cooked chicken to the skillet and stir it around well, allowing it to soak up that fabulous garlic aroma. Then, throw in your mozzarella cheese and fresh spinach. Stir until the cheese is melty and gooey, about 2-3 minutes. Chef Hack: If the mixture looks a bit dry, you can add a splash of chicken broth for a nice finishing touch. -
Assemble the Wraps:
Lay out your tortillas on a clean surface. Spoon about a quarter of the cheesy chicken mixture onto the center of each tortilla. Roll it up tightly, tucking in the sides as you go to ensure nothing spills out. It helps to wrap it in foil if you plan to serve it warm later on! -
Toast the Wraps (Optional):
For an extra crunch, wipe down that skillet and add a little olive oil (or butter) back onto the pan. Place the wrapped tortillas seam side down and toast them for about 3-4 minutes on each side, until golden brown and crispy. Tip: Use a panini press if you have one—works like a charm! -
Slice and Serve:
Remove the wraps from the skillet and allow them to cool for a minute before slicing them in half (if you can resist!). This helps the cheesy goodness stay intact.
These cheesy garlic chicken wraps are ready to be plated and enjoyed!
Serving Suggestions
Arrange your delicious wraps on a colorful platter and add a small bowl of marinara sauce or ranch dressing for dipping. Garnishing with chopped fresh herbs like parsley or basil can add a pop of color and elevate the presentation. You could even serve them alongside a fresh salad for a balanced accompaniment and additional crunch!
Recipe Variations
Feeling creative? Try out these delicious variations:
- Buffalo Chicken Wraps: Add some hot sauce to your chicken mixture for a spicy kick!
- Mediterranean Style: Substitute feta cheese for mozzarella, toss in olives, and include chopped tomatoes for a refreshing twist.
- BBQ Chicken Wrap: Replace garlic with some BBQ sauce for a smoky-sweet flavor—perfect for summer gatherings!
- Veggie Delight: Go meatless by using grilled vegetables like zucchini, bell peppers, and sautéed mushrooms combined with cheese.
Chef’s Notes
This recipe is one of those that has evolved beautifully over the years. At first, I simply combined garlic and cheese with chicken, but I’ve learned that experimenting brings out the best flavors. I often invite friends over for a “wrap night,” where everyone creates their own personalized versions of these wraps with different fillings. It’s a fun way to bond over cooking, share ideas, and taste a variety of flavors. Remember, there are no hard and fast rules—embrace the joy of creating something special in your kitchen!
FAQs and Troubleshooting
Q: Can I make these wraps ahead of time?
Absolutely! You can prep everything up to the assembly stage and refrigerate the filling for up to 2 days. Just warm it through before wrapping and toasting.
Q: What if my wrap is falling apart?
No worries! If you have extra filling, try placing more in your wrap and roll it tighter. If that doesn’t work, consider making a bowl instead and serving the filling over a bed of greens!
Q: How can I make this dairy-free?
You can use dairy-free cheese alternatives or simply leave out the cheese altogether and substitute avocado for creaminess!
Q: Can I freeze these wraps?
Yes! Just make sure they are fully wrapped in foil or an airtight container. When you’re ready to eat, thaw and bake them in the oven to retain maximum crispiness.
Nutritional Info
(Approximate per wrap if using flour tortilla)
- Calories: 500
- Fat: 20g
- Protein: 30g
- Carbohydrates: 45g
- Fiber: 4g
So there you have it—your guide to making mouthwateringly delicious Cheesy Garlic Chicken Wraps! I hope you have as much fun making them as I do. Remember, the kitchen is all about joy and experimentation, so don’t hold back! Get those pans sizzling, gather your loved ones, and let’s create some unforgettable meals together. Happy cooking!
Print
Cheesy Garlic Chicken Wraps
- Total Time: 25 minutes
- Yield: 4 servings 1x
- Diet: Non-Vegetarian
Description
Delicious cheesy garlic chicken wraps that are easy to make and bursting with flavor, perfect for a cozy dinner or a crowd-pleasing meal.
Ingredients
- 2 cups cooked chicken breast (shredded or diced)
- 1 cup shredded mozzarella cheese
- 2 tablespoons garlic (minced)
- 1 tablespoon olive oil
- 4 large tortillas (flour or whole wheat)
- 1/2 cup fresh spinach (optional)
- Salt and pepper to taste
Instructions
- Prep the Ingredients: Start by gathering all your ingredients. If you haven’t cooked the chicken yet, dice it up and grill or sauté it in olive oil until cooked through—about 8-10 minutes.
- Sauté the Garlic: Warm 1 tablespoon of olive oil in a large skillet over medium heat. Add minced garlic and sauté for 1-2 minutes until fragrant, being careful not to let it brown.
- Combine Chicken, Cheese, and Spinach: Add the cooked chicken to the skillet, stir well, and then add mozzarella cheese and fresh spinach. Stir until the cheese is melty, about 2-3 minutes.
- Assemble the Wraps: Lay out tortillas and spoon about a quarter of the cheesy chicken mixture onto each. Roll up tightly, tucking in the sides.
- Toast the Wraps (Optional): Wipe down the skillet, add a little olive oil, and toast the wraps seam side down for 3-4 minutes on each side until golden brown.
- Slice and Serve: Allow the wraps to cool for a minute before slicing in half and serving.
Notes
Serve with marinara sauce or ranch dressing for dipping. Feel free to experiment with different fillings.
- Prep Time: 10 minutes
- Cook Time: 15 minutes
- Category: Main Course
- Method: Sautéing
- Cuisine: American
Nutrition
- Serving Size: 1 wrap
- Calories: 500
- Sugar: 2g
- Sodium: 800mg
- Fat: 20g
- Saturated Fat: 10g
- Unsaturated Fat: 8g
- Trans Fat: 0g
- Carbohydrates: 45g
- Fiber: 4g
- Protein: 30g
- Cholesterol: 60mg
Keywords: chicken wraps, cheesy wraps, garlic chicken
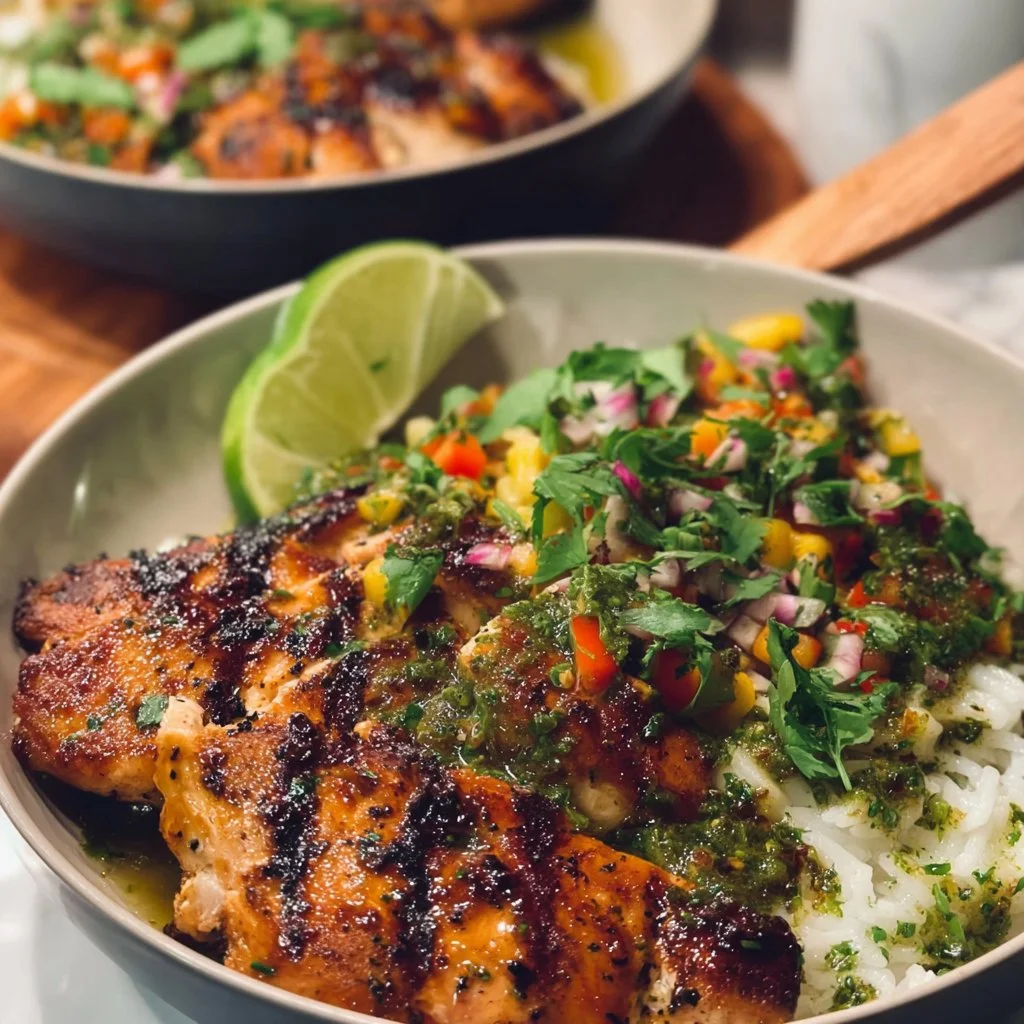
Honey Cilantro Lime Chicken Bowl
Honey Cilantro Lime Chicken Bowl
Welcome back to my kitchen, fellow food lovers! Today, I have a treat that combines the flavors of sweetness, tanginess, and a touch of herbaceous goodness: Honey Cilantro Lime Chicken Bowl. This dish is not just a meal; it’s a celebration of flavors that harmoniously come together to create a vibrant, satisfying bowl perfect for dinner or a delightful lunch.
Picture this: You’re having a cozy evening at home, the sun is setting, and the aroma of marinated chicken sizzling on the grill fills the air. You pull together colorful veggies, warm rice, and a drizzle of honey lime dressing, transforming a simple dinner into a feast that’s bursting with life and flair. Whether you’re entertaining guests or treating yourself to a tasty meal after a long day, this bowl ticks all the boxes—delicious, accessible, and memorable.
I’ve always been passionate about crafting meals that are not only packed with flavor but also encourage a sense of connection. There’s something so special about gathering around a table, sharing stories, and savoring good food together. The Honey Cilantro Lime Chicken Bowl perfectly embodies that spirit. It’s fresh, bright, and full of positive vibes, making it an ideal dish to bring friends and family together.
So grab your apron, roll up your sleeves, and let’s embark on this culinary adventure together! By the end of this post, you’ll be empowered to whip up your own beautiful Honey Cilantro Lime Chicken Bowl that will impress anyone lucky enough to join you. Let’s dive into a delightful recipe that will make your flavor-loving heart sing!
Personal Story
I remember the first time I made Honey Cilantro Lime Chicken Bowl. It was a sunny Saturday afternoon, and my friends and I were gathered for a casual cookout in my backyard. We had an array of ingredients and a general idea, but that day was all about spontaneity and creativity. As the aromas of grilling chicken filled the air, laughter erupted as we tasted the honey-lime marinade, debating whether to add more lime or turn up the heat with a touch of chili.
At one point, I decided to toss some fresh cilantro into the mix, and it instantly transformed everything! The vibrant green sprigs were not just a flavor boost; they brought a fresh character to our gathering. As we piled our bowls high with chicken, colorful veggies, and a drizzle of that sweet and tangy sauce, I felt a sense of warmth wash over us. We were not just eating; we were engaging in connection, laughter, and culinary discovery.
That day sparked my love for creating bowls that speak to the heart. It’s amazing how a simple dish can draw people closer together, leaving behind nothing but smiles and satisfied stomachs. Now, every time I make this dish, it brings back that joyful, carefree moment—a reminder that good food and good company are the secret ingredients to happiness!
Ingredients
Now, let’s gather our ingredients for this delicious bowl! Here’s what you’ll need:
-
Chicken Breasts (2 large)
Perfect for grilling, pan-searing, or baking! You can substitute with thighs for a richer flavor or even use tofu for a vegetarian option. -
Honey (1/4 cup)
Sweet, sticky goodness! If you’re avoiding sugar, agave syrup or maple syrup works well too. -
Fresh Lime Juice (from 2 limes)
Bright and zesty, it cuts through the sweetness. For a twist, orange juice can be an interesting alternative. -
Cilantro (1/4 cup, chopped)
Fresh and fragrant! If you’re not a fan, parsley can substitute nicely, although it lacks that distinct cilantro flavor. -
Garlic (2 cloves, minced)
Adds depth and aromatic flavor. Fresh garlic is always best, but garlic powder can be used if you’re in a pinch. -
Olive Oil (2 tablespoons)
For marinating and sautéing the chicken. Feel free to use avocado oil or another high-heat oil as a substitute. -
Salt and Pepper
Essential for seasoning. You can add chili flakes for a kick or smoked paprika for those smoky notes. -
Rice (1 cup, cooked)
A great base for the bowl. Quinoa, farro, or cauliflower rice are excellent options for a grain swap. -
Toppings (Cherry tomatoes, avocado, or corn)
These are optional, but they add color and texture. Get creative here! You can use black beans or roasted bell peppers for variation.
Step-by-Step Instructions
Ready to create your wonderful Honey Cilantro Lime Chicken Bowl? Let’s break it down step by step!
Step 1: Prepare the Marinade
In a medium bowl, whisk together the honey, juice of the limes, minced garlic, olive oil, salt, and pepper. This is where the magic starts! Take a moment to inhale the fragrant mix and imagine the flavors you’re about to experience. Feel free to adjust the lime juice and honey to your taste. Want it zesty? Add more lime!
Step 2: Marinate the Chicken
Place your chicken breasts (or your chosen protein) in a large resealable bag or shallow dish. Pour the marinade over the chicken, ensuring every piece gets a generous coating. Seal the bag or cover the dish and let it marinate in the fridge for at least 30 minutes (or up to 4 hours). This helps the flavors penetrate and tenderize the chicken.
Step 3: Cook the Chicken
Heat a grill pan or outdoor grill over medium-high heat. Once hot, remove the chicken from the marinade (reserving the marinade for later). Cook the chicken for about 6-7 minutes per side, or until it reaches an internal temperature of 165°F (75°C). For an extra burst of flavor, baste it with the reserved marinade while cooking. Just be careful not to contaminate it with raw chicken juices.
Step 4: Prepare the Rice
While the chicken is cooking, let’s get the rice ready. If you haven’t done so already, cook your rice according to package instructions. I love using a rice cooker for perfectly fluffy grains, but the stovetop works just fine too!
Step 5: Chop the Veggies
While everything is cooking, chop your avocado, slice cherry tomatoes in half, and prepare any other toppings. Let your creativity shine! This is where you get to add pops of color and texture to your bowl.
Step 6: Assemble the Bowl
Once the chicken is cooked to perfection, let it rest for a few minutes before slicing it into strips. In a large bowl, start with a bed of rice, layer on the sliced chicken, and sprinkle with cilantro. Add the chopped veggies on top, drizzle with any extra honey-lime dressing, and finish with a squeeze of fresh lime. Don’t hold back—this is where you want to go wild with toppings!
Step 7: Enjoy!
Grab your favorite spoon or fork and dig in! Take a moment to appreciate the vibrant colors and the enticing aromas before you dive into this delicious bowl of goodness.
Serving Suggestions
Present your Honey Cilantro Lime Chicken Bowl in a large, colorful bowl to showcase all those beautiful layers of ingredients. You can serve it with lime wedges on the side for that extra zesty punch. A sprinkle of additional chopped cilantro on top gives a fresh finish, making it not just a meal but a work of art! Pair it with a cool drink, like sparkling water with a splash of lime, and you’re all set for a relaxed dining experience.
Recipe Variations
- Spicy Twist: Add diced jalapeños or a splash of hot sauce to the marinade for a kick.
- Grain-Free: Swap out the rice for a bed of spiralized zucchini noodles for a lighter option.
- Vegan Delight: Use chickpeas or tempeh in place of chicken and add roasted sweet potatoes for extra flavor.
- Asian Fusion: Substitute soy sauce for honey and lime for a soy-sesame flavored bowl, topped with sesame seeds and green onions.
- Tropical Flair: Toss in diced mango or pineapple for a sweet and fruity variation.
Chef’s Notes
This recipe has evolved beautifully over the years. Originally, it was all about marinated grilled chicken on a plate, but I quickly realized that creating a bowl allows for more creativity and flavor. It’s all about layering—textures, colors, and tastes! Whenever I’m in need of a meal that’s comforting yet fresh, this bowl is my go-to, and every time I make it, I come up with new twists! You’ll find me jamming out to my favorite tunes in the kitchen, taking bites along the way, and savoring every moment.
FAQs and Troubleshooting
-
What if my chicken turns out dry?
Overcooking is usually the culprit! Always use a meat thermometer to check for doneness, and remember to let the chicken rest before slicing. -
Can I make this dish ahead of time?
Absolutely! You can marinate the chicken the night before and cook it ahead of time. Just store everything separately in the fridge and assemble when you’re ready to serve. -
What if I’m allergic to honey?
You can simply replace honey with maple syrup or agave as a natural sweetener. The flavor will still shine through without compromising your health. -
How can I store leftovers?
Keep any leftovers in airtight containers in the fridge for up to three days. To reheat, gently warm in the microwave or on a stovetop to maintain that juicy goodness.
Nutritional Info (if applicable)
While I like to keep things wholesome, specific nutritional information can vary based on your ingredients and portion sizes. As a rough estimate, here’s what you can expect for a single serving:
- Calories: Approximately 450
- Protein: 35g
- Carbohydrates: 45g
- Fiber: 6g
- Fats: 15g
Remember, these are just guidelines! You can always make substitutions that fit your dietary needs.
So there you have it—a delicious Honey Cilantro Lime Chicken Bowl that’s sure to become a favorite in your home. Cooking is not just about filling bellies; it’s about creating moments and memories. Get in the kitchen, make a bit of a mess, and enjoy every bite! Happy cooking! 🍽️✨
Print
Honey Cilantro Lime Chicken Bowl
- Total Time: 45 minutes
- Yield: 4 servings 1x
- Diet: Gluten-Free
Description
A vibrant and satisfying bowl combining sweet honey, zesty lime, and fresh cilantro with grilled chicken and colorful veggies, perfect for dinner or lunch.
Ingredients
- 2 large Chicken Breasts
- 1/4 cup Honey
- Juice from 2 Fresh Limes
- 1/4 cup Cilantro, chopped
- 2 cloves Garlic, minced
- 2 tablespoons Olive Oil
- Salt and Pepper to taste
- 1 cup Rice, cooked
- Toppings: Cherry tomatoes, avocado, corn (optional)
Instructions
- Prepare the Marinade: In a medium bowl, whisk together honey, lime juice, minced garlic, olive oil, salt, and pepper.
- Marinate the Chicken: Place chicken in a large resealable bag, pour the marinade over, seal, and refrigerate for at least 30 minutes.
- Cook the Chicken: Heat a grill over medium-high and cook chicken for 6-7 minutes per side until it reaches 165°F (75°C).
- Prepare the Rice: Cook rice according to package instructions.
- Chop the Veggies: Chop avocado, slice cherry tomatoes and prepare other toppings.
- Assemble the Bowl: Layer rice, sliced chicken, cilantro, and toppings in a large bowl.
- Enjoy!
Notes
Feel free to substitute ingredients like chicken with tofu for a vegetarian option or adjust the marinade to taste.
- Prep Time: 30 minutes
- Cook Time: 15 minutes
- Category: Main Course
- Method: Grilling
- Cuisine: Fusion
Nutrition
- Serving Size: 1 bowl
- Calories: 450
- Sugar: 25g
- Sodium: 350mg
- Fat: 15g
- Saturated Fat: 2g
- Unsaturated Fat: 12g
- Trans Fat: 0g
- Carbohydrates: 45g
- Fiber: 6g
- Protein: 35g
- Cholesterol: 75mg
Keywords: chicken bowl, healthy meals, cilantro lime chicken, easy dinner, grilled chicken
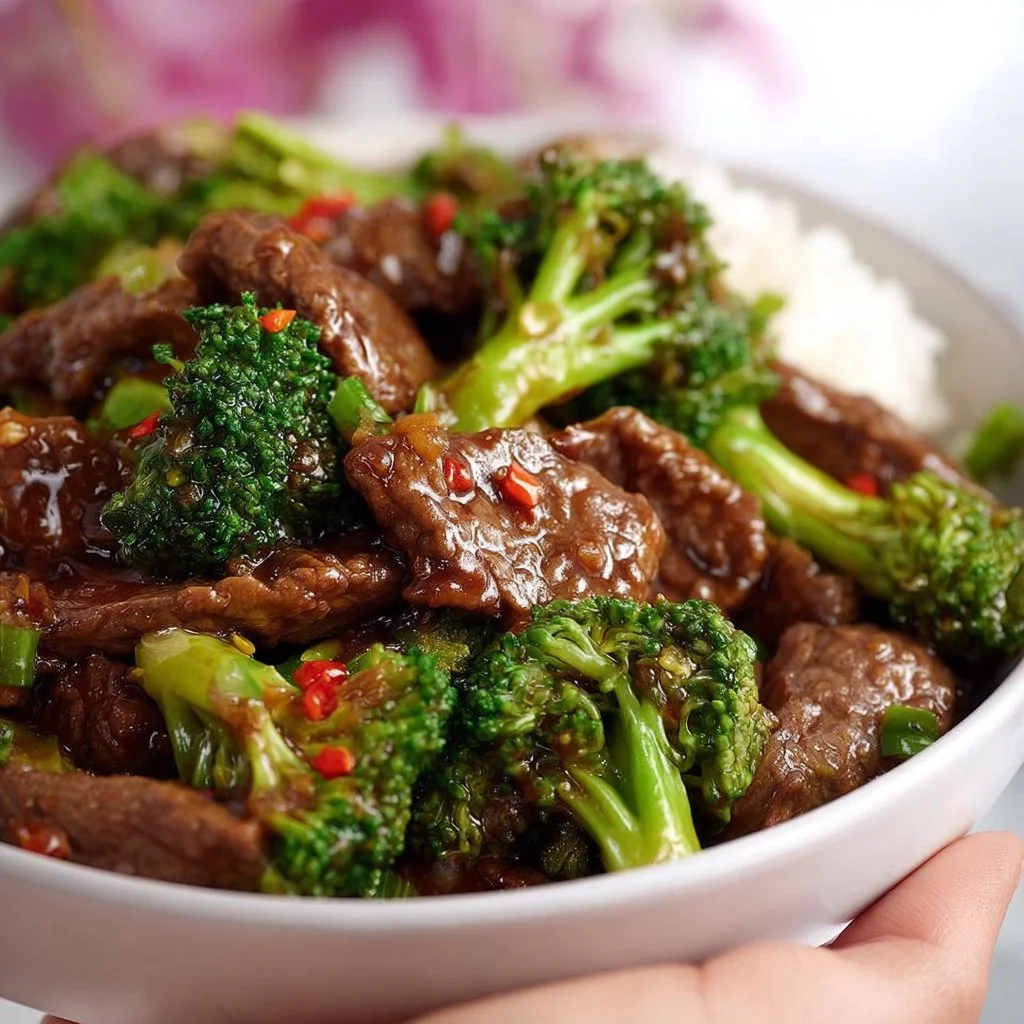
Beef and Broccoli Stir-Fry
Beef and Broccoli Stir-Fry: A Cozy Culinary Adventure
Welcome, fellow kitchen adventurers! Today, I’m absolutely thrilled to take you on a delicious journey as we dive into the world of Beef and Broccoli Stir-Fry. It’s not just any dish; this one holds a special place in my heart, brimming with flavor and nostalgia. As we whisk together tender beef, vibrant broccoli, and a sauce so irresistible, you’ll feel like a culinary rockstar in no time!
Growing up, stir-fry was one of the go-to meals in our household, especially on busy weeknights. My mom, a queen in her own right, always managed to whip up something quick yet satisfying, often relying on fresh vegetables and whatever protein we had on hand. The sizzle of ingredients hitting a hot pan was like music to my ears, the enticing aroma wrapping us in warmth and comfort. It was a dish that sparked family conversations, filled our bellies, and created memories that still bring a smile to my face.
Now, as a passionate home cook, I realize the beauty of this quick-cooking technique. It’s not just about slapping ingredients together; it’s an art form! Stir-fry celebrates fresh ingredients, bold flavors, and, most importantly, the joy of gathering around the table with your loved ones. Whether you’re cooking for two or hosting a casual get-together, this Beef and Broccoli Stir-Fry is bound to impress.
So, grab your apron, put on some upbeat music, and let’s get started! With a little guidance, you’ll become the stir-fry wizard you were always meant to be. Ready? Let’s do this!
Personal Story
One of my fondest memories of making stir-fries was the first time I tried my hand at cooking solo. I was just fourteen, excited to impress my family with my newfound culinary skills. Armed with a recipe I found in a dusty old cookbook, I decided to tackle Beef and Broccoli. I’ll never forget my dad’s face when he walked in on me using the biggest chopping board I could find, surrounded by broccoli florets and thinly sliced beef that looked more like confetti than dinner.
After fumbling a bit, the stir-fry came together beautifully. The sautéed beef shimmered in the vibrant dark sauce, and the broccoli retained its crunch. What made that dinner even more special was when my mom enthusiastically declared it the best she had ever tasted (though I’m pretty sure she just wanted to spare my teenage feelings). From that day on, stir-fry became my go-to meal for family gatherings, and I’ll always cherish the smiles and compliments that filled our home as we dug into my culinary creation.
Ingredients
Here’s what you’ll need to recreate this delightful dish, along with some handy chef insights and substitution tips:
-
1 lb of beef sirloin
Great for stir-fry due to its tenderness. You can substitute with flank steak or chicken breast if you prefer. -
4 cups of fresh broccoli florets
Packed with nutrients and vibrant color. If broccoli isn’t your thing, you can easily swap in bell peppers, snap peas, or even bok choy. -
3 cloves of garlic, minced
An aromatic powerhouse! Fresh garlic is best, but garlic powder can be a quick substitute if you’re in a pinch. -
1 tablespoon of fresh ginger, minced
Adds a lovely warmth and spice. Ground ginger works well if fresh isn’t available, just lessen the quantity a bit. -
1/4 cup of soy sauce
The base of our flavor profile! Use low-sodium soy sauce if you’re watching your salt intake, or tamari for a gluten-free version. -
2 tablespoons of oyster sauce
This will take your dish to the next level of umami flavor. For a vegetarian option, try mushroom sauce instead. -
1 tablespoon of cornstarch
This helps to thicken our sauce for the perfect glossy finish. You can use arrowroot powder as a gluten-free alternative. -
2 tablespoons of vegetable oil
Ideal for high heat stir-frying. You could also use sesame oil for a distinct flavor, but use less since it’s quite potent! -
Cooked rice or noodles (for serving)
Perfect for soaking up all that delicious sauce! Go for brown rice or whole grain noodles for a healthier twist.
Step-by-Step Instructions
Let’s get cooking! Here’s your detailed guide to crafting the perfect Beef and Broccoli Stir-Fry:
-
Prep Your Ingredients:
- Start by slicing the beef into thin strips against the grain. This ensures that each bite is as tender as can be.
- Chop your broccoli into bite-sized florets and mince the garlic and ginger. Pro tip: If you’re pressed for time, buy pre-cut broccoli from the grocery store.
-
Make the Sauce:
- In a small bowl, mix together the soy sauce, oyster sauce, minced garlic, ginger, and cornstarch.
- Stir until everything is combined and the cornstarch is dissolved. Chef hack: This can be made ahead of time and stored in the fridge for up to a week!
-
Marinate the Beef:
- Toss the beef strips with half of the sauce mixture and let it sit for about 15-20 minutes. This will infuse flavors while tenderizing the meat. If you’re in a rush, even a 5-minute marinade will help!
-
Heat the Pan:
- Add 1 tablespoon of vegetable oil to a large skillet or wok and heat over medium-high heat. Make sure the pan is hot before you add anything to achieve that perfect sizzle.
-
Cook the Beef:
- Once the oil is shimmering, add the marinated beef in a single layer. Don’t overcrowd the pan; you want that nice caramelization! Cook for about 2-3 minutes until browned, stirring occasionally.
- When the beef is just about cooked through, remove it from the pan and set aside. Remember, the beef will continue cooking a bit while resting.
-
Stir-Fry the Broccoli:
- In the same pan, add another tablespoon of oil if needed. Toss in the broccoli and stir-fry for about 3-4 minutes until bright green and tender-crisp. The idea is to keep that vibrant color and crunch!
-
Combine Beef and Broccoli:
- Return the beef to the pan, add the remaining sauce, and stir everything together. Cook for an additional 1-2 minutes, allowing the sauce to thicken and coat every morsel beautifully. You know it’s ready when you see that lovely glossy finish!
-
Serve Immediately:
- Remove from heat and serve hot over a bed of rice or noodles. I like to garnish mine with sesame seeds for a nice crunch and some green onions for freshness!
Serving Suggestions
Plating is an art form in itself! For a beautiful presentation, lay a generous scoop of rice or noodles on your plate, and then top with the sizzling beef and broccoli mixture. Drizzle any extra sauce over the top, sprinkle with sesame seeds and thinly sliced green onions, and voilà! You’ve transformed a simple diner into a vibrant, restaurant-worthy dish.
Recipe Variations
Feel free to get creative with this Beef and Broccoli Stir-Fry! Here are a few ideas to spark your culinary imagination:
- Spicy Kick: Add a splash of sriracha or a pinch of red pepper flakes to the sauce for an extra spice level.
- Vegetarian Delight: Swap the beef for tofu or tempeh for a plant-based version while keeping all the delicious flavors intact.
- Sweet & Savory: Toss in some sliced bell peppers and orange juice for a fresh and vibrant take.
- Noodle Lover’s Paradise: Replace rice with cooked udon or rice noodles for a hearty twist.
- Crispy Additions: Top your dish with crunchy fried onions or nuts for that delightful texture.
Chef’s Notes
This Beef and Broccoli Stir-Fry has evolved beautifully over the years in my kitchen. Originally, I relied on a store-bought sauce, but as my love for cooking deepened, I began crafting my own to play with flavors. It’s become so much more than just a recipe; it’s a canvas for creativity! Whenever I have friends over, this dish often makes an appearance, instantly filling the room with warmth and laughter.
And let me tell you, there was that one time I accidentally grabbed a bottle of vinegar instead of soy sauce. Spoiler alert: it was not delicious! We all had a good laugh, and I learned to keep my glasses handy while cooking—always a wise choice in the kitchen!
FAQs and Troubleshooting
-
Why did my beef turn out tough?
Overcooking or not slicing against the grain can lead to tough beef. Make sure your pan is hot and only cook until just browned! -
Can I use frozen broccoli?
Absolutely! Just ensure to thaw and drain excess water before cooking, and reduce the cooking time, as frozen broccoli cooks faster. -
What can I serve this with besides rice?
Consider serving with quinoa, cauliflower rice for a lighter option, or even adding it to a wrap for a delicious meal on the go. -
Help! My sauce didn’t thicken!
If your sauce is too thin, allow it to simmer a little longer, and it should begin to thicken up beautifully. If in doubt, add a little more cornstarch mixed with water—just make sure to stir continuously!
Nutritional Info
(For 1 serving of Beef and Broccoli Stir-Fry served over rice)
- Calories: Approximately 450
- Protein: 30g
- Carbohydrates: 56g
- Fats: 14g
- Fiber: 4g
And there you have it! A culinary journey that’s not only easy to follow but rich in flavors, stories, and memories. I hope this Beef and Broccoli Stir-Fry becomes a beloved staple in your kitchen, just as it has in mine. Happy cooking, my friends! Let’s spark some joy, one plate at a time!
Print
Beef and Broccoli Stir-Fry
- Total Time: 30 minutes
- Yield: 4 servings 1x
- Diet: None
Description
A quick and delicious Beef and Broccoli Stir-Fry that brings together tender beef and vibrant vegetables in a flavorful sauce.
Ingredients
- 1 lb of beef sirloin
- 4 cups of fresh broccoli florets
- 3 cloves of garlic, minced
- 1 tablespoon of fresh ginger, minced
- 1/4 cup of soy sauce
- 2 tablespoons of oyster sauce
- 1 tablespoon of cornstarch
- 2 tablespoons of vegetable oil
- Cooked rice or noodles (for serving)
Instructions
- Prep your ingredients by slicing the beef into thin strips against the grain and chopping the broccoli into bite-sized florets.
- Make the sauce by mixing soy sauce, oyster sauce, minced garlic, ginger, and cornstarch in a small bowl.
- Marinate the beef with half of the sauce mixture for about 15-20 minutes.
- Heat 1 tablespoon of vegetable oil in a large skillet or wok over medium-high heat.
- Cook the marinated beef in a single layer for about 2-3 minutes until browned, then remove from the pan.
- Stir-fry the broccoli in the same pan for about 3-4 minutes until bright green and tender-crisp.
- Combine the beef and remaining sauce in the pan and cook for an additional 1-2 minutes to thicken the sauce.
- Serve hot over rice or noodles, garnished with sesame seeds and green onions.
Notes
For a vegetarian option, substitute beef with tofu or tempeh and use mushroom sauce instead of oyster sauce.
- Prep Time: 15 minutes
- Cook Time: 15 minutes
- Category: Main Course
- Method: Stir-Frying
- Cuisine: Asian
Nutrition
- Serving Size: 1 serving
- Calories: 450
- Sugar: 3g
- Sodium: 900mg
- Fat: 14g
- Saturated Fat: 3g
- Unsaturated Fat: 8g
- Trans Fat: 0g
- Carbohydrates: 56g
- Fiber: 4g
- Protein: 30g
- Cholesterol: 60mg
Keywords: beef stir-fry, broccoli recipe, quick dinner ideas, Asian cuisine




