
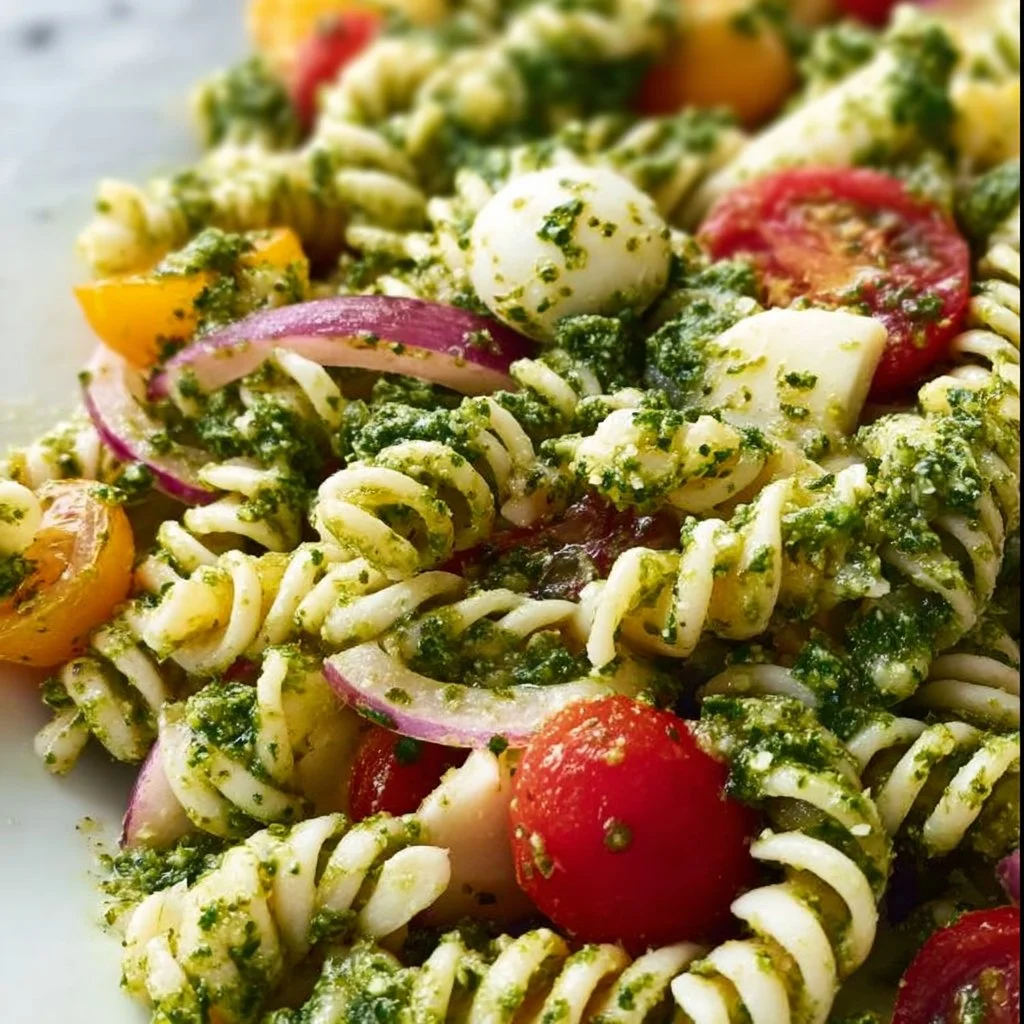
Easy Kale Pesto Pasta Salad
Easy Kale Pesto Pasta Salad: A Deliciously Green Delight!
Hey there, fellow foodies! Welcome back to my cozy corner of the internet where the kitchen is always buzzing with flavor and the air is filled with the delightful aroma of something scrumptious. Today, I’m thrilled to share one of my absolute favorite recipes: Easy Kale Pesto Pasta Salad! This cheeky dish combines the goodness of vibrant greens with the hearty satisfaction of pasta — all tied together with a zesty homemade kale pesto that’s so good, you might just want to slather it on everything.
Now, I understand that life can often feel like a whirlwind, but that doesn’t mean we have to sacrifice taste for convenience. This kale pesto pasta salad is perfect for busy weeknights, leisurely weekend brunches, or even a delightful potluck contribution! It’s filled with fresh, wholesome ingredients and comes together in under 30 minutes. Plus, it can be made ahead of time and stored in the fridge, making it an excellent grab-and-go lunch option.
Whenever I whip up this salad, I’m transported back to those sunny days in my childhood when my mom would take us to local farmer’s markets. We’d come home bursting with excitement, bags filled with crisp greens, juicy tomatoes, and fragrant herbs. Those vibrant colors and earthy smells sparked a love for fresh ingredients that drives my cooking today.
And how about that pesto? Oh boy, it’s a game-changer! When I first made pesto using kale instead of basil on a whim, I couldn’t believe how delicious it was. It’s nutrient-packed, eco-friendly, and adds a delightful twist to the traditional recipe. I can’t wait for you to give it a whirl!
So grab your aprons and let’s dive into this Easy Kale Pesto Pasta Salad together!
Personal Story
Let me take you back to a moment filled with laughter and the sweet echo of childhood memories. Picture this: the sun was shining, and my mom and I were digging through vibrant crates overflowing with fresh produce at our local market. We stumbled across a stall bursting with fresh greens—kale, arugula, and more! It was kale that caught my eye, and I insisted we bring some home.
That weekend, we decided to make homemade pesto, and it turned into a kale-inspired culinary adventure. While my mom expertly chopped and blended, I experimented with flavors by tossing in garlic and pine nuts to the mix. You could feel the excitement in the air as the warm, nutty smell wafted through our kitchen. It was pure magic when we tossed the bright green pesto with our warm pasta, watching the vibrant colors meld together. That first bite was a game-changer—rich, creamy, and just awesomely fresh!
Now, every time I make this kale pesto pasta salad, I’m reminded of those sun-soaked days where simple, fresh ingredients created a feast of flavors and memories. It’s those beautiful moments that inspire me to keep cooking and sharing with all of you. And believe me, once you try this dish, you’ll understand why it holds such a special place in my heart!
Ingredients
Here’s a simple shopping list for everything you’ll need to create your kale pesto pasta salad masterpiece:
-
Pasta (your choice!)
I love using whole wheat or gluten-free pasta for an earthy touch, but any shape works! Penne, fusilli, or even spaghetti are all great options. -
Fresh Kale (about 4 cups, chopped)
Kale packs a nutrient punch and makes the best pesto! You can substitute with spinach or Swiss chard if you prefer a milder taste. -
Garlic (3 cloves)
A must-have for flavor! For a milder pesto, try roasting the garlic first for a sweeter profile. -
Nuts (1/4 cup, pine nuts or walnuts)
Adds creaminess to your pesto! If you’re nut-free, sunflower seeds or hemp seeds are great alternatives! -
Parmesan Cheese (1/2 cup, grated)
This gives it a savory depth. For a vegan option, nutritional yeast can provide a cheesy flavor without dairy. -
Olive Oil (1/3 cup)
Use high-quality extra virgin olive oil for the best flavor! Avocado oil or grapeseed oil can be substituted for a different twist. -
Lemon Juice (from 1 lemon)
A splash of citrus keeps the flavors vibrant! If you’re out of lemons, vinegar can also add a nice zing. -
Salt & Pepper (to taste)
Essential for bringing out the flavors! Don’t skimp here; a pinch can really elevate your dish!
With this lineup of ingredients, your taste buds are in for a treat!
Step-by-Step Instructions
Alright, let’s dive into the nitty-gritty of making this kale pesto pasta salad! Put on some good tunes, and let’s get cooking!
-
Cook Your Pasta
Start by bringing a large pot of salted water to a boil. Toss in your pasta and cook according to the package directions until al dente. Don’t forget to taste! Once cooked, reserve about 1/2 cup of pasta water and then drain the rest. A little pasta water can be the secret weapon for making your pesto cling beautifully to your pasta.Tips: If you’re using a pasta that tends to stick, a drizzle of olive oil in the water can help!
-
Prepare the Kale Pesto
While the pasta is cooking, it’s time to make the star of the show: the kale pesto! In a food processor, combine chopped kale, garlic, nuts, Parmesan cheese, and lemon juice. Pulse until the mixture begins to blend, scraping down the sides as needed.Chef hack: To really amp up the flavor, add a few basil leaves or a sprinkle of chili flakes for a little heat!
-
Incorporate Olive Oil
With the food processor running, slowly drizzle in the olive oil until it reaches a smooth, creamy consistency. If it seems a bit thick, add a tablespoon of that reserved pasta water until it’s just right. Taste and adjust with salt and pepper! -
Combine Pasta and Pesto
In a large bowl, toss the warm pasta with the luscious kale pesto. Mix until the pasta is generously coated, giving it that lovely green hue we all adore. Add more pasta water if it feels too dry!Chef tip: Mixing the pesto with warm pasta helps the flavors meld beautifully!
-
Chill or Serve Immediately
You can enjoy this pasta salad warm, or refrigerate it for about 30 minutes for a refreshing cold dish! If you’re serving it cold, it’s great with an additional squeeze of lemon juice to brighten the flavors. -
Garnish and Enjoy!
Just before serving, give it a final sprinkle of grated Parmesan, a drizzle of olive oil, and a dash of fresh pepper. Yum!
And there you have it—a dazzling bowl of Easy Kale Pesto Pasta Salad ready to be devoured.
Serving Suggestions
Plating this pasta salad is super fun and casual—just how I like it! Grab a large serving bowl and pile your kale pesto pasta salad high, allowing those vibrant green tones to shine through. For extra flair, you can garnish with toasted nuts or a few fresh basil leaves on top. Oh, and don’t forget a wooden serving spoon for that rustic touch! This dish is tasty, pretty, and best enjoyed among good company.
Recipe Variations
Feeling adventurous? Here are some fun variations to switch up your Easy Kale Pesto Pasta Salad:
-
Mediterranean Twist: Add sun-dried tomatoes, olives, and feta cheese for a burst of Mediterranean flavor!
-
Protein Power: Toss in grilled chicken, shrimp, or chickpeas to amp up the protein content!
-
Roasted Veggie Medley: Roast seasonal veggies like bell peppers, zucchini, or broccoli and fold them into your salad for added flavor and nutrients.
-
Creamy Avocado: Fold in diced avocado for a creamy texture that pairs beautifully with the pesto.
-
Spicy Kick: Add diced jalapeños or a sprinkle of red pepper flakes to fire things up!
Chef’s Notes
Now, let’s chat a bit about the evolution of this recipe. When I first experimented with kale in my pestos, I was a bit skeptical. After all, who could compete with the vibrant flavor of basil? But as I tasted each version, I realized that kale has a unique earthiness that offers something new and delightful. Plus, it’s a leafy green powerhouse packed with vitamins A, K, and C—now that’s a win-win!
Over the years, I’ve refined this recipe, swapped out nuts, played with various cheese types, and even experimented with different herbs (the addition of mint is a surprising delight!). Each version is delicious, bringing a little piece of my kitchen adventures right to your table.
FAQs and Troubleshooting
1. What can I do if my pesto is too bitter?
If your pesto tastes a bit bitter, try adding a pinch of salt or a bit more lemon juice. Balancing flavors can be key!
2. Can I use frozen kale or store-bought pesto?
Absolutely! Just be sure to thaw and drain any excess moisture from frozen kale before blending. Store-bought pesto can also be a huge time-saver—just toss in some fresh garlic or lemon for a personal touch!
3. How do I store leftovers?
Store any leftovers in an airtight container in the fridge for up to 3 days. You may want to add a splash of olive oil to keep it fresh and vibrant!
4. Can I make this vegan?
Totally! Replace the Parmesan cheese with nutritional yeast, and use a substitute for pasta that aligns with your dietary needs.
Nutritional Info (optional)
While specific nutritional information can vary, here’s a rough breakdown for one serving (based on 4 servings total):
- Calories: Approx. 350
- Protein: 12g
- Fat: 18g
- Carbohydrates: 40g
- Fiber: 6g
- Sodium: 250mg
And there you have it, my food-loving friends! I hope you give this Easy Kale Pesto Pasta Salad a try and let it spark joy in your kitchen just like it does in mine. Remember, cooking is all about exploration and enjoyment, so don’t be afraid to make it your own! Happy cooking! 🥗✨
Print
Easy Kale Pesto Pasta Salad
- Total Time: 30 minutes
- Yield: 4 servings
- Diet: Vegetarian
Description
A delightful kale pesto pasta salad that’s perfect for busy weeknights or potlucks, combining vibrant greens with hearty pasta.
Ingredients
- Pasta (your choice! Penne, fusilli, or spaghetti)
- Fresh Kale (about 4 cups, chopped)
- Garlic (3 cloves)
- Nuts (1/4 cup, pine nuts or walnuts)
- Parmesan Cheese (1/2 cup, grated)
- Olive Oil (1/3 cup)
- Lemon Juice (from 1 lemon)
- Salt & Pepper (to taste)
Instructions
- Cook your pasta by bringing a large pot of salted water to a boil. Toss in your pasta and cook according to the package directions until al dente, reserving about 1/2 cup of pasta water, then drain.
- Prepare the kale pesto by combining chopped kale, garlic, nuts, Parmesan cheese, and lemon juice in a food processor and pulsing until it starts to blend.
- Incorporate olive oil by drizzling it in while the processor is running until smooth, adjusting with reserved pasta water if too thick.
- Combine the warm pasta with the kale pesto in a large bowl, mixing until the pasta is coated.
- Chill it for about 30 minutes for a refreshing cold dish, or serve immediately.
- Garnish before serving with grated Parmesan, olive oil, and fresh pepper.
Notes
For a vegan option, replace Parmesan with nutritional yeast. Leftovers can be stored in an airtight container for up to 3 days.
- Prep Time: 10 minutes
- Cook Time: 20 minutes
- Category: Salad
- Method: No-Cook
- Cuisine: Italian
Nutrition
- Serving Size: 1 serving
- Calories: 350
- Sugar: 2g
- Sodium: 250mg
- Fat: 18g
- Saturated Fat: 5g
- Unsaturated Fat: 10g
- Trans Fat: 0g
- Carbohydrates: 40g
- Fiber: 6g
- Protein: 12g
- Cholesterol: 20mg
Keywords: pasta salad, kale, pesto, vegetarian, easy recipes

Mandarin Orange Salad
Mandarin Orange Salad: A Burst of Sunshine in Every Bite
Welcome back to my cozy little corner of the kitchen! Today, we’re diving into a recipe that’s as bright and cheerful as a sunny afternoon: Mandarin Orange Salad. This dish is not just about combining ingredients; it’s a celebration of flavors, textures, and memories that have brought me immense joy. That beautiful, juicy mandarin, vibrant greens, and a delightful dressing come together to create a salad that’s perfect for any occasion.
Imagine this: the fresh scent of citrus fills your kitchen as you peel the juicy mandarins, their zesty aroma lifting your spirits and transporting you back to warm, family gatherings. I can still recall those summer afternoons spent at my grandmother’s house, where dinner often included her famous Mandarin Orange Salad. It was a hit at every barbecue, picnic, and holiday meal, and I’m excited to share how you can recreate that nostalgic feeling right in your own home!
This salad is more than just a side dish; it’s a way to connect with those you love and to create new memories around the table. Whether you’re whipping it up for a casual weeknight dinner or dressing up a festive gathering, this Mandarin Orange Salad is sure to leave everyone smiling and reaching for seconds. The vibrant colors and refreshing flavors not only tantalize your taste buds but also give off a sense of warmth and happiness—because let’s face it; food tastes better when it’s shared with the people you care about.
Are you ready to brighten your day with this delightfully simple and stunning salad? Let’s gather our ingredients and make some kitchen magic together!
Personal Story
I will never forget my first attempt at making Mandarin Orange Salad as a teenager. I was determined to impress my family during one of our classic Sunday dinners. Armed with a cookbook I had borrowed from my mother’s shelf, I eagerly flipped through the pages. There it was—a photo of the salad, bursting with colors that promised flavor. I raced to the grocery store, filled my basket with fresh ingredients, and couldn’t wait to get started.
But the real adventure began when I realized I forgot to buy the pecans. Under pressure, I scoured my pantry and found some walnuts lurking in the back. I tossed those in with a prayer, thinking they could mimic the crunch. To my absolute surprise, the salad turned out to be a fantastic hit! The contrast of the crisp greens, juicy mandarins, and the unexpected nutty twist brought everyone back for seconds. That night, I learned an invaluable lesson: cooking is as much about creativity and improvisation as it is about following a recipe. It was in that moment I fell in love with cooking—an adventure in every dish, where you sometimes find magic in your mistakes.
Ever since then, this Mandarin Orange Salad has held a special place in my heart (and on my dinner table). I can’t wait for you to experience the joy this recipe brings, possibly even creating your own unforgettable kitchen stories along the way.
Ingredients
Here’s what you’ll need to whip up this delicious salad:
-
Mixed greens (spinach, arugula, romaine)
- A blend of greens adds texture and nutrition. You can substitute with kale for a heartier taste or use baby greens for a tender option.
-
Mandarin oranges (fresh or canned)
- These sweet little gems are the star of the show! Fresh mandarins brighten up the dish but canned ones in juice can work too (just be sure to drain & rinse).
-
Red onion (thinly sliced)
- For a bit of bite, thinly sliced red onion adds an excellent crunch. You can swap it with green onions for a milder flavor or skip it altogether for a sweeter salad.
-
Cucumber (sliced)
- Adds refreshing crunch and balance. Feel free to switch it with zucchini or use pickled cucumbers for a tangy twist.
-
Feta cheese (crumbled)
- Feta brings a salty creaminess that pairs beautifully with the sweetness of the oranges. If you want a vegan option, try crumbled tofu or omit the cheese entirely.
-
Nuts (walnuts or pecans, toasted)
- The nuts are essential for adding crunch! You can also try sunflower seeds or pumpkin seeds if you’re looking for something different or nut-free.
-
Olive oil (for dressing)
- A good quality olive oil makes all the difference for flavor. You can use avocado oil or a nut oil for a unique twist.
-
Apple cider vinegar (for dressing)
- The acidity from the vinegar balances the sweetness of the salad. Lemon juice works wonderfully if you need a substitution.
-
Honey (or maple syrup for a vegan option)
- Adding sweetness to the dressing elevates the salad. If you prefer a savory note, take a pass on the honey.
Writing this list makes me feel excited about all the possibilities! Don’t be afraid to play around with substitutes based on what you have on hand. Cooking is all about creativity, after all!
Step-by-Step Instructions
Now, let’s get to the exciting part: making this vibrant Mandarin Orange Salad from scratch!
Step 1: Prepare Your Ingredients
Begin by rinsing your greens under cold water and thoroughly drying them. I like to use a salad spinner—it’s such a lifesaver! This ensures your greens stay crisp and don’t wilt from excess moisture. While you’re at it, go ahead and peel and segment your mandarin oranges. Take your time; this is a stress-free moment to enjoy each juicy slice!
Step 2: Slice Your Vegetables
Next, grab your trusty knife, and thinly slice the red onion and cucumber. A sharp knife is always a friend in the kitchen—it cuts down on time and keeps things safe. Pro tip: if you’re sensitive to onion’s bite, soak the slices in cold water for about 10–15 minutes to mellow the flavor before adding them to the salad.
Step 3: Toast Your Nuts
In a dry skillet over medium heat, add your chosen nuts—this step is key to unlocking their full flavor! Keep a close eye on them as they toast for about 5 minutes. You want them lightly golden and fragrant. If you pass that golden mark, not to worry; just embrace that “toasted” flavor (but it’ll be a tad stronger than the sweet nuttiness you’re aiming for).
Step 4: Mix the Dressing
For the dressing, in a small bowl, whisk together the olive oil, apple cider vinegar, honey (or maple syrup), and a pinch of salt and pepper. Taste it as you go—feel free to tweak those ingredients until you achieve the perfect balance of sweetness and tang. Remember, the dressing is where the magic happens!
Step 5: Assemble the Salad
In a large mixing bowl, place the dried greens, mandarin segments, cucumbers, and sliced onions. Gently toss them together. Drizzle some of the dressing over the top, but hold off on adding too much at once—you can always add more later! This is another moment where personal preference reigns. Sometimes, a light touch is all you need.
Step 6: Add the Cheese and Nuts
Now, sprinkle the crumbled feta cheese and toasted nuts over the salad. Carefully fold everything to combine without bruising those delicate greens and mandarins. The luscious feta will cling to the oranges, making every bite divine.
Step 7: Serve and Enjoy!
Transfer your gorgeous salad to a serving bowl or plate—presentation is all part of the fun! Drizzle a bit more dressing on top if you like, and garnish with extra mandarins or nuts for that wow factor. Don’t forget to take a moment to admire your handiwork before diving in!
Serving Suggestions
When it comes to serving this delightful Mandarin Orange Salad, keep it simple and elegant! Opt for a large serving bowl that showcases the vibrant colors, or plate individual portions for a more refined touch. I like to place a few additional mandarin segments or nuts on top for that finishing touch, making each dish feel special. Pair it with grilled chicken or fish for a complete meal or serve it as a side with your favorite main dishes. It’s versatile and pairs well with many flavors!
Recipe Variations
Ready to get creative with your Mandarin Orange Salad? Here are a few fun variations you can try:
- Tropical Twist: Swap out mandarin oranges for fresh pineapple or add coconut flakes for a tropical vibe.
- Spicy Kick: Toss in some sriracha or chili oil in your dressing for a spicy twist.
- Color Pop: Add roasted beets or pomegranate seeds to enhance the visual appeal and add depth of flavor.
- Herbal Infusion: Mix in fresh herbs like mint or basil to elevate the freshness significantly.
- Grain Boost: Toss in some cooked quinoa or farro to make this salad heartier and packed with protein.
Experiment, have fun with it, and find your perfect combination!
Chef’s Notes
Over the years, my Mandarin Orange Salad has evolved. Each dinner gathering brings unique ingredients and surprises. From adding grilled shrimp for a seafood twist to swapping feta for creamy goat cheese, I adore how adaptable this salad is! There was also that time I accidentally added way too much honey—needless to say, it quickly became an unofficial sweet treat rather than a savory salad. But hey, perfection is overrated, right? Embrace the happy accidents; they often lead to the best tasting stories and dishes!
FAQs and Troubleshooting
1. What if I can’t find mandarins?
Not an issue at all! You can use any citrus fruit. Navel oranges, clementines, or even grapefruit can work well, just adjust the sweetness of your dressing accordingly.
2. My salad turned out soggy. What went wrong?
Soggy salad happens when greens are wet or if dressing is added too early. Make sure your greens are dried properly, and only dress the salad right before serving to keep them crisp.
3. How can I store leftovers?
If you have leftovers, I recommend storing the salad components separately. Keep the greens and dressing in airtight containers. Combine when ready to serve, and you’ll maintain that fresh crunch!
4. Can I make this salad in advance?
Certainly! You can chop and prepare most of the ingredients a day ahead, but hold off on combining the greens and dressing until just before serving to keep everything crisp and fresh.
Nutritional Info
- Servings: 4
- Calories: Approximately 200 per serving
- Protein: 4g
- Fat: 12g
- Carbohydrates: 22g
- Fiber: 3g
- Sugar: 10g
(Note: Nutritional values can vary based on ingredients used and portion sizes. Always be sure to account for your variations!)
Now that you’ve got the full scoop on this radiant Mandarin Orange Salad, it’s time to roll up your sleeves and get cooking! I hope this brings a burst of sunshine into your kitchen like it always does in mine. Remember, cooking is about joy, exploration, and creating connections through food. So gather your loved ones, enjoy the process, and savor every delicious bite. Happy cooking!
Print
Mandarin Orange Salad
- Total Time: 20 minutes
- Yield: 4 servings
- Diet: Vegetarian
Description
A vibrant Mandarin Orange Salad bursting with flavors and textures, perfect for any occasion.
Ingredients
- Mixed greens (spinach, arugula, romaine)
- Mandarin oranges (fresh or canned)
- Red onion (thinly sliced)
- Cucumber (sliced)
- Feta cheese (crumbled)
- Nuts (walnuts or pecans, toasted)
- Olive oil (for dressing)
- Apple cider vinegar (for dressing)
- Honey (or maple syrup for a vegan option)
Instructions
- Prepare your ingredients by rinsing the greens and drying them. Peel and segment the mandarin oranges.
- Slice your vegetables, including red onion and cucumber.
- Toast your nuts in a dry skillet over medium heat for about 5 minutes.
- Mix the dressing by whisking together olive oil, apple cider vinegar, honey, salt, and pepper.
- Assemble the salad by tossing dried greens, mandarin segments, cucumbers, and sliced onions in a bowl.
- Add the crumbled feta cheese and toasted nuts on top, folding gently to combine.
- Serve and enjoy your beautifully presented salad.
Notes
Feel free to substitute ingredients based on what you have available. This salad is versatile and can be tailored to your taste.
- Prep Time: 15 minutes
- Cook Time: 5 minutes
- Category: Salad
- Method: No Cooking
- Cuisine: American
Nutrition
- Serving Size: 1 serving
- Calories: 200
- Sugar: 10g
- Sodium: 300mg
- Fat: 12g
- Saturated Fat: 2g
- Unsaturated Fat: 6g
- Trans Fat: 0g
- Carbohydrates: 22g
- Fiber: 3g
- Protein: 4g
- Cholesterol: 10mg
Keywords: salad, mandarin oranges, healthy, vegetarian, fresh
Marry Me Salad: Find Out Why Everyone Craves This Recipe!
Marry Me Salad: Find Out Why Everyone Craves This Recipe!
Introduction: The Love Story of Food
Welcome, fellow food lovers! Grab a cozy seat and a warm cup of tea, because today we’re diving into a recipe that may just steal your heart (and your taste buds). Meet the infamous Marry Me Salad — the dish that’s said to be so irresistibly delicious that it could lead to an engagement! Now, I’m not saying you’ll get a ring out of it, but I can guarantee a mouthwatering experience that will make your loved ones weak in the knees.
I stumbled upon this salad during a particularly memorable family gathering. My friend Sarah whipped up her version for a potluck dinner, and I remember sitting at the table, chatting about life, love, and everything in between, while this vibrant bowl of greens sat majestic in the center of the table. As each person dug in, a chorus of “Mmm”s and “Wow”s erupted, each bite bringing smiles and cheerful chatter. It was as if this salad was more than just a dish; it was a catalyst for connection, laughter, and yes—love.
What makes the Marry Me Salad so special? It’s a harmonious blend of fresh ingredients, tangy flavors, and delightful textures that simply dance together on your palate. It’s colorful and eye-catching, making it not just a meal but a celebration of life, love, and the joy of cooking. So, whether you’re planning a romantic dinner, a lively brunch with friends, or just a quiet night in, this salad is sure to impress.
Alright, let’s get cooking! You’re about to be the star in your own kitchen love story.
Personal Story: A Salad That Stole Hearts
I’ll let you in on a little secret—this salad has a magical backstory in my life. A few summers ago, I was visiting a charming vineyard with my partner. The sun was setting, casting an enchanting golden hue over everything, and as we sat outside on the patio, I knew we were in for something special. The host brought out a simple spread, and there it was—the Marry Me Salad!
This version was bursting with fresh ingredients and bold dressings, and we couldn’t help but share tidbits about our lives as we savored each bite. With every forkful, laughter mingled with whispers of dreams and plans for the future, building the kind of intimate atmosphere that felt like magic.
That salad was a game changer; we analyzed its every element, attempting to decode why it tasted so extraordinary. It quickly became our go-to dish, one that sparked dreams of epic romance and culinary adventures. Since then, I’ve tweaked the original recipe and sprinkled in my own flavor profile to create a version perfect for you to enjoy!
Ingredients: Freshness at its Finest
Before we jump into the nitty-gritty of cooking, let’s gather our star ingredients. Here’s what you’ll need for your Marry Me Salad:
-
Mixed Greens (2 cups)
- A blend of arugula, spinach, and kale creates a delightful base. Chef Insight: Feel free to swap in your favorite leafy greens based on your mood!
-
Cherry Tomatoes (1 cup, halved)
- These sweet little gems add color and juiciness. Substitution Tip: Grape tomatoes work just as well if you have those on hand.
-
Cucumber (1 small, sliced)
- Crisp and refreshing for that perfect crunch. Did You Know? You can use pickled cucumbers for an extra zing!
-
Red Onion (1/4, thinly sliced)
- A touch of sharpness sends the flavor off the charts. Chef Hack: Soaking in cold water before adding can mellow their bite.
-
Avocado (1, diced)
- Creamy, rich, and oh-so-satisfying! Substitution Tip: If avocados are out of season, consider using sliced apples for a fruity twist.
-
Feta Cheese (1/2 cup, crumbled)
- Adds a tangy flavor that elevates the salad. Note: Goat cheese is a fantastic swap if you’re a fan of its creaminess.
-
Olive Oil (3 tablespoons)
- The heart of our dressing! Chef Tip: High-quality, cold-pressed olive oil will enhance every flavor.
-
Balsamic Vinegar (2 tablespoons)
- For that sweet and tangy kick! Variation: Honey balsamic can bring a lovely sweetness to the mix.
-
Salt and Pepper (to taste)
- Always season to bring out the incredible flavors!
This combination of fresh ingredients is what makes the Marry Me Salad sing. Your taste buds are going to be in for a treat. Now, let’s get these ingredients dancing together in harmony!
Step-by-Step Instructions: Crafting Your Culinary Masterpiece
Alright, my kitchen warriors, let’s put on our aprons and get to work! Here’s how to create your very own Marry Me Salad in a few simple steps:
1. Prepare the Greens
Start by rinsing your mixed greens in cold water. This will ensure all that delightful, vibrant crunch remains intact. Tip: Use a salad spinner to remove excess water, keeping your greens crisp and fresh!
2. Slice the Veggies
Next, take your cherry tomatoes and slice them in half. As you slice, give a little shoutout to these colorful beauties—they’re more than just eye candy! For the cucumber, slice thinly to match the salad’s elegance. Chef Hack: A serrated knife is great for tomatoes!
3. Tame the Onion
Time to tackle the red onion! Slice it thinly, coaxing out all those pungent, flavorful oils. If the sharpness is too much for you, remember that soaking in cold water will mellow it out.
4. Dice the Avocado
Grab your avocado and slice it in half. Remove the pit and scoop the green goodness into a bowl, dicing it into bite-sized cubes. Tip: Sprinkle some lemon juice over the avocado to prevent it from browning.
5. Assemble the Salad
In a large salad bowl, layer the mixed greens followed by the colorful veggies: tomatoes, cucumber, and red onion. Then, gently fold in your diced avocado and crumbled feta. Preparation Tip: Toss the salad carefully to prevent mashing the avocado.
6. Dress It Up
In a small bowl, whisk together the olive oil and balsamic vinegar, seasoning it with salt and pepper to taste. Drizzle the dressing over the salad, adding as much or as little as you prefer. Tongs are your best friend here; use them to combine everything evenly.
7. Serve it Beautifully
Garnish your Marry Me Salad with a sprinkle of extra feta or chopped herbs, such as parsley or cilantro, for that final touch. Presentation matters, so take a moment to admire your creation before serving!
8. Gather ‘Round the Table
Gather your loved ones, and savor the moment! Enjoy this salad either as a main dish or a side; I can’t wait for you to experience the delight we felt during that unforgettable summer evening.
Serving Suggestions: How to Plate Your Creation
Plating is one of the most delightful parts of cooking — it’s all about making your dish visually appeal! For the Marry Me Salad, serve it family-style in a large bowl in the center of the table, accompanied by a side of crusty bread or warm pita. Alternatively, for individual servings, use beautiful, clear glass containers or plates to showcase those vibrant colors. Add a lemon wedge on the side for a touch of zest!
Recipe Variations: Get Creative!
If you’re feeling adventurous or have specific dietary needs, here are a few fantastic twists on the traditional Marry Me Salad:
- Protein-Packed Version: Add grilled chicken, shrimp, or chickpeas for extra sustenance.
- Mediterranean Flair: Mix in Kalamata olives, sun-dried tomatoes, or roasted red peppers for a richer flavor profile.
- Dairy-Free Delight: Swap the feta cheese for avocado or use a vegan cheese alternative.
- Crunch Factor: Toss in some nuts like slivered almonds or walnuts for a satisfying crunch.
- Spicy Kick: Drizzle with a bit of sriracha or add sliced jalapeños for heat.
Remember, this salad is all about expressing your tastes and creativity, so mix it up to fit your palate!
Chef’s Notes: The Evolution of My Favorite Salad
Okay, here’s a peek behind the curtain of my kitchen saga. This salad has evolved over the years as I experimented with different ingredients and techniques. Initially, I followed a dear friend’s version to the letter. But as I started to host my own gatherings, I found myself unable to resist adding personal touches—like toasting pumpkin seeds and turning up the tanginess with lemon zest.
Recently, I’ve taken a likening to adding grilled nectarines in summer for some sweet juiciness; it’s like summer love in a bowl! This journey has shown me just how adaptable this salad can be, and how it tells a story of seasonal ingredients and individual flair.
FAQs and Troubleshooting: Common Questions and Simple Fixes
Q1: Can I make the salad ahead of time?
Absolutely! Just prepare the individual components beforehand—wash the greens, chop the veggies, and store them separately in airtight containers. Dress right before serving to keep everything fresh!
Q2: What if the avocado browns?
A sprinkle of lemon juice over the cut avocado should keep it a lovely green. If you have leftovers, try squeezing lemon juice over the salad and covering it!
Q3: How do I prevent soggy salad?
The key is to use dry greens and not to dress the salad until you’re ready to eat. Keeping the dressing on the side can help maintain texture.
Q4: What should I do if I don’t have balsamic vinegar?
No worries! You can use red wine vinegar, apple cider vinegar, or even a splash of lemon juice to bring that zesty kick.
Nutritional Info
While I believe the joy of food goes beyond numbers, the Marry Me Salad brings with it a bounty of nutrients, including vitamins from the greens, healthy fats from the avocado, and protein from the feta cheese or chickpeas (if added). A typical serving contains:
- Calories: Around 250-300 (depending on dressing)
- Protein: Approx. 7-10g (more if you add protein)
- Healthy Fats: Approx. 20g from olive oil and avocado
- Fiber: About 5-7g
Feel free to adjust your ingredients based on dietary preferences and health goals!
Conclusion
There you have it! The ever-enticing Marry Me Salad is not just a recipe; it’s a celebration of love, flavors, and the joy of cooking together. From its colorful ingredients to those heartwarming memories shared over meals, this salad has a way of ushering people together.
So gather your favorite humans, whip up this delightful dish, and who knows—you might just ignite a spark (or a few engagements) in your own kitchen! Happy cooking, friends; now go get married… to good food! 🍽️❤️
Print
Marry Me Salad
- Total Time: 15 minutes
- Yield: 4 servings 1x
- Diet: Vegetarian
Description
A vibrant and delightful salad known for its irresistible flavors, perfect for romantic dinners or lively gatherings.
Ingredients
- 2 cups Mixed Greens (a blend of arugula, spinach, and kale)
- 1 cup Cherry Tomatoes, halved
- 1 small Cucumber, sliced
- 1/4 Red Onion, thinly sliced
- 1 Avocado, diced
- 1/2 cup Feta Cheese, crumbled
- 3 tablespoons Olive Oil
- 2 tablespoons Balsamic Vinegar
- Salt and Pepper to taste
Instructions
- Prepare the Greens by rinsing them in cold water and using a salad spinner to remove excess water.
- Slice the cherry tomatoes in half and the cucumber thinly.
- Tame the red onion by slicing it thinly, soaking if necessary to mellow the flavor.
- Dice the avocado, sprinkling lemon juice to prevent browning.
- Assemble the salad by layering mixed greens, veggies, feta, and avocado in a large bowl.
- Dress it by whisking together olive oil and balsamic vinegar, seasoning to taste, and drizzle over the salad.
- Serve it beautifully, garnishing with extra feta or fresh herbs.
- Gather around the table and enjoy your delicious creation!
Notes
This salad is versatile; feel free to swap ingredients based on preferences, and dress just before serving to keep it fresh.
- Prep Time: 15 minutes
- Cook Time: 0 minutes
- Category: Salad
- Method: No Cook
- Cuisine: Mediterranean
Nutrition
- Serving Size: 1 serving
- Calories: 300
- Sugar: 4g
- Sodium: 320mg
- Fat: 20g
- Saturated Fat: 5g
- Unsaturated Fat: 15g
- Trans Fat: 0g
- Carbohydrates: 25g
- Fiber: 5g
- Protein: 8g
- Cholesterol: 15mg
Keywords: salad, vegetarian, healthy, fresh, Mediterranean

Chicken Pesto Pasta Salad
# Chicken Pesto Pasta Salad: A Flavorful Journey

## Introduction

Hey there, fellow food lovers! Welcome to my kitchen, where every sizzle and simmer tells a story. Today, I’m super excited to share with you a delightful recipe that’s one of my summer go-tos: Chicken Pesto Pasta Salad. Whether you’re whipping it up for a picnic in the park or serving it as a weekday dinner with a twist, this dish is all about bright flavors and comforting vibes.

Picture this: the sun is shining, and you’ve got a plateful of colorful pasta salad in front of you. Each bite bursts with vibrant green basil, savory chicken, and a drizzle of rich pesto that takes your taste buds on a joyride. It's a celebration of fresh ingredients that’s cozy enough for a family meal but chic enough for a party spread.

What I adore about this Chicken Pesto Pasta Salad is its versatility. You can easily customize it to fit your dietary needs or reinvent it with whatever ingredients you have on hand. And don’t worry—I promise, you don’t need to be a culinary wizard to whip this up. With simple ingredients and easy steps, you’ll feel like a master chef in no time.

So grab your apron, crank up your favorite playlist, and let’s get cooking this delicious dish together!

---

## Personal Story

I remember the first time I made Chicken Pesto Pasta Salad. It was during one of those blissful summer days when the smell of outdoor barbecues filled the air, and the sun seemed to make everything brighter. My family had decided to host a backyard gathering, and I wanted to impress them with something light yet hearty.

After rummaging through my fridge and pantry, I came across a jar of homemade basil pesto my grandma had given me. That jar was a treasure, packed with memories of her kitchen and summer days spent picking fresh basil. Inspired, I got to work boiling pasta, grilling chicken, and tossing everything together in a huge bowl. When I served it up, the vibrant colors and fresh flavors brought smiles to every face at the table.

That is the magic of food, isn’t it? It not only fills our stomachs but connects us with memories and the people we cherish. Since then, this Chicken Pesto Pasta Salad has become a staple in my kitchen, a recipe I love to share with friends and family during those sunny gatherings and quiet evenings alike.

---

## Ingredients

Here’s what you’ll need to make this delicious Chicken Pesto Pasta Salad:

- **Pasta (2 cups, any shape)**
  Use your favorite pasta shape—fusilli, farfalle, or even whole wheat. If you're looking for gluten-free options, chickpea or quinoa pasta works wonderfully!

- **Cooked Chicken Breast (1 cup, shredded or diced)**
  Grilled or roasted chicken works best! If you’re short on time, use a store-bought rotisserie chicken.

- **Pesto (1/2 cup)**
  Homemade is always best, but store-bought works too. Pro tip: add a squeeze of lemon juice for a zesty kick.

- **Cherry Tomatoes (1 cup, halved)**
  Their sweetness adds a fresh burst! Substitute with diced red bell peppers for extra crunch if desired.

- **Spinach (2 cups, fresh)**
  You can also use arugula for a peppery bite or kale for added nutrition.

- **Parmesan Cheese (1/4 cup, grated)**
  This adds a nutty flavor. Nutritional yeast is a great dairy-free alternative!

- **Olive Oil (1 tablespoon)**
  A smooth drizzle enhances the flavors. Substitute canola oil if you prefer a milder taste.

- **Salt and Pepper (to taste)**
  Essential for flavor! Spice it up with red pepper flakes if you like a bit of heat.

---

## Step-by-Step Instructions

Ready to get those taste buds dancing? Let’s dive into the steps for making this vibrant Chicken Pesto Pasta Salad—feel free to channel your inner culinary artist!

1. **Cook the Pasta**
   Begin by bringing a large pot of salted water to a boil. Once it’s bubbling away, toss in your pasta and cook according to the package instructions until al dente. (Pro tip: reserve a cup of pasta water before draining for later use!) Drain the pasta and rinse it under cold water to stop the cooking process and cool it down quickly.

2. **Prepare the Chicken**
   If you’re grilling your chicken, season it with a pinch of salt and pepper. Grill until it’s golden brown and cooked through (about 6-7 minutes per side depending on thickness). Once done, let it rest for a few minutes before shredding. If using rotisserie chicken, simply shred the breast meat into bite-sized pieces.

3. **Mix the Salad**
   In a large mixing bowl, combine the cooled pasta, shredded chicken, cherry tomatoes, spinach, and pesto. Toss everything gently until it’s well coated. If the mixture seems too dry, add a splash of the reserved pasta water to loosen it up.

4. **Add Cheese and Season**
   Sprinkle in the grated Parmesan cheese, a drizzle of olive oil, and season with salt and freshly cracked black pepper to taste. Toss a bit more to incorporate everything evenly.

5. **Chill (Optional)**
   You can serve this salad right away, but if you have time, let it chill in the fridge for 30 minutes. This helps the flavors meld beautifully!

6. **Serve**
   Serve this delightful Chicken Pesto Pasta Salad in individual bowls or on a large serving platter. Garnish with extra Parmesan and a few fresh basil leaves if you’re feeling fancy!

---

## Serving Suggestions

Presentation can elevate any dish, and this Chicken Pesto Pasta Salad is no exception! Serve it in a colorful bowl atop a rustic wooden table or on a chic white platter for a contrasting touch. A sprinkle of fresh herbs or a few cherry tomatoes on top can add a pop of color that’s visually appealing. Pair it with a crisp green salad or some crusty bread on the side to soak up any extra pesto goodness.

---

## Recipe Variations

Here are a few creative twists to customize your Chicken Pesto Pasta Salad:

1. **Mediterranean Twist**: Add olives, cucumbers, and artichoke hearts for a Mediterranean flair.
2. **Vegan Version**: Substitute chicken with chickpeas or grilled eggplant and use vegan pesto.
3. **Spicy Affair**: Toss in some jalapeños or buffalo sauce for a spicy kick.
4. **Autumn Twist**: Incorporate roasted butternut squash or sweet potatoes in the fall—yum!

---

## Chef’s Notes

This Chicken Pesto Pasta Salad isn’t just a recipe; it’s an evolving celebration of flavors! I initially started with only chicken and pesto, but as I explored different ingredients, I discovered how transformative a few cherry tomatoes and spinach could be. And let’s not forget that moment when I decided to add a bit of lemon juice—it was a game changer! Each time I make this dish, I find new ways to enjoy and share it with loved ones, and that’s what cooking is all about—sharing love through food!

---

## FAQs and Troubleshooting

**1. Can I make this salad in advance?**
Absolutely! It’s actually even better when allowed to chill, as the flavors develop over time. Just keep it in an airtight container in the fridge for up to 3 days.

**2. What if I don’t have pesto?**
No problem! You can create a dressing with olive oil, lemon juice, garlic, and chopped fresh herbs to keep it flavorful.

**3. How can I make this dish more filling?**
Add chickpeas or nuts for extra protein and crunch!

**4. Why is my salad bland?**
Always taste as you go! If it’s missing something, adding more pesto or a pinch of salt might do the trick.

---

## Nutritional Info (Optional)

- **Serving Size**: 1 cup
- **Calories**: Approximately 350
- **Protein**: 25g
- **Carbohydrates**: 30g
- **Fat**: 15g
- **Dietary Fiber**: 4g

---

So there you have it, friends—my delightful Chicken Pesto Pasta Salad recipe! I hope this warm and flavorful dish brings joy into your kitchen, just as it does in mine. Can’t wait to hear how yours turns out, so please share your kitchen tales with me! Happy cooking! 🥗✨

Chicken Pesto Pasta Salad
- Total Time: 30 minutes
- Yield: 4 servings
- Diet: Gluten-Free
Description
A vibrant and easy Chicken Pesto Pasta Salad that’s perfect for summer gatherings, featuring colorful ingredients and rich flavors.
Ingredients
- Pasta (2 cups, any shape)
- Cooked Chicken Breast (1 cup, shredded or diced)
- Pesto (1/2 cup)
- Cherry Tomatoes (1 cup, halved)
- Spinach (2 cups, fresh)
- Parmesan Cheese (1/4 cup, grated)
- Olive Oil (1 tablespoon)
- Salt and Pepper (to taste)
Instructions
- Cook the pasta by bringing a large pot of salted water to a boil. Add pasta and cook until al dente. Drain and rinse under cold water.
- Prepare the chicken by seasoning it and grilling until golden brown. Let it rest and then shred.
- Mix the salad by combining pasta, chicken, tomatoes, spinach, and pesto in a large bowl.
- Add Parmesan cheese and olive oil, then season with salt and pepper. Toss to incorporate.
- Chill in the fridge for 30 minutes for best flavors if time allows.
- Serve in bowls or on a platter, garnished with extra Parmesan and basil if desired.
Notes
This salad can be made in advance and tastes even better once chilled. Customize with your favorite add-ins!
- Prep Time: 15 minutes
- Cook Time: 15 minutes
- Category: Salad
- Method: Mixing
- Cuisine: Italian
Nutrition
- Serving Size: 1 serving
- Calories: 350
- Sugar: 3g
- Sodium: 400mg
- Fat: 15g
- Saturated Fat: 4g
- Unsaturated Fat: 8g
- Trans Fat: 0g
- Carbohydrates: 30g
- Fiber: 4g
- Protein: 25g
- Cholesterol: 50mg
Keywords: chicken salad, pasta salad, pesto, summer recipes, easy recipes
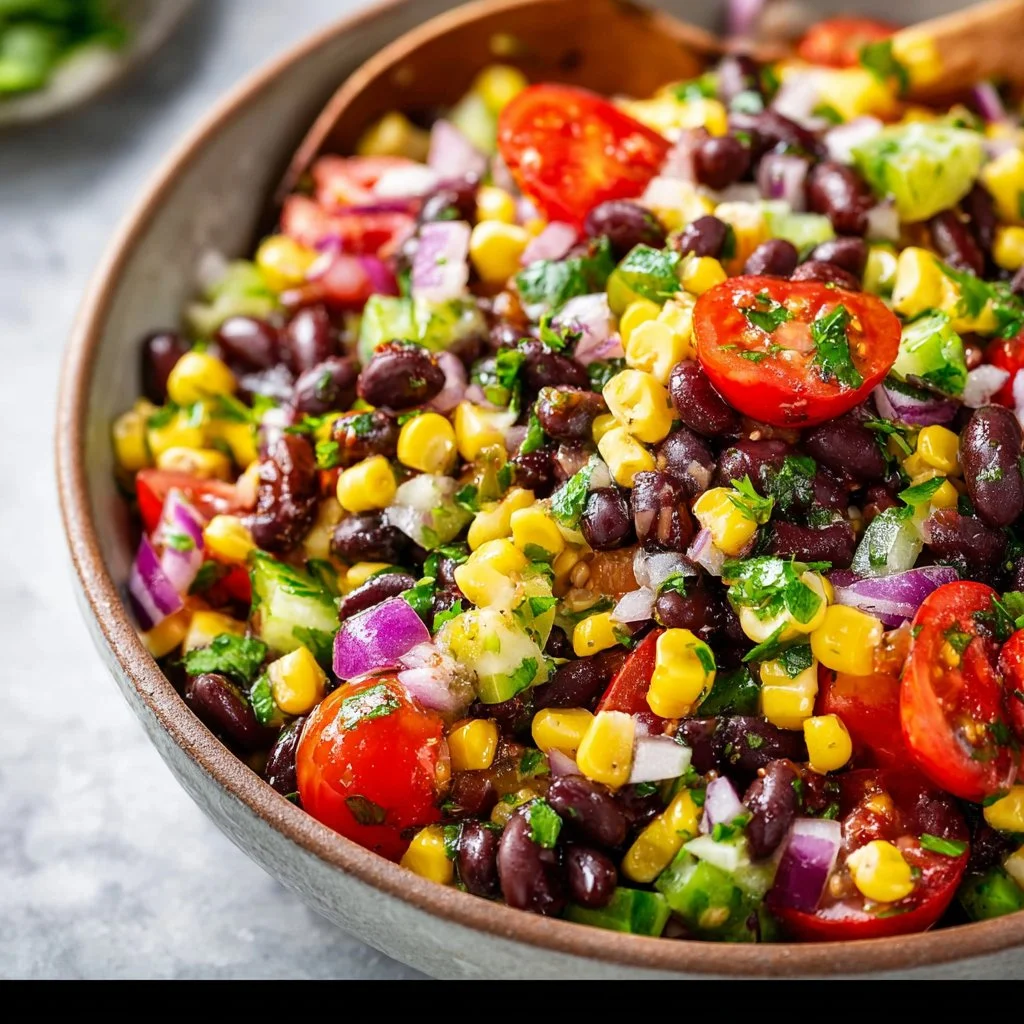
Black Bean and Corn Salsa Salad
Black Bean and Corn Salsa Salad: A Colorful Celebration of Flavor
Introduction
Welcome back to my kitchen! I’m so excited to share one of my favorite dishes with you today—Black Bean and Corn Salsa Salad. This vibrant, flavorful salad is not only a feast for the eyes but also a delightful burst of freshness in every bite. It’s the perfect side dish for summer barbecues, a fabulous topping for tacos, or a light lunch on a warm day. The best part? It’s super easy to whip up in no time!
I remember the first time I made this dish—a sun-drenched afternoon, the air filled with laughter, and the scent of freshly grilled chicken wafting in from the patio. I wanted something refreshing that could balance out the savory flavors of the grilled meats while adding a pop of color to our spread. After rummaging through my pantry and fridge, I stumbled upon some canned black beans, frozen corn, fresh cilantro, tomatoes, and a squeeze of lime. Just like that, the Black Bean and Corn Salsa Salad was born!
With its delightful medley of flavors and textures—crunchy bell peppers, sweet corn, hearty black beans, and zesty lime—this salad embodies everything I love about cooking: simplicity, nourishment, and connection. So, gather your ingredients and get ready to experience the joy of creating something delicious that your family and friends will absolutely adore!
Now, let’s dive into the story behind this delicious recipe, the ingredients, and how to make your very own Black Bean and Corn Salsa Salad.
Personal Story
Growing up, summer evenings at my grandparents’ house were nothing short of magical. My grandmother, the queen of backyard barbecues, had this uncanny ability to gather everyone around the grill, filling the air with the aroma of sizzling meats and vegetables. But amidst the smoky goodness, her signature Black Bean and Corn Salsa always stole the show.
I loved sneaking spoonfuls of the salad while it rested on the kitchen counter, impatiently waiting for it to be served. The vibrant colors glistened under the light, and each bite was a refreshing explosion of flavor. It wasn’t just a salad; it was a canvas for creativity and love.
Today, every time I whip up this recipe, I can’t help but reminisce about those carefree summer nights, the laughter surrounding me, and the feeling of being connected to my family through food. This dish is not just a salad; it’s a tribute to my family traditions and a reminder that the simplest recipes often carry the richest memories.
Ingredients
Let’s gather everything you need to create this colorful salsa salad. Here’s what you’ll need:
-
1 can (15 oz) black beans
- Packed with protein and fiber, black beans are a fantastic base for this salad. Make sure to rinse them well before adding to get rid of the excess sodium. If you’re looking for a substitute, kidney beans work beautifully too!
-
1 cup corn (fresh, frozen, or canned)
- Sweet corn adds a crunchy texture to the dish. If using fresh corn, just boil or grill it briefly to soften it up. For a twist, consider using roasted corn for a deeper flavor!
-
1 red bell pepper, diced
- This vibrant veggie adds sweetness and a lovely crunch. Feel free to swap it with a yellow or orange pepper for a different color palette, or even jalapeño for some extra heat if you’re feeling spicy!
-
1 cup cherry tomatoes, halved
- Bursting with flavor and juiciness, cherry tomatoes are my go-to choice. They’re easier to eat and add a pop of color. You can also use grape tomatoes or any ripe heirloom variety for unique flavors.
-
1/2 red onion, finely chopped
- Red onions bring a sharp bite that complements the sweetness of the corn. If you prefer a milder taste, soaking the onion in cold water for a few minutes can take the edge off!
-
1 cup fresh cilantro, chopped
- Cilantro adds a bright, herbaceous note that ties all the flavors together. If you’re not a fan, consider fresh parsley as a substitute or even a sprinkle of fresh oregano for something different.
-
Juice of 1 lime
- The acidity from lime juice is essential to brighten up the salad. You can use lemon juice in a pinch, but the lime really gives it that zesty kick we crave!
-
Salt and pepper, to taste
- Simple seasonings can make or break a dish! Start with a pinch of each, then taste and adjust as needed. I always remind my friends that it’s better to start small and add more if needed.
Step-by-Step Instructions
Now that we have our ingredients lined up, let’s make this vibrant salad! Follow these easy steps:
-
Prep the Beans and Corn
- If you’re using canned black beans, drain and rinse them under cold water until the water runs clear. This will wash away any excess sodium and improve the final flavor. For frozen corn, microwave it per the package instructions, then cool it down quickly in a bowl of ice water to stop the cooking process. This ensures your corn stays sweet and crunchy!
-
Chop the Veggies
- Dice your red bell pepper and red onion, and halve the cherry tomatoes. I like to keep the veggies pretty uniform in size so they blend well together, creating a beautiful mosaic! For the onion, remember to use a sharp knife—it helps to prevent the release of those tear-inducing compounds!
-
Mix It Up
- In a large mixing bowl, combine the black beans, corn, diced bell pepper, halved cherry tomatoes, and chopped red onion. Mix everything gently with a spatula or wooden spoon, being careful not to mash the beans!
-
Add Fresh Herbs and Lime Juice
- Toss in the chopped cilantro and squeeze the juice of one lime over the mixture. Toss everything again until well combined. The lime juice not only adds flavor but also helps marry all the ingredients together. Plus, who doesn’t love the smell of fresh lime in their kitchen?
-
Season to Taste
- Finally, sprinkle the salad with salt and pepper, mixing until evenly distributed. Now’s the time to give it a taste! If you want it zestier, feel free to add more lime juice.
-
Chill (Optional)
- Although you can serve it immediately, allowing the salad to chill in the fridge for about 30 minutes enhances the flavors as they mingle. It’s perfect for making ahead for parties!
Serving Suggestions
This Black Bean and Corn Salsa Salad can be served in various ways! You can present it in a large bowl for family-style sharing, or portion it out in individual cups for a fun, casual presentation. Garnish with additional cilantro for extra flair! Serve alongside grilled meats for a tasty contrast, scoop it up with tortilla chips for a add it as a topping for tacos, or enjoy it as a standalone dish on a hot day!
Recipe Variations
-
Add Avocado: For a creamy twist, dice up an avocado and gently fold it into the salad just before serving for added richness.
-
Spicy Kick: Chop up 1-2 jalapeño peppers (with or without seeds depending on your heat preference!) and toss them in for a fiery bite.
-
Quinoa Power: For extra protein and texture, mix in some cooked quinoa—it’s a great way to turn this salad into a more filling main dish.
-
Southwestern Flair: Sprinkle some crumbled feta or cotija cheese on top for a salty, creamy contrast. You can even use a dressing made from olive oil, cumin, and chili powder for added flavor.
-
Herb Swap: Try substituting fresh basil for cilantro, or add a handful of arugula for peppery notes that complement the sweet corn.
Chef’s Notes
This recipe has been a staple in my kitchen for years, and it has evolved with me! I’ve made it during countless summer gatherings, family picnics, and even as a light lunch when I want something refreshing. The beauty of salad is its adaptability; you can change the ingredients based on what’s in season or what flavors you’re craving.
I once had a friend add diced mango, and it was a game changer! The sweet and savory combination was incredible. There’s a certain joy in experimenting with this dish, so don’t be afraid to put your own spin on it!
FAQs and Troubleshooting
1. Can I make this salad ahead of time?
Yes! This salad can be made ahead, making it perfect for meal prepping or parties. The flavors get even better as they marinate together. Just keep it in an airtight container in the refrigerator.
2. How do I store leftover salad?
Any leftovers can be stored in an airtight container in the fridge for up to 3 days. However, if you’ve added avocado, it may brown a bit quicker. Just squeeze some extra lime juice on top before sealing!
3. Can I use dried beans instead of canned?
Absolutely! If you prefer dried beans, make sure to soak and cook them ahead of time. Just ensure they are thoroughly cooled before mixing them into your salad.
4. Why did my salad turn watery after storing?
This can happen if you’ve added ingredients that release moisture, like tomatoes. To avoid this, you can remove the seeds of the tomatoes or serve them on the side.
Nutritional Information
(Optional, as this might vary based on specific brands and quantities used. If you want, you can include an estimated breakdown based on one serving size).
And there you have it—my beloved Black Bean and Corn Salsa Salad! I hope you find as much joy in making and sharing this dish as I do. It’s not just a salad; it’s a celebration of flavors, colors, and memories waiting to be made. Happy cooking, and enjoy every bite!
Print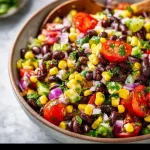
Black Bean and Corn Salsa Salad
- Total Time: 20 minutes
- Yield: 4 servings 1x
- Diet: Vegetarian
Description
A vibrant and flavorful salad featuring black beans, sweet corn, and fresh vegetables, perfect for summer gatherings or as a light meal.
Ingredients
- 1 can (15 oz) black beans, rinsed
- 1 cup corn (fresh, frozen, or canned)
- 1 red bell pepper, diced
- 1 cup cherry tomatoes, halved
- 1/2 red onion, finely chopped
- 1 cup fresh cilantro, chopped
- Juice of 1 lime
- Salt and pepper, to taste
Instructions
- Prep the beans and corn by draining and rinsing the black beans, and cooking the corn if needed.
- Chop the red bell pepper and red onion, and halve the cherry tomatoes.
- Mix the black beans, corn, diced bell pepper, halved cherry tomatoes, and chopped red onion in a large bowl.
- Add the chopped cilantro and lime juice to the mixture and toss to combine.
- Season with salt and pepper to taste.
- Chill in the fridge for 30 minutes or serve immediately.
Notes
This salad can be customized with avocado, jalapeños, or quinoa for added flavor and nutrition.
- Prep Time: 15 minutes
- Cook Time: 5 minutes
- Category: Salad
- Method: Mixing
- Cuisine: Mexican
Nutrition
- Serving Size: 1 serving
- Calories: 250
- Sugar: 6g
- Sodium: 300mg
- Fat: 5g
- Saturated Fat: 0.5g
- Unsaturated Fat: 4g
- Trans Fat: 0g
- Carbohydrates: 45g
- Fiber: 10g
- Protein: 12g
- Cholesterol: 0mg
Keywords: black bean salad, corn salsa, summer salad, vegetarian recipes
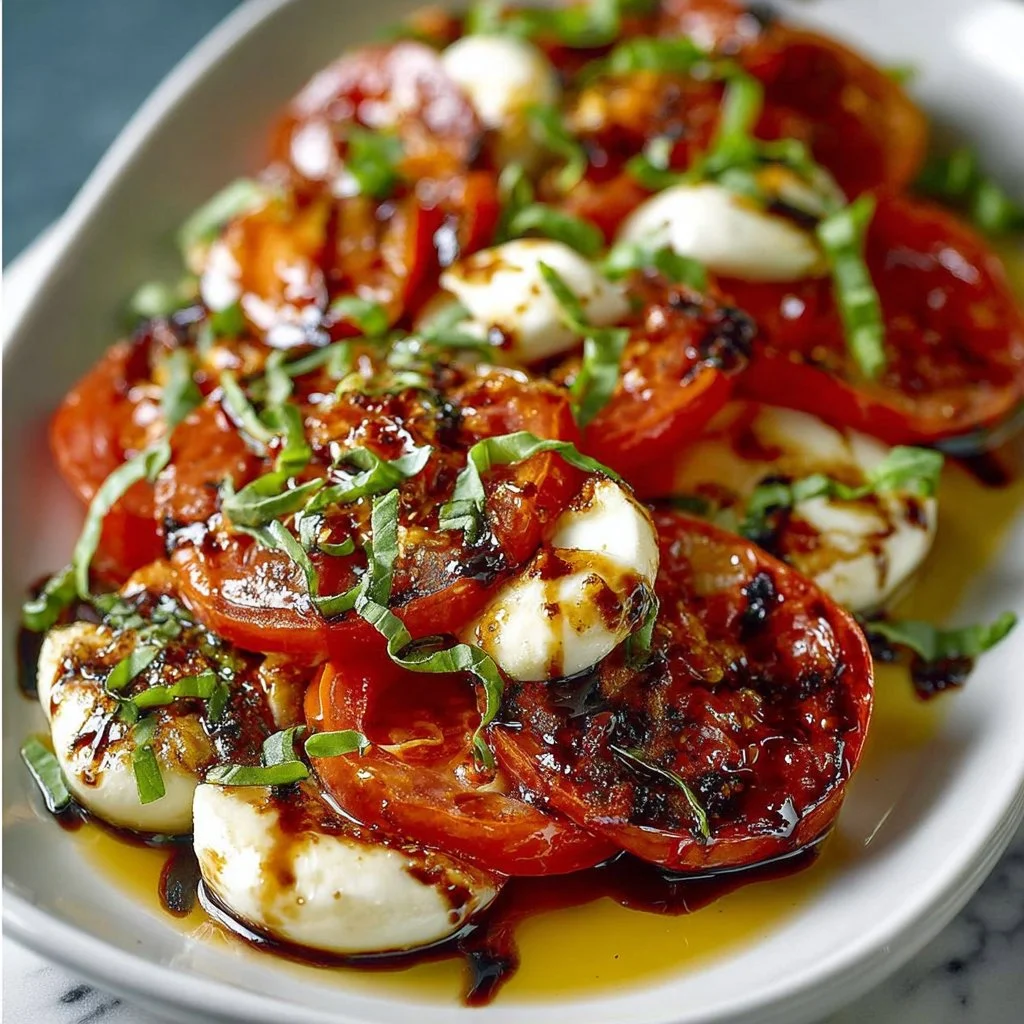
Vibrant Roasted Tomato Caprese Salad
Vibrant Roasted Tomato Caprese Salad: A Flavorful Ode to Simplicity
Welcome back to my kitchen, dear friends! Today, we’re diving into a dish that’s as vibrant as a summer garden—Roasted Tomato Caprese Salad. It’s a celebration of fresh ingredients that’ll make your taste buds dance with joy. Perfect for a simple weeknight dinner or as a showstopper at your next gathering, this salad is all about taking the classic Caprese to the next level by roasting those sweet tomatoes until they burst with flavor.
I remember the first time I indulged in a Caprese salad; it was a warm evening, and I found myself at a rustic Italian trattoria. The air was aromatic with herbs and fresh bread, not to mention the irresistible smell of tomatoes mingling with rich, creamy mozzarella. The dish arrived, and as I took my first bite, it felt like summer had arrived on my plate! Every layer—the juicy tomatoes, creamy mozzarella, fragrant basil, and drizzles of olive oil—sang in harmony.
As the seasons change, I find myself craving the comfort of roasted tomatoes—sweet, caramelized, and packed with flavor. Paired with fresh cheese and aromatic herbs, it creates a medley of textures and tastes that is sure to impress. Whether you’re looking to impress a date, feed a hungry family, or simply want to enjoy a bowl of sunshine, this Roasted Tomato Caprese Salad will not disappoint!
So, roll up those sleeves, preheat that oven, and let’s create something truly special together. Here’s a wonderful recipe that’s packed with flavor and love.
Personal Story
Growing up, my grandmother was the queen of tomatoes. Every year, we’d eagerly await the moment her garden produced those plump, juicy fruits. It was like a family tradition—the whole clan would gather to help with harvesting the tomatoes. I remember my grandmother’s delight, confidently guiding us on how to pick the ripest ones—“Pull with a gentle twist, Olivia!” she would say.
The best part? We’d always end the day with a delicious Caprese salad on her sun-drenched patio, where laughter and stories blended as beautifully as the ingredients on our plates. To her, cooking wasn’t just about feeding hungry bellies; it was about sharing love and memories. This Roasted Tomato Caprese Salad, then, is a tribute to those unforgettable summers spent in her garden, where the aroma of fresh basil and tomatoes lingered in the air and the spirit of family surrounded us.
Ingredients
To create this vibrant dish, you’ll need a few simple, high-quality ingredients. Here’s what to gather:
-
Ripe Tomatoes: About 2 pounds of your favorite tomatoes—heirlooms, Roma, or vine-ripened work beautifully. Tip: Look for tomatoes that feel heavy and smell fragrant; that’s how you know they’re ripe!
-
Fresh Mozzarella Cheese: 8 ounces. The creaminess of fresh mozzarella balances the acidity of the roasted tomatoes. Substitution: If you’re looking for something lighter, burrata or even a vegan mozzarella can work wonders!
-
Fresh Basil Leaves: A handful, roughly torn. Basil will add a fragrant kick that brightens everything up. Chef Insight: Use the leaves whole to release more flavor or chop finely for a more intense basil hit!
-
Extra Virgin Olive Oil: 3 tablespoons. A good-quality oil enhances the dish with its fruity, peppery notes. Tip: Don’t skimp on quality here; it truly makes a difference.
-
Balsamic Vinegar: 1 tablespoon (optional). It adds a tangy sweetness that pairs beautifully with the flavors. For a twist, try a balsamic glaze for a thicker, richer flavor!
-
Salt and Pepper: To taste. Simple yet essential for enhancing the flavors of the dish.
Step-by-Step Instructions
Step 1: Preheat the Oven
Start by preheating your oven to 400°F (200°C). This is crucial because we want those tomatoes to roast evenly, enhancing their natural sweetness.
Step 2: Prep the Tomatoes
While the oven is warming up, wash your tomatoes thoroughly. Slice them in half—if they’re larger, into quarters—and place them cut-side up on a baking sheet lined with parchment paper. Pro Tip: Spreading them out evenly will ensure they roast well and get that delicious caramelization!
Step 3: Season
Drizzle the cut tomatoes lightly with olive oil, and sprinkle them generously with salt and pepper. You want those flavors to seep into every nook and cranny! Don’t be shy—this is where the magic begins.
For added flavor, I sometimes toss in a few sprigs of fresh thyme or rosemary for an herby touch. Oven magic tip: If you have a little honey or sugar, a touch can help accentuate the tomatoes’ sweetness as they roast!
Step 4: Roast the Tomatoes
Place your baking sheet in the oven and roast for about 25-30 minutes, or until they’re soft, slightly caramelized, and exuding that lovely roasted scent. Keep an eye on them—the edges should get a little golden but should not turn into total mush. You want some structure left in them.
Step 5: Mix and Layer
Once the tomatoes are done, take them out and let them cool for just a few minutes. In the meantime, slice your fresh mozzarella into thick slices. Chef Hack: If you can get your hands on the ball of mozzarella, slice it in half for even thicker slices!
Now for the fun part! In a large serving bowl, layer the roasted tomatoes with slices of fresh mozzarella. Tear in those basil leaves, drizzling more olive oil and balsamic vinegar over everything. Visual tip: Don’t worry about being perfect—rustic is what we’re going for!
Step 6: Give it a Toss
Gently toss the salad so that all the flavors can blend together, but be careful; we want to keep our mozzarella intact! This is where you might want to give it another sprinkle of salt and fresh cracked pepper.
Step 7: Serve
Serve your Roasted Tomato Caprese Salad immediately, or let it sit for a few moments for the flavors to meld together. But trust me, it’s hard to resist digging in right away!
Serving Suggestions
For an inviting presentation, serve your Caprese salad on a beautiful platter. Arrange the layers artfully, sprinkle some extra torn basil leaves on top, and drizzle a beautiful swirl of balsamic glaze for added flair. Pair it with a fresh baguette or some crispy crostini on the side for a complete meal that everyone will love!
Recipe Variations
- Grilled Caprese: If you’re firing up the grill, try grilling the tomatoes and even the mozzarella for an extra smoky flavor!
- Add Avocado: For a creamy twist, slice in some ripe avocado for added richness and nutrients.
- Protein Boost: Add marinated grilled chicken or chickpeas to make it heartier, perfect as a main dish.
- Seasonal Twist: Swap out tomatoes for roasted peaches or pears in the summer for an exciting contrast of flavors.
- Pasta Salad Version: Toss in cooked pasta for a delightful pasta salad that takes you straight to Italy!
Chef’s Notes
This recipe has truly evolved over time in my kitchen. I originally started with plain tomatoes and cheese, but as I began to explore the world of flavors, each iteration brought me closer to today’s vibrant dish. One memorable mishap—during a dinner party, I mistakenly used sweet balsamic glaze instead of regular balsamic vinegar, and to my surprise, everyone absolutely loved it! So don’t be afraid to experiment and make this recipe your own. Cooking should be fun and creative!
FAQs and Troubleshooting
1. What type of tomatoes should I use?
For the best flavor, use ripe heirloom tomatoes or vine-ripened ones. Roma tomatoes are great for roasting too, but feel free to experiment with whatever you find fresh and appealing!
2. How do I know when my tomatoes are done roasting?
Look for a slight caramelization on the edges and a soft, juicy inside. They should smell heavenly! A little golden goes a long way in flavor.
3. Can I make this salad ahead of time?
While it’s best enjoyed fresh, you can prepare the roasted tomatoes and mozzarella in advance and toss everything together right before serving. Just be mindful that the basil may wilt a bit if left too long!
4. What if I don’t like fresh mozzarella?
No worries! You can substitute with feta for a tangy punch or even use vegan cheese for a dairy-free option. Whichever you choose, make sure it’s something that complements the roasted tomatoes!
Nutritional Info
Approximate Per Serving:
- Calories: 235
- Protein: 10g
- Fat: 20g
- Carbohydrates: 6g
- Fiber: 1g
So, dear foodies, ready to get cooking? I hope you enjoy making and sharing this Roasted Tomato Caprese Salad as much as I do! Each bite is a reminder that great food doesn’t have to be complicated; sometimes, it’s the simplest things that bring us together. Happy cooking!
Print
Vibrant Roasted Tomato Caprese Salad
- Total Time: 40 minutes
- Yield: 4 servings 1x
- Diet: Vegetarian
Description
A delicious and simple Roasted Tomato Caprese Salad that celebrates fresh ingredients and brings summer to your plate.
Ingredients
- 2 pounds ripe tomatoes (heirlooms, Roma, or vine-ripened)
- 8 ounces fresh mozzarella cheese
- A handful of fresh basil leaves, roughly torn
- 3 tablespoons extra virgin olive oil
- 1 tablespoon balsamic vinegar (optional)
- Salt and pepper to taste
Instructions
- Preheat the oven to 400°F (200°C).
- Wash the tomatoes thoroughly and slice in half.
- Drizzle cut tomatoes with olive oil, and sprinkle with salt and pepper.
- Roast in the oven for about 25-30 minutes until soft and caramelized.
- Slice the fresh mozzarella into thick slices.
- Layer roasted tomatoes, mozzarella, and basil in a serving bowl.
- Toss gently to combine all ingredients.
- Serve immediately or let sit for a few moments for flavors to meld.
Notes
Try adding grilled chicken or chickpeas for added protein. This salad can also be enjoyed by replacing tomatoes with grilled peaches or pears.
- Prep Time: 10 minutes
- Cook Time: 30 minutes
- Category: Salad
- Method: Baking
- Cuisine: Italian
Nutrition
- Serving Size: 1 serving
- Calories: 235
- Sugar: 3g
- Sodium: 200mg
- Fat: 20g
- Saturated Fat: 5g
- Unsaturated Fat: 15g
- Trans Fat: 0g
- Carbohydrates: 6g
- Fiber: 1g
- Protein: 10g
- Cholesterol: 30mg
Keywords: Roasted Tomato, Caprese Salad, Summer Salad, Vegetarian Recipe, Fresh Ingredients

Low Carb Pizza Casserole (Easy, Cheesy & Family-Approved)
Low Carb Pizza Casserole (Easy, Cheesy & Family-Approved)
Introduction
Welcome to my cozy corner of the culinary world! Today, we’ll take a delightful dive into a dish that’s a real crowd-pleaser—Low Carb Pizza Casserole. Now, don’t let the “low carb” scare you; I promise, this casserole delivers all the cheesy, saucy goodness that you crave while hugging that carb count. Picture this: a bubbling, cheesy casserole that’s packed with flavor and makes life on a low-carb diet infinitely more delicious. If you’re anything like me, where the mere mention of ‘pizza’ makes your stomach do a happy dance—then, oh boy, are you in for a treat!
Growing up, pizza night was a sacred ritual in my family. Every Friday, like clockwork, we’d gather around our rickety dining table with a steaming pizza that my dad would whip up from scratch. The aroma of the homemade sauce simmering on the stove combined with the distinctive sound of dough being tossed in the air still brings a nostalgic smile to my face. As I got older and started my own family, I found ways to keep those joyful pizza nights alive—but with a healthy twist. That’s how this Low Carb Pizza Casserole was born!
Imagine layering your favorite pizza toppings in a warm, comforting casserole, perfect for a family dinner, parties with friends, or even a cozy night in, just you and your favorite movie. Trust me, it’s all about satisfying those cravings while keeping it healthy, and I can’t wait to share this recipe with you! So roll up those sleeves, grab that apron, and let’s dive right into this cheesy goodness that’s bound to become a family favorite!
Personal Story
Let me take you back to a chilly fall evening a few years ago. I had just come home after a long day at work, and after a tiring week, all I wanted was the comforting embrace of something cheesy and warm. As I rummaged through the fridge, I came across an assortment of veggies, some leftover cooked chicken, and a half-opened jar of marinara sauce.
I started layering everything in a baking dish—a little cheese here, a sprinkle of herbs there, and before I knew it, I had a bubbling masterpiece in the oven resembling all the flavors of pizza without the guilt of a heavy crust. As my family gathered for dinner, their eyes lit up, and the smell wafting from the oven had them entranced. As we dug in, the jokes and laughter flowed—a reminder that food is truly the heartbeat of our home. That became our first “pizza night” casserole, and it sparked ideas for countless other family meals.
That evening not only gave birth to the Low Carb Pizza Casserole you’re about to learn but also solidified my firm belief that the best recipes often come from a mix of creativity, necessity, and heart!
Ingredients
Here’s what you’ll need to create your very own Low Carb Pizza Casserole, along with some handy insights for each ingredient:
-
1 pound ground beef or Italian sausage
Chef Insight: Feel free to substitute with turkey or chicken for a healthier variant, or even omit it entirely for a vegetarian option. -
½ cup onion, chopped
Substitution Tips: You can use shallots or even green onions for a milder flavor. -
2 cloves garlic, minced
Chef Tip: Fresh garlic packs a punch, but if you’re in a pinch, garlic powder works too—just use about 1/4 teaspoon per clove. -
1 cup marinara sauce
Try This: Store-bought works great, but homemade marinara adds a personal touch, especially on special occasions! -
2 cups chopped cauliflower or zucchini
Swap It Out: If you’re not a fan of cauliflower, chopped bell peppers or mushrooms work wonders too! -
1 teaspoon Italian seasoning
Chef’s Hack: Use fresh herbs like basil or oregano for a vibrant flavor! -
2 cups shredded mozzarella cheese
Cheesy Variations: Swap in your favorite cheese—parmesan, provolone, or pepper jack for an extra kick! -
½ cup pepperoni slices or your favorite pizza toppings
Customization: Try using olives, cooked bacon, or even artichoke hearts to shake things up.
Step-by-Step Instructions
Now, let’s get cooking! Follow these detailed steps to whip up your Low Carb Pizza Casserole.
-
Preheat Your Oven
Preheat your oven to 375°F (190°C). Getting that oven nice and hot gives you the best bubbly, cheesy outcome! -
Brown the Meat
In a large skillet over medium heat, add your ground beef or Italian sausage. Cook, breaking it apart with a spatula until browned—about 5-7 minutes. Don’t forget to drain any excess fat if you’re using fatty meat. -
Sauté the Onion and Garlic
Once the meat is browned, toss in your chopped onion and minced garlic to the skillet. Sauté until the onions are translucent and fragrant, around 3-4 minutes. This is your flavor base! -
Mix in the Marinara Sauce
Stir in your marinara sauce, bringing everything together into a gorgeous mixture. Add your Italian seasoning—smell that? It’s like a warm hug in the kitchen! -
Incorporate the Veggies
Gently fold in the chopped cauliflower or zucchini. This is where the low carb magic happens! Mix until everything is evenly coated in that saucy goodness. -
Transfer to Baking Dish
Pour the meat and veggies mixture into a greased 9×13-inch baking dish. Spread it out evenly to ensure every bite is bursting with flavor. -
Cheesy Topping
Sprinkle the shredded mozzarella cheese generously over the top. You want a good blanket of cheese to melt and form that delicate, gooey layer everyone loves. -
Add Toppings
Don’t forget the pepperoni (or any of your chosen toppings) on top of the cheese. Pile them high, friends! -
Bake in the Oven
Slide the casserole into the oven and bake for 20-25 minutes, or until the cheese is bubbling and golden on top. Keep an eye on it so it doesn’t get too brown! -
Serve and Enjoy
Once out of the oven, let it sit for about 5 minutes (if you can resist!). Serve hot, maybe with a fresh side salad for a delightful dinner.
Serving Suggestions
For presentation, scoop a generous portion onto a plate and drizzle a little extra marinara on the side for dipping. A sprinkle of fresh basil or oregano on top will add a beautiful touch and fragrant aroma.
Recipe Variations
- Pepperoni Lovers: Add extra layers of pepperoni, or use spicy Italian sausage for a pepperoni explosion!
- Veggie Delight: Load up with even more veggies—spinach, olives, or artichokes for those vibrant flavors!
- Buffalo Chicken: Spice things up with buffalo sauce instead of marinara and add shredded chicken for an exciting twist.
- Cheesy Pesto: Instead of marinara, spread a thin layer of pesto and mix mozzarella with Parmesan for that classic pizza flavor.
- Free-from Options: Use vegan cheese and a cauliflower base for an entirely dairy-free and low carb version!
Chef’s Notes
As with every recipe, it’s evolved over time! Initially, I was hesitant about including cauliflower, but it truly adds that hearty bite reminiscent of crust. My kids are now huge fans and often request this casserole with various toppings—they even suggest some wild combinations! Whenever I do make this dish, it’s remarkable how the kitchen erupts with laughter and joy, making every meal a little gathering of love.
FAQs and Troubleshooting
-
Can I prep this casserole ahead of time?
Absolutely! You can prep the casserole, cover it tightly, and refrigerate until you’re ready to bake. Just add a few extra minutes to the baking time if it’s cold from the fridge. -
What if my casserole is too watery?
If you find it watery after baking, it could be due to the veggies releasing excess moisture. Next time, consider sautéing the veggies first to help them release moisture before adding them to the casserole. -
How do I check if it’s done?
Your casserole is ready when the cheese is bubbly and golden brown. You might also want to insert a knife in the center; it should come out hot and the veggies tender! -
Can I freeze leftovers?
Yes! Cool the casserole completely, then transfer to an airtight container. It should keep well in the freezer for up to 2 months. Thaw in the fridge overnight before reheating.
Nutritional Info
This section is optional, but if you’d like the nutritional breakdown of your casserole, please let me know, and I’ll be more than happy to provide it!
So there you have it—the ultimate recipe for a Low Carb Pizza Casserole that’s easy to whip up, downright delicious, and sure to light up your family dinner table. Let the leftovers disappear in a flash and look forward to the smiles and satisfied bellies around your dining table. Happy cooking, friends!
Print
Low Carb Pizza Casserole
- Total Time: 45 minutes
- Yield: 4 servings 1x
- Diet: Low Carb, Gluten-Free
Description
A delicious low carb pizza casserole, packed with flavor and cheesy goodness, perfect for family dinners.
Ingredients
- 1 pound ground beef or Italian sausage
- ½ cup onion, chopped
- 2 cloves garlic, minced
- 1 cup marinara sauce
- 2 cups chopped cauliflower or zucchini
- 1 teaspoon Italian seasoning
- 2 cups shredded mozzarella cheese
- ½ cup pepperoni slices or your favorite pizza toppings
Instructions
- Preheat your oven to 375°F (190°C).
- Brown the meat in a large skillet over medium heat for about 5-7 minutes.
- Sauté the onion and garlic in the skillet until translucent, around 3-4 minutes.
- Mix in the marinara sauce and Italian seasoning.
- Incorporate the chopped cauliflower or zucchini into the mixture.
- Transfer the mixture to a greased 9×13-inch baking dish.
- Sprinkle the shredded mozzarella cheese over the top.
- Add the pepperoni or your favorite toppings on top of the cheese.
- Bake in the oven for 20-25 minutes, until the cheese is bubbling and golden.
- Serve hot and enjoy!
Notes
You can customize this casserole with different toppings or make it vegetarian by omitting the meat.
- Prep Time: 15 minutes
- Cook Time: 30 minutes
- Category: Main Course
- Method: Baking
- Cuisine: Italian
Nutrition
- Serving Size: 1 serving
- Calories: 350
- Sugar: 5g
- Sodium: 400mg
- Fat: 20g
- Saturated Fat: 10g
- Unsaturated Fat: 8g
- Trans Fat: 0g
- Carbohydrates: 10g
- Fiber: 3g
- Protein: 25g
- Cholesterol: 70mg
Keywords: pizza, low carb, casserole, family-friendly, easy recipe

Greek Chicken Bowls
Greek Chicken Bowls: A Taste of the Mediterranean in Your Own Kitchen
Welcome to my kitchen! I’m Olivia Bennett, your passionate home cook and flavor enthusiast, here to guide you on a delicious journey to Greece without leaving your home. If you’re like me and find joy in fragrant spices, colorful veggies, and mouthwatering meals that bring everyone together, then you’re in for a treat with these Greek Chicken Bowls!
Imagine anchoring your evening around a table filled with vibrant colors and bright flavors—cooked chicken marinated to perfection, crisp fresh veggies, and a zesty tahini dressing that ties all the elements together. Not only are these bowls a feast for the eyes, but they also sing with flavor that captures the essence of Mediterranean cuisine. Perfect for busy weeknights or leisurely dinners with family or friends, these Greek Chicken Bowls bring warmth to your kitchen in the coziest way.
I vividly recall the first time I tried a Greek chicken dish during a vacation in Santorini. The sun was setting, casting a golden hue over everything, and I was seated at a rustic tavern overlooking the Aegean Sea. The smell of grilled chicken, fresh herbs, and warm pita wafted through the air, and my heart raced with excitement. I still remember that first bite—the juicy chicken, the tangy tzatziki, and the crunchy, refreshing salad. It was a beautiful symphony of flavors that left me spellbound. Later, I made it my mission to recreate that magic in my very own kitchen.
And today, my dear friends, I want to share that magic with you! This recipe is easy enough for any home cook, yet impressive enough to wow your guests. The best part? You can customize each bowl with your favorite toppings and make it your own!
So, roll up your sleeves, tie on that apron (messy ones are my favorite!), and let’s dive into the details of creating these delightful Greek Chicken Bowls from scratch!
Ingredients
Here’s what you’ll need for this refreshing dish. Don’t worry—I’ve got some easy substitutions and tips to help out along the way!
For the Chicken Marinade:
- Chicken Breasts: About 1.5 pounds boneless. Chicken thighs can also be used for juiciness and extra flavor.
- Olive Oil: ¼ cup. Extra virgin olive oil is preferred for its rich flavor.
- Lemon Juice: ¼ cup, freshly squeezed. Adds a bright, zesty element! If you’re short on lemons, lime juice can be substituted.
- Garlic: 3 cloves, minced. The heart of Greek cuisine! You can use garlic powder in a pinch—1 teaspoon equals about one clove.
- Oregano: 2 teaspoons dried or 1 tablespoon fresh. Fresh herbs are wonderful but dried works perfectly for this marinade.
- Salt and Pepper: To taste—always a must for seasoning your proteins!
For the Greek Salad:
- Cucumbers: 1 large, diced. For a twist, try using English cucumbers—no need to peel!
- Cherry Tomatoes: 1 cup, halved. Juicy and sweet! Any fresh tomatoes will do, but these are super convenient.
- Red Onion: ½ medium, thinly sliced. If raw onion is too strong for you, soak slices in water for 10 minutes—it mellows the taste!
- Kalamata Olives: ½ cup, pitted and sliced. These tangy beauties are traditional, but green olives can also add a nice flavor.
- Feta Cheese: ½ cup, crumbled. For dairy-free options, try using dairy-free feta or omit it altogether.
For the Tahini Dressing:
- Tahini: ¼ cup. This creamy sesame paste adds richness! Peanut butter could work in a pinch for a different flavor.
- Yogurt: ½ cup, Greek or plain. Adds creaminess; you can use a dairy-free alternative if needed.
- Lemon Juice: 1 tbsp. Brightens the dressing!
- Garlic: 1 clove, minced. Because you can never have enough garlic, right?
- Water: 2-3 tablespoons. Adjust to your desired consistency.
- Salt: To taste.
Now that we have our tasty ingredients lined up, let’s dive into the magic of creating these Greek Chicken Bowls!
Step-by-Step Instructions
Step 1: Marinate the Chicken
- In a large bowl, combine olive oil, lemon juice, minced garlic, oregano, salt, and pepper. Whisk until well blended.
- Add the chicken breasts to the marinade, ensuring they’re fully coated. It’s best if you can let them marinate in the fridge for at least 30 minutes (or up to 4 hours). This allows the flavors to seep deep into the meat!
Chef’s Tip: If you’re in a rush, even 15 minutes can make a difference, so don’t hesitate to get started!
Step 2: Prepare the Salad
- While the chicken marinates, chop your veggies! Dice the cucumbers, halve the cherry tomatoes, and slice the red onion. Toss these ingredients in a bowl with Kalamata olives and crumbled feta. Set aside, and take a moment to appreciate those lovely colors!
Chef’s Insight: This salad is the heart of the dish! Feel free to add bell peppers, radishes, or whatever fresh veggies you have on hand. It’s a great way to clean out the fridge!
Step 3: Make the Tahini Dressing
- In a separate bowl, whisk together tahini, yogurt, lemon juice, minced garlic, and water. Adjust the thickness with more water, if desired. Add salt to taste.
Chef’s Hack: Want a kick? Add a pinch of cayenne pepper or a drizzle of hot honey for an unexpected flavor twist!
Step 4: Cook the Chicken
- Preheat your grill or skillet over medium-high heat. Grill or pan-sear the chicken for about 6-7 minutes on each side, until the internal temperature reaches 165°F (75°C).
- Once cooked, allow the chicken to rest for at least 5 minutes before slicing it into strips.
Step 5: Assemble Your Bowls
- Now for the fun part! In a bowl, scoop a generous serving of the salad mixture. Place the sliced chicken on top, and drizzle with the tahini dressing. You can also serve it with warm pita bread or over a bed of fluffy rice if you’d like!
Serving Suggestions
Presentation is everything! To create a delightful feast for the eyes:
- Use shallow bowls to layer the salad, chicken, and dressing beautifully.
- Garnish with fresh parsley or mint for a pop of color and flavor.
- Serve with lemon wedges for an extra zesty kick!
Recipe Variations
Feel free to mix and match and make this recipe your own! Here are some fun variations:
- Mediterranean Quinoa Bowl: Swap out the chicken for grilled shrimp or roasted chickpeas, and use quinoa as the base for a hearty grain bowl.
- Spicy Chicken Bowls: Add harissa or chili flakes to the marinade for a spicy kick!
- Wrap It Up: Turn this bowl into a wrap—use a large pita or wrap, fill it up, and enjoy these flavors on-the-go!
- Veggie-Only Bowl: Make a vibrant vegan version by omitting the chicken and stuffing it with roasted veggies, hummus, and a sprinkle of nuts or seeds.
Chef’s Notes
This recipe has come a long way since my first attempt at recreating that unforgettable meal in Santorini. I’ve tweaked the flavors and ingredients over the years, and now it holds a special place in my heart for nostalgic reasons. Last summer, I hosted a Mediterranean-themed dinner party, and this dish was the star! Friends were raving about it, and it sparked some lively conversations about summer travels and kitchen experiments.
I still chuckle remembering a kitchen disaster where I mistakenly grabbed the cumin instead of oregano for the marinade. Let’s just say that "cumin chicken" still haunts my family—it was a lesson learned, but hey, we laughed through it!
FAQs and Troubleshooting
1. Why is my chicken dry?
Make sure to marinate it long enough and cook it to the right temperature—165°F (75°C). Overcooking will definitely dry it out, so keep an eye on those cooking times!
2. Can I meal prep these bowls?
Absolutely! They store well in the fridge for up to 3-4 days. Just keep components separate until ready to eat.
3. What herb can I use if I don’t have oregano?
Try thyme or a little rosemary! Adjust the amounts to taste, as these herbs are a bit stronger in flavor.
4. How can I make this recipe gluten-free?
The recipe is already naturally gluten-free! Just ensure any sides, like pita, are certified gluten-free or replaced with your favorite gluten-free bread or rice.
Nutritional Information
While the exact nutritional value can vary based on specific ingredient brands and measurements, here’s a general breakdown:
- Calories: Approximately 450-500 per serving
- Protein: 35-40 grams
- Carbs: 30-40 grams
- Fat: 20-25 grams
With every bite of these Greek Chicken Bowls, I hope you feel the spirit of the Mediterranean come alive in your kitchen, bringing comfort and joy to your table. Cooking should be about having fun, experimenting, and creating memories—so gather your favorite people, put on some music, and make this gorgeous meal together. Bon appétit, my friends!
Print
Greek Chicken Bowls
- Total Time: 45 minutes
- Yield: 4 servings 1x
- Diet: Gluten-Free, Dairy Optional
Description
A delicious journey to Greece with marinated chicken, fresh veggies, and zesty tahini dressing.
Ingredients
- 1.5 pounds boneless chicken breasts
- ¼ cup extra virgin olive oil
- ¼ cup freshly squeezed lemon juice
- 3 cloves garlic, minced
- 2 teaspoons dried oregano
- Salt and pepper, to taste
- 1 large cucumber, diced
- 1 cup cherry tomatoes, halved
- ½ medium red onion, thinly sliced
- ½ cup Kalamata olives, pitted and sliced
- ½ cup feta cheese, crumbled
- ¼ cup tahini
- ½ cup Greek or plain yogurt
- 1 tablespoon lemon juice
- 1 clove garlic, minced
- 2–3 tablespoons water, to desired consistency
- Salt, to taste
Instructions
- Marinate the chicken: In a large bowl, combine olive oil, lemon juice, minced garlic, oregano, salt, and pepper. Whisk until well blended. Add the chicken breasts to the marinade, ensuring they’re fully coated. Marinate for at least 30 minutes or up to 4 hours.
- Prepare the salad: While the chicken marinates, chop the cucumbers, halve the cherry tomatoes, and slice the red onion. Toss these ingredients in a bowl with Kalamata olives and crumbled feta.
- Make the tahini dressing: In a separate bowl, whisk together tahini, yogurt, lemon juice, minced garlic, and water. Adjust consistency with more water if desired. Add salt to taste.
- Cook the chicken: Preheat your grill or skillet to medium-high heat. Grill or pan-sear the chicken for about 6-7 minutes on each side, until the internal temperature reaches 165°F (75°C). Allow the chicken to rest for at least 5 minutes before slicing.
- Assemble your bowls: In a bowl, scoop a generous serving of the salad mixture, place the sliced chicken on top, and drizzle with the tahini dressing. Optionally, serve with warm pita bread or over rice.
Notes
Customize each bowl with your favorite toppings and make it your own! Allow chicken to marinate longer for deeper flavor.
- Prep Time: 15 minutes
- Cook Time: 30 minutes
- Category: Main Course
- Method: Grilling
- Cuisine: Mediterranean
Nutrition
- Serving Size: 1 bowl
- Calories: 475
- Sugar: 4g
- Sodium: 500mg
- Fat: 22g
- Saturated Fat: 4g
- Unsaturated Fat: 15g
- Trans Fat: 0g
- Carbohydrates: 34g
- Fiber: 4g
- Protein: 36g
- Cholesterol: 70mg
Keywords: Greek Chicken Bowls, Mediterranean recipe, healthy dinner, meal prep, summer meals

Cracked Garlic Steak Tortellini in Creamhouse Sauce Bliss
Cracked Garlic Steak Tortellini in Creamhouse Sauce Bliss
Hey there, fellow food lovers! Welcome back to my cozy little corner of the internet—my kitchen! If you’re looking for a dish that beautifully blends hearty comfort with gourmet flair, you’re in for a treat. Today, we’re diving into the world of Cracked Garlic Steak Tortellini in Creamhouse Sauce Bliss. Yes, you read that right—steak, tortellini, and a creamy sauce that’s turning "bliss" into an understatement!
This isn’t just any pasta dish; it’s a culinary love letter to those perfect moments spent around the dinner table. Picture this: the aroma of garlic sizzling in butter, the tender bite of steak melding with pillowy tortellini, and a velvety cream sauce drenching every delicious surface. It’s the kind of meal that speaks to the soul—warm, inviting, and beautifully simple while being downright impressive. Whether you’re trying to impress your date, wow your friends at a dinner party, or simply indulge yourself on a cozy night in, this dish will make you feel like a rockstar in the kitchen.
Now, this recipe isn’t just about putting food on the table; it’s about creating memories that linger long after the last bite. One of my favorite things about cooking is how it brings us all together, sparking conversations and laughter. Plus, I promise it’s easy enough to whip up on a busy weeknight—no three-hour cooking sessions required! So, grab your apron, let’s get crackin’ on this glorious dish that’ll make you want to do a little happy dance!
Personal Story
Before I dive into the nitty-gritty of the recipe, I want to share a little story that sits close to my heart: the first time I made tortellini from scratch. It was a rainy Saturday afternoon, and I was feeling adventurous, armed with a family recipe that had been passed down through generations. My kitchen was a whirlwind—flour flying everywhere, my apron soaked with both water and laughter.
I remember the feel of the dough in my hands, the joy of rolling it out, and the sheer delight of filling each little piece with cheesy goodness. I had my best friend over for the day, and we ended up making a huge mess but creating a magical bond over pasta! When we finally cooked those tortellini and tossed them in a rich sauce, the flavors were incredible. It was then that I realized how powerful cooking could be—not just about feeding the body but also about nourishing the spirit and fostering relationships.
So today, we’re building on that nostalgic experience, combining that same delightful tortellini with savory cracked garlic steak, which adds a whole new layer of depth to our dish. Are you ready? Let’s make some magic in the kitchen!
Ingredients
To whip up this delicious dish, you’ll need the following ingredients. Don’t worry if you’re missing a few items; I’ve added some substitution tips along the way!
For the Tortellini:
- Cheese Tortellini (fresh or frozen): The star of the show! You can use store-bought for convenience, or if you’re up for a culinary adventure, make your own. If cheese isn’t your vibe, try spinach or mushroom-filled tortellini.
For the Steak:
- Sirloin Steak (about 1 pound): I love using sirloin because it’s flavorful yet tender. For a leaner option, opt for flank steak. Not a beef lover? Chicken or sliced portobello mushrooms work well, too!
For the Creamhouse Sauce:
-
Unsalted Butter (4 tablespoons): Adds richness and helps create a luscious sauce. If you want a dairy-free option, use vegan butter or olive oil.
-
Crushed Garlic (4-6 cloves): Garlic is what takes this dish to the next level! Freshly crushed garlic adds the most flavor, but you can substitute with minced garlic if needed.
-
Heavy Cream (1 cup): This creates that delightful creaminess. Half-and-half can be a good light alternative, or almond milk for a lighter, dairy-free option.
-
Parmesan Cheese (1 cup, grated): Because what’s a creamy sauce without a little cheesy goodness? For a vegan substitute, try nutritional yeast.
-
Fresh Basil (1/4 cup, chopped): A touch of freshness to balance the richness. You can easily swap in parsley or even a bit of arugula if you prefer.
-
Salt and Pepper to taste: Essential for bringing out all the flavors!
Optional Garnish:
- Extra Parmesan and fresh basil leaves for sprinkling on top before serving. They bring a beautiful presentation and additional flavor!
Step-by-Step Instructions
Okay, let’s roll up those sleeves and get to cooking! Follow these step-by-step instructions, and don’t forget to have fun along the way. Cooking is all about creativity and connection!
Step 1: Cook the Tortellini
-
Boil Water: Bring a large pot of salted water to a boil. The salt enhances the tortellini’s flavor beautifully!
-
Add the Tortellini: Once boiling, add in your tortellini. Fresh tortellini will cook in about 3-5 minutes; frozen may take a minute or two longer. Stir occasionally so they don’t stick together. Check the package for the exact cooking time.
-
Drain and Set Aside: Once the tortellini are al dente, drain them well and toss with a splash of olive oil to prevent sticking. Set them aside while we work on the steak and sauce.
Step 2: Prepare the Steak
-
Season Your Steak: Pat your sirloin dry with paper towels (this ensures a great sear), then generously season both sides with salt and pepper. This is where we really build flavor!
-
Cook the Steak: In a large skillet over medium-high heat, melt 2 tablespoons of butter. Once it’s nice and bubbly, add the steak. Let it sear without moving it for about 4-5 minutes, depending on its thickness. This helps form a crust.
-
Flip and Finish: Using tongs, flip the steak and cook for another 3-4 minutes for medium-rare. Adjust the cooking time depending on your desired doneness. Once done, remove the steak from the skillet and let it rest for about 5 minutes before slicing it into bite-sized pieces.
Step 3: Make the Creamhouse Sauce
-
Sauté Garlic: In the same skillet, add the remaining 2 tablespoons of butter. Toss in the crushed garlic and sauté for about 30 seconds until fragrant. Keep an eye on it—garlic goes from perfectly golden to burnt really quickly!
-
Add Cream: Lower the heat and pour in your heavy cream, stirring gently to combine with the garlic and butter. Let it simmer for about 2-3 minutes.
-
Stir in Parmesan: Gradually add in the grated Parmesan cheese, stirring until it melts and creates a smooth sauce. It should be thick and creamy! If it feels too thick, add a splash of pasta water to adjust the consistency.
-
Season: Add chopped basil, and season with salt and pepper to taste. Such a simple step but makes a world of difference!
Step 4: Combine Everything
-
Mix it All Together: Toss the cooked tortellini in the creamhouse sauce, and gently stir to coat every piece. Add in the sliced steak, and let everything mingle over low heat for another minute or two.
-
Taste and Adjust: Give it a final taste. Need a little more salt? A squeeze of lemon juice can brighten things up too!
Serving Suggestions
Now for the fun part—plating! Serve the Cracked Garlic Steak Tortellini in deep bowls for a hearty presentation. Top it with extra grated Parmesan and a sprinkle of fresh basil leaves for that gourmet touch. You can even drizzle a bit of olive oil on top for added richness. This dish pairs beautifully with a side of garlic bread or a simple mixed greens salad dressed with balsamic vinaigrette.
Recipe Variations
Feeling adventurous? Here are some fun twists you can try with this dish:
-
Vegetarian Version: Swap the steak for a hearty mix of sautéed mushrooms and bell peppers. You’ll keep all that flavor while adding some delightful veggies!
-
Spicy Kick: Spice things up by adding a pinch of red pepper flakes to the cream sauce. Just a little heat can elevate the whole dish!
-
Seafood Inspired: Replace the steak with shrimp or scallops for a seafood twist. They cook fast and pair beautifully with cream sauce.
-
Add Veggies: Toss in some spinach or cherry tomatoes during the last few minutes of cooking for added color and nutrition.
-
Herb Variations: Swap out the basil for thyme or rosemary for a different flavor profile, providing a unique twist on the traditional dish.
Chef’s Notes
You know, the beauty of this recipe is that it’s evolved over time. When I first started cooking, I was intimidated by making sauces from scratch—but now I find it so rewarding! This dish was born out of me standing in front of the fridge, wondering how I could make a quick dinner with what I had on hand. It’s a wonderful reminder that cooking is about improvisation and creativity—bringing together flavors and techniques to create something special.
And let me tell you, every time I make this dish, I remember that rainy Saturday with my best friend—it reminds me of the joyous times spent cooking and creating. So, I invite you to make this dish, yes, for its incredible flavors but also to spark your kitchen adventures and treasured memories.
FAQs and Troubleshooting
Why is my sauce too thin?
If your sauce is too thin, try letting it simmer for a bit longer to thicken. Alternatively, you can mix a tablespoon of cornstarch with a bit of cold water to create a slurry, then add that to the sauce to help it thicken.
Can I make this ahead of time?
While this dish is best enjoyed fresh, you can prepare the tortellini and cream sauce ahead of time and store them separately in the fridge. Just reheat the sauce gently before adding the tortellini and steak.
What can I use instead of tortellini?
If you can’t find tortellini, feel free to substitute with other pasta shapes like rotini or farfalle. Just cook according to package instructions, as the cooking times will vary.
How do I know when my steak is done?
A meat thermometer is your best friend! Aim for 130°F for medium-rare. If you prefer a doneness level like medium or well-done, adjust the cooking time accordingly.
Nutritional Info (Optional)
For those keeping track, here’s a rough estimate per serving (assuming four servings):
- Calories: 550
- Protein: 35g
- Fat: 30g
- Carbohydrates: 45g
- Fiber: 2g
And there you have it! Your ultimate guide to making Cracked Garlic Steak Tortellini in Creamhouse Sauce Bliss. I hope this dish brings joy to your kitchen just as it does to mine. Remember, cooking is all about love, laughter, and a touch of creativity. So get cooking, and most importantly—enjoy every moment and every bite!
Print
Cracked Garlic Steak Tortellini in Creamhouse Sauce Bliss
- Total Time: 35 minutes
- Yield: 4 servings 1x
- Diet: Carnivore
Description
A delightful blend of tender steak and cheese tortellini in a rich, creamy garlic sauce. Perfect for impressing guests or enjoying a cozy night in.
Ingredients
- 1 pound Sirloin Steak
- 9 ounces Cheese Tortellini (fresh or frozen)
- 4 tablespoons Unsalted Butter
- 4–6 cloves Crushed Garlic
- 1 cup Heavy Cream
- 1 cup grated Parmesan Cheese
- 1/4 cup Fresh Basil, chopped
- Salt and Pepper to taste
- Extra Parmesan and fresh basil leaves for garnish
Instructions
- Boil Water: Bring a large pot of salted water to a boil.
- Add the Tortellini: Once boiling, add in your tortellini. Cook according to package instructions.
- Drain and Set Aside: Drain the tortellini, toss with olive oil, and set aside.
- Season Your Steak: Pat steak dry and season both sides with salt and pepper.
- Cook the Steak: In a skillet over medium-high heat, melt 2 tablespoons of butter and sear the steak for 4-5 minutes.
- Flip and Finish: Flip the steak and cook for another 3-4 minutes. Let rest before slicing.
- Sauté Garlic: In the same skillet, melt the remaining butter and sauté garlic for 30 seconds.
- Add Cream: Pour in the heavy cream, reduce heat, and simmer for 2-3 minutes.
- Stir in Parmesan: Gradually add Parmesan cheese and stir until melted and smooth.
- Season: Add chopped basil, and season with salt and pepper to taste.
- Mix it All Together: Toss the tortellini in the sauce, add sliced steak, and gently combine.
Notes
Feel free to substitute ingredients based on dietary preferences, such as chicken for steak or vegan alternatives for cream and cheese.
- Prep Time: 15 minutes
- Cook Time: 20 minutes
- Category: Main Course
- Method: Stovetop
- Cuisine: Italian
Nutrition
- Serving Size: 1 serving
- Calories: 550
- Sugar: 3g
- Sodium: 750mg
- Fat: 30g
- Saturated Fat: 15g
- Unsaturated Fat: 10g
- Trans Fat: 0g
- Carbohydrates: 45g
- Fiber: 2g
- Protein: 35g
- Cholesterol: 90mg
Keywords: steak, tortellini, creamy pasta, comfort food, Italian recipe

Garlic Butter Steak Rigatoni (Easy & Creamy Family Favorite)
Garlic Butter Steak Rigatoni: The Easy & Creamy Family Favorite
Hello, fellow food lovers! I’m Olivia Bennett, your friendly kitchen companion who believes that the heart of every home lies in the cooking pot. Today, we’re whipping up something to truly get excited about: Garlic Butter Steak Rigatoni. Let’s face it, who doesn’t love a creamy, dreamy meal that combines steak and pasta? It’s like a warm hug on a plate!
Picture this: a delectable blend of perfectly cooked rigatoni, tender steak bathed in a luscious garlic butter sauce, and a sprinkle of fresh parsley for that pop of color. It’s comfort food that’s both hearty and indulgent, yet super simple to create. Whether you’re cooking for your family on a busy weeknight or impressing friends at a weekend gathering, this dish is sure to become a favorite.
As a home cook, I always strive to incorporate flavors that resonate with all ages. Garlic Butter Steak Rigatoni does exactly that with its rich umami notes, whisper of garlic, and a comforting creaminess. Plus, the versatility of this dish allows for creativity—I can’t wait for you to make it your own!
So, grab your apron, and let’s dive into this delectable journey together where I share not just the recipe, but also some kitchen stories, tips, and tricks you’ll want to remember for your own culinary adventures. Cooking is about connection, and I’m thrilled to share these moments with you.
Personal Story
Let me take you back to a cozy Friday night at home when I first crafted this dish. I remember a rather hectic week filled with meetings, groceries piling up, and those frustrating “What’s for dinner?” moments. After rifling through my pantry, I had a lightbulb moment about combining two of my absolute favorites: steak and pasta. The comfort of buttery pasta with savory steak instantly felt nostalgic—a little reminiscent of my dad’s famous grilled steak dinners from my childhood.
Our family kitchen was always alive with laughter and chatter, especially during dinner. I can still hear my sister teasingly fighting for the last bite of dad’s juicy steak while I’d clamored for extra pasta. It became a sort of ritual, you could say—sharing bites, laughter, and stories over delicious food. This dish captures that early family dinner vibe I cherish so much.
Creating this garlic butter sauce meant I could not only enjoy the rich flavors reminiscent of my dad’s unforgettable meals, but I could also add my twist to it. The result? A creamy, rich, and utterly delicious combination that has stood the test of time. It has become a staple in my kitchen, and I can confidently say it’s the perfect dish to reconnect with your loved ones.
Ingredients
To whip up this restaurant-quality Garlic Butter Steak Rigatoni, here’s what you’ll need:
-
Rigatoni Pasta (12 oz)
Perfectly shaped for holding onto that creamy sauce! If you’re out of rigatoni, any tubular pasta like penne or ziti works just as well. -
Steak (1 lb)
I recommend ribeye for its marbling, but sirloin or flank steak will also work. If you’re looking for a leaner option, go for sirloin. The key is to cut it against the grain to keep it tender. -
Salt (to taste)
Essential for seasoning your food! Remember, you can always add more, but you can’t take it out, so salt in moderation. -
Black Pepper (to taste)
Adds a lovely earthy flavor. Freshly cracked pepper is the best way to go for maximum flavor. -
Garlic (3-4 cloves, minced)
The star of our dish! Fresh garlic gives the best flavor. If you’re in a pinch, a teaspoon of garlic powder will do, but it won’t have the same punch. -
Butter (1/2 cup)
Rich and creamy, butter takes the flavor up a notch. If you want to save calories, you can use a mix of olive oil and butter. -
Heavy Cream (1 cup)
This is what gives our dish that irresistible creaminess. If you want to lighten it up, try half-and-half or even unsweetened almond milk, though it won’t be quite as rich. -
Parmesan Cheese (1 cup, grated)
It provides a salty depth and ties the whole dish together. Freshly grated is preferred! If you want a dairy-free alternative, nutritional yeast can add a cheesy flavor. -
Fresh Parsley (for garnish)
Not just a pretty garnish! Fresh parsley balances the richness of the dish.
Your pantry might be stocked with a few fantastic alternatives. Keep reading, as I’ll share more about substitutions as we go along!
Step-by-Step Instructions
Step 1: Cook the Rigatoni
In a large pot, bring salted water to a rolling boil. Add the rigatoni and cook according to package directions until it’s al dente—usually around 10-12 minutes. Remember, we will toss it in the sauce later, so don’t overcook the pasta! This is a common mistake, but it will turn into mush if you do. When done, reserve about a cup of the pasta water before draining. This starchy water is liquid gold that can be used to adjust the sauce consistency later!
Step 2: Prepare the Steak
While the pasta is cooking, heat a large skillet over medium-high heat. Add a tablespoon of butter to the pan, allowing it to melt and foam. Slice your steak into thin strips. Season generously with salt and black pepper. Add it to the hot skillet in a single layer—don’t overcrowd! This helps achieve a nice sear. Cook for about 3-4 minutes on each side for medium-rare, longer if you prefer it more done. When it’s cooked, remove it from the pan and let it rest. This is incredibly important as resting allows the juices to redistribute, keeping the meat tender.
Step 3: Make the Garlic Butter Sauce
In the same skillet, lower the heat to medium-low (add a bit more butter if the pan is dry) and toss in the minced garlic. Sauté for about 30 seconds until fragrant. Be careful not to burn it—the garlic will turn bitter! Pour in the heavy cream, stirring continuously, and let it cook for a couple of minutes until it slightly thickens.
Step 4: Combine Everything
Next, add the grated Parmesan cheese to your sauce, stirring until it melts beautifully into that creamy goodness. If it feels too thick, don’t stress! Just add in some of the reserved pasta water slowly until it reaches your desired consistency. Stir in the cooked rigatoni and the sliced steak. Toss everything together, ensuring the pasta is fully coated in that sultry sauce. A little tip? Using tongs makes this easier and gives you more control.
Step 5: Finish and Serve!
Sprinkle the chopped parsley over the top for freshness, and voilà! You can taste the layers of flavor with each bite—garlic, butter, and rich steak combined with pasta perfection.
Serving Suggestions
This dish is best served immediately while it’s still warm. Ladle it into bowls or plates, garnishing with a sprinkle of extra Parmesan and a touch of parsley for color. For those who like a little heat, keep some red pepper flakes on hand to sprinkle on top! Pair it with a simple side salad or roasted veggies for a well-rounded meal.
Recipe Variations
-
Veggie Lovers: Toss in some sautéed spinach or mushrooms in with the garlic for an extra kick of nutrition and flavor.
-
Spicy Twist: Add crushed red pepper flakes or a splash of hot sauce while cooking the garlic for some heat.
-
One-Pan Wonder: Skip boiling the pasta separately and add it directly to the pan with your sauce—just be sure to add extra water as needed to cook the pasta through.
-
Creamy Tomato Variation: Stir in a cup of marinara sauce into the garlic butter sauce for a cheesy, tomato-flavored twist.
-
Gluten-Free: Substitute the rigatoni with gluten-free pasta made from brown rice or lentils for an equally tasty result.
Chef’s Notes
When I first started making this dish, I stuck to the classic ingredients. But over the years, I’ve experimented with it, discovering how adding a splash of white wine to the sauce can really enhance the flavors—though that’s completely optional!
Oh, and speaking of kitchen mishaps, there was that one time I accidentally poured in a cup of coffee instead of cream. Let’s just say that the result was… unique! Thankfully, my best friends have always kept it real and were willing to taste everything—good kitchen friends are truly worth their weight in gold!
This dish has become a warm reminder of love shared around the dinner table and the beauty of cooking. So, whether you’re whipping this up solo or with a partner, remember that the joy is in the journey, not just the destination.
FAQs and Troubleshooting
Q1: My sauce came out too thick, what do I do?
No worries! Just add small amounts of reserved pasta water until it’s the desired consistency.
Q2: Can I use a different type of pasta?
Absolutely! Any pasta shape you love will work. Just keep an eye on the cooking time.
Q3: What can I do if my steak turned out tough?
Be sure to slice the meat against the grain and don’t rush the resting phase after cooking. This allows the meat to relax and retain its juices.
Q4: Is there a vegetarian version of this dish?
Yes! Replace the steak with sautéed mushrooms or tofu cubes, and add more veggies for a flavorful alternative.
Nutritional Info (Per Serving)
- Calories: 600
- Protein: 30g
- Carbohydrates: 70g
- Fat: 25g
- Fiber: 3g
And there you have it, my friends! A delightful recipe for Garlic Butter Steak Rigatoni that’s sure to become a staple in your home. I can’t wait to hear how you make it your own—share your creations, memories, or little kitchen mishaps below. Happy cooking, and may your kitchen always be filled with joy and laughter!
Print
Garlic Butter Steak Rigatoni
- Total Time: 45 minutes
- Yield: 4 servings 1x
- Diet: Carnivore
Description
A creamy and hearty dish combining rigatoni pasta and tender steak in a luscious garlic butter sauce, perfect for family dinners or impressing friends.
Ingredients
- 12 oz Rigatoni Pasta
- 1 lb Steak (recommended: ribeye)
- Salt (to taste)
- Black Pepper (to taste)
- 3–4 cloves Garlic, minced
- 1/2 cup Butter
- 1 cup Heavy Cream
- 1 cup Parmesan Cheese, grated
- Fresh Parsley (for garnish)
Instructions
- Cook the Rigatoni: In a large pot, bring salted water to a rolling boil. Add the rigatoni and cook according to package directions until al dente, usually around 10-12 minutes. Reserve about a cup of the pasta water before draining.
- Prepare the Steak: Heat a large skillet over medium-high heat. Add a tablespoon of butter, then slice your steak into thin strips, season with salt and black pepper, and add to the skillet. Cook for about 3-4 minutes on each side for medium-rare, then remove and let rest.
- Make the Garlic Butter Sauce: Lower the heat to medium-low in the skillet, add minced garlic and sauté for about 30 seconds until fragrant. Pour in heavy cream, stirring continuously, and let it cook for a couple of minutes until slightly thickened.
- Combine Everything: Add grated Parmesan to your sauce, stirring until melted. If too thick, mix in reserved pasta water until desired consistency, then stir in rigatoni and sliced steak.
- Finish and Serve: Sprinkle chopped parsley over the top and serve immediately while warm, optionally garnished with extra Parmesan and red pepper flakes.
Notes
Optional: Add sautéed spinach or mushrooms for extra nutrition, or a splash of white wine for flavor enhancement.
- Prep Time: 15 minutes
- Cook Time: 30 minutes
- Category: Main Course
- Method: Baking
- Cuisine: Italian
Nutrition
- Serving Size: 1 serving
- Calories: 600
- Sugar: 2g
- Sodium: 800mg
- Fat: 25g
- Saturated Fat: 15g
- Unsaturated Fat: 8g
- Trans Fat: 0g
- Carbohydrates: 70g
- Fiber: 3g
- Protein: 30g
- Cholesterol: 90mg
Keywords: Garlic Butter, Steak Rigatoni, Comfort Food, Easy Dinner, Family Recipe


