

Honey-Glazed Ham with Pineapple (Classic Easter & Holiday Main)
The Heartbeat of the Holiday Table: Your Ultimate Honey-Glazed Ham
Picture this: the oven is humming, the kitchen windows are lightly fogged, and an aroma so profoundly good it feels like a hug is wafting through every room. That smell—the sweet, smoky, savory perfume of a honey-glazed ham baking with pineapple—is the unmistakable soundtrack to so many of my favorite memories. It’s the sound of family arriving, of laughter bubbling over, and of that beautiful, collective sigh of contentment as everyone gathers around the table.
If you’ve ever felt a little flutter of intimidation at the thought of preparing the holiday centerpiece, let me be the first to tell you: you’ve got this. This honey-glazed ham with pineapple isn’t just a recipe; it’s a friendly, forgiving, and fantastically delicious project that promises big rewards. We’re taking a fully cooked ham (the secret to stress-free success!) and transforming it with a simple, shimmering glaze into a showstopper. The pineapple doesn’t just look pretty—it caramelizes into sweet-tart jewels, and its juices mingle with the glaze to create something magical. My goal today is to walk with you, step-by-step, and unlock the secrets to a ham that’s juicy on the inside, gloriously sticky and caramelized on the outside, and absolutely destined to be the star of your celebration. So tie on that apron (messy is totally welcome here), and let’s make some magic together.
Nana’s Apron and the Glaze Pot
My love affair with this ham started long before I ever owned a roasting pan. It began at my grandmother’s house, where I’d stand on a wobbly step stool, peering over the edge of the stove as she stirred the glaze. To me, it was a potion—golden honey, dark brown sugar, and the sharp tang of mustard merging into this glossy, bubbling syrup. She’d let me dip a spoon in to taste, always warning, “Careful, Olivia, it’s hotter than a July sidewalk!” The ritual of scoring the ham felt like an ancient art, and the ceremonial placement of the pineapple rings and cherries was my favorite job. I took it very seriously, ensuring each cherry sat perfectly in the center.
Years later, the roles reversed. I was the one preparing the ham, with Nana now sitting at the kitchen table, offering commentary that ranged from “A bit more glaze on the left, dear!” to “Smells just right.” That dish, for me, is so much more than food. It’s a thread that connects generations—a taste of home, of patience, and of the simple, profound joy that comes from preparing something beautiful for the people you love. Every time I make it, I feel that connection, and I hope this recipe helps you create your own delicious traditions.
Gathering Your Cast of Characters
Here’s everything you’ll need to create your holiday masterpiece. I’ve included some notes and swaps so you can shop and cook with confidence!
- 1 fully cooked bone-in or spiral ham (8–10 lb): This is our superstar! Bone-in hams are my personal favorite—the bone adds incredible flavor and helps keep the meat succulent. A spiral-cut ham is a fantastic time-saver and gives you those perfect, ready-to-serve slices. “Fully cooked” is key; we’re just reheating and flavor-building, so no stress about food safety!
- 1 cup honey: The heart of our glaze. Honey adds a floral, mellow sweetness that browns beautifully. For a deeper flavor, try using a dark honey like buckwheat. In a pinch, pure maple syrup makes a lovely substitute.
- 1/2 cup brown sugar: Team this with the honey, and you get a deeper, almost molasses-like sweetness and that perfect sticky texture. Light or dark brown sugar works—dark will give you a richer flavor.
- 1/4 cup pineapple juice: We’re pulling double duty! Use the juice from the can of pineapple we’ll open for decorating. It adds a bright, acidic note that cuts through the sweetness and keeps the glaze from being one-dimensional. Freshly squeezed works too!
- 2 tbsp Dijon mustard: My secret weapon! Dijon brings a subtle tang and complexity that balances the sugar. It also helps emulsify the glaze into a smooth, brushable consistency. Don’t skip it!
- 1/2 tsp ground cloves (optional): A tiny pinch goes a long way. Cloves give that classic, warm “ham spice” aroma. If you’re not a fan or don’t have any, a pinch of cinnamon or allspice is nice, or you can omit it entirely.
- Pineapple slices or chunks: For that iconic, beautiful presentation. Canned rings are classic and lay flat beautifully. Fresh pineapple works too—just know it may release a little less juice.
- Maraschino cherries (optional): The festive “button” in the center of the pineapple ring! They add a pop of color and a bit of extra sweetness. Totally optional but so cheerful.
Let’s Get Cooking: Your Foolproof Roadmap to Ham Heaven
Ready? Let’s do this. I’ll guide you through each step with all my favorite tips and hacks. Remember, cooking is about feeling, not just following—use your senses!
- Prep & Preheat: Start by positioning your oven rack in the lower third of the oven and preheating to 325°F (165°C). This ensures even cooking without the top getting too dark too fast. Place your ham, cut-side down, in a roasting pan. The cut side down traps juices inside, making every bite moist. Tent the pan very loosely with aluminum foil—you’re creating a little steamy environment to reheat the ham gently without drying it out. Chef’s Hack: If your ham didn’t come with a plastic cap on the bone, cut a small piece of foil to cover just the exposed bone tip so it doesn’t char.
- Craft the Glaze: While the oven heats, let’s make the magic potion! In a small saucepan, combine the honey, brown sugar, pineapple juice, Dijon mustard, and cloves (if using). Whisk it together over medium heat until it comes to a gentle simmer. Let it bubble for 3-5 minutes, stirring often. You’ll see it transform from a separated, grainy mixture into a smooth, glossy, cohesive glaze. It should coat the back of a spoon nicely. Tip: Don’t walk away! Sugar mixtures can go from perfect to burnt in a flash. Once done, remove it from the heat.
- The First Bake (The Warm-Up): Slide your tented ham into the preheated oven. The general rule is to bake for about 15 minutes per pound for a fully cooked ham. For a 10-pound ham, that’s about 2.5 hours total. We’re not just reheating; we’re letting the flavors settle in. About every 30 minutes, carefully open the oven, pull out the rack, and brush the ham generously with your warm glaze. Use those pan drippings too! This layering builds incredible flavor.
- The Grand Finale (Uncover & Caramelize): This is where the beauty happens! During the last 30 minutes of the calculated cooking time, remove the ham from the oven (close the door to keep heat in!). Increase the oven temp to 375°F (190°C). Carefully remove and discard the foil tent. Now, artfully arrange your pineapple slices over the surface of the ham, securing them with toothpicks if you like. Pop a cherry in the center of each ring if using. Brush the entire ham, pineapple and all, with a very generous amount of the remaining glaze. This is your last chance, so be lavish!
- Caramelize & Rest: Return the ham, now uncovered and beautiful, to the hotter oven. Bake for those final 25-30 minutes. Watch it closely—the glaze will bubble, darken, and become gorgeously sticky and caramelized. The pineapple edges will brown slightly. When it looks like a glossy holiday dream, it’s done! Here’s the most crucial step: let it rest. Transfer the ham to a cutting board or platter and tent it loosely with foil for a full 15 minutes. This allows the frantic juices to redistribute throughout the meat, ensuring every slice is juicy and tender, not dry.
Plating Your Masterpiece
Presentation is part of the fun! Transfer the rested ham to a large, clean platter. You can leave the pineapple and cherries in place for a rustic, festive look. For slicing, a sharp, long carving knife is your best friend. For a spiral ham, simply follow the pre-cut lines. For a bone-in ham, slice perpendicular to the bone for beautiful, long slices. Don’t forget to drizzle any of those incredible sticky-sweet pan juices from the roasting pan over the slices on the platter. Serve it right in the center of the table and get ready for the oohs and aahs!
Make It Your Own: Creative Twists
Love the classic but want to play? Here are a few of my favorite riffs:
- Bourbon-Spiked Glaze: Replace 2 tablespoons of the pineapple juice with good bourbon. It adds a wonderful, warm oakiness.
- Citrus & Herb: Swap pineapple juice for orange juice and add a tablespoon of fresh chopped rosemary to the glaze. Use orange slices instead of pineapple for decorating.
- Spicy & Sweet: Add 1-2 teaspoons of sriracha or a pinch of cayenne pepper to the glaze for a delightful sweet-heat kick.
- Maple-Mustard: Use pure maple syrup instead of honey and add an extra tablespoon of whole-grain mustard for texture.
- Pineapple-Chunk Crust: Skip the rings. In the last 30 minutes, toss pineapple chunks in the glaze and scatter them thickly around the ham in the pan to roast and caramelize.
From My Kitchen to Yours
This recipe has been my holiday workhorse for years, and it’s evolved with me. I once, in a pre-coffee haze, used spicy brown mustard instead of Dijon. It was…aggressive. We still ate it, but I learned to label my fridge jars! The biggest lesson? Don’t rush the rest. I’ve carved too early out of excitement, and while it still tastes good, those perfectly juicy slices are worth the wait. I also started saving the ham bone and any pan scrapings—they make the absolute best base for a pot of soul-warming split pea or white bean soup the next day. Nothing goes to waste in this kitchen!
Your Questions, Answered
Q: My glaze isn’t getting sticky and caramelized in the last 30 minutes. What’s wrong?
A: No worries! This usually means the oven temp needs a boost or the glaze needs more sugar content. Make sure you increased the temp to 375°F for the final uncovered bake. If it’s still not browning, you can briefly (and carefully!) use the broiler for the last 2-3 minutes, watching it like a hawk to prevent burning.
Q: Can I make the glaze ahead of time?
A> Absolutely! You can mix and simmer the glaze up to 3 days in advance. Let it cool, store it in a jar in the fridge, and gently reheat it on the stove or in the microwave until it’s fluid again before using.
Q: How do I know for sure the ham is heated through?
A> The safest way is to use a meat thermometer. Insert it into the thickest part of the ham (avoiding the bone). A fully cooked, properly reheated ham should register 140°F (60°C).
Q: I have a lot of glaze left in the pan. What should I do with it?
A> That’s liquid gold! After removing the ham to rest, skim off any excess fat from the pan juices. You can then simmer the remaining glaze and juices on the stovetop for a few minutes to reduce it into a thicker, incredible sauce to serve on the side.

Honey-Glazed Ham with Pineapple (Classic Easter & Holiday Main)
Description
Nothing says celebration like a glossy, caramelized honey-glazed ham coming out of the oven. The good news? It’s far easier than it looks. Starting with a fully cooked ham keeps things simple, and a quick homemade glaze turns it into a sweet-savory centerpiece with almost no stress. Perfect for holidays, big family meals, or anytime you want a show-stopping main dish.
Ingredients
-
1 fully cooked bone-in or spiral ham (8–10 lb / 3.5–4.5 kg)
-
1 cup honey
-
½ cup brown sugar
-
¼ cup pineapple juice (from canned pineapple or fresh)
-
2 tbsp Dijon mustard
-
½ tsp ground cloves (optional)
-
Pineapple slices or chunks
-
Maraschino cherries (optional)
-
Toothpicks (optional, for decorating)
Instructions
-
Preheat oven
Heat oven to 325°F (165°C). Place rack in the lower third. -
Prepare ham
Put ham cut-side down in a roasting pan. Cover loosely with foil to keep moisture in. -
Make the glaze
In a small saucepan combine honey, brown sugar, pineapple juice, Dijon mustard, and cloves.
Simmer over medium heat for 3–5 minutes, stirring, until smooth and slightly thickened. -
Initial bake
Bake ham covered for about 15 minutes per pound, brushing with glaze every 30 minutes. -
Decorate & uncover
During the last 30 minutes, raise oven to 375°F (190°C). Remove foil.
Arrange pineapple and cherries on the ham (secure with toothpicks if needed). Brush generously with remaining glaze. -
Caramelize
Return ham to oven uncovered and bake 25–30 minutes more, until glaze is sticky and golden. -
Rest
Remove from oven and let rest 15 minutes before slicing. Spoon pan juices over slices when serving.
Notes
-
Use a fully cooked ham — you’re reheating and glazing, not cooking from raw.
-
Keep it covered for most of the bake to prevent drying.
-
If glaze browns too fast, loosely tent with foil again.
-
For extra caramelization, broil the ham for 1–2 minutes at the end — watch closely.
-
Save the ham bone for soup or beans later.
Nutritional Information (Per Serving, Approximately)
Please note: This is an estimate based on the ingredients used and can vary depending on specific brands and portion sizes.
Calories: ~380 kcal | Protein: ~28 g | Fat: ~18 g | Carbohydrates: ~24 g | Sugars: ~22 g
Final Thoughts
The ham is resting now. The kitchen has settled into that quiet, expectant hush that comes just before the doorbell starts ringing. Outside, maybe the first few flakes of snow are falling, or maybe it’s just the streetlights flickering on as the afternoon melts into evening. Inside, everything glows. The table is set, the candles are waiting, and there, in the center of it all, sits your ham—darkly caramelized, studded with golden pineapple and bright cherries, glossy as a jewel box.
You did that.
I want you to pause here, just for a moment, before the chaos and the laughter and the “who gets the crispy edge piece” negotiations begin. Take a breath. Look at what your hands have made. That ham isn’t just dinner. It’s the culmination of a thousand small generosities—your grandmother’s whispered advice, your partner’s patient trip to three different stores for the right pineapple rings, your own willingness to stand at the stove and stir until the glaze turned from good to unforgettable.

Cheesy Loaded Burger Wrap : Crispy Fries, Beef & Creamy Sauce
The Ultimate Comfort Food Hack: Cheesy Loaded Burger Wraps
Hey there, friend! Can you smell that? That’s the sound of sizzling beef meeting a hot skillet, the whisper of crispy fries straight from the oven, and the glorious, unmistakable scent of cheese getting all melty and perfect. If your stomach just growled in solidarity, you are exactly where you’re supposed to be. Welcome to my kitchen corner, where we turn big, messy burger joint cravings into a handheld, utterly genius dinner that comes together faster than you can say, “Extra sauce, please!”
Today, we’re not just making dinner; we’re creating an experience. We’re talking about my Cheesy Loaded Burger Wrap. Imagine everything you adore about a fully-loaded, drippy, delicious burger and a side of perfect fries… but wrapped up snugly in a golden, toasted tortilla. It’s the best of all worlds—juicy, crunchy, creamy, and oh-so-satisfying. This isn’t fussy food. It’s the kind of meal you make on a busy Wednesday when you need a serious hug from your plate, or on a Saturday game night when you want to hear a chorus of “Oh wow, you MADE these?!” from your friends. So, tie on that apron (messy is encouraged!), grab your favorite spatula, and let’s make something incredibly delicious, together.
The Night That Inspired It All
This recipe was born from a beautiful, chaotic, and very hungry moment. Picture this: It’s a rainy Friday, my friends are piled into my living room for our classic movie night, and the consensus is a unanimous craving for burgers and fries. The problem? One tiny, ancient apartment kitchen, six very impatient people, and the sheer logistics of building and flipping that many burgers felt like a short-order cook’s nightmare.
I stared into my fridge, then at the tortillas on the counter, and had one of those lightbulb moments that feels equal parts “brilliant” and “will this be a disaster?” What if I just… wrapped it all up? I cooked the beef with our favorite burger seasoning, piled in the crispy fries we’d just baked, went overboard with cheese (a cardinal sin I do not believe in), and slathered it all with my version of a special sauce. The first wrap came out of the pan, golden and crisp. I sliced it in half, and a literal cheese pull happened. The room went quiet, then erupted. It was a hit. It was a mess. It was perfect. That night, a kitchen hack turned into a signature dish, all because of a little chaos and a lot of hunger.
Gathering Your Flavor Crew
Here’s what you’ll need to bring this cheesy masterpiece to life. Don’t stress about exact brands—this is about flavor and fun!
- 4 large flour tortillas: The burrito-sized ones are your best friend here. They need to be sturdy enough to hold all that goodness. A quick pro-tip: warm them for 10 seconds in the microwave before assembling to make them more pliable and less likely to crack.
- 1 lb ground beef (80/20 blend is ideal): That bit of fat equals big flavor and juiciness. Feeling adventurous? Swap in ground turkey, chicken, or even a plant-based crumble. The seasoning will make it shine.
- 1½ cups frozen fries, cooked until crispy: This is our crunch factor! Use your favorite style—shoestring, crinkle-cut, or seasoned wedges all work. Bake them until they’re extra crispy so they hold up in the wrap.
- 1½ cups shredded cheddar or mozzarella: Cheddar gives that classic burger sharpness, while mozzarella is the stretchy, melty dream. I often use a blend!
- ½ cup shredded Monterey Jack (optional but recommended): This is my secret for next-level meltiness and a subtle tang. If you don’t have it, just add more of your other cheese.
- ½ cup mayonnaise: The creamy base of our sauce. Use full-fat for the best texture and flavor.
- 2 tbsp ketchup & 1 tbsp mustard: The dynamic duo! They transform plain mayo into that iconic “burger sauce” taste. Yellow mustard is classic, but Dijon or whole-grain add a fantastic zing.
- 1 tsp paprika & ½ tsp garlic powder: Our simple, powerhouse seasoning for the beef. Smoked paprika adds a wonderful depth if you have it.
- Salt & black pepper, to taste: Season confidently! Taste your beef as you cook.
- Butter or oil, for toasting wraps: Butter gives an unbeatable golden-brown color and rich flavor, but a neutral oil like avocado works great too.
Let’s Build Some Magic: Step-by-Step
Ready to cook? Follow these steps, and you’ll be in cheesy, crispy heaven in no time. I’ve packed each one with my favorite little kitchen hacks.
Step 1: The Crispy Fry Foundation. Start by cooking your fries according to the package directions, but aim for them to be a shade crisper than usual. We’re going for texture that stands up to the saucy beef! While they bake, you can multitask on everything else. This is the “get-ahead” move that makes the whole process smooth.
Step 2: Brown & Season That Beef. Heat a large skillet over medium-high heat. Add your ground beef, breaking it up with a spatula. Don’t just gray it—let it get some nice, flavorful browning in spots. When it’s almost cooked through, sprinkle in the paprika, garlic powder, a good pinch of salt, and a few cracks of black pepper. Cook for another minute until fragrant and juicy. Drain any excess grease if you like, but I keep a little for flavor. Transfer the beef to a bowl for a second.
Step 3: Whip Up That “Secret” Sauce. In a small bowl, combine the mayonnaise, ketchup, and mustard. Whisk it until it’s smooth and a beautiful pale orange color. Taste it! Want more tang? Add a splash of pickle juice. More zip? Another dash of mustard. This sauce is your creation. Set it aside.
Step 4: The Art of Assembly. Lay a tortilla flat on your work surface. In the lower third, create a hearty horizontal line of ingredients: a generous scoop of beef, a handful of those crispy fries, and a mountain of the shredded cheeses. The key? Don’t overfill, or wrapping gets tricky. Leave about 2 inches clear on the sides. Now, drizzle that glorious sauce right over the top.
Step 5: Master the Wrap. Fold the sides of the tortilla in over the ends of the filling. Then, lift the bottom edge up and over the filling, tucking it in tightly. Roll it forward, keeping it snug, until you have a sealed, burrito-style package. A perfect wrap is a tight wrap—this keeps everything inside during the toasting stage.
Step 6: Golden, Crispy Perfection. Wipe out the skillet you used for the beef and place it over medium heat. Add a small pat of butter or a drizzle of oil. Place your wrap seam-side down first. This is critical! Cooking it seam-side down first seals the wrap shut. Toast for 2-3 minutes per side, or until each side is beautifully golden brown and you can see the cheese starting to ooze out the sides (the best sign!). Repeat with remaining wraps.
How to Serve These Beauties
Serve these wraps immediately while they’re hot and the cheese is at its peak pull! I love slicing them in half on a sharp diagonal—it shows off all the gorgeous layers inside. Plate them with a little extra sauce on the side for dipping, and maybe a simple, crisp green salad or some pickles to cut through the richness. Have plenty of napkins handy. The glorious mess is part of the fun!
Make It Your Own: Delicious Twists
- BBQ Bacon Ranch: Swap the sauce for BBQ sauce mixed with ranch dressing. Add cooked, crumbled bacon to the filling.
- Breakfast Burger Wrap: Use seasoned breakfast sausage, add a layer of scrambled eggs, and swap the cheese for American. Serve with maple syrup for dipping!
- Spicy Southwest: Add a diced jalapeño to the beef, use pepper Jack cheese, and mix a bit of chipotle powder into the sauce.
- Greek-Style: Use ground lamb or beef seasoned with oregano and mint. Swap the sauce for tzatziki, and add chopped tomato, onion, and feta cheese.
- “California” Veggie: For a meatless version, use black bean or veggie crumbles, and add sliced avocado, sprouts, and a sun-dried tomato aioli.
Olivia’s Chef Notes & Kitchen Confessions
This recipe is a living, breathing thing in my kitchen. I’ve made it probably a hundred times since that first movie night, and I still tweak it. Sometimes I add a handful of thin onion rings inside for an extra crunch. Sometimes I mix a tablespoon of finely minced dill pickle right into the sauce—it’s a game changer! My biggest confession? I once tried to make eight of these for a crowd simultaneously and turned my kitchen into a wrap-toasting assembly line. It was chaotic, cheese was everywhere, and it was the most fun I’ve ever had cooking. The moral: don’t be afraid to double the batch, and always, always make more sauce than you think you’ll need. It has a way of disappearing.
Your Questions, Answered!
Q: My wrap keeps falling apart when I try to toast it! Help!
A: I feel your pain! This usually means one of three things: 1) The tortilla was too cold (warm it up first!), 2) It was overstuffed (show restraint, friend!), or 3) You didn’t start toasting it seam-side down. That initial sear on the seam is your secret weapon for a sealed, stable wrap.
Q: Can I make these ahead of time?
A: You can prep the components ahead! Cook the beef and fries, make the sauce, and shred the cheese. Store them separately in the fridge. When you’re ready, assemble and toast. The wraps themselves are best enjoyed fresh off the pan.
Q: The inside isn’t as hot as I’d like when the outside is perfectly toasted.
A> Great catch! Ensure your beef and fries are still very warm when you assemble. If they’ve cooled, give them a quick reheat before building. Also, toasting over a medium, not screaming hot, heat allows the inside to warm through without burning the tortilla.
Q: Any tips for a lower-carb version?
A> Absolutely! Use a low-carb tortilla or large lettuce leaves (like butter lettuce) for wrapping. You can also swap the fries for roasted cauliflower florets for a veggie-packed crunch.

Cheesy Loaded Burger Wrap : Crispy Fries, Beef & Creamy Sauce
Description
Love burgers and fries but want something faster, crispier, and easier to eat? These Cheesy Loaded Burger Wraps bring all the best burger flavors into one golden, toasted tortilla. Juicy seasoned beef, crispy fries, melty cheese, and creamy burger sauce — all wrapped and pan-toasted until perfectly crunchy. Ideal for busy weeknights or fun casual dinners.
Ingredients
-
4 large flour tortillas (burrito size)
-
1 lb (450 g) ground beef (80/20 preferred)
-
1½ cups cooked crispy fries (frozen or homemade)
-
1½–2 cups shredded cheese (cheddar, mozzarella, or blend)
-
Salt & black pepper to taste
-
1 tsp paprika
-
½ tsp garlic powder
-
Butter or oil for toasting
Burger Sauce
-
½ cup mayonnaise
-
2 tbsp ketchup
-
1 tbsp mustard
Optional Add-Ins
-
Pickles, diced onions, jalapeños, cooked bacon bits
Instructions
-
Cook the fries
Bake or air-fry fries until extra crispy. Set aside warm. -
Brown the beef
Heat a skillet over medium-high heat. Cook beef, breaking it up, until nicely browned. Season with salt, pepper, paprika, and garlic powder. Drain excess grease if needed. -
Make the sauce
Stir mayo, ketchup, and mustard in a small bowl until smooth. -
Assemble wraps
Warm tortillas briefly so they’re flexible. On the lower third of each tortilla add:-
Cooked beef
-
Crispy fries
-
Shredded cheese
-
Spoonful of sauce
-
-
Wrap tightly
Fold in sides, then roll up burrito-style. -
Toast
Heat a clean skillet over medium heat with a little butter or oil. Place wraps seam-side down first. Cook 2–3 minutes per side until golden and crisp and cheese is melted. -
Serve
Slice in half and serve hot with extra sauce for dipping.
Notes
-
Warm tortillas before filling to prevent cracking.
-
Don’t overstuff — tight wraps toast better.
-
Start seam-side down so the wrap seals.
-
Use freshly shredded cheese for smoother melting.
-
Keep fillings hot when assembling so centers get fully warm.
Nutritional Information (Per Wrap, Approximate)
Calories: 680 | Fat: 42g | Saturated Fat: 15g | Carbohydrates: 48g | Fiber: 3g | Sugar: 5g | Protein: 32g
Please note: These are estimates based on the specific ingredients used. Values can vary significantly with substitutions.
Prep Time: 15 minutes | Cook Time: 15 minutes | Total Time: 30 minutes | Servings: 4 wraps
Final Thoughts
And there you have it, friend—the Cheesy Loaded Burger Wrap, born from a cramped apartment kitchen and a serious case of the Friday night munchies.
Here’s the thing about recipes like this one: they’re never really finished. Every time I make these wraps, something shifts. Maybe I swap in pepper Jack because that’s what’s in the fridge. Maybe I accidentally buy waffle fries instead of shoestring and discover they’re even better for crunch. Maybe I forget the sauce entirely and my family barely notices because the cheese pull is just that good. The recipe adapts. It forgives. It works anyway.
That’s what I want you to take away today—not a rigid checklist, but permission.
Permission to use whatever ground meat you have. Permission to sub in that lonely block of cheese hiding in the back of the drawer. Permission to let your five-year-old “help” assemble and end up with beef scattered across the counter and sauce on the ceiling. Permission to stand at the stove, spatula in hand, and feel like you absolutely nailed it.
Because you did.

Easy Tortilla Pizza (4-Ingredient Cheesy Weeknight Dinner)
The 4-Ingredient Miracle: Your New Favorite Weeknight Pizza Is Here!
Hey there, friend! Come on in, grab an apron, and let’s talk about one of life’s great truths: there is never a bad time for pizza. But let’s be real—between work, life, and that ever-growing to-do list, ordering takeout or wrestling with dough isn’t always in the cards. I get it. That’s exactly why I’m practically jumping up and down to share this little kitchen magic trick with you: the Easy Tortilla Pizza.
Imagine this: layers of crispy, golden flour tortillas, acting as the world’s simplest, most forgiving crust. Between each layer, a generous slather of tangy marinara, a snowfall of melty mozzarella, and those irresistible, slightly crispy pepperoni cups. It bakes into a cheesy, pull-apart stack of pure comfort that’s ready in under 30 minutes, start to finish. The best part? You likely have everything you need in your kitchen right this very minute. No fancy skills, no hours of rising, just a straight shot to deliciousness. This recipe is for the busy weeknights, the impromptu movie nights, the “I need something fun and fast” moments. It’s for getting the kids involved in the kitchen and for treating yourself without the hassle. So, let’s ditch the stress and embrace the joy of a homemade pizza night that’s easier than you ever dreamed. Ready to make some magic?
A Stack of Memories: How This Recipe Came to Be
This tortilla pizza isn’t just a recipe; it’s a time machine. It takes me straight back to my first apartment—a charming little box with a kitchen the size of a postage stamp and a budget that made gourmet ingredients a fantasy. My roommate and I lived off of creative concoctions made from tortillas, cheese, and whatever else was lurking in the fridge. One particularly exhausted Thursday, the pizza craving hit hard. We had no dough, no delivery cash, but we did have a half-pack of tortillas and a dream.
What started as a desperate, single-layer “tortilla pizza” evolved over that year. We began stacking them, joking that we were building a “pizza lasagna.” We’d experiment with different sauces, argue over the optimal cheese-to-topping ratio, and always, always burn the edges a little because we were too busy chatting and sipping wine to set a timer. Those stacks became our celebration meal for a good week, our comfort food after a bad day, and the centerpiece of many laugh-filled, messy-kitchen gatherings. This recipe is that spirit in edible form: imperfect, joyful, and utterly satisfying. It’s proof that the best meals aren’t about perfection; they’re about the connection and creativity you stir into the pot.
Gathering Your Flavor Tools: It’s All About Quality & Swaps
Here’s the beautiful part: the foundation is just four simple ingredients. But as with all simple things, the quality and little choices you make can elevate it from “good” to “can I have this every night?” Let’s break it down.
- 9 Medium Flour Tortillas: These are your canvas! I prefer the “soft taco” size (about 8-inch). The key is thickness—go for a brand that feels substantial, not the super thin, almost translucent ones. They hold up to the layers better. Chef’s Insight: For a nuttier, more robust flavor, sub in whole wheat or spinach tortillas. For a gluten-free version, use your favorite GF tortilla, but keep an eye on baking time as they can crisp up faster.
- 1 Jar (about 24 oz) Marinara Sauce: This is your flavor engine. Use a sauce you love to eat on its own! A simple, herb-forward marinara is perfect. Pro Tip: If your sauce is very watery, give it a quick simmer in a saucepan for 5-10 minutes to thicken slightly. This prevents a soggy pizza stack. No marinara? A can of crushed tomatoes seasoned with a pinch of salt, dried oregano, and a garlic clove works wonders.
- 10–12 oz Mozzarella Cheese, Shredded: Melty, stretchy, glorious mozzarella is non-negotiable for that iconic pizza pull. I highly recommend shredding a block yourself. Pre-shredded cheese contains anti-caking agents that can make it less melty. Substitution Love: Mix in some provolone for extra sharpness, or pepper jack for a kick. For a dairy-free version, a good melting vegan mozzarella style shred will do the trick.
- 6 oz Sliced Pepperoni: They add a salty, savory, slightly spicy punch and get delightfully crisp-edged in the oven. Fun Hack: If you have 2 extra minutes, place your pepperoni slices on a paper towel and microwave for 30-45 seconds before building. This renders out some fat, making them extra crispy and preventing a greasy pizza.
Optional Add-Ins (Go Wild!): Fresh basil after baking, sliced jalapeños, sautéed mushrooms, black olives, diced bell peppers, red onion, cooked Italian sausage, or a sprinkle of grated Parmesan or ricotta dollops between layers.
Let’s Build Your Pizza Masterpiece: Step-by-Step
Okay, team! Preheat that oven to 400°F (205°C) and let’s get stacking. This is the fun part—it’s like edible LEGO.
- Prep Your Stage: Line a large baking sheet with parchment paper. This isn’t just for easy cleanup (though, hallelujah for that); it prevents the bottom tortilla from sticking and ensures an even, golden crisp. No parchment? A light grease with olive oil will work.
- Lay the Foundation: Place your first tortilla right in the center of the sheet. Think of this as the sturdy base of your pizza tower. Using a spoon or the back of a ladle, spread about 2-3 tablespoons of marinara over it, leaving just a tiny ¼-inch border around the edge. This bare border acts as a “seal” and gets extra crispy—it’s a textural delight!
- The First Flavor Layer: Now, the artistry begins! Scatter a few pepperoni slices (maybe 5-6) over the sauce. Then, sprinkle a generous handful of cheese over everything. Don’t be shy—the cheese is the glue that holds this beautiful stack together.
- Repeat & Build: Carefully place a second tortilla directly on top. Gently press down so it adheres to the cheesy layer below. Repeat the process: sauce, pepperoni, cheese. Keep going! This rhythm—tortilla, sauce, toppings, cheese—is your meditation. Build until all tortillas are used. I find 9 gives the perfect height for slicing into wedges.
- The Grand Finale (Top Tier): Your top tortilla is the star of the show. Give it a good spread of sauce and an extra generous layer of cheese. This is what will bubble and bronze into that gorgeous, restaurant-quality finish. Feel free to add a few decorative pepperoni on top here.
- Bake to Golden Perfection: Slide your creation into the hot oven. Bake for 15 minutes. You’ll smell the magic happening. Then, turn your oven to BROIL (keep the rack in the middle, not too close to the top element!). Watch it like a hawk for 1-3 minutes, just until the top is spotty golden brown and the cheese is violently bubbly. This broil step is the secret weapon for that professional finish.
- The Hardest Part – Rest & Slice: Remove your masterpiece from the oven. I know, I know, you want to dive in. But let it rest on the sheet for 3-4 minutes. This allows the layers to set just enough so you can slice it without everything sliding apart. Use a sharp chef’s knife or a pizza cutter to slice into wedges, like a cake. Garnish with fresh basil if you’re feeling fancy, and serve immediately while the cheese is at its peak stretch!
How to Serve This Cheesy Wonder
Presentation is part of the fun! I love placing the whole golden stack on a large wooden cutting board or a big platter right in the center of the table. Let everyone admire it for a second before you slice. The wedges are hearty, so one or two per person is usually plenty. Serve it alongside a bright, simple green salad with a lemony vinaigrette to cut through the richness, or some roasted veggies like broccoli or asparagus. For a true “fun night in” vibe, offer small bowls of extra marinara, ranch dressing, or hot honey for dipping those crispy edges. It’s interactive, delicious, and guaranteed to spark smiles.
Make It Your Own: 5 Delicious Twists
The beauty of this format is its versatility. Here are a few ways to play with your food:
- The Supreme: Swap pepperoni for cooked Italian sausage, and add layers with thinly sliced bell peppers, red onions, black olives, and mushrooms.
- Spicy Fiesta: Use a salsa or enchilada sauce instead of marinara. Layer with pepper jack cheese, seasoned ground beef or chicken, pickled jalapeños, and top with fresh cilantro and a dollop of sour cream after baking.
- Veggie Lover’s Dream: Skip the meat and layer with roasted zucchini, spinach (squeezed dry), artichoke hearts, and sun-dried tomatoes. A sprinkle of feta or goat cheese between layers adds a fantastic tang.
- Breakfast Pizza Stack: Use a creamy country gravy as the “sauce.” Layer with cooked breakfast sausage, scrambled eggs, and cheddar cheese. Top with extra cheese and bake. Serve with hot sauce!
- The “Fancy” One: Use a garlic-infused olive oil as your base layer. Top with shredded rotisserie chicken, caramelized onions, and a mix of mozzarella and fontina cheese. Finish with a drizzle of balsamic glaze after baking.
Olivia’s Kitchen Notes & Stories
This recipe has seen some things, let me tell you. The first time I made it for my now-husband, I was so nervous to impress him I accidentally used cinnamon sugar tortillas (they were in a similar package!). We still laugh about the “Dessert Pizza Surprise” and it’s a reminder to always, always check the package label. Over the years, I’ve learned that letting the stack rest before slicing is non-negotiable—my early attempts were delicious but structurally chaotic. I’ve also found that if you’re feeding a crowd, you can make two smaller 5-layer stacks side-by-side on the same sheet pan for easier serving. This recipe has evolved from a pantry scramble to my most-requested weeknight meal by friends. It’s resilient, forgiving, and endlessly customizable—just like we are in the kitchen. Don’t strive for perfection; strive for flavor and fun.
Your Questions, Answered!
Q: My tortilla pizza turned out a bit soggy in the middle. What happened?
A: Sogginess usually comes from too much sauce or a very watery sauce. Next time, measure your sauce (2-3 Tbs per layer is plenty) and consider simmering your marinara for a few minutes to thicken it before building. Also, ensure your oven is fully preheated—a hot oven is key for immediate crisping!
Q: Can I make this ahead of time?
A: You can assemble the entire stack, wrap it tightly in plastic wrap, and refrigerate it for up to 6 hours before baking. You might need to add 2-3 extra minutes to the baking time since it’s going in cold. I don’t recommend freezing the assembled stack, as the tortillas can get gummy.
Q: What’s the best cheese for maximum meltiness?
A: For that iconic stretch, whole-milk, low-moisture mozzarella from a block that you shred yourself is the gold standard. The pre-shredded stuff works in a pinch, but it often contains starches that inhibit melting. Combining mozzarella with a bit of provolone or Monterey Jack also gives you fantastic melt and flavor.
Q: Can I use corn tortillas?
A: I wouldn’t recommend it for this stacked version. Corn tortillas are more brittle and don’t layer as well, plus their distinct flavor competes with the Italian-style toppings. Stick with flour tortillas for the best texture and neutral base.

Easy Tortilla Pizza (4-Ingredient Cheesy Weeknight Dinner)
Description
When you want pizza fast — and I mean really fast — this tortilla pizza stack saves the day. No dough, no rise time, no delivery wait. Just crispy tortillas, sauce, cheese, and your favorite topping baked into a golden, melty, sliceable stack. Perfect for busy weeknights, movie nights, or anytime you want something fun and comforting with almost no prep.
Ingredients
-
9 medium flour tortillas (soft taco size)
-
2–2½ cups marinara sauce (thick-style works best)
-
10–12 oz (280–340 g) mozzarella cheese, shredded
-
6 oz (170 g) sliced pepperoni
Optional: basil, olives, peppers, mushrooms, sausage, jalapeños, parmesan
Instructions
-
Preheat oven to 400°F (205°C). Line a large baking sheet with parchment paper.
-
Start first layer
Place 1 tortilla on the sheet. Spread 2–3 tablespoons marinara, leaving a small border. -
Add toppings
Sprinkle mozzarella and add a few pepperoni slices. -
Build the stack
Add another tortilla on top and repeat: sauce → cheese → pepperoni. Continue until all tortillas are used. -
Top layer
Finish with sauce and a generous layer of cheese and pepperoni. -
Bake
Bake for 15 minutes until hot and melted. -
Broil finish (optional but recommended)
Broil 1–3 minutes until the top is golden and bubbly. Watch closely. -
Rest & slice
Let rest 3–4 minutes, then slice like a cake and serve.
Notes
-
Use thick marinara or simmer it briefly to reduce wateriness.
-
Shred cheese from a block for better melting.
-
Don’t overload each layer — thin layers crisp better.
-
Let it rest before slicing so the stack holds together.
-
For extra crisp edges, lightly brush the bottom tortilla with olive oil.
Quick Nutritional Snapshot
Please note: This is an estimate for 1 serving (1 wedge of a 9-layer stack) based on the core 4 ingredients, using standard grocery store brands. Values will change with substitutions and add-ins.
- Prep Time: 10 mins
- Cook Time: 17 mins
- Total Time: 27 mins
- Servings: 10
- Estimated Per Serving: Calories: ~221 kcal | Carbohydrates: ~18g | Protein: ~15g | Fat: ~9g
Final Thoughts
The 4-Ingredient Miracle: Your New Favorite Weeknight Pizza Is Here!
So here we are, standing over a golden, bubbling tower of cheese and possibility, and I have to ask: wasn’t that easy? No flour-dusted countertops, no temperamental yeast, no delivery wait times—just you, four humble ingredients, and twenty-seven minutes of pure kitchen satisfaction.
This Easy Tortilla Pizza isn’t trying to be authentic Italian pizza. It’s not competing with the wood-fired Neapolitan pies or the legendary slices of New York. What it is—and what I hope you’ve discovered through these pages—is something perhaps even more valuable: a reliable friend in the kitchen. It’s the recipe that says, “I’ve got you” on a Tuesday night when you’re running on fumes. It’s the project that turns a “what’s for dinner?” groan into a “can I help?” moment with your kids. It’s the canvas that transforms whatever sad vegetables are wilting in your crisper drawer into something worth celebrating.

Homemade Spaghetti Sauce : Classic, Healthy & Full of Flavor
Homemade Spaghetti Sauce: The Ultimate Cozy, Flavor-Packed Recipe
Hey friends, Olivia here! Can we just take a moment to appreciate the magic of a truly great spaghetti sauce? That incredible, soul-warming smell that starts with a sizzle of onions and garlic and ends with a pot of rich, ruby-red sauce simmering on your stovetop. It’s the soundtrack to a perfect pasta night, the hero of a weeknight dinner, and the secret handshake of home cooks everywhere.
But let’s be real for a second. For years, I thought the “from scratch” version was a full-day affair, reserved for nonnas and chefs with endless time. I’d reach for a jar, feeling a tiny pang of “I could do better.” And then, one snowy Sunday, I did. I gathered a handful of simple, wholesome ingredients, turned on some music, and gave it a go. What happened in that pot? Pure alchemy. The flavor was so much deeper, brighter, and more real than anything I’d unscrewed from a jar. And the best part? It wasn’t complicated at all.
This recipe is my love letter to that moment. It’s my go-to, my forever sauce, the one I make in big batches so I always have a taste of home in my freezer. It’s classic, healthy, and bursting with flavor, but it’s also incredibly approachable. You don’t need fancy skills or all afternoon. You just need a good pot and a desire to create something wonderful. This sauce turns simple spaghetti into a celebration, a loaf of crusty bread into a vehicle for joy, and your kitchen into the coziest room in the house. So, tie on your apron (messy is encouraged!), and let’s make something unforgettable together.
The Sauce That Started It All: A Kitchen Memory
My obsession with this sauce has roots in a slightly chaotic, utterly perfect childhood memory. Picture me, about eight years old, standing on a wobbly step-stool in my grandma’s kitchen. The counters were a battlefield of tomato-splattered spoons and onion skins. The air was thick with the scent of garlic and dried oregano, a smell I now equate with pure love.
Grandma wasn’t measuring anything. She’d toss a glug of oil into her ancient, well-loved pot, and the dance would begin. “Listen to the onion, Livvy,” she’d say, as they sizzled. “When they get quiet and sweet, they’re ready for the garlic.” She’d let me stir the tomato paste, watching it caramelize and darken, calling it “giving it a little tan.” To my young mind, it was witchcraft. She’d hand me the wooden spoon for the long, lazy simmer, teaching me that patience wasn’t just a virtue—it was the main ingredient.
That sauce wasn’t just dinner; it was the centerpiece of our family Sunday. It meant cousins crowded around the table, laughter bouncing off the walls, and the profound comfort of being fed by someone who loved you. This recipe is my homage to that feeling. It’s streamlined for our busy lives but holds onto that essential, slow-simmered soul. Every time I make it, I’m back on that step-stool, learning that the best food isn’t about perfection. It’s about presence, patience, and sharing the delicious results with the people you love.
Your Flavor Toolkit: Ingredients & Why They Matter
Great flavor starts with understanding your ingredients. Here’s exactly what you’ll need and why each one plays a starring role. I’ve also included my favorite swaps and chef secrets!
- 2 tablespoons extra virgin olive oil: This is our flavor foundation. Extra virgin has a fruitier, more robust taste than regular olive oil, which adds depth right from the start. Chef’s Tip: If you’re out, any neutral oil like avocado or even butter works in a pinch!
- 1 medium onion, finely diced: Onions are the sweet, aromatic base of almost every great sauce. Finely dicing them ensures they melt beautifully into the sauce. Substitution: A large shallot or two works wonderfully for a milder, slightly sweeter flavor.
- 4 cloves garlic, minced: The aromatic heartthrob! Fresh is non-negotiable here—it provides a pungent, fragrant kick that powdered garlic just can’t match. Chef’s Insight: Don’t add it with the onions! Garlic burns fast. We add it later to keep its flavor bright and potent.
- 28 oz can crushed tomatoes: The star of the show! Look for a brand with no added sugar or citric acid—just pure tomatoes. Crushed tomatoes give us the perfect saucy texture straight from the can. Chef’s Secret: I often give the can a good shake or stir before opening to blend any separated liquid.
- 2 tablespoons tomato paste: This is our flavor concentrate. It adds a rich, intense tomatoey depth and helps thicken the sauce. We’ll “cook it out” to mellow its raw taste.
- 1 teaspoon each dried oregano & basil: The classic Italian herb duo. Dried herbs are perfect here because their flavor stands up to and infuses the long simmer. Pro Tip: Rub them between your palms as you add them to wake up their oils!
- ½ teaspoon salt & ¼ teaspoon black pepper: Season as you go! Salt enhances all the other flavors. We start with this amount and adjust at the end.
- Pinch of red pepper flakes (optional): Just a pinch adds a gentle, warming heat in the background. It’s my not-so-secret weapon for a more complex sauce.
- 1 teaspoon sugar or 2 tablespoons grated carrot (optional): This is your “balance” button. If your tomatoes are a bit sharp or acidic, a tiny bit of sugar or the natural sweetness of grated carrot (which melts right in!) can smooth everything out perfectly.
- Fresh basil or parsley, chopped (optional): The finishing flourish! A sprinkle of fresh herbs added right before serving brings a vibrant, garden-fresh aroma that ties the whole dish together.
Let’s Get Cooking: Step-by-Step Instructions
Ready to create some magic? Follow these steps, and you’ll have a sauce that’ll make your house smell like an Italian trattoria.
Step 1: Build Your Flavor Base. Heat the olive oil in a large, heavy-bottomed saucepan or Dutch oven over medium heat. Add the diced onion and a tiny pinch of salt (this helps them sweat). Now, here’s my first big tip: be patient here. Sauté for 4-5 minutes, stirring occasionally, until the onions are soft, translucent, and smell sweet. They shouldn’t brown! We’re coaxing out their natural sugars, not frying them.
Step 2: Wake Up the Aromatics. Push the onions to the side of the pan. Add the minced garlic to the cleared space and let it cook for just 30 seconds to 1 minute. You’ll know it’s ready when that incredible, fragrant smell hits you. Stir it into the onions immediately so it doesn’t burn. Burnt garlic tastes bitter, and we want fragrant and sweet!
Step 3: The Flavor Power-Up. Now, add the tomato paste right into the center of the pan with the onions and garlic. Let it cook for 1-2 minutes, stirring constantly. Watch as it darkens from bright red to a rusty, brick red. This step, called “cooking out” the paste, is a GAME CHANGER. It removes any tinny or raw flavor and gives the sauce an incredible, caramelized depth.
Step 4: Bring It All Together. Pour in the crushed tomatoes. Then, fill the empty can about a quarter full with water, swish it around to get every last bit of tomato, and add that to the pot too. This ensures no flavor is left behind and helps with consistency. Add the dried oregano, basil, salt, pepper, and red pepper flakes (if using). Give everything a big, enthusiastic stir.
Step 5: The Simmer (This is Where the Magic Happens). Bring the sauce to a gentle bubble, then immediately reduce the heat to low. Let it simmer uncovered for at least 25 minutes, but ideally 40 minutes to an hour if you have time. Stir it occasionally to prevent sticking. As it simmers, the sauce will reduce, thicken, and the flavors will marry and intensify. Your kitchen will smell absolutely heavenly. This is the “patience pays off” part!
Step 6: Taste and Balance. After simmering, take a spoonful (let it cool a bit first!). Taste it. Does it need more salt? A grind of pepper? If it tastes a little too sharp or acidic, this is when you add that optional teaspoon of sugar or grated carrot. Stir it in and let it cook for another 5 minutes. Chef’s Hack: For an ultra-smooth, velvety texture, you can use an immersion blender right in the pot for a few pulses.
Step 7: Finish with Flair. Turn off the heat. If you’re using fresh basil or parsley, stir it in now. The residual heat will wilt it perfectly and release its aromatic oils. Your masterpiece is ready!
How to Serve Your Homemade Masterpiece
This sauce is the ultimate versatile star! Of course, toss it with al dente spaghetti for the classic experience. But don’t stop there! I love serving it over thick, tubular rigatoni that catches the sauce in every bite, or swirling it into a dish of creamy polenta. For a next-level meal, use it as the base for a baked ziti or homemade lasagna. No matter how you serve it, remember the golden rule: reserve a cup of the starchy pasta water before you drain your noodles! Adding a splash back when you toss the pasta and sauce helps the sauce cling to every strand beautifully. Finish with a drizzle of good olive oil, a sprinkle of Parmesan or Pecorino cheese, and maybe a few more fresh basil leaves. Perfection.
Make It Your Own: Delicious Recipe Variations
- “Sunday Gravy” Style: Brown ½ lb of Italian sausage or ground beef in the pot before adding the onions. Remove the meat, then proceed. Add it back with the tomatoes for a hearty, meaty sauce.
- Vegan & Rich: Add ¼ cup of rinsed, drained green or brown lentils with the tomatoes. They’ll break down as they simmer, adding incredible body and a meaty texture without any meat!
- Roasted Red Pepper Twist: Blend one jar of roasted red peppers until smooth and stir it in with the crushed tomatoes. It adds a sweet, smoky dimension and a gorgeous color.
- Creamy Vodka Sauce (Quick!): After the sauce is done, stir in ½ cup of heavy cream and 2 tablespoons of vodka (the alcohol cooks off, promise!). Let it simmer for 5 more minutes for a luxurious, pink-hued sauce.
- Puttanesca-Inspired: Love bold flavors? In the last 10 minutes of simmering, stir in 2 tablespoons of rinsed capers, ½ cup chopped Kalamata olives, and a few anchovy fillets (they’ll melt in, adding salty depth, not fishiness!).
Chef Olivia’s Notes & Kitchen Stories
This recipe has been my kitchen companion for years, and it’s evolved with me. The first time I made it, I was so nervous I quadruple-checked every measurement. Now, I make it by heart, often while dancing to 80s hits or listening to an audiobook. It’s my therapy. One hilarious fail? I once thought “simmer” meant “rapid boil.” I walked away and came back to a pot that looked like a tomato volcano had erupted all over my stovetop. Lesson learned: a gentle bubble is your friend!
Over time, I’ve learned to double or triple the batch every time. I freeze it in 2-cup portions in zip-top bags (lay them flat to save space!). Having this homemade sauce at the ready on a busy Tuesday is a gift to my future self. It’s also become my go-to hostess gift or meal for a friend in need. Nothing says “I care about you” like a jar of something made slowly, with love. Remember, cooking is a journey, not a test. Have fun with it, taste as you go, and make it yours.
Your Questions, Answered: FAQs & Troubleshooting
Q: My sauce tastes a bit acidic or sharp. What did I do wrong?
A: You didn’t do anything wrong! Tomatoes vary in acidity based on brand and season. This is totally normal and an easy fix. First, make sure you simmered it long enough (at least 25 mins) to mellow the flavors. If it’s still sharp, stir in that optional 1 tsp of sugar or grated carrot. Start with a little, let it cook for 5 minutes, then taste again. The goal is balance, not sweetness.
Q: Can I use fresh herbs instead of dried?
A> Absolutely, but the timing changes. Dried herbs are added at the beginning to infuse the whole sauce. If using fresh, add sturdier herbs like rosemary or thyme with the onions, but save delicate herbs like fresh basil or parsley to stir in right at the end, off the heat. Use about three times the amount of fresh herbs (so 1 tsp dried = 1 tbsp fresh).
Q: My sauce is too thin! How do I thicken it?
A> No worries! The simplest fix is to just let it simmer uncovered for another 10-15 minutes; the excess liquid will evaporate. If you’re in a rush, make a “slurry”: mix 1 tablespoon of cornstarch with 2 tablespoons of cold water until smooth. Stir this into the simmering sauce and cook for 1-2 minutes until thickened.
Q: How long does this homemade sauce last, and can I freeze it?
A> Stored in an airtight container, it will last in the fridge for 4-5 days. And yes, it freezes beautifully for up to 3 months! Let it cool completely, then portion it into freezer-safe jars (leave headspace) or zip-top bags. Thaw overnight in the fridge or reheat gently from frozen in a saucepan.

Homemade Spaghetti Sauce : Classic, Healthy & Full of Flavor
Description
A cozy, flavor-packed, from-scratch sauce that turns any pasta night into a celebration. Versatile, comforting, and surprisingly easy to make.
Ingredients
-
2 tbsp extra virgin olive oil (or neutral oil/butter)
-
1 medium onion, finely diced (or 2 shallots)
-
4 cloves garlic, minced
-
28 oz can crushed tomatoes
-
2 tbsp tomato paste
-
1 tsp dried oregano
-
1 tsp dried basil
-
½ tsp salt (adjust to taste)
-
¼ tsp black pepper (adjust to taste)
-
Pinch red pepper flakes (optional)
-
1 tsp sugar or 2 tbsp grated carrot (optional, for acidity balance)
-
Fresh basil or parsley, chopped (optional, for garnish)
Optional Variations:
-
½ lb Italian sausage or ground beef (“Sunday Gravy” style)
-
¼ cup cooked lentils for vegan richness
-
1 jar roasted red peppers, blended
-
½ cup heavy cream + 2 tbsp vodka (creamy vodka sauce)
-
2 tbsp capers + ½ cup chopped olives + anchovy fillets (puttanesca-style)
Instructions
-
Build the Flavor Base
-
Heat olive oil in a large saucepan or Dutch oven over medium heat.
-
Add diced onions and a pinch of salt; sauté 4–5 mins until soft and translucent.
-
-
Wake Up the Aromatics
-
Push onions aside; add garlic to the empty space and cook 30 sec–1 min. Stir immediately with onions to prevent burning.
-
-
Cook the Tomato Paste
-
Add tomato paste to the pan; cook 1–2 mins until it darkens to a rusty red. This deepens flavor and removes raw taste.
-
-
Add Tomatoes & Seasonings
-
Pour in crushed tomatoes and a splash of water from the can to capture all the tomato goodness.
-
Add oregano, basil, salt, pepper, and red pepper flakes. Stir well.
-
-
Simmer & Develop Flavor
-
Bring to a gentle bubble, reduce heat to low, and simmer uncovered 25–60 mins, stirring occasionally.
-
-
Taste & Balance
-
Taste the sauce; adjust salt, pepper, or add sugar/grated carrot if too acidic. Simmer 5 more minutes if adjusted. Optional: blend with an immersion blender for a smooth texture.
-
-
Finish with Fresh Herbs
-
Stir in chopped fresh basil or parsley off the heat for aroma and color.
-
Notes
-
Meaty Sunday Gravy: Brown sausage or beef before onions; add back with tomatoes.
-
Vegan/Protein Boost: Stir in lentils while simmering.
-
Smoky Roasted Red Pepper: Blend peppers with sauce for a colorful twist.
-
Creamy Vodka: Stir in cream + vodka at the end, simmer 5 mins.
-
Bold Puttanesca: Add capers, olives, anchovies in the last 10 mins.
Final Thoughts
And so, here we are—standing side by side in our separate kitchens, wooden spoon in hand, the scent of garlic and simmering tomatoes wrapping around us like the warmest hug. This sauce, my friends, is so much more than a recipe. It’s an invitation.
It’s an invitation to slow down, just for a little while. To resist the siren call of convenience and instead give yourself the gift of forty minutes at the stove, stirring, tasting, adjusting. In a world that constantly demands our speed and efficiency, choosing to make something from scratch is a quiet act of rebellion—and a deeply generous one, both to yourself and to the people you’ll feed.
I think about that eight-year-old version of me, wobbling on that step-stool, watching my grandmother’s hands move with the easy confidence of someone who had made this sauce a thousand times before. She wasn’t trying to impress anyone. She wasn’t following a rigid formula. She was simply cooking—with presence, with intuition, with love. And that’s what I want for you, too.
This recipe is your starting line, not your finish. Maybe the first time, you follow it exactly, measuring each teaspoon and setting a timer. The second time, you might find yourself reaching for that pinch of red pepper flake, or remembering you have a Parm rind in the fridge that would be magnificent simmered in there. The third time? You might not need the recipe at all. You’ll know by the smell when the tomato paste has darkened enough. You’ll know by the sound when the onions are ready. The sauce will become yours—inflected with your taste, your rhythm, your story.
That’s the secret handshake of home cooks, by the way. It’s not about having a nonna’s intuition handed down through bloodlines. It’s about showing up, again and again, until the pot recognizes you.

Creamy Peanut Butter Pie (Easy No-Bake Dessert)
The One Pie That Makes Everyone Smile (Seriously, Try It!)
Hey there, friend! Come on in—grab a mug of coffee and pull up a chair. If you’ve ever had one of those days where only something rich, creamy, and peanut-buttery will do, then you and I are already on the same wavelength. Today, we’re not just making dessert; we’re creating a masterpiece of comfort. I’m talking about my legendary No-Bake Creamy Peanut Butter Pie.
Picture this: a velvety, cloud-like peanut butter filling that’s somehow both decadent and light, all nestled into a crisp, chocolatey cookie crust. It’s the dessert that disappears first at every potluck, the one my family requests for birthdays over cake, and my secret weapon for when I need a guaranteed “wow” without spending all day in the kitchen. The best part? You don’t even need to turn on your oven. This is about mixing a few gorgeous ingredients together and letting the fridge do the magic. Whether you’re a seasoned baker or someone who considers boiling water an adventure, this recipe is your ticket to dessert-hero status. So, tie on that (probably already messy) apron, and let’s make something unforgettable!
Why This Pie is My Kitchen Comfort Blanket
This pie holds a special, slightly chaotic place in my heart. Years ago, I volunteered to bring dessert to a big, loud family reunion. I had grand plans for a towering layer cake, but life had other ideas—a broken oven element and a kitchen that looked like a flour bomb went off. With two hours to go and mild panic setting in, I stared into my pantry. There it was: a jar of peanut butter, a brick of cream cheese, and a box of chocolate wafers. I threw them together with a prayer.
What emerged from the fridge later was nothing short of a miracle. That pie was the star of the table. My grumpy uncle had two slices. Cousins I hadn’t seen in years asked for the recipe. It was the moment I truly learned that the best food isn’t about being fancy; it’s about being real, resourceful, and made with a big scoop of love. Now, every time I make it, I remember that chaos-to-triumph feeling and smile. It’s proof that sometimes the simplest things bring the most joy.
Gathering Your Dream Team of Ingredients
Here’s everything you’ll need to create this peanut butter paradise. I’ve included my little chef-y insights to help you understand the “why” behind each item!
- 1 (9-inch) Chocolate Cookie Crust (store-bought or homemade): This is our foundation. I often use a store-bought chocolate graham cracker crust for ultimate ease—no shame in that game! But if you’re feeling fancy, pulse 20 Oreos (filling included) with 5 tbsp melted butter and press into a pie plate. Chef Insight: The bittersweet chocolate notes are the perfect contrast to the sweet, creamy filling.
- 1 cup Creamy Peanut Butter: Use a standard, no-stir kind like Jif or Skippy. The stabilizers in them help the filling set better. Natural, oily peanut butter can make the pie too soft. Sub Tip: For a nut-free version, SunButter works shockingly well and gives a similar color/texture!
- 8 oz Cream Cheese, softened: This is our secret for structure and that luscious tang. Full-fat is non-negotiable here for the right texture. Leave it on the counter for a good 1-2 hours. Chef Hack: If you forget, microwave it unwrapped for 15-second bursts until it yields to a gentle press.
- ¾ cup Powdered Sugar: It sweetens and dissolves seamlessly without graininess. Sift it if it’s lumpy for the smoothest filling possible.
- 1 tsp Pure Vanilla Extract: The flavor amplifier. It rounds out all the other ingredients. Don’t skip it!
- 1 cup Heavy Whipping Cream: This is what gives our pie its ethereal, mousse-like lift. Make sure it’s cold, cold, cold straight from the fridge for the best whip. Chef Insight: The higher the fat content, the more stable and luxurious your whipped cream will be.
For Toppings (Go Wild!): Chocolate shavings, a simple chocolate drizzle (melt ¼ cup chocolate chips with 1 tsp coconut oil), crushed peanut butter cups, or just a dollop of extra whipped cream. It’s your canvas!
Let’s Build Some Magic: Step-by-Step
Follow these steps, and you’ll be a no-bake pie pro in no time. I’m chatting you through each one like you’re right here with me at the counter!
- The Fluffening (aka Beating Cream Cheese & PB): In a large bowl, beat the softened cream cheese and peanut butter with a hand mixer (or stand mixer) on medium-high speed for 2-3 minutes. Stop and scrape down the sides once. We want this supremely smooth and fluffy—no lumps allowed! This aerates the mixture, which is key for a light pie. Chef Hack: If your mixture seems stubbornly stiff, add a single tablespoon of the heavy cream from your carton to loosen it up.
- Sweeten the Deal: Reduce the mixer speed to low and add the powdered sugar and vanilla. Mix until just combined, then scrape the bowl and beat for another 30 seconds on medium. Taste it! This is your moment to adjust—want it a touch sweeter? Add another tablespoon of powdered sugar.
- Whip It Good: In a separate, clean, cool bowl, pour in your cold heavy cream. Whip on medium-high until stiff peaks form. You’ll know they’re stiff when you lift the beaters and the peak stands straight up without flopping over. Pro-Tip: Chill your bowl and beaters in the freezer for 10 minutes beforehand for even faster, more voluminous whipped cream.
- The Gentle Fold: This is the most crucial step for a light texture. Add about 1/3 of the whipped cream to the peanut butter mixture. Use a rubber spatula to fold it in—this means gently cutting through the center, sliding along the bottom, and turning the mixture over itself. Rotate the bowl as you go. Once incorporated, add the remaining whipped cream and fold until no white streaks remain. Be patient and gentle; we’re keeping all that air we just whipped in!
- Fill & Chill: Spoon this dreamy filling into your waiting crust. Smooth the top with an offset spatula or the back of a spoon. Now, the hardest part: walk away. Cover loosely with plastic wrap and refrigerate for at least 4 hours, but overnight is absolute perfection. This chill time lets the flavors marry and the filling firm up to sliceable bliss.
- Garnish & Serve: Just before serving, add your toppings! Drizzle with chocolate, sprinkle with crushed candy, or add rosettes of whipped cream. Run a sharp knife under hot water, wipe it dry, and slice cleanly for beautiful pieces.
How to Serve This Beauty
Presentation is the final fun step! I love serving this on a simple cake stand or a colorful ceramic plate. For a rustic-chic look, sprinkle the toppings just in the center. For individual servings, use a warm knife to get clean slices and plate each piece with a tiny extra pinch of sea salt or a mini peanut butter cup on the side. A cup of strong cold brew or a glass of cold milk is its perfect soulmate. It’s rich, so small slices are totally acceptable (but good luck stopping at one!).
Make It Your Own: Fun Variations
This recipe is a fantastic blueprint for creativity. Here are a few of my favorite twists:
- Chocolate Peanut Butter Cup: Fold ½ cup of mini chocolate chips into the filling before chilling. Top with chopped Reese’s cups.
- Salted Caramel Swirl: Before chilling, drizzle ¼ cup of thick salted caramel sauce over the filled pie and use a knife to swirl it gently into the top layer.
- Vegan Dream: Use vegan cream cheese, a plant-based heavy cream alternative (like Country Crock Plant Cream), and ensure your chocolate crust is vegan. Sweeten with maple syrup to taste (note: this will be a softer set).
- Banana Cream Fusion: Spread a layer of sliced bananas over the crust before adding the peanut butter filling. Top with fresh banana slices and a dusting of cinnamon before serving.
- Cookie Dough Lover’s: Fold in ½ cup of mini chocolate chips and ¼ cup of oat flour or heat-treated all-purpose flour into the filling mixture for a safe-to-eat “cookie dough” vibe.
Olivia’s Chef’s Notes & Kitchen Confessions
This recipe has evolved from my panic-mode original. I used to just mix everything together in one bowl, but I learned that whipping the cream separately and folding is the game-changer for that cloud-like texture. One time, I accidentally used chunky peanut butter, and you know what? The little peanut bits added a fantastic crunch that my dad now insists on! So, feel free to try it.
My biggest kitchen story with this pie involves my dog, Baxter. Let’s just say he has a sixth sense for peanut butter and once managed to gently nose a finished (but unguarded) pie off the counter. The pie was a loss (RIP), but the look of pure, unadulterated guilt on his furry face was priceless. Moral of the story: guard your chilled pie with your life, or at least with a securely placed oven mitt!
Your Questions, Answered!
Q: My filling seems a bit soft/runny after chilling. What happened?
A: This usually means the whipped cream wasn’t whipped to stiff peaks, or the natural peanut butter was used (which is oilier). Don’t worry—it will still taste amazing! Serve it in bowls as a mousse. Next time, ensure your cream is very cold and whip until truly stiff, and use a standard processed peanut butter.
Q: Can I make this ahead of time?
A: Absolutely! That’s one of its best features. It keeps beautifully, covered, in the fridge for up to 3 days. Add any fresh toppings (like whipped cream or candy) right before serving.
Q: Can I freeze the peanut butter pie?
A> You can! Wrap it tightly in plastic wrap and freeze for up to a month. Thaw in the refrigerator overnight. The texture will be slightly denser but still delicious—like a frozen peanut butter cheesecake slice.
Q: My cream cheese was still a bit lumpy when I mixed it. How do I avoid that?
A> Proper softening is key! If you get small lumps, you can press the finished filling through a fine-mesh sieve—a bit fussy but it works. Or, embrace the rustic texture and call it “homestyle.”

Creamy Peanut Butter Pie (Easy No-Bake Dessert)
Description
If you need a guaranteed dessert win, this no-bake peanut butter pie is it. It’s smooth, fluffy, rich, and perfectly balanced with a chocolate cookie crust. No oven, no complicated steps — just simple mixing, chilling, and smiling when everyone asks for seconds. It’s ideal for parties, birthdays, or anytime you want something impressive with minimal effort.
Ingredients
-
1 prepared 9-inch chocolate cookie crust (store-bought or homemade)
-
1 cup creamy peanut butter (regular, not natural-style)
-
8 oz (225 g) cream cheese, softened
-
¾ cup powdered sugar
-
1 tsp vanilla extract
-
1 cup cold heavy whipping cream
Optional Toppings
-
Chocolate drizzle
-
Chocolate shavings
-
Crushed peanut butter cups
-
Extra whipped cream
Instructions
-
Beat peanut butter & cream cheese
In a large bowl, beat softened cream cheese and peanut butter for 2–3 minutes until completely smooth and fluffy. -
Add sugar & vanilla
Mix in powdered sugar and vanilla until fully combined. Scrape the bowl and mix again briefly. -
Whip the cream
In a separate cold bowl, whip heavy cream to stiff peaks (peaks stand straight when beaters lift). -
Fold gently
Fold one-third of the whipped cream into the peanut butter mixture to lighten it. Then gently fold in the remaining whipped cream until smooth and airy. -
Fill the crust
Spoon filling into the crust and smooth the top. -
Chill
Refrigerate at least 4 hours (overnight is best) until firm. -
Decorate & serve
Add toppings just before serving. Slice with a warm knife for clean cuts.
Notes
-
Use regular creamy peanut butter — natural versions can make the pie too soft.
-
Cream cheese must be fully softened to avoid lumps.
-
Cold cream whips better — chill the bowl and beaters if possible.
-
Fold, don’t stir — gentle folding keeps the filling light and mousse-like.
-
Overnight chill = best texture and flavor.
Nutritional Information (Approximate)
Per slice (1/8th of pie, without additional toppings): Calories: ~450 | Fat: 35g | Saturated Fat: 16g | Carbohydrates: 28g | Sugar: 20g | Protein: 9g
Remember, this is a celebratory treat! Enjoy it mindfully and savor every single creamy, peanut-buttery bite.
Final Thoughts
The One Pie That Makes Everyone Smile (Seriously, Try It!)
And here we are, friend—coffee mug empty, apron dusted with powdered sugar, and a gorgeous pie resting peacefully in your fridge. All that’s left is the hardest part: waiting.
But while we wait, let me tell you what I hope you’ve taken from this little kitchen adventure of ours.
This No-Bake Creamy Peanut Butter Pie isn’t just a recipe. It’s permission. Permission to take shortcuts when life gets chaotic. Permission to show up with something simple that still steals the show. Permission to believe that you—yes, you—can create something that makes people close their eyes on the first bite and let out that involuntary little mmmph of pure satisfaction.
I’ve made this pie in a borrowed apartment with a dull butter knife and a whisk that squeaked. I’ve made it at midnight when I couldn’t sleep, the fridge humming its quiet song while I folded cream cheese and peanut butter together like a prayer. I’ve made it for celebrations and for heartbreaks, for potlucks and for no reason at all except that Tuesday needed to be a little better.
And every single time, it works.
Not because I’m a pastry chef or because I own fancy equipment. It works because peanut butter and chocolate are soulmates. It works because cream cheese and whipped cream refuse to let you down. It works because sometimes the most honest, generous thing you can offer someone is something creamy and cold and made just for them.
So go ahead—pull that pie out of the fridge. Run your knife under hot water. Wipe it dry. Slice cleanly through that chocolate crust and into that cloud of peanut butter heaven. Watch the way the fork glides through. Listen to the quiet click against the plate.
And when you take that first bite, the one you’ve been waiting for since you started reading this? I hope you smile. I hope you close your eyes. I hope you think, I made this.
Because you did.

Ultimate Dark Chocolate Cake : Rich, Moist & From Scratch
The Ultimate Dark Chocolate Cake: Your New Go-To for Every Celebration
Hey there, friend! Come on in, grab an apron, and let’s talk about chocolate. I’m not talking about a polite, subtle hint of cocoa. I’m talking about the kind of deep, soul-satisfying, unapologetically rich chocolate experience that makes you close your eyes for a second after the first bite. The kind that turns a regular Tuesday into a celebration and makes a birthday feel truly momentous. If you’ve ever scanned a bakery case, longing for that perfect slice of dark chocolate cake but hesitated at the price tag, I’ve got fantastic news: you can make one that’s even better, right in your own kitchen.
This Ultimate Dark Chocolate Cake is my absolute pride and joy. It’s the recipe I’ve tweaked, tasted, and perfected over years of family birthdays, potluck dinners, and “just because” baking sessions. What makes it so special? It’s incredibly moist with a tender, velvety crumb that stays that way for days. The flavor is intense and complex, not just sweet. And the best part? It comes together in one bowl without any fussy techniques. This isn’t a fussy, temperamental dessert; it’s a reliable, beloved friend. Whether you’re a seasoned baker or someone who gets nervous just preheating the oven, this recipe is for you. We’re going to walk through it together, step-by-step, and by the end, you’ll have a stunning, bakery-worthy cake that’s brimming with homemade love. Let’s bake some magic!
The Birthday Cake That Started It All
This cake has roots in a little kitchen disaster that turned into a sweet tradition. Years ago, for my husband’s birthday, I ambitiously decided to tackle a five-layer chocolate monstrosity from a famous chef’s cookbook. It involved double boilers, separated eggs, and a frosting that demanded a candy thermometer. Let’s just say… it did not go well. The layers were lopsided, the frosting was grainy, and I was nearly in tears as our guests were due to arrive.
In a panic, I scrapped it all. I whisked together the simple, back-to-basics ingredients I always keep on hand—flour, cocoa, sugar, eggs—and poured in a cup of hot coffee on a whim, remembering my grandma’s old trick. What came out of the oven was a miracle: two perfectly domed, incredibly fragrant dark chocolate cakes. They were so moist they practically glistened. I slapped some hastily whipped chocolate frosting between them, piled some berries on top, and served it with a laugh and the full story. It was a smash hit. The simplicity was its genius. Now, it’s the only birthday cake he requests. It taught me that the best recipes aren’t about showing off; they’re about sharing joy, even when it comes from a happy accident.
Gathering Your Ingredients: A Baker’s Blueprint
Here’s everything you’ll need to create this chocolate masterpiece. I’ve added my little notes next to each one—why it’s important, and how you can swap things if needed. Baking is part science, part art, and I want you to feel confident making it your own!
- 1 ¾ cups all-purpose flour: The sturdy backbone of our cake. It gives structure. For a slightly more tender crumb, you can swap in ½ cup cake flour, but all-purpose works beautifully.
- ¾ cup unsweetened cocoa powder (dark or Dutch-processed): This is the star! Dutch-processed cocoa is alkalized, making it darker, less acidic, and richer in flavor. It’s my top choice for this “ultimate” deep flavor. If you only have natural cocoa, that’s okay—the recipe’s baking soda will react with it just fine.
- 2 cups granulated sugar: Sweetens and, importantly, helps retain moisture for that famously tender texture.
- 1 ½ tsp baking powder & 1 ½ tsp baking soda: Our dynamic leavening duo. They work together to give the cake a beautiful, even rise. Make sure yours is fresh for the best lift!
- 1 tsp salt: Never skip the salt in desserts! It’s the secret weapon that enhances and balances all the chocolatey sweetness, preventing it from being one-dimensional.
- 2 large eggs: They bind, enrich, and add to the structure. Bring them to room temperature for easier mixing and a smoother batter.
- 1 cup buttermilk: The key to unbelievable moisture and a subtle tang that makes the chocolate flavor pop. No buttermilk? Make a quick “sour milk”: mix 1 cup regular milk with 1 tablespoon white vinegar or lemon juice. Let it sit for 5 minutes before using.
- ½ cup vegetable oil: Oil keeps the crumb moist longer than butter would. I use a neutral oil like canola or grapeseed.
- 2 tsp vanilla extract: The floral notes of vanilla are chocolate’s best friend. Use pure extract if you can!
- 1 cup hot coffee or hot water: This is the magic trick. The hot liquid “blooms” the cocoa powder, intensifying its flavor. The coffee (don’t worry, you won’t taste it!) simply makes the chocolate taste more chocolatey. If you’re avoiding caffeine, hot water works perfectly.
For the Luxurious Chocolate Frosting (Optional, but Highly Recommended!)
- ½ cup unsalted butter, softened: The base for a rich, spreadable frosting. Unsalted lets you control the salt level.
- ⅔ cup unsweetened cocoa powder: We’re doubling down on that deep chocolate flavor.
- 3 cups powdered sugar: Sifted, if possible, to avoid lumps in your beautifully smooth frosting.
- ⅓ cup heavy cream or milk: Heavy cream will give you a richer, more decadent consistency. Milk works for a slightly lighter version.
- 1 tsp vanilla extract: A must for balancing sweetness.
Step-by-Step: Let’s Build Your Dream Cake
Ready? Let’s do this! I’ll walk you through each step with all my favorite tips and hacks to ensure success.
Step 1: Prep Like a Pro. First, preheat your oven to 350°F (175°C). This is non-negotiable—a properly preheated oven is crucial for the perfect rise. While it heats, grease two 9-inch round cake pans with butter or baking spray. Then, line the bottoms with parchment paper circles. (I just trace the pan on parchment and cut it out!). This guarantees your cakes will release beautifully without a single crumb left behind. Trust me on this one.
Step 2: The One-Bowl Wonder Dry Mix. In a large mixing bowl (you can use a stand mixer, hand mixer, or just a whisk and some elbow grease!), whisk together the flour, cocoa powder, sugar, baking powder, baking soda, and salt. Take a moment to really whisk it well. We want everything evenly distributed so every bite is perfect. You’ll already start to smell that amazing chocolatey aroma.
Step 3: Bring in the Wet Team. To the dry ingredients, add the eggs, buttermilk, vegetable oil, and vanilla extract. Now, beat everything together on medium speed for about 2 minutes. The batter will be thick, creamy, and gloriously shiny. Scrape down the sides of the bowl to make sure no dry pockets are hiding.
Step 4: The Magic Pour. Here comes the fun part! With the mixer on low speed, slowly pour in the hot coffee or hot water. The batter will look thin and almost soupy—this is exactly right! Don’t panic. This liquid is what creates that incredibly moist texture and intensifies the cocoa. Just mix until it’s fully combined, which will only take a minute.
Step 5: Divide and Conquer. Pour the thin batter evenly into your two prepared pans. A kitchen scale is the most precise tool for this, but if you don’t have one, just eyeball it as best you can. A little tilt of the pans will help the batter settle evenly.
Step 6: Bake to Perfection. Slide the pans into the center of your preheated oven. Now, the hardest part: do not open the oven door for at least 25 minutes! Peeking can cause a draft and make your cakes sink. Bake for 30-35 minutes total. You’ll know they’re done when the tops are set and spring back when lightly touched, and a toothpick or skewer inserted into the center comes out with just a few moist crumbs (not wet batter).
Step 7: The Patient Cool-Down. Once baked, let the cakes cool in their pans on a wire rack for exactly 10 minutes. This allows them to firm up a bit. Then, run a knife around the edges, invert the pans onto the rack, and carefully peel off the parchment paper. Let them cool completely before you even *think* about frosting. A warm cake will melt your frosting into a sad puddle. I sometimes pop them in the fridge for 30 minutes to speed things up if I’m impatient!
Step 8: Make the Frosting. While the cakes cool, beat the softened butter until it’s smooth and creamy. Add the cocoa powder and beat again. Gradually add the powdered sugar, alternating with the heavy cream or milk, and beat on medium-high speed. Finish with the vanilla and beat for a final 1-2 minutes until it’s light, fluffy, and spreadable. If it’s too thick, add a splash more cream. Too thin? Add a bit more powdered sugar.
Step 9: Frost & Decorate! Place one cooled cake layer on your serving plate. Spread a generous dollop of frosting over it. Add the second layer on top. Use an offset spatula or butter knife to apply a thin “crumb coat” of frosting all over the cake to seal in any loose crumbs. Chill for 15 minutes, then pile on the rest of the frosting, swirling it beautifully. I love a rustic, swoopy finish—perfection is overrated!
How to Serve This Showstopper
Presentation is the final flourish! For a classic look, simply frost the cake and maybe add a sprinkle of chocolate shavings or a dusting of cocoa powder. To make it extra special, crown it with a pile of fresh raspberries or strawberries—the bright, tart fruit is heavenly with the rich cake. For a party, add some edible gold flakes or chocolate-dipped espresso beans on top. Slice with a sharp knife dipped in hot water for clean, beautiful slices. Serve it at room temperature with a cold glass of milk, a hot cup of coffee, or even a dollop of lightly sweetened whipped cream on the side.
Make It Your Own: Delicious Twists & Swaps
This recipe is a fantastic canvas for creativity! Here are a few of my favorite ways to mix it up:
- Espresso Lovers’ Dream: Use hot, strong espresso instead of coffee for an even deeper, mocha-forward flavor.
- Vegan-Friendly Version: Swap eggs for ½ cup applesauce or commercial egg replacer, use plant-based milk + vinegar for the buttermilk, and use a vegan butter and cream alternative in the frosting.
- Chocolate-Orange Bliss: Add 1 tablespoon of finely grated orange zest to the batter and 1 teaspoon of orange extract to the frosting for a bright, citrusy twist.
- Peppermint Patty Cake: Add 1 teaspoon of peppermint extract to the chocolate frosting. Perfect for the holidays!
- Cupcake Conversion: This batter makes about 24 perfect cupcakes. Fill liners ⅔ full and bake for 18-22 minutes.
Olivia’s Chef Notes & Kitchen Confessions
This cake has been my faithful companion through so many life moments, and I’ve learned a thing or two. First, the batter being thin still surprises me every single time—I have to remind myself it’s correct! Second, I once forgot the baking soda and baking powder entirely (mom brain is real). The result was two dense, sad chocolate frisbees. So, now I always mix my leaveners into the flour first thing to avoid that disaster! Over time, I’ve also started adding a tiny pinch of cinnamon or even a dash of cayenne pepper to the dry ingredients for a mysterious, warm background note that people can never quite place. It’s our little secret. Most importantly, have fun with it. Licking the bowl is mandatory, and a little mess means you’re doing it right.
FAQs & Your Baking Questions, Answered
Q: My cake sunk in the middle! What happened?
A: Oh no, the classic sink! This is usually due to 1) Underbaking (the center wasn’t set yet), 2) Opening the oven door too early before the structure had set, or 3) Expired or mismeasured leavening agents (baking powder/soda). Make sure your oven is fully preheated, don’t peek before 25 minutes, and test for doneness with a toothpick that comes out clean or with dry crumbs.
Q: Can I make this cake ahead of time?
A: Absolutely! In fact, I think it tastes even better the next day. You can bake the layers, let them cool completely, wrap them tightly in plastic wrap, and store at room temperature for one day or freeze for up to 3 months. Thaw before frosting. You can also frost the entire cake and store it, covered, in the fridge for up to 3 days. Let it sit at room temperature for an hour before serving for the best texture and flavor.
Q: My frosting is too runny/grainy. Help!
A: Runny frosting usually means it’s too warm or you added a bit too much liquid. Pop the whole bowl in the fridge for 20 minutes to firm up the butter, then re-whip. Grainy frosting is often from unsifted powdered sugar. You can try beating it for a full 5-7 minutes on high—sometimes that incorporates the sugar fully. If not, next time, sift your sugar and cocoa!
Q: I don’t have two 9-inch pans. Can I use a different pan?
A> Yes! A 9×13-inch rectangular pan works wonderfully—just bake for 35-40 minutes. For a stunning Bundt cake, grease and flour a 10-12 cup Bundt pan extremely well and bake for 45-55 minutes. Always do the toothpick test to be sure.

Ultimate Dark Chocolate Cake : Rich, Moist & From Scratch
Description
If you love bold chocolate flavor, this dark chocolate cake is the one to keep forever. It’s incredibly moist, tender, and intensely chocolatey without being overly sweet. Even better, it’s a simple one-bowl batter that works for birthdays, holidays, and anytime you want a guaranteed crowd-pleaser.
Ingredients
Cake
-
1¾ cups all-purpose flour
-
¾ cup unsweetened cocoa powder (Dutch-process preferred)
-
2 cups granulated sugar
-
1½ tsp baking powder
-
1½ tsp baking soda
-
1 tsp salt
-
2 large eggs (room temperature)
-
1 cup buttermilk (or 1 cup milk + 1 tbsp lemon juice)
-
½ cup vegetable oil
-
2 tsp vanilla extract
-
1 cup hot coffee or hot water
Chocolate Frosting
-
½ cup unsalted butter, softened
-
⅔ cup unsweetened cocoa powder
-
3 cups powdered sugar
-
⅓ cup heavy cream or milk
-
1 tsp vanilla extract
Instructions
-
Prep oven & pans
Preheat oven to 350°F / 175°C. Grease two 9-inch round pans and line bottoms with parchment. -
Mix dry ingredients
In a large bowl, whisk flour, cocoa, sugar, baking powder, baking soda, and salt. -
Add wet ingredients
Add eggs, buttermilk, oil, and vanilla. Beat 2 minutes until smooth. -
Add hot liquid
Slowly mix in hot coffee or water. Batter will be thin — that’s correct. -
Bake
Divide into pans. Bake 30–35 minutes until a toothpick comes out with a few moist crumbs. -
Cool
Cool in pans 10 minutes, then turn out and cool completely before frosting.
Notes
-
Use Dutch-process cocoa for darker color and smoother flavor.
-
Hot coffee boosts chocolate taste without making the cake taste like coffee.
-
Don’t overbake — moist crumbs on the tester are perfect.
-
Chill layers briefly before frosting for cleaner spreading.
-
Make cupcakes: bake 18–22 minutes (makes ~24).
Nutritional Information (Approximate)
Per slice (1/12th of cake with frosting): Calories: ~420 | Total Fat: 18g | Saturated Fat: 8g | Cholesterol: 55mg | Sodium: 380mg | Total Carbohydrates: 66g | Dietary Fiber: 3g | Sugars: 50g | Protein: 5g
Final Thoughts
And here we are, friend—flour-dusted countertops, a sink full of mixing bowls, and the most beautiful dark chocolate cake sitting right there on your kitchen counter. You did it. You.
As I sit down to write these final words, I can’t help but smile at the journey we’ve taken together through these pages. This isn’t really a recipe you’ve just read; it’s an invitation. An invitation to stop waiting for the “right occasion” and start making your own. An invitation to trust your hands, your instincts, and a simple bowl of ingredients that somehow, through a little heat and a lot of heart, transforms into something almost magical.
This cake has been with me through candlelit birthdays and quiet Tuesday nights. It’s traveled to potlucks where it came back with an empty plate and a dozen scribbled requests for the recipe. It’s been the peace offering after a long week, the centerpiece of a “just because” dinner, the late-night snack stolen from the fridge with a fork when no one was watching. And now, it’s yours.
What I hope you’ll take away from this isn’t just a reliable chocolate cake recipe—though it absolutely is that, and I’ll never gatekeep a good thing. What I hope you’ll carry with you is the knowledge that you don’t need professional training, expensive equipment, or a perfectly organized kitchen to create something extraordinary. You just need to show up, be willing to make a mess, and remember that the slightly lopsided cake made with your own two hands will always taste better than the flawless one from the bakery case. Always.

Homemade Tahini Recipe : Creamy, Healthy Sesame Paste
Homemade Tahini Recipe: Your Secret Weapon for Creamy, Dreamy Flavor
Hey there, friend! Come on in, grab an apron, and let’s get something straight: that little jar of tahini hiding in the back of your pantry? The one that’s maybe a little… gritty, or has that weird separated oil pool on top? We’re giving it a graceful retirement. Today, we’re making our own.
I’m a firm believer that some of the most transformative ingredients in cooking are also the simplest to make from scratch. And tahini—that luxuriously smooth, nutty, subtly bitter sesame paste—is the queen of that category. If you’ve only ever experienced it as a humble hummus ingredient, you’re in for a revelation. This homemade version is a universe away. It’s richer, fresher, creamier, and carries a toastiness that sings of quality and care.
The best part? You need exactly one main ingredient and about 10 minutes. That’s it. No fancy skills, no obscure tools. Just you, some sesame seeds, and a trusty blender or food processor. We’re going to turn those tiny seeds into liquid gold that will become your new kitchen obsession. Drizzle it over roasted sweet potatoes, whisk it into a lightning-fast garlic sauce for grilled chicken, fold it into brownie batter, or yes, make the most incredible hummus of your life. This homemade tahini recipe is about to become your flavor secret weapon. Ready to see how truly easy it is? Let’s go.
My Tahini “Aha!” Moment: A Story from a Sunny Market
My love affair with tahini wasn’t love at first sight. For years, I bought the same supermarket brand, dutifully stirring the stubborn oil back into the thick paste, never quite thrilled with the faintly stale, sometimes bitter result. I thought that was just… how tahini was.
Then, on a trip to visit a friend in Jerusalem, we got lost in the maze of the Machane Yehuda market. The air was thick with the scent of spices, frying falafel, and fresh pita. At a tiny stall overflowing with barrels of nuts and seeds, an older vendor with kind eyes offered me a taste of his tahini. He drizzled it straight from a large vat onto a piece of warm pita. I took a bite, and my entire concept of the ingredient shattered.
It was creamy. Like, silken-pudding creamy. It was deeply nutty but also sweet, complex, and impossibly smooth. There was no grit, no harsh bitterness—just a warm, rounded flavor that made me immediately want another bite. “The secret,” he said with a wink, “is to be friends with the sesame seed. Toast it just enough to wake it up, not to scare it.” That philosophy—respecting the ingredient, handling it with intention—stuck with me. I came home determined to recreate that magic. After a few batches (and a very patient food processor), I realized the secret wasn’t a secret at all. It was just freshness, simplicity, and a little bit of patience. And now, I get to share that “aha!” moment with you.
What You’ll Need: Keeping It Simple & Stellar
Here’s the beautiful part. Our ingredient list is gloriously short. Quality is key here, as there’s nowhere for mediocre ingredients to hide.
- 2 cups sesame seeds (hulled): This is our star! Hulled seeds (the kind without the outer bran) will give you the classic, pale beige, ultra-creamy tahini. You can use unhulled for a darker, more robust flavor and extra fiber, but your tahini will be thicker, slightly grainier, and more bitter. For your first time, I highly recommend hulled for that silky-smooth texture we’re after.
- 2-4 tablespoons neutral oil: Our texture magician. I typically use a mild avocado oil or a light olive oil (not extra virgin, its flavor is too strong). For a deeply aromatic, “next-level” tahini, you can use 1-2 tablespoons of toasted sesame oil blended with a neutral oil. Chef’s Insight: Start with 2 tablespoons and add more only as needed. The seeds release their own oils as they blend!
- A generous pinch of salt (optional): Just a pinch! This isn’t for preservation, but for flavor. Salt acts as a flavor enhancer, rounding out the nuttiness and balancing any subtle bitter notes. I never skip it.
Let’s Make It: Your Step-by-Step Guide to Sesame Gold
Ready? This process is almost meditative. Put on some good music, and let’s transform these seeds.
- Toast the Sesame Seeds: Add your sesame seeds to a large, dry skillet (no oil!) over medium heat. Now, channel your inner market vendor and “wake them up, don’t scare them.” Toast them for 3-5 minutes, stirring or shaking the pan constantly. They’ll become fragrant and take on a very light golden hue. The moment you smell that warm, nutty aroma, they’re done! Pro-Tip: Immediately pour them onto a cool plate or baking sheet. They carryover cook in the hot pan, and we want to avoid burning at all costs—burnt seeds make bitter tahini.
- Let Them Cool (The Patience Step): I know, I know. You want to blend! But letting the seeds cool completely is a non-negotiable chef’s hack. Blending warm seeds creates steam, which can make your tahini seize up or become gummy. Give them 10-15 minutes to come to room temperature. Use this time to wash the pan and set up your food processor.
- The First Blend – From Seeds to Crumbs: Add the completely cooled seeds to your food processor or high-powered blender. Secure the lid and let it run! At first, it’ll sound like a sandstorm. After a minute or so, it’ll form a dry, crumbly paste that clumps together. This is perfectly normal. Stop, scrape down the sides and bottom with a spatula.
- The Magic Transformation – Adding the Oil: Here’s where the alchemy happens. Turn the processor back on. With it running, slowly drizzle in your oil through the feed tube. Start with 2 tablespoons. You’ll witness the magic: the dry crumbs will suddenly collapse into a thick, smooth paste. Let the machine run for a full 1-2 minutes. It will get smoother and smoother. Chef’s Hack: If it still seems too thick or grainy after 2 minutes, stop, scrape, and add another ½ tablespoon of oil. Repeat until it’s pourable but still luxuriously thick.
- Season and Finalize: Add your pinch of salt. Process for another 30 seconds to incorporate it fully. Give it a taste on a spoon. Be amazed. That’s it!
- Store with Love: Scrape every last bit into a clean, airtight glass jar. A mason jar is perfect. It will keep in the refrigerator for up to a month. The oil may separate on top—that’s natural! Just give it a good stir before each use.
How to Use Your Liquid Gold: Serving Suggestions
Congratulations! You now have a jar of culinary magic. Beyond the classic hummus, try these simple ideas: Drizzle it over roasted vegetables (cauliflower, broccoli, sweet potatoes) straight from the oven. Thin it with lemon juice, water, and a crushed garlic clove for an instant, heavenly sauce for grilled meats or falafel. Swirl it into morning oatmeal or yogurt with a drizzle of honey. Or, my favorite lazy dinner: a big spoonful whisked into hot pasta water with a squeeze of lemon, chili flakes, and pasta for a creamy, dairy-free sauce in seconds.
Make It Your Own: Fun Recipe Variations
- Roasted Garlic Tahini: Blend in 2-3 cloves of roasted garlic for a mellow, sweet kick. Perfect for dressings.
- Lemon-Zest & Herb: Add the zest of one lemon and a handful of fresh dill or parsley for a bright, herbaceous spread.
- Spiced Tahini: Blend in ½ tsp each of ground cumin and coriander for a Middle Eastern flair.
- Maple-Cinnamon Tahini: For a sweet version, blend in 1 tbsp maple syrup and ½ tsp cinnamon. Incredible on toast or pancakes.
- Oil-Free (Seed-Only) Tahini: In a powerful blender like a Vitamix, you can often achieve a smooth paste with just seeds, though it will be very thick. Add water by the teaspoon to adjust consistency for dressings.
Chef’s Notes & Kitchen Confessions
This recipe has evolved from a “let’s see if this works” experiment to a weekly staple in my kitchen. My first batch? I over-toasted the seeds and my food processor sounded like it was going to launch into orbit. The tahini was… aggressively bitter. Lesson learned! Now, I’m almost obsessive about gentle toasting and letting the seeds cool.
I also used to add all the oil at once. Big mistake. It splattered everywhere and took forever to emulsify. The slow drizzle is a game-changer—it’s the difference between a cohesive sauce and a messy one. And a funny story: I once tried to quadruple the batch for a party. My poor little food processor overheated and shut down for a “cool-down break.” We had to finish blending in two batches. So, if you’re making a big batch, give your machine a breather! Now, you get to learn from my messy-apron mistakes. Enjoy the smooth, easy journey.
Your Tahini Questions, Answered
Q: My tahini is super bitter! What did I do wrong?
A: The most common culprit is over-toasting the sesame seeds. Even a few extra seconds can push them from “nutty” to “burnt and bitter.” Next time, toast just until fragrant and immediately remove from the pan. Using unhulled seeds can also contribute to a more bitter flavor profile.
Q: It’s too thick/crumbly and won’t get smooth, even with more oil. Help!
A: First, ensure you blended the dry seeds long enough before adding oil—let the processor run for a full minute to start breaking them down. Second, your machine might need a break. Processing generates heat. Stop, let it cool for 5-10 minutes, then try again with a bit more oil. A high-powered blender will always get it smoother than a basic food processor.
Q: How long does homemade tahini last, and how do I store it?
A> In an airtight jar in the refrigerator, it will stay fresh and delicious for about a month. The oil will separate—that’s totally normal and a sign of a natural, non-emulsified product. Just stir it back together before using.
Q: Can I use a blender instead of a food processor?
A> Yes, a high-speed blender (like a Vitamix or Blendtec) works brilliantly and often creates an even smoother texture. A standard blender may struggle with the initial dry blend, so you might need to stop and stir more frequently. Be patient and use the tamper if you have one.
Homemade Tahini Recipe : Creamy, Healthy Sesame Paste
Description
Tahini is one of those small ingredients that makes a big difference. Freshly made tahini tastes smoother, nuttier, and less bitter than most jarred versions—and it’s surprisingly easy to make at home. With just sesame seeds, a little oil, and a blender or food processor, you can create a rich, creamy paste perfect for hummus, sauces, dressings, and desserts.
Ingredients
Ingredients (Makes about 1 cup)
-
2 cups hulled sesame seeds
-
2–4 tablespoons neutral oil (avocado oil, light olive oil, or sunflower oil)
-
Pinch of salt (optional)
Instructions
-
Toast the sesame seeds
Place seeds in a dry skillet over medium heat. Toast 3–5 minutes, stirring constantly, until lightly golden and fragrant. Do not let them darken too much. -
Cool completely
Transfer seeds to a plate and let them cool fully (about 10–15 minutes). This helps prevent a gummy texture when blending. -
First blend
Add cooled seeds to a food processor or high-speed blender. Blend 1–2 minutes until they form a dry, crumbly paste. Scrape down sides. -
Add oil slowly
With the machine running, drizzle in 2 tablespoons oil. Blend until smooth and thick. Add more oil a little at a time until you reach a creamy, pourable consistency. -
Season
Add a pinch of salt if desired and blend 20–30 seconds more. -
Store
Transfer to an airtight jar. Refrigerate up to 1 month. Stir before each use if oil separates.
Notes
-
Use hulled seeds for the smoothest, mildest flavor.
-
Light toast only — over-toasting causes bitterness.
-
Be patient while blending — smoothness improves after each minute.
-
Start with less oil and add gradually.
-
If too thick: blend longer or add 1 teaspoon oil at a time.
Nutritional Information (Per 1 Tablespoon)
Approximate values, as oil amount can vary.
Calories: 90 | Fat: 8g | Saturated Fat: 1g | Carbohydrates: 3g | Fiber: 1g | Protein: 3g | Sodium: 5mg
***
There you have it! Your very own jar of homemade, creamy tahini. I’m so excited for you to crack it open and start drizzling, dipping, and dressing your way to more flavorful meals. Tag me on Instagram @OliviasCozyKitchen if you make it—I love seeing your creations! Now, go enjoy that well-earned, nutty, delicious reward.
Final Thoughts
So here we are, standing side by side in your kitchen—flour dusted on the counter, the warm, nutty aroma of toasted sesame still lingering in the air, and a jar of liquid gold cooling on the counter. You did it.
I meant what I said at the beginning: tahini isn’t just an ingredient. It’s an invitation. It’s the bridge between a good meal and one you remember weeks later. And now, tucked away in your fridge, you have something the store could never quite give you. You have your version—made with your hands, your timing, your patience. That slight variance in toastiness, that perfect drizzle of oil you added drop by drop? That’s not imperfection. That’s signature.
What strikes me every single time I make tahini from scratch isn’t just the transformation of seed to silk—it’s how this humble paste quietly elevates everything it touches without demanding credit. It doesn’t shout. It deepens. It rounds out sharp edges, adds body to sauces, brings roasted vegetables into full bloom. It’s the kitchen equivalent of a really good friend: steady, versatile, and always welcome at the table.
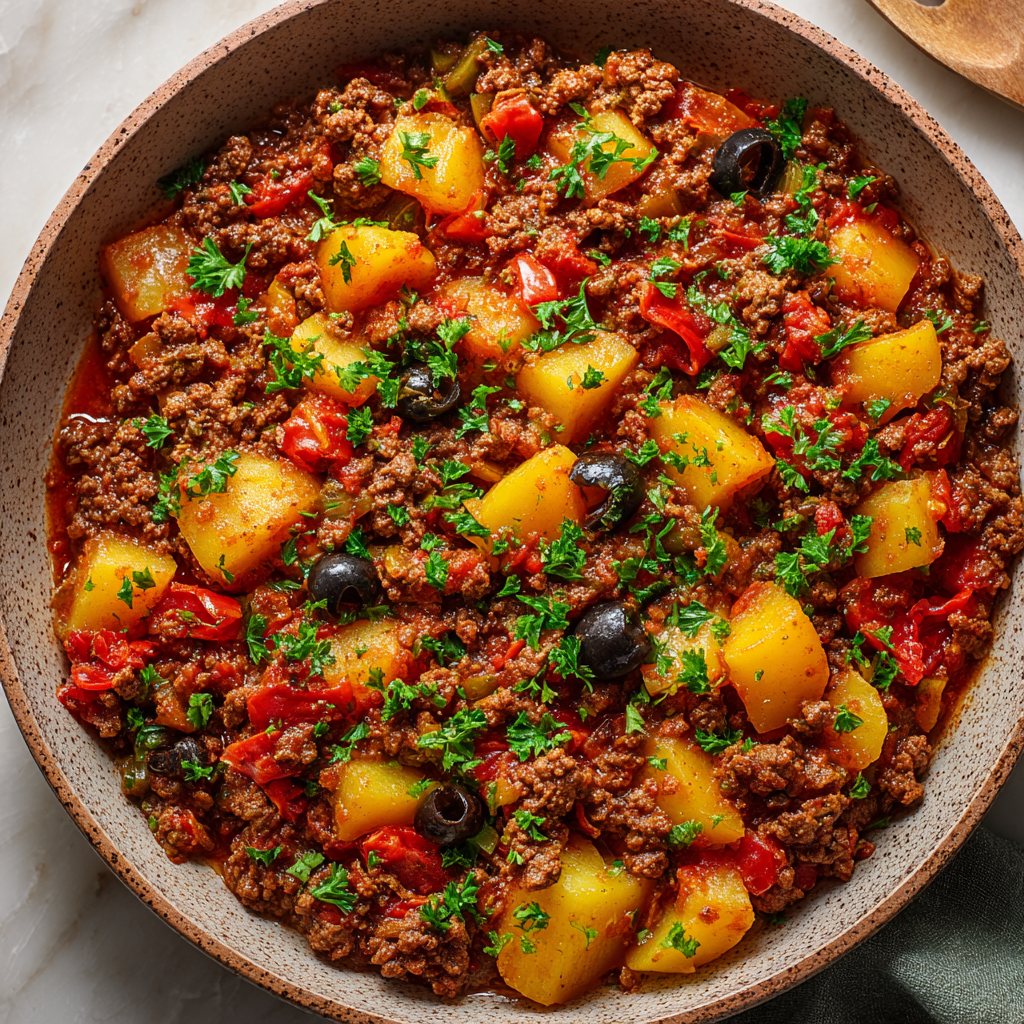
Classic Picadillo Recipe : Easy, Hearty & Full of Flavor
Let’s Make Dinner Magic: My Go-To Classic Picadillo
Hey there, friend! Olivia here, waving from a kitchen that currently smells like warm spices and happy memories. Is there anything better than the sound of something savory simmering on the stove? It’s the universal signal that a cozy, delicious meal is moments away, and that’s exactly the feeling I want to bottle up and share with you today.
We’re diving into one of my all-time favorite, no-fuss, flavor-packed wonders: Classic Picadillo. If you’ve never met picadillo before, get ready for a hug in a bowl. Imagine savory ground beef, tender little cubes of potato, all swimming in a rich, tomatoey sauce that’s been kissed with cumin and paprika. It’s hearty, it’s homestyle, and it has this magical ability to make a Tuesday night feel like a special occasion.
This isn’t a fussy, chef-y recipe. This is the kind of cooking I live for—real, approachable, and utterly satisfying. It’s the dish I make when I want to feed my people something I know will make them smile. Whether you spoon it over a mountain of fluffy rice, scoop it up with warm tortillas, or just eat it straight from the pot (no judgment here!), picadillo is a versatile champion.
So, tie on your apron—the cute one with the stains that prove you know your way around a kitchen. Grab your favorite wooden spoon. We’re about to create something truly special, together. Let’s get that stove fired up and fill your home with the incredible aroma of homemade goodness.
More Than a Recipe: A Bowl Full of Stories
My love affair with picadillo started long before I had my own kitchen. It began in my best friend Maria’s bustling family kitchen when we were teenagers. After school, her abuela, Señora Rosita, would always have a pot of something incredible going. One rainy afternoon, it was picadillo.
I remember watching, mesmerized, as she moved with a calm, sure rhythm—chopping onions with swift precision, toasting the spices until the air itself tasted warm. She let me brown the beef, teaching me to listen for the specific sizzle that meant it was perfectly seared, not steamed. “You build the flavor in layers, mija,” she’d say, her hands guiding mine. “First the onion, then the spice, then the heart.”
That “heart” was the tomatoes and broth, the simmer that brought it all together into a cohesive, comforting whole. We ate it that day wrapped in soft flour tortillas, laughing and talking over each other at the crowded table. In that moment, I understood that this dish was more than food; it was a gathering place. It was simplicity, warmth, and connection, all simmering in one pot. Every time I make it now, that memory—the sound of her laughter, the steam fogging up the windows—comes right back. It’s my reminder that the best recipes are the ones that feed more than just our stomachs.
Gathering Your Flavor Makers
Here’s the beautiful part: the ingredient list is simple and flexible! This is where we get to play. Let’s look at each one, because knowing your ingredients is the first step to feeling confident and making the recipe your own.
- 1 lb ground beef (85/15 or 90/10): This is our hearty base. I like a little fat for flavor, but you can use leaner beef if you prefer—just add a touch more oil to the pan. Chef’s Insight: For a fantastic twist, try ground turkey or a plant-based ground “meat.” The spices carry the flavor beautifully!
- 2 tbsp olive oil: Our cooking fat. It adds a lovely fruitiness and helps sauté our aromatics to perfection.
- 1 small onion, finely chopped: The sweet, savory foundation of so many great dishes. Don’t rush this step—cooking it until soft and translucent builds a deep flavor base.
- 3 cloves garlic, minced: Fragrant, pungent magic. Please, use fresh! It makes a world of difference compared to the jarred stuff.
- 2 medium potatoes, peeled and diced small: They soak up all the delicious sauce and add comforting texture. Substitution Tip: Sweet potatoes are a gorgeous, vitamin-packed alternative here. Or, for a lower-carb option, try diced carrots or even chopped cauliflower.
- 1 can (14 oz) diced tomatoes: Our liquid and tangy backbone. I love the fire-roasted variety for an extra layer of smoky depth.
- 2 tbsp tomato paste: This is our flavor concentrate! It adds a rich, umami depth that balances the acidity of the diced tomatoes. Pro Hack: Sauté it for a minute with the onions and spices to “cook out” any tinny flavor and caramelize its sugars.
- ½ cup beef broth or water: This helps create our saucy consistency. Broth adds more savory notes, but water works perfectly fine in a pinch.
- 1 tsp ground cumin, 1 tsp paprika, ½ tsp oregano: The holy trinity of warmth! Cumin is earthy, paprika adds sweet pepperiness (try smoked paprika for a kick!), and oregano brings a subtle herbal note. This is your spice profile—make it yours!
- Salt and black pepper, to taste: The essential flavor enhancers. Season in layers as you cook.
- Optional: ¼ cup chopped green olives or 2-3 tbsp raisins: This is the fun debate! Olives add a briny, salty punch, while raisins plump up with a sweet contrast. Try one, both, or neither. I love the sweet-savory surprise of raisins!
Let’s Cook: Building Flavor, One Step at a Time
Ready? This is where the magic happens. We’re not just following steps; we’re building layers of flavor. Put on some good music, pour yourself a drink, and let’s cook with joy.
- Heat the oil in a large skillet or Dutch oven over medium heat. I love using my heavy-bottomed Dutch oven because it distributes heat so evenly. Give it a minute to get properly warm—you should see the oil shimmer slightly.
- Add the chopped onion. Cook, stirring occasionally, for 5-7 minutes until soft and translucent. This is your first flavor layer. We’re not looking for color here, just sweetness and tenderness. That gentle sizzle is the sound of flavor developing!
- Stir in the minced garlic and cook for just 30 seconds, until fragrant. Garlic burns fast, so keep it moving! You’ll know it’s ready when that incredible aroma hits you. Ahhh, that’s the good stuff.
- Increase the heat to medium-high. Add the ground beef, breaking it up with your spoon. Cook until browned, about 5-7 minutes. Don’t just gray it—let it get some nice, brown, caramelized bits. That’s called the Maillard reaction, and it’s the secret to deep, meaty flavor. If there’s a lot of excess fat, you can drain some off, but I usually leave a tablespoon or two for richness.
- Now, the spices! Sprinkle in the cumin, paprika, oregano, a good pinch of salt, and a few cracks of black pepper. Stir for 1 minute. Toasting the spices in the heat of the pan wakes them up and makes their flavors bloom. Your kitchen will smell absolutely incredible right now.
- Add the diced potatoes, the entire can of diced tomatoes (juice and all), the tomato paste, and the broth or water. Give everything a really good stir to combine. Make sure the tomato paste is fully dissolved into the liquid and that the potatoes are nestled in. It will look saucy and promising!
- Bring the mixture to a lively bubble, then reduce the heat to low. Cover the pot and let it simmer gently for 20-25 minutes. This is the patient part. The simmer is where everything gets to know each other. The potatoes become tender, the sauce thickens, and the flavors marry into something greater than the sum of their parts. Peek and give it a stir halfway through to prevent sticking.
- After 20 minutes, check a piece of potato with a fork. It should be tender. If you’re using olives or raisins, stir them in now. The olives will warm through and impart their brine, and the raisins will plump up beautifully. Give it a final taste—this is your moment! Does it need more salt? A pinch more cumin? Adjust to your heart’s content.
- Remove from heat and let it sit for 5 minutes before serving. This little rest allows the sauce to settle and the flavors to deepen just a touch more. Perfect time to fluff your rice or warm those tortillas!
How to Serve Your Picadillo Masterpiece
Here’s where you get to be the artist! My absolute favorite way is a big, fluffy mound of white or brown rice with the picadillo spooned generously over the top. The rice soaks up every drop of that glorious sauce. For a fun, hands-on meal, set out a stack of warm flour or corn tortillas and let everyone build their own tacos or soft wraps. Got some creamy avocado? A dollop of cool sour cream or tangy Greek yogurt? A sprinkle of fresh cilantro or chopped white onion? Throw it all on the table and let your crew create their perfect bite. It’s a communal, interactive, and utterly delicious experience.
Make It Your Own: Creative Twists & Swaps
- Picadillo Poblanco: Skip the tomatoes and use a cup of salsa verde (green tomatillo salsa) instead. It’s bright, tangy, and a completely different but amazing vibe.
- Spicy Kick: Add a diced jalapeño or serrano pepper with the onions, and/or a ½ teaspoon of chipotle powder with the other spices for a smoky heat.
- Lentil & Walnut “Picadillo”: Make it vegetarian! Swap the beef for 1 cup of cooked brown lentils and ¾ cup of finely chopped walnuts. You’ll be shocked at the satisfying, meaty texture.
- Breakfast Picadillo: Serve it topped with a fried or poached egg for the ultimate hearty breakfast or brunch. The runny yolk creates the best sauce!
- Stuffed Bell Peppers: Spoon the finished picadillo into hollowed-out bell peppers, top with cheese, and bake at 375°F for 20 minutes for a gorgeous, all-in-one meal.
Olivia’s Kitchen Notes & Stories
This recipe has been my weeknight warrior for years, and it’s evolved with me. The first time I made it alone, I was so nervous I forgot the paprika entirely! It was… fine. But it taught me that recipes are guides, not gospel. Now, I often add a bay leaf during the simmer for an extra aromatic note, and I almost always throw in those sweet raisins—my little homage to Señora Rosita’s version.
One funny fail? I once diced the potatoes way too big in a hurry. Let’s just say we had “rustic, al dente” potatoes that night. The lesson? Small, even dices are key for that perfect, tender bite in the given time. And remember, the picadillo you make will be uniquely yours, and that’s what makes home cooking so beautiful. It’s your story, told in spices and simmering pots.
Your Questions, Answered!
Q: My sauce is too thin/watery. How can I thicken it?
A: No worries! First, make sure you’ve simmered it uncovered for the last 5-10 minutes to allow excess liquid to evaporate. If it’s still too thin, mix 1 tablespoon of cornstarch with 2 tablespoons of cold water to make a slurry. Stir this into the simmering picadillo and cook for another 2-3 minutes until thickened.
Q: Can I make this ahead of time or freeze it?
A: Absolutely! Picadillo tastes even better the next day as the flavors continue to meld. Let it cool completely and store it in an airtight container in the fridge for up to 4 days. It freezes beautifully for up to 3 months. Thaw overnight in the fridge and reheat gently on the stove.
Q: It tastes a little bland. What did I miss?
A: The most common culprit is under-seasoning. Remember to season in layers: salt the onions as they cook, season the beef, and then always do a final taste and adjust at the end. A splash of something acidic can also wake up the flavors—try a squeeze of fresh lime juice or a teaspoon of apple cider vinegar. And don’t be shy with those spices!
Q: Can I use a different meat?
A> 100%! Ground turkey, chicken, pork, or lamb all work wonderfully. For pork or lamb, you might want to bump up the cumin and oregano slightly. Plant-based grounds are also a fantastic, easy swap—just follow the package instructions for browning.

Classic Picadillo Recipe : Easy, Hearty & Full of Flavor
Description
There’s something special about a one-pan meal that fills the kitchen with warm, savory aromas and comes together without stress. Classic Picadillo is exactly that kind of dish—simple, hearty, and full of flavor. It’s made with ground beef, tender potatoes, tomatoes, and cozy spices, and it works perfectly over rice or tucked into warm tortillas. If you want a reliable comfort dinner that tastes like home, this is it.
Ingredients
-
1 lb (450 g) ground beef (85–90% lean)
-
2 tbsp olive oil
-
1 small onion, finely chopped
-
3 cloves garlic, minced
-
2 medium potatoes, peeled and diced small
-
1 can (14 oz / 400 g) diced tomatoes
-
2 tbsp tomato paste
-
1/2 cup beef broth or water
-
1 tsp ground cumin
-
1 tsp paprika
-
1/2 tsp dried oregano
-
Salt and black pepper, to taste
-
Optional: 1/4 cup green olives or 2–3 tbsp raisins
Instructions
-
Sauté aromatics:
Heat olive oil in a large skillet over medium heat. Add onion and cook 5–7 minutes until soft. Stir in garlic and cook 30 seconds. -
Brown the beef:
Add ground beef and cook until well browned, breaking it apart as it cooks. Drain excess fat if needed. -
Add spices:
Stir in cumin, paprika, oregano, salt, and pepper. Cook 1 minute to toast the spices. -
Simmer:
Add diced potatoes, diced tomatoes (with juice), tomato paste, and broth. Stir well. Bring to a gentle boil. -
Cook until tender:
Reduce heat to low, cover, and simmer 20–25 minutes, stirring occasionally, until potatoes are tender and sauce thickens. -
Finish:
Stir in olives or raisins if using. Taste and adjust seasoning. Rest 5 minutes before serving.
Notes
-
Dice potatoes small so they cook evenly and quickly.
-
Brown the beef well — deep color = deeper flavor.
-
Simmer uncovered the last 5 minutes if the sauce is too thin.
-
Make it lighter: swap ground beef for turkey or chicken.
-
Add veggies: peas or diced carrots work great stirred in near the end.
Nutritional Information (Per Serving)
Approximate values, based on 4 servings using 90/10 ground beef and without optional olives/raisins.
Calories: 420 | Total Fat: 24g | Saturated Fat: 8g | Cholesterol: 80mg | Sodium: 450mg | Total Carbohydrates: 25g | Dietary Fiber: 4g | Sugars: 6g | Protein: 28g
Final Thoughts
And there you have it, friend—a pot full of comfort, connection, and pure, unpretentious magic.
As I sit here writing this, my own kitchen has gone quiet. The last spoonful of picadillo has been scraped from the pot, the dishes are drying in the rack, and the only thing lingering is that faint, warm whisper of cumin and garlic that promises tomorrow’s lunch will be just as good as tonight’s dinner. Maybe better.
This is what I want you to carry with you, not the precise measurements or the exact simmer time, but this feeling right here. The feeling of taking simple, honest ingredients and turning them into something that makes people slow down, take a deep breath, and say, “Wow, that smells amazing.” The feeling of knowing that you made that. You.
Because here’s the beautiful secret nobody tells you when you’re just starting out in the kitchen: the magic was never in the recipe. It was always in you.
Señora Rosita taught me that, standing at her stove all those years ago. She wasn’t just teaching a teenage girl how to brown beef and toast spices. She was passing down the understanding that cooking isn’t about perfection—it’s about presence. It’s about showing up, paying attention, and pouring a little bit of your heart into everything you make. The onions will get soft. The meat will brown. The sauce will simmer. And somehow, in that simple, sacred rhythm, you’ll find yourself right where you need to be.

Greek Yogurt Ranch Veggie Cups : Fresh, Fun & Party-Perfect
The Day I Realized Snacking Could Be Both Pretty and Perfect
Picture this: It’s an hour before friends are coming over. You’ve got a beautiful main dish in the oven, but the snack situation is… well, it’s a bowl of chips next to a lonely veggie platter. We’ve all been there. The dip is dwindling, the carrots look sad, and you’re doing that awkward scoop-and-crunch maneuver while trying to hold a conversation. Not exactly the effortless host vibe we’re going for, right?
I used to stress so much about those little details until I had a literal “cup-half-full” moment. I was staring into my fridge, willing it to produce party magic, when my gaze landed on a tub of Greek yogurt and some leftover mason jars from a canning project. Lightbulb. What if we served the snack already assembled? What if every guest got their own perfect, personal portion of creamy ranch and crisp veggies, all in one neat, grab-and-go package?
Friends, that was the birth of these Greek Yogurt Ranch Veggie Cups, and let me tell you, they’ve been a game-changer ever since. They’re not just food; they’re an experience. They’re the conversation starter on your Easter buffet, the hero of your baby shower spread, the superstar in your kid’s lunchbox, and the secret weapon for your own healthy afternoon craving. They prove that eating your veggies doesn’t have to be a chore—it can be fun, beautiful, and wildly delicious. So, tie on your favorite apron (the messy one tells the best stories), and let’s make snacking something to celebrate.
My Ranch Revelation: A Dip That Defined Childhood
My love affair with ranch dressing started in my grandma’s kitchen, a place that always smelled like simmering tomatoes and fresh basil. But amidst all her Italian classics, there was one American icon she always kept in the fridge: a bottle of creamy ranch. To my sister and me, it was liquid gold. We’d dunk everything from pizza crusts to carrot sticks, convinced it made even the most questionable veggie delicious.
Years later, when I started my own cooking journey, I wanted to recreate that creamy, herby flavor but in a way that felt nourishing and grown-up. The bottled stuff just wasn’t cutting it anymore. My “aha” moment came when I swapped the typical mayo and sour cream base for thick, tangy Greek yogurt. Suddenly, the dip had a bright, clean protein punch that made me feel good. I could taste the fresh dill, the punch of garlic, the subtle onion powder. It was the ranch of my childhood dreams, but better—one I could feel great about eating by the spoonful (no judgment here). These veggie cups are my homage to that evolution: all the nostalgic, crave-able flavor, packed into a fresh, modern, and utterly adorable package.
Gathering Your Flavor Toolkit
Here’s the beautiful part: this recipe is less about strict rules and more about building a flavorful foundation. Let’s break down each ingredient and why it’s here. Feel free to make it your own!
- 1½ cups plain Greek yogurt: This is our superstar base. I use full-fat for the creamiest, richest texture, but 2% or 0% works too. The tanginess is key! Chef’s Insight: If you’re dairy-free, a high-quality, unsweetened coconut or almond milk yogurt can work, but be sure to strain it through a cheesecloth for an hour to thicken it up.
- 1 tbsp olive oil: A splash of good olive oil adds a lovely richness and helps carry the fat-soluble flavors of the herbs and spices. It gives the dip a beautiful sheen.
- 1–2 tbsp milk: This is your texture tuner. Start without it! Greek yogurt thickness varies by brand. Only add milk if your dip feels too thick to comfortably coat a veggie. Any milk (dairy or unsweetened plant-based) works.
- 1 tsp garlic powder & 1 tsp onion powder: We’re using powders here, not fresh, for a reason. They distribute flavor evenly without any harsh raw bite and give that classic “ranch” taste. Sub Tip: In a pinch, you can use ¼ tsp of each granulated version.
- 1 tbsp fresh dill or parsley, finely chopped: FRESH IS BEST! It makes all the difference. Dill is my go-to for that iconic flavor, but parsley is wonderful too. Use the stems and all for extra herby goodness.
- Salt & black pepper, to taste: Don’t be shy here. Salt makes the flavors pop. I always do a generous pinch of flaky sea salt and a few cracks of fresh black pepper.
For the Veggie Army: This is where you get to play with color and crunch! My non-negotiables are:
- Baby carrots: Sweet, classic, and no chopping required. A total win.
- Cucumber sticks: Use English/hothouse cukes if you can—they have fewer seeds and hold up better. I leave the peel on for color and nutrients.
- Celery sticks: The ultimate crunch vehicle. A quick run down the ribs with a vegetable peeler can take away any stringy bits.
- Bell pepper strips: Use a mix of red, yellow, and orange for a rainbow effect. They’re sweet and gorgeous.
- Sugar snap peas: That delightful snap and fresh, green flavor is irresistible. A surefire crowd-pleaser.
Other fantastic recruits: Radish slices, cherry tomatoes (add right before serving), blanched broccoli or cauliflower florets, endive spears, or jicama sticks.
Let’s Build Some Snack Magic: Step-by-Step
This is the fun part! We’re going to create layers of flavor and texture that are as pleasing to make as they are to eat.
- The Dip Foundation: In a medium bowl, add your Greek yogurt, olive oil, garlic powder, onion powder, and chopped fresh herbs. Now, take your whisk and go to town! Whisk vigorously for a good 45 seconds to a minute. You’re not just mixing; you’re incorporating air, which makes the dip wonderfully light and creamy. Taste it right off the whisk (chef’s privilege!). Does it need more salt? Another crack of pepper? A squeeze of lemon for brightness? Adjust it until it makes you do a little happy dance. Chef Hack: If you have 10 extra minutes, let this dip sit in the fridge. The flavors get to know each other and deepen beautifully.
- Texture Checkpoint: Grab a baby carrot and dunk it. Does the dip coat it in a lovely, clingy layer, or is it so thick it just sits on top? If it’s the latter, add your milk, one tablespoon at a time, whisking after each addition, until it’s perfectly dippable. Remember, it will thicken slightly once chilled.
- Veggie Prep Party: While your dip chills (or if you’re assembling immediately), wash and cut all your veggies. The goal is uniform “dip-able” sticks. For cucumbers, I slice them in half lengthwise, scoop out the seeds with a spoon, then slice into half-moons or sticks. For bell peppers, I slice off the sides (the “walls”) and then cut those into strips. This avoids the curved, ribby parts. Pro Tip: If prepping more than an hour ahead, you can keep your cut veggies crisp by storing them in a container lined with a damp paper towel in the fridge.
- The Art of Assembly: Get out your clear cups! I love 5-9 oz plastic cups for parties (they’re reusable!) or small mason jars. Using a spoon, portion the ranch dip into the bottom of each cup. Aim for about 2-3 tablespoons, enough for a generous base. For super-neat presentation, you can spoon the dip into a zip-top bag, snip off a corner, and pipe it in. It feels fancy and is oddly satisfying.
- Stand & Deliver: Now, channel your inner artist. Take your assortment of veggie sticks and stand them upright in the dip, like a colorful, edible bouquet. Mix up the colors and textures in each cup—a carrot, a snap pea, a pepper strip, a celery stick. The variation is what makes them so visually appealing. Pack them in snugly so they stay standing tall and proud.
- The Final Touch: If you’re feeling extra, a tiny extra sprinkle of fresh herbs or a twist of black pepper on top of the dip looks gorgeous. Cover the cups with plastic wrap or their lids and refrigerate until you’re ready to serve. They’re best eaten within 4-6 hours of assembly, but the dip itself will last 3-4 days in the fridge.
How to Serve These Little Cups of Joy
Presentation is half the fun! Arrange the cups on a wooden board, a tiered dessert stand, or simply line them up down the center of your table. For a party, I love adding little chalkboard signs that say “Grab & Go Veggie Cups” or tying a sprig of fresh dill around each cup with baker’s twine. They are self-contained, so there’s no need for extra plates or serving utensils—just pure, simple, grab-and-go goodness that leaves everyone’s hands (and your tablecloth) clean.
Make It Your Own: 5 Fun Twists
Once you master the base, the flavor world is your oyster! Here are some of my favorite riffs:
- Everything Bagel Style: Add 2 tablespoons of everything bagel seasoning to the yogurt base. Unbelievably good.
- Spicy Southwest: Mix in 1 tsp smoked paprika, ½ tsp cumin, and a finely chopped chipotle in adobo (start with half!). Swap veggies for jicama sticks, bell peppers, and cherry tomatoes.
- Herb Garden Delight: Swap the dill for a mix of chives, tarragon, and parsley. Bright and very French-feeling.
- Lemon-Zest & Parmesan: Add the zest of one lemon and 3 tbsp of finely grated Parmesan cheese to the base. Elegant and savory.
- “Buffalo Blue” Style: Stir 1-2 tbsp of your favorite buffalo sauce into the dip and crumble a little blue cheese on top before adding veggies. Celery sticks are a must here!
A Few Notes from My Kitchen to Yours
This recipe has become such a staple in my home that it’s evolved in the funniest ways. My husband now requests them for football Sundays (we do the Buffalo Blue version). My niece calls them “flower cups” and insists on arranging the veggies by color. I’ve even started making mini versions in shot glasses for fancy appetizer parties—they’re always the first to go!
The biggest lesson this recipe taught me? Don’t underestimate the power of presentation. Taking five extra minutes to make food beautiful and easy to eat is an act of love. It says, “I thought about your happiness and your possibly-full hands.” And that’s what cooking from the heart is all about. So, have fun with it! Make a mess, taste as you go, and watch these little cups bring a smile to everyone’s face.
Your Questions, Answered!
Q: Can I make these veggie cups the night before?
A: I recommend a “night-before, morning-of” hybrid for the best results. Make the dip and prep/cut your veggies the night before, storing them separately in the fridge. Assemble the cups 1-2 hours before serving. This keeps the veggies super crisp and prevents any potential sogginess or weeping from the cucumbers.
Q: My dip is too runny! What did I do wrong?
A> No worries, this is an easy fix! First, check your yogurt. Some brands are thinner than others. To thicken a runny dip, you can: 1) Strain it through a fine-mesh sieve lined with a coffee filter or paper towel for 15-20 minutes, or 2) Gently stir in a tablespoon of mayonnaise or sour cream, which will help stabilize it and add richness.
Q: Help! My veggies are wilting in the cups.
A> The usual culprits are moisture and time. Ensure your veggies are completely dry after washing. For cucumbers and celery, patting them dry is crucial. Also, don’t assemble too far in advance. If you need to prep way ahead, store your cut veggies in an airtight container with a dry paper towel to absorb excess moisture.
Q: Are there any veggies I should avoid using?
A> I’d steer clear of very watery veggies that don’t hold up well, like standard lettuce or thinly sliced zucchini, as they can get limp quickly. Also, avoid pre-cutting avocado or apple—they’ll brown before you serve. If you want to include them, add a squeeze of lemon to the apple and add both right at the last minute.
Greek Yogurt Ranch Veggie Cups : Fresh, Fun & Party-Perfect
Description
These Greek Yogurt Ranch Veggie Cups turn simple vegetables into a fun, grab-and-go snack or party appetizer. Each cup is layered with creamy, herby ranch dip and crisp veggie sticks, so every guest gets their own perfect portion. They’re fresh, colorful, high in protein, and great for parties, lunchboxes, or afternoon cravings.
Ingredients
Ranch Yogurt Dip
-
1½ cups plain Greek yogurt
-
1 tbsp olive oil
-
1–2 tbsp milk (as needed for thinning)
-
1 tsp garlic powder
-
1 tsp onion powder
-
1 tbsp fresh dill or parsley, finely chopped
-
Salt and black pepper, to taste
-
Optional: 1–2 tsp lemon juice for extra brightness
Veggies (Mix & Match)
-
Baby carrots
-
Cucumber sticks (seeds removed if watery)
-
Celery sticks
-
Bell pepper strips (mixed colors)
-
Sugar snap peas
-
Optional extras: radishes, cherry tomatoes, broccoli florets, cauliflower florets, jicama sticks
For Serving
-
5–9 oz clear cups or small jars
Instructions
1. Make the Ranch Dip
-
In a bowl, whisk together Greek yogurt, olive oil, garlic powder, onion powder, and herbs.
-
Season with salt and pepper.
-
Taste and adjust (add lemon juice if you like it brighter).
-
If too thick, whisk in milk 1 tablespoon at a time until dippable.
-
Chill 10–30 minutes if time allows for better flavor.
2. Prep the Veggies
-
Wash and dry vegetables very well.
-
Cut into even sticks sized to stand inside cups.
-
Keep chilled until assembly.
3. Assemble the Cups
-
Spoon 2–3 tablespoons of dip into the bottom of each cup.
-
Stand veggie sticks upright in the dip, mixing colors and textures.
-
Cover and refrigerate until serving (best within 4–6 hours).
Notes
-
Dry Veggies Well: Extra moisture makes dip watery and veggies limp. Pat dry with paper towels.
-
Make Ahead Smart: Prepare dip and cut veggies a day ahead, but assemble cups shortly before serving.
-
Neat Filling Trick: Pipe the dip into cups using a zip-top bag with the corner snipped.
-
Extra Flavor: Add 1–2 tsp ranch seasoning or everything-bagel seasoning to the dip.
Nutritional Information (Per Cup, Approximate)
This is a general estimate based on using full-fat Greek yogurt and the listed veggies. It will vary with your specific ingredients and portions.
- Calories: 110
- Protein: 7g
- Carbohydrates: 8g
- Fat: 5g
- Fiber: 2g
Highlights: High in protein, calcium, and vitamins from the veggies. A balanced, satisfying snack that fuels you without the crash.
I hope you and your loved ones adore these Greek Yogurt Ranch Veggie Cups as much as we do. They’re proof that a little creativity can turn everyday ingredients into something truly special. If you make them, I’d love to see your creations! Tag me on social @OliviasCozyKitchen or leave a comment below telling me your favorite variation. Happy snacking!
Final Thoughts: More Than Just a Snack
Looking at a tray of these bright, cheerful veggie cups, I’m reminded that the best kitchen creations often come from a simple desire to solve a problem—with a dash of whimsy. These aren’t just a convenient party trick; they’re a tiny manifesto on how I want to eat and live: with intention, color, and joy.
They prove that healthy choices don’t have to be austere, and that a little thoughtful presentation can transform the ordinary into something special. Whether it’s the nostalgic punch of that herby ranch or the satisfying crunch of a perfectly cut pepper, these cups engage all the senses. They’re a quiet way to say, “I care”—whether you’re saying it to your guests, your family, or yourself.
So the next time you’re staring into the fridge an hour before company arrives, or packing yet another predictable lunch, remember this: a little creativity, a few clear cups, and a willingness to play with your food can change everything. Here’s to snacks that are as delightful to make as they are to eat, and to finding small, beautiful solutions in our everyday kitchens.
Now, go make a cup for someone you love—and definitely one for you.
Happy Snacking,
Olivia

Spring Grain Bowls (Quinoa or Farro with Roasted Veggies & Lemon Vinaigrette)
Welcome Spring to Your Table with Every Vibrant Bite
Hey there, friend! Can you feel it? That little shift in the air, the way the light lingers a bit longer in the evenings, and the sudden, irresistible urge to eat something that tastes as bright and hopeful as the world outside is starting to look. That’s the magic of spring, and it’s my absolute favorite time to reignite my kitchen inspiration after the cozy, heavy comforts of winter.
For me, spring cooking isn’t about complicated techniques or hours chained to the stove. It’s about celebrating simplicity, color, and the incredible flavors that start popping up at the market. It’s about meals that make you feel nourished, light, and energized. And honestly? Nothing does that better than a gorgeous, build-your-own-adventure grain bowl.
Today, I’m so excited to share my blueprint for the ultimate Spring Grain Bowl. We’re talking fluffy quinoa or wonderfully chewy farro as our canvas, a rainbow of roasted seasonal veggies, a bed of crisp greens, and a lemon vinaigrette so zesty and bright it’s basically sunshine in a jar. This isn’t just a recipe; it’s a formula for a feel-good meal that you can make your own every single time. It’s perfect for a quick weeknight dinner, impressive enough for a casual lunch with friends, and a total meal-prep superstar. So, tie on your favorite apron (the messy one tells the best stories, right?), and let’s make something delicious that celebrates the season.
The Bowl That Brings Back Sunny Days
This recipe always takes me back to my grandma’s sun-drenched porch in late April. She wasn’t a “recipe” cook; she was a “what’s-in-the-garden” cook. I’d follow her outside, and she’d hand me a basket, pointing at the first slim spears of asparagus and the tender green tops of fresh radishes. “We’re making a bit of spring,” she’d say with a wink.
Back in her kitchen, there was no fuss. Things got chopped, tossed with glugs of her best olive oil, and roasted until they smelled like earthy, caramelized goodness. She’d always have a pot of something hearty simmering—often barley or farro she called “peasant food” with total reverence. We’d pile the warm grains and hot veggies into big bowls, always over a handful of peppery greens she’d snipped from a planter. The final act was a reckless squeeze of lemon over everything. It wasn’t fancy, but eating that bowl on her porch, with the spring breeze coming in, felt like a ceremony. It tasted like hope, freshness, and the pure joy of a meal made straight from the earth. My version here is just a slightly more structured homage to her brilliant, intuitive cooking—and I think she’d approve.
Gathering Your Rainbow: Ingredients & Insights
Here’s where the fun begins! Think of this list as your playground. I’ll give you my favorite starters, but your mission is to make it yours. Check out what looks good at your local market or what’s hanging out in your fridge’s veggie drawer.
For the Grain Bowl Base
- 1 cup uncooked quinoa or farro (which becomes about 3 cups cooked) – Here’s your foundation! Quinoa cooks faster and gets lovely and fluffy, plus it’s a complete protein. Farro has a satisfying, nutty chew that I absolutely adore. You truly can’t go wrong.
- 1½ pounds of mixed spring vegetables – This is your color palette! My spring go-tos are: asparagus (snap off the woody ends), carrots (cut into coins or batons), zucchini or summer squash, radishes (they become sweet when roasted!), and bell peppers for a pop of red. Aim for a mix of colors and textures.
- 1 tablespoon extra virgin olive oil – For roasting. A good, fruity olive oil makes a difference here!
- Kosher salt and freshly cracked black pepper – The essential flavor boosters. Don’t be shy!
- 2 big handfuls of fresh greens – This adds a fresh, crisp layer. Arugula adds a peppery punch, baby spinach is mild and tender, and a spring mix gives you a little bit of everything.
For the Sunshine Lemon Vinaigrette
- 3 tablespoons extra virgin olive oil – The body of our dressing.
- 1½ tablespoons fresh lemon juice – PLEASE use freshly squeezed! Bottled juice just doesn’t have the same bright, vibrant zip. This is the star of the show.
- 1 teaspoon Dijon mustard – Our secret weapon for emulsification and a subtle depth of flavor. It makes the dressing creamy and helps it cling to every ingredient.
- 1 teaspoon honey or maple syrup – A tiny touch of sweetness balances the sharp lemon perfectly. Maple syrup keeps it vegan.
- Salt and pepper, to taste – Yes, you even season your dressing. Taste as you go!
Optional Toppings (The Finishing Flourishes!)
- Crumbled feta or goat cheese – For creamy, tangy bites.
- Avocado slices – Adds richness and healthy fats.
- Toasted nuts or seeds – Slivered almonds, pepitas (pumpkin seeds), or sunflower seeds add incredible crunch.
- Fresh herbs – A shower of chopped parsley, dill, or mint makes it taste like a professional chef made it. Seriously, herbs are a game-changer.
Let’s Build Your Masterpiece: Step-by-Step
Ready to cook? I’ll walk you through each step with my favorite little hacks to ensure your bowls are nothing short of spectacular.
Step 1: Wake Up Your Oven & Prep Your Veggies
First things first, preheat your oven to 400°F (205°C). This hot temperature is key for getting those beautiful caramelized edges on our veggies without steaming them. While it heats, chop all your vegetables into uniform, bite-sized pieces. This isn’t just for looks—it ensures everything cooks at the same rate. Pile them onto a large baking sheet. Drizzle with the olive oil, a good pinch of salt, and several grinds of black pepper. Now, use your hands to toss everything together. Get in there! Hands are the best kitchen tools for making sure every nook and cranny is coated. Chef’s Hack: Give the baking sheet a quick spritz of cooking spray first. It makes cleanup a dream.
Step 2: Roast to Perfection
Spread the vegetables out in a single, even layer. This is crucial! If you pile them on top of each other, they’ll steam and become soggy instead of roasting. We want tender-inside, crispy-edged goodness. Slide the pan into your hot oven and let them work their magic for 20-25 minutes. You’ll know they’re ready when you can easily pierce a carrot with a fork and the asparagus and zucchini have some gorgeous golden-brown spots. I like to give the pan a shake or a quick stir halfway through for even cooking.
Step 3: Cook Your Grains
While the veggies roast, let’s cook our grain base. If you’re using quinoa, I always rinse it in a fine-mesh sieve under cold water first. It removes a natural coating called saponin that can taste bitter. Cook it according to package directions (usually a 1:2 ratio of quinoa to water, simmer for 15 mins). For farro, check if you have pearled, semi-pearled, or whole. Pearled cooks fastest (about 15-20 mins). I often cook my grains in a light vegetable broth instead of water for an extra layer of flavor. Once cooked, fluff it with a fork and let it sit, covered. Chef’s Hack: After cooking, spread the hot grains on a baking sheet for 5 minutes to dry out slightly. This prevents a mushy bowl!
Step 4: Whisk Up the Sunshine
Time for the vinaigrette! This takes 60 seconds and makes all the difference. In a small bowl or jar, combine the fresh lemon juice, Dijon mustard, and honey or maple syrup. Whisk it together. Now, while whisking constantly, slowly drizzle in the olive oil. It will magically thicken and turn into a beautiful, creamy emulsion. Season with a pinch of salt and pepper. Taste it! Want it more tangy? Add a squeeze more lemon. More mellow? A bit more oil. You’re the boss.
Step 5: The Grand Assembly
This is my favorite part. Grab your favorite bowls—the prettier, the better! Start with a warm base of your fluffy quinoa or chewy farro. Top with a generous handful of those fresh, crisp greens. Then, artfully pile on your gorgeous, hot roasted vegetables. The heat from the grains and veggies will slightly wilt the greens, which is divine. Now, take that jar of sunshine and drizzle that lemon vinaigrette all over everything. Finish with your chosen toppings: a crumbling of cheese, slices of creamy avocado, a big sprinkle of toasted nuts, and a confetti of fresh herbs. Voilà! You just created a restaurant-worthy, nourishing meal at home.
How to Serve Your Spring Creation
These bowls are meant to be served immediately, while the grains and veggies are still warm. I love putting all the components—the big bowl of grains, the sheet pan of veggies, small dishes of toppings, and the vinaigrette—in the middle of the table and letting everyone build their own. It’s interactive, fun, and guarantees everyone gets their perfect combo. They’re also fantastic packed into a lidded container for lunch the next day (just keep the dressing in a separate small container until you’re ready to eat to keep everything crisp).
Make It Your Own: Delicious Twists & Swaps
- Mediterranean Twist: Use chickpeas (toss them with the veggies to roast!), add kalamata olives, cucumbers, and swap the vinaigrette for a lemon-oregano one. Top with crumbled feta.
- Protein Power Bowl: Add grilled shrimp, shredded rotisserie chicken, or pan-seared salmon fillet on top. A perfect complete meal.
- Vegan & Creamy: Skip the cheese and add a big dollop of lemony tahini sauce or vegan pesto instead of (or in addition to) the vinaigrette.
- Different Grain, Different Vibe: Try freekeh, brown rice, or even couscous as your base. Each one brings a new texture.
- Fall/Winter Version: Swap the veggies for roasted sweet potato, Brussels sprouts, and red onion. Use a maple-balsamic vinaigrette instead of lemon.
From My Kitchen to Yours: A Few Parting Thoughts
This recipe has been my springtime constant for years, but it’s never the same twice. I’ve made it for frantic weeknights, for “help, I need to clean out the fridge” nights, and for casual dinner parties where it’s always a hit. The biggest lesson it’s taught me? Don’t stress about precision. No zucchini? Use broccoli. Out of quinoa? Rice works. No fresh lemon? A tablespoon of good white wine vinegar will do in a pinch. The spirit of the bowl—fresh, colorful, balanced—is what matters.
One funny fail I had early on: I got overzealous with the vinaigrette and doubled the mustard. Let’s just say my family politely asked if I was trying to clear their sinuses! Now I taste as I go. Cooking is about learning, laughing, and creating something that brings joy. I hope this bowl becomes your springtime staple, too.
Your Questions, Answered
Q: Can I make this ahead for meal prep?
A: Absolutely! This is a meal prep champion. Cook your grain, roast your veggies, and make the dressing. Store them all separately in airtight containers in the fridge for up to 4 days. When ready to eat, you can enjoy it cold, at room temp, or gently reheat the grains and veggies before assembling over fresh greens.
Q: My roasted vegetables are soggy. What did I do wrong?
A> The most common culprit is overcrowding the pan! If the veggies are piled on top of each other, they release steam and can’t caramelize. Use two baking sheets if needed to give them plenty of space. Also, make sure your oven is fully preheated before they go in.
Q: My vinaigrette won’t emulsify (it stays separated). Help!
A> No worries! The key is adding the oil slowly while whisking vigorously. If it breaks, you can fix it. Put a teaspoon of Dijon mustard in a clean bowl, then slowly whisk in the broken dressing. The fresh mustard will usually grab hold and re-emulsify it. Or, just shake it all up in a jar right before using—it’ll taste the same!
Q: Is farro gluten-free?
A> No, farro is a form of wheat and contains gluten. For a gluten-free bowl, stick with quinoa, certified gluten-free oats, or brown rice.
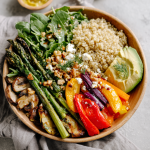
Spring Grain Bowls (Quinoa or Farro with Roasted Veggies & Lemon Vinaigrette)
Description
Celebrate spring with this vibrant, build-your-own grain bowl! Warm grains, roasted seasonal vegetables, crisp greens, and a zesty lemon vinaigrette make a simple yet stunning meal that’s flexible, colorful, and packed with flavor. Perfect for dinner, lunch, or meal prep.
Ingredients
Grain Base
-
1 cup uncooked quinoa or farro (~3 cups cooked)
Roasted Spring Vegetables
-
1½ lbs mixed vegetables: asparagus (trimmed), carrots (sliced), zucchini/summer squash, radishes, bell peppers
-
1 tbsp extra virgin olive oil
-
Kosher salt and freshly cracked black pepper
Fresh Greens
-
2 large handfuls: arugula, baby spinach, or spring mix
Lemon Vinaigrette
-
3 tbsp extra virgin olive oil
-
1½ tbsp fresh lemon juice
-
1 tsp Dijon mustard
-
1 tsp honey or maple syrup
-
Salt & pepper, to taste
Optional Toppings
-
Crumbled feta or goat cheese
-
Avocado slices
-
Toasted nuts or seeds (almonds, pepitas, sunflower seeds)
-
Fresh herbs (parsley, dill, mint)
Instructions
1. Prep & Roast Vegetables
-
Preheat oven to 400°F (205°C).
-
Chop vegetables into uniform pieces. Toss with olive oil, salt, and pepper. Spread in a single layer on a baking sheet.
-
Roast for 20–25 mins until tender and caramelized, tossing halfway.
2. Cook Grains
-
Quinoa: Rinse, then cook 1:2 with water for 15 mins.
-
Farro: Pearled: 15–20 mins in water or broth.
-
Fluff with a fork; optionally spread on a tray to dry slightly.
3. Make Lemon Vinaigrette
-
Whisk lemon juice, mustard, and honey/maple syrup. Slowly drizzle in olive oil while whisking. Season with salt and pepper.
4. Assemble Bowls
-
Layer warm grains, fresh greens, roasted vegetables.
-
Drizzle vinaigrette over everything.
-
Add optional toppings: cheese, avocado, nuts, herbs.
Notes
-
Soggy Veggies: Don’t overcrowd the pan—use 2 sheets if needed.
-
Broken Vinaigrette: Whisk a teaspoon of mustard in a new bowl, then slowly incorporate the broken dressing to re-emulsify.
-
Make Ahead/Meal Prep: Store grains, veggies, and dressing separately up to 4 days. Reheat grains and veggies if desired.
-
Gluten-Free Option: Use quinoa, GF oats, or brown rice instead of farro.
Nourishment in a Bowl (Approximate per Serving)
- Calories: 380-450
- Protein: 10-14g
- Carbohydrates: 45-55g
- Fat: 14-18g
- Fiber: 8-12g
Note: This is a balanced, nutrient-dense meal packed with fiber, vitamins from the veggies, healthy fats, and plant-based protein. Values can vary based on your specific ingredients and toppings.
Prep Time: 15 mins | Cook Time: 25 mins | Total Time: 40 mins | Serves: 2-3
Final Thoughts: The Bowl That Grows With You
As the last bite of your colorful creation disappears, I hope you feel that same sense of lightness and possibility that inspired it. This Spring Grain Bowl is more than a meal; it’s a mindset. It’s permission to play in the kitchen, to celebrate what’s fresh, and to build something uniquely nourishing for your body and spirit.
The true beauty of this recipe isn’t locked in the ingredients list. It’s in its glorious flexibility. It’s a framework that will hold whatever spring (or any season!) throws at you. It’s a clean-out-the-produce-drawer hero, a dinner-party savior, and a lunchbox game-changer. Mastering this blueprint means you’ve unlocked a lifetime of effortless, feel-good meals.
So, as the days grow longer and the markets brim with color, let this be your culinary companion. Tinker with it. Make it with farro one week and freekeh the next. Toss in the first strawberries of the season or the last of the spring peas. Let it reflect your garden, your farmers’ market haul, or simply your mood.
Because the best kind of cooking doesn’t just feed us—it connects us. To the rhythm of the seasons, to the memory of a sun-drenched porch, and to the simple, profound joy of creating something beautiful and delicious with your own two hands. Here’s to a season of vibrant, wholesome, and utterly satisfying meals. Happy building


