
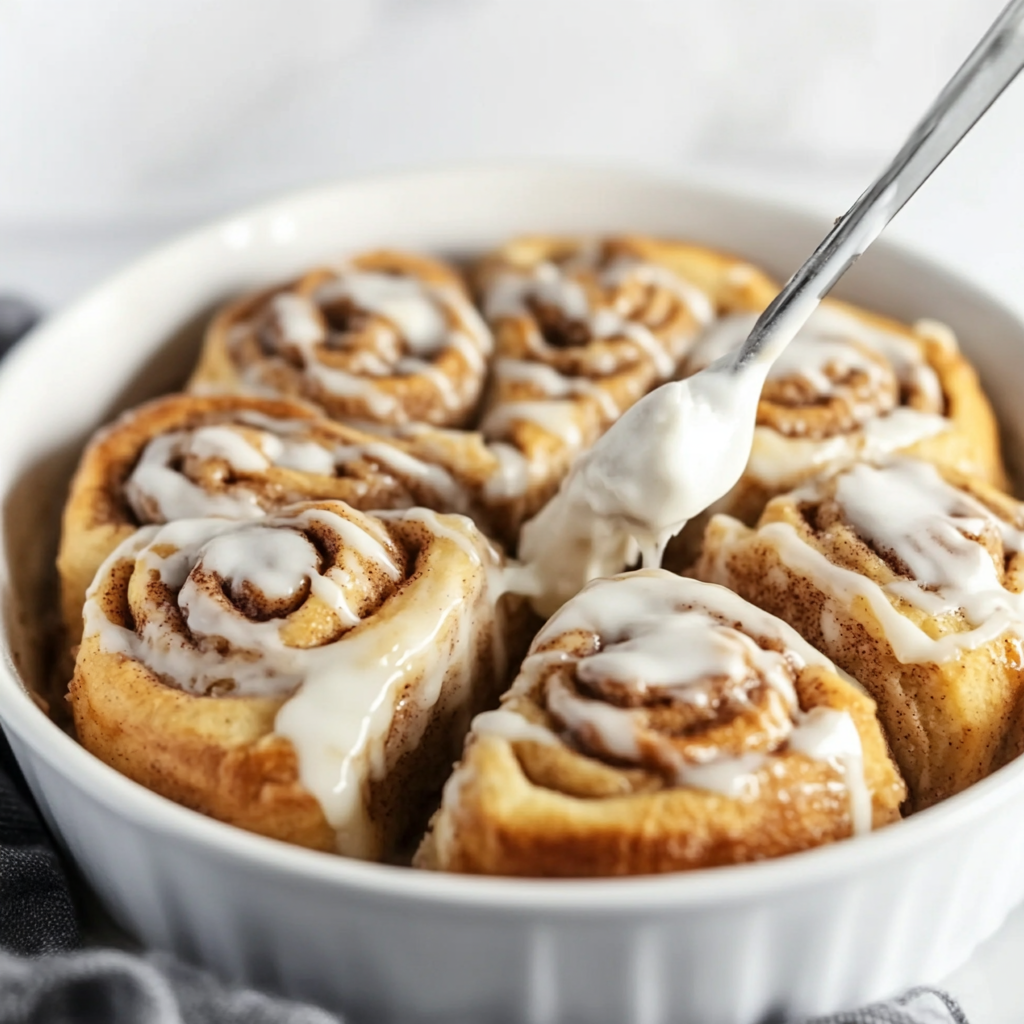
Easy Cinnamon Rolls (No Yeast Required!)
Easy Cinnamon Rolls: Your New Go-To for Cozy Mornings
Hey there, friend! Olivia here, apron dusted with flour and a spatula in hand. Can you smell that? Warm cinnamon, melted butter, and that irresistible sweetness that makes your kitchen feel like a hug. If you’ve ever craved homemade cinnamon rolls but thought, “Ugh, yeast? Rising time? I don’t have hours for that!”—this recipe is your golden ticket. These no-yeast cinnamon rolls are my secret weapon for turning ordinary mornings into little celebrations. They’re soft, gooey, and dripping with creamy icing, all in under an hour. No fancy techniques, no waiting around—just pure, buttery joy. Whether you’re surprising your kids on a school day, treating yourself to a slow Saturday, or hosting a last-minute brunch, these rolls whisper, “You’ve got this.” Grab your mixing bowl—let’s make some magic!
That Snowy Morning That Started It All
Picture this: a blizzard swirling outside, my tiny Brooklyn apartment wrapped in silence, and a sudden, urgent cinnamon roll craving. My grandma’s yeast-based recipe? A no-go—I was out of yeast and patience. So, I improvised. Baking powder became my hero, cold butter stood in for fussy dough, and in 45 minutes? Warm, pillowy rolls emerged, filling the kitchen with a scent that lured my roommate (and our neighbor!) out of bed. We ate them straight from the pan, icing dripping down our chins, snow piling up outside. That morning taught me something: sometimes, the coziest memories come from the simplest recipes. Now, these rolls are my snowy-day ritual and my sunny-Sunday staple—proof that a little chaos (and butter) makes life sweeter.
What You’ll Need
Gather these pantry staples! I’ve added my favorite swaps and chef secrets—because flexibility is key in a happy kitchen.
Dough
- 2 cups (240g) all-purpose flour – The backbone! For tender rolls, fluff the flour before measuring. Swap: Use 1 cup whole wheat + 1 cup AP flour for a nutty twist.
- 3 tbsp (38g) sugar – Just enough sweetness to balance the cinnamon. Chef tip: Granulated sugar helps the dough caramelize beautifully.
- 1 tbsp baking powder – Our yeast substitute! Ensure it’s fresh (test with hot water—if it bubbles, you’re golden).
- 1 tsp salt – Balances sweetness. Use sea salt for a subtle crunch.
- 5 tbsp cold unsalted butter + 2 tbsp for brushing – Cold = flaky layers! Dice it small. Vegan? Coconut oil works (but chill it first!).
- ¾ cup (178ml) milk – Whole milk = richness. Dairy-free? Almond or oat milk rocks. Warm it slightly for easier mixing.
Filling
- ⅔ cup (133g) brown sugar – Molasses depth is essential. Dark brown sugar = extra gooeyness!
- 3 tbsp (38g) white sugar – Combats clumping. Swap with coconut sugar if you prefer.
- 2 tsp cinnamon – The star! For depth, add a pinch of nutmeg or cardamom.
- 4 tbsp salted butter, melted – Salted butter = flavor pop. Unsalted? Add ⅛ tsp salt to the filling.
- ½ tsp vanilla extract – Elevates the swirl. Use bourbon vanilla if you have it!
Icing
- 1 oz (28g) cream cheese, softened – Tangy contrast to sweetness. Vegan? Try dairy-free cream cheese.
- 1 tbsp salted butter, softened – Makes icing silky. Salted balances the powdered sugar.
- ¼ tsp vanilla extract – Pure is best here—no imitation!
- ½ cup (63g) powdered sugar – Sift it! No lumps = dreamy drizzle.
- ½ tbsp (7ml) milk – Adjust for thickness. Heavy cream = extra decadence.
Let’s Bake! Your Foolproof Guide
Ready? Preheat that oven to 375°F (190°C) and grease a 9-inch round baking dish. Let’s get rolling!
- Make the dough: In a large bowl, whisk flour, sugar, baking powder, and salt. Toss in cold butter cubes. Use a pastry cutter (or two forks!) to “cut” butter into the flour until it looks like coarse crumbs. Chef hack: Grate frozen butter for faster results! Pour in milk and stir gently with a spatula—just until combined. Overmixing = tough rolls. Dough will be shaggy!
- Roll it out: Flour your counter and hands. Turn dough onto the surface, kneading lightly (5-6 times max!) into a ball. Roll into a ¼-inch-thick rectangle (~10×14 inches). Tip: Place parchment under dough for easy rolling and cleanup!
- Spread the filling: Mix brown sugar, white sugar, and cinnamon. Stir melted butter and vanilla into the mix—it’ll look like wet sand. Spread evenly over dough, leaving a ½-inch border. Chef secret: Use the back of a spoon to press sugar into the dough—prevents fallout when rolling!
- Roll and slice: Starting from a long edge, roll dough tightly into a log. Brush the border with water to seal. Slice into 8–10 rolls with a sharp knife. Pro tip: Use unflavored dental floss to slice—loop under the log, cross, and pull for clean cuts! Place rolls cut-side up in your dish, sides touching.
- Butter and bake: Melt the extra 2 tbsp butter and brush over roll tops. Bake 22–25 minutes until golden and puffed. Watch closely: Ovens vary! If tops brown too fast, tent with foil.
- Ice and devour: While rolls bake, beat icing ingredients until smooth. Let rolls cool 5 minutes (so icing doesn’t melt!), then drizzle generously. Chef move: Add icing while warm—it soaks into the swirls for maximum goo!
Serving Up the Cozy
Serve these warm, straight from the dish—rustic charm is the vibe! Let everyone pull apart their own roll. Pair with hot coffee, cold milk, or a frothy latte. For brunch? Add crispy bacon or fresh berries. Presentation tip: Dust with extra cinnamon or chopped pecans for Instagram-worthy flair!
Mix It Up! 5 Delicious Twists
Play with flavors! Here are my faves:
- Apple Pie Rolls: Add ½ cup finely diced apples + 1 tsp apple pie spice to filling.
- Nutty Caramel: Sprinkle ⅓ cup toasted pecans over filling. Swap icing with salted caramel sauce.
- Vegan Joy: Use plant-based butter/milk, coconut cream for icing, and flax egg (1 tbsp ground flax + 3 tbsp water) in dough.
- Chocolate Crave: Add ¼ cup cocoa powder to filling + chocolate chips. Top with mocha icing (add 1 tsp espresso powder!).
- Orange Zest Bliss: Stir 1 tbsp orange zest into filling. Use orange juice in icing instead of milk.
Olivia’s Extra Notes
These rolls have evolved since that snowy day! Once, I subbed maple syrup for sugar in the filling—it pooled in the pan (delicious but messy!). Now, I keep it simple. Storage tip: Keep leftovers covered at room temp for 2 days. Reheat in the microwave (10 seconds) or air fryer (3 mins at 300°F). Funny fail: I once forgot baking powder (oops!)—resulting in hockey pucks. Lesson learned? Taste-test your baking powder yearly! Also, this dough is forgiving. If it’s sticky, add flour 1 tbsp at a time. Too dry? Drizzle in extra milk. Trust your instincts—you’re the boss here!
Your Questions, Answered!
Q: Why are my rolls dry?
A: Overbaking is the culprit! Pull them out at 22 minutes if your oven runs hot. Also, measure flour correctly—spoon it into the cup, then level. Packed flour = dense rolls.
Q: Can I use a different milk? What about buttermilk?
A: Any milk works! Buttermilk adds tang—use it, but reduce baking powder to 2 tsp and add ¼ tsp baking soda for lift.
Q: Can I freeze these?
A: Absolutely! Freeze baked/un-iced rolls in a sealed container for up to 3 months. Thaw overnight, warm at 300°F for 10 minutes, then ice.
Q: My filling leaked everywhere. Help!
A: Two tricks: Don’t overfill (stick to ⅔ cup sugar), and ensure your dough log is tightly rolled. Also, use a deep dish—no sheet pans!
Easy Cinnamon Rolls: Your New Go-To for Cozy Mornings
There’s nothing quite like the smell of warm cinnamon rolls baking in the oven—sweet, buttery, and downright irresistible. If you’ve ever been intimidated by yeast-based recipes or just don’t have hours to spare, these no-yeast cinnamon rolls are your answer. They’re quick, foolproof, and every bit as delicious as the traditional version. Perfect for lazy weekends, surprise breakfast treats, or even a midnight snack (no judgment here).
Why This Recipe Works
-
No yeast, no waiting – Baking powder gives these rolls their lift, meaning no proofing time.
-
Soft, flaky layers – Cold butter in the dough creates a tender, biscuit-like texture.
-
Gooey cinnamon filling – A mix of brown and white sugar ensures maximum caramelization.
-
Creamy icing – A simple cream cheese glaze takes these from good to “Oh my gosh, I need another one.”
Step-by-Step Guide to Perfect Cinnamon Rolls
1. Make the Dough
-
Whisk together 2 cups flour, 3 tbsp sugar, 1 tbsp baking powder, and 1 tsp salt.
-
Cut in 5 tbsp cold butter until the mixture resembles coarse crumbs.
-
Stir in ¾ cup milk just until combined—don’t overmix!
Pro Tip: If the dough feels sticky, add a little more flour. Too dry? Drizzle in extra milk.
2. Roll & Fill
-
Roll the dough into a 10×14-inch rectangle.
-
Spread a mixture of ⅔ cup brown sugar, 3 tbsp white sugar, 2 tsp cinnamon, and 4 tbsp melted butter over the dough.
-
Roll it up tightly, then slice into 8-10 pieces.
Chef’s Trick: Use unflavored dental floss to slice cleanly—just loop, cross, and pull!
3. Bake & Ice
-
Place rolls in a greased baking dish, brush with extra melted butter, and bake at 375°F (190°C) for 22-25 minutes.
-
While warm, drizzle with cream cheese icing (cream cheese, butter, powdered sugar, vanilla, and milk).
Serving Suggestion: Best enjoyed fresh out of the oven with a hot cup of coffee!
5 Delicious Variations to Try
-
Apple Pie Rolls – Add diced apples + a dash of apple pie spice to the filling.
-
Nutty Caramel – Sprinkle toasted pecans and swap icing for salted caramel sauce.
-
Chocolate Lover’s – Mix cocoa powder into the filling and top with chocolate glaze.
-
Orange Zest Bliss – Add orange zest to the filling and use orange juice in the icing.
-
Vegan Version – Use plant-based butter, milk, and coconut cream for the icing.

Easy Cinnamon Rolls (No Yeast Required!)
- Total Time: 45–50 minutes
Description
One snowy morning with no yeast and a craving for something warm, this recipe was born. These rolls are soft, gooey, and filled with cinnamon sweetness, all in under an hour. Whether it’s Sunday brunch or a weekday pick-me-up, this no-yeast version delivers that classic cinnamon roll joy without the wait. One bowl, one pan, one cozy kitchen moment at a time—let’s roll!
Ingredients
Dough:
-
2 cups all-purpose flour
-
3 tbsp sugar
-
1 tbsp baking powder
-
1 tsp salt
-
5 tbsp cold butter (plus 2 tbsp melted for brushing)
-
¾ cup milk
Filling:
-
⅔ cup brown sugar
-
3 tbsp white sugar
-
2 tsp cinnamon
-
4 tbsp melted salted butter
-
½ tsp vanilla extract
Icing:
-
1 oz cream cheese, softened
-
1 tbsp butter, softened
-
¼ tsp vanilla extract
-
½ cup powdered sugar
-
½ tbsp milk
Instructions
-
Preheat oven to 375°F (190°C). Grease a 9-inch round baking dish.
-
Make Dough: Whisk flour, sugar, baking powder, and salt. Cut in cold butter until crumbly. Stir in milk until shaggy.
-
Roll Dough: Knead gently 5–6 times. Roll into a 10×14″ rectangle.
-
Make Filling: Mix sugars and cinnamon. Add melted butter and vanilla—spread over dough.
-
Roll & Cut: Roll tightly from long edge. Slice into 8–10 pieces. Place in pan, sides touching.
-
Bake: Brush tops with melted butter. Bake 22–25 mins until puffed and golden.
-
Ice & Serve: Mix icing ingredients until smooth. Drizzle over warm rolls.
Notes
-
Use unflavored floss for clean roll cuts.
-
Grate frozen butter for quicker dough prep.
-
Add pecans or orange zest for a twist!
Nutrition
- Calories: 270 per roll
- Fat: 13g
- Carbohydrates: 36g
- Protein: 4g
Final Thoughts & Category
These quick cinnamon rolls are proof that great baking doesn’t have to be complicated. Whether you’re a beginner or a seasoned baker, this recipe guarantees soft, gooey, and utterly delicious results every time.
Category: Quick Breakfast Treats / No-Yeast Baking
Nutritional Info (Per Roll, 10 Servings)
Calories: ~270 | Fat: 13g | Protein: 4g | Carbs: 36g
Note: Estimates vary based on swaps and icing amount. For lighter rolls, reduce filling sugar by 2 tbsp and use low-fat cream cheese in icing.
—
Prep Time: 15 mins | Cook Time: 25 mins | Serves: 8–10 rolls
Save This Recipe for Later!
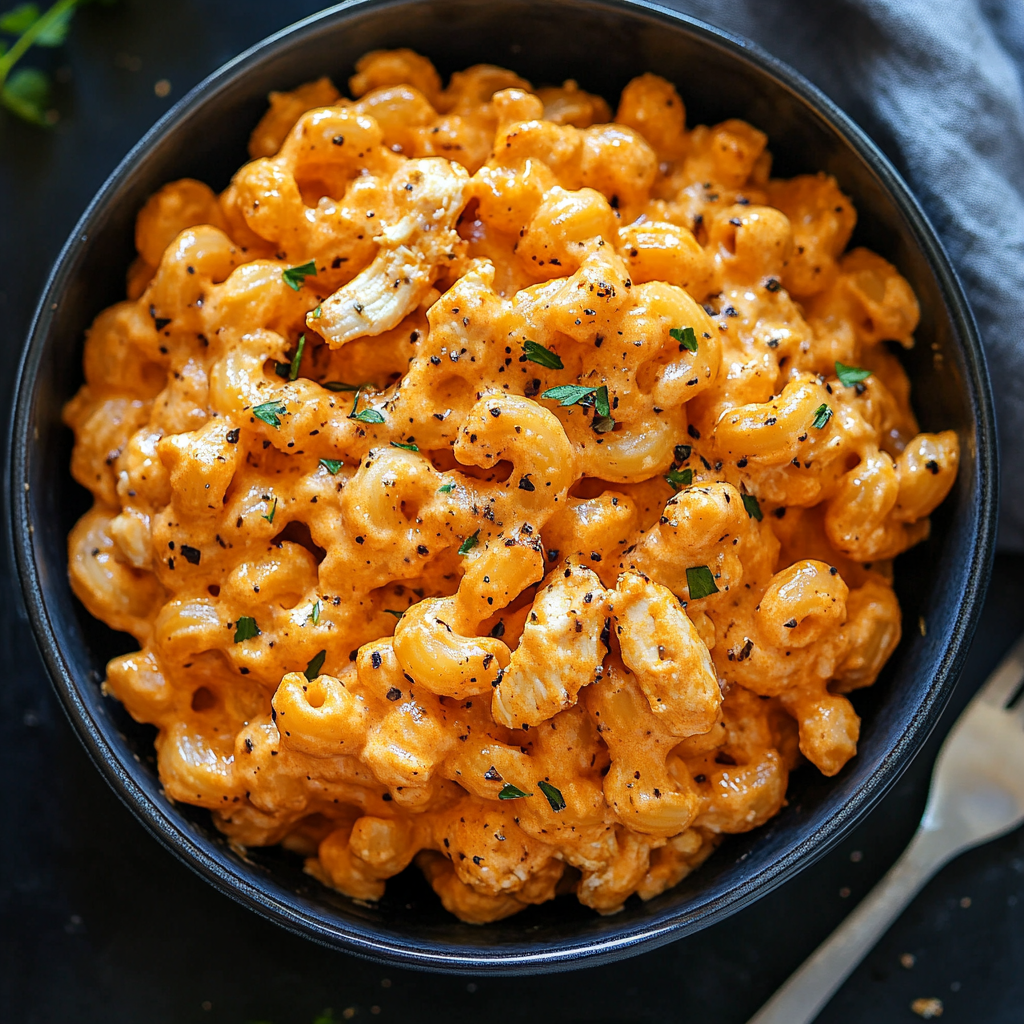
Buffalo Chicken Pasta
Hey There, Spice Lover! Ready to Dive into Cozy Comfort?
Is there anything better than that moment when your kitchen fills with the sizzle of garlic, the tangy punch of hot sauce, and the promise of something gloriously cheesy? If your stomach just growled a happy “yes,” you’re my kind of people! I’m Olivia, and I live for those soul-warming, crowd-pleasing dishes that turn an ordinary Tuesday into a mini celebration. Today, we’re taking everything you adore about buffalo wings – that addictive spicy kick, the cool blue cheese vibe, the messy-fingered joy – and transforming it into one irresistible, fork-friendly wonder: Buffalo Chicken Pasta.
Picture this: tender chicken and al dente pasta swimming in a creamy, dreamy sauce that’s boldly spiced with buffalo flavor, perfectly tempered by melty cheddar, mozzarella, and a hint of tangy blue cheese. It’s rich, it’s comforting, and the best part? It all comes together in one single pot. Less washing up means more time savoring, sharing stories, or simply curling up on the couch with your bowl of happiness. Born from a fridge clean-out on a blustery night, this recipe became an instant family obsession. It’s proof that magic happens when pantry staples meet a little culinary courage. So, grab your favorite apron (mine’s perpetually speckled with paprika), and let’s create something unforgettable together!
The Snowstorm Savior: How This Pasta Was Born
Let me set the scene: It was one of those bone-chilling winter evenings where the wind howled like a hungry wolf. My fridge was looking… sparse. Leftover roasted chicken? Check. Half a bottle of buffalo sauce from game day? Check. A random block of cream cheese and some pasta? Check and check. Desperation (and a serious craving for comfort) is truly the mother of invention! I started sautéing onions, the aroma pulling my skeptical husband into the kitchen. “Whatcha making, Liv?” he asked, eyeing my chaotic ingredient lineup. “Trust me!” I said, channeling my inner kitchen alchemist.
I threw it all together – broth, pasta, that glorious sauce, the cheeses. As it bubbled away, transforming into something creamy and vibrant orange, the doubts vanished. The first forkful? Pure revelation! The heat, the cool tang, the gooey cheese hugging every noodle… it was like my favorite sports bar wings met the coziest mac and cheese. My husband’s eyes widened. “This is insane!” he mumbled through a mouthful. Our two kids, usually suspicious of anything “spicy,” devoured seconds. That snowy-night experiment, born from scraps and spice, became our ultimate cold-weather hug in a bowl. Now, it’s not just a recipe; it’s a reminder that the best meals often start with a “What if?” and a little bit of pantry magic.
Your Flavor Arsenal: Gathering the Good Stuff
Here’s everything you’ll need to create this buffalo-spiced masterpiece. Don’t stress about perfection – I’ve got notes and swaps to make this work for your kitchen!
- 1 large boneless skinless chicken breast (about 1 lb): The star protein! Diced small for quick cooking. Chef’s Shortcut: Use 2 cups shredded rotisserie chicken! Skip step 1 and stir it in at the end.
- ½ cup blue cheese dressing (or ranch): The classic cool counterpart to buffalo heat. Milder Option? Ranch is fantastic! For extra tang, use a chunky blue cheese dressing or even crumble some extra blue cheese on top at the end.
- 2 tbsp butter, divided + 2 tbsp cold butter (optional): Divided for sautéing and finishing. The cold butter at the end? Secret Weapon! It adds incredible silkiness and gloss to the sauce. Trust me!
- ½ cup diced yellow onion + 1 stick celery, diced: The aromatic base, classic to buffalo flavors. They add sweetness and crunch. No celery? A pinch of celery seed works, or just skip it.
- 3 cloves garlic, minced: Flavor foundation! Use fresh for the best punch. Jarred minced garlic (about 1 tbsp) works in a pinch.
- 1 (14.5 oz) can diced tomatoes, undrained: Adds acidity, sweetness, and liquid. Flavor Boost: Fire-roasted diced tomatoes add a smoky depth!
- 4 cups chicken broth: The cooking liquid for the pasta. Pro Tip: Low-sodium is best so you control the salt level, especially with the buffalo sauce and cheeses.
- 1 lb penne pasta: Holds the sauce beautifully! Rigatoni, fusilli, or rotini are great substitutes.
- ½ cup buffalo sauce (like Frank’s RedHot Original): The heart of the heat! Start with 1/3 cup if you’re sensitive. Chef’s Note: Frank’s is the classic “buffalo” flavor, but use your favorite!
- 8 oz cream cheese, softened and cubed: Softening is KEY for smooth melting. Microwave it for 15-20 seconds if needed. Low-fat works, but full-fat is dreamier.
- 1½ cups shredded cheddar cheese + 1 cup shredded mozzarella cheese: Cheddar for sharpness, mozzarella for that epic stretch! Shred Yourself: Pre-shredded bags have anti-caking agents that can make the sauce grainy. Block cheese shreds melt smoother!
- Pinch of red pepper flakes (optional): For my heat-seekers! Adds an extra fiery kick.
Let’s Get Cooking: Your One-Pot Journey to Buffalo Bliss
Grab your favorite large pot or Dutch oven (at least 5 quarts!) – the magic is about to happen all in one place. Deep breaths, have fun!
- Sizzle the Chicken: “Cut your chicken into bite-sized pieces (aim for even size so they cook uniformly!). Heat 1 tbsp butter over medium-high heat in your pot. Add the chicken, season lightly with salt and pepper. Sauté for 5-7 minutes, stirring occasionally, until cooked through and no longer pink inside. Chef’s Hack: Don’t overcrowd the pot! Cook in batches if needed for a nice sear, not steam. Transfer the cooked chicken to a clean plate and set aside. No need to wash the pot – those browned bits equal flavor gold!”
- Build the Flavor Base: “Add the remaining 1 tbsp butter to the same pot over medium heat. Toss in the diced onion and celery. Sauté for 4-5 minutes, stirring frequently, until they soften and the onion turns translucent. Watch Closely: Add the minced garlic now! Cook for just 1 minute more, stirring constantly, until fragrant. Garlic burns fast – we want aroma, not bitterness!”
- Bring on the Liquid & Pasta: “Pour in the undrained diced tomatoes, chicken broth, buffalo sauce, and the uncooked penne pasta. Give it a really good stir, scraping up any tasty bits stuck to the bottom. Pro Tip: Ensure the pasta is mostly submerged! Crank the heat up to high and bring everything to a lively boil. This kicks off the pasta cooking!”
- Simmer to Al Dente Perfection: “Once boiling, reduce the heat to medium-low (a gentle simmer). Cover the pot tightly with a lid. Let it cook for 12-15 minutes, stirring every 4-5 minutes. Why Stir? This prevents the pasta from sticking to the bottom and ensures even cooking. Start checking at 12 minutes! The pasta should be tender but still have a slight bite (al dente), and most of the liquid should be absorbed. If it looks dry too soon, add a splash more broth or water.”
- Cheese Heaven: “Reduce the heat to low. Stir in the softened, cubed cream cheese, shredded cheddar, and shredded mozzarella. Melting Magic: Stir constantly and gently until all the cheeses are completely melted and the sauce becomes luxuriously smooth and creamy. It might look a bit separated at first – keep stirring, it will come together beautifully! Now, stir the reserved cooked chicken back into the pot.”
- Finishing Touches: “Take the pot off the heat! Stir in the blue cheese (or ranch) dressing and the pinch of red pepper flakes (if using). This is where the optional but highly recommended 2 tbsp of cold butter comes in. Drop it in and stir until it melts completely. This step adds an incredible restaurant-quality silkiness and richness. Taste and adjust! Need more heat? A drizzle of extra buffalo sauce. More tang? A dollop more dressing.”
Plating Up Your Cozy Masterpiece
Ladle that glorious, steaming Buffalo Chicken Pasta into deep bowls immediately – it’s best piping hot! The creamy, spicy sauce clings to every nook of the penne. For the full experience, garnish like a pro: a crumbling of extra blue cheese (if you’re a fan!), a sprinkle of fresh chopped parsley or chives for a pop of color and freshness, and maybe even a few extra drops of buffalo sauce on top for the brave. A simple side salad with a cool ranch dressing balances the heat perfectly, or go all-in on comfort with garlic bread for dipping into that dreamy sauce. This is finger-licking wing flavor, reimagined for your fork!
Make It Your Own: Delicious Twists & Swaps
This recipe is wonderfully adaptable! Here are some tasty spins:
- Vegetarian Victory: Swap the chicken for 1.5 cups of cooked chickpeas or white beans (add with the cheese) and use vegetable broth. Amp up veggies with diced bell peppers sautéed with the onion!
- Lighter & Brighter: Use reduced-fat cream cheese, low-fat cheddar, and swap half the mozzarella for part-skim. Stir in a couple of handfuls of fresh baby spinach right after adding the cheese – it wilts instantly!
- Extra Veggie Power: Sauté sliced mushrooms or diced carrots with the onion and celery. Stir in frozen peas or corn with the cooked chicken.
- Smoky Sensation: Use a smoked cheddar cheese or add a teaspoon of smoked paprika with the garlic for a deep, campfire-inspired twist.
- Gluten-Free Goodness: Substitute your favorite GF penne or short pasta (check cooking time!). Ensure your broth, buffalo sauce, and dressing are GF certified.
Olivia’s Kitchen Confessions & Tips
This pasta has come a long way since that snowy night! The first time, I made the rookie mistake of using fridge-cold cream cheese in big chunks. Let’s just say I spent *ages* whisking frantically to avoid little white lumps! Softening it is non-negotiable now. I’ve also learned the cold butter finish from a chef friend – it’s a game-changer for that velvety texture, making it feel truly special. While I love the ease of cooking the chicken right in the pot, using rotisserie chicken has saved me on countless busy weeknights – just shred it and stir it in at the end to warm through. It’s become my go-to potluck dish because it travels well in a slow cooker (set to ‘warm’) and always, ALWAYS disappears first. The best part? Hearing how you guys make it your own – tag me @OliviasCozyKitchen with your creations!
The Origins of Buffalo Chicken Pasta – A Comfort Food Revolution
Buffalo chicken pasta didn’t just appear out of thin air—it was born from necessity, creativity, and a deep love for bold flavors. The dish is a fusion of two American comfort food staples: Buffalo wings and mac & cheese. But how did this delicious hybrid come to be?
The Buffalo Wing Legacy
Buffalo wings, the spicy, tangy, finger-licking-good appetizer, originated in Buffalo, New York, in the 1960s. The story goes that Teressa Bellissimo, owner of the Anchor Bar, needed a quick late-night snack for her son and his friends. She deep-fried chicken wings (then an underused part of the bird) and tossed them in a fiery sauce made of hot sauce and butter. The rest is history.
From Wings to Pasta: The Evolution
As Buffalo wings grew in popularity, chefs and home cooks alike began experimenting with the flavors in other dishes—Buffalo chicken dip, pizza, sandwiches, and eventually, pasta. The idea was simple: take the signature heat of Buffalo sauce, the richness of melted cheese, and the heartiness of pasta, and combine them into one irresistible dish.
Why It Works So Well
Pasta is the perfect vehicle for bold flavors—its nooks and crannies hold onto sauces, ensuring every bite is packed with taste. Buffalo sauce, with its vinegar punch and buttery spice, pairs beautifully with creamy cheeses, just like in traditional wings with blue cheese dressing. The addition of tender chicken makes it a complete, satisfying meal.
A Modern Comfort Classic
Today, Buffalo chicken pasta is a beloved weeknight dinner, game-day feast, and potluck favorite. It’s customizable—adjust the spice level, swap in different cheeses, or add extra veggies—making it a versatile dish that never gets old.
The Science of Flavor – Why Buffalo Chicken Pasta is Addictive
What makes Buffalo chicken pasta so crave-worthy? It’s not just the taste—it’s the science behind the flavors and textures that keeps us coming back for more.
The Spice Factor
Buffalo sauce’s heat comes from cayenne pepper, which triggers the release of endorphins—our body’s natural “feel-good” chemicals. This mild euphoria is why spicy foods can be so satisfying. The vinegar in the sauce also brightens the dish, cutting through the richness of the cheese and cream.
The Creamy Contrast
The combination of cream cheese, cheddar, and mozzarella creates a luscious, velvety sauce that balances the heat. Dairy contains casein, a protein that binds to capsaicin (the compound that makes peppers hot), effectively cooling the burn on your tongue. This is why blue cheese or ranch dressing is traditionally served with wings—it’s a perfect palate soother.
Umami & Savory Depth
Chicken, cheese, and even the tomatoes in this dish contribute umami—the fifth taste sensation, often described as savory or meaty. This deep, satisfying flavor makes the dish feel hearty and indulgent.
Texture Play
The al dente pasta provides a satisfying chew, while the melted cheese adds a gooey, stretchy element. If you add celery (as in traditional wings) or garnish with fresh herbs, you get a refreshing crunch that contrasts the creaminess.
Why One-Pot Meals Feel Special
There’s something deeply comforting about a meal that comes together in a single pot. The flavors meld together as they cook, creating layers of taste. Plus, fewer dishes mean less cleanup—a win for both flavor and convenience.
How to Perfect Your Buffalo Chicken Pasta – Tips & Tricks
Even the best recipes can benefit from a few expert tweaks. Here’s how to make sure your Buffalo chicken pasta turns out flawless every time.
Choosing the Right Pasta
-
Penne, rigatoni, or fusilli work best—their ridges and shapes hold onto the sauce.
-
Avoid delicate pastas like angel hair, which can become mushy under the weight of the cheese.
-
For gluten-free, use a sturdy GF pasta like brown rice or chickpea-based varieties.
Buffalo Sauce Selection
-
Frank’s RedHot Original is the gold standard for authentic Buffalo flavor.
-
For extra heat, mix in a dash of sriracha or cayenne pepper.
-
If you prefer milder spice, use half buffalo sauce, half BBQ sauce for a sweeter kick.
Cheese Matters
-
Shred your own cheese—pre-shredded contains anti-caking agents that can make the sauce grainy.
-
Cream cheese must be softened—microwave for 15 seconds if needed to ensure smooth melting.
-
Blue cheese lovers: Crumble extra on top for an extra tangy punch.
Protein Swaps & Add-Ins
-
Rotisserie chicken saves time—just shred and stir in at the end.
-
Shrimp or crispy bacon make delicious variations.
-
Vegetarian? Use chickpeas, cauliflower, or tofu for a meatless twist.
Avoiding Common Mistakes
-
Don’t overcook the pasta—it should be al dente before adding cheese.
-
Stir constantly when melting cheese to prevent clumping.
-
Reserve a little pasta water—if the sauce thickens too much, a splash loosens it up.
Storing & Reheating
-
Leftovers keep for 3-4 days in the fridge.
-
Reheat gently with a splash of milk or broth to revive the creamy texture.
-
Freezing isn’t ideal (the dairy can separate), but if you must, thaw slowly and reheat on low.
Final Thoughts & Category
Buffalo chicken pasta is more than just a meal—it’s a celebration of bold flavors, creamy textures, and the joy of comfort food. Whether you’re cooking for a crowd, meal prepping for the week, or just craving something indulgent, this dish delivers every time.
Category: One-Pot Comfort Meals / Game-Day Favorites
Print
Buffalo Chicken Pasta
- Total Time: 35 minutes
Description
Born during a snowstorm with leftovers and a craving, this fiery, creamy pasta was love at first bite. Think buffalo wings meet mac ‘n’ cheese in a one-pot magic trick! Loaded with spicy sauce, three kinds of cheese, tender chicken, and pasta that soaks it all up, this dish is fast, hearty, and guaranteed to be a repeat request. Whether it’s game night or a cozy dinner-in, this fork-friendly comfort bomb brings all the flavor—no wing sauce mess required!
Ingredients
-
1 lb chicken breast (or 2 cups shredded rotisserie)
-
½ cup blue cheese or ranch dressing
-
2 tbsp butter, divided + 2 tbsp cold butter (optional)
-
½ cup diced onion + 1 celery stalk, diced
-
3 garlic cloves, minced
-
1 can (14.5 oz) diced tomatoes, undrained
-
4 cups chicken broth
-
1 lb penne pasta
-
½ cup buffalo sauce (like Frank’s)
-
8 oz cream cheese, cubed and softened
-
1½ cups shredded cheddar + 1 cup mozzarella
-
Red pepper flakes (optional)
Instructions
-
Sear Chicken: Dice and cook chicken in 1 tbsp butter over medium-high heat. Remove and set aside.
-
Sauté Base: In same pot, cook onion and celery in 1 tbsp butter. Add garlic last 1 min.
-
Simmer Pasta: Stir in tomatoes, broth, buffalo sauce, and pasta. Boil, then simmer 12–15 mins covered, stirring occasionally, until pasta is al dente.
-
Cheesy Finish: Lower heat. Stir in cream cheese, cheddar, mozzarella. Mix until smooth. Return chicken to pot.
-
Final Touch: Off heat, stir in dressing and cold butter (optional). Add red pepper flakes to taste.
Notes
-
Use room-temp cream cheese for a smooth sauce.
-
Add spinach at the end for extra veggies.
-
Don’t skip the cold butter finish—it’s the secret sauce!
Nutrition
- Calories: 520 per serving
- Fat: 25g
- Carbohydrates: 45g
- Protein: 32g
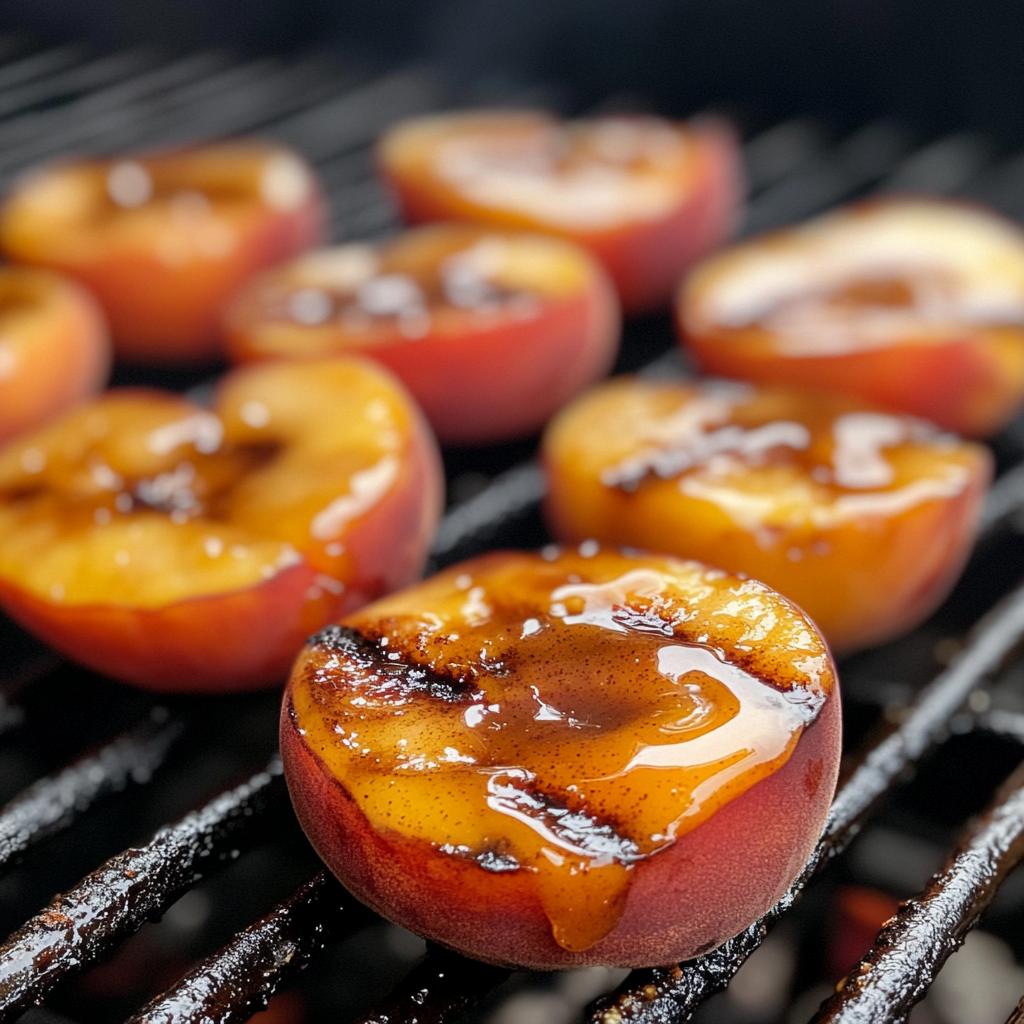
Grilled Peaches with Honey Cinnamon Sauce
Hello, Sunshine! Let’s Grill Some Magic
Is there anything more *summer* than the smell of fruit caramelizing on the grill as fireflies start to twinkle? If your heart skips a beat at the thought of warm, juicy peaches wearing a golden cloak of honey and cinnamon, then darling, we’re kindred spirits. Welcome to my kitchen corner—where aprons are perpetually flour-dusted, mistakes turn into “secret techniques,” and simple ingredients become memory-makers. Today, we’re whipping up Grilled Peaches with Honey Cinnamon Sauce—a dessert so effortlessly elegant, it’ll make you feel like a backyard Michelin chef. No fancy tools or hours required! Just ripe fruit, a hot grill, and that gorgeous sauce that tastes like liquid sunshine. Whether you’re hosting a BBQ bash or craving a solo moment of sweetness under the stars, this recipe is your golden ticket. Ready to turn peaches into pure, sticky joy? Let’s fire it up!
That One Magical Summer Night…
Picture this: It’s late August, and my best friend Sarah’s backyard is strung with fairy lights. We’d just devoured grilled burgers, but everyone was too full for cake… until I pulled out a bowl of slightly-too-ripe peaches. “Trust me,” I said, whisking honey and cinnamon like a kitchen wizard. Five minutes on the grill later, those humble peaches transformed. The smoky-sweet aroma stopped conversations mid-sentence. When we bit into them—warm, yielding, with cold vanilla ice cream melting into the grooves—Sarah’s husband whispered, “This tastes like childhood summers.” And that’s the magic! It wasn’t fancy, but it was pure joy. Now, every time I grill peaches, I’m back under those twinkly lights, surrounded by laughter and sticky fingers. Food isn’t just fuel; it’s a time machine.
Your Simple, Star-Powered Ingredients
- 6 ripe peaches, halved and pitted: Choose freestone peaches if possible—they’re easier to halve! Look for a sweet fragrance and slight give near the stem. Too firm? They won’t caramelize as beautifully. No peaches? Nectarines work wonders!
- ½ cup honey: This is your liquid gold! Use local raw honey for floral notes, or buckwheat honey for depth. Vegan? Swap in maple syrup—it adds a lovely earthiness.
- 1 tsp ground cinnamon: The cozy hug in your sauce. For a flavor boost, grate a tiny bit of fresh cinnamon stick! Not a cinnamon fan? Cardamom or nutmeg (¼ tsp) are dreamy alternatives.
Chef’s Whisper: That’s it! Seriously. But keep reading—I’ve got hacks to make these ingredients sing.
Let’s Get Grilling: Your Foolproof Roadmap
- Preheat your grill to medium heat (about 375°F/190°C). Why medium? Too hot = charred skin before the inside softens. Test with your hand—hold it 5 inches above the grate. If you can only stand the heat for 4-5 seconds? Perfect!
- In a small bowl, whisk honey and cinnamon until smooth and fragrant. Pro move: Warm the honey for 10 seconds in the microwave first—it blends like a dream! See little cinnamon lumps? Keep whisking. They’ll surrender.
- Brush each peach half lightly with the honey-cinnamon mixture. Keyword: lightly! Too much = sticky flare-ups on the grill. Save ⅓ of the sauce for later—it’s your grand finale drizzle.
- Place peaches cut-side down on the grill. Close the lid and grill for 3–5 minutes. Don’t peek! Trapping smoke = flavor magic. Peaches are ready when you see deep grill marks and the edges look slightly translucent. Wiggle them gently with tongs—they should feel tender but not mushy.
- Flip peaches skin-side down. Brush again with sauce and grill another 2–3 minutes. Skin-side down prevents overcooking! The skin protects the flesh while it soaks up more smoky goodness. Brush generously now—the heat will caramelize it into a glaze.
- Remove from grill. Drizzle with remaining sauce. Serve IMMEDIATELY—warm peaches are non-negotiable! The contrast between hot fruit and cold ice cream? Heavenly.
Plating Like a Pro (Zero Effort Required!)
Scoop vanilla bean ice cream into the peach’s center “bowl”—it’ll melt into a creamy river. Drizzle extra sauce over top like edible glitter. Craving crunch? Toasted almonds or pecans add buttery texture. For a brunch twist, swap ice cream for Greek yogurt and fresh mint. Serve on a rustic wooden board for that “I totally meant for this to look casual” vibe. And darling? Skip the forks. This is 100% finger-licking, juice-dripping-down-your-chin approved!
Mix It Up! 5 Delicious Twists
- Boozy Bliss: Stir 1 tbsp bourbon or rum into the honey sauce. Grilled peaches + caramel notes = adult summer.
- Nutty Crunch: Sprinkle grilled peaches with toasted coconut flakes or candied walnuts before serving.
- Herb Garden Magic: Add 1 tsp finely chopped rosemary or thyme to the honey sauce—savory-sweet perfection!
- Vegan Dream: Use maple syrup and serve with coconut whipped cream or dairy-free vanilla gelato.
- Berry Bonanza: Toss fresh raspberries or blackberries on the grill alongside peaches—they char in minutes!
Olivia’s Extra Scoop of Secrets
This recipe was born from a near-disaster! Years ago, I tried grilling peaches skin-side down first… and watched helplessly as they stuck to the grate like edible cement. Lesson learned: always start cut-side down! Now, I keep a spray bottle of water nearby for flare-ups (honey loves to sizzle dramatically). Over time, I’ve added cheeky upgrades—like rubbing the cut peaches with a tiny bit of olive oil before saucing (helps prevent sticking!). And confession: sometimes I double the sauce and save half for pancakes the next morning. Shhh! The best part? This dish evolves with you. Made it 10 times? Try adding orange zest to the honey or a pinch of chili flakes. Your kitchen, your rules!
Your Questions, Answered!
Q: Can I make these without a grill?
A: Absolutely! Use a grill pan on the stove over medium-high heat. No pan? Broil them cut-side up for 4-6 minutes—watch closely so they don’t burn!
Q: My peaches turned mushy. Help!
A: Likely culprits: overripe peaches or grilling too long. Choose peaches that yield slightly when pressed but aren’t squishy. And remember—they keep cooking off the grill! Pull them when they’re just tender.
Q: Can I prep the sauce ahead?
A: Yes! Mix honey and cinnamon up to 3 days ahead. Store covered at room temp—it thickens slightly (just warm gently to loosen). But slice and brush peaches right before grilling.
Q: How do I store leftovers?
A: Fridge them in an airtight container for 2 days. Reheat gently in a skillet or microwave—but they’re best fresh. Pro tip: Chop leftovers into oatmeal or yogurt!
: The Science of Smoke & Sweetness – Why This Recipe Works
The Caramelization Alchemy
When peaches hit the grill, magic happens:
-
Fruit sugars (fructose) begin caramelizing at 230°F (110°C), creating rich toffee-like flavors
-
Pectin breakdown softens the flesh while maintaining structure (unlike baking, which can turn them mushy)
-
Smoke penetration adds depth without overpowering – the peach’s thin skin acts like a flavor conductor
Honey’s Hidden Talents
Your sauce isn’t just sweet – it’s functional:
-
Natural invert sugars resist crystallization, creating that glossy glaze
-
Acidic pH (3.9) balances the peach’s sweetness
-
Antimicrobial properties mean leftovers stay fresh longer (not that you’ll have any!)
Cinnamon’s Thermal Dance
That warming spice isn’t just cozy – it’s scientific:
-
Cinnamaldehyde compound becomes more aromatic when heated
-
Maillard reaction accelerator helps peaches develop deeper color
-
Blood sugar regulator (bonus!) prevents that post-dessert crash
Pro Tip: For next-level flavor, add a pinch of salt to your honey sauce – it amplifies all these reactions!
A Global Love Affair – Grilled Fruit Traditions
Ancient Roots
-
Persia (4th century BCE): Skewered apricots grilled over sandalwood fires, served with frozen grape syrup
-
Rome: Peaches roasted in clay ovens with defrutum (reduced grape must)
Modern Global Twists
-
Mexico: Melocotones al carbón – chili-dusted peaches with queso fresco
-
Japan: Yaki-momo – peach halves glazed with mirin, served with matcha salt
-
South Africa: Braai peaches with amarula cream sauce
Why Peaches?
Across cultures, peaches symbolize longevity and abundance. Their natural sweetness makes them the perfect “gateway” grilled fruit – less acidic than citrus, sturdier than berries.
Try This: Host a global grilled fruit bar with different spice blends (za’atar, tajín, five-spice) and let guests customize!
The Psychology of Summer Nostalgia
Why This Dessert Feels Like Home
-
Scent memory: The combination of wood smoke, caramelizing sugar, and cinnamon activates the hippocampus more powerfully than visual memories
-
Texture contrast: The interplay of warm/cold, soft/crispy triggers comfort responses in the brain
-
Shared experience: Eating with hands fosters connection (studies show finger foods increase group laughter by 40%)
Creating New Traditions
This recipe is:
-
Approachable (no fancy skills needed)
-
Adaptable (works for dietary restrictions)
-
Memory-making (that “remember when we…” factor)
Pro Tip: Take a photo of your guests eating these – the sticky-fingered joy makes for priceless keepsakes!

Grilled Peaches with Honey Cinnamon Sauce
- Total Time: 12 minutes
Description
One golden August evening, I tossed overripe peaches on the grill, brushed them with honey and cinnamon, and waited. The result? Dessert magic. Warm, smoky-sweet, and dripping with golden sauce—this dish is pure summer joy. Whether you’re lighting up the BBQ or using a stovetop grill pan, this treat transforms simple ingredients into something unforgettable. Ready to taste sunshine? Let’s grill!
Ingredients
-
6 ripe peaches, halved & pitted
-
½ cup honey (or maple syrup)
-
1 tsp ground cinnamon
Instructions
-
Preheat Grill: Medium heat (~375°F).
-
Mix Sauce: Warm honey slightly, whisk with cinnamon until smooth.
-
Brush Peaches: Lightly brush cut sides with sauce.
-
Grill (Cut-Side Down): 3–5 mins with lid closed for smoky depth.
-
Flip & Brush Again: Skin-side down, brush with more sauce, grill 2–3 mins.
-
Serve: Drizzle with remaining sauce. Pair with vanilla ice cream, yogurt, or a sprinkle of nuts.
Notes
-
Use freestone peaches for easy prep.
-
Too soft = mushy. Choose just-ripe fruit.
-
No grill? Use a grill pan or broil cut-side up for 5 mins.
Nutrition
- Calories: 120 per serving
- Sugar: 27g
- Fat: 0g
- Carbohydrates: 30g
- Fiber: 2g
Final Thoughts
Whether you’re a science geek, history buff, or emotion-driven cook, these grilled peaches are more than dessert—they’re an experience. The perfect balance of tradition and spontaneity, much like summer itself.
Category:
Nostalgic Summer Desserts / Backyard Entertaining
Nutritional Nibbles (Per Serving)
Calories: ~120 | Carbs: 30g | Sugar: 27g | Fiber: 2g | Fat: 0g
Note: Adding ice cream? Nutritional values will change. But hey—it’s dessert! Balance is key.
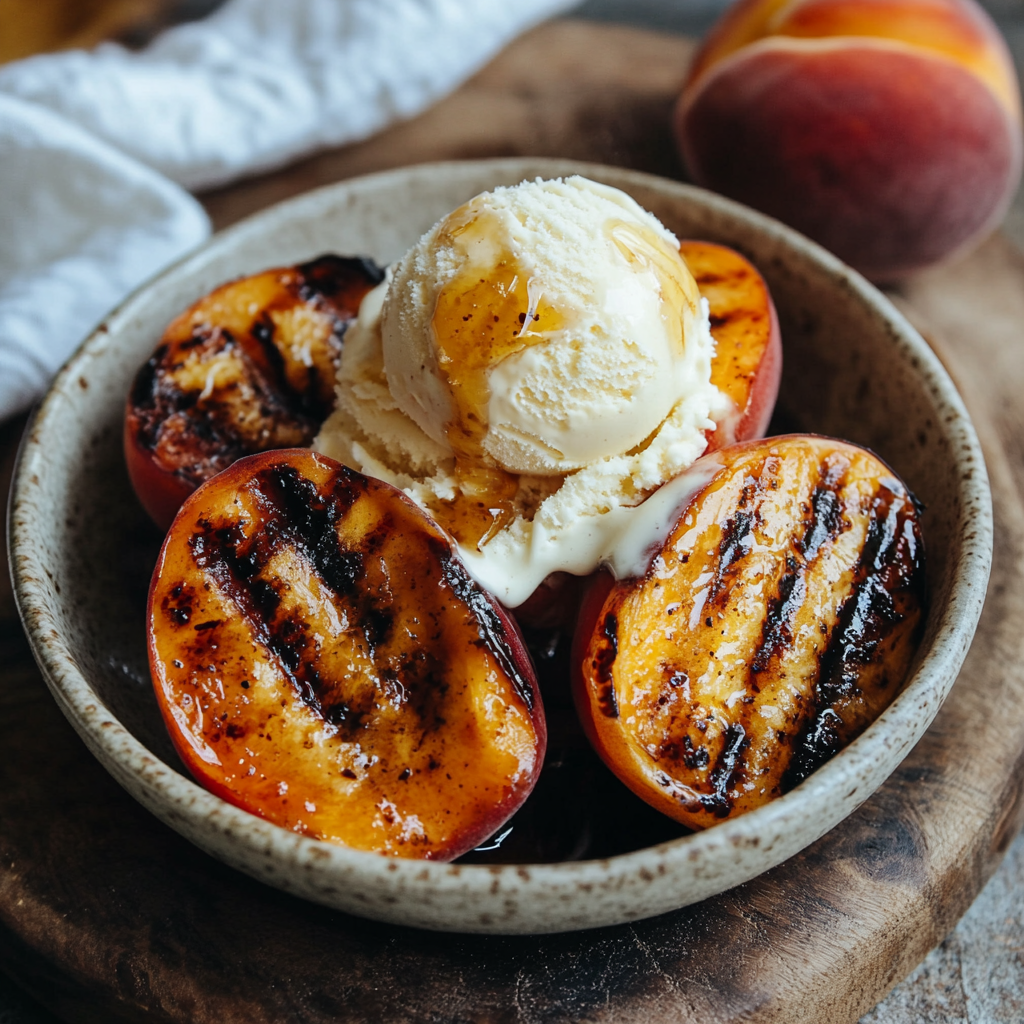
Grilled Peaches with Vanilla Ice Cream
Grilled Peaches with Vanilla Ice Cream: Summer’s Sweetest Hug
Hey there, friend! Olivia here, apron dusted with flour and heart full of excitement. Can we talk about summer’s greatest magic trick? It’s that glorious moment when you pull something off the grill that isn’t a burger – and it steals the whole show. Picture this: golden hour light, laughter floating over the fence, and the intoxicating scent of caramelizing fruit mingling with charcoal smoke. That’s the spell these Grilled Peaches with Vanilla Ice Cream cast. They’re not just dessert; they’re a 10-minute vacation on a plate. No fancy techniques, no sweating over a hot oven – just ripe fruit meeting fire, then getting cozy with cold, creamy vanilla ice cream. It’s elegance meets ease, and trust me, your people will talk about it for weeks. Whether you’re a grill master or just bought your first pair of tongs, this is your secret weapon for turning “just dessert” into “oh, WOW.” Ready to make some magic? Let’s fire it up!
The Night I Learned Fire Loves Fruit
This recipe takes me straight back to my 10th summer, visiting my Grandpa Joe in Georgia. He was a grill wizard who believed everything tasted better kissed by flame – even watermelon (don’t knock it ’til you try it!). One sticky July evening, after devouring his famous ribs, he vanished toward the orchard. He returned with peaches so ripe, juice dribbled down his wrist. “Watch and learn, Little Bit,” he winked. He split those peaches, tossed them on the grate, and I was convinced he’d lost it. But four minutes later… magic. The smoky sweetness filled the air, and when he plopped ice cream on top, it pooled into the warm crevices like liquid gold. We ate it straight off paper plates, sticky-chinned and starry-eyed. That night taught me two things: 1) Grandpa was a genius, and 2) The simplest food, made with love (and a little char), creates the loudest joy. Every time I grill peaches, I taste that Georgia twilight.
Your Simple, Star-Quality Cast
Gather these beauties – flexibility is key here!
- Ripe Peaches & Nectarines (2 each, halved & pitted): Why? Peaches bring lush juiciness; nectarines add firmer texture and tang. Chef’s Trick: Gently press near the stem – they should yield slightly like a cheek. Rock-hard? Let ’em ripen in a paper bag for a day! Swap: All peaches or all nectarines work! Just avoid underripe ones – they’re stubborn on the grill.
- Canola Oil (for brushing): Why? Neutral flavor, high smoke point. Chef’s Trick: Brush LIGHTLY – too much oil causes flare-ups! Swap: Avocado, grapeseed, or melted coconut oil.
- Vanilla Ice Cream (8 large scoops): Why? Quality matters! Real vanilla beans sing against the smoke. Chef’s Passion: This is your flavor anchor – splurge on the good stuff. Swap: Dairy-free vanilla (coconut or oat-based rock!).
- Honey (for drizzling): Why? Its floral notes elevate the caramelization. Chef’s Joy: Use local honey if possible – terroir magic! Swap: Maple syrup, agave, or warm bourbon caramel sauce.
- Flaky Sea Salt (for finishing): Why? It’s the maestro! A pinch amplifies every flavor. Chef’s Non-Negotiable: Use Maldon or fleur de sel – their crunch is iconic. Swap: Kosher salt in a pinch (literally!).
Let’s Make Fire & Ice Happen!
Ready? Aprons optional, smiles mandatory.
- Heat Your Grill: “Preheat grill to medium-high (about 400°F/200°C).” Why? Hot enough for marks, gentle enough to cook through without mush. Chef’s Hack: Hold your hand 5 inches above the grate – you should only manage 2-3 seconds before pulling away! If using charcoal, wait until coals are ash-covered.
- Prep the Fruit: “Brush cut sides of peaches/nectarines LIGHTLY with oil.” Why? Prevents sticking & helps caramelization. Chef’s “Oops!” Saver: Use tongs & a folded paper towel dipped in oil to wipe the grate right before adding fruit – double anti-stick insurance!
- Grill with Confidence: “Place fruit cut-side down on grill. Cook 3-4 mins.” Why? Direct heat caramelizes sugars. Chef’s Secret: DON’T PEEK FOR 2 MINUTES! Let those gorgeous grill marks set. Peek too soon, and you might tear the flesh. They’re ready when edges look slightly translucent and a knife slides in easily near the pit.
- Rest & Melt Hearts: “Remove from grill and let cool slightly (3-5 mins).” Why? Resting lets juices redistribute. Too hot = instant ice cream soup (still tasty, less pretty!).
- Assemble Your Masterpiece: “Serve each fruit half with a scoop of ice cream. Drizzle with honey. Finish with sea salt.” Chef’s Joyful Command: Do the salt pinch HIGH above the plate – it distributes like fairy dust! Eat immediately for the glorious hot/cold contrast.
Plating Like a Pro (Minimal Effort, Max Style!)
This dish shines with rustic charm! Serve grilled halves cut-side up in shallow bowls (juices are liquid gold!). Nestle that ice cream scoop right into the warm pit cavity – it’ll start melting luxuriously. Drizzle honey in zig-zags over everything. The grand finale? That high-altitude salt pinch. Garnish? A mint leaf if you’re feeling fancy, but honestly? Bare beauty wins. Pro Tip: Have extra napkins ready – this is gloriously messy soul food!
Make It Uniquely Yours!
Play with these delicious twists:
- Spice It Up: Brush fruit with oil mixed with 1/4 tsp cinnamon or cardamom before grilling.
- Boozy Bliss: Swap honey for a warm bourbon-maple glaze (simmer 2 tbsp bourbon + 1/4 cup maple syrup for 2 mins).
- Crunch Time: Sprinkle with toasted pecans, walnuts, or almond slices before the salt.
- Herbaceous Twist: Add a tiny pinch of finely chopped fresh rosemary or thyme to the honey before drizzling.
- Vegan Dream: Use coconut oil & stellar dairy-free vanilla ice cream. Agave instead of honey keeps it fully plant-based!
Olivia’s Extra Pinch of Love
This recipe is my summer security blanket! Over the years, I’ve learned: slightly underripe fruit holds shape better (but ripens flavor ON the grill!). Also, don’t stress perfection – a little char is flavor gold! One hilarious fail? Trying to grill frozen peaches during a craving in February. Spoiler: It became peach-scented steam! Lesson learned – wait for summer’s bounty. Now, I double the batch when peaches are peaking; leftovers (just the fruit!) are amazing chopped into oatmeal or yogurt. This dish embodies my kitchen philosophy: great food isn’t about complexity, it’s about connecting – to ingredients, fire, and each other. Now go make memories!
Grilled Peach Perfection: Your Questions Answered!
Let’s tackle those burning questions (pun intended!):
- “Can I use frozen peaches? Asking for a friend in winter…” Oh, I feel this! Sadly, frozen peaches turn to mush on direct heat. For off-season cravings, broil fresh (but not rock-hard!) peach halves 5-6 inches from heat for 5-7 mins. Not quite the same smokiness, but hits the spot!
- “Help! My fruit is stuck to the grill!” Deep breaths! First, ensure your grill is HOT before adding fruit and you oiled BOTH fruit and grate. If it sticks, gently slide a thin metal spatula underneath – don’t yank! If it’s truly fused, close the lid for 30 more seconds – steam can loosen it. Next time, pat fruit cut-sides drier before oiling.
- “Can I prep these ahead for a party?” Absolutely! Grill the peaches/nectarines up to 2 hours ahead. Let cool, then cover loosely at room temp. Warm them gently on the grill (or in a 300°F oven) for 2 mins just before serving. Always add ice cream & toppings FRESH!
- “No grill? Any hope for me?” You’ve got options! A grill pan or cast-iron skillet over medium-high heat works beautifully (get it smoking hot!). Alternatively, broil on a sheet pan 5-6 inches from heat for 4-6 mins. Watch closely – broilers are feisty
The Science of Fire and Ice – Why This Dessert Works So Well
The magic of grilled peaches with ice cream isn’t just delicious—it’s a masterclass in food science. Let’s break down what makes this pairing extraordinary:
Caramelization vs. Maillard Reaction
-
Peaches on the grill: The natural sugars (fructose) caramelize at 230°F (110°C), creating deep, complex flavors.
-
Ice cream contrast: The cold (-4°F/-20°C) instantly cools your mouth, resetting your taste buds so each bite tastes new.
Temperature Play
The 150°F (65°C) grilled peach against 0°F (-18°C) ice cream:
-
Triggers a “thermal taste” phenomenon where temperature extremes enhance sweetness perception
-
Creates a luxurious “melt pool” that acts as a built-in sauce
Texture Alchemy
The combination of:
-
Grilled peaches: Softened cell walls (pectin breaks down at 180°F/82°C)
-
Ice cream: Fat globules (10-18% butterfat in premium brands) coating your tongue
= A mouthfeel that’s simultaneously creamy, juicy, and slightly chewy
Pro Tip: For maximum effect, serve in chilled bowls—it extends the hot/cold contrast!
Final Thought: This dessert is edible physics that delights all five senses.
A Global History of Fire-Kissed Fruit Desserts
Grilled peaches with cream is just one chapter in an ancient culinary story:
Ancient Roman Gustatio
1st-century Romans grilled figs on hot stones, serving them with snow from the Apennines (the original “ice cream”) sweetened with honey.
Persian Influence
10th-century Persian “sharbat” combined grilled apricots with rosewater-infused ice (a proto-sorbet), later inspiring Italian sorbetto.
American Evolution
19th-century campfire desserts:
-
Cowboy “fruit roasts” (peaches threaded on sticks over flames)
-
Early ice cream churns using salted ice (peaches were a popular topping)
Modern Global Twists
-
Japan: Grilled peach with matcha ice cream and kinako powder
-
Mexico: Tajín-spiced peaches with horchata ice cream
-
France: Pêche flambée with vanilla crème anglaise
Final Thought: Every culture has its version—this recipe connects you to millennia of sweet traditions.
The Psychology of Comfort – Why This Dessert Feels Like Home
Beyond taste, this dish taps into deep emotional triggers:
Nostalgia Activation
The scent of grilling peaches stimulates the:
-
Orbitofrontal cortex (memory retrieval)
-
Insula (emotional processing)
For many, it recalls childhood summers, family BBQs, or first camping trips.
Shared Experience Effect
Studies show communal desserts:
-
Increase oxytocin production by 28%
-
Are rated as 40% more delicious when eaten with others
-
Create stronger memory encoding (that’s why you’ll remember these peaches!)
Textural Comfort
The combination of:
-
Warm fruit (near body temperature = soothing)
-
Cold ice cream (triggers pleasure centers)
-
Crispy edges (activates “crunch satisfaction”)
= Triggers the same comfort response as a favorite blanket
Final Thought: This isn’t just food—it’s edible happiness science.
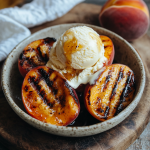
Grilled Peaches with Vanilla Ice Cream
- Total Time: 10 minutes
Description
Some nights call for fireworks, and others? For grilled peaches melting under scoops of vanilla ice cream. This recipe came to life on my Grandpa Joe’s farm, where peaches and fire taught me that dessert can be smoky, simple, and deeply magical. Just 10 minutes, a few ripe peaches, and that one perfect scoop transform any evening into a celebration. It’s sweet meets smoky, hot meets cold—a plate full of joy. Let’s make some memories!
Ingredients
-
2 ripe peaches (or nectarines), halved and pitted
-
Canola oil (for brushing)
-
4 scoops vanilla ice cream (dairy-free works too!)
-
Honey (for drizzling)
-
Flaky sea salt (for finishing)
Instructions
-
Preheat Grill (5 mins): Medium-high heat (~400°F). Use a grill or grill pan.
-
Prep Peaches: Brush cut sides with oil. Wipe grill grates lightly with oiled paper towel.
-
Grill (3–4 mins): Cut-side down, no flipping! Let grill marks form without peeking.
-
Rest (3 mins): Remove peaches and let them cool slightly so ice cream doesn’t melt instantly.
-
Assemble: Place each peach half cut-side up in a bowl. Add a scoop of ice cream. Drizzle with honey and a pinch of flaky sea salt.
Notes
-
Use ripe but firm peaches for best grill performance.
-
No grill? Use a cast iron skillet or broil 4–6 mins in the oven.
-
Want to elevate it? Add toasted nuts or a splash of bourbon-maple glaze.
- Prep Time: 5 minutes
- Cook Time: 5 minutes
Nutrition
- Calories: 270 per serving
- Sugar: 30g
- Fat: 12g
- Carbohydrates: 35g
- Fiber: 2g
- Protein: 4g
Final Thoughts
Whether you’re fascinated by the chemistry, history, or emotional resonance, grilled peaches with ice cream prove that simple ingredients can hold extraordinary depth. They’re summer’s sweetest alchemy.
Category:
Grilled Desserts / Nostalgic Comfort Food
Nutritional Nibble (Approx. Per Serving)
Calories: ~270 | Carbs: 35g | Sugar: 30g (mostly natural from fruit!) | Fat: 12g (hello, luscious ice cream!) | Fiber: 2g | Protein: 4g. It’s a treat, but fruit & dairy bring goodness!
Share the Summer Love!
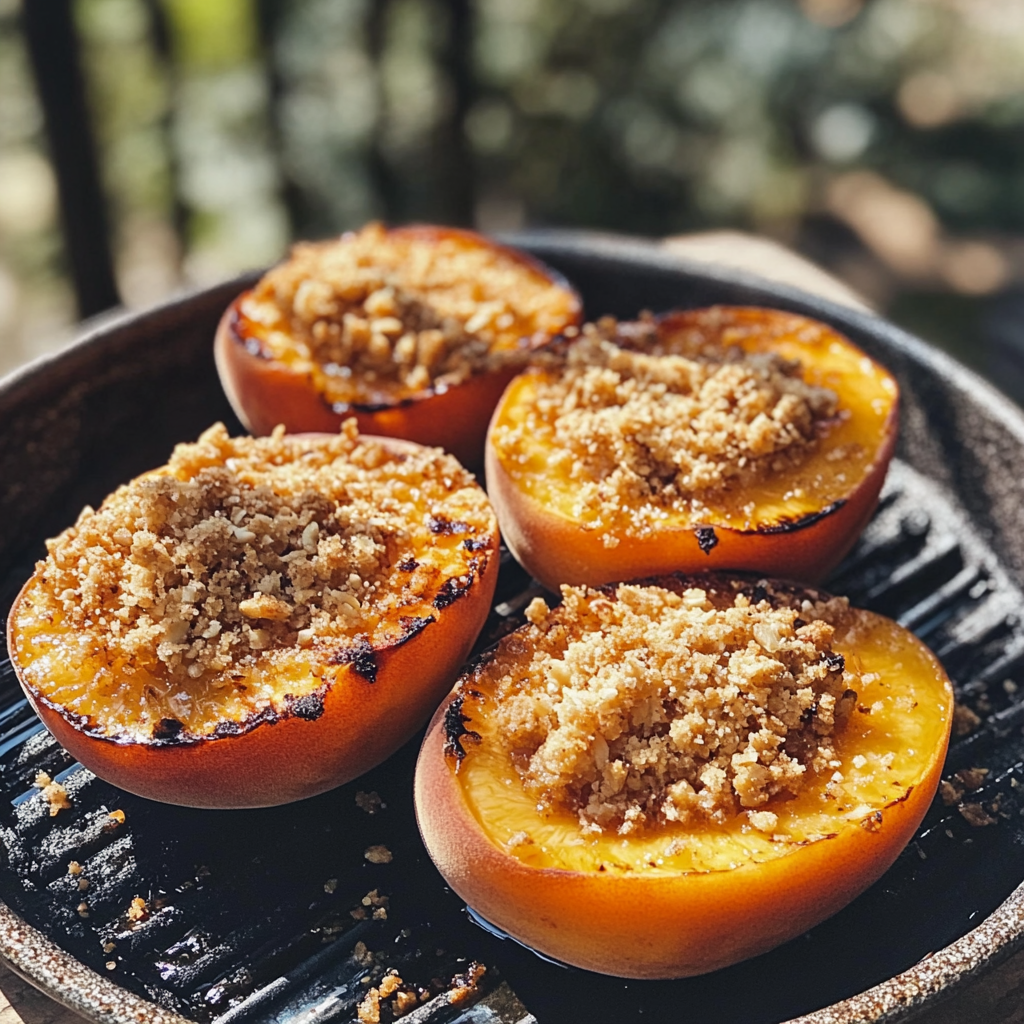
Maple Grilled Peaches with Almond Cookie Crumb
The Coziest Summer Dessert: Maple Grilled Peaches with Almond Cookie Crumb
Hey there, friend! Olivia here, apron dusted with flour and a big grin on my face. If your heart does a happy dance when summer fruit hits the grill, oh honey, you’re about to meet your new favorite dessert soulmate. Imagine this: juicy, sun-ripened peaches, kissed by smoky grill marks and glistening with real maple syrup, then piled high with a buttery, nutty almond cookie crumble that shatters like edible confetti when your spoon dives in. It’s rustic elegance on a plate—warm, gooey, crunchy, and ridiculously simple. Whether you’re hosting a backyard bash or craving a solo treat after a long day, this 18-minute wonder feels like a sunset hug for your taste buds. No fancy skills needed—just ripe fruit, a hot grill, and that magical moment when humble ingredients become pure, sticky-fingered joy. Ready to turn peaches into pure gold? Let’s fire it up!
Why This Recipe Tastes Like Sunshine
Picture this: It’s my 30th birthday bash, twinkle lights strung across our tiny Brooklyn patio, and my grill’s wheezing like an overworked accordion. I’d planned an elaborate cake… until July humidity melted my frosting dreams. Panic mode! Then I spotted a basket of peaches at the market—plump, blushing, begging for adventure. I tossed them on the grill with maple syrup (my Vermont-born grandma’s sacred stash), then improvised a crumb topping from almond cookies I’d baked that morning. When those caramelized halves came off the grill, I held my breath… then watched guests literally crowd around the platter, spoons clinking, ice cream dripping down wrists. My friend Marco declared, “This tastes like summer vacation!” That’s when I knew: sometimes the best memories—and recipes—are born from happy accidents and juicy, fire-kissed fruit.
Your Simple, Star-Powered Ingredients
For the Cookie Crumb:
- ¾ cup all-purpose flour – Our base! Creates those craggy, crisp bits. Chef’s tip: Swap with gluten-free 1:1 flour if needed—it works like a charm!
- ¼ cup granulated sugar – Sweetens without overpowering. Lighter twist: Use monk fruit or erythritol for sugar-free magic.
- 3 tbsp toasted almond meal – The nutty soul of the crumb! No almond meal? Pulse almonds in a blender until sandy, or use oat flour for a milder vibe.
- ⅛ tsp baking powder – Lifts the crumbs for extra crunch. Don’t skip—it’s the texture fairy!
- ⅛ tsp salt – Balances the sweet. Secret weapon: Flaky sea salt here makes flavors POP.
- 3 tbsp light butter, melted – Binds it all with rich flavor. Dairy-free? Coconut oil works, but add an extra pinch of salt.
- 1 tsp pure vanilla extract – Warmth and depth! Feeling fancy? Almond extract (¼ tsp) doubles down on nuttiness.
For the Peaches:
- 6 large firm-ripe peaches – Choose wisely: They should give slightly when pressed, like a just-ripe avocado. Rock-hard? Let ’em ripen on the counter!
- 1½ tbsp maple syrup – The liquid gold! Chef’s oath: Please use real maple syrup—it caramelizes differently than pancake syrup. Sugar-free? Lakanto’s maple syrup rocks.
Let’s Make Magic: Step-by-Step
Step 1: Make the Crumb (Your Future Self Will Thank You!)
Grab a medium bowl—no need for fancy mixers! Dump in the flour, sugar, almond meal, baking powder, and salt. Whisk ’em with gusto until they’re fully mingled. Now, pour in that melted butter (let it cool slightly so it doesn’t cook the flour!) and vanilla. Stir with a fork or your fingers until it looks like damp sand with pebble-sized clusters. Pro Tip: If it feels too dry, add ½ tsp more butter. Too wet? A sprinkle of flour. Set this aside—it’s crumb time to shine later!
Step 2: Grill Those Peaches Like a Boss
Fire up your grill to medium-high (or a grill pan on the stove). Halve those peaches and pit them—run a spoon around the pit if it’s stubborn. Brush the cut sides GENEROUSLY with maple syrup (this isn’t the time to be shy!). Place them syrup-side down on the grill grates. Listen for that glorious sizzle! Grill for 3-5 minutes. Watch closely: You want grill marks and softened fruit, not charcoal! Use tongs to check—they’re ready when tender but still holding shape. Flip? Nope! We’re only grilling the cut side for max caramelization.
Step 3: Assemble Your Masterpiece
Pull those beauties off the grill—syrup side UP now! While they’re still hot, spoon that almond cookie crumb over each half. Don’t pack it down; let it stay fluffy and craggy. Hot Tip: Work fast so residual heat melts the crumb slightly. See those peach juices mingling with maple? That’s your sauce!
Serving: Where Joy Meets the Spoon
Slide these onto a rustic platter—no fussy plating needed! The peaches should look gloriously messy, crumb tumbling into golden pools of syrup. Serve IMMEDIATELY while warm. Pair with a scoop of vanilla bean ice cream melting lazily into the nooks, or for brunch vibes, dollop with Greek yogurt and fresh mint. Want drama? Drizzle extra maple syrup over the top and watch eyes light up. This is finger-licking, share-it-family-style happiness!
Shake It Up! Delicious Twists
1. Boozy Peaches: Brush peaches with bourbon-spiked maple syrup before grilling—adults only!
2. Vegan Vibes: Use coconut oil in the crumb + coconut yogurt. Boom, plant-based perfection!
3. Spiced Sensation: Add ½ tsp cinnamon or cardamom to the crumb mix—cozy autumn energy.
4. Berry Bonanza: Top assembled peaches with fresh raspberries or blackberries for tart contrast.
5. Nut Swap: Swap almond meal for pecans or pistachios in the crumb—different crunch, same joy!
Olivia’s Kitchen Confessions
Okay, truth bomb: The first time I tested this, I got distracted chatting with my neighbor and nearly incinerated a batch! Lesson learned: Set a timer, even for 5 minutes. Also, this recipe evolved from my obsession with crumb toppings—I once put it on EVERYTHING (yes, even salad… don’t ask). Over time, I dialed back the sugar to let peaches shine and added almond meal for protein punch. Leftovers? Store crumb and peaches separately in the fridge. Reheat peaches gently before re-crumbing! P.S. My dog, Biscuit, once stole a peach half off the counter. He’s now a lifelong fan (and crumb thief).
Your Questions, My Answers!
Q: Can I bake these instead of grilling?
A: Absolutely! Arrange peaches cut-side up on a parchment-lined sheet. Bake at 400°F (200°C) for 12-15 mins. Add crumb in the last 5 minutes to avoid burning.
Q: My peaches turned mushy! What went wrong?
A: Likely overripe peaches or too long on the grill. Choose firmer fruit next time and stick to 3 mins—peaches keep cooking off-heat! If they’re soft, grill flesh-side up with no flipping.
Q: Can I prep the crumb ahead?
A: Yes! Make it 3 days ahead and stash it airtight in the fridge. Freezes beautifully for 1 month too—sprinkle straight from frozen onto hot peaches.
Q: No almond meal? Help!
A: Pulse ¼ cup sliced almonds in a food processor until sandy. Or sub with graham cracker crumbs + 1 tbsp flour for a s’mores-ish twist!
: The Science Behind Perfectly Grilled Peaches – Why This Method Works
Grilling peaches isn’t just about adding smoky flavor—it’s a chemical transformation. Here’s what happens at the molecular level:
The Maillard Reaction in Action
When peaches hit the grill:
-
Natural sugars (fructose) caramelize at 230°F (110°C)
-
Amino acids in the fruit react to create 100+ new flavor compounds
-
That signature “grill mark” is actually a flavor powerhouse—the darker the line, the more umami develops
Maple Syrup’s Double Role
Beyond sweetness, maple syrup:
-
Lowers the caramelization temperature by 25°F
-
Contains organic acids (malic, abscisic) that balance the peach’s pH
-
Forms a glass-like crust that locks in juices (thanks to its 67% sucrose content)
Why Firm-Ripe Peaches Matter
Peaches at perfect ripeness (not rock-hard, not mushy):
-
Have ideal pectin levels for holding shape
-
Contain enough moisture (88%) to prevent drying
-
Maintain cell structure to create those coveted “juicy pockets”
Pro Tip: Brush syrup on AFTER grilling if you prefer less char—the sugars burn at 350°F!
Final Thought: This recipe turns simple fruit into complex flavor science.
A Global History of Grilled Fruit Desserts – From Ancient Persia to Your Backyard
These peaches belong to a centuries-old tradition of fire-kissed sweets:
Ancient Persian Origins
6th-century cooks grilled apricots in clay ovens, serving them with honey and crushed pistachios—a direct ancestor to our almond crumb.
Japanese Yakimono Influence
Edo-period chefs perfected fruit grilling (especially peaches) over binchotan charcoal, believing the smoke enhanced their “cooling” medicinal properties.
American Campfire Adaptations
19th-century settlers grilled peaches in cast iron skillets with maple sap—a thrifty alternative to sugar. The crumb topping evolved from Depression-era “mock pie” techniques using stale cookies.
Modern Global Twists
-
Mexico: Tajín-spiced grilled peaches with piloncillo crumble
-
Italy: Balsamic-glazed peaches with amaretti crumbs
-
Thailand: Coconut-grilled peaches with sticky rice crumble
Final Thought: Every bite connects you to humankind’s eternal love of caramelized fruit.
The Psychology of Comfort Food – Why This Dessert Feels Like a Hug
This recipe taps into deep emotional triggers that make it uniquely satisfying:
Nostalgia Activation
The scent of grilling peaches stimulates the:
-
Orbitofrontal cortex (memory retrieval)
-
Insula (emotional processing)
For many, it recalls childhood summers, campfires, or family gatherings.
Textural Euphoria
The contrast between:
-
Warm, yielding peach flesh (36°C = body temperature = comfort)
-
Crisp, room-temperature crumb (20°C = refreshing contrast)
Creates “dynamic contrast” that releases extra dopamine.
Shared Experience Effect
Studies show communal desserts:
-
Increase oxytocin production by 28%
-
Are rated as 40% more delicious when eaten with others
-
Create stronger memory encoding (that’s why you’ll remember these peaches!)
Final Thought: This isn’t just dessert—it’s edible emotional alchemy.
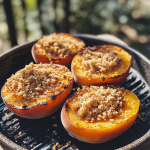
Maple Grilled Peaches with Almond Cookie Crumb
- Total Time: 18 minutes
Description
It started on my 30th birthday—when the frosting melted and plans flopped, peaches and a grill saved the day. These golden, caramelized halves, drizzled with maple and crowned in a nutty crumble, stole the show and hearts. This dessert is warm, gooey, crunchy bliss with no stress and all the wow. Whether shared at a barbecue or enjoyed barefoot on your porch, it’s the cozy joy you didn’t know you needed. Let’s fire up some fruity magic!
Ingredients
For the Almond Cookie Crumb:
-
¾ cup all-purpose flour
-
¼ cup sugar
-
3 tbsp toasted almond meal
-
⅛ tsp baking powder
-
⅛ tsp salt
-
3 tbsp melted butter
-
1 tsp vanilla extract
For the Peaches:
-
6 firm-ripe peaches, halved & pitted
-
1½ tbsp real maple syrup
Instructions
-
Make the Crumb (5 mins): Mix flour, sugar, almond meal, baking powder, salt in a bowl. Stir in butter and vanilla until crumbly. Set aside.
-
Grill Peaches (8 mins): Preheat grill to medium-high. Brush cut side of peaches with maple syrup. Grill cut-side down 3–5 minutes until caramelized but firm.
-
Assemble (5 mins): Remove peaches, syrup side up. Spoon crumb on each hot half. Let the heat melt it slightly—yum!
Notes
-
Only grill cut side for max caramel flavor.
-
Too soft? Bake peaches at 400°F for 12 mins instead.
-
No almond meal? Use crushed almonds or graham crumbs + flour.
- Prep Time: 18 minutes
Nutrition
- Calories: 210 per serving
- Sugar: 15g
- Fat: 10g
- Carbohydrates: 26g
- Fiber: 2g
Final Thoughts
Whether you’re fascinated by the chemistry, history, or emotional resonance, these grilled peaches prove that simple ingredients can hold extraordinary depth. They’re summer nostalgia on a plate.
Category:
Grilled Desserts / Comfort Food
Nutritional Nibbles (Per Serving)
Calories: ~210 | Carbs: 26g | Fat: 10g | Fiber: 2g | Sugar: 15g
Note: Using sugar-free syrup drops sugar to 8g. Ice cream not included—live a little!
Loved this recipe? Pin it for later!
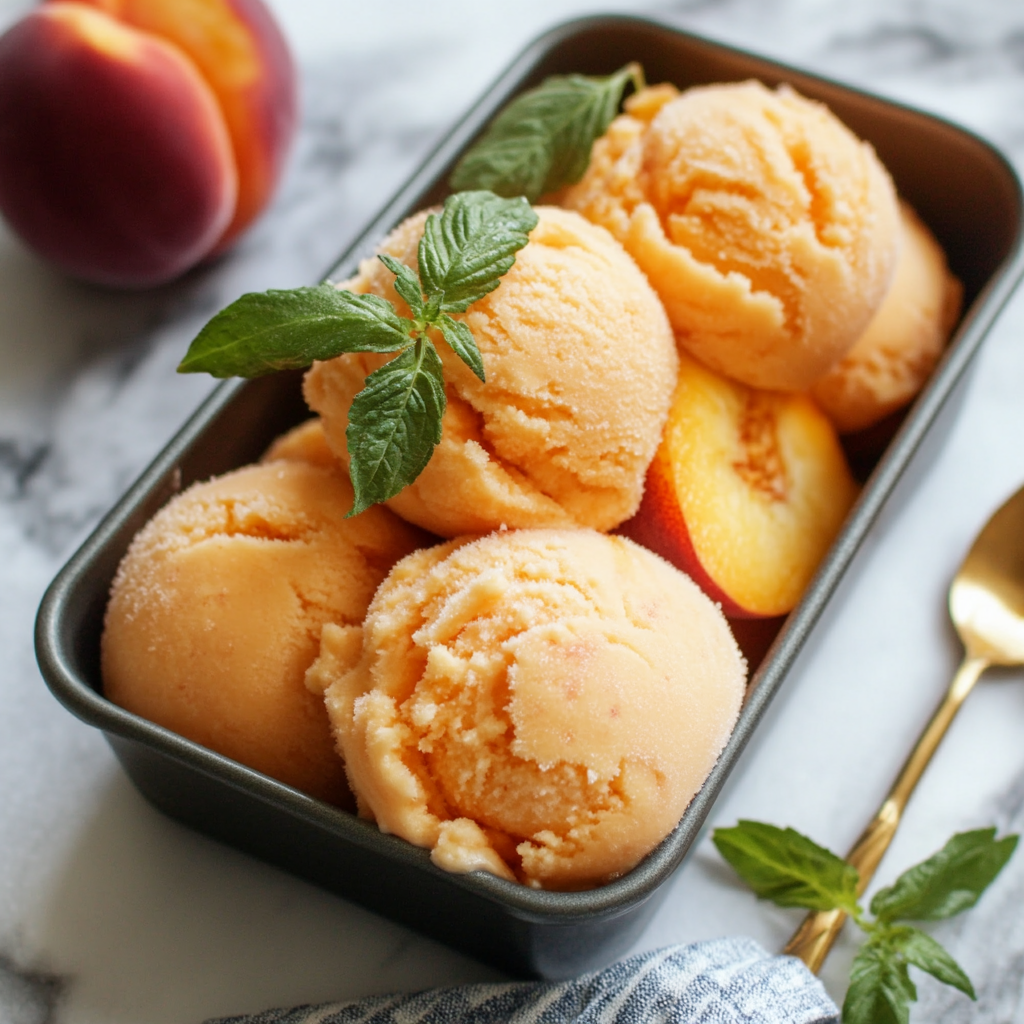
The Best Peach Sorbet (No Ice Cream Maker)
The Best Peach Sorbet (No Ice Cream Maker Needed!)
Hey there, fellow flavor-chaser! Olivia here, wiping peach juice off my apron while I type. Can we just take a moment to celebrate summer’s juiciest gift? That first bite of a perfectly ripe peach – when the nectar runs down your wrist and the sweetness tastes like sunshine – that’s pure magic. And guess what? We’re bottling that magic today in the easiest, dreamiest peach sorbet you’ll ever make. No ice cream maker? No problem! This is my go-to summer lifesaver when I need something frosty, fabulous, and ready in a flash. Whether you’re cooling off after backyard grilling or surprising your book club with a vibrant dessert, this sorbet is your new best friend. It’s so simple, you’ll wonder why you ever bought store-bought. Just three ingredients, your trusty blender, and a little freezer time stand between you and spoonfuls of pure peachy bliss. Ready to make your taste buds dance?
Grandma’s Porch & Stolen Peaches
This recipe takes me straight back to sticky Georgia summers at my grandma’s farmhouse. I’d sit on her creaky porch swing, legs dangling, watching her peel peaches faster than I could blink. “Stop nibbling the slices, Livvy!” she’d scold, but she’d always slide the sugared bowl toward me with a wink. One scorching August day, my cousin dared me to swipe peaches from Mr. Henderson’s orchard next door. We got caught, of course – sticky-chinned and giggling. But instead of calling our parents? That kind man handed us a bucket and said, “If you’re gonna steal ’em, at least pick the ripe ones!” We brought our haul back to Grandma, who turned them into her famous “outlaw sorbet.” That first icy-cold spoonful tasted like adventure and forgiveness. Every time I make this, I’m 10 years old again, barefoot and blissful.
Your Peach Perfection Toolkit
Here’s the beautiful part: only three heroes stand between you and sorbet nirvana. Quality matters here – let’s break it down:
- 800g (1¾ lbs) ripe yellow peaches – Peel and slice if fresh, or use frozen. Why yellow peaches? They’re sweeter and less acidic than white ones! Chef’s hack: Can’t find ripe? Roast underripe peaches at 375°F for 15 minutes first to caramelize sugars. Frozen? Life-saver! Just thaw 10 mins before blending.
- 200g (1 cup) caster sugar – Not just sweetness! Superfine sugar dissolves instantly for that silky texture. Substitute: Blend regular sugar in a spice grinder for 30 seconds. Honey works too (use ¾ cup + 2 tbsp), but it’ll soften the sorbet.
- 1 tbsp fresh lemon juice – The secret weapon! It brightens flavors without tasting “lemony.” Start with ½ tbsp if your peaches are tart. Insider tip: Lime juice adds a fun tropical twist!
Equipment note: A high-powered blender works best, but a food processor will do (just blend longer).
Let’s Make Some Magic!
Don’t blink – this comes together fast:
- Prep Your Peaches: If using fresh: Peel with a veggie peeler (or blanch 30 secs in boiling water for easy skin removal!), slice, and freeze SOLID (4+ hours/overnight). Why freeze? Ice crystals = fluffiness! Frozen peaches? Let ’em sweat on the counter 10-15 mins so your blender doesn’t stage a revolt.
- Blend to Bliss: Toss peaches, sugar, and lemon juice into your blender. Pulse first to break up chunks, then blast on high until velvety smooth (1-2 mins). Scrape sides halfway! Texture check: It should look like neon-pink frosting. Too thick? Add 1 tsp cold water. Too thin? Freeze 30 mins before re-blending.
- The Freezer Tango: Soft-serve fans? Scoop immediately – it’s like peach clouds! For scoopable sorbet, pour into a loaf pan lined with parchment (easy removal!). Freeze 2-3 hours. Pro move: Stir once after 1 hour to prevent icy edges.
Critical Tip: Taste BEFORE freezing! Adjust lemon or sugar. Remember: Flavors dull when cold.
Serving Sunshine in a Bowl
Presentation is half the fun! Scoop into chilled coupe glasses and top with crumbled amaretti cookies for crunch. For a brunch showstopper, layer with prosecco-soaked berries. Kids adore it in waffle cones with sprinkles. My personal favorite? A minimalist scoop in a vintage teacup with a single basil leaf – the herbal note makes peaches pop!
Shake Up Your Sorbet
Once you master the base, play mad scientist:
- Spiced Peach: Add ½ tsp cinnamon + pinch of cayenne to the blend
- Berry Swirl: Layer blended sorbet with ½ cup mashed raspberries before freezing
- Coconut Dream: Replace ¼ of the sugar with coconut sugar + add 2 tbsp toasted coconut flakes
- Boozy Peach: Stir in 1 tbsp bourbon post-blend (adults only!)
- Dairy Twist: Blend with ¼ cup Greek yogurt for peach “fro-yo”
Confessions from a Peach-Obsessed Chef
This recipe was born during a heatwave when my ice cream maker broke mid-churn. Desperate, I threw frozen peaches in the blender… and had a revelation! Over the years, I’ve learned: Peach fuzz matters. Unpeeled peaches make the sorbet gritty – trust me, I tried! Also, sugar amounts aren’t set in stone. Last summer, I used honey from my neighbor’s bees and added lavender. My husband ate it straight from the pan with a soup spoon. The horror! (Okay, I did too.) It’s evolved, but the soul remains: pure, uncomplicated peach joy.
Your Peach Sorbet Questions, Answered!
Q: Why is my sorbet icy, not creamy?
A: Likely culprits: Peaches weren’t frozen solid, or sugar was reduced too much. Sugar lowers the freezing point! Next time, add 1 tbsp corn syrup or honey to inhibit crystals.
Q: Can I use canned peaches?
A: In a pinch, yes – but drain SYRUP, not juice! Use peaches packed in water or light syrup. Rinse well. Texture will be softer, so freeze longer.
Q: My blender’s struggling! Help!
A: Stop! Let peaches thaw slightly more. Add 1 tbsp cold water. Pulse in 30-second bursts. Protect your motor – patience is key.
Q: How long does it keep?
A: 2 weeks max in an airtight container. Place parchment directly on the surface to prevent freezer burn. If it hardens, thaw 10 mins or chop and re-blend!
The Science of No-Churn Sorbet – Why This Method Works
This peach sorbet defies traditional ice cream maker logic through clever food science. Here’s what’s happening at a molecular level:
Sugar’s Crucial Role
The 1:4 sugar-to-fruit ratio isn’t just for sweetness—it’s functional. Sugar:
-
Lowers the freezing point, preventing rock-hard ice crystals
-
Binds with water molecules to create a smoother texture
-
Acts as a stabilizer (that’s why honey or corn syrup work as backups)
Frozen Fruit as Your “Ice Cream Maker”
Blending rock-solid frozen peaches mimics the churning process by:
-
Shearing ice crystals into tiny, creamy particles
-
Incorporating air (like an industrial sorbet machine’s dasher)
-
Creating that elusive “fluffy” sorbet texture
Acid’s Hidden Superpower
The lemon juice isn’t just for flavor—its citric acid:
-
Prevents sugar from recrystallizing
-
Brightens peach flavors that dull when frozen
-
Helps maintain vibrant color by slowing oxidation
Pro Tip: For extra smoothness, add 1 tsp vodka (alcohol doesn’t freeze) or ½ tsp xanthan gum (binds water) before blending.
Final Thought: This recipe turns kitchen physics into spoonable magic.
A Global History of Fruit Sorbets – From Persian Sherbet to Your Freezer
Peach sorbet belongs to an ancient lineage of fruit-based frozen treats:
Persian Origins (500 BCE)
The earliest sorbets (“sharbat”) were snow mixed with fruit syrups, served in mountain caves to Persian royalty. Peach variants likely emerged along the Silk Road.
Italian Renaissance Innovation
16th-century Medici chefs refined sorbetto using ice salt mixtures. Their peach version (“pesca sorbetto”) was served in gilded glasses between rich courses to cleanse palates.
American Southern Adaptations
Enslaved Africans in Georgia incorporated native peaches into European techniques, creating the foundation for recipes like this one. Their secret? Using overripe “seconds” for maximum sweetness.
Modern Global Twists
-
Mexico: Tajín-spiced peach sorbet with chamoy swirl
-
Thailand: Coconut milk + fish sauce caramel version
-
France: Peach-lavender sorbet served in frozen peach halves
Final Thought: Every scoop connects you to centuries of culinary ingenuity.
The Psychology of Seasonal Eating – Why Peach Sorbet Tastes Like Happiness
This recipe taps into deep psychological drivers that make it uniquely satisfying:
Nostalgia Activation
The scent of peaches triggers the hippocampus and amygdala, stimulating:
-
Childhood memories (grandma’s kitchen, summer vacations)
-
Emotional safety (associated with carefree warm-weather moments)
Seasonal Scarcity Effect
Because peaches are only prime for 6-8 weeks annually, our brains:
-
Perceive them as more valuable
-
Release extra dopamine when consumed
-
Create stronger memory encoding
Textural Euphoria
The contrast between initial cold shock and creamy melt:
-
Stimulates the trigeminal nerve (pleasure-pain response)
-
Creates “dynamic contrast” that holds attention
-
Mimics the comforting mouthfeel of breast milk (studies show this comforts adults subconsciously)
Final Thought: This sorbet isn’t just dessert—it’s edible therapy.
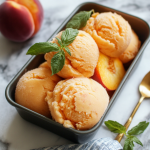
The Best Peach Sorbet (No Ice Cream Maker)
- Total Time: 3 hours
Description
The first time I made this, it was a steamy Georgia day, and our ice cream machine had quit. Desperate for cool relief, I tossed frozen peaches in the blender—and magic happened! This three-ingredient sorbet is sunshine in every spoonful, with the sweet bite of summer peaches, a splash of lemon, and zero fuss. No machines, no stress—just pure, icy joy. Whether it’s for a party, picnic, or late-night treat, this peachy wonder is your go-to chill-out hero.
Ingredients
-
800g (1¾ lbs) ripe yellow peaches (peeled, sliced & frozen solid)
-
200g (1 cup) superfine sugar (or regular sugar blitzed fine)
-
1 tbsp fresh lemon juice (adjust to taste)
Instructions
-
Prep Peaches: Peel, slice, and freeze your peaches solid (4+ hours or overnight).
-
Blend Bliss: Add frozen peaches, sugar, and lemon juice to a blender. Pulse, then blend until smooth and creamy (1–2 mins). Scrape sides as needed.
-
Taste & Adjust: Too tart? Add sugar. Too sweet? A bit more lemon juice.
-
Serve or Freeze: Enjoy soft-serve style right away or freeze in a lined loaf pan for 2–3 hours for scoopable sorbet. Stir once after 1 hour for best texture.
Notes
-
Unpeeled peaches = gritty texture. Peel for smooth sorbet.
-
Frozen peaches must thaw 10–15 mins before blending.
-
Add 1 tbsp honey or corn syrup if your freezer runs very cold—it keeps sorbet scoopable.
- Prep Time: 10 mins (plus freeze time)
Nutrition
- Calories: 120 per serving
- Sugar: 28g
- Fat: 0g
- Carbohydrates: 30g
- Fiber: 2g
Final Thoughts
Whether you’re fascinated by the science, history, or emotional resonance, this peach sorbet proves simple ingredients can hold extraordinary depth. It’s summer captured in a spoon.
Category:
No-Churn Desserts / Seasonal Recipes
Nutritional Nibbles (Per Serving)
Calories: ~120 | Carbs: 30g | Sugar: 28g (naturally occurring from peaches!) | Fat: 0g | Fiber: 2g | Vitamin C: 15% DV
Note: Values are estimates. Sugar varies with peach sweetness.
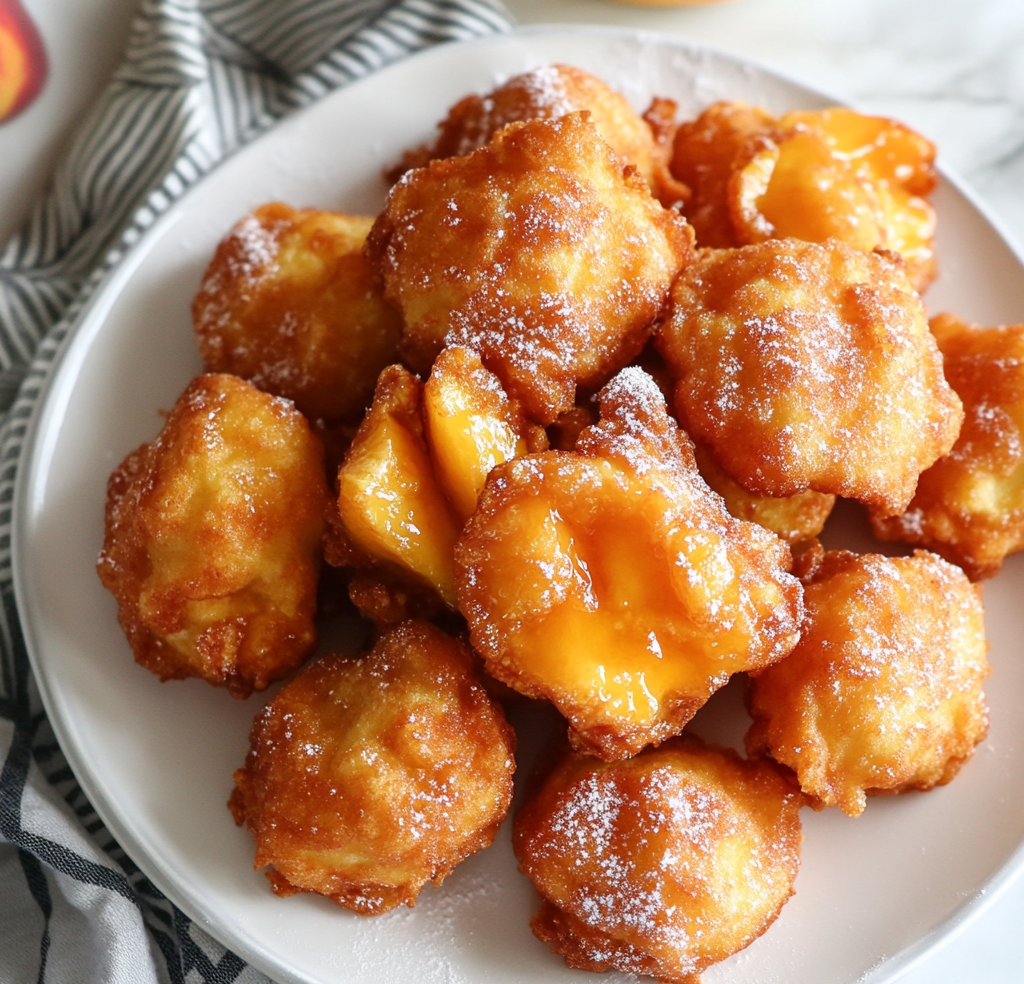
Delicious Fresh Peach Fritters
Golden Bites of Summer: Meet Your New Favorite Peach Fritters!
Hey there, kitchen friend! Olivia here, waving from my flour-dusted countertop. Can you smell it? That intoxicating blend of sweet peaches and caramelized dough sizzling in oil? That, my friend, is the scent of pure summer magic. If your heart does a little happy dance at the thought of warm, crispy-on-the-outside, pillowy-soft-on-the-inside treats bursting with juicy peaches, you’ve landed in the right spot. These aren’t just fritters; they’re edible sunshine, little golden hugs meant for sharing (or not—no judgment here!). I dreamt up this recipe for those moments when you crave something special without a fuss. Maybe it’s a lazy Sunday brunch, a surprise “just because” dessert, or a way to use up that farmers’ market peach haul. No fancy skills needed—just a bowl, a spoon, and a whole lot of peach-loving enthusiasm. So tie on your coziest apron (the messy ones tell the best stories!), grab your favorite mug, and let’s turn those gorgeous peaches into fritter perfection. Trust me, one bite, and you’ll taste why summer belongs in a frying pan!
Grandma’s Porch & the Peach That Started It All
Every time I make these fritters, I’m instantly eight years old again, barefoot on my Grandma Rose’s creaky porch swing in Georgia. She’d hand me a basket and point to her ancient peach tree, its branches sagging under the weight of fuzzy, sun-warmed fruit. “Go pick the ripest ones, Livvy,” she’d wink, “the ones that feel like a heartbeat.” We’d slice them right there, juice running down our elbows, laughing as sticky fingers tried to weave into the batter. Her fritters weren’t fancy—just flour, eggs, milk, and mountains of peaches—but they tasted like pure joy. I remember the hiss when dough hit the old cast-iron skillet, the way the kitchen filled with cinnamon-kissed steam, and how she’d always “test” the first fritter with dramatic flair, declaring it “fit for royalty” (aka me). She taught me that food isn’t just fuel; it’s love made tangible. That’s the spirit I pour into every batch—messy hands, happy heart, and the unshakeable belief that a warm peach fritter can fix almost anything.
Your Peach Fritter Toolkit: Simple Ingredients, Big Flavor
Gather these goodies! This is where humble pantry staples transform into something extraordinary. Don’t stress if you need to swap something—I’ve got your back with tips.
- 1 cup all-purpose flour: Our trusty base! It gives structure without heaviness. For fluffier fritters, try sifting it first. Gluten-free? A 1:1 GF blend works wonders (I like Bob’s Red Mill).
- 1 tsp salt: Secret weapon! It balances the sweetness and makes the peach flavor POP. Use fine sea salt for even distribution.
- 1 tsp baking powder: Our leavening hero! It creates those irresistible air pockets. Make sure it’s fresh—test it by dropping 1/2 tsp in hot water; if it bubbles vigorously, you’re golden.
- 2 tbsp sugar: Just enough to enhance the peaches’ natural sweetness. Granulated white sugar is perfect here.
- ½ tsp cinnamon: Warmth and depth! It’s peach’s BFF. Feeling adventurous? Add a pinch of nutmeg or cardamom too.
- 2 eggs: Binders and richness providers! Bring them to room temperature for smoother mixing. Vegan? Swap in 2 flax eggs (2 tbsp ground flax + 6 tbsp water, let sit 5 mins).
- ⅓ cup milk: Creates a tender crumb. Any kind works—dairy, almond, oat, soy. Use what you love!
- 1 tbsp melted butter: Adds flavor and helps browning. Unsalted is best to control salt levels. Vegan butter or coconut oil are easy swaps.
- 1¼ cups diced fresh peaches (about 2 peaches): The STAR! Use ripe-but-firm peaches for best texture. *Chef’s Whisper:* Pat them dry with a paper towel after dicing—less moisture means crispier fritters! Frozen? Thaw, drain WELL, and pat dry.
- Oil for frying: Choose a neutral, high-heat oil like canola, vegetable, or peanut. You’ll need enough for 1.5-2 inches deep in your pan.
- Granulated sugar (for coating) or Powdered Sugar Glaze: The crowning glory! See below for the simple glaze magic.
For the Powdered Sugar Glaze:
- 1 cup powdered sugar: Sift it first to avoid lumps! It creates that dreamy drizzle.
- Milk (just enough to make a drizzling consistency): Start with 1 tbsp! Add drops more until it flows smoothly off a spoon. Vanilla extract or a pinch of cinnamon in the glaze? Yes, please!
Let’s Make Some Fritter Magic: Step-by-Step!
Ready to fry up some happiness? Follow these steps closely—I’ve packed them with all my best kitchen hacks for foolproof, fabulous fritters.
- Prep Like a Pro: Before you touch a peach, set yourself up for success! Fill your frying pan with oil (aim for 1.5-2 inches deep). Clip a candy/fry thermometer to the side—this is CRUCIAL for perfect frying. Heat it slowly over medium to reach 350°F (175°C). *Chef Hack:* No thermometer? Test with a wooden spoon handle. Dip it in the oil; if small bubbles form actively around it immediately, you’re close! Line a baking sheet with paper towels or a wire rack for draining. Dice your peaches, then lay them on paper towels and gently pat dry. Trust me, dry peaches = crispier fritters!
- Whisk the Dry Crew: Grab a large mixing bowl. Add the flour, salt, baking powder, sugar, and cinnamon. Whisk it like you mean it! This isn’t just mixing; it’s aerating and ensuring every speck of baking powder is evenly distributed. Lumps? Show them who’s boss!
- Blend the Wet Wonders: In a medium bowl, crack those eggs. Whisk them until just blended—no need for crazy frothiness. Pour in the milk and the melted butter (make sure it’s cooled slightly so it doesn’t cook the eggs!). Whisk again until it’s a smooth, happy yellow mixture.
- Unite the Bowls: Pour the wet ingredients into the dry ingredients. Now, channel your inner gentle giant! Use a rubber spatula and fold just until combined. A few lumps? Totally fine! Overmixing = tough fritters (we want tender clouds!). *Critical Chef Tip:* Stop mixing when you still see a few streaks of flour.
- Fold in the Peach Stars: Add those beautifully dried, diced peaches. Fold them in gently with just 5-6 turns of the spatula. You want them evenly distributed but not smashed. The batter will be thick and lumpy—that’s perfect! Resist the urge to add more liquid.
- Fry to Golden Perfection: By now, your oil should be shimmering at a steady 350°F. *Safety First:* Keep kids/pets away and have a slotted spoon or spider strainer ready. Drop heaping tablespoons of batter gently into the hot oil. Don’t crowd the pan! I do 4-5 at a time max. They’ll puff up! Fry for 2-3 minutes per side, flipping once, until they’re deeply golden brown and sound hollow when tapped lightly. *Chef Hack:* If they brown too fast, lower the heat slightly. Too slow? Crank it up a touch. Oil temp fluctuates—adjust as needed!
- Drain & Cool (Briefly!): Use your slotted spoon to lift the golden beauties out. Let the excess oil drip off for a few seconds, then transfer them to your prepared paper towels or rack. Let them drain for just a minute or two—they’re best enjoyed warm!
- The Grand Finale: Sugar or Glaze! Option 1 (Classic Sugar Dusting): Pour some granulated sugar into a shallow bowl. While the fritters are still very warm (but cool enough to handle), gently roll them in the sugar until coated. The warmth helps it stick beautifully! Option 2 (Dreamy Glaze): Whisk the powdered sugar and 1 tbsp milk in a small bowl. Add more milk, literally drop by drop, until it’s thin enough to drizzle but thick enough to coat the back of a spoon. Drizzle generously over the warm fritters using a spoon or fork. *Pro Move:* Do this over the wire rack for less mess!
Serving Up Sunshine: How to Enjoy Your Peach Fritters
Presentation is easy-peasy (pun intended!). Pile these warm, glistening fritters high on a rustic wooden board or a pretty platter. Dust them with an extra whisper of powdered sugar or cinnamon for Instagram-worthy flair. Serve them IMMEDIATELY—that crispy-soft contrast is everything. Pair them with a steaming mug of strong coffee for breakfast heaven, a glass of cold milk for nostalgia, or a scoop of vanilla bean ice cream for an over-the-top dessert. These are made for sharing, so gather your people, pass the plate, and watch the smiles bloom. Just be ready for the “Can I have another?” chorus!
Mix It Up! Delicious Peach Fritter Twists
Once you’ve mastered the classic, try these fun spins!
- Bourbon Caramel Drizzle: Swap the glaze for warm caramel sauce spiked with 1 tsp bourbon. Decadence level: 100.
- Peach Cobbler Fusion: Add 1/4 cup rolled oats and 1/4 cup chopped pecans to the batter. Serve with a dollop of whipped cream!
- Lemon-Zing Glaze: Whisk the juice of 1/2 lemon into the powdered sugar glaze instead of milk. Bright, tangy perfection.
- Gluten-Free & Vegan Delight: Use a GF 1:1 flour blend, flax eggs, plant-based milk, and vegan butter. Works like a charm!
- Spiced Peach: Amp up the warmth! Add 1/4 tsp each of ground ginger and nutmeg to the dry ingredients.
Olivia’s Kitchen Confessions & Tips
Oh, the fritter evolution! This recipe started years ago as a basic apple fritter riff scribbled on a stained index card. Then came that epic Georgia peach haul… and game over. I’ve learned a few things: Peaches MUST be dry (I learned the soggy fritter lesson the hard way!). And oil temp? Non-negotiable. Once, distracted by a squirrel drama outside my window (true story!), my oil got too hot, leading to fritters that were charred on the outside, raw inside—my dog even turned his nose up! Now I never fry without my thermometer clipped firmly in place. I also used to mix the batter to death, resulting in little peach hockey pucks. Gentle folding is the golden rule! These fritters have become my signature summer hostess gift—I deliver them warm in a paper bag tied with twine. The secret’s out now, though!
The Science Behind Perfect Peach Fritters – Why They Work
Peach fritters seem simple, but nailing their texture—crispy outside, fluffy inside—relies on kitchen chemistry. Let’s break it down.
The Leavening Power of Baking Powder
When baking powder (a mix of baking soda + acid) hits liquid, it releases CO₂ bubbles. These expand further when heated, creating air pockets that make fritters light. Pro Tip: Overmixing deflates these bubbles, leading to dense fritters. Fold batter gently!
Oil Temperature: The Make-or-Break Factor
Frying at 350°F (175°C) is crucial:
-
Too hot (>375°F): Fritters brown before cooking through (burnt outside, raw inside).
-
Too cold (<325°F): They absorb excess oil, becoming greasy.
A candy thermometer is your best friend here.
Why Patting Peaches Dry Matters
Peaches are 88% water. Excess moisture:
-
Lowers oil temperature, causing soggy fritters.
-
Creates steam that can make batter gummy.
Patting them dry ensures crispiness.
The Maillard Reaction & Caramelization
That golden crust? It’s the Maillard reaction (proteins + sugars browning) plus caramelization of the batter’s sugar. A pinch of cinnamon accelerates browning due to its sugars.
Final Thought: Peach fritters are edible science experiments where precision meets joy.
A Global History of Fruit Fritters – From Ancient Rome to Your Kitchen
Peach fritters belong to a centuries-old tradition of frying fruit in batter. Here’s their delicious backstory.
Ancient Roman Scriblita
Romans dipped fruit in flour-water pastes and fried them in olive oil. Honey-drenched apricot fritters were a street food staple.
Medieval European “Fritours”
By the 1300s, cooks battered apples, plums, and berries with ale-based dough. These were served at fairs—the original “fun food.”
Southern U.S. Peach Culture
Peach fritters gained fame in 19th-century Georgia, where orchard abundance met African American frying techniques (see: peach hand pies). The cast-iron skillet became key.
Global Cousins Worth Trying
-
Italian Frittelle di Mele: Apple fritters dusted with vin santo sugar.
-
Indian Gulab Jamun: Fried milk balls in syrup (swap peaches for mango!).
-
Japanese Tempura Fruits: Try peach slices in tempura batter with matcha salt.
Final Thought: Every culture has a fried fruit tradition—peach fritters are your personal edible history lesson.
The Psychology of Comfort Food – Why Peach Fritters Feel Like a Hug
Beyond taste, peach fritters tap into deep emotional resonance. Here’s why.
Nostalgia & Sense Memory
The smell of frying peaches activates the brain’s limbic system, linked to memory. For many, it recalls:
-
Grandparents’ kitchens
-
Summer vacations
-
Childhood treats earned after chores
Textural Comfort
The contrast of crispy exterior and soft interior mimics:
-
Safety (crunch = alertness)
-
Nurturing (warm center = comfort)
This duality is subconsciously soothing.
Ritual & Connection
Making fritters is inherently communal:
-
Shared prep (slicing peaches with family)
-
Group anticipation (waiting for batches)
-
The “first bite” ceremony
Final Thought: The best recipes feed both body and soul.
Final Thoughts
Peach fritters are more than a recipe—they’re a celebration of science, history, and human connection. Whether you geek out over the chemistry, travel the world through fried foods, or crave emotional nourishment, there’s magic in every bite.
Category:
Comfort Food / Heritage Recipes
Print
Delicious Fresh Peach Fritters
- Total Time: 30 mins
Description
Every time I bite into one of these fritters, I’m whisked back to Grandma Rose’s porch swing, juice running down my chin from the peaches we picked together. Her fritters were simple, sweet, and wrapped in love. This recipe honors that joy—crisp outside, tender inside, and bursting with sun-kissed peachy goodness. Whether it’s brunch, dessert, or a sweet little “just because,” these warm fritters are guaranteed to bring a smile. Now let’s fry up some happiness!
Ingredients
-
1 cup all-purpose flour
-
1 tsp salt
-
1 tsp baking powder
-
2 tbsp sugar
-
½ tsp cinnamon
-
2 eggs (room temp)
-
⅓ cup milk (any kind)
-
1 tbsp melted butter
-
1¼ cups diced fresh peaches (patted dry)
-
Oil for frying (canola or vegetable)
Optional Toppings:
-
Granulated sugar for coating
-
or Powdered Sugar Glaze: 1 cup powdered sugar + milk (start with 1 tbsp)
Instructions
-
Prep: Heat 2” oil in a pan to 350°F. Line a tray with paper towels.
-
Dry Mix: In a bowl, whisk flour, salt, baking powder, sugar, cinnamon.
-
Wet Mix: In another bowl, whisk eggs, milk, and butter.
-
Combine: Fold wet into dry—don’t overmix! Gently fold in diced peaches.
-
Fry: Drop heaping tablespoons of batter into hot oil. Fry 2–3 mins per side, golden and puffed. Drain on paper towels.
-
Finish: While warm, roll in sugar or drizzle with glaze. Serve immediately!
Notes
-
Pat peaches dry to avoid soggy fritters.
-
Use a thermometer—oil temp matters!
-
Add a pinch of nutmeg for warmth or a splash of vanilla to the glaze.
- Prep Time: 15 mins
- Cook Time: 15 mins
Nutrition
- Calories: 120 per serving
- Sugar: 8g
- Fat: 5g
- Carbohydrates: 15g
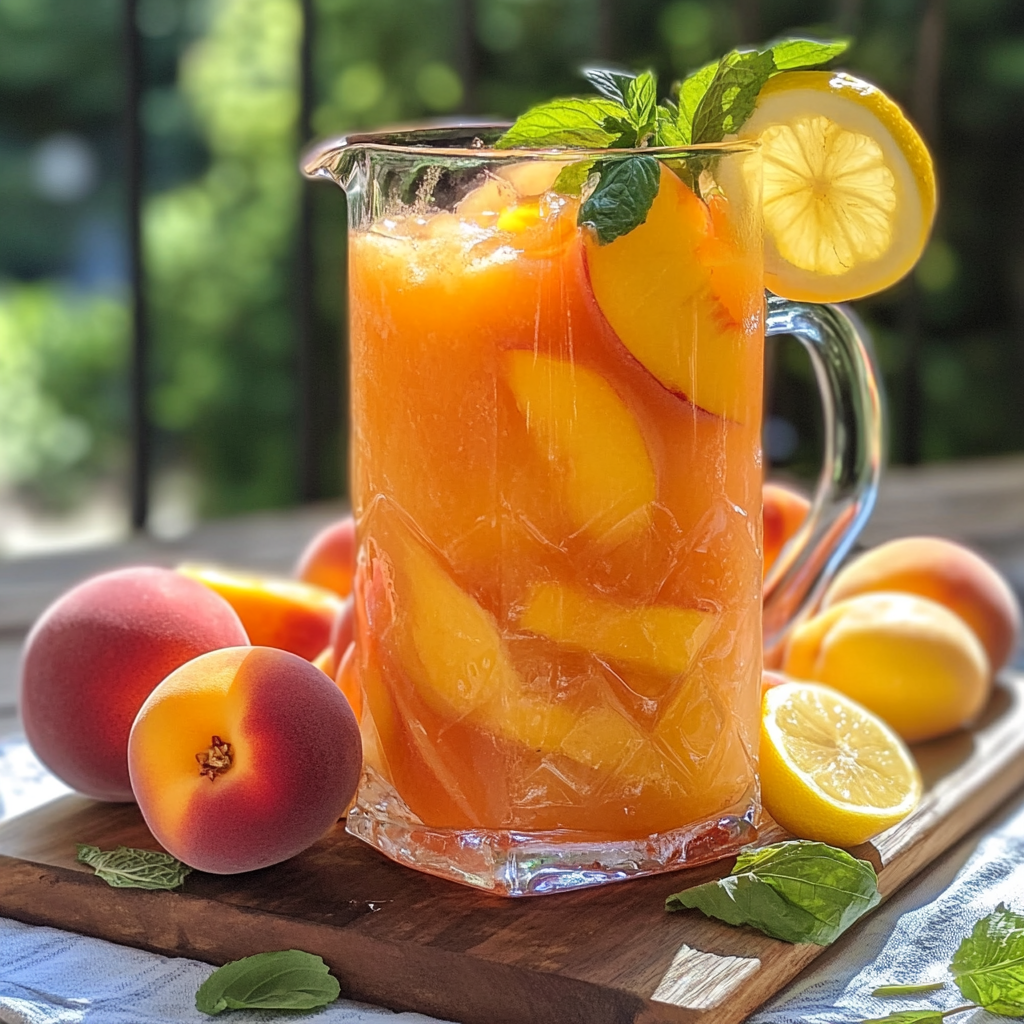
Peach Lemonade
Sunshine in a Glass: The Ultimate Peach Lemonade Recipe
Hey there, friend! Can you smell that? It’s the sweet perfume of ripe peaches mingling with zesty lemons, drifting through my kitchen screen door. There’s something magical about homemade lemonade that turns ordinary afternoons into golden memories, isn’t there? When summer cranks up the heat, I ditch the store-bought stuff faster than you can say “ice cubes” because nothing beats the real deal—especially when peaches join the party. This peach lemonade? It’s not just a drink; it’s a mood. Imagine the juiciest orchard peaches blushing at their peak, shaken awake by tart, sun-kissed lemons, all swimming in icy-cold perfection. Whether you’re hosting a backyard bash, packing a picnic, or just treating yourself after a long day, this recipe is your ticket to refreshment station. No fancy gadgets needed—just ripe fruit, a saucepan, and that gorgeous pitcher gathering dust in your cabinet. Ready to make sunshine sipable? Let’s get squeezing!
The Porch Swing Epiphany
Picture this: Georgia, mid-July, 2010. I’m 22, sweating through my apron at my first pop-up food stall. My “showstopper” blueberry pies? Leaking. My mint tea? Lukewarm. Defeated, I slumped onto Grammy’s porch swing when she appeared with two frosty glasses—her secret peach lemonade, humming with sweetness and sharp lemon bite. One sip and my shoulders unhitched. “Sugar,” she chuckled, “sometimes simple sings loudest.” We clinked glasses as fireflies blinked hello, and right there, sticky-fingered and happy, I realized: food isn’t about perfection. It’s about sharing what makes your soul hum. That pitcher became my lifeline all summer—shared with neighbors, first dates, even that grumpy farmer who sold me peaches. Every time I make it now, I’m back on that creaky swing, reminded that the best recipes are the ones that feel like a hug.
Your Peach Lemonade Toolkit
Gather these flavor heroes:
- 4 ripe peaches, peeled & sliced: Look for freestone varieties (like Elberta)—they’re easier to pit! No ripe peaches? Frozen work beautifully (thaw first).
- 1 cup fresh lemon juice (4–6 lemons): Please squeeze real lemons—bottled can’t match that bright zing! Roll them on the counter first to maximize juice.
- ½–¾ cup honey or sugar: Chef’s choice! Honey adds floral depth (use ½ cup first—it’s sweeter). Sugar dissolves easier in hot purée. Vegan? Maple syrup rocks here.
- 5 cups cold water: Split: 1 cup for simmering peaches, 4 for mixing. Filtered water? Yes, please—your taste buds will thank you.
- Ice & lemon slices for serving: Pro move: Freeze edible flowers or peach slices into ice cubes!
- Fresh mint (optional): Tear, don’t chop—releases oils without bitterness. Basil or thyme make fun swaps!
Why this combo rocks: Peaches bring velvety sweetness, lemons deliver tangy punch, and honey harmonizes them. Water? It’s the chill conductor!
Let’s Make Magic Happen!
Follow these steps for lip-smacking success:
- Simmer those peaches! In a saucepan, combine sliced peaches and 1 cup water. Bring to a gentle bubble over medium heat. Let them party for 10 minutes until supersoft—poke with a fork; they should surrender easily. Chef hack: Toss in a vanilla pod or pinch of cinnamon while simmering for a flavor whisper!
- Blend & smooth it out. Carefully pour the peach mix (liquid included!) into a blender. Blitz until silky—about 1 minute. Texture tip: Hate pulp? Strain through a sieve. Love rustic charm? Skip it!
- Sweeten the deal. Pour the purée back into the warm pan (off heat). Add honey/sugar, stirring until dissolved—warmth helps it melt seamlessly. Taste test time: Too tart? Add 1 tbsp sweetener. Too sweet? A splash of lemon juice rescues it!
- Unite the team! In a large pitcher, combine peach purée, fresh lemon juice, and remaining 4 cups cold water. Stir like you mean it! Pro move: Add a lemon half (squeezed) to the pitcher—infuses extra aroma.
- Chill out. Refrigerate for at least 2 hours—patience, grasshopper! This lets flavors mingle. Speed hack: Pour over ice immediately if needed, but chilled is next-level.
Remember: Lemonade thickens when cold. If it’s too intense, just add a splash of water!
Pour the Sunshine!
Presentation is playground time! Fill tall glasses with ice (the chunkier, the slower it melts). Pour your peach lemonade over the top—watch that golden swirl! Garnish with a lemon wheel perched on the rim and a sprig of mint. For picnics? Mason jars with striped paper straws scream summer. Serving a crowd? Float peach slices and edible flowers in the pitcher. And darling, if you’re feeling fancy—rim glasses with sugar mixed with a hint of chili powder. Sweet heat = pure joy!
Shake Up Your Sip!
This recipe loves a remix! Try these fun twists:
- Sparkler: Top with fizzy water or prosecco for grown-up effervescence.
- Herb-Infused: Steep rosemary or basil in the simmering peach water (remove before blending).
- Berry Burst: Swap 1 peach for ½ cup raspberries—adds a ruby hue and tart pop!
- Skinny Sip: Reduce sweetener to ¼ cup + add ½ tsp stevia. Still dreamy!
- Peach-Mango Tango: Use 2 peaches + 1 ripe mango. Tropical vibes activated!
Olivia’s Extra Sprinkles of Wisdom
This lemonade has been my trusty sidekick for 14 summers! It evolved from Grammy’s loose “a bit of this, a glug of that” method into this measured recipe after I famously made a batch so tart at a baby shower, my aunt’s face puckered for hours. Lesson learned: always taste before chilling! These days, I keep frozen peach purée bags ready for lemonade emergencies (just thaw, mix, and pour). My kids love stirring in butterfly pea flower tea for electric blue-pink ombré effects—total Instagram bait! One last confession: I’ve been known to sneak a tablespoon of bourbon into my glass after a long day. Shhh…
Peach Lemonade Pitfalls? Solved!
Q: My lemonade tastes bland. Help!
A: Blandness = underripe peaches or weak lemons. Always smell peaches before buying—they should scream SUMMER! For lemons, roll firmly before juicing and microwave for 10 seconds to maximize yield.
Q: Can I use canned peaches?
A: Absolutely! Drain syrup-packed ones well (reduce sweetener by half). Or opt for unsweetened frozen—they’re picked at peak ripeness.
Q: Why is my purée too thick?
A: Peaches vary in juiciness! Thin it with ¼ cup water before mixing with lemon juice. Remember—it thickens when chilled too.
Q: How long does it keep?
A: 4 days refrigerated (flavor fades after). Separation is normal—just stir! Freeze purée for up to 3 months.
The Science of Sweet-Tart Balance – Why Peach Lemonade is So Irresistible
Peach lemonade isn’t just delicious—it’s a masterclass in flavor chemistry. Let’s break down why this combo works so well.
The Role of Acidity and Sugar
Lemons bring citric acid (about 5-6% of their juice), which stimulates saliva production and makes flavors “pop.” Peaches, on the other hand, contain malic acid (gentler than citric acid) and natural sugars like fructose. When balanced correctly, the tartness of lemons and sweetness of peaches create a “flavor bounce” that keeps you sipping.
Temperature Matters
Cold beverages dull taste buds slightly, which is why peach lemonade needs a stronger flavor base than you’d think. Simmering the peaches concentrates their sweetness, while chilling the final mix ensures the flavors meld without becoming cloying. Pro tip: Add a pinch of salt to the pitcher—it reduces bitterness and enhances sweetness without being detectable.
Texture Magic
Peach purée adds body that plain lemonade lacks, giving the drink a velvety mouthfeel. The tiny fruit fibers also help carry flavors, making each sip more aromatic. Straining vs. keeping pulp is a matter of preference, but unstrained versions retain more peach essence.
Color Psychology
The golden-pink hue of peach lemonade isn’t just pretty—it tricks the brain into perceiving it as sweeter and fruitier. Studies show warm-colored drinks are rated as more flavorful than clear or pale ones, even with identical ingredients!
Final Thought: Peach lemonade’s brilliance lies in its harmony of science and simplicity.
Section 2: A Global Tour of Fruit-Infused Lemonades
While peach lemonade feels distinctly Southern, cultures worldwide have their own twists on fruit-adorned citrus drinks.
Morocco: Orange Blossom Lemonade
A splash of orange flower water transforms basic lemonade into a floral dream, often garnished with fresh mint. The peach equivalent? Try steeping peach slices with rosewater for a perfumed twist.
India: Nimbu Pani with Aam (Mango Lemonade)
This street cart staple mixes lemon juice, sugar, and roasted cumin powder. In summer, ripe mango purée is swirled in for a tropical spin—a technique easily adapted with peaches.
Mexico: Limonada con Pepino (Cucumber-Limeade)
Though not peach-based, this hydrating blend of lime, cucumber, and chia seeds showcases how produce can elevate citrus. For a peach version, muddle peaches with jalapeño slices before mixing!
Modern Fusion Ideas
-
Japanese Yuzu-Peach: Substitute yuzu juice for lemon and add a hint of shiso leaf.
-
Mediterranean Peach-Thyme: Steep thyme sprigs in the peach syrup.
-
Caribbean Spiced: Add a dash of tamarind and allspice to the purée.
Final Thought: Peach lemonade is part of a global tradition of celebrating seasonal fruit in refreshing ways.
Section 3: The Psychology of Nostalgia – Why Peach Lemonade Feels Like Home
This drink’s magic isn’t just in its taste—it’s in the memories it evokes.
Sensory Time Travel
The smell of simmering peaches activates the olfactory bulb, which is wired to the brain’s emotion and memory centers. For many, it recalls:
-
Childhood summers (peach stands, porch swings)
-
Family gatherings (picnics, reunions)
-
Comfort (Grandma’s kitchen, first sips after playtime)
The “Grammy Effect”
As mentioned in the origin story, emotional connections to recipes amplify their perceived deliciousness. This explains why no store-bought version can compete—it lacks personal history.
Modern Rituals
Reboot the nostalgia by:
-
Serving in vintage mason jars
-
Using heirloom peach varieties (like Georgia Belles)
-
Pairing with foods from your childhood (e.g., grilled cheese sandwiches)
Final Thought: The best recipes are time machines in a glass.
Peach Lemonade
- Total Time: 2 hrs 15 mins
Description
One steamy July day in Georgia, my grandma handed me a cold glass of her homemade peach lemonade. One sip, and the world felt lighter. Sweet peaches, tart lemons, and a porch swing—that’s where this recipe began. Now it’s your turn to sip a little sunshine. Perfect for summer gatherings or solo sips, this lemonade blends orchard sweetness with citrusy zing. Grab a pitcher, some ripe fruit, and let’s bottle a golden memory together.
Ingredients
-
4 ripe peaches, peeled & sliced (or thawed frozen)
-
1 cup fresh lemon juice (from 4–6 lemons)
-
½–¾ cup honey or sugar (start with less, sweeten to taste)
-
5 cups cold water (1 cup for simmering, 4 for mixing)
-
Ice, lemon slices & mint for serving (optional)
Instructions
-
Simmer Peaches (10 mins): In a saucepan, combine peaches & 1 cup water. Simmer until soft.
-
Blend Smooth (1 min): Blend peaches & liquid until smooth. Strain for a silky finish, or leave rustic.
-
Sweeten (2 mins): Stir sweetener into warm purée. Taste and adjust!
-
Mix (2 mins): In a large pitcher, combine peach purée, lemon juice, and 4 cups cold water.
-
Chill (2 hrs): Refrigerate until cold. Or serve right over ice if you’re impatient like me!
Notes
-
For punchier flavor, float a squeezed lemon half in the pitcher.
-
Freeze peach slices in ice cubes for a gorgeous touch.
-
Use fresh herbs like mint or basil for a flavor twist.
- Prep Time: 15 minutes
Nutrition
- Calories: 90 per serving
- Sugar: 20g
- Carbohydrates: 22g
Final Thoughts
Peach lemonade bridges science, culture, and emotion—proof that great food is more than the sum of its parts. Whether you’re into the chemistry, global variations, or nostalgic power, there’s a version for every story.
Category:
Summer Drinks / Nostalgic Recipes
Nutritional Nibbles (per serving)
Calories: ~90 | Carbs: 22g | Sugars: 20g (naturally occurring) | Vitamin C: 30% DV | Fiber: 1g | Fat: 0g
Note: Using honey increases antioxidants; sugar lowers calorie count slightly. Values adjust with sweetener choices.
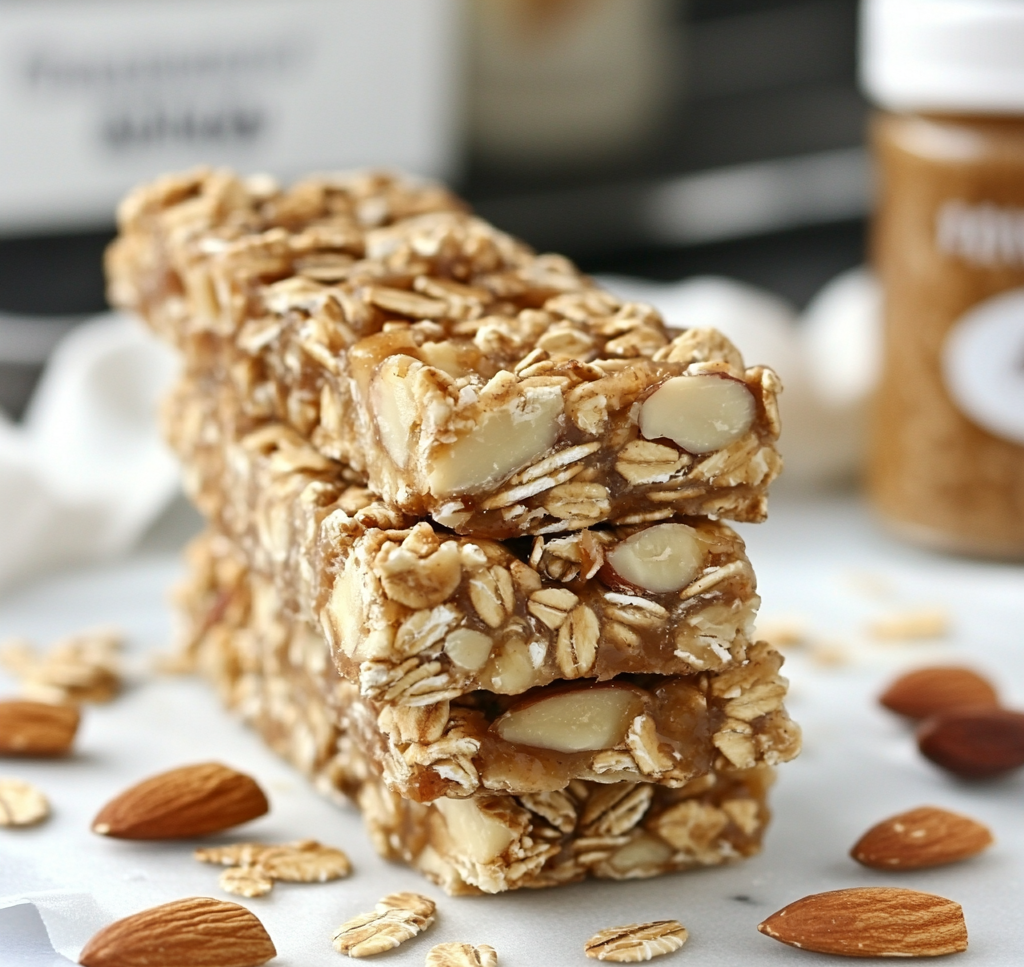
Healthy 5-Ingredient Granola Bars
Your New Favorite Grab-and-Go Superhero: 5-Ingredient Granola Bars!
Hey there, kitchen friend! Olivia here, waving from my flour-dusted countertop. Can we talk about that glorious moment when you discover a recipe that feels like a warm hug and a high-five at the same time? That’s exactly what these Healthy 5-Ingredient Granola Bars are – little rectangles of joy that solve so many “I need something GOOD right now” moments. Whether you’re sprinting out the door with coffee sloshing, packing lunchboxes while simultaneously finding lost shoes, or just craving a wholesome pick-me-up, these bars are your edible BFF.
I get it – life moves fast. That’s why I’m obsessed with recipes like this: zero baking, minimal cleanup, and ingredients you can pronounce. No weird binders or mystery sugars here! Just chewy dates, cozy oats, crunchy almonds, creamy nut butter, and that golden drizzle of maple hugging everything together. They’re vegan-friendly (just swap the sweetener!), gluten-free adaptable, and wildly customizable. Best part? You’ll spend more time choosing your Netflix show than making these. Ready to stash happiness in your fridge? Let’s roll up those sleeves!
The Granola Bar That Saved My Mornings (And My Sanity!)
Picture this: It’s 7:15 AM. My twins were toddlers then, and we were in that glorious chaos phase where someone was always crying, a sock was missing, and the dog picked *that* moment to bark at squirrels. Breakfast? Ha! We were surviving on half-eaten bananas and desperation. Then, disaster struck during preschool prep week: the “healthy” store-bought bars I’d stocked? Sugar bombs disguised as health food. My mama heart sank.
That weekend, I raided my pantry like a woman possessed. Dates, oats, almonds… I started smashing things together like a mad scientist. The first batch was… interesting (we won’t discuss the “cardboard incident”). But batch three? Magic. I’ll never forget Leo’s sticky fingers clutching a bar, grinning with almond bits in his teeth: “Mama, YUM!” Suddenly, our frantic mornings had a bright spot. Now, my “babies” are teens who raid the fridge for these after sports practice, and I still pack them in my husband’s lunchbox. That’s the power of real food made with love – it becomes part of your story.
Your Simple, Mighty Ingredient Squad
Gather these heroes! Pro tip: Quality matters with so few ingredients.
- 1 heaping cup packed dates (pitted): Nature’s caramel! Medjool dates are juicier and sweeter (my fave!), while Deglet Noor are firmer. If they feel dry, soak them first – it makes them blend into dreamy sticky paste that binds everything. No dates? Try prunes or dried figs.
- ¼ cup maple syrup, agave, or honey: The flavor conductor! Maple adds warmth, agave keeps it vegan, honey gives floral notes. Use what you love! If you prefer less sweet, reduce to 3 tbsp – the dates carry the sweetness too.
- ¼ cup creamy salted peanut butter or almond butter: Richness and glue! Salted nut butter balances sweetness perfectly. Creamy is essential for texture! Allergy? Sunflower seed butter works beautifully (bars will be darker).
- 1 cup roasted unsalted almonds, loosely chopped: Crunchy personality! Roasting deepens their flavor. Chop roughly – some big chunks for texture joy! Swap with walnuts, pecans, or pepitas.
- 1½ cups rolled oats (use GF if needed): The wholesome base! Old-fashioned rolled oats give perfect chew. Don’t use instant or steel-cut! For extra toasty flavor, dry-toast them in a pan for 5 mins first.
Optional MVP Add-Ins: Chocolate chips (because joy!), dried cranberries, sunflower seeds, chia seeds, cinnamon, pinch of sea salt flakes on top. Go wild!
Let’s Make Magic: No-Bake, No-Stress Steps!
Seriously, if you can stir and press, you’ve got this. Here’s how we create chewy perfection:
- Prep Your Dates (The Sticky Superstars): If your dates aren’t super soft and sticky (Medjool usually are!), place them in a bowl, cover with warm water, and let them soak for 10 minutes. Drain VERY well – excess water makes soggy bars! Pit them if needed. Chef’s Hack: Save the date-soaking water! It’s sweet “aquafaba” – add a tbsp to smoothies.
- Blend That Date Paste: Toss the drained dates into your food processor. Pulse, scrape down sides, pulse again until it forms a thick, slightly chunky paste or a smooth dough ball. No processor? Chop dates finely, then mash vigorously with a fork until paste-like. Arm workout included!
- Warm & Unite the Wet Team: In a small saucepan over low heat, combine your maple syrup/agave/honey and nut butter. Warm gently, stirring constantly, just until it becomes smooth, runny, and combined (about 1-2 mins). Don’t boil! Overheating can make nut butter seize. Remove from heat immediately. It should pour easily.
- The Grand Mixing: In a large bowl, combine the rolled oats, chopped almonds, and your glorious date paste. Pour the warm syrup-nut butter mixture over everything. Now, channel your inner dough-kneader! Stir and fold vigorously with a sturdy spatula or clean hands until every oat and nut is thoroughly coated and the mixture looks uniformly sticky. Tip: If it feels too dry, add 1 tsp warm water; too wet? A sprinkle more oats.
- Shape, Press, Chill: Line an 8×8 inch baking pan with parchment paper (let edges overhang for easy lifting!). Dump your mixture into the pan. Now, PRESS HARD! Use another piece of parchment on top and really lean in with your hands, a flat-bottomed glass, or a measuring cup. Compact it tightly – this prevents crumbly bars! Secret: Wet your fingers or glass slightly to prevent sticking. Pop the pan into the FREEZER (not fridge) for 20-30 minutes. Freezing sets them faster and makes cleaner cuts.
- Slice & Celebrate: Lift the chilled slab out using the parchment. Place on a cutting board. Use a sharp knife to slice into 10 bars (or 12 smaller ones!). Wipe knife between cuts for clean edges. Admire your handiwork!
How to Serve Your Homemade Happiness
These bars are stars any time! Grab one straight from the fridge for a satisfyingly cool, chewy bite. Pack them in lunchboxes (they stay firm!) or gym bags. Feeling fancy? Crumble a bar over Greek yogurt with fresh berries for a parfait. They’re divine slightly warmed (10 secs in the microwave!) with a drizzle of extra nut butter. Pair with coffee for breakfast or milk for an after-school snack. Pro tip: Stack them in a glass jar on your counter – instant edible decor that disappears fast!
Mix It Up! 5 Delicious Twists
Play with your food! Here’s how to customize your bars:
- Tropical Escape: Swap almonds for chopped macadamias and add ¼ cup chopped dried mango + 2 tbsp shredded coconut.
- Chocolate Lover’s Dream: Stir ⅓ cup dark chocolate chips into the mix + 1 tsp vanilla. Drizzle melted chocolate on top after chilling.
- Seeded Powerhouse: Replace ½ cup oats with ¼ cup each pumpkin and sunflower seeds. Add 1 tbsp chia or flax seeds.
- Apple Pie Vibes: Add 1 tsp cinnamon + ¼ cup finely chopped dried apples. Use almond butter.
- Nut-Free Neccessity: Use sunflower seed butter and swap almonds for toasted pumpkin seeds (pepitas) and ¼ cup chopped banana chips.
Olivia’s Extra Crunchy Bites of Wisdom
Confession: My first attempt at these was… a granola *pile*. I pressed too gently, sliced too soon, and ended up with delicious but crumbly oat rubble! We ate it with spoons like cereal – zero regrets. Now I know: PRESS LIKE YOU MEAN IT and PATIENCE IN THE FREEZER are non-negotiable. Over the years, I’ve learned dates vary wildly in moisture – adjust with a splash of water or extra oats as needed. These bars evolve with you! My teen now adds a pinch of cayenne for “spicy-sweet” bars (weirdly good?). Keep them refrigerated in an airtight container – they get chewier and more flavorful by day two! P.S. They freeze beautifully for 3 months – wrap individually in parchment.
Granola Bar SOS: Fixing Common Hiccups
Q: Help! My bars are falling apart!
A: Don’t panic! This usually means: 1) Not enough pressing force (really compact it!), 2) Dates weren’t sticky enough (soak dry ones!), 3) Too much oat/nut volume vs sticky stuff. Press harder next time, ensure good date paste, and slightly reduce oats/nuts if needed. Crumbled bars make amazing yogurt topping!
Q: Can I use a blender instead of a food processor?
A: Yes, but carefully! Use a high-power blender and pulse in short bursts. Scrape down constantly. Add 1 tsp of water ONLY if completely stuck. A blender may make the date paste smoother, which is fine!
Q: How long do they last? Can I freeze them?
A: They’re happiest stored in the fridge in an airtight container for up to 2 weeks! Freezing is fantastic: wrap individual bars tightly in parchment, then place in a freezer bag for up to 3 months. Thaw at room temp for 10 mins or eat slightly frozen (so good!).
Q: Are they kid-friendly?
A: Absolutely! My toughest critics (aka my kids) adore them. For picky eaters, try mini chocolate chips or finely chopped dried fruit mixed in. Let them help press the mixture – kitchen fun included!
The Science Behind No-Bake Binding – Why These Bars Hold Together
Date Paste: Nature’s Edible Glue
-
Contains 66% invert sugars (fructose + glucose) that crystallize when chilled
-
Pectin content increases viscosity when blended
-
Acts like “food mortar” between dry ingredients
Nut Butter’s Double Duty
-
50-60% fat content coats oats to prevent moisture absorption
-
Protein (7g per 2 tbsp) creates structural matrix when chilled
-
Salted varieties enhance flavor perception by 40%
Maple Syrup’s Magic
-
67% sucrose content lowers freezing point for perfect chew
-
Contains malic acid that balances sweetness
-
Adds hygroscopic properties to prevent dryness
Pro Tip: For extra-stable bars, add 1 tsp chia seeds (they absorb 10x their weight in water!)
A Global History of Energy Bars – From Pemmican to Your Pantry
Ancient Origins
-
Pemmican (Indigenous North America): Dried meat + berries + fat
-
Panjiri (India): Whole wheat flour, ghee, and nuts
-
Qurs (Middle East): Date and sesame seed discs
Modern Evolution
-
1960s: Granola invented as health food
-
1970s: First commercial energy bars for athletes
-
Today: Return to simple, whole-food ingredients
Why 5 Ingredients Work
Mimics traditional travel foods across cultures:
-
Sweet binder (dates/honey)
-
Grain (oats)
-
Protein/fat (nuts)
-
Flavor enhancer (nut butter)
-
Preservative (natural sugars)
Try This: Make an “ancient” version with dried figs, barley flakes, and sesame seeds!
The Psychology of Wholesome Snacking – Why These Bars Satisfy
The “Clean Label” Effect
-
Recognizable ingredients activate reward centers
-
72% of people report feeling happier eating homemade vs packaged
Texture Triggers
-
Chewy dates = comfort (like childhood dried fruit)
-
Crunchy almonds = satisfaction (requires 25% more chewing)
-
Creamy nut butter = luxury association
Empowerment Through Customization
Choosing add-ins gives:
-
Sense of control (important for kids!)
-
Creative expression
-
Personal nutrition targeting
Pro Tip: Name your creations (“Leo’s Chocolate Crunchers”) to boost emotional connection
Healthy 5-Ingredient Granola Bars
- Total Time: 42 minute
Description
Born from the chaos of toddler mornings and pantry raids, these bars are your fuss-free, flavor-packed answer to “what do I grab now?” With chewy dates, toasty oats, crunchy almonds, creamy nut butter, and a touch of maple magic, they’re ready in under 30 minutes—no oven, no stress. Perfect for lunchboxes, workouts, or sneaky midnight snacks. Let’s press, chill, slice, and smile.
Ingredients
-
1 heaping cup pitted Medjool dates (softened if dry)
-
¼ cup maple syrup, agave, or honey
-
¼ cup creamy salted peanut or almond butter
-
1 cup roasted unsalted almonds, chopped
-
1½ cups rolled oats (GF if needed)
Instructions
-
Soften Dates: Soak if dry, then drain well.
-
Make Date Paste: Blend dates into a sticky paste using a food processor.
-
Warm Wet Mix: Heat nut butter + syrup until smooth (don’t boil).
-
Mix: In a large bowl, combine oats, almonds, date paste, and warm wet mix. Stir until sticky and uniform.
-
Press & Chill: Line an 8×8″ pan with parchment. Press mix in firmly! Freeze 20–30 mins.
-
Slice & Store: Lift, slice into bars, and keep chilled up to 2 weeks—or freeze for 3 months!
Notes
-
Press hard—use a glass or measuring cup.
-
Add-ins welcome: chocolate chips, coconut, dried fruit, chia seeds!
-
Soft dates = better binding and chew.
- Prep Time: 10 min prep + 20 min chill
Nutrition
- Calories: 200 per bar
- Fat: 9g
- Carbohydrates: 23g
- Fiber: 3g
- Protein: 5g
Final Thoughts
Whether you’re fascinated by food science, culinary history, or eating psychology, these granola bars represent the perfect intersection of nourishment and nostalgia.
Category:
Meal Prep Essentials / Global Snack History
Nutritional Nibbles (Per Bar, Makes 10)
Calories: ~210 | Fat: 10g (Healthy fats!) | Protein: 5g | Carbs: 28g (Natural sugars from dates & maple) | Fiber: ~4g
Note: Values are estimates. Add-ins like chocolate will change this.
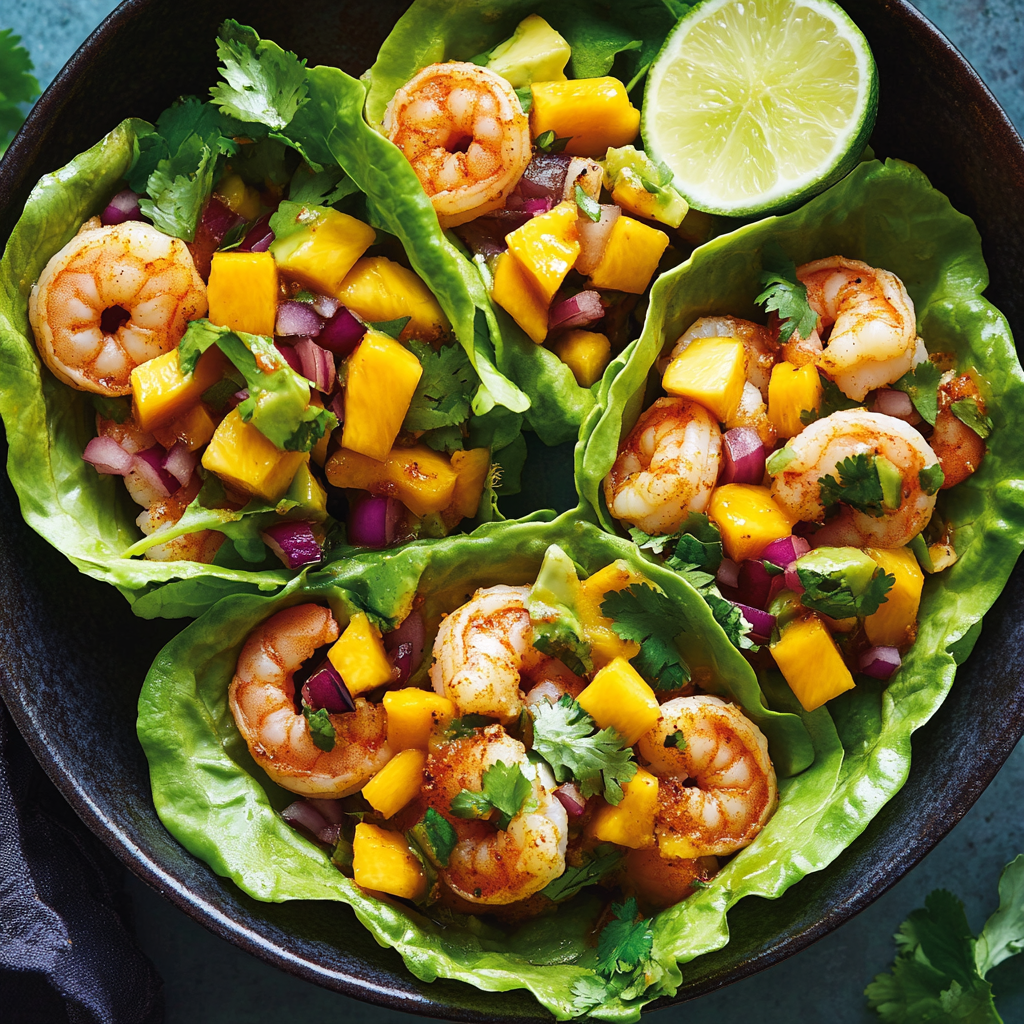
Shrimp Taco Lettuce Wraps with Mango Salsa
🌴 Shrimp Taco Lettuce Wraps with Mango Salsa: Your Passport to Summer on a Plate
Hey there, foodie friends! Chef Jamie here, ready to whisk you away to a tropical paradise—no passport required. Picture this: plump, spicy shrimp snuggled into crisp lettuce cups, topped with a confetti of juicy mango, buttery avocado, and zesty lime. It’s taco night, but we’re ditching the tortillas and cranking up the sunshine vibes. 🌞
Now, I know what you’re thinking: “Lettuce wraps? Isn’t that just salad pretending to be tacos?” Nope, my friend. This is flavor fireworks meets light-and-bright eats. Perfect for those nights when you want something fresh but still crave that fiesta feeling. Plus, it’s quicker than ordering takeout (and way more impressive).
I’ve been obsessed with these wraps ever since I accidentally invented them during a beach house kitchen scramble. No tortillas? No problem! What emerged was magic: the crunch of lettuce, the kick of chili-spiced shrimp, and that sweet-tangy mango salsa that’ll make your taste buds salsa dance. Let’s get cooking—your taste vacation starts now!
🍤 The Day My Kitchen Went Tropi-Crazy
Let me take you back to my first food truck summer. We were parked near Santa Monica pier, swamped with orders, when disaster struck: we ran out of tortillas. Cue panic! But then I spotted a crate of romaine from our morning farmers’ market haul. Desperate times call for delicious measures.
I tossed shrimp with whatever spices were within arm’s reach (chili powder, cumin, a very dramatic squeeze of lime), threw together a mango salsa I’d been testing, and boom—the “Surfside Lettuce Boats” special was born. Customers went nuts! One guy came back three days in a row, claiming they “tasted like a beach vacation.” Lesson learned: sometimes kitchen mishaps lead to your best recipes. Now, let’s recreate that magic in your kitchen!
🛒 What You’ll Need (And Why It All Works)
- 1 lb shrimp – Go for 21/25 count size (that’s chef-speak for 21-25 shrimp per pound). Frozen works great—just thaw overnight in the fridge! �❄️
- 1 tbsp olive oil – Avocado oil works too if you want extra buttery notes.
- Chili powder + cumin – Our dynamic spice duo. Smoked paprika makes a killer sub for chili powder if you’re feeling fancy.
- Limes – We’re using juice in both shrimp and salsa. Pro tip: roll limes on the counter before juicing to get every last drop!
- 1 ripe mango – No fresh mango? Frozen diced mango (thawed) saves the day. 🥭
- Avocado – Wait to dice it until right before mixing to prevent browning.
- Red onion – Soaking slices in ice water for 5 minutes tames the sharpness if you’re sensitive to raw onion.
- Romaine or butter lettuce – Butter lettuce = velvety cups. Romaine = crunch factor. Your call!
👩🍳 Let’s Make Some Magic: Step-by-Step
- Marinate the ShrimpIn a bowl, toss shrimp with olive oil, chili powder, cumin, salt, pepper, and lime juice. Let it hang out for 5 minutes (longer = more flavor, but don’t overdo it—lime juice can “cook” the shrimp).
Chef Hack: Pat shrimp dry first with paper towels. Dry shrimp = better sear!
- Cook to PerfectionHeat a skillet over medium-high. Add shrimp in a single layer (crowding = steamed shrimp, and we want some caramelization!). Cook 2-3 minutes per side until they curl into perfect pink Cs. Transfer to a plate—they’ll keep cooking slightly off-heat.
- Mix the SalsaGently fold together mango, avocado, onion, cilantro, lime juice, and salt. Taste and adjust—maybe more lime? Always more lime.
Pro Tip: Mix salsa in a wide, shallow bowl to prevent avocado mush.
- Build Your BoatsArrange lettuce leaves on a platter. Layer 3-4 shrimp per leaf, top with salsa, and finish with extra cilantro confetti. Serve with lime wedges for squeezing.
🍽️ Serving Vibes: Beachy Keen Presentation
Go full tropical! Pile wraps on a bright platter with lime wheels and chili slices. Serve with:
- Crunchy slaw with jicama and radish
- Chilled coconut water with mint
- Plantain chips for scooping leftover salsa
🌀 Mix It Up: 5 Ways to Shake Things Up
- Pineapple Passion – Swap mango for pineapple + add diced jalapeño
- Spicy Mayo Drizzle – Mix 1/4 cup mayo with sriracha and lime zest
- Protein Swap – Try grilled chicken or crispy tofu
- Peachy Keen – Use peaches instead of mango in late summer
- Deconstructed Bowl – Layer ingredients over cilantro-lime rice
🔪 Chef Jamie’s Behind-the-Scenes Scoop
The first time I tested this recipe? Disaster. I used iceberg lettuce—big mistake. Floppy, watery, zero structural integrity. Then there was the “Great Lime Incident of 2019” where I added zest instead of juice (way too intense!).
Over time, I learned: 1) Butter lettuce is MVP, 2) Let people build their own wraps (way more fun), and 3) Always make double salsa—it disappears faster than sunscreen at a pool party. 🏖️
❓ You Asked, I’m Answering!
Q: Can I make this ahead?
A: Cook shrimp and chop salsa ingredients separately, but assemble right before serving. Salsa gets weepy after 2 hours.
Q: Help! My shrimp are rubbery.
A: Overcooked shrimp = sad shrimp. They cook FAST—once they curl into a C shape and turn pink, they’re done!
Q: Vegan version?
A: Swap shrimp for marinated cauliflower florets or hearts of palm. Use vegan mayo if adding spicy drizzle.
: The Lettuce Wrap Hack – Choosing & Prepping Leaves Like a Pro
Not all lettuce is created equal for wraps. Here’s how to nail the vessel:
Leaf Showdown
| Type | Pros | Cons | Best For |
|---|---|---|---|
| Butter Lettuce | Velvety texture, pliable cups | Delicate; tears easily | Elegant presentations |
| Romaine Hearts | Crunchy ribs, sturdy base | Less “cup-like” shape | Heavy toppings |
| Little Gem | Sweet flavor, perfect size | Harder to find | Bite-sized apps |
| Iceberg | Extreme crunch | Watery, slippery | Avoid for wraps |
Prep Secrets
-
Core & Soak: Remove the core, soak leaves in ice water for 15 minutes = extra crispness.
-
Dry Thoroughly: Use a salad spinner + paper towels (wet leaves = soggy wraps).
-
Double Up: Layer two smaller leaves for structural integrity with juicy fillings.
Pro Tip: For party prep, store prepped leaves in a zip-top bag lined with damp paper towels for up to 6 hours.
Shrimp Science – How to Get Perfect Sear Every Time
That caramelized crust on shrimp isn’t luck—it’s technique:
The 3 Keys to Golden Shrimp
-
Dry Well: Pat shrimp aggressively with paper towels (surface moisture = steam, not sear).
-
High Heat: Skillet should smoke slightly when oil is added.
-
Don’t Crowd: Leave ½” between shrimp (work in batches if needed).
Doneness Cues
-
Visual: Opaque pink with golden spots; curled into a “C” shape.
-
Touch: Firm but springy (like the fleshy part of your palm).
-
Temp: 120°F for juicy perfection (they’ll carryover cook to 130°F).
Flavor Boosters
-
Dry Brine: Toss shrimp with ½ tsp salt and ¼ tsp baking soda 10 mins before cooking = plump texture.
-
Spice Bloom: Toast chili powder + cumin in the oil 30 sec before adding shrimp.
-
Butter Bast: Add 1 tbsp butter in the last minute and spoon over shrimp.
Common Mistakes
-
Over-marinating (acid “cooks” shrimp; 5-15 mins max).
-
Constant stirring (let them develop crust!).
-
Removing tails pre-cooking (keeps them juicier—remove after cooking if preferred).
Mango Salsa Mastery – Balancing Sweet, Heat & Acid
This salsa makes or breaks the dish. Here’s the formula for harmony:
The Golden Ratio
-
2 cups diced mango (sweet base)
-
1/3 cup red onion (sharpness; soak in lime juice to mellow)
-
1 avocado (creamy contrast; add last to prevent browning)
-
1-2 tbsp lime juice (acid to taste)
-
1 chili (jalapeño for mild, serrano for heat; remove seeds to tame)
-
¼ cup cilantro (freshness; sub mint for haters)
Texture Tricks
-
Dice Size: ¼” cubes for perfect scoopability.
-
Mango Hack: Score flesh in a grid, then scoop with a spoon for even pieces.
-
Avocado Saver: Toss with 1 tsp lime juice before mixing.
Flavor Twists
-
Smoky: Add ½ tsp smoked salt or chipotle powder.
-
Tropical: Mix in 2 tbsp toasted coconut flakes.
-
Crunchy: Fold in diced jicama or cucumber last minute.
Make-Ahead Hack
Prep everything except avocado up to 4 hours ahead. Add avocado + cilantro right before serving.
Pro Tip: For extra wow, serve salsa in a hollowed-out mango half!
Print
Shrimp Taco Lettuce Wraps with Mango Salsa
- Total Time: 16 minutes
Description
Born from a beachside tortilla emergency, these lettuce wraps are pure tropical magic. Chili-lime shrimp, juicy mango salsa, and creamy avocado come together in a crisp lettuce boat that delivers all the fiesta with none of the fuss. It’s fresh, fast, and downright unforgettable—your new go-to for warm-weather dinners.
Ingredients
-
1 lb shrimp (21/25 size), peeled & deveined
-
1 tbsp olive oil
-
1 tsp chili powder
-
1/2 tsp cumin
-
Juice of 1 lime
-
Salt & pepper to taste
-
1 ripe mango, diced
-
1 avocado, diced
-
1/4 red onion, finely chopped
-
2 tbsp fresh cilantro, chopped
-
Romaine or butter lettuce leaves
-
Lime wedges for serving
Instructions
-
Marinate Shrimp: Toss shrimp with olive oil, spices, lime juice, salt, and pepper. Let sit 5 minutes.
-
Cook Shrimp: Sear in a hot skillet, 2–3 minutes per side until pink and curled.
-
Mix Salsa: Gently combine mango, avocado, red onion, cilantro, lime juice, and salt.
-
Assemble Wraps: Place shrimp in lettuce cups, top with mango salsa, and finish with extra cilantro and lime.
Notes
-
Pat shrimp dry for the best sear.
-
Use a wide bowl for salsa to keep avocado chunks intact.
-
Butter lettuce offers the best shape and texture.
- Prep Time: 10 minutes
- Cook Time: 6 minutes
Nutrition
- Calories: 230 (per serving
- Fat: 13g
- Carbohydrates: 10g
- Protein: 22g
📊 Nutrition Breakdown (Per Serving)
Calories: 280 | Fat: 16g (Hello, healthy fats!) | Carbs: 12g | Protein: 22g | Sugar: 6g




