
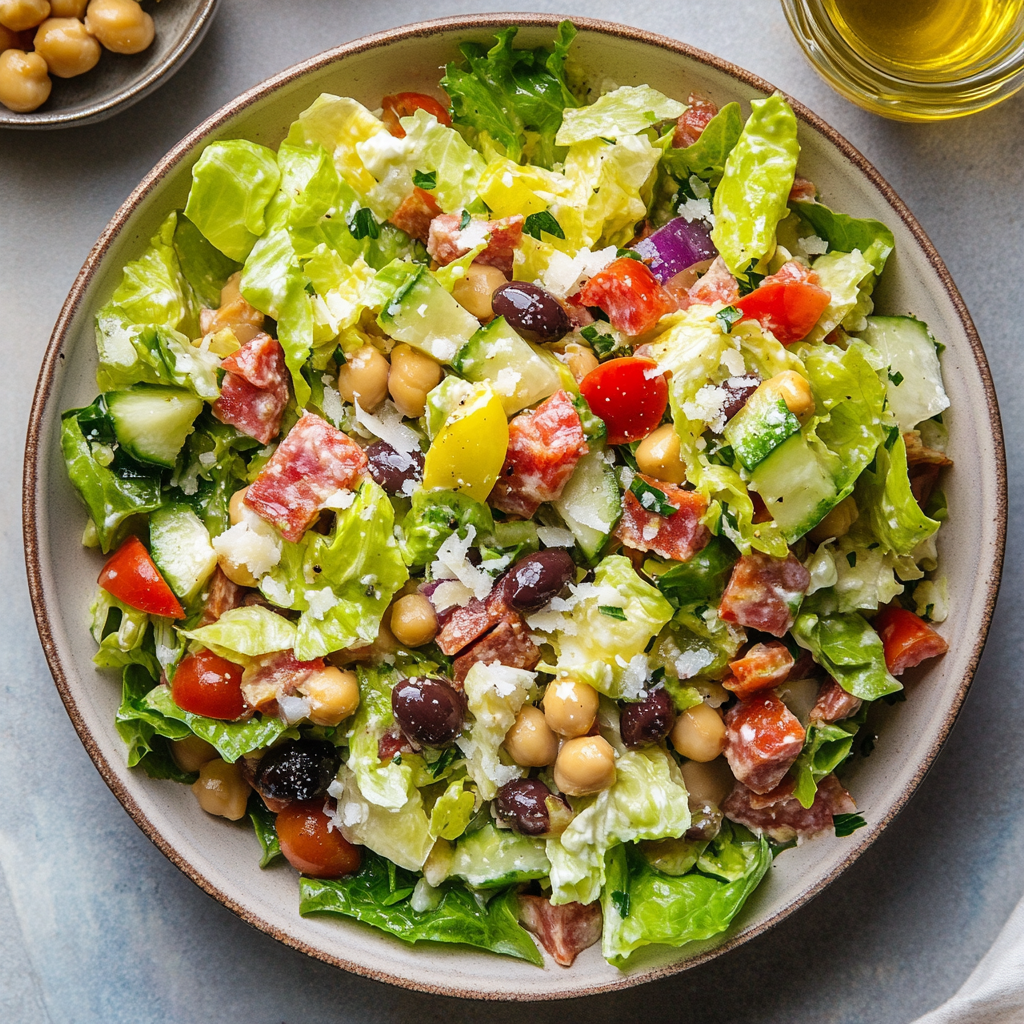
Italian Chopped Salad
Welcome to My Crunchy, Zesty Happy Place: Italian Chopped Salad
Hey there, kitchen friend! Olivia here, waving from my flour-dusted countertop. Raise your hand if you’ve ever stared into your fridge at 5:30 PM, willing dinner to magically assemble itself? *Both hands up over here!* That’s exactly why this Italian Chopped Salad has become my trusty weeknight superhero. Imagine this: crisp lettuces shattering like edible confetti, salty salami doing a happy dance with briny olives, and a garlicky red wine vinaigrette that’ll make your taste buds sing “That’s Amore.” This isn’t just salad—it’s a flavor explosion that turns “What’s for dinner?” panic into a standing ovation. Best part? You’re 15 minutes away from a bowlful of sunshine that works as a hearty main or a show-stealing side. No fancy skills required—just a big bowl and a bigger appetite for joy. Let’s make magic happen!
My Nonna’s Picnic & The Salad That Stole Summer
Picture this: Sicily, 1998. I’m 12 years old, trailing behind my Nonna through a farmers’ market that smells like sun-warmed tomatoes and adventure. We’re gathering ingredients for a beach picnic, and she’s haggling over olives like a seasoned general. Back in her tiny kitchen, she hands me a knife (supervised, of course!) and says, “Piccolina, food tastes better when you chop it small enough to share.” Together, we diced cucumbers into emerald confetti, tore lettuce with our hands, and showered everything with pecorino like edible gold dust. When we unpacked that salad on the sand, cousins appeared like seagulls. That messy, joyful feast—fingers sticky with vinaigrette, laughter bouncing off the waves—taught me that the best meals aren’t about perfection. They’re about chopping, sharing, and savoring the chaos. This salad? It’s my edible postcard from that day.
Your Flavor Toolkit: Ingredients & Why They Matter
Grab these pantry rockstars—and remember, flexibility is your superpower!
For the Zingy Vinaigrette:
- 1/3 cup extra-virgin olive oil: The VIP! Use the good stuff—it’s the flavor backbone. (Chef’s cheat: Smell it! If it’s grassy/fruity, you’re golden.)
- 3 tbsp red wine vinegar: Our tangy maestro. Swap with lemon juice in a pinch, but you’ll miss that Italian oomph.
- 1 tsp Dijon mustard: Secret weapon! It emulsifies the dressing AND adds depth. No Dijon? A dab of mayo works.
- 1 tbsp dried oregano: Rub it between your palms first—it wakes up the oils! Fresh? Use 3 tbsp.
- 1 tsp garlic powder: Trust me—it blends better than fresh here. (But 1 minced clove works if you’re feeling sassy.)
- Sea salt + black pepper: Season like you mean it! Start with 1 tsp salt; add more after tossing.
For the Salad Party:
- 4 cups chopped iceberg + 3 cups chopped romaine: Iceberg = CRUNCH. Romaine = FRESHNESS. Swap with radicchio or endive for bitter flair!
- 4 Persian cucumbers: Sweeter and fewer seeds than regular cukes. No Persians? Use 1 English cucumber.
- ½ cup diced salami: Go for Genoa or hot capicola! Vegetarian? Skip it or add roasted chickpeas for crunch.
- 1 can (15 oz) garbanzo beans: RINSE THEM! Pro tip: Pat dry for better dressing cling.
- ½ cup chopped kalamata olives: Pit-in = more flavor! Swap with green olives or artichoke hearts.
- ¾ cup diced tomatoes: Campari or grape tomatoes hold up best. Winter hack: Use sun-dried tomatoes (oil-packed, chopped).
- ½ cup grated parmesan: Microplane it yourself—pre-grated won’t melt as dreamily. Pecorino Romano kicks it saltier!
Let’s Build Some Delicious: Your Foolproof Roadmap
Channel your inner Italian nonna—we’re making confetti!
- DRESSING DRAMA: In a jar with a tight lid (or bowl), combine olive oil, red wine vinegar, Dijon, oregano, garlic powder, salt, and pepper. SHAKE LIKE YOU’RE DANCING TO DISCO! (Or whisk furiously.) Taste. Adjust salt—it should make your tongue tingle. Chef’s tip: Make this first so flavors marry while you chop!
- CHOP THERAPY: Finely chop iceberg and romaine—aim for bite-sized confetti, not chunky pieces. Dice cucumbers, salami, and tomatoes into similar-sized bits (about ¼-inch). Drain and rinse garbanzos; pat dry so they don’t waterlog the salad. Pit and chop olives. Chef’s hack: Use a pizza cutter to shred lettuce piles FAST!
- BIG BOWL ENERGY: In your largest bowl (seriously—crowding is the enemy of tossing!), combine lettuces, cucumbers, salami, beans, olives, and tomatoes. Gently toss with your hands—like you’re fluffing a pillow!
- DRESS TO IMPRESS: Drizzle dressing around the bowl’s edges first (prevents pooling at the bottom!). Toss with salad tongs or clean hands until every nook sparkles. Chef’s warning: Don’t drown it! Add ¾ dressing, toss, then add more if needed.
- CHEESE PLEASE: Sprinkle parmesan over the top. Give one last light toss—just enough to distribute, not bury the cheese. Taste. Need more salt? Pepper? Vinegar? Fix it now!
Serving: Where Joy Meets the Bowl
This salad LOVES to be the star! Serve it family-style in a rustic wooden bowl with extra parmesan on the side. For main-dish vibes, add crusty garlic bread for dipping into dressing that escapes to the plate. Pair it with chilled Pinot Grigio or sparkling lemonade. If packing for lunch? Layer dressing at the bottom of a jar, then sturdy ingredients (beans, salami), then greens on top. Shake to mix when ready!
Mix It Up: 5 Flirty Twists
- Mediterranean Fling: Swap salami for grilled shrimp, add artichoke hearts and feta cheese.
- Vegetarian Vibes: Omit salami, add roasted red peppers and white beans. Use vegan parm!
- Spicy Soprano: Add pepperoncini slices and a pinch of red pepper flakes to dressing.
- Bread Lover’s Bonus: Toss in homemade garlic croutons or torn chunks of focaccia.
- Summer’s Bounty: Add fresh corn, basil ribbons, and ripe peaches in season.
Olivia’s Notebook Scribbles
This salad has survived kitchen disasters! Once, I subbed balsamic for red wine vinegar… and created a murky brown swamp. Lesson learned: stick to zippy vinegars! Over the years, I’ve tweaked the chop size—too big feels lazy, too fine feels like slaw. The sweet spot? Pea-sized pieces that hug the dressing. Funny story: My husband once “helped” by using vanilla yogurt instead of Dijon (don’t ask). We ordered pizza that night. Moral: Label your condiments, folks! This recipe evolves with seasons—right now, I’m obsessed with adding shaved fennel in spring. Make it YOURS.
Your Salad Questions: Solved!
Q: Can I make this ahead?
A: Yes—with strategy! Prep dressing, chop veggies, and store separately. Combine MAX 1 hour before serving (greens wilt!). Leftovers keep 1 day, but expect softer lettuce.
Q: My salad got soggy! What went wrong?
A> Three culprits: 1) You didn’t dry beans/veggies enough, 2) Over-dressed it (start light!), 3) Tossed too early. Salt draws water from veggies—toss at the last minute!
Q: No salami on hand. Ideas?
A> Pepperoni, prosciutto crisps, or even diced mozzarella balls work! For non-pork, try sun-dried tomatoes or marinated mushrooms.
Q: Can I use bottled dressing?
A> *Gasp!* Just kidding—you do you. But homemade takes 3 minutes and tastes brighter. If using bottled, pick an Italian herb vinaigrette and jazz it up with extra oregano.
The Architecture of Crunch – Why Chopping Technique Makes or Breaks Your Salad
The Science of the Perfect Bite
An Italian chopped salad isn’t just tossed—it’s engineered. Unlike leafy salads where fork-wrangling is half the battle, every spoonful of this dish should deliver a harmonious flavor bomb. The secret? Uniformity. When cucumbers, salami, and lettuce are diced to near-identical sizes (¼-inch is ideal), your taste buds register all ingredients simultaneously. Compare this to chunky salads where one bite is all tomato, the next all cheese—chaos!
Knife Skills 101
-
Lettuce: Stack leaves, roll like a cigar, and slice crosswise for ribbons, then chop perpendicularly. Iceberg’s high water content shatters satisfyingly; romaine’s ribs add structure.
-
Salami: Fold slices into quarters before dicing—efficient and safe for fingers.
-
Tomatoes: Use a serrated knife to pierce the skin without squashing.
Texture Psychology
Studies show crunch triggers satisfaction by engaging our primal love for fresh, “alive” foods. The combo of crispy lettuce, creamy beans, and chewy salami creates a sensory symphony that tricks your brain into feeling fuller longer.
Thoughts: This section transforms chopping from a chore to a craft, appealing to both perfectionists and food science nerds. It subtly justifies the prep work by linking it to flavor payoff.
The Vinaigrette Alchemy – How to Balance Acid Like an Italian Nonna
The 3:1 Ratio Myth (And When to Break It)
Classic vinaigrette wisdom says 3 parts oil to 1 part acid—but this salad’s dressing defies rules with a punchier 1.5:1 ratio (½ cup oil to ⅓ cup vinegar). Why? Robust ingredients (salami, olives, parmesan) demand boldness. The vinegar’s acidity cuts through their richness, while the oregano’s earthy notes bridge the gap.
Dijon’s Double Agent Role
That teaspoon of mustard isn’t just for flavor—it’s an emulsifier. Its lecithin binds oil and vinegar temporarily, creating a creamy texture that clings to lettuce instead of pooling. No Dijon? Whisk in ½ tsp honey or maple syrup; their sugars mimic emulsification by thickening the mix.
Garlic Powder > Fresh Garlic
While fresh garlic seems purist, powder distributes evenly without overpowering. Fresh garlic’s allicin compound intensifies over time, often turning dressings harsh. Powder offers mellow, toastier notes—key for a make-ahead dressing.
Thoughts: This section elevates the humble dressing from an afterthought to the salad’s MVP. It empowers readers to tweak ratios confidently based on their ingredients.
The Italian-American Salad Revolution – A Cultural Mashup
From Sicilian Roots to Subway Sandwiches
The “Italian chopped salad” as we know it is a U.S. immigrant innovation. Traditional Italian insalata mista favors simplicity (lettuce, oil, lemon), while American-Italian delis loaded salads with antipasti flair—salami, provolone, pepperoncini—to showcase abundance. This recipe straddles both worlds: Sicilian in spirit (Nonna’s market-fresh ethos) but unapologetically bold like a Brooklyn deli case.
The Picnic Principle
In Italy, salads are rarely meal stars—they’re contorni (sides). But American practicality turned them into hearty one-bowl feeds. The garbanzo beans? A protein-packed nod to U.S. lunch culture.
Global Twists That Work
-
Mexican: Cotija cheese, jicama, lime vinaigrette
-
Greek: Swap salami for kalamata olives, add feta, use lemon oregano dressing
-
Japanese: Toss with wakame, sesame oil, and pickled ginger
Thoughts: This contextualizes the recipe as part of a larger culinary conversation, inviting readers to riff while honoring origins.
Italian Chopped Salad
- Total Time: 30 minutes
Description
Inspired by my Nonna’s farmers market feasts and beach picnics, this salad is a symphony of crunchy greens, briny bites, and garlicky goodness—without fuss or fluff. It’s the weeknight hero you didn’t know you needed. Just chop, toss, and enjoy the edible sunshine.
Ingredients
For the Vinaigrette:
-
⅓ cup extra-virgin olive oil
-
3 tbsp red wine vinegar
-
1 tsp Dijon mustard
-
1 tbsp dried oregano (rub between palms)
-
1 tsp garlic powder
-
Salt & black pepper to taste (start with 1 tsp salt)
For the Salad:
-
4 cups chopped iceberg lettuce
-
3 cups chopped romaine
-
4 Persian cucumbers or 1 English cucumber, diced
-
½ cup diced salami
-
1 (15 oz) can garbanzo beans, rinsed and patted dry
-
½ cup chopped kalamata olives
-
¾ cup diced tomatoes
-
½ cup grated parmesan
Instructions
-
Make the Dressing: In a jar, combine all vinaigrette ingredients. Shake well or whisk until emulsified. Let sit while you prep.
-
Chop & Prep: Finely chop lettuce, cucumbers, salami, tomatoes, and olives. Dry beans thoroughly.
-
Toss the Base: In a large bowl, combine all salad ingredients except parmesan.
-
Dress It Up: Drizzle ¾ of the vinaigrette around the bowl’s edge. Toss gently. Add more dressing as needed.
-
Cheese It: Sprinkle parmesan over the top and give a final light toss.
Notes
-
Make the dressing first—it gets better as it sits.
-
Use a pizza cutter to slice lettuce fast.
-
Add dressing just before serving for max crunch.
- Prep Time: 15 minutes
- Cook Time: 15 minutes
Nutrition
- Calories: 360 per serving
- Fat: 25g
- Carbohydrates: 18g
- Fiber: 5g
- Protein: 14g
Final Thoughts
This salad is a celebration of contrasts—crisp and creamy, salty and tangy, tradition and rebellion. It’s a reminder that the best dishes aren’t about rigid rules, but about listening to your ingredients (and maybe your Nonna’s ghost whispering “più olio!”).
Pro Tip: Save a handful of chopped ingredients to garnish the top—it’s instant visual appeal. And always dress the salad in the bowl you’ll serve it in. Those garlicky drippings are the best part!
Now tell me: Team Croutons or Team Pure Greens? Fight it out in the comments!
Nutritional Sunshine (per serving)
Calories: ~360 • Protein: 14g • Carbs: 18g • Fat: 25g • Fiber: 5g
Note: Stats vary with ingredient swaps. Want it lighter? Reduce salami/cheese by half, add extra cucumbers!
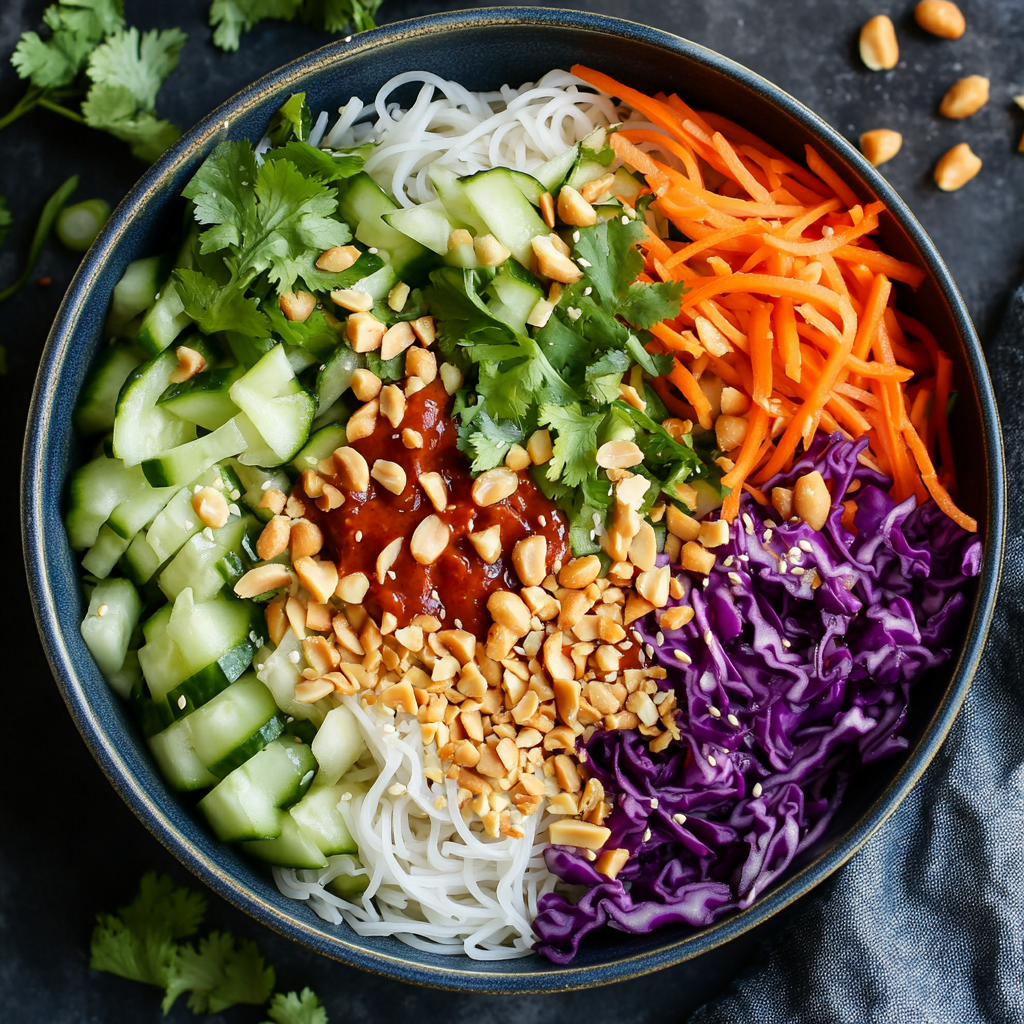
Spring Roll Salad
Spring Roll Salad: Your Favorite Fresh Rolls, Unwrapped!
Hey there, kitchen friends! Olivia here, waving from my sauce-splattered countertop. Can we talk about those days when you’re craving the bright, crunchy magic of spring rolls… but absolutely cannot be bothered to fuss with delicate rice paper wrappers? (Raise your hand if you’ve ever turned your kitchen into a sticky wrestling ring with those things! 🙋♀️) That’s exactly why this Spring Roll Salad was born. Imagine all the vibrant goodness of fresh rolls—crisp veggies, soft rice noodles, and that dreamy peanut sauce—tossed together in one big, glorious bowl. No rolling skills required! It’s like your favorite takeout appetizer decided to put on its comfy pants and become a full meal. Perfect for sweltering summer evenings, packed lunches that actually excite you, or when you need a rainbow on your plate in under 20 minutes. Let’s make something crunchy, creamy, and utterly unstoppable together!
The Spring Roll Disaster That Started It All
Picture this: It’s 90 degrees outside, my college apartment has zero AC, and my best friend Maya and I are determined to make “fancy” spring rolls for a potluck. Spoiler: It was chaos. Rice paper sheets clung to everything except the fillings—our fingers, the counter, the cat (just kidding… mostly). We laughed so hard we cried as shredded carrots tumbled everywhere and peanut sauce dripped off our elbows. In a sweaty moment of desperation, I just threw all the filling ingredients into a bowl, dumped sauce on top, and yelled, “TA-DA! DECONSTRUCTED SPRING ROLLS!” Maya took one bite, eyes wide, and said, “Olivia… this is better than the rolls.” The salad was born that day—a happy accident proving that sometimes, the messiest kitchen fails lead to the tastiest wins. Now, it’s my go-to when I want that fresh, herb-packed flavor without the wrapper warfare.
Your Colorful Cast of Characters
Grab these fresh pals—this salad is all about texture and vibrancy!
For the Salad
- Thin rice noodles (about 4 oz dry): The silky backbone! Look for “vermicelli” or “maifun.” Chef tip: Swap with zucchini noodles for low-carb!
- 1/2 cucumber, julienned: Crisp, cool, and hydrating. Insight: Leave the skin on for extra color and nutrients!
- 1 cup purple cabbage, shredded: Adds gorgeous color and crunch. Sub: Green cabbage or baby spinach.
- 1 cup carrots, matchstick-cut: Sweet earthiness. Hack: Grab pre-cut at the store to save time!
- 1 red bell pepper, thinly sliced: Juicy sweetness. Swap: Yellow or orange pepper for sunshine vibes.
- 1/4 cup chopped peanuts: Toasty crunch! Allergy? Use sunflower seeds.
- 1/4 cup fresh cilantro, chopped: Bright, herbaceous pop. Not a fan? Basil or mint work!
- 2 green onions, sliced: Mild oniony zing. Use both white and green parts!
- Sesame seeds, for garnish: Tiny, nutty confetti. Toast them for extra flavor!
For the Peanut Sauce
- 1/2 cup natural peanut butter (runny): Creamy base! Must be runny—if stiff, warm it slightly. Sub: Almond butter or tahini.
- 3 tbsp coconut aminos: Sweet-salty depth. No aminos? Use 2 tbsp soy sauce + 1 tbsp maple syrup.
- 1 tbsp soy sauce: Umami punch. Use tamari for gluten-free!
- 1 tbsp rice vinegar: Tangy balance. Sub: Lime juice or apple cider vinegar.
- 2 tbsp hot water: Thins the sauce perfectly. Chef secret: Hot water blends better than cold!
- 1 tbsp sriracha (optional): For spice lovers! Start with 1 tsp if sensitive to heat.
- 1 tsp garlic powder: Quick flavor hack. Fresh garlic? Mince 1 clove finely!
- 1/2 tsp ground ginger: Warm, zippy note. Fresh ginger? Grate 1 tsp instead!
- 1 tbsp toasted sesame oil: Nutty fragrance. Don’t skip—it’s magic!
Let’s Build Your No-Roll Rainbow Bowl!
- Cook rice noodles according to package. (Usually 3-5 minutes in boiling water!) ⏱️ Pro Tip: Set a timer! Overcooked noodles turn mushy. We want them tender but springy—al dente for salads!
- Rinse noodles with cold water and drain well. ❄️ Chef Hack: Toss them with a tiny splash of sesame oil post-rinse to prevent clumping. Cold noodles = refreshing salad base!
- Prep all veggies and add to a large bowl with the noodles. 🌈 Fun Move: Arrange veggies in colorful sections before mixing—it’s Insta-worthy! Then toss gently to combine.
- Whisk all sauce ingredients until smooth and creamy. 🥜 Game-Changer: Whisk in the hot water LAST. It transforms thick PB into silky, pourable gold! Taste and adjust: more vinegar for tang, sriracha for heat.
- Pour dressing over salad and toss gently to coat. 💃 Gentle is Key: Use tongs or clean hands to fold—no smashing our beautiful crunch!
- Garnish with extra peanuts, sesame seeds, and cilantro. ✨ Olivia’s Rule: More garnish = more joy. Be generous!
How to Serve This Party in a Bowl
Pile this confetti-bright salad high in a wide, shallow bowl to show off those colors! For gatherings, let friends build their own bowls with extra toppings: lime wedges for squeezing, chopped mint, or crispy wonton strips. Pack it for lunch (keep dressing separate until ready to eat), or serve it alongside grilled chicken or shrimp for protein power. It’s fantastic slightly chilled or at room temp—just keep it vibrant and breezy!
Shake It Up! 5 Tasty Twists
- Protein Powerhouse: Add shredded rotisserie chicken, crispy tofu cubes, or chilled shrimp.
- Mango Tango: Toss in diced ripe mango or pineapple for tropical sweetness.
- Spice Lover’s Dream: Add sliced jalapeños or a drizzle of chili crisp.
- Veggie Swap: Try sugar snap peas, avocado slices, or shredded broccoli stems!
- Nut-Free Bliss: Use sunflower seed butter in the sauce and top with toasted pepitas.
Olivia’s Extra Crunchy Confessions
This recipe has evolved SO much since that fateful spring roll fail! I used to drown it in soy sauce, but coconut aminos brought the perfect balance. And confession: I once added so much sriracha, my brother drank three glasses of milk with his salad. 😂 Over time, I learned bigger veggie cuts = better crunch (floppy matchsticks are sad matchsticks). It’s also become my fridge-cleaner hero—wilted herbs? Extra radishes? Toss ’em in! The peanut sauce? It now doubles as a dip for everything from satay to apple slices. Moral: Recipes aren’t set in stone—make it yours!
Your Spring Roll Salad Questions, Answered!
- Q: Can I make this ahead for meal prep?
A: Absolutely! Keep components separate: Store undressed salad (noodles + veggies) in airtight containers for 2 days. Sauce lasts 1 week refrigerated. Toss together JUST before eating to avoid sogginess. - Q: My peanut sauce is too thick/clumpy. Help!
A: No stress! Warm it slightly (microwave 10 sec), then whisk in hot water 1 tsp at a time. If it’s too salty, add a squeeze of lime or honey. - Q: Can I use regular peanut butter instead of natural?
A: Yes, but adjust wisely! Skippy/Jif have added sugar and oil. Omit coconut aminos’ sweet swap, reduce soy sauce, and whisk in extra water to thin. - Q: Noodles turned gummy! What did I do wrong?
A: Likely overcooked or didn’t rinse well. Next time: Set a timer, rinse under COLD water until chilled, and drain thoroughly. Toss with a bit of oil if sticking.
The Spring Roll Disaster That Started It All
Picture this: It’s 90 degrees outside, my college apartment has zero AC, and my best friend Maya and I are determined to make “fancy” spring rolls for a potluck. Spoiler: It was chaos. Rice paper sheets clung to everything except the fillings—our fingers, the counter, the cat (just kidding… mostly). We laughed so hard we cried as shredded carrots tumbled everywhere and peanut sauce dripped off our elbows. In a sweaty moment of desperation, I just threw all the filling ingredients into a bowl, dumped sauce on top, and yelled, “TA-DA! DECONSTRUCTED SPRING ROLLS!” Maya took one bite, eyes wide, and said, “Olivia… this is better than the rolls.”
That was the day this salad was born—a happy accident proving that sometimes, the messiest kitchen fails lead to the tastiest wins. Now, it’s my go-to when I want that fresh, herb-packed flavor without the wrapper warfare.
Thoughts on Kitchen Fails & Creativity
This experience taught me that cooking isn’t about perfection—it’s about adaptability. Some of the best dishes come from improvisation. If rice paper wrappers aren’t cooperating, why force it? Turning a struggle into a shortcut is the kind of kitchen magic I live for.
Final Thoughts
If you’ve ever given up on rolling spring rolls neatly, this salad is your redemption. It’s proof that delicious food doesn’t have to be complicated. Sometimes, the best meals are the ones that come together in a messy, joyful rush.
Your Colorful Cast of Characters
This salad is all about texture and vibrancy! Here’s what you’ll need:
For the Salad
-
Thin rice noodles (about 4 oz dry): The silky backbone! Look for “vermicelli” or “maifun.” Chef tip: Swap with zucchini noodles for low-carb!
-
1/2 cucumber, julienned: Crisp, cool, and hydrating. Insight: Leave the skin on for extra color and nutrients!
-
1 cup purple cabbage, shredded: Adds gorgeous color and crunch. Sub: Green cabbage or baby spinach.
-
1 cup carrots, matchstick-cut: Sweet earthiness. Hack: Grab pre-cut at the store to save time!
-
1 red bell pepper, thinly sliced: Juicy sweetness. Swap: Yellow or orange pepper for sunshine vibes.
-
1/4 cup chopped peanuts: Toasty crunch! Allergy? Use sunflower seeds.
-
1/4 cup fresh cilantro, chopped: Bright, herbaceous pop. Not a fan? Basil or mint work!
-
2 green onions, sliced: Mild oniony zing. Use both white and green parts!
-
Sesame seeds, for garnish: Tiny, nutty confetti. Toast them for extra flavor!
For the Peanut Sauce
-
1/2 cup natural peanut butter (runny): Creamy base! Must be runny—if stiff, warm it slightly. Sub: Almond butter or tahini.
-
3 tbsp coconut aminos: Sweet-salty depth. No aminos? Use 2 tbsp soy sauce + 1 tbsp maple syrup.
-
1 tbsp soy sauce: Umami punch. Use tamari for gluten-free!
-
1 tbsp rice vinegar: Tangy balance. Sub: Lime juice or apple cider vinegar.
-
2 tbsp hot water: Thins the sauce perfectly. Chef secret: Hot water blends better than cold!
-
1 tbsp sriracha (optional): For spice lovers! Start with 1 tsp if sensitive to heat.
-
1 tsp garlic powder: Quick flavor hack. Fresh garlic? Mince 1 clove finely!
-
1/2 tsp ground ginger: Warm, zippy note. Fresh ginger? Grate 1 tsp instead!
-
1 tbsp toasted sesame oil: Nutty fragrance. Don’t skip—it’s magic!
Thoughts on Ingredients & Flexibility
The beauty of this salad is how customizable it is. Don’t like cilantro? Swap it. Need more protein? Add tofu or shrimp. Cooking should be fun, not rigid—experiment and make it yours!
Final Thoughts
Fresh, crunchy, and packed with flavor, this salad is a celebration of textures. The peanut sauce ties everything together, making each bite a perfect balance of sweet, salty, and tangy.
Let’s Build Your No-Roll Rainbow Bowl!
Step-by-Step Assembly
-
Cook rice noodles according to package. (Usually 3-5 minutes in boiling water!) ⏱️ Pro Tip: Set a timer! Overcooked noodles turn mushy. We want them tender but springy—al dente for salads!
-
Rinse noodles with cold water and drain well. ❄️ Chef Hack: Toss them with a tiny splash of sesame oil post-rinse to prevent clumping. Cold noodles = refreshing salad base!
-
Prep all veggies and add to a large bowl with the noodles. 🌈 Fun Move: Arrange veggies in colorful sections before mixing—it’s Insta-worthy! Then toss gently to combine.
-
Whisk all sauce ingredients until smooth and creamy. 🥜 Game-Changer: Whisk in the hot water LAST. It transforms thick PB into silky, pourable gold! Taste and adjust: more vinegar for tang, sriracha for heat.
-
Pour dressing over salad and toss gently to coat. 💃 Gentle is Key: Use tongs or clean hands to fold—no smashing our beautiful crunch!
-
Garnish with extra peanuts, sesame seeds, and cilantro. ✨ Olivia’s Rule: More garnish = more joy. Be generous!
Serving Suggestions
-
For gatherings: Let friends build their own bowls with extra toppings like lime wedges, chopped mint, or crispy wonton strips.
-
Meal prep: Store undressed salad and sauce separately. Toss just before eating to keep it crisp.
-
Protein boost: Add grilled chicken, shrimp, or crispy tofu.
Spring Roll Salad
Description
Born out of a sticky rice paper mishap, this salad takes everything you love about spring rolls—crisp veggies, rice noodles, zesty herbs, and that dreamy peanut sauce—and tosses them together into a no-fuss, color-packed bowl of joy. Perfect for warm days, quick lunches, or your “what’s-for-dinner” panic moment, it’s a crave-worthy meal that comes together in under 20 minutes.
Ingredients
For the Salad:
-
4 oz thin rice noodles (vermicelli or maifun)
-
½ cucumber, julienned
-
1 cup shredded purple cabbage
-
1 cup matchstick carrots
-
1 red bell pepper, thinly sliced
-
¼ cup chopped peanuts
-
¼ cup chopped fresh cilantro
-
2 green onions, sliced
-
Sesame seeds, for garnish
For the Peanut Sauce:
-
½ cup natural peanut butter (runny)
-
3 tbsp coconut aminos
-
1 tbsp soy sauce
-
1 tbsp rice vinegar
-
2 tbsp hot water
-
1 tbsp sriracha (optional)
-
1 tsp garlic powder
-
½ tsp ground ginger
-
1 tbsp toasted sesame oil
Instructions
-
Cook Noodles: Boil noodles for 3–5 minutes until tender. Rinse under cold water and drain well. Toss with a bit of sesame oil to prevent clumping.
-
Prep Veggies: Slice, shred, and chop all salad ingredients. Combine with noodles in a large bowl.
-
Make Sauce: Whisk all sauce ingredients, adding hot water last to smooth and thin it out.
-
Toss Together: Pour sauce over the salad and gently mix to coat. Garnish with peanuts, sesame seeds, and more cilantro.
-
Serve: Enjoy immediately or store components separately for meal prep!
Notes
-
For meal prep, store salad undressed and mix just before serving.
-
Add protein like tofu, shrimp, or grilled chicken for a full meal.
-
Make the peanut sauce in bulk—it keeps for a week and works on everything!
Nutrition
- Calories: 310 per serving
- Sugar: 6g
- Fat: 18g
- Carbohydrates: 28g
- Fiber: 4g
- Protein: 9g
Thoughts on Presentation & Enjoyment
Food should be as fun to look at as it is to eat. The vibrant colors of this salad make it irresistible. Plus, the mix of textures—crunchy, creamy, chewy—makes every bite exciting.
Final Thoughts
This salad is proof that the best meals are often the simplest. No fussy rolling, no complicated techniques—just fresh, flavorful ingredients tossed together in a way that feels like a celebration. Whether you’re meal-prepping, hosting friends, or just treating yourself, this dish is a winner.
Nutritional Per Serving (approx)
Calories: 380 • Protein: 12g • Carbs: 34g • Fat: 22g • Fiber: 5g
Note: Stats include all ingredients; variations will change values.
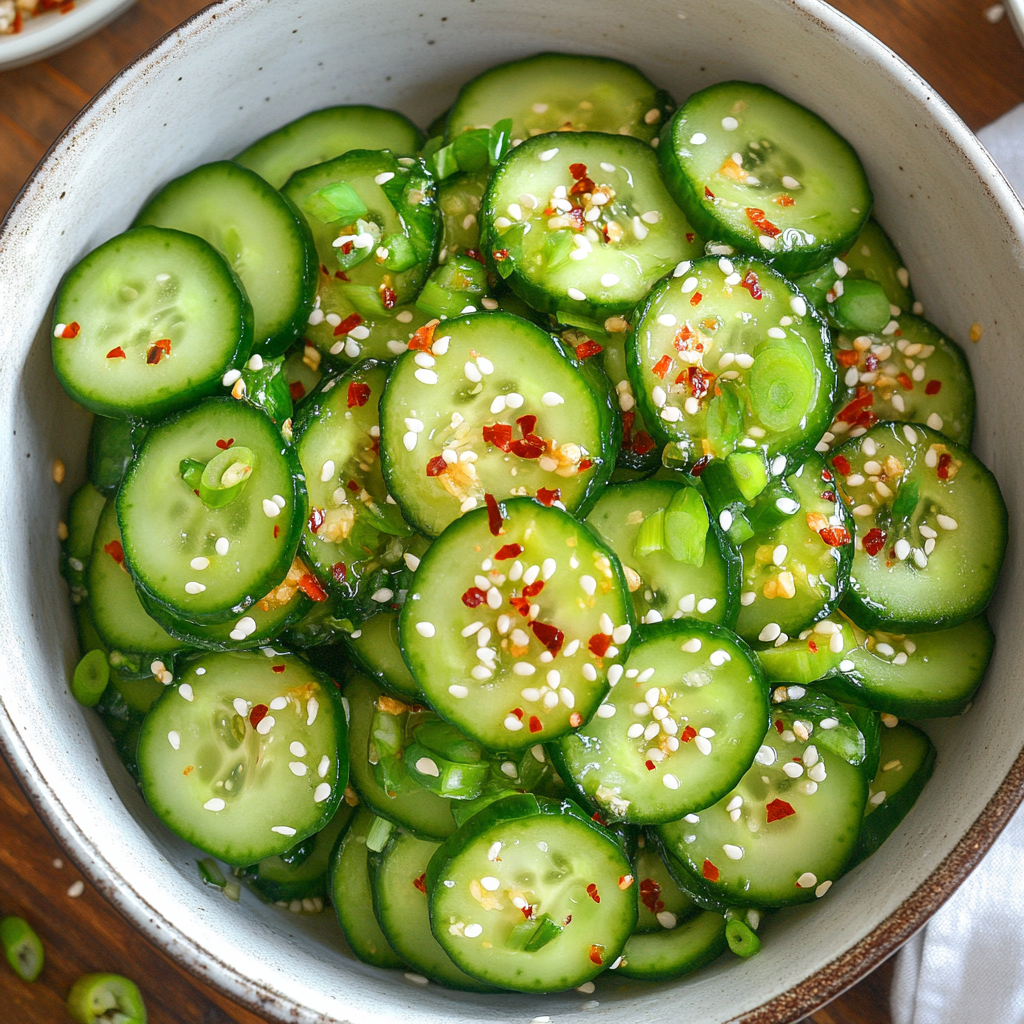
Spicy Cucumber Salad
🥒 Cool, Crisp & Kicked Up with Heat: Your New Summer Obsession
Hey there, kitchen friend! Olivia here, waving from my flour-dusted countertop. Can we just take a moment to celebrate that magical moment when you bite into something so perfectly cool-yet-fiery that your taste buds do a happy dance? That’s exactly what this Spicy Cucumber Salad is all about. Picture this: It’s 90 degrees outside, your kitchen feels like a sauna, and you need a side dish that won’t melt your will to live. Enter: these vibrant, chili-kissed cucumber slices swimming in a tangy-sweet dressing that’ll make you close your eyes and sigh. I created this recipe during one sweltering summer when my AC died (true story!), and it became my fridge superhero – ready in 10 minutes, endlessly crunchy, and bold enough to wake up grilled chicken or lazy takeout nights. Whether you’re hosting a backyard bash or just craving a snack with personality, this salad brings the zing without the fuss. No fancy skills required – just your favorite knife and the joy of making something explosively delicious!
🌞 The Picnic That Started It All
Let me take you back to my cousin’s lakeside potluck two summers ago. I’d spent HOURS baking a fancy tart, only to watch it slide tragically off the picnic table (RIP, berry masterpiece). Panicking, I raided my cooler: leftover cucumbers, a sad-looking green onion, and condiments. I threw together this spicy dressing on a paper plate, tossed everything together, and sprinkled sesame seeds like confetti. Within minutes, that humble bowl was EMPTY. My aunt – who “never eats seconds” – chased me down for the recipe. That’s when it hit me: magic happens when simplicity meets bold flavor. Now, I make a double batch every Friday. It’s my edible reset button after chaotic weeks – crisp, bright, and unapologetically punchy. Pro tip: The leftovers (if they exist!) taste even better with morning scrambled eggs. Trust me.
🛒 Let’s Gather Your Flavor Arsenal
For the Salad:
- 8 mini or Persian cucumbers – Thinly sliced. Why? Their thin skins stay crisp, and tiny seeds mean less water! Swap with 1 large English cucumber if needed (deseed it!).
- 1 green onion – Finely sliced. Chef’s hack: Use the green AND white parts! The white adds peppery zing.
- Sesame seeds – For garnish. Toast them in a dry pan for 2 minutes first – total game-changer!
For the Dressing (aka Liquid Gold):
- 1½ tbsp low-sodium soy sauce – Base umami. Use tamari for GF, coconut aminos for soy-free!
- 1½ tbsp rice vinegar – Bright acidity. White wine vinegar works too, but rice vinegar is milder.
- 1 tsp sesame oil – Nutty depth! Don’t sub with olive oil – it’s the flavor anchor!
- 1 tbsp honey or maple syrup – Balances the heat. Agave works for vegan friends!
- 2 large garlic cloves, minced – Fresh is non-negotiable! Jarred garlic turns bitter here.
- 1 tsp crushed red chili flakes – Adjust to your fire tolerance! Start with ½ tsp if nervous.
👩🍳 Let’s Make Magic in 10 Minutes Flat!
- Slice & Chill Your Cukes: Thinly slice cucumbers (about ⅛-inch thick) and toss with green onions in your serving bowl. Chef’s secret: Pop the bowl in the freezer while you make the dressing – extra crispiness guaranteed!
- Whisk That Zingy Dressing: In a small jar or bowl, combine soy sauce, vinegar, sesame oil, honey, garlic, and chili flakes. Whisk like you mean it! Tip: Taste with a cucumber slice – adjust honey for sweetness or chili for heat.
- Marinate with Confidence: Pour dressing over cucumbers. Toss gently with clean hands (feel the textures!). Hack: Add ½ tsp grated ginger for extra kick!
- Let the Flavors Mingle: Wait 10-15 minutes. DO NOT SKIP THIS! This is when cucumbers transform from shy to sassy, soaking up all that garlicky chili goodness.
- Garnish & Devour: Sprinkle generously with sesame seeds. Serve straight from the bowl – rustic charm wins!
🍽 Serving Up the Crunch
Slide this vibrant salad into a shallow ceramic bowl to show off those glistening green slices! Pair it with grilled salmon for a light dinner, or pile it alongside sticky-sweet Korean fried chicken for contrast. Pack it in mason jars for picnics (dressing at the bottom, cukes on top – shake before eating!). For brunch? Top avocado toast with it – the cool heat cuts through rich avocado like a dream. Always serve it slightly chilled – that crisp bite is everything!
✨ 5 Fun Twists to Shake It Up
1. Seafood Lover: Add ½ lb cooked shrimp or shredded crab meat.
2. Rainbow Crunch: Toss in matchstick carrots, radishes, or sugar snap peas.
3. Peanut Power: Whisk 1 tbsp creamy peanut butter into the dressing + top with crushed peanuts.
4. Fruit Fiesta: Add diced mango or watermelon for sweet-heat contrast.
5. Keto Kick: Swap honey for ½ tsp monk fruit sweetener + add sliced avocado.
📝 Olivia’s Extra Crunchy Confessions
This recipe evolved from my obsession with Szechuan smashed cucumber salad – but I wanted something quicker and pantry-friendly. The first batch? I accidentally used 1 TABLESPOON of chili flakes (yikes!). My lips tingled for hours, but my spice-loving neighbor begged for the recipe! Now I keep a jar of pre-mixed dressing in my fridge for instant veggie glazes or noodle tosses. Pro tip: If your cukes weep water after sitting, drain excess liquid before serving – crunch is king! Oh, and my kids call this “Dragon Salad”… which makes eating veggies way more exciting.
❓ You Asked, I Answered!
Q: My salad got watery overnight. Fixable?
A: Absolutely! Drain excess liquid before serving. For make-ahead meals, store dressing separately and toss 15 mins pre-serving.
Q: Too spicy! How do I rescue it?
A: Add a squeeze of lime juice + 1 tsp honey to balance. Toss in extra cucumbers or crunchy lettuce to dilute heat!
Q: Can I use regular cucumbers?
A: Yes! Slice them thin, then sprinkle with 1 tsp salt. Let sit 10 mins, RINSE WELL, and pat dry. Removes excess water!
Q: How long does it keep?
A: 2 days max in the fridge. Cucumbers lose crunch over time – it’s best fresh!
The Art of Balancing Heat and Refreshment
There’s something almost poetic about the way spicy and cool elements play off each other in this salad. The cucumbers, with their high water content and mild flavor, act as a blank canvas for the bold dressing. But this isn’t just about contrast—it’s about harmony. The chili flakes and garlic bring the heat, while the rice vinegar and honey temper it with brightness and sweetness. It’s a dance of flavors that keeps you coming back for another bite.
What makes this salad so special is its versatility. It can be a side dish, a snack, or even a topping for grilled meats or rice bowls. The key is in the balance: too much heat overwhelms the cucumber’s freshness, while too little makes it forgettable. The recipe’s genius lies in its simplicity—no obscure ingredients, no complicated techniques. Just a few pantry staples combined in a way that feels revelatory.
Thoughts:
I love how this salad challenges the idea that “spicy” means “painful.” The heat here is playful, not punishing. It’s a gentle warmth that builds with each bite, never overpowering the crispness of the cucumbers. The sesame oil adds a toasty depth, while the green onion brings a sharp, grassy note. It’s a masterclass in layering flavors without overcomplicating things.
Final Thoughts:
This isn’t just a salad—it’s a mood. It’s the kind of dish that makes you pause mid-bite and think, “Why don’t I eat like this more often?” It’s refreshing yet exciting, simple yet deeply satisfying. Whether you’re a spice lover or a hesitant newbie, this salad meets you where you are and leaves you craving more.
The Unexpected Origins of a Kitchen Staple
Olivia’s story about the ill-fated berry tart and the impromptu cucumber salad is more than just a charming anecdote—it’s a reminder that some of the best recipes are born from necessity. There’s a certain magic in improvisation, in turning what you have into something extraordinary. This salad is a testament to that creativity.
What’s fascinating is how universal this concept is. Variations of spicy cucumber salads exist across cultures—Korean oi muchim, Szechuan smashed cucumbers, Thai ajad. They all share the same spirit: quick, crunchy, and packed with flavor. Olivia’s version feels like a love letter to those traditions while being entirely her own. The addition of honey for sweetness and sesame seeds for texture gives it a unique identity.
Thoughts:
I’m struck by how this recipe embodies the idea that cooking doesn’t have to be perfect to be great. The “failed” tart led to a dish that’s now a staple. It’s a reminder that mistakes can be delicious—literally. The salad’s spontaneity is part of its charm. It’s unfussy, adaptable, and forgiving, much like the best home cooking tends to be.
Final Thoughts:
This story makes me want to raid my fridge and see what I can throw together. It’s a celebration of resourcefulness and the joy of unplanned culinary wins. The salad’s origin—born from a picnic disaster—makes it feel relatable and real. It’s not a fussy restaurant dish; it’s something you can imagine making (and remaking) in your own kitchen.
The Science of Crunch (And Why It Matters)
Let’s talk texture. The success of this salad hinges on the cucumbers staying crisp, even after marinating. That’s not just luck—it’s science. Mini or Persian cucumbers have thinner skins and smaller seeds, which means less water content and better crunch retention. Slicing them thin (but not too thin) ensures they hold up to the dressing without turning soggy.
The dressing itself is a study in balance. The soy sauce provides umami, the vinegar adds acidity, and the sesame oil brings richness. But the real star is the garlic, which infuses the dish with its pungent aroma. The chili flakes, meanwhile, deliver capsaicin—the compound responsible for heat—which stimulates endorphins, literally making you feel good as you eat.
Print
Spicy Cucumber Salad
- Total Time: 25 minutes
Description
Born during a heatwave with no AC and only a handful of ingredients, this salad became my go-to summer rescue. Think crunchy cucumbers, bold chili heat, a garlicky punch, and a tangy-sweet kick that wakes up every bite. It’s light, flavorful, and ready in minutes—perfect for potlucks, lazy dinners, or fridge raids when it’s just too hot to cook.
Ingredients
For the Salad:
-
8 mini or Persian cucumbers, thinly sliced
-
1 green onion, finely sliced
-
1 tbsp toasted sesame seeds
For the Dressing:
-
1½ tbsp low-sodium soy sauce
-
1½ tbsp rice vinegar
-
1 tsp sesame oil
-
1 tbsp honey or maple syrup
-
2 garlic cloves, minced
-
1 tsp red chili flakes (adjust to taste)
Instructions
-
Prep Cucumbers: Slice cucumbers thinly and mix with green onion in a large bowl. Chill in the freezer while you make the dressing.
-
Whisk Dressing: Combine soy sauce, vinegar, sesame oil, honey, garlic, and chili flakes. Whisk until smooth.
-
Toss & Marinate: Pour dressing over chilled cucumbers. Toss gently to coat.
-
Rest: Let sit for 10–15 minutes to soak in flavor.
-
Serve: Garnish with toasted sesame seeds and serve slightly chilled.
Notes
-
Add ½ tsp grated fresh ginger for extra zing.
-
Store leftovers up to 2 days; drain before serving.
-
Serve with grilled meats, on avocado toast, or as a spicy side to rice bowls.
- Prep Time: 10 minutes
Nutrition
- Calories: 60 per serving
- Sugar: 4g
- Fat: 3g
- Carbohydrates: 7g
- Fiber: 1g
- Protein: 1g
Thoughts:
I’m fascinated by how small tweaks can elevate this salad. Toasting the sesame seeds, for example, unlocks their nutty flavor. Letting the salad sit for 10-15 minutes allows the cucumbers to absorb the dressing without losing their bite. Even the choice of honey over sugar adds a floral note that complements the heat. It’s a dish that rewards attention to detail.
Final Thoughts:
This salad is a reminder that great cooking is equal parts art and science. Understanding why things work—why the cucumbers stay crisp, why the flavors meld—makes you a better cook. But at the end of the day, it’s all about the joy of eating something that’s as satisfying to crunch as it is to taste. And that’s a win in my book.
📊 Nutrition Per Serving (Serves 4)
Calories: 60 | Carbs: 7g | Fat: 3g | Sugar: 4g | Protein: 1g | Fiber: 1g
Note: Values include honey. Use maple syrup for vegan.
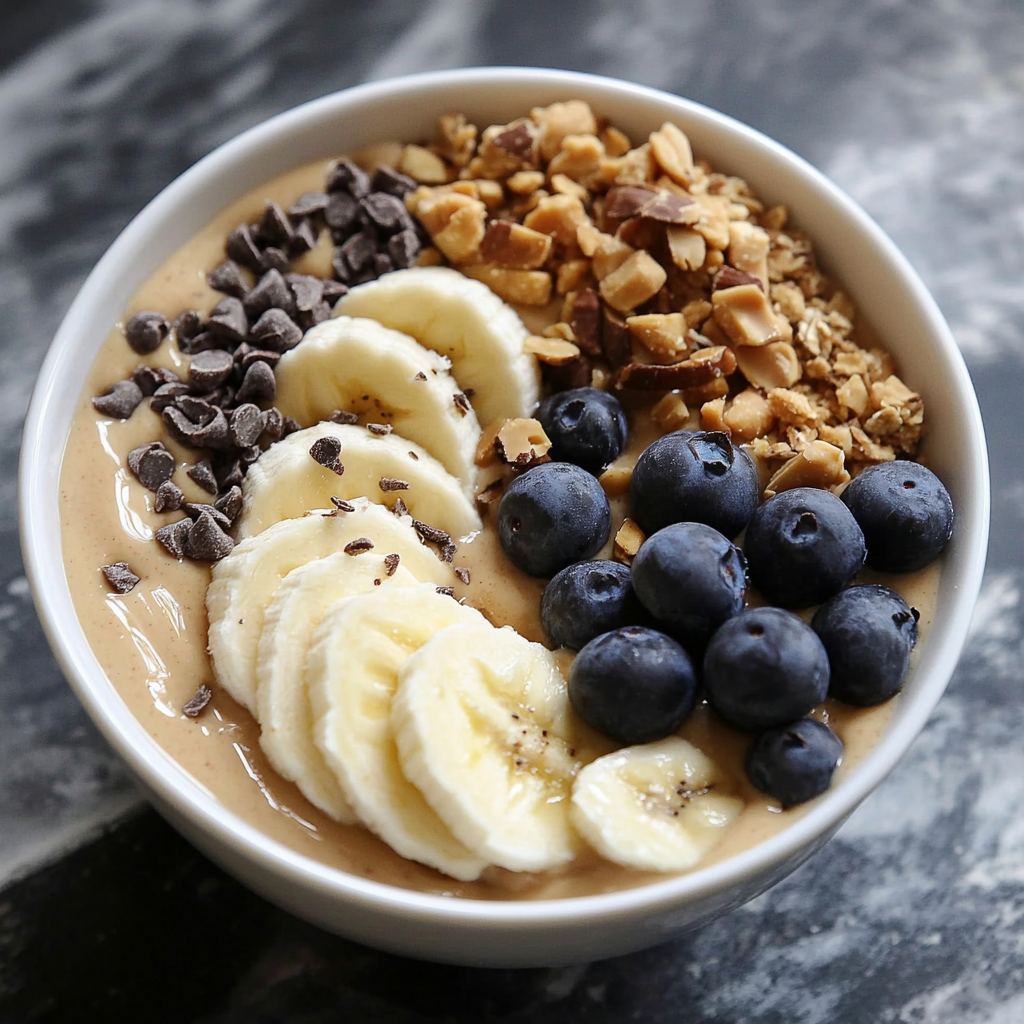
Peanut Butter Yogurt Bowls
Let’s Make Magic in a Bowl: Your New Favorite Snack Awaits!
Hey there, kitchen friend! Olivia here, apron dusted with cinnamon (as usual), ready to share one of my all-time feel-good food secrets. You know those afternoons when your energy crashes harder than a dropped soufflé? Or those mornings when you crave something sweet but don’t want to feel weighed down? Enter the superhero of simplicity: Peanut Butter Yogurt Bowls & Pots. This isn’t just a snack—it’s a creamy, dreamy hug in a bowl that takes literally 3 minutes to make.
Imagine this: velvety Greek yogurt swirled with rich peanut butter and a kiss of honey, creating a luscious base that’s pure protein-packed bliss. Then, you crown it with whatever makes your taste buds sing—banana slices for sunshine sweetness, crunchy granola for texture, or maybe chocolate chips because… well, chocolate. It’s endlessly customizable, ridiculously satisfying, and tastes like you fussed way more than you did. Whether you need a post-workout refuel, a desk lunch that doesn’t suck, or a wholesome dessert that feels indulgent, this bowl’s got your back. No fancy skills required—just a spoon and a happy appetite!
I call these my “Choose-Your-Own-Adventure” bowls because you are the boss here. Feeling virtuous? Load up on berries and seeds. Need a mood boost? Hello, sprinkles and crushed cookies! They’re perfect for meal prep, too—layer them in jars for grab-and-go goodness. So, let’s ditch the complicated recipes and embrace the joy of something wonderfully simple. Grab your favorite bowl (mine’s the chipped one with the polka dots—full of character!), and let’s whip up some edible happiness together!
My Peanut Butter Savior: A Snack Born of Chaos & Cravings
Picture it: my tiny apartment kitchen circa 2018. I was juggling recipe testing, a leaky sink, and a growling stomach that sounded like a disgruntled badger. It was 3 PM—that dreaded slump where coffee fails and cookies feel too heavy. I needed something now. My eyes darted between a half-eaten tub of Greek yogurt (leftover from breakfast) and the jar of peanut butter I’d been stress-spooning all week. Desperation breeds genius, right? I scooped both into a bowl, drizzled honey like a culinary SOS signal, grabbed the nearest banana, and stirred like my sanity depended on it.
What emerged was pure alchemy—creamy, tangy, nutty, sweet, and shockingly filling. That humble bowl became my daily ritual. I’d perch on my fire escape (the “break room”), savoring each bite while watching pigeons argue. It felt like a tiny act of rebellion against hectic days: “I deserve five minutes of delicious calm.” When my niece Zoe visited and declared it “better than ice cream” (high praise from an 8-year-old!), I knew it was special. Now, whether I’m prepping for a marathon cooking session or recovering from one, this bowl is my edible reset button—a sweet little reminder that joy doesn’t need to be complicated.
Gather Your Goodies: Simple Ingredients, Big Flavor
Here’s what you’ll need to build your masterpiece. Pro tip: Quality matters with so few ingredients!
- ⅔ cup Greek yogurt (full-fat recommended!) – This is your creamy foundation! Full-fat gives the richest texture (like edible silk). Insight: Straining regular yogurt in cheesecloth for 30 mins works in a pinch. For dairy-free, coconut yogurt adds tropical vibes!
- ⅓ cup smooth peanut butter – The star! Use natural PB for pure peanut flavor (just stir that oil in!). Chef Secret: Warm it slightly for easier mixing. Almond or sunflower butter? Go for it!
- 1 tbsp honey – Our natural sweetener. Swap smart: Maple syrup for vegan, or a mashed ripe banana for sugar-free sweetness.
Topping Ideas (Pick Your Posse!):
- Sliced banana – Classic pairing! Adds creaminess and potassium.
- Chocolate chips (dark, milk, or mini) – Melty pockets of joy! Use cacao nibs for crunch without sugar.
- Chopped peanuts – Double down on nuttiness! Toasted is *chef’s kiss*.
- Fresh berries or granola – Berries cut richness; granola adds crunch. Try my easy oat-almond granola recipe!
- Crushed Oreos or sprinkles – For your inner child! Perfect for dessert bowls.
Let’s Build That Bowl: Easy Steps to Yum
Ready? This is so simple, you’ll laugh. But I’ve got pro tricks to make it perfect every time!
- Choose Your Vessel: Grab a bowl for instant gratification or a cute jar for layering (great for picnics!). Tip: Wide bowls = more topping real estate! Jars? Start with yogurt mix, then toppings.
- Mix the Base: Plop yogurt, peanut butter, and honey together. DO NOT JUST STIR—use small, tight circles in the center first to incorporate the PB smoothly, then widen your strokes. Hack: If PB is stubborn, microwave it for 10 seconds! Want ultra-silky? Whisk it. Takes 1 extra minute = game changer.
- Taste & Tweak: Dip a spoon in! Need sweeter? Add another tsp of honey. Too thick? A splash of milk or almond milk loosens it beautifully. This is YOUR canvas—adjust!
- Top It Like a Pro: Channel your inner artist! Bananas fanned in a circle? Yes. Chocolate chips artfully scattered? Absolutely. Golden Rule: Mix textures! Creamy (yogurt) + Crunchy (granola) + Juicy (berries) = Bliss.
- Serve or Stash: Devour immediately for peak freshness, OR layer toppings in jars and refrigerate for up to 24 hours (perfect for grab-&-go!). Warning: Granola loses crunch overnight—add it last minute!
Making It Pretty: Serve with Joy!
Presentation is half the fun! For bowls, use the back of a spoon to swirl the base, then pile toppings high in the center—like a delicious mountain. In jars, layer: yogurt mix → banana slices → yogurt mix → berries/granola. Seal with a lid, tie a ribbon, and feel fancy! Serve with a long spoon for digging deep. Pair it with cold brew coffee for breakfast or a tiny espresso cup for dessert vibes. The goal? Make it look as joyful as it tastes!
Shake It Up: 5 Delicious Twists
Don’t stop at bananas! Try these riffs:
- “Elvis Special”: Base + sliced banana + crispy bacon bits + drizzle of honey. Sweet, salty, iconic!
- Tropical Escape: Coconut yogurt base + mango chunks + toasted coconut flakes + macadamia nuts.
- Berry Bliss: Base mixed with 1 tsp vanilla + mixed berries + chia seeds.
- Chocolate Lover’s: Add 1 tbsp cocoa powder to base + chocolate chips + crushed graham crackers.
- Protein Powerhouse: Stir 1 scoop vanilla protein powder into base + chopped almonds + hemp seeds.
Olivia’s Extra Scoops: Tips & Tales
This recipe has evolved from my “desperation snack” to a family legend! My husband now adds chili flakes (madness!), and Zoe insists on rainbow sprinkles only on Fridays. Lesson? Make it yours. Over the years, I’ve learned: Greek yogurt brands vary in thickness—if yours is super thick, add a splash of liquid. Natural peanut butter separates? Stir the jar well before using! Once, I accidentally used salted caramel peanut butter… and it was AMAZING. Don’t fear happy accidents! Also, confession: I’ve eaten this straight from the mixing bowl while “testing seasoning.” No regrets. It’s that forgiving and fabulous.
Your Questions, Answered!
Q: My peanut butter won’t blend smoothly! Help!
A: This happens! Warm your PB for 10 seconds in the microwave first. Start mixing in the center with a whisk or fork before incorporating all the yogurt. If lumps persist, embrace them—they’re like peanut butter surprises!
Q: Can I make this ahead?
A: Absolutely! Layer without crunchy toppings (granola, nuts) in a sealed jar for 24 hours. Add those right before eating. The base actually gets creamier as it chills!
Q: Is this healthy? Seems too good!
A: With quality ingredients, it’s a powerhouse! Greek yogurt = protein + probiotics. Natural PB = healthy fats + protein. Honey = natural sweetness. Toppings add fiber/vitamins. Balance is key—go light on sugary add-ons for everyday, or go wild occasionally!
Q: My yogurt mix is too thick/thin. Fixes?
A: Too thick? Add milk, 1 tsp at a time. Too thin? Use thicker yogurt next time, or stir in a pinch of oat flour or protein powder to absorb moisture.
Let’s Make Magic in a Bowl: Your New Favorite Snack Awaits!
Hey there, kitchen friend! Olivia here, apron dusted with cinnamon (as usual), ready to share one of my all-time feel-good food secrets. You know those afternoons when your energy crashes harder than a dropped soufflé? Or those mornings when you crave something sweet but don’t want to feel weighed down? Enter the superhero of simplicity: Peanut Butter Yogurt Bowls & Pots. This isn’t just a snack—it’s a creamy, dreamy hug in a bowl that takes literally 3 minutes to make.
Imagine this: velvety Greek yogurt swirled with rich peanut butter and a kiss of honey, creating a luscious base that’s pure protein-packed bliss. Then, you crown it with whatever makes your taste buds sing—banana slices for sunshine sweetness, crunchy granola for texture, or maybe chocolate chips because… well, chocolate. It’s endlessly customizable, ridiculously satisfying, and tastes like you fussed way more than you did. Whether you need a post-workout refuel, a desk lunch that doesn’t suck, or a wholesome dessert that feels indulgent, this bowl’s got your back. No fancy skills required—just a spoon and a happy appetite!
I call these my “Choose-Your-Own-Adventure” bowls because you are the boss here. Feeling virtuous? Load up on berries and seeds. Need a mood boost? Hello, sprinkles and crushed cookies! They’re perfect for meal prep, too—layer them in jars for grab-and-go goodness. So, let’s ditch the complicated recipes and embrace the joy of something wonderfully simple. Grab your favorite bowl (mine’s the chipped one with the polka dots—full of character!), and let’s whip up some edible happiness together!
Thoughts:
This introduction sets the tone for a fun, approachable recipe that feels like a kitchen triumph rather than just another snack. The emphasis on customization, speed, and satisfaction makes it appealing for busy folks, health-conscious eaters, and dessert lovers alike. The playful language (“hug in a bowl,” “edible happiness”) makes the reader feel like they’re in for a treat—literally and emotionally.
Final Thoughts:
The magic of this recipe lies in its versatility and simplicity. It’s a reminder that great food doesn’t have to be complicated. Whether you’re a meal-prep pro, a snack enthusiast, or someone who just needs a quick bite, this bowl is a no-stress, high-reward solution.
My Peanut Butter Savior: A Snack Born of Chaos & Cravings
Picture it: my tiny apartment kitchen circa 2018. I was juggling recipe testing, a leaky sink, and a growling stomach that sounded like a disgruntled badger. It was 3 PM—that dreaded slump where coffee fails and cookies feel too heavy. I needed something now. My eyes darted between a half-eaten tub of Greek yogurt (leftover from breakfast) and the jar of peanut butter I’d been stress-spooning all week. Desperation breeds genius, right? I scooped both into a bowl, drizzled honey like a culinary SOS signal, grabbed the nearest banana, and stirred like my sanity depended on it.
What emerged was pure alchemy—creamy, tangy, nutty, sweet, and shockingly filling. That humble bowl became my daily ritual. I’d perch on my fire escape (the “break room”), savoring each bite while watching pigeons argue. It felt like a tiny act of rebellion against hectic days: “I deserve five minutes of delicious calm.” When my niece Zoe visited and declared it “better than ice cream” (high praise from an 8-year-old!), I knew it was special. Now, whether I’m prepping for a marathon cooking session or recovering from one, this bowl is my edible reset button—a sweet little reminder that joy doesn’t need to be complicated.
Thoughts:
This backstory adds personality and relatability to the recipe. Everyone has had those moments of kitchen desperation where they throw things together—and sometimes, it works spectacularly. The imagery of eating on a fire escape and the niece’s approval make it feel authentic and heartwarming.
Final Thoughts:
The best recipes often come from happy accidents. This story reinforces that cooking doesn’t always have to be precise—sometimes, the best dishes are born from instinct, necessity, and a little bit of chaos.
Gather Your Goodies: Simple Ingredients, Big Flavor
Here’s what you’ll need to build your masterpiece. Pro tip: Quality matters with so few ingredients!
The Base:
-
⅔ cup Greek yogurt (full-fat recommended!) – This is your creamy foundation! Full-fat gives the richest texture (like edible silk). Insight: Straining regular yogurt in cheesecloth for 30 mins works in a pinch. For dairy-free, coconut yogurt adds tropical vibes!
-
⅓ cup smooth peanut butter – The star! Use natural PB for pure peanut flavor (just stir that oil in!). Chef Secret: Warm it slightly for easier mixing. Almond or sunflower butter? Go for it!
-
1 tbsp honey – Our natural sweetener. Swap smart: Maple syrup for vegan, or a mashed ripe banana for sugar-free sweetness.
Topping Ideas (Pick Your Posse!):
-
Sliced banana – Classic pairing! Adds creaminess and potassium.
-
Chocolate chips (dark, milk, or mini) – Melty pockets of joy! Use cacao nibs for crunch without sugar.
-
Chopped peanuts – Double down on nuttiness! Toasted is chef’s kiss.
-
Fresh berries or granola – Berries cut richness; granola adds crunch. Try my easy oat-almond granola recipe!
-
Crushed Oreos or sprinkles – For your inner child! Perfect for dessert bowls.
Peanut Butter Yogurt Bowls
- Total Time: 3–30 minutes
Description
One busy afternoon, with chaos swirling and hunger roaring, I swirled together Greek yogurt, peanut butter, and honey. What came out wasn’t just a snack—it was sanity in a bowl. Smooth, nutty, and naturally sweet, it became my go-to for everything from late breakfasts to late-night cravings. Easy, nourishing, and endlessly customizable, this little bowl is joy you can eat with a spoon.
Ingredients
-
⅔ cup Greek yogurt (full-fat recommended for richness)
-
⅓ cup smooth peanut butter (natural preferred)
-
1 tbsp honey (or maple syrup/mashed banana for a twist)
Topping Ideas:
-
Sliced banana or fresh berries
-
Dark chocolate chips or cacao nibs
-
Granola or crushed nuts
-
Sprinkles or cookie crumbs for fun!
Instructions
-
Mix Base: In a bowl or jar, stir together yogurt, peanut butter, and honey. Start mixing in tight circles to blend smoothly.
-
Taste & Adjust: Add extra honey for sweetness, or a splash of milk if it’s too thick.
-
Add Toppings: Layer on fruit, chocolate chips, nuts—your favorites!
-
Serve or Store: Enjoy right away or refrigerate in jars for up to 24 hours. Add crunchy toppings just before eating.
Notes
-
Warm peanut butter for easier blending.
-
For meal prep, layer in jars but add granola last-minute for crunch.
-
Customize for seasons—cinnamon & apples in fall, mango & coconut in summer!
- Prep Time: 3 minutes
Nutrition
- Calories: 310 (base only, approx. per serving)
- Sugar: 8g
- Fat: 22g
- Carbohydrates: 12g
- Fiber: 2g
- Protein: 20g
Thoughts:
This section ensures the reader knows exactly what they need—no guesswork. The tips and swaps make it adaptable for different diets (vegan, dairy-free, sugar-conscious). The topping suggestions encourage creativity, so no two bowls have to be the same.
Final Thoughts:
With just three core ingredients, this recipe is accessible to everyone. The toppings are where the fun begins—endless possibilities mean you’ll never get bored. Whether you want healthy, indulgent, or somewhere in between, this bowl delivers.
Nutritional Nibbles (Base Only)
Calories: 310 | Protein: 20g | Carbs: 12g | Fat: 22g | Sugar: 8g | Fiber: 2g
Note: Toppings change values. Approximate, based on standard ingredients.
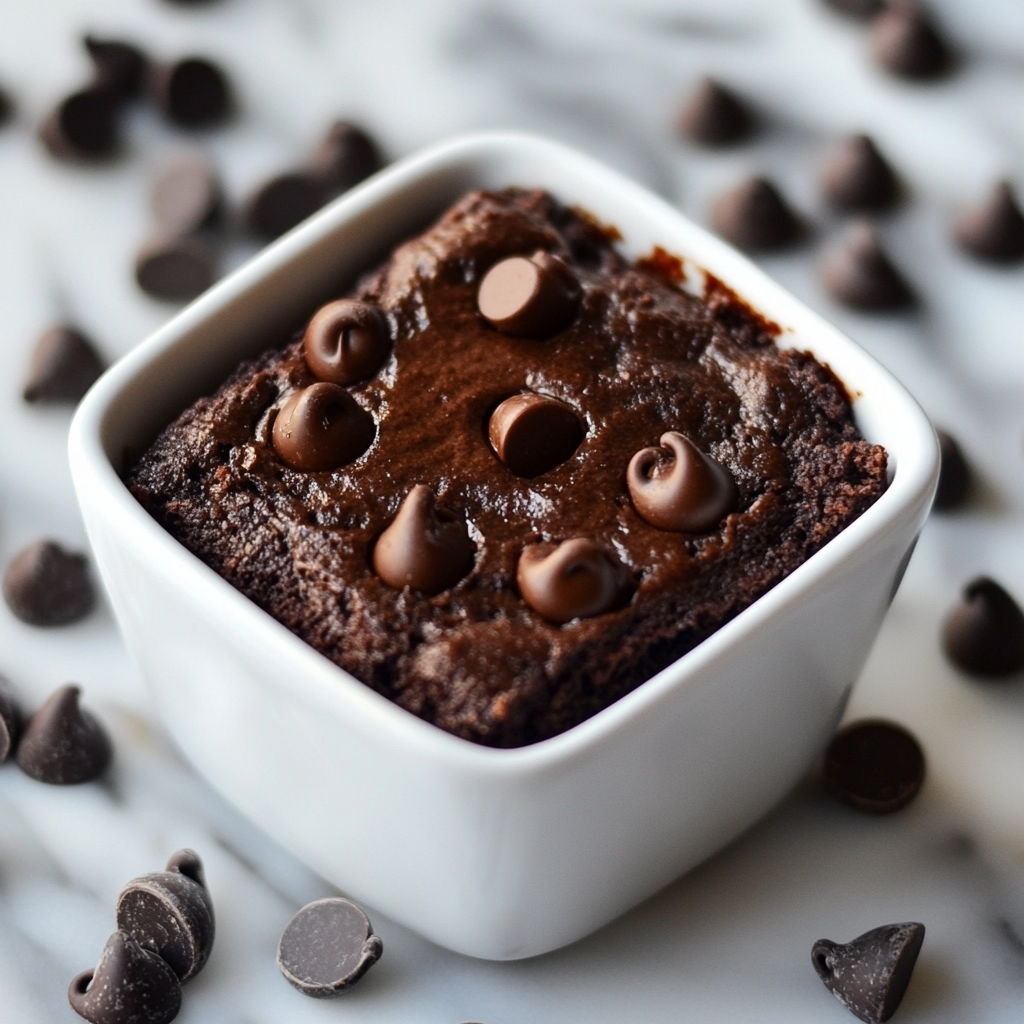
Two-Minute Protein Brownie
When Chocolate Cravings Strike… We Strike Back!
Hey there, friend! Olivia here, waving at you from my flour-dusted kitchen counter. You know those moments? When it’s 9 PM, your soul is screaming for chocolate, and baking a whole pan of brownies feels like climbing Everest? Or when your post-workout hunger morphs into a *need* for something decadent, but you’re trying to be kind to your goals? Yeah, I’ve been camped out in that exact emotional snack bunker more times than I can count. That’s why I’m practically giddy to share my superhero of snacks: the Two-Minute Protein Brownie.
This isn’t just a recipe—it’s your edible life raft. Imagine: warm, fudgy, deeply chocolatey goodness with a molten center, ready faster than you can find your TV remote. No oven, no fancy gadgets, and zero gluten. Just one mug, a few pantry staples, and the magical power of your microwave. It’s packed with protein to keep you satisfied, low in sugar, and utterly indulgent. Whether you’re a busy parent sneaking a quiet moment, a student cramming for exams, or just someone who believes chocolate is a major food group (raises hand!), this little miracle is about to become your bestie. So grab your favorite mug—let’s make magic!
The Midnight Brownie Epiphany
Picture this: It’s midnight during my final semester of college. Papers are piled high, stress is higher, and my craving for my mom’s legendary fudge brownies hits like a freight train. But my dorm “kitchen” was a sad microwave and a mini-fridge. Desperation led to experimentation. Greek yogurt (always in the fridge for breakfast), cocoa powder (my emergency stash), and a lonely egg became my tools. After a few hilarious failures (we don’t speak of the “chocolate lava scramble”), I nailed it. That first warm, spoonful of rich, gooey brownie—made in 90 seconds with zero clean-up—felt like a revolution. It wasn’t just dessert; it was comfort, victory, and self-care in a mug. Now, years later, it’s still my secret weapon against chaos. My husband calls it my “superhero cape snack.” Honestly? He’s not wrong.
Your Chocolate Rescue Squad: Simple, Smart Ingredients
Gather these pantry heroes! Every ingredient pulls double duty for flavor, texture, and nutrition:
- 1 Egg – Your binding powerhouse! Adds richness and helps the brownie rise. Vegan? Swap for a flax egg (1 tbsp ground flax + 2.5 tbsp water, let sit 5 mins).
- ⅓ Cup Greek Yogurt (Plain) – The secret to insane moisture and a protein punch! Insider Tip: Full-fat = extra fudgy heaven. Dairy-free? Use unsweetened almond or coconut yogurt.
- 1 Tbsp Sweetener – Honey or maple syrup for natural vibes, monk fruit for sugar-free. Chef’s Whisper: Liquid sweeteners keep it gooey! Granular? Add 1 tsp extra yogurt.
- 3 Tbsp Cocoa Powder – NON-negotiable for deep chocolate bliss! Use dutch-process for smoother flavor or raw cacao for antioxidant boost.
- 1 Tbsp Chocolate Protein Powder – Amplifies chocolate + adds staying power. Whey protein isolate blends best! Plant-based? Opt for a brownie-friendly brand (avoid gritty ones!).
- Chocolate Chips (or Chunks!) – Because melty pockets = joy. Dark chocolate (70%+) keeps sugar low. Sugar-free chips work too!
Let’s Build Your Brownie: Fast, Foolproof Steps!
Ready? Set? MUG! Here’s how to craft your masterpiece:
- Grab Your Vessel: Choose a large microwave-safe mug or small bowl (trust me, it puffs up!). Ceramic or glass works best. No need to grease it! Why? The yogurt prevents sticking!
- Whisk the Wet Team: Crack in the egg and add the Greek yogurt. Whisk like you mean it—until completely smooth and creamy, no streaks! Pro Tip: Use a tiny fork or small whisk. Lumps = sad brownie texture.
- Dump the Dry Crew: Add the sweetener, cocoa powder, and protein powder right on top. Chef Hack: Sift the cocoa & protein powder if clumpy! Nobody wants a chalky surprise.
- Stir It Like You Love It: Stir vigorously until you have a thick, luscious, dark batter. Scrape the sides! It should look like decadent chocolate pudding. Watch for hidden dry patches!
- Chocolate Chip Bliss: Fold in your chocolate chips (or chunks!). Be gentle but thorough—distribute that joy! Save a few for a melty top garnish? Yes, please.
- Microwave Magic: Pop it in the microwave. Start with 60 seconds on HIGH. Peek! It should look set around edges but slightly jiggly in the center (that’s your fudgy heart!). If needed, add 10-15 second bursts (MAX 90 secs total). OVERCOOKING = CAKEY BROWNIE (tragedy!).
- The Patience Test: Carefully remove (mug = HOT!). Let it rest for 1-2 minutes. This is CRUCIAL! It finishes cooking, firms up slightly, and prevents molten chocolate lava burns (ouch!).
- Dive In! Grab a spoon and attack that warm, gooey perfection straight from the mug. Pure. Bliss.
Serving Your Single-Serve Sensation
Embrace the mug life! This brownie is meant to be eaten warm, cozy, and straight from its vessel—no fancy plating needed. For extra “I’m treating myself” vibes, top it with a dollop of Greek yogurt (like tangy whipped cream!), a drizzle of almond butter, or a sprinkle of flaky sea salt. Pair it with a big glass of cold almond milk or your favorite coffee. Perfect for couch snuggles, desk fuel, or a secret kitchen moment!
Mix It Up! Your Brownie, Your Rules
Craving a twist? Try these fun spins:
- Peanut Butter Cup Swirl: Drop 1 tbsp peanut butter into the batter before microwaving. Swirl gently with a knife!
- Mint Chocolate Chip: Add ¼ tsp peppermint extract + swap chips for sugar-free dark mint chips.
- Espresso Kick: Stir in ½ tsp instant espresso powder with the cocoa for deep mocha flavor.
- Berry Burst: Fold in 2 tbsp fresh raspberries or chopped strawberries before cooking.
- Nutty Crunch: Top with crushed pecans, walnuts, or almonds before microwaving.
Olivia’s Kitchen Confessions
Okay, real talk: This brownie has seen some… *experimental* phases. There was the “avocado swap” era (result: greenish, oddly savory… nope). The “protein powder overload” incident (aka The Hockey Puck). Lesson learned! Simplicity wins. Over the years, I’ve tweaked the ratios obsessively—more yogurt for fudginess, less sweetener to let the chocolate shine, precise microwave times for that perfect gooey center. My biggest tip? KNOW YOUR MICROWAVE. They vary wildly! Mine sings at 70 seconds. Yours might be a 55-second rockstar. Start low, peek often. And laugh if it overflows (it happens!). This little brownie isn’t just food; it’s a 2-minute hug. I hope it becomes your happy place too!
Your Brownie Questions, Answered!
Q: My brownie came out rubbery! What went wrong?
A: Overmixing or overcooking is usually the culprit! Mix *just* until combined after adding dry ingredients. And watch that microwave time like a hawk—stop when the center is still slightly jiggly. It sets as it cools!
Q: Can I bake this in the oven instead?
A: Absolutely! Pour batter into a greased ramekin. Bake at 350°F (175°C) for 12-18 minutes, until edges are set but center is soft. It’s less “instant,” but still delicious!
Q: My batter seems too thick/dry. Help!
A: Different yogurts/protein powders absorb differently! If it’s pasty, add ½-1 tsp milk (dairy or plant-based) or water. Aim for a thick but pourable brownie batter consistency.
Q: Can I make this without protein powder?
A: Yes! Replace the protein powder with 1 extra tbsp cocoa powder + ½ tbsp almond flour or oat flour. Texture will be slightly less fluffy but still delicious and fudgy.
When Chocolate Cravings Strike… We Strike Back!
Hey there, friend! Olivia here, waving at you from my flour-dusted kitchen counter. You know those moments? When it’s 9 PM, your soul is screaming for chocolate, and baking a whole pan of brownies feels like climbing Everest? Or when your post-workout hunger morphs into a need for something decadent, but you’re trying to be kind to your goals? Yeah, I’ve been camped out in that exact emotional snack bunker more times than I can count. That’s why I’m practically giddy to share my superhero of snacks: the Two-Minute Protein Brownie.
This isn’t just a recipe—it’s your edible life raft. Imagine: warm, fudgy, deeply chocolatey goodness with a molten center, ready faster than you can find your TV remote. No oven, no fancy gadgets, and zero gluten. Just one mug, a few pantry staples, and the magical power of your microwave. It’s packed with protein to keep you satisfied, low in sugar, and utterly indulgent. Whether you’re a busy parent sneaking a quiet moment, a student cramming for exams, or just someone who believes chocolate is a major food group (raises hand!), this little miracle is about to become your bestie. So grab your favorite mug—let’s make magic!
Thoughts on Instant Indulgence
In a world where convenience often means sacrificing nutrition or flavor, this Two-Minute Protein Brownie is a revelation. It’s proof that you don’t have to choose between health and indulgence. The beauty of this recipe lies in its simplicity—no complicated techniques, no obscure ingredients, just straightforward, wholesome goodness.
I love how adaptable it is, too. Whether you’re vegan, gluten-free, or just trying to cut back on sugar, this brownie can be tweaked to fit your needs. And the best part? It’s impossible to mess up. Even if you overcook it slightly, you’re still left with a delicious, chocolatey treat.
But beyond practicality, there’s something deeply comforting about this recipe. It’s a reminder that self-care doesn’t have to be elaborate. Sometimes, it’s as simple as taking two minutes to make something that feels like a hug in a mug.
Final Thoughts
If you’ve ever felt guilty about giving in to a chocolate craving, this recipe is your permission slip to enjoy dessert without regret. It’s quick, satisfying, and packed with enough protein to keep you full—not to mention the sheer joy of eating warm, gooey chocolate straight from the mug.
So next time that late-night craving hits, or you need a post-workout pick-me-up, remember: you don’t have to resist. You just have to strike back—with a spoon and a microwave.
The Midnight Brownie Epiphany
Picture this: It’s midnight during my final semester of college. Papers are piled high, stress is higher, and my craving for my mom’s legendary fudge brownies hits like a freight train. But my dorm “kitchen” was a sad microwave and a mini-fridge. Desperation led to experimentation. Greek yogurt (always in the fridge for breakfast), cocoa powder (my emergency stash), and a lonely egg became my tools. After a few hilarious failures (we don’t speak of the “chocolate lava scramble”), I nailed it. That first warm, spoonful of rich, gooey brownie—made in 90 seconds with zero clean-up—felt like a revolution. It wasn’t just dessert; it was comfort, victory, and self-care in a mug. Now, years later, it’s still my secret weapon against chaos. My husband calls it my “superhero cape snack.” Honestly? He’s not wrong.
Thoughts on Kitchen Creativity
This brownie was born out of necessity, but it taught me something important: some of the best recipes come from limitations. When you don’t have an oven, a fully stocked pantry, or even much time, you get creative. And often, that creativity leads to something unexpectedly amazing.
I also love how this recipe represents resourcefulness. Instead of giving up on my craving (or worse, settling for a sad, store-bought snack), I found a way to make something better. That mindset applies to so much in life—when things don’t go as planned, sometimes the solution is just a little improvisation.
Final Thoughts
This Two-Minute Protein Brownie isn’t just a dessert; it’s a reminder that great things can come from small, desperate moments. Whether you’re a college student surviving finals, a parent sneaking a late-night treat, or just someone who loves chocolate, this recipe is proof that indulgence doesn’t have to be complicated.
So embrace the chaos, grab a mug, and make something delicious. Because sometimes, the best solutions are the simplest ones.
Your Chocolate Rescue Squad: Simple, Smart Ingredients
Gather these pantry heroes! Every ingredient pulls double duty for flavor, texture, and nutrition:
-
1 Egg – Your binding powerhouse! Adds richness and helps the brownie rise. Vegan? Swap for a flax egg (1 tbsp ground flax + 2.5 tbsp water, let sit 5 mins).
-
⅓ Cup Greek Yogurt (Plain) – The secret to insane moisture and a protein punch! Insider Tip: Full-fat = extra fudgy heaven. Dairy-free? Use unsweetened almond or coconut yogurt.
-
1 Tbsp Sweetener – Honey or maple syrup for natural vibes, monk fruit for sugar-free. Chef’s Whisper: Liquid sweeteners keep it gooey! Granular? Add 1 tsp extra yogurt.
-
3 Tbsp Cocoa Powder – NON-negotiable for deep chocolate bliss! Use dutch-process for smoother flavor or raw cacao for antioxidant boost.
-
1 Tbsp Chocolate Protein Powder – Amplifies chocolate + adds staying power. Whey protein isolate blends best! Plant-based? Opt for a brownie-friendly brand (avoid gritty ones!).
-
Chocolate Chips (or Chunks!) – Because melty pockets = joy. Dark chocolate (70%+) keeps sugar low. Sugar-free chips work too!
Thoughts on Ingredient Choices
What I love most about this recipe is that every ingredient serves a purpose—nothing is wasted, nothing is unnecessary. The Greek yogurt keeps it moist, the egg binds it, and the cocoa powder delivers that deep, rich chocolate flavor. Even the protein powder isn’t just for nutrition; it enhances the chocolate taste while adding structure.
This is also a forgiving recipe. Don’t have Greek yogurt? Regular yogurt (or even applesauce) works. Out of eggs? A flax egg does the trick. It’s flexible enough to adapt to what you have on hand, which makes it perfect for those “I need chocolate NOW” emergencies.
Two-Minute Protein Brownie
- Total Time: 5 minutes
Description
Late-night cravings? Post-gym chocolate dreams? This warm, gooey, single-serve brownie has your back in just 2 minutes. Born from a microwave mishap in a college dorm, it’s now my go-to comfort fix—packed with protein, low in sugar, and made with ingredients you probably already have. No oven, no mess—just chocolate magic in a mug.
Ingredients
-
1 egg (or flax egg for vegan)
-
⅓ cup plain Greek yogurt (full-fat for fudginess)
-
1 tbsp honey or maple syrup (or monk fruit for sugar-free)
-
3 tbsp cocoa powder
-
1 tbsp chocolate protein powder (optional)
-
1–2 tbsp dark chocolate chips or chunks
Instructions
-
Mix Wet Ingredients: In a microwave-safe mug, whisk together egg and yogurt until smooth.
-
Add Dry Ingredients: Stir in sweetener, cocoa powder, and protein powder. Mix until a thick batter forms.
-
Fold in Chocolate: Add chocolate chips, stirring gently. Sprinkle a few on top for melt-factor.
-
Microwave: Heat on high for 60–75 seconds. The center should still look slightly gooey. Do not overcook!
-
Cool Slightly: Let rest for 1–2 minutes. Enjoy straight from the mug!
Notes
-
Adjust microwave time by wattage—start with 60 sec and add in 10-sec bursts.
-
Want extra richness? Swirl in 1 tbsp nut butter before cooking.
-
Vegan? Use coconut yogurt and a flax egg!
- Prep Time: 2 minutes
- Cook Time: 1 minute
Nutrition
- Calories: 220 per serving
- Sugar: 4g
- Fat: 12g
- Carbohydrates: 9g
- Fiber: 3g
- Protein: 17g
Final Thoughts
The magic of this brownie lies in its simplicity and balance. It’s not just about throwing ingredients together—it’s about choosing ones that work together to create something greater than the sum of its parts.
So next time you’re staring at your pantry, wondering if you can possibly make dessert with what you have, remember: you probably can. And it might just be the best brownie you’ve ever had.
Nutritional Info (Approximate, per brownie)
Calories: 220 | Protein: 17g | Carbs: 9g (Net Carbs: 6g) | Fat: 12g | Sugar: 4g | Fiber: 3g
Note: Values vary based on specific ingredients used (e.g., yogurt fat %, sweetener type, chocolate chips).
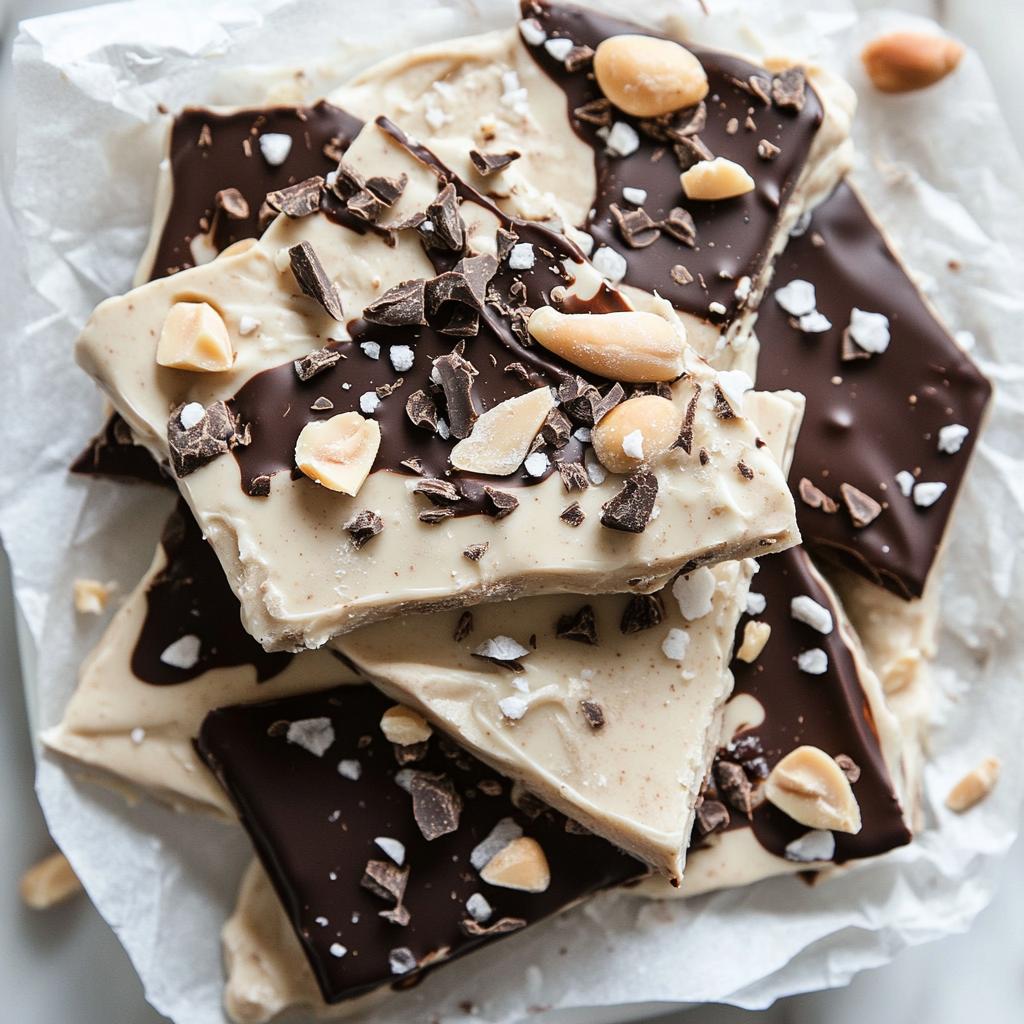
Greek Yogurt Protein Bark
That Magical Moment When Snack Time Feels Like a Victory Lap
Hey there, kitchen friend! Olivia here, waving from my flour-dusted counter. You know those afternoons when your energy tanks faster than a soufflé in a thunderstorm? When you’re craving something cold, sweet, and downright indulgent—but your body’s screaming for actual fuel? Yeah, me too. That’s exactly why I fell head-over-apron for this Greek Yogurt Protein Bark. Picture this: creamy, tangy yogurt swirled with rich peanut butter, topped with a crackly dark chocolate cloak, all frozen into satisfying shards you can grab straight from the freezer. It’s like a candy bar and a protein shake had a deliciously crunchy love child. No oven, no fuss—just pure, icy joy that keeps you powered through chaotic days. Whether you’re sneaking a piece post-workout, bribing kids (or yourself!) into happiness, or just treating your taste buds, this bark is your secret weapon. Let’s make snack time feel like a celebration, shall we?
The Melted Ice Cream Incident That Started It All
Rewind to last July: my kitchen felt like a sauna, and my nephews were visiting. We’d promised them “special ice cream” after hiking, but when we opened the freezer? Tragedy. My fancy pint had melted into a sad puddle. Cue three very dramatic sighs. Panic mode activated! I scanned the kitchen—Greek yogurt, peanut butter, protein powder (leftover from my smoothie phase), and emergency chocolate chips. I mixed everything frantically, slapped it on a tray, drowned it in melted chocolate, and bribed the kids with “magic freezer candy.” Two hours later? They DEVOURED it. My nephew Max, chocolate smeared on his chin, declared it “way cooler than boring ice cream.” And just like that, our accidental hero snack was born. Now, it’s a summer ritual—proof that happy accidents make the best recipes!
Your Grocery List, But Make It ✨Sparkly✨
Gather these pantry pals (and why they matter!):
- 1 cup plain Greek yogurt (full fat): The creamy MVP! Full-fat hugs your taste buds while staying protein-packed. Swap: Dairy-free? Coconut yogurt works—just strain it in cheesecloth first to thicken.
- ¾ cup peanut butter: Nutty richness that binds everything. Chef’s hack: Warm it slightly for easier mixing! Swap: Almond or sunflower butter for allergies.
- ¼ cup vanilla protein powder: Our stealthy protein boost! Vanilla adds warmth. Skip if you hate it—just add 1 extra tbsp maple syrup.
- 1–2 tbsp maple syrup or honey: Just enough sweetness to dance with the tang. Start with 1 tbsp—you can always add more!
- ¼ tsp vanilla extract: The fairy dust that makes flavors pop. Use the good stuff—real vanilla only!
- 1 cup dark chocolate chips (melted): The crispy crown! Dark chocolate balances sweetness. Chef’s tip: Melt with 1 tsp coconut oil for extra snap.
- Flaked sea salt (optional): Trust me—it’s the Beyoncé of toppings. That salty crunch? *Chef’s kiss*.
Let’s Build Some Delicious Chaos!
Ready? Aprons optional, enthusiasm mandatory:
- Mix it like you mean it: Dump yogurt, peanut butter, protein powder, maple syrup, and vanilla into a bowl. Grab a spatula and stir until smooth and dreamy—no lumps allowed! Pro tip: If your PB’s stubborn, microwave the bowl for 15 seconds to soften it.
- Spread the love: Line a baking sheet with parchment paper (non-negotiable for easy peeling!). Pour your mixture onto it. Use the spatula to spread it evenly into a ½-inch layer. Think “yogurt blanket.” Hack: Wet your spatula lightly to prevent sticking!
- Chocolate waterfall time: Melt chocolate chips (stovetop or microwave—no judgment!). Drizzle it lavishly over the yogurt layer. Swirl with a knife for artsy marbling. Now, sprinkle flaked salt like confetti! Chef’s secret: Work fast before the chocolate sets!
- Freeze your masterpiece: Slide the tray into the freezer. Set a timer for 2–3 hours. Patience check: Don’t peek! Let it set completely.
- Break it, baby! Remove the tray. Grab the parchment edges and lift. Now, channel your inner rock star—smack it gently on the counter to crack into rustic shards. Storage pro tip: Keep pieces in a freezer bag—they’ll stay crisp for 2 weeks!
How to Serve Your Edible Jewelry
This isn’t just food—it’s an experience! Serve straight from the freezer for maximum crunch. Pile shards high in a bowl for sharing (or hoarding). Pair with iced coffee for an afternoon lift, or crumble over oatmeal for breakfast drama. Feeling fancy? Drizzle extra melted peanut butter on top. Just watch people’s eyes light up when they bite into that creamy-cold-chocolatey magic!
Switch It Up, Superstar!
Make this bark your own with these twists:
- Berry Blast: Press fresh raspberries into the yogurt layer before freezing.
- Tropical Escape: Swap peanut butter for coconut butter, and top with toasted coconut + dried mango.
- Cookie Monster: Crush your favorite protein cookies into the mix—hello, texture party!
- Vegan Vibes: Use coconut yogurt, maple syrup, and dairy-free chocolate.
- Mocha Madness: Add 1 tbsp espresso powder to the yogurt mix. You’re welcome, coffee lovers!
Confessions from My Messy Apron Pocket
This recipe? It’s evolved like my questionable haircuts in college. Version 1.0 used honey instead of maple syrup—tasted great but froze rock-hard! Then I tried low-fat yogurt… big mistake (watery sadness). Now? I embrace the full-fat glory. Funny story: Once, I forgot the parchment paper. Spent 20 minutes chiseling bark off the tray with a butter knife—while my dog “helped” by licking chocolate off the floor. Lesson learned! Now, I triple-check that paper. Over time, I’ve added more protein powder (for gym days) and less sweetener (because life’s already sweet enough). Make it yours—that’s the joy!
That Magical Moment When Snack Time Feels Like a Victory Lap
Hey there, kitchen friend! Olivia here, waving from my flour-dusted counter. You know those afternoons when your energy tanks faster than a soufflé in a thunderstorm? When you’re craving something cold, sweet, and downright indulgent—but your body’s screaming for actual fuel? Yeah, me too. That’s exactly why I fell head-over-apron for this Greek Yogurt Protein Bark.
Picture this: creamy, tangy yogurt swirled with rich peanut butter, topped with a crackly dark chocolate cloak, all frozen into satisfying shards you can grab straight from the freezer. It’s like a candy bar and a protein shake had a deliciously crunchy love child. No oven, no fuss—just pure, icy joy that keeps you powered through chaotic days.
Whether you’re sneaking a piece post-workout, bribing kids (or yourself!) into happiness, or just treating your taste buds, this bark is your secret weapon. Let’s make snack time feel like a celebration, shall we?
Thoughts:
This recipe is a game-changer for anyone who struggles with afternoon slumps. It’s indulgent enough to satisfy a sweet tooth but packed with protein to keep you full. Plus, the no-bake factor makes it perfect for hot summer days when turning on the oven feels like a crime.
Final Thoughts:
If you’ve ever wished for a snack that tastes like dessert but fuels like a meal, this is it. It’s versatile, easy, and downright delicious—the kind of recipe you’ll keep coming back to.
The Melted Ice Cream Incident That Started It All
Rewind to last July: my kitchen felt like a sauna, and my nephews were visiting. We’d promised them “special ice cream” after hiking, but when we opened the freezer? Tragedy. My fancy pint had melted into a sad puddle. Cue three very dramatic sighs.
Panic mode activated! I scanned the kitchen—Greek yogurt, peanut butter, protein powder (leftover from my smoothie phase), and emergency chocolate chips. I mixed everything frantically, slapped it on a tray, drowned it in melted chocolate, and bribed the kids with “magic freezer candy.”
Two hours later? They DEVOURED it. My nephew Max, chocolate smeared on his chin, declared it “way cooler than boring ice cream.” And just like that, our accidental hero snack was born. Now, it’s a summer ritual—proof that happy accidents make the best recipes!
Thoughts:
This story is a reminder that some of the best recipes come from kitchen disasters. Instead of stressing over a melted dessert, I turned it into something even better—a protein-packed, freezer-friendly treat that’s now a family favorite.
Final Thoughts:
Never underestimate the power of improvisation in the kitchen. Sometimes, the most unexpected fails lead to the most delicious wins.
Your Grocery List, But Make It ✨Sparkly✨
Gather these pantry pals (and why they matter!):
-
1 cup plain Greek yogurt (full fat) – The creamy MVP! Full-fat hugs your taste buds while staying protein-packed. Swap: Dairy-free? Coconut yogurt works—just strain it in cheesecloth first to thicken.
-
¾ cup peanut butter – Nutty richness that binds everything. Chef’s hack: Warm it slightly for easier mixing! Swap: Almond or sunflower butter for allergies.
-
¼ cup vanilla protein powder – Our stealthy protein boost! Vanilla adds warmth. Skip if you hate it—just add 1 extra tbsp maple syrup.
-
1–2 tbsp maple syrup or honey – Just enough sweetness to dance with the tang. Start with 1 tbsp—you can always add more!
-
¼ tsp vanilla extract – The fairy dust that makes flavors pop. Use the good stuff—real vanilla only!
-
1 cup dark chocolate chips (melted) – The crispy crown! Dark chocolate balances sweetness. Chef’s tip: Melt with 1 tsp coconut oil for extra snap.
-
Flaked sea salt (optional) – Trust me—it’s the Beyoncé of toppings. That salty crunch? Chef’s kiss.
Your Bark Questions, Answered!
Let’s troubleshoot like pros:
- “Why is my bark soggy?!” Ah, the yogurt water strike! Always use thick Greek yogurt (drain it in a sieve if watery). Low-fat versions add more liquid—stick to full-fat for perfect texture.
- “Can I use regular yogurt?” Greek yogurt is key—it’s strained, so less moisture. Regular yogurt turns icy and brittle. In a pinch? Strain regular yogurt overnight in the fridge!
- “Help! My chocolate cracked like glass!” You over-melted it, friend! Chocolate seizes if overheated. Melt it gently: microwave in 20-second bursts, stirring between. Add 1 tsp coconut oil for flexibility.
- “How long does it last?” In an airtight freezer bag? 2 weeks max! After that, it might get frosty (still edible, just less glam).
Greek Yogurt Protein Bark
- Total Time: 3 hours
Description
One hot summer day, a melted ice cream disaster sparked a happy kitchen accident—and this bark was born! Creamy Greek yogurt, rich peanut butter, and a chocolatey crunch make this the perfect grab-and-go snack or post-workout treat. Easy to make, fun to crack, and full of flavor, it’s your freezer’s new favorite tenant.
Ingredients
-
1 cup plain full-fat Greek yogurt
-
¾ cup peanut butter (warm slightly for easy mixing)
-
¼ cup vanilla protein powder (optional)
-
1–2 tbsp maple syrup or honey
-
¼ tsp vanilla extract
-
1 cup dark chocolate chips, melted
-
Flaked sea salt (optional, but magical)
Instructions
-
Mix the Base: In a bowl, combine yogurt, peanut butter, protein powder, sweetener, and vanilla. Stir until smooth.
-
Spread It Out: Line a baking sheet with parchment. Spread mixture into a ½-inch thick rectangle.
-
Top with Chocolate: Pour melted chocolate over yogurt layer. Swirl gently and sprinkle sea salt on top.
-
Freeze: Place tray in freezer for 2–3 hours until solid.
-
Break and Store: Lift parchment and break bark into pieces. Store in a freezer-safe bag for up to 2 weeks.
Notes
-
Use full-fat yogurt to avoid ice crystals.
-
Add 1 tsp coconut oil to chocolate for smoother texture.
-
Customize with fruit, nuts, or seeds for added flair.
- Prep Time: 10 minutes
Nutrition
- Calories: 190 (per piece, makes 12)
- Sugar: 5g
- Fat: 13g
- Carbohydrates: 10g
- Fiber: 2g
- Protein: 8g
Thoughts:
Every ingredient here has a purpose—whether it’s adding creaminess, protein, or that perfect salty-sweet contrast. The best part? Most are pantry staples, so you might not even need a grocery run!
Final Thoughts:
A well-stocked kitchen is a happy kitchen. With these ingredients, you’re not just making a snack—you’re crafting a delicious, nutrient-packed masterpiece.
Bite-Sized Power Stats
Per Serving (1 piece/12 servings): Calories: 190 | Protein: 8g | Carbs: 10g | Fat: 13g | Sugar: 5g | Fiber: 2g
Prep Time: 10 min | Freeze Time: 2–3 hrs | Total Time: 3 hrs | Makes: 12 pieces
Save This Recipe for Later!
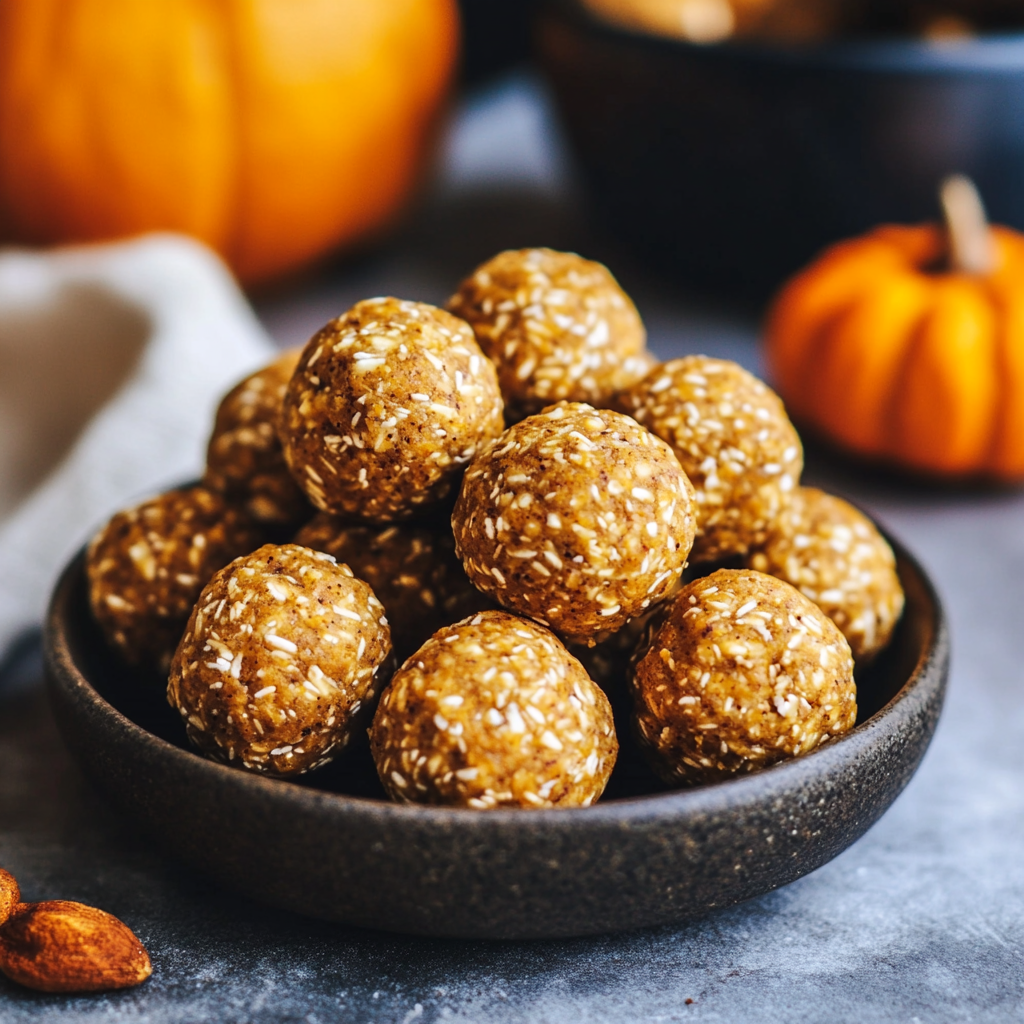
No-Bake Healthy Pumpkin Pie Energy Balls
Hey Pumpkin! Let’s Make Magic Without Turning On the Oven
Picture this: It’s a crisp autumn afternoon. Golden leaves are dancing outside your window, you’re wrapped in your favorite chunky sweater, and that unmistakable craving for pumpkin pie hits you like a freight train. But let’s be real—who has time to make pastry dough, blind-bake crusts, and babysit an oven today? Not me, and probably not you either! That’s exactly why I created these little bites of pure cozy joy: No-Bake Healthy Pumpkin Pie Energy Balls. 🎃
Imagine all the warm, spiced comfort of your grandma’s pumpkin pie… but rolled into a bite-sized snack you can whip up in 10 minutes flat. No oven, no fuss, just creamy cashew butter hugging real pumpkin purée, kissed with maple sweetness and that iconic pumpkin spice hug. These aren’t just “healthy snacks”—they’re tiny celebrations of fall that’ll make your taste buds throw a party. Perfect for lunchboxes, post-yoga fuel, or sneaking from the fridge at midnight (no judgment here!).
As a busy home cook who believes good food should always fit into real life, I’m obsessed with recipes that deliver big flavor without demanding your entire afternoon. These energy balls? They’re my edible love letter to effortless coziness. So grab your mixing bowl (and maybe that messy apron I’m always raving about)—let’s roll!
The Day Pumpkin Pie Saved My Sanity (No Fork Required!)
Okay, story time! Last October, I was hosting my niece’s pumpkin-carving party. Twelve kids. Glitter everywhere. And me? Completely forgot to make a snack. Cue panic! I had a can of pumpkin purée staring me down, a jar of cashew butter, and approximately 4.5 minutes before tiny humans started chanting for snacks. Desperation breeds genius, friends. I threw everything into a bowl, rolled sticky blobs like my life depended on it, and popped them in the freezer. Ten minutes later? Silence. Just wide-eyed kids nibbling, then demanding “more pumpkin cookies, Aunt Liv!”
My sister still jokes they’re “emergency peace treaties.” But seeing those kids—covered in pumpkin guts and grinning with maple-sweetened smiles—I knew this accident was a keeper. It reminded me that the best kitchen moments aren’t Pinterest-perfect. They’re messy, improvisational, and full of heart. Now, every time I make these, I think of glitter on my floor and that beautiful, crumb-covered silence. Magic, right?
Your Pumpkin Spice Pantry Heroes 🛒
Gather these feel-good ingredients! Pro tip: Measure everything before you start mixing. Trust me, sticky fingers + frantic spice-jar searching = chaos.
- 2 tbsp paleo flour (coconut or almond flour works!) – Our binder! Coconut flour absorbs moisture like a champ, while almond adds a subtle nuttiness. Chef’s swap: Oat flour works too for non-paleo folks.
- 1 tbsp vanilla protein powder – Boosts staying power & adds creaminess. Chef’s insight: Skip if you hate powders! Add an extra tbsp flour instead.
- 1 tbsp pumpkin pie spice – The soul of fall! Chef’s confession: I often add an extra pinch—life’s short!
- 1 cup cashew butter (or any nut/seed butter) – Cashew’s buttery mildness lets pumpkin shine! Pro tip: Use runny, room-temp butter. If yours is stiff, warm it slightly.
- 1 tbsp maple syrup (or honey) – Just enough sweetness! Dietary swap: Agave for vegan friends.
- 2 tbsp pumpkin purée – NOT pie filling! Pure purée adds moisture and that iconic flavor. Storage hack: Freeze leftover purée in ice cube trays!
Why these work: The flour/protein powder combo gives structure, nut butter adds healthy fats for satiety, and purée keeps them irresistibly moist. It’s science… but delicious!
Let’s Roll! (Literally) 👩🍳
Ready for the easiest “baking” session ever? No oven mitts required!
- Combine Everything Like You Mean It! Grab a medium bowl (I like wide, shallow ones for easy mixing). Dump in all the ingredients—yes, all at once! No fancy order needed. Now, arm yourself with a sturdy spatula or fork and mix with enthusiasm until it looks like a thick, spiced cookie dough. Chef’s hack: If mixing feels tough, pop the bowl in the microwave for 15 seconds to slightly soften the nut butter. Watchpoint: Dough should hold together when pinched—if too crumbly, add 1 tsp maple syrup; if too sticky, add ½ tsp flour.
- Scoop & Roll Those Cozy Balls! Time for hands-on fun! Use a mini cookie scoop (a #60 size is perfect) or a tablespoon to portion dough. Roll quickly between slightly damp palms into smooth balls—about 1-inch diameter. Sticky situation? Rub a tiny bit of coconut oil on your hands! Size matters: Keep ’em small for energy bites, or go bigger for dessert-style “truffles.”
- Chill Out (Your Balls, That Is!) Line a plate or tray with parchment paper. Arrange balls without touching. Slide them into the fridge for 20-30 minutes (freezer for 10 in a pinch!). This firms them up, melds the flavors, and makes them *chef’s kiss* perfect. Impatient? Eat one soft—it’s like pumpkin pie frosting!
- Store for Snack Attacks! Once firm, transfer your pumpkin jewels to an airtight container. Layer with parchment if stacking. They keep happily in the fridge for 1 week or freeze for 2 months! Thawing tip: Frozen balls soften in 5 mins at room temp—ideal for instant cravings.
How to Serve Your Pumpkin Spice Gems ✨
These cuties shine brightest when treated like the little treasures they are! For everyday snacking, pile them into a cute mason jar on your counter (if they last that long!). Hosting? Arrange them on a rustic wooden board with a dusting of extra pumpkin spice or cinnamon. Coffee date? Nestle a few beside a steaming mug—dunking encouraged! Post-workout? Toss 2-3 in a small container with an apple. They’re also *cheat code* adorable threaded onto lollipop sticks as “pumpkin pops” for kids (or fun adults!).
Mix It Up! 5 Delicious Twists 🌈
Once you master the base, play with flavors!
- Chocolate Swirl Bliss: Fold in 2 tbsp mini dark chocolate chips before rolling.
- Nutty Crunch: Add 2 tbsp finely chopped pecans or walnuts for texture.
- Ginger Snap: Swap ½ tsp pumpkin spice for ground ginger + add 1 tbsp chopped crystallized ginger.
- Sunflower Power (Nut-Free): Use sunflower seed butter + swap flour for oat flour.
- Oatmeal Cookie Vibes: Replace protein powder with 1 tbsp rolled oats (blitzed fine) + add 1 tsp cinnamon.
Liv’s Extra Sprinkles of Wisdom 😉
These little balls have come a long way since that chaotic pumpkin-carving day! I initially used peanut butter, but found cashew butter let the pumpkin spice truly sing. Once, mid-roll, my cat Mr. Whiskers tried to “help” by swatting a ball across the kitchen… hence my “damp hands” hack—less flying projectiles! Over time, I’ve learned the dough improves if you let it rest 5 mins before rolling (hydrates the flour). They’re my most-requested recipe for book clubs and hiking trips—proof that simple, whole ingredients make the happiest memories. P.S. Doubling the batch is ALWAYS a good idea!
The Magic of No-Bake Pumpkin Pie Energy Balls
There’s something undeniably magical about the flavors of fall—cinnamon, nutmeg, cloves, and, of course, pumpkin. But as much as we love traditional pumpkin pie, the reality is that baking one requires time, effort, and a level of patience that many of us just don’t have on a busy weekday. That’s where these No-Bake Healthy Pumpkin Pie Energy Balls come in. They’re the perfect solution for when you want that warm, spiced pumpkin flavor without the hassle of baking.
These little bites are packed with wholesome ingredients that not only satisfy your sweet tooth but also give you a boost of energy. The combination of cashew butter, pumpkin purée, maple syrup, and pumpkin pie spice creates a flavor profile that’s rich, creamy, and perfectly balanced. Unlike traditional desserts that leave you crashing an hour later, these energy balls provide sustained fuel thanks to healthy fats, fiber, and a touch of protein.
One of the best things about this recipe is its versatility. Whether you need a quick breakfast on the go, a post-workout snack, or a guilt-free dessert, these pumpkin balls fit the bill. They’re also kid-friendly, making them a great option for lunchboxes or after-school snacks. And because they’re no-bake, they’re perfect for those days when turning on the oven feels like too much effort (or when you’re just craving something sweet now).
Thoughts:
I love how this recipe takes the essence of pumpkin pie and transforms it into something portable, nutritious, and effortless. It’s a reminder that delicious food doesn’t have to be complicated.
Final Thoughts:
If you’re a pumpkin spice lover but short on time, these energy balls are a must-try. They’re proof that the best recipes are often the simplest ones.
The Story Behind the Recipe—A Happy Kitchen Accident
Some of the best recipes come from moments of pure kitchen chaos, and these No-Bake Pumpkin Pie Energy Balls are no exception. As mentioned in the intro, this recipe was born out of desperation during a pumpkin-carving party. Twelve kids, zero snacks, and a pantry full of random ingredients led to an impromptu creation that ended up being a hit.
What makes this story so special is that it highlights how imperfect moments can lead to something amazing. Cooking doesn’t always have to be about following a recipe to the letter—sometimes, the best dishes come from improvisation. That day, I learned that pumpkin purée and nut butter make an incredible base, and a little maple syrup and spice can turn them into something magical.
This recipe also taught me the value of keeping things simple. There’s beauty in recipes that don’t require fancy equipment or hard-to-find ingredients. Everything here is pantry-friendly, and the method is so easy that even a beginner can nail it on the first try.
Thoughts:
It’s funny how some of my most-loved recipes were born from kitchen disasters. This one is a reminder that cooking should be fun, not stressful.
Final Thoughts:
If you’ve ever felt intimidated by baking or worried about messing up a recipe, let this be your sign to just go for it. The best creations often come from happy accidents.
Customizing Your Pumpkin Energy Balls—Endless Possibilities!
One of the best things about this recipe is how adaptable it is. Once you master the base, you can tweak it to suit your tastes, dietary needs, or whatever ingredients you have on hand. Here are some of my favorite variations:
-
Chocolate Lover’s Version: Fold in dark chocolate chips or drizzle melted chocolate on top for a decadent twist.
-
Crunchy Texture: Add chopped pecans or walnuts for a satisfying bite.
-
Nut-Free Option: Swap cashew butter for sunflower seed butter and use oat flour instead of almond flour.
-
Gingerbread Spice: Replace half the pumpkin spice with ground ginger and add a sprinkle of molasses for depth.
-
Oatmeal Cookie Style: Mix in rolled oats for a heartier texture.
This flexibility makes the recipe perfect for allergies, preferences, or just experimenting with new flavors. You can even adjust the sweetness—add more maple syrup if you like it sweeter, or reduce it if you prefer a more subtle taste.
Your Questions, Answered! ❓
Q: My dough is too sticky! Help!
A: Been there! Chill the dough 10 mins before rolling. Still sticky? Very lightly dampen your hands (not wet!) or dust them with a tiny bit of coconut flour. Sticky dough often means warm nut butter—next time, use it straight from the pantry, not warmed.
Q: Can I skip the protein powder?
A: Absolutely! Just add an extra 1 tbsp of your chosen flour. The texture might be slightly softer but just as delicious.
Q: Why aren’t my balls firming up in the fridge?
A: Two likely culprits: 1) Too much pumpkin purée—measure precisely! 2) Nut butter was too oily. Next batch, try a different brand or stir natural butter well before using. If they’re still soft, pop ’em in the freezer for 15 mins—they’ll set!
Q: Can I make these vegan?
A: Yes! Use maple syrup (not honey) and ensure your protein powder is plant-based (or skip it). Cashew butter is naturally vegan—just check labels if using another butter.
No-Bake Healthy Pumpkin Pie Energy Balls
- Total Time: 30 minutes
Description
One chilly October afternoon, with pumpkin cravings high and time running low, I whipped these up for my niece’s pumpkin-carving party. With sticky hands and a sprinkle of chaos, what came out was pure magic—bite-sized pumpkin pie hugs. No oven, no stress—just nourishing joy in every bite. Whether you’re on-the-go or curled up with a mug of tea, these little gems will bring autumn to your taste buds.
Ingredients
-
2 tbsp coconut or almond flour
-
1 tbsp vanilla protein powder (or use extra flour)
-
1 tbsp pumpkin pie spice
-
1 cup cashew butter (room temp & smooth)
-
1 tbsp maple syrup or honey
-
2 tbsp pumpkin purée (not pie filling)
Instructions
-
Mix Everything: In a bowl, combine all ingredients. Stir until a thick dough forms.
-
Adjust Texture: Too sticky? Add a little flour. Too dry? Add a dash of syrup.
-
Roll Into Balls: Use a tablespoon or mini scoop to shape 1-inch balls. Roll with damp hands to avoid sticking.
-
Chill to Set: Place on a parchment-lined plate and refrigerate 20–30 minutes (or 10 in the freezer).
-
Store & Enjoy: Keep in an airtight container in the fridge for up to 1 week, or freeze for 2 months.
Notes
-
Use sunflower seed butter for a nut-free version.
-
Sprinkle with extra pumpkin spice for flair.
-
Great with coffee or tucked into a lunchbox!
- Prep Time: 10 minutes
Nutrition
- Calories: 110 per ball, based on 12 balls
- Sugar: 3g
- Fat: 8g
- Carbohydrates: 6g
- Fiber: 2g
- Protein: 3g
Thoughts:
I love recipes that serve as a blank canvas. It’s so fun to play around with flavors and make a dish truly your own.
Final Thoughts:
Don’t be afraid to get creative! Cooking is all about making food that you love, and these pumpkin balls are the perfect starting point for endless delicious variations.
Nutrition Per Ball (Makes 12) 📊
Calories: 130 | Protein: 4g | Carbs: 5g | Fat: 10g | Sugar: 3g | Fiber: 2g
Note: Values are estimates and can vary based on ingredient brands/substitutions.
⏱ Prep Time: 10 min | ⏱ Chill Time: 20 min | 🍽 Total Time: 30 min | 🎃 Makes: 12 balls
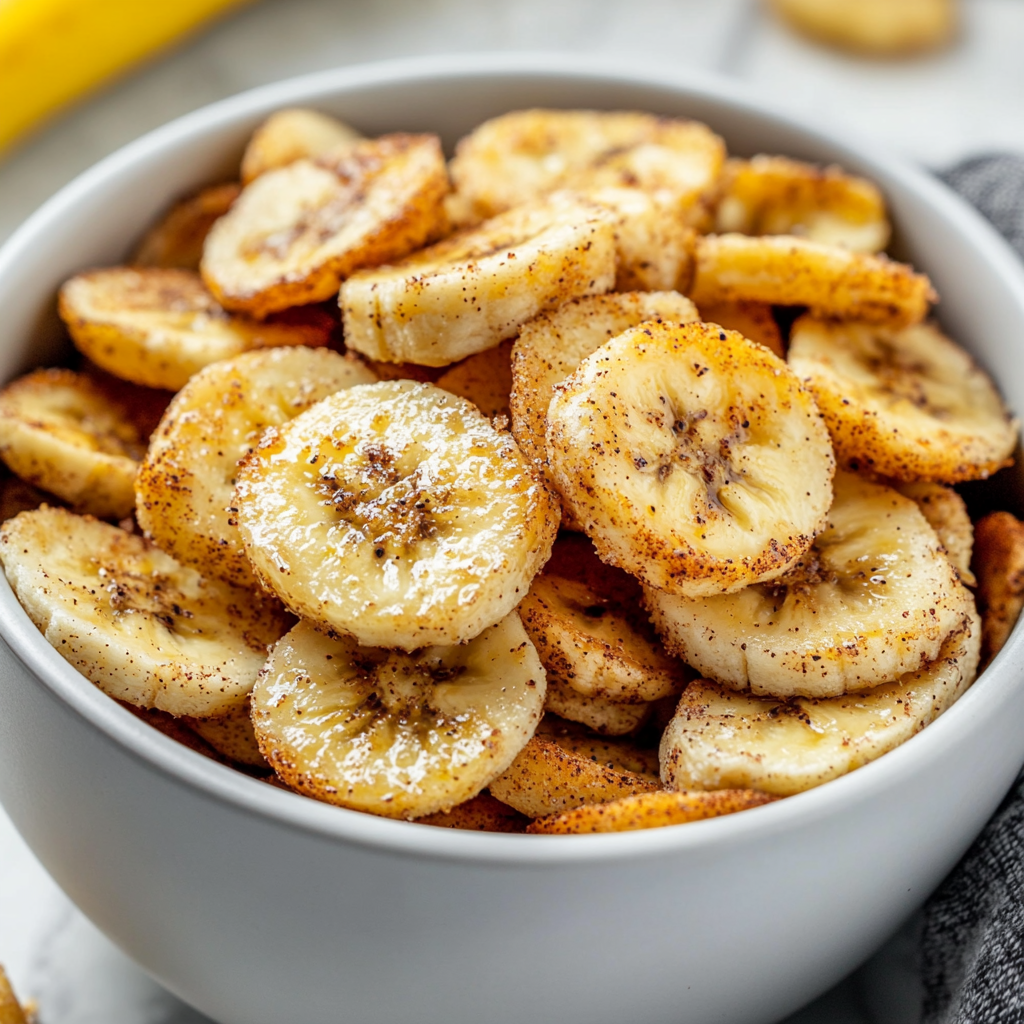
Cinnamon-Sugar Air Fryer Banana Chips
Crunchy Cinnamon Bliss: Your New Favorite Snack Is Just Bananas Away!
Hey there, kitchen friends! Olivia here, apron dusted with cinnamon (as usual), ready to share one of those magical recipes that makes you wonder why you ever bought packaged snacks. Raise your hand if you’ve ever craved something crispy, sweet, and secretly wholesome at 3 PM! 🙋♀️ That’s exactly how these Cinnamon-Sugar Air Fryer Banana Chips were born—in a whirlwind of snack-time desperation and a stubborn refusal to settle for sad, store-bought versions swimming in oil. Picture this: thinly sliced bananas, kissed with warm cinnamon and transformed into shatteringly crisp coins of joy. No deep-fryer vats, no mysterious ingredients—just pure, golden simplicity. Whether you’re packing lunchboxes, fueling a work-from-home marathon, or jazzing up morning yogurt, these little gems are your crispy soulmates. Grab those spotty bananas (we’ll chat about ripeness secrets later!), and let’s turn your air fryer into a snack wizard!
The Banana Chip Epiphany: A Tale of Snack Redemption
Okay, real talk: my love affair with banana chips started… poorly. Picture 9-year-old me, begging my mom for those neon-yellow bags at the grocery store. They tasted like sugary cardboard and left my fingers greasy—total betrayal! Fast-forward to my early cooking adventures, when I tried baking them. Let’s just say “charcoal briquettes” were involved. But then! My air fryer entered the scene like a superhero. One rainy Sunday, armed with underripe bananas and sheer determination (and maybe a toddler demanding snacks NOW), I finally cracked the code. That first batch? Pure magic. My daughter’s eyes lit up, my husband hid the bowl “for safekeeping,” and I did a happy dance right there by the counter. These chips became our family’s edible high-five—proof that happy accidents and a little kitchen courage can rewrite snack history. Now, they’re my go-to gift for neighbors, my salad’s crunch MVP, and the reason my air fryer might need a banana-scented candle tribute.
Your Crispy Treasure Map: Ingredients & Why They Matter
Gather these pantry heroes—each plays a starring role!
- Bananas (2, green or slightly yellow): Not your smoothie-ready buddies! Underripe bananas are firmer, starchier, and slice beautifully without turning to mush. They crisp up like a dream and have less natural sugar, so they won’t burn as easily. Chef’s Hack: Spotted bananas? Freeze ’em for smoothies! For chips, seek green-tipped ones.
- Avocado Oil or Olive Oil (2 tsp): Just enough to help the cinnamon cling and promote even browning. Avocado oil’s high smoke point makes it my fave, but light olive oil works too! Sub Alert: Melted coconut oil adds tropical flair (it solidifies when cool, so chips may feel less “dry-crisp”).
- Ground Cinnamon (¼ tsp): Our flavor rockstar! Warm, cozy, and packed with antioxidants. Spice It Up: Add a sneaky pinch of nutmeg, cardamom, or vanilla powder. Not a cinnamon fan? Try smoked paprika for a savory twist!
Why no sugar? Trust me—underripe bananas have subtle sweetness that shines when concentrated! Adding sugar risks burning. But hey, rebel away (see Variations below)!
Let’s Get Crunchy: Your Foolproof Blueprint
Ready? Aprons on! This takes 20 minutes tops—most of it is hands-off air fryer time.
- Peel & Slice (1/8″ thick!): Remove banana peels. Using a very sharp knife or mandoline (hello, $10 game-changer!), slice into coins. Thickness is KEY: Too thin (1/16″) = burns fast. Too thick (1/4″) = chewy centers. Aim for dime-width! Pro Tip: Slightly angled slices = more surface area = extra crunch.
- Toss Gently: In a bowl, combine slices, oil, and cinnamon. Use your fingers or a silicone spatula to coat evenly—be delicate! Bruised bananas = sad, broken chips. Hack: Mist slices with oil spray instead for ultra-light coverage.
- Single Layer Symphony: Arrange slices in your air fryer basket. NO overlapping! They need airflow like plants need sunshine. Batch Warning: Crowding = steam = soggy chips. Cook in batches if needed. It’s worth it!
- Air Fry Low & Slow (300°F/150°C): Slide that basket in! Cook for 12-15 minutes, flipping halfway with tongs or a fork. Watch Closely: At 10 minutes, peek! Edges should be golden. If browning too fast, lower temp to 285°F. Air Fryer Truth: All models vary! My Cosori? 14 mins. Your Ninja? Might be 12. Let scent be your guide—cinnamon = ready soon!
- The BIG Wait: Transfer chips to a cooling rack IMMEDIATELY (don’t leave them in the basket!). They’ll seem soft at first—this is normal! Resist snatching! As they cool (5-7 mins), they transform into crispy perfection. Science magic!
Beyond the Bowl: Serving Up Joy
Once cooled, these golden gems are versatility queens! Pile them high in a rustic bowl for grab-and-go snacking (bye-bye, vending machine!). Crush them over Greek yogurt with honey for a parfait that’ll make brunch guests swoon. Stir into oatmeal while warm—they soften slightly into caramelized bites. Or, get fancy: layer with dark chocolate chunks and coconut flakes for trail mix. My toddler’s favorite? Dunked in almond butter “paint.” Store leftovers (ha!) in an airtight jar for 3 days—if they last that long!
Shake It Up: 5 Delicious Twists
Once you master the basic, play mad scientist!
- Sweet Heat: Toss with ¼ tsp cayenne + cinnamon. Fiery tropical vibes!
- Tropical Sunset: Swap cinnamon for ½ tsp turmeric + pinch of black pepper (anti-inflammatory boost!).
- Choco-Dipped Dreams: Melt dark chocolate, dip half of cooled chips, sprinkle with sea salt. *chef’s kiss*
- Savory Herb Crunch: Skip cinnamon. Toss with ½ tsp rosemary, ¼ tsp garlic powder, and flaky salt.
- Apple Pie Vibes: Use thinly sliced apples (pat SUPER dry first!) + pumpkin spice instead of cinnamon.
Olivia’s Behind-the-Scenes Scoop
Confession: Batch #1 of these? I used ripe bananas. They caramelized into banana “tiles” welded to the basket—oops! Lesson learned: green bananas rule. Over the years, I’ve flirted with lime zest (brightens flavor!), nutritional yeast (for umami savory chips), and even a controversial dash of balsamic (surprisingly good?). The biggest evolution? Flipping technique! I used to fussily turn each chip. Now? I give the basket one confident shake mid-cook—efficiency meets chaos. These chips also starred in my “Great Pantry Cleanout of 2020,” proving they’re forgiving with spice swaps. Moral: Don’t stress. Snack joy is messy, delicious, and always evolving!
The Science of Crispy Banana Chips – Why Your Air Fryer is a Game-Changer
The Maillard Reaction Meets Fruit
Banana chips seem simple, but their transformation hinges on food science. When thinly sliced bananas hit the heat of an air fryer, two key processes occur: dehydration and the Maillard reaction. Unlike deep-frying, which drowns slices in oil, air frying circulates hot air to evaporate moisture while caramelizing natural sugars. Underripe bananas work best because their higher starch content (versus ripe bananas’ sugars) provides structure, preventing mush. The result? A satisfying snap instead of a chew.
Oil’s Role: Less is More
Just 2 teaspoons of oil for two bananas might seem stingy, but it’s strategic. A light coating ensures cinnamon adheres while creating micro-crispy edges. Avocado oil’s high smoke point (up to 520°F/270°C) prevents burnt notes during the 300°F (150°C) cook time. For comparison, butter smokes at 302°F (150°C)—a surefire path to acrid chips.
Air Fryer vs. Oven: The Texture Showdown
Air fryers dominate for three reasons:
-
Speed: 15 minutes vs. 2 hours in an oven.
-
Circulation: Fans mimic a convection oven, browning evenly without flipping every chip.
-
Humidity Control: Unlike ovens, which trap steam, air fryers vent moisture aggressively—critical for crispness.
Thoughts: This section demystifies why the recipe works, empowering cooks to troubleshoot (e.g., soggy chips = insufficient dehydration). It positions the air fryer as essential without dismissing oven users.
From Sad Snacks to Culinary Joy – The Psychology of Homemade Banana Chips
The Nostalgia Trap
Olivia’s childhood memory of “greasy, sugary cardboard” resonates because nostalgia often overshadows quality. Store-bought banana chips are typically fried in coconut oil (sometimes hydrogenated) and doused in syrup. By recreating them at home, we reclaim control—replacing guilt with pride.
The “I Made This!” Effect
Studies show that preparing food from scratch triggers dopamine release, akin to completing a puzzle. Slicing bananas uniformly, timing the flip, and hearing the first crispy bite activates a sense of achievement. This contrasts with mindlessly tearing open a bag.
Snacking as Self-Care
At 3 PM, when energy lags, reaching for homemade chips becomes a ritual of intentionality. The cinnamon’s aroma, the crunch—these sensory cues signal a pause. Compare this to stress-eating processed snacks, which often leave us unsatisfied.
Thoughts: This section elevates the recipe beyond technique, tapping into emotional and psychological benefits. It’s a subtle nudge to reframe snack time as a mindful act.
Global Banana Chip Culture – A Flavor Journey
Philippines: The OG Banana Chip
In the Philippines, saba bananas (starchy, like plantains) are sliced thick, fried, and coated in caramelized brown sugar. Texture? Chewy-crisp hybrids. Olivia’s air-fryer version offers a lighter take but nods to this heritage.
India’s Spiced Twist
Kerala’s upperi chips toss raw bananas with turmeric, chili, and salt before sun-drying or frying. Savory, fiery, and addictive. (Try Olivia’s “Savory Herb Crunch” variation with curry powder!)
Latin America’s Green Banana Chips
Tostones are twice-fried green plantains, often salted. While not sweet, they prove underripe bananas’ versatility.
Thoughts: This section broadens appeal by connecting the recipe to global traditions. It invites curiosity—readers might explore international markets for saba or plantains next.
Snack SOS: Your Questions, Answered!
Q: Why aren’t my chips crispy? HELP!
A) Did you let them cool completely? Patience, grasshopper! They crisp as they cool. B) Overcrowded basket = steam city. Cook in batches! C) Bananas too ripe? Excess moisture = chewiness. Green-tipped is best!
Q: Can I bake these if I don’t own an air fryer?
Absolutely! Arrange on a parchment-lined baking sheet. Bake at 200°F (95°C) for 1.5–2 hours, flipping halfway. Low and slow is key! They’ll be less “puffy” but still delicious.
Q: Why avocado oil? Can I use butter?
Butter burns at high temps! Avocado/olive oil handles heat beautifully. For buttery flavor, try brushing cooled chips with melted, cooled butter post-bake—but they won’t stay as crisp.
Q: How do I prevent sticking without non-stick spray?
Lightly brush or mist your basket with oil first! Silicone air fryer liners with holes also work wonders. No metal utensils—they scratch coatings!
Cinnamon-Sugar Air Fryer Banana Chips
- Total Time: 27 minutes
Description
Every bite of these banana chips brings back the joy of spontaneous kitchen adventures. One rainy afternoon, I was desperate for a snack—something crispy, wholesome, and sweet. With underripe bananas in hand and an air fryer at the ready, these golden, cinnamon-dusted chips were born. Now a family favorite, they’re perfect for lunchboxes, yogurt toppers, or cozy couch snacking. Let’s turn your everyday bananas into crispy treasures!
Ingredients
-
2 underripe bananas (green to slightly yellow)
-
2 tsp avocado oil or light olive oil (or melted coconut oil)
-
¼ tsp ground cinnamon
-
Optional: pinch of nutmeg or cardamom for extra warmth
Instructions
-
Slice bananas into 1/8-inch thick coins using a sharp knife or mandoline.
-
Toss slices gently with oil and cinnamon until evenly coated.
-
Arrange in a single layer in your air fryer basket—no overlapping!
-
Air Fry at 300°F (150°C) for 12–15 minutes, flipping or shaking halfway. Peek at 10 minutes to prevent overbrowning.
-
Cool on a rack for 5–7 minutes. Chips will crisp up as they cool.
Notes
-
Use firm, underripe bananas for the best crunch.
-
Avoid overlapping slices—crowding = soggy chips!
-
Store in an airtight container for up to 3 days.
- Prep Time: 5 minutes
- Cook Time: 15 minutes
Nutrition
- Calories: 22g per serving
- Sugar: 12g
- Fat: 3g
- Fiber: 2g
- Protein: 1g
Final Thoughts
This recipe’s brilliance lies in its flexibility. It’s a blank canvas for flavors (sweet, spicy, herbal), a science lesson (Maillard reaction mastery), and a cultural passport (Philippines to Kerala). But most importantly, it transforms a humble fruit into something extraordinary—proof that kitchen magic often starts with a single banana and a dash of courage.
Pro Tip: Save the peels! Blend into compost or make banana peel vinegar (yes, it’s a thing). Zero-waste snacking for the win.
Nutritional Sunshine (Per Serving, Serves 2)
Calories: 100 | Fat: 3.5g | Carbs: 18g | Sugar: 8g | Fiber: 2g | Protein: 1g
⏱ Prep: 5 min | Cook: 15 min | Total: 20 min
Note: Values are estimates. Underripe bananas have resistant starch—a prebiotic gut booster!

Zucchini Tots
Welcome to My Cozy Kitchen, Friend!
Is there anything better than that moment when your kitchen smells like crispy, golden goodness and you know you’re about to bite into something magical? If your heart does a happy dance at the sound of a sizzling skillet or the scent of fresh herbs, pull up a stool – we’re about to become best kitchen buddies. I’m Olivia, your fellow flavor adventurer, and today? We’re turning humble zucchini into pure crispy-cheesy joy with my obsession-worthy Zucchini Tots!
Picture this: golden-brown bites with a satisfying crunch giving way to a tender, savory center. They’re like the cool, veggie-packed cousin of tater tots – but honestly? They often steal the show. I started whipping these up years ago as a ninja move to sneak greens onto picky plates (shh… don’t tell!). But guess what happened? They became the first thing devoured at parties, the lunchbox heroes, and my ultimate go-to “I need something delicious STAT” snack. No fancy skills required – just simple ingredients, a little love, and maybe a flour-dusted apron. Let’s make snack time unforgettable!
My Zucchini Tot “Aha!” Moment
Okay, story time! Picture a sweltering summer day, my kitchen overflowing with zucchini from my neighbor’s garden (bless her green thumb!). My then-toddler, Lily, was deep in her “no green things!” phase. Desperate, I grated zucchini into everything – muffins, sauces, you name it. One evening, craving something crispy while avoiding the oven’s heat, inspiration struck: “What if I make… tiny zucchini fritters? Like tots?”
I squeezed that zucchini like my sanity depended on it (it kinda did!), mixed in cheese and breadcrumbs, held my breath as they baked… and bam! The first tray emerged golden and smelling like heaven. Lily toddled over, eyed one suspiciously, then popped it whole into her mouth. Silence. Then… “More, Mama! More tots!” Cue my happy dance! That was the day these little heroes earned their permanent spot in my recipe hall of fame. They’re not just a snack; they’re a tiny, crispy victory against veggie resistance.
Gathering Your Tot-Making Squad
Simple ingredients, big flavor! Here’s your lineup (and my chef-y whispers):
- Cooking spray: Our non-stick superhero! (Chef’s Tip: A light mist is key – too much makes them greasy. Avocado oil spray is my fave for high heat.)
- 1 packed cup grated zucchini (about 1 medium): The star! (Insight: Pack it firmly in the cup measure! Sub: Yellow summer squash works beautifully too.)
- 1 large egg: The binder that holds our tots together. (Sub: Flax egg (1 tbsp ground flax + 2.5 tbsp water) for vegan.)
- ¼ medium onion, minced: Flavor foundation! (Tip: Mince it super fine so it blends seamlessly. Sub: 1 tsp onion powder in a pinch.)
- ¼ cup grated reduced-fat sharp cheddar cheese: Melty, savory goodness! (Chef’s Love: Sharp cheddar packs a punch! Sub: Pepper Jack for spice, Parmesan for nuttiness, or dairy-free shreds.)
- ⅓ cup seasoned breadcrumbs: Creates that crave-worthy crunch. (Essential Hack: Use gluten-free panko if needed! Plain crumbs? Add ½ tsp garlic powder + ¼ tsp paprika.)
- ¼ tsp kosher salt: Balances and brightens. (Note: Kosher salt is less salty by volume than table salt. Adjust if subbing!)
- Black pepper, to taste: Freshly cracked is chef’s kiss!
See? Nothing intimidating! This flexible squad lets you riff based on what’s in your fridge. Now, let’s get those hands messy!
Let’s Build Some Tasty Tots!
Ready for the fun part? Follow these steps for tot perfection (I’ll be right beside you with tips!):
- Preheat & Prep: Crank your oven to 400°F (200°C). Generously spray a 24-cup mini muffin tin with cooking spray. Seriously, get every nook! (Why? This is CRUCIAL for easy removal. No muffin tin? Form small patties on a parchment-lined baking sheet!)
- Squeeze the Daylights Out of That Zucchini! Place your grated zucchini in a clean kitchen towel or several layers of paper towels. Twist and SQUEEZE over the sink until barely any moisture comes out. (Game-Changer Hack: This step prevents soggy tots! Pretend it’s stress relief – squeeze like it owes you money! You’ll be amazed at the water volume!)
- Mix It Up! In a medium bowl, combine the dried zucchini, egg, minced onion, grated cheese, breadcrumbs, salt, and a good crack of black pepper. Stir with a fork until everything is evenly distributed. (Chef’s Whisper: Don’t overmix! Just combine. The mixture should hold together when pressed.)
- Fill ‘Er Up! Spoon the mixture into the prepared muffin cups, pressing down firmly with the back of the spoon or your fingers to compact it. Fill them almost to the top! (Tip: Packing them tightly ensures they hold their cute tot shape and don’t crumble.)
- Bake to Golden Glory! Slide the tin into the hot oven and bake for 16-18 minutes. You want them deeply golden brown on top and edges, and set through. (Watch Closely: Ovens vary! Mine are perfect at 17 mins. They should feel firm to a light touch.)
- Cool & Release! This takes patience! Let the tots cool in the tin for at least 5 minutes. This lets them set fully. Then, gently run a small knife or offset spatula around the edges and pop them out! (Trouble? If one sticks, gently nudge under it with the knife tip. Cooling is key!)
Smell that victory? You just made homemade veggie magic! Now, let’s serve them up right.
How to Serve Your Crispy Creations
Hot out of the oven, these tots are irresistible solo acts! But let’s talk dip dreams:
- Classic Cool: A big dollop of creamy ranch or cool tzatziki is perfection.
- Spicy Kick: Sriracha mayo (mix mayo with sriracha to taste!) or marinara for dipping.
- Brunch Star: Serve alongside fried or scrambled eggs and avocado slices.
- Party Platter: Pile them high on a board with assorted dips – instant crowd-pleaser!
- Lunchbox Love: Pack cooled tots in a container (they’re great room temp too!) with a tiny cup of dip.
Get creative! Their versatility is part of the charm.
Shake Up Your Tot Game!
Once you master the basic, try these fun twists:
- Pizza Party Tots: Add 2 tbsp chopped pepperoni + 1 tsp Italian seasoning to the mix. Dip in marinara!
- Southwest Fiesta: Swap cheddar for pepper jack, add 2 tbsp finely chopped corn + 1 tsp cumin. Serve with avocado crema.
- Mediterranean Twist: Use feta cheese instead of cheddar, add 1 tbsp chopped sun-dried tomatoes + 1 tsp dried oregano. Tzatziki dip mandatory!
- Veggie Boost: Fold in 2 tbsp finely grated carrot or finely chopped spinach (squeezed dry!).
- Keto-Friendly: Swap breadcrumbs for ¼ cup almond flour + 2 tbsp grated Parmesan. Ensure cheese is full-fat.
The flavor canvas is yours!
Olivia’s Kitchen Confessions & Wisdom
Oh, these little tots! They’ve seen some kitchen fails (mostly mine!) to reach this level of awesome. Remember that first batch where I didn’t squeeze the zucchini? Let’s just say we had “zucchini puddles,” not tots. Lesson learned the soggy way! Over the years, I’ve tweaked the breadcrumb ratio, tested cheeses, and perfected the squeeze. Now, they’re my most-requested recipe!
Pro Tips I Swear By: Use the large holes on your box grater for zucchini – finer grates release more water. If your mix feels too wet after squeezing, add another tablespoon of breadcrumbs. And the absolute best part? They freeze like a dream (see FAQs!). I always double the batch. Always. Because finding an empty tray when you’re craving a crispy bite is pure heartbreak. Make extra – your future self will thank you during snack emergencies!
Your Tot Questions, Answered!
Let’s tackle those common kitchen curiosities:
Q1: Can I freeze zucchini tots?
A: YES! It’s a game-changer. Bake them completely, let them cool completely on a wire rack, then freeze in a single layer on a baking sheet. Once frozen solid (about 1-2 hours), transfer to a freezer bag. They’ll keep for up to 3 months! Reheat straight from frozen on a baking sheet at 400°F for 10-15 mins until hot and crispy. No soggy reheats here!
Q2: Why are my tots soggy/falling apart?
A: Two likely culprits: 1) Not squeezing enough water from the zucchini! This is VITAL. Squeeze until your hand aches! 2) Not packing the mixture firmly enough into the muffin cups. Give it a good press! If the mixture still seems too wet after squeezing, add 1-2 extra tablespoons of breadcrumbs.
Q3: Can I use an air fryer?
A: Absolutely! Spray your air fryer basket well. Form the mixture into small tot shapes (about 1 tbsp each). Air fry at 380°F for 8-10 minutes, shaking the basket gently halfway through, until golden and crispy. Watch them closely as air fryers cook faster!
Q4: Can I make these ahead?
A: You bet! Prep the mixture (steps 1-3) up to 24 hours ahead. Store it tightly covered in the fridge. When ready, give it a quick stir, fill your muffin tin, and bake! The texture might be slightly denser, but still delicious. Baking straight from the fridge might add 1-2 minutes to the cook time.
The Science Behind Perfect Zucchini Tots – Why This Recipe Works
The Moisture Battle
Zucchini is 95% water – that’s why squeezing is non-negotiable! Here’s what happens when you wring it out:
-
Removes excess liquid that would steam during baking (soggy tot enemy #1)
-
Concentrates the zucchini’s natural sweetness
-
Allows the egg and breadcrumbs to bind properly
Breadcrumb Alchemy
The 1:3 ratio of breadcrumbs to zucchini isn’t arbitrary:
-
Panko crumbs create airier texture than regular breadcrumbs
-
Seasoned crumbs already contain salt/pepper/garlic powder for flavor distribution
-
Gluten-free option: Almond flour works but requires 1 extra egg white for binding
Cheese’s Functional Magic
Sharp cheddar isn’t just for taste – it:
-
Melts at 150°F (65°C), acting as a “glue”
-
Contains sodium citrate which helps emulsification
-
Adds umami that makes kids forget they’re eating veggies
Pro Tip: For extra crispiness, spray tots lightly with oil before baking – it mimics frying!
A Global Tour of Vegetable Fritters – Zucchini Tots’ Cousins
Your tots belong to an ancient family of veggie-packed bites:
Middle Eastern (Kibbeh)
Bulgar wheat and zucchini patties fried to crisp perfection
Indian (Pakora)
Chickpea-battered zucchini coins with turmeric and cumin
Italian (Frittelle di Zucchine)
Fried zucchini balls with ricotta and lemon zest
Korean (Hobak Jeon)
Thin zucchini slices dipped in egg and pan-fried
Why Zucchini?
Its mild flavor makes it the perfect “gateway vegetable” across cultures – just like your tots are for picky eaters!
The Psychology of Picky Eating – Why These Tots Win
The “Fun Food” Effect
-
Finger food = 30% more likely to be tried by resistant eaters
-
Bite-sized pieces feel less intimidating than whole vegetables
-
Golden brown color triggers dopamine response
Sensory Science
The perfect crunch (auditory) + creamy interior (textural) creates:
-
Contrast that holds attention
-
Satisfaction that reduces craving for less healthy snacks
Empowerment Through Dipping
Allowing choice of dips gives kids (and adults!) a sense of control – key for establishing positive food relationships
Pro Tip: Let kids help shape the tots – they’re 3x more likely to eat what they’ve “created”
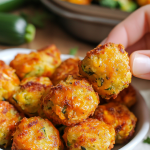
Zucchini Tots
- Total Time: 30 minutes
Description
Born on a hot summer day with a fridge full of zucchini and one toddler’s veggie resistance, these tots became my favorite victory snack. Crispy outside, tender inside, and packed with cheesy goodness, they’re a bite-sized celebration of flavor—and a clever way to get greens on every plate. Perfect for picky kids, party trays, or your next “snack attack” moment. Let’s tot!
Ingredients
-
1 packed cup grated zucchini (squeezed dry)
-
1 large egg
-
¼ medium onion, finely minced
-
¼ cup shredded sharp cheddar cheese
-
⅓ cup seasoned breadcrumbs
-
¼ tsp kosher salt
-
Black pepper, to taste
-
Cooking spray (for pan)
Instructions
-
Preheat oven to 400°F (200°C). Spray a 24-cup mini muffin tin generously.
-
Squeeze zucchini dry using a clean towel—get every drop!
-
Mix everything in a medium bowl: zucchini, egg, onion, cheese, breadcrumbs, salt, pepper.
-
Fill muffin cups with the mixture, pressing down firmly.
-
Bake 16–18 mins until golden and crisp at the edges.
-
Cool 5 mins before gently removing with a knife or spatula.
Notes
-
No muffin tin? Bake in spoonfuls on a lined sheet.
-
Too wet? Add breadcrumbs 1 tbsp at a time.
-
Want extra crunch? Broil the last 2 mins.
Nutrition
- Calories: 45per serving
- Sodium: 120mg
- Fat: 2g
- Carbohydrates: 4g
- Protein: 3g
Final Thoughts
Whether you’re a science geek, global cuisine enthusiast, or just battling dinnertime struggles, these zucchini tots are more than a snack – they’re edible psychology with roots across continents.
Category:
Healthy Snacks / Global Comfort Food
Nutritional Info (Per Serving – 2 Tots)
Approximate values: Calories: ~45 | Fat: 2g | Protein: 3g | Carbohydrates: 4g | Fiber: 0.5g | Sugar: 0.5g | Sodium: 120mg
(Note: Values can vary based on specific ingredients/brands used.)
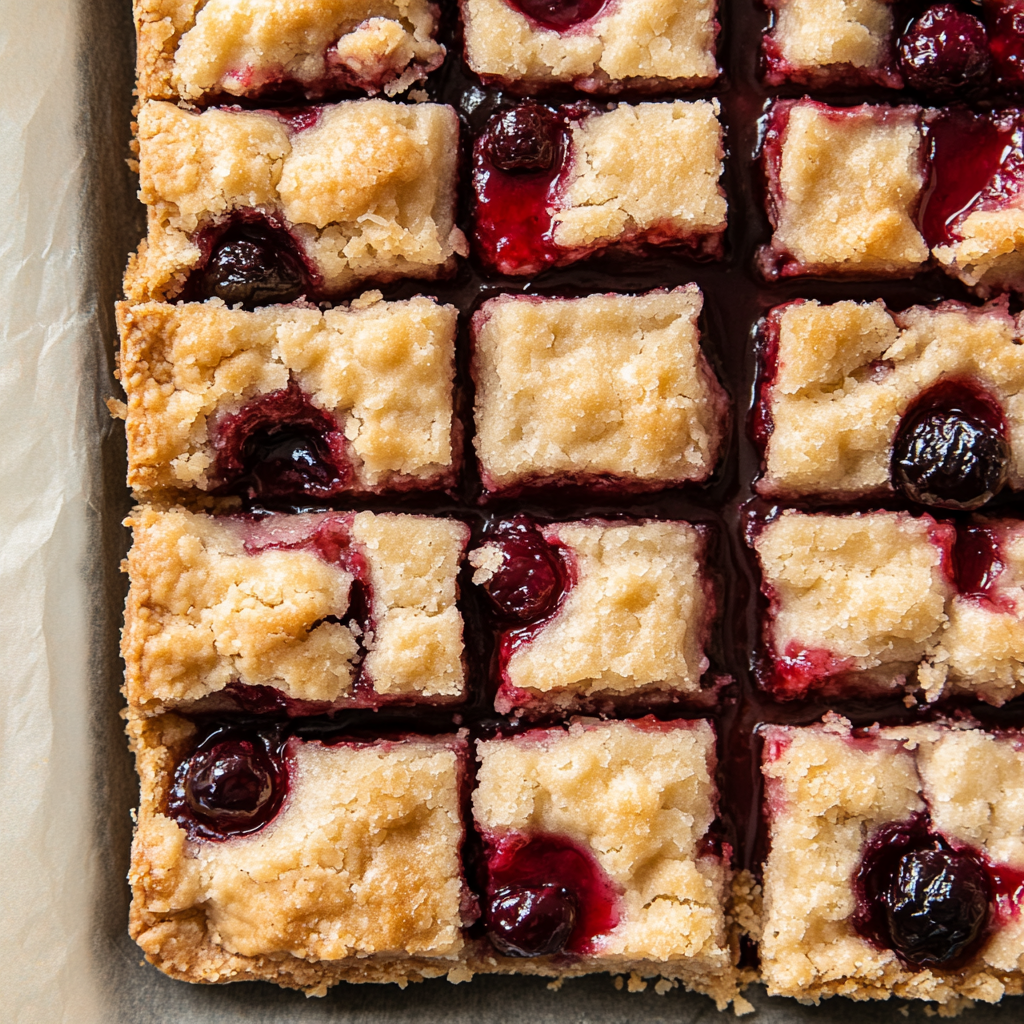
Cherry Pie Bars
Cherry Pie Bars: The Easy, Crowd-Pleasing Dessert You Need
There’s something magical about cherry pie—the sweet-tart filling, the buttery crust, the way it instantly transports you to summer picnics and family gatherings. But let’s be honest: rolling out pie dough isn’t always how we want to spend our time. Enter Cherry Pie Bars—all the flavor of homemade cherry pie, but in easy, portable, no-fuss bar form!
These bars are perfect for potlucks, bake sales, or just treating yourself (because you deserve it). With a buttery shortbread-like base, a luscious cherry filling, and a sweet almond glaze, they’re guaranteed to disappear fast.
Why You’ll Love These Cherry Pie Bars
✔ No pie crust stress – Just press the dough into the pan—no rolling, crimping, or blind baking!
✔ Perfect for feeding a crowd – One batch makes 24 bars, ideal for parties and gifting.
✔ Make-ahead friendly – These taste even better the next day as the flavors meld.
✔ Endless variations – Swap the cherry filling for blueberry, apple, or even chocolate!
Ingredients You’ll Need
For the Bars:
-
1 cup (2 sticks) unsalted butter, softened – The key to a rich, tender crust.
-
2 cups granulated sugar – Sweetens the dough and balances the tart cherries.
-
4 large eggs – Gives structure and richness.
-
1 tsp vanilla extract + ¼ tsp almond extract – The almond extract makes the cherry flavor pop!
-
3 cups all-purpose flour – Spoon & level for the perfect texture.
-
2 (21 oz) cans cherry pie filling – Look for brands with plump cherries (like Comstock).
For the Glaze:
-
1 cup powdered sugar – Sifted for smoothness.
-
½ tsp vanilla + ½ tsp almond extract – Echoes the flavors in the bars.
-
2-3 tbsp milk – Adjust for your desired drizzle consistency.
Step-by-Step Instructions
1. Prep & Preheat
-
Preheat oven to 350°F (175°C).
-
Grease a 9×13-inch pan (or line with parchment for easy removal).
2. Make the Dough
-
Cream butter & sugar until light and fluffy (3-5 mins).
-
Beat in eggs one at a time, then add vanilla and almond extract.
-
Mix in flour just until combined—don’t overmix!
3. Layer the Bars
-
Press ⅔ of the dough into the pan (it’ll be thick—use wet fingers to spread).
-
Spread cherry filling evenly over the dough.
-
Dot remaining dough on top (no need to cover completely—gaps are good!).
4. Bake & Cool
-
Bake 35-40 mins until golden brown.
-
Cool completely before glazing (this prevents a melty mess!).
5. Drizzle & Serve
-
Whisk glaze ingredients and drizzle over cooled bars.
-
Slice & enjoy!
Can you smell that? It’s the sweet, buttery scent of nostalgia wafting from my oven right into your kitchen. If you’re anything like me, the mere mention of cherry pie makes your heart do a happy little dance – but let’s be real, rolling out pie crust isn’t always how we want to spend a golden afternoon. That’s where these glorious Cherry Pie Bars swoop in like culinary superheroes! Imagine all the joy of homemade cherry pie – the jammy fruit, the tender crumb, that gorgeous ruby hue – but in fuss-free bar form. No lattice-weaving required, no soggy-bottom panic, just pure, uncomplicated bliss. I created these for a lakeside picnic last summer, and let me tell you, the empty pan came back faster than kids chasing an ice cream truck. Whether you’re feeding a crowd, surprising a neighbor, or just treating yourself (you deserve it!), these bars are your golden ticket to homemade happiness. So tie on that apron – the slightly flour-dusted one, you know the one – and let’s bake some magic!
The Picnic That Started It All
Picture this: It’s the Fourth of July, and my family’s annual lakeside potluck is in full swing. My aunt always brought her legendary cherry pie – crimped edges perfect enough to make Martha Stewart weep. Last year, I wanted to bring something equally special but less… high-maintenance. (Have you ever tried transporting a full pie in a crowded car on a 90-degree day? Disaster waiting to happen!) Inspiration struck: why not capture that pie magic in portable bar form? I whipped up my first batch of these cherry-studded wonders, nervously setting them beside Aunt Linda’s masterpiece. The result? My bars vanished faster than the fireworks at dusk! My cousin’s toddler even smeared cherry filling across her cheeks like war paint – the ultimate compliment. That day, these bars earned their permanent spot in my recipe hall of fame. They’re not just dessert; they’re edible confetti for life’s little celebrations.
Your Cherry Pie Bar Toolkit
Gather these simple stars – pantry heroes unite!
For the Dreamy Bars:
- 1 cup (2 sticks) unsalted butter, softened – The flavor foundation! Unsalted lets you control the salt. If using salted, reduce added salt by half. Vegan? Swap in equal amounts of high-quality plant-based butter (I love Miyoko’s).
- 2 cups sugar – Sweetens the deal. Granulated white sugar gives that classic texture, but feel free to sub 1 cup with light brown sugar for caramel notes.
- 1 tsp salt – Secret weapon! Balances the sweetness and makes flavors pop. Use fine sea salt.
- 4 large eggs – Room temp is key for smooth blending! Pull them out an hour before baking.
- 1 tsp pure vanilla extract – The warm hug in every bite. Splurge on the good stuff!
- ¼ tsp almond extract – The cherry’s BFF! This tiny amount makes the fruit sing. Omit if allergic, but you’ll miss the magic.
- 3 cups all-purpose flour – Spoon and level it, friends! No packing. For slightly denser bars, swap 1 cup with cake flour.
- 2 (21 oz) cans cherry pie filling – The superstar! Look for brands with plump cherries (Comstock or Oregon Fruit are fab). Feeling ambitious? Use 4 cups of homemade cherry filling!
For the Glorious Glaze:
- 1 cup powdered sugar – Sift it first for silky smoothness.
- ½ tsp vanilla extract – Echoes the bar’s flavor.
- ½ tsp almond extract – Doubles down on that bakery-worthy aroma.
- 2–3 tbsp milk – Any kind works! Start with 2 tbsp; add the 3rd only if needed for drizzling consistency.
Let’s Build Some Bar Magic!
Ready? Aprons on, oven preheating, and let’s get mixing!
- Preheat & Prep: Fire up your oven to 350°F (175°C). Grease your trusty 9×13-inch pan really well with butter or baking spray, or line it with parchment paper (leaving overhangs for easy lifting later – game changer!).
- Creamy Dreams: In your largest bowl, beat the softened butter and sugar together with an electric mixer on medium-high. Keep going for 3-5 minutes until it’s light, fluffy, and almost white. Chef’s Whisper: “This isn’t just mixing; it’s creating tiny air pockets for lift! Don’t rush it.”
- Egg-cellent Adventure: Beat in the eggs, one at a time, letting each fully incorporate before adding the next. Scrape the bowl! Now mix in the vanilla, almond extract, and salt. That almond-vanilla perfume? Heavenly.
- Flour Power: Reduce mixer speed to low. Gradually add the flour, mixing just until no dry streaks remain. Pro Tip: “Overmixing = tough bars! Stop when it looks shaggy but combined.”
- Layer Up: Dollop about ⅔ of your batter into the pan. Use a spatula or lightly wet fingers to spread it evenly – it’ll be thick, like cookie dough. Don’t stress perfection!
- Cherry Bomb: Spoon the glorious cherry pie filling evenly over the base layer. Gently spread it, leaving a tiny border. Fun Hack: “Use the back of a spoon to create slight ‘wells’ – helps the top layer settle in.”
- Top It Off: Drop spoonfuls of the remaining batter randomly over the cherries. No need to cover completely – the gaps let the ruby filling peek through beautifully!
- Bake to Bliss: Slide the pan into the oven’s center rack. Bake 35-40 minutes until the top is golden brown, the edges are pulling away slightly, and a toothpick inserted near the center (avoid cherries!) comes out clean. Watch Closely: “Ovens vary! Mine sings at 38 minutes.”
- Cool It, Hot Stuff: Let the pan cool completely on a wire rack. I know it’s tempting, but glazing warm bars = melty mess! Patience, grasshopper.
- Glaze Glory: Whisk all glaze ingredients in a small bowl. Start with 2 tbsp milk; add the 3rd only if needed for a thick but drizzle-able consistency. Drizzle artfully (or enthusiastically!) over the cooled bars. Let set for 10 minutes before slicing.
Showtime! Serving Your Masterpiece
Presentation is half the fun! Slice these beauties into 24 squares (or be generous and cut 12 larger bars – no judgment!). For a casual vibe, serve them right from the pan with a stack of napkins. Feeling fancy? Plate individual bars on vintage dessert plates with a dollop of softly whipped cream or a scoop of vanilla bean ice cream melting seductively alongside. A tiny sprinkle of flaky sea salt or toasted sliced almonds on top adds gourmet flair. These bars shine brightest at room temperature, letting all those buttery, cherry-almond flavors sing. Perfect for bake sales, brunch buffets, or that 3pm coffee break when you deserve something splendid!
Make It Your Own!
Love the base recipe? Try these tasty twists:
- Berry Bonanza: Swap cherry filling for blueberry, apple, or mixed berry pie filling. Raspberry + cherry is a stunning combo!
- Nutty Nirvana: Stir 1/2 cup chopped toasted pecans or walnuts into the batter for crunch. Sprinkle more on the glaze.
- Chocolate-Cherry Romance: Add 1/2 cup mini chocolate chips to the batter. Drizzle glaze with melted dark chocolate.
- Gluten-Free Friendly: Use a 1:1 gluten-free flour blend (like Bob’s Red Mill). Ensure extracts and pie filling are GF.
- Lemon Zing: Add 1 tbsp lemon zest to the batter and replace almond extract in the glaze with lemon extract for a bright, sunny vibe.
Olivia’s Extra Sprinkles of Wisdom
These bars have evolved like a fine wine (or, well, a really good pie)! The almond extract was a happy accident – I grabbed it instead of vanilla once and never looked back. They freeze beautifully too! Cool completely, freeze UNGLAZED bars in a single layer, then wrap tightly. Glaze after thawing. A funny kitchen confession? I once mistook salt for sugar in the glaze (yikes!). We salvaged it by scraping off the glaze and making a new batch, but lesson learned: label your pantry jars! Over the years, I’ve found these bars taste even better on day two, as the flavors meld. If you can resist, cover them overnight before slicing. Most importantly? Share them. Seeing someone’s eyes light up after that first bite? That’s the real recipe for joy.
Cherry Bar SOS: Your Questions Answered
Let’s tackle those baking hiccups before they happen!
- My top layer disappeared into the cherries! Help! “Ah, the great cherry sinkhole!” This usually means the batter was a bit too thin or the filling very juicy. No worries – taste is unaffected! Next time: Chill your batter 15 mins before layering, spoon filling gently without pressing down, and freeze the dolloped top batter 10 mins before baking for extra structure.
- Can I use fresh cherries instead of canned filling? Absolutely! Pit 4 cups fresh cherries. Toss with 1/2 cup sugar, 3 tbsp cornstarch, 1 tbsp lemon juice, and 1/4 tsp almond extract. Simmer 5-7 mins until thickened. Cool completely before using.
- Bars are browning too fast on top! Ovens can be feisty! Tent loosely with aluminum foil after 25 minutes if the top looks deep golden before the center is set. Also, ensure your rack is in the middle – too high = scorched tops!
- Glaze too runny/thick? Easy fixes! Too runny: Whisk in more powdered sugar, 1 tbsp at a time. Too thick: Add milk or cream, 1 tsp at a time. Aim for honey-like consistency – it should drizzle but hold its shape briefly.
5 Delicious Variations to Try
-
Berry Bliss – Swap cherry filling for blueberry or raspberry.
-
Apple Cinnamon – Use apple pie filling + 1 tsp cinnamon in the dough.
-
Chocolate-Cherry – Add ½ cup mini chocolate chips to the batter.
-
Nutty Crunch – Stir ½ cup chopped pecans into the dough.
-
Lemon Zest – Add 1 tbsp lemon zest for a bright twist.
Storage & Freezing Tips
-
Room Temp: Keep covered for 2-3 days.
-
Freeze (unglazed): Wrap tightly and freeze for up to 3 months. Thaw and glaze before serving.

Cherry Pie Bars
- Total Time: 55 mins
Description
Born on a sunny picnic blanket and loved ever since, these Cherry Pie Bars bring all the flavor of homemade cherry pie—ruby fruit, buttery crumb, and nostalgic sweetness—without the rolling, crimping, or soggy-bottom stress. They’re simple to bake, easy to slice, and a guaranteed hit from potlucks to porch snacks. Grab your apron and let’s turn cherries into pure delight!
Ingredients
For the Bars:
-
1 cup unsalted butter, softened
-
2 cups sugar
-
1 tsp salt
-
4 large eggs (room temp)
-
1 tsp vanilla extract
-
¼ tsp almond extract
-
3 cups all-purpose flour
-
2 (21 oz) cans cherry pie filling
For the Glaze:
-
1 cup powdered sugar
-
½ tsp vanilla extract
-
½ tsp almond extract
-
2–3 tbsp milk
Instructions
-
Preheat oven to 350°F (175°C). Grease or line a 9×13-inch baking dish.
-
Cream butter & sugar until fluffy (3–5 mins). Add eggs one at a time, then vanilla, almond extract, and salt.
-
Mix in flour gradually just until combined. Don’t overmix!
-
Spread ⅔ of dough into pan evenly. Layer cherry filling on top.
-
Dot remaining dough over filling by spoonfuls—let some cherry peek through!
-
Bake 35–40 mins until golden and set. Cool completely.
-
Whisk glaze until smooth. Drizzle over cooled bars. Let set before slicing.
Notes
-
Use a spoon’s back to press filling gently into base.
-
Want deeper flavor? Sub half the sugar with light brown sugar.
-
Bars taste even better the next day!
Nutrition
- Serving Size: 24 small bars or 12 large
- Calories: 280 per bar
- Sugar: 27g
- Fat: 12g
- Carbohydrates: 40g
Final Thoughts & Category
These Cherry Pie Bars are the ultimate easy, crowd-pleasing dessert—perfect for when you want all the flavor of pie without the fuss.
Category: Easy Dessert Bars / No-Roll Pie Alternatives
Nutritional Nibbles (Per Bar, 24 Servings)
Calories: ~230 | Fat: 9g | Saturated Fat: 5g | Cholesterol: 50mg | Sodium: 110mg | Carbohydrates: 35g | Fiber: 1g | Sugar: 22g | Protein: 2g
Note: Estimates based on ingredients used. Values may vary with substitutions.
Prep Time: 15 mins | Cook Time: 40 mins | Total Time: 55 mins (+ cooling) | Serves: 24




