
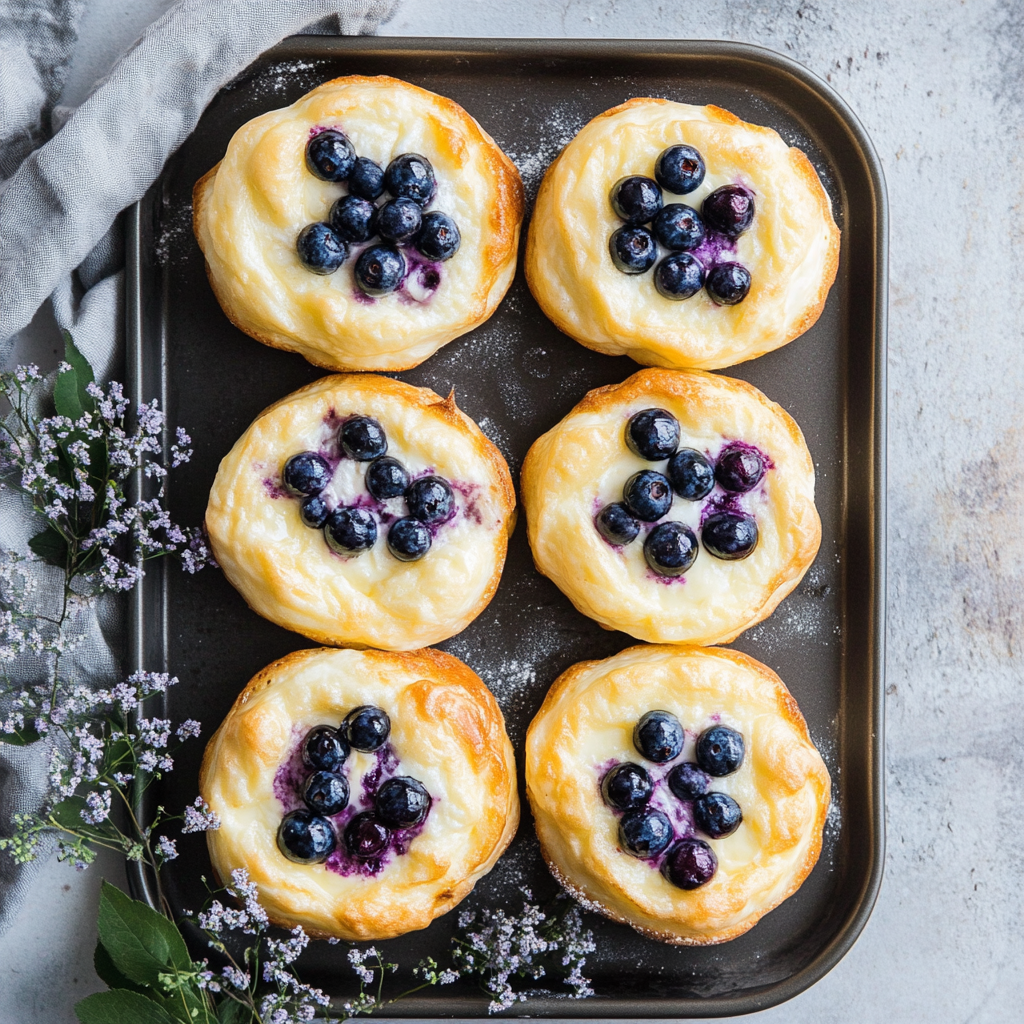
Fluffy Cottage Cheese Blueberry Cloud Bread
☁️ Fluffy Cottage Cheese Blueberry Cloud Bread: Your New Breakfast Obsession!
Hey there, kitchen friend! Olivia here, waving from my flour-dusted countertop. Ever have one of those mornings where you crave something just sweet enough to feel like a treat, but light enough that you don’t slump over by 10 AM? That exact craving birthed these magical little Fluffy Cottage Cheese Blueberry Cloud Breads! Picture this: pillows of airy, protein-packed goodness, speckled with juicy blueberries that burst like tiny flavor fireworks. They’re ridiculously easy to make (seriously, no fancy skills needed!), gluten-free by nature, and taste like summer captured in a bite. Forget heavy muffins or sugar-bomb pastries – this cloud bread is your guilt-free ticket to feeling like you’re floating on a blueberry-scented dream. Whether you’re grabbing a quick bite before work, serving them at a lazy Sunday brunch, or sneaking one as an afternoon pick-me-up, these clouds are about to become your new happy place. Ready to whip up some edible sunshine? Let’s get whisking!
☁️ The Day I Chased Clouds (And Found Bliss!)
This recipe actually started with a kitchen flop! Last summer, I was determined to make a super-light blueberry soufflé for a friend’s garden brunch. Picture me, apron askew, whisking egg whites like my life depended on it… only to have the whole thing dramatically collapse the second I peeked in the oven. Total heartbreak! But as I sadly poked the deflated mess, I realized something: the texture was INCREDIBLY soft, almost cloud-like, and the blueberry pockets were still delicious. “What if I embraced the flat?” I thought. I scooped spoonfuls onto a baking sheet, crossed my fingers, and popped them back in. What emerged were these rustic, golden puffs – slightly crisp outside, melt-in-your-mouth tender inside. My friend took one bite, closed her eyes, and sighed, “Olivia, this tastes like eating a blueberry cloud.” The name stuck, and the flop became a star! Now, every time I make them, I giggle remembering that soufflé’s great escape. Sometimes the best recipes aren’t born from perfection, but from happy little kitchen accidents (and a refusal to waste good blueberries!).
🛒 Gathering Your Cloud-Making Magic
Here’s the beauty squad – simple ingredients doing extraordinary things!
- 3 large eggs, separated: The backbone! Room temp whites whip BEST. Save those yolks – they add richness. (Chef Tip: Crack cold eggs into a bowl, let sit 15 mins. Perfect temp!)
- ½ cup full-fat cottage cheese, drained & blended smooth: Our secret protein punch & moisture master! Drain any excess liquid first, then BLEND until silky. (Sub: Ricotta works, but cottage cheese gives a lighter texture.)
- 1 tbsp cornstarch: The gentle glue holding our cloud together. Crucial for structure! (Sub: Arrowroot powder works 1:1.)
- ¼ tsp cream of tartar: The egg white MVP! Stabilizes the peaks for maximum fluff. Don’t skip! (Sub: ½ tsp lemon juice in a pinch.)
- 1 tbsp powdered sweetener (optional): A subtle hint of sweetness. (Sub: Regular powdered sugar works beautifully too!)
- ½ tsp vanilla extract (optional): Warmth & depth. (Sub: Almond extract for a fun twist!)
- ½ tsp lemon zest (optional): Brightens the berries SO nicely! Use a microplane. (Chef Love: Zest the lemon BEFORE juicing it!)
- ½ cup fresh blueberries: Little bursts of joy! Toss in 1 tsp cornstarch if they’re extra juicy to prevent sinking. (Sub: Frozen berries work! Don’t thaw – add straight from freezer.)
Why full-fat cottage cheese? Fat = flavor and tenderness! Low-fat can make things a bit rubbery. Trust me, the blend makes it incredibly smooth.
👩🍳 Let’s Build Some Clouds! (Step-by-Step)
Ready for the fun part? Grab your bowls – it’s cloud-raising time!
- Preheat & Prep: Fire up your oven to 300°F (150°C). Line a baking sheet with parchment paper – NO grease needed! The paper is your cloud’s best friend. (Chef Hack: Crumple the parchment slightly, then flatten it out. It stays put better!)
- Yolk Bliss: In a medium bowl, plop in your egg yolks, that beautifully blended cottage cheese, cornstarch, powdered sweetener (if using), vanilla, and lemon zest. Whisk it like you mean it until it’s completely smooth and pale yellow. No lumps allowed! Set this sunny bowl aside.
- White Peak Party! Now, the STAR show! In a squeaky-clean, dry bowl (any grease kills peaks!), beat the egg whites with the cream of tartar. Use an electric mixer on medium-high. Beat until STIFF peaks form – this means when you lift the beaters, the peaks stand straight up without flopping over. (Chef Secret: Patience is key! Takes 3-5 mins. Don’t rush it.)
- Gentle Folding Magic: Time to marry the mixtures! Add about 1/3 of the fluffy egg whites to the yolk mixture. Gently fold it in with a spatula – think “scoop, turn, repeat” – just to lighten it up. Now, carefully pour this lightened mixture back into the bowl with the remaining egg whites. Fold GENTLY again, using broad, sweeping motions, JUST until no big white streaks remain. (Crucial: Overmixing = flat clouds! Be kind to the fluff.)
- Blueberry Bounty: Gently fold in most of the blueberries, saving a handful for the tops. Again, be light-handed!
- Cloud Sculpting: Use a large spoon or cookie scoop to dollop the batter onto your parchment-lined sheet. Aim for 6 generous mounds – they spread a little, so leave space! Now, press your reserved blueberries gently into the tops of each cloud. (Chef Touch: Dust tops VERY lightly with extra powdered sweetener for a frosty look pre-bake!)
- Bake to Golden Perfection: Slide the tray into the oven. Bake for 25-30 minutes. They’re done when deeply golden brown on top and bottom, and they feel set when lightly touched. (No peeking for first 20 mins! Cold air makes clouds sad.)
- The Cool Down: This is vital! Let the clouds cool on the baking sheet for at least 10 minutes before even thinking about moving them. They firm up as they cool. (Resist the urge! Hot clouds are fragile dreamers.)
Serving Your Sky-High Creations
How to enjoy these blueberry beauties? Keep it simple and let them shine! Slide a spatula gently under each cooled cloud and transfer to a plate. They’re fantastic warm, at room temp, or even chilled. For a touch of elegance, dust with a whisper of powdered sugar right before serving. Pair them with a dollop of Greek yogurt or a drizzle of honey for extra decadence (or keep it light!). They’re perfect alongside scrambled eggs for brunch, or just pop one straight into your mouth while leaning against the counter – my personal favorite method! Serve on a pretty plate or a rustic wooden board.
Cloud Nine Variations: Make It Your Own!
Love the base? Let your imagination float!
- Berry Bonanza: Swap blueberries for raspberries, chopped strawberries, or blackberries. Frozen mixed berries work great too!
- Citrus Sunshine: Replace lemon zest with orange zest. Add 1 tsp poppy seeds for lemon-poppyseed cloud vibes!
- Cozy Spice: Add ½ tsp cinnamon or pumpkin pie spice to the yolk mixture for a warm hug.
- Chocolate Chip Dream: Fold in mini chocolate chips instead of (or with!) berries. Kid (and adult!) magnet.
- Savory Twist: Skip the sweetener, vanilla, berries & lemon. Fold in ¼ cup grated sharp cheddar, 1 tbsp chopped chives, and a pinch of garlic powder for cheesy herb clouds!
Olivia’s Chef Notes & Whispers
This recipe feels like an old friend now, but it definitely evolved! My first batches were… let’s say, *inspired* by my soufflé disaster. They were delicious but SUPER fragile. Adding the cornstarch was the game-changer – thank you, late-night kitchen experimentation! The blending step for the cottage cheese also came later; I realized lumps were the enemy of ethereal fluff. A funny fail? Once I tried doubling the recipe in one giant bowl. Big mistake! Folding became impossible, and I ended up with one sad, flat blueberry pancake. Lesson learned: keep batches intimate! These clouds are best enjoyed fresh the day they’re made, but they surprisingly hold okay in an airtight container for a day (they lose a *little* height but keep the flavor). If they soften, a quick 5-minute warm-up in a low oven brings back their spirit. Mostly, just enjoy the process and embrace the rustic charm – no two clouds are exactly alike, and that’s part of their magic!
Cloud Bread SOS: Your Questions Answered!
Let’s tackle those common fluffy mysteries:
- Q: Why did my cloud bread deflate? It looked great in the oven!
A: Heartbreak! The #1 culprit is usually under-whipped egg whites or over-mixing when folding. Stiff peaks are non-negotiable! Also, resist opening the oven door early – the rush of cold air shocks them. Ensure your bowl and beaters are spotlessly clean and grease-free for the whites. Finally, cooling them completely on the sheet is crucial for setting their structure. - Q: Can I use frozen blueberries? Won’t they make everything soggy?
A: Absolutely! Do not thaw them first. Toss frozen berries in about 1 tsp of the cornstarch called for in the recipe (before adding to the batter) – this helps absorb excess moisture. Fold them in gently, straight from the freezer. They work like a charm and often bleed less than super-ripe fresh ones! - Q: My clouds spread a lot/flattened into pancakes. Help!
A: This often points to the egg whites not being stiff enough or the batter being slightly over-mixed, weakening the structure. Also, ensure your oven is fully preheated – a cold start hinders the rise. Make sure you’re dolloping tall mounds, not spreading the batter thinly. If your batter seems very runny after folding, the whites likely needed more whipping. - Q: Can I make these dairy-free?
A: You can try! Substitute the cottage cheese with an equal amount of well-blended silken tofu (drained) or a thick, unsweetened dairy-free yogurt (coconut works, but adds flavor). Results may vary slightly in texture, but it should work! Ensure any substitute is as thick and smooth as possible.

Fluffy Cottage Cheese Blueberry Cloud Bread
Description
Born from a sweet soufflé flop, these golden cloud breads combine airy egg whites and creamy cottage cheese with bursts of juicy blueberries. Gluten-free and light, they’re perfect for breakfast, brunch, or a guilt-free snack. Feel the day lift with each soft, summery bite—let’s whisk up some edible sunshine!
Ingredients
-
3 large eggs, separated (room temp is best)
-
½ cup full‑fat cottage cheese, blended smooth
-
1 tbsp cornstarch
-
¼ tsp cream of tartar
-
1 tbsp powdered sweetener (or powdered sugar)
-
½ tsp vanilla extract (optional)
-
½ tsp lemon zest (optional)
-
½ cup fresh blueberries (or frozen, unthawed; dust with 1 tsp cornstarch)
Instructions
-
Preheat & prep – Set oven to 300°F (150°C). Line a baking sheet with parchment.
-
Whisk egg yolk mix – In a bowl, combine egg yolks, blended cottage cheese, cornstarch, sweetener, vanilla, and lemon zest until smooth.
-
Beat egg whites – In a clean bowl, beat egg whites with cream of tartar until stiff peaks form (3–5 mins).
-
Fold gently – Fold one-third of whites into yolk mix to lighten. Then fold in the rest, keeping it fluffy.
-
Add blueberries – Gently fold in most berries, reserving a few for topping.
-
Scoop & bake – Use a spoon to dollop six mounds onto the pan. Top each with reserved berries. Bake 25–30 mins until golden and set.
-
Cool – Let clouds rest on the pan for 10 mins to firm up before serving.
Notes
-
Use room-temperature eggs for loftier clouds.
-
Clean, dry bowls & beaters = perfect peaks.
-
Don’t open the oven early; hot air is essential for lift.
-
Let them cool on the sheet—moving too soon can collapse them
Nutrition
- Calories: 65 cal per cloud
- Sugar: 1 g
- Fat: 4 g
- Carbohydrates: 3 g
- Fiber: 0.5 g
- Protein: 5 g
Final Thoughts: Why This Recipe Earned a Permanent Spot in My Kitchen
In a world of complicated baking trends and Instagram-perfect pastries, this humble cloud bread stands out for its honest simplicity and reliable joy. It’s the recipe I make when I want to feel like a kitchen wizard without the stress. The one I teach kids for their first baking lesson. The version I adapt for gluten-free friends and dairy-avoiding relatives.
What began as a failed soufflé has become my most-requested recipe – not because it’s fancy, but because it delivers that magical combination of lightness and satisfaction we all crave in the morning. It represents everything I love about cooking: creativity born from mistakes, global flavors in a simple form, and that irreplaceable feeling of sharing something delicious made with your own hands.
So whether you’re a meal prep enthusiast, a brunch lover, or just someone who appreciates the quiet magic of a perfectly balanced bite, I hope these clouds bring as much happiness to your kitchen as they have to mine. After all, shouldn’t every day start with something that makes you smile? Happy cloud-making!
🍎 A Little Bite of Goodness (Nutritional Info)
Per Cloud (Makes 6):
Calories: ~65 | Protein: 5g | Carbohydrates: 3g | Fiber: 0.5g | Sugar: 1g (natural from berries) | Fat: 4g
(Note: Using powdered sugar adds approx. 1g sugar & 5 calories per cloud.)
These little clouds pack a satisfying protein punch thanks to the eggs and cottage cheese, making them a much more balanced choice than your average pastry. The blueberries add antioxidants and a touch of natural sweetness. Enjoy them as a light, wholesome treat!
📌 Save This Recipe for Later!
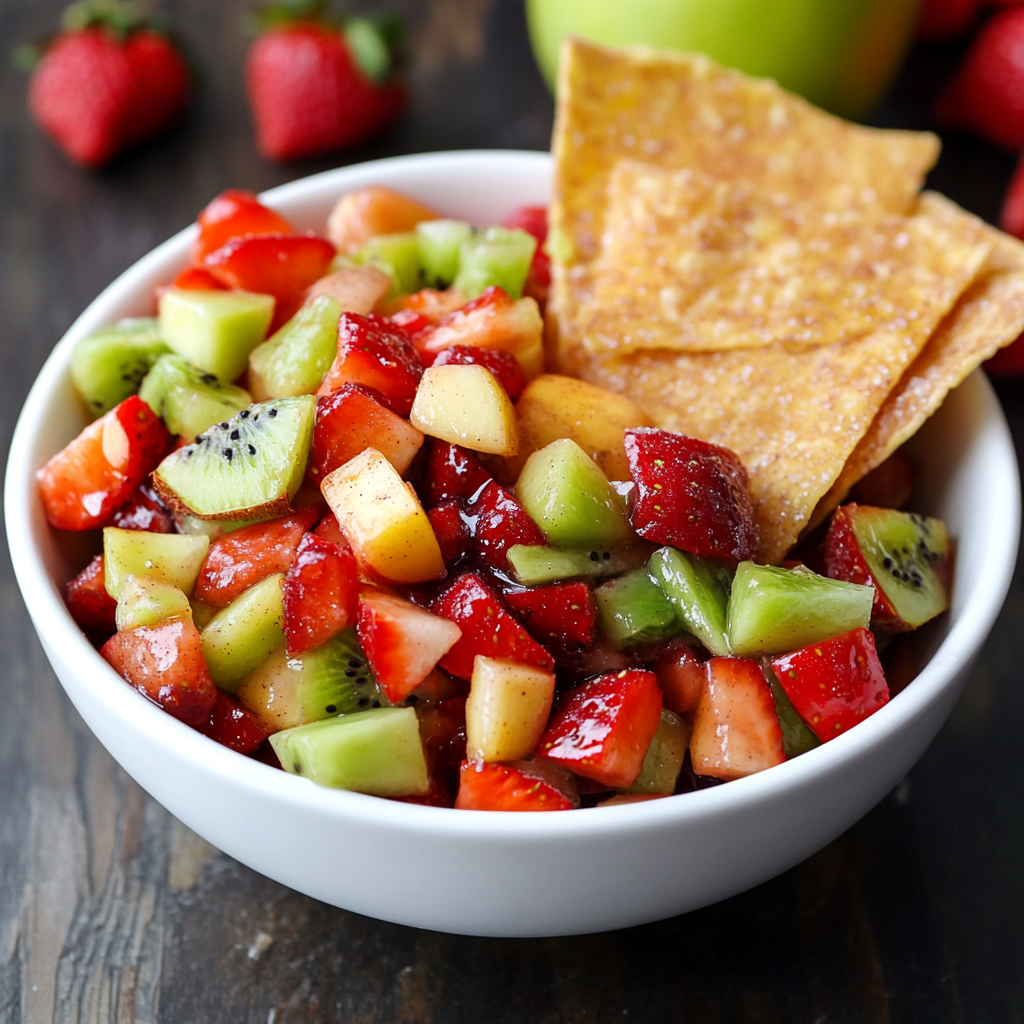
Fruit Salsa with Cinnamon Sugar Tortilla Chips
Summer Sunshine in a Bowl: Let’s Make Magic with Fruit Salsa & Cinnamon Chips!
Hey there, kitchen friend! Olivia here, apron slightly flour-dusted (as usual), ready to share one of my all-time favorite crowd-pleasers. Picture this: golden tortilla chips, warm from the oven, sparkling with cinnamon sugar like edible glitter. Beside them, a bowl bursting with jewel-toned fruit—ruby strawberries, emerald kiwi, crisp apples—all dancing together in a sweet-tart salsa that tastes like pure sunshine. This isn’t just a recipe; it’s an invitation to joy. Whether you’re hosting a backyard BBQ, needing a show-stopping potluck contribution, or just craving a snack that makes Tuesday feel special, this Fruit Salsa with Cinnamon Sugar Tortilla Chips is your secret weapon. It’s embarrassingly easy, wildly adaptable, and guaranteed to make people hover around the snack table with happy murmurs of “Oh wow, what IS this?” Best part? You likely have most ingredients already. So grab your favorite chopping knife and let’s turn simple fruits and tortillas into something unforgettable. Trust me, once you see how fast this disappears, you’ll be making it all summer long!
Picnic Blankets & Berry-Stained Fingers: Why This Recipe Feels Like Home
This recipe takes me straight back to my grandma’s sprawling backyard, circa age eight. Every Fourth of July, she’d orchestrate a “Kid’s Fancy Snack Station” beside the adult buffet. One year, she handed me a butter knife (the safe, blunt kind!), a mountain of strawberries, and whispered, “You’re in charge of the fancy fruit confetti, Livvy.” We chopped apples tossed in lemon juice (“so they don’t turn sad and brown!”), smashed raspberries into jammy goodness, and sprinkled cinnamon sugar on tortillas with the solemn focus of scientists. I felt like a culinary wizard watching my cousins devour it, their faces smeared with pink juice and cinnamon. Grandma winked, “See? Food’s magic when you make it with love and a little mess.” That messy, joyful collaboration—turning humble fruits into something celebratory—is baked into every bite of this salsa. It’s not just a dish; it’s a tiny edible hug, a reminder that the simplest ingredients, shared with heart, create the warmest memories. Now, every time I make it, I swear I catch a whiff of her rose garden and hear the crackle of that old picnic blanket.
Your Colorful Cast of Characters: What You’ll Need
Gather these vibrant players! Don’t stress over perfection—this recipe thrives on flexibility. Here’s your shopping list with my chef-y insights:
- For the Cinnamon Sugar Tortilla Chips:
- 10 (10″) flour tortillas: The blank canvas! Stale ones work great here. Sub: Whole wheat tortillas for nuttiness, or corn tortillas for a gluten-free, crisper chip (reduce bake time by 1-2 mins).
- Non-stick cooking spray: Helps the cinnamon sugar cling like glitter. Sub: Lightly brush with melted butter or coconut oil for extra richness.
- ⅓ cup sugar: Plain granulated is perfect. Chef Hack: Use raw sugar for a subtle crunch!
- 1 tsp cinnamon: The warm, cozy star. Pro Tip: Add a tiny pinch of nutmeg or cardamom for intrigue.
- For the Fruit Salsa:
- 2 Granny Smith apples: Their tart crunch is essential! Sub: Honeycrisp or Fuji if you prefer sweeter, but reduce added sugar.
- Juice of 1 lemon: The anti-browning superhero! Chef Insight: Bottled works in a pinch, but fresh adds brighter flavor.
- 2 kiwis: Adds tropical zing & gorgeous green flecks. Sub: Firm mango chunks or peeled peaches.
- 1 lb strawberries: Sweet heart of the salsa! Hull & chop evenly. Sub: Extra raspberries or blackberries.
- ½ lb raspberries (optional): Gorgeous color & pops of tang. Pro Tip: Frozen work if thawed & drained well—gently fold in last.
- 1 tbsp brown sugar: Deepens flavor without being overly sweet. Sub: Honey or maple syrup (start with 2 tsp).
- 3 tbsp strawberry or raspberry preserves: The “glue” that adds shine & intensifies berry flavor. Chef Hack: Warm preserves slightly for easier mixing.
Let’s Get Chopping & Baking: Your Foolproof Guide
Ready to create magic? Follow these steps—I’ve packed them with my favorite kitchen hacks!
- Preheat & Mix Dry Bliss: Fire up your oven to 375°F (190°C). While it heats, grab a small bowl. Mix the ⅓ cup sugar and 1 tsp cinnamon together. Chef Hack: Use a fork to break up any clumps! This is your edible glitter—make it sprinkle-ready.
- Transform Tortillas into Chips: Lay tortillas on a clean surface. Lightly spray both sides with cooking spray (or brush with melted butter). Generously sprinkle one side with the cinnamon sugar mix—don’t be shy! Stack them, sugary side up. Using a sharp knife or pizza cutter, slice the stack into 8 triangles (like a pizza!). Pro Tip: Stacking & cutting saves SO much time vs. doing each tortilla individually.
- Bake to Golden Perfection: Arrange triangles in a single layer on baking sheets (sugary side up! No parchment needed if sprayed). Bake for 8-10 minutes. Watch Closely at 7 mins! They’re done when edges curl slightly and they’re golden and crisp (not browned!). They crisp up more as they cool. Transfer to a wire rack immediately. Chef Secret: Undercook by 30 seconds if you love a slightly chewy center!
- Chop & Protect the Fruit: While chips bake/cool, make the salsa. Peel, core, and finely dice the apples. Immediately toss them in a large bowl with the lemon juice. This prevents browning and adds zing! Hack: Use an apple corer/slicer first, then dice—super fast!
- Add the Berry Brigade: Peel and dice the kiwis. Hull and dice the strawberries (aim for similar size to apples). If using raspberries, you can leave them whole, halve them, or gently mash a few for extra sauciness. Add all fruit to the bowl with the apples.
- Bring it All Together: Sprinkle the brown sugar over the fruit. Dollop in the preserves. GENTLY fold everything together with a large silicone spatula until just combined. You want vibrant chunks, not mush! Pro Tip: Fold from the bottom up to avoid crushing delicate berries.
- Chill & Marry Flavors: Cover the bowl and pop it in the fridge for at least 15-30 minutes. This is non-negotiable magic time! The sugar and preserves mingle with the juices, creating a luscious, syrupy goodness that coats every piece. Stir gently once before serving.
Showtime! How to Serve Your Masterpiece
Presentation is part of the fun! Pile the cooled cinnamon chips high in a rustic basket or wide-mouthed jar. Spoon the vibrant fruit salsa into a clear glass bowl or even individual mini mason jars for a cute picnic touch. For serious “wow” factor, place the bowl on a larger platter and scatter extra chips artfully around it. Add a tiny bowl of extra cinnamon sugar for sprinkling (trust me, people will!). This is best served within 2-3 hours of making for maximum crispness and freshness. Grab a chip, scoop up a generous mound of salsa, and get ready for the compliments to roll in!
Make It Your Own: Delicious Twists & Swaps
This recipe is a playground! Try these easy variations:
- Tropical Twist: Swap apples for diced mango, add 1/4 cup toasted coconut flakes to the salsa, and use lime juice instead of lemon.
- Berry Burst: Omit kiwi and apples. Use 1.5 lbs strawberries, 1 lb blueberries, and 1 cup blackberries. Use blueberry preserves.
- Spicy Kick: Add 1 finely minced jalapeño (seeds removed!) and 1 tbsp chopped fresh mint to the salsa. Perfect for grown-up gatherings!
- Protein Power (Breakfast Style): Serve the salsa over Greek yogurt or cottage cheese with the chips on the side for dipping. Adds staying power!
- Vegan/Dairy-Free: Ensure tortillas are vegan (check ingredients). Use maple syrup instead of honey if subbing for brown sugar. Spray with oil or use melted coconut oil.
Olivia’s Extra Pinch of Love & Lessons Learned
Oh, the stories this recipe holds! There was the infamous “Great Salsa Slide of 2018” at a friend’s pool party—a slightly overfilled bowl met a wobbly table. We salvaged it with extra chips and called it “Fruit Salsa Dip Nachos.” Crisis averted, laughter ensued! Over the years, I’ve learned: Size matters! Aim for a small, consistent dice on the apples and strawberries so everything scoops beautifully. Don’t skip the chill time! That 30 minutes lets the flavors do a happy dance together. And my biggest evolution? Embracing frozen berries! When fresh raspberries cost a fortune in winter, frozen (thawed and well-drained) work shockingly well. This dish has traveled with me from clumsy first dates to baby showers to backyard memorials. It’s a reminder that food doesn’t need to be complicated to be deeply meaningful. It’s about color, crunch, sweetness, and sharing. Now, go make your own messy, joyful memories with it!
Your Questions Answered: Fruit Salsa SOS!
Let’s tackle common hiccups before they happen:
- Q: My salsa got super watery! What went wrong?
A: This usually happens if the fruit is very ripe or chopped too far ahead. Fix: Drain excess liquid before serving. Next time, chop fruit closer to serving, ensure berries are dry, and don’t overmix. Adding 1 tsp of chia seeds (stirred in with the preserves) can help absorb juice!
- Q: Chips are chewy, not crisp. Help!
A: Likely culprits: overcrowded baking sheet (steam softens chips), underbaking, or cooling in a pile instead of a single layer. Fix: Bake in batches if needed, extend time by 1-2 mins (watch closely!), and always cool completely spread out on a rack. Stale tortillas actually crisp up better!
- Q: Can I make this ahead of time?
A: Partially! Make the chips up to 2 days ahead; store airtight at room temp (they might soften slightly—re-crisp in a 300°F oven for 3-4 mins). Chop apples/kiwi, toss with lemon juice, and store separately in the fridge up to 24 hours. Chop strawberries and mix the salsa max 3 hours ahead for best texture and to prevent sogginess.
- Q: What other fruits work? Peaches? Pineapple?
A: Absolutely! Firm peaches, diced pineapple, blueberries, even pitted cherries are fantastic. Key: Balance soft fruits (like peaches) with crunchy ones (like apples). Avoid super watery fruits like watermelon or citrus segments. Taste as you go and adjust sugar/lemon!
Fruit Salsa with Cinnamon Sugar Tortilla Chips
Description
Imagine jewel-toned fruit—strawberries, kiwi, apples—dancing in a sweet‑tart salsa, paired with warm, oven‑crisped cinnamon-sugar chips. Easy, colorful, and absolutely irresistible—a treat that turns any Tuesday into a mini celebration.
Ingredients
Cinnamon Sugar Chips
-
10 flour tortillas (or corn for GF)
-
Non‑stick spray or melted butter
-
⅓ cup sugar + 1 tsp cinnamon (optional: pinch nutmeg)
Fruit Salsa
-
2 tart apples (Granny Smith), diced
-
Juice of 1 lemon
-
2 kiwis, peeled & diced
-
1 lb strawberries, hulled & diced
-
½ lb raspberries (optional)
-
1 tbsp brown sugar (or 2 tsp honey/maple)
-
3 tbsp berry preserves (strawberry or raspberry)
Instructions
-
Preheat oven to 375°F (190°C).
-
Mix sugar & cinnamon. Set aside.
-
Make chips: Spray tortillas, sprinkle sugar blend, stack & slice into 8 wedges.
-
Bake: Arrange in one layer for 8–10 mins until golden at edges. Cool on rack.
-
Prepare salsa: Toss apples with lemon juice. Add kiwi, berries, brown sugar, preserves; gently fold. Chill 15–30 mins.
-
Serve: Present chips and salsa side by side. Scoop & dip!
Notes
-
Rotate with mango + coconut for a tropical flair.
-
Add jalapeño + mint for a spicy twist.
-
Perfect over Greek yogurt for a breakfast option.
-
Use corn tortillas for a gluten-free alternative.
Storage & Make-Ahead
-
Chips: Bake up to 2 days ahead; re-crisp briefly if needed.
-
Fruit prep: Dice apples & kiwi and coat in lemon juice up to 24 hrs ahead. Combine berries & preserves max 3 hrs before serving.
Nutrition
- Calories: 170 per serving
- Sugar: 18 g
- Fat: 3 g
- Carbohydrates: 33 g
- Fiber: 4 g
- Protein: 2 g
Final Thoughts: A Bowl of Sunshine & Smiles
This Fruit Salsa with Cinnamon Sugar Chips is more than a snack—it’s a celebration of summer, nostalgia, and shared joy. It’s the dish that turns a regular afternoon into a mini-fiesta, the one that makes kids (and adults!) light up with every sweet, crunchy bite.
Whether you’re serving it at a party, packing it for a picnic, or just treating yourself, remember: the best recipes are the ones that spark memories and bring people together. So grab those berries, dust on that cinnamon sugar, and let’s make every bite a little brighter.
Nutritional Snapshot (Per Serving – 8 Servings)
Calories: 170 | Carbs: 33g | Sugar: 18g (Includes natural fruit sugars) | Fat: 3g | Fiber: 4g | Protein: 2g
Note: This is an estimate. Values can vary based on specific ingredients and portion sizes. It’s a delicious way to enjoy fruit!
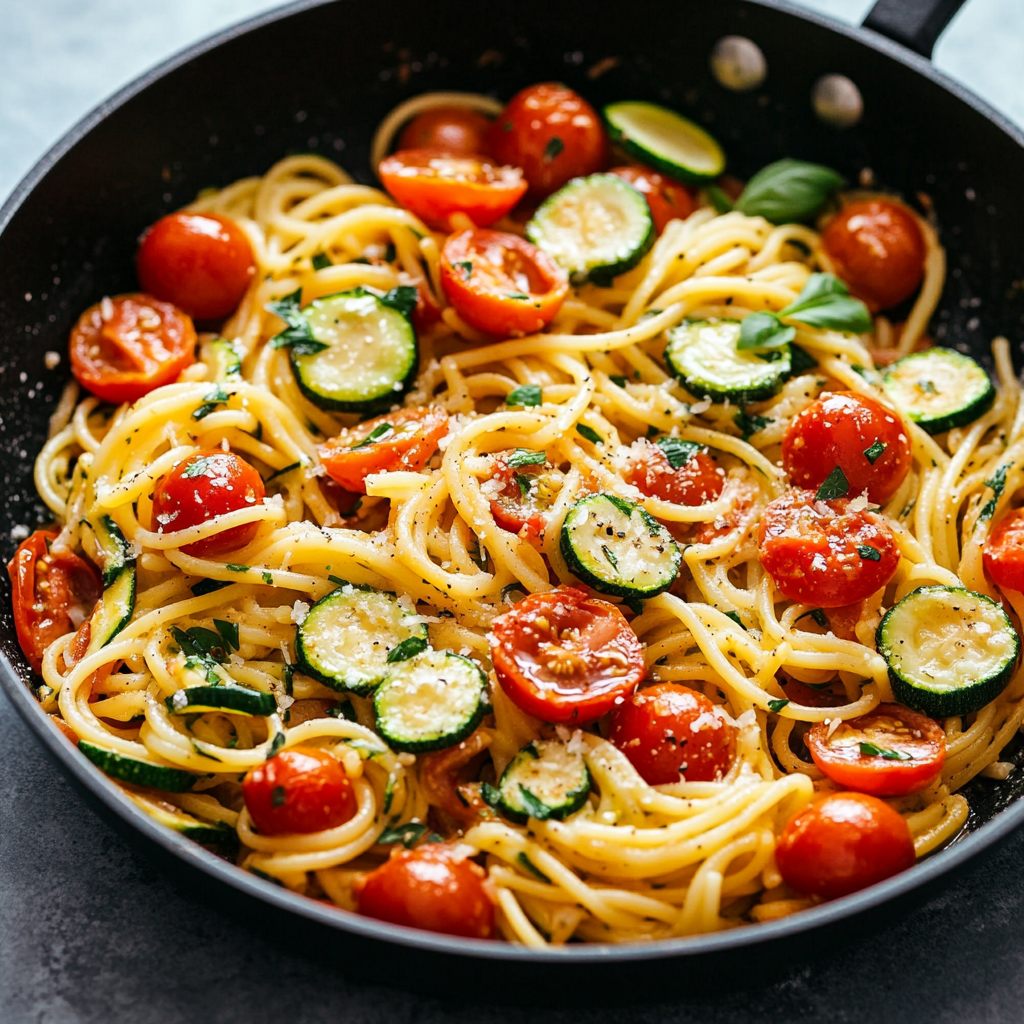
Healthy Tomato Zucchini Pasta
When Healthy Feels Like a Warm Hug: My One-Pan Tomato Zucchini Pasta
Hey there, kitchen friend! Olivia Bennett here, apron probably dusted with flour and definitely stained with olive oil. Can we chat for a moment about weeknight dinner miracles? You know the kind – when you’re staring into the fridge, tired but craving something that tastes like sunshine and comfort rolled into one bowl? That exact moment is why I’m practically bursting to share this Healthy Tomato Zucchini Pasta with you today. 🍝✨
Picture this: juicy cherry tomatoes bursting open like little flavor fireworks, tender zucchini soaking up garlicky goodness, and pasta twirling happily in a light, vibrant sauce – all made in one single pan. No mountain of dishes, no complicated techniques, just pure, feel-good deliciousness. This isn’t about deprivation; it’s about celebration! Celebrating fresh produce, celebrating simplicity, and celebrating that incredible feeling when you nourish yourself and your people with something utterly satisfying yet wonderfully light. Whether you’re a veggie-packing pro or just dipping your toes into healthier swaps, this dish is your new best friend. It’s the kind of recipe that makes you do a little happy dance when you take the first bite – trust me, I’ve done it! So grab your favorite skillet, and let’s turn those simple ingredients into a weeknight superstar.
The Zucchini That Started It All: A Garden Tale
This recipe? It has roots! Deep, slightly chaotic, zucchini-filled roots. Let me take you back to my Aunt Margo’s sprawling garden one sweltering July. I was maybe twelve, convinced vegetables were the enemy, until she handed me a sun-warmed zucchini the size of my forearm. “Magic wands,” she declared, winking. “Watch this.” In her tiny, steam-fogged kitchen, she transformed that giant green beast (and a colander overflowing with cherry tomatoes I’d just picked) into the most incredible, garlic-scented pasta I’d ever tasted. No fancy sauce, no fuss – just veggies, pasta, good olive oil, and her infectious laugh filling the room.
That meal was a revelation. It wasn’t just dinner; it was pure joy shared on a plate. Aunt Margo showed me that healthy food wasn’t rabbit food – it could be vibrant, hearty, and deeply comforting. Every time I make this dish now, especially when zucchini season hits its peak, I’m right back in that kitchen. I can almost smell the basil from her windowsill plant and hear her saying, “See, Liv? Magic!” It’s a reminder that the best recipes often start with simple ingredients, a bit of love, and maybe an oversized zucchini threatening to take over the counter.
Your Flavor Toolkit: What You’ll Need
Gather your veggie squad! Here’s everything for our vibrant, one-pan wonder (Serves 4 hungry souls):
- 2 cups cherry or grape tomatoes: These little gems are sweetness bombs! They burst beautifully, creating their own instant sauce. Chef Insight: Grab the reddest ones you see – more color = more flavor depth. Out of season? Use canned fire-roasted diced tomatoes (drained slightly) for a deeper vibe.
- 2 medium zucchinis, chopped: Our green glory! Chop them into bite-sized chunks (about 1-inch). Sub Tip: Yellow summer squash works just as well for a sunny twist. Got eggplant? Dice it small and add it with the zucchini!
- 2 tbsp olive oil: Our flavor carrier! Good extra virgin olive oil makes a difference here. Chef Must: Don’t skimp – it helps roast the veggies and coats the pasta perfectly.
- 2–3 garlic cloves, minced: Flavor foundation! Mince it fine so it infuses every bite without burning. Shortcut: 1 tsp pre-minced jarred garlic works in a pinch, but fresh is best!
- 1/2 tsp red pepper flakes (optional): The gentle kick! Adds warmth without overwhelming heat. Leave it out if sensitive, or add more if you like a tingle.
- 1 tsp Italian seasoning: Our herby hug! That classic oregano-basil-thyme blend. Fresh Swap: Got fresh herbs? Use 1 tbsp chopped basil + 1 tsp fresh oregano.
- Salt & black pepper, to taste: Essential flavor awakeners! Season as you go – taste after adding the tomatoes.
- 8 oz rotini or pasta of choice: The twirly canvas! Rotini holds the sauce beautifully. Dietary Love: Whole wheat adds fiber, gluten-free pasta works great (check cook time!), or try legume pasta for extra protein.
- 1/3 cup grated Parmesan cheese: Salty, umami magic! Vegan Tip: Swap in nutritional yeast or a vegan parm for that cheesy punch.
- Fresh basil or parsley for garnish (optional): The bright finish! A sprinkle adds color and a fresh aroma that lifts the whole dish.
Pro Tip from My Countertop: Always reserve that pasta water! It’s liquid gold for adjusting sauce consistency.
Let’s Get Cooking: Your Foolproof Steps
Ready to create some one-pan magic? Follow these steps – I’ve packed them with my favorite kitchen hacks!
- Roast Those Veggies Like a Boss: Grab your largest, trustiest skillet (cast iron is fab here!). Heat the olive oil over medium heat. Toss in your chopped zucchini with a pinch of salt. Sauté for 5-6 minutes, letting it get those lovely golden-brown edges – that’s FLAVOR developing! Chef Hack: Don’t crowd the pan! Give the zucchini space to caramelize, not steam. If your skillet’s small, do it in batches.
- Garlic & Tomato Party Time: Push the zucchini to the skillet’s edges. Add the minced garlic and red pepper flakes (if using) right into the center. Let them sizzle for just 30 seconds – until fragrant! Don’t let the garlic brown, or it turns bitter. Quickly stir in the cherry tomatoes and Italian seasoning. Crank the heat up slightly to medium-high. Cook for another 5-7 minutes, stirring occasionally. You’re waiting for those tomatoes to soften, wrinkle, and start bursting open, releasing their incredible juices. Listen for the Pops! That’s the sound of your sauce being born! Season well with salt and black pepper here.
- Pasta Power, Simultaneously: While the veggies work their magic, get your pasta going! Bring a large pot of well-salted water to a boil (it should taste like the sea!). Cook your pasta according to the package directions, but aim for al dente – it should have a slight bite. Why Al Dente? It holds up better when tossed with the sauce and won’t get mushy. Before draining, SCOOP OUT at least 1/4 cup of that starchy pasta water! This is crucial. Drain the pasta.
- The Grand Unification: Slide the drained pasta directly into the skillet with your glorious roasted veggies and tomato sauce. Toss everything together with gusto! Let it mingle over medium heat for a minute. Is it looking a bit dry? This is where your reserved pasta water shines! Add a splash (start with 2 tbsp) and toss again. The starch in the water helps create a silky, light sauce that clings perfectly to every noodle and veggie bit. Keep adding splashes until it looks beautifully coated but not soupy.
- The Cheesy, Herby Finale: Take the skillet off the heat! Stir in the grated Parmesan cheese. The residual heat will melt it into creamy perfection. Off-Heat Tip: Adding cheese off the heat prevents it from clumping or getting greasy. Give it one final, gentle toss. Taste! Need more salt? Pepper? A squeeze of lemon? Adjust now. Scatter over your fresh basil or parsley if using.
Key Hack for Flavor Depth: If you have an extra 5 minutes, let the combined pasta and veggies sit in the warm skillet (off heat) for a few minutes before serving. This lets the flavors marry even more beautifully!
Plating Up the Sunshine
How to serve this vibrant bowl of goodness? Keep it simple and inviting! Pile the pasta high into warm, shallow bowls – the steam rising is part of the experience. Grab your microplane and shower a little extra Parmesan right over the top for that irresistible salty tang. A final drizzle of your best extra virgin olive oil adds a lovely sheen and richness. If you went for the fresh herb garnish, now’s the time for that bright green flourish! Pair it with a simple green salad dressed with lemon vinaigrette or just some crusty bread for mopping up every last bit of that light, tomatoey sauce. This dish is cozy enough for a weeknight but looks effortlessly elegant for casual guests. Serve it family-style right in the skillet for maximum “oohs” and “aahs”!
Make It Your Own: Delicious Twists
This recipe is a fantastic canvas! Play around with these fun variations:
- Protein Power-Up: Stir in 1 cup of shredded rotisserie chicken, 1 (15oz) can of rinsed white beans (cannellini or Great Northern), or a handful of cooked chickpeas with the pasta for a heartier meal.
- Lemony Zing: Add the zest of 1 lemon with the garlic, and finish with a big squeeze of fresh lemon juice right before serving. Bright perfection!
- Creamy Dreamy (Dairy or Vegan): Craving creaminess? Stir in 1/4 cup of ricotta, mascarpone, or vegan cream cheese right after adding the Parmesan until just melted.
- Mediterranean Twist: Add 1/4 cup chopped Kalamata olives and 2 tbsp capers with the tomatoes. Finish with crumbled feta instead of Parmesan.
- Spicy Arrabbiata Vibe: Up the red pepper flakes to 1 tsp and stir in 1 tbsp of tomato paste with the garlic for a richer, spicier sauce.
Olivia’s Kitchen Confessions & Tips
Oh, this recipe! It’s evolved from that first garden-fresh version with Aunt Margo into my ultimate clean-out-the-fridge, I-need-comfort-stat lifesaver. One hilarious disaster stands out: I once got overzealous with the red pepper flakes (think ‘volcano level’) while chatting and not paying attention. Let’s just say we needed copious amounts of garlic bread and milk to recover! Lesson learned: measure the spice! 😅
Over time, I’ve learned a few key things. First, patience with the tomatoes is non-negotiable. Letting them truly burst and release their juices is what builds the sauce foundation. Rushing this step means a drier dish. Second, pasta water is sacred! I’ve forgotten to reserve it exactly once. Never again. That starchy liquid is the secret silky weapon. Finally, season in layers. Salt the zucchini, salt the tomatoes, taste after combining, adjust before serving. It makes a world of difference. This dish is forgiving, flexible, and always delivers that cozy, feel-good satisfaction. It’s seen me through busy weeknights, impromptu gatherings, and even the occasional ‘need a big bowl of veggie comfort’ moment. Make it yours!
Your Questions, Answered!
Let’s tackle those common kitchen hiccups before they happen:
Q: My sauce turned out too watery! What did I do wrong?
A: Ah, the watery sauce blues! Two main culprits: 1) Not letting the tomatoes burst and reduce enough. Really give them time over medium-high heat to soften, wrinkle, and release their liquid – it should thicken slightly in the pan. 2) Adding too much pasta water. Start with just a splash (2 tbsp), toss, and only add more if absolutely needed. The residual heat after combining will also help the sauce thicken as it sits for a minute. If it’s still too thin, let it simmer gently for 1-2 minutes more off the heat before adding cheese.
Q: Can I make this ahead of time?
A: Absolutely! You can roast the veggies (step 1 & 2) up to a day ahead and store them covered in the fridge. Cook the pasta fresh when ready to serve, then combine everything in the skillet as directed (you might need an extra splash of warm water or broth when reheating the veggies). The fully assembled dish is best eaten fresh, as the pasta can absorb the sauce and soften over time. Leftovers will keep for 2-3 days in the fridge – reheat gently in a skillet with a tiny splash of water.
Q: My zucchini got mushy! How do I keep it tender-crisp?
A: Texture matters! The key is not overcooking it in the first step. Sauté it just until it gets those golden spots and is tender-crisp (5-6 mins). Remember, it will cook a bit more with the tomatoes. Also, chop it evenly (1-inch chunks) so everything cooks at the same rate. If you prefer firmer zucchini, you can even add it *after* the tomatoes have started bursting, reducing its cook time by a few minutes.
Q: Is there a way to boost the protein without adding meat?
A: You bet! Stir in a can of rinsed white beans or chickpeas when you add the pasta. Using a legume-based pasta (like chickpea or lentil pasta) is a fantastic high-protein, high-fiber swap. Adding a scoop of ricotta when you add the Parmesan also boosts protein and creaminess. A handful of toasted pine nuts or walnuts on top adds crunch and protein too!
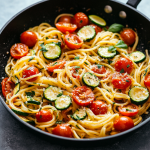
Healthy Tomato Zucchini Pasta
- Total Time: 30 mins
Description
Bursting cherry tomatoes, tender zucchini, and garlicky herbs swirl with pasta in a light, silky sauce—all in one skillet. It’s cozy, vibrant, and nourishing. Whether you’re feeding family, meal-prepping, or just need a veggie hug in a bowl, this is your go-to weeknight miracle.
Ingredients
-
2 cups cherry tomatoes
-
2 medium zucchinis, chopped
-
2 tbsp olive oil
-
2–3 garlic cloves, minced
-
½ tsp red pepper flakes (optional)
-
1 tsp Italian seasoning (or fresh herbs)
-
Salt & black pepper to taste
-
8 oz rotini or pasta of choice (whole wheat or gluten-free works!)
-
⅓ cup grated Parmesan
-
Fresh basil or parsley (optional)
Instructions
-
Sauté Zucchini – Heat olive oil in a large skillet. Cook zucchini 5–6 mins until golden. Don’t overcrowd!
-
Add Garlic & Tomatoes – Push zucchini aside, sauté garlic & pepper flakes 30 sec, then stir in tomatoes & seasoning. Cook 5–7 mins until tomatoes burst.
-
Boil Pasta – Meanwhile, cook pasta until al dente. Reserve ¼ cup pasta water, then drain.
-
Combine & Toss – Add pasta to skillet, toss with veggies. Add reserved pasta water as needed for a silky sauce.
-
Finish – Off heat, stir in Parmesan. Garnish with herbs. Taste and adjust seasoning.
Notes
-
Add beans or chickpeas for extra protein.
-
Use legume pasta or vegan cheese for dietary needs.
-
Let sit 5 mins off heat before serving—flavor magic!
- Prep Time: 10 mins
- Cook Time: 20 mins
Nutrition
- Calories: 320 per serving
- Fat: 10g
- Carbohydrates: 45g
- Fiber: 5g
- Protein: 10–12g
Final Thoughts: Why This Dish Endures
This recipe’s brilliance lies in its versatility and nostalgia. It’s equally at home at a toddler’s birthday party and a bridal shower, adaptable to dietary needs (gluten-free, vegan), and impossible to mess up. The chips satisfy our craving for warmth and crunch, while the salsa delivers freshness—a textural yin-yang that keeps forks (and hands) returning.
Beyond taste, it’s a lesson in resourcefulness. Stale tortillas? Overripe fruit? This dish transforms kitchen stragglers into something extraordinary. It teaches us to balance flavors, respect texture, and embrace imperfection—sometimes a smashed berry makes the best bite.
Most importantly, it’s food that connects. Like my grandma’s picnic blanket, it invites people to gather, share, and linger. In a world of complicated recipes, this one whispers: Keep it simple, make it colorful, and always leave them wanting more. Now, who’s ready for seconds?
Nourishing Bite by Bite (Per Serving)
Approximate values based on using whole wheat rotini and standard ingredients:
- Calories: ~320 kcal
- Protein: 10–12 g
- Carbohydrates: 45 g
- Fat: 10 g (mostly heart-healthy monounsaturated from olive oil)
- Fiber: 5 g (thanks to the whole wheat pasta & veggies!)
Remember: This is a light, veggie-forward meal packed with vitamins A & C from the tomatoes and zucchini. Using whole wheat pasta increases the fiber significantly!
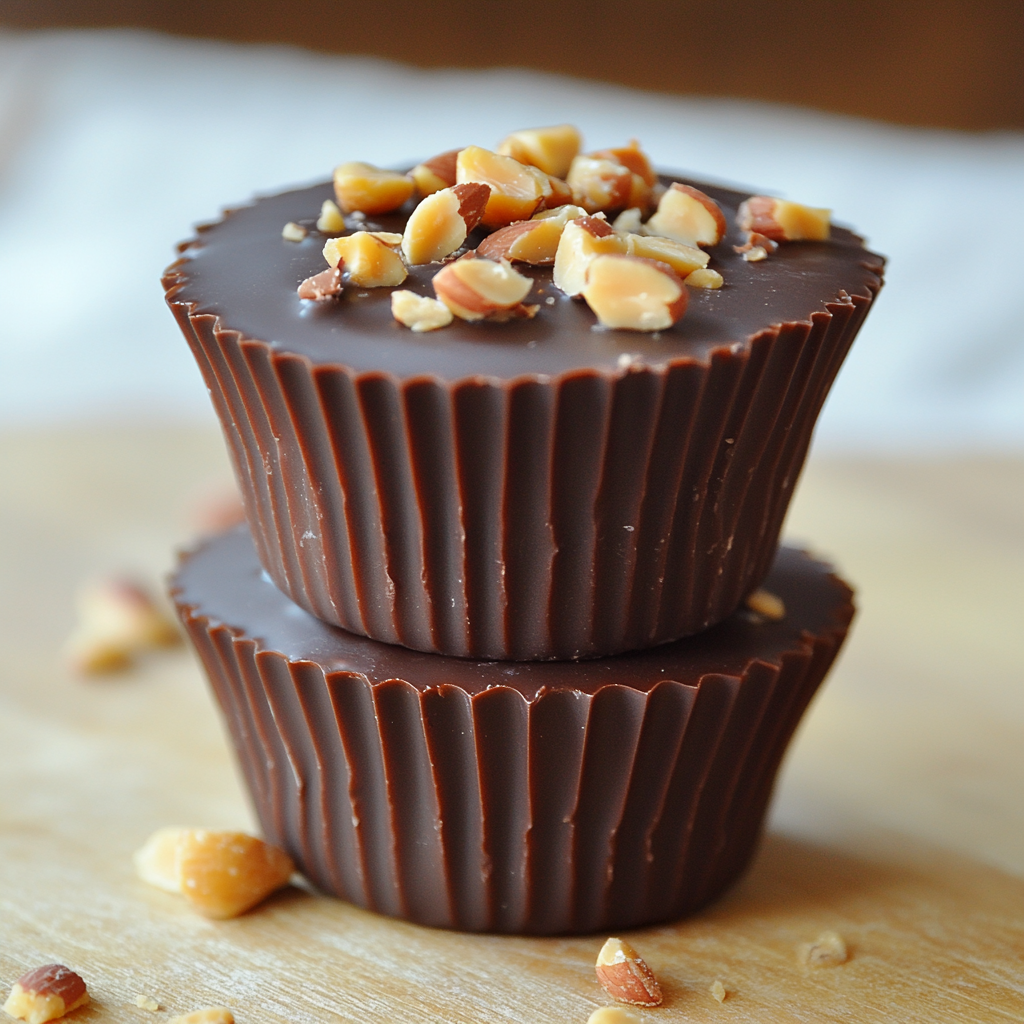
Protein Peanut Butter Chocolate Cups
Hey There, Sweet-Toothed Friend!
Can you smell that? It’s the cozy, nutty aroma of possibility wafting through my kitchen today! If your eyes light up at the words “peanut butter cup” but your grown-up brain whispers “maybe something with protein?”, oh honey, I’ve got magic for you. These Protein Peanut Butter Chocolate Cups are my little freezer miracles—creamy, rich, and packed with wholesome fuel. They taste like a decadent dessert but play nice with your wellness goals. Imagine biting into something cold and chocolatey, with that salty-sweet peanut butter hug… only to realize it’s *actually* good for you. Yes, really! No fancy equipment or pastry chef skills needed—just 10 minutes of prep, a freezer, and that joyful anticipation of digging into a treat that loves you back. Perfect for post-workout wins, sneaky afternoon pick-me-ups, or satisfying late-night cravings without the guilt. Let’s make your freezer the happiest place on earth!
Why These Cups Have My Heart (And Freezer!)
Picture this: It’s 2020, my tiny apartment kitchen feels like a cage, and I’m stress-baking my fifth loaf of banana bread. My yoga pants are judging me. I craved Reese’s Cups like crazy but wanted something that didn’t derail my energy. Cue the “aha!” moment: I dumped Greek yogurt (my protein BFF) and peanut butter into a bowl, swirled in some dark chocolate, and froze it. The result? Pure joy! My partner took one bite, raised an eyebrow, and said, “Wait… this is *yogurt*?!” Now, these cups are our ritual—we pop them after Sunday meal prep while dancing to 80s hits. They’ve seen us through marathon training, Netflix binges, and even made appearances in lunchboxes for friends’ kids (shhh, they never suspect the protein!). That’s the beauty of them: they taste like childhood nostalgia but keep adult-you feeling strong.
Your Simple, Soul-Satisfying Toolkit
Grab these pantry heroes—each plays a delicious role!
- 2 cups Greek yogurt – The protein powerhouse! I use full-fat for creaminess, but low-fat works. Chef’s hack: If your yogurt seems watery, strain it in a cheesecloth for 30 minutes first. Vegan? Swap with thick coconut yogurt!
- ¼ cup natural peanut butter – The sticky, salty soul of the cup! Must be natural (just peanuts + salt) to avoid added sugars. Almond or sunflower butter? Go for it! Stir well if oily.
- 4 pieces (about 2 oz) 90% dark chocolate – Our antioxidant-rich blanket. Why 90%? Lower sugar lets peanut butter shine! Milk chocolate works if you prefer sweeter—just chop a bar.
- Handful of roasted peanuts – The crunchy high-five on top! Salted adds blissful contrast. Allergic? Try pumpkin seeds or omit.
Let’s Build Your Bite-Sized Bliss!
Ready? Aprons optional (but recommended for peanut butter mishaps!).
- Mix the dreamy base: In a medium bowl, combine Greek yogurt and peanut butter. Whisk like you’re making clouds—get it ultra-smooth! Tip: Warm PB for 10 seconds if stubbornly clumpy. Taste? Add a drizzle of honey now if you like sweeter (I keep it pure!).
- Spoon with love: Line a muffin tin with 6-8 silicone liners (paper works, but silicone pops out easier!). Divide the yogurt mix evenly. Tap the tin gently on the counter—no air bubbles allowed! Chef’s hack: Use a cookie scoop for perfect, mess-free portions.
- Melt your chocolate magic: Break chocolate into a microwave-safe bowl. Nuke in 20-second bursts, stirring between, until just melted (crucial! Overheating makes it grainy). Or use a double boiler. Stir slowly—it should look glossy and sexy.
- Top it like a pro: Pour melted chocolate over each cup, swirling to cover the yogurt completely. Work fast before it sets! Immediately sprinkle crushed peanuts on top—they’ll embed beautifully. Fun twist: Add flaky sea salt now for gourmet vibes!
- Freeze the fabulousness: Slide the tin into your freezer. Set a timer for 1.5 hours—they should be firm but not rock-solid. Patience test: Do NOT open the freezer early! Cold air escape slows setting.
- Serve & savor: Transfer cups to an airtight container. When craving strikes, let one sit on the counter for 5 minutes. That slight soften? *Chef’s kiss.* Bite, sigh, repeat.
Making It Instagram-Worthy (Or Just For You!)
These cuties shine solo, but let’s gild the lily! Plate them on a rustic board with fresh berries for color pop. Packed lunch? Tuck one beside a crisp apple—sneaky protein boost! Hosting? Drizzle with extra melted PB and stack ’em high. Post-workout? Grab straight from freezer—that cool creaminess is *everything* on tired muscles. Coffee date? Pair with espresso; bitter coffee + sweet-salty cup = heaven. Store extras frozen (they keep 2 weeks!), but let’s be real… they’ll vanish faster!
Mix It Up, Make It Yours!
Play with these fun twists—your cup, your rules!
- Berry Swirl: Add 2 tbsp raspberry jam between yogurt and chocolate layers. Tart + sweet = fireworks!
- Tropical Escape: Swap peanut butter for coconut butter, top with toasted coconut + macadamia nuts.
- Cookie Dough Dream: Fold mini chocolate chips + 1 tsp vanilla into yogurt mix. Top with crumbled graham cracker.
- Vegan Delight: Use coconut yogurt, almond butter, and dairy-free chocolate. Boom—plant-powered perfection!
- Mocha Buzz: Stir 1 tsp instant espresso powder into melted chocolate. Coffee lovers, rejoice!
Confessions from My Cozy Chaos
Okay, real talk: my first batch looked like sad, lumpy snowballs. I’d used watery yogurt and cheap chocolate—big mistake! Now, I’m religious about thick yogurt and quality dark chocolate. These cups have evolved like a favorite sweater: comfier each time! Once, I brought them to a picnic… in July. They became peanut butter soup in 10 minutes. Lesson? Keep ’em frozen until serving! My favorite “oops” turned win? I ran out of chocolate and used cacao nibs mixed with coconut oil—crispy topping genius! They’re forgiving, so make them your own. Pro tip: Double the batch. Always. Your future self will high-five you.
Your Burning Questions, Answered!
Let’s troubleshoot like kitchen BFFs:
- “My chocolate cracked! Help!” → Likely from pouring while too hot. Let melted chocolate cool slightly (5 mins) before topping. If it’s already cracked? Drizzle more chocolate over gaps—delicious spackle!
- “Can I use regular yogurt?” → Greek’s thickness is key! Regular yogurt makes runny cups. In a pinch? Strain regular yogurt overnight in the fridge.
- “Why is my peanut butter layer separating?” → Natural PB can get oily if overmixed. Stir gently until *just* combined. If it separates after freezing, no stress—still tasty!
- “How do I prevent freezer burn?” → Layer cups between parchment paper in an airtight container. They keep 2 weeks max for peak texture.
The Nutritional Breakdown – Why These Cups Are a Smart Choice
When it comes to satisfying your sweet tooth, most desserts come with a side of guilt—but not these Protein Peanut Butter Chocolate Cups. Let’s dive into why they’re a nutritional powerhouse.
Macronutrient Balance
Each cup delivers a well-rounded mix of:
-
Protein (8-10g per cup) – Supports muscle repair and keeps you full.
-
Healthy fats (9g per cup) – From peanut butter and dark chocolate, providing sustained energy.
-
Minimal sugar (2-3g per cup) – Unlike traditional Reese’s, which can have 20g+ sugar per serving.
This balance makes them ideal for:
✔ Post-workout recovery (protein + fats help rebuild muscle)
✔ Weight management (keeps cravings at bay)
✔ Balanced snacking (no blood sugar spikes)
Functional Ingredients
-
Greek yogurt → Probiotics for gut health + calcium for bones.
-
Natural peanut butter → Monounsaturated fats (heart-healthy) + vitamin E.
-
Dark chocolate → Antioxidants (flavonoids) + magnesium (relaxes muscles).
Vegan? Swap Greek yogurt for coconut yogurt, and use dairy-free chocolate.
Comparing to Store-Bought Alternatives
| Ingredient | Homemade Cups | Traditional Reese’s |
|---|---|---|
| Sugar | 2-3g | 21g |
| Protein | 8-10g | 4g |
| Additives | None | Emulsifiers, preservatives |
Verdict: These cups are indulgence without compromise.
The Psychology of Healthy Desserts – Why These Satisfy Cravings
The Science of Sweet Satisfaction
Our brains are wired to crave sugar and fat—a survival mechanism. But modern diets overload us with hyper-palatable, nutrient-void sweets that leave us wanting more.
These cups hack that craving system by providing:
✅ Rich mouthfeel (from peanut butter + chocolate)
✅ Sweetness (just enough to trick your brain)
✅ Protein & fiber (signals fullness to prevent overeating)
Studies show that high-protein desserts reduce subsequent snacking by up to 50% compared to sugary treats.
The Role of Texture
Texture plays a huge role in satisfaction. These cups nail it with:
-
Creamy (Greek yogurt + peanut butter)
-
Crunchy (roasted peanuts on top)
-
Crisp (dark chocolate shell)
This multi-textured experience makes them more satisfying than one-note candy bars.
Mindful Eating Benefits
Because they’re portion-controlled and nutrient-dense, you’re less likely to binge. Try this:
-
Take one cup out of the freezer.
-
Let it sit for 5 minutes.
-
Eat slowly, savoring each bite.
You’ll find one is enough—unlike store-bought candy, where you mindlessly eat the whole pack.
Meal Prep & Storage – Keeping Them Perfect Every Time
Batch-Making for Busy Lifestyles
One batch = 6-8 cups, ready in 10 mins active time. Here’s how to optimize:
✔ Double the recipe – They freeze beautifully for up to 2 weeks.
✔ Use silicone molds – No sticking, easy pop-out.
✔ Layer between parchment – Prevents freezer burn.
Freezing vs. Fridge Storage
| Method | Texture | Best For |
|---|---|---|
| Freezer (1.5 hrs) | Firm, crisp shell | Long-term storage |
| Fridge (2 hrs) | Softer, mousse-like | Eating same day |
Pro Tip: If freezing long-term, vacuum-seal to prevent ice crystals.
On-the-Go Packaging
-
Mini mason jars – Stackable, cute for gifting.
-
Reusable snack bags – Toss in gym bags.
-
Bento boxes – Pair with fruit & nuts.
Travel-Friendly? Yes! They stay solid for 2-3 hours at room temp.
Protein Peanut Butter Chocolate Cups
Description
Think creamy Greek yogurt swirled with peanut butter, topped with a glossy blanket of dark chocolate and a crunch of roasted peanuts. These protein-packed cups feel like a dessert, but nourish like a post-workout win. No baking, no stress—just simple joy in a cup that keeps your wellness goals in check.
Ingredients
-
2 cups Greek yogurt (full-fat or strained)
-
¼ cup natural peanut butter (just peanuts + salt)
-
2 oz (4 squares) 90% dark chocolate, chopped
-
Handful roasted peanuts (optional for topping)
Instructions
-
Mix Base – Whisk yogurt and peanut butter until smooth. Add a touch of honey if sweeter is your style.
-
Spoon into Liners – Divide mixture evenly into silicone muffin liners. Smooth tops.
-
Melt Chocolate – Microwave chocolate in 20-sec bursts, stirring between, until glossy. Let cool briefly.
-
Top & Decorate – Spoon chocolate over yogurt mix. Sprinkle peanuts on top.
-
Freeze – Freeze for 1.5 hours until firm. Transfer to airtight container for up to 2 weeks.
-
Enjoy – Let sit 5 mins before eating for dreamy, soft-bite texture.
Notes
-
Vegan? Use coconut yogurt + dairy-free chocolate.
-
Add jam, espresso, or cookie crumbs for variety.
-
Always double the batch. You’ll thank yourself.
Nutrition
- Calories: 130 per serving
- Sugar: 2–3g
- Fat: 9g
- Carbohydrates: 6g
- Protein: 8–10g
Final Thoughts: A Dessert Revolution
These aren’t just “healthy” treats—they’re better treats. They prove you don’t need:
❌ Refined sugar crashes
❌ Artificial ingredients
❌ Regret after eating
Instead, you get:
✅ Real, whole-food energy
✅ Guilt-free enjoyment
✅ A habit that supports your goals
Nourishment That Feels Like a Hug
Per cup (approx., based on 8 cups): Calories: ~130 kcal | Protein: 8–10g | Carbs: 6g | Fat: 9g | Sugar: 2–3g. *Note: Values vary with ingredient brands. Natural sugars from yogurt + peanut butter make this a balanced treat!
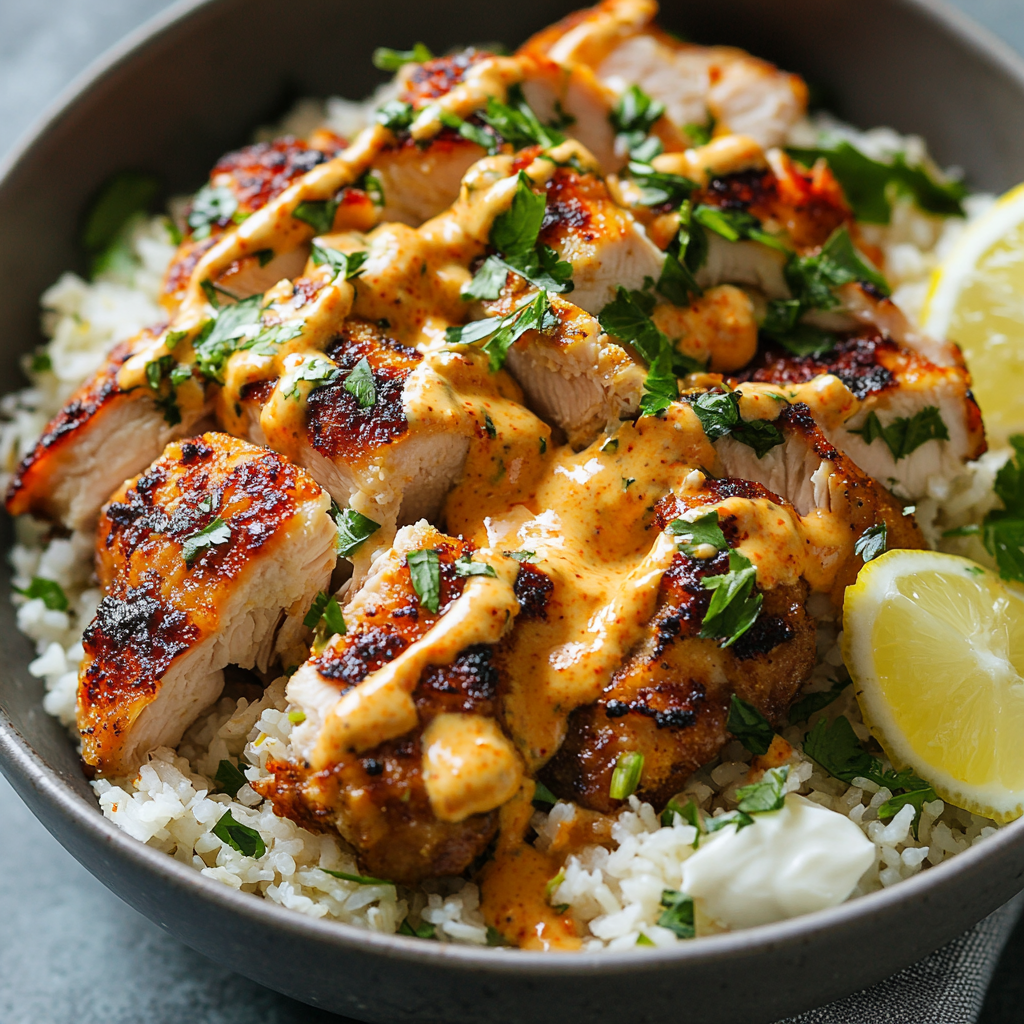
High-Protein Bang Bang Chicken Rice Bowls
Spice Up Your Dinner Routine with a Bowl Full of Joy
Hey there, kitchen friend! Olivia here, apron dusted with paprika and a big smile on my face because we’re about to dive into one of my all-time favorite recipes. You know those nights when you crave something explosively flavorful but also want to feel good about what you’re eating? That’s exactly where these High-Protein Bang Bang Chicken Rice Bowls come in. Imagine this: crispy, golden chicken thighs drenched in a creamy-spicy bang bang sauce, piled high over fragrant lemon garlic herb coconut rice. It’s like a flavor fireworks show in your mouth! 🌶️✨
I get it – life’s busy. Between work, family, and that never-ending laundry pile, cooking can feel like a chore. But this? This is cooking that feels like a hug. It’s quick (under 30 minutes hands-on!), meal-prep magic, and packed with 40g of protein per serving to keep you fueled. And let’s be real: anything with “bang bang” in the name promises a good time. The sauce alone – a tangy, creamy, sweet-heat dream made with light mayo, yogurt, and sriracha – will have you licking the spoon. Trust me, your taste buds will throw a party, and your body will thank you for the protein punch. Ready to make your kitchen smell incredible? Let’s go!
The Sauce That Started It All
Picture this: It’s a rainy Tuesday, years ago, and I’m huddled under a blanket feeling blah. My husband texts, “Bringing home takeout from that new Asian fusion spot!” What arrived changed everything – shrimp drenched in this electric orange sauce called “bang bang.” One bite and I was OBSESSED. But here’s the thing: it felt heavy, like a “sometimes” treat. So, I embarked on a mission: recreate that addictive magic in a way felt nourishing enough for regular rotation. Cue months of kitchen experiments (my poor blender!). Yogurt instead of full-fat mayo? Check. Reduced-sugar chili sauce? Yep. A splash of rice vinegar for brightness? Absolutely! When I finally nailed it and paired it with juicy baked chicken and coconut-kissed rice? EUREKA. Now, it’s our go-to “celebrate Tuesday” meal. Because why wait for the weekend for fireworks? 🎆
Gather Your Flavor Arsenal
Here’s everything you need to build these vibrant bowls. Don’t stress – I’ve got notes and swaps!
For the Chicken Marinade (Hello, Flavor Base!):
- 1000g boneless skinless chicken thighs, cubed: Thighs stay juicier than breasts when baked! Swap: Use chicken breast if preferred, but reduce cook time by 2-3 mins to avoid dryness.
- 1.5 tsp salt, 2 tsp black pepper: Essential seasoning layers. Tip: Freshly cracked pepper tastes brighter!
- 2.5 tsp garlic powder, 2.5 tsp onion powder: The savory backbone. Chef Insight: Powder ensures even coating without burning like fresh might.
- 2 tsp smoked paprika: Adds depth and a subtle smokiness. Swap: Regular paprika works, but you’ll miss that cozy campfire hint.
- 2 tsp ginger powder: Warmth that complements the sauce. Tip: Fresh grated ginger (1 tbsp) works too for extra zing!
- 3 tsp olive oil: Helps spices cling and promotes crispy edges.
For the Low-Calorie Bang Bang Sauce (The Star!):
- 100g light mayo: Creamy base without the guilt. Swap: Vegan mayo works great!
- 60g fat-free yogurt: Tang and lightness. Chef Insight: Greek yogurt adds extra protein.
- 50g reduced-sugar sweet chili sauce: Sweetness and mild heat. Swap: Regular sweet chili sauce is fine, just note extra sugar.
- 50g sriracha: The “BANG!” Adjust to your heat love! Tip: Start with 30g if heat-averse.
- 20g rice vinegar: Essential bright acidity. Swap: Lime juice in a pinch.
- 1 tbsp chopped fresh parsley: Fresh herb pop! Swap: Cilantro or chives.
For the Lemon Garlic Herb Coconut Rice (The Fragrant Bed):
- 260g uncooked white rice (or 5 cups cooked): Jasmine or basmati are perfect. Tip: Cook rice ahead for faster assembly!
- 20g reduced-fat butter: Richness for sautéing. Swap: Olive oil or coconut oil.
- 35g garlic, finely chopped: Flavor foundation! Chef Insight: Don’t skimp – it mellows beautifully.
- 170g white onion, finely chopped: Sweetness and texture. Swap: Shallots for a milder vibe.
- 1 tsp each: salt, oregano, parsley, chili flakes: Savory, herby, hint of heat. Tip: Dried herbs are fine here!
- 35g shredded or desiccated coconut: Tropical aroma and texture. Swap: Omit for nut-free, but you’ll miss the magic.
- 2 tsp lemon zest, Juice of ½ lemon: The bright, sunny finish! Chef Insight: Zest first, THEN juice the lemon.
Let’s Build Flavor, Step-by-Step!
Don’t worry – I’ll walk you through every sizzle and stir!
- Prep the Chicken (5 mins): In a large bowl, toss the cubed chicken thighs with ALL the marinade spices (salt, pepper, garlic powder, onion powder, smoked paprika, ginger powder) and the olive oil. Massage it in like you’re giving the chicken a mini spa treatment – this ensures every piece is coated! Chef Hack: Add 2 tbsp of the bang bang sauce to the marinade now for an extra flavor boost. Let it sit while you prep the sauce (or up to 30 mins in the fridge).
- Whip Up the Bang Bang Sauce (3 mins): In a medium bowl, whisk together the light mayo, fat-free yogurt, reduced-sugar sweet chili sauce, sriracha, rice vinegar, and fresh parsley until smooth and gloriously orange. Tip: Taste it! Want more heat? Add sriracha. More tang? A splash more vinegar. Set aside half for serving.
- Cook the Chicken (22-25 mins): Preheat your air fryer or oven to 200°C/400°F. Spread the chicken in a single layer on your air fryer tray or a parchment-lined baking sheet (crucial for crispiness!). Air fry or bake for 12 mins, then flip the pieces. Cook for another 10-13 mins until deeply golden, crispy, and cooked through (internal temp 74°C/165°F). Pro Tip: Spritz chicken lightly with oil before cooking for extra crunch! Immediately brush generously with some of the reserved bang bang sauce while hot.
- Make the Dreamy Rice (While Chicken Cooks): Melt the reduced-fat butter in a large skillet or pot over medium heat. Add the chopped onion and sauté for 3-4 mins until softened. Add the garlic and cook for another 1-2 mins – don’t let it brown! Stir in the salt, oregano, parsley, chili flakes, and shredded coconut. Cook, stirring constantly, for 1-2 mins until fragrant – it’ll smell like heaven! Add the COOKED rice, lemon zest, and lemon juice. Gently toss everything together until the rice is heated through and beautifully coated in the buttery, coconutty, herby goodness. Keep warm.
- Assemble Your Masterpiece (2 mins): Fluff the rice and divide it between bowls. Pile high with that gorgeous saucy chicken. Drizzle liberally with the remaining bang bang sauce. Final Flourish: A sprinkle of extra chopped parsley or a pinch of chili flakes makes it Instagram-worthy!
Plating for Maximum Happiness
Presentation matters, even on a Tuesday! Use wide, shallow bowls to show off all those gorgeous layers. Spoon that vibrant lemon coconut rice as the base – let it peek out around the edges. Artfully pile the saucy bang bang chicken right in the center. Drizzle MORE sauce over the chicken and let some cascade onto the rice (sauce is life!). Garnish with a final sprinkle of bright green parsley or chopped scallions for freshness and color contrast. Serve immediately while the chicken is still crispy-hot and the rice is steamy. Pair with simple steamed greens like broccoli or snap peas for a complete, colorful feast!
Make It Uniquely Yours!
Love this base recipe? Try these fun twists:
- Protein Swap-Out: Use shrimp (cook 8-10 mins), baked tofu cubes (marinate same way!), or even chickpeas for a plant-powered punch.
- Heat Lover’s Dream: Add 1 tsp cayenne to the chicken marinade AND stir 1 tbsp sambal oelek into the bang bang sauce.
- Grain-Free Goodness: Swap the rice for cauliflower rice! Sauté the onions/garlic/spices, then stir in riced cauliflower and coconut. Skip the lemon until the end (it can make cauli rice mushy).
- Thai-Inspired Twist: Add 1 tbsp finely chopped lemongrass to the rice with the garlic, and swap parsley for cilantro in the sauce.
- Meal-Prep Magic: Keep components separate! Store rice, sauced chicken, and extra sauce in airtight containers for up to 4 days. Reassemble and reheat (chicken in air fryer for 3 mins to re-crisp!).
Olivia’s Kitchen Confessions & Evolution
Okay, real talk: the first time I made bang bang sauce, I used full-fat mayo and a *generous* hand with the sriracha. My husband took one bite, gasped dramatically, and chugged his water – cue my laughter! That’s how we landed on the yogurt cut and adjustable heat level. This recipe has seen SO many iterations. The coconut in the rice? Inspired by a beach vacation. The lemon zest? My Meyer lemon tree’s bounty! It’s evolved into the perfect weeknight balance: indulgent-tasting but energizing. My biggest tip? DOUBLE the sauce. Seriously. You’ll want it for dipping veggies, drizzling on eggs… it’s that good. And that messy apron I mentioned? Guaranteed when I’m zestfully attacking a lemon for this bowl. Worth every stain!
Your Questions, Answered!
Let’s tackle those common kitchen hiccups:
Q: Can I use chicken breast instead of thighs? Will it dry out?
A: You absolutely can! Cube it slightly smaller than thighs (they cook faster). Marinate the same way, but reduce cooking time to 18-22 minutes total (check at 16 mins!). The key is not to overcook. Breast is done at 74°C/165°F internally. Brushing with sauce right after cooking helps keep it moist!
Q: Help! My sauce is too spicy/not spicy enough. Can I fix it?
A: Easy fix! Too Spicy: Whisk in an extra 1-2 tbsp of yogurt or light mayo and 1 tsp honey or maple syrup to tame the heat. Needs More Kick: Whisk in extra sriracha, 1 tsp at a time, or add a pinch of cayenne pepper. Always adjust AFTER combining all ingredients.
Q: Can I make this ahead for meal prep? Does the chicken stay crispy?
A: Yes! Meal prep is this bowl’s superpower. BUT, store components SEPARATELY: rice, sauced chicken, extra sauce. When ready to eat, reheat the rice. For the chicken, pop it back in the air fryer (or a 200°C/400°F oven) for 3-4 minutes to re-crisp beautifully! THEN add the extra sauce drizzle. Assembling cold components leads to soggy chicken sadness.
Q: My coconut rice tastes dry. What happened?
A: Two likely culprits! 1) Rice Texture: Ensure your cooked rice was moist and fluffy to start. If it was dry, sprinkle 1-2 tbsp water or broth over it when reheating with the aromatics. 2) Sauté Time: Did you cook the onions/garlic/coconut too long before adding the rice? This can dry it out. Keep the sauté step quick and fragrant! Add the cooked rice while the onion mixture is still slightly moist.
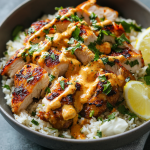
High-Protein Bang Bang Chicken Rice Bowls
- Total Time: 35 mins
Description
Crispy, spiced chicken thighs, lemony coconut rice, and a creamy, spicy-sweet sauce that might just change your life. This bowl is a celebration of balance: indulgent taste meets real nourishment, with 40g of protein per serving and under 30 minutes hands-on. You’re about to fall in love with dinner again—yes, even on a Tuesday.
Ingredients
Chicken Marinade:
-
1000g boneless chicken thighs, cubed
-
1.5 tsp salt, 2 tsp pepper
-
2.5 tsp each garlic powder, onion powder
-
2 tsp smoked paprika
-
2 tsp ginger powder
-
3 tsp olive oil
Bang Bang Sauce:
-
100g light mayo
-
60g fat-free Greek yogurt
-
50g reduced-sugar sweet chili sauce
-
50g sriracha
-
20g rice vinegar
-
1 tbsp parsley (or chives/cilantro)
Lemon Garlic Herb Coconut Rice:
-
260g uncooked white rice (or 5 cups cooked)
-
20g reduced-fat butter
-
170g white onion, 35g garlic (finely chopped)
-
1 tsp each: salt, oregano, parsley, chili flakes
-
35g shredded coconut
-
Zest & juice of ½ lemon
Instructions
-
Marinate Chicken – Toss all marinade ingredients. Let sit 10–30 mins.
-
Make Sauce – Whisk all sauce ingredients. Taste and adjust spice. Set half aside.
-
Cook Chicken – Bake or air-fry at 200°C/400°F for 22–25 mins, flipping halfway. Brush with sauce while hot.
-
Sauté Rice Base – In butter, sauté onion (3–4 mins), then garlic. Stir in herbs, coconut. Add cooked rice, lemon zest, juice. Toss gently.
-
Assemble – Spoon rice into bowls. Top with chicken and drizzle with sauce. Garnish with parsley.
- Prep Time: 10 mins
- Cook Time: 25 mins
Nutrition
- Calories: 470 per serving
- Fat: 20g
- Carbohydrates: 35g
- Protein: 40g
Final Thoughts
This High-Protein Bang Bang Chicken Rice Bowl is more than a recipe—it’s a flavor experience. From the crispy, saucy chicken to the fragrant coconut rice, every component is designed to delight your taste buds while keeping things nutritious and easy.
Why This Recipe Works for Real Life:
✅ Meal-prep friendly (stores + reheats beautifully)
✅ Customizable (swap proteins, adjust spice, change grains)
✅ Balanced macros (40g protein, complex carbs, healthy fats)
Pro Tip: Double the bang bang sauce—you’ll want it on eggs, sandwiches, even as a veggie dip!
Fuel Your Body Right (Approx. Per Serving)
- Calories: ~470 kcal
- Protein: 40g (Powerhouse!)
- Carbs: 35g
- Fat: 20g
- Fiber: 2-3g
- Prep
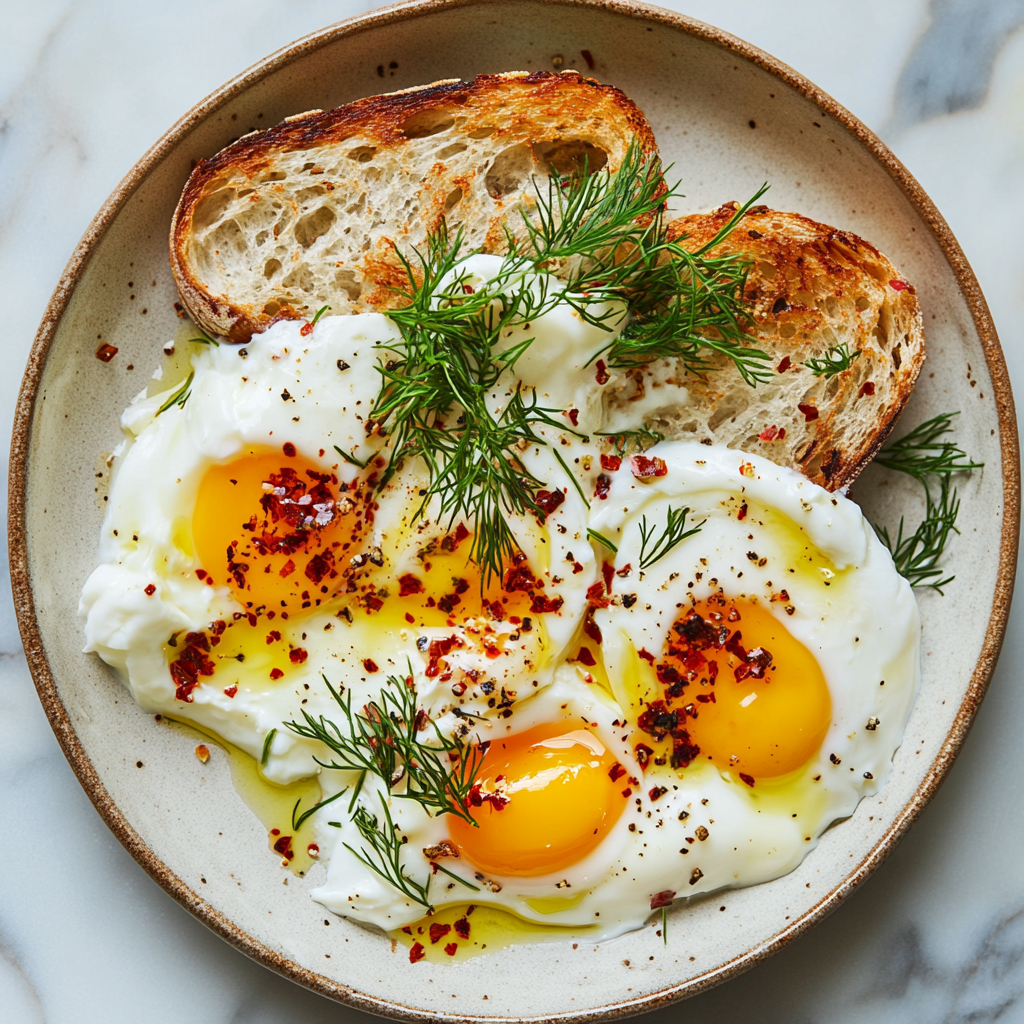
Savory Yogurt & Soft-Boiled Egg Plate
Wake Up to Sunshine on a Plate: Your New Favorite Breakfast
Hey there, kitchen friend! Olivia here, waving from my flour-dusted countertop. Can we talk about magical breakfast moments? You know the ones—when you’re bleary-eyed but craving something that feels like a warm hug and a high-five at the same time. That’s exactly why I’m obsessed with this Savory Yogurt & Soft-Boiled Egg Plate. Imagine: cool, garlicky yogurt swirled on a plate like edible clouds, topped with jammy eggs that spill gold when you cut into them, all finished with spicy chili oil and toasty sourdough for scooping. It’s not just food; it’s a 10-minute vacation for your taste buds. Whether you’re rushing out the door or savoring a slow morning, this dish is your secret weapon. No fancy skills needed—just big, bold flavors that’ll make you feel like you’ve unlocked breakfast wizardry. Let’s turn ordinary mornings into little celebrations together!
How a Rainy Morning in Istanbul Changed My Breakfast Game Forever
Picture this: It’s pouring rain in Istanbul, and I’m ducking into a tiny café that smells like toasted cumin and strong coffee. The owner, a grinning grandma named Ayla, slides a plate toward me—creamy yogurt cradling soft eggs, drizzled with ruby-red chili oil. “Bunu ye, güç topla,” she insists (“Eat this, gather strength”). One bite and fireworks went off! The tangy yogurt cut through the rich egg yolks, while the chili oil warmed me from the inside out. I must’ve looked ridiculous grinning at my plate, because Ayla started laughing and taught me her trick: rubbing the garlic clove into the yogurt bowl instead of mincing it for gentler flavor. I scribbled notes on a napkin, flew home, and tweaked it for my own kitchen. Now, every time I make this, I’m back in that steamy café, laughing in the rain. Some dishes aren’t just meals—they’re time machines.
Your Flavor Toolkit: Simple Ingredients, Big Personality
Grab these pantry heroes—they’re about to become your breakfast dream team! Pro tip: Quality matters here since each ingredient shines.
- 3–4 eggs: The stars! Farm-fresh or pasture-raised eggs have richer yolks. Short on eggs? Use 2 and bulk up with extra yogurt.
- ½ cup plain Greek yogurt: Full-fat = dreamy texture. For a lighter twist, swap in labneh (strained Middle Eastern yogurt). Avoid runny yogurts—they won’t hold up!
- 1 garlic clove, minced: Chef insight: Grate it instead for no-bite silkiness. Garlic-phobic? Skip it or use ¼ tsp garlic powder.
- 1 tbsp lemon juice: Brightness alert! Fresh-squeezed is non-negotiable. Out of lemons? A dash of white wine vinegar works.
- 1 tbsp chopped dill: Its grassy freshness balances richness. No dill? Try mint, chives, or basil.
- Salt & pepper: Flaky sea salt + cracked black pepper = flavor elevators.
- Chili oil: The showstopper! Use store-bought or make your own. Sriracha works in a pinch.
- 2 slices sourdough bread: Its tang pairs perfectly. Gluten-free? Use seeded whole-grain bread.
- Butter: Salted butter for toast = chef’s kiss.
- Flaky salt (optional): Maldon salt adds crunch. Skip if watching sodium.
See? No unicorn ingredients—just smart swaps and layers of love.
Let’s Build Your Breakfast Masterpiece: Step by Step
Ready? Aprons optional, enthusiasm mandatory! We’ll multitask like pros.
- Yogurt Base: In a small bowl, combine yogurt, minced garlic, lemon juice, dill, ¼ tsp salt, and pepper. Stir until smooth and creamy. Chef hack: Stir in one ice cube while mixing—it prevents curdling if your yogurt is warm! Spread mixture onto a shallow plate like you’re frosting a cake. Pop it in the fridge to chill while you tackle the eggs.
- Eggs: Fill a saucepan with enough water to cover eggs by an inch. Bring to a rolling boil—big bubbles dancing! Gently lower eggs into the water with a spoon (no cracks, please). Set a timer for exactly 7 minutes. Why 7? It’s the sweet spot for jammy yolks that ooze without being raw. While they cook, prep an ice bath (cold water + ice cubes). When the timer dings, transfer eggs to the ice bath. Let them sit 2 minutes—this stops cooking and makes peeling effortless. Tap eggs on the counter, roll gently, and peel under cool running water. Slice in half lengthwise, revealing those sunny centers.
- Toast: While eggs cool, toast sourdough until golden. Immediately slather with butter so it melts into every pore. Sprinkle with flaky salt if using. Pro move: Rub a raw garlic clove on the hot toast for extra aroma!
- Assemble: Pull yogurt from the fridge. Nestle egg halves into the yogurt, yolks facing up like little gems. Drizzle generously with chili oil—don’t be shy! Finish with a crack of black pepper.
Congrats! You just made brunch-worthy magic in less time than your coffee brews.
Making It Pretty: Serve with Soul
This dish is a stunner with zero fuss! Slide the yogurt plate onto a wooden board for rustic charm. Lean the buttery toast against the plate’s edge—it’s begging to be dipped. Scatter extra dill fronds or edible flowers (nasturtiums are gorgeous!) over the eggs. Serve immediately with strong coffee or a zesty mimosa. Want to impress? Add sides like quick-pickled radishes or avocado slices. Remember: the joy is in tearing that toast and swiping it through the yolky, spicy, creamy goodness. Messy fingers = happy heart!
Shake It Up: 5 Delicious Twists
This plate is your canvas! Try these riffs:
- Mediterranean: Swap dill for za’atar. Top with olives and cucumber ribbons.
- Protein Power: Add crispy chickpeas or crumbled feta to the yogurt.
- Vegan Dream: Use coconut yogurt + soft-boiled tofu (marinated in turmeric and nooch). Skip eggs.
- Spice Adventurer: Mix harissa into yogurt instead of chili oil drizzle.
- Winter Cozy: Fold roasted squash into yogurt base; top with sage-brown butter.
See? One recipe, endless adventures.
The Cultural Roots – How Global Traditions Inspired This Dish
This seemingly simple breakfast plate is actually a love letter to culinary traditions spanning from the Mediterranean to the Middle East. The combination of yogurt and eggs appears in various forms across cultures, each with its own unique twist that highlights local flavors and eating philosophies.
Turkish Çılbır: The Original Inspiration
In Turkey, a dish called çılbır (pronounced “chul-bur”) has been served since Ottoman times. It features poached eggs over garlicky yogurt, drizzled with melted butter infused with Aleppo pepper. My version borrows this brilliant pairing but simplifies the technique by using soft-boiled eggs instead of poached. The Turkish approach teaches us that yogurt isn’t just for sweet parfaits – its cooling tang provides the perfect counterpoint to rich egg yolks and spicy toppings.
Middle Eastern Labneh Traditions
Across Lebanon and Syria, thick strained yogurt (labneh) frequently appears at breakfast tables, often topped with olive oil and za’atar. The practice of pairing cultured dairy with eggs comes from the understanding that the probiotics in yogurt help balance the richness of eggs. My recipe incorporates this wisdom by using either Greek yogurt or labneh as the base.
East Asian Chili Crisp Influence
The addition of chili oil is my nod to Chinese breakfast traditions where chili crisp elevates simple dishes like congee or steamed buns. The crunchy, umami-packed oil adds textural contrast and depth that transforms this from a simple combination to something extraordinary. This global fusion represents how modern cooking can honor traditions while creating something new.
Why This Matters for Home Cooks
Understanding these cultural connections helps us:
-
Appreciate how different cuisines solve similar flavor puzzles
-
Feel confident improvising based on what we have available
-
Recognize that “authenticity” can coexist with personal adaptation
The beauty of this dish lies in its ability to bridge culinary worlds while remaining incredibly approachable. Whether you garnish with sumac like in Turkey, drizzle with tahini like in Israel, or add fermented black beans like in China, you’re participating in a global breakfast conversation.
The Science of Perfect Texture – Why Technique Matters
Creating this seemingly simple dish actually relies on several important scientific principles that affect texture and flavor. Understanding these will help you consistently achieve restaurant-quality results at home.
The Yogurt Chemistry
Full-fat Greek yogurt provides the ideal base because:
-
Its high protein content (about 10g per 100g) gives structural integrity
-
The straining process removes excess whey, preventing a watery plate
-
The fat content (around 5-10%) carries flavors better than non-fat versions
Pro Tip: If your yogurt seems thin, line a strainer with cheesecloth and let it drain in the fridge for 1-2 hours. This mimics traditional labneh preparation.
Egg Cookery Physics
Achieving the perfect soft-boiled egg requires precision:
-
Room temperature eggs prevent thermal shock that causes cracking
-
Vinegar in water (1 tbsp per quart) helps coagulate any whites that might leak
-
7-minute timing creates:
-
Fully set whites (165°F)
-
Thick but runny yolks (145-150°F)
-
-
Ice bath immediately stops cooking through rapid heat transfer
Common Mistakes:
-
Overcrowding the pan lowers water temperature
-
Not peeling under water leads to torn whites
-
Skipping the ice bath allows residual heat to overcook yolks
Bread Selection Science
Sourdough works best because:
-
Its acidity complements the yogurt’s tang
-
The sturdy crumb holds up to dipping
-
Natural leavening creates irregular air pockets perfect for catching toppings
Texture Timeline:
-
Fresh from toaster: Maximum crispness (best for contrast)
-
After 5 minutes: Begins softening from yogurt
-
After 15 minutes: Loses structural integrity
The Art of Balancing Flavors – Creating Harmony on the Plate
This dish exemplifies how to balance the five fundamental tastes: sweet, sour, salty, bitter, and umami. Each component plays a specific role in creating a satisfying flavor profile.
Breaking Down the Taste Elements
Yogurt Base:
-
Sour from lactic acid
-
Umami from fermented dairy
-
Sweet undertones from milk sugars
Eggs:
-
Umami from egg proteins
-
Richness from fats
-
Mineral notes from yolks
Chili Oil:
-
Spicy from capsaicin
-
Bitter from toasted chilis
-
Salty from seasoning
Bread:
-
Sweet from caramelized crust
-
Sour from fermentation
-
Salty from butter
Adjusting for Personal Preference
For More Brightness:
-
Add lemon zest to yogurt
-
Include quick-pickled shallots
-
Sprinkle sumac before serving
For More Depth:
-
Swirl in miso paste to yogurt
-
Use smoked salt
-
Add crispy fried shallots
For More Heat:
-
Increase chili oil quantity
-
Add crushed Urfa pepper
-
Include thinly sliced fresh chilis
The Flavor Timeline Experience
-
First Bite: Cold yogurt and warm toast contrast
-
Mid-Palate: Egg yolk creates creamy mouthfeel
-
Finish: Chili oil lingers with pleasant heat
This intentional layering creates an eating experience that evolves with each bite, preventing flavor fatigue that can happen with one-note dishes.
Olivia’s Behind-the-Scenes Kitchen Confessions
Okay, real talk: This recipe was born from a brunch disaster. I’d burned pancakes (again), and in desperation, threw yogurt and eggs on a plate. My husband took one bite and said, “Why have we been eating pancakes?!” We’ve tweaked it weekly since—adding chili oil after a trip to Mexico, trying every herb under the sun (cilantro lovers, go for it!). The biggest game-changer? Room-temperature eggs! Taking them out of the fridge 15 minutes before boiling prevents cracking and cooks evenly. Now, it’s our Sunday ritual—we even serve it in big sharing bowls when friends crash our kitchen. It’s proof that the best recipes aren’t perfect; they’re alive, adaptable, and full of delicious stories.
Your Questions, Answered!
Q: Help! My yolks are hard-boiled, not jammy. What went wrong?
A> Timing is everything! Overcooking by even 30 seconds changes the game. Use a timer religiously, and ensure your water is at a full boil before adding eggs. High altitude? Add 30 seconds. Old eggs? They need 10 extra seconds. Practice makes perfect—you’ll nail it!
Q: Can I prep this ahead?
A> Totally! Mix the yogurt base (without herbs) up to 2 days ahead; stir in dill before serving. Boil eggs 1 day prior; store peeled in cold water. Toast and assemble fresh for maximum wow factor.
Q: My yogurt looks watery after sitting. Fixes?
A> Greek yogurt can weep. Prevent this by straining it overnight in a cheesecloth-lined sieve. If it’s already watery, blot gently with paper towels before spreading. Also, avoid over-stirring after adding lemon!
Q: Chili oil too spicy for my kiddo?
A> Easy fix! Swap in olive oil infused with smoked paprika or a drizzle of pesto. Or serve chili oil on the side for adults to add.
Savory Yogurt & Soft-Boiled Egg Plate
- Total Time: 10 mins
Description
Inspired by a rainy morning in Istanbul, this 10-minute breakfast is a flavor vacation on a plate. Cool garlicky yogurt, silky jammy eggs, bold chili oil, and golden sourdough—each bite is comfort, spice, and joy. Perfect for slow Sundays, fast mornings, or anytime you need a nourishing hug.
Ingredients
-
3–4 eggs
-
½ cup plain full-fat Greek yogurt
-
1 garlic clove, minced
-
1 tbsp lemon juice
-
1 tbsp chopped dill (or mint/chives)
-
Salt & pepper to taste
-
Chili oil (or paprika-infused olive oil)
-
2 slices sourdough, toasted & buttered
-
Optional: flaky salt, extra herbs for garnish
Instructions
-
Make Yogurt Base – Mix yogurt, garlic, lemon juice, dill, salt, and pepper. Spread on a shallow plate. Chill.
-
Boil Eggs – Gently boil eggs for 7 mins. Ice bath 2 mins. Peel and halve.
-
Toast Bread – Toast sourdough, butter generously, and season with flaky salt.
-
Assemble – Place eggs on yogurt. Drizzle with chili oil. Add extra pepper and herbs. Serve with toast.
Notes
-
Use labneh for tang or coconut yogurt for dairy-free.
-
Add crispy chickpeas or olives for texture.
-
Prep yogurt and eggs ahead—toast fresh for best results.
- Prep Time: 5 mins
- Cook Time: 7 mins
Nutrition
- Calories: 350 per serving
- Fat: 22g
- Carbohydrates: 18g
- Protein: 20g
Final Thoughts: Why This Dish Represents Modern Home Cooking
This Savory Yogurt & Soft-Boiled Egg Plate embodies everything great about contemporary home cooking:
-
Global Inspiration, Local Execution – It respects traditions while encouraging personalization
-
Scientifically Informed – Understanding why techniques work leads to better results
-
Balanced Nutrition – Provides protein, healthy fats, and complex carbs
-
Adaptable – Works for various diets and ingredient availability
-
Emotionally Satisfying – The perfect combination of comforting and exciting
Most importantly, it proves that extraordinary meals don’t require exotic ingredients or complicated techniques – just thoughtful combinations of quality components. Whether you enjoy it as a slow weekend breakfast or a quick weekday fuel-up, this dish will make you feel like you’ve treated yourself to something special.
The Last Bite: Keep experimenting! Try different herb combinations, alternative toppings like dukkah or gremolata, or even swapping in different cultured dairy like kefir cheese. The basic template welcomes creativity while always delivering satisfaction. That’s the mark of a truly great recipe.
Nutritional Highlights
Per serving (based on 2 servings): Calories: ~350 | Protein: 20g | Fat: 22g (mostly healthy!) | Carbs: 18g | Fiber: 1g | Sugar: 3g. Packed with protein, probiotics, and energy to fuel your day!
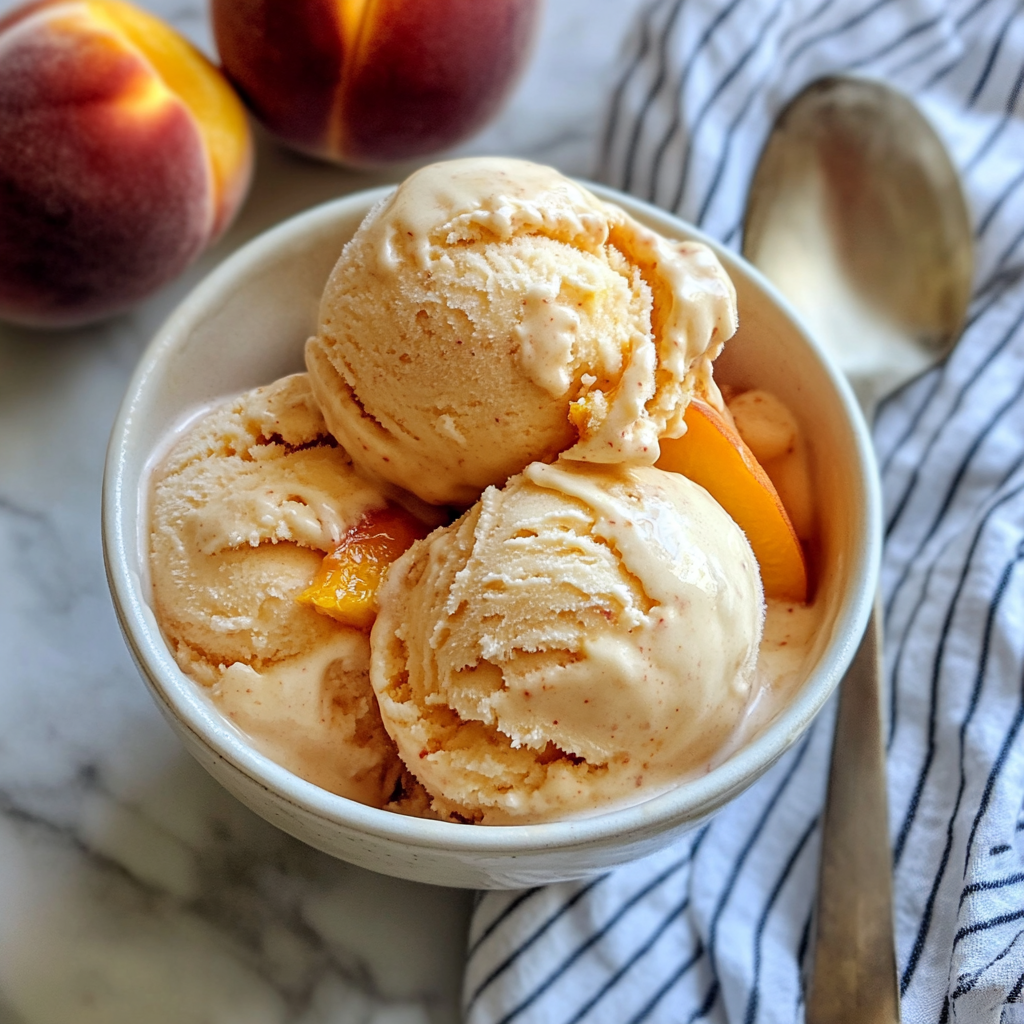
Homemade Peach Ice Cream
## 🍑 Homemade Peach Ice Cream: A Scoop of Summer Sunshine You Can Make in Your Own Kitchen!
Let’s Make Magic with Peaches!
Hey there, friend! Olivia here, waving from my flour-dusted countertop. Can you smell it? That heady, sweet perfume of ripe peaches warming in the sun? It’s the scent of childhood summers, lazy porch swings, and pure, unadulterated joy. And what better way to capture that golden magic than turning it into creamy, dreamy homemade peach ice cream? Forget the store-bought tubs that taste like faint whispers of fruit. We’re making the real deal today – ice cream so luscious, so bursting with peachy goodness, it’ll transport you straight to grandma’s kitchen on a sticky July afternoon. The best part? You don’t need fancy gadgets or chef-level skills. Just a few simple ingredients, a little patience (the hardest part!), and that spark of excitement to create something truly special. Whether you’re a kitchen newbie or a seasoned spoon-licker, this recipe is your ticket to homemade happiness. Ready to churn up some sunshine? Let’s dive in!
Sticky Fingers & Porch Swing Dreams: Why This Recipe Steals My Heart
Close your eyes for a sec. Can you hear it? The rhythmic *thwack-thwack-thwack* of an old wooden screen door? That’s the soundtrack to my core memory with this ice cream. Picture me, age 8, barefoot and buzzing with anticipation on my Aunt Mae’s sprawling Georgia porch. Humidity hung thick as syrup, cicadas screamed in the pines, and the air shimmered with heat. But then… the magic. Aunt Mae would emerge, triumphantly holding her old, dented ice cream maker, its sides already sweating. Inside? Pure, peachy gold. We’d take turns cranking that handle, our arms aching but our giggles louder than the machine’s churn. The reward? Scoops so cold they made our teeth sing, bursting with chunks of Georgia peaches so ripe they tasted like sunshine itself. That first bite – creamy, cold, impossibly fruity – wasn’t just dessert. It was pure, sticky-fingered joy, shared laughter, and the feeling of being utterly, perfectly loved. *That’s* the feeling I want to bottle for you with every spoonful of this recipe. It’s more than ice cream; it’s a scoop of pure, uncomplicated summer love.
Your Peach Ice Cream Toolkit: Simple Ingredients, Big Flavor!
Gather your squad! This recipe is beautifully simple, but each player brings something special to the party. Here’s what you need and why:
- 3 Ripe Peaches, peeled and chopped (about 2 cups): This is the STAR! Seek out peaches that yield slightly to gentle pressure near the stem and smell heavenly. Supermarket rocks won’t cut it! Chef’s Hack: Can’t find great fresh? High-quality frozen peaches (thawed & drained) work in a pinch off-season. No peeling needed!
- 1 Cup Heavy Cream: The backbone of our luxurious texture. Its high fat content whips into that dreamy, scoopable consistency we crave. Substitution Tip: For a *slightly* lighter version (still creamy!), use half heavy cream and half full-fat coconut milk. Avoid low-fat substitutes here – texture is key!
- 1 Cup Whole Milk: Balances the richness of the cream and adds fluidity. Whole milk is non-negotiable for the best mouthfeel. Substitution Tip: Lactose-free whole milk works perfectly fine!
- ½ Cup Granulated Sugar: Sweetens and helps control freezing, preventing ice crystals. Sweetener Swap: Honey or pure maple syrup (½ cup) add lovely floral notes. Reduce milk by 2 tbsp if using liquid sweeteners as they add moisture.
- 1 tsp Pure Vanilla Extract: The flavor enhancer! It deepens the peachiness without overpowering it. Chef’s Insight: Splurge on real vanilla – it makes a difference! A tiny scrape of vanilla bean paste is even more magical.
- Pinch of Fine Sea Salt: Don’t skip this! It’s the secret weapon that makes all the other flavors pop and balances the sweetness beautifully.
Crafting Your Peach Masterpiece: Let’s Churn!
Okay, team! Let’s transform these beauties into frozen gold. This process is easy-peasy (peachy?), but a few key tips ensure perfection:
- Peach Perfection First! Bring a pot of water to a boil. Score a small “X” on the bottom of each peach. Dunk them in the boiling water for 30-45 seconds, then plunge them into an ice bath. The skins will slip right off! Pit and chop the peaches. Chef’s Hack: Save one peach! Chop it super fine (don’t puree) and stir it in AFTER churning for incredible bursts of fresh fruit!
- Blend the Sunshine. Toss your peeled, chopped peaches (minus that reserved one, if using) into your blender. Pulse until mostly smooth but with some lovely little peachy flecks remaining – about 10-15 seconds. We want texture, not baby food! Tip: If your peaches aren’t super juicy, add 1 tbsp of the milk to help them blend.
- Create the Creamy Dream. Pour in the heavy cream, whole milk, sugar (or honey/maple syrup), vanilla extract, and that magical pinch of salt. Blend again for just 10-15 seconds until everything is gloriously combined and looks like a peachy milkshake. Chef’s Secret: Taste it now! Adjust sweetness if needed (remember, cold dulls sweetness slightly). Want more peach punch? Add a tiny drop of almond extract (seriously, just a drop!).
- Patience is a Virtue (Chill Time!). Pour this luscious mixture into a container, cover it, and pop it in the fridge for at least 2 hours, or better yet, overnight. This step is CRUCIAL! Chilling it thoroughly ensures your ice cream maker churns efficiently and results in the creamiest texture possible. Cold base = smaller ice crystals. No Skipping!
- Churn, Baby, Churn! Give your chilled mixture a quick stir. Pour it into your ice cream maker and churn according to the manufacturer’s instructions, usually 20-25 minutes. It’s ready when it looks like super soft-serve and holds its shape on the paddle. Chef’s Hack: In the last 2 minutes of churning, add that reserved finely chopped peach for amazing texture!
- The Big Freeze. Gently scoop your just-churned ice cream into a freezer-safe container (a loaf pan works great!). Press a piece of parchment paper directly onto the surface. This prevents ice crystals from forming! Seal tightly and freeze for at least 2-4 hours, or ideally overnight, for scoopable perfection. Tip: If it freezes rock solid, let it sit on the counter for 10-15 minutes before scooping.
- No Ice Cream Maker? No Problem! Pour the chilled mixture into a shallow, freezer-safe dish (metal works best). Freeze for 45 minutes. Take it out and vigorously stir/scrape it with a fork, breaking up any ice crystals. Repeat this stirring process every 30 minutes for about 2-3 hours, or until frozen and creamy. It’s more effort, but oh-so-worth it!
Scooping Up the Joy: How to Serve Your Peach Perfection
Presentation is part of the fun! Scoop your glorious peach ice cream into chilled bowls or vintage sundae glasses. Keep it pure and simple to let the peach flavor shine, or go all out! Crumble some buttery shortbread cookies or ginger snaps on top for delightful crunch. A drizzle of warm honey or bourbon caramel adds a decadent touch. For peak summer vibes, garnish with a thin, fresh peach slice and a tiny mint leaf. Sharing it straight from the container with spoons and your favorite people? That’s the *best* serving suggestion of all.
Mix It Up! Delicious Twists on Classic Peach
Once you’ve mastered the classic, play with your food! Here are some fun variations:
- Peach Melba Swirl: After churning, gently fold in ½ cup of room-temperature raspberry jam or sauce for beautiful ribbons.
- Bourbon Peach & Pecan: Add 1-2 tbsp good bourbon to the base before chilling. Fold in ½ cup chopped toasted pecans after churning.
- Gingered Peach: Add 1-2 tsp finely grated fresh ginger to the peaches before pureeing for a lovely zing.
- Vegan Sunshine: Substitute full-fat coconut milk for both the heavy cream and whole milk. Use maple syrup as the sweetener. The coconut flavor pairs beautifully with peach!
- Peach Pie Ice Cream: Fold in ½ cup crumbled pie crust pieces and ¼ tsp cinnamon after churning. Instant pie in a scoop!
Olivia’s Kitchen Confessions & Tips
Oh, this recipe! It’s seen some things in my kitchen. Like the time I got *so* excited I forgot the sugar until after churning started (cue frantic stirring of gritty peaches!). Or the infamous “Double Salt Incident of ‘19″… we don’t talk about that salty surprise! Over the years, I’ve learned a few things: Ripe peaches are non-negotiable. They are 90% of the flavor. Chill that base! I know, I nag, but it truly is the difference between creamy bliss and icy disappointment. And don’t fear the chunks! A little peachy texture is pure joy. This recipe is forgiving – it’s evolved from Aunt Mae’s original (which involved eggs and custard-making that intimidated me for years!) to this simpler, no-cook version that delivers all the flavor with less fuss. It’s my go-to for summer potlucks, bad-day remedies, and “just because I love you” treats. Make it your own!
The Cultural History of Peach Ice Cream – A Southern Icon with Global Roots
Few desserts capture the essence of summer quite like peach ice cream, but its story stretches far beyond backyard barbecues. This frozen treat carries a rich cultural legacy that spans continents and centuries.
From Ancient China to Southern Porches
-
Peaches originated in China over 8,000 years ago, where they symbolized longevity and immortality.
-
Spanish explorers brought peaches to the Americas in the 16th century, where they thrived in the South’s warm climate.
-
Early American ice cream (dating back to the 1700s) was a luxury, but resourceful Southern cooks adapted it using local fruit.
Why Peach Ice Cream Became a Southern Staple
-
Georgia’s peach obsession (the state produces over 130 million pounds annually!) made the fruit a natural choice for desserts.
-
Before refrigeration, ice cream was a seasonal treat—peach harvests aligned perfectly with sweltering summers.
-
Community “ice cream socials” in the 1800s often featured peach ice cream as the star attraction.
Global Variations on the Theme
-
Italy’s Pesca Gelato – Often paired with amaretti cookies or Prosecco sorbet.
-
France’s Pêche Melba – Vanilla ice cream with peaches and raspberry sauce, created for opera singer Nellie Melba.
-
Mexico’s Nieve de Durazno – A lighter, fruit-forward version sometimes spiked with chili powder.
Why This Recipe Feels Like Heritage
Making peach ice cream today isn’t just about dessert—it’s a connection to generations past. The scent of ripe peaches and cream churning in an old-fashioned machine evokes a slower, sweeter time.
The Science of Sweetness – How to Balance Flavors Like a Pro
Great peach ice cream isn’t just sweet—it’s a symphony of balanced flavors. Here’s how to fine-tune your recipe for maximum deliciousness.
Understanding Flavor Dynamics
-
Sweetness – Comes from peaches + sugar. Too little = bland; too much = cloying.
-
Acidity – Peaches provide natural tartness, but a splash of lemon juice can brighten dull fruit.
-
Fat – Heavy cream rounds out sharp edges, creating a “velvety” mouthfeel.
-
Salt – Just a pinch makes other flavors pop (like in salted caramel).
The Golden Ratio for Perfect Sweetness
-
1 part sugar to 4 parts liquid is the sweet spot for most ice creams.
-
Adjust based on peach ripeness – Super-sweet peaches need less sugar; tart ones may need more.
Pro Tips for Flavor Layering
-
Infuse the cream – Steep a split vanilla bean or fresh basil leaves in warm cream before mixing.
-
Add a touch of almond extract (just 1/8 tsp!)—it enhances peach flavor without tasting artificial.
-
Finish with flaky sea salt before serving to elevate every bite.
Fixing Common Flavor Mishaps
| Problem | Solution |
|---|---|
| Too sweet | Add a squeeze of lemon juice or a pinch of salt. |
| Too bland | Blend in roasted peaches or a drop of almond extract. |
| Artificial taste | Always use real vanilla (not imitation) and ripe fruit. |
The Ultimate Peach Ice Cream Experience – Serving & Pairing Ideas
Peach ice cream is delicious alone, but with a few creative touches, it becomes an unforgettable dessert experience.
Next-Level Serving Styles
-
The Classic Sundae – Warm peach compote + crumbled ginger snaps + whipped cream.
-
Boozy Float – Pour chilled Prosecco or bourbon over a scoop.
-
Grilled Peach Split – Halve a peach, grill until caramelized, and top with ice cream.
Unexpected but Perfect Pairings
-
Spicy – A drizzle of hot honey or Tajín seasoning for contrast.
-
Herbal – Fresh basil or thyme leaves as garnish.
-
Crunchy – Toasted pecans, granola, or crumbled shortbread.
The Best Beverage Pairings
-
Sweet Tea – A Southern classic.
-
Sparkling Rosé – The effervescence cuts the richness.
-
Cold Brew Coffee – For a peaches-and-cream affogato.
How to Turn Leftovers into New Desserts
-
Ice Cream Sandwiches – Between oatmeal cookies.
-
Milkshakes – Blended with a splash of milk.
-
Cobbler Topping – Melted over warm pie.
Peach Ice Cream SOS: Your Questions Answered!
Let’s tackle those common kitchen hiccups:
- Q: My ice cream is too hard! Help!
A: This usually means either (1) the base wasn’t chilled long enough before churning, or (2) it over-churned in the machine. Next time, chill longer! For now, let it sit at room temp for 10-15 minutes before scooping. Adding 1 tbsp of vodka (which doesn’t freeze) to the base next time can also help soften it. - Q: Why is it icy/gritty?
A: Large ice crystals often form if the base isn’t cold enough before churning, or if you skipped the surface parchment step before freezing. Stirring too infrequently with the no-machine method also causes this. Ensure thorough chilling and consistent stirring/freezing. - Q: My peach flavor seems weak. What happened?
A: Blame the peaches! Underripe peaches just won’t deliver. Always use peaches at peak ripeness. You can also try roasting the peaches (pitted, halved, 375°F for 20-25 mins until soft and caramelized) before pureeing – this concentrates their flavor amazingly! - Q: Can I use canned peaches?
A: You *can* in a pinch, but drain them VERY well and use peaches packed in juice, not heavy syrup (too sweet!). Fresh or high-quality frozen are always best for the brightest flavor.
Homemade Peach Ice Cream
- Total Time: 6 hours
Description
Inspired by sticky porch summers and family laughter, this peach ice cream is a tribute to ripe fruit, simple ingredients, and the sweet magic of homemade desserts. No eggs, no fuss—just creamy, peach-packed bliss you can make with or without an ice cream maker. One bite and you’re back on that creaky porch swing.
Ingredients
-
3 ripe peaches, peeled & chopped (about 2 cups)
-
1 cup heavy cream
-
1 cup whole milk
-
½ cup granulated sugar (or ½ cup maple syrup)
-
1 tsp pure vanilla extract
-
Pinch of fine sea salt
Instructions
-
Peel & Blend – Blanch peaches to peel, blend with other ingredients until smooth (save one peach for chopped texture).
-
Chill – Refrigerate mixture at least 2 hours or overnight.
-
Churn – Pour into your ice cream maker and churn 20–25 mins until soft-serve consistency.
-
Freeze – Transfer to container, press parchment on top, freeze 4 hours minimum. Let soften before scooping.
No machine? Freeze in a shallow pan, stirring every 30 mins for 2–3 hours until creamy.
Notes
-
Add bourbon + pecans or swirl with raspberry jam.
-
Make it vegan with coconut milk & maple syrup.
-
Roasting peaches first deepens the flavor.
- Prep Time: 15 mins
Nutrition
- Calories: 180 per serving
- Sugar: 17g
- Fat: 11g
- Carbohydrates: 18g
- Protein: 3g
Final Thoughts: Why Homemade Peach Ice Cream is Worth the Effort
In an era of instant gratification, making peach ice cream from scratch is a deliberate act of joy. It’s not just about the dessert—it’s about:
-
Savoring seasonal abundance at its peak.
-
Creating memories (whether you’re churning with kids or gifting a scoop to a friend).
-
Honoring tradition while making it your own.
Nutritional Info (Per ½ Cup Serving – Approximate)
Calories: ~180 kcal | Protein: 3g | Carbohydrates: 18g | Fat: 11g (7g Saturated) | Sugar: 17g | Calcium: 8% DV
Remember: This is a treat! Enjoy it mindfully and savor every delicious, peachy bite.
There you have it, friend! Your very own ticket to summer in a bowl. Making this homemade peach ice cream isn’t just about the dessert; it’s about slowing down, savoring the season’s best fruit, and creating a little moment of pure, sticky-fingered joy. So grab those peaches, fire up that ice cream maker (or your trusty fork!), and make some memories. I’d love to hear how your peachy adventure turns out! Tag me @OliviasCozyKitchen or leave a comment below. Now, go get churning! 🍑✨
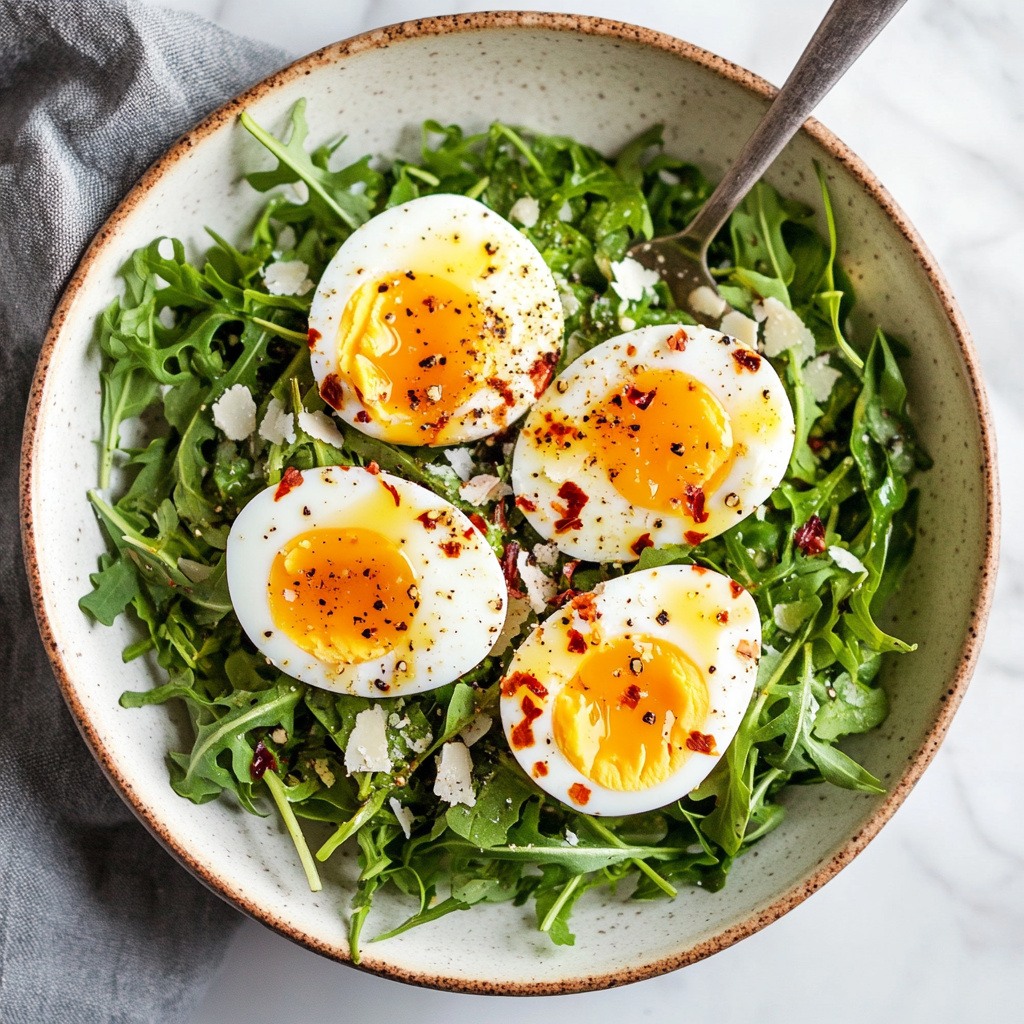
Breakfast Salad with Soft-Boiled Eggs
Sunshine in a Bowl: Why Your Mornings Need This Breakfast Salad
Hey there, early birds and snooze-button connoisseurs alike! Olivia here, your apron-clad cheerleader for all things delicious. Let’s talk about that first meal of the day. I know what you’re thinking: “Salad? For breakfast?” Trust me, I used to side-eye the idea too. But picture this: peppery arugula doing a happy dance under silky soft-boiled eggs, everything glistening with lemon-kissed olive oil and crowned with salty Parmesan. It’s not just fuel—it’s a joyful jolt of energy that’ll make you wonder why you ever settled for sad toast. This isn’t diet food; it’s celebration food that happens to make you feel incredible. Whether you’re rushing out the door or savoring a slow Sunday, this 10-minute wonder proves breakfast can be both lightning-fast and soul-nourishing. Ready to turn your AM routine into something you actually crave? Let’s make mornings sparkle.
The Jet-Lagged Epiphany: How Travel Rewrote My Breakfast Rules
Okay, story time! Picture me: rumpled hair, bleary-eyed, stumbling through a tiny Roman café after an overnight flight. I was expecting espresso and pastries, but the nonna behind the counter slid me this vibrant bowl—eggs like golden suns nested in greens. One bite and my fog lifted. The crunch! The zing! The way the yolk draped everything in velvet? Revelation. Back home, I became obsessed with recreating that “aha!” moment. My first attempts? Comedy gold. I over-boiled eggs into bouncy balls, drowned greens in dressing… but eventually, I cracked the code. Now, this salad’s my secret handshake with mornings. It’s on the menu when I need clarity before recipe testing, or when my niece sleeps over and declares it “fancy dinosaur food” (high praise!). That Roman breakfast didn’t just feed me—it rewired how I think about starting the day with intention and joy.
Your Flavor Toolkit: Simple Ingredients, Big Personality
Psst: Don’t stress about perfection here. Salad is forgiving!
- 2 Soft-Boiled Eggs – Your protein-packed stars! Chef insight: Room-temp eggs peel cleaner. Swap with pan-fried halloumi for vegan magic.
- 1 Cup Fresh Arugula – Peppery and bold! Why it rocks: Its bite stands up to rich yolks. Baby spinach works if arugula’s too intense.
- 1 Tbsp Olive Oil – Go extra-virgin! Pro tip: This is where flavor lives. Use your good bottle—it’s worth it.
- Juice of ½ Lemon – Sunshine alert! Hack: Roll the lemon on the counter first to maximize juice.
- 2 Tbsp Grated Parmesan – Salty umami punch! Substitute: Pecorino for sharper vibes, or nutritional yeast for dairy-free.
- Freshly Cracked Black Pepper – Non-negotiable! Fun fact: Grinding it fresh releases floral notes you lose in pre-ground.
- Pinch of Aleppo Pepper – Mild, fruity heat. No Aleppo? Smoked paprika + pinch of red chili flakes = great backup.
- Salt to Taste – Flavor conductor! Watch: Season greens lightly—Parmesan adds saltiness too.
Let’s Build Your Breakfast Masterpiece: No Stress, All Finesse
Confession: I still occasionally send eggshells flying. It’s part of the charm!
- Egg Excellence: Bring a small pot of water to a rolling boil. Gently lower eggs with a spoon (prevents cracking!). Set timer for 6:30 minutes—this gets you that dreamy, jammy yolk. Game-changer: Add 1 tsp vinegar to water for easier peeling later!
- Ice Bath Heroics: While eggs cook, prep a bowl with ice water. When timer dings, transfer eggs immediately to chill. Why? This stops cooking AND loosens the membrane. Let them sit 2 minutes—just enough time to…
- Wake Up Your Greens: In your serving bowl, toss arugula with olive oil, lemon juice, salt, and pepper. Massage gently with your hands (yes, really!) to soften the leaves slightly and coat every ripple.
- Peel Like a Pro: Tap eggs all over on the counter, then roll gently under your palm. Peel under cool running water—the stream helps lift stubborn bits. Slice in half with a lightly oiled knife (keeps yolk from sticking!).
- The Grand Assembly: Nestle egg halves into the greens, yolk-side up. Sprinkle with Parmesan and Aleppo pepper. Final flourish: Crack extra black pepper over the yolks. The contrast is *chef’s kiss*!
Beyond the Bowl: Serving with Style
This salad begs to be eaten immediately while the eggs are still warm—their heat slightly wilts the greens into luxurious silkiness. I serve it in shallow bowls to cradle the dressing. For a “company’s coming!” upgrade: Add lemon zest curls on top, offer crusty sourdough soldiers for yolk-dipping, or serve with an iced mint tea. If packing to-go? Keep dressing and eggs separate—assemble at your desk for a desk-lunch envy situation!
Mix It Up: Your Salad, Your Rules
This recipe is a canvas! Try these twists:
- Mediterranean Mood: Add sliced cucumbers, Kalamata olives, and a sprinkle of oregano.
- Protein Power-Up: Top with crispy bacon, smoked salmon, or white beans.
- Spring Fling: Swap arugula for shaved asparagus ribbons and fresh peas; use goat cheese instead of Parmesan.
- Sweet & Savory: Toss in sliced strawberries or pears with toasted walnuts.
- Keto-Friendly: Add sliced avocado and pumpkin seeds; double the eggs!
Kitchen Chronicles: From “Meh” to Magic
This recipe has been my breakfast BFF for years, evolving with every season and kitchen blunder. Remember my “runny yolk disaster of 2019”? I tried shortcutting the ice bath… and ended up with crumbled, overcooked eggs. Lesson learned! Now I keep a dedicated ice cube tray in the freezer just for egg baths. My husband calls this salad “Olivia’s Mood Fixer”—it’s true, it’s hard to be grumpy when eating something so vibrant. Funny thing? My original version had twice the Parmesan. Turns out restraint lets the lemon and pepper sing! Over time, I’ve embraced the mess: yolk on my thumb, arugula on the counter, joy in the chaos. That’s real cooking, friends.
The Morning Makeover – Reimagining What Breakfast Can Be
For decades, breakfast has worn the same uniform: toast, cereal, scrambled eggs, maybe pancakes on weekends. But imagine stepping outside that box—into a bright, green patch of morning sunshine where greens glisten with olive oil and jammy eggs melt into every forkful. That’s the magic of the Breakfast Salad with Soft-Boiled Eggs. It isn’t a passing health trend or a nod to diet culture. It’s a quiet revolution. A plateful of greens in the morning sets a tone—like choosing to listen to a symphony rather than a jarring alarm clock.
What makes this dish transformative is how it bridges feeling good with eating well. Instead of a sugar crash from syrupy waffles, your energy remains even and bright. The salad’s peppery arugula does more than fill the plate—it invigorates. Each bite is grounded with the softness of egg yolk, the citrus kiss of lemon, and that nutty, umami finish from Parmesan.
It’s also endlessly flexible. No time for boiling eggs? Pan-fry a couple or crumble in feta and roasted chickpeas. Out of arugula? Baby kale, spinach, or even microgreens will happily take the baton. And the best part? This isn’t a Sunday-only ritual. With just 10 minutes, you’re not cooking—you’re composing.
So if you’ve been stuck in a breakfast rut or longing for a new morning ritual that energizes both body and spirit, let this salad be your delicious reset button.
The Heart of Home – A Breakfast Tradition with Soul
I didn’t grow up eating salad for breakfast. In our kitchen, mornings meant buttered toast, fried eggs, and whatever fruit was ripening on the counter. But life has a way of evolving our habits. My version of home cooking changed the moment I met this breakfast salad in a quiet corner of Italy. It reminded me that nourishing food doesn’t need complexity—it needs intention.
Over time, it became more than a dish. It became a ritual. It’s what I make when family comes to visit. It’s the recipe I pull out when someone’s had a hard week or when I want to show a little extra care. My niece, who once refused to touch anything green, now calls it “dinosaur brunch” and demands her egg yolk be as “squishy as the sun.”
Cooking this salad is tactile, grounding. You boil water, you wait. You massage greens. You crack pepper by hand. It asks you to slow down in a way that so few breakfasts do. And that act of slowing down, of choosing something fresh, real, and lovingly made—it reshapes how we treat ourselves and those we love.
When you serve this salad, you’re not just feeding someone. You’re saying, “You deserve something beautiful.” That’s the legacy this breakfast leaves behind in my kitchen.
Your Questions, My Answers: Salad Wisdom Unpacked
Q: Help! My yolks are chalky/runny. What went wrong?
A: Timing is everything! At 6:30 mins, eggs are jammy. For firmer yolks, go to 7 mins. Altitude? Add 30 secs. Always start with boiling water and room-temp eggs for consistency. Stuck with fridge-cold eggs? Add 1 minute to cook time.
Q: Can I meal-prep this ahead?
A: Yes—with strategy! Keep components separate: Blanched eggs (unpeeled) in the fridge for 2 days. Washed/dried greens in a container with a paper towel. Dressing in a tiny jar. Assemble cold, but let eggs sit at room temp 10 mins first.
Q: My arugula always wilts into sadness by lunch. Tips?
A: Dry those greens like your happiness depends on it! After washing, spin aggressively in a salad spinner, then pat with towels. Store with a dry paper towel in an airtight container. Also: Dress JUST before eating!
Q: No Aleppo pepper. What’s the best sub?
A: Blend ¾ tsp smoked paprika + ¼ tsp cayenne or red chili flakes. Aleppo’s magic is its mild fruitiness—this combo gets close! Skip standard chili powder; it’s too cumin-heavy.
Breakfast Salad with Soft-Boiled Eggs
- Total Time: 10 mins
Description
Inspired by a jet-lagged breakfast in Rome, this salad is a morning ritual of simplicity and sparkle. Peppery arugula, creamy eggs, zesty lemon, and salty parmesan—it’s elegance in 10 minutes. Whether you need a gentle start or a joyful reset, this bowl fuels your morning with calm clarity and a wink of flavor mischief.
Ingredients
-
2 soft-boiled eggs
-
1 cup arugula (or baby spinach)
-
1 tbsp extra virgin olive oil
-
Juice of ½ lemon
-
2 tbsp grated Parmesan
-
Salt & black pepper, to taste
-
Pinch of Aleppo pepper (or smoked paprika + red chili flakes)
Instructions
-
Boil Eggs – Lower eggs into boiling water. Cook for 6½ minutes, then chill in ice bath for 2 minutes. Peel gently and slice in half.
-
Toss Greens – In a bowl, mix arugula with olive oil, lemon juice, salt, and pepper. Massage briefly to soften.
-
Assemble – Place egg halves on greens. Sprinkle Parmesan, Aleppo pepper, and crack extra black pepper over the top.
-
Serve Warm – Enjoy immediately while eggs are soft and warm. Add crusty toast if you like!
Notes
-
Use goat cheese or halloumi for a twist.
-
Add avocado or bacon for extra richness.
-
Meal prep by storing eggs unpeeled and greens dry.
- Prep Time: 5 mins
- Cook Time: 7 mins
Nutrition
- Calories: 250 per serving
- Fat: 20g
- Carbohydrates: 4g
- Fiber: 1g
- Protein: 13g
Final Thoughts
This breakfast salad isn’t just a meal—it’s a mindset shift. It’s proof that mornings can be vibrant, nourishing, and full of flavor without requiring hours in the kitchen. Whether you’re a busy parent, a work-from-home warrior, or just someone who wants to start the day right, this dish is your ally.
So go ahead—break the breakfast rules. Eat salad in the morning. Play with flavors. Make it yours. Because the best meals aren’t just about filling your stomach; they’re about feeding your soul.
Nutritional Nibbles (Approximate Per Serving)
Calories: ~250 | Protein: 13g | Carbs: 4g | Fat: 20g | Fiber: 1g
Note: Values increase with added toppings like avocado or bacon. This salad is rich in Vitamin K (arugula!) and protein.
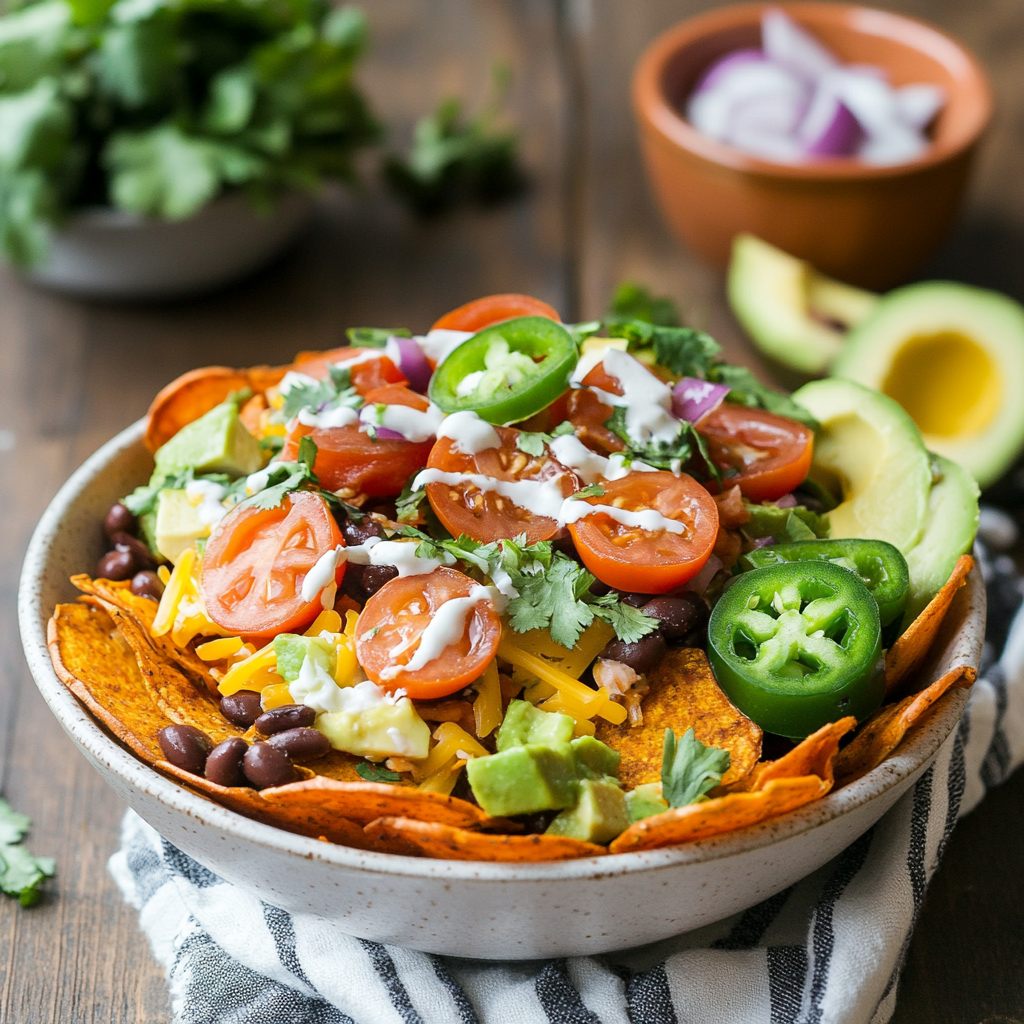
Sweet Potato Nacho Bowl
Sweet Potato Nacho Bowl: Your New Comfort Food Obsession
Hey there, kitchen friends! Olivia here, waving from my flour-dusted countertop. Can we talk about that magical moment when you’re craving something crunchy, cheesy, and soul-warming… but also secretly want to feel like you’re making a *slightly* healthier life choice? Enter my Sweet Potato Nacho Bowl – the love child of taco night and loaded nachos that’ll make your taste buds do a happy dance. 🎉
Imagine this: golden rounds of roasted sweet potatoes (crispy-edged and tender-hearted) playing base for spicy taco chicken, melty cheese, creamy avocado, and all those vibrant toppings that make your eyes sparkle. It’s colorful, nourishing, and ridiculously satisfying – like a hug in bowl form. No fancy skills required, just a baking sheet and that gorgeous enthusiasm you bring to the kitchen. This recipe is your ticket to a 30-minute dinner that feels like a fiesta, whether you’re feeding hungry kids, impressing a date, or treating yourself to solo comfort food bliss. Ready to ditch the chips and dive into something gloriously messy? Let’s get roasting!
Why This Dish Sparks Joy (and a Little Nostalgia)
This bowl actually started as a happy accident! Picture this: It was Super Bowl Sunday, and my crew demanded nachos. But my niece – my sweet, veggie-loving goddaughter – looked so crestfallen when she saw that mountain of chips. “Aunt Liv,” she whispered, “potatoes make my tummy wobbly.” Cue my kitchen improv mode! I spotted sweet potatoes glowing like sunshine in my pantry. I sliced them thick, blasted them with taco seasoning, and crossed my fingers. Twenty minutes later? We had a platter of sweet potato “chips” that disappeared faster than the halftime show. My niece piled hers high with beans and avocado, beaming like she’d won the trophy. That’s when it hit me: This wasn’t just a substitute. It was an UPGRADE. Now, every time I smell those spicy-sweet rounds roasting, I remember her victorious grin – proof that the best recipes are born from love, a little chaos, and feeding the people who light up your world.
Gather Your Flavor Dream Team 🥑
Here’s what you’ll need for two generous bowls (double it for a crowd!). Don’t stress – flexibility is my kitchen mantra:
- 2 medium sweet potatoes, sliced into ½” rounds: Your sturdy, vitamin-packed base! Look for firm potatoes with smooth skin. Chef’s Insight: Slice ’em evenly so they roast uniformly. Too thin = crisp but might burn. Too thick = soft centers take forever. Swap: Butternut squash rounds work beautifully!
- 1 cup shredded chicken (seasoned with taco seasoning): Use leftover rotisserie chicken! Instant flavor hero. Chef’s Tip: No pre-seasoned chicken? Toss plain shredded chicken with 1.5 tsp of your fave taco blend while warming it.
- ½ cup black beans, rinsed & drained: Creamy, protein-packed goodness. Swap: Pinto beans or even corn kernels add a sweet pop!
- ½ cup shredded cheese (cheddar or Mexican blend): The melt factor! Chef’s Insight: Freshly grated melts WAY better than pre-shredded (which has anti-caking agents). Swap: Pepper jack for extra kick, or dairy-free shreds.
- ¼ cup diced red onion: For that essential zesty crunch! Soak in cold water for 5 mins if raw bite is too intense.
- 1 small tomato, diced: Fresh, juicy acidity. Swap: 2 tbsp salsa if tomatoes are sad.
- ½ avocado, diced: Creamy, cool contrast. Spritz with lime juice to prevent browning.
- Jalapeño slices (optional): For my heat-seekers! Remove seeds for milder spice.
- 2 tbsp sour cream: Tangy richness. Swap: Greek yogurt or cashew cream.
- 2 tbsp taco sauce: Flavor amplifier! I adore green salsa (salsa verde) here too.
- Fresh cilantro for garnish: The confetti finish! Skip if you’re a cilantro-hater.
- PLUS: 1 tbsp olive oil & 1.5 tsp taco seasoning for roasting the potatoes!
Let’s Build Your Flavor Masterpiece! ✨
Trust me, this is easier than assembling IKEA furniture (and way more rewarding).
- Roast Those Sweet Potato “Chips” to Perfection: Preheat your oven to 400°F (200°C). On a large baking sheet, toss your sweet potato rounds with olive oil and 1.5 tsp taco seasoning. Massage it in like you’re giving them a spa treatment! CHEF’S HACK: Line the sheet with parchment paper for ZERO stuck potatoes and easy cleanup. Arrange rounds in a single layer – no overlapping! Crowding = steamed potatoes, not crispy. Roast for 15 minutes, then flip each round (tongs are your BFF here). Roast another 10-15 minutes until gorgeously golden and fork-tender. Pro Tip: If they’re browning too fast, lower the rack in your oven.
- Warm Your Chicken & Beans – Quick & Sizzly: While potatoes roast, warm your shredded chicken and black beans together in a small skillet over medium heat. Stir in 1-2 tbsp water or broth to keep it juicy! No skillet? Microwave for 60-90 seconds. CHEF’S CONFESSION: I sometimes add a squeeze of lime here – brightens everything!
- Assemble Like the Nacho Boss You Are: Time for the fun part! Grab your plates or wide bowls. Lay down those glorious roasted sweet potato rounds like edible tiles. Immediately sprinkle the cheese over the hot potatoes – hello, melty magic! Now, pile on the warm chicken & beans, followed by red onion, tomato, and avocado. CHEF’S SECRET: This order matters! Hot potatoes melt cheese, warm chicken heats beans, and cool veggies stay crisp.
- Finish with Flair: Dollop with sour cream, drizzle generously with taco sauce, scatter jalapeños if using, and crown it all with fresh cilantro. CHEF’S TOUCH: A final pinch of flaky sea salt over the avocado makes it sing!
Serving Up Sunshine 🌞
Presentation is half the joy! I serve these in wide, shallow bowls so all those vibrant layers shine. For a fun “build-your-own” vibe (perfect for friends or picky kiddos!), arrange the roasted sweet potatoes on a big platter and let everyone pile on toppings buffet-style. Pair it with an icy-cold limeade or a light Mexican lager. Got extra cilantro? Sprinkle it everywhere – edible confetti! This bowl is a complete meal, but a simple side of lime-kissed slaw or charred corn adds extra fresh crunch.
Shake It Up! 5 Delicious Twists
This bowl is your canvas! Get creative:
- Veggie Fiesta: Skip chicken, double the black beans, and add roasted corn or sautéed peppers/mushrooms.
- Breakfast Nachos: Top with a fried or poached egg! Swap chicken for crumbled chorizo sausage.
- Tex-Mex BBQ: Use pulled pork tossed in BBQ sauce instead of taco chicken. Pickled red onions are *chef’s kiss* here.
- Mediterranean Twist: Swap taco seasoning for za’atar on potatoes. Top with chickpeas, feta, cucumber, tzatziki, and kalamata olives.
- Fully Loaded Vegan: Use spicy seasoned lentils or tofu crumbles, vegan cheese shreds, and cashew sour cream. Boom!
Olivia’s Kitchen Chronicles: Nacho Edition
This recipe has evolved like my favorite playlist! The first time I made it, I sliced the sweet potatoes WAY too thin – nacho shards, anyone? Lesson learned: ½-inch is the Goldilocks zone. My husband once tried to “speed things up” by broiling the potatoes… cue the smoke alarm serenade! We laugh about it now. Over time, I’ve embraced shortcuts – rotisserie chicken is a weeknight MVP. The biggest evolution? Embracing the mess! This isn’t a dainty dish. Embrace the cheese drips, the rogue bean escapees, the sour cream smears. That’s the sign of a meal made and enjoyed with heart. Leftovers? Store components separately. Reheat potatoes in the oven/toaster oven (not microwave!) to keep them crispy.
Nacho Bowl Q&A: Your Questions, Solved!
Q: My sweet potatoes got soggy! What happened?
A: Ah, the sogginess struggle! Likely culprits: Overcrowding the pan (steam is the enemy of crispness!), slicing unevenly (thin pieces overcook), or not flipping halfway. Next time: Give ’em space, slice consistently, flip with gusto, and ensure your oven is fully preheated. A hot start is key!
Q: Can I prep this ahead for a busy weeknight?
A: Absolutely! Roast the sweet potato rounds up to 2 days ahead – store them uncovered in the fridge (this helps them stay crisper). Cook and shred the chicken, rinse the beans, and dice the onion/tomato. Store toppings separately. When ready to eat, reheat potatoes at 375°F for 10 mins, warm chicken/beans, and assemble fresh! The avocado and cilantro should always be added last-minute.
Q: How can I make it spicier (or milder)?
A: Spice control is yours! For Heat Lovers: Add a pinch of cayenne to the taco seasoning on the potatoes, use spicy taco sauce or salsa, extra jalapeños (seeds in!), or a dash of hot sauce at the end. For Mild Moods: Use mild taco seasoning, skip jalapeños, choose a mild salsa/taco sauce, and consider swapping red onion for milder green onions.
Q: Can I use regular potatoes instead of sweet potatoes?
A: You sure can! Yukon Gold or Russet potatoes work well. Slice them ½-inch thick, toss with oil/taco seasoning, and roast the same way. They might cook slightly faster, so check at 20 mins. The flavor will be more classic “nacho,” but still deliciously cozy!
Sweet Potato Nacho Bowl
- Total Time: 35 mins
Description
Born from a Super Bowl improv, this sweet potato nacho bowl is the ultimate crowd-pleaser—satisfying, nourishing, and brimming with bold, vibrant flavors. Roasted sweet potato “chips” form the base for melty cheese, taco-spiced chicken, creamy avocado, and tangy toppings. It’s comfort food you can feel good about—perfect for taco night or a quick weeknight win!
Ingredients
-
2 medium sweet potatoes (½” slices)
-
1 tbsp olive oil + 1.5 tsp taco seasoning
-
1 cup shredded taco chicken
-
½ cup black beans
-
½ cup shredded cheese (cheddar or blend)
-
¼ cup diced red onion
-
1 small tomato, diced
-
½ avocado, diced
-
2 tbsp sour cream or Greek yogurt
-
2 tbsp taco sauce or salsa
-
Jalapeños (optional), fresh cilantro for garnish
Instructions
-
Roast Potatoes – Toss slices with oil & seasoning. Roast at 400°F for 15 mins, flip, roast 10–15 more until crisp-edged.
-
Heat Chicken & Beans – Warm in skillet with a splash of broth or microwave.
-
Assemble – Layer sweet potatoes in bowls, sprinkle cheese to melt. Top with warm chicken & beans, then veggies and avocado.
-
Finish – Add sour cream, sauce, jalapeños, and cilantro. Sprinkle flaky salt on avocado.
Notes
-
Sub squash or Yukon potatoes.
-
Add fried egg for brunch vibes.
-
Use BBQ pulled pork or vegan lentils.
-
Store leftovers separately; reheat potatoes in oven.
- Prep Time: 10 mins
- Cook Time: 25 mins
Nutrition
- Calories: 520 per serving
- Fat: 25g
- Carbohydrates: 40g
- Fiber: 10g
- Protein: 35g
Final Thoughts: Why This Bowl Wins Every Time
The Sweet Potato Nacho Bowl isn’t just a meal—it’s a celebration of textures, flavors, and pure comfort. It’s the kind of dish that feels indulgent but still leaves you energized, not weighed down. Whether you’re a busy parent, a meal-prep enthusiast, or just someone who loves a good flavor fiesta, this recipe is flexible, forgiving, and downright delicious.
So next time you’re staring into the fridge wondering what to make, remember: sweet potatoes are your canvas, and nacho night just got a whole lot brighter. Now go forth, roast with abandon, and make every bite a little celebration. 🌮✨
Nourishment Note (Because We Care!)
Per Serving (Approximate, based on specific ingredients used): Calories: ~520 | Protein: 35g | Carbohydrates: 40g | Fat: 25g | Fiber: 10g
This bowl packs a nutritional punch! Sweet potatoes offer vitamin A and fiber, chicken provides lean protein, black beans add more fiber and plant-based protein, and avocado brings healthy fats. It’s a balanced, satisfying meal!
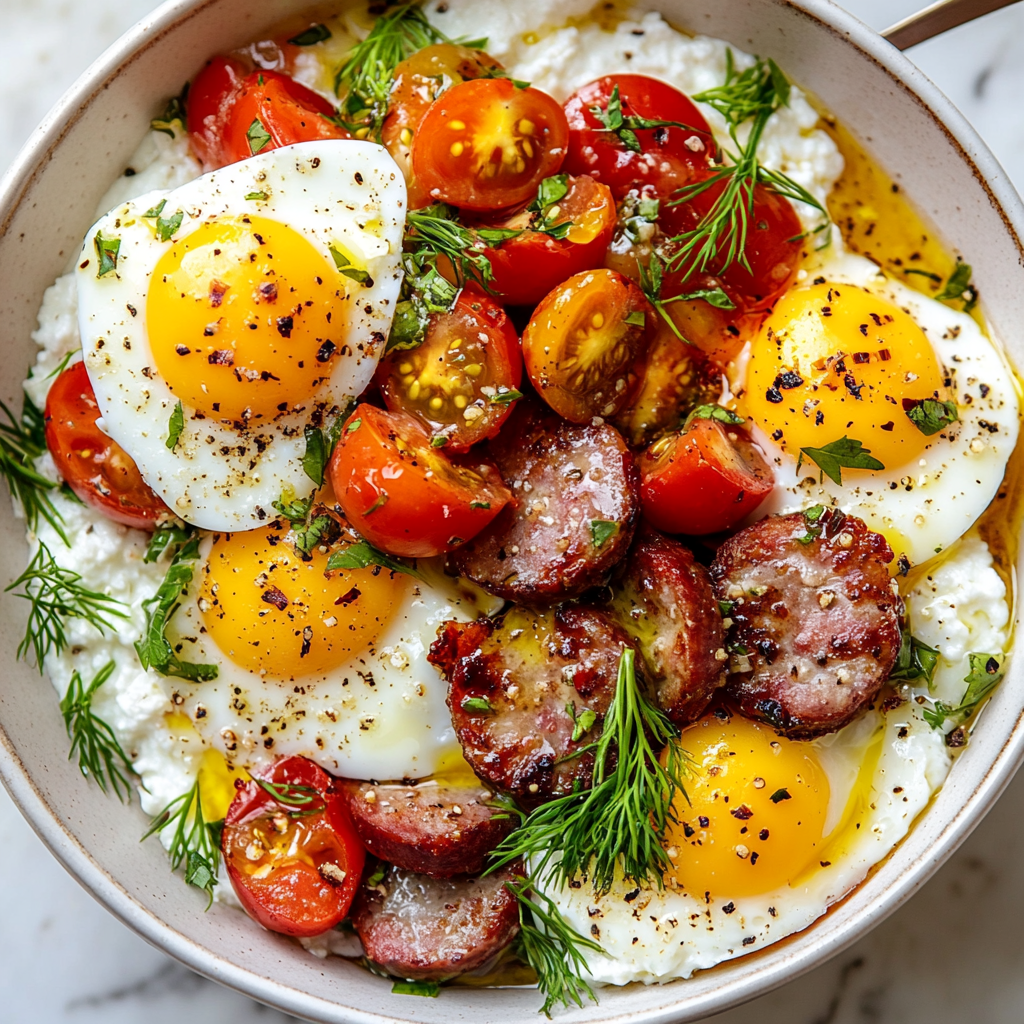
Savory Breakfast Power Bowl
Savory Breakfast Power Bowl: Fuel Your Morning with Color & Comfort! 🍳🥣
Rise, Shine, and Conquer Your Morning (One Delicious Bite at a Time)
Hey there, early birds and sleepyheads alike! Olivia here, your apron-clad cheerleader for all things cozy and delicious. Tell me, friend: How many mornings have you stared blankly into your pantry, dreaming of something that feels both nourishing and exciting? That magical breakfast unicorn that fuels your body without sacrificing flavor? If you’re nodding along (maybe with a half-yawn, half-smile), pull up a stool – we’re about to become best kitchen companions.
I created this Savory Breakfast Power Bowl for exactly those mornings. You know the ones: when sugary cereals leave you crashing by 10 AM, or when toast feels… well, just meh. This isn’t just food; it’s a vibrant, protein-packed hug in a bowl designed to make you feel capable and delighted. Imagine creamy cottage cheese, tangy kraut, juicy tomatoes, savory sausage, and those dreamy jammy eggs – all mingling in one glorious, colorful bowl. It’s quick (10 minutes, promise!), endlessly adaptable, and packed with 32g of protein to keep you buzzing happily until lunch. Whether you’re resetting after a hectic week or savoring a slow Sunday, this bowl is your edible sunshine. Let’s make mornings something you genuinely look forward to!
The Cozy Kitchen Memory That Sparked This Bowl
This bowl’s soul comes straight from my grandma’s farmhouse kitchen. Picture this: frosty Michigan mornings, the woodstove crackling, and Nana bustling about in her floral apron. She’d always have a pot of something simmering – but breakfast? That was her quiet triumph. No fancy gadgets, just intuition. Her mantra? “Feed the engine right, Livvy-girl.”
One snowy Saturday, after a chaotic week of burnt toast and skipped meals, I found her assembling the quirkiest plate: a scoop of cottage cheese, leftover roasted sausage, pickled beets from the cellar, and a perfectly boiled egg. “Leftover magic, sweetheart,” she’d winked. It was humble, a bit haphazard, yet utterly satisfying. That plate taught me breakfast doesn’t need rules – just good, real food that makes you feel strong. This power bowl is my love letter to Nana’s wisdom. It’s that same spirit of nourishing simplicity, jazzed up with color and modern flair. Every bite takes me back to her warm kitchen – and now, I hope it brings a little cozy magic to yours.
Your Flavor-Packed Toolkit: Ingredients & Smart Swaps
Think of this as your breakfast blueprint! Each ingredient brings texture, tang, or protein power. Here’s the breakdown (and how to make it YOURS):
- 2 Soft-Boiled Eggs: The creamy, golden-yolked heart of the bowl! (Chef’s Tip: Room temp eggs peel easier! Sub: Fried eggs or crispy tofu scramble for vegan.)
- ¼ Cup Sauerkraut: Our tangy, probiotic punch! (Why I love it: Adds brightness and gut-friendly zing. Sub: Kimchi for spicy kick or quick-pickled red onions.)
- ¼ Cup Cottage Cheese: Creamy, high-protein base. (Insider Hack: Use full-fat for richness! Sub: Thick Greek yogurt, ricotta, or smashed avocado.)
- 1–2 Breakfast Sausage Links: Savory, hearty goodness. (Pro Swap: Chicken apple sausage, plant-based patties, or crispy bacon bits.)
- ½ Cup Cherry Tomatoes, Halved: Bursting juicy sweetness! (Seasonal Twist: Swap for roasted sweet potatoes in winter or fresh peaches in summer!)
- Optional Magic Makers: Fresh dill (herbal pop!), chili flakes (heat!), black pepper (depth!), mustard drizzle (tangy zip!). (Don’t skip these – they’re flavor elevators!)
Let’s Build Your Breakfast Masterpiece: Step-by-Step
Grab your favorite bowl – the fun begins! This comes together faster than your coffee brews.
- Egg-cellent Timing: Gently lower eggs into boiling water. Set that timer for 6.5 minutes for gloriously jammy yolks! (Hack: Add 1 tsp vinegar to the water – it helps prevent leaks if shells crack!) Immediately transfer to an ice bath. Let them chill for 2 minutes – this stops cooking and makes peeling a breeze. Tap, roll gently, and peel under cool water. Slice carefully – admire that sunshine center!
- Sizzle That Sausage: While eggs cook, heat a small skillet over medium. Add sausage links (no oil needed – they’ll release their own tasty fat!). Cook for 6-8 minutes, turning often, until beautifully browned and cooked through. (Chef’s Secret: Cut links into coins halfway through cooking for extra crispy edges!) Transfer to a paper towel.
- Bowl Assembly Joy: Spoon the cottage cheese into your bowl as the creamy base. Artfully arrange your halved tomatoes, tangy sauerkraut, and those glorious sausage pieces around it. Think vibrant sections!
- The Grand Finale: Nestle your sliced soft-boiled eggs on top. Now, the flourish: Drizzle with mustard (I love whole grain!), sprinkle generously with fresh dill, crack on black pepper, and add a pinch of chili flakes for warmth. (Pro Move: Sprinkle flaky sea salt on those eggs!)
Take a breath. Admire your colorful creation. Now, dive in and let those flavors dance!
Serving Up Sunshine: How to Present Your Power Bowl
We eat with our eyes first! Use a wide, shallow bowl to showcase all those gorgeous layers. Place the cottage cheese slightly off-center – it creates visual interest. Group the tomatoes and kraut in vibrant little piles next to the sausage coins. Let the sliced eggs star in the center, yolks gleaming. Finish by draping that mustard drizzle artfully over the eggs and cottage cheese. Sprinkle herbs and spices generously – they look like confetti! Serve immediately with a big spoon (or crusty toast for scooping!). Perfect for savoring solo at the kitchen counter or doubling up for a cozy weekend brunch spread.
The Art of Balancing Flavors & Textures
At the heart of this Savory Breakfast Power Bowl is a masterclass in contrast. Each ingredient plays a specific role in creating a symphony of flavors and textures that wake up the palate. The creamy cottage cheese (or its substitutes) acts as a neutral canvas, tempering the tangy sauerkraut’s sharpness and the umami-rich sausage’s savoriness. Meanwhile, the jammy eggs introduce a luscious, velvety texture, while the cherry tomatoes burst with juicy acidity. Even the garnishes—cracked black pepper, chili flakes, and fresh dill—add layers of warmth, heat, and herbal brightness.
This balance isn’t accidental. It’s a lesson borrowed from global breakfast traditions: think Middle Eastern labneh bowls with olives and za’atar, or Japanese rice bowls with pickled veggies and tamago. The key is ensuring no single element overpowers the others. For example, if you’re using a particularly salty sausage (like chorizo), balance it with extra cottage cheese or a drizzle of honey. If sauerkraut feels too intense, a handful of peppery arugula can bridge the gap. Texture-wise, the bowl avoids monotony by combining soft (eggs, cheese), crunchy (sausage edges, fresh veggies), and fermented (kraut) components.
Pro Tip: For an even deeper flavor profile, try roasting the tomatoes with a pinch of sugar to caramelize their sweetness, or toast the sausage with fennel seeds for an aromatic twist. The bowl’s adaptability is its superpower—swap ingredients, but always aim for that harmony of creamy, tangy, savory, and fresh.
The Science Behind the Sustenance
This bowl isn’t just delicious—it’s engineered to fuel your body efficiently. Let’s break down its nutritional prowess:
Protein Powerhouse: With 32g of protein primarily from eggs, cottage cheese, and sausage, this bowl supports muscle repair and satiety. The combination of fast-digesting whey protein (in cottage cheese) and slow-digesting casein (in eggs) provides a steady release of energy, preventing mid-morning crashes. Plant-based? Swap in tofu scramble and chickpea-based sausage for similar benefits.
Gut-Friendly Ferments: Sauerkraut isn’t just for zing—it’s a probiotic superstar. Fermented foods introduce beneficial bacteria to the gut, aiding digestion and immunity. Studies suggest regular consumption may reduce inflammation and improve nutrient absorption. For maximum benefits, use unpasteurized kraut (look for refrigerated varieties).
Smart Fats: The fats here—from egg yolks, sausage, and dairy—are satiating and support brain function. To boost this further, add avocado or a drizzle of olive oil for heart-healthy monounsaturated fats.
Low-Sugar Energy: Unlike sugary cereals or pastries, this bowl keeps carbs minimal and fiber-rich (thanks to tomatoes and kraut), stabilizing blood sugar. The result? No 10 AM energy slump.
Practical Hack: For meal preppers, cook components in advance, but store eggs unpeeled and kraut separately to preserve texture. Reheat sausage gently to avoid drying it out.
Cultural Inspirations & Global Twists
This bowl is a passport to global breakfast traditions. Here’s how to take it on a world tour:
Nordic Revival: Swap sausage for smoked salmon, use skyr (Icelandic yogurt) instead of cottage cheese, and top with diced cucumbers and radishes. Add a sprinkle of dill and capers for a Scandinavian vibe.
Asian Fusion: Replace sausage with miso-glazed tempeh, use kimchi instead of sauerkraut, and drizzle with sesame oil and furikake. Soft-boiled eggs can be marinated in soy-mirin broth for ramen-inspired flavor.
Mexican Fiesta: Black beans, crumbled queso fresco, and pickled jalapeños bring heat and heartiness. Top with avocado and a squeeze of lime for freshness.
French Bistro: Use herbed goat cheese as the base, add crispy lardons (French bacon), and swap tomatoes for roasted mushrooms. A dollop of Dijon mustard ties it together.
Each variation respects the original’s balance while celebrating local ingredients. This adaptability makes the bowl a weeklong staple without monotony.
Make It Your Own: Delicious Twists & Swaps
This bowl is your canvas! Get creative:
- Mediterranean Magic: Swap sausage for crumbled feta & olives, add cucumber, use tzatziki instead of cottage cheese. Top with oregano.
- Green Goddess: Use smashed avocado as the base. Add sautéed spinach, asparagus, and a sprinkle of pumpkin seeds. Drizzle with lemon tahini.
- Southwest Fiesta: Black beans instead of sausage! Corn, avocado, pickled jalapeños, salsa. Cotija cheese & cilantro on top.
- Vegan Vibes: Crispy seasoned tofu scramble or tempeh bacon replaces eggs/sausage. Coconut yogurt swap for cottage cheese. Add sunflower seeds!
- Lower-Carb Love: Double the sausage or eggs. Skip tomatoes, add extra kraut and sautéed mushrooms. Drizzle with olive oil.
Olivia’s Kitchen Confessions & Tips
This bowl has seen some experiments! Once, mid-blog photoshoot, my cat Balthazar leapt onto the counter and tried to abscond with a sausage link – chaos ensued, eggs flew (RIP, jammy yolk). Lesson learned: defend your breakfast fiercely! Over time, I’ve tweaked the formula – the mustard drizzle was a happy accident when I ran out of hot sauce, and adding fresh dill felt like unlocking a secret garden in my mouth. The real magic? Embrace the mess! Don’t stress perfect egg slicing. Cottage cheese blob looking rustic? That’s homemade charm! This recipe thrives on flexibility. Use what’s fresh, use what you love, and make it work for YOUR morning rhythm. That’s the true power in this bowl.
Your Breakfast Bowl Questions, Answered!
Q: Help! My soft-boiled eggs are impossible to peel neatly. What am I doing wrong?
A: Egg-stremely common frustration! Try these tricks: 1) Use slightly older eggs (fresh ones cling tighter to the membrane). 2) Shock them REALLY well in ice water – full 2 minutes. 3) Gently tap the entire egg on the counter, then roll it between your palms to crackle the shell before peeling under running water. Patience is key!
Q: Can I meal prep components ahead?
A: Absolutely! Soft-boil eggs (keep unpeeled in fridge for 3 days). Cook sausage links and store separately. Halve tomatoes. Assemble cottage cheese + kraut + tomatoes in a container. Morning-of: Reheat sausage briefly, peel/slice eggs, assemble, and garnish! Avoid pre-assembling the full bowl with kraut – it can make things watery.
Q: The sauerkraut tang is too strong for me. Alternatives?
A: No problem! Rinse it quickly under cold water to mellow the flavor. Or swap for milder fermented veggies like curtido (Latin American slaw) or a spoonful of quick-pickled shallots. Kimchi works if you love heat!
Q: My cottage cheese seems watery in the bowl. How to fix?
A: Great eye! Drain off any excess liquid from your cottage cheese container before scooping. For extra creaminess, try “small-curd” or “squeezed dry” cottage cheese. You can also mix in a pinch of everything bagel seasoning or herbs to thicken it slightly!
Savory Breakfast Power Bowl
- Total Time: 10 mins
Description
Born from my grandma’s no-fuss farmhouse mornings, this bowl blends comfort and nutrition in one vibrant scoop. Think creamy cottage cheese, golden-yolked eggs, juicy sausage, and tangy kraut—all layered with care, not rules. Whether it’s a busy Tuesday or a slow Sunday, this breakfast bowl says: you’ve got this.
Ingredients
-
2 soft-boiled eggs
-
¼ cup sauerkraut
-
¼ cup full-fat cottage cheese
-
1–2 breakfast sausage links
-
½ cup cherry tomatoes, halved
-
Fresh dill, mustard drizzle, black pepper, chili flakes (optional but powerful!)
Instructions
-
Boil Eggs – Boil eggs for 6.5 mins, ice bath 2 mins, peel and halve.
-
Cook Sausage – Sauté links 6–8 mins, slice into crispy coins.
-
Assemble Bowl – Spoon cottage cheese in. Add tomatoes, kraut, sausage, and nestle sliced eggs on top.
-
Finish – Drizzle mustard, sprinkle herbs, crack pepper, add chili flakes.
Notes
-
Swap sauerkraut for kimchi, or sausage for crispy tofu.
-
Use Greek yogurt or avocado instead of cottage cheese.
-
Add sweet potatoes or spinach for extra color and fiber.
- Prep Time: 5 mins
- Cook Time: 5 mins
Nutrition
- Calories: 430 per serving
- Fat: 28g
- Carbohydrates: 10g
- Fiber: 3g
- Protein: 32g
Final Thoughts: More Than a Meal
This Savory Breakfast Power Bowl transcends its ingredients—it’s a mindset. It’s about rejecting rushed mornings and embracing nourishment as self-care. Whether you’re a busy parent, a fitness enthusiast, or someone rediscovering the joy of cooking, this bowl meets you where you are. It’s forgiving (burnt sausage? Toss it in!), versatile (clean-out-the-fridge-friendly), and deeply satisfying.
Most importantly, it carries a legacy—Olivia’s grandma knew that food is more than fuel; it’s love, memory, and resilience. So tomorrow, when you stand at the pantry, unsure, remember: breakfast doesn’t need to be perfect. It just needs to be yours. Now, go forth and conquer your morning.
Nutritional Power-Up (Per Serving)
Calories: ~430 | Protein: 32g | Carbs: 10g (Fiber: 3g) | Fat: 28g
Note: Values are estimates. Includes 1 sausage link and standard ingredients. Optional toppings not included. Swaps will alter values!




