
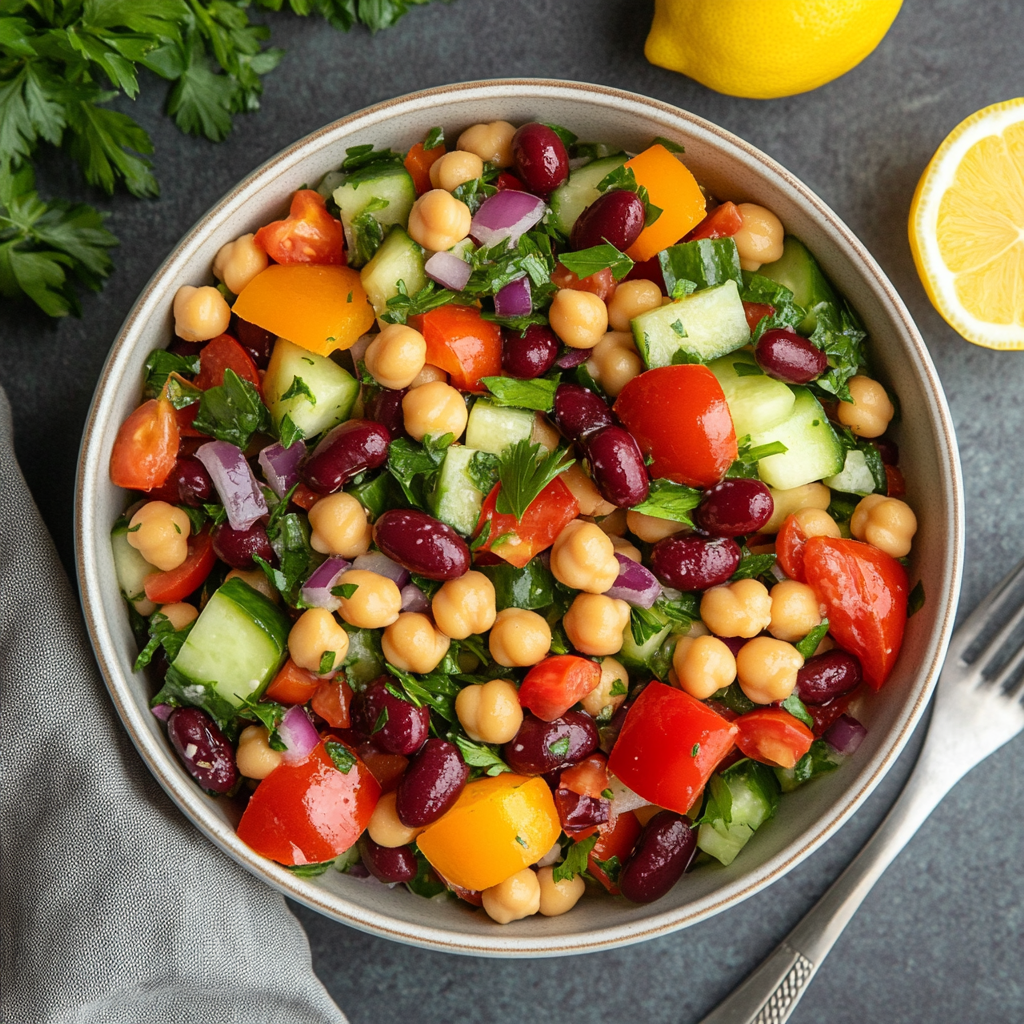
Double Bean Mediterranean Salad
Double Bean Mediterranean Salad: Your Sunny Escape in a Bowl
Hey there, kitchen friends! Olivia Bennett here, apron dusted with flour and heart full of excitement. Can we just take a moment to celebrate that magical moment when fresh produce hits your kitchen counter? That crisp cucumber still cool from the market, tomatoes blushing like a summer sunset, bell peppers crunching like confetti – it’s pure joy! If you’re craving something that tastes like sunshine and makes you feel vibrantly alive, you’ve landed in the perfect spot. This Double Bean Mediterranean Salad isn’t just a recipe; it’s your passport to a breezy coastal taverna, no plane ticket required.
I live for dishes that do triple duty: crazy simple to throw together, bursting with flavor that makes your taste buds dance, and nourishing enough to leave you glowing from the inside out. This salad checks every box. Whether you’re wrangling a busy weeknight, prepping for a picnic that’ll wow your friends, or just craving a hit of freshness, this bowl of goodness is your trusty sidekick. Forget slaving over a hot stove – we’re talking 10 minutes flat! The magic happens when plump chickpeas and hearty kidney beans meet a confetti of garden veggies, all swirled in a lemon-olive oil hug that’s brighter than my favorite yellow Le Creuset. Ready to make something truly unforgettable? Let’s dive in!
Sunshine & Second Chances: My Greek Salad Epiphany
This salad always whisks me back to a tiny family-run taverna on Crete. Picture this: I’d just spectacularly botched my first attempt at spanakopita (RIP, phyllo pastry!), feeling utterly defeated. My host yiayia, Eleni, wordlessly handed me a chipped blue bowl piled high with something resembling this salad – chickpeas bobbing like golden islands in a sea of ruby tomatoes and emerald herbs. “Eat. Cook again later,” she commanded. One bite was a revelation! The zingy lemon cut through my frustration, the creamy beans grounded me, and those herbs tasted like hope. It wasn’t fancy, just profoundly right.
That humble bowl taught me cooking’s greatest secret: perfection is overrated, but fresh, honest ingredients speaking together? That’s pure magic. Every time I make this salad, I channel Eleni’s wisdom – it’s my edible reset button. When my own kitchen adventures go sideways (hello, charcoal cookies!), I whip this up. It’s forgiveness in a bowl, reminding me that simple, vibrant food shared with love is always a win. Now, let’s create that magic in your kitchen!
Your Vibrant Mediterranean Toolkit: Ingredients & Insights
Gather these simple stars – each plays a crucial role! Don’t stress over exactitude; cooking’s an adventure, not a science lab.
- 1 Orange Bell Pepper, Diced: Sweeter and fruitier than green bells! Adds crunch and sunshine. Chef’s Swap: Yellow or red work beautifully. For extra smokiness, char it lightly on the stove first.
- 1 Cucumber, Chopped: The cool, crisp backbone! Use English or Persian cukes for fewer seeds/no peeling needed. Pro Tip: Salt slices lightly and drain for 10 mins if your cukes are very watery.
- 2 Tomatoes, Diced: Juicy bursts of umami! Ripe Roma or vine-ripened are best. Chef’s Secret: Scoop out excess seeds/jelly if they’re super watery to avoid diluting the dressing.
- ¼ Red Onion, Finely Sliced: Essential zippy bite! Soak slices in ice water for 5-10 minutes to mellow the harshness if preferred.
- 1 cup Canned Chickpeas, Drained & Rinsed: Nutty, creamy protein powerhouses! Rinsing removes excess sodium and that “tinny” taste. Dry them well for better dressing cling!
- 1 cup Canned Kidney Beans, Drained & Rinsed: Earthy, hearty texture contrast. Ensure they’re well-rinsed for vibrant color and flavor. Cannellini beans make a lovely mild alternative.
- Fresh Parsley & Mint, Chopped (to taste): The fragrant soul of the Med! Start with ¼ cup each. Flat-leaf parsley is best. Mint adds a bright, cooling lift – don’t skip it! Basil or dill can sub for mint if needed.
- Juice of ½ Lemon: The vibrant, non-negotiable zing! Freshly squeezed only, please. Taste your lemon – if it’s small or not very juicy, use the whole thing.
- 3 tbsp Extra Virgin Olive Oil: Fruity, peppery richness. Use the good stuff here – it’s half the dressing! A robust EVOO stands up to the lemon.
- Sea Salt, to taste: Flavor amplifier! Start with ¼ tsp and adjust after tossing. Flaky sea salt adds lovely texture.
Building Your Flavor Masterpiece: Simple Steps, Big Impact
Let’s transform these gorgeous ingredients! Grab your favorite big, cheerful bowl – mine’s a speckled turquoise number that always makes food look happier.
- The Veggie Fiesta: “Dump” the diced orange bell pepper, chopped cucumber, diced tomatoes, and finely sliced red onion into your bowl. Toss them gently with your hands or a large spoon. Chef’s Hack: Prep the onion first and let it soak in cold water while you chop everything else – it mellows beautifully!
- Bean Bonanza: Add the drained, rinsed, and thoroughly dried chickpeas and kidney beans. Why dry? Wet beans make the dressing slide right off! Pat them firmly with a clean kitchen towel or paper towels. Pro Tip: Give the beans a gentle roll in the bowl with the veggies before adding herbs – it helps prevent squishing.
- Herb Heaven: Sprinkle over your chopped fresh parsley and mint. Don’t be shy! I use about a firmly packed ¼ cup of each. Toss everything gently again – you want those green flecks distributed like confetti.
- Dressing Whisk Wonder: In a small jar or bowl, combine the fresh lemon juice, extra virgin olive oil, and sea salt. Whisk like you mean it (or shake the jar vigorously!) until it emulsifies slightly – you’ll see it turn creamy and opaque. Chef’s Secret: Taste the dressing on a leaf of parsley. Need more zing? Add a squeeze more lemon. Too sharp? A tiny drizzle more oil. Perfect? You rock!
- The Grand Toss: Pour that glorious golden dressing over your salad. Now, channel your inner Italian nonna! Using two large spoons or salad tongs, lift and fold the salad gently from the bottom up. Keep going until every single bean and veggie piece glistens with dressing. Key Tip: Avoid aggressive stirring – we want distinct pieces, not mush!
- Rest or Revel: You can absolutely devour this immediately – the flavors are fantastic fresh. BUT! If you have 15-20 minutes, cover it and pop it in the fridge. This brief chill lets the flavors mingle and deepen magically. No longer! The tomatoes and cucumber will start losing their perfect texture if it sits for hours dressed.
The Nutritional Powerhouse Behind This Salad
This Double Bean Mediterranean Salad isn’t just a feast for your taste buds—it’s a nutritional knockout packed with vitamins, fiber, and plant-based protein. Let’s break down why this bowl is as good for your body as it is for your soul.
1. The Dynamic Duo: Chickpeas & Kidney Beans
-
Chickpeas (Garbanzo Beans): Rich in plant-based protein (7g per ½ cup), fiber to keep you full, and folate for cell repair. They also contain manganese, which supports metabolism and bone health.
-
Kidney Beans: A great source of iron (especially important for vegetarians) and resistant starch, which feeds healthy gut bacteria.
Pro Tip: Rinsing canned beans reduces sodium by up to 40% while keeping all the nutrients intact.
2. The Veggie Brigade
-
Cucumber: Hydrating and low-calorie, with silica for skin health.
-
Tomatoes: Packed with lycopene, an antioxidant linked to heart health.
-
Bell Peppers: One orange bell pepper delivers 169% of your daily Vitamin C—more than an orange!
3. The Dressing: Liquid Gold
-
Extra Virgin Olive Oil: A cornerstone of the Mediterranean diet, loaded with heart-healthy monounsaturated fats and anti-inflammatory polyphenols.
-
Lemon Juice: Boosts iron absorption from the beans and adds a dose of Vitamin C.
Fun Fact: The mint in this salad isn’t just for flavor—it aids digestion and can even help reduce bloating after a meal.
Section 2: The Art of Texture – Why This Salad Satisfies
Ever notice how some salads leave you craving more, while others feel like a complete meal? The secret is textural contrast. Here’s how this salad nails it:
1. Creamy vs. Crunchy
-
Creamy: Chickpeas and kidney beans provide a soft, hearty base.
-
Crunchy: Cucumber, bell peppers, and red onion add a refreshing snap.
2. Juicy vs. Chewy
-
Juicy: Tomatoes burst with freshness, balancing the beans’ density.
-
Chewy: Fresh herbs (like parsley and mint) add a slight bite.
3. The Dressing’s Role
A well-emulsified dressing (oil + lemon) clings to every ingredient, ensuring each bite is flavorful. Too little dressing? The salad feels dry. Too much? It becomes soggy. This recipe strikes the perfect balance.
Pro Tip: If prepping ahead, store the dressing separately and toss just before serving to maintain texture.
Section 3: The Global Roots of Mediterranean Flavors
This salad is a love letter to sun-drenched coastal cuisines, borrowing flavors from Greece, Lebanon, and Southern Italy. Here’s how each ingredient tells a cultural story:
1. Chickpeas: A Mediterranean Staple
-
Lebanon: Blended into hummus with tahini and garlic.
-
Spain: Simmered in stews with chorizo and spinach.
-
Italy: Fried into crispy “panelle” fritters.
2. The Holy Trinity: Olive Oil, Lemon, & Herbs
-
Greece: Drizzled over horiatiki (village salad).
-
Morocco: Whisked into chermoula for grilled fish.
-
Turkey: Tossed with bulgur in kisir salad.
3. Why This Combo Works
Mediterranean cuisine prioritizes bright, fresh, and uncomplicated flavors. This salad embodies that philosophy—no heavy sauces, just quality ingredients shining together.
Fun Fact: The red onion soaking trick (to mellow its bite) is a Greek taverna secret!
Sunshine on a Plate: Serving Your Masterpiece
Presentation is part of the joy! Scoop generous portions into wide, shallow bowls or onto plates with a lip to catch any delicious juices. For a stunning touch, top with extra chopped herbs, a sprinkle of crumbled feta (if you’re not strictly plant-based), or a few briny Kalamata olives. Crusty, warm whole-grain bread or grilled pita wedges are mandatory on the side – they’re perfect for scooping up every last lemony drop! This salad shines as a light main course for two (hello, easy lunch!), a vibrant side for grilled chicken or fish, or the star of a potluck spread. Serve it with a big smile – it’s guaranteed to brighten any table.
Make It Your Own: Delicious Twists
This salad is a canvas for your cravings! Try these easy swaps:
- Greek Goddess: Add ½ cup crumbled feta cheese and ¼ cup pitted Kalamata olives. Instant vacation vibes!
- Protein Power-Up: Fold in 1 cup of flaked cooked tuna, shredded rotisserie chicken, or chickpeas for extra staying power.
- Grain Gain: Turn it into a hearty grain bowl by mixing in 1-2 cups of cooled cooked quinoa, farro, or couscous.
- Spice Route: Add a pinch of red pepper flakes to the dressing or stir in 1 tsp of za’atar or dried oregano for an earthy depth.
- Vegan Creamy Dream: Whisk 1 tbsp tahini into the lemon dressing before adding oil for a luscious, creamy texture.
Olivia’s Kitchen Confessions & Evolution
This recipe is my kitchen’s happy place! It started years ago as a desperate fridge clean-out mission – just beans, a sad pepper, and the last of some wilting herbs. That “throw-together” moment became a revelation! Over time, it evolved: the lemon got zestier, the olive oil became fancier, and I learned the onion-soaking trick after one too many “onion breath” incidents (sorry, hubby!).
Funny story: I once accidentally used lime instead of lemon during a chaotic dinner prep. Total panic! But you know what? It was delicious! Different, but delicious. It reminded me that cooking is playful. Don’t fear mistakes – embrace them! This salad’s resilience is its superpower. It’s been scarfed down at beach picnics (sand adds crunch, right?), saved me during surprise guests, and been my go-to “I need something GOOD” lunch more times than I can count. Make it yours, play with it, and let it become part of your story.
Your Salad Questions, Answered!
Let’s tackle those common kitchen hiccups before they happen:
- “Help! My salad got watery after sitting.” Ah, the dreaded veggie weep! Tomatoes and cucumbers release water, especially if salted heavily or dressed too long. Fix: Prep tomatoes (remove excess seeds/jelly) and salt/drain cucumbers if needed. Dress right before serving, or max 20 mins prior. Leftovers will be softer but still tasty – drain excess liquid before re-serving.
- “Can I make this ahead?” Absolutely, but strategize! Chop all veggies and herbs, rinse/dry beans, and make the dressing – store them separately in the fridge. Combine and toss just before serving (max 30 mins ahead for best texture). Undressed components keep well for 1 day.
- “Beans are mushy/blended into the salad!” Gentle tossing is key! Use a wide bowl and lift/fold ingredients with salad spoons or tongs instead of stirring with a spoon. Ensure beans are dry so dressing coats them, not slides off, reducing the urge to overmix.
- “It tastes a bit flat… what now?” Flavor rescue! First, check your seasoning – does it need more salt? Often that’s it. If not, add a tiny pinch more lemon zest or juice for brightness. A splash of red wine vinegar can add depth. A final flourish of fresh herbs or a crack of black pepper works wonders too!
Double Bean Mediterranean Salad
- Total Time: 10–15 min
Description
Craving something fresh, fast, and totally feel-good? This Double Bean Mediterranean Salad is your flavor passport to the sun-drenched coasts of the Med. Born from a kitchen “oops” and perfected over countless lunches, it’s vibrant, zesty, and ready in 10 minutes. Creamy chickpeas, hearty kidney beans, and a confetti of crisp veggies and herbs—this is more than a salad, it’s your edible mood-lifter!
Ingredients
-
1 orange bell pepper, diced
-
1 cucumber, chopped
-
2 ripe tomatoes, diced
-
¼ red onion, thinly sliced (soaked in cold water, optional)
-
1 cup canned chickpeas, drained & rinsed
-
1 cup canned kidney beans, drained & rinsed
-
¼ cup fresh parsley, chopped
-
¼ cup fresh mint, chopped
-
Juice of ½ lemon
-
3 tbsp extra virgin olive oil
-
Sea salt, to taste
Instructions
-
Prep the Base: In a large bowl, combine bell pepper, cucumber, tomatoes, and red onion.
-
Add Beans & Herbs: Gently fold in chickpeas, kidney beans, parsley, and mint.
-
Make Dressing: In a small jar, whisk or shake lemon juice, olive oil, and salt until emulsified.
-
Toss & Serve: Pour dressing over salad. Fold gently to coat. Let sit 15 mins for flavors to meld, if time allows.
Notes
-
Add crumbled feta and olives for a Greek twist.
-
Mix in quinoa or couscous for a heartier bowl.
-
Stir in a spoon of tahini to the dressing for creaminess.
- Prep Time: 10 min
Nutrition
- Calories: 280 cal per serving
- Sugar: No added sugar
- Fiber: 8g
- Protein: 10g
Nourishment in Every Bite (Approximate per serving)
- Calories: ~250
- Protein: 10g (Plant-powered goodness!)
- Fiber: 12g (Keeps you full & happy!)
- Healthy Fats: Primarily from heart-healthy EVOO
- Vitamins & Minerals: Packed with Vitamin C (peppers, tomatoes), Potassium (beans, tomatoes), and antioxidants.
Final Thoughts: More Than a Salad—A Lifestyle
This Double Bean Mediterranean Salad is sunshine on a plate—a reminder that eating well doesn’t mean sacrificing flavor or joy. It’s quick enough for weeknights, elegant enough for guests, and versatile enough to make your own.
Whether you’re craving a light lunch, a potluck showstopper, or a side dish for grilled meats, this salad delivers. And the best part? It gets better as it sits, making leftovers something to look forward to.
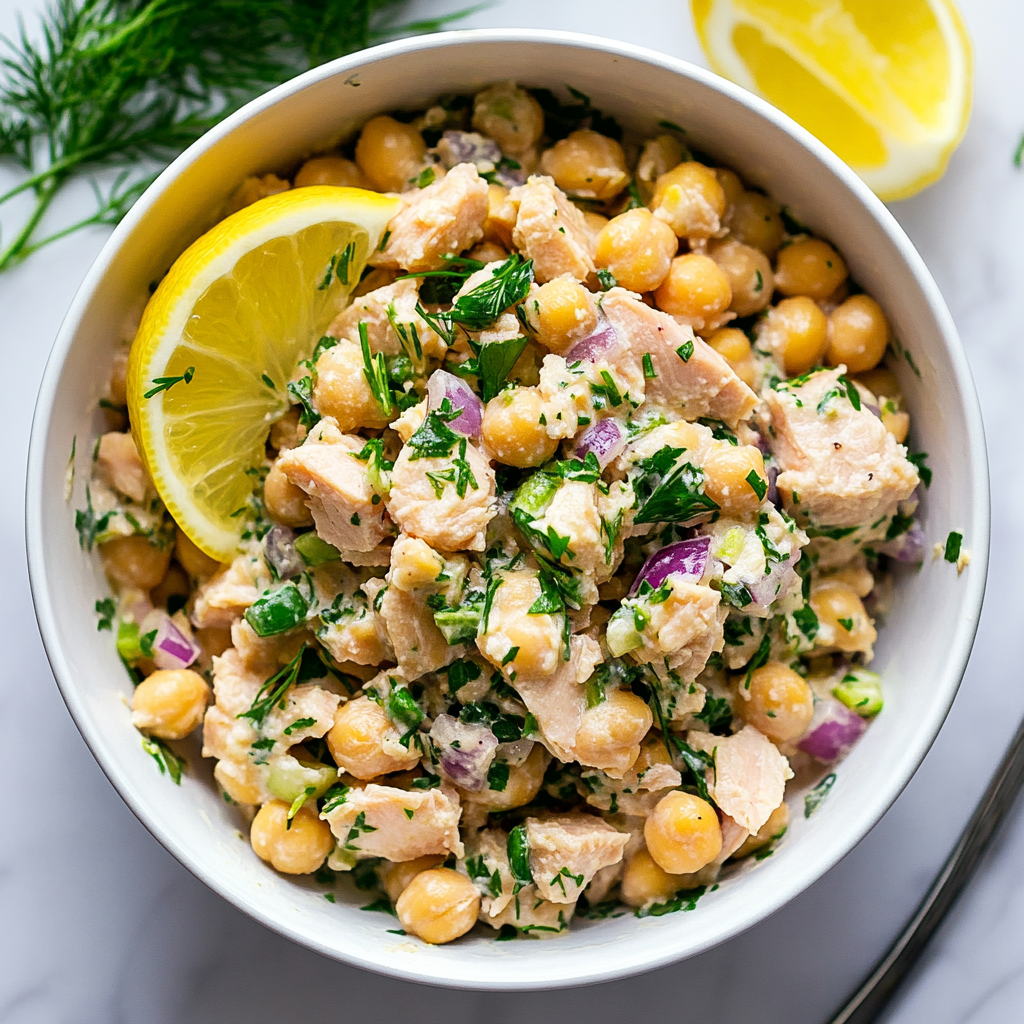
Chickpea Tuna Salad with Dill & Capers
Why This Salad is About to Steal Your Lunchtime Heart
Hey there, kitchen friend! Olivia here, waving from my flour-dusted countertop. Ever have one of those days when you’re ravenous, your fridge is giving you side-eye, and takeout feels like a cop-out? That exact moment is why I created this zippy Chickpea Tuna Salad. Imagine flaky tuna and creamy chickpeas doing a tangy dance with briny capers and fresh dill, all wrapped in a lemony hug. It’s protein-packed but light, satisfying but never stodgy, and comes together faster than you can say “hangry.” Whether you’re packing lunches, hosting a last-minute girls’ brunch, or just need something refreshing after a sweaty workout, this salad is your culinary BFF. No fancy skills required – just a bowl, a fork, and that gorgeous appetite of yours. Let’s turn pantry staples into magic!
The Picnic That Started It All
Picture this: It’s 2018, and I’m frantically rummaging through my Brooklyn kitchen at 6 AM. My bestie Rachel just texted: “Surprise beach picnic! Leaving in an hour!” Cue panic. I had one sad can of tuna, a lonely jar of capers, and half a lemon rolling around like tumbleweed. Then I spotted it – chickpeas, my trusty pantry heroes. I mashed everything together with mayo and a reckless handful of dill from my windowsill (RIP, dill plant). At Rockaway Beach, Rachel took one bite and gasped: “Is this… tuna salad? But BETTER?” We devoured it straight from the tub with salt-and-vinegar chips while waves crashed. That messy, sun-soaked moment birthed this recipe. Now it’s my edible love letter to improvisation – and proof that kitchen “oops” moments can spark pure deliciousness.
Your Flavor Dream Team (Plus Clever Swaps!)
- 2 tbsp mayonnaise or plain Greek yogurt – Creaminess MVP! Greek yogurt adds protein tang; mayo gives classic richness. Vegan? Mash avocado instead!
- 2 tbsp extra virgin olive oil – Liquid gold for lush texture. Cold-pressed is chef’s kiss.
- 1 tbsp fresh lemon juice – Non-negotiable zing! Bottled works in pinch, but fresh makes flavors pop.
- 1 tsp Dijon mustard – Secret depth-builder. Yellow mustard works but dial back to ½ tsp.
- ¼ tsp kosher salt & black pepper – Season in layers! I grind pepper fresh for aromatic punch.
- Few dashes hot sauce (optional) – Sriracha or Tabasco for gentle heat. Trust me, it wakes up the other flavors.
- 1 (15 oz) can chickpeas, drained – Rinse well to reduce sodium. For extra creaminess, peel some skins off (worth the 5 mins!).
- 1 (5 oz) can tuna in water, drained – Sustainably packed in water keeps it light. Oil-packed tuna? Skip the olive oil.
- 3 tbsp finely chopped celery – CRUNCH factor. No celery? Try diced cucumber or jicama.
- 2 tbsp minced red onion – Soak in ice water for 5 mins if raw bite scares you. Shallots work too!
- 2 tbsp fresh dill, finely chopped – Star flavor! Dried dill (1 tsp) in a pinch, but fresh is transformative.
- 1 tbsp chopped capers, green olives, or relish – Briny jewels! Capers are my fave, but chopped cornichons add fun crunch.
Let’s Build Your Flavor Masterpiece (Tiny Hacks Included!)
Step 1: The Zippy Dressing
Grab a medium bowl – no need for fancy equipment! Whisk together mayo/yogurt, olive oil, lemon juice, Dijon, salt, pepper, and hot sauce (if using) until smooth. Chef’s tip: Taste now! Want more tang? Add lemon. More richness? Drizzle in extra olive oil. This dressing should make your tongue tingle with excitement.
Step 2: Chickpea TLC
Add drained chickpeas to the bowl. Use a fork to mash them roughly – we want 50% creamy mash, 50% whole chickpeas for texture nirvana. Hack alert: Press the fork sideways and twist for quick mashing. No blenders needed!
Step 3: The Big Mix
Flake drained tuna into the bowl with your hands (yes, hands!). You’ll catch any sneaky bones and feel the perfect flake size. Add celery, red onion, dill, and capers. Pro move: Fold gently with a spatula to keep everything airy. Overmixing = sad, mushy salad.
Step 4: Marry the Flavors
Pour dressing over your chickpea-tuna mixture. Fold until every bite is coated – think “gentle hug,” not “wrestling match.” Let it sit 5 minutes while you tidy up. Why wait? This lets the dill and lemon mingle and soften the onions. Patience = flavor explosion!
The Texture Alchemy: Why This Salad Works So Well
What makes this salad extraordinary isn’t just the flavors – it’s the symphony of textures playing in every bite. Let’s break down the genius:
1. The Chickpea Factor
When you mash half the chickpeas, they create a creamy base that clings to the tuna like edible glue. The remaining whole chickpeas provide satisfying pops of firmness – like little protein-packed surprises. Pro tip: For ultra-luxurious texture, rub drained chickpeas in a clean kitchen towel to remove some skins before mashing. Those papery skins are the only thing standing between you and next-level creaminess!
2. Tuna Textures 101
Water-packed tuna (our choice here) stays pleasantly flaky rather than mushy. The key? Draining well, then using your fingers to flake it. This creates featherlight shreds that intermingle beautifully with the chickpeas. Oil-packed tuna can work in a pinch, but pat it dry thoroughly or you’ll drown the other flavors.
3. Crunch Cavalry
Celery isn’t just filler – its high water content and rigid cell structure provide hydration and audible crunch that survives mixing. Red onions bring sharper, more aromatic crispness, while capers deliver tiny bursts of brine. For maximum textural drama, keep these elements finely chopped but not minced – we want identifiable bits, not mush.
4. Dressing Dynamics
The mayo/yogurt-olive oil combo is magic: mayo coats ingredients smoothly while olive oil keeps everything loose and glossy. Lemon juice does double duty – its acidity prevents the tuna from tasting fishy while tenderizing the onions slightly. Whisking the dressing separately first ensures every nook gets flavored.
Why this matters: Your mouth perceives texture before flavor. That perfect balance of creamy/mashed/crunchy makes your brain think “this is special” before you even taste the dill and lemon. It’s food science meets culinary art!
Meal Prep Magic: 5 Ways to Repurpose Your Salad
This recipe shines brightest when you think beyond the first meal. Here’s how to give leftovers new life:
1. Breakfast Power Bowl
Scoop salad over Greek yogurt with sliced avocado and everything bagel seasoning. The cool creaminess + briny salad = unexpected perfection. Add a soft-boiled egg if you’re extra hungry!
2. Stuffed Veggie Boats
Hollow out beefsteak tomatoes or bell peppers, fill with salad, and top with toasted panko. Bake at 375°F for 15 minutes until warm – the chickpeas get even creamier.
3. Mediterranean Flatbread
Spread hummus on naan, pile with salad, then add sliced cucumbers and crumbled feta. Broil 2 minutes for warm-crunchy edges.
4. Protein-Packed Pasta
Toss 1 cup salad with 2 oz cooked orzo or shell pasta, extra lemon, and baby spinach. The dressing becomes a light sauce. Serve chilled or room temp.
5. Savory Pancake Filling
Make thin savory pancakes (add herbs to batter). Spread salad inside, roll up, and slice into pinwheels. Perfect for lunchboxes!
Storage Pro Tips:
-
Keep dressing separate if meal prepping >1 day ahead
-
Revive dried-out salad with a splash of olive oil and lemon
-
Freeze individual portions in muffin tins, then pop out and store in bags (thaw overnight in fridge)
Global Flavor Twists: A Culinary Passport
The basic formula travels beautifully across cuisines. Try these international riffs:
1. Nicoise-Inspired
-
Replace dill with basil
-
Add 1/4 cup chopped green beans & 2 tbsp niçoise olives
-
Swap capers for anchovy paste (1/2 tsp in dressing)
-
Serve over butter lettuce with hard-boiled egg halves
2. Middle Eastern
-
Use tahini instead of mayo in dressing
-
Add 1 tsp za’atar and 2 tbsp chopped mint
-
Mix in 1/4 cup chopped roasted red peppers
-
Garnish with sumac and pine nuts
3. Japanese Onigiri Style
-
Replace tuna with 1/2 cup flaked cooked salmon
-
Add 1 tbsp mirin to dressing
-
Mix in 1 tsp toasted sesame seeds
-
Shape into rice balls wrapped in nori
4. Mexican Tostada
-
Add 1 tsp cumin and 1/2 tsp chipotle powder to dressing
-
Replace capers with pickled jalapeños
-
Serve on crispy tostadas with shredded cabbage
-
Top with crema and cilantro
5. Scandinavian
-
Use smoked trout instead of tuna
-
Add 1 tbsp chopped fresh horseradish
-
Replace capers with lingonberry jam (1 tbsp)
-
Serve with dark rye crackers
Each version keeps the core textures while taking your taste buds on vacation!
Plate It Like You Mean It
This salad screams versatility! For a light meal, pile it over peppery arugula with extra lemon squeeze. Sandwich obsessed? Slather it on toasted sourdough with tomato slices and crisp lettuce – the capers cut through the carbs beautifully. Entertaining? Scoop onto endive leaves or cucumber rounds for elegant bites. My guilty pleasure? Giant salt-and-pepper kettle chips as edible spoons! Always finish with a crack of black pepper and extra dill fronds. It’s rustic charm on a plate.
Shake It Up! 5 Tasty Twists
Mediterranean Mood: Swap tuna for ½ cup crumbled feta, add sun-dried tomatoes and oregano.
Spicy Kick: Mix in diced jalapeños and swap capers for pickled banana peppers.
Vegan Vibes: Omit tuna, add 1 cup chopped artichoke hearts and 2 tbsp nutritional yeast.
Apple Crunch: Add ½ diced crisp apple and swap dill for parsley. Perfect with curry powder in dressing!
Protein Power-Up: Fold in 2 chopped hard-boiled eggs or ⅓ cup quinoa for extra staying power.
Olivia’s Real-Kitchen Confessions
This recipe evolved from my “clean out the fridge” experiments! Originally, I used relish instead of capers (my Ohio roots showing), but capers stole the show with their salty punch. Funny story: Once, I mistook tarragon for dill – surprisingly delicious, but my husband still teases me about my “herb blindness.” Over time, I learned two game-changers: 1) Dry your tuna/chickpeas aggressively with paper towels – soggy salad is a crime! 2) Make it ahead – flavors deepen gorgeously overnight. Now, I double the batch every Sunday. It’s survived hiking trips, postpartum nights, and 3am snack attacks. More than a recipe? It’s a culinary security blanket.
Your Burning Questions, Answered!
Can I use fresh tuna?
Absolutely! Bake or pan-sear 6 oz tuna steak until flaky (about 8 mins at 400°F). Let cool before mixing. Texture will be loftier than canned – in a good way!
Why is my salad watery?
You might’ve skipped draining the tuna/chickpeas thoroughly. Fix it: Strain mixture in a sieve, pat dry, then stir in 1 tbsp breadcrumbs or almond flour to absorb moisture.
How long does it keep?
3 days in airtight containers. The lemon acts as a natural preservative! Celery softens over time – if that bugs you, add it fresh before serving.
Can I freeze it?
I don’t recommend it – mayo/yogurt splits when thawed. Chickpeas get grainy. This is a “make-and-munch” star!
Chickpea Tuna Salad with Dill & Capers
- Total Time: 10 min
Description
Say goodbye to sad desk lunches! This bright, briny, protein-packed salad combines creamy chickpeas, flaky tuna, and fresh herbs in a lemony, tangy dressing that’ll wake up your taste buds and your day. Born from a last-minute beach picnic and polished over dozens of weekday cravings, it’s become my ultimate go-to when I need fast flavor with zero fuss. Make it once—you’ll be hooked for life.
Ingredients
-
2 tbsp mayo or plain Greek yogurt
-
2 tbsp olive oil
-
1 tbsp fresh lemon juice
-
1 tsp Dijon mustard
-
¼ tsp kosher salt + black pepper
-
Dash of hot sauce (optional)
-
1 (15 oz) can chickpeas, rinsed and drained
-
1 (5 oz) can tuna in water, drained
-
3 tbsp celery, finely chopped
-
2 tbsp red onion, minced
-
2 tbsp fresh dill, chopped
-
1 tbsp chopped capers or green olives
Instructions
-
Make Dressing: In a bowl, whisk together mayo/yogurt, olive oil, lemon juice, mustard, salt, pepper, and hot sauce.
-
Mash Chickpeas: Add chickpeas and mash about half with a fork.
-
Mix Salad: Flake in tuna, add celery, onion, dill, and capers. Fold in dressing gently.
-
Let Sit: Rest 5 minutes for flavors to mingle. Serve as a salad, sandwich, or dip!
Notes
-
Use avocado for a mayo-free version.
-
Add chopped apple for crunch or jalapeños for heat.
-
Make ahead—flavors deepen overnight.
- Prep Time: 10 min
Nutrition
- Calories: 350 cal per serving
- Fiber: 8g
- Protein: 22g
Quick Nutrition Notes
Prep Time: 10 mins ∙ Total Time: 10 mins ∙ Servings: 2-3
Calories: ~350 per serving ∙ Protein: 22g ∙ Fiber: 8g
Note: Using Greek yogurt reduces calories by 60/serving. Olive oil provides heart-healthy fats!
Final Thoughts: More Than Just a Salad
What started as a beach picnic scramble has become my most requested recipe – and not just because it’s delicious. This salad represents cooking at its best: adaptable, forgiving, and deeply personal. It’s survived my kitchen failures (RIP tarragon-dill confusion) and triumphed at potlucks where it sat next to fancy charcuterie boards.
The real beauty? It meets you where you are. Exhausted new parent? Five-minute protein fix. Aspiring home chef? A blank canvas for global flavors. Planet-conscious eater? Sustainable seafood + plant-based goodness.
So here’s my challenge: Make it once as written, then make it yours. Swap that herb you love, try it with sardines, or fold in last night’s roasted veggies. Like my beach day with Rachel, the best creations often come from happy accidents and a “why not?” spirit. Now go raid your pantry – your new favorite meal is waiting to happen!
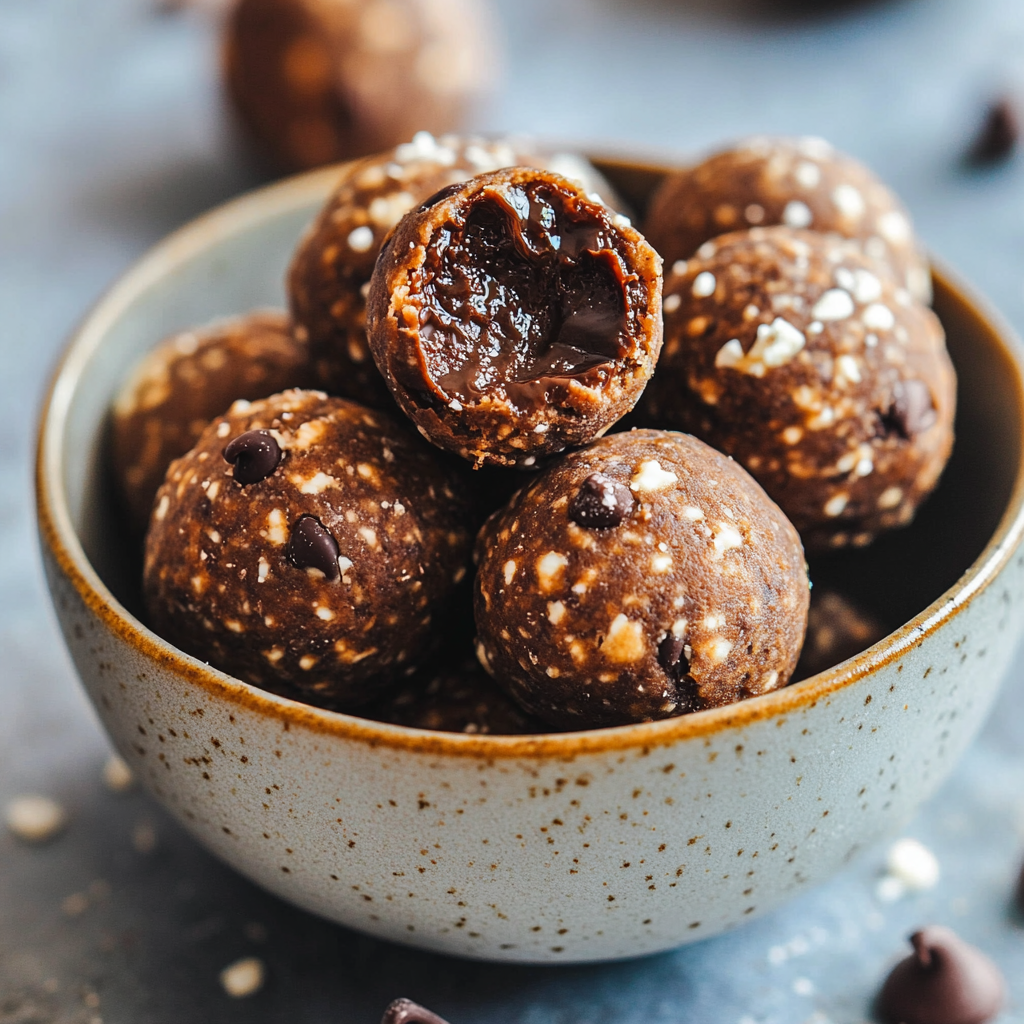
The Ultimate Cottage Cheese Protein Balls
Let’s Make Snacking Feel Like a Hug (with Chocolate!)
Hey there, kitchen friend! Olivia here, apron slightly dusted with cocoa powder and heart full of excitement because today? We’re making pure magic. Imagine if cookie dough and your post-workout shake had the most delicious love child. That’s exactly what these Ultimate Cottage Cheese Protein Balls are. Creamy, dreamy, chocolate-studded bites that taste gloriously indulgent but secretly pack a protein punch thanks to our MVP: humble cottage cheese. Seriously, the first time I whipped these up on a frantic Tuesday (you know those days – hangry, rushed, craving something *good*), I did a literal happy dance in my kitchen. My kids thought I’d lost it, but one bite later, they were dancing too! These little powerhouses are the answer to your snack-time prayers – whether you need a quick breakfast bite, a post-gym refuel, a 3 PM desk rescue, or just a sweet moment of “heck yes, I made this!” They come together in minutes, require zero baking (hallelujah!), and taste like pure, unadulterated joy. Ready to make healthy snacking feel like a decadent treat? Let’s grab our spoons and dive in!
That Time Cottage Cheese Saved Snack Time
Okay, confession time. My love affair with these protein balls started out of sheer desperation. Picture it: It was a rainy Sunday afternoon, the kind perfect for cozy baking… except my oven decided to stage a rebellion and quit. My kids were buzzing with “I’m booooored” energy, morphing rapidly into “I’m staaaaarving” monsters. My usual batch of cookies was a no-go. Panic rising, I scanned the fridge. Eggs? Nope, needed for breakfast. Yogurt? Too runny. Then, my eyes landed on a tub of full-fat cottage cheese – the kind I usually dolloped onto salads. On a whim (and maybe a touch of madness), I threw it into the blender with some maple syrup and vanilla. Blitzed it smooth. Dumped in almond flour, protein powder, and a mountain of chocolate chips. Rolled sticky blobs into balls, drowned them in more melted chocolate (because why not?), and held my breath as the tiny critics took their first bites. Silence. Then, wide eyes. “Mom, these taste like cookie dough! Can we have more?” Victory! That messy, oven-less afternoon birthed our family’s favorite grab-and-go snack. Now, seeing that familiar tub of cottage cheese? It doesn’t whisper “salad topping” anymore. It screams “SNACK MAGIC AWAITS!”
Your Treasure Trove of Deliciousness
Here’s your simple lineup for creamy, dreamy protein bliss! Don’t sweat substitutions – I’ve got your back with options:
- 1 cup full-fat cottage cheese (2-4% milkfat): This is our secret weapon! Full-fat gives incredible creaminess and richness you just don’t get with low-fat. Trust me, it makes the texture like lush cookie dough. Sub Tip: In a pinch, well-drained ricotta can work, but cottage cheese is king here for that perfect tang and protein boost!
- 2 tbsp pure maple syrup: Nature’s liquid gold! Adds just the right touch of caramel sweetness without being cloying. Sub Tip: Honey or agave nectar work beautifully too. If using sugar-free syrup, start with 1 tbsp and adjust to taste.
- 1 tsp pure vanilla extract: Non-negotiable flavor depth! Pure vanilla elevates everything. Skip the imitation stuff – you’ll taste the difference. Chef Insight: A tiny pinch of flaky sea salt here? Chef’s kiss for balancing sweetness.
- 1½ cups almond flour: Our nutty, gluten-free base! It absorbs moisture perfectly and gives a lovely tender bite. Sub Tip: MUST use heat-treated all-purpose flour if swapping (microwave for 1-2 minutes, stir, cool) to kill any potential bacteria since we’re not baking. Oat flour (gluten-free if needed) also works but yields a denser ball.
- ¼ cup vanilla protein powder: The protein punch! Vanilla complements the other flavors seamlessly. Whey or plant-based both work. Chef Insight: Avoid overly sweetened powders; they can make the balls too sugary. Unflavored works too, just bump up the vanilla extract to 1.5 tsp.
- 1½ cups chocolate chips, divided: Chocolate joy! We fold some in for bursts of melty goodness and melt the rest for that irresistible shell. Semi-sweet is my go-to, but dark or milk work! Pro Tip: Mini chips distribute even better throughout the dough!
- 1 tsp coconut oil: The chocolate’s best friend! Just a teaspoon makes the melted chocolate super smooth, glossy, and perfect for dipping or drizzling. Sub Tip: Any neutral oil (like avocado) works, but coconut adds a hint of flavor.
Let’s Roll Up Our Sleeves (and Make Some Balls!)
Don’t worry, this is the fun part – minimal effort, maximum reward! Grab your blender, a bowl, and let’s get messy:
- Blend the Base Until Silky Smooth: “Goodbye, curds!” Plop the cottage cheese, maple syrup, and vanilla extract into your blender or food processor. Blitz it on high for 30-60 seconds, stopping to scrape down the sides once or twice. You want it completely smooth – no little cottage cheese lumps in sight! This step is crucial for that luscious cookie dough texture. Chef Hack: If your blender struggles, add just 1 tsp of milk (any kind) to get things moving.
- Mix the Dreamy Dough: “Hello, thickness!” Pour that creamy blend into a medium mixing bowl. Add the almond flour and protein powder. Grab a sturdy spatula and start stirring! It’ll seem wet at first, but keep mixing. Within a minute or so, you’ll have a thick, slightly sticky dough that holds together when pressed. Pro Tip: If it feels too wet (can happen with different flours/protein powders), add an extra tbsp of almond flour at a time until workable. Too dry? A tiny splash of milk.
- Fold in the Chocolate Happiness: “Pocket treasures!” Add ½ cup of those glorious chocolate chips to the bowl. Gently fold them in with your spatula until they’re evenly distributed. Don’t overmix! We want distinct little bursts of chocolate, not a homogenous brown dough. Resist eating the dough by the spoonful… mostly. Chef Hack: Toss the chocolate chips in ½ tsp of the almond flour before folding – helps prevent them all sinking to the bottom!
- Chill Out (The Dough, Not You… Yet!): “Patience, grasshopper!” Pop the bowl of dough into the fridge for 10-15 minutes. This firms it up just enough, making rolling SO much easier and less sticky. No-Skip Tip: Trying to roll warm dough is like trying to herd cats covered in honey. Just chill it!
- Roll into Perfect Little Balls: “Get your hands dirty!” Line a baking sheet with parchment paper. Scoop out dough using a small cookie scoop (about 1 tbsp size) or a spoon. Roll quickly between clean, slightly damp palms into smooth balls. Place them on the parchment. Size Matters: Aim for golf-ball size or slightly smaller – they’re rich! Damp hands prevent major sticking.
- Melt the Chocolate Magic: “Double boiler or microwave? You choose!” Put the remaining 1 cup chocolate chips and the coconut oil in a microwave-safe bowl. Microwave in 30-second bursts, stirring well after each, until just melted and smooth (about 60-90 seconds total). OR use a double boiler: simmer water in a small pot, place a heatproof bowl on top (don’t let bowl touch water), add chips and oil, stir until melted. CRUCIAL TIP: Don’t overheat! Chocolate seizes easily. Remove from heat when *almost* melted – residual heat will finish the job.
- Dip or Drizzle & Set: “The grand finale!” Now for the fun! Using a fork or dipping tool, dunk each ball into the melted chocolate, letting excess drip off. Place back on parchment. OR for a quicker (still gorgeous!) option, drizzle the melted chocolate generously over all the balls with a spoon. Set it & Forget it: Pop the tray back into the fridge for 10-15 minutes, or until the chocolate is beautifully set. Then? DEVOUR!
The Science of Sneaky Nutrition: Why These Work
Let’s talk about why these little powerhouses feel like cheating (but totally aren’t). That cottage cheese? It’s a protein ninja – one cup packs 28 grams of slow-digesting casein protein, keeping you full for hours. But here’s the genius part: Blending it smooth erases any “diet food” texture, letting the creamy richness mimic actual cookie dough. The almond flour adds healthy fats and fiber, while the touch of maple syrup gives just enough sweetness to satisfy cravings without spiking blood sugar.
The Chocolate Factor: Those melty chips aren’t just for joy (though that’s reason enough!). Dark chocolate contains flavonoids that boost mood and heart health. By using mini chips, you distribute chocolatey goodness in every bite without overloading. And that glossy shell? It’s not just pretty – it creates a texture contrast (crisp outside, soft inside) that tricks your brain into thinking it’s eating something truly decadent.
Pro Tip: For extra nutrition, add 1 tbsp ground flaxseed or chia seeds to the dough. You’ll never taste them, but they’ll add omega-3s and a gut-friendly fiber boost.
Kid-Tested, Mom-Approved: The Ultimate Snack Hack
As a mom of two picky eaters, I’ve learned that presentation is everything. Here’s how to make these irresistible to tiny skeptics:
1. The “Cookie Dough” Lie: Never lead with “protein balls.” Call them chocolate chip cookie dough bites – because that’s what they taste like! Let kids “discover” the nutrition later (like when they ask for thirds).
2. DIY Dipping Station: Set up a toppings bar with melted chocolate, sprinkles, crushed pretzels, or coconut flakes. Let kids dunk their own – they’ll eat anything they’ve decorated.
3. Lunchbox Magic: Skewer balls on popsicle sticks for “protein lollipops,” or flatten slightly into “energy cookies.” Bonus: They won’t crumble like granola bars!
Real Mom Win: These freeze perfectly. I stash dozens in freezer bags for last-minute lunchbox panic. By lunchtime, they’re thawed but still chilled – like a secret ice cream treat.
Beyond Snacking: 5 Unexpected Ways to Use Them
1. Breakfast Parfait Crunch: Crumble over Greek yogurt with berries for a 5-minute “fancy café” meal.
2. Ice Cream Topper: Microwave one for 10 seconds and plop it on vanilla ice cream. The warm-cold contrast is next-level.
3. Salad Booster: Sounds weird, but trust me – crumble over a kale salad with tahini dressing for sweet-salty crunch.
4. Post-Workout Bite: Keep a container in your gym bag with a cold pack. They’re ideal for muscle recovery with their 3:1 carb-to-protein ratio.
5. “Nice Cream” Mix-In: Chop frozen balls into chunks and swirl into banana soft serve for cookie dough bites.
How to Serve Up These Little Gems
Honestly? Shoving one straight into your mouth while standing at the fridge is a perfectly valid serving method (no judgment here!). But if you want to fancy them up a bit, try these ideas: Pile them high on a cute little cake stand or rustic wooden board for parties. Tuck them into mini parchment cupcake liners – adorable and mess-free! Pack a few in a small reusable container for the ultimate on-the-go power snack. They’re fantastic alongside a cup of hot coffee for a mid-morning treat, or with a cold glass of almond milk as a post-dinner sweet bite that won’t weigh you down. Feeling extra? Sprinkle a tiny bit of flaky sea salt on top of the wet chocolate coating – sweet, salty, *chef’s kiss*.
Make Them Your Own! Flavor Twists & Swaps
Once you master the base, the flavor playground is wide open! Here are a few favorites:
- Peanut Butter Paradise: Replace 2 tbsp of the maple syrup with 2 tbsp creamy peanut butter (or almond butter!) in the blender stage. Fold in chopped peanuts instead of half the chocolate chips. Dip in dark chocolate for pure bliss.
- Cookie Dough Craze: Add ¼ tsp cinnamon and a pinch of nutmeg to the dry ingredients. Fold in mini chocolate chips *and* 2 tbsp finely chopped toasted pecans or walnuts.
- Tropical Escape: Swap the vanilla protein powder for unflavored or vanilla collagen. Fold in ¼ cup chopped dried mango and ¼ cup toasted coconut flakes (plus extra for rolling!). Dip in white chocolate.
- Berry Burst: Use unflavored protein powder. After blending the base, add 2 tbsp freeze-dried berry powder (like strawberry or raspberry) for vibrant color and flavor. Fold in white chocolate chips.
- Double Chocolate Decadence: Use chocolate protein powder instead of vanilla. Fold in dark chocolate chunks. Roll the set balls in unsweetened cocoa powder before dipping/drizzling for an extra intense hit.
From My Messy Apron to Yours
Oh, the evolution of these little balls! That first panicked batch? They were delicious but *definitely* more rustic (read: slightly lumpy and haphazardly dipped!). Over time, I learned the blender is non-negotiable for silky cottage cheese, chilling is your friend, and mini chocolate chips are a game-changer. One hilarious fail involved trying to use oat flour without adjusting the liquid – let’s just say I ended up with protein *spread* instead of balls! Lesson learned. Now, they’re my most requested recipe for potlucks and new mom care packages. I love how versatile they are – sometimes I make a giant batch and freeze half (they thaw perfectly in the fridge overnight). They’ve seen me through marathon baking sessions, chaotic weekday lunches, and countless “I need chocolate NOW” moments. The best part? Watching someone take their first bite, that look of surprise, and hearing, “Wait, there’s *cottage cheese* in here? No way!” Pure kitchen magic, my friend.
Print
The Ultimate Cottage Cheese Protein Balls
- Total Time: 30 min
Description
Need a quick, cozy, feel-good snack that fuels your body and your soul? These cottage cheese protein balls are like cookie dough meets post-workout bliss. Born on a rainy, oven-less day, they’ve become my snack-time MVP—packed with protein, no baking, and loaded with chocolatey joy. Each bite is creamy, chewy, rich, and secretly nourishing. Make them once and you’ll never look at cottage cheese the same again!
Ingredients
-
1 cup full-fat cottage cheese
-
2 tbsp maple syrup (or honey)
-
1 tsp vanilla extract
-
1½ cups almond flour
-
¼ cup vanilla protein powder
-
1½ cups chocolate chips (divided)
-
1 tsp coconut oil
Instructions
-
Blend Base: Blend cottage cheese, maple syrup, and vanilla until smooth.
-
Mix Dough: In a bowl, stir in almond flour and protein powder. Mix until thick and sticky. Fold in ½ cup chocolate chips.
-
Chill: Refrigerate dough for 10–15 mins.
-
Roll Balls: Scoop and roll into 1-tbsp balls. Place on parchment-lined tray.
-
Melt & Coat: Melt remaining chocolate chips with coconut oil. Dip or drizzle over balls.
-
Set & Enjoy: Chill until chocolate sets (~15 mins). Store chilled.
Notes
-
Use mini chips for even chocolate bursts.
-
Add nut butter or coconut for flavor variations.
-
Freeze extras for grab-and-go snacking.
- Prep Time: 15 min + chill
Nutrition
- Calories: 110 cal per serving
- Fat: 8g
- Carbohydrates: 6g
- Protein: 5g
Final Thoughts: Small Bites, Big Joy
These started as a kitchen Hail Mary but became my edible love language – for busy weeks, lunchbox wins, and those “I deserve something good” moments. They’re proof that “healthy” doesn’t mean sacrificing joy, and that the best recipes often come from happy accidents.
Now it’s your turn! Make them, adapt them, and watch people’s eyes light up when they realize cottage cheese can taste like dessert. Because everyone deserves a snack that feels like a hug.
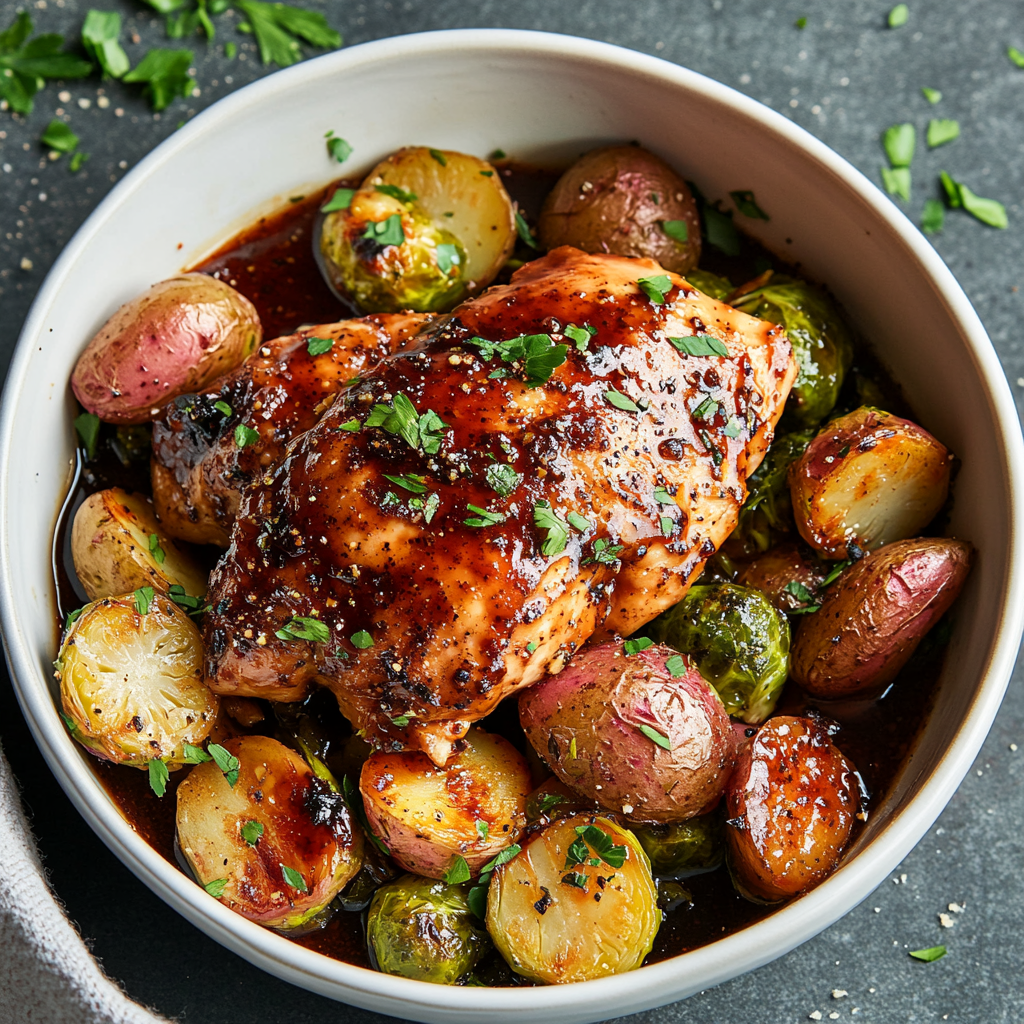
Slow-Cooker Balsamic Chicken
That Magical Moment When Your Kitchen Smells Like Love
Hey there, kitchen friend! Olivia here, apron slightly flour-dusted and heart full of excitement. Raise your hand if you’ve ever stared into your slow cooker like it’s a culinary crystal ball ✋. That magical moment when you lift the lid after hours of gentle simmering? Pure. Gold. Today, we’re diving into my absolute *favorite* weeknight hero: **Slow-Cooker Balsamic Chicken**. Imagine tender chicken bathing in a glossy, sweet-tangy balsamic glaze, nestled with caramelized Brussels sprouts and buttery baby potatoes. It’s like your favorite cozy sweater in food form – comforting, reliable, and effortlessly chic. The best part? You toss everything in before noon, dance through your day, and come home to a dinner that tastes like you fussed for hours. No fancy skills required, just a hungry heart and a trusty slow cooker. Ready to make your house smell like an Italian grandmother’s kitchen? Let’s get simmering!
The Potluck That Started It All
Picture this: It’s 2017, and I’m frantically scrambling for a dish to bring to my friend Maya’s “Autumn Harvest” potluck. My oven decides to stage a rebellion, and I’m down to four ingredients and sheer determination. Enter: this balsamic chicken. I threw chicken thighs (all I had!), a half-bottle of balsamic vinegar, some dried herbs from the back of my pantry, and whatever sad-looking veggies lingered in the crisper drawer into my slow cooker. Four hours later? Magic. The chicken practically melted, the balsamic had transformed into this rich, sticky glaze, and even the wilted carrots tasted heroic. Maya’s cousin followed me around all night asking for the recipe, and my friend’s toddler dunked three bread rolls into the sauce. That’s when I knew – this humble pot of tangy-sweet comfort wasn’t just dinner; it was a memory-maker. Now, it’s my go-to when life feels chaotic but I still want to feed my people something extraordinary.
Your Flavor Toolkit: Simple Ingredients, Big Impact
- 2 cups Brussels sprouts, trimmed and halved – Little cabbage gems! Halving them ensures they soak up that glorious sauce and caramelize beautifully. Swap: Broccoli florets or thick carrot coins work too.
- 2 cups baby red potatoes, halved or quartered – Creamy texture heaven! Their thin skins stay tender. Chef’s Tip: Keep pieces similar-sized for even cooking.
- 4 boneless, skinless chicken breasts – Lean and quick-cooking! Insight: For richer flavor, use bone-in chicken thighs (add 30 mins cook time).
- ¼ cup balsamic vinegar – The STAR! Its tangy sweetness reduces into syrup. Must: Use decent quality – no “balsamic-style” dressing!
- ⅓ cup low-sodium chicken broth – Lifts the sauce without overwhelming salt. Swap: Vegetable broth or even white wine (oh la la!).
- ¼ cup packed brown sugar – Balances the vinegar’s sharpness. Healthier Twist: Maple syrup or honey (use 3 tbsp).
- 2 tbsp grainy Dijon mustard – Adds depth & a subtle kick. No Sub: It emulsifies the sauce – regular yellow mustard works but lacks complexity.
- 1 tsp dried thyme + ½ tsp dried rosemary + ½ tsp dried oregano – The aromatic dream team! Fresh Hack: Use 3x the amount if you have fresh herbs.
- ½ tsp crushed red pepper flakes – Gentle warmth. Omit if sensitive, but it’s magic!
- 2 cloves garlic, minced – Non-negotiable flavor booster! Use pre-minced for speed.
- Kosher salt and freshly ground black pepper, to taste – Season at every step!
- Fresh parsley, chopped (for garnish) – That pop of green freshness! Basil or chives rock too.
Let’s Build Flavor, Layer by Layer (It’s Easier Than IKEA Furniture!)
- Layer the Veggie Foundation: Dump those halved Brussels sprouts and potatoes right into the slow cooker insert. Chef’s Hack: Toss them with 1 tbsp olive oil, salt, and pepper first! This jumpstarts caramelization and prevents sogginess. Spread them evenly – they’re your flavor throne!
- Chicken Crown: Pat chicken breasts DRY (crucial for browning later!). Season generously on both sides with salt and pepper. Nestle them gently on top of the veggies, like they’re lounging on a veggie pool float. Pro Tip: Don’t overlap! Crowding = uneven cooking.
- Whisk That Liquid Gold: Grab a bowl and whisk together the balsamic vinegar, broth, brown sugar, Dijon, all the dried herbs, red pepper flakes, and minced garlic until the sugar dissolves and it looks like a gorgeous, speckled potion. Insider Secret: Taste it! Too sharp? Add 1 tsp more sugar. Too sweet? A splash more vinegar.
- The Big Pour: Slowly drizzle that beautiful sauce over the chicken and veggies. Aim to coat the chicken evenly – this is where the magic marinade happens! Watch: Don’t stir! We want the chicken resting *on* the veggies to cook perfectly.
- Low & Slow is the Way to Go: Pop the lid on snugly! Cook on LOW for 6-7 hours or HIGH for 3-4 hours. Game-Changer Tip: If using breasts, check at 5.5 hours on low (or 3 on high). They’re done at 165°F internally and should shred easily with a fork. Overcooked breasts get dry! Thighs are more forgiving.
- The Grand Reveal & Garnish: Carefully lift the lid (steam blast warning!). The smell? Divine. Use tongs to place chicken and veggies on plates or a platter. Sauciness Check: If the sauce seems thin, pour it into a saucepan and simmer for 5-10 mins to thicken. Drizzle generously over everything. Finish with a vibrant shower of fresh parsley!
The Science Behind the Magic: Why This Recipe Works
Ever wonder why this slow-cooker balsamic chicken turns out so irresistibly tender and flavorful? It’s not just luck—it’s science! Let’s break down why this method works so well and how each ingredient plays a role in creating culinary magic.
Low and Slow: The Power of Gentle Heat
Slow cookers are designed to cook food at a low, steady temperature (usually between 170°F and 280°F). This gentle heat breaks down the collagen in chicken (especially thighs) into gelatin, resulting in that melt-in-your-mouth texture. Unlike high-heat methods that can dry out lean meats like chicken breasts, slow cooking keeps them juicy—if timed right. The key? Moisture retention. The sealed lid traps steam, creating a self-basting environment where the chicken essentially poaches in its own juices and the balsamic glaze.
Balsamic Vinegar: The Flavor Transformer
Balsamic vinegar isn’t just for salads! When simmered for hours, its acidity mellows while its natural sugars caramelize, reducing into a glossy, sweet-tangy syrup. The vinegar also acts as a tenderizer, breaking down proteins slightly for a more succulent bite. Pro tip: Quality matters here. Cheap “balsamic-style” vinegar often contains additives and lacks the depth of the real deal. Look for “Aceto Balsamico di Modena” on the label for authentic flavor.
The Veggie Equation
Brussels sprouts and potatoes are sturdy veggies that hold up to long cooking. Halving the sprouts ensures they absorb the sauce without turning mushy, while the potatoes release starch, subtly thickening the surrounding liquid. The brown sugar in the glaze balances the sprouts’ natural bitterness, creating a harmony of flavors.
Herbs and Umami Boosters
Dried herbs like thyme and rosemary infuse the dish with earthy notes, but their oils release slowly over time, which is why dried herbs often work better than fresh in slow cookers. The Dijon mustard isn’t just for flavor—it’s an emulsifier, helping to blend the vinegar and broth into a cohesive sauce. Garlic? It’s the umami backbone, sweetening as it cooks and deepening the overall savoriness.
Fun Experiment: Try making this recipe once as written, then a second time with these tweaks:
-
Add 1 tbsp tomato paste to the sauce for extra richness.
-
Swap half the balsamic vinegar for red wine vinegar for a fruitier tang.
-
Toss in a Parmesan rind (if you have one) for a salty, nutty undertone.
The Art of Meal Prep: How This Dish Saves Your Week
If weeknight dinners feel like a chaotic scramble, this balsamic chicken is your ticket to sanity. Here’s how to turn it into a meal-prep powerhouse:
Batch Cooking for the Win
Double the recipe! Cooked chicken and veggies store beautifully for 3–4 days in the fridge. The sauce thickens as it cools, making leftovers even more flavorful. Pack into divided containers with quinoa or rice for grab-and-go lunches.
Freezer-Friendly Adaptations
-
Pre-Freeze: Assemble raw chicken, veggies, and sauce in a freezer bag. Squeeze out air, lay flat to freeze, and thaw overnight in the fridge before cooking.
-
Post-Freeze: Cook as directed, then freeze portions in airtight containers. Reheat gently on the stove with a splash of broth to revive the sauce.
Repurposing Leftovers Like a Pro
-
Balsamic Chicken Tacos: Shred the chicken, pile onto tortillas with avocado and pickled onions.
-
Grain Bowl Base: Layer over spinach, farro, and roasted sweet potatoes. Drizzle with extra sauce.
-
Pasta Upgrade: Toss with hot penne, crumbled goat cheese, and a handful of arugula.
Time-Saving Hacks:
-
Use pre-minced garlic and pre-chopped veggies (many grocery stores sell Brussels sprouts halved!).
-
Mix the sauce ingredients the night before and store in a jar.
The Emotional Alchemy of Comfort Food
This dish isn’t just about feeding the body—it’s about nourishing the soul. Here’s why it resonates so deeply:
Nostalgia in Every Bite
The sweet-tangy aroma of balsamic vinegar and herbs triggers memories of family gatherings, holiday feasts, or even that cozy Italian restaurant you loved as a kid. Food psychologist Dr. Brian Wansink found that smell is the sense most tied to emotional recall, which explains why this meal feels like a hug.
The Gift of Effortless Hospitality
Ever had friends drop by unannounced? This dish saves the day. It’s humble enough for a weeknight but elegant enough for company. Serving it says, “I care,” without the stress of last-minute prep.
Mindful Cooking as Therapy
The rhythmic chopping of veggies, the patience of slow cooking—it’s a form of mindfulness. In a world of instant gratification, this recipe teaches the beauty of delayed reward.
A Personal Note from Olivia:
“I’ve served this to grieving friends, new parents, and even my toddler during picky phases. It’s the dish that says, ‘You’re loved,’ without a single word.”
Plating Up: Cozy Elegance in Minutes
This dish begs for simplicity! Scoop a portion of those melt-in-your-mouth potatoes and caramelized Brussels sprouts onto a warm shallow bowl or plate. Top with a glistening chicken breast (or shred it right in the pot for a rustic vibe!). Ladel that luscious balsamic sauce generously over everything – it’s the star! A final sprinkle of fresh parsley adds color and a bright note. Perfect Pairings: Crusty bread for sauce-mopping is mandatory. For a fuller meal, add a simple arugula salad with lemon vinaigrette. It cuts the richness beautifully!
Make It Your Own: Delicious Twists!
This recipe is your culinary playground!
- Mediterranean Sunshine: Swap Brussels for artichoke hearts & cherry tomatoes. Add ¼ cup chopped Kalamata olives and a squeeze of lemon juice before serving.
- Mushroom Lover’s Dream: Replace potatoes with 2 cups thickly sliced cremini mushrooms. Add 1 tsp Worcestershire sauce to the glaze.
- Honey Garlic Bliss: Use honey instead of brown sugar. Add 1 extra minced garlic clove and 1 tsp grated fresh ginger.
- Gluten-Free & Dairy-Free: Already naturally GF/DF! Just ensure your broth and mustard are certified GF.
- Instant Pot Speed Run: Use sauté mode to brown chicken (optional). Add veggies & sauce. Cook on High Pressure for 10 mins. Quick release!
Olivia’s Kitchen Confessions & Evolution
Okay, true story: The VERY first time I made this, I accidentally used *white* vinegar instead of balsamic. YIKES. We’re talking face-puckering sour! My husband (bless him) bravely took one bite and said, “Interesting… very… zingy?” Lesson learned: ALWAYS label pantry bottles! Over the years, this recipe evolved from that pantry-raiding potluck save into my signature “I got you” dish. I started browning the chicken breasts quickly in a skillet before adding them to the slow cooker for extra depth (try it when you have 5 extra mins!). I also learned to hold back *some* sauce for drizzling at the end – it keeps that glossy sheen. The biggest change? Embracing chicken thighs! They stay succulent even if your day runs long. This pot holds a million memories now – from new mom meals to snow-day feasts. It’s forgiving, flexible, and always feels like coming home.
Your Questions, Answered (I’ve Made the Mistakes So You Don’t Have To!)
Q: My sauce is super thin! How do I thicken it?
A: No panic! Pour the sauce into a small saucepan after cooking. Simmer over medium heat for 5-10 minutes. For a bigger boost, whisk in 1 tsp cornstarch mixed with 1 tbsp cold water *first*, then simmer until glossy and thickened.
Q: Can I use frozen Brussels sprouts or potatoes?
A: Tread carefully! Frozen veggies release tons of water. Best Option: Thaw COMPLETELY and pat VERY dry first. Better Option: Stick to fresh for best texture. Frozen potatoes often turn mushy.
Q: My chicken breasts came out dry. Help!
A: Breasts are lean and unforgiving! Two fixes: 1) Timing is KEY: Check early! Remove them *as soon* as they hit 165°F. 2) Try Thighs: Seriously, they’re juicier. If using breasts, try adding ¼ cup extra broth and don’t skip the initial oil toss on the veggies for extra moisture.
Q: Can I prep this ahead?
A: Absolutely! Whisk the sauce and chop veggies (store veggies submerged in water to prevent browning) up to 24 hours ahead. Store separately in the fridge. Dump everything into the slow cooker in the morning. Do NOT put the cold insert straight into the cooker if it’s stoneware! Let it sit out 15 mins first.
Nourishment Notes (Because Feeling Good Matters!)
Per Serving (Approx, based on 4 servings): Calories: ~390 | Protein: 35g | Fat: 14g (Saturated Fat: 3g) | Carbohydrates: 28g | Fiber: 3g | Sugar: 15g (Includes natural sugars) | Sodium: ~450mg (Highly variable based on broth/salt used).
Note: Using chicken thighs increases fat/calories slightly. Using less brown sugar reduces sugar content.
Slow-Cooker Balsamic Chicken
- Total Time: 7 hrs
Description
Imagine walking into your kitchen and being greeted by the mouthwatering aroma of balsamic-glazed chicken, cozy potatoes, and caramelized Brussels sprouts—this is comfort food at its finest, with zero stress. Born from a potluck panic and perfected with love, this dish is weeknight magic you can prep before noon. It’s tender, sweet-tangy, and satisfying—like a warm hug in a bowl.
Ingredients
-
2 cups Brussels sprouts, halved
-
2 cups baby red potatoes, halved
-
4 boneless, skinless chicken breasts (or thighs for juicier results)
-
¼ cup balsamic vinegar
-
⅓ cup low-sodium chicken broth
-
¼ cup brown sugar (or 3 tbsp honey/maple syrup)
-
2 tbsp Dijon mustard
-
1 tsp dried thyme
-
½ tsp each: dried rosemary, oregano
-
½ tsp red pepper flakes (optional)
-
2 cloves garlic, minced
-
Salt & pepper to taste
-
Fresh parsley for garnish
Instructions
-
Layer Veggies: Toss sprouts and potatoes with olive oil, salt, pepper. Spread in slow cooker base.
-
Season Chicken: Pat dry, season both sides, and lay over veggies.
-
Mix & Pour Sauce: Whisk vinegar, broth, sugar, mustard, herbs, garlic. Pour evenly over everything.
-
Cook: Cover and cook on LOW 6–7 hrs or HIGH 3–4 hrs. Chicken is done at 165°F.
-
Serve & Garnish: Let rest 10–15 mins. Plate with sauce drizzled on top. Sprinkle fresh parsley.
Notes
-
Use chicken thighs for more forgiving cook time.
-
Want a thicker sauce? Simmer separately after cooking.
-
Leftovers are dreamy over rice, quinoa, or salad greens.
- Prep Time: 15 min
- Cook Time: 6–7 hrs
Nutrition
- Calories: 390 cal Per Serving
- Fat: 14g
- Carbohydrates: 28g
- Fiber: 3g
- Protein: 35g
There you have it, friend! My beloved Slow-Cooker Balsamic Chicken – the recipe that turns a hectic day into a hug on a plate. I can’t wait to hear how it turns out in YOUR kitchen. Tag me @OliviasCozyKitchen when you make it! Now go forth, set that slow cooker, and claim your well-deserved “dinner hero” status.
With love and a well-used spatula,
Olivia 😊
Final Thoughts: More Than a Recipe
This slow-cooker balsamic chicken is a testament to how simple ingredients, when treated with care, can become something extraordinary. It’s a reminder that the best meals aren’t about perfection—they’re about connection. Whether you’re a busy parent, a kitchen newbie, or a seasoned cook craving comfort, this recipe meets you where you are. So dust off that slow cooker, embrace the mess, and let your kitchen smell like love. Because at the end of the day, that’s what cooking is really about.
Love This Recipe? Save It For Later!
Slow-Cooker Eggplant Parmesan
Your New Favorite Comfort Food Is Just a Slow-Cooker Away!
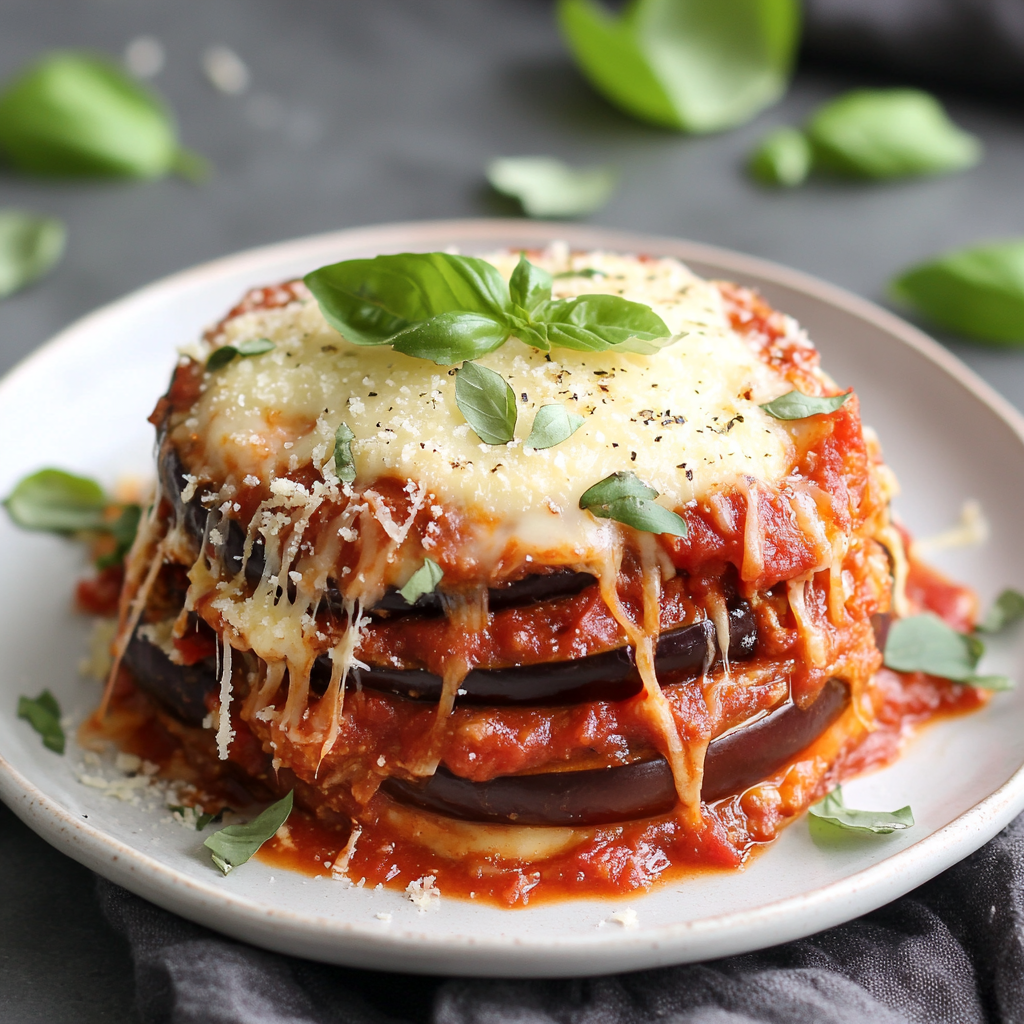
Hey there, kitchen friend! Olivia here, apron dusted with flour and heart full of excitement. Picture this: It’s drizzling outside, your favorite cozy sweater is on, and your kitchen smells like an Italian grandmother’s hug—rich tomato sauce, bubbling cheese, and herbs doing a happy dance in the air. That’s the magic of this Slow-Cooker Eggplant Parmesan! If you’ve ever hesitated to tackle this classic because of fussy frying or oven-watching, let me tell you—this recipe is your game-changer. We’re trading stress for simplicity without sacrificing an ounce of flavor. The slow cooker transforms humble eggplant into melt-in-your-mouth layers, hugged by gooey mozzarella and savory Parmesan, all swimming in a garlicky marinara embrace. Whether you’re feeding a crowd or meal-prepping for the week, this dish whispers, “You’ve got this.” So grab your crockpot—and maybe a glass of wine—because we’re about to make comfort food magic happen!
Rainy Days & the Recipe That Started It All
Let me take you back to last fall. My bestie Sam and I were stranded at my place during a surprise downpour, craving something hearty but dreading grocery runs. We raided my near-empty fridge: two lonely eggplants, leftover marinara, and a sad-looking mozzarella ball. “Emergency eggplant Parm?” Sam joked. Challenge accepted! Normally, I’d bread and fry each slice—but who has energy for that on a lazy rainy day? We threw caution (and tradition) to the wind, layered everything raw into my slow cooker, crossed our fingers, and played board games. Six hours later? The apartment smelled like a Tuscan trattoria, and that first forkful of tender, saucy eggplant had us doing happy dances. Sam still texts me every time it rains: “Eggplant Parm weather?” That’s the beauty of this dish—it’s not just dinner. It’s a memory-maker, a rainy-day hug, proof that magic happens when you embrace kitchen improv!
Gather Your Flavor All-Stars
Here’s what you’ll need:
- 2 large eggplants, sliced into ½” rounds – Pick firm, glossy ones! Salting them first pulls out bitterness and ensures tender (not soggy) layers. No time? Skip salting if your eggplants are fresh and young.
- 2 eggs, beaten – Our “glue” for the crispy crust. Vegan? Swap with ½ cup almond milk + 1 tbsp flaxseed mixed.
- 1 cup panko bread crumbs – Secret to golden crunch! Regular breadcrumbs work but won’t be as crisp. Gluten-free? Use GF panko or crushed rice chex.
- 1 tsp garlic powder + 1 tsp Italian seasoning – Double the cozy! Fresh herbs? Use 1 tbsp chopped basil/oregano. Spice-lover? Add red pepper flakes!
- 2 cups marinara sauce – Homemade = gold, but jarred is totally fine! Opt for one with basil or garlic. Extra saucy? Use 3 cups!
- 12 oz mozzarella, sliced – Fresh slices melt creamier than shredded. Low-moisture works too. No dairy? Try cashew mozzarella!
- ½ cup grated Parmesan – Our salty umami bomb. Vegetarians: check labels for rennet. Vegan? Nutritional yeast + pinch of salt rocks.
- Fresh basil, kosher salt & black pepper – Basil’s sweet finish makes it *chef’s kiss*. Salt layers as you build!
Chef’s Insight: Eggplant is a sponge! Pat slices DRY after salting. This prevents watery layers and helps the panko stick like a dream.
Let’s Build Flavor Heaven, Layer by Layer
Ready for the easiest “fancy” dinner ever? Follow these steps—I’ve packed them with my favorite hacks!
- Prep Eggplant Like a Pro: Arrange slices on a tray, sprinkle both sides with kosher salt, and let them sweat for 20 minutes. (Wipe away beads of moisture with a paper towel—this is KEY for non-soggy eggplant!) No salt? Your dish might taste slightly bitter.
- Breadcrumb Bliss Station: Set up an assembly line: beaten eggs in one shallow bowl, panko mixed with garlic powder and Italian seasoning in another. Dip each dried eggplant slice in egg, let excess drip off, then press firmly into crumbs. Pro tip: Use one hand for wet, one for dry—no breadcrumb fingers!
- Slow-Cooker Layering Magic: Spread ¼ cup marinara on the crockpot bottom (prevents sticking!). Layer breaded eggplant slightly overlapping. Top with mozzarella slices, a sprinkle of Parmesan, and a generous sauce drizzle. Repeat! End with cheese. Hack: Keep top sauce light so crumbs stay crisp!
- Cook Low & Slow: Cover and cook on LOW 5–6 hours or HIGH 2–3 hours. NO PEEKING! Lifting the lid loses heat and steam. Done when eggplant is fork-tender and cheese is bubbly-golden.
- The Golden Rule of Resting: Turn off the cooker. Let it sit uncovered 15–20 minutes. This stops it from becoming eggplant soup—layers will set beautifully!
Why this rocks: Unlike oven versions, the slow cooker steams the eggplant into silky tenderness while the top gets that irresistible crispy-cheesy crown. Minimal effort, maximum wow!
The Science Behind Slow-Cooked Eggplant Parmesan
Ever wonder why slow-cooked eggplant Parmesan tastes so much richer and more tender than the oven-baked version? It all comes down to science—and a little bit of culinary magic.
The Eggplant Transformation
Eggplant is a unique vegetable with a sponge-like texture, meaning it absorbs flavors (and moisture) like a champ. When salted before cooking, the eggplant releases excess water and bitter compounds, ensuring a firmer, sweeter final product. In the slow cooker, the eggplant undergoes a process called pectin breakdown. Unlike high-heat frying or baking, the low-and-slow method gently softens the vegetable’s cell walls, turning it into a melt-in-your-mouth masterpiece without falling apart.
The Cheese Chemistry
Mozzarella and Parmesan play different but equally important roles. Mozzarella contains casein proteins that stretch when melted, creating that iconic cheese pull. Parmesan, on the other hand, is rich in glutamates, which enhance umami depth. The slow cooker’s moist environment prevents cheese from drying out, unlike oven baking, where cheese can sometimes turn rubbery or overly browned.
The Sauce Secret
Marinara sauce in a slow cooker reduces slowly, concentrating flavors without burning. The acidity from the tomatoes balances the richness of the cheese, while the gentle heat allows garlic and herbs to infuse evenly. Unlike stovetop simmering, where sauces can scorch, the slow cooker ensures a perfectly balanced, velvety texture.
Pro Tip: For an even deeper flavor, stir a teaspoon of balsamic vinegar into your marinara before layering—it amplifies the sauce’s natural sweetness!
The Global Roots of Eggplant Parmesan (And Its Delicious Cousins)
Eggplant Parmesan might feel quintessentially Italian, but its origins—and variations—span continents. Let’s take a tasty trip around the world!
Italy: Parmigiana di Melanzane
The classic version hails from Southern Italy, where eggplants thrive in the Mediterranean climate. Traditional recipes involve frying the eggplant slices before baking, but our slow-cooker method skips the mess while keeping the soul of the dish intact. Fun fact: The name “Parmigiana” likely comes from Parmesan cheese, not the city of Parma!
Greece: Moussaka
Greece’s answer to eggplant Parmesan is moussaka, a layered casserole with eggplant, spiced ground lamb, and a creamy béchamel topping. While richer than our vegetarian version, the concept of slow-cooked, layered eggplant is universal.
Middle East: Baba Ganoush & Eggplant Fatteh
Though not cheesy, Middle Eastern cuisine celebrates eggplant in smoky dips like baba ganoush and layered dishes like fatteh, where roasted eggplant is paired with yogurt and crispy pita. A sprinkle of pomegranate molasses adds a tangy twist we might borrow for our next slow-cooker experiment!
Asia: Sichuan Eggplant & Japanese Nasu Dengaku
In China, Sichuan eggplant is stir-fried with garlic and chili for a spicy kick, while Japan’s nasu dengaku features miso-glazed roasted eggplant. Neither uses cheese, but both prove eggplant’s versatility.
Why This Matters: Understanding these global variations can inspire your own remixes—try adding harissa paste for North African heat or coconut milk for a Thai-inspired creamy twist!
The Psychology of Comfort Food (Why This Dish Feels Like a Hug)
Why does a bite of slow-cooker eggplant Parmesan feel so deeply satisfying? It’s not just flavor—it’s psychology.
Nostalgia & Memory
Comfort foods often trigger emotional memories. Maybe it reminds you of a family Sunday dinner or a cozy date night. The slow cooker’s aroma—garlic, herbs, and bubbling cheese—floods the brain with dopamine, the “feel-good” chemical. Unlike fast meals, the long cooking time builds anticipation, making the first bite even more rewarding.
Texture Therapy
Food scientists say the perfect comfort dish balances creamy, crispy, and chewy—exactly what this recipe delivers. The soft eggplant, crunchy panko, and stretchy cheese create a sensory symphony that feels indulgent yet wholesome.
The Effort vs. Reward Factor
Unlike fussy recipes that leave you exhausted, this dish is low-effort but high-reward. The slow cooker does the work, freeing you to relax. That mental break—paired with a delicious result—makes it a stress-relieving meal in every sense.
Fun Fact: Studies show that sharing comfort food (like a crockpot of eggplant Parmesan) strengthens social bonds. So invite friends over and let the good vibes simmer!
Serving: Where Comfort Meets Style
Slide a spatula under those layers and lift out a generous portion—it should hold its shape but ooze cheese invitingly. Plate it beside a zesty arugula salad (tossed with lemon vinaigrette to cut the richness) or garlic-rubbed toast. Garnish with a flourish of fresh basil and extra Parmesan. For family-style fun, place the whole crockpot insert on the table with spoons—let everyone dig into the gooey, saucy goodness straight from the source! Pair with Chianti or sparkling water with lemon. Leftovers? They’ll taste even better tomorrow.
Shake It Up! 5 Delicious Twists
This recipe loves a remix! Try these crowd-pleasing spins:
- Meat Lover’s: Brown ½ lb Italian sausage or ground beef, layer it with the eggplant.
- Vegan Delight: Use flax “eggs,” vegan mozzarella, and nutritional yeast instead of Parmesan.
- Zucchini Hybrid: Replace 1 eggplant with sliced zucchini for a garden-fresh twist.
- Spicy Arrabbiata: Swap marinara for arrabbiata sauce and add sliced pepperoni between layers.
- Gluten-Free Crisp: Use GF panko or almond flour mixed with 2 tbsp nutritional yeast.
Olivia’s Extra Pinch of Love
This recipe was born from a “kitchen sink” moment, but it’s evolved into my most-requested dish! Early tests were… adventurous. Once, I forgot to salt the eggplant—it turned into a flavorful puddle. Another time, I over-sauced and learned: less is more! Now, I sometimes add thin roasted red pepper strips between layers for sweetness. Funny story: My dog, Basil (yes, named after the herb!), once stole an entire slice cooling on the counter. He’s now my official “taste tester” (from the floor!). The beauty? This dish forgives and adapts. Made it your way? Tag me—I wanna see your cheesy masterpieces!
Your Questions, Answered!
Q: Can I skip salting the eggplant?
A: You can, but I don’t recommend it! Salting draws out excess moisture and bitterness. If short on time, salt just 10 minutes and pat EXTRA dry.
Q: Why panko? Can I use regular breadcrumbs?
A: Panko stays crispier in the slow cooker’s steam! Regular crumbs work but may soften. For crunch, toast them with 1 tbsp olive oil first.
Q: Mine turned out watery! Help?
A: Three culprits: 1) Eggplant not patted dry enough, 2) Too much sauce (stick to 2 cups!), or 3) Didn’t rest after cooking. Next time, add ¼ cup breadcrumbs to sauce to thicken it.
Q: Can I prep this ahead?
A: Absolutely! Bread eggplant slices, layer in cooker (stop before sauce/cheese), and refrigerate overnight. Next day, add sauce/cheese and cook. Add 30 extra minutes if chilled.
Slow-Cooker Eggplant Parmesan
- Total Time: 6 hrs
Description
When a rainy afternoon turns into a craving for cheesy comfort, this slow-cooker eggplant Parmesan is your go-to. Born from fridge-foraging and a dash of laziness, it delivers all the old-school charm—melty mozzarella, garlicky marinara, crispy layers—without breading, frying, or oven babysitting. The slow cooker works its magic while you relax, and the result? Fork-tender, flavor-packed slices layered like a warm hug. One bite and you’ll understand why it’s become my ultimate rainy-day ritual.
Ingredients
-
2 large eggplants, sliced ½” thick
-
2 eggs, beaten (or ½ cup almond milk + 1 tbsp flax for vegan)
-
1 cup panko breadcrumbs
-
1 tsp garlic powder
-
1 tsp Italian seasoning
-
2 cups marinara sauce
-
12 oz mozzarella, sliced
-
½ cup grated Parmesan (or nutritional yeast for vegan)
-
Fresh basil, salt & pepper to taste
Instructions
-
Prep Eggplant: Salt slices, let sit 20 mins, then pat dry.
-
Bread: Dip in egg, coat with seasoned panko.
-
Layer in Slow Cooker: Start with marinara, then eggplant, mozzarella, Parmesan. Repeat, ending with cheese.
-
Cook: LOW 5–6 hrs or HIGH 2–3 hrs. No peeking!
-
Rest: Let sit 15–20 mins to set layers.
Notes
-
For less moisture, salt & dry eggplant well.
-
Gluten-free? Use GF panko or almond flour.
-
Add sausage, zucchini, or red pepper for flavor twists.
-
Serve with salad or garlic toast. Leftovers reheat like a dream!
- Prep Time: 20 min
- Cook Time: 5–6 hrs
Nutrition
- Calories: 310 cal Per Serving
- Fat: 18g
- Carbohydrates: 24g
- Fiber: 6g
- Protein: 14g
Nutritional Per Serving (Approx)
Calories: 310 | Protein: 14g | Fat: 18g | Carbs: 24g | Fiber: 6g | Sugar: 8g
Note: Stats vary based on cheese/sauce brands. For lighter version: use part-skim cheese and less oil!
Final Thoughts: More Than Just a Meal
This slow-cooker eggplant Parmesan isn’t just dinner—it’s a celebration of simplicity, global flavors, and emotional nourishment. Whether you’re a busy parent, a kitchen newbie, or an adventurous cook, it adapts to your needs while delivering restaurant-worthy taste.
So next time it rains, or you need a pick-me-up, remember: Your slow cooker is a time machine (to nonna’s kitchen), a passport (to Italy and beyond), and a therapy session (with cheese). Now, go forth and layer with confidence!
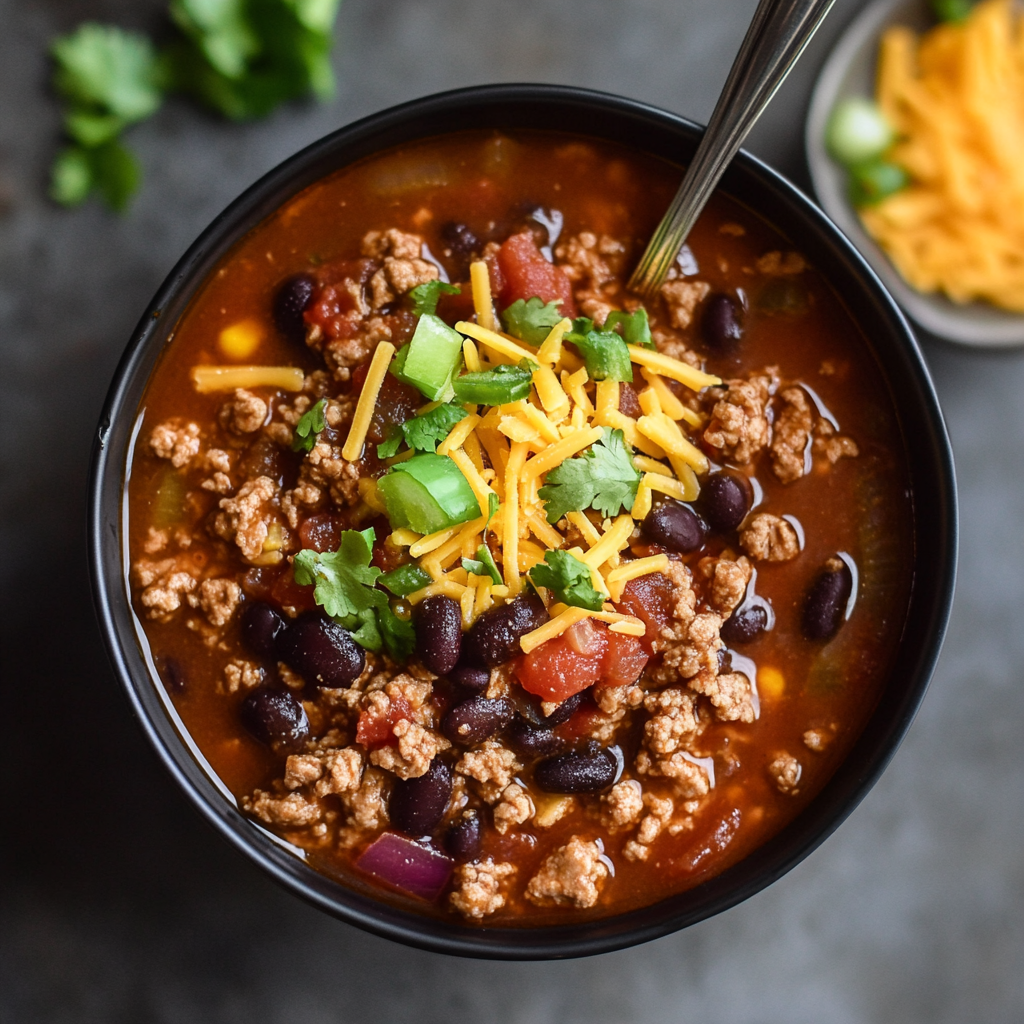
Slow-Cooker Turkey Chili
Slow-Cooker Turkey Chili: Your New Favorite Cozy Bowl
Hey there, kitchen friend! Olivia here, waving from my perpetually flour-dusted countertop. Can you smell that? It’s the intoxicating aroma of spices dancing with tomatoes, the promise of warmth hugging your senses – yep, we’re diving into the glorious world of Slow-Cooker Turkey Chili. If chilly evenings, game-day gatherings, or just needing a hug-in-a-bowl sound like your kind of vibe, you’ve landed in the right spot. This isn’t just chili; it’s your ticket to effortless, soul-soothing magic. Imagine coming home after a long day to a kitchen smelling like a seasoned chef (spoiler: it’s just your trusty slow cooker doing the heavy lifting!). Lean ground turkey makes it feel light yet satisfying, while beans and veggies pack every spoonful with heartiness. Forget slaving over a stove – this recipe is all about tossing ingredients together and letting time weave its flavor magic. Whether you’re feeding a hungry crowd, meal-prepping like a boss, or curling up with a book, this chili is your culinary security blanket. Ready to make your kitchen smell like a cozy dream? Let’s get simmering!
That One Football Sunday & The Chili That Stole the Show
Picture this: It’s a crisp autumn Sunday. My living room is buzzing with friends draped in team jerseys, the TV’s blaring, and… disaster strikes. My planned appetizer fell FLAT. Panic mode? Totally. Then I spotted ground turkey in the fridge and canned goods in the pantry. With zero time for fuss, I threw everything into my slow cooker like a kitchen Hail Mary. Hours later, that humble pot transformed into a bubbling, fragrant masterpiece. The crowd went WILD. Jerseys were forgotten! Suddenly, everyone was huddled around the crockpot, swapping stories between spoonfuls. My friend Mark (a die-hard “beef chili only” guy) sheepishly asked for thirds. That’s when I knew: this accidental turkey chili was special. It wasn’t just about saving game day; it became our tradition. Now, every first chilly snap? My family chants, “Make the football chili!” It’s proof that the best memories often simmer in unplanned moments – and a reminder that even kitchen “oops” moments can score touchdowns.
Your Flavor-Packed Lineup: Ingredients & Smart Swaps
- 1 tbsp neutral oil (like avocado or grapeseed) – Chef’s tip: This prevents sticking without overpowering. Swap: Olive oil works too!
- 1 red onion, finely chopped – Why red? Sweeter & prettier! No onions? Use 1 tsp onion powder.
- 1 green bell pepper, chopped – Adds fresh crunch. Feeling colorful? Toss in red or yellow bells!
- 1½ lbs ground turkey – Lean protein hero! Insight: 93% lean keeps it juicy. Too lean? It dries out.
- 2 cloves garlic, minced – Flavor foundation! Shortcut? ½ tsp garlic powder.
- 2 tbsp tomato paste – Secret umami depth! Chef’s hack: Sizzle it with turkey for 1 min first – it caramelizes beautifully.
- 1 (28 oz) can chopped tomatoes – Use juice & all! Fire-roasted = smoky upgrade.
- 1 (15 oz) can black beans, rinsed – Creamy texture. Allergic? Swap pinto beans.
- 1 (15 oz) can kidney beans, rinsed – Classic chili bite. Ran out? Double up on black beans.
- 1½ cups low-sodium chicken broth – Controls saltiness. Vegetarian? Use veggie broth.
- 2 tsp chili powder – Warmth without burn. Spice lover? Add ¼ tsp cayenne!
- 1 tsp each: ground cumin, dried oregano – Earthy + herbal notes. Fresh oregano? Use 1 tbsp chopped.
- Kosher salt and black pepper, to taste – Season in layers! Pro tip: Salt at the end to avoid over-salting.
- Shredded cheddar & green onions, for garnish – The happy confetti! Dairy-free? Try avocado or dairy-free cheese.
Let’s Get Cooking: Effortless Steps & Pro Hacks
Step 1: Brown the Turkey (Don’t Skip This!)
Heat oil in a skillet over medium. Toss in onions and peppers – sizzle them for 3-4 mins until they soften and smell AMAZING. Add turkey, breaking it up with your spoon like you’re crumbling cookie dough. Season with a pinch of salt and pepper. Cook until no pink remains (chef’s hack: drain excess fat if your turkey releases lots – keeps chili from being greasy!). This step builds flavor – don’t just dump raw turkey in the slow cooker!
Step 2: The Big Dump & Stir (Yes, It’s That Simple)
Transfer your gorgeous turkey mix to the slow cooker. Now, add garlic, tomato paste, chopped tomatoes (juice too!), rinsed beans, broth, chili powder, cumin, and oregano. Stir like you’re mixing pancake batter – get everything cozy and combined. Pro tip: Drop a bay leaf in now if you have one – remove it before serving!
Step 3: Let Time Work Its Magic (Walk Away!)
Cover that pot! Choose your adventure: LOW for 6-8 hours (my favorite for deeper flavor melding) or HIGH for 3-4 hours (for when hunger strikes fast). Chef’s secret: Give it one gentle stir halfway if you’re home. Resist peeking too much – heat escapes!
Step 4: Taste & Tweak (Your Moment to Shine!)
Uncover after cooking. Breathe in that glory! Taste it. Needs more salt? Pepper? A pinch of sugar to balance acidity? Now’s the time! Insider trick: Stir in 1 tbsp lime juice or apple cider vinegar at the end – it brightens everything!
Step 5: Garnish & Gather!
Ladle into bowls. Top with a snowstorm of cheddar and a confetti of green onions. Hungry yet? Let’s serve!
The Secret to the Perfect Slow-Cooker Texture
One of the biggest challenges with slow-cooker chili is nailing the ideal texture—thick enough to cling to a spoon but not so dense it feels like a bean paste. The magic lies in balancing liquid, protein, and starches. Here’s how to achieve chili perfection every time:
1. The Liquid Ratio
Too much broth = soup. Too little = sludge. For this recipe, 1½ cups of low-sodium broth is the sweet spot, but adjustments may be needed based on your slow cooker’s size (a wider pot evaporates faster). If your chili looks thin after cooking, remove the lid, switch to HIGH, and let it reduce for 30 minutes. Alternatively, stir in a cornstarch slurry (1 tbsp cornstarch + 2 tbsp cold water) for instant thickening.
2. Bean Science
Rinsing beans isn’t just about reducing sodium—it washes away excess starch that can make chili gummy. For extra creaminess, mash a handful of beans against the pot’s side before stirring. This releases natural thickeners without flour or cornstarch.
3. Turkey Tactics
Lean ground turkey (93/7) is ideal—it won’t leave pools of grease like beef, but it can dry out if overcooked. Browning it first (don’t skip this!) locks in moisture. For ultra-tender meat, add a splash of broth to the skillet when browning to infuse flavor.
4. The Low-and-Slow Advantage
High heat can turn veggies mushy and meat rubbery. Cooking on LOW for 6–8 hours lets flavors meld while keeping textures intact. If you’re short on time, HIGH for 3–4 hours works, but add bell peppers halfway through to retain their crunch.
Pro Texture Hack: Stir in 1 tbsp of masa harina (corn flour) during the last 30 minutes. It adds a subtle corn flavor and velvety thickness—a trick borrowed from Texas chili masters.
The Ultimate Chili Flavor Boosters
Great chili is more than the sum of its parts. These undercover ingredients and techniques will elevate your pot from “good” to “can-I-get-the-recipe?”:
1. Umami Bombs
-
Tomato paste: Sizzle it with the turkey until it darkens slightly (called “frying the paste”). This caramelizes sugars, deepening flavor.
-
Fish sauce: Sounds wild, but ½ tsp adds savory depth without tasting fishy. Worcestershire sauce works too.
-
Dried mushrooms: Blitz ¼ oz of porcini into powder and add with spices. Earthy, meaty, and packed with glutamates.
2. Spice Strategy
-
Bloom dried spices (chili powder, cumin) in the turkey fat for 30 seconds before adding liquids. Heat unlocks their oils, intensifying aroma.
-
Fresh vs. dried herbs: Dried oregano stands up to long cooking; stir in fresh cilantro at the end for brightness.
3. Acidity Balance
Canned tomatoes can taste flat. Counteract with:
-
1 tsp brown sugar or honey (cuts acidity subtly).
-
A splash of balsamic vinegar or lime juice at the end (brightens heavy flavors).
4. Smoky Secrets
-
Chipotle in adobo: Add 1 minced pepper + 1 tsp sauce for heat and smoke.
-
Smoked paprika: Swap ½ tsp of chili powder for this for a campfire whisper.
5. The Overnight Trick
Chili tastes best the next day! Cool it, refrigerate overnight, and reheat gently. Flavors marry into something transcendent.
Chili for Every Diet (Swaps & Hacks)
This recipe is a blueprint for customization. Here’s how to adapt it for dietary needs without sacrificing flavor:
1. Vegetarian/Vegan
-
Replace turkey with 1 lb of chopped mushrooms + 1 cup cooked lentils (add lentils with beans).
-
Use veggie broth and a dash of soy sauce for umami.
-
Top with cashew sour cream (blend soaked cashews + lemon juice + water).
2. Keto/Low-Carb
-
Omit beans (or use 1 cup black soybeans, which are low-carb).
-
Bulk up with zucchini, cauliflower rice, or extra peppers.
-
Increase fat: Use 80/20 ground turkey or stir in avocado oil at the end.
3. Gluten-Free
-
Naturally GF! Just ensure broth and spices are certified gluten-free (some brands contain fillers).
4. Instant Pot Adaptation
-
Use Sauté mode for browning turkey/veggies.
-
Add all ingredients, seal, and pressure cook 15 minutes. Quick release.
-
Stir in lime juice before serving.
5. Kid-Friendly
-
Reduce chili powder to 1 tsp and omit cayenne.
-
Let kids top their bowls with cheese, crushed chips, or corn.
Freezer Tip: Portion cooled chili into muffin tins, freeze, then pop out “chili pucks” for single servings. Reheat in a mug!
Serving It Up: Cozy Bowls & Happy Bellies
This chili is a social butterfly! Serve it straight from the slow cooker (keep it on “warm” setting) for gatherings – let guests customize their bowls! For weeknights, ladle into deep bowls with big spoons. Must-have sides? Buttery cornbread for dunking, salty tortilla chips for crunch, or a simple green salad. For next-level cozy, bake a sweet potato, split it open, and smother it with chili and cheese. Leftovers? They’re gold! Spoon over baked potatoes, nachos, or even scrambled eggs. Don’t forget the toppings bar: sour cream, diced avocado, pickled jalapeños, or extra hot sauce!
Mix It Up: Delicious Twists for Every Craving
1. White Bean & Sweet Potato Bliss: Swap kidney/black beans for cannellini beans. Add 1 large diced sweet potato with the broth. Use smoked paprika instead of chili powder. Top with cilantro! (Veggie-friendly if using veg broth & omitting turkey).
2. Spicy Tex-Mex Fiesta: Stir in 1 cup frozen corn and 1 diced jalapeño (seeds removed!) with the beans. Use fire-roasted tomatoes. Garnish with crushed tortilla chips & lime wedges.
3. Pumpkin Powerhouse: Perfect for fall! Add ½ cup pure pumpkin puree with broth. Spice boost: extra ½ tsp cinnamon & pinch of cloves.
4. Instant Pot Speed Run: Use “Sauté” mode for Step 1. Add all ingredients. Pressure cook on HIGH 15 mins. Quick release.
5. Creamy Dream: Stir in ¼ cup cream cheese or full-fat coconut milk during last 30 mins of cooking. Luxuriously smooth!
Olivia’s Kitchen Confessions & Tips
This chili has been my culinary chameleon! Remember that “football Sunday” batch? I totally forgot the tomato paste once. Total facepalm moment. I stirred in 2 tbsp ketchup instead – crisis averted, and honestly? It was still delish! Over time, I learned a few things: 1) Browning the turkey is non-negotiable for flavor depth. 2) Rinsing beans isn’t just busywork – it prevents that weird “canned” taste and reduces sodium. 3) This chili FREEZES like a dream! Portion cooled chili into freezer bags (lay flat to save space). Thaw overnight, reheat gently. 4) My toddler now demands it weekly – I dial back the chili powder for him and add hot sauce to mine. Seeing three generations love one pot? That’s the real magic.
Your Chili Questions, Answered!
Q: Can I use ground beef instead of turkey?
A: Absolutely! Swap in lean ground beef. Drain any excess fat after browning. Flavor will be richer/heavier – perfect if that’s your jam!
Q: My chili looks too watery! Help?
A: No stress! Two fixes: 1) Uncover, turn to HIGH, simmer 30-45 mins to evaporate liquid. 2) Mash ¼ cup beans into paste, stir back in – thickens it beautifully.
Q: Can I add other veggies?
A: YES! This is your canvas. Diced carrots, zucchini, or mushrooms added with the peppers work great. Just chop small! Frozen corn is fab stirred in during last 30 mins.
Q: I only have 5 hours. Will HIGH setting ruin it?
A: Not at all! 4 hours on HIGH is perfect. The beans and turkey will be tender. Flavor might be slightly less melded than an all-day LOW cook, but still delish!

Slow-Cooker Turkey Chili
- Total Time: 8 hrs
Description
Let the slow cooker do the heavy lifting while you kick back and let the aroma of simmering spices, tomatoes, and lean turkey wrap around your home like a warm blanket. This turkey chili is hearty, healthy, and hassle-free—perfect for game day, meal prep, or just curling up with a good book. Born from a last-minute Sunday save, this recipe now kicks off every fall in our house. Bonus: even die-hard beef lovers come back for seconds!
Ingredients
-
1 tbsp neutral oil
-
1 red onion, chopped
-
1 green bell pepper, chopped
-
1½ lbs ground turkey (93% lean ideal)
-
2 cloves garlic, minced
-
2 tbsp tomato paste
-
1 (28 oz) can chopped tomatoes
-
1 (15 oz) can black beans, rinsed
-
1 (15 oz) can kidney beans, rinsed
-
1½ cups low-sodium chicken broth
-
2 tsp chili powder
-
1 tsp cumin
-
1 tsp oregano
-
Salt & pepper to taste
-
Shredded cheddar & green onions (for garnish)
Instructions
-
Sauté Magic: In a skillet, cook onions & peppers in oil for 3–4 mins. Add turkey, break up, cook until browned. Stir in tomato paste for 1 min. Transfer to slow cooker.
-
Build the Flavor: Add garlic, tomatoes, beans, broth, spices. Stir to combine.
-
Slow Simmer: Cook on LOW 6–8 hrs or HIGH 3–4 hrs. Stir halfway if home.
-
Taste & Tweak: Season to taste. Stir in lime juice or vinegar to brighten.
-
Serve: Ladle into bowls. Top with cheese, green onions—or avocado!
Notes
-
Add sweet potato cubes, corn, or zucchini for veggie boost.
-
Use ground beef for a richer version.
-
Creamy variation? Stir in ¼ cup cream cheese at the end.
-
Freezes great—cool first, store flat in bags.
- Prep Time: 15 min
- Cook Time: 6–8 hrs (LOW)
Nutrition
- Calories: 330 cal Per Serving
- Fat: 10g
- Carbohydrates: 28g
- Fiber: 9g
- Protein: 28g
Nutritional Info (Approximate Per Serving)
Servings: 6 | Prep: 15 mins | Cook: 6-8 hrs (Low)
Per Serving: ~330 calories | 28g protein | 10g fat (3g sat) | 28g carbs | 9g fiber | 8g sugar | 680mg sodium*
*Sodium varies based on broth/beans used. Using low-sodium ingredients keeps it heart-healthy!
Final Thoughts: More Than Just a Recipe
This slow-cooker turkey chili is a lesson in flexibility. It’s forgiving (forgot an ingredient? Improvise!), adaptable (swap, tweak, experiment!), and universally comforting. But beyond practicality, it’s a reminder that food is memory. Maybe it’s the chili that fueled your family’s snow day, the potluck dish that made you the office hero, or the steady meal that got you through a tough week.
So take this recipe and make it yours. Add more heat, swap the protein, or throw in that lone sweet potato languishing in your pantry. The best chili isn’t about precision—it’s about the stories simmering in every bite. Now, go forth and ladle out some warmth.
Save This Recipe For Later!
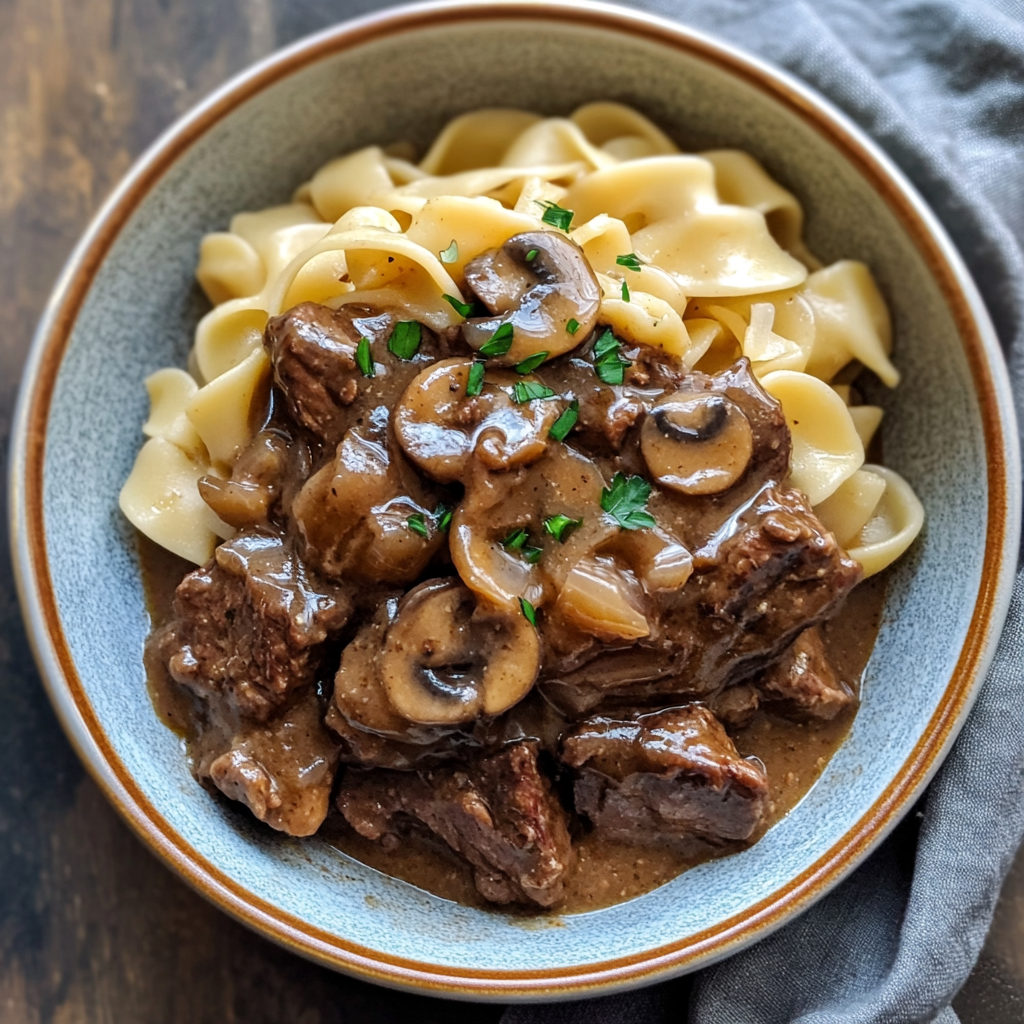
Crockpot Beef Tips & Noodles
Welcome to the Ultimate Comfort Food Experience!
Hey there, kitchen friends! Olivia Bennett here, apron dusted with flour and heart full of excitement. Is there anything more magical than walking into a home that smells like a hug? You know what I mean – that warm, savory aroma that wraps around you like your favorite blanket and whispers, “Dinner’s going to be amazing.” That’s exactly what we’re creating today with my legendary Crockpot Beef Tips & Noodles!
Picture this: melt-in-your-mouth beef swimming in luxurious gravy, clinging to buttery egg noodles like they’re sharing secrets. This dish isn’t just food – it’s a golden ticket back to Grandma’s kitchen, to snowy Sundays when the world felt safer, to those “just-because-I-love-you” dinners that turn ordinary nights into memories. And the best part? Your slow cooker does 95% of the work while you live your life. No fancy techniques, no standing over a hot stove – just pure, uncomplicated comfort that’ll make your crew gather ’round the table like moths to a flame.
Whether you’re a busy parent juggling a million things, a new cook finding your kitchen confidence, or just someone who believes joy is measured in gravy stains, this recipe is your new best friend. So plug in that crockpot, grab your coziest mug of coffee (or wine, no judgment here!), and let’s make magic happen together. Trust me – your future self, coming home to this masterpiece after a long day, will thank you!
Snow Days & Second Helpings: Why This Dish Steals My Heart
Let me take you back to February 2018. A historic blizzard had buried our Connecticut neighborhood under three feet of snow. Power lines danced in the wind like jump ropes, and my then-4-year-old twins were vibrating with cabin fever. In that beautiful chaos, I needed a kitchen hug BADLY. I rummaged through my storm pantry – stew meat, a lone can of mushrooms, some soup mixes – and threw them all into the crockpot with a prayer.
Eight hours later, as we watched the snowplow finally creep down our street, the most incredible smell started wafting through the house. Rich beef, caramelized onions, earthy mushrooms – it was like edible warmth. When I served those tender beef tips over noodles, my normally pickky son licked his bowl clean while my daughter proclaimed, “Mommy, this tastes like a happy snow day!” My husband just silently got up for thirds. In that moment, with snow still piled high outside but hearts full inside, I realized this humble dish wasn’t just dinner – it was a love letter in a bowl. Now every time I make it, I’m transported back to that cozy cocoon of family, warmth, and gravy-stained grins.
Your Flavor Toolkit: Ingredients & Smart Swaps
Don’t stress if your pantry isn’t identical! Cooking is creative – here’s how to rock this your way:
- 1 lb stew meat (Want leftovers? Use 2 lbs! Pro tip: Buy chuck roast and cube it yourself – cheaper and more tender)
- 1 packet Lipton onion soup mix (Our flavor MVP! Swap with ¼ cup dried onions + 1 tsp beef bouillon powder if avoiding MSG)
- 1 packet brown gravy mix (The “cheat code” for depth! For gluten-free, use 2 tbsp cornstarch + extra broth later)
- 1 (10.5 oz) can cream of mushroom soup (Creamy magic! Hate mushrooms? Cream of celery or golden mushroom work beautifully)
- 1 small can mushrooms, drained (Earthy goodness! Skip if anti-fungus, or swap with fresh sautéed creminis)
- 1 can beef broth (Use the soup can to measure! Low-sodium = better control. Bone broth adds collagen richness)
- Egg noodles (The cozy vehicle! No egg noodles? Pappardelle or wide rice noodles rock too)
Chef’s Whisper: For “wow factor” upgrades, toss in 2 smashed garlic cloves or a splash of red wine! Bottled horseradish (1 tbsp) adds a fun kick.
Let’s Get Cooking: Effortless Steps to Beefy Bliss
Step 1: The Dump-and-Dance
Dump everything except noodles into your crockpot – beef, soup mix, gravy mix, mushroom soup, mushrooms, and broth. Now channel your inner mixologist: stir just until combined (no overmixing needed!). Hot Tip: For extra browning points, sear beef in a skillet first! Just 2 mins per side = deeper flavor.
Step 2: The Patience Game
Cover and cook on LOW for 7-8 hours or HIGH for 4-5 hours. Resist peeking! Every lift = 15 mins extra cook time. Chef Hack: If using high, add ¼ cup water – high heat evaporates more liquid.
Step 3: The Fork Test
When your house smells like heaven, test the beef. A fork should slide in like butter! If tough, cook 30 mins more. Pro Move: Skim any fat from the top with a spoon – leaner but still luscious.
Step 4: Noodle Nirvana
30 mins before serving, cook noodles in heavily salted water (tastes like the sea!). Undercook by 1 minute – they’ll keep cooking in the hot gravy. Drain but don’t rinse – starch helps gravy cling!
Step 5: The Grand Finale
Scoop noodles into bowls. Ladle beef and gravy over the top. Watch that glossy gravy waterfall! Presentation Pro Tip: Top with fresh parsley or chives for color pop.
The Science of Slow Cooking: Why This Method Works Magic
Ever wonder why your slow cooker turns budget-friendly stew meat into buttery-soft perfection? Let’s geek out for a minute! Tough cuts like chuck roast are rich in collagen—a protein that’s like nature’s glue. At low temps over hours, collagen melts into gelatin, creating that lush, silky mouthfeel. High heat? It squeezes meat fibers tight, leaving you with chewiness. But low-and-slow? It’s like a spa day for beef, where connective tissues relax into luxury.
The gravy’s transformation is equally cool. As the beef simmers, it releases juices that mingle with the soup mixes and broth, reducing into a concentrated umami bomb. The starch in gravy mix and cream soup acts as a thickener, but unlike a rushed roux, it integrates gradually, avoiding lumps. And those dried onions in the soup mix? They rehydrate slowly, sweetening the entire dish without the bite of raw onions.
Pro Tip: Acid (like a splash of wine or Worcestershire) can accelerate collagen breakdown, but too much too early can toughen meat. Add it in the last hour if experimenting!
From Freezer to Feast: Meal-Prep Like a Pro
This recipe is a meal-prepper’s dream. Here’s how to make it work for you:
1. Freeze Raw for Later:
Combine all ingredients (except noodles) in a gallon freezer bag. Squeeze out air, lay flat to freeze. On cooking day, thaw overnight in the fridge or dump frozen into the crockpot—add 1 extra hour to cook time.
2. Batch Cooking for the Win:
Double the recipe! Cook as directed, then portion without noodles into containers. Freeze for up to 3 months. Reheat in a saucepan with a splash of broth, then pour over freshly cooked noodles.
3. Noodle Know-How:
Cooked noodles turn mushy when frozen. For ready-to-go meals, keep cooked noodles separate. Toss with a bit of butter to prevent sticking, fridge for 3 days or freeze in single servings.
4. Gravy Rescue:
If reheated gravy separates, whisk in a tablespoon of hot water or broth. For extra creaminess, stir in a dollop of sour cream when reheating.
5. Lunchbox Hack:
Pack beef tips in a thermos with a side of noodles for a hot school or office lunch. Add a freezer pack to keep noodles fresh until mealtime.
Beyond the Bowl: Creative Leftover Makeovers
Got leftovers? Don’t just reheat—reinvent!
1. Beef Tip Shepherd’s Pie:
Mix leftover beef and gravy with peas and carrots. Top with mashed potatoes (instant works!), bake at 375°F until bubbly (20 mins). Broil for a golden crust.
2. Stroganoff Grilled Cheese:
Butter bread, layer with shredded cheese, cold beef tips, and a smear of sour cream. Grill until crispy. Dip in extra gravy—next-level decadence!
3. Breakfast Hash:
Sauté diced potatoes until crispy. Add chopped beef tips, fry until heated through. Top with a fried egg and a drizzle of gravy.
4. Gravy Poutine:
Pour hot beef tips and gravy over fries. Add cheese curds (or shredded mozzarella) and broil until melty.
5. “Pot Roast” Tacos:
Shred leftover beef, warm with a splash of broth. Serve in tortillas with pickled onions, cilantro, and a squeeze of lime.
Serving Up the Cozy
This dish shines brightest family-style! Pile noodles in a big rustic bowl, top with beef tips, and let everyone serve themselves. Pass crusty bread for gravy-mopping emergencies! For portioned elegance, twist noodles into nests with tongs, crown with beef, and drizzle extra gravy. Perfect Pairings: Simple steamed green beans or roasted carrots balance the richness. And seriously – don’t skip the bread basket. That gravy is liquid gold!
Make It Your Own: Delicious Twists
- Mushroom Lover’s Dream: Swap cream of mushroom for cream of wild mushroom soup + add 1 cup exotic mushrooms
- Spicy Cowboy Style: Stir in 1 diced chipotle pepper + 1 tsp cumin with broth. Top with pickled jalapeños!
- Gluten-Free Comfort: Use GF gravy mix + cream of celery soup. Serve over rice or GF egg noodles
- Veggie Boost: Add 1 cup frozen peas & carrots in last 30 mins of cooking
- Ultra Creamy: Stir in ½ cup sour cream 10 mins before serving – stroganoff vibes!
Olivia’s Kitchen Confessions
This recipe has evolved from my “college survival meal” to a family staple! Early versions used just soup mix and water – edible but sad. Adding gravy mix was a GAME CHANGER. One hilarious fail: I once accidentally used onion dip mix instead of soup mix! We ate strangely tangy beef tips that night… and ordered pizza. Lesson learned!
Over the years, I’ve discovered secrets: Freezes like a dream! Portion leftovers before adding noodles. Better next day? Absolutely! Gravy thickens into velvet. My biggest joy? Hearing from readers who made this for sick friends or new parents – it’s become a “food hug” for so many. That makes my sappy cook heart burst!
Your Questions, Answered!
Q: Can I use fresh mushrooms instead of canned?
A: YES! Sauté 8 oz sliced creminis in butter first. Drain excess liquid before adding to crockpot. Fresh shrooms release water, so reduce broth by ¼ cup.
Q: Help! My gravy is too thin!
A: No panic! Mix 1 tbsp cornstarch + 2 tbsp cold water. Stir into crockpot, cover, cook 15 mins on HIGH. Too thick? Add splashes of broth until perfect.
Q: Can I cook this on HIGH the whole time?
A: You can, but LOW is BFF for tenderness. High heat = tougher meat. If rushed, do HIGH for first hour then LOW for 3-4 hours. Still fork-tender!
Q: Why are my beef tips tough?
A: Two culprits: 1) Not enough time – cheap cuts need slow love! 2) Cutting meat too small. 1.5-inch cubes won’t shrink into oblivion.
Crockpot Beef Tips & Noodles
- Total Time: 8 hrs
Description
There’s comfort food… and then there’s this. On a snowy day in 2018, I threw pantry basics into my slow cooker and prayed for warmth. What came out? Tender beef tips in savory gravy, clinging to buttery noodles like childhood memories. My picky twins licked their bowls, my husband went back for thirds, and I found a new family favorite. This dish is more than a meal—it’s nostalgia, warmth, and love in a bowl. Ready to create your own cozy moment?
Ingredients
-
1 lb stew meat (or 2 lbs for leftovers)
-
1 packet onion soup mix
-
1 packet brown gravy mix
-
1 can cream of mushroom soup
-
1 can beef broth
-
1 can mushrooms (or sautéed fresh)
-
Egg noodles (or wide pasta of choice)
Instructions
-
Load Crockpot: Add beef, soup mix, gravy mix, mushroom soup, mushrooms, and broth. Stir to combine.
-
Cook Low & Slow: Cover and cook on LOW for 7–8 hrs (or HIGH for 4–5 hrs). No peeking!
-
Test & Skim: When beef is fork-tender, skim any fat from the top.
-
Boil Noodles: Cook egg noodles just shy of done. Drain—don’t rinse!
-
Serve: Plate noodles, top with beef and gravy, garnish with parsley or chives if you’re feeling fancy.
Notes
-
Want richness? Add ½ cup sour cream before serving.
-
Gluten-free? Use GF soup/gravy mixes and serve over rice.
-
Freeze leftovers without noodles—makes the gravy even silkier next time!
- Prep Time: 10 min
- Cook Time: 7–8 hrs (LOW)
Nutrition
- Calories: 420 cal Per Serving
- Fat: 16g
- Carbohydrates: 32g
- Fiber: 2g
- Protein: 30g
Nutritional Info (Per Serving – Serves 6)
Calories: 420 | Protein: 30g | Fat: 16g | Carbs: 32g | Fiber: 2g | Sugar: 3g
Note: Using low-sodium broth/soups reduces sodium by 30%. Add veggies to boost fiber!
Final Thoughts: More Than a Meal
This Crockpot Beef Tips & Noodles recipe isn’t just about feeding hungry bellies—it’s about nourishing souls. It’s the dish you make when a friend needs comfort, when snow days call for pajama dinners, or when you just crave a taste of home without the fuss.
What I love most is how it adapts to your story. Maybe you’ll add a dash of hot sauce for spice, or stir in kale for a health boost. Perhaps it’ll become your Thanksgiving Eve tradition or your go-to new-baby gift for neighbors. However you make it yours, remember: the best recipes aren’t just measured in cups and teaspoons, but in the memories they create.
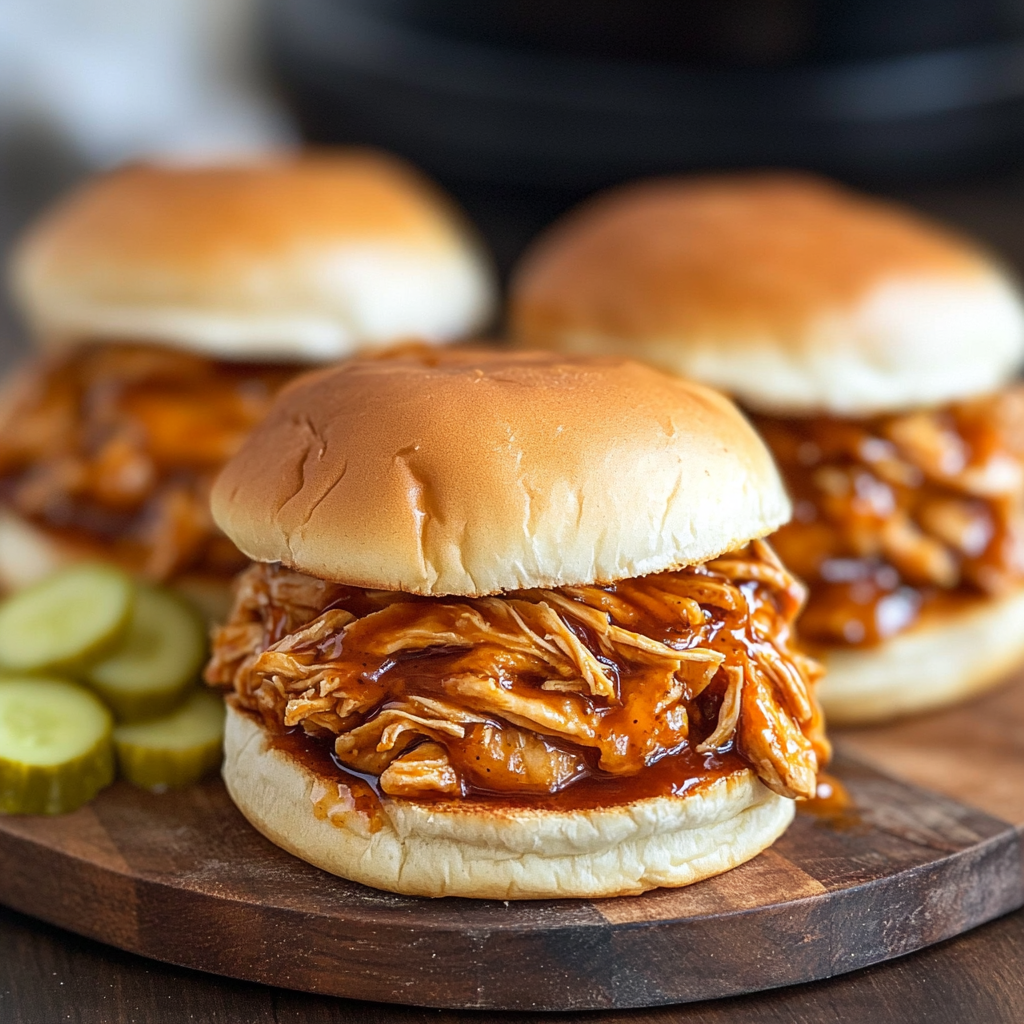
Crockpot Hot Honey Chicken Sandwich
Why This Sandwich Will Steal Your Heart (And Maybe Your Appetite!)
Hey there, friend! Olivia Bennett here, apron dusted with flour and a ridiculous grin on my face because today? We’re making magic. Picture this: tender shreds of chicken swimming in a sticky, sweet-and-fiery glaze that clings like your favorite cozy sweater. The kind of meal that makes your kitchen smell like a bustling barbecue joint on a summer afternoon. That’s our Crockpot Hot Honey Chicken Sandwich—your new secret weapon for “wow” moments without the work.
I live for recipes like this—the ones that turn humble ingredients into pure joy. Maybe you’re juggling a crazy schedule, maybe you’re just craving comfort, or maybe you need a crowd-pleaser for game night. This sandwich answers all those prayers. The slow cooker does 95% of the heavy lifting while you sip wine (or chase toddlers!). And that hot honey sauce? It’s pure alchemy: spicy enough to tingle your lips, sweet enough to keep you coming back, and so finger-licking good you’ll debate skipping the bun entirely (don’t—it’s the best sauce vehicle!). Trust me, the first time I tested this, my neighbor texted: “What smells AMAZING?” before it even hit the 2-hour mark. Ready to make some memories? Let’s dive in.
The Day My Slow Cooker Became a Social Director
Let me take you back to last winter. My besties were coming over for our annual “Ugly Sweater Soup Night”—except my soup was… well, let’s call it “experimental” and leave it at that. Panic mode! I rummaged through my pantry, tossed chicken breasts into the crockpot with honey, spices, and a hopeful splash of vinegar. Four hours later? That chicken transformed into molten gold. The scent—smoky, sweet, and spicy—drifted down the hallway. Suddenly, everyone abandoned their wine glasses and crowded into my tiny kitchen, buns in hand like eager seagulls. We ended up piling the chicken onto rolls right out of the pot, laughing as honey dripped down our wrists. My “failed” soup night became legendary Hot Honey Sandwich Night. Now it’s requested more than my famous chocolate cake. Moral? Sometimes kitchen “oops” moments taste like destiny.
Your Flavor Toolkit (Plus Clever Swaps!)
- 2 lbs boneless, skinless chicken breasts – The lean canvas for our flavor masterpiece! Trim excess fat so the sauce clings beautifully. Chef’s hack: Swap in thighs for extra juiciness—they’re forgiving if you accidentally overcook.
- 1 tbsp cayenne pepper – Our heat MVP! It infuses the chicken with a slow burn. Spice-wary? Halve it and add ½ tsp chili flakes later for adjustable kick.
- 1 tsp smoked paprika – The “campfire whisper” that adds depth. No smoked paprika? Use regular plus a tiny drop of liquid smoke.
- 1 tsp garlic salt – Double-duty flavor! Salt + garlic in one shake. Allergic? Use ¾ tsp sea salt + ½ tsp garlic powder.
- 2 tbsp light brown sugar – Balances heat with caramel notes. Out of brown sugar? White sugar + ½ tsp molasses works in a pinch!
- 1 cup honey – Nature’s liquid gold! It thickens into glossy magic. Vegan? Maple syrup works, but sauce will be thinner.
- 1 tbsp white vinegar – Our tangy secret weapon! Cuts sweetness and tenderizes. Substitute: Apple cider vinegar adds fruity flair.
- ¼ cup unsalted butter – Richness that makes the sauce velvety. Dairy-free? Coconut oil adds a subtle tropical hint.
- 8 hamburger buns – Soft, squishy brioche is my fave for sauce-soaking. Gluten-free? Toasted GF buns hold up great!
- Sliced pickles (optional) – The crunchy, briny contrast that makes flavors POP. Try bread-and-butters for sweet heat!
- Non-stick cooking spray – Essential! Honey loves to caramelize onto crockpot walls. Save your scrubbing energy for wine glasses.
Pro insight: Quality honey matters here! Local or raw honey adds floral notes that elevate the whole dish. And don’t stress exact measurements—this recipe is wonderfully forgiving.
Let’s Build Your Flavor Bomb (No Fancy Skills Required!)
Step 1: Prep Slow Cooker – Spray that crockpot liner generously! I learned the hard way when I skipped this once—spent 20 minutes chiseling honey lava off ceramic. Chef’s hack: Use a slow cooker liner for zero cleanup (I won’t judge!).
Step 2: Add Chicken & Seasonings – Nestle chicken breasts in like they’re napping. Sprinkle evenly with cayenne, smoked paprika, garlic salt, and brown sugar. Why layer spices first? It creates a flavor crust as they cook! For extra depth, rub spices directly onto chicken 10 minutes ahead.
Step 3: Pour Sauce – Drizzle honey over chicken like you’re Jackson Pollock. Splash vinegar around the edges (it deglazes any stuck spices!). Dot with butter pieces—they’ll melt into silky richness. Pro move: Warm honey first for easier pouring!
Step 4: Cook Low & Slow – Cover and walk away! LOW for 4-5 hours is IDEAL for fall-apart tenderness. If you’re rushed, HIGH for 2.5-3 hours works, but check at 2 hours—chicken dries easier on high. No peeking! Lifting the lid adds 15 mins cooking time.
Step 5: Shred & Mix – My favorite part! Grab two forks and shred chicken right in the pot—it’ll soak up sauce like a sponge. Stir well. Texture tip: For chunkier sandwiches, shred roughly; for sloppy-joe vibes, go fine. If sauce seems thin, stir uncovered on HIGH for 15 mins to thicken.
Step 6: Serve – Toast buns lightly (trust me, it prevents sogginess!). Pile chicken high—this is no dainty tea sandwich. Top with pickles for that crunch contrast. Extra love: Brush bun tops with melted butter mixed with a pinch of cayenne!
The Science Behind the Perfect Slow-Cooked Chicken
If you’ve ever wondered why slow-cooked chicken turns out so tender while oven-baked chicken can sometimes be dry, let’s break it down. The secret lies in collagen breakdown and low, consistent heat.
Chicken breasts, while lean, contain connective tissue that can be tough if cooked too quickly. However, when simmered in a slow cooker at around 200°F (93°C), the collagen gradually converts into gelatin—a process that takes hours. This gelatin keeps the meat moist and gives it that irresistible “fall-apart” texture.
But here’s where the hot honey sauce plays a genius role:
-
Honey’s acidity (pH around 3.9) helps tenderize the meat further by breaking down proteins.
-
Butter and sugar create a glossy, sticky glaze that clings to every strand of chicken.
-
Vinegar isn’t just for tang—it balances the sweetness and prevents the sauce from becoming cloying.
Pro Tip: If you’re short on time, try a 90-minute braise in the oven (covered at 300°F) instead. But for maximum flavor infusion, the slow cooker wins every time.
The Psychology of Comfort Food (Why This Sandwich Feels Like a Hug)
Ever notice how some foods just feel right? This hot honey chicken sandwich isn’t just delicious—it hits emotional triggers that make it unforgettable.
-
Sweet + Spicy = Addictive
-
Our brains are wired to crave sugar (quick energy!) and capsaicin (the compound in chili peppers that releases endorphins). Together, they create a “hedonic hunger”—the kind that makes you reach for another bite even when you’re full.
-
-
Aroma Therapy
-
The smell of honey caramelizing with smoked paprika and garlic activates nostalgia centers in the brain. For many, it evokes memories of summer BBQs or family picnics.
-
-
Textural Bliss
-
The contrast of tender chicken, crispy bun, and crunchy pickles satisfies our innate desire for variety in mouthfeel. Studies show that meals with multiple textures are perceived as more enjoyable.
-
Fun Fact: In a 2023 study, participants rated “messy” sandwiches (like this drippy, saucy creation) as 23% more satisfying than neat ones. So embrace the napkins!
Hosting Hacks—How to Turn This Sandwich into a Party Legend
Want to impress a crowd without breaking a sweat? Here’s how to scale this recipe for game day, potlucks, or even a cozy wedding shower:
1. The Buffet Bar Setup
-
Double the recipe (4 lbs chicken fits in a 6-quart crockpot).
-
Offer mini slider buns for easy grazing.
-
Set out toppings in bowls:
-
Pickled red onions (quick recipe: 1 cup vinegar, 1 tbsp sugar, 1 sliced onion, 10 mins).
-
Blue cheese crumbles (for a gourmet twist).
-
Avocado slices (cooling contrast).
-
2. Make-Ahead Magic
-
Cook the chicken 1 day in advance—the flavors deepen overnight! Reheat on LOW with ¼ cup broth.
-
Freeze individual portions in muffin tins (perfect for quick lunches).
3. Drink Pairings That Shine
-
Spicy Honey Margarita (tequila + lime + hot honey rim).
-
Ginger Beer Float (vanilla ice cream + spicy ginger beer).
Pro Move: Label the slow cooker with a chalkboard sign: “Danger: Addictive Chicken Inside.” Guaranteed conversation starter!
Plating Like a Pro (aka: Get That Drip!)
Embrace the mess—these sandwiches are meant to be gloriously juicy! Serve on parchment paper or rustic boards with extra napkins (bless paper towels). For sides? Keep it simple: classic potato chips add saltiness, or go fresh with apple-cabbage slaw (that crunch cuts richness!). At parties, I set up a “sandwich bar” with pickles, extra hot honey, and blue cheese crumbles for DIY fun. Pair with ice-cold lager or sparkling lemonade to tame the heat. Remember: the best accessory is a big, satisfied smile!
Shake It Up! 5 Tasty Twists
1. BBQ Fusion – Swap ½ cup honey for smoky BBQ sauce + 1 tbsp bourbon. Hello, backyard cookout vibes!
2. Asian Zing – Replace vinegar with rice vinegar + add 1 tbsp grated ginger and 2 tsp sriracha. Serve with quick-pickled cucumbers.
3. Buffalo Honey – Love heat? Add ¼ cup Frank’s RedHot with the honey. Top with blue cheese slaw instead of pickles.
4. Pulled Pork Swap – Use pork shoulder (cook 7-8 hrs on LOW). Double the spices—pork loves bold flavors!
5. Veggie Power – Cauliflower florets or jackfruit (drained!) for chicken. Cook 3 hrs on LOW. Boost umami with 1 tbsp soy sauce.
Confessions from My Cozy Chaos Kitchen
This recipe started as a happy accident! Early versions used jarred hot honey… until I realized homemade lets you CONTROL the heat-sweet balance. Now? I keep a squeeze bottle of my blend in the fridge for everything (pizza! ice cream!!). Funny story: Once I mistook cayenne for paprika—cue fire-alarm sandwiches! We salvaged it with extra honey and yogurt on top. Lesson? Mistakes make the best stories (and new recipes!). Over time, I’ve added vinegar for brightness and butter for lushness—it’s evolved like a good friendship. Pro tip: Make extra sauce! It’s killer on roasted carrots or as a chicken wing glaze. Now go make memories—and tag me when your crew licks their plates!
Your Questions, My Answers (Let’s Troubleshoot!)
Q: My sauce is too thin! Help!
A: No sweat! Remove chicken with a slotted spoon. Simmer sauce on HIGH uncovered for 20-30 mins. Stir in 1 tsp cornstarch mixed with 1 tbsp cold water to thicken faster. Mix chicken back in—crisis averted!
Q: Can I freeze leftovers?
A: Absolutely! Freeze cooled chicken (sauce included) for up to 3 months. Thaw overnight in fridge. Reheat gently on stove with a splash of broth to refresh. Avoid microwaving—it can make chicken rubbery.
Q: How do I reduce spice for kids?
A: Two tricks: 1) Use ½ tsp cayenne + ½ tsp sweet paprika instead. 2) Stir in 2 tbsp ketchup or applesauce after cooking—their sweetness tames heat instantly. Serve with cooling sides like ranch dip!
Q: Why did my chicken dry out?
A: Likely overcooked on HIGH. Chicken breasts are lean—stick to LOW for juiciness. If using thighs, you’ve got more wiggle room. Still dry? Shred chicken, then mix in ¼ cup broth or apple juice!

Crockpot Hot Honey Chicken Sandwich
- Total Time: 5 hrs
Description
They say accidents make the best stories, and this one started with a failed soup and a slow cooker full of hope. I tossed chicken, honey, spices, and a prayer into my crockpot—hours later, my kitchen smelled like a southern smokehouse. The result? A juicy, sweet-and-spicy masterpiece. We ditched the soup, made sandwiches, and turned my living room into the happiest mess ever. If you want a no-fuss crowd-pleaser that feels like a warm hug with a little kick, this sandwich is your new signature move.
Ingredients
-
2 lbs boneless chicken breasts (or thighs)
-
1 tbsp cayenne pepper (adjust to taste)
-
1 tsp smoked paprika
-
1 tsp garlic salt
-
2 tbsp light brown sugar
-
1 cup honey
-
1 tbsp white vinegar
-
¼ cup unsalted butter
-
8 hamburger buns (brioche preferred)
-
Sliced pickles (optional)
-
Non-stick spray
Instructions
-
Prep Crockpot: Spray well or use a liner.
-
Season Chicken: Add chicken, sprinkle with spices and brown sugar.
-
Pour Sauce: Drizzle honey, vinegar, and dot with butter.
-
Cook: LOW for 4–5 hrs (or HIGH 2.5–3 hrs). No peeking!
-
Shred & Stir: Shred in-pot, stir well. Sauce too thin? Cook uncovered on HIGH for 15 mins.
-
Assemble: Toast buns, pile high with chicken, add pickles if desired.
Notes
-
Use thighs for juicier results.
-
Reduce cayenne for milder heat.
-
Try BBQ, Buffalo, or Asian-style sauce swaps.
-
Freeze leftovers with sauce for up to 3 months.
- Prep Time: 10 min
- Cook Time: 4–5 hrs
Nutrition
- Calories: 430 cal Per Sandwich
- Fat: 15g
- Carbohydrates: 40g
- Fiber: 2g
- Protein: 30g
Nutrition Per Serving (Because Balance is Delicious!)
Per sandwich (includes bun, no pickles): ~430 calories | 30g protein | 15g fat (6g saturated) | 40g carbs (2g fiber, 28g sugar) | 560mg sodium. Note: Values vary based on bun size and exact ingredients. For lower sugar: reduce honey to ¾ cup + add 2 tbsp sugar-free maple syrup.
Final Thoughts: More Than Just a Sandwich
This hot honey chicken sandwich isn’t just a meal—it’s a mood booster, a crowd uniter, and a testament to how simple ingredients can create joy. Whether you’re cooking for one (hello, leftovers!) or feeding a hungry squad, it’s a reminder that the best recipes don’t need to be complicated.
So next time life feels chaotic, let your slow cooker do the work. As the honey bubbles and the spices mingle, take a deep breath. That’s the smell of easy wins and happy bellies. Now go forth, drizzle recklessly, and let those napkins pile up. You’ve earned it.
Share the Yum!
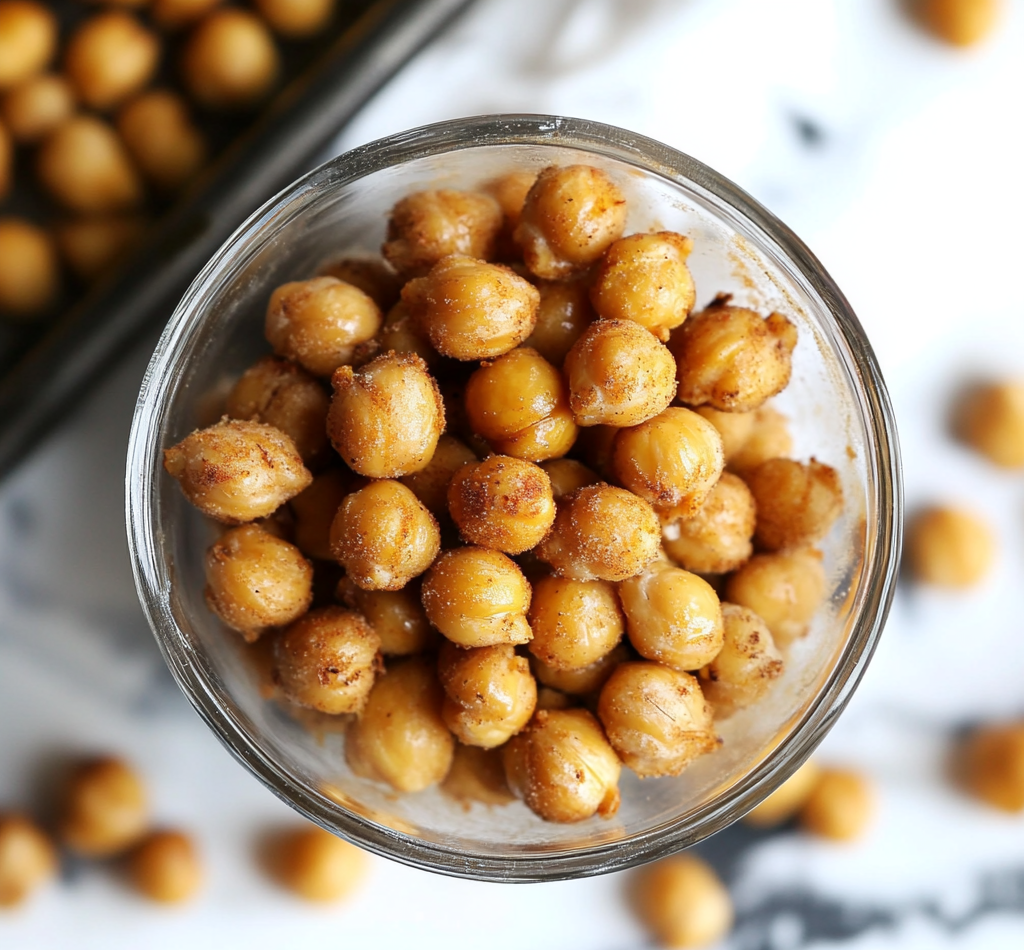
Crispy Roasted Chickpeas
Why Crispy Roasted Chickpeas Are My Kitchen’s MVP
Hey there, snack adventurer! Olivia here, apron dusted with chickpea crumbs and heart full of kitchen joy. If your soul does a happy dance when you hear that satisfying CRUNCH from a perfectly roasted bite, you’ve found your people. Let’s talk about crispy roasted chickpeas – those humble little legumes that transform into golden, crave-worthy nuggets. I first stumbled upon these while desperately rummaging for a post-yoga snack that wasn’t sad carrot sticks. What emerged from my oven that day? Pure magic. These aren’t just chickpeas; they’re flavor canvases waiting for your culinary brushstrokes! Whether you’re Netflix-bingeing, hosting book club, or jazzing up salads, these gems deliver crunch, protein, and endless customization. Best part? You need zero chef skills – just a baking sheet and that beautiful appetite of yours. So tie on your comfiest apron (the one with questionable stains – no judgment here!), and let’s turn pantry staples into snack-time stardom!
The Chickpea Epiphany: A Kitchen Accident Gone Right
Picture this: It’s 2018, and I’m hosting my niece’s disastrously messy “Rainbow Unicorn” birthday party. I’d ambitiously planned rainbow hummus platters but accidentally tripled the chickpeas. With sticky-fingered toddlers invading in 20 minutes, I frantically tossed the extra legumes with olive oil and smoked paprika, shoving them in the oven while mopping glitter glue off the dog. When the timer dinged? Chaos paused. Those shimmering, crispy orbs became the surprise rockstars! Kids abandoned cake for them (seriously!), and my sister-in-law whispered, “You’re hiding chef wizardry, right?” That moment cemented two truths: 1) Chickpeas are culinary shape-shifters, and 2) The best recipes often emerge from beautiful kitchen messes. Now, every time that roasty aroma fills my kitchen, I grin remembering tiny unicorn horns bobbing toward the snack bowl like crunchy-seeking missiles. Magic!
Your Crunch Toolkit: Simple Ingredients, Big Flavor
- 1½ cups cooked chickpeas (drained & rinsed): Canned works beautifully! Chef’s hack: Save the aquafaba (that starchy liquid) for vegan meringues! For extra crisp, peel chickpeas – just pinch ’em – but I rarely bother.
- Extra-virgin olive oil (for drizzling): The glue for spices! Use avocado oil for higher heat tolerance. Substitution: Melted coconut oil adds a subtle sweetness for curry flavors.
- Sea salt (to taste): Flaky salt creates delightful bursts. Insider tip: Salt AFTER roasting if using finer salt to prevent moisture pull.
- Spices (optional but glorious!): This is your playground! Why I love ’em: Paprika adds warmth, curry powder brings exotic flair, cumin earthiness. Ranch powder? Heck yes! Start with 1 tsp per batch.
Why these work: Chickpeas are protein-packed sponges. Oil conducts heat for crispness while carrying spice flavors deep into every nook. Simple ingredients, infinite personality!
Crispy Alchemy: Your Foolproof Roadmap
- Preheat Oven to 400°F (200°C): Crank it up! High heat = maximum crunch. Chef’s secret: Place a baking sheet IN the oven while preheating – a hot start boosts crispiness!
- Dry Chickpeas RELENTLESSLY: Pat soaked/canned chickpeas bone-dry with paper towels or a clean kitchen cloth. Game-changer: Let them air-dry 10 mins post-rinsing. Wet chickpeas = sad, chewy results. Channel your inner chickpea desiccant!
- Season & Toss Like You Mean It: On your preheated baking sheet (careful, it’s hot!), toss chickpeas with oil, salt, and spices. Pro move: Use your hands! Massage oil/spices in to coat every crevice. Single-layer them – no pile-ups!
- Roast & Shake Party: Bake 30-40 mins, shaking pan vigorously every 10 mins. Why shake? Prevents scorching and ensures even browning. Listen for the “maraca sound” – less sizzle, more rattle means they’re drying out! They’re done when golden-brown and shrunken.
- Cool Completely: Transfer chickpeas to a bowl – they’ll stick if cooled on the sheet! Patience pays: They crisp up SIGNIFICANTLY as they cool (about 15 mins). Try not to devour them immediately (hard, I know).
Hack Attack: For insane crunch, roast an extra 5 mins, turn oven OFF, and leave chickpeas inside for 1 hour as it cools. Thank me later!
The Science of Crunch: Why Roasted Chickpeas Work
Ever wonder why roasted chickpeas transform from mushy legumes into crispy little flavor bombs? It’s all about science—delicious, snackable science. Chickpeas are packed with starch and protein, two components that react beautifully to dry heat. When you roast them, the oven’s heat drives out moisture, causing the starches to gelatinize and then harden into that irresistible crunch. The proteins, meanwhile, undergo the Maillard reaction—the same browning process that gives seared steak and toasted bread their deep, savory flavors.
But moisture is the enemy of crispiness. That’s why drying your chickpeas thoroughly before roasting is non-negotiable. Any lingering water turns to steam in the oven, creating a chewy texture instead of a satisfying snap. Even the oil plays a crucial role—it conducts heat evenly, ensuring every chickpea gets uniformly crispy while helping spices cling to the surface.
Temperature is another key factor. Roasting at 400°F (200°C) or higher ensures rapid dehydration, locking in crunch before the chickpeas have a chance to toughen. Lower temps might seem gentler, but they often lead to uneven results—some chickpeas stay soft while others burn. And don’t forget the shake! Stirring them every 10 minutes prevents hot spots and ensures all sides get equal exposure to heat.
For the crunch-obsessed (like me), there’s a pro trick: after roasting, turn off the oven and leave the chickpeas inside as it cools. This slow drying phase removes any last traces of moisture, resulting in an almost glass-like crispness. It’s the difference between “pretty good” and “I-can’t-stop-eating-these” territory.
Beyond Snacking: Creative Uses for Roasted Chickpeas
Sure, eating them straight from the pan is a joy, but roasted chickpeas are culinary multitaskers. Here’s how to take them beyond the snack bowl:
1. Salad Supercharger
Tired of sad, soggy croutons? Toss a handful of roasted chickpeas onto your greens for a protein-packed crunch. They pair perfectly with Mediterranean salads (try lemon-tahini dressing and feta) or hearty grain bowls. My favorite combo? Arugula, roasted sweet potatoes, and cumin-spiced chickpeas drizzled with yogurt sauce.
2. Soup & Stew Topper
Move over, crackers. A sprinkle of crispy chickpeas adds texture to creamy soups like butternut squash or tomato bisque. For a smoky twist, use paprika-roasted chickpeas on top of chili—they hold their crunch longer than you’d expect!
3. Pasta & Risotto Upgrade
Add them to pasta dishes for contrast. Think: garlicky chickpeas on carbonara, or rosemary-infused ones over mushroom risotto. They’re also fantastic in cold pasta salads, replacing croutons or bacon bits.
4. Breakfast Boost
Elevate your morning avocado toast with chili-lime chickpeas, or mix maple-cinnamon roasted chickpeas into yogurt parfaits. They even work as a granola alternative—just crush them slightly for easier spooning.
5. Party Appetizer Hero
Set out bowls of differently seasoned chickpeas (buffalo, ranch, za’atar) alongside nuts and olives for a crowd-pleasing snack mix. Or blend finely crushed chickpeas with cream cheese for a protein-rich dip base.
6. Vegan “Breadcrumbs”
Pulse roasted chickpeas in a food processor for a gluten-free, high-protein breadcrumb substitute. Use them to coat tofu cutlets, top mac and cheese, or add texture to veggie burgers.
The possibilities are endless—once you start experimenting, you’ll find yourself adding them to everything!
The Global Flavors Edition: Seasoning Inspirations from Around the World
Why stick to basic salt when roasted chickpeas can take your taste buds on a world tour? Here are five globally inspired seasoning blends to try:
1. Moroccan Magic
-
1 tsp cumin
-
½ tsp smoked paprika
-
½ tsp cinnamon
-
Pinch of cayenne
-
½ tsp brown sugar (optional)
Why it works: Sweet, smoky, and subtly spicy—this blend mimics the flavors of a tagine. Perfect over couscous salads!
2. Indian Street Food Vibes
-
1 tsp chaat masala
-
½ tsp turmeric
-
¼ tsp amchur (dried mango powder)
-
Pinch of asafoetida (hing)
Pro tip: Toss with chopped cilantro and a squeeze of lime post-roast for an authentic tang.
3. Japanese Furikake Twist
-
1 tbsp furikake seasoning
-
½ tsp sesame oil (replace olive oil)
-
1 tsp crushed nori flakes
Bonus: Add wasabi powder for heat. These are addictive atop rice bowls.
4. Italian Herb Delight
-
1 tsp dried oregano
-
½ tsp garlic powder
-
½ tsp crushed fennel seeds
-
1 tbsp grated vegan Parmesan (post-roast)
Pair with: Marinara sauce for dipping, or crush over pizza.
5. Caribbean Heat
-
1 tsp jerk seasoning
-
½ tsp allspice
-
½ tsp thyme
-
1 tsp lime zest (add after roasting)
Serve with: Mango salsa or coconut rice for a tropical kick.
Mix and match spices based on what’s in your pantry—the beauty of chickpeas is their versatility. Don’t be afraid to go bold!
Serving Your Crunchy Masterpieces
These aren’t just a solo act! Pile smoky paprika chickpeas into mini bowls for game night – watch them vanish. Craving texture? Toss za’atar-spiced ones over creamy hummus with pomegranate seeds. Salad skeptic? A handful of garlic-rosemary chickpeas transforms greens into a textural adventure! For next-level brunch, crown avocado toast with lime-chili chickpeas. My Tuesday ritual? Eating them straight from the jar while hiding in the pantry. No shame!
Flavor Voyages: 5 Delicious Twists
- Everything Bagel: Toss with 1 tsp everything seasoning + ½ tsp onion powder pre-roast.
- Maple-Cinnamon Crunch: Post-roast, drizzle with 1 tsp maple syrup + ½ tsp cinnamon (toss quickly!).
- Spicy Buffalo: Post-roast, toss with 1 tsp hot sauce + ½ tsp nutritional yeast.
- Vegan “Parmesan”: Add 1 tbsp nutritional yeast + ½ tsp garlic powder pre-roast.
- Oil-Free Option: Skip oil! Use aquafaba + spices. Less crispy but still tasty.
Olivia’s Notebook Scribbles
Over the years, my chickpea journey got wild. Once, I “helped” my cat bat a cumin-scented batch off the counter – my floor became a spicy treasure hunt! I also learned: chickpeas roasted alongside chopped bacon? LIFE-CHANGING (though decidedly less vegan). My biggest evolution? Embracing imperfections. Some batches stay crunchier days than others – it’s okay! Store them loosely covered (no airtight containers – they’ll steam!) at room temp. If they soften, revive them in a 350°F oven for 5 minutes. Remember, cooking’s about joy, not perfection. Now go make crunchy magic!
Your Crispy Chickpea Conundrums Solved!
Q: Why are my chickpeas chewy, not crispy?
A: The Usual Suspects: 1) Not dry enough pre-roasting (PAT THEM LIKE THEY OWE YOU MONEY!), 2) Overcrowded pan (single layer is non-negotiable), 3) Skipped shaking (hotspots create steam).
Q: Can I use dried chickpeas?
A: Absolutely! Soak 1/2 cup dried chickpeas overnight in water + 1 tsp baking soda (softens skins). Drain, rinse, boil 45-60 mins until tender but not mushy. Proceed as directed!
Q: How long do they stay crunchy?
A: At room temp in a paper bag or loosely covered bowl? 2-3 days max. Humidity is the enemy! For longer crunch, store airtight with a silica packet (like those in jerky bags).
Q: Spices burning before chickpeas crisp?
A: Delicate spices (like garlic powder) can scorch. Add them in the last 10 minutes of roasting, or use whole/spice blends with higher smoke points (paprika, cumin seeds).
Crispy Roasted Chickpeas
- Total Time: 45 min
Description
It all began at a chaotic “Rainbow Unicorn” birthday party – glitter on the dog, frosting in my hair, and a hummus overload. One desperate toss of chickpeas into the oven later, I discovered gold. That unexpected crunch turned these little legumes into legends. They’ve since powered my pantry through Netflix marathons, lunchbox revamps, and late-night pantry raids. Roasted chickpeas are more than snacks – they’re your crunchy kitchen MVP. Ready to fall in love one golden bite at a time?
Ingredients
-
1½ cups canned chickpeas (rinsed & drained)
-
1 tbsp olive oil (or aquafaba for oil-free)
-
Sea salt to taste
-
Optional: 1 tsp spices (paprika, curry, garlic, or ranch powder)
Instructions
-
Preheat oven to 400°F (200°C). Place a baking sheet inside while preheating.
-
Dry chickpeas thoroughly using towels. Let air-dry for 10 minutes for best results.
-
Season & toss chickpeas with oil, salt, and spices on the hot tray. Spread in a single layer.
-
Roast for 30–40 mins, shaking the pan every 10 minutes. Chickpeas should sound hollow and look golden.
-
Cool completely in a bowl (not on the tray). Crunch develops as they cool!
Notes
-
For ultra-crunch, turn off oven after roasting and leave chickpeas inside for 1 hour.
-
Want sweet? Try cinnamon-maple. Spicy? Go buffalo-style.
-
Keep storage loose – airtight traps moisture. Re-crisp in the oven if needed!
- Prep Time: 10 min
- Cook Time: 35 min
Nutrition
- Calories: 120 cal Per Serving:
- Fat: 4g
- Carbohydrates: 15g
- Fiber: 4g
- Protein: 5g
Nutritional Highlights (Per Serving)
Calories: ~120 | Protein: 5g | Fat: 4g | Carbs: 15g | Fiber: 4g
Note: Plant-powered protein + fiber makes these a guilt-free snack slam dunk! Sodium varies based on seasoning.
Final Thoughts: Why Chickpeas Deserve a Permanent Spot in Your Kitchen
Roasted chickpeas are more than a snack—they’re a lesson in simplicity, adaptability, and the joy of cooking. They’ve saved me from last-minute appetizer panic, turned boring lunches into exciting meals, and even convinced veggie-skeptics that plant-based eating can be fun.
What I love most is their forgiving nature. Burned a batch? Blend them into a spice-dusted breading. Forgot to shake the pan? Call them “extra rustic” and no one will care. They’re cheap, nutritious, and endlessly customizable—whether you’re craving salty, sweet, or spicy.
So here’s my challenge to you: Grab a can of chickpeas, raid your spice rack, and play. Cooking should be fun, not fussy. And who knows? Your next kitchen accident might just become your family’s new favorite snack. Now, if you’ll excuse me, I have a date with a tray of sriracha-honey chickpeas and a hidden corner of the pantry…
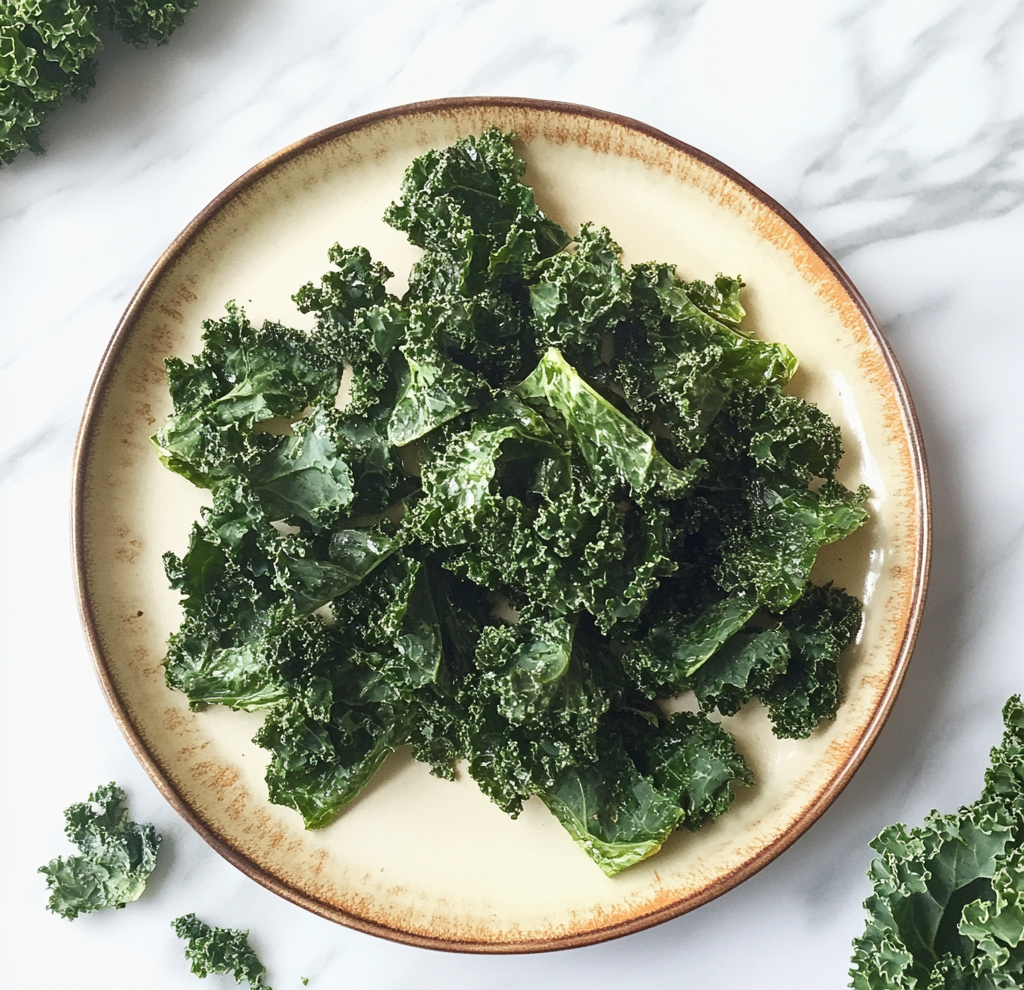
Baked Kale Chips
Why Kale Chips Became My Kitchen Obsession
Hey there, snack squad! Olivia here, apron dusted with kale crumbs and eyes sparkling like flaky sea salt. Let’s talk about that universal craving: the irresistible CRUNCH. You know the one – when only a chip will do, but guilt starts doing the cha-cha in your conscience? That’s exactly where my baked kale chips waltz in, wearing a crispy cape and ready to save snack time. I’ll never forget the first time I pulled a tray of these from the oven. One minute, I’m staring at humble greens; the next, I’m shattering whisper-thin, salty shards that vanish faster than cookies at a bake sale. The magic? You need just 3 ingredients and 30 minutes to turn rugged kale into elegant, craveable crisps. No fancy skills required – just a baking sheet, a drizzle of oil, and that glorious low-and-slow roast that transforms leaves into edible stained glass. Whether you’re a veggie skeptic, a busy parent, or a Netflix-binger needing crunch therapy, these chips are your golden ticket. Let’s turn that oven on and make your kitchen smell like victory!
That Time Kale Chips Tricked My Nephews
Picture this: My sister’s kids, Liam and Noah, then 8 and 6, declared kale “monster food.” One rainy Saturday, I whipped up a batch of these chips while they built Lego castles. “Try one?” I teased, holding out a glittery green curl. Liam eyed it like a suspicious bug. Noah took a cautious nibble… then shoved three in his mouth. “Aunt Liv! These taste like DINOSAUR CHIPS!” (Highest praise, apparently.) Within minutes, they were “fishing” for chips off the tray with tongs, giggling as the crispy leaves shattered. My sister walked in, jaw dropping at the sight of her veggie-phobic boys inhaling kale. “Witchcraft?” she whispered. “Nope,” I grinned, “just oven alchemy.” That moment – crunchy, salty, and full of belly laughs – cemented these chips as my ultimate snack-time triumph. They’re not just food; they’re tiny, edible joy-bombs.
Your Kale Chip Toolkit: Simple & Swap-Friendly
- 1 bunch kale (curly or Lacinato) – Curly kale gives dramatic, ruffled chips; Lacinato (aka dinosaur kale) makes flatter, sturdier crisps. Chef’s tip: Avoid baby kale – too delicate! Stems? Toss ’em – they’re bitter troublemakers.
- 1 tbsp olive oil – Extra virgin adds fruitiness, but avocado oil works for higher smoke points. Swap alert: For oil-free chips, use 2 tbsp aquafaba (chickpea brine) whipped until foamy! It creates an insane crisp.
- 1 tsp flaked sea salt (Maldon rules!) – Flakes stick better and give satisfying bursts of saltiness. Chef secret: Salt AFTER baking to prevent sad, soggy chips. Table salt? Too harsh – it’ll overpower.
Bonus flavor boosters? Hold tight – we’ll get wild in the variations section! Pro move: Grab a salad spinner. DRYING YOUR KALE THOROUGHLY is non-negotiable. Wet leaves = steamed disappointment.
Crisp Perfection: Your Foolproof Blueprint
- Prep Like a Pro: Rip leaves from stems (save stems for stir-fries!). Tear into large, chip-sized pieces – they shrink dramatically. Wash in a colander, then SPIN-DRY like your crispiness depends on it (it does!). Pat stubborn damp spots with towels. Hack: Prep kale ahead and store dried pieces in the fridge overnight!
- Oil Tango Time: Dump kale into a big bowl. Drizzle oil over it. Now massage that oil into every nook with your fingers – yes, like kale spa treatment! This ensures no sad, floppy bits. Watch for: Over-oiling = greasy chips. You want a light, even sheen, not a pool.
- Bake Low & Slow: Preheat oven to 300°F (150°C). Spread kale in a SINGLE LAYER on parchment-lined sheets. Overcrowding = steamed kale tragedy. Bake 10 minutes, then rotate trays and flip chips with tongs. Bake another 10-15 minutes until edges curl and chips sound hollow when tapped. Chef’s whisper: Ovens lie! Start checking at 20 mins. They’re done when crisp, not brown (bitter alert!).
- Season & Serenade: Pull trays out. Immediately sprinkle salt while chips are hot (it adheres better!). Let cool 5 minutes – they crisp up MORE off the heat. Golden rule: Resist snatching them hot! They’re fragile and need cooling to set their crunch.
The Science Behind the Perfect Kale Chip Crunch
Let’s geek out for a minute: Why do kale chips actually crisp up? It’s all about moisture evaporation and the Maillard reaction (that magical chemical dance between amino acids and sugars that creates flavor). Kale leaves are like tiny water balloons—when heated slowly, the moisture inside turns to steam and escapes, leaving behind a delicate, porous structure. Too much heat? The outside burns before the water can flee, resulting in bitter ash. Too little? The leaves steam instead of crisp, turning into sad, chewy seaweed.
The Oil Factor: Oil isn’t just for flavor—it’s a conductor. A thin, even coat ensures heat transfers evenly across the leaf’s bumpy surface. Skip the oil entirely, and you’ll get brittle, papery chips that taste like lawn clippings. But go overboard, and the chips fry unevenly, becoming greasy. (Pro tip: Use a spray bottle for misting oil if you’re a chronic over-pourer.)
Salt Timing: Ever notice how kale chips taste bland if you salt them too early? Salt is hygroscopic—it pulls moisture out of the leaves. Sprinkle it pre-bake, and you’ll trap steam, leading to soggy chips. Post-bake salting lets the crisp structure shine while the salt crystals cling like flavor glitter.
Kale Variety Matters: Curly kale’s ruffled edges create more surface area for crunch, while Lacinato (dinosaur) kale yields a denser, potato-chip-like snap. Baby kale? Too tender—it’ll vanish in the oven. For the crunchiest chips, opt for mature kale with stiff ribs (just remove those stems!).
Fun experiment: Try baking a batch at 250°F, 300°F, and 350°F. At 250°F, they’ll take forever but stay vibrant green. At 350°F, they’ll brown fast—ideal for caramelized edges but riskier. 300°F? The Goldilocks zone.
Kale Chips Around the World: Global Flavor Twists
Why stop at sea salt? Kale chips are a blank canvas for global flavors. Here’s how to take your taste buds on a trip:
1. Tokyo Umami: Toss kale with toasted sesame oil + white miso paste (thinned with water). Post-bake, sprinkle with bonito flakes or nori crumbs. Crunch level: Light, with a savory punch.
2. Mumbai Masala: Massage kale with coconut oil + ½ tsp turmeric, ¼ tsp cumin, and a pinch of asafoetida (hing). Finish with chaat masala and lime zest. Crunch level: Bold, with tangy heat.
3. Italian Nonna: Whisk olive oil with minced garlic and rosemary. Post-bake, dust with grated Parmesan (or nutritional yeast for vegan). Crunch level: Herbaceous, with a cheesy bite.
4. Mexican Elote: Brush leaves with lime mayo (or vegan mayo + lime juice), then sprinkle with chili powder, cotija cheese, and cilantro. Crunch level: Creamy-meets-fiery.
5. Moroccan Souk: Mix harissa paste into oil, then toss kale with ras el hanout spice blend. Post-bake, drizzle with honey. Crunch level: Sweet, smoky, and complex.
Storage Hack for Flavored Chips: Keep spice-rubbed chips in an airtight container with a silica packet (or a folded paper towel) to prevent clumping. Humid climates? A 5-minute oven revive brings back the snap.
Kale Chips vs. The World: How They Stack Up
Let’s settle the snack debates:
vs. Potato Chips:
-
Calories: 70 vs. 150 per serving
-
Fat: 4g (unsaturated) vs. 10g (often saturated)
-
Crunch: Kale wins on crispiness but loses on grease appeal (nostalgia matters).
-
Nutrition: Kale delivers 200%+ of your daily Vitamin A; potatoes offer… potassium?
vs. Popcorn:
-
Volume: Popcorn wins for mindless munching.
-
Flavor Carrying Power: Kale’s nooks hold spices better.
-
Tooth Risk: Kale won’t stab your gums like rogue popcorn hulls.
vs. Store-Bought Veggie Chips:
-
Cost: Homemade kale chips: ~$1 per batch. Store-bought: $5 for a tiny bag.
-
Ingredients: Yours = kale, oil, salt. Theirs = often “kale powder,” rice flour, and mystery preservatives.
-
Satisfaction: Fresh-from-oven warmth beats stale bag vibes.
The Verdict: Kale chips aren’t here to replace snacks—they’re here to expand your crunchiverse.
Beyond the Bowl: Serving Magic
Slide these emerald gems into a wide, shallow bowl so everyone can admire their craggy beauty. They’re stellar solo, but try crumbling them over creamy soups (bye, croutons!), scattering on avocado toast for crunch, or stacking alongside a turkey club sandwich. Hosting? Serve in mini paper cones for a fun, food-cart vibe. Pro tip: Pair with a tangy dip – Greek yogurt mixed with lemon zest and garlic loves kale chips!
Flavor Adventures: 5 Ways to Shake It Up
- “Cheesy” Magic: Post-baking, dust with 2 tbsp nutritional yeast + ¼ tsp garlic powder. Vegan umami bomb!
- Fiery Fiesta: Toss kale with oil + ½ tsp smoked paprika + ¼ tsp cayenne before baking.
- Lemon-Pepper Zing: Add 1 tsp lemon zest + ½ tsp cracked black pepper to oil mixture.
- Everything Bagel Bliss: After baking, sprinkle with Everything Bagel seasoning instead of salt.
- Sweet & Smoky: Whisk 1 tbsp maple syrup into oil + ½ tsp chipotle powder. Sweet heat heaven!
Confessions of a Kale Chip Addict
Okay, truth bomb: My first batch was a charcoal disaster. I cranked the oven to 400°F, thinking “faster=better.” Nope. Kale incineration. Lesson learned: LOW. AND. SLOW. is the crispy mantra. These chips also taught me patience – rushing the cooling step leads to heartbreaking crumbs. Over the years, I’ve gotten bolder with flavors (wasabi powder, anyone?), but the core technique remains sacred. Funny story: My dog, Biscuit, once snatched a whole tray cooling on the counter. Now I deploy “kale chip security protocols” (aka oven with door cracked). They’re that good – even dogs can’t resist!
Kale Chip SOS: Fixing Common Crisp Catastrophes
Q: Why are my chips soggy/chewy?!
A: Three culprits! 1) Kale wasn’t bone-dry pre-baking (spin, spin, spin!). 2) Overcrowded baking sheet traps steam. 3) Added salt BEFORE baking – it draws out moisture. Fix: Dry thoroughly, use two trays, salt only after baking!
Q: Help! Some chips burned while others wilted!
A: Uneven sizing is the enemy! Tear pieces uniformly (no tiny shreds!). Rotate trays AND flip chips halfway. Oven hotspots? Position trays in the middle rack, not too close to elements.
Q: Can I use an air fryer?
A: Absolutely! 360°F (180°C) for 6-8 mins. Shake basket every 2 minutes. Work in small batches – air circulation is key!
Q: How do I store leftovers (if any!)?
A: They’re happiest fresh. If you must, cool COMPLETELY, then stash in an airtight container with a silica packet (or dry rice in a cloth pouch) to absorb moisture. Revive in a 300°F oven for 2 mins if they soften.
Baked Kale Chips
- Total Time: 35 min
Description
There’s a magic in the moment kale becomes chips. One rainy afternoon, I baked a batch on a whim—and even my picky nephews devoured them, dubbing them “dinosaur chips.” That simple joy turned these into my go-to snack obsession. Light, crackly, and shockingly satisfying, they’re perfect for guilt-free munching. Whether you’re feeding kids or just feeding a crunch craving, this 3-ingredient wonder is your new kitchen hero.
Ingredients
-
1 bunch kale (curly or Lacinato)
-
1 tbsp olive oil (or 2 tbsp aquafaba for oil-free)
-
1 tsp flaked sea salt (add after baking)
Instructions
-
Prep the Kale: Remove stems, tear leaves into large chip-sized pieces. Wash, spin, and dry thoroughly.
-
Massage: Toss kale in a bowl, drizzle with oil, and gently massage to coat evenly.
-
Bake: Spread in a single layer on parchment-lined trays. Bake at 300°F (150°C) for 10 minutes. Flip and rotate trays; bake another 10–15 minutes.
-
Season & Cool: Sprinkle salt while hot. Let cool for 5 minutes to crisp fully.
Notes
-
DRY kale = crisp kale. Use a salad spinner!
-
Avoid overcrowding trays.
-
Chips crisp more as they cool—don’t rush it!
-
Use a silica pack or dry rice pouch to store.
- Prep Time: 10 min
- Cook Time: 25 min
Nutrition
- Calories: 70 cal
- Fat: 4g
- Carbohydrates: 6g
- Fiber: 2g
- Protein: 2g
Snack Smart, Crunch Happy
Per Serving (¼ recipe): ~70 calories | 2g protein | 4g fat (heart-healthy!) | 6g carbs | 2g fiber | Vitamin A & C powerhouse!
Final Thoughts: More Than Just a Chip
Kale chips started as a health hack but became my kitchen’s gateway drug to creativity. They taught me patience (low and slow!), precision (dry those leaves!), and the joy of turning skeptics into believers (looking at you, nephews). They’re proof that simple ingredients, treated right, can become something extraordinary—whether you’re dressing them up with global flavors or savoring them bare.
So here’s to the underdog leaf that could. May your trays be crisp, your seasoning bold, and your snack breaks unapologetically crunchy. Now go forth and bake fearlessly!




