
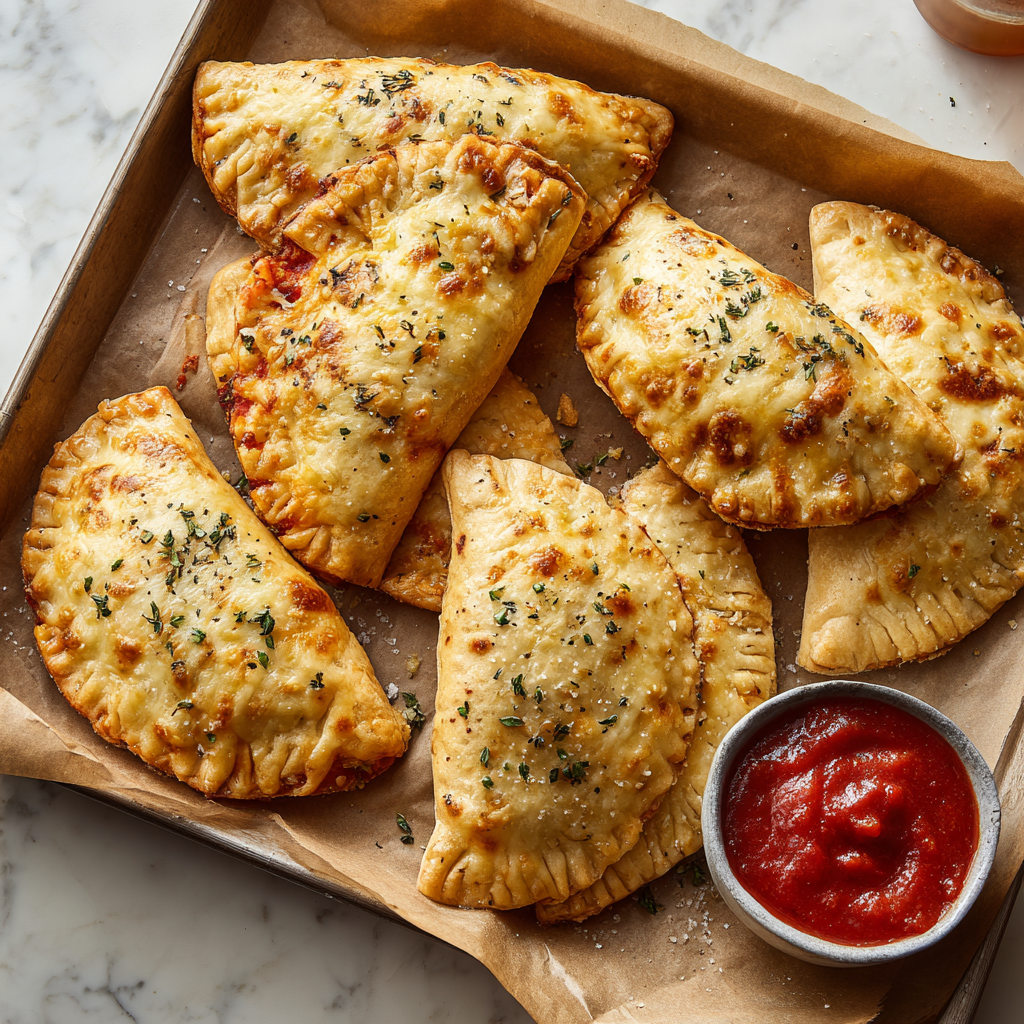
High Protein Pizza Hot Pockets
High Protein Pizza Hot Pockets: Your New Meal Prep BFF!
Hey there, kitchen friends! Olivia here, apron dusted with flour and heart full of cheesy dreams. Raise your hand if you’ve ever stared into the fridge at 6 PM, torn between pizza cravings and that protein goal whispering in your ear 🙋♀️ We’ve all been there! That exact hangry standoff inspired these magical High Protein Pizza Hot Pockets. Imagine: warm, golden-brown pockets bursting with melty cheese and tangy pizza sauce, wrapped in a soft, pillowy dough made shockingly wholesome with Greek yogurt. No fancy skills needed—just 30 minutes between you and handheld pizza joy. These are meal-prep superheroes (freeze like a dream!), post-workout fuel, and sneaky-smart lunchbox wins. Best part? You’re literally eating pizza… the kind that loves you back. Ready to turn “I want pizza” into “I *made* pizza”? Let’s roll!
My Pizza Pocket Epiphany
Flashback to last winter: I was training for a half-marathon, constantly ravenous, and knee-deep in meal prep containers. One snowy Sunday, my pizza craving hit HARD. But delivery felt indulgent, and sad “health” alternatives just… weren’t pizza. I stared at my tub of Greek yogurt (my protein staple) and had a wild thought: “What if this became dough?” Cue messy countertops, flour in my hair, and a few hilarious failed folds (RIP, cheese explosions!). But that first bite? EUREKA! The dough was soft yet sturdy, the filling oozed like a pizzeria dream, and the protein punch kept me full for hours. Now, these pockets are my freezer’s glittering treasure—grabbed before dawn runs, packed for my kids’ lunches (they beg for them!), and my secret weapon when friends pop by hungry. They’re proof that cravings and nutrition can hug it out in one delicious bite.
Your Pizza Pocket Toolkit
- 410g low-fat Greek yogurt (like Chobani 0.5%): Our protein powerhouse! The tang gives depth, and its thickness creates the perfect dough texture. Chef’s Tip: Full-fat works for creamier dough, but adds calories. Avoid “regular” yogurt—it’s too watery!
- 400g all-purpose flour: The trusty base. Swap Alert: Self-raising flour works! Skip the baking powder if using it. For GF, try a 1:1 blend (add 1 tbsp extra yogurt if dry).
- 2 tsp baking powder: Our lift-off agent! Ensures pockets puff up beautifully.
- 1 tsp Italian herb seasoning: Hello, flavor! Chef’s Twist: Rub dried herbs between your fingers before adding—it wakes up the oils!
- ½ tsp garlic powder: Savory magic. Insider Trick: Granulated garlic adds a subtle crunch if you’re feeling fancy.
- ½ tsp salt: Balances the tang. Don’t skip! It makes the dough sing.
- 15g pizza sauce per pocket: Flavor core! Use store-bought or homemade. Pro Move: Simmer sauce with a pinch of red pepper flakes for 5 mins first—next-level depth!
- 20g low-fat cheese per pocket (like Bega): Melty goodness! Sub Freely: Part-skim mozzarella, light cheddar, or even dairy-free shreds work. Avoid pre-grated—it has anti-caking agents that hinder melt.
Let’s Build Some Magic: Step-by-Step
- Preheat & Prep: Crank your oven to 375°F (190°C). Line a baking tray with parchment. Why parchment? No sticking AND easy cleanup. Win-win!
- Dry Team Unite: In a big bowl, whisk together flour, baking powder, Italian herbs, garlic powder, and salt. Chef’s Secret: Whisking = no baking powder lumps = even rise. Your dough will thank you!
- Yogurt Power Incoming! Add Greek yogurt. Stir with a sturdy spoon until shaggy, then get hands-on! Knead 2-3 mins until smooth. Watch the Texture: Too sticky? Sprinkle in 1 tbsp flour. Too dry? Dampen hands. It should feel like soft playdough!
- Divide & Conquer: Split dough into 8 equal balls (a kitchen scale helps!). Hack: Roll into a log first—slices will be more uniform.
- Roll It Out: On a lightly floured surface, roll each ball into a 6-inch circle or oval (⅛-inch thick). No Rolling Pin? A wine bottle works! Or press gently with hands—rustic is charming.
- Fill & Fold: On one half of each circle, spread sauce, then sprinkle cheese—leave a ½-inch border! Fold dough over filling. Crimp edges HARD with a fork. Sealant Pro Tip: Dab water on the edge before folding—it’s glue! Leak-proof guarantee.
- Bake to Glory: Arrange pockets on the tray. Bake 18-20 mins until deeply golden. Spot Check: Rotate tray at 15 mins for even browning. They should sound hollow when tapped!
- Cool Slightly… If You Can Wait! Rest 5 mins. Why? Melty cheese lava is real! This saves your tastebuds.
The Science Behind the Dough – Why Greek Yogurt Works
Ever wondered why Greek yogurt transforms into such perfect dough? It’s not magic—it’s science! Traditional dough relies on gluten development (from flour) and leavening agents (like yeast or baking powder) for structure and rise. But Greek yogurt? It’s a protein-packed powerhouse that replaces both fat and liquid in dough, while adding a tangy depth of flavor.
Protein Powerhouse
Greek yogurt is strained to remove whey, leaving behind a thick, protein-rich base. A single cup of low-fat Greek yogurt packs 23–25g of protein—compared to regular yogurt’s 8–10g. When mixed with flour, the yogurt’s proteins (casein and whey) bind with gluten strands, creating a sturdy yet tender texture. The lactic acid in yogurt also slightly weakens gluten, making the dough easier to roll without becoming tough.
The Leavening Secret
Unlike yeast, which requires time to ferment, our dough uses baking powder for instant lift. When baking powder meets the yogurt’s acidity, it creates a chemical reaction that releases carbon dioxide bubbles. These bubbles expand in the oven, giving the pockets their signature puff. Pro tip: If your dough feels dense, check your baking powder’s expiration date—old powder won’t rise properly!
Moisture Balance
Greek yogurt’s thickness is key. Regular yogurt or sour cream can make the dough sticky or gummy, but Greek yogurt’s low moisture content ensures the dough stays pliable without needing excess flour. If your dough feels too wet, add flour 1 tablespoon at a time. Too dry? A spritz of water or extra yogurt (½ tsp) saves the day.
Flavor Boost
The yogurt’s tanginess cuts through the richness of the cheese, mimicking the fermented flavor of traditional pizza dough. For extra depth, try adding 1 tbsp nutritional yeast to the dry ingredients—it amps up the umami!
Meal Prep Mastery – Freezing, Reheating & On-the-Go Hacks
These pizza pockets aren’t just delicious—they’re meal-prep legends. Here’s how to make them work for your busy schedule:
Freezing Unbaked Pockets (Best for Freshness)
-
Assemble as directed, but don’t bake.
-
Flash-Freeze on a parchment-lined tray for 1 hour (this prevents sticking).
-
Transfer to a freezer bag, squeezing out air. Label with the date!
-
Bake Straight from Frozen at 375°F for 25–28 mins (no thawing needed).
Freezing Baked Pockets (Quick Rewards)
-
Let baked pockets cool completely.
-
Wrap individually in foil or stack with parchment between layers.
-
Reheat in a toaster oven (10 mins at 350°F) or microwave (60–90 secs, though the crust softens).
Lunchbox Pro Tips
-
Crispiness Hack: Include a small silica gel packet (the kind from seaweed snacks) in the container to absorb moisture.
-
Dipping Sauce: Pack marinara in a mini condiment cup or smear extra sauce inside the pocket before baking.
-
Veggie Boost: Add a handful of baby spinach or cherry tomatoes on the side to round out the meal.
Travel-Friendly Upgrades
-
Air Fryer Love: Reheat at 370°F for 5 mins—crispier than a microwave!
-
Thermos Trick: For warm pockets on the go, preheat a thermos with boiling water, dump it out, and tuck in a hot pocket. It’ll stay toasty for hours!
Nutrition Deep Dive – Making It Work for Your Goals
These pockets are customizable for weight loss, muscle gain, or keto—here’s how:
High-Protein Mods
-
Cottage Cheese Swap: Replace half the yogurt with blended low-fat cottage cheese for extra 5g protein/pocket.
-
Protein Powder Boost: Add 1 scoop unflavored whey/casein powder to the dry ingredients (reduce flour by 2 tbsp).
Lower-Carb/Keto Tweaks
-
Almond Flour Dough: Swap flour for 200g almond flour + 50g coconut flour (add 1 egg to bind). Note: Texture will be denser.
-
Cauliflower Crust: Use riced cauliflower (squeezed dry!) mixed with 1 egg and 50g Parmesan. Pre-bake crusts for 10 mins before filling.
Calorie-Conscious Versions
-
Veggie Bulk: Add ¼ cup diced mushrooms or zucchini (sautéed and drained) to stretch the filling.
-
Lighter Cheese: Use fat-free mozzarella or reduce cheese to 15g/pocket.
Post-Workout Refuel
Pair a pocket with a quick protein shake (1 scoop vanilla protein + almond milk + ice) for a 40g protein recovery meal.
Serving Up the Cozy
Slide these golden beauties onto a rustic board or straight into lunchboxes! For ultimate indulgence, serve hot with a side of warmed marinara for dipping and a big green salad. Packing for later? Let them cool completely before storing—they’ll stay crispier! Pro tip: Tuck a tiny basil leaf on top before serving. Insta-worthy *and* aromatic!
Mix It Up! 5 Flavor Adventures
- Veggie Fiesta: Add 1 tbsp sautéed spinach + roasted red peppers per pocket (squeeze veggies dry first!).
- Pepperoni Party: Layer 3-4 slices turkey pepperoni under the cheese. *Chef’s Kiss*.
- Breakfast Bonanza: Swap sauce for scrambled eggs + crumbled cooked sausage + cheddar. Bake as usual!
- Mediterranean Twist: Use pesto instead of marinara, feta cheese, and a sprinkle of olives.
- Spicy ‘Nduja: Swirl ½ tsp spicy ‘nduja paste into the sauce. Fiery heaven!
Olivia’s Notebook Scribbles
Okay, real talk: my first batch looked like doughy grenades—cheese everywhere! The key is less filling than you think and SEALING LIKE YOUR LIFE DEPENDS ON IT. Over time, I learned: rolling thinner = crispier pockets, letting dough rest 10 mins before rolling = easier handling, and adding herbs to the dough itself? Game-changer. My kids now demand “Mama’s Pizza Pouches” weekly—they even “help” crimp (read: make fork-shaped dents everywhere). These evolved from a craving hack to a family ritual. Funny story: I once subbed beetroot powder in the dough for pink pockets… my toddler declared it “unicorn pizza.” Kitchen wins come in all forms!
Your Pocket Questions, Answered!
- Q: Can I freeze these? A: YES! Freeze UNBAKED pockets on a tray, then transfer to bags. Bake frozen—add 5-7 mins! Or freeze baked ones; reheat in a 350°F oven for 10 mins.
- Q: My dough is SO sticky! Help! A: Breathe! Flour your hands and surface generously. Knead in 1 tbsp flour at a time until manageable. Greek yogurt brands vary—some are thicker than others.
- Q: Cheese leaked everywhere. What went wrong? A: Likely overfilling OR not sealing tightly enough. Leave that ½-inch border, press HARD with the fork, and consider the water-seal trick! Also, ensure cheese isn’t touching the edge.
- Q: Can I use plant-based yogurt/cheese? A: Absolutely! Use thick, unsweetened vegan yogurt (like coconut or soy-based). For cheese, pick a meltable vegan shred. Texture might vary slightly, but flavor will rock.

High Protein Pizza Hot Pockets
- Total Time: 30 min
Description
Born from a half-marathon hunger and a Greek yogurt epiphany, these hot pockets are warm, cheesy, and surprisingly wholesome. They’re freezer-friendly, kid-approved, and hit that pizza spot without sidelining your goals. Think: soft, golden dough hugging melty cheese and zesty sauce—all in one tidy, high-protein bite.
Ingredients
-
410g low-fat Greek yogurt
-
400g all-purpose flour
-
2 tsp baking powder
-
1 tsp Italian seasoning
-
½ tsp garlic powder
-
½ tsp salt
-
120g pizza sauce (15g per pocket)
-
160g low-fat cheese (20g per pocket)
Instructions
-
Preheat oven to 375°F (190°C). Line a baking tray with parchment paper.
-
Mix dough: In a large bowl, combine flour, baking powder, herbs, garlic, and salt. Stir in yogurt. Knead 2–3 mins until smooth.
-
Shape: Divide dough into 8 balls. Roll each into a 6-inch oval.
-
Fill: On half of each, add sauce and cheese. Leave a ½-inch border.
-
Fold & seal: Fold dough over, press edges firmly with a fork. Optional: dab water along edges before folding for a stronger seal.
-
Bake 18–20 mins until golden. Let rest 5 mins before serving.
Notes
-
Seal tightly to avoid cheese leaks.
-
Don’t overfill—less is more.
-
Cool completely before storing.
- Prep Time: 10 min
- Cook Time: 20 min
Nutrition
- Calories: 280 per serving
- Fat: 7g
- Carbohydrates: 30g
- Protein: 25g
Fuel Facts (Per Pocket)
Calories: ~280 • Protein: ~25g • Carbs: ~30g • Fat: ~7g
Note: Stats can vary based on exact brands and fillings. These use low-fat dairy for max protein punch!
Final Thoughts
These High Protein Pizza Hot Pockets are more than a recipe—they’re a lifestyle hack. They prove that “healthy” doesn’t mean sacrificing joy, and that cravings can coexist with nutrition. Whether you’re a meal-prep newbie, a parent battling lunchbox wars, or a fitness enthusiast chasing macros, these pockets adapt to your needs.
So here’s to fewer hangry meltdowns, more freezer wins, and the triumphant feeling of biting into a crispy, cheesy masterpiece you made yourself. Now go forth and pizza-pocket all the things!
Save This Recipe for Later!
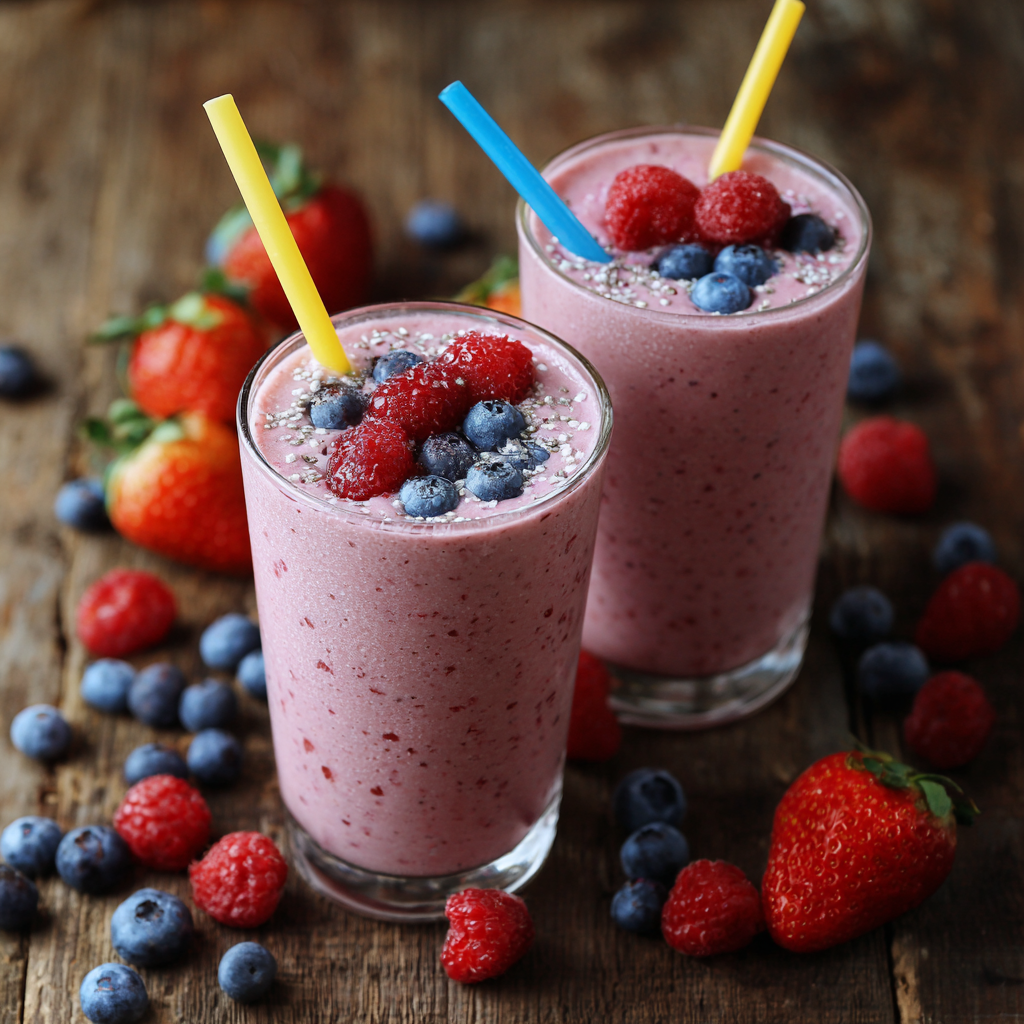
Banana Berry Smoothie
Sunshine in a Cup: Your New Favorite Banana Berry Smoothie
Hey there, smoothie lover! Olivia here, apron dusted with flour and blender perpetually parked on my counter. You know those mornings when you need a hug in a glass? When your energy needs a boost but you crave something that tastes like dessert? That’s exactly why I’m obsessed with this Banana Berry Smoothie. It’s my daily ritual – the kind of recipe that feels like a warm high-five from your kitchen.
Picture this: velvety bananas dancing with jewel-toned berries, swirled into creamy yogurt and kissed with honey. It’s not just fuel; it’s pure joy that takes five minutes flat. No fancy techniques, no obscure ingredients hiding in the back of your pantry. Just honest, vibrant goodness that makes you feel like you’re doing something wonderful for yourself. Whether you’re sprinting out the door, need a post-yoga refresh, or just want a sweet moment of calm, this blend is your secret weapon. Let’s make your blender sing!
My Berry Sweet “Aha!” Moment
This smoothie? It saved my sanity during the wildest summer of my life. Picture: sweltering heatwave, my kitchen felt like a sauna, and my twin nieces were visiting – two tornadoes of adorable energy. Oven? Off-limits. Stove? A hard no. We needed something cool, fast, and crowd-pleasing.
One sticky afternoon, desperation led me to chuck overripe bananas (you know, the ones with freckles!), a forgotten pint of berries, and some strawberry yogurt into the blender. The girls watched, skeptical. But that first sip? Their eyes lit up like fireworks. “Aunt Liv’s Magic Pink Drink!” they declared, slurping through rainbow straws. We spent the rest of the week experimenting – adding blueberries, sneaking in spinach (shhh!), giggling at raspberry mustaches. It became our thing. That blender whir became the soundtrack to sticky-fingered hugs and impromptu kitchen dance parties. Now, every time I make it, I taste summer and hear their laughter. Food magic? You bet.
Your Smoothie Dream Team: Ingredients & Insights
Gather these vibrant pals – they’re about to become your breakfast BFFs!
- 2 Ripe Bananas (spotted is perfect!): Nature’s ultimate sweetener & thickener. Those brown spots mean maximum sweetness and creaminess! Chef Hack: Keep peeled, overripe bananas frozen in chunks – they transform your smoothie into an ultra-thick, frosty milkshake texture! No ripe bananas? Use 1/4 cup of unsweetened applesauce or 2-3 pitted dates (soak them first!).
- 1/2 Cup Blueberries (fresh or frozen): Little bursts of antioxidants & subtle sweetness. Frozen berries make the blend instantly colder and thicker. Out of blueberries? Blackberries work beautifully for a deeper, tangier twist.
- 1/2 Cup Raspberries (fresh or frozen): That gorgeous pink hue & signature tang! Their seeds add a lovely texture. Don’t love seeds? Strain the smoothie after blending, or swap in hulled strawberries.
- 1/2 Cup Strawberry Yogurt: Creaminess + berry flavor boost! Protein Power Move: Swap in Greek yogurt for a serious protein punch (it’ll be tangier, so maybe add a touch more honey). Vegan? Coconut yogurt or silken tofu are dreamy substitutes!
- 1-2 tsp Honey (or maple syrup): A touch of floral sweetness to tie it all together. Start with 1 tsp! Taste after blending – ripe fruit might be sweet enough. Agave nectar works too. Skip it if using very sweetened yogurt.
- 3/4 Cup Almond Milk (or any milk/nut milk): The liquid lifeline! Start here – you can always add more for a thinner sip. Oat milk makes it extra creamy, coconut water adds lightness. Insider Tip: Using frozen fruit? You might need a splash more liquid to get things moving!
Blending Bliss: Let’s Make That Magic Happen!
Ready? This is the easiest kind of kitchen alchemy. Let’s do it step-by-step:
- Load Up the Blender: Toss those ripe banana chunks in first. Why? Bananas are the heavy lifters! Putting them near the blade helps break them down faster. Follow with the blueberries, raspberries, yogurt, honey, and finally pour the almond milk over the top. Why milk last? It helps push the heavier ingredients down towards the blade as it starts blending, preventing frustrating air pockets. Chef Hack: Add a tiny pinch of salt (seriously!). It doesn’t make it salty, it just makes all the flavors pop brighter!
- Blend Until Dreamy: Secure that lid tightly (trust me, berry explosions are… vibrant). Start on low speed for 10 seconds to break things up, then ramp up to high. Blend for 30-45 seconds. What are we listening for? That smooth, consistent motor sound – no more chunky bits! Stop and scrape down the sides with a spatula if needed. Texture Tip: Want it thicker? Add 3-4 ice cubes and blend again. Thinner? Add almond milk 1 tbsp at a time. Listen to your blender – if it sounds stressed, pause and stir!
- Taste & Tweak (The Fun Part!): Pour a little into a spoon. Is it tangy? Add another drizzle of honey. Too sweet? A squeeze of fresh lemon juice balances it perfectly. Thicker than you like? Splash in more milk. This is YOUR perfect sip! Pro Move: Add a tablespoon of chia seeds or flax seeds now and blend for 5 seconds for a fiber boost without changing texture.
Serving Up Sunshine
This smoothie is basically happiness in liquid form, so serve it with joy! Pour it into a chilled mason jar for that rustic feel, or a tall, colorful glass to show off its vibrant berry hue. My personal favorite? A wide-mouthed bowl with a spoon – it feels indulgent! Toss a few extra fresh berries on top, or a thin banana slice. Feeling fancy? A tiny sprinkle of granola adds crunch. Enjoy it immediately – that fresh, frothy top is the best part! Perfect for sipping slowly on the porch or grabbing in a travel mug for your commute. Pure, delicious energy!
Mix It Up! Berry Delicious Variations
This smoothie is your blank canvas! Try these tasty twists:
- Tropical Twist: Swap the mixed berries for 1 cup frozen mango + pineapple chunks. Use coconut yogurt and coconut milk. Sunshine vacation vibes!
- Green Powerhouse: Sneak in a big handful of fresh spinach or kale. You won’t taste it, I promise! The berries dominate. Add a tablespoon of almond butter for staying power.
- Protein Punch: Add a scoop of vanilla or unflavored protein powder (whey, pea, or collagen). Perfect post-workout fuel!
- Berry-Chocolate Indulgence: Add 1 tablespoon of unsweetened cocoa powder or cacao nibs. Like a healthy chocolate-covered strawberry!
- Vibrant Cherry: Use frozen dark sweet cherries instead of mixed berries. Tart, sweet, and packed with antioxidants.
Olivia’s Kitchen Confessions
This recipe has evolved more than my taste in kitchen towels! It started as a simple banana-berry mix, but one day I grabbed strawberry yogurt instead of plain by accident… revelation! The honey was born after a particularly tart batch of raspberries made my niece pucker. And freezing bananas? Game-changer discovered during a “use-it-or-lose-it” fridge cleanout frenzy.
A funny fail? That time I confidently added a whole beet (for color!) without roasting it first. Let’s just say the result tasted… earthy. And looked alarmingly like a science experiment. Lesson learned: Stick to berries for pink perfection! Now, it’s my most-requested recipe by friends. My husband even calls it his “vitamin boost” (shh, don’t tell him it tastes like dessert!). The best part? Seeing YOUR versions online – tag me with #OliviasSunshineSip!
Smoothie SOS: Your Questions Answered
Ran into a bump? Let’s troubleshoot together!
- “Can I use all frozen fruit?” Absolutely! It makes the smoothie gloriously thick and frosty. Just remember: You’ll likely need to add an extra 1/4 to 1/2 cup of liquid (milk or water) to get it blending smoothly. Start with the recipe amount and add gradually while blending.
- “Help! My smoothie is too thick/too thin!” Easy fix! Too Thick: Add your liquid (milk, water, juice) 1 tablespoon at a time while blending on low until it reaches your dream consistency. Too Thin: Add more frozen fruit (banana chunks work best!), a handful of ice cubes, or a spoonful of yogurt or nut butter. Blend again!
- “Can I make this ahead of time?” Honestly, it’s best fresh! But if you must, blend it and store it in the coldest part of your fridge in a sealed jar for up to 12 hours. Give it a vigorous shake or a quick re-blend before drinking. It might separate slightly – that’s natural! Avoid freezing the blended smoothie; the texture gets icy.
- “My blender isn’t super powerful. Will it work?” No problem! Hack it: Use softer fruits (ripe bananas, thawed berries), cut bananas into smaller chunks, add the liquid first, and start on low speed. Blend longer, stopping to scrape down the sides frequently. Adding the berries frozen might be harder for weaker blenders – partially thaw them first if needed.
Banana Berry Smoothie
- Total Time: 22 minute
Description
Born in the middle of a summer heatwave and fueled by giggles, this smoothie quickly became my go-to. It’s creamy, fruity, and blissfully easy—like a warm hug in a frosty glass. Perfect for busy mornings, post-yoga chill-outs, or impromptu dance breaks with rainbow straws.
Ingredients
-
2 ripe bananas (frozen or fresh)
-
½ cup blueberries (fresh or frozen)
-
½ cup raspberries (or strawberries)
-
½ cup strawberry yogurt (Greek or dairy-free)
-
1–2 tsp honey or maple syrup
-
¾ cup almond milk (or any milk)
Optional Boosts
-
Pinch of salt (flavor enhancer)
-
1 tbsp chia or flax seeds (for fiber)
-
3–4 ice cubes (for a frostier blend)
Instructions
-
Layer into blender: Add bananas first, then berries, yogurt, honey, and almond milk last.
-
Blend until smooth: Start low, then high for 30–45 secs. Adjust texture with ice (thicker) or more milk (thinner).
-
Taste & tweak: Too tart? Add a drizzle of honey. Too sweet? A squeeze of lemon brightens it up.
Serve With Joy
Pour into a mason jar or glass, top with berries or a sprinkle of granola. Best enjoyed fresh with a spoon or straw!
- Prep Time: : 5 minutes
Nutrition
- Calories: 275 per serving
- Fiber: 5g
- Protein: 5g
Nourishing Sip (Approximate per serving)
This isn’t just tasty, it’s giving your body love! Naturally sweet from fruit, packed with goodness:
- Calories: ~250-300 (depends on yogurt/milk choices)
- Fiber: ~5g (Thanks, berries & bananas!)
- Key Boosters: Vitamin C (hello, berries!), Potassium (bananas for the win!), Natural sugars for quick energy, Probiotics (if using live-culture yogurt).
Final Thoughts: More Than Just a Recipe
This Banana Berry Smoothie is a celebration of simplicity—proof that the best foods don’t need to be complicated. It’s a reminder to embrace imperfections (bruised bananas = extra sweet!), play with what’s in season, and find joy in nourishing yourself.
Whether you’re a busy parent, a fitness enthusiast, or someone who just wants to start the day with a little sunshine, this recipe adapts to your life. It’s forgiving, flexible, and always delicious.
So here’s to pink mustaches, blender victories, and the small acts of self-care that taste this good. Now, go make your own magic—and don’t forget to tag me with #OliviasSunshineSip!
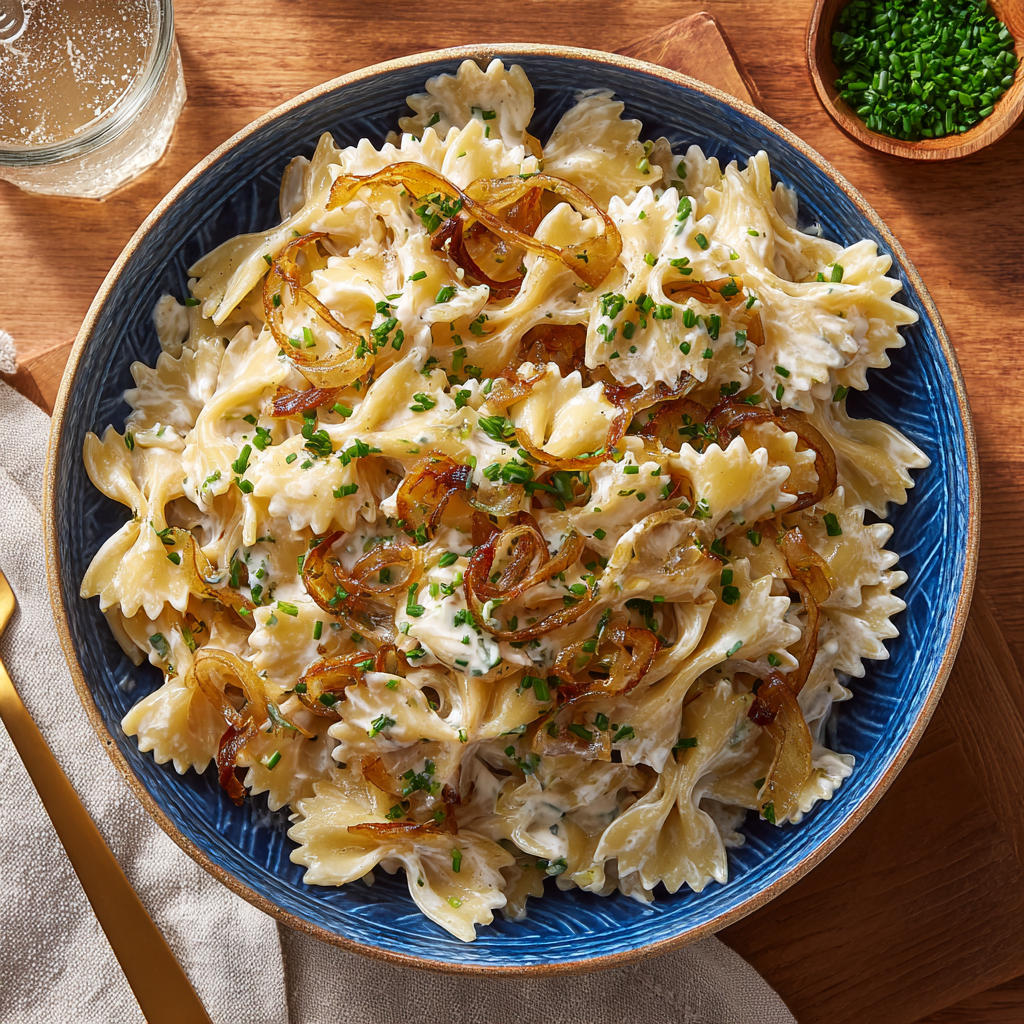
French Onion Dip Pasta Salad
French Onion Dip Pasta Salad: Your New Potluck Obsession!
Hey there, kitchen friend! Olivia here, waving from my flour-dusted countertop. Ever have one of those food cravings that hits like a lightning bolt? That’s exactly how this French Onion Dip Pasta Salad was born. Imagine your favorite ridged potato chip dunked in that creamy, oniony goodness… now picture those exact flavors clinging to twirly farfalle pasta, with caramelized onions whispering sweet secrets in every bite. It’s nostalgic comfort food wearing a party hat! 🎉
Whether you’re prepping for a backyard BBQ, a picnic in the park, or just need a happy-making lunch that’ll have you doing a fridge-side jig, this salad delivers. It’s creamy yet tangy, deeply savory with a hint of sweetness, and ridiculously easy to whip up. No fancy techniques or obscure ingredients—just real, cozy food that brings people together. And trust me, when you show up with this? You’ll be the MVP of the snack table. Ready to make magic? Grab your favorite wooden spoon and let’s dive in!
A Dip That Started It All
Picture this: It’s 1997. I’m eight years old, hiding under a folding table draped in a plastic checkered cloth at my aunt’s summer cookout. My mission? To covertly drag potato chips through a giant bowl of French onion dip without getting caught by the grown-ups. That tangy, umami-rich flavor felt like a secret rebellion! Fast-forward twenty years: I’m hosting my own BBQ, staring at pasta salad and dip bowls side-by-side. Lightbulb moment! 💡 What if I merged them? After a few hilarious trial runs (one involving far too much Worcestershire sauce—RIP, batch #3), this beauty emerged. Now, it’s my most-requested dish. Every time I make it, I grin remembering tiny Olivia’s chip heist. Some flavors just stick to your soul—and your fingers!
Your Flavor Arsenal (Plus Swaps!)
- 2 white onions, thinly sliced: They’re sweet and caramelize beautifully! Swap: Yellow onions work too, but avoid red—they’ll muddy the color.
- 3 tbsp extra virgin olive oil (EVOO): Our caramelizing hero! Chef’s tip: Low heat + patience = golden magic.
- ¼ tsp salt: Draws out onion juices for faster caramelizing. No skip!
- 2–3 garlic cloves, minced: Adds depth. Swap: ½ tsp garlic powder in a pinch.
- ¾ lb farfalle pasta: Those “bows” cradle dressing perfectly! Swap: Fusilli or rotini for similar sauce-grabbing power.
- ½ cup sour cream + ¼ cup mayo: The dreamy, tangy base. Insight: Mayo adds richness; sour cream brings zing. Use full-fat for best texture!
- ¼ cup white wine vinegar: Cuts the richness. Swap: Apple cider vinegar for a fruitier tang.
- 2 tbsp fresh chopped parsley + 1 tbsp chives: Fresh herbs = flavor confetti! Tip: Save some for garnish—it’s pretty!
- 1 tbsp soy sauce: Our umami secret weapon! Chef’s hack: Adds depth without tasting “soy-y.” Gluten-free? Use tamari.
Let’s Build Flavor, Step-by-Step
1. Caramelize Onions (The Heartbeat!): Heat EVOO in a large skillet over medium-low. Add onions and salt. Stir to coat, then let them sizzle slowly for 25-30 minutes. 👉 Chef’s Patience Tip: Don’t rush this! Stir every 5 minutes. They’re ready when jammy and honey-colored. Add garlic in the last 2 minutes—its sugars burn fast! Let cool. (This step smells like heaven!)
2. Cook Pasta Like a Pro: Boil farfalle in heavily salted water (tastes like the sea!) until al dente. Drain, rinse under cold water to stop cooking, and cool completely. 👉 Hack Alert: Toss rinsed pasta with 1 tsp olive oil to prevent clumping!
3. Whisk the “Dip” Dressing: In a bowl, combine sour cream, mayo, vinegar, parsley, chives, and soy sauce. Whisk until smooth. 👉 Taste Test Time: Dip a spoon in! Want more tang? Add 1 tsp vinegar. More savoriness? Extra pinch of salt.
4. The Grand Mix: In a big bowl, gently fold cooled pasta, caramelized onions (include every sticky bit!), and dressing. 👉 Pro Move: Use a rubber spatula—it’s gentle and scrapes the bowl clean!
5. Chill & Transform: Cover and refrigerate for at least 30 minutes. 👉 Why Wait? Chilling lets flavors marry and transforms “good” into “I-need-this-recipe-NOW!”
The Science of Caramelization: Why Onions Make or Break This Dish
Caramelizing onions isn’t just a step—it’s the soul of this pasta salad. When you slowly cook onions, their natural sugars break down and undergo the Maillard reaction, the same process that gives seared steaks and toasted bread their deep flavor. Here’s why nailing this step matters:
1. Low and Slow Wins the Race
Onions contain about 9% sugar by weight. At high heat, they’ll burn before caramelizing. Medium-low heat (around 300°F/150°C) lets the sugars gradually concentrate, turning sharp alliums into sweet, jammy ribbons. Stirring every 5 minutes ensures even cooking—those brown bits stuck to the pan? Gold! Deglaze them with a splash of water or vinegar to rescue every flavor-packed drop.
2. Salt’s Secret Role
Adding salt early isn’t just for seasoning. It draws out moisture, speeding up the breakdown of cell walls. As water evaporates, the sugars concentrate, accelerating caramelization. No more waiting 45 minutes for limp, pale onions!
3. The Garlic Rule
Garlic contains more fructose than onions, so it caramelizes—and burns—faster. Adding it in the last 2 minutes preserves its aroma without bitterness. Pro tip: Mince it finely for even distribution in every bite.
Common Pitfalls (and Fixes!)
-
Pile-Up Problem: Overcrowding the pan steams onions instead of browning them. Use a wide skillet (12-inch ideal) and cook in batches if needed.
-
Oil Choice: EVOO’s smoke point is 375°F (190°C), perfect for caramelizing. Butter burns faster; if using, mix it with oil.
-
Acid Trick: A dash of vinegar or lemon juice at the end brightens the richness. Try balsamic for a fruity twist!
Fun fact: French onion soup inspired the dip that inspired this salad—so those onions are the flavor bridge across three dishes!
Pasta Salad Psychology: Why This Recipe Wins at Potlucks
Ever noticed how some dishes vanish at gatherings while others languish? This pasta salad is a social recipe—engineered for crowd appeal. Here’s the psychology behind its success:
1. Flavor Nostalgia
French onion dip is a shared cultural memory (hello, 90s snack tables!). This salad taps into that comfort while feeling fresh. Studies show nostalgic foods spark dopamine hits, making people instinctively reach for seconds.
2. Texture Play
The human brain craves contrast. Farfalle’s ridges hold dressing, while caramelized onions add silkiness. For extra crunch, some guests add the optional potato chip garnish—a textural “surprise” that delights.
3. Visual Triggers
Golden onions against white pasta with green herbs signals “homemade” and “balanced.” Research confirms people perceive herb-garnished dishes as tastier—even before the first bite!
4. The “I Can Make That” Effect
Unlike fussy dishes, this salad looks approachable. Guests will ask for the recipe, boosting your culinary cred. Pro tip: Mention the easy swaps (like vinegar options) to make it feel adaptable to their pantry.
5. Portability = Popularity
Pasta salads don’t need reheating, survive summer heat, and fit in disposable containers. This one’s sturdy enough to travel but fancy enough for a wedding buffet.
Crowd-Tested Tweaks
-
For Kids: Skip chives and add sweet peas—their tiny hands love picking up farfalle.
-
For Foodies: Top with frizzled shallots for gourmet flair.
-
For Diet-Conscious Crowds: Highlight the vegetarian option upfront (it’s easily made vegan!).
Leftover Alchemy: 3 Unexpected Ways to Reinvent Your Salad
Day-old French Onion Dip Pasta Salad is arguably better—the flavors meld—but if you’re craving variety, try these transformations:
1. Savory Pancake Mix-In
Chop the salad finely, mix with 1 beaten egg and ¼ cup flour, then pan-fry as fritters. The caramelized onions crisp into lacy edges. Serve with a dollop of sour cream and extra chives.
2. Stuffed Veggie Boats
Hollow out tomatoes or bell peppers, fill with chilled pasta salad, and bake at 375°F (190°C) for 15 minutes. The mayo-sour cream mix becomes a creamy sauce.
3. Breakfast Hash Upgrade
Sauté leftover salad in a skillet with diced potatoes until crispy. Top with a fried egg—the runny yolk merges with the dressing for a decadent brunch.
Storage Hacks
-
Freezing? Not recommended (mayo breaks down).
-
Reviving Dried Salad: Sprinkle with broth or water, then microwave 30 seconds. Toss well.
-
Herb Refresh: Stir in fresh parsley before serving to revive brightness.
Showtime! Serving Your Masterpiece
Scoop this beauty into a big ceramic bowl or a rustic platter for that homemade charm. Garnish with extra chives and parsley for a fresh pop of color! Pair it with grilled chicken or burgers at cookouts, or pack it in mason jars for picnics (they’re leak-proof and adorable). For home meals, serve alongside a crisp green apple and kale salad to balance the richness. Pro tip: Offer extra potato chips on the side for scooping—trust me, guests will!
Mix It Up! 5 Tasty Twists
1. Bacon Lover’s: Fold in ½ cup crispy chopped bacon at the end. Smoke + onion = 😍.
2. Veggie-Packed: Add 1 cup halved cherry tomatoes and ½ cup diced cucumber for crunch.
3. Vegan Vibes: Swap sour cream/mayo for vegan alternatives; use maple syrup instead of soy sauce.
4. Cheese Please: Stir in ⅓ cup sharp cheddar or gruyère shreds (hello, French onion soup vibes!).
5. Protein Power: Toss with 2 cups shredded rotisserie chicken for a hearty main-dish salad.
Olivia’s Kitchen Confessions
This recipe started as a “what if?” experiment during a Netflix marathon! Batch one was… aggressively onion-y (lesson: slicing thickness matters!). Batch two drowned in dressing (hence the precise measures!). But batch three? My neighbor Dan literally licked the bowl. True story! Over time, I learned two game-changers: rinsing the pasta stops overcooking, and adding soy sauce amplifies the dip’s savory backbone without shouting “soy!” Now, it’s my go-to for last-minute invites. I’ve even made it in a hotel room with a microwave and kettle—adaptability is key! The moral? Good food is born from happy accidents and a dash of courage.
Your Questions, Answered!
Q: Can I make this ahead?
A: Absolutely! It tastes better day two. Store covered in the fridge for up to 3 days. Stir well before serving—you might add a splash of water if it thickens.
Q: Why rinse the pasta?
A: Rinsing halts cooking (no mushy bows!) and cools it fast so the dressing doesn’t “melt.” It also removes excess starch, preventing clumping.
Q: My dressing seems thin. Help!
A: Did you rinse the pasta thoroughly? Extra water = thin dressing. Fix it by stirring in 1 extra tbsp mayo or chilling longer (dressing thickens when cold!).
Q: Can I use frozen onions?
A: I don’t recommend it—they release too much water. Fresh onions caramelize sweeter and jammy-er!
French Onion Dip Pasta Salad
- Total Time: 15 minutes
Description
Born from childhood snack raids and grown-up cravings, this pasta salad is a creamy, savory twist on everyone’s favorite party dip. It’s rich yet tangy, full of caramelized onion magic, and perfect for BBQs, potlucks, or sneaky fridge forks at midnight. One bite and you’ll know—this isn’t your average pasta salad.
Ingredients
-
2 white onions, thinly sliced
-
3 tbsp olive oil
-
¼ tsp salt
-
2–3 garlic cloves, minced
-
¾ lb farfalle pasta
-
½ cup sour cream + ¼ cup mayo
-
¼ cup white wine vinegar
-
1 tbsp soy sauce (or tamari)
-
2 tbsp chopped parsley + 1 tbsp chives
-
Salt & pepper to taste
Instructions
-
Caramelize onions: In a skillet over medium-low heat, cook onions with oil and salt for 25–30 mins, stirring every 5 mins. Add garlic in last 2 mins. Cool completely.
-
Boil pasta: Cook in salted water until al dente. Drain, rinse with cold water, and toss with 1 tsp olive oil.
-
Make dressing: Whisk sour cream, mayo, vinegar, soy sauce, parsley, and chives until smooth.
-
Mix salad: Combine pasta, onions, and dressing. Stir gently with a rubber spatula.
-
Chill: Refrigerate for at least 30 minutes before serving. Garnish with extra herbs.
Notes
-
Don’t rush the onions—golden = flavor.
-
Chill before serving to let flavors bloom.
-
Add crushed chips on the side for fun!
- Prep Time: 15 min
Nutrition
- Calories: 350 per serving
- Sugar: 4g
- Fat: 18g
- Carbohydrates: 42g
- Protein: 7g
Nutritional Nibbles (Per Serving)
Calories: ~350 | Fat: 18g | Carbs: 42g | Protein: 7g | Sugar: 4g
Note: This is comfort food with balance! The onions add fiber, and using full-fat dairy keeps portions satisfying (no sad, hungry tummies here!).
Final Thoughts: More Than a Recipe
This pasta salad is a story—one of childhood chip raids, kitchen experiments, and shared tables. It’s proof that the best dishes aren’t about perfection, but connection. Every time you caramelize onions, you’re participating in a centuries-old tradition of transforming humble ingredients into joy. So whether you’re feeding a crowd or just your future self (hello, midnight snack!), remember: good food is love made edible. Now go forth and twirl those forks!
Share the Love! Save This Recipe ↓
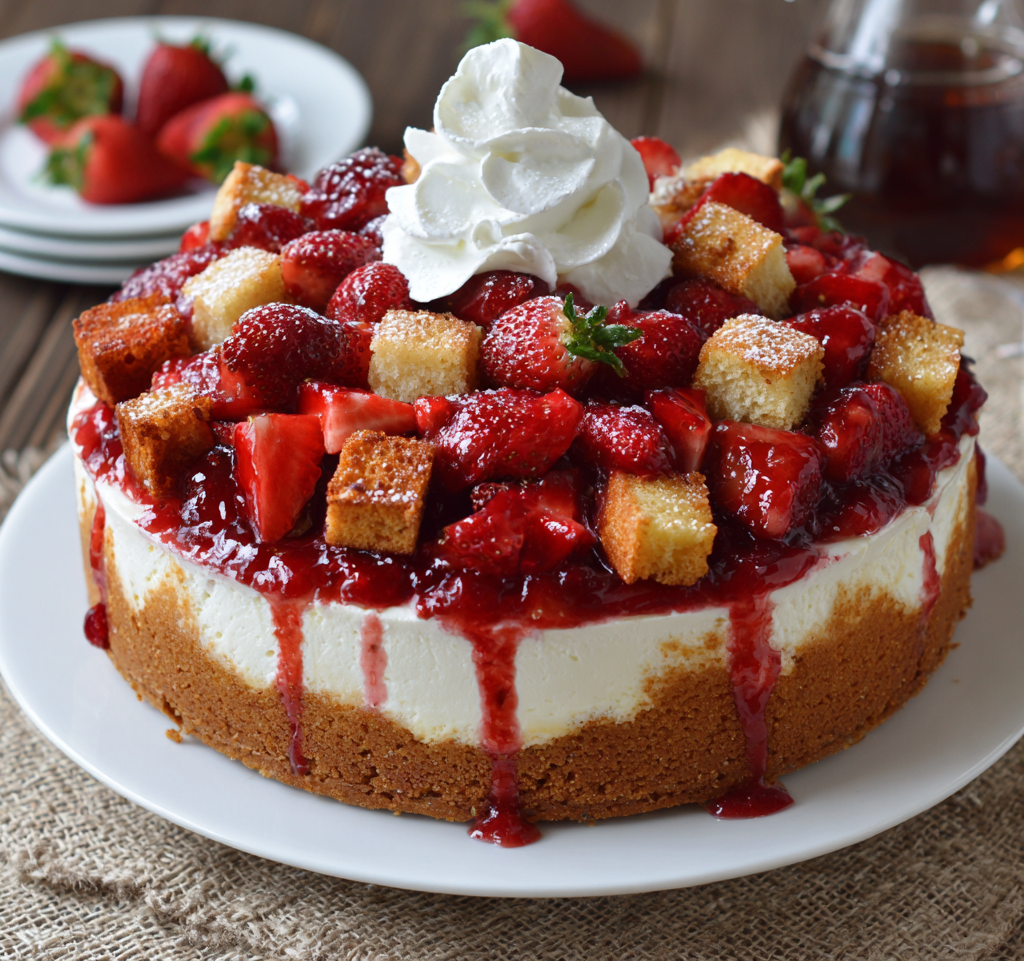
Gluten-Free Strawberry Shortcake Cheesecake
When Life Gives You Strawberries… Make Showstopping Cheesecake!
Hey there, kitchen friend! Olivia here, apron dusted with gluten-free flour and a berry-stained spoon in hand. Can we talk about that magical moment when summer strawberries hit their peak? You know the ones – ruby-red, juice-dripping-down-your-chin perfection. Now imagine those beauties layered into a gluten-free cheesecake that combines EVERYTHING we love about strawberry shortcake. We’re talking buttery graham crust, velvety cheesecake swirled with jammy berries, pockets of tender pound cake, clouds of whipped cream, and that fresh macerated strawberry crown. This isn’t just dessert; it’s a sweet celebration of layers that turns ordinary days into something sparkly. 🍓✨
Whether you’re gluten-free by necessity or just exploring delicious options, this recipe is your new best friend. Forget dry, crumbly imposters – this cheesecake is luxuriously creamy, perfectly balanced, and packed with nostalgic flavor. I promise, no one will guess it’s GF! It’s the ultimate showstopper dessert for birthdays, potlucks, or “just because Tuesdays.” So grab your favorite mixing bowl (and maybe an extra spoon for sneaky tastes), and let’s create some berry bliss together!
The Picnic That Started It All
This beauty was born from a happy kitchen accident! Last summer, my niece Lily (who’s gluten-free) was feeling left out at our family picnic because she couldn’t dig into Grandma’s famous strawberry shortcake. Seeing her disappointed little face? Nope, not on my watch! I raided my fridge and pantry: leftover GF pound cake, cream cheese, strawberries, and graham crackers. “Let’s make a Franken-dessert, Aunt Liv!” she giggled. What emerged from my oven was a lopsided, jam-swirled cheesecake with pound cake chunks peeking out. We topped it with whipped cream and berries right there in the park. One messy, joyous bite later, Lily declared it “WAY better than regular shortcake!” That lopsided triumph became this layered masterpiece. Now, it’s our tradition – every first strawberry haul means baking this together, licking spoons and making memories. Food magic happens when you bake from the heart, mistakes and all!
Your Berry Best Friends: The Ingredients
Gather these goodies! Using room-temperature dairy is KEY for a silky cheesecake batter – no lumps allowed! Here’s the breakdown:
- Fresh Strawberries (3½ cups total): The star! Divided for filling & topping. Choose ripe, fragrant berries. Frozen work in a pinch for the filling (thaw first!), but fresh is best for topping.
- Granulated Sugar: Sweetens the berries and cheesecake. For the macerated topping, coconut sugar adds a caramel note.
- Fresh Lemon Juice: Brightens the berries perfectly. Don’t sub bottled – the fresh zing is essential!
- Gluten-Free Graham Crackers (18 sheets): Forms our buttery base. Pamela’s or Schär work great. Can’t find GF grahams? Blend 2 cups GF oats + 2 tbsp brown sugar + 1/4 tsp cinnamon.
- Unsalted Butter (melted): Binds the crust. For dairy-free, use refined coconut oil.
- Cream Cheese (32 oz, softened): Full-fat is non-negotiable for richness. Let it sit out for 2 hours!
- Cornstarch: Our sneaky stabilizer – prevents cracks and gives structure.
- Vanilla Bean Paste: That gorgeous speckled depth! Pure extract works, but paste is magic.
- Eggs (room temp): 4 large. Cold eggs = lumpy batter. Pop them in warm water for 10 mins if forgotten!
- Heavy Cream & Sour Cream: Room temp! Cream adds silkiness, sour cream gives tangy balance.
- Gluten-Free Pound Cake (1½ cups cubed): The “shortcake” surprise! Store-bought (Kinnikinnick) or homemade. Stale cake works great – it soaks up flavor!
- Powdered Sugar (for whipped cream): Dissolves instantly for smooth clouds. Maple syrup (2 tbsp) works too.
Chef’s Whisper: Taste your berries! If they’re super sweet, reduce sugar in the filling by 1 tbsp.
Let’s Build Some Berry Bliss: Step-by-Step
Put on some tunes, and let’s dance through these steps! Remember: patience is your secret ingredient.
- Jammin’ Berry Filling: Toss chopped strawberries with 3 tbsp sugar and 1 tbsp lemon juice in a saucepan. Cook over medium heat for 10-12 minutes, mashing gently, until thick and jammy. (Tip: Stir often to prevent scorching! It should coat the back of a spoon.) Cool completely. This can be done a day ahead!
- Crust Time – Press Play! Blitz GF grahams in a food processor to fine crumbs. Mix with melted butter, brown sugar, and salt until it resembles wet sand. Firmly press into the bottom and 1 inch up the sides of a 9-inch springform pan. Use a flat-bottomed cup for even pressure. Chill 15 mins. (Hack: Line the pan bottom with parchment for foolproof release!)
- Cheesecake Alchemy: Beat softened cream cheese on medium-low until perfectly smooth (1-2 mins). Scrape bowl! Add granulated sugar, cornstarch, salt, and vanilla bean paste. Beat another 2 mins. Add eggs one at a time, mixing JUST until yellow disappears after each. Slowly blend in heavy cream and sour cream. (Crucial: Don’t overbeat after adding eggs/cream – it incorporates air and causes cracks!) Gently fold in cooled strawberry filling and cubed pound cake. Some streaks are good!
- Bake it Like You Mean It (Water Bath Style!): Wrap springform pan bottom tightly in heavy-duty foil. Place in a large roasting pan. Pour batter over crust. Pour HOT water into roasting pan until halfway up springform sides. Bake at 325°F (160°C) for 50-60 minutes. (It should look set around edges but slightly jiggly in the center – like Jell-O™!) Turn oven off, crack door open 1 inch, and let it cool inside for 1 hour. This gradual cooldown prevents sinking!
- The Long Chill (Worth it!): Remove from oven/water bath. Run a thin knife around the edge to loosen. Cool completely on a rack (about 2 hours). Then, refrigerate uncovered for at least 8 hours, preferably overnight. This sets the texture and deepens the flavor. (Resist temptation! Cold cheesecake slices cleanly.)
- Macerate & Whisk: 1 hour before serving, toss sliced strawberries with 3 tbsp sugar and 2 tbsp lemon juice. Let sit at room temp – they’ll get juicy! Whip cold heavy cream, powdered sugar, and vanilla to soft peaks.
- Grand Finale – Assemble! Release springform sides. Spread whipped cream over chilled cheesecake. Spoon macerated strawberries and their glorious syrup over the top. Slice with a hot, wet knife for pristine pieces.
Sharing is Caring: Serving it Up!
Presentation is part of the joy! I love serving this on a vintage cake stand for maximum “wow.” Garnish with extra fresh mint sprigs or edible flowers beside each slice. For picnics, pre-slice and pack in individual jars layered with extra whipped cream and berries – portable perfection! Pair it with a glass of sparkling rosé or a hot cup of Earl Grey tea. Remember: This is a rich dessert. Small slices (with extra berries!) are often plenty. Watching faces light up at the first bite? That’s the real reward!
Make It Your Own: Delicious Twists!
This recipe loves to play dress-up! Try these fun spins:
- Mixed Berry Bonanza: Swap half the strawberries for raspberries or blueberries in the filling/topping.
- Lemon Love: Add 1 tbsp lemon zest to the cheesecake batter + use lemon pound cake for a bright twist.
- Dairy-Free Dream: Use DF cream cheese (Kite Hill), coconut cream for whipping, coconut oil crust, and DF sour cream (Forager Project). Ensure pound cake is DF too!
- Chocolate Dipped: Drizzle melted dark chocolate over the whipped cream before adding berries.
- Boozy Berries: Add 1 tbsp Grand Marnier or Chambord to the macerating strawberries.
Olivia’s Kitchen Confessions
Okay, truth bomb: My first attempt at this cheesecake looked like the Grand Canyon! Massive crack right down the middle. I nearly cried. Then I remembered Lily’s lopsided picnic cake – it tasted incredible anyway. So I embraced it, piled on extra whipped cream and berries, and called it “Rustic Berry Canyon Cake.” Guess what? Everyone raved! Now I don’t sweat small cracks (the topping hides everything!). Over time, I learned the water bath and gradual cooling are crack-prevention superheroes. I also started using slightly stale pound cake – it holds its shape better in the batter! This recipe evolved through laughter, spills, and happy taste-testers. So if yours isn’t “perfect,” own it! Flavor and love always win.
Your Cheesecake Questions, Answered!
Let’s troubleshoot those common kitchen hiccups:
- Q: My cheesecake cracked! Disaster?
A: Absolutely not! First, cracks taste delicious. Second, we’re piling on whipped cream and berries – nature’s perfect cover-up! To prevent next time: Ensure ingredients are room temp, avoid overmixing after adding eggs, use a water bath, and cool gradually in the oven. Cornstarch also helps minimize cracks. - Q: Can I freeze this cheesecake?
A: Yes! Freeze the un-topped baked and chilled cheesecake (wrap tightly in plastic then foil) for up to 2 months. Thaw overnight in the fridge. Make the whipped cream and macerated berries fresh before serving. - Q: My filling is runny after baking/chilling. Help!
A: Likely causes: Underbaking (center should be *slightly* jiggly, not sloshy), rushing the chill (needs FULL 8+ hours), or overmixing the batter incorporating too much air. Ensure your oven temp is accurate with a thermometer! Runny filling still tastes great but will be messy. Serve in bowls! - Q: No springform pan? Alternatives?
A: A deep 9-inch cake pan lined with parchment paper (overhanging edges) works. To remove, lift parchment. A pie plate makes a thinner cheesecake – reduce baking time by 10-15 mins.
Gluten-Free Strawberry Shortcake Cheesecake
- Total Time: 1 hour 30 minutes
Description
This beauty was born from a picnic, a giggling niece, and a fridge full of odds and ends. What started as a “Franken-dessert” is now our most requested treat—layered with jammy berries, cubes of pound cake, and clouds of whipped cream. Whether you’re gluten-free or just craving joy on a fork, this cheesecake is pure berry magic.
Ingredients
-
Crust: 18 GF graham crackers, 6 tbsp melted butter, 2 tbsp brown sugar, pinch salt
-
Filling:
-
32 oz cream cheese (room temp)
-
¾ cup granulated sugar
-
1 tbsp cornstarch
-
1 tsp vanilla bean paste
-
4 eggs (room temp)
-
¼ cup heavy cream + ¼ cup sour cream
-
1½ cups cubed GF pound cake
-
1 cup strawberry jam or homemade berry compote
-
-
Topping:
-
2 cups sliced fresh strawberries
-
3 tbsp sugar + 2 tbsp lemon juice (macerate)
-
1 cup whipped cream + 2 tbsp powdered sugar
-
Instructions
-
Preheat oven to 325°F. Wrap springform pan in foil. Line bottom with parchment.
-
Make crust: Combine graham crumbs, butter, sugar, and salt. Press into pan bottom & sides. Chill 15 mins.
-
Berry filling: Cook 1½ cups chopped strawberries with 3 tbsp sugar & lemon juice for 10–12 mins until thick. Cool.
-
Cheesecake: Beat cream cheese until smooth. Add sugar, cornstarch, and vanilla. Beat in eggs one at a time. Fold in cream, sour cream, berry jam, and pound cake cubes.
-
Bake in water bath for 50–60 mins until center jiggles slightly. Turn oven off, crack door, cool 1 hour. Chill 8 hrs or overnight.
-
Top with whipped cream and macerated berries before serving.
Notes
-
Room temp ingredients = no lumps.
-
Water bath + slow cooling = no cracks.
-
Slice with hot knife for clean cuts.
- Prep Time: 30 min
- Cook Time: 60 min
Nutrition
- Calories: 950 per slice
- Sugar: 50g
- Fat: 76g
- Carbohydrates: 63g
- Protein: 14g
Nutritional Info (Per Slice, Approximate)
Calories: 951 | Fat: 76g | Saturated Fat: 45g | Carbohydrates: 63g | Fiber: 2g | Sugar: 50g | Protein: 14g | Sodium: 520mg
Note: This is a celebratory dessert! Nutritional info varies based on specific brands and ingredient amounts used. Enjoy mindfully!
Final Thoughts: More Than a Dessert
This strawberry cheesecake is a testament to the magic of improvisation and heart. It’s proof that dietary restrictions don’t limit joy—they can inspire it. From Lily’s picnic disappointment to a family tradition, this recipe embodies resilience, creativity, and the sweetness of shared moments.
So whether you’re baking it for someone gluten-free, for a summer gathering, or just to treat yourself, remember: The cracks, the lopsided layers, and the sticky strawberry fingers are all part of the story. And what a delicious story it is.
Now, go forth and bake—and don’t forget to lick the spoon!

Cheesy Turkish Pide with Spiced Beef
When Comfort Takes the Shape of a Golden Boat
Hey there, kitchen friend! Olivia here, apron probably dusted with flour already. Can you smell it? That intoxicating blend of toasty crust, bubbling cheese, and beef spiced with warm, earthy notes? That’s the magic of Turkish Pide (pronounced pee-DAY) calling your name. If you’ve ever craved something deeply satisfying, effortlessly shareable (or gloriously solo-devourable!), and packed with bold flavors, you’ve docked at the right recipe.
Picture this: a tender, slightly chewy dough, lovingly shaped into an open boat, cradling a molten heart of savory spiced ground beef and oozing cheese. The edges puff up golden-brown and crisp, brushed with egg for that irresistible shine, while the filling bubbles and beckons. It’s like the best parts of pizza and a calzone had a delicious, Middle Eastern-inspired love child. 🇹🇷
What I absolutely adore about pide is its beautiful duality. It feels special enough for a weekend gathering – slice it up, watch your friends’ eyes light up. But it’s also shockingly achievable for a Tuesday night when you need a hug on a plate, fast. We’re talking about 35 minutes from fridge to face, people! No fancy skills required, just good ingredients and a little enthusiasm. This recipe? It’s straight from the heart of bustling Turkish kitchens, passed down with warmth, and now I’m thrilled to share it with *you*. Get ready to fill your kitchen with the kind of aromas that make everyone wander in, asking “What smells SO good?” Let’s bake some cozy, cheesy joy!
A Pide Revelation in a Bustling Istanbul Side Street
My love affair with pide wasn’t born in a fancy restaurant, but tucked away in a tiny, steam-clouded bakery in Istanbul. Jet-lagged and wide-eyed on my first trip, I followed the irresistible scent of baking dough and charred peppers down a narrow alley. Behind a counter piled high with golden, boat-shaped beauties, a man with flour-dusted forearms worked with lightning speed, stretching dough and piling on fillings with practiced ease.
I pointed helplessly at the one bubbling with cheese and something richly red-brown. He grinned, slid a freshly baked one onto a piece of parchment, and gestured for me to eat it right there, leaning against the warm stone wall. That first bite? Pure revelation. The crust was simultaneously crisp and yielding, the beef filling spiced with warmth (cumin! cinnamon!) but not heat, and the cheese… oh, the cheese! Salty, stretchy, molten perfection. It wasn’t just food; it was pure, unadulterated comfort and hospitality handed to me on a piece of paper. I must have looked utterly blissful because he just laughed and handed me another piece, refusing payment for the second helping. That messy, joyful, standing-in-an-alley feast cemented pide as my ultimate soul food. Every time I make it now, I’m transported back to that moment of delicious discovery. ✨
Your Pide Pantry: Simple Ingredients, Big Flavor
Gather your crew! This recipe makes 2 beautiful pides, perfect for 4 hungry people (or 2 *very* enthusiastic ones with leftovers!). Let’s chat about what goes in:
- 1 medium yellow onion, quartered: The sweet, savory base. Red onion works too for a sharper bite.
- 1 small green bell pepper, deseeded: Adds freshness and a subtle grassy note. Feel free to swap in red or yellow for sweeter vibes.
- 1 small tomato: Brings juicy acidity and helps create the saucy filling. A plum tomato is ideal, but any ripe one works! Chef’s Insight: Processing these raw veggies together is our flavor-building shortcut!
- 3 garlic cloves: Non-negotiable aromatic punch! Use more if you’re a garlic fiend (no judgment!).
- 1 tbsp olive oil: For sautéing our flavor base. Extra virgin adds fruitiness.
- 1 lb ground beef (85/15 is ideal): The hearty star! Ground lamb is a fantastic traditional swap for deeper flavor. For a lighter twist, try ground turkey or chicken (bump up the spices slightly!).
- 2 tbsp tomato paste: Concentrated umami magic! Double-concentrate? Use 1 tbsp. Chef’s Tip: Fry it with the beef for 30 seconds before adding spices to deepen its flavor.
- 1 tsp ground cumin: Earthy, warm, essential Turkish flavor. Smell it? That’s comfort.
- 1 tsp paprika: Sweet or smoked paprika both work! Smoked adds a lovely depth.
- 1 tsp kosher salt (plus more to taste): Diamond Crystal is my go-to. Table salt? Use about 3/4 tsp initially. Always taste and adjust!
- ½ tsp ground cinnamon: The secret whisper! Don’t skip it – it adds incredible warmth and complexity without tasting “cinnamony”.
- ½ tsp black pepper: Freshly ground is best!
- 2 (8 oz) pizza dough balls, room temp: The foundation! Store-bought is a lifesaver (look for dough near the deli or canned biscuits). Thaw frozen dough overnight in the fridge. Homemade? Even better! Chef’s Hack: Room temp dough is MUCH easier to stretch without tearing.
- 2 cups shredded cheese, divided: Mozzarella is melty and mild. Turkish Kasar (or Kasseri) is traditional – salty, tangy, and fantastic! A blend of mozz and a sharper cheese like provolone, white cheddar, or even feta crumbles is delicious. Sub Tip: Need it melty and dairy-free? A good vegan mozz shred works!
- 1 large egg, beaten: Our golden glow potion! Gives the crust that irresistible shine and color. Egg wash is key!
- Chopped parsley + chili flakes (for garnish): Fresh parsley adds brightness. Chili flakes (like pul biber/Urfa if you have them!) offer a customizable kick. Optional but highly recommended!
Shaping Your Flavor Boats: Let’s Get Baking!
Okay, crew! Preheat that oven to 425°F (220°C) – nice and hot for the perfect crust. Grab your baking sheet (line it with parchment for easy cleanup!). Let’s turn these ingredients into golden perfection:
- Pulse Power! Toss your quartered onion, deseeded bell pepper, tomato, and garlic cloves into your food processor. Pulse 8-10 times until everything is finely chopped – you want small pieces, not a puree. No processor? No sweat! Just chop everything as finely as you can by hand. Chef’s Hack: This veggie mix is your flavor base – processing it together saves SO much chopping time and ensures everything cooks evenly.
- Sizzle & Brown: Heat the olive oil in a large skillet over medium heat. Add the chopped veggie mix and sauté for 3-4 minutes, stirring often, until softened and fragrant (the onions will turn translucent). Now, add the ground beef, breaking it up with your spoon. Cook until the beef is no longer pink, about 5-6 minutes. Drain any excess fat if needed (especially if using higher-fat beef). Stir in the tomato paste, cumin, paprika, salt, cinnamon, and black pepper. Cook for another 2 minutes, letting those spices toast and mingle beautifully with the beef and veggies. Your kitchen should smell AMAZING right now! Remove the skillet from the heat and let the filling cool slightly while you work the dough. Chef’s Tip: Cooling prevents the hot filling from making the dough soggy or hard to handle.
- Dough Time – Be Gentle! Lightly flour your work surface. Take one dough ball (keep the other covered) and gently press it down with your hands. Using a rolling pin (or even just your hands!), gently stretch and roll the dough into an oval shape, about 12-14 inches long and 6-8 inches wide. Don’t stress perfection! Rustic is charming. Aim for an even thickness, slightly thicker at the edges. Repeat with the second dough ball. Chef’s Hack: If the dough fights you and shrinks back, cover it with a towel and let it rest for 5 minutes – the gluten relaxes!
- Fill & Fold – Make the Boat! Carefully transfer one dough oval to your prepared baking sheet (it might hang over a bit, that’s okay!). Spoon half of the slightly cooled spiced beef mixture down the center of the oval, leaving a generous 1 to 1.5-inch border clear all the way around. Sprinkle 1 cup of your chosen cheese evenly over the beef. Now, the fun part: creating the boat! Starting at one end, fold the edges of the dough inward over the filling, pinching the very tips together firmly. Work your way down both sides, pinching the dough edges together as you go to form raised sides and secure the ends. You want it to look like an open canoe filled with deliciousness! Repeat with the second dough oval and remaining filling/cheese. Chef’s Insight: Don’t overfill! Keeping that border clear ensures the dough can puff and crisp properly. Pinch firmly so your boat doesn’t spring a leak!
- Golden Glow & Bake: Beat that egg in a small bowl. Using a pastry brush (or even your fingers!), gently brush the exposed crust edges (the folded-over dough) with the beaten egg. This is what gives it that beautiful, deep golden shine! Pop the baking sheet into your preheated oven. Bake for 12-15 minutes. You’re looking for the crust to be deeply golden brown and crisp, the cheese to be gloriously melted and bubbly, and the filling piping hot. Chef’s Tip: Rotate the baking sheet halfway through baking for even browning. Ovens have hot spots!
Anchoring Your Delicious Creation: How to Serve
Resist diving in immediately! Let your glorious pides rest for just 2-3 minutes after baking – this helps the cheese set slightly so it doesn’t completely escape when you slice. Transfer them carefully to a large cutting board using a big spatula. Sprinkle generously with fresh chopped parsley for a burst of color and freshness, and add a pinch of chili flakes if you like a little heat. Slice crosswise into thick strips – think of it like slicing a baguette. The beauty? Everyone gets a piece with that perfect crust-to-filling ratio! Serve it straight off the board, family-style. This is pure, unpretentious, shareable comfort. A simple side salad (think cucumber, tomato, red onion, lemon-olive oil dressing) cuts through the richness perfectly. Enjoy it warm, when the cheese is at its most seductive pull! 🧀🔥
Set Sail with Flavor: Creative Pide Twists!
The beauty of pide is its versatility! Once you’ve mastered the basic spiced beef boat, try these delicious detours:
- Spinach & Feta Classic: Sauté 10oz chopped fresh spinach with 2 minced garlic cloves until wilted. Drain well, squeeze out excess water. Mix with 1 cup crumbled feta, 1/2 cup ricotta or cottage cheese, a pinch of nutmeg, salt, and pepper. Omit the beef spices. Divine!
- Breakfast Pide Power: Scramble 4-5 eggs with a splash of milk. After baking the crust with cheese for 5 mins, pull it out, pour in the eggs, top with cooked crumbled sausage or bacon and extra cheese. Bake another 8-10 mins until eggs set. Weekend brunch hero!
- Veggie Lover’s Delight: Swap beef for sautéed mushrooms, zucchini, eggplant, and bell peppers. Add a splash of balsamic and Italian herbs (oregano, basil) instead of the Turkish spices. Use mozzarella and goat cheese.
- Spicy Lamb & Pine Nut: Use ground lamb instead of beef. Add 1/4 tsp cayenne or 1 tsp Aleppo pepper to the spice mix. Stir in 1/4 cup toasted pine nuts into the cooked filling. Rich and textured!
- White Cheese & Herbs (Peynirli Pide): Skip the meat! Mix 2 cups kasar or mozzarella with 1/2 cup crumbled feta, 1 beaten egg, 2 tbsp chopped fresh dill, and 1 tbsp chopped fresh mint. Spread down the center. Simple, cheesy perfection.
From My Messy Apron to Yours: Chef’s Notes
This recipe has become my go-to “impress-with-minimal-stress” dish. Over the years, I’ve learned a few things: First, room temp dough is non-negotiable for easy shaping – trying to wrestle cold dough is a recipe for frustration (and tears!). Second, don’t skip the egg wash! It seems small, but it transforms the crust from pale and sad to gloriously golden and professional-looking. That shine is pure kitchen magic. Third, embrace the imperfect shape! My first pide looked more like a lopsided slipper than a boat, but it tasted incredible. Rustic charm is part of its homemade appeal.
Funny story: I once was so excited to serve these to friends, I forgot to pinch the ends of one pide firmly enough. Mid-bake, I heard a distinct “plop” sound. Sure enough, one end had opened like a drawbridge, and a river of cheesy beef was slowly escaping onto the baking sheet! We dubbed it the “Pide Pac-Man” and just scooped the filling back on after baking – still delicious, just extra crispy on one end. 😂 The lesson? Pinch those ends like you mean it! Now, this recipe feels like an old friend – reliable, comforting, and always ready to deliver joy. I hope it becomes one of your kitchen staples too!
Pide Perfection: Your Questions Answered
Let’s tackle those common pide puzzlers:
- Q: My dough keeps shrinking back when I try to roll it! Help!
A: Dough tension strikes! This usually means the gluten is too tight. Cover the dough with a clean kitchen towel or inverted bowl and let it rest for 5-10 minutes. Relaxed gluten = much more cooperative dough! Also, ensure it’s truly room temperature. - Q: My filling leaked out during baking! What happened?
A: Oh, the dreaded leak! This usually boils down to two things: 1) Overfilling: Respect the border! Leave that 1-1.5 inch edge clear. 2) Insufficient Pinching: Really crimp and pinch those folded edges together firmly, especially at the pointed ends. Think of sealing an envelope. Also, ensure your filling isn’t too wet – drain cooked beef well and let the filling cool slightly so it doesn’t steam the dough.µ

Cheesy Turkish Pide with Spiced Beef
- Total Time: 35 min
Description
My first taste of pide came on a quiet Istanbul alley, jet-lagged and hungry, when a flour-dusted baker handed me a bubbling cheese-and-beef boat straight from his oven. One bite—savory, warm, slightly crisp—and I was hooked. This dish is more than a meal; it’s an edible hug, perfect for weeknights or impressing guests. Let’s bring that street-corner joy to your kitchen.
Ingredients
-
1 lb ground beef (or lamb)
-
1 onion, 1 small bell pepper, 1 tomato, 3 garlic cloves (finely chopped or pulsed)
-
1 tbsp olive oil
-
2 tbsp tomato paste
-
1 tsp each: cumin, paprika, kosher salt
-
½ tsp cinnamon, ½ tsp black pepper
-
2 (8 oz) pizza dough balls, room temp
-
2 cups shredded mozzarella or Turkish cheese
-
1 egg, beaten (for brushing)
-
Parsley, chili flakes (for garnish)
Instructions
-
Preheat oven to 425°F (220°C). Line a baking sheet with parchment.
-
Sauté filling: In a skillet, heat oil. Add chopped veggies; cook 3–4 mins. Add beef, cook until browned. Stir in tomato paste and spices; cook 2 more mins. Let cool slightly.
-
Shape dough: Roll each dough ball into a 12″x6″ oval. Transfer to baking sheet.
-
Assemble pides: Spoon half the beef filling down each center. Top with 1 cup cheese per pide. Fold edges over slightly, pinching ends to form a boat.
-
Brush crust with egg wash. Bake 12–15 mins until golden and bubbly.
-
Garnish with parsley and chili flakes. Slice and serve warm.
Notes
-
Let dough rest if it resists shaping.
-
Don’t overfill—leave 1″ border.
-
Cheese alternatives: Feta, kasseri, or dairy-free mozz.
- Prep Time: 20 min
- Cook Time: 15 min
Nutrition
- Calories: 600 per serving
- Fat: 35g
- Carbohydrates: 40g
- Fiber: 3g
- Protein: 30g
-
Final Thoughts: Why Pide Belongs in Your Kitchen
Pide is more than a recipe—it’s a gateway to curiosity. It teaches you to shape dough with confidence, to balance spices by taste, and to share food with abandon. Whether you’re feeding a crowd or treating yourself, it’s a reminder that the best meals aren’t fussy; they’re flavorful, forgiving, and full of heart.
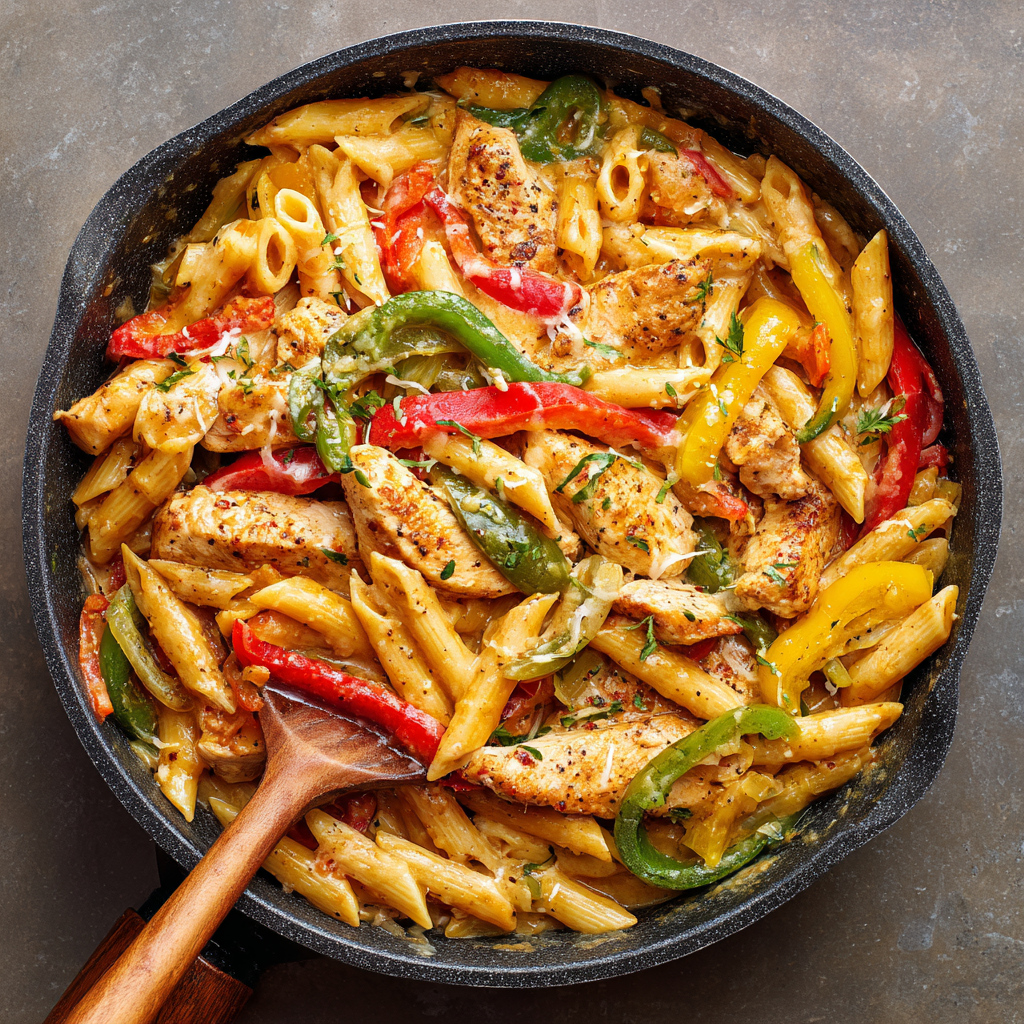
One-Pot Chicken Fajita Pasta
One-Pot Chicken Fajita Pasta: Your New Weeknight Hero
Hey there, kitchen friends! Olivia here, and I’ve got a confession: some nights, I stare into my fridge like it’s a puzzle I can’t solve. You know those evenings—when you’re craving something bold and comforting, but the clock’s ticking, the sink’s already full, and takeout sounds way too tempting? That’s exactly when this One-Pot Chicken Fajita Pasta swoops in like a culinary superhero. 🌯✨
Imagine your favorite sizzling fajita flavors—smoky cumin, punchy chili powder, sweet peppers—hugging tender chicken and pasta in a creamy, cheesy embrace. Now picture making it all in one pot while barely breaking a sweat. That’s the magic of this recipe! It’s weeknight gold: ready in 30 minutes, packed with protein and veggies, and so ridiculously flavorful that my family literally crowds around the stove. No fancy skills needed—just your trustiest pot, a hungry heart, and maybe an apron (because cheese has a way of finding its way everywhere, right?). Let’s turn “What’s for dinner?” into “Can I have seconds?”
The Night Fajitas Met Pasta (And Changed My Life)
This dish was born during one of those chaotic “refrigerator roulette” nights. Picture it: college me, hosting 5 friends in my shoebox apartment, realizing I’d promised “something epic” but only had chicken breasts, half a bag of penne, and a rainbow of slightly-wrinkly peppers. Panic mode? Totally. But then… inspiration struck! I’d been obsessing over fajitas all week, so I tossed Tex-Mex spices into the pot with everything else, crossed my fingers, and prayed. When that creamy, spicy aroma hit the room? Silence. Then forks clattering. My buddy Mark—who’d been skeptically eyeing the pot—mumbled through a full mouth: “Is this… fajita pasta? GENIUS.” Fifteen years later, it’s still my most-requested “Olivia Special”—proof that happy accidents make the best kitchen memories. 🥰
Your Flavor Toolkit: Ingredients & Swaps
Why these ingredients work: We’re building layers of Tex-Mex vibes and creamy comfort. Don’t stress if you need swaps—I’ve got you!
- 3 tbsp neutral oil (like avocado or grapeseed): High smoke point = perfect searing. Swap: Butter works too (adds richness), but watch for burning!
- 3 chicken breasts, sliced: Lean and quick-cooking. Chef’s hack: Freeze for 15 mins before slicing—easiest thin cuts ever! Swap: Thighs for extra juiciness.
- 1 red + 1 green + 1 yellow bell pepper, sliced: Color = flavor depth! Reds are sweetest, greens are bright, yellows mellow. Swap: Use any combo—even poblanos for smokiness!
- 1 yellow onion, sliced: Caramelizes beautifully. Swap: Red onion for sharper bite.
- 1 tsp kosher salt + 1 tsp black pepper: Season in layers! Kosher salt sticks better than table salt.
- 1 tbsp each chili powder + cumin + garlic powder: The fajita trifecta! Chef’s insight: Toasting spices in step 2 wakes up their oils—smell that? That’s flavor magic.
- 5 cups milk (whole preferred): Whole milk = luxuriously creamy sauce. Swap: 2% works, but avoid skim (too thin). Non-dairy? Unsweetened oat milk is my fave sub!
- 4 cups penne pasta: Holds sauce in its tubes! Swap: Any short pasta like rigatoni or fusilli.
- 1 cup shredded pepper jack cheese: Melts like a dream with a spicy kick. Swap: Monterey Jack for milder, or cheddar for tang.
Let’s Get Cooking: Your No-Stress Steps
Grab your largest pot (I use my 5-quart Dutch oven) and let’s dance through this together! Active time? Just 10 minutes. You’ve got this.
- Heat oil over medium-high heat. Test it with a pepper slice—it should sizzle gently! Add chicken in a single layer (don’t crowd!). Sprinkle salt and pepper. Chef’s hack: That brown crust = flavor gold. Don’t stir for 2 mins! Let it sear. Cook 5-6 mins until golden, then set aside on a plate. (Psst: It’ll finish cooking later!)
- In that same glorious pot, toss in peppers and onions. Sauté 4-5 mins until slightly softened but still vibrant. Tip: Want char? Let them sit untouched for 1 min! Now rain in chili powder, cumin, and garlic powder. Stir like you mean it for 30 seconds—you’ll smell the spices blooming! This toasts them, deepening the flavor.
- Reunite chicken with veggies! Pour in milk. Pro move: Warm milk slightly first to prevent curdling (I zap it 1 min in the microwave). Bring to a light simmer—tiny bubbles at the edges, not a rolling boil. Stir once.
- Add penne, pushing it gently under the liquid. Uncovered is key here—we’re reducing! Stir every 2-3 mins to prevent sticking. Cook 12-15 mins until pasta is al dente (taste test at 12!). Sauce thickens as it cools. Watch-out: If it looks too thick early, add splash of milk. Too thin? Simmer 2 mins extra.
- Kill the heat. Stir in cheese until it melts into velvety bliss. Secret: Off-heat stirring prevents grainy sauce! Taste? Adjust salt if needed. Boom—dinner’s served!
The Science of One-Pot Magic: Why This Method Works
Ever wonder why one-pot meals taste so deeply satisfying? It’s not just convenience—it’s chemistry! Here’s why this technique delivers next-level flavor with minimal cleanup:
1. Flavor Layering (The Maillard Reaction):
When you sear the chicken in Step 1, the high heat triggers the Maillard reaction—a fancy term for the browning process that creates hundreds of new flavor compounds. Those golden bits left in the pot? They’re called fond, and they’re packed with umami. By deglazing with milk and scraping them up, you’re essentially making an instant sauce base. Pro tip: If your fond sticks too hard, a splash of broth or water helps loosen it without diluting flavor.
2. Starch Power (Creamy Sauce Hack):
Pasta releases starch as it cooks, which thickens the milk into a luscious sauce—no roux needed! This is why stirring occasionally matters: it redistributes the starch evenly. For extra silkiness, some chefs reserve a bit of pasta water to adjust consistency at the end (its starch content is gold).
3. Spice Blooming (Oil’s Role):
Toasting the spices in oil (Step 2) isn’t just for aroma; fat dissolves and carries fat-soluble flavor compounds, making the cumin and chili powder taste more vibrant. Ever noticed how store-bought fajita seasoning can taste flat? This step fixes that!
4. Controlled Reduction:
Simmering uncovered reduces the liquid gradually, concentrating flavors while the pasta cooks. Covered pots trap steam, leading to mushy pasta and watery sauce. The milk’s proteins also behave better with gentle heat—boiling can make them seize up, causing graininess.
5. Cheese Science (Emulsification):
Adding cheese off-heat prevents the proteins from clumping. Pepper Jack’s sodium citrate (a natural emulsifier) helps it melt smoothly. Fun fact: Pre-shredded cheeses contain anti-caking agents that can make sauces grainy—always grate your own for silky results!
Global Twists: Reinventing Fajita Pasta Worldwide
This recipe is a blank canvas for global flavors! Here are five international spins:
1. Italian-Argentine Fusion:
Swap fajita spices for 1 tbsp dried oregano + 1 tsp smoked paprika. Use Italian sausage instead of chicken, and stir in sun-dried tomatoes with the peppers. Finish with Parmesan and basil.
2. Thai-Inspired:
Replace cumin/chili powder with 2 tbsp red curry paste + 1 tbsp fish sauce. Use coconut milk instead of dairy, and add shrimp with the pasta. Top with cilantro, peanuts, and lime zest.
3. Indian Masala Version:
Sauté 1 tbsp garam masala + 1 tsp turmeric with the veggies. Swap chicken for paneer (add in the last 5 minutes), and use spinach instead of bell peppers. Finish with cream and fresh fenugreek.
4. Mediterranean Delight:
Skip the Tex-Mex spices. Add 1 tsp each dried thyme and rosemary with garlic. Use feta cheese and kalamata olives, and toss in artichoke hearts at the end. Lemon zest brightens it up!
5. Korean BBQ Twist:
Marinate chicken in 2 tbsp gochujang + 1 tbsp soy sauce before cooking. Use shiitake mushrooms instead of peppers, and garnish with scallions and sesame seeds. Kimchi on the side is a must!
Why These Work: Each twist respects the original technique while borrowing signature ingredients from other cuisines. The one-pot method adapts beautifully—just adjust cook times for proteins (e.g., shrimp cooks faster than chicken).
Kid-Friendly Hacks & Picky Eater Wins
Getting kids to eat veggies and spices can feel like a stealth mission. Here’s how I’ve won over even the most skeptical little eaters:
1. The “Rainbow Noodle” Trick:
My toddler named this dish because of the colorful peppers. I lean into it by cutting peppers into fun shapes (use mini cookie cutters for stars or hearts) and calling the spices “superhero flavor dust.”
2. Hide & Seek Veggies:
Finely dice or grate carrots/zucchini and sauté them with the onions—they’ll blend into the sauce. Pureed roasted red peppers (instead of sliced) add sweetness without texture complaints.
3. Cheese Bridges:
For spice-averse kids, reduce chili powder to ½ tsp and let them stir in extra cheese at the table. The melting action feels like a fun activity!
4. DIY Topping Bar:
Set out small bowls of toppings and let kids build their own bowls. Crushed tortilla chips, mild salsa, and corn kernels are hits. They’re more likely to eat what they “create.”
5. Leftover Makeovers:
Transform leftovers into “Fajita Grilled Cheese” (butter bread, add pasta inside, grill) or “Fajita Quesadillas” (mix with extra cheese between tortillas). Familiar formats = acceptance!
Pro Tip: Involve kids in safe steps like sprinkling cheese or stirring (with supervision). Ownership = curiosity!
Plating with Pizzazz (Minimal Effort, Max Wow)
This dish is a rainbow in a pot—show it off! Scoop straight into deep bowls. Top with a handful of fresh cilantro, avocado slices (essential for creamy contrast!), and a squeeze of lime. Want extra fun? Set out small bowls of toppings: sour cream, pickled jalapeños, crushed tortilla chips for crunch, or extra cheese. Pair with a crisp green salad or just grab a cold cerveza. Fiesta vibes achieved without a single extra pan to wash. 🙌
Mix It Up: 5 Delicious Twists
This recipe loves a costume change! Try these spins:
- Seafood Fiesta: Swap chicken for shrimp (add in last 5 mins of cooking!).
- Veggie Power: Skip chicken, add black beans and corn with the peppers.
- Smoky Chipotle: Add 1 tbsp adobo sauce from canned chipotles with the spices.
- Green Goddess: Use poblano peppers + spinach stirred in at the end. Top with cotija cheese.
- Gluten-Free/Dairy-Free: GF pasta + unsweetened oat milk + vegan cheese shreds.
Olivia’s Behind-the-Scenes Notes
This recipe’s my kitchen mutt—it evolved from that college experiment to a family staple! My toddler now calls it “rainbow noodles,” and I’ve learned a few things: First, slice peppers evenly (about ¼-inch thick) so they cook uniformly. Second, stirring is non-negotiable—I learned this the hard way when I got distracted by a video call and ended up with pasta “tile” at the bottom of my pot! 😅 Third, leftovers? Even better day two—just loosen with a splash of milk when reheating. Fun fact: My husband adds hot sauce to his bowl every single time. Every. Single. Time. Some things never change!
Your Burning Questions, Answered!
Q: Can I use frozen peppers?
A: Absolutely! No need to thaw—just add them straight to the pot. They’ll release more water, so simmer 2-3 mins extra.
Q: Why did my sauce break/curdle?
A: High heat is the culprit! Milk can curdle if boiled aggressively. Keep it at a gentle simmer (tiny bubbles!), and warm the milk first. If it separates, whisk in 1 tbsp cold butter—it’ll often save the day.
Q: Pasta turned mushy—help!
A: Different pasta brands cook faster. Test at 10 mins next time! Also, residual heat keeps cooking it, so undercook slightly when you turn off the stove.
Q: Can I make this ahead?
A: Totally! Cook until pasta is almost done (step 4), then cool and refrigerate. Reheat gently with ¼ cup milk or broth, stirring often. Cheese gets extra gooey—win!
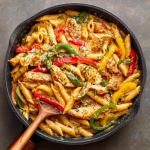
One-Pot Chicken Fajita Pasta
- Total Time: 30 min
Description
Born from a fridge clean-out and a dinner promise I had no idea how to keep, this dish became an instant classic in my tiny college kitchen. Today, it’s a weeknight regular—full of sizzling fajita flavors, tender chicken, and creamy pasta—all made in one pot with zero stress. Gather around the stove and get ready for second helpings.
Ingredients
-
3 tbsp neutral oil (avocado or grapeseed)
-
3 chicken breasts, sliced thin
-
1 red, 1 green, 1 yellow bell pepper, sliced
-
1 yellow onion, sliced
-
1 tsp kosher salt + 1 tsp black pepper
-
1 tbsp each: chili powder, cumin, garlic powder
-
5 cups whole milk (or unsweetened oat milk)
-
4 cups penne pasta
-
1 cup shredded pepper jack cheese
Instructions
-
Heat oil in a large pot over medium-high. Sear chicken (5–6 mins), season, then set aside.
-
Sauté peppers and onions (4–5 mins). Stir in spices for 30 seconds.
-
Return chicken. Add milk and bring to a light simmer.
-
Stir in pasta. Cook uncovered 12–15 mins, stirring often, until al dente.
-
Turn off heat, stir in cheese until melted. Taste and adjust seasoning.
Notes
-
Stir pasta often to prevent sticking.
-
Warm milk first to avoid curdling.
-
Slice peppers evenly for perfect texture.
-
Let sauce thicken off-heat—it’ll become creamier as it cools.
- Prep Time: 10 min
- Cook Time: 20 min
Nutrition
- Calories: 550 per serving
- Fat: 20g
- Carbohydrates: 45g
- Fiber: 4g
- Protein: 35g
Nutritional Per Serving (Approx):
Calories: ~550 | Protein: ~35g | Carbs: ~45g | Fat: ~20g | Fiber: ~4g
Note: Values vary based on swaps. Add avocado? Healthy fats boost nutrition!
Final Thoughts: More Than Just a Recipe
This One-Pot Chicken Fajita Pasta isn’t just dinner—it’s a lifeline for busy nights, a canvas for creativity, and a reminder that the best meals often come from happy accidents. It’s taught me that cooking doesn’t need to be perfect to be joyful. Whether you’re feeding a crowd, experimenting with global flavors, or coaxing veggies into a picky eater, this dish bends without breaking. So grab that pot, embrace the chaos, and let dinner be deliciously unfussy. After all, the secret ingredient is always you.
Roasted Cauliflower Bowl with Garlic Confit Yogurt Dip
When Life Gives You Cauliflower, Make Magic Bowls
Hey there, kitchen friend! Olivia here, waving from my flour-dusted countertop. Ever have one of those days where you crave something that feels equally nourishing and exciting? Like your taste buds want a vacation but your soul needs a hug? That’s exactly where this Roasted Cauliflower Bowl with Garlic Confit Yogurt Dip was born! Picture this: caramelized, spice-kissed veggies tumbling over protein-packed lentils, all swirled with a creamy, dreamy garlic dip that’ll make you close your eyes and sigh. It’s not just dinner – it’s a full sensory experience in a bowl.
I get it – sometimes “bowls” can feel fussy or time-consuming. But trust me, this one’s different. We’re talking 15 minutes of prep, one baking sheet, and ingredients that transform into pure gold under the heat of your oven. The secret weapon? That garlic confit. Roasting whole garlic cloves in olive oil turns them into sweet, buttery nuggets that melt into the yogurt like a savory whisper. Paired with smoky harissa and earthy lentils? Pure plant-based bliss. Whether you’re a veggie veteran or just cauliflower-curious, this bowl is your ticket to a vibrant, satisfying meal that’ll have you scraping every last bite. Ready to make your kitchen smell incredible? Let’s dive in!
The Accidental Love Affair: How This Bowl Found Me
This recipe? It started with desperation and a nearly-empty fridge! Picture a rainy Tuesday last fall. My best friend Jess showed up unannounced, soaked and starving, right as I realized my grocery run was… forgotten. All I had: a lone cauliflower, an eggplant looking slightly dubious, lentils, yogurt, and a head of garlic. “Challenge accepted,” I declared! I tossed the veggies with harissa (my forever pantry hero), chucked the garlic in foil, and crossed my fingers.
The moment that roasted lemon hit the garlic yogurt? Magic. Jess took one bite, eyes wide, and mumbled, “You’re NOT allowed to forget this.” We sat on my tiny kitchen floor, bowls steaming, rain pattering outside, and just… savored. It was messy, imperfect, and utterly delicious. That’s the heart of this bowl for me – it’s resourceful, unfussy, and born from making something beautiful out of the “not enough.” Every time I make it, I remember that cozy floor picnic and how the simplest ingredients can create the warmest memories. Now, let’s recreate that magic in YOUR kitchen!
Your Flavor Toolkit: Gathering the Good Stuff
Don’t stress about perfection here! This list is flexible – think of it as your flavor playground.
Roasted Veggies (The Starring Act!)
- 1 small cauliflower, cut into florets: The MVP! Look for tight, creamy-white heads. No cauliflower? Broccoli florets work beautifully too – they’ll roast faster, so check them early.
- 1 eggplant, diced: Adds meaty depth. Chef’s hack: Salting eggplant is optional here since high heat and cornstarch fix sogginess! If swapping, try zucchini or sweet potato cubes.
- 1 tbsp harissa paste: Our flavor rocket! Smoky, spicy, complex. No harissa? Mix 1 tsp smoked paprika + 1/2 tsp cayenne + 1/2 tsp cumin. Insight: Taste your harissa first – heat levels vary wildly!
- ½ tsp ground cumin + ½ tsp ground turmeric: Earthy warmth and golden glow. Turmeric stains – embrace the apron mess!
- 1 tbsp cornstarch: The CRISP secret! Draws out moisture, creating irresistible caramelized edges. Don’t skip!
- 2 tsp olive oil: Helps the spices cling and promotes browning. Avocado oil is a great high-heat sub.
- 3 pinches sea salt flakes: Flaky salt = bigger flavor bursts. Table salt works, but use half the amount.
- 1 lemon, halved: Roasting mellows its sharpness into sweet, jammy sunshine. Essential for squeezing!
Garlic Confit Yogurt Dip (The Velvety Dream)
- 1 head garlic: Yes, the WHOLE thing! Confit transforms it into sweet, spreadable gold. No substitutes here – it’s the soul of the dip.
- 1 tsp olive oil: For roasting the garlic. Protects and infuses.
- 1 cup thick soy yogurt: Creamy, tangy, plant-based base. Chef’s tip: Full-fat coconut yogurt works, but it’ll taste coconutty. Greek yogurt is perfect for non-vegan.
- 1 tbsp tahini: Adds nutty depth and richness. Out of tahini? Try 2 tsp almond butter or omit it – the garlic still shines!
- Salt to taste: Start small! Roasted garlic is mellow, so you’ll need less than you think.
To Serve (The Grand Finale)
- 1 cup cooked black lentils: Beluga lentils hold shape best! Canned brown/green lentils work in a pinch (rinse well!). Insight: Warm them slightly for extra coziness.
- 4 tbsp fresh parsley, chopped: Bright, fresh pop! Cilantro or dill are fun swaps.
- 1 tsp dukkah (for garnish): That crunchy, nutty sprinkle! No dukkah? Toasted sesame seeds + chopped pistachios = instant hack.
Let’s Get Roasting: Your Foolproof Roadmap
Grab your sheet pan and let’s turn these ingredients into pure deliciousness! Active time is minimal – the oven does the heavy lifting.
- Confit That Garlic (Low & Slow Love): Preheat oven to 375°F (190°C). Slice the very top (pointy end!) off the whole garlic head to expose the cloves. Place it on foil, drizzle with 1 tsp olive oil, wrap tightly into a little parcel. Roast directly on the rack for 30-40 mins. Chef’s Hack: No peeling needed! The cloves will squeeze out like soft butter when done. Tip: Do this FIRST – it needs the most time!
- Spice & Crisp Your Veggies (Flavor Bomb Incoming!): On a large baking sheet, toss cauliflower florets and diced eggplant with harissa paste, cumin, turmeric, cornstarch, 2 tsp olive oil, and those salt flakes. Massage it all together with your hands – get in there! Why hands? You’ll coat every nook evenly! Nestle the lemon halves cut-side up on the tray. Roast for 25-30 mins, tossing halfway, until veggies are deeply caramelized and tender. Critical Tip: Don’t overcrowd the pan! Give veggies space for steam to escape = maximum crispiness.
- Whip Up That Dreamy Dip (2 Minutes Flat): Carefully unwrap your garlic (it’s HOT!). Let it cool slightly, then squeeze the soft, fragrant cloves into a bowl. Mash gently with a fork. Add soy yogurt, tahini, and a pinch of salt. Whisk until gloriously smooth. Taste! Adjust salt or add a tiny squeeze of fresh lemon if needed. Chef’s Insight: This dip tastes even better after 10 mins, letting flavors meld.
- Assemble Your Masterpiece (The Fun Part!): Divide warm lentils between bowls. Pile high with those gorgeous roasted veggies. Dollop generously with garlic yogurt dip. Scatter fresh parsley and that glorious dukkah. The grand finale? Squeeze those soft, roasted lemon halves over everything! Pro Move: Drizzle a tiny bit of the garlicky oil from the confit foil over the bowls. Liquid gold!
Plating with Pizzazz (It’s Easier Than You Think!)
Bowls are meant to be rustic and inviting! Use wide, shallow bowls so everything mingles beautifully. Start with a cozy base of lentils. Artfully pile the vibrant roasted veggies on one side. Swirl that luscious garlic yogurt generously right on top or in a swoosh beside the veggies – don’t hide it! The contrast of the white dip against the golden veggies is stunning. Sprinkle the bright green parsley and crunchy dukkah like confetti. Place a roasted lemon half right on the rim for that final, dramatic squeeze at the table. Serve immediately while the veggies are still warm and slightly crisp. Grab a big spoon and dig in – texture and flavor in every bite!
Make It Your Own: Delicious Twists & Swaps
This bowl is your canvas! Get creative with what you love or have on hand:
- Protein Power-Up: Swap lentils for chickpeas (toss them in the spice mix and roast with the veggies!), crispy baked tofu cubes, or even shredded rotisserie chicken (non-vegan).
- Veggie Fiesta: Add diced sweet potato or butternut squash cubes (roast 5-10 mins longer). Throw in some cherry tomatoes or sliced bell peppers in the last 10 mins of roasting. Kale chips make a killer crispy topping!
- Spice Adventure: Swap harissa for gochujang (Korean chili paste) for sweet heat, or use curry powder instead of cumin/turmeric. Add a pinch of cinnamon or smoked paprika for depth.
- Dip Diversion: Stir chopped fresh herbs (dill, chives) into the yogurt dip. Add a teaspoon of lemon zest for extra zing. For nut-free, skip tahini and add 1 tsp white miso paste instead.
- Grain Gain: Serve over quinoa, farro, or brown rice instead of lentils for a different base texture.
Olivia’s Kitchen Confessions & Evolution
Okay, true story: The first time I made garlic confit for this, I got distracted by a VERY important text about cat memes and almost burned it to oblivion! Thankfully, I caught it just as the edges were turning deep amber – and you know what? That slightly deeper roast added an incredible, almost caramelized note that I now intentionally aim for! This recipe has evolved from that “clean-out-the-fridge” moment into a weekly staple. I’ve learned a few things: 1) Cornstarch is non-negotiable for crispy eggplant (I learned the soggy way!). 2) Doubling the garlic confit is ALWAYS a good idea – smear the extra on toast tomorrow! 3) This bowl is shockingly good cold the next day, straight from the fridge, like a roasted veggie salad. It’s become my go-to for potlucks because it wows every time. Don’t be afraid to play – that’s where kitchen magic happens!
Your Questions, Answered (Let’s Avoid Kitchen Oops!)
Let’s tackle those common hiccups before they happen:
- Q: My veggies turned out soggy instead of crispy! What did I do wrong?
A: The main culprits are usually overcrowding the pan or skipping the cornstarch. Veggies need space! Use two pans if needed. Cornstarch is key for absorbing moisture. Also, ensure your oven is fully preheated and give the pan a good shake/toss halfway through roasting. - Q: Can I make parts of this ahead of time?
A: Absolutely! Roast the garlic confit up to 5 days ahead; store cloves submerged in their oil in the fridge. Cook lentils 2-3 days ahead. The yogurt dip tastes better after a few hours (or overnight!) and keeps for 4-5 days. Roast veggies are best fresh, but you *can* do them 1 day ahead and re-crisp in a 400°F oven for 5-10 mins. - Q: Help! I can’t find harissa. Is there a good substitute?
A: No panic! Mix 1 tsp smoked paprika + 1/2 tsp cumin + 1/4 tsp cayenne (adjust heat!) + 1 tsp tomato paste for body. Sriracha mixed with a little smoked paprika also works in a pinch, though the flavor profile changes. - Print
Roasted Cauliflower Bowl with Garlic Confit Yogurt Dip
- Total Time: 55 mins
Description
This hearty veggie bowl emerged from a fridge cleanup emergency—and now it’s my ultimate comfort dish. Caramelized cauliflower and eggplant meet earthy lentils and a silky garlic-yogurt drizzle made from sweet, oven-roasted garlic confit. It’s soulful, nourishing, and utterly comforting. Ready in under an hour, plus minimal cleanup. Scoop it into a bowl, squeeze warm lemon over it, and savor a full sensory experience—no fuss, just flavor.
Ingredients
ScaleRoasted Veggies
-
1 small cauliflower, cut into florets
-
1 eggplant, diced
-
1 tbsp harissa paste (or 1 tsp smoked paprika + ½ tsp cayenne + ½ tsp cumin)
-
½ tsp cumin
-
½ tsp turmeric
-
1 tbsp cornstarch
-
2 tsp olive oil
-
3 pinches sea salt flakes
-
1 lemon, halved
Garlic Confit Yogurt Dip
-
1 head garlic
-
1 tsp olive oil
-
1 cup thick soy or Greek yogurt
-
1 tbsp tahini (or almond butter)
-
Salt to taste
Bowl Assembly
-
1 cup cooked black or brown lentils
-
4 tbsp fresh parsley, chopped
-
1 tsp dukkah (or toasted sesame + pistachios)
Instructions
-
Roast Garlic: Preheat oven to 375°F (190°C). Slice garlic top to expose cloves, drizzle with 1 tsp oil, wrap in foil, and roast 30–40 minutes until soft.
-
Spice Veggies: Toss cauliflower and eggplant with harissa, cumin, turmeric, cornstarch, oil, and salt. Massage by hand for even coating. Arrange on a baking sheet with lemon halves cut-side up. Roast 25–30 mins, tossing halfway, until golden and caramelized.
-
Make Dip: Once garlic is cool enough to handle, squeeze cloves into a bowl. Mash and whisk with yogurt, tahini, and a pinch of salt. Adjust seasoning to taste.
-
Build Bowls: Place warm lentils in bowls. Top with roasted cauliflower, eggplant, and lemon halves. Dollop garlic-yogurt dip on top. Sprinkle with parsley and dukkah. Squeeze roasted lemon over everything and drizzle any garlic-infused oil for extra richness.
Notes
-
Crispy Cauliflower 101:
Don’t crowd the pan—spread veggies in a single layer for maximum caramelization. Overcrowding = steaming, not roasting. -
Confit Like a Pro:
Roast garlic until soft and golden, not brown. If cloves aren’t meltingly tender after 40 mins, pop back in the oven for 10 more. -
Cornstarch = Game Changer:
It draws out moisture, making eggplant and cauliflower irresistibly crisp. No substitute gets quite the same effect! -
Balance the Spice:
Taste your harissa before using—heat levels vary! For milder heat, start with ½ tbsp or dilute with a splash of oil. -
Meal Prep Magic:
Make the garlic yogurt dip and lentils ahead (both keep for days!). Reheat roasted veggies briefly in the oven to regain crispness. -
Flavor Boost:
Use the garlic oil leftover in the foil as a finishing drizzle. It’s liquid gold—don’t waste a drop! -
Cold Option:
Surprisingly tasty straight from the fridge the next day—like a Mediterranean-style veggie salad. -
Plating Win:
Assemble in wide, shallow bowls for gorgeous presentation and easier mixing. Don’t forget a roasted lemon squeeze just before serving!
- Prep Time: 15 mins
- Cook Time: 35–40 mins
Nutrition
- Calories: 400 kcalper serving
- Fat: 18 g
- Carbohydrates: 45g
- Fiber: 8 g
- Protein: 18 g
-
Final Thoughts: Why This Bowl Will Steal Your Heart (And Your Appetite)
There’s something quietly revolutionary about a meal that’s both nourishing and exciting—one that doesn’t ask for perfection but delivers it anyway. This roasted cauliflower bowl isn’t just food; it’s a love letter to resourcefulness, to the alchemy of simple ingredients transforming into something greater than the sum of their parts.
It’s the kind of dish that adapts to your mood, your pantry, your season. Craving comfort? Pile on extra garlic yogurt. Need brightness? Squeeze that roasted lemon with abandon. Short on time? Air-fry the veggies and call it a win. It’s forgiving, flexible, and always satisfying.
But beyond the flavors, this bowl carries a deeper magic—the kind that turns a Tuesday night into something memorable. Maybe it’s the way the harissa caramelizes into sticky sweetness, or how the garlic confit melts into the yogurt like a secret. Maybe it’s the ritual of assembling it, layering textures and colors with the care of an artist. Or maybe it’s the way it brings people together, whether you’re sharing it with a friend on the kitchen floor (hi, Jess!) or savoring it solo, straight from the bowl.
So here’s my challenge to you: Make it once as written. Then make it again, but yours. Swap the spices, play with the veggies, tweak the dip. Let it evolve with you. Because the best recipes aren’t just instructions—they’re starting points for your own kitchen stories.
Dill Pickle Salad with Candied Cashews
Crunchy, Tangy & Totally Addictive: Meet Your New Favorite Salad
Hey there, kitchen friends! Olivia here, apron dusted with quinoa and probably a smudge of beet juice on my cheek – because if I’m not slightly messy, did I even cook? Picture this: It’s golden hour, your favorite playlist is humming, and you’re tossing together a salad that makes taste buds do a happy dance. That’s exactly what we’re creating today with this Dill Pickle Salad with Candied Cashews. This isn’t just a salad; it’s a TEXTURE FESTIVAL in a bowl. We’re talking roasty caramelized beets and pumpkin, protein-packed lentils and quinoa, peppery arugula, all drenched in a creamy, tangy dill pickle dressing that’ll make you wanna lick the blender. And the crowning glory? Sweet-spicy candied cashews that crunch like autumn leaves under your boots. Whether you’re a plant-based pro or just craving something fresh and fun, this recipe is your ticket to flavor town. No fancy skills needed – just grab your favorite chopping knife and let’s make magic!
How a Pickle Jar Inspired This Salad Obsession
Okay, story time! Last summer, my niece Zoe (a self-proclaimed pickle fanatic) dared me to create a dish using her prized jar of garlic dills. Challenge accepted! I started tossing pickles into everything – until one rainy Tuesday, I roasted beets for meal prep and accidentally knocked over the pickle jar into my yogurt dressing. Disaster? Nope – EUREKA! That happy accident became this salad. I remember Zoe’s skeptical eyebrow raise when I added candied cashews (“Aunt Liv, sweet AND pickles?!”). But one bite? Her eyes lit up like fairy lights. Now, it’s our “cheat day” ritual (even though it’s crazy healthy). Every time I make it, I giggle remembering her holding a dripping pickle slice like a victory flag. Food’s best when it’s playful, right?
Your Flavor Toolkit: Ingredients & Smart Swaps
- Beetroot (500g): Earthy sweetness! Chef’s hack: Wear gloves unless you want pink fingertips. Swap: Sweet potatoes.
- Pumpkin (300g): Buttery and caramelizes beautifully. Use any squash – butternut’s my backup.
- Cooked Lentils (2¼ cups): Protein powerhouse! Use canned for speed, or Puy lentils hold shape best.
- Cooked Quinoa (1 cup): Nutty fluffiness. Swap: Couscous or wild rice.
- Arugula (3 cups): Peppery bite! Swap: Baby spinach (less punchy) or kale (massage first!).
- Raw Cashews (3 tbsp): For candying! Insight: Don’t sub pre-roasted – they’ll burn.
- Maple Syrup (1 tbsp) + Chili Powder (¼ tsp): Sweet heat magic. Swap: Honey or agave.
- Dairy-Free Yogurt (1 cup): Creamy base. Soy works, but coconut adds richness.
- Pickles + Juice (⅓ cup + 1 tbsp): THE STAR! Use garlic dills for max flavor.
- Fresh Dill (½ cup): Non-negotiable for that herby zing. Dried? Use 2 tbsp but fresh is brighter.
- Hemp Seeds (3 tbsp): Creamy texture + omega-3 boost. Swap: Soaked sunflower seeds.
- Wholegrain Mustard (1 tbsp): Tangy depth. Yellow mustard works in a pinch.
Let’s Build Your Flavor Masterpiece: Step-by-Step
Step 1: Roast Those Veggies! Preheat that oven to 400°F (200°C). Toss your cubed beets and pumpkin with olive oil on a parchment-lined tray (life hack: parchment saves scrubbing later!). Roast 25-30 mins until tender and caramelized at the edges – give ’em a shuffle halfway! Pro Tip: Roast beets on one side of the tray, pumpkin on the other. Pumpkin cooks faster – yank it out early if needed!
Step 2: Candy Those Cashews! While veggies roast, grab a small skillet. Toss in cashews, maple syrup, and chili powder. Cook over medium heat 3-5 mins, stirring constantly, until sticky and golden. WATCH CLOSELY – they go from perfect to burnt in seconds! Immediately spread on parchment to cool. They’ll crisp up like a dream.
Step 3: Blend That Zingy Dressing! Into your blender: yogurt, pickles, pickle juice, dill, garlic, salt, hemp seeds, and mustard. Blitz until SMOOTH (30 secs). Taste! Want more tang? Add pickle juice. More herbiness? Throw in extra dill. Chef’s Secret: Let it sit 10 mins – flavors mingle and it thickens!
Step 4: Assemble Your Masterpiece! In a big bowl, gently mix roasted veggies (slightly cooled), lentils, quinoa, and arugula. Tip: Warm veggies soften arugula fast – mix just before serving! Drizzle generously with dressing. Top with those GLORIOUS cashews. Toss lightly once more at the table for drama!
The Science of Sweet & Tangy – Why This Flavor Combo Works
Ever wonder why the punchy dill pickle dressing and sweet-spicy cashews in this salad create such an addictive flavor experience? It all comes down to flavor chemistry and texture psychology.
The Tangy Mechanism
Pickles (and their brine) bring two key components: acetic acid from fermentation and glutamates from the garlic and spices. These trigger our umami and sour taste receptors, making saliva flow and preparing the palate for more flavors. The yogurt base tempers the sharpness with creaminess, while the hemp seeds add oleogustus (the lesser-known “fatty” taste), rounding out the dressing.
Sweet Heat Science
The candied cashews work magic through the Maillard reaction—when maple syrup’s sugars caramelize with the cashews’ proteins at high heat, creating complex, toasty notes. The chili powder adds capsaicin, which mildly irritates pain receptors, releasing endorphins (hello, subtle happy buzz!).
Texture Contrast = Brain Joy
Our brains crave varied textures. The:
-
Crispy (cashews)
-
Creamy (dressing/roasted veggies)
-
Chewy (lentils)
-
Fluffy (quinoa)
activate different chewing sensations, making each bite more satisfying than a uniform texture.
Pro Tip: For maximum crunch, add cashews just before serving—they absorb moisture over time!
Ancient Roots, Modern Twists – The Global Heritage of These Ingredients
This salad’s ingredients have globetrotting histories that span millennia:
Pickles: From Mesopotamian Preservation to Deli Counters
The earliest pickles date back to 2400 BCE Mesopotamia, where cucumbers were preserved in the Tigris Valley’s salty brine. Garlic dill pickles became a Jewish deli staple in 19th-century New York—hence their tangy punch. Fun fact: Cleopatra credited pickles for her beauty!
Quinoa & Lentils: Protein Powerhouses of the Andes and Indus Valley
-
Quinoa was domesticated 7,000 years ago by Andean civilizations. The Incas called it chisaya mama (“mother grain”).
-
Lentils appear in the Bible and Hindu texts—India still produces 25% of the world’s supply! Their combo here creates a complete protein, just like traditional dal and rice pairings.
Beets: Mediterranean Gold to Nordic Staples
Ancient Romans used beetroots medicinally, while Nordic cultures roasted them for winter survival. Their natural sweetness balances the pickle’s acidity—a trick borrowed from Polish ćwikła (horseradish-beet relish).
Why It Matters: Knowing these roots inspires creative riffs—try adding:
-
Amba (mango pickle) for Middle Eastern flair
-
Toasted buckwheat for Russian vibes
-
Tamarind paste in the dressing for Indo-Chinese tang
The Psychology of Colorful Eating – Why This Salad Feels So Satisfying
This salad isn’t just tasty—its vibrant hues and varied components tap into food psychology:
The Rainbow Effect
Studies show we’re subconsciously drawn to plates with 3-5 colors. Here’s what each shade does:
-
Deep red beets: Signal antioxidant-rich nutrition (triggering a “healthy=happy” response)
-
Orange pumpkin: Associated with comfort and energy (thanks to beta-carotene)
-
Green arugula: Freshness cues that psychologically “lighten” heavy meals
The “Scavenger Hunt” Satisfaction
Unlike uniform dishes, this salad’s mix of ingredients engages our foraging instinct. Finding a crispy cashew or creamy lentil in each bite keeps the brain interested, preventing “flavor fatigue.”
Mindful Eating Made Easy
The prep work (roasting, blending, candying) creates anticipation, which enhances dopamine release when eating. The recipe’s flexibility also reduces kitchen stress—a key factor in meal enjoyment.
Fun Fact: The combo of crunch + creaminess is the same principle behind iconic comfort foods like nachos and apple pie à la mode!
Serving Up the Good Vibes
This salad SHINES family-style! Pile it high in a rustic wooden bowl or on a big platter. For individual servings, layer it: start with arugula, then lentils/quinoa, veggies, dressing swirls, and cashews on top like edible confetti. Pair with crusty sourdough to mop up extra dressing! Perfect slightly warm or chilled. Bonus: Serve in mason jars for picnics – dressing at the bottom, then layers, nuts on top. Shake to mix!
Mix It Up! Delicious Twists
1. Cheesy Lover: Crumble feta or vegan goat cheese over the top.
2. Protein Boost: Add chickpeas or crispy baked tofu cubes.
3. Apple Crunch: Toss in thin apple slices with the arugula.
4. Spice It Up: Add a pinch of cayenne to the dressing or cashews.
5. Nut-Free: Swap candied cashews for maple-chili roasted pumpkin seeds!
Olivia’s Kitchen Confessions
This recipe is my kitchen’s happy accident that stuck! Originally, I used walnuts, but Zoe (yes, the pickle niece!) declared cashews “more fancy.” The dressing evolved too – I added hemp seeds after realizing they make it creamier AND add protein. True story: Once I forgot the quinoa and used leftover rice… still delicious! This salad is RIDICULOUSLY forgiving. Don’t stress exact measurements – got extra pumpkin? Roast it! Dill gone wild in your garden? Toss it in! My favorite part? The dressing doubles as a killer veggie dip or sandwich spread. I’ve been caught eating it straight with a spoon… no shame.
Your Questions, Answered!
Q: Can I make components ahead?
A: Absolutely! Roast veggies and cook lentils/quinoa 2 days ahead (store separately in fridge). Blend dressing 1 day ahead (it thickens – stir in a splash of water if needed). Candy cashews 3 days ahead (store airtight). Assemble just before serving!
Q: My dressing is too thick! Help!
A: Easy fix! Whisk in pickle juice or water, 1 tsp at a time, until creamy but pourable. Remember, it thickens as it sits!
Q: Beets stained everything pink. Did I ruin it?
A: Nope – that’s the beet’s charm! Toss gently to minimize color bleed. If serving for guests, layer arugula on top initially. Pink quinoa is pretty, I promise!
Q: Can I use regular yogurt?
A: Yes! Dairy yogurt works (Greek yogurt = extra thick). But the dairy-free tang complements the pickles beautifully.
Dill Pickle Salad with Candied Cashews
- Total Time: 45 minutes
Description
This salad was born from a playful kitchen accident—and became a full-blown obsession! It’s a celebration of contrasts: creamy and crunchy, sweet and tangy, warm and fresh. Perfect for lunch, picnic, or when you just need a hit of joy. If a salad could hug you, this would be it.
Ingredients
Roasted Veggies
-
500 g (about 1 lb) beets, peeled & cubed
-
300 g pumpkin (or butternut), cubed
Grains & Greens
-
2¼ cups cooked lentils (canned OK, rinse)
-
1 cup cooked quinoa
-
3 cups arugula
Candied Cashews
-
3 Tbsp raw cashews
-
1 Tbsp maple syrup
-
¼ tsp chili powder
Creamy Pickle Dressing
-
1 cup dairy-free yogurt (soy or coconut)
-
⅓ cup chopped dill pickles + 1 Tbsp pickle juice
-
½ cup fresh dill, chopped
-
1 Tbsp wholegrain mustard
-
3 Tbsp hemp seeds
-
Salt & pepper to taste
Instructions
-
Roast Veggies
-
Preheat to 400°F (200°C).
-
Toss beets & pumpkin with olive oil, salt, pepper. Roast 25–30 mins, stirring halfway. Cool slightly.
-
-
Candy Cashews
-
Melt maple syrup with chili powder in a skillet. Add cashews, stirring until golden (3–5 mins). Cool on parchment until crisp.
-
-
Blend Dressing
-
In a blender, combine yogurt, pickles, pickle juice, dill, mustard, hemp seeds, salt and pepper. Blend until smooth. Let rest 10 mins to thicken.
-
-
Assemble Salad
-
In a big bowl, combine roasted veggies, lentils, quinoa, arugula. Add creamy dressing and toss gently. Sprinkle candied cashews on top.
-
Notes
-
Prep veggies, grains, and dressing 1–2 days ahead. Store separately.
-
Cashews and dressing last several days—make ahead!
-
If dressing thickens too much, whisk in a bit of pickle juice or water.
-
Roasted beets are bold—mix gently to minimize color bleed.
- Prep Time: 15 minutes
- Cook Time: 30 minutes
Nutrition
- Calories: 450 cal per serving
Nutritional Per Serving (Approx)
Calories: 450 | Protein: 18g | Carbs: 60g | Fiber: 12g | Sugar: 15g (natural from veggies/maple) | Healthy Fats: 18g | Iron: 30% DV | Vitamin A: 120% DV
Final Thoughts: A Salad That Breaks All the Rules
This Dill Pickle Salad isn’t just a meal—it’s a flavor adventure, a history lesson, and a texture party all in one bowl. It proves healthy food can be bold, playful, and deeply comforting.
So next time you’re craving something fresh yet hearty, remember: Great cooking isn’t about perfection. It’s about pickle juice mishaps, niece-approved cashew upgrades, and trusting your taste buds. Now go forth and toss with abandon!
Save This Recipe For Later!
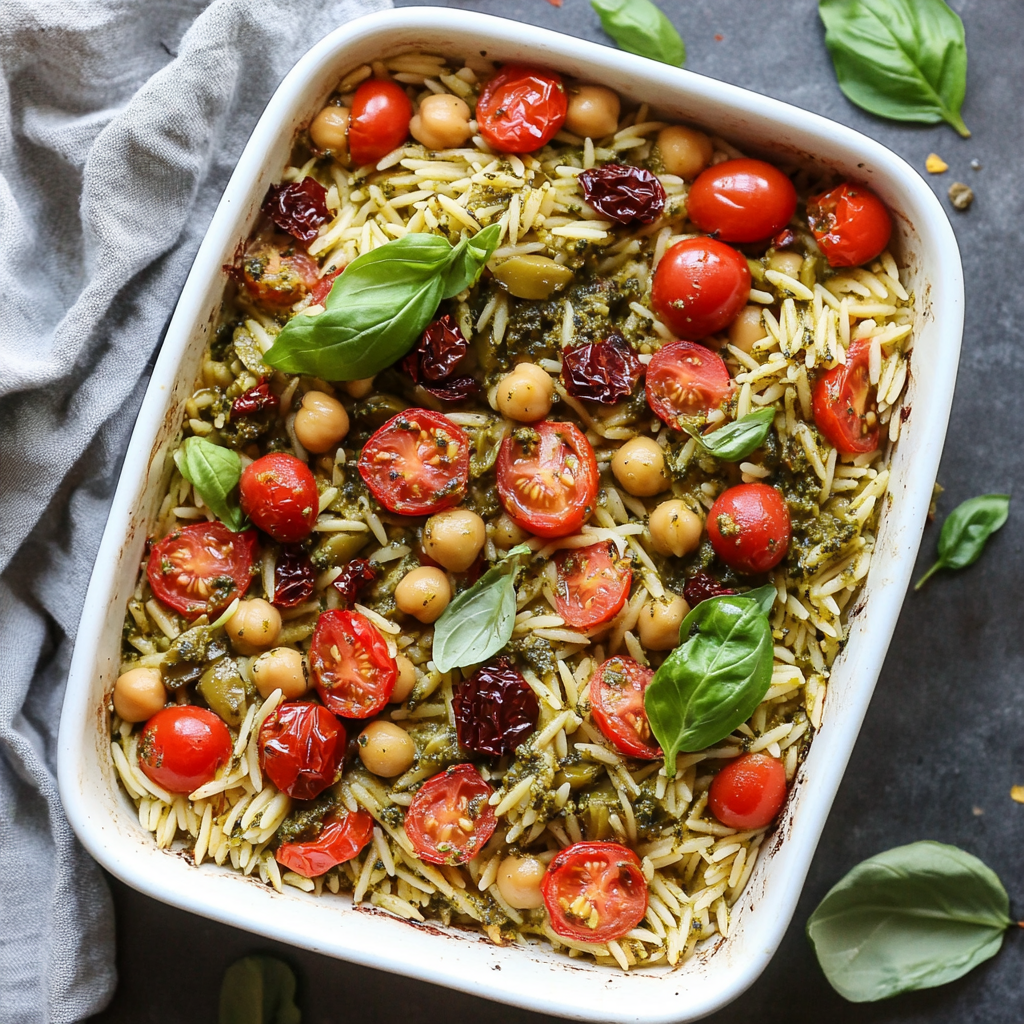
Pesto Baked Orzo Meal Prep
Your New Weeknight Hero: Pesto Baked Orzo Meal Prep
Hey there, kitchen friend! Olivia here. Can you smell that? That’s the scent of freedom… well, freedom from chaotic weeknight dinners and sad desk lunches. If your life feels like a never-ending scroll of “what’s for dinner?” panic, lean in close because I’ve got your back (and your tastebuds) with this Pesto Baked Orzo Meal Prep. Imagine tender orzo pasta baked until creamy, tangled with plump cherry tomatoes, earthy chickpeas, briny olives, and sun-dried tomatoes, all hugged by vibrant pesto. It’s a Mediterranean vacation in a baking dish! As a flavor enthusiast and confessed meal-prep addict, I live for recipes that are hearty, healthy, and practically make themselves. This one-pan wonder is my golden ticket to stress-free evenings. No fancy skills needed—just dump, stir, bake, and revel in the applause (even if it’s just from your cat). Whether you’re feeding a crowd or prepping lunches that’ll make coworkers green with envy, this dish is cozy, protein-packed, and guaranteed to spark joy. Ready to turn “ugh, cooking again” into “heck yes, leftovers”? Let’s dive in!
Why This Dish Feels Like a Warm Hug
This recipe? It’s got roots. Picture this: It’s 2020, my tiny apartment kitchen is doubling as an office, and my sourdough starter has officially declared mutiny. I was drowning in Zoom calls and craving something wholesome that wouldn’t chain me to the stove. One rainy Tuesday, I riffed on pantry staples—a jar of pesto from my sister’s garden haul, lonely chickpeas, and half a bag of orzo. I tossed it all in a dish with water (yes, water—no pre-cooking pasta, genius!) and crossed my fingers. When that first herby, garlicky whiff hit me as I pulled it from the oven? EUREKA. Creamy, comforting, and stupidly easy. My partner Dan did a literal happy dance. We ate it straight from the pan, rain pattering outside, and I remember thinking, “This is it. This is how we survive busy lives without sacrificing flavor.” Now, it’s my edible security blanket—the dish I gift new parents, pack for potlucks, and lean on when life gets loud. It tastes like resilience, and I can’t wait for you to make it yours.
Gather Your Flavor All-Stars
Here’s your squad (and my chef-y whispers about each):
- 2 cups (320 g) dry orzo: The star! Orzo’s rice-shaped pasta soaks up broth beautifully. Chef’s hack: No orzo? Sub arborio rice (adjust water slightly) or small pasta like ditalini.
- 14 oz (400 g) cherry tomatoes, halved: Bursty sweetness! Use rainbow ones for color. Struggling off-season? Swap in 1 cup fire-roasted canned tomatoes (drained).
- 4 garlic cloves, minced: Non-negotiable for depth. Shortcut? 1 tsp garlic powder works in a pinch.
- 1 spring onion, sliced: Mild oniony kick. No spring onions? Use ¼ cup chopped red onion or chives.
- 3 cups (490 g) cooked chickpeas: Protein powerhouse! Canned is fine (rinse well!). Vegan friends: Keep ’em! Allergy? White beans or lentils work.
- 2 oz (50 g) pesto: The flavor boss. Store-bought is great, but pro tip: freeze homemade pesto in ice cubes for recipes like this!
- 1.8 oz (50 g) sun-dried tomatoes, thinly sliced: Chewy umami bombs. Use oil-packed for extra richness. Swap: Roasted red peppers.
- 12 Kalamata olives, pitted and chopped: Salty, briny magic. Green olives or capers add fun twists!
- ½ tsp sea salt flakes: Enhances all flavors. Note: If using salted stock, reduce this.
- ½ tsp red chili flakes: Gentle heat. Omit if sensitive, or add more for drama!
- 1 tsp vegetable stock powder: Secret savoriness. No powder? Use 1 crumbled bouillon cube or 2 cups broth + 3 cups water.
- Freshly cracked black pepper, to taste: Always be peppering!
- 5 cups (1.15 L) water: The magic liquid that cooks it all. Chef’s insight: Using broth instead? Reduce salt!
Let’s Build Your Flavor Masterpiece (No Stress Allowed!)
Preheat & Prep: Crank that oven to 375°F (190°C). Grab your largest baking dish—think 9×13 inches or similar. Trust me, you want wiggle room for stirring! No rushing preheating; we’re multitasking heroes here.
Combine the Party: Dump ALL your dry ingredients into the dish: orzo, halved cherry tomatoes, minced garlic, sliced spring onion, chickpeas, sun-dried tomatoes, chopped olives, chili flakes, salt, pepper, and stock powder. Chef’s hack: Toss everything with your hands—it’s therapeutic and ensures even distribution! No clumpy spice pockets allowed.
Water Works: Pour in the 5 cups of water. Gently stir with a spoon—just enough to mix, not aggressively. Watch for this: It’ll look like a LOT of water. That’s perfect! The orzo will drink it up as it bakes.
Bake Covered (Patience, Padawan!): Cover the dish tightly with foil. This traps steam, cooking the orzo perfectly. Slide it into the oven for 30 minutes. Set a timer for 15 minutes—pull it out (careful, steam!) and give it a good stir. This prevents sticking and ensures even cooking. Re-cover, bake another 15-20 minutes.
Pesto Power Move: Remove the dish (hello, gorgeous smells!), take off the foil, and stir in the pesto. Why now? Adding pesto earlier dulls its bright flavor. Stirring here makes it creamy! Bake uncovered for 5 final minutes. You want golden edges and a creamy, risotto-like texture.
Rest & Revel: Let it sit 5-10 minutes—it thickens beautifully. Meal prep pro move: Portion into containers now if packing lunches!
The Science Behind No-Precook Pasta Success
Most baked pasta dishes require boiling noodles first, but this recipe’s magic lies in its “dump-and-bake” approach. Here’s why it works—and how to guarantee perfect orzo every time:
1. Liquid-to-Pasta Ratios Decoded
Orzo absorbs liquid at a 2:1 ratio (2 parts liquid to 1 part dry pasta). This recipe uses slightly more (2.5:1) to account for evaporation and absorption by other ingredients. The tomatoes and chickpeas release moisture too, creating a self-sustaining sauce. Pro tip: If your dish looks dry halfway through baking, add ¼ cup warm water and stir.
2. The Steam Dome Effect
Covering the dish with foil creates a mini steam oven. As water heats, it condenses on the foil and drips back down, basting the orzo evenly. This mimics the constant stirring of risotto—without the arm workout!
3. Starch Is Your Friend
Unlike pre-rinsed pasta, raw orzo releases starch gradually as it cooks, thickening the surrounding liquid into a creamy sauce. Stirring halfway redistributes this starch. For extra silkiness, use a wooden spoon—it’s gentler on delicate pasta shapes.
4. Altitude Adjustments
Live above 3,000 feet? Increase liquid by ½ cup and bake time by 5-10 minutes. Lower air pressure means water boils at a lower temperature, slowing starch absorption.
Troubleshooting Texture:
-
Crunchy pasta: Likely underbaked. Re-cover and check every 5 minutes.
-
Mushy pasta: Overbaked or overstirred. Next time, reduce cook time by 5 minutes and stir just once.
Pesto Power—How to Maximize Flavor Without Overpowering
Pesto is the star here, but its bold flavors need balance. Here’s how to make it shine:
1. Choosing Your Pesto
-
Store-bought: Opt for refrigerated (not shelf-stable) versions with olive oil as the first ingredient. Brands like Buitoni or Kirkland Signature (Costco) deliver restaurant-quality flavor.
-
Homemade: Freeze basil-based pesto in ice cube trays (1 tbsp per cube) for instant bursts of summer flavor.
2. When to Add It
Adding pesto at the end preserves its bright, herbal notes. Heat dulls fresh basil and can turn garlic bitter. Stirring it in post-bake lets the residual warmth meld flavors without cooking them out.
3. Flavor Synergy
Pesto’s garlic, nuts, and cheese (or nutritional yeast) complement the dish’s other umami elements:
-
Sun-dried tomatoes: Their concentrated sweetness offsets pesto’s saltiness.
-
Olives: Brininess cuts through richness.
-
Chickpeas: Mild nuttiness echoes pesto’s pine nuts or walnuts.
4. The “Pesto Plus” Trick
Boost depth by mixing:
-
1 tbsp lemon zest into pesto before adding
-
½ tsp honey to round out acidity
-
A splash of pasta cooking water (or reserved chickpea liquid) to loosen texture
Allergy-Friendly Swaps
-
Nut-free: Use sunflower seed pesto or swap 2 tbsp tahini + 1 tbsp olive oil for store-bought.
-
Dairy-free: Look for vegan pesto (or make your own with nutritional yeast).
Meal Prep Like a Pro—Storage & Reinvention Tips
This dish was born for meal prep. Here’s how to optimize it:
1. Portioning for Success
-
Single servings: Use 2-cup glass containers with vents. Layer spinach at the bottom—steam from reheating wilts it perfectly.
-
Family-style: Store in a shallow airtight container (max 2-inch depth) for even reheating.
2. Reheating Methods
-
Microwave: Add 1 tbsp water, cover loosely, and heat 2 minutes. Stir, then heat 1 more minute.
-
Oven: 350°F (175°C) for 15-20 minutes covered with foil. Spritz with water to revive creaminess.
-
Stovetop: Low heat with a splash of broth, stirring frequently.
3. Reinventing Leftovers
-
Orzo Frittata: Mix 1 cup leftovers with 3 beaten eggs, bake at 375°F (190°C) for 20 mins.
-
Stuffed Peppers: Hollow bell peppers, fill with orzo mix, top with cheese, bake 25 mins.
-
Pesto Soup: Thin with 1 cup vegetable broth, blend slightly, and garnish with croutons.
4. Freezer Hacks
-
Flash-freeze: Scoop cooled orzo onto a parchment-lined tray. Freeze solid, then transfer to bags.
-
Reheating frozen: Microwave from frozen with 2 tbsp water, stirring every 90 seconds.
Food Safety Note: Discard after 5 days fridge storage or 3 months frozen. Always reheat to 165°F (74°C).
Plate It Like You Mean It (Or Don’t—We’re Chill Here)
Scoop this beauty into bowls while warm! Garnish matters: A drizzle of extra pesto, a sprinkle of chili flakes, fresh basil ribbons, or vegan parm (nutritional yeast works too!). For dinner tonight, pair with a crisp green salad and crusty bread to mop up the goodness. Meal prepping? Layer it in containers with baby spinach—the residual heat wilts it gently. Reheats like a dream: 2 minutes in the microwave with a splash of water or broth to revive creaminess.
Make It Your Own Delicious Adventure
This recipe begs for remixes! Try these:
- Lemony Spinach Boost: Stir in 2 cups fresh spinach with the pesto + zest of 1 lemon.
- “Cheesy” Vegan Dream: Add ¼ cup nutritional yeast with the pesto. Creamy + cheesy vibes!
- Protein Power-Up: Swap chickpeas for shredded rotisserie chicken or Italian sausage (cooked).
- Roasted Veg Bounty: Add roasted zucchini or bell peppers when stirring halfway.
- Pesto Swap: Use kale-walnut pesto or sun-dried tomato pesto for a flavor flip!
Olivia’s Extra Nuggets of Kitchen Wisdom
This dish evolved from my “lazy pantry raid” phase into my most-requested recipe! Early tests had me pre-cooking the orzo—big mistake. It turned mushy. Baking it raw in liquid? Game-changer. Texture is everything! One time, I subbed water entirely with broth… and nearly salted us into the next dimension. Lesson learned: Stock powder + water gives control. Also—true story—my neighbor once mistook the baking dish for a “fancy candle” because it smelled so divine through the walls. Now I double the batch to share! Pro tip: Freezes beautifully for 3 months. Thaw overnight, reheat with a splash of water, and boom—instant comfort.
Your Questions, Answered (We’ve All Been There!)
Q: Help! My orzo is still crunchy after baking.
A: Fear not! Cover it back up (add ¼ cup water if it looks dry) and bake 5-10 more minutes. Ovens vary—yours might be a chill vibe.
Q: Can I use frozen cherry tomatoes?
A: Absolutely! Toss ’em in frozen—no need to thaw. They release more liquid, so reduce water by ½ cup.
Q: Why did my dish turn out dry/soggy?
A: Dry? Next time, add ½ cup more water or ensure your dish is tightly covered. Soggy? You might have a smaller/deeper dish. Bake uncovered longer (10 mins) after pesto add, or use less water next time.
Q: How long does this last refrigerated?
A: 4-5 days in airtight containers! The flavors meld beautifully—day two might be even better.
Pesto Baked Orzo Meal Prep
- Total Time: 45 minutes
Description
If busy weeknights or sad desk lunches have you uninspired, this one’s your new hero. Creamy baked orzo, chickpeas, sun-dried tomatoes, olives, and sweet cherry tomatoes—tied together with bright, herby pesto. It’s cozy, craveable, and cooks entirely in the oven. No pre-boiling. No stress. Just toss, bake, and enjoy the applause (even if it’s just your cat). One dish. Five meals. Pure joy.
Ingredients
-
2 cups dry orzo
-
14 oz cherry tomatoes, halved
-
3 cups cooked chickpeas
-
4 garlic cloves, minced
-
1 spring onion, sliced
-
2 oz pesto
-
1.8 oz sun-dried tomatoes, sliced
-
12 Kalamata olives, chopped
-
½ tsp sea salt flakes
-
½ tsp red chili flakes
-
1 tsp vegetable stock powder
-
Fresh black pepper, to taste
-
5 cups water
Instructions
-
Preheat oven to 375°F (190°C).
-
In a 9×13″ baking dish, combine all ingredients except pesto and water. Toss well.
-
Add water, stir gently, and cover tightly with foil.
-
Bake 30 mins, stirring halfway through.
-
Uncover, stir in pesto, bake uncovered 5 more minutes.
-
Rest 5–10 mins, then serve or portion for meal prep.
Notes
-
Add spinach + lemon zest with pesto for brightness.
-
Stir in shredded chicken or vegan sausage for protein.
-
Make it cheesy with ¼ cup nutritional yeast!
-
Freezes beautifully—just reheat with a splash of water.
- Prep Time: 10 min
- Cook Time: 35min
Nutrition
- Calories: 450 cal per serving
- Fat: 10g
- Carbohydrates: 72g
- Fiber: 10g
- Protein: 18g
Nourishment That Loves You Back
Per Serving (1 of 5): Calories: ~450 | Protein: 18g | Carbs: 72g | Fiber: 10g | Fat: 10g (Varies with pesto/chickpeas). Packed with plant protein, fiber from chickpeas, and lycopene from tomatoes. Gluten-free? Use GF orzo!
Final Thoughts: More Than Meal Prep—A Mindset Shift
This recipe isn’t just about saving time—it’s about reclaiming joy in feeding yourself well. As someone who’s burned grilled cheese while answering emails, I get it. But dishes like this prove that “easy” doesn’t mean bland, and “meal prep” isn’t punishment. It’s the difference between surviving your week and savoring it.
The first time I made this, I was exhausted. But pulling that bubbling dish from the oven, I felt like a wizard who’d hacked the system. Four days of delicious lunches? Check. A dinner that made my apartment smell like an Italian trattoria? Check. The realization that good food could be this simple? Priceless.
So take this blueprint and run with it. Swap the olives for artichokes, the chickpeas for shrimp, or the pesto for harissa. Make it yours. Because the best recipes aren’t just about ingredients—they’re about the life you make around them. Now go forth and bake your way to freedom, one lazy-but-brilliant dish at a time.
Save This Recipe For Later!
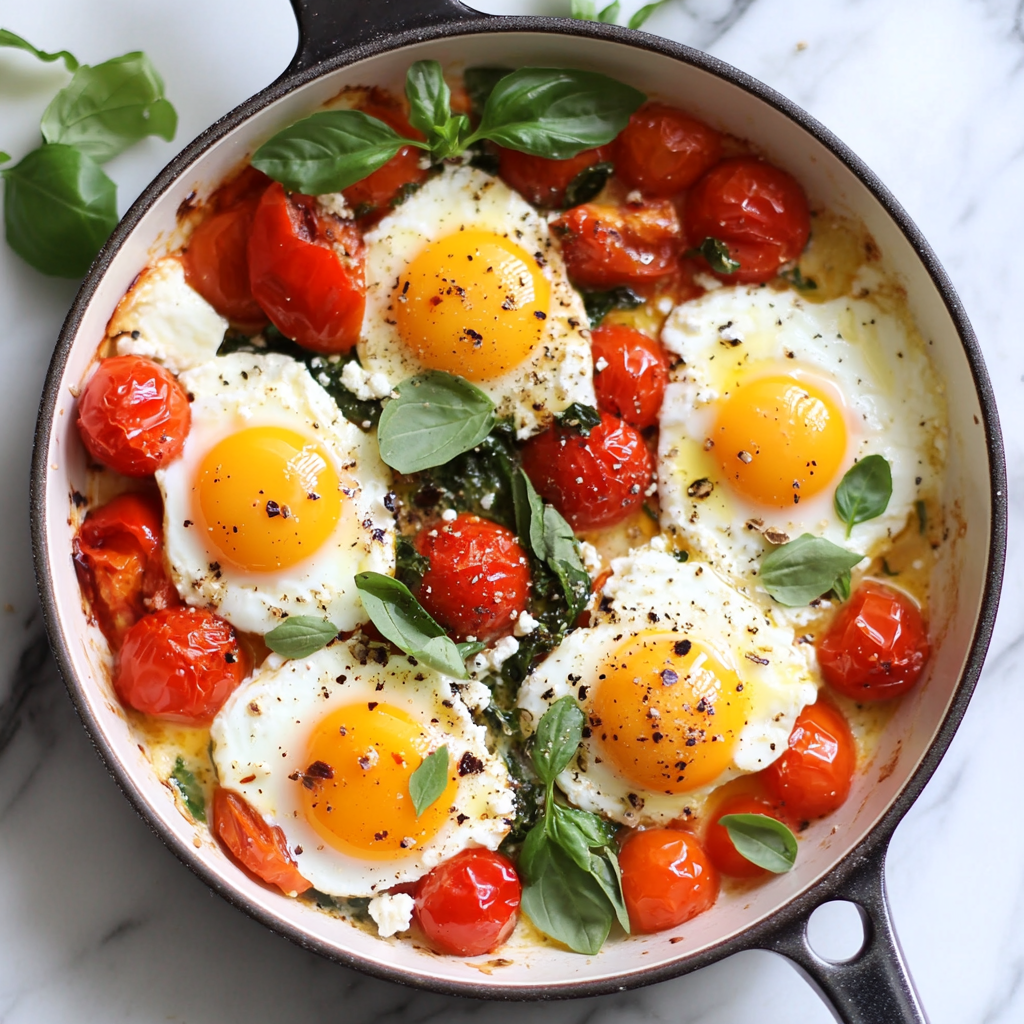
Baked Feta Eggs
Sunshine in a Skillet: My Go-To Baked Feta Eggs
Good morning, lovely people! Olivia here, apron slightly flour-dusted and coffee in hand. Can we talk about those mornings when you crave something cozy, vibrant, and effortlessly delicious? Enter my forever-favorite: Baked Feta Eggs. Imagine plump tomatoes bursting with sweetness, creamy feta turning golden and luscious, all cradling perfectly runny-yolked eggs. It’s like a Mediterranean sunrise right in your oven!
This dish? It’s my kitchen’s happy place. Whether I’m hosting a lazy Sunday brunch crowd or sneaking in a solo breakfast-for-dinner moment (zero judgment here!), it never fails. The best part? It’s impossibly simple. No fancy techniques, no hours of prep—just honest ingredients dancing together in one pan. If you’ve got 10 minutes to chop and 30 minutes to let the oven work its magic, you’re golden. Literally. Let’s turn your kitchen into the coziest corner of the world today!
Trust me, once that herby, tangy aroma fills your home, you’ll understand why this recipe has permanent residency in my heart (and my brunch rotation). Grab your favorite skillet—let’s make some magic!
The Greek Island Memory That Inspired This Dish
Picture this: me, 22 years old, backpacking through Greece with my best friend. We stumbled into a tiny family-run taverna on Santorini, starving after a morning hike. The owner, Yiayia Maria, took pity on us and brought out a sizzling clay dish straight from the oven—tomatoes practically singing, clouds of steam rising off creamy feta, and eggs nestled in like little treasures. One bite and we were hooked. It tasted like sunshine and salt air and pure joy.
When I got home, I became a woman obsessed. I spent weeks trying to recreate that moment in my tiny apartment kitchen, burning tomatoes and overcooking eggs until… aha! The combo of high heat + leaving the feta in a block (not crumbled!) finally unlocked Yiayia Maria’s magic. Now, every time I pull this dish out of the oven, I’m back on that sun-drenched patio, laughing with my friend and licking olive oil off my fingers. Food memories? They’re the best souvenirs.
Your Flavor Toolkit: Ingredients & Why They Shine
- 2 cups cherry tomatoes – Little flavor bombs! They caramelize and burst, creating the saucy base. Swap with diced heirlooms in summer.
- 1 diced red bell pepper – Adds sweetness and crunch. No peppers? Try zucchini or eggplant!
- ½ small red onion, diced – For a punchy bite. Soak in cold water for 5 mins if you prefer milder flavor.
- 3 cloves garlic, minced – Non-negotiable for that savory depth. Pro tip: Use a microplane for paste-like consistency!
- 8 oz feta cheese (block!) – Key insight: A block browns beautifully vs crumbles. For dairy-free, firm tofu marinated in lemon juice + salt works surprisingly well.
- 4 tbsp olive oil – The glue that brings it all together. Use your good stuff—it shines here!
- Herbs & Spices (oregano, thyme, salt, pepper, red pepper flakes) – Mediterranean soulmates. Fresh thyme > dried if you have it. Skip red pepper for kid-friendly versions.
- 1 cup chopped baby spinach – Folded in last minute for color and nutrients. Kale or arugula work too!
- 4 large eggs – Room temp eggs set more evenly. Trust me.
- Fresh basil/chives (garnish) – The confetti finish! Makes it Instagram-pretty.
Chef’s Whisper: Salt mindfully—feta’s already salty! Taste after baking before adding eggs.
Let’s Build Your Flavor Masterpiece: Step-by-Step
- Preheat & Party Prep: Crank that oven to 375°F (190°C). Grab a 10-inch ovenproof skillet or baking dish—cast iron is my MVP for perfect browning!
- Veggie Fiesta: Toss tomatoes, bell pepper, onion, garlic, olive oil, oregano, thyme, salt, black pepper, and red pepper flakes in the skillet. Mix like you mean it! Coat every piece in that herby oil. (P.S. This mix can sit for 30 mins to marinate—flavor bonus!)
- Feta Time: Place the feta block RIGHT in the center of the veggie chaos. Chef hack: Drizzle extra oil on top so it crisps like a dream. Bake 20-25 mins until tomatoes collapse and feta’s golden-edged. Your kitchen will smell insane!
- Spinach Surprise: Pull the skillet out (hot pad—always!). Stir in chopped spinach—it wilts instantly in the heat. Make 4 little wells in the mixture with a spoon. Gently does it!
- Egg-cellent Finale: Crack eggs into each well. Pro move: Crack into a ramekin first to avoid shells! Slide back into oven for 7-10 mins. Want runny yolks? Pull at 7 mins. Solid yolks? 10 mins. Eggs keep cooking after pulling out!
- Garnish & Gloat: Sprinkle with fresh basil/chives. Carry skillet triumphantly to the table—applause optional but encouraged!
The Science of Sizzle: Why This Dish Works So Well
Ever wonder why baked eggs with feta taste so much better than scrambled? It’s all about layers of flavor and texture science!
-
Tomatoes’ Sweet Transformation
Cherry tomatoes are sugar bombs waiting to explode. At high heat, their natural sugars caramelize, deepening their sweetness while their juices mingle with olive oil and herbs to form a luscious sauce. The key? Don’t stir too much—let them blister and collapse naturally for maximum flavor. -
Feta’s Magic Two-Step
Unlike crumbled feta (which dries out), a whole block undergoes a beautiful metamorphosis:-
The top browns and crisps, creating a salty, umami crust.
-
The inside stays creamy, melting into the tomato base like a tangy, rich binder.
-
-
Eggs: The Perfect Finish
Baking eggs in this hot, flavorful nest ensures:-
The whites set gently (no rubbery texture!).
-
The yolks stay runny, creating a natural sauce when pierced.
-
The residual heat from the skillet continues cooking them slightly off the heat—so pull them out before they look done!
-
Pro Tip: A splash of lemon juice or balsamic glaze after baking brightens the dish’s richness.
Meal-Prep Magic: Make-Ahead & Leftover Hacks
This dish isn’t just for lazy Sundays—it’s a meal-prep superstar!
1. The Night-Before Shortcut
-
Chop all veggies (tomatoes, peppers, onions) and store in an airtight container.
-
Whisk olive oil + herbs in a small jar.
-
Morning-of? Dump veggies in the skillet, pour herby oil over them, and bake!
2. Freezer-Friendly Base
-
Roast the tomato-feta mixture (without eggs), cool completely, and freeze in portions.
-
To reheat: Thaw overnight, warm in a skillet, then add fresh eggs.
3. Leftover Reinventions
-
Feta Egg Scramble: Chop leftovers, reheat in a pan, and scramble with extra eggs.
-
Grain Bowl Star: Serve over quinoa or couscous with cucumber and olives.
-
Omelette Filling: Fold into fluffy eggs with a sprinkle of fresh dill.
-
Pasta Sauce: Toss with hot penne and a splash of pasta water.
4. Brunch-for-a-Crowd Trick
-
Use a large sheet pan instead of a skillet. Double the veggies, add multiple feta blocks, and make 8-10 egg wells. Bake as usual—perfect for feeding a crowd!
Global Twists: A Flavor Tour in One Skillet
This dish is a blank canvas for world flavors. Here’s how to travel without leaving your kitchen:
1. Italian Caprese Style
-
Swap feta for fresh mozzarella pearls.
-
Add torn basil before baking.
-
Finish with a balsamic drizzle.
2. Middle Eastern Shakshuka Vibes
-
Stir in 1 tbsp harissa paste + 1 tsp cumin with the veggies.
-
Top with fresh cilantro and crumbled halloumi.
3. Spanish Tortilla-Inspired
-
Add diced cooked potatoes and sliced chorizo.
-
Skip whole eggs—whisk them with a splash of cream and pour over the mix. Bake until set.
4. French Provençal Twist
-
Use herbes de Provence instead of oregano.
-
Add sliced black olives and a splash of pastis (or white wine).
5. Indian-Inspired Masala Eggs
-
Sauté 1 tsp garam masala + ½ tsp turmeric with the veggies.
-
Swap feta for paneer (Indian cheese).
-
Garnish with fresh cilantro and a squeeze of lime.
Bonus: For a low-carb version, serve over sautéed greens or roasted eggplant slices.
How to Serve This Beauty
This is a showstopper in the skillet—serve it straight from the oven at the table for maximum oohs and aahs! Scoop generous spoonfuls onto warm, crusty sourdough toast or charred pita wedges. The bread is essential for mopping up every last drop of that tomato-feta nectar. For a full spread, add sliced avocado, Kalamata olives, and a simple cucumber salad. Brunch bonus: Pair with a frothy cappuccino or a zesty Aperol spritz!
Shake It Up: Delicious Twists!
- Spicy Shakshuka Style: Stir in 2 tbsp harissa paste with the veggies + top with cilantro.
- Protein Powerhouse: Scatter cooked chickpeas or chorizo slices before adding eggs.
- Green Goddess: Swap tomatoes for asparagus + peas, use goat cheese instead of feta.
- Low-Carb Love: Serve over sautéed kale or with almond-flour crackers.
- Seafood Fiesta: Nestle in cooked shrimp or flaked smoked salmon with the eggs.
Olivia’s Extra Kitchen Confessions
This recipe has evolved from my “Greek Tragedy” phase (burnt onions, weeping over watery eggs) to my ultimate comfort food. Early on, I learned two game-changers: using block feta (crumbles dry out!) and room-temp eggs (no rubbery whites!). One Sunday, my cat Mr. Whiskers tried to jump onto the counter mid-bake—cue a heroic one-handed skillet rescue! Now I keep oven mitts permanently on standby. Over the years, friends have added their own spins—like Sarah’s infamous “everything bagel” topping version. Make it yours! And if your eggs overcook? Call it a frittata scramble and embrace it. Perfection is overrated; flavor is forever.
Your Questions, Answered!
Q: My eggs turned rubbery! What went wrong?
A: Overbaking is the usual suspect. Pull them out at 7 minutes—they’ll keep cooking off-heat. Also, cold eggs straight from the fridge set unevenly. Let them lounge on the counter for 15 mins first!
Q: Can I prep this ahead?
A: Absolutely! Roast the veggie/feta mix up to 2 days ahead. Store covered in the fridge. When ready, reheat at 375°F for 10 mins, then add eggs as directed. Easy brunch hero!
Q: Help! It’s too salty.
A: Feta varies in saltiness. Taste your mix BEFORE adding eggs. Too zingy? Stir in 1 tsp honey or a squeeze of lemon to balance. Next time, reduce added salt by half.
Q: Can I use crumbled feta?
A> You can, but it dries out faster. If using crumbles, reduce initial bake time to 15 mins and add an extra drizzle of oil. Block feta stays gloriously creamy inside!
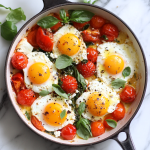
Baked Feta Eggs
- Total Time: 32 minute
Description
Say hello to your new breakfast obsession! Bursting cherry tomatoes, creamy block feta, jammy eggs, and fresh herbs—all baked in one skillet and ready to scoop onto toast or devour straight from the pan. Inspired by a sun-drenched morning in Greece, this dish delivers cozy, café-level elegance with zero stress. Whether it’s brunch for a crowd or solo breakfast-for-dinner magic, Baked Feta Eggs bring the glow, bite after bite.
Ingredients
-
2 cups cherry tomatoes
-
1 red bell pepper, diced
-
½ red onion, diced
-
3 garlic cloves, minced
-
8 oz block feta cheese
-
4 tbsp olive oil
-
1 tsp oregano, ½ tsp thyme, pinch red pepper flakes
-
Salt & pepper to taste
-
1 cup chopped spinach
-
4 large eggs (room temp)
-
Fresh basil/chives, for garnish
Instructions
-
Preheat oven to 375°F (190°C). Use a 10″ ovenproof skillet.
-
Toss tomatoes, pepper, onion, garlic, spices & oil in skillet. Place feta block in center. Bake 20–25 mins until veggies soften and feta browns.
-
Stir in spinach, make 4 wells. Crack eggs into each. Bake 7–10 mins, depending on yolk preference.
-
Garnish & serve hot with toast or pita!
Notes
-
Use block feta for best texture.
-
Add cooked chickpeas or harissa for a twist.
-
Let eggs rest 2 mins post-bake—they’ll finish cooking gently.
- Prep Time: 10 min
- Cook Time: 30–35 min
Nutrition
- Calories: 350 cal per serving
- Fat: 27g
- Carbohydrates: 12g
- Protein: 15g
Nutritional Nibbles (Per Serving, Serves 4)
Calories: 350 • Protein: 15g • Carbs: 12g • Fat: 27g (Sat: 10g) • Fiber: 3g • Sugar: 7g • Sodium: 900mg
Note: Sodium varies based on feta brand. Using low-sodium feta reduces sodium by ~30%.
Final Thoughts: More Than Just Breakfast
This baked feta egg skillet isn’t just a meal—it’s a mood lifter, a memory maker, and a kitchen confidence booster. It’s proof that the simplest ingredients, treated with care, can create something extraordinary.
Whether you’re cooking for one on a quiet morning or serving a brunch crowd, this dish adapts to your story. Maybe you’ll add a spicy kick for adventure, or keep it classic for comfort. Maybe it’ll become your signature “I’ve got this” meal after a long week.
So here’s to sunny skillets, crispy-edged feta, and eggs that taste like joy. Now go forth and bake something beautiful—and don’t forget to lick the spoon.




