
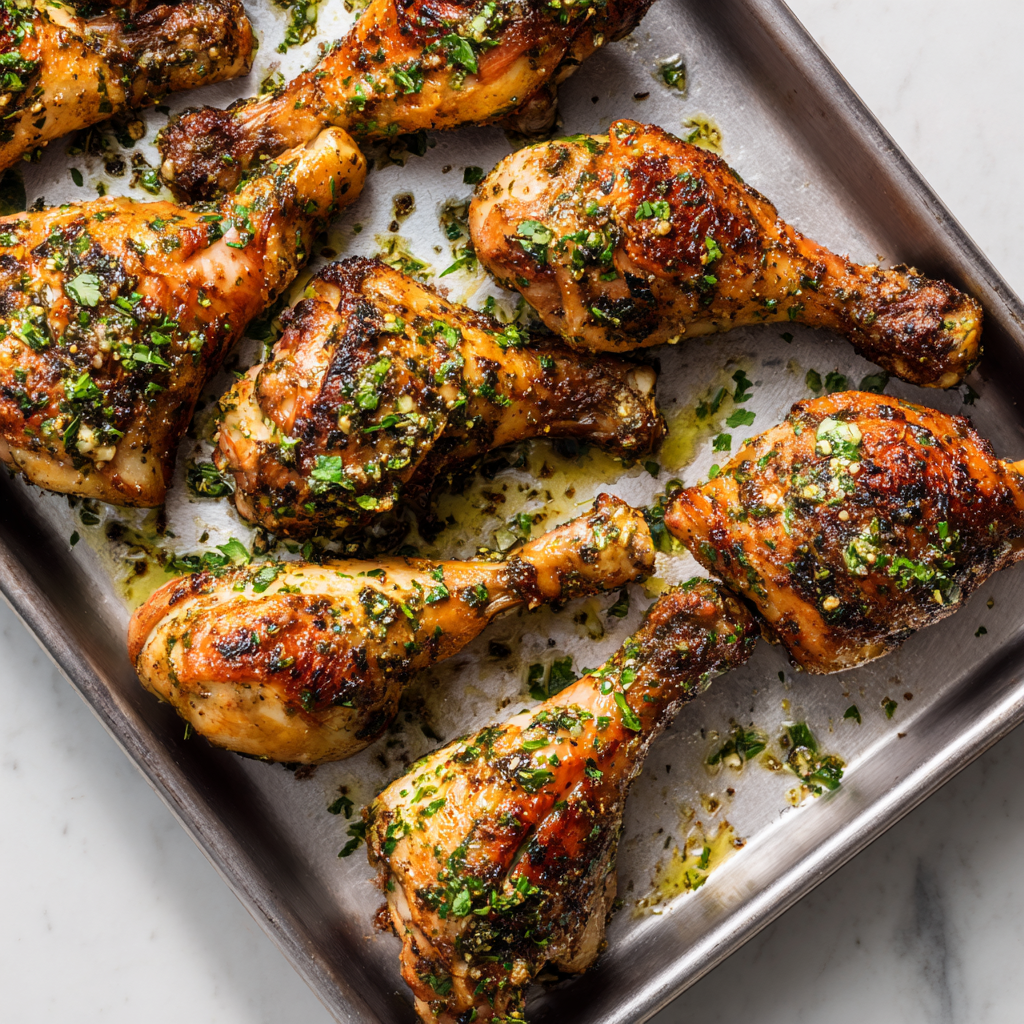
GARLIC HERB CHICKEN LEGS
Hey There, Flavor Friend! Let’s Talk Crispy, Juicy Chicken Magic
You know that moment when you walk into a kitchen smelling like roasted garlic, earthy herbs, and golden chicken skin? Yeah, that’s the *exact* happiness we’re creating today. I’m so thrilled you’re here! If your weeknights need a hero or your soul craves uncomplicated comfort, these Garlic Herb Chicken Legs are your new best friend. Drumsticks are the unsung champions of the chicken world—forgiving, affordable, and packed with juicy flavor. No fancy techniques or 20-ingredient marathons needed! Just honest, hearty goodness that makes everyone hover near the oven asking, “Is it ready yet?” We’re talking crispy skin, tender meat, and a garlic-herb hug in every bite. Perfect for busy nights, lazy Sundays, or when you just want to feel like a kitchen rockstar with minimal effort. Ready to make your kitchen smell like a cozy Italian trattoria? Let’s dive in!
Why These Chicken Legs Taste Like My Grandma’s Kitchen Table
This recipe? It’s pure nostalgia for me. Picture 8-year-old me, feet dangling off a stool in my Nonna’s steamy kitchen, “helping” her season chicken legs for Sunday supper. She’d let me mix the olive oil and dried herbs with my tiny hands, giggling when I’d pretend to be a fancy chef. “More garlic, Olivia! Always more garlic!” she’d say, winking. Those drumsticks roasted while we argued over card games, filling the house with this insane aroma that pulled the whole family to the table like magnets. Even now, the second that garlicky-herb scent hits the air, I’m transported back—to clattering plates, my uncle’s terrible jokes, and Nonna beaming as we devoured every bite. It’s more than dinner; it’s a warm memory on a plate. That’s the magic of simple food done right, don’t you think?
Your Flavor Toolkit: Simple Stars, Big Impact
Grab these pantry pals (and yes, swaps totally welcome!):
- 6 chicken legs (drumsticks) – Skin-on, bone-in is KEY for juicy insides + crispy outsides! Thighs work too, but adjust cooking time.
- 2 tbsp olive oil – Extra virgin hugs the herbs and crisps the skin. Out? Neutral oil like avocado works.
- 1 tsp Italian seasoning – That dried herb blend (oregano, basil, rosemary) is your flavor backbone. No blend? Use ½ tsp oregano + ½ tsp basil.
- 1 tsp garlic powder – Trust me, powder gives deeper, even garlic love vs. fresh here. For punch, add 1 minced fresh clove too!
- ½ tsp onion powder – Sweet depth without chopping! Swap with ¼ tsp paprika for smokiness.
- Salt & pepper to taste – I use 1 tsp salt + ½ tsp pepper. Season like you mean it—it’s your flavor foundation!
Chef’s Whisper: See dried herbs in your cabinet looking sad? Rub them between your palms before adding—it wakes up their oils!
Let’s Get Roasting: Crispy Skin, Juicy Meat Guaranteed
Follow these steps (and sneaky pro tips!) for perfection:
- Preheat & Prep: Crank that oven to 400°F (200°C). Line your baking sheet with foil or parchment (hello, easy cleanup!). Why 400°F? High heat = crispy skin fast, before the meat dries out. Genius, right?
- Mix the Magic: In a bowl big enough for your chicken, whisk together the olive oil, Italian seasoning, garlic powder, onion powder, salt, and pepper. Tip: Make it pasty, not runny—this clings better!
- Get Hands-On: Add chicken legs to the bowl. Massage that herby oil mix under the skin and all over. Yes, get messy! Hack: Slide a butter knife under the skin gently to lift it—creates a flavor pocket!
- Space for Crispiness: Arrange legs on the sheet, skin-side up, not touching. Crowding = steamed chicken (sad trombone). Pro Move: Use a rack on the sheet for air flow & ultimate crisp!
- Roast & Flip: Bake 35-45 mins, flipping legs halfway through. Why flip? Even browning! Peek at 30 mins—skin should be golden, juices clear.
- Temp Check: Thermometer in the thickest part (avoiding bone) must hit 165°F (74°C). No thermometer? Pierce with a knife—juices run clear, not pink!
- Rest is Best: Let chicken rest 5 mins off the sheet. Patience, grasshopper! Resting = juices redistribute = mega tenderness. Garnish with fresh parsley or thyme.
The Science of Perfectly Roasted Chicken Legs
Why do these garlic herb chicken legs come out so juicy inside with that irresistible crispy skin? Let’s geek out on the culinary science!
1. Skin-On, Bone-In = Flavor Insurance
Chicken legs are forgiving because:
-
Bones conduct heat gently, preventing the meat from drying out.
-
Fat under the skin bastes the meat as it renders, while the skin itself crisps into golden perfection.
-
Dark meat stays moist longer than breast meat—it has more collagen that breaks down into succulent gelatin during cooking.
2. The 400°F Sweet Spot
This temperature is magic because:
-
High enough to crisp the skin quickly (lower temps make skin rubbery).
-
Low enough to cook the meat through without burning the exterior.
-
Creates the Maillard reaction—that complex browning process that makes roasted chicken taste deeply savory.
3. Why Dried Herbs Work Better Than Fresh Here
-
Concentrated flavor stands up to roasting (fresh herbs would burn).
-
Oil helps rehydrate them, releasing their essential oils evenly.
-
Garlic powder distributes flavor more consistently than fresh garlic, which can burn and turn bitter.
4. The Flip Factor
Flipping halfway ensures:
-
Even heat distribution (ovens often have hot spots).
-
All sides get caramelized, not just the top.
Pro Tip: For extra crispiness, pat the chicken dry with paper towels before seasoning, and for the last 5 minutes, broil on high (watch closely!).
Global Flavor Twists—5 Ways to Travel with Your Taste Buds
Same technique, wildly different flavors! Here’s how to take these chicken legs around the world:
1. Tandoori-Inspired (India)
-
Swap the oil for yogurt mixed with 1 tbsp lemon juice.
-
Spice blend: 1 tsp cumin, 1 tsp coriander, ½ tsp turmeric, ½ tsp garam masala, ¼ tsp cayenne.
-
Garnish with cilantro and serve with naan.
2. Za’atar & Sumac (Middle East)
-
Replace Italian seasoning with 1 tbsp za’atar + ½ tsp sumac.
-
Drizzle with tahini after roasting.
-
Pair with tabbouleh or hummus.
3. Jerk-Spiced (Caribbean)
-
Marinade: 1 tbsp soy sauce, 1 tbsp brown sugar, 1 tsp allspice, ½ tsp thyme, ½ tsp cinnamon, 1 minced Scotch bonnet (or ¼ tsp cayenne).
-
Char under the broiler for smokiness.
4. Miso-Ginger (Japan)
-
Whisk 1 tbsp white miso into the olive oil.
-
Add 1 tsp grated ginger and ½ tsp sesame oil.
-
Sprinkle with toasted sesame seeds.
5. French Herbes de Provence
-
Use 1 tbsp herbes de Provence (lavender, thyme, savory).
-
Finish with a pat of butter and a squeeze of lemon.
Why It Works: The roasting method stays the same—just the flavors change!
Leftover Alchemy—5 Next-Day Recipes
Don’t let leftovers go to waste! Transform them into:
1. Chicken Caesar Salad
-
Shred the meat over romaine, croutons, and Parmesan.
-
Use the crispy skin as crouton substitutes!
2. Garlic Herb Chicken Pasta
-
Toss with hot pasta, olive oil, and roasted cherry tomatoes.
-
Stir in pan juices for instant sauce.
3. Breakfast Hash
-
Dice and sauté with potatoes, onions, and bell peppers.
-
Top with a fried egg.
4. Chicken Tacos
-
Shred and warm with cumin and lime juice.
-
Serve in tortillas with avocado crema.
5. Savory Chicken Soup
-
Simmer the bones with veggies for stock.
-
Add shredded meat at the end.
Pro Tip: Freeze leftover meat in portioned bags for quick future meals!
Plating Up: Make It a Feast!
Slide these beauties onto a warm platter—rustic charm is the vibe! Drizzle any pan juices over the top. Pair with creamy mashed potatoes (that sauce deserves dipping!), or keep it light with roasted veggies (asparagus or zucchini love garlic too). For a summer twist, toss with a lemony arugula salad. Crusty bread? Mandatory for mopping up every last herby-garlicky bit. Family-style serving = less fuss, more “oohs!”
Mix It Up! 5 Tasty Twists
Play with these fun spins:
- Lemon Lover’s: Add 1 tbsp lemon zest + 1 tbsp juice to the oil mix. Serve with extra lemon wedges.
- Spicy Kick: Toss in ½ tsp chili flakes or 1 tsp smoked paprika with the herbs.
- Dairy-Free Creamy: After roasting, drizzle with coconut milk mixed with 1 minced garlic clove.
- Mediterranean: Swap Italian seasoning for 1 tsp dried oregano + ½ tsp dried mint. Add ¼ cup chopped olives before baking.
- Air Fryer Fun: Cook at 380°F for 22-25 mins, flipping once. Gets EXTRA crispy!
Olivia’s Extra Nuggets of Wisdom
This recipe started as a desperate “what’s in my pantry?” weeknight throw-together years ago. Now? It’s my most-requested dish for potlucks! Funny story: Once, I accidentally used cinnamon instead of paprika (morning coffee hadn’t kicked in). Weirdly… it wasn’t terrible? But stick to the herbs, friends. Over time, I’ve learned two game-changers: 1) Pat the chicken dry before oiling for crispier skin, and 2) Letting the seasoned legs sit 10 mins pre-oven deepens the flavor. It’s evolved, but its soul—simple, joyful, crowd-pleasing—stays the same.
Your Burning Questions, Answered!
Q: Can I use boneless chicken?
A: You can, but reduce cook time to 20-25 mins! Bone-in keeps it juicier, though.
Q: Why isn’t my skin crispy?
A: Three culprits! 1) Chicken was wet—pat it dry first. 2) Overcrowded pan—give space! 3) Oven temp too low—use an oven thermometer to check.
Q: Can I prep ahead?
A: Totally! Season legs up to 24 hours ahead. Store covered in the fridge. Let sit at room temp 20 mins before roasting.
Q: Leftovers?
A: They shine! Store in an airtight container for 3-4 days. Reheat in a 375°F oven (not microwave—keeps skin crisp!). Chop into salads or pasta!
GARLIC HERB CHICKEN LEGS
- Total Time: 50 mins
Description
Welcome to the kind of dinner that smells like love, tastes like comfort, and practically makes itself. These Garlic Herb Chicken Legs are golden, garlicky, and packed with earthy herbs and crispy-skinned goodness. They’re unfussy, deeply flavorful, and exactly what your weeknight (or lazy Sunday) needs.
Ingredients
-
6 chicken legs (skin-on, bone-in)
-
2 tbsp olive oil
-
1 tsp Italian seasoning (or ½ tsp oregano + ½ tsp basil)
-
1 tsp garlic powder
-
½ tsp onion powder
-
1 tsp salt + ½ tsp black pepper
Instructions
-
Preheat oven to 400°F (200°C). Line a baking sheet with parchment or foil. Optional: use a rack on top.
-
Mix Seasoning: In a large bowl, combine olive oil, herbs, garlic powder, onion powder, salt, and pepper.
-
Coat Chicken: Pat drumsticks dry. Rub seasoning mix all over, getting under the skin if you can.
-
Bake: Arrange drumsticks skin-side up with space between. Roast 35–45 mins, flipping once halfway. Cook until internal temp is 165°F.
-
Rest & Serve: Let rest 5 mins before serving. Spoon pan juices over for extra flavor.
Notes
-
Pat dry before seasoning = crispier skin.
-
Use lemon zest for brightness or chili flakes for heat.
-
Air fryer? Cook at 380°F for 22–25 mins, flipping halfway.
- Prep Time: 10 mins
- Cook Time: 40 mins
Nutrition
- Calories: 260 cal Per Serving
- Fat: 17g
- Carbohydrates: 1g
- Protein: 24g
Nutritional Spotlight (Per Serving)
Calories: ~260 | Protein: 24g | Carbs: 1g | Fat: 17g
Note: Values are estimates. Using less oil or skinless chicken lowers fat.
Final Thoughts: Why This Recipe Belongs in Your Life
These garlic herb chicken legs are more than dinner—they’re a template for confidence in the kitchen. They teach you the fundamentals of roasting, adapt to any flavor craving, and turn humble ingredients into something extraordinary. Whether you’re feeding a family, meal-prepping, or just need a bite of comfort after a long day, this recipe is your ally.
So tie on that apron, crank up the oven, and let the aroma of garlic and herbs remind you: good food doesn’t have to be complicated to be unforgettable. Happy cooking!
Save This Recipe For Later!
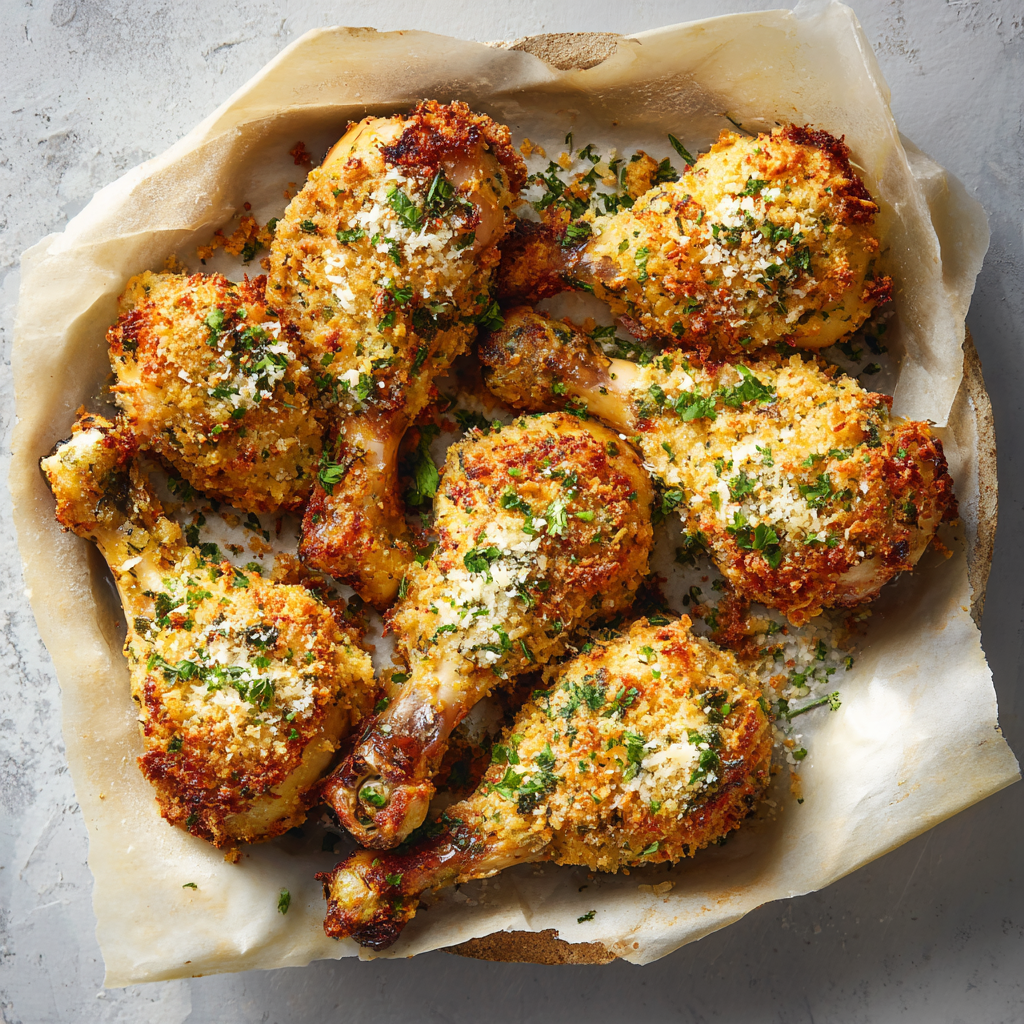
CRISPY PARMESAN CHICKEN LEGS
Welcome to Flavor Town: Crispy Parmesan Chicken Legs!
Hey kitchen friends! Olivia here, apron dusted with Parmesan (as usual) and ready to share one of my all-time favorite recipes that turns ordinary weeknights into little celebrations. If your idea of heaven involves golden, shatteringly crispy chicken skin giving way to juicy meat beneath – with a serious umami punch – you’re about to meet your new obsession. These Crispy Parmesan Chicken Legs are the ultimate edible hug: ridiculously flavorful, embarrassingly easy, and guaranteed to make everyone at your table do that happy fork-clink dance. They’re my go-to when I need guaranteed smiles, whether it’s a chaotic Tuesday or a lazy Sunday feast. Forget complicated techniques or fancy gadgets; this is pure, unfussy magic happening right on your baking sheet. Let’s turn those humble drumsticks into crispy, cheesy masterpieces that’ll have everyone licking their fingers (and maybe sneaking seconds when they think you’re not looking!).
The Recipe That Started with a Happy Accident
Picture this: It was my nephew Leo’s 10th birthday, and I’d ambitiously planned an elaborate, three-layer cake. Naturally, I completely forgot to plan the actual dinner. Panic mode! I had a pack of chicken legs, a half-empty wedge of Parmesan, and about 30 minutes before hungry little pirates invaded my kitchen. In a “throw-everything-tasty-into-a-bowl” moment, I mixed grated Parmesan with whatever herbs smelled good, slapped it on the chicken, and crossed my fingers. What emerged from the oven wasn’t just salvaged dinner – it was a revelation. The cheese formed this incredible, crackly crust that made Leo declare it “better than dinosaur nuggets” (high praise!). The best part? Watching my usually-picky niece meticulously scrape every last crispy bit off her plate. That happy accident became our family’s “Celebration Chicken,” requested for birthdays, graduations, and even just because it’s Tuesday. It taught me that the best recipes often start with a little chaos and a whole lot of heart.
Your Crispy Parmesan Toolkit
Here’s what you’ll need to create this magic (and why each piece matters):
- 6 chicken legs (drumsticks): Drumsticks are my MVP here – affordable, forgiving, and packed with juicy flavor. Chef’s Tip: Skin-on is non-negotiable for maximum crispiness! If you prefer thighs, see variations below.
- 1 cup grated Parmesan cheese: NOT the shelf-stable powder! Use freshly grated Parmigiano-Reggiano or a good quality pre-grated Parmesan from the refrigerated section. It melts into a lacy, savory crust. Substitution: Pecorino Romano adds a sharper bite.
- 1 tsp garlic powder: Provides consistent, mellow garlic flavor without burning. Chef’s Insight: Powder sticks better than fresh garlic here!
- 1 tsp dried parsley: Adds a pop of color and subtle freshness. Substitution: 1 tbsp fresh chopped parsley works (add after baking).
- 1 tsp paprika: Sweet or smoked paprika both work wonders for color and depth. Smoked paprika adds a subtle BBQ vibe! Chef’s Twist: Add 1/4 tsp cayenne for heat lovers.
- Salt & pepper to taste: Start with 1/2 tsp salt & 1/4 tsp pepper. Taste the coating mix – it should be slightly salty (remember, Parmesan is salty too!).
- 2 tbsp olive oil (optional for brushing): Helps the crust adhere and promotes browning. Chef’s Hack: A quick spritz of cooking spray works wonders too!
Let’s Get That Chicken Crispy! (Step-by-Step)
Follow these steps for golden perfection – I’ll walk you through every trick!
- Preheat & Prep: Fire up that oven to 400°F (200°C). This high heat is CRUCIAL for crispiness! Line a baking sheet with parchment paper (my fave for easy cleanup) or foil. Pro Tip: Avoid overcrowding – use two sheets if needed! Crowding = steaming = sad, soggy skin.
- Mix Your Magic Dust: In a shallow dish (a pie plate works great!), combine the grated Parmesan, garlic powder, dried parsley, paprika, salt, and pepper. Use a fork to break up any Parmesan clumps. Chef’s Secret: Taste a pinch! Adjust salt/pepper now. It should make you go “Mmm!”
- Dry Those Drumsticks: Pat the chicken legs fiercely dry with paper towels. This is the #1 step for CRUNCH! Moisture is the enemy of crisp. Seriously, channel your inner chicken-drying ninja.
- Oil ‘Em Up (Optional but Awesome): Lightly brush or spray each drumstick with olive oil or cooking spray. This creates a “glue” for the coating and boosts browning. Don’t skip if you want maximum golden glory!
- Coat Like You Mean It: Roll each oiled drumstick vigorously in the Parmesan mixture. Press, press, PRESS the coating onto every nook and cranny! Chef’s Move: Lift the skin slightly and stuff some coating underneath for extra flavor bombs.
- Space Them Out: Place the coated legs on your prepared sheet, not touching. Think “socially distant chicken.” This ensures hot air circulates for even crisping.
- Bake to Golden Glory: Slide the tray into the hot oven. Bake for 35-40 minutes. Resist opening the oven too early! You’ll know they’re done when the coating is deep golden brown, the chicken juices run clear (not pink!), and the internal temp hits 165°F (74°C).
- Broil for the Final Crunch (Optional): For insane, shattering crispiness, switch to broil for the last 2-3 minutes. WATCH CONSTANTLY! Broilers can turn golden into charcoal in seconds. Safety Dance: Use oven mitts and stay put!
- Rest & Resist: Let the chicken rest for 5 minutes before serving. This keeps the juices locked in. I know, the smell is torture… but it’s worth it!
Plating Up Your Parmesan Perfection
This chicken is the star, so keep it simple! Arrange the crispy legs on a warm platter or rustic wooden board. Scatter over some fresh chopped parsley or chives for a vibrant pop. For a fun, casual vibe, serve them right on the baking sheet (lined with fresh parchment, of course!). Pair them with crowd-pleasers like creamy garlic mashed potatoes (hello, sauce vehicle!), roasted lemon-herb veggies (asparagus or broccoli are fab), or a crisp simple green salad with tangy vinaigrette to cut the richness. Don’t forget crusty bread for mopping up every last cheesy crumb!
Shake It Up! Flavor Twists & Swaps
Love the base recipe? Try these delicious spins:
- “Everything Bagel” Chicken: Swap 2 tbsp of the Parmesan for Everything Bagel Seasoning! Toasted sesame, garlic, onion, poppy seeds? Yes please!
- Lemon-Herb Zing: Add 1 tbsp finely grated lemon zest + 1 tsp dried oregano or thyme to the coating mix. Serve with extra lemon wedges.
- Spicy ’Nduja Kick: Mix 1-2 tbsp soft ’nduja (spicy Calabrian sausage paste) into the olive oil before brushing. Fiery, funky, incredible!
- Gluten-Free & Keto Bliss: This recipe is naturally GF and low-carb! Just ensure your Parmesan is GF. Perfect as-is for keto friends.
- Thighs or Wings? Absolutely! Use skin-on, bone-in chicken thighs (bake 40-45 mins) or party wings (bake 30-35 mins, flipping halfway). Adjust cooking time based on size.
Olivia’s Crispy Chronicles (A.K.A. Chef’s Notes)
This recipe is my kitchen workhorse, and it’s evolved beautifully over the years! I initially used way more oil, resulting in a slightly greasy crust – lesson learned: a light touch is key. One hilarious disaster involved using “low-fat” Parmesan (why, past Olivia, why?!). It melted into a sad, oily puddle instead of crisping. Stick to the good stuff! My biggest “aha” moment? Realizing pressing the coating FIRMLY onto the dry chicken is the difference between “meh” and “MAGIC.” I also love adding a sprinkle of panko breadcrumbs (about 1/4 cup) to the Parmesan mix sometimes for extra shatter – but honestly, the pure Parmesan crust is iconic. It’s survived toddler tantrums, last-minute guests, and my oven’s questionable temperature accuracy – truly bulletproof deliciousness!
Crispy Q&A: Your Parmesan Problems Solved!
Q: My coating fell off! What did I do wrong?
A: Two likely culprits: 1) Not drying the chicken enough (moisture = coating slippage!). Be ruthless with those paper towels. 2) Not pressing the coating firmly enough. Really compact it onto the skin. Brushing with oil/spray first also helps it adhere.
Q: Can I use boneless, skinless chicken breasts?
A: You *can*, but expect a different (less crispy) result! Breasts cook faster (25-30 mins) and the lack of skin/fat means the coating won’t get as crunchy or flavorful. Stick to skin-on, bone-in thighs or legs for the true experience. If you must use breasts, pound them thin and reduce baking time.
Q: How do I store and reheat leftovers without losing the crunch?
A: Store cooled leftovers in an airtight container in the fridge for up to 3 days. Reheating Magic: DO NOT microwave! Use a 375°F (190°C) oven or air fryer for 8-12 minutes, until heated through and crispy again. The broiler trick (1-2 mins watchfully!) works wonders too.
Q: Is the chicken supposed to look super dark? Did I burn it?
A: The Parmesan crust naturally turns a deep, rich golden brown – almost mahogany in spots! This is GOOD and packed with flavor. True burning smells acrid and tastes bitter. If it’s dark brown but smells amazing and cheesy, it’s perfect. If using smoked paprika, it’ll be even darker. Trust the process (and your nose)!
CRISPY PARMESAN CHICKEN LEGS
- Total Time: 50 mins
Description
Golden, crunchy, and packed with umami-rich flavor, these Crispy Parmesan Chicken Legs are the definition of comfort meets crave-worthy. Think juicy meat under a shatteringly cheesy crust that’s embarrassingly easy to make and totally unforgettable. No frying, no fuss—just simple, satisfying magic baked to perfection. This is the dinner that makes everyone lick their fingers and ask for more (even the picky ones).
Ingredients
-
6 chicken legs (skin-on, bone-in)
-
1 cup grated Parmesan (fresh, not shelf-stable)
-
1 tsp garlic powder
-
1 tsp dried parsley
-
1 tsp paprika (sweet or smoked)
-
½ tsp salt + ¼ tsp pepper
-
2 tbsp olive oil (or cooking spray)
Instructions
-
Preheat oven to 400°F (200°C). Line a baking sheet with parchment or foil.
-
Mix Coating: Combine Parmesan, garlic powder, parsley, paprika, salt, and pepper in a shallow bowl.
-
Prep Chicken: Pat legs very dry with paper towels. Lightly brush or spray with olive oil.
-
Coat: Press each leg firmly into the Parmesan mix, covering well. Stuff a little under the skin if you’re feeling fancy.
-
Bake: Space out on tray and bake for 35–40 mins. Optional: broil 2–3 mins at the end for extra crunch.
-
Rest 5 mins before serving.
Notes
-
Super dry skin = super crispy crust.
-
Use quality Parmesan—grates better, crisps better, tastes better.
-
Reheat leftovers in the oven or air fryer for best texture.
- Prep Time: 10 mins
- Cook Time: 40 mins
Nutrition
- Calories: 300 cal Per Serving
- Fat: 20g
- Carbohydrates: 2g
- Protein: 25g
Nutritional Info (Per Serving – Approximate)
Calories: ~300 | Protein: 25g | Carbohydrates: 2g | Fat: 20g (Saturated Fat: 7g) | Cholesterol: 95mg | Sodium: 450mg
Note: Values are estimates and can vary based on specific ingredients used and portion size.
Final Thoughts: Why This Recipe Earned Permanent Rotation Status
After years of testing and countless batches, this Parmesan chicken recipe remains my ultimate weeknight hero for three key reasons:
-
The Crispy/Juicy Paradox Solved – It delivers what most baked chicken recipes promise but rarely achieve: shatteringly crisp exterior with perfectly moist meat inside.
-
Universal Appeal – From picky kids to foodie adults, this dish gets enthusiastic thumbs up across all demographics. The flavor is bold but not challenging.
-
Adaptable Foundation – As we’ve seen, the basic technique serves as a springboard for endless global variations while maintaining its essential satisfying character.
The real magic happens when you make it your own. Maybe you’ll add a splash of hot sauce to the coating like my neighbor Carlos does, or throw in some orange zest like my grandmother preferred. However you customize it, this recipe delivers that rare combination of restaurant-quality results with home-cooked simplicity.
So next time you’re staring at a pack of chicken legs wondering what to make, remember: greatness is just some Parmesan and 40 minutes away. Here’s to many delicious, crispy-beyond-belief meals ahead!
Save This Recipe For Later!
SWEET & SOUR CHICKEN LEGS
Sweet & Sour Chicken Legs: Your New Sticky, Tangy Obsession
Why This Recipe Will Steal Your Dinner Spotlight
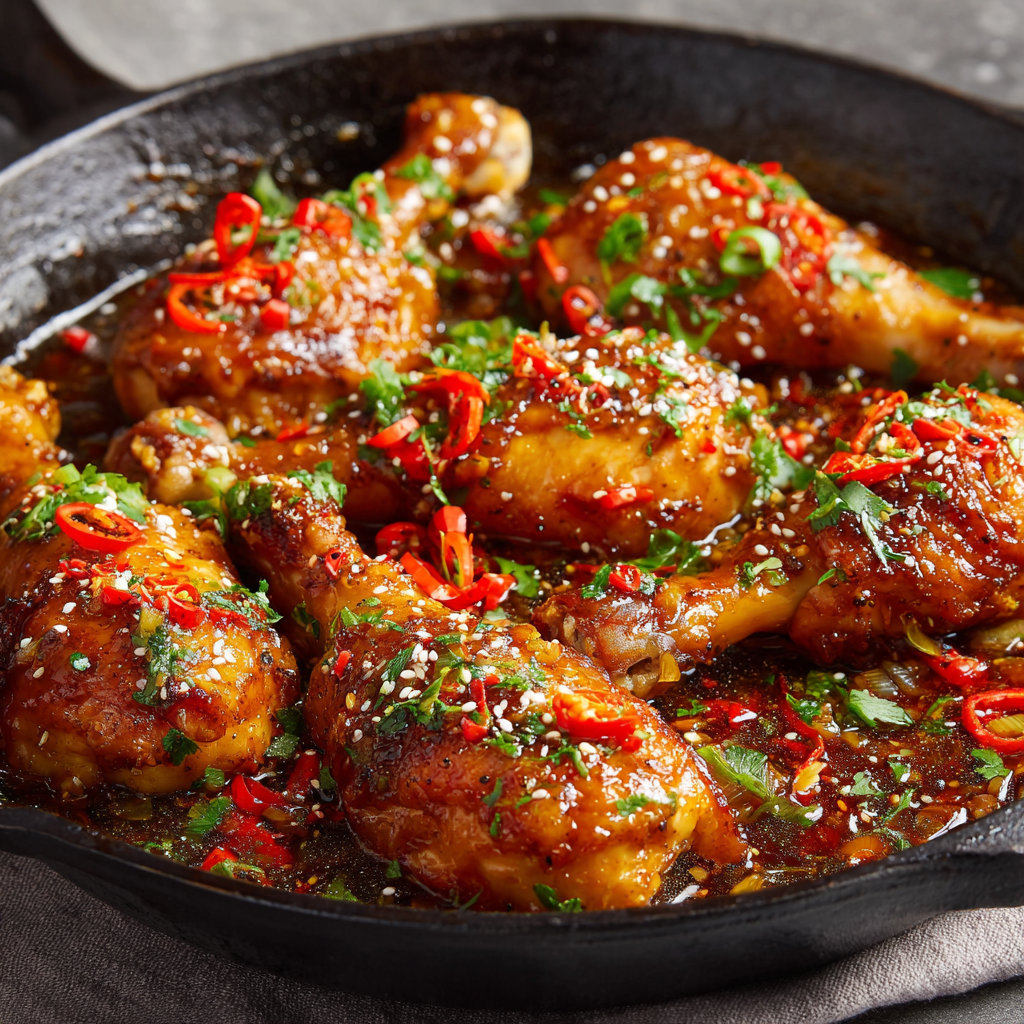
Hey there, kitchen friend! Olivia here, waving from my flour-dusted countertop. Can we talk about that magical moment when sweet meets sour in a dance so delicious, it makes your taste buds throw a party? That’s exactly what happens with these Sweet & Sour Chicken Legs. Forget takeout containers—this is sticky-fingered, lip-smacking joy made right in your oven. Picture this: juicy chicken legs, seared golden, then bathed in a glossy sauce that’s equal parts honeyed comfort and zippy tang. It caramelizes into this crackly-edged glaze that’s downright addictive. Best part? You likely have everything in your pantry *right now*. No fancy skills needed—just a skillet, a baking dish, and that gorgeous appetite of yours. Whether it’s a chaotic Tuesday or a lazy Sunday feast, this dish turns “just chicken” into a flavor explosion that’ll have everyone hovering around the kitchen. Ready to make some magic? Aprons on!
The Dinner That Started a Family Tradition
This recipe? Oh, it’s got roots. Picture my tiny Brooklyn apartment years ago, hosting my then-boyfriend’s (now husband!) very Italian family for the first time. I was terrified. His Nonna could make a Michelin-starred chef sweat! Desperate, I riffed on a vague memory of my mom’s sweet-sour ribs using chicken legs—cheaper and impossible to overcook. I remember basting them, praying the sauce wouldn’t burn… and then Nonna took her first bite. Silence. Then, she jabbed her fork toward the dish and declared: “Olivia. You cook like a Roman peasant—smart and full of fire!” Highest. Praise. Ever. Now, these legs star at every family game night. My kids fight over the “crispy bits,” and my husband still fake-pouts if I don’t make extra sauce for his rice. It’s messy, saucy, and 100% love on a plate.
Gather Your Flavor Arsenal
Simple ingredients, BIG personality! Here’s what you’ll need:
- Chicken legs (drumsticks) – 6 juicy legs. Why legs? Drumsticks stay moist during baking! Skin-on = crispy magic. Swap: Thighs work too (reduce bake time by 5 mins).
- Tomato sauce – 1/2 cup. Not marinara! Plain tomato sauce is your tangy base. Chef hack: Ketchup works in a pinch (omit brown sugar—it’s sweeter!).
- Brown sugar – 1/4 cup, packed. Deep molasses notes = caramelized glaze! Swap: Honey or maple syrup for floral warmth.
- White vinegar – 1/4 cup. That essential tang! Swap: Apple cider vinegar (fruity twist) or rice vinegar (milder).
- Worcestershire sauce – 1 tbsp. Your umami secret weapon! Swap: Soy sauce or tamari (use less salt).
- Salt & pepper – To taste. Season generously—it balances the sweet/sour.
- Olive oil – 1 tbsp. For searing. Swap: Any neutral oil like avocado or canola.
Let’s Build That Flavor, Step by Step!
- Preheat & Prep: Crank that oven to 375°F (190°C). Why? High heat = sticky glaze, not soupy sauce! Pat chicken legs super dry—this is CRUCIAL for golden skin. Season all over with salt and pepper.
- Sear Like a Boss: Heat olive oil in a heavy skillet (cast iron = MVP!) over medium-high. Add legs—don’t crowd! Sear 4-5 mins per side until deeply golden. Chef truth: This isn’t just color—it’s flavor foundation! Those browned bits? Liquid gold.
- Whisk That Magic Sauce: While chicken sears, mix tomato sauce, brown sugar, vinegar, and Worcestershire in a bowl. Taste it! Too sharp? Add 1 tsp sugar. Too sweet? A splash of vinegar. Make it yours!
- Sauce & Nestle: Arrange seared legs in a baking dish (single layer!). Pour sauce evenly over top—don’t waste a drop! Pro move: Scrape skillet fond into the sauce. Bonus flavor!
- Bake to Sticky Perfection: Bake uncovered 35-40 mins. Baste halfway! Spoon sauce over legs—this builds shine. Done when chicken hits 165°F internally and sauce is thick, bubbly, and clingy. Watch closely: Sugar burns fast! If browning too quick, tent loosely with foil.
- Rest & Shine: Let legs rest 5 mins off heat. Why rest? Juices redistribute! Garnish with chopped parsley or sesame seeds for color pop.
The Science Behind the Perfect Sweet & Sour Glaze
What makes sweet and sour sauce so irresistibly sticky, tangy, and glossy? It’s all about chemistry—and a little kitchen magic. The key to this recipe’s success lies in the balance of sugar, acid, and protein breakdown, creating a sauce that clings to the chicken like edible lacquer.
The Maillard Reaction & Searing
Before the sauce even comes into play, searing the chicken legs is a non-negotiable step. When chicken skin hits a hot skillet, the Maillard reaction occurs—a chemical process where amino acids and reducing sugars create hundreds of new flavor compounds. This reaction is why well-seared chicken tastes deeper, richer, and more complex than boiled or steamed poultry. Those crispy, golden-brown bits? They’re packed with umami, which enhances the sauce’s savory backbone.
Sugar’s Role in Caramelization
The brown sugar in this recipe isn’t just for sweetness—it’s the foundation of the glaze. As the chicken bakes, the sugar dissolves into the sauce, then re-caramelizes in the oven’s dry heat. When sugar reaches around 340°F (170°C), it breaks down into new compounds, creating toasty, nutty, and slightly bitter notes that balance the sauce’s brightness. This is why baking uncovered is crucial: It allows moisture to evaporate, concentrating flavors and thickening the glaze.
Acid for Brightness & Balance
Vinegar isn’t just for tang—it’s a tenderizer. The acetic acid gently breaks down proteins in the chicken, ensuring each bite stays juicy. Additionally, acid balances the richness of the fat from the chicken skin, preventing the dish from tasting cloying. The Worcestershire sauce (or soy sauce alternative) adds glutamates, ramping up the umami factor and making the sauce taste even more addictive.
Tomato Sauce: The Unsung Hero
Unlike ketchup (which is loaded with extra sugar and spices), plain tomato sauce provides a clean, tangy base. Tomatoes contain natural glutamic acid, another umami booster, and their slight sweetness harmonizes with the brown sugar. When reduced, tomato sauce thickens beautifully, helping the glaze cling to every nook and cranny of the chicken.
Pro Tip: If your sauce isn’t thickening enough, a pinch of cornstarch (mixed with a splash of water) can help. But patience works too—just let it bake a little longer!
The Cultural Roots of Sweet & Sour Flavors
Sweet and sour isn’t just a takeout staple—it’s a global phenomenon with deep culinary roots. From ancient Chinese kitchens to Roman feasts, the interplay of sugar and acid has been tantalizing taste buds for centuries.
Ancient China: The Birthplace of Sweet & Sour
The earliest recorded sweet and sour dishes date back to the Han Dynasty (206 BCE–220 CE) in China. Originally, the sauce was made with vinegar, honey, and fermented plums, used to preserve and flavor meats. By the Tang Dynasty (618–907 CE), citrus and spices like ginger were added, creating a more complex profile. This tradition evolved into the Cantonese-style sweet and sour pork we know today—crispy protein coated in a bright red sauce.
European Twists: Agrodolce & Gastrique
In Italy, agrodolce (literally “sour-sweet”) is a staple of Sicilian cooking, featuring vinegar, sugar, and sometimes raisins or pine nuts. It’s often paired with eggplant or game meats. Meanwhile, French gastrique—a caramelized sugar and vinegar reduction—forms the base for many sauces, demonstrating how universal this flavor pairing is.
American Adaptations: From Chinese Takeout to Home Kitchens
In the U.S., sweet and sour chicken became popular in the mid-20th century, adapted by Chinese-American restaurants to suit local tastes. The version most Americans recognize—bright red, sticky, and often made with pineapple—is a far cry from its ancestors but no less beloved. This recipe bridges the gap: It’s not quite traditional, but it honors the spirit of sweet-sour balance while keeping ingredients accessible.
Fun Fact: The addition of Worcestershire sauce is a British influence, showing how cuisines blend over time!
Why Chicken Legs Are the Ultimate Choice for This Recipe
Not all chicken cuts are created equal—especially when it comes to baking in a sticky glaze. Drumsticks (and thighs) have distinct advantages over breasts or wings in this dish.
1. Built-in Flavor & Moisture
Chicken legs are dark meat, meaning they contain more fat and connective tissue than lean breasts. As they cook, collagen breaks down into gelatin, keeping the meat succulent even if slightly overcooked. This makes them forgiving for home cooks—no dry chicken here!
2. Skin That Crisps Perfectly
The skin on drumsticks acts like a protective layer, browning beautifully during searing and staying crisp under the glaze. Unlike wings (which can dry out) or boneless cuts (which lack structural integrity), legs hold up to the baking process without falling apart.
3. Budget-Friendly & Family-Friendly
Drumsticks are often cheaper than other cuts, making this dish economical for weeknight dinners. Plus, their handheld shape makes them fun to eat—kids love gnawing on the bones, and adults appreciate the juicy, flavorful meat.
4. Ideal Sauce-to-Meat Ratio
The curved shape of drumsticks creates nooks where sauce pools and caramelizes, ensuring every bite is coated. Thighs work well too, but their flatter shape means less crispy edge variety.
Pro Swap: For a faster version, use pre-cut chicken thigh pieces (bone-in or boneless). Just reduce baking time by 5–10 minutes!
Plate It Pretty (Or Just Dig In!)
This dish begs to be the star! Serve legs on a platter drizzled with extra glaze. Pair with fluffy jasmine rice or coconut rice to soak up sauce. Need crunch? Quick-pickled cucumbers or stir-fried snap peas balance the richness. For a cozy night, add garlicky mashed potatoes. And please—extra napkins! This is finger-licking, share-it-family-style food.
Make It Your Own!
Play with your food! Fun twists:
- Spicy Firecracker: Add 1 tsp sriracha or red pepper flakes to the sauce.
- Tropical Vibes: Stir in 1/2 cup pineapple chunks (canned or fresh) before baking.
- Extra Veggie Love: Nestle bell peppers or onions in the baking dish—they caramelize in the sauce!
- Gluten-Free: Ensure Worcestershire is GF (or use coconut aminos).
- Sticky Wings: Use chicken wings! Bake 25-30 mins until crispy.
Olivia’s Kitchen Confessions
This recipe evolved from near-disaster! Once, I doubled the vinegar (oops)—my kitchen smelled like a pickle factory! I salvaged it with extra brown sugar and a splash of orange juice. Now? I keep OJ in my back pocket for balance. Over time, I learned: searing is non-negotiable, and basting builds that lacquered shine. My kids call it “Mom’s Candy Chicken,” and honestly? I’ll take it. It’s been scribbled on index cards, spilled on, and loved through 12 years of dinnertime chaos. Perfection? Nah. Delicious? Always.
Your Questions, Answered!
Q: Can I use boneless chicken?
A: Absolutely! Thighs or breasts work. Reduce bake time to 20-25 mins (check temp at 165°F).
Q: Sauce too thin after baking?
A: Transfer sauce to a saucepan. Simmer 3-5 mins until thickened. Stir constantly—sugar loves to burn!
Q: Can I prep ahead?
A: Yes! Sear chicken and mix sauce up to 24 hours ahead. Store separately in fridge. Assemble & bake cold—add 5-10 mins to cook time.
Q: Help! My glaze burned!
A: Ovens vary! If browning too fast, tent loosely with foil after the first 20 mins. Next time, try middle oven rack, not top.

SWEET & SOUR CHICKEN LEGS
- Total Time: 55 mins
Description
Craving takeout-level flavor with homemade ease? These Sweet & Sour Chicken Legs are your weeknight hero: juicy, golden-seared drumsticks baked in a sticky glaze of brown sugar, vinegar, and tomato goodness. No deep frying, no fancy steps—just bold, craveable comfort that’ll have everyone licking their fingers and begging for seconds.
Ingredients
-
6 chicken legs (drumsticks), skin-on
-
½ cup tomato sauce (or ketchup, omit sugar if using)
-
¼ cup packed brown sugar
-
¼ cup white vinegar
-
1 tbsp Worcestershire sauce
-
1 tbsp olive oil
-
Salt & black pepper, to taste
Instructions
-
Prep Oven: Preheat to 375°F (190°C). Pat chicken dry and season well.
-
Sear Chicken: Heat oil in a skillet over medium-high. Sear chicken 4–5 mins per side until golden. Transfer to a baking dish.
-
Make Sauce: Whisk tomato sauce, brown sugar, vinegar, and Worcestershire. Taste and adjust balance if needed.
-
Bake: Pour sauce over chicken. Bake uncovered 35–40 mins, basting halfway. Chicken is done at 165°F and glaze should be thick and sticky.
-
Rest: Let sit 5 mins. Garnish with parsley or sesame seeds.
Notes
-
Tent with foil if browning too fast.
-
Use thighs or wings for variation.
-
Great with rice, pickled veggies, or a quick slaw.
- Prep Time: 10 mins
- Cook Time: 45 mins
Nutrition
- Calories: ~280 cal Per Serving
- Fat: 15g
- Carbohydrates: 12g
- Protein: 23g
Nutrition Per Serving (1 leg + sauce)
Calories: ~280 • Protein: 23g • Carbs: 12g • Fat: 15g
Note: Estimates include skin. For lighter version, remove skin pre-sear.
Prep Time: 10 mins • Cook Time: 45 mins • Serves: 3
Final Thoughts: More Than Just a Recipe
This dish isn’t just about sticky, tangy chicken—it’s about the joy of cooking something unpretentious yet deeply satisfying. It’s about the way a simple sauce can turn humble ingredients into a meal that feels like a celebration. Whether you’re feeding a crowd, meal-prepping for the week, or just craving something nostalgic yet new, these Sweet & Sour Chicken Legs deliver.
So grab those drumsticks, crank up the oven, and let the magic happen. And remember: The best recipes aren’t about perfection—they’re about flavor, fun, and maybe a little bit of mess. Happy cooking!
Brioche French Toast
Hey There, Breakfast Dreamer!
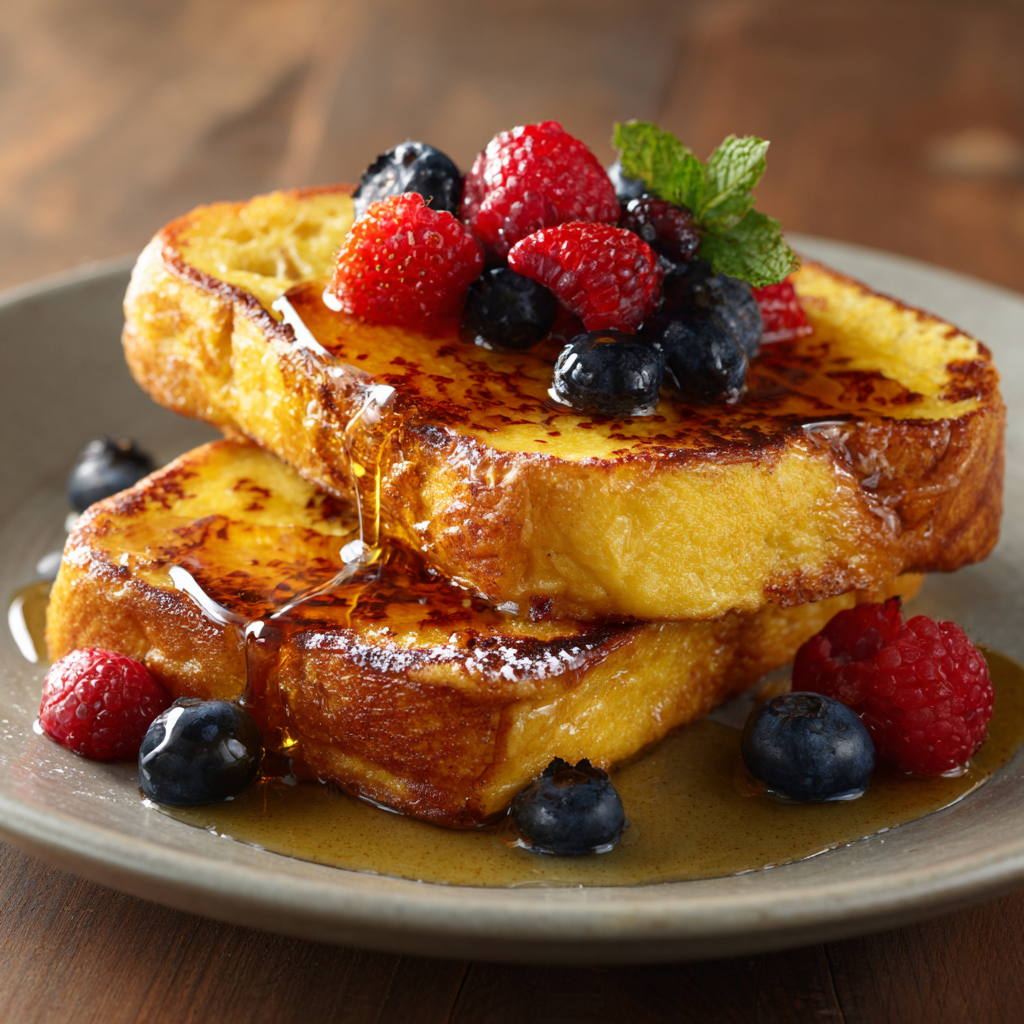
Is there anything more magical than the sizzle of French toast hitting a buttered skillet on a lazy weekend morning? That heavenly scent of vanilla and caramelizing sugar drifting through the house like a delicious alarm clock? If your heart does a happy dance at the thought of golden, custardy slices with crisp edges and a cloud-like center, you and I are kindred spirits. This isn’t just breakfast—it’s a warm hug on a plate, a celebration of cozy mornings and syrup-drenched moments.
Today, we’re diving fork-first into my absolute Brioche French Toast – the recipe that turns my kitchen into Grand Central Station when family visits. Forget complicated techniques or hard-to-find ingredients. This is pure, unapologetic indulgence made with simple pantry staples. We’re talking rich brioche soaked in a luscious vanilla-kissed custard, cooked to golden perfection, and crowned with rivers of maple syrup and jewel-toned berries. It’s the dish that makes my nephew declare, “Aunt Liv, you’re a breakfast wizard!” (High praise from an 8-year-old obsessed with Harry Potter).
Whether you’re nursing your first coffee or hosting a boisterous brunch crew, this recipe is your secret weapon. I’ll walk you through every step with the same care I’d use showing a friend around my kitchen—apron stains and all. Ready to turn ordinary mornings into something extraordinary? Grab your favorite spatula—let’s make some magic.
The French Toast That Started It All
Picture this: Me at sixteen, babysitting my neighbor’s twins. Hungry kids, an empty fridge, and one glorious loaf of slightly stale brioche left over from their mom’s dinner party. Panic? Nope—opportunity! I whisked eggs, milk, and vanilla with the confidence only a teenager faking competence can muster. That first batch? Burnt edges, undercooked centers… a hot mess. But those brave kiddos drowned it in syrup and declared it “the best toast EVER.”
Their wide-eyed, sticky-grinned approval sparked something. I spent months tweaking—testing milk ratios, vanilla levels, bread thickness—until I landed on this version. Now, whenever I make it, I still see those syrup-smeared little faces. It taught me that cooking isn’t about perfection; it’s about joy shared. And really, isn’t that what brunch is all about? Messy fingers, clinking forks, and the beautiful chaos of people you love gathered around a plate of something warm and wonderful.
Your French Toast Toolkit
Here’s what you’ll need to create your own brunch masterpiece. Don’t stress—I’ve included swaps for every situation!
- 4 large eggs – Your custard base! They create that luscious interior. Tip: Room temp eggs blend smoother. Vegan? Swap 1 tbsp chia or flax seed + 3 tbsp water per egg.
- ¾ cup whole milk – Adds richness. Half-and-half makes it extra decadent! Dairy-free? Oat milk or almond milk work beautifully.
- 1 tbsp sugar – Just enough to caramelize those edges. Brown sugar adds a lovely molasses note.
- 1 tsp vanilla extract – Non-negotiable for that warm aroma! Use pure vanilla for best flavor.
- 3 tbsp butter, divided – For frying. Salted butter gives a nice flavor contrast to the sweet custard.
- 10 slices brioche bread (1″ thick) – The STAR! Its buttery richness soaks up custard like a dream. Stale bread (1-2 days old) absorbs better without falling apart. Challah or thick-cut Texas toast work too.
- ½ cup pure maple syrup, warmed – Please, skip the pancake syrup! Real maple is liquid gold. Warm it gently in a saucepan.
- Fresh berries, for serving – Strawberries, blueberries, raspberries—their bright acidity cuts the richness. Frozen berries (thawed) work in a pinch!
Let’s Get Cooking: Your Foolproof Roadmap
Follow these steps for French toast that’s crispy outside, creamy inside—no stress allowed!
- Whisk Like You Mean It: In a shallow bowl (a pie plate works great!), vigorously whisk eggs, milk, sugar, and vanilla until completely smooth and pale yellow. No streaks! Chef’s Tip: Whisk for a full minute—this incorporates air for a lighter texture.
- Butter Up Your Stage: Heat a large non-stick skillet or griddle over MEDIUM heat (not high—patience is key!). Melt 1 tbsp butter, swirling to coat the pan. Listen for that gentle sizzle. Hack: Brush melted butter on the pan between batches for even coverage without pooling.
- The Dip & Dwell: Dip one brioche slice into the custard. Count to 3-Mississippi, flip, count to 3-Mississippi again. You want it fully coated but not disintegrating! Watch Out: Oversoaking makes soggy toast. Set a timer if needed!
- Golden Brown Magic: Place slices in the skillet (don’t crowd—cook 2-3 at a time). Cook 2-3 minutes per side until deeply golden and crisp. Peek underneath—if it’s sticking, it’s not ready to flip! Secret: Press gently with your spatula—if it springs back, the custard is set.
- Butter, Batch, Repeat: Transfer cooked slices to a wire rack on a baking sheet (keeps them crisp!). Add more butter to the pan before each new batch. Pro Move: Keep finished toast in a 200°F oven while cooking the rest.
Plating Perfection: Make It Instagram-Worthy
Presentation is the cherry on top! Stack two slices slightly overlapping on a warm plate. Drizzle generously with warm maple syrup—let it cascade down the sides like a delicious waterfall. Scatter a rainbow of fresh berries over the top. For extra pizzazz? Dust with powdered sugar using a fine sieve, add a dollop of whipped cream or Greek yogurt, or sprinkle with toasted pecans for crunch. Serve immediately while it’s gloriously warm and crisp!
Shake It Up: Endless Flavor Adventures
Once you’ve mastered the classic, try these fun twists:
- Citrus Burst: Add 1 tsp orange zest + 1 tbsp Grand Marnier to the custard. Top with candied orange slices.
- Spiced Apple Pie: Mix 1 tsp cinnamon + ¼ tsp nutmeg into custard. Serve with sautéed cinnamon apples and caramel sauce instead of syrup.
- Tropical Escape: Use coconut milk instead of dairy. Top with toasted coconut flakes, mango chunks, and a drizzle of passionfruit syrup.
- Savory-Sweet: Omit sugar in custard. Top with crispy prosciutto, a fried egg, and a sprinkle of chives.
- Stuffed Sensation: Sandwich slices with cream cheese & jam or Nutella before dipping (dip carefully!).
From My Apron-Pocket to Yours
This recipe has been my brunch MVP for 10 years, evolving through countless Sunday mornings. Early on, I learned the hard way that high heat = burnt outsides + raw insides (RIP, batch #3!). Now? Low and slow is the mantra. My biggest “aha” moment? Using slightly stale brioche. Fresh bread turns to mush, but day-old soaks up custard while holding its shape—like a delicious sponge! I also used to whisk the custard lazily… until lumps led to uneven soaking. Now I whisk like I’m in a competition! Funny story: My husband once tried to “help” by using garlic powder instead of cinnamon in a variation. We ordered pizza that morning. Lesson? Label your spice jars, friends.
French Toast SOS: Your Questions Answered
Q: My French toast is soggy inside! What went wrong?
A: Three likely culprits: 1) Bread was too fresh (stale is better!), 2) Over-soaking (3 seconds per side max!), or 3) Pan was too hot, cooking the outside too fast before the center set. Medium heat is key!
Q: Can I prep this ahead for a crowd?
A: Absolutely! Whisk the custard and slice the brioche the night before (store separately). Dip and cook morning-of. Cooked toast holds well in a 200°F oven for 20-30 minutes on a wire rack.
Q: Help! My toast is sticking to the pan.
A: Ensure your pan is properly heated before adding butter, and use enough butter (about 1 tbsp per batch). Non-stick skillets are ideal. If it sticks, wait another 30 seconds before flipping—it will release when ready!
Q: Is brioche essential? Can I use gluten-free bread?
A: Brioche’s richness makes it special, but challah, Texas toast, or even croissants work! For gluten-free, choose a sturdy GF brioche or sourdough. Dip gently and reduce soak time slightly.
Brioche French Toast
- Total Time: 25 mins
Description
Golden on the outside, custardy on the inside, and kissed with vanilla and butter, this Brioche French Toast is your go-to for turning slow mornings into something spectacular. Whether it’s brunch with friends or a quiet moment with coffee, this recipe brings pure comfort and just the right amount of indulgence. It’s simple, nostalgic, and absolutely magical.
Ingredients
-
4 large eggs
-
¾ cup whole milk (or half-and-half for extra richness)
-
1 tbsp sugar
-
1 tsp vanilla extract
-
3 tbsp butter (divided, for frying)
-
10 slices day-old brioche (1″ thick)
-
½ cup warm maple syrup
-
Fresh berries (optional)
Instructions
-
Make Custard: In a shallow bowl, whisk eggs, milk, sugar, and vanilla until smooth and pale.
-
Preheat Pan: Heat a skillet or griddle over medium heat. Melt 1 tbsp butter until it sizzles gently.
-
Soak Bread: Dip brioche slices in custard—3 seconds per side. Don’t oversoak!
-
Cook: Fry 2–3 slices at a time for 2–3 mins per side until golden and set. Keep warm on a rack in a 200°F oven.
-
Repeat: Add butter between batches. Finish cooking all slices.
Notes
Stack slices, drizzle with maple syrup, and top with berries. Dust with powdered sugar or add whipped cream for flair.
- Prep Time: 10 mins
- Cook Time: 15 mins
Nutrition
- Calories: 300cal Per Serving
- Fat: 15g
- Carbohydrates: 32g
- Protein: 8g
Nutritional Notes (Because Balance!)
Prep: 10 min | Cook: 15 min | Total: 25 min | Serves: 5 (2 slices each)
Per Serving (approx.): Calories: 310 | Fat: 15g | Carbs: 34g | Sugar: 12g | Protein: 10g
Note: Values are estimates. To reduce sugar, use less syrup or top with yogurt instead of whipped cream.
Final Thoughts: More Than Just Breakfast
French toast is a humble dish with a extraordinary power—to turn mornings into memories. Whether it’s the laughter of kids fighting over the crispest slice or the quiet joy of a solo breakfast with coffee and a book, this recipe is a vessel for connection. It’s forgiving (even “mistakes” taste good drowned in syrup), adaptable (savory or sweet, fancy or frugal), and universally loved.
So here’s my challenge to you: Make this recipe your own. Add a splash of bourbon to the custard, swap in matcha powder for sugar, or crown it with caramelized bananas. Then share it—with family, friends, or even just your future self on a tough day. Because the best meals aren’t about perfection; they’re about the hands that make them and the hearts they feed.
Pineapple Chicken Kabobs
Welcome to My Flavor Party: Pineapple Chicken Kabobs for the Win!
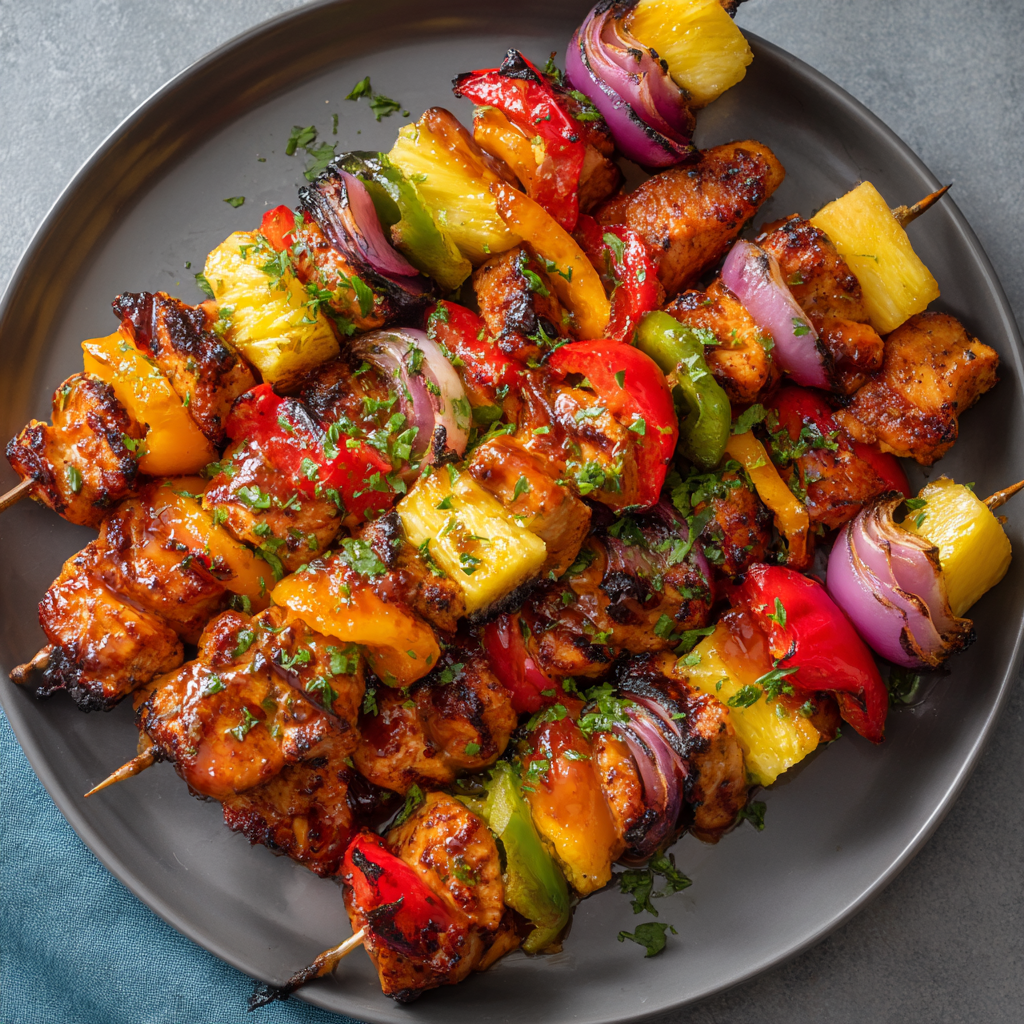
Hey there, kitchen friend! Olivia here, waving from my sauce-splattered countertop. Is there anything more magical than that sizzle-hiss sound when food hits a hot grill? Especially when it involves juicy chicken, caramelized pineapple, and those vibrant bell peppers that look like edible confetti? Today, we’re making Pineapple Chicken Kabobs – scaled up BIG to feed your whole crew (think backyard BBQs, birthday bashes, or “just because” family feasts). This isn’t just dinner; it’s a sweet, savory, smoky celebration on a stick! Picture tender chicken glazed in a sticky-sweet marinade, chunks of pineapple that turn almost candy-like over the flames, and crisp-tender veggies with those gorgeous grill marks. It’s the kind of dish that makes people hover around the grill, plate in hand, pretending they’re “just checking” while secretly snagging a pineapple chunk. Best part? You don’t need chef-level skills or all day. We’re talking simple prep, big flavor, and that unbeatable feeling of serving up pure happiness. Grab your apron (messy is encouraged!), fire up that grill, and let’s turn ordinary ingredients into an unforgettable, crowd-pleasing moment together!
Sunshine, Smoke, and a Kabob Revelation
Let me take you back to my cousin’s beach wedding potluck years ago. I was tasked with “something grilled,” and honestly? I panicked. Cooking for 50+ people felt like scaling Mount Everest in flip-flops. I remembered my grandma’s trick: when in doubt, put it on a stick! So, I whipped up a giant batch of these pineapple chicken kabobs. Picture this: me, frantically threading skewers on a picnic table as the sunset turned the sky peach-pink. When they hit the grill, that sweet, smoky aroma stopped conversations. People drifted over like happy zombies! My uncle (a self-proclaimed “meat-and-potatoes-only” guy) took one bite, raised his eyebrow, and muttered, “Okay, kid… you got me.” He went back for thirds. Seeing strangers bonding over skewers, juice dripping down their chins, laughing? That’s when it clicked: food isn’t just fuel. It’s the spark that turns strangers into friends and gatherings into memories. These kabobs became my go-to “feed the village” recipe – every charred pineapple chunk whispers, “Relax, have fun, they’ll love it.”
Your Flavor Toolkit: What You’ll Need
Don’t sweat the quantities – feeding 10 hungry humans requires a little abundance! Here’s your shopping list, packed with my favorite tips:
For the Kabobs:
- 3⅓ lbs boneless skinless chicken breast: Cut into 1½-inch cubes. Pro Tip: Slightly freeze the breasts for 20 minutes for cleaner, easier cuts! Swap: Thighs work beautifully for extra juiciness.
- 5 cups fresh pineapple cubes (~2 pineapples): Must be fresh! Canned gets mushy. That sweet-tangy punch and natural enzyme (bromelain) tenderizes the chicken like magic. Chef Insight: Save the core! It’s packed with juice for the marinade.
- 4–5 bell peppers (mixed colors): Cut into 1½-inch pieces. Why mixed? Color = visual feast! Swap: Add zucchini or mushrooms if peppers aren’t your jam.
- 2 large red onions: Cut into 1½-inch pieces. They caramelize divinely and add a touch of sharp sweetness.
- 3 tbsp olive oil, plus extra for grill: Coats everything for even charring and prevents sticking. Sub: Any neutral oil works.
- ½ tsp salt & ½ tsp black pepper: Simple seasoning to make the other flavors pop!
- 20 wooden or metal skewers (10–12 inches): Wooden? Soak ’em! 30 mins in water prevents fiery disasters. Metal = reusable ease.
For the Marinade & Basting Sauce:
- ½ cup reduced-sodium soy sauce or tamari: The savory backbone. Tamari is gluten-free friendly! Chef Insight: Reduced-sodium lets you control saltiness.
- ½ cup canned pineapple juice: Intensifies the pineapple vibe! Use juice from canned chunks if you *must* use canned fruit for the sauce only.
- ½ cup ketchup: Adds tangy depth and helps caramelization. Swap: Tomato paste + a splash of vinegar in a pinch.
- ⅓ cup packed dark brown sugar: Creates that crave-worthy sticky glaze. Sub: Honey or maple syrup, but reduce heat slightly to avoid burning.
- 2 tbsp extra virgin olive oil + 1 tbsp + 1 tsp sesame oil: EVOO carries flavor; sesame oil adds nutty richness. Don’t skip the sesame!
- 1 tbsp + 1 tsp minced garlic & 1 tbsp + 1 tsp grated fresh ginger: Flavor POWERHOUSES! Fresh is non-negotiable here for that bright zing. Pro Tip: Use a microplane for ginger – no stringy bits!
- ½ tsp salt & ½ tsp black pepper (to taste): Season after mixing – soy sauce adds salt!
- 1½ tbsp water + 1½ tsp cornstarch: Our thickening duo for the basting sauce. Creates a glossy, clingy glaze. Swap: Arrowroot powder works too.
Let’s Build Some Flavor Sticks! Your Foolproof Guide
Ready to thread, grill, and thrill? Follow these steps for kabob perfection:
- Marinade Magic: “Whisk it good!” In a large bowl, combine ALL marinade ingredients EXCEPT the water and cornstarch. Taste it (yum, right?). Now, crucial step: scoop out ¾ cup of this liquid gold into a small saucepan – this is your basting sauce base! Set it aside. Pour the remaining marinade over the chicken cubes in a large ziplock bag or container. Squish it around, seal it, and let it get cozy in the fridge. Chef Hack: Minimum 30 minutes, but 2-4 hours is the SWEET SPOT for max flavor penetration without the chicken getting mushy. Pop it in when you start prepping veggies!
- Skewer Savvy: If using wooden skewers, soak them in warm water for at least 30 minutes. No shortcuts! This prevents them from becoming mini torches on the grill. Trust me, I’ve learned the hard way!
- Thicken That Glaze: Whisk the water and cornstarch together in a small bowl until smooth. Add this slurry to the reserved ¾ cup of marinade in the saucepan. Bring it to a gentle simmer over medium heat, whisking constantly. It’ll transform from thin to gloriously thick and glossy in about 2-3 minutes! Remove from heat and let it cool slightly. Pro Tip: This step is KEY for the sauce clinging beautifully to the kabobs instead of dripping off. Cover it to keep it warm.
- Veggie Prep Party: While the chicken marinates and skewers soak, chop your peppers and onions into those 1½-inch pieces. Cut your fresh pineapple chunks too! Aim for uniform sizes so everything cooks evenly. Chef Insight: Pat the pineapple chunks dry with paper towels – less moisture = better caramelization!
- Thread the Dream: Time for assembly! Drain the chicken (discard the used marinade – food safety first!). Grab your skewers. Alternate threading: chicken, pineapple, pepper, onion. Repeat! Leave a tiny space between pieces for heat circulation. Hack: Start and end with chicken – it holds firmer than soft pineapple or onion. Lightly brush the loaded skewers with olive oil and sprinkle with the ½ tsp salt and pepper.
- Fire It Up! Preheat your grill to medium-high heat (about 375-400°F). Clean the grates well, then oil them generously (use tongs and a folded paper towel dipped in oil). Place the kabobs on the grill. Listen for that glorious sizzle! Grill for 12-15 minutes total, turning them every 3-4 minutes. Baste generously with your thickened sauce during the last 8-10 minutes of cooking (turning and basting each time). Pro Tip: Don’t baste too early or the sugar can burn! Wait until you see good grill marks. They’re done when the chicken is cooked through (internal temp 165°F, no pink!) and the pineapple is gorgeously charred.
Plating Up the Party
Presentation is part of the fun! Grab a huge, vibrant platter. Arrange those gorgeous, glistening kabobs slightly overlapping. Drizzle any remaining warmed basting sauce over the top – let that sticky goodness shine! Sprinkle with a flourish of toasted sesame seeds or chopped fresh cilantro for a pop of color and freshness. These kabobs are stars on their own, but for a full feast? Serve them alongside fluffy jasmine rice or quinoa to soak up the incredible sauce, and maybe a big, crunchy Asian slaw. Don’t forget napkins – it’s gloriously messy finger food meant to be enjoyed with laughter!
Make It Your Own! Delicious Twists
Love the base recipe? Try these fun spins next time:
- Spicy Aloha: Add 1-2 tsp sriracha or ½ tsp red pepper flakes to the marinade for a sweet-heat kick!
- Surf & Turf: Swap half the chicken for large, peeled shrimp (thread them on last, cook just until pink – about 3-4 mins less total).
- Tropical Veggie Delight (Vegan): Use extra-firm tofu or tempeh (pressed and cubed) instead of chicken, and swap soy sauce for tamari. Add chunks of sweet potato (par-cooked) or eggplant!
- Teriyaki Twist: Replace the ketchup and brown sugar with ⅓ cup store-bought or homemade teriyaki sauce for a different savory-sweet profile.
- Winter Grill Hack: No grill? No problem! Broil in the oven on a sheet pan lined with foil (4-6 inches from element), turning and basting frequently, for 10-14 minutes.
Olivia’s Kitchen Confessions & Tips
This recipe? It’s a living thing in my kitchen! It started as a scaled-down weeknight meal, but after that fateful potluck, the quantities ballooned. I learned the hard way that overcrowding skewers leads to steamed, not seared, chicken – hence the “leave space” tip! One hilarious fail involved forgetting to soak wooden skewers… let’s just say we had “flambéed kabobs” that year (cue the fire extinguisher!). Now, I set a timer for soaking! The biggest evolution? The cornstarch slurry. My early versions had sauce that just slid right off. Thickening it was a game-changer for that perfect sticky-sweet cling. Honestly, the beauty is in its flexibility. Play with the veg! Got cherry tomatoes? Toss ’em on! Feeling fancy? A splash of rum in the marinade adds depth. Don’t stress perfection – slightly charred pineapple is part of the charm. Just focus on good company and great flavor!
Your Kabob Questions, Answered!
Let’s tackle those common grill-time head-scratchers:
- “Can I make these ahead?” Absolutely! Threading: Assemble skewers up to 4 hours ahead. Cover tightly on a sheet pan in the fridge. Marinating: Chicken can marinate up to 4 hours (longer can make it mushy). Sauce: Make the basting sauce up to 2 days ahead; gently reheat before using. Grill just before serving for best texture!
- “Help! My sauce is burning on the grill!” Classic culprit: Basting too early! Sugar in the sauce caramelizes fast. Wait until the last 8-10 minutes of grilling to baste, and keep your grill at a steady medium-high (not scorching hot). Also, ensure your sauce is thickened with cornstarch – a thinner sauce drips and burns easier.
- “Is the chicken done? I don’t want to overcook it!” Fear not! Invest in an instant-read thermometer – target 165°F in the thickest chicken cube. Visually, the chicken should be opaque throughout with no pink, and juices should run clear. If you *must* cut one test piece, sacrifice a skewer end piece!
- “Can I bake these instead?” You bet! Preheat oven to 425°F. Line a baking sheet with foil and place a wire rack on top. Arrange skewers on the rack. Bake for 15-20 minutes, turning and basting halfway through, until chicken hits 165°F. Broil for the last 1-2 mins for char (watch closely!).
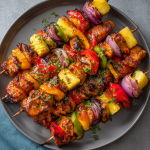
Pineapple Chicken Kabobs
- Total Time: 45 mins + marinate time
Description
Get ready to level up your grill game with these irresistible Pineapple Chicken Kabobs! Bursting with caramelized pineapple, juicy chicken, and rainbow-bright veggies, this recipe is a total crowd-pleaser—perfect for BBQs, birthdays, or weeknight feasts. Glazed in a sticky, savory-sweet sauce and cooked to perfection, they’re easy to prep, fun to assemble, and even more fun to eat. No forks needed—just good vibes and great flavor.
Ingredients
Kabobs
-
3⅓ lbs chicken breast, cubed
-
5 cups fresh pineapple chunks
-
4–5 bell peppers, chopped
-
2 large red onions, chopped
-
3 tbsp olive oil
-
½ tsp salt + ½ tsp black pepper
-
20 skewers (soaked if wooden)
Marinade & Glaze
-
½ cup soy sauce or tamari
-
½ cup pineapple juice
-
½ cup ketchup
-
⅓ cup brown sugar
-
2 tbsp olive oil
-
1 tbsp + 1 tsp sesame oil
-
1 tbsp + 1 tsp garlic (minced)
-
1 tbsp + 1 tsp fresh ginger (grated)
-
1½ tbsp water + 1½ tsp cornstarch
Instructions
-
Make Marinade: Whisk all marinade ingredients (except water + cornstarch). Reserve ¾ cup in a saucepan.
-
Marinate Chicken: Pour remaining marinade over chicken in a zip bag. Chill 30 mins–4 hrs.
-
Prep Sauce: Simmer reserved ¾ cup marinade with cornstarch slurry until thickened. Set aside.
-
Assemble Skewers: Thread chicken, pineapple, peppers, onions. Brush with oil; season with salt & pepper.
-
Grill: Preheat grill to medium-high. Grill skewers 12–15 mins, turning every 3–4 mins. Baste with sauce during final 8–10 mins.
-
Serve: Plate kabobs, drizzle with leftover sauce, and sprinkle with sesame seeds or fresh herbs.
Notes
-
Grill marks = flavor! Preheat grill and oil grates well.
-
Don’t baste early—wait for browning or sauce may burn.
-
No grill? Bake at 425°F for 20 mins, broil briefly for char.
- Prep Time: 30 mins
- Cook Time: 15mins
Nutrition
- Calories: 300 cal Per Serving
- Fat: 12g
- Carbohydrates: 18g
- Protein: 30g
Final Thoughts: Why Kabobs Are the Ultimate Party Food
There’s something magical about food on a stick—it’s fun, interactive, and universally loved. These Pineapple Chicken Kabobs aren’t just a meal; they’re a conversation starter, a memory maker, and a guaranteed crowd-pleaser.
Whether you stick to the classic recipe or experiment with spicy, herby, or smoky twists, the key is to have fun with it. Grill with confidence, embrace the mess (juice dripping down your chin is part of the experience!), and watch as your guests gather around the grill, laughing and reaching for seconds.
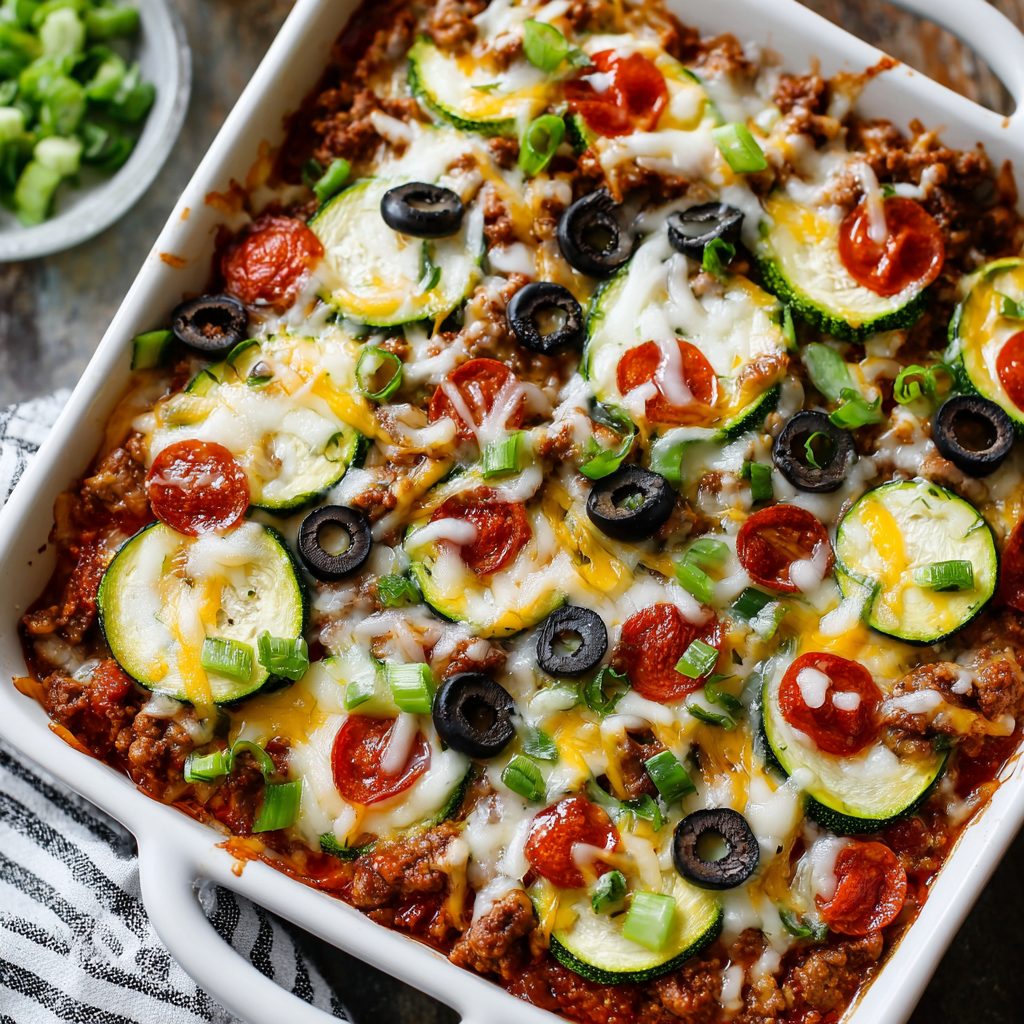
Zucchini Pizza Bake
Why Zucchini Pizza Bake is Your New Weeknight Best Friend
Hey there, kitchen comrades! Olivia here, waving from my flour-dusted countertop. Can you smell that? It’s the magical scent of bubbling cheese, savory beef, and roasted veggies—but here’s the twist: we’re ditching the dough! If your eyes just lit up like mine do when I spot ripe heirloom tomatoes at the market, you’re gonna adore this Zucchini Pizza Bake. Picture all your favorite pizza toppings piled high on a golden, crispy zucchini “crust” that holds its own without weighing you down. This isn’t just dinner; it’s a high-five to your veggies and a hug for your pizza cravings.
Maybe you’re gluten-free, keto-curious, drowning in summer zucchini, or just want a lighter twist on comfort food. Whatever brought you here—welcome! This recipe is my love letter to busy cooks who crave big flavor without the fuss. No fancy skills needed, just a grater, a baking dish, and that beautiful mess we call “cooking with heart.” We’re talking juicy ground beef, melty mozzarella, punchy tomato sauce, and colorful peppers and olives, all baked into a sliceable masterpiece. It’s the dish that makes my kids actually ask for seconds on veggies. Ready to turn that mountain of zucchini into pizza night magic? Aprons on—let’s get cozy!
That Time Zucchini Saved Pizza Night
Flashback to last August: my garden was exploding with zucchini like it was going out of style. Meanwhile, my 8-year-old niece, Chloe, was visiting, demanding “real pizza” (her words, not mine!). But here’s the catch—my sister had just gone gluten-free. Cue the kitchen panic! I stared at those green giants on my counter, remembering how my grandma used to make “zucchini boats.” What if I shredded them into a crust? Skeptical eyebrows were raised (especially from Chloe), but I went for it. I wrung those zucchinis like a sponge, mixed in cheese and eggs, and held my breath as it baked. The result? A golden, sturdy base that held up to chunky meat sauce and a mountain of toppings. Chloe took one bite, cheese stretching like edible sunshine, and declared: “Aunt Liv, this is BETTER than real pizza!” My sister teared up—finally, a pizza she could share with her daughter. Now, it’s our rainy-day-meets-sunshine tradition. Every bite tastes like victory (and a little bit like summer).
Your Flavor Toolkit: Ingredients & Clever Swaps
Gather your squad! These ingredients build layers of flavor while keeping things flexible. Organic? Local? Pantry raid? Make it your own.
- 4 cups shredded unpeeled zucchini – That skin adds color, nutrients, and texture! No need to peel—just wash well. Shortcut: Use your food processor’s grating blade.
- ½ tsp salt – Our moisture-wrangler! Crucial for drawing water out of zucchini. Don’t skip, or you’ll get a soggy crust. Sea salt or kosher works best.
- 2 cups shredded mozzarella, divided – Low-moisture part-skim is my MVP—melts beautifully without making things watery. Swap in smoked mozzarella for a campfire vibe!
- 1 cup shredded Monterey Jack, divided – Buttery, mild, and melty. Pepper Jack lovers? Go spicy! Can’t find it? Use all mozzarella or mild cheddar.
- ½ cup grated Parmesan – Our umami bomb! Grana Padano works too. Avoid the shelf-stable powder—freshly grated packs a punch.
- 2 large eggs, lightly beaten – The glue! Binds our crust. Vegan? A flax egg (1 tbsp ground flax + 2.5 tbsp water per egg) works surprisingly well.
- 1 lb ground beef – 80/20 is ideal—fat equals flavor! Swap with Italian sausage, ground turkey, or lentils for vegetarian.
- ½ cup chopped onion – Yellow or sweet onions add depth. Frozen pre-chopped? I won’t tell!
- 1 (15 oz) can Italian-style tomato sauce – Secret weapon! Pre-seasoned for lazy perfection. No can? Use marinara or crushed tomatoes + 1 tsp garlic powder.
- 1 tsp Italian seasoning – Shortcut to herb heaven. DIY blend: ½ tsp oregano + ¼ tsp each basil, thyme, rosemary.
- 1 green bell pepper, chopped – Crunchy freshness! Red or yellow peppers add sweetness. Hate peppers? Skip ’em!
- ½ cup sliced fresh mushrooms – Earthy goodness. Not a fan? Try spinach or artichoke hearts.
- ½ cup sliced black olives – Salty little gems. Kalamata olives add Greek flair, or omit if olives aren’t your jam.
Let’s Build Your Zucchini Masterpiece: Step-by-Step
Step 1: Preheat & Prep – Crank that oven to 400°F (200°C) and grab your 9×13-inch baking dish. Grease it generously with olive oil or non-stick spray—trust me, you want easy release later! Chef’s Tip: Place the dish in the oven while it preheats for an extra-crispy crust bottom.
Step 2: Zucchini TLC – Pile shredded zucchini into a large bowl. Sprinkle with ½ tsp salt and toss. Let it sit 10 minutes—this pulls out water! Now, the fun part: dump zucchini onto a clean kitchen towel, wrap it up, and SQUEEZE like you’re wringing out a wet swimsuit. Get aggressive! Chef’s Hack: Use a potato ricer to press zucchini—it’s shockingly effective and less messy.
Step 3: Crust Alchemy – Return dried zucchini to the bowl. Add 1 cup mozzarella, ½ cup Monterey Jack, all the Parmesan, and the beaten eggs. Mix with your hands (yes, hands!) until it feels like sticky confetti. Press firmly into your greased dish—compact it well, especially the edges. Chef’s Secret: A flat-bottomed glass helps press it evenly without sticking.
Step 4: Bake That Base – Slide the crust into the oven for 20 minutes. It should look set, golden at the edges, and slightly shrunken. Watch for Sogginess: If the center looks wet, bake 5 more minutes. A dry crust = crispy bliss!
Step 5: Sizzle Your Toppings – While the crust bakes, brown ground beef and onion in a skillet over medium heat. Drain excess fat (leave a little for flavor!). Stir in tomato sauce and Italian seasoning. Simmer 5 minutes—it should smell like pizza heaven! Flavor Boost: Add a splash of red wine or balsamic vinegar here for depth.
Step 6: Layer Up the Love – Spread the meat sauce evenly over your baked crust. Sprinkle with remaining cheeses (hello, gooey factor!), then artfully scatter bell peppers, mushrooms, and olives. Chef’s Artistry: Place toppings in little clusters—it looks gorgeous and ensures every bite has goodies!
Step 7: The Grand Finale Bake – Return the dish to the oven for 20–25 minutes. Cheese should be bubbly and gloriously golden. Broiler Magic: If the cheese isn’t speckled after 20 mins, broil 1-2 minutes (WATCH CLOSELY!).
Step 8: Patience, Grasshopper – Let it rest 10 minutes before slicing. This lets the crust firm up! Cutting Hack: Use a pizza wheel—it glides through toppings without dragging.
Serving Your Slice of Genius
Slide that spatula under a generous square and watch the cheese stretch! I serve mine on vibrant plates with a simple side salad—think peppery arugula with lemon vinaigrette to cut the richness. For a “pizza night” vibe, add garlic bread roasted cauliflower or crispy prosciutto chips. Leftovers? They reheat beautifully, but my family usually swarms the pan like hungry seagulls. Pro tip: Garnish with fresh basil or red pepper flakes for a pop of color and zing!
Shake It Up: Delicious Twists
This recipe is your culinary playground! Try these riffs:
- Mediterranean: Swap beef for crumbled feta and spinach, top with artichokes, roasted red peppers, and kalamata olives.
- Taco Fiesta: Use seasoned ground turkey or black beans, enchilada sauce instead of tomato sauce, and top with jalapeños, corn, and cilantro. Serve with avocado!
- Veggie Supreme: Skip meat, add roasted eggplant and zucchini ribbons to the sauce, and load up with all the veggies. Vegan? Use plant-based cheese and flax eggs.
- White Pizza: Replace tomato sauce with ricotta mixed with garlic and lemon zest. Top with caramelized onions and sautéed mushrooms.
- Breakfast Bake: Layer cooked crumbled sausage, scrambled eggs, and cheddar over the crust. Top with cherry tomatoes!
Olivia’s Notebook: Stories & Tips
This recipe was born from a zucchini avalanche and desperation—now it’s my most-requested dish! Over the years, I’ve learned: squeezing zucchini dry is non-negotiable (I once got lazy and made zucchini soup… not ideal). I also started adding a sprinkle of cornstarch (1 tbsp) to the crust mix for extra crispness—try it if you like a firmer bite! Funny story: My husband once mistook the raw crust for coleslaw and tried to eat it with a fork. Spoiler: it wasn’t salad. The beauty? It evolves with the seasons. Summer calls for fresh garden tomatoes on top; winter begs for roasted butternut squash. Make it yours—and tag me when you do! #ZucchiniPizzaMagic
Your Burning Questions, Answered!
Q: Why is my crust soggy?!
A: Three culprits: 1) Didn’t squeeze enough water from zucchini (really go HAM on that towel!), 2) Skipped pre-baking the crust, or 3) Overloaded with wet toppings. Fix: Press zucchini twice, bake crust until golden, and pat veggies dry before adding.
Q: Can I make this ahead?
A: Absolutely! Prep components separately: cook meat sauce, store chilled. Shred zucchini, salt it, and store wrapped in the towel in the fridge. Assemble and bake day-of. Pre-assembled bake? Cover and refrigerate up to 24 hours—add 5-10 mins to bake time.
Q: My cheese browned too fast—help!
A: Ovens vary! Tent loosely with foil if cheese darkens before bake time ends. Next time, place the dish lower in the oven or reduce temp to 375°F after the first bake.
Q: Can I freeze leftovers?
A: Yes! Slice cooled bake, wrap portions tightly in foil. Freeze up to 3 months. Reheat frozen slices at 350°F in a covered dish (add 10-15 mins). Texture stays great!
Zucchini Pizza Bake
- Total Time: 1 hr 5 mins
Description
Think pizza night can’t be light, hearty, and veggie-forward? Think again. This Zucchini Pizza Bake layers all your favorite toppings—gooey mozzarella, zesty sauce, savory beef—on a golden zucchini crust that’s crisp, sturdy, and totally crave-worthy. Gluten-free, low-carb, and packed with flavor, it’s comfort food with a clever twist. Whether you’re juggling picky eaters or feeding your inner pizza purist, this bake hits all the right notes.
Ingredients
-
4 cups shredded zucchini (unpeeled)
-
½ tsp salt
-
2 cups shredded mozzarella, divided
-
1 cup shredded Monterey Jack, divided
-
½ cup grated Parmesan
-
2 large eggs, beaten
-
1 lb ground beef
-
½ cup chopped onion
-
1 (15 oz) can Italian-style tomato sauce
-
1 tsp Italian seasoning
-
1 green bell pepper, chopped
-
½ cup sliced mushrooms
-
½ cup sliced black olives
Instructions
-
Prep Oven & Dish: Preheat oven to 400°F (200°C). Grease a 9×13-inch baking dish.
-
Zucchini Crust: Salt zucchini, let sit 10 mins, then squeeze dry with a towel. Mix with 1 cup mozzarella, ½ cup Monterey Jack, Parmesan, and eggs. Press into dish.
-
Bake Crust: Bake for 20 mins until golden and set.
-
Cook Beef: Sauté beef and onion until browned. Drain fat, stir in sauce and seasoning. Simmer 5 mins.
-
Assemble: Spread meat sauce on crust. Top with remaining cheese, peppers, mushrooms, and olives.
-
Final Bake: Bake another 20–25 mins until bubbly. Broil 1–2 mins for golden top if desired.
-
Rest & Serve: Let cool 10 mins before slicing. Garnish with fresh basil or red pepper flakes.
Notes
-
Squeeze zucchini thoroughly—moisture is the crust’s enemy.
-
Customize with your favorite pizza toppings or go veggie-packed.
-
Stores well and reheats like a champ—perfect for meal prep.
- Prep Time: 20 mins
- Cook Time: 45 mins
Nutrition
- Calories: 350cal Per Serving
- Fat: 24g
- Carbohydrates: 8g (Net: 5g)
- Protein: 25g
Nutritional Highlights (Per Serving)
Approximate values for 1 of 8 servings: Calories: 350 | Protein: 25g | Carbs: 8g (Net: 5g) | Fat: 24g. Packed with protein from beef and eggs, vitamins from zucchini and peppers, and gut-friendly lycopene in tomato sauce. Lower carb than traditional pizza, but big on satisfaction!
Final Thoughts: Why This Recipe Deserves a Spot in Your Rotation
The Zucchini Pizza Bake isn’t just a recipe; it’s a game-changer. It solves weeknight dinner dilemmas, sneaks in veggies without complaints, and satisfies pizza cravings in a healthier way. Whether you’re gluten-free, keto, or just tired of the same old meals, this dish delivers flavor, nutrition, and versatility.
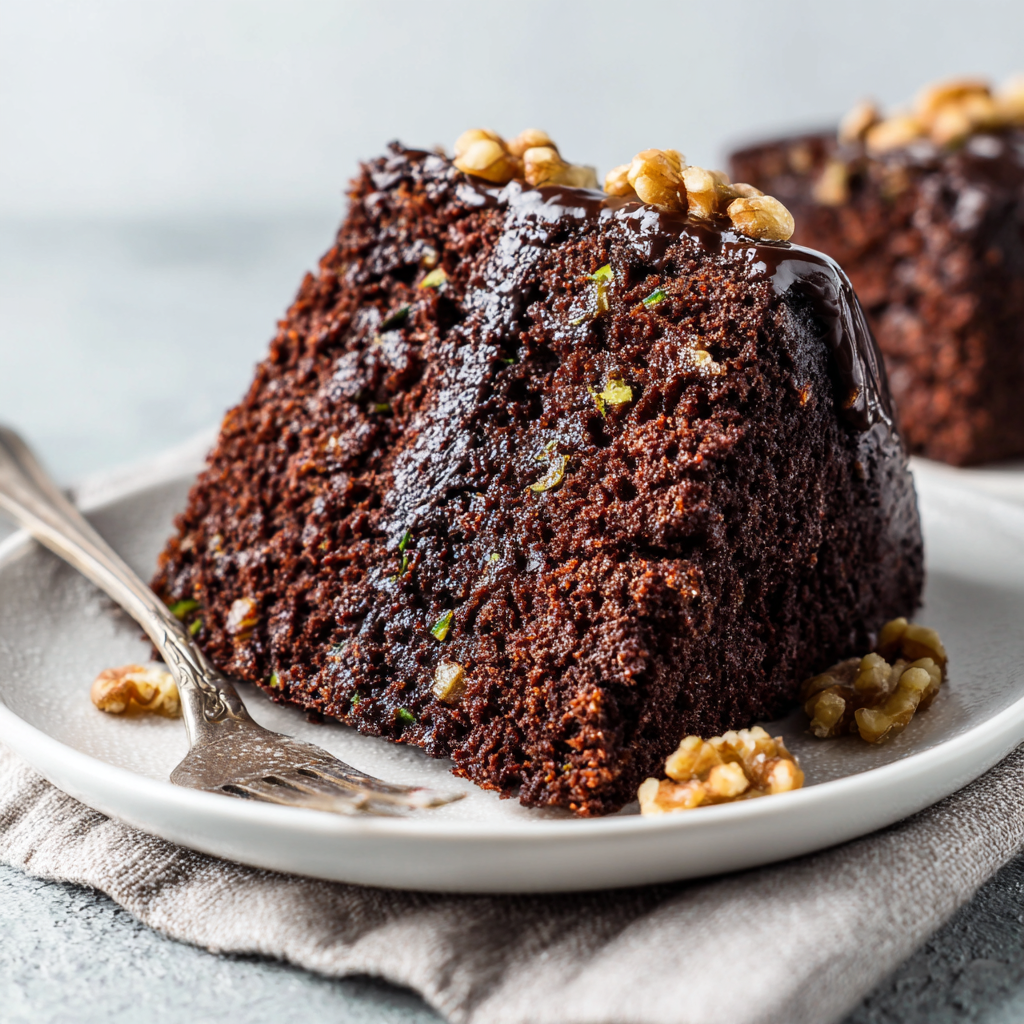
Chocolate Zucchini Cake
When Chocolate Cake Gets a Sneaky Superpower
Hey there, friend! Olivia here, apron dusted with cocoa powder and hands still warm from the oven. Can I let you in on my favorite kitchen magic trick? It’s the day I discovered that chocolate cake could be outrageously moist, deeply decadent, AND packed with garden-fresh goodness—all without anyone being the wiser. This Chocolate Zucchini Cake isn’t just a recipe; it’s a delicious conspiracy between you and your veggie drawer! Picture this: rich cocoa, cozy cinnamon, and a crumb so tender it practically hugs your fork. The zucchini? It vanishes into the batter like a culinary ninja, leaving only pure, fudgy bliss. Whether you’re drowning in summer squash or just craving a cake that feels like a warm hug, this is your secret weapon. So grab that spatula—we’re making magic today!
Grandma’s Garden & the Cake That Started It All
This recipe takes me straight back to my grandma’s sun-drenched kitchen, where zucchini grew like confetti in her backyard. One August, her plants went wild—we were eating zucchini bread for breakfast and grilled zucchini for dinner. “Enough!” I declared, clutching a squash the size of my arm. “Let’s trick everyone!” Grandma winked, and we grated mountains of green into her biggest mixing bowl. When my skeptical cousins arrived, we served thick slices of this chocolatey wonder. They devoured it, licking frosting off their thumbs. “What’s the secret?” my brother mumbled through a full mouth. Grandma just smiled: “Love and sunlight.” The gasps when we revealed the zucchini? Priceless. Now, every time I bake this, I swear I smell her lilac perfume and hear her laugh. It’s proof that the best recipes hide stories—and sometimes, vegetables!
Your Treasure List: Ingredients & Pro Tips
- 2 cups all-purpose flour – The trusty base! For a nutty twist, swap ½ cup with whole wheat flour.
- 2 cups white sugar – Sweetens the deal. Reduce to 1¾ cups if you prefer less sweetness—the zucchini adds natural balance!
- ¾ cup unsweetened cocoa powder – Use natural cocoa (not Dutch-process) for that bold, fruity chocolate punch.
- 2 tsp baking soda + 1 tsp baking powder – Dynamic rising duo! Check expiration dates—old ones sabotage fluffiness.
- 1 tsp ground cinnamon – My “secret” flavor booster! It whispers warmth without shouting “spice.” Omit if you’re anti-cinnamon.
- ½ tsp salt – Balances sweetness. Sea salt or kosher works best.
- 1½ cups vegetable oil – Creates melt-in-your-mouth moisture. Melted coconut oil adds a subtle tropical vibe.
- 4 large eggs – Room temp eggs blend smoother. Tip: soak cold eggs in warm water for 5 mins!
- 3 cups shredded zucchini – No need to peel! Squeeze out zero water—its juice is the moisture magic.
- ¾ cup chopped walnuts (optional) – For crunch lovers. Toast them first for extra depth! Pecans or almonds work too.
Let’s Bake! Step-by-Step with Chef’s Secrets
- Preheat oven to 350°F (175°C). Grease and flour a 9×13-inch baking pan. – Pro hack: Use cocoa powder instead of flour for dusting—no white streaks!
- In a large bowl, whisk together flour, sugar, cocoa, baking soda, baking powder, cinnamon, and salt. – Whisk like you mean it! This aerates the mix. Sift if your cocoa is clumpy.
- In another bowl, whisk oil and eggs until smooth. – Whisk for 60 seconds—it should look like glossy caramel. Add a splash of vanilla if you’re feeling fancy!
- Add wet mix to dry ingredients. Stir until just combined. – Do not overmix! Lumps are fine; overworking = tough cake. Channel “gentle folds.”
- Fold in shredded zucchini and walnuts. – Use a spatula in sweeping motions. The batter will thicken—don’t panic! Zucchini releases moisture as it bakes.
- Pour batter into pan. Smooth the top. – Tap the pan twice on the counter to bust air bubbles.
- Bake 45–50 minutes. – Rotate pan at 30 mins for even baking. Cake is done when a toothpick comes out with moist crumbs (not wet batter).
- Cool completely in pan. – Crucial step! Cutting warm cake = crumbly mess. Patience, grasshopper.
The Science Behind the Sneaky Squash: Why Zucchini Works
Most bakers raise an eyebrow when they hear “zucchini in cake,” but this humble squash is the MVP of moisture. Here’s why:
1. Water Wizardry: Zucchini is 95% water, but unlike draining spinach or cucumbers, you want that liquid here. As the cake bakes, the zucchini’s moisture slowly releases, steaming the crumb from within. This mimics the effect of oil-heavy cakes—but without greasiness.
2. Fiber’s Secret Role: The squash’s soluble fiber acts like a sponge, binding to fats and sugars. This means every bite stays tender for days (no stale bricks here!).
3. Neutral Ninja: Unlike carrots or beets, zucchini has no strong flavor. Its mildness lets chocolate shine while adding a subtle, buttery richness.
Pro Tip: Don’t peel the zucchini—the green skin blends into the dark batter, but the peel’s nutrients (like vitamin A and potassium) stay put.
Texture Hack: For ultra-fudgy results, grate zucchini finely (use a box grater’s small holes). For a slight “pudding-like” center, leave it coarser.
Bonus: Zucchini’s water content means you can reduce oil by ¼ cup if needed—though I don’t recommend it. The oil’s fat carries flavor and ensures a velvety crumb.
Frosting Wars: The Great Chocolate Zucchini Cake Debate
Purists argue this cake needs no adornment—its damp crumb and cocoa intensity are enough. But for special occasions, here’s how to pair it:
1. Cream Cheese Frosting
Why it works: Tangy cream cheese cuts the cake’s sweetness.
Recipe: Beat 8 oz softened cream cheese + ½ cup butter until fluffy. Add 2 cups powdered sugar + 1 tsp vanilla. Spread cold.
2. Salted Caramel Drizzle
Why it works: The salt amplifies the chocolate’s depth.
Shortcut: Melt 1 cup store-bought caramels + 2 tbsp heavy cream. Stir in ½ tsp flaky salt.
3. Whipped Ganache
Why it works: Luxurious but light.
Recipe: Heat 1 cup heavy cream until steaming. Pour over 1½ cups dark chocolate chips. Wait 5 mins, then whisk. Chill for 2 hours, then whip like frosting.
Controversial Take: Avoid buttercream—it’s too sweet alongside the cake’s sugar. If you must, use Swiss meringue buttercream for a less cloying option.
Naked Cake Trend: Skip frosting altogether! Dust with cocoa powder and serve with fresh berries for a rustic vibe.
From Lunchboxes to Dinner Parties: How to Repurpose This Cake
This recipe isn’t just for dessert—here’s how to hack it for any occasion:
1. Breakfast Muffins
Reduce sugar to 1½ cups, add ½ cup oats. Bake in a muffin tin for 20 mins. Pack with yogurt for a “sneaky veggie” school snack.
2. Ice Cream Sandwiches
Slice cooled cake into 2-inch squares. Sandwich with vanilla ice cream, roll edges in mini chocolate chips, and freeze.
3. Trifle Layers
Crumble cake into a glass bowl. Layer with whipped cream, raspberries, and chocolate shavings.
4. Savory-Sweet Appetizer
Cut into tiny cubes. Skewer with a basil leaf, cherry tomato, and mozzarella ball for a “caprese cake bite.”
5. Cake Pops
Crumble leftovers, mix with 2 tbsp frosting, roll into balls, and dip in melted chocolate.
Genius Trick: Bake a double batch—freeze one un-frosted cake for emergencies (it thaws in 1 hour at room temp).
Serving: Where Joy Meets the Plate
Slice into squares while humming “Happy Birthday” (no occasion needed!). For simple elegance, dust with powdered sugar using a fine sieve. Feeling extra? Drizzle with melted dark chocolate or smear on cream cheese frosting. Pair it with cold milk for kiddos, or a bold espresso for adults. My favorite move: warm a slice for 10 seconds in the microwave and top with vanilla ice cream. The contrast of cool cream and fudgy cake? *Chef’s kiss.* Serve on a rustic wooden board—this cake is proudly homemade!
Mix It Up! 5 Fun Twists
- Gluten-Free: Swap flour for 1:1 GF blend (like Bob’s Red Mill). Add 1 tsp xanthan gum if the blend doesn’t include it.
- Vegan: Use flax eggs (4 tbsp ground flax + 10 tbsp water) and replace eggs with applesauce or mashed banana. Opt for vegan chocolate frosting!
- Spice Explorer: Add ½ tsp cayenne for a “chocolate-chili” kick, or orange zest for brightness.
- Nut-Free Bliss: Skip walnuts! Fold in chocolate chips or sunflower seeds instead.
- Caramel Swirl: Before baking, dollop ½ cup salted caramel sauce on the batter and swirl with a knife.
Olivia’s Notebook: Crumbs of Wisdom
This cake has been my ride-or-die since 2017, when my neighbor gifted me a zucchini bigger than my cat. Version 1.0 was dense as a brick—oops! But after tweaking oil ratios and refusing to drain the zucchini (game-changer!), it became my most-requested recipe. True story: I once brought it to a bake sale labeled “Chocolate Cake.” When I revealed the secret veggie? A dad spat his bite into a napkin—then sheepishly asked for seconds. Lesson: reveal after they’re hooked! These days, I grate extra zucchini and freeze it in 3-cup bags for off-season cravings. P.S. This cake tastes even better on day two—if it lasts that long.
Your Questions, Solved!
Q: Can I use frozen zucchini?
A: Absolutely! Thaw it first, squeeze out excess liquid (unlike fresh!), and measure after squeezing.
Q: Why did my cake sink in the middle?
A: Two culprits: overmixing (develops too much gluten) or underbaking. Use the toothpick test religiously! If your oven runs cool, bake 5-10 mins longer.
Q: Can I bake this in two round pans for a layer cake?
A: Yes! Grease two 9-inch pans, split the batter, and bake 30-35 mins. Frost with chocolate ganache—dreamy!
Q: How do I store leftovers?
A: Room temp (covered) for 3 days, fridge for 5, or freeze slices for 3 months. Thaw at room temp—or microwave straight from frozen for a gooey treat!
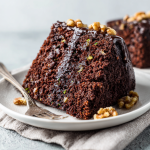
Chocolate Zucchini Cake
- Total Time: 1 hr 5 mins
Description
Moist, fudgy, and impossibly rich, this Chocolate Zucchini Cake is what happens when decadent dessert meets backyard brilliance. Hidden zucchini makes it ultra-tender while vanishing into the batter like a flavor ninja. It’s the cake that shocks your guests after they’ve licked their plates clean. Whether you’ve got a counter full of summer squash or just a craving for cozy chocolate joy, this recipe delivers every time.
Ingredients
-
2 cups all-purpose flour
-
2 cups white sugar
-
¾ cup unsweetened cocoa powder
-
2 tsp baking soda
-
1 tsp baking powder
-
1 tsp cinnamon
-
½ tsp salt
-
1½ cups vegetable oil
-
4 large eggs
-
3 cups shredded zucchini (unpeeled, undrained)
-
¾ cup chopped walnuts (optional)
Instructions
-
Prep: Preheat oven to 350°F (175°C). Grease and flour a 9×13-inch pan (or dust with cocoa powder).
-
Mix Dry: In a large bowl, whisk together flour, sugar, cocoa, baking soda, baking powder, cinnamon, and salt.
-
Mix Wet: In a separate bowl, whisk oil and eggs until smooth.
-
Combine: Stir wet into dry just until blended. Fold in zucchini and walnuts.
-
Bake: Pour batter into pan, smooth top, and bake for 45–50 mins. A toothpick should come out with moist crumbs.
-
Cool: Let cool completely before slicing. Optional: dust with powdered sugar or frost as desired.
Notes
-
No need to squeeze the zucchini! Its natural moisture makes this cake extra soft.
-
Swap walnuts for chocolate chips or go nut-free entirely.
-
Cake keeps beautifully—better on day two!
- Prep Time: 15 mins
- Cook Time: 50 mins
Nutrition
- Calories: 330cal Per Serving
- Fat: 20g
- Carbohydrates: 35g
- Protein: 4g
Nutritional Per Serving (1/16th slice)
- Calories: ~330
- Protein: 4g
- Carbs: 35g
- Fat: 20g
- Prep Time: 15 mins
- Cook Time: 50 mins
- Total Time: 1 hr 5 mins
Final Thoughts: Why This Cake Wins Hearts (and Lunchboxes)
This chocolate zucchini cake isn’t just a recipe—it’s a rebellion. It proves that veggies can be decadent, that “healthy” doesn’t mean joyless, and that grandma’s tricks still outsmart modern food trends. Every time I bake it, I’m reminded that the best food stories aren’t about perfection; they’re about grated zucchini on the counter, a brother’s shocked face, and the courage to hide goodness where no one expects it. So here’s to cakes that nourish and delight—may your spatula always be sticky, and your secrets always delicious.
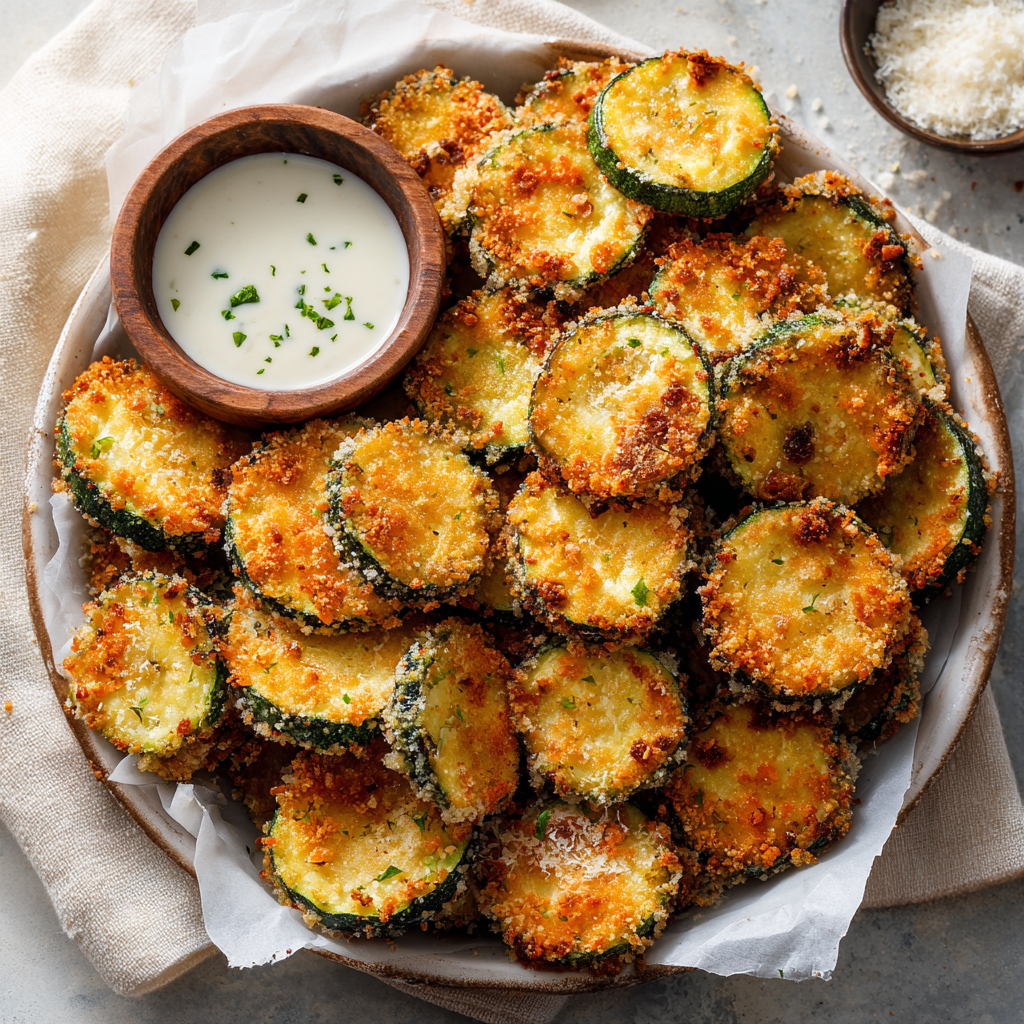
Easy Fried Zucchini
Crispy Little Clouds of Joy: Let’s Make Fried Zucchini!
Hey there, kitchen friend! Olivia here, wiping flour off my apron and grinning because we’re about to make magic happen. Ever had one of those days where you crave something crunchy, salty, and ridiculously satisfying without spending hours in the kitchen? That’s exactly why these Easy Fried Zucchini rounds are my secret weapon. Picture this: golden, buttery-crisp edges giving way to tender, melt-in-your-mouth zucchini centers. They’re like little edible hugs! Whether you’re sneaking a bite straight from the pan (no judgment—I do it too!) or loading them onto a platter for game night, this recipe is pure joy on a plate. No fancy skills needed—just a skillet, a few pantry staples, and that glorious zucchini sitting in your fridge. Ready to turn humble veggies into a showstopper? Let’s get sizzling!
I know what you’re thinking: “But Olivia, frying sounds messy!” Trust me, this method is so approachable, it’s practically foolproof. We’re using a simple pan-fry technique that gives you maximum crunch with minimal oil. Plus, that Ritz cracker crust? Game-changer. It adds a toasty, buttery flavor that’ll make you wonder why you ever bothered with complicated breading. These little rounds are perfect for beginner cooks, busy parents, or anyone who believes snacks should be both delicious and deeply comforting. So tie on your favorite apron—let’s create some crispy magic together!
Sunshine, Squash, and Grandma’s Apron Strings
Every time I make these fried zucchini rounds, I’m instantly transported to my grandma’s sun-drenched kitchen in late August. Picture it: screen door slamming shut, cicadas humming, and me—a barefoot 8-year-old—perched on a wobbly stool next to her ancient cast-iron skillet. She’d pull zucchini straight from her garden, still warm from the sun, and slice them with lightning speed while I crushed Ritz crackers in a paper bag with a rolling pin (my favorite “job”).
I remember how she’d let me dip the slices into the egg mixture, her hands guiding mine when I got over-enthusiastic and created a cracker-crust avalanche. “Patience, little bean,” she’d chuckle, as we waited for that perfect golden sizzle. The best part? She always gave me the first slice—blowing on it dramatically before handing it over. That hot, crispy bite tasted like summer and love and safety. To this day, I swear I can still smell the garden tomatoes ripening on the windowsill whenever I fry up a batch. That’s the magic of food, isn’t it? It’s never just about what’s in the pan—it’s the stories that simmer alongside it.
Your Crunchy Dream Team: Simple Ingredients, Big Flavor
Gather these pantry heroes—you probably have most already!
- 2 medium zucchini: Look for firm, glossy skins! Smaller zucchinis = fewer seeds = less sogginess. Chef’s trick: If your zucchini feels limp, revive it in ice water for 10 minutes!
- 2 large eggs, beaten: Our “glue”! Room temp eggs coat better. Allergy-friendly swap: Use buttermilk or mayo thinned with water.
- 1 sleeve buttery round crackers (like Ritz®), crushed: The STAR! Ritz adds insane buttery flavor. Crush like a pro: Seal in a zip-top bag and roll with a wine bottle—stress relief included!
- 2 tbsp olive oil (or more): Extra virgin works, but regular olive oil handles heat better. Flavor boost: Add 1 tbsp butter to the oil for extra richness!
- Salt & black pepper: Season immediately after frying while hot—salt sticks better! Fun twist: Add garlic powder or smoked paprika to the cracker crumbs.
Why this combo rocks: The crackers create an airy, shattery crust that panko can’t match, while the quick fry keeps zucchini tender—not oily. Genius? Totally accidental (thanks, Grandma!).
Let’s Fry: Your Path to Golden Perfection
- Prep your zucchini: Slice into ¼-inch rounds—no thinner (they’ll wilt), no thicker (they won’t cook through). Pro tip: Pat slices DRY with paper towels. Moisture is the enemy of crispiness!
- Set up your coating station: Beat eggs in a shallow bowl until uniform. Place crushed crackers in another bowl with curved sides (easier for scooping!). Kitchen hack: Add ¼ cup grated parmesan to crumbs for umami magic!
- Dip & coat like a boss: Use one hand for wet (egg), one for dry (crackers) to avoid “clown fingers.” Dip zucchini in egg, let excess drip off, then press firmly into crumbs. Secret move: Place coated slices on a wire rack for 5 minutes—this sets the crust!
- Fry to golden glory: Heat oil in a skillet (not non-stick—cast iron or stainless steel works best) over medium heat. Test with a crumb—it should sizzle immediately! Fry in a single layer (don’t crowd!) 2–3 mins per side until deeply golden. Flip confidently: Slide a fork under each slice for minimal crust loss!
- Drain & dazzle: Transfer slices to a paper-towel-lined plate. Sprinkle with salt and pepper NOW—heat opens flavor pores! Crisp keeper: Place in a 200°F oven on a wire rack if frying batches.
Watch for the sizzle symphony: That crackle means your oil is hot enough. No sound? Wait! Too smoky? Lower heat slightly. Perfect frying is a dance—you’ve got this!
Plating: Where Crunch Meets Celebration
Slide these golden beauties onto a rustic wooden board or a vibrant ceramic platter—contrast makes them pop! Pile them high like edible coins and tuck ramekins of dipping sauces between them. For a fun family-style vibe, serve straight from the skillet (add a towel handle for safety!). Dippin’ dreams: Classic ranch is heavenly, but try lemon-dill yogurt, spicy marinara, or my fave—garlic aioli with a squeeze of honey. Pair with grilled chicken or burgers for a crowd-pleasing meal, or pile atop a salad for crunch-tastic texture. Pro tip: Garnish with lemon zest or microgreens for Insta-worthy flair!
Shake It Up: 5 Tasty Twists
Customize your crunch with these playful spins:
- Italian Fiesta: Mix 2 tsp Italian seasoning + ¼ cup grated parm into cracker crumbs.
- Spicy Southwest: Add 1 tsp chili powder + ½ tsp cumin to crumbs. Serve with avocado crema!
- Gluten-Free Crunch: Swap Ritz for GF panko + 1 tbsp nutritional yeast for buttery flavor.
- Vegan Vibes: Use aquafaba (3 tbsp = 1 egg) and vegan butter crackers. Boom!
- Zucchini “Fries”: Cut into sticks instead of rounds—perfect for dunking!
Olivia’s Notebook: Confessions & Lessons
Okay, real talk: The first time I made these solo (age 12!), I used saltines instead of Ritz. Sad, bland little disks! Lesson learned: buttery crackers are non-negotiable. Over the years, I’ve tweaked this recipe more than my dating profile—thinner slices, better drying techniques, that parmesan hack—but the soul remains Grandma’s. Funny story: My corgi, Biscuit, once stole an entire batch cooling on the counter. He left a trail of crumbs straight to his bed… the little food critic! These days, I double the recipe because (a) they disappear faster than free samples, and (b) cold leftovers make shockingly good next-day wraps with hummus and arugula. Final thought? Don’t stress perfection. Crooked slices? Extra-crispy edges? That’s homemade charm, baby!
Your Crispy Questions, Answered!
Q: Why are my rounds soggy?
A: Three culprits! 1) Zucchini wasn’t dried well enough—pat like it owes you money. 2) Oil was too cool—wait for that sizzle test. 3) Pan overcrowding lowers oil temp fast—fry in batches!
Q: Can I bake these instead?
A: Absolutely! Arrange on a wire rack over a baking sheet. Spray with oil and bake at 425°F for 15-18 mins, flipping halfway. Less rich but still tasty!
Q: Help! My coating falls off!
A: Egg wash is key! Let excess drip off before crumbing, and PRESS firmly. Letting coated slices rest 5 mins pre-fry helps glue set.
Q: Can I prep ahead?
A> Coat slices and refrigerate (unfried) up to 2 hours. Fry just before serving—reheating makes them soft. For parties, fry 80% done, then crisp in 400°F oven for 3 mins!
Easy Fried Zucchini
- Total Time: 25 mins
Description
Get ready to transform humble zucchini into crunchy, buttery bites that vanish faster than you can say “just one more.” These pan-fried zucchini rounds are everything: quick, crispy, and full of nostalgic flavor that tastes like summer afternoons and grandma’s kitchen magic. Whether you serve them as a snack, a side, or sneak a few straight from the skillet (we won’t tell), these little golden rounds are guaranteed to steal the show. Grab a skillet – your tastebuds are about to get hugged.
Ingredients
-
2 medium zucchinis (firm, small = best texture)
-
2 large eggs, beaten
-
1 sleeve buttery crackers (like Ritz®), crushed
-
2 tbsp olive oil (plus more as needed)
-
Salt and black pepper, to taste
-
Optional: ¼ cup grated Parmesan for extra umami
Instructions
-
Slice & Dry: Cut zucchini into ¼-inch rounds. Pat dry well—this step = ultimate crisp!
-
Set Up Coating: Place eggs in one bowl, crackers (and Parmesan, if using) in another.
-
Dip & Coat: Dip slices in egg, then press into crumbs. Rest coated slices on a rack 5 mins to set.
-
Fry: Heat oil in a skillet over medium. Fry zucchini in batches 2–3 mins per side until golden. Drain on paper towels and season immediately.
-
Serve Hot: Pile high and serve with ranch, garlic aioli, or spicy marinara.
Notes
-
Dry zucchini slices like a pro—moisture is the enemy!
-
Don’t overcrowd the pan—batch cooking = better crisp.
-
Let coated slices rest before frying to lock in that crust.
- Prep Time: 10 mins
- Cook Time: 15 mins
Nutrition
- Calories: 180 cal Per Serving
- Fat: 12g
- Carbohydrates: 14g
- Protein: 5g
Nutritional Snapshot (Per Serving)
Prep: 10 mins | Cook: 15 mins | Total: 25 mins | Servings: 4
Calories: ~180 | Protein: 5g | Carbs: 14g | Fat: 12g
Note: Values estimated. Dipping sauces add extra calories.
Final Thoughts: Why This Recipe is a Keeper
Fried zucchini rounds are more than just a tasty snack—they’re nostalgia, science, and creativity all in one bite. Whether you’re reliving childhood memories, geeking out over the perfect crisp, or reinventing them in new dishes, this recipe is flexible, forgiving, and always delicious.
So next time you see zucchini at the store, grab a couple and make these little clouds of joy. Your future self (and anyone lucky enough to try them) will thank you. Happy frying!
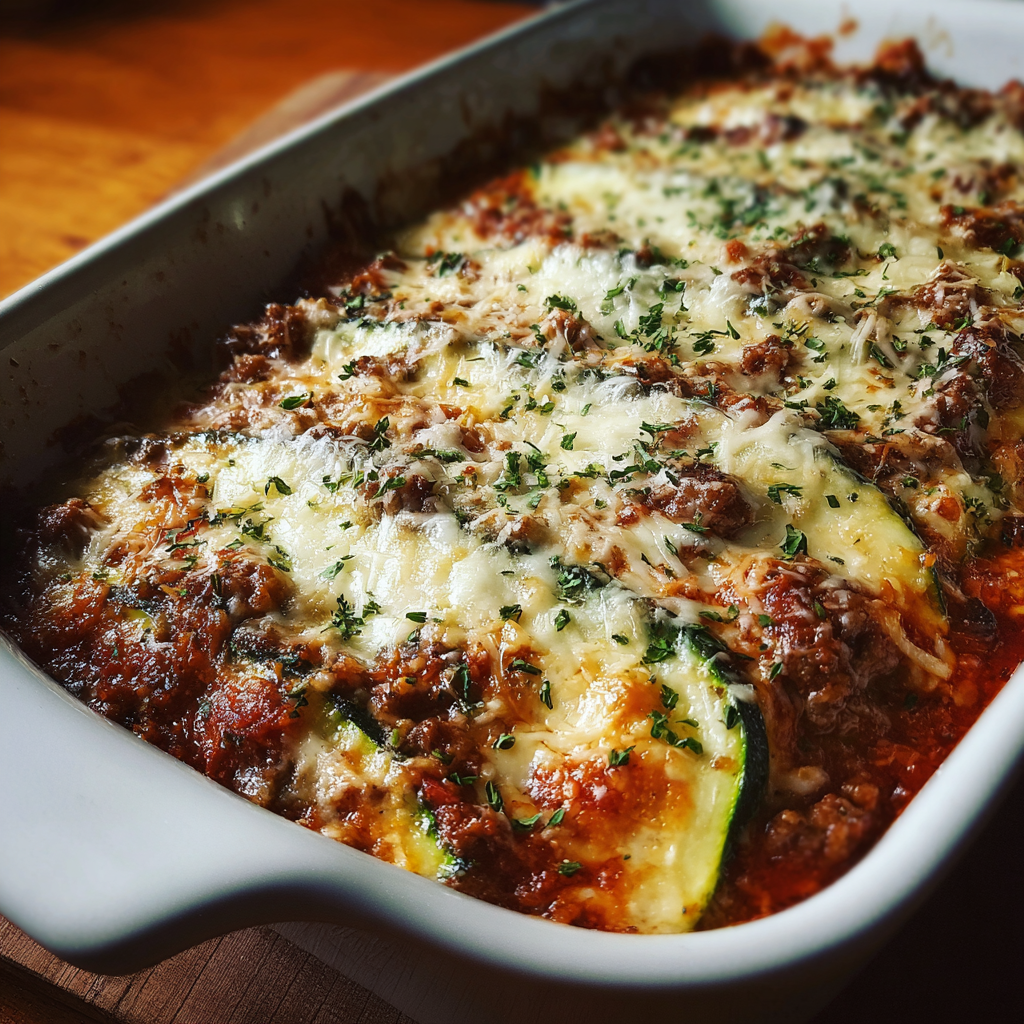
Zucchini Lasagna (Low-Carb & Comforting)
When Comfort Food Gets a Fresh, Green Makeover
Hey there, kitchen friend! Olivia here, waving from my flour-dusted countertop. Can we talk about that magical moment when a bubbling pan of lasagna comes out of the oven? That crispy cheese crown, that rich tomato aroma hugging you like a favorite sweater? Pure magic. But what if I told you we could capture that soul-warming hug of traditional lasagna while making it glow-up with garden-fresh goodness? Enter our star: Zucchini Lasagna.
This isn’t just “diet food” – it’s a celebration on a fork. By swapping pasta for thinly sliced zucchini, we’re creating layers that taste like summer kissed by Italy. It’s naturally gluten-free, lower in carbs, and packed with sneaky veggies, but oh honey, it still delivers that oozy, cheesy, sauce-splattered comfort we crave. Whether you’re low-carb curious, gluten-free, or just zucchini-blessed from your garden (we’ve all been there!), this dish turns “healthy swap” into “heck yes!”
Grab your favorite apron – the one with the questionable stain near the pocket – and let’s build some layers together. I promise, no fancy skills needed. Just bring that joy of feeding people you love, and I’ll bring the cheesy secrets. Ready to make comfort food feel as bright as a sun-ripened tomato? Let’s roll!
The Zucchini That Started It All
Picture this: It’s late August, and my neighbor Frank shows up at my door looking slightly panicked, holding a grocery bag overflowing with zucchinis the size of toddler baseball bats. “Olivia!” he pleads. “My garden plot rebelled! Take them… please!”
That bag sat on my counter, staring at me. Zucchini bread? Done it. Stir-fry? Yawn. Then I remembered Nonna Rosa’s legendary lasagna – the one she’d slide onto our table with a wink, saying “Mangia!” as cheese strings stretched like edible golden threads. A lightbulb moment! What if I used these emerald beauties as the noodles?
My first attempt? Let’s just say it resembled a delicious cheesy soup more than layered perfection. But on try three – after mastering the critical zucchini sweat-and-pat step – magic happened. When my skeptical husband took that first bite? Silence. Then: “Wow. This tastes like… lasagna. Really good lasagna.” Frank got a steaming dish delivered that night, and my zucchini lasagna legend was born. Now, every summer, I secretly hope Frank’s garden rebels again.
Your Flavor Toolkit: Simple Ingredients, Big Taste
- Cooking spray: Our no-stick superhero! Olive oil spray adds flavor; coconut oil spray works great too.
- 1½ large zucchinis, thinly sliced lengthwise: The noodle stars! Pick firm, vibrant green zukes. Chef’s Hack: A mandoline slicer (carefully used!) gets perfect, even “noodles.” No mandoline? A sharp knife and steady hand work too.
- 1 tbsp olive oil: Our sautéing base. Avocado oil is a good high-heat sub.
- 1 lb ground beef (85/15 lean/fat ideal): Brings rich savoriness. Feeling Lighter? Swap for ground turkey or Italian sausage. Vegetarian Power: Use 2 cups of finely chopped mushrooms + lentils!
- 1½ cups low-carb marinara sauce: Check labels for added sugars! Rao’s Homemade® is my pantry MVP. DIY Queen? Simmer canned crushed tomatoes with garlic, basil, and a pinch of red pepper flakes.
- 2 tsp salt, divided: 1 tsp for zucchini prep (crucial for moisture control!), ½ tsp in sauce, ½ tsp in ricotta. Diamond Crystal kosher salt is my go-to.
- 1 tsp dried oregano: That classic Italian punch. Fresh? Use 1 tbsp chopped!
- ½ tsp ground black pepper: Freshly cracked adds the best zing.
- 1 (8 oz) container ricotta cheese: Whole milk ricotta = dreamy creaminess. Lactose-Free? Kite Hill® almond milk ricotta is fantastic.
- 1 large egg: Binds the ricotta layer, preventing separation. Vital!
- ½ tsp ground nutmeg: The secret whisper in creamy fillings! Just a pinch – it elevates without shouting.
- 2 cups shredded mozzarella cheese: Low-moisture part-skim melts beautifully. Buy a block and shred it yourself – it melts smoother than pre-shredded (which has anti-caking agents).
- ¼ cup grated Parmesan cheese: The salty, umami kick on top. Pecorino Romano works too for a sharper bite.
- Aluminum foil: Essential for trapping steam during the first bake, preventing dry-out!
Building Your Delicious Masterpiece: Step-by-Step
- Preheat & Prep: Fire up your oven to 375°F (190°C). Generously coat your trusty 9×13 baking dish with cooking spray. Why this temp? Hot enough to cook thoroughly and melt cheese gloriously, but gentle enough to avoid zucchini mush!
- Zucchini TLC (The KEY Step!): Lay your zucchini slices in a single layer on paper towels. Sprinkle evenly with 1 tsp salt. Let them sweat it out for 10 minutes – this draws out excess water so your lasagna isn’t a soup! Chef’s Non-Negotiable: After 10 mins, firmly pat EACH slice dry with fresh paper towels. Don’t skip this!
- Beefy Bliss: Heat olive oil in a large skillet over medium-high. Add ground beef. Break it up and cook until beautifully browned (5-7 mins). Drain any excess fat if needed. Stir in your marinara sauce, oregano, black pepper, and ½ tsp salt. Let this gorgeous mixture simmer gently for 5-7 minutes. Flavor Boost: Toss in a minced garlic clove with the beef 30 seconds before adding sauce!
- Creamy Ricotta Cloud: In a medium bowl, combine ricotta, egg, nutmeg, and the remaining ½ tsp salt. Mix until smooth and dreamy. Texture Tip: A fork works better than a whisk here – avoids overworking.
- The Grand Layer Assembly: Time for lasagna therapy!
- Base Layer: Spread about ¾ cup of the meat sauce thinly over the bottom of your dish. This prevents sticking and starts the flavor party.
- Zucchini Noodles: Arrange a single layer of your well-dried zucchini slices, slightly overlapping like shingles.
- Ricotta Love: Dollop half the ricotta mixture over the zucchini. Gently spread it into an even layer – a small offset spatula is magic here!
- Cheese Please: Sprinkle generously with about ⅓ of the mozzarella.
REPEAT these layers (Meat Sauce > Zucchini > Ricotta > Mozzarella). You’ll typically get 2 full repeats. Top the final zucchini layer with the remaining meat sauce, then shower on ALL the remaining mozzarella and the glorious Parmesan. Layer Pro Tip: Keep the layers even but don’t pack them down – let the ingredients breathe!
- Bake to Perfection: Tightly cover the dish with aluminum foil (shiny side down). Bake for 30 minutes. Steam Power! This trapped steam cooks the zucchini tenderly. Uncover (hello, gorgeous cheese!) and bake for another 15 minutes, until the top is golden, bubbly, and irresistible.
- The Golden Rule: REST! Remove from oven. Resist the cheesy siren call! Let it rest for 10-15 minutes. Why? This lets the layers set, making slicing clean and preventing a hot, saucy landslide on your plate.
Plating Your Prize (And What to Serve Alongside!)
Slide a spatula under a generous square – admire those beautiful layers! Plate it simply; this beauty speaks for itself. Garnish? Maybe a tiny sprinkle of fresh basil or parsley if you’re feeling fancy. The perfect partners? A crisp, bright arugula salad with lemon vinaigrette cuts the richness beautifully. For carb-lovers at the table, offer some garlicky whole-wheat breadsticks. And if it’s a cozy night? Just a big fork and maybe a second helping. This lasagna is hearty enough to be the star, no elaborate sides needed!
Make It Your Own: Delicious Twists!
- Mediterranean Magic: Swap beef for 1 lb ground lamb. Add ½ tsp cinnamon and ¼ cup crumbled feta to the ricotta mix. Top with fresh mint after baking.
- Veggie-Loaded Extravaganza: Sauté 1 cup chopped spinach and ½ cup diced roasted red peppers with the ground beef (or instead of it!). Mix into the ricotta layer.
- Dairy-Free Dream: Use cashew ricotta (blend soaked cashews, lemon juice, nutritional yeast, salt) and your favorite vegan mozzarella shreds. Ensure sauce is dairy-free too!
- “White” Zucchini Lasagna: Skip the marinara. Sauté mushrooms and leeks. Make a creamy béchamel sauce (butter, almond flour, unsweetened almond milk, nutmeg). Layer with zucchini, béchamel, sautéed veggies, and cheese.
- Spicy Arrabbiata Kick: Use a spicy marinara or add ½ tsp red pepper flakes to the sauce. Layer with pepper jack cheese instead of some mozzarella!
Olivia’s Kitchen Confessions & Tips
Okay, true story: My first zucchini lasagna attempt? Let’s just say it could have doubled as a swimming pool. I learned the hard way that skipping the zucchini salt-and-pat step is culinary sabotage! Now, I treat those green strips with the reverence they deserve. Over the years, I’ve tweaked this recipe like a favorite playlist. Adding nutmeg to the ricotta? Game-changer. Using *low-moisture* mozzarella? Life-saving. Letting it rest? Non-negotiable!
This dish has become my go-to for potlucks (it travels like a champ!), new parents needing freezer meals, and those “I need serious comfort STAT” nights. It’s surprisingly forgiving once you master the moisture control. Don’t stress about perfect layers – rustic is charming! The biggest compliment? When someone takes a bite, pauses, and says, “Wait… this is ZUCCHINI?!” Mission accomplished, my friend.
Your Zucchini Lasagna Questions, Answered!
Q: My lasagna was watery! What went wrong?
A: Watery woes almost always trace back to the zucchini prep! Did you slice thicker than ¼ inch? Did you skip or skimp on salting and patting DRY? Using a sauce with high water content? Ensure you: 1) Salt generously and let sit 10 mins, 2) PAT DRY like your lasagna depends on it (it does!), 3) Use a thick, low-carb marinara. Draining excess fat from the beef helps too.
Q: Can I make this ahead? How do I store/reheat?
A: Absolutely! Assemble completely (unbaked), cover tightly, and refrigerate for up to 24 hours. Add 5-10 mins covered bake time if going straight from fridge to oven. Baked lasagna keeps beautifully: Cool completely, cover, refrigerate for 3-4 days. Reheat individual slices in the microwave (covered) or the whole dish covered with foil in a 350°F oven until hot (20-30 mins). Freezer Friendly: Freeze baked or unbaked in the dish tightly wrapped for up to 3 months. Thaw overnight in the fridge before baking/reheating.
Q: My zucchini slices are breaking/too floppy! Help!
A: Overly thin slices or very large, mature zucchini can be fragile. Aim for slices about ¼ inch thick – sturdy enough to layer but thin enough to cook through. Slightly overlapping helps support the layers. If they break, just patchwork them in! It’ll still taste amazing.
Q: Can I use other squash?
A: Yes! Yellow summer squash works identically. For a firmer texture, try partially peeled eggplant slices (salt/pat dry like zucchini). Lasagna is adaptable – embrace the veg!
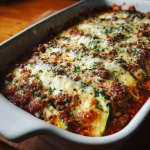
Zucchini Lasagna (Low-Carb & Comforting)
- Total Time: 1 hr 30 mins
Description
Nothing says “home” like the smell of bubbling lasagna in the oven – but what if comfort food could feel a little lighter, brighter, and greener? Enter this Zucchini Lasagna: rich with savory layers, oozy cheese, and that nostalgic tomato kick, but with a fresh, garden-forward twist. Swap the pasta for tender zucchini ribbons and keep all the joy. It’s cozy, it’s satisfying, and it might just become your new favorite way to eat your veggies.
Ingredients
-
1½ large zucchinis, sliced lengthwise (¼-inch thick)
-
1 tbsp olive oil
-
1 lb ground beef (or turkey/mushroom-lentil mix)
-
1½ cups low-carb marinara sauce
-
2 tsp salt, divided
-
1 tsp dried oregano
-
½ tsp black pepper
-
8 oz ricotta cheese
-
1 large egg
-
½ tsp ground nutmeg
-
2 cups shredded mozzarella
-
¼ cup grated Parmesan
-
Cooking spray
-
Optional: fresh basil or parsley for garnish
Instructions
-
Prep: Preheat oven to 375°F (190°C). Grease a 9×13 baking dish.
-
Zucchini Prep: Lay zucchini slices on paper towels, sprinkle with 1 tsp salt. Let sit 10 mins, then pat dry.
-
Cook Beef: In a skillet, heat oil, brown beef (5-7 mins), drain fat. Add marinara, oregano, pepper, and ½ tsp salt. Simmer 5 mins.
-
Ricotta Mix: Stir ricotta, egg, nutmeg, and ½ tsp salt until smooth.
-
Assemble: Start with a thin sauce layer. Add zucchini, half the ricotta, mozzarella. Repeat layers. Top with sauce, rest of mozzarella, and Parmesan.
-
Bake: Cover with foil, bake 30 mins. Uncover, bake 15 mins until golden.
-
Rest: Let sit 10-15 mins before serving.
Notes
Always salt and dry your zucchini – soggy lasagna is a heartbreak we can avoid. This dish is freezer-friendly, crowd-pleasing, and endlessly customizable.
- Prep Time: 30 mins
- Cook Time: 45 mins
Nutrition
- Calories: 340cal Per Serving
- Fat: 22g
- Carbohydrates: 10g
- Protein: 25g
Nutritional Info (Per Serving, Approx. 1/6th of recipe)
- Calories: ~320
- Protein: 28g</
Final Thoughts: Comfort Food, Reinvented
Zucchini lasagna proves that healthy eating doesn’t mean sacrificing flavor. It’s a dish that satisfies cravings while packing in nutrients—perfect for weeknight dinners, potlucks, or meal prep.
Why It Works:
✅ Flexible (endless variations to suit tastes and diets).
✅ Nutrient-dense (more veggies, less empty carbs).
✅ Comforting yet light (no post-meal sluggishness).So next time you’re craving lasagna, don’t default to the heavy classic—give this green goddess a try. Your taste buds (and your body) will thank you.
Chicken Burrito Protein Bowl
Hey There, Bowl Buddy! Let’s Build Some Delicious
Picture this: It’s 6 PM, your stomach’s rumbling like a tiny thunderstorm, and you’re craving something bold, fresh, and seriously satisfying. You want protein power, vibrant veggies, and flavors that dance—but without the fuss of a fancy recipe or hours chained to the stove. Sound familiar? Friend, you’ve just described EXACTLY why I’m obsessed with this Chicken Burrito Protein Bowl!
Imagine tender, smoky chipotle chicken strips hugging zesty cilantro-lime rice, all piled high in a bowl just waiting for your favorite toppings. This isn’t just dinner; it’s a customizable fiesta in a dish! Whether you’re meal-prepping like a boss or throwing together a weeknight win after a crazy day, this bowl is your kitchen BFF. It’s wholesome, packed with 35g of protein (hello, energy!), and bursting with that crave-worthy burrito flavor—minus the tortilla roll-up struggle. So tie on that apron (embrace the mess—I always do!), and let’s make magic happen. Trust me, your taste buds will throw a party!
Why bowls? Because life’s more fun when you can mix, match, and make it YOURS! This recipe? It’s my love letter to easy, joyful cooking. Let’s dive in.
The Bowl That Started It All: A Kitchen Floor Picnic
Let me take you back to my tiny first apartment kitchen. My bestie Sarah and I had just finished moving heavy boxes all day. We were starving, sweaty, and frankly, too tired to even *think* about complicated cooking. My fridge held random bits: leftover rice, a lone chicken breast, a can of chipotles, and sad-looking limes. Desperation (and hunger!) sparked creativity. I whipped up a quick marinade for the chicken, zinged up the rice with lime and cilantro, and threw everything into bowls with whatever toppings we could scavenge (think crushed tortilla chips and a very questionable avocado).
We plopped down right there on the kitchen floor, bowls in hand, too exhausted for chairs. One bite in, Sarah’s eyes went wide. “Olivia. This is… stupidly good.” We demolished those bowls, laughing at our floor picnic, sauce on our chins. That messy, improvised meal became our go-to “I’m exhausted but need awesome food” ritual. It taught me that the best dishes aren’t about perfection—they’re about flavor, ease, and sharing joy (even if you’re sitting on linoleum!). This bowl? It’s that memory on a plate.
Grab These Flavor Heroes!
For the Chipotle Chicken:
- ¼ cup avocado oil: My go-to for high-heat cooking! Its mild flavor lets the chipotle shine, and it won’t smoke up your kitchen. Swap tip: Use olive oil if needed, but lower the heat slightly.
- 3 tbsp lime juice: Fresh is best! It tenderizes the chicken and adds bright acidity. Chef hack: Roll limes on the counter firmly before juicing for maximum yield.
- 3 chipotle chilies in adobo sauce + 1½ tbsp adobo sauce: The flavor MVP! Smoky, spicy, complex. Insight: Use gloves when chopping! Start with 1-2 chilies if you’re heat-shy. Freeze leftovers in ice cube trays!
- 1½ tsp garlic powder: Quick depth without chopping. Substitution: 3 minced fresh garlic cloves work too!
- ¾ tsp salt: Balances and enhances everything. Tip: Taste your adobo sauce—some brands are saltier!
- 1½ lbs chicken breast, cut into strips: Lean and quick-cooking! Swap: Thighs are juicier! Use boneless, skinless and increase cook time by 2-3 mins.
For the Cilantro Lime Rice:
- 1 cup long-grain white rice, rinsed: Rinsing removes starch for fluffy grains! Alternative: Jasmine rice adds fragrance. For brown rice, use 1 3/4 cups water and simmer 35-40 mins.
- 1½ cups water: The perfect ratio for fluffy rice. Chef note: Use broth for extra flavor!
- ¼ tsp salt (plus more to taste): Seasons the rice from within.
- Zest of 1 lime + 2 tbsp fresh lime juice: Zest first! It packs aromatic punch. Juice adds tang. Must: Use fresh lime—bottled just isn’t the same!
- ¼ cup chopped cilantro: Fresh herb power! No-cilantro squad: Swap parsley or omit.
Topping Ideas (Go wild!): Black beans, corn, diced avocado, salsa, shredded cheese, sour cream, pickled onions, shredded lettuce.
Let’s Build Your Flavor Masterpiece!
1. Marinate the Chicken (5 mins + resting): In a medium bowl, whisk together the avocado oil, lime juice, chopped chipotles, adobo sauce, garlic powder, and salt. Toss in the chicken strips until they’re completely coated in that gorgeous, spicy marinade. Chef Tip: Want next-level flavor? Marinate overnight! Minimum 30 minutes at room temp (or up to 24 hours covered in the fridge). Why this rocks: Marinating at room temp for 30 mins lets the flavors penetrate quickly without chilling the meat, leading to better searing!
2. Cook the Rice (20 mins): Combine the rinsed rice, water, and salt in a saucepan. Bring it to a lively boil over medium-high heat. Once boiling, immediately reduce the heat to low, cover tightly with a lid, and let it simmer gently for 15 minutes. HACK ALERT: NO PEEKING! Steam is key. After 15 mins, turn off the heat and let it sit, still covered, for 5 minutes. This is the secret to perfectly fluffy rice! Fluff it gently with a fork, then fold in the lime zest, lime juice, and chopped cilantro. Taste and add a pinch more salt if needed. Pro Move: Spread rice on a baking sheet to cool slightly for meal prep bowls—prevents mush!
3. Cook the Chicken (8-10 mins): Heat a large skillet (cast iron is perfect!) over medium-high heat. No need to add oil—the marinade has plenty! Once hot, add the chicken strips in a single layer (work in batches if needed—don’t crowd!). Cook for 3-4 minutes without moving to get a beautiful sear. Flip and cook another 3-5 minutes, or until the chicken is cooked through (internal temp 165°F) and has those irresistible charred bits. Watch Out: Chipotle can burn! If bits start getting too dark, lower heat slightly. Transfer cooked chicken to a plate. Juicy Chicken Secret: Let it rest for 5 mins before slicing—keeps all those flavorful juices locked in!
4. Assemble Your Bowls (5 mins of fun!): Here’s where YOU shine! Divide the vibrant cilantro-lime rice between bowls. Top generously with the smoky chipotle chicken. Now, raid your fridge! Add black beans for fiber, corn for sweetness, creamy avocado, tangy salsa, shredded cheese—whatever makes your heart (and stomach!) sing. My Fave Combo: Black beans, charred corn, chunky pico de gallo, sliced avocado, and a dollop of Greek yogurt. Drizzle with extra lime!
Serving Up Sunshine in a Bowl
Presentation is part of the fun! Use wide, shallow bowls so all those gorgeous colors and textures shine. Start with the bright green cilantro-lime rice as your base. Arrange the deeply colored chipotle chicken strips prominently on one side. Then, artfully scatter your toppings—think of it as edible confetti! Group beans here, corn there, a fan of avocado slices, a sprinkle of cheese. The goal? A vibrant, inviting mosaic. Finish with a final squeeze of fresh lime juice and maybe a cilantro sprig on top. Serve immediately while everything’s warm and fresh! These bowls are perfect for DIY dinner parties—set out toppings buffet-style and let everyone build their dream bowl.
Make It Your Own! Flavor Twists & Swaps
This bowl is your culinary playground! Try these easy twists:
- Protein Power-Up: Swap chicken for shrimp (cook 2-3 mins per side!), lean steak strips, or crispy tofu (press well, marinate, then pan-fry!).
- Veggie-Lover’s Dream: Skip meat! Use extra black beans, roasted sweet potatoes, or sautéed peppers & onions as the star. Add a dollop of guac for healthy fats.
- Low-Carb Love: Ditch the rice! Use cauliflower rice (sauté with lime zest/juice & cilantro) or a bed of crisp romaine lettuce.
- Tropical Vibes: Add mango or pineapple salsa! The sweetness balances the smoky chipotle beautifully.
- Breakfast Bowl: Top with a fried egg! Runny yolk = instant sauce. Add crumbled bacon or chorizo.
Olivia’s Extra Pinch of Love & Laughs
This bowl has serious evolution cred! It started life as a failed burrito attempt (tortilla ripped, filling everywhere… kitchen carnage!). In frustration, I just scooped it all into a bowl. Best. Mistake. Ever. Over time, I perfected the marinade (confession: I once used 5 chilies… 🔥 my lips were numb for hours! Learn from my pain!). The rice? Non-negotiable now—that lime zest makes it SING. This recipe embodies my cooking philosophy: Start simple, embrace imperfection, taste fearlessly, and always, ALWAYS make it yours. It’s been my weeknight savior, my meal-prep superstar (components keep 4 days!), and the dish my nephew requests every time he visits. Pro tip: Double the chicken marinade and freeze half with raw chicken—future you will send grateful vibes!
Print
Chicken Burrito Protein Bowl
- Total Time: 40 mins total
Description
Hey Bowl Buddy! Craving bold, fresh, and satisfying? Meet your new go-to: smoky chipotle chicken strips over fluffy cilantro-lime rice, piled with all your fave toppings. Meal prep it, build it fresh, eat it straight from the bowl — your taste buds win every time.
Ingredients
Chipotle Chicken:
-
¼ cup avocado oil (or olive oil)
-
3 tbsp fresh lime juice
-
3 chipotle chilies in adobo + 1½ tbsp adobo sauce (adjust for heat!)
-
1½ tsp garlic powder (or 3 fresh cloves, minced)
-
¾ tsp salt
-
1½ lbs boneless skinless chicken breasts, cut into strips
Cilantro-Lime Rice:
-
1 cup long-grain white rice, rinsed
-
1½ cups water (or broth for extra flavor)
-
¼ tsp salt (plus more to taste)
-
Zest of 1 lime + 2 tbsp fresh lime juice
-
¼ cup fresh cilantro, chopped
Toppings (Mix & Match!):
-
Black beans, corn, salsa, avocado, shredded cheese, sour cream, pickled onions, shredded lettuce — your bowl, your rules!
Instructions
1️⃣ Marinate Chicken (5 mins + 30 mins rest):
Whisk oil, lime juice, chipotles, adobo sauce, garlic, and salt in a bowl. Toss chicken to coat. Marinate 30 mins at room temp (or up to 24 hrs in the fridge).
2️⃣ Make Rice (20 mins):
Boil rice, water, and salt. Cover, reduce heat to low, simmer 15 mins. Remove from heat, let sit covered 5 mins. Fluff, fold in zest, juice, and cilantro.
3️⃣ Cook Chicken (8–10 mins):
Heat skillet over medium-high. Add chicken strips in a single layer (work in batches). Sear 3–4 mins, flip, cook 3–5 mins more until cooked through (165°F). Rest 5 mins before slicing.
4️⃣ Build Bowls:
Spoon rice into bowls. Top with chicken and your fave toppings. Finish with fresh lime juice & extra cilantro. Dig in!
Notes
-
Swap protein: Try shrimp, steak, or tofu!
-
Make it veggie: Double black beans, add roasted veggies or sweet potatoes.
-
Low-carb: Use cauliflower rice or crisp romaine instead.
-
Meal-prep: Store rice & chicken separately, assemble fresh. Lasts 4 days!
Nutrition
- Calories: 520 cal Per Bowl
- Fat: 18g
- Carbohydrates: 45g
- Protein: 35g
Your Questions, Answered (Before You Ask!)
Q: Help! My chicken is tough. What went wrong?
A: Overcooking is the usual culprit! Chicken breast cooks fast. Pull it off the heat at 165°F (use a meat thermometer!). Slicing against the grain (see those lines on the breast? Cut perpendicular!) also makes it tender. Using thighs helps too—they’re more forgiving!
Final Thoughts: Why This Bowl Wins
This isn’t just dinner – it’s a customizable culinary adventure that checks all the boxes:
✅ Nutritionally balanced (protein, fiber, healthy fats)
✅ Adaptable to any diet (GF, dairy-free, vegan options)
✅ Equally impressive for meal prep or dinner parties
✅ Teaches fundamental cooking techniques
✅ Endlessly variable to prevent food boredom
The real magic? How such simple components create extraordinary satisfaction. That first bite with smoky chicken, bright rice, cool avocado, and crunchy tortilla chips is pure harmony. It’s the kind of meal that makes you pause mid-chew to appreciate the flavor symphony.
Remember my kitchen floor picnic story? That’s what this recipe represents – the joy of unpretentious, flavor-packed food shared with people you love. Whether you’re fueling workouts, feeding a family, or just treating yourself right, this bowl delivers.
Pro Tip: Keep chipotle marinade portions frozen for instant flavor anytime. Your future hungry self will thank you!




