
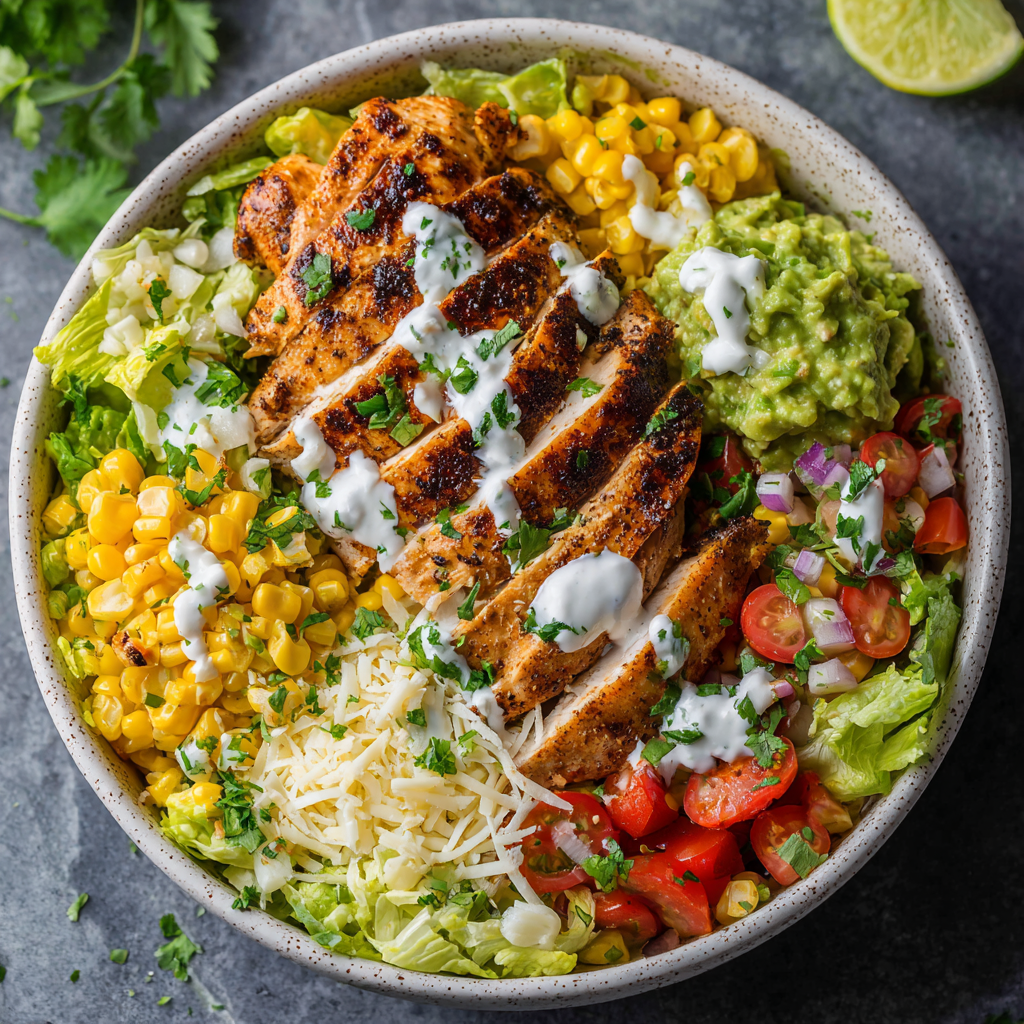
Healthy Chicken Taco Bowls
Your New Favorite Weeknight Hero: Healthy Chicken Taco Bowls!
Hey there, kitchen friend! Olivia here, waving from my perpetually flour-dusted countertop. You know that magical moment when you crave something bold, fresh, and deeply satisfying… but don’t wanna undo your wellness goals or spend hours cooking? Enter: Healthy Chicken Taco Bowls! Imagine juicy, spice-kissed chicken snuggled into crisp lettuce, piled high with smoky roasted corn, creamy guac, and a tangy yogurt drizzle. It’s everything you adore about taco night—the vibrant flavors, the colorful layers, the fun of building each bite—but light, balanced, and packed with protein. No heavy tortillas weighing you down, just pure, guilt-free deliciousness. Whether you’re racing between soccer practice and Zoom calls or craving a solo lunch that feels like a hug, these bowls are your answer. They’re crazy versatile (hello, fridge clean-out magic!), ready in 20-ish minutes, and guaranteed to make you feel like a kitchen rockstar. So grab your favorite chopping knife—let’s turn simple ingredients into something unforgettable together!
Taco Tuesdays & Grandma’s Apron Strings
Let me take you back to my grandma’s sun-drenched Texas kitchen circa 1998. Every Tuesday, without fail, she’d host “Taco Night Extravaganza.” The air would hum with sizzling beef, warm corn tortillas, and her infectious laugh. But here’s the twist: Little Olivia was obsessed with the toppings. While everyone else built tacos, I’d sneakily pile shredded lettuce, beans, salsa, and a mountain of cheese into a bowl, eating it like confetti salad. Grandma would wink, calling it my “Taco Confetti Surprise.” Years later, when I started tweaking recipes for healthier living, that memory sparked an idea—why not make the toppings the STAR? These taco bowls are my grown-up homage to Grandma’s chaos-to-cosiness magic. They capture that same joy of mixing textures and flavors, minus the carb crash. Every bite still tastes like her kitchen: vibrant, generous, and full of love. Pass the guac, please!
What You’ll Need (Plus My Chef Secrets!)
Gather these fresh pals—quality matters here since each layer shines! Don’t stress over exact amounts; taco bowls are forgiving.
- 1 grilled chicken breast, sliced – Pro tip: Use thighs for extra juiciness! Leftover rotisserie chicken? Perfect shortcut.
- 1 tsp taco seasoning – Skip store-bought! Mix ½ tsp cumin, ¼ tsp each chili powder + smoked paprika + garlic powder. Trust me—it’s life-changing.
- ½ cup roasted or grilled corn – Charred kernels = flavor bombs! Frozen corn works—just pan-sear it dry until golden.
- ½ cup guacamole – Mash 1 ripe avocado with lime juice, salt, and minced onion. Add jalapeño if you’re spicy-curious!
- 1.5 cups crisp lettuce (romaine or butter lettuce) – Butter lettuce’s sweet softness is my fave. Kale? Massage it first with lemon to soften.
- ¼ cup low-fat shredded cheese – Cotija or feta crumbles add salty zing if you’re dairy-light!
- 2 tbsp plain Greek yogurt – Our “cheat code” creamy drizzle! Sour cream works, but yogurt packs protein punch.
- Fresh cilantro (optional) – Don’t skip! It’s the confetti on top. Swap parsley if you’re a cilantro-hater.
Let’s Build Some Deliciousness: Step-by-Step!
Ready? Aprons on! We’ll multitask like pros—this comes together FAST.
- Season & Cook Chicken: Rub that chicken breast all over with your taco seasoning (get under the skin if it’s bone-in!). Heat a skillet or grill to medium-high. Cook 5-6 mins per side until internal temp hits 165°F. Chef hack: Cover with foil while it rests—juices redistribute, making it tender! Slice against the grain when slightly cooled.
- Char Your Corn: While chicken cooks, toss corn in that hot skillet (no oil needed!). Let it sit untouched 2 mins for gorgeous blackened bits. Stir once, repeat. Smell that? That’s flavor gold.
- Whisk Your “Creamy Drizzle”: Stir Greek yogurt with a squeeze of lime and pinch of cumin. Too thick? Add 1 tsp water. This replaces heavy crema—shh, no one will know!
- Assemble Like an Artist: In your prettiest bowl, layer lettuce first (it’s your canvas!). Top with chicken slices, guac dollops, charred corn, and cheese. Pro move: Warm ingredients (chicken/corn) go next to cool lettuce—texture contrast is key!
- Finish with Flair: Drizzle yogurt sauce generously. Scatter cilantro like confetti. Want crunch? Add pickled onions or crushed tortilla chips!
The Ultimate Guide to Customizing Your Taco Bowl
Taco bowls are the ultimate blank canvas—endlessly adaptable to fit your cravings, dietary needs, or whatever’s lurking in your fridge. Here’s how to make them your own:
Protein Swaps for Every Palate
While chicken is a lean, reliable choice, don’t stop there!
-
Shrimp: Toss peeled shrimp with chili powder, lime zest, and garlic. Sauté for 2-3 minutes—they cook in a flash!
-
Beef: Use flank steak or ground beef (90% lean) with homemade taco seasoning for a richer flavor.
-
Plant-Based: Black beans, lentils, or crispy tofu crumbled with smoked paprika make it vegan-friendly.
-
Leftover Magic: Rotisserie chicken, pulled pork, or even grilled salmon from last night’s dinner? Perfect.
Veggie Power-Up
Boost nutrition (and color!) with these add-ins:
-
Roasted Sweet Potatoes: Toss cubed sweet potatoes with cumin and olive oil; roast at 400°F for 20 minutes.
-
Sautéed Peppers & Onions: A quick stir-fry with a pinch of salt adds sweetness and crunch.
-
Pickled Veggies: Thinly slice radishes or red onions, soak in lime juice + salt for 15 minutes—instant tangy crunch!
-
Avocado Alternatives: No ripe avocados? Try mashed edamame with lime or a dollop of hummus for creaminess.
Grain & Greens Options
-
Cauliflower Rice: Sauté with a dash of taco seasoning for a low-carb base.
-
Quinoa or Brown Rice: Adds fiber and keeps you full longer.
-
Kale or Spinach: Massage with olive oil and salt to soften. Even shredded Brussels sprouts work!
Sauce Hacks
-
Chipotle Crema: Blend yogurt with canned chipotle peppers for smoky heat.
-
Tahini-Lime Drizzle: Mix tahini, lime juice, and water for a nutty, dairy-free option.
-
Pineapple Salsa: Dice pineapple, jalapeño, and cilantro for a sweet-spicy kick.
Pro Tip: Keep a “taco bowl bar” in your fridge—prep proteins, chopped veggies, and sauces in containers for easy assembly all week!
The Science Behind Why Taco Bowls Are Actually Good for You
This isn’t just a tasty meal—it’s a nutritional powerhouse. Here’s why:
Balanced Macros
-
Protein: Chicken (or beans/shrimp) keeps you full and supports muscle repair.
-
Healthy Fats: Avocado and olive oil provide monounsaturated fats, great for heart health.
-
Fiber: Lettuce, corn, and veggies aid digestion and stabilize blood sugar.
Gut-Friendly Perks
-
Probiotics: Greek yogurt in the drizzle adds good bacteria for gut health.
-
Prebiotics: Onions, garlic, and corn feed those beneficial gut microbes.
Low-Glycemic & Anti-Inflammatory
-
No Refined Carbs: Skipping tortillas means no blood sugar spikes.
-
Spices Like Cumin & Chili Powder: Contain antioxidants that fight inflammation.
Fun Fact: The charred corn isn’t just tasty—it’s rich in ferulic acid, a compound linked to anti-aging benefits!
Taco Bowls Around the World (Global Twists!)
Why stick to Tex-Mex? Here’s how to globe-trot from your kitchen:
Mediterranean Style
-
Protein: Lemon-oregano grilled chicken or chickpeas.
-
Toppings: Cucumber, cherry tomatoes, kalamata olives, feta, and tzatziki sauce.
-
Base: Quinoa or mixed greens.
Asian-Inspired
-
Protein: Sesame-ginger tofu or shrimp.
-
Toppings: Shredded carrots, edamame, sliced mango, and a drizzle of peanut sauce (mix PB, soy sauce, and lime).
-
Base: Cabbage slaw or brown rice.
Indian Fusion
-
Protein: Tandoori-spiced chicken or lentils.
-
Toppings: Mango chutney, cilantro-mint yogurt, and roasted cauliflower.
-
Base: Turmeric-spiced cauliflower rice.
Why It Works: Swapping spices and sauces keeps meals exciting while sticking to the same easy formula!
How to Serve These Beauties
These bowls are meant to be messy and personal! Serve them deconstructed-style: Pile ingredients in little bowls (chicken, corn, guac, etc.) and let everyone build their own masterpiece at the table. It’s interactive, fun, and perfect for picky eaters! Pair with icy lime agua fresca or a light lager. For brunch? Top with a fried egg—runny yolk = instant sauce upgrade. Fancy it up with edible flowers or lime wedges on the side!
Shake It Up! 5 Flavorful Twists
Swap, tweak, and make it yours! Here’s how:
- Protein Power: Shredded chili-lime shrimp, black beans (for vegan), or cumin-roasted chickpeas.
- Bowl Base Bliss: Swap lettuce for cilantro-lime cauliflower rice or quinoa for extra fiber.
- Fiesta Toppings: Pickled red onions, mango salsa, roasted sweet potatoes, or crushed plantain chips.
- Heat Lovers: Add chipotle peppers to the yogurt drizzle or jalapeños to the guac.
- Dairy-Free Dream: Use cashew cream instead of yogurt, and skip cheese or use nutritional yeast.
Olivia’s Kitchen Confessions
This recipe? It’s evolved more than my taste in aprons! Originally, I used sour cream and cheddar… until my yoga teacher (and bestie) challenged me to “lighten it up without losing soul.” Enter Greek yogurt and cotija—game changers! The corn started as canned, but one summer night, I charred fresh cobs on my dying grill, and WOW. Now, even in winter, I keep frozen corn just for this. True story: I once subbed pumpkin seeds for cheese during a pantry emergency—my kids dubbed it “crunchy confetti bowl.” Moral? Play with your food. That’s where the magic happens. Also: double the chicken. Leftovers make killer next-day salads!
Your Burning Questions, Answered!
Q: My chicken turns out dry—help!
A: Two tricks: 1) Don’t overcook! Pull it at 165°F (get a thermometer). 2) Let it REST 5 mins before slicing. Cover loosely with foil—it reabsorbs juices.
Q: Can I meal prep these bowls?
A: Absolutely! Store components separately: Cooked chicken (3 days), corn (2 days), lettuce (washed/dried in a container with paper towel), and guac (press plastic wrap directly on surface to prevent browning). Assemble day-of for crispness!
Q: Greek yogurt drizzle is too tangy for me.
A: No sweat! Mix in ½ tsp honey or maple syrup. Or thin it with a splash of mild olive oil instead of water.
Q: How do I make this lower-carb?
A: You’re already winning! But to go ultra-low: Skip corn, add extra grilled zucchini or bell peppers. Ensure your taco seasoning is sugar-free!
Healthy Chicken Taco Bowls
- Total Time: 20 mins
Description
Say hello to your new weeknight hero. These Healthy Chicken Taco Bowls bring all the taco-night flavor without the food coma. Think juicy seasoned chicken, charred corn, creamy guac, and a zesty yogurt drizzle—layered on crisp lettuce and topped like a fiesta. Whether it’s dinner for one or a DIY taco bar for the whole fam, this bowl’s got your back with protein, crunch, and feel-good vibes in every bite.
Ingredients
-
1 grilled chicken breast, sliced
-
1 tsp taco seasoning (or DIY: cumin, chili powder, smoked paprika, garlic powder)
-
½ cup roasted corn (frozen or fresh)
-
½ cup guacamole (avocado, lime, salt, onion)
-
1.5 cups lettuce (romaine or butter lettuce)
-
¼ cup shredded cheese (cotija, feta, or low-fat)
-
2 tbsp plain Greek yogurt
-
Cilantro (optional)
-
Lime wedge (for garnish)
Instructions
-
Season & Grill Chicken: Rub chicken with taco seasoning and cook 5–6 mins per side. Rest 5 mins, then slice.
-
Char Corn: Dry-sear corn in a hot skillet until golden and smoky.
-
Yogurt Drizzle: Mix Greek yogurt with lime juice + pinch of cumin. Thin with water if needed.
-
Assemble: Layer lettuce in a bowl, top with sliced chicken, guac, corn, cheese.
-
Finish: Drizzle yogurt sauce, sprinkle cilantro, and serve with a lime wedge.
Notes
Want crunch? Add crushed tortilla chips or pickled onions. Feeling fancy? Swap lettuce for cauliflower rice or quinoa for a heartier bowl.
- Prep Time: 5 mins
- Cook Time: 12–15 mins
Nutrition
- Calories: 450 cal Per Serving
- Fat: 25g
- Carbohydrates: 14g
- Fiber: 6g
- Protein: 38g
Nutritional Goodness (Per Serving)
Calories: ~450 • Protein: 38g • Carbs: 14g (Net) • Fats: 25g • Fiber: 6g
Note: Stats vary with swaps. Using thighs? Add ~50 calories. Skipping cheese? Subtract ~80 calories.
Final Thoughts: More Than Just a Meal
These taco bowls aren’t just dinner—they’re a mindset. They prove that healthy eating doesn’t mean sacrificing flavor or fun. Whether you’re meal-prepping for the week, feeding a family with diverse tastes, or treating yourself to a solo fiesta, this recipe adapts to your life.
So grab that bowl and play with your food! Tweak it, share it, or eat it straight from the skillet (we won’t judge). Because the best meals aren’t just nourishing—they’re joyful. And that’s something worth celebrating, one delicious bite at a time.
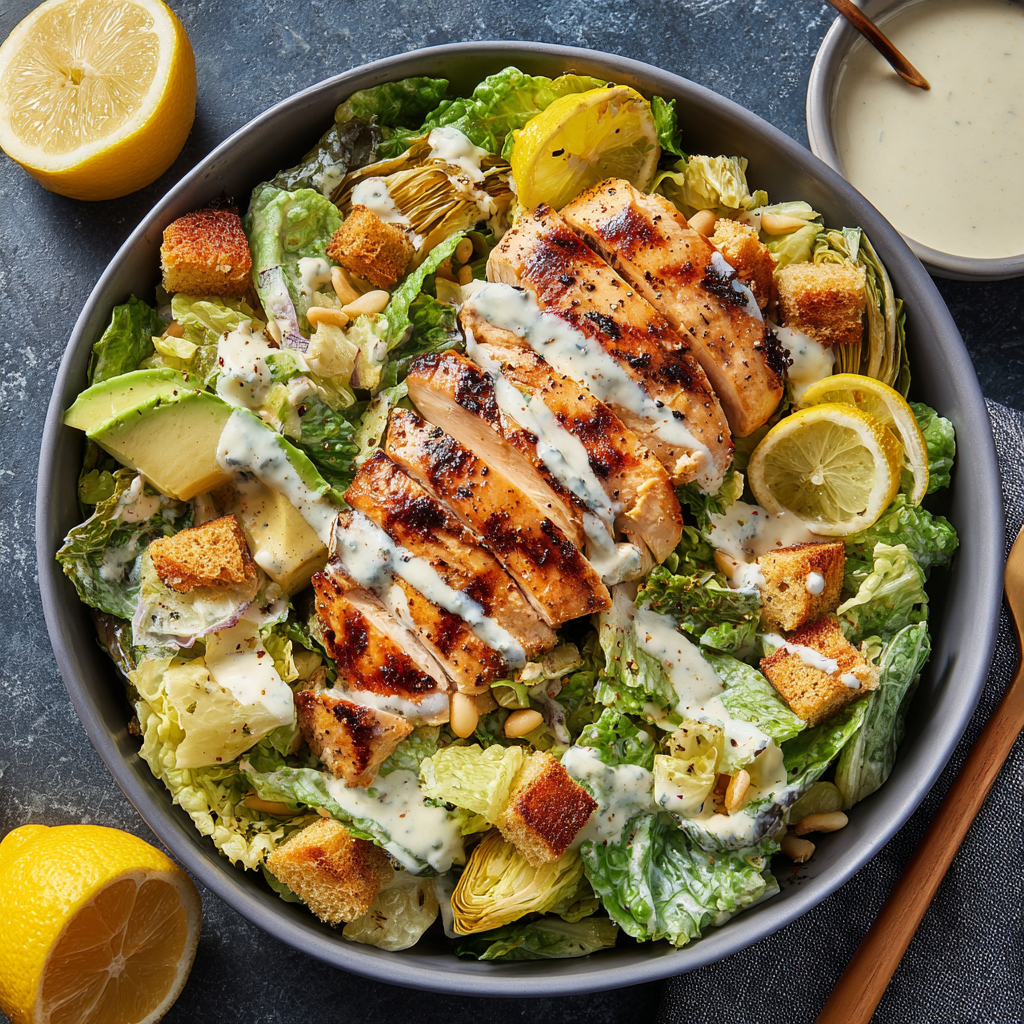
Hot Honey Chicken Caesar Salad
Your New Salad Obsession: Hot Honey Chicken Caesar
Hey there, kitchen friends! Olivia here, and I’ve got a confession: I used to think Caesar salads were boring. *Gasp!* I know. But hear me out – before you revoke my foodie card – I’ve cracked the code on transforming this classic into something that’ll make your tastebuds do a happy dance. Imagine juicy grilled chicken glazed with spicy-sweet hot honey, creamy avocado slices, crunchy low-carb croutons, and toasted pine nuts all tangled up in crisp romaine and rich Caesar dressing. Then – BAM! – a bright squeeze of lemon to cut through it all. This Hot Honey Chicken Caesar Salad isn’t just a meal; it’s a flavor explosion that turns salad skeptics into believers. Perfect for busy weeknights when you want something FAST but fabulous, or when you need to impress guests without sweating over the stove. Grab your favorite chopping knife and that slightly stained apron (no judgment here!), because we’re about to make magic!
How a Rainy Night Created My Favorite Salad
Picture this: It’s pouring rain, my fridge is nearly empty, and my best friend texts “Emergency craving – need comfort food STAT.” All I had was a lonely chicken breast, sad romaine, and half an avocado. In a moment of “what the heck” inspiration, I drizzled honey mixed with chili flakes on the chicken I was grilling. That sweet heat smell? *Chef’s kiss.* When I tossed it with the Caesar-dressed greens and added toasted pine nuts I found in the pantry, my friend took one bite and declared, “This is your masterpiece.” Now, it’s our tradition – whenever life gets messy, we make this salad, crank up 90s hip-hop, and dance in the kitchen. It’s proof that the best recipes aren’t planned; they’re born from happy accidents and empty fridges!
Gather Your Flavor Arsenal
(Serves 1 – easily doubled!)
- 1 grilled chicken breast – Use leftovers or grill fresh! Chef’s tip: Pound it evenly for juicier results. Swap with shrimp or chickpeas for pescatarian/vegan.
- 1 tsp hot honey – Find it near regular honey! No hot honey? Mix ¾ tsp honey + ¼ tsp sriracha or chili flakes.
- 2 cups chopped romaine – The crunch king! Kale or butter lettuce work too.
- ½ sliced avocado – Adds creaminess without heavy dressing. No avocado? Try a spoonful of Greek yogurt in the dressing.
- 2 tbsp Caesar dressing – Store-bought is fine! My fave hack: Add 1 anchovy fillet (minced) to bottled dressing for umami depth.
- Handful low-carb croutons – I use almond-flour ones. Craving carbs? Garlic-bread croutons are divine here.
- 1 tbsp toasted pine nuts – Toasting is NON-NEGOTIABLE – it unlocks their buttery magic! Sub with walnuts or pepitas.
- 1 lemon wedge – That citrus zing cuts the richness. Key for balance!
- Salt & pepper – Season as you go!
Let’s Build Your Flavor Masterpiece
- Glaze That Chicken: Grill or pan-sear chicken breast over medium-high heat for 5-6 mins per side until internal temp hits 165°F. *Pro move:* Brush hot honey on BOTH sides during the last 2 minutes. Let rest 5 mins before slicing – this keeps it crazy juicy!
- Toast Your Nuts: While chicken cooks, toss pine nuts in a dry skillet over medium heat for 2-3 mins until golden. *Watch closely!* They burn faster than a gossip in a small town. Set aside.
- Dress to Impress: In your serving bowl, toss romaine with Caesar dressing. *Don’t drown it!* Start with 1 tbsp, add more after toppings if needed.
- Artful Assembly: Fan sliced chicken over greens. Arrange avocado like a sunburst! Scatter croutons and toasted nuts over everything. *Why?* This keeps croutons crunchy!
- The Grand Finale: Squeeze lemon wedge over the top. Finish with a crack of black pepper and flaky sea salt. *Secret weapon:* Add lemon zest for extra fragrance!
The Science of Sweet & Spicy – Why This Flavor Combo Works
Let’s geek out for a minute: Why does hot honey make everything taste better? It’s not just magic—it’s science. The combination of sweet and spicy triggers a phenomenon called “hedonic contrast,” where opposing flavors amplify each other. Honey’s fructose mellows the capsaicin in chili flakes (or hot sauce), tricking your brain into craving more. It’s the same reason mango habanero wings and chili-chocolate desserts are irresistible.
But this salad takes it further by layering umami (hello, Caesar dressing and toasted pine nuts) and fat (avocado, olive oil in the dressing) for a full sensory experience. Here’s the breakdown:
-
Sweet (honey): Cuts bitterness in the romaine and balances saltiness.
-
Spicy (chili): Stimulates endorphins—literally a mood booster.
-
Creamy (avocado/dressing): Coats your palate, preventing spice overload.
-
Crunch (croutons/nuts): Triggers the “sound-taste” connection—studies show crispy food tastes fresher.
Pro Tip: For maximum flavor layering, season each component individually. Salt the avocado, pepper the chicken, and lightly dress the greens before assembling. Tiny bursts of seasoning in every bite = next-level deliciousness.
Fun Experiment: Try different chili varieties in your hot honey! Smoked paprika adds depth, cayenne brings sharp heat, and gochujang (Korean chili paste) introduces funky-sweet complexity.
The Ultimate Caesar Dressing Hack – Bottled vs. Homemade
Confession: I use store-bought Caesar dressing 80% of the time. But with one tiny upgrade—add an anchovy. Yes, even to the fancy bottled stuff. Traditional Caesar gets its umami punch from anchovies, but most commercial versions skimp. Mince one fillet and whisk it into ½ cup dressing with a squeeze of lemon and a garlic clove (grated). Suddenly, your $4 bottle tastes like a bistro’s $18 salad.
For DIY Purists:
Ingredients:
-
1 egg yolk (or 2 tbsp Greek yogurt for safer eating)
-
1 garlic clove, minced
-
3 anchovy fillets
-
2 tbsp lemon juice
-
½ cup olive oil
-
¼ cup grated Parmesan
-
1 tsp Dijon mustard
Method:
Blend everything except oil until smooth. Slowly drizzle in oil while blending to emulsify. Taste and adjust—need more tang? Add lemon. Too thick? A splash of water.
Storage Tip: Homemade dressing lasts 3 days in the fridge. Store it in a mason jar and shake before use.
Why This Matters: A great Caesar salad hinges on the dressing clinging to every leaf. Too thin? It pools at the bottom. Too thick? It’s gloppy. The ideal consistency coats the back of a spoon but drips slowly.
Salad as a Meal – How to Bulk It Up (Without Carbs)
“But Olivia, I’ll be hungry in an hour!” Challenge accepted. Here’s how to transform this salad into a protein-packed, fiber-rich meal that keeps you full:
1. Double the Protein:
-
Add 2 hard-boiled eggs (sliced) or ¼ cup chickpeas (roasted until crispy).
-
Swap chicken for grilled flank steak or salmon for omega-3s.
2. Sneaky Veg Boosters:
-
Shredded Brussels sprouts (they’re like romaine’s heartier cousin).
-
Thinly sliced fennel for a licorice crunch (sounds weird, tastes amazing).
3. Healthy Fats:
-
Toasted pepitas (pumpkin seeds) add magnesium and crunch.
-
Half an avocado is great; a whole avocado is greater.
4. Cheese, Please:
-
Shaved Pecorino instead of Parmesan for sharper flavor.
-
Crumbled goat cheese for tangy creaminess.
Meal-Prep Trick: Roast a tray of chicken breasts, veggies, and nuts on Sunday. Assemble salads in jars—dressing at the bottom, greens on top—and shake when ready to eat.
Nutrition Note: With these tweaks, one bowl delivers 600+ calories, 50g protein, and 15g fiber—ideal for post-workout recovery or a desk lunch that won’t cause a 3 PM crash.
Plating Like a Pro (No Fancy Skills Required!)
Serve this beauty in a wide, shallow bowl – we eat with our eyes first! Stack ingredients high so every forkful gets ALL the textures. Pair it with an ice-cold sparkling lemonade or crisp rosé. For dinner parties? Serve deconstructed: let guests build their own bowls with toppings in little ramekins. Bonus points for edible flowers (nasturtiums are peppery-perfect!) or extra hot honey drizzle on the rim. This salad is bold enough to stand alone, but garlicky breadsticks never hurt anyone…
Shake It Up! 5 Delicious Twists
- Mediterranean Mood: Swap Caesar for lemon-tahini dressing, add kalamata olives + feta.
- BBQ Lover: Use smoked paprika in the hot honey glaze + add charred corn.
- Keto Power Bowl: Skip croutons, add crispy bacon + blue cheese crumbles.
- Asian Fusion: Replace Caesar with ginger-sesame dressing + add mandarin oranges.
- Meatless Marvel: Use crispy tofu or roasted chickpeas + nutritional yeast in dressing.
Olivia’s Kitchen Confessions
This recipe has serious glow-up energy! My first version used Frank’s hot sauce straight from the bottle (RIP my tastebuds). Over time, I learned hot honey’s magic: it clings to chicken like edible glitter. The pine nuts? Total accident – I grabbed them instead of almonds during a Netflix-and-cook session. Best mistake ever! Now, my husband hides the pine nuts if we’re running low… true love? Also, a warning: this salad is ADDICTIVE. My neighbor texted me at 10 PM last week asking for the recipe because her teenager was “having a craving meltdown.” Mission accomplished! 😉
Hot Honey Salad SOS
Q: My chicken turned out dry! Help!
A: Two tricks! 1) Pound breast to even thickness so it cooks uniformly. 2) Brush honey ONLY at the end – sugar burns easily and toughens meat.
Q: Can I meal prep this?
A: Absolutely! Prep components separately: store dressed lettuce, cooked chicken, and toppings in different containers. Assemble RIGHT before eating to keep everything crisp. Avocado? Squirt lemon juice on it to prevent browning!
Q: Too spicy for my kids?
A: Dial back the heat! Use mild honey and add chili flakes only to adult portions. Or serve honey glaze on the side for dipping.
Q: Why toast pine nuts? Can’t I use them raw?
A> Raw pine nuts taste like little pieces of cardboard – sad! Toasting unlocks their buttery, rich flavor. No time? Buy pre-toasted at Trader Joe’s!
Hot Honey Chicken Caesar Salad
- Total Time: 20–22 mins
Description
Forget everything you thought you knew about Caesar salads. This one’s got attitude—sweet-heat glazed chicken, creamy avocado, toasty pine nuts, and crisp romaine tossed in bold Caesar dressing. It’s fast, fiery, and unforgettable. Whether you’re meal-prepping like a pro or dancing in the kitchen to 90s throwbacks, this is comfort food that crunches. One bite and you’ll see—boring salads are officially canceled.
Ingredients
-
1 grilled chicken breast
-
1 tsp hot honey (or mix honey + chili flakes)
-
2 cups chopped romaine
-
½ avocado, sliced
-
2 tbsp Caesar dressing
-
Handful low-carb croutons
-
1 tbsp toasted pine nuts
-
1 lemon wedge
-
Salt & pepper to taste
Instructions
-
Cook Chicken: Grill or sear chicken 5–6 mins per side. Brush hot honey during final 2 mins. Let rest 5 mins before slicing.
-
Toast Pine Nuts: Heat in a dry skillet 2–3 mins until golden. Watch closely!
-
Toss & Build: Toss romaine with Caesar dressing. Top with chicken slices, avocado, croutons, and pine nuts.
-
Finish: Squeeze lemon, crack pepper, add a pinch of sea salt. Optional: Lemon zest or extra drizzle of hot honey.
- Prep Time: 10 mins
- Cook Time: 10–12 mins
Nutrition
- Calories: 480 cal Per Serving
- Fat: 30g
- Carbohydrates: 10g
- Protein: 42g
Nutritional Per Serving (Approx)
- Calories: 480
- Protein: 42g
- Carbs: 10g (net)
- Fats: 30g
- Prep: 10 mins | Cook: 10-12 mins
Final Thoughts: More Than Just a Salad
This Hot Honey Chicken Caesar isn’t just a recipe—it’s a template for creativity. Once you master the balance of sweet/spicy/creamy/crunchy, you’ll start seeing potential everywhere. Leftover roasted sweet potatoes? Toss them in. A handful of strawberries? Surprisingly delicious with the savory dressing.
It’s also a reminder that cooking doesn’t need to be complicated to feel special. A 15-minute salad with thoughtful touches (toasted nuts, a citrus finish) can taste like a restaurant splurge. So raid that fridge, embrace the happy accidents, and dance in your kitchen while you cook. Because the best meals aren’t just fed; they’re felt.
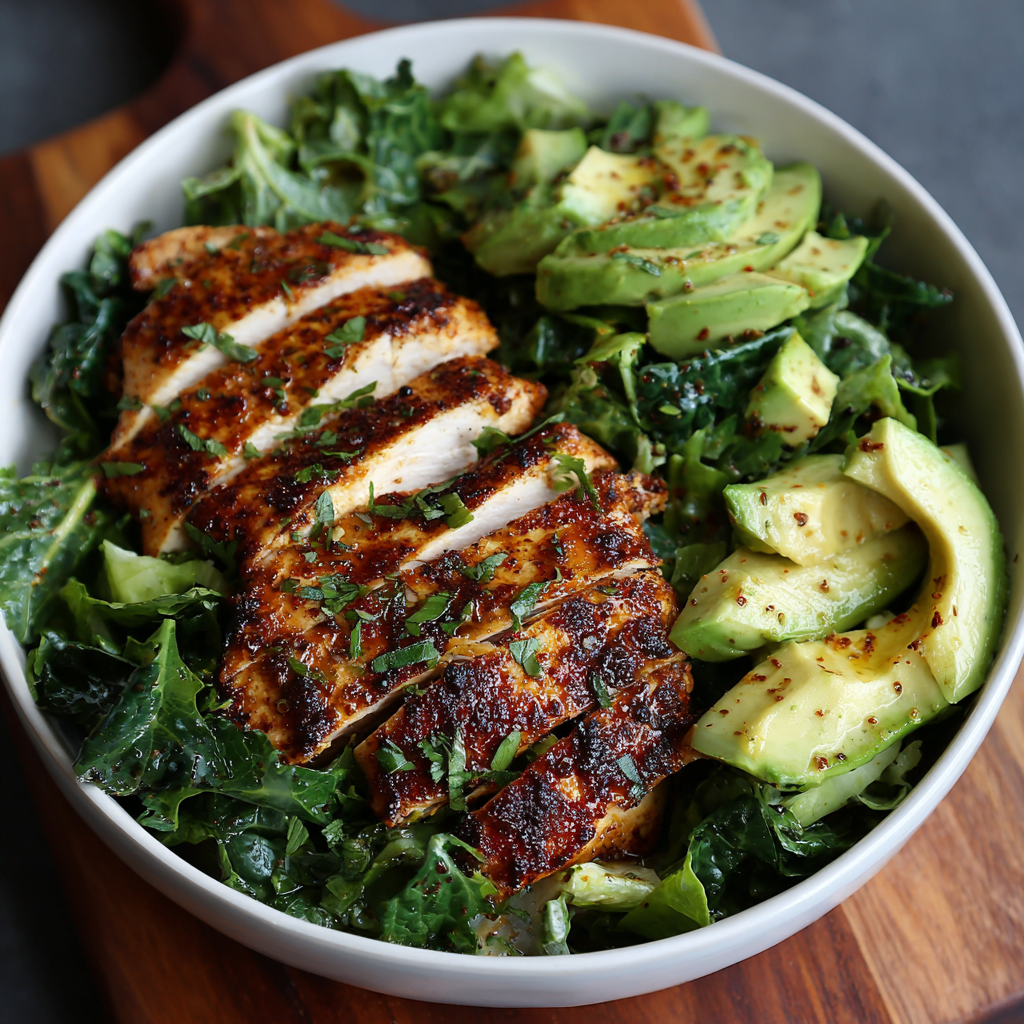
Grilled Chicken & Avocado Power Bowl
Hey, Hungry Friend! Let’s Build Your New Favorite Power Bowl
Is there anything better than a meal that makes you feel amazing after eating it? You know the kind – where every bite tastes like a little celebration, and you finish feeling energized, satisfied, and ready to tackle whatever’s next? That’s the magic we’re cooking up today with this Grilled Chicken & Avocado Power Bowl! If your weeknights feel like a race against the clock or you’re craving something fresh and protein-packed after a workout, this bowl is your new best friend. It’s not just fuel; it’s a flavor explosion – tender, spice-kissed chicken, creamy avocado that practically melts, and crisp greens that give that satisfying crunch. It’s the comfort of a hearty meal and the bright, clean energy of something truly nourishing, all in one gorgeous bowl. Think of it as a hug for your taste buds and a high-five for your body! Best part? We’re talking under 25 minutes from fridge to table. No fancy techniques, no obscure ingredients – just simple, beautiful food that works as hard as you do. So tie on that apron (messy is totally welcome here!), grab your favorite chopping knife, and let’s create something seriously delicious together. Get ready to fall in love with how easy and rewarding eating well can be!
That One Summer & The Bowl That Started It All
This bowl? It’s got roots! Picture this: It was peak summer, sweltering hot, and my tiny apartment kitchen felt like a sauna. My best friend, Maya, had just finished a brutal training session and was ravenous. We were both too tired for complex cooking but desperately needed something substantial and refreshing. I rummaged through the fridge – found a lone chicken breast, a perfectly ripe avocado threatening to go soft, and the last handfuls of salad greens. Desperation breeds genius, right? I whipped up a quick smoky rub for the chicken, seared it in a screaming hot pan (while dramatically fanning the smoke alarm with a tea towel – true chef life!), sliced it over the greens and avocado, and finished it with a squeeze of lime. We flopped down at the table, skeptical. One bite in, Maya’s eyes went wide. “Liv, this is… everything?” It was pure, simple satisfaction. Cool, creamy avocado against the warm, spicy chicken, the greens adding freshness. We devoured it in minutes, feeling instantly revived. That thrown-together desperation dinner became our post-workout ritual, our lazy Sunday lunch, our “I need something good, fast” lifeline. Every time I make it now, I’m back in that hot kitchen, laughing with Maya, reminded that the best meals often come from the simplest moments and ingredients.
Gather Your Bowl Brigade: Simple Ingredients, Big Impact
Here’s your dream team! Don’t stress about perfection – this bowl is wonderfully flexible.
- 1 boneless, skinless chicken breast: The protein powerhouse! Look for plump, even-sized breasts. Chef’s Swap: Thighs work beautifully for extra juiciness! Pre-cooked rotisserie chicken? Absolutely! Shred about 1 cup.
- 1 tbsp olive oil: Our cooking fat and flavor carrier. Chef’s Insight: Using good extra virgin olive oil adds a lovely fruity note. Avocado oil is a great high-heat alternative.
- 1/2 tsp smoked paprika: The secret weapon! It gives that deep, warm, almost bacony vibe without any smoke. Chef’s Tip: If you only have regular paprika, add a tiny pinch of chipotle powder for smoke.
- 1/4 tsp garlic powder: Convenient, quick flavor that won’t burn like fresh garlic on the grill. Chef’s Swap: Minced fresh garlic (about 1 clove) works too – just add it with the oil before the chicken.
- Salt & black pepper to taste: The essential flavor enhancers! Don’t be shy – season well.
- 1 cup mixed greens or romaine: The fresh, crisp base. Chef’s Insight: Romaine gives crunch; spring mix adds color and variety. Spinach or kale (massaged with a little oil!) are great too.
- 1/2 ripe avocado, diced: Our creamy, healthy fat superstar. Chef’s Tip: How to pick? It should yield slightly to gentle pressure near the stem. Rock hard? Wait! Mushy? Pass!
- Fresh lime juice (optional): Brightens everything up! A squeeze at the end is magic. Chef’s Swap: Lemon works too!
- Chopped parsley or cilantro for garnish: The fresh pop! Cilantro adds a vibrant kick, parsley is more herbal. Use what you love!
Feeling Fancy? Optional Boosters: A sprinkle of feta or cotija cheese, a handful of cherry tomatoes, a spoonful of black beans or corn, a drizzle of sriracha mayo or Greek yogurt ranch!
Let’s Get Cooking: Building Your Flavor Masterpiece
Ready? This is where the fun happens! Grab your skillet or fire up that grill.
- Season Like You Mean It: Pat that chicken breast dry with paper towels (crucial for a good sear!). Drizzle it with the olive oil, then rub the smoked paprika, garlic powder, salt, and pepper all over. Really massage those spices in – this is flavor town! Chef’s Hack: Let it sit for 5-10 minutes if you have time. It lets the flavors sink in deeper!
- Get That Sizzle On (Grill or Skillet): Heat your grill, grill pan, or a heavy skillet (cast iron is my hero!) over medium-high heat until it’s seriously hot. A drop of water should skitter and evaporate instantly. Place the seasoned chicken breast on the hot surface. Hear that sizzle? That’s the sound of deliciousness forming! Chef’s Tip: DON’T move it for at least 4-5 minutes! Let it develop a gorgeous golden-brown crust. Peek underneath – beautiful color? Flip it! Cook for another 5-6 minutes on the other side. Critical Chef Knowledge: Chicken is done when an instant-read thermometer inserted into the thickest part reads 165°F (74°C). No thermometer? Cut into the thickest part – no pink, juices should run clear. This is non-negotiable for safety!
- The Power of Patience (Resting): Transfer the cooked chicken to a cutting board and walk away for 5 minutes. Seriously! Tenting it loosely with foil is fine. This lets the juices redistribute. Cutting in too soon means all those lovely juices end up on your board, not in your mouth. Dry chicken = sad chicken!
- Base Camp: While the chicken rests, grab your bowl. Pile in those fresh, crisp greens. Top them with the diced, buttery avocado. Chef’s Hack: Squeeze a tiny bit of lime juice over the avocado right now – it helps prevent browning and adds instant zing!
- Slice & Shine: Slice the rested chicken against the grain into beautiful strips or bite-sized pieces. This makes it extra tender. Arrange that gorgeous, spice-rubbed chicken over the greens and avocado.
- Finish with Flair: Sprinkle generously with your chosen fresh herbs (parsley or cilantro). If you’re feeling it, give it another light squeeze of fresh lime juice. Craving heat? A pinch of red pepper flakes or a drizzle of hot sauce is perfection! Chef’s Final Touch: A tiny extra pinch of flaky sea salt over the top? Chef’s kiss!
The Art of Perfectly Grilled Chicken – Tips & Tricks for Maximum Flavor
Grilling chicken might seem straightforward, but achieving juicy, flavorful results every time requires a few key techniques. Whether you’re using a grill pan, outdoor grill, or skillet, mastering the process will elevate your power bowl from good to restaurant-worthy.
1. The Importance of Drying & Seasoning
Before anything else, pat your chicken dry with paper towels. Moisture is the enemy of a good sear—it causes steaming instead of browning. Once dry, drizzle with olive oil (or avocado oil for high-heat cooking) and massage in your spices. The oil helps the seasonings adhere and promotes even cooking.
Pro Tip: If you have time, dry brine your chicken by salting it 30 minutes to 24 hours in advance. Salt penetrates the meat, enhancing flavor and moisture retention.
2. Heat Control & Searing Like a Pro
A common mistake? Not getting the pan or grill hot enough. You want a screaming-hot surface before the chicken touches it. Test by flicking a drop of water—if it sizzles and evaporates instantly, you’re ready.
-
Grill Method: Medium-high heat (about 400°F/200°C). Place the chicken at a 45° angle for those beautiful crosshatch marks.
-
Skillet Method: Cast iron or stainless steel is best. Once seared, you can finish in the oven at 375°F (190°C) if the chicken is thick.
Golden Rule: Don’t move the chicken for the first 4-5 minutes! Let that crust form before flipping.
3. The Resting Ritual
Never skip resting! After cooking, transfer the chicken to a cutting board and let it sit for 5-10 minutes (tented loosely with foil). This allows the juices to redistribute. Cutting too soon = dry chicken.
Bonus Hack: While it rests, drizzle a tiny bit of olive oil or a squeeze of lime over the top. It adds extra moisture and brightness.
4. Slicing Against the Grain
For maximum tenderness, always slice against the grain. Look for the direction of the muscle fibers and cut perpendicular to them. This shortens the fibers, making each bite melt-in-your-mouth tender.
Extra Flavor Boost: While slicing, sprinkle a pinch of flaky sea salt or smoked paprika over the warm chicken for an extra layer of flavor.
Avocado Mastery – How to Pick, Prep & Keep It Fresh
Avocado is the creamy crown jewel of this bowl, but we’ve all faced the struggle of unripe rock-hard or mushy-brown avocados. Let’s fix that!
1. Choosing the Perfect Avocado
-
Ripeness Check: Gently press near the stem—it should yield slightly but not feel mushy.
-
Stem Test: Pop off the small stem nub. If it’s bright green underneath, it’s ripe. Brown? Overripe.
Pro Tip: Buy avocados at different stages (one ripe, one almost there) to avoid a week of guacamole emergencies.
2. Cutting Without the Mess
-
Slice lengthwise around the pit, twist to separate halves.
-
Whack the pit with a knife, twist to remove.
-
Use a spoon to scoop out the flesh in one piece.
Chef’s Hack: If dicing, score the avocado in its skin first, then scoop out neat cubes.
3. Preventing Browning (Because Nobody Likes Sad, Brown Avocado)
-
Acid is your friend! A squeeze of lime or lemon juice slows oxidation.
-
Store with an onion: The sulfur compounds help (place a slice in the container).
-
Press plastic wrap directly on the surface to limit air exposure.
Meal Prep Trick: If prepping ahead, leave the pit in the unused half and wrap tightly.
4. Avocado Alternatives & Swaps
-
Too expensive? Try mashed white beans with olive oil and lemon for creaminess.
-
Allergic? Roasted sweet potato or hummus adds a similar richness.
Power Bowl Variations – Global Twists on the Classic
This bowl is a flavor chameleon—here’s how to take it around the world!
1. Mediterranean-Inspired Bowl
-
Protein: Grilled lemon-oregano chicken or chickpeas.
-
Base: Quinoa or farro.
-
Toppings: Cucumber, cherry tomatoes, kalamata olives, feta, tzatziki drizzle.
-
Dressing: Lemon-garlic olive oil.
Why It Works: Bright, herby, and loaded with fiber.
2. Mexican Fiesta Bowl
-
Protein: Chipotle-rubbed chicken or black beans.
-
Base: Cilantro-lime brown rice.
-
Toppings: Roasted corn, pico de gallo, pickled red onions, cotija cheese.
-
Dressing: Creamy avocado-lime crema.
Spice It Up: Add jalapeños or a dash of hot sauce.
3. Asian-Inspired Sesame Bowl
-
Protein: Soy-ginger grilled chicken or tofu.
-
Base: Mixed greens + shredded cabbage.
-
Toppings: Edamame, shredded carrots, sesame seeds.
-
Dressing: Ginger-sesame vinaigrette.
Crunch Factor: Top with crispy wonton strips.
Plating Perfection: Serving Your Power Bowl
This bowl is a beauty! Serve it immediately in your favorite deep bowl – you want those layers to shine. The vibrant greens, the creamy pale green avocado, the golden-brown chicken slices, and the pop of fresh herbs create a feast for the eyes. It’s perfect solo as a complete, satisfying meal. If you’re feeling extra hungry or sharing, pair it with some warm whole-wheat pita wedges for scooping, or a side of simple sliced cucumbers tossed with lemon juice and dill. A chilled glass of sparkling water with lime or a light iced green tea complements it beautifully without weighing you down. Dig in while the chicken is still warm and the avocado is cool – that contrast is divine!
Mix It Up! Your Bowl, Your Rules
This bowl is your blank canvas! Get creative:
- Protein Power Swap: Not feeling chicken? Try grilled shrimp (cook 2-3 mins per side), seared salmon fillet, crispy tofu cubes (pressed, cubed, tossed with the spices, and baked/pan-fried), or even lean steak strips!
- Grain Gain: Add a hearty base! Spoon 1/3-1/2 cup of cooked quinoa, brown rice, farro, or couscous under the greens for extra staying power and fiber.
- Veggie Fiesta: Load it up! Add roasted sweet potatoes, black beans, corn kernels (fresh or grilled!), halved cherry tomatoes, sliced radishes, shredded carrots, or quick-pickled red onions.
- Dressing Dreams: While the lime juice is light and perfect, a drizzle elevates it. Try a creamy cilantro-lime dressing, a simple honey-mustard vinaigrette, or a tahini-lemon sauce.
- Cheesy Indulgence: Crumble over some feta, cotija, or goat cheese for a salty, creamy punch.
Liv’s Kitchen Confidential: Notes from My Apron Pocket
This bowl has truly evolved from that sweaty summer night! The original was literally just chicken, avocado, greens, and lime. Over time, that smoked paprika became non-negotiable – it adds such depth. I also learned the hard way about resting chicken! I once sliced into it immediately (impatient chef syndrome), watched all the juices flood the board, and ended up with chicken jerky on my greens. Lesson painfully learned! Now I set a timer. The avocado? Oh, the avocado struggles are real. I’ve definitely chosen a few duds that were either rock-hard or brown mush inside. My tip? Buy one slightly firm and let it ripen on the counter for a day or two next to bananas. Check it daily! And don’t be afraid to experiment – adding a scoop of salsa one day led to the “Mexi-Bowl” variation Maya now demands weekly. The beauty is in its simplicity and adaptability. It’s my fridge-cleaner, my energy-booster, my “I need a win” meal. Make it yours!
Grilled Chicken Bowl FAQs: Solving Your Kitchen Queries!
Let’s tackle those common questions and oopsies:
Q1: Can I meal prep this bowl?
A: Yes, but strategically! Prep components separately: Cook and slice the chicken, store airtight in the fridge (up to 4 days). Keep greens washed and dried in a container with a paper towel. Dice the avocado ONLY when ready to assemble – it browns quickly. Store lime wedges separately. Assemble just before eating for the best texture and freshness.
Q2: My chicken is always dry! What am I doing wrong?
A: Two main culprits: Overcooking and not resting! Use a thermometer! Pull it at 165°F (74°C) – it will carry over a bit more. Resting for 5 minutes is mandatory. Also, ensure your pan/grill is hot enough for a quick sear that locks in juices. Pounding the breast to an even thickness helps it cook evenly (no thin parts overcooking while the thick center cooks).
Q3: I don’t have a grill or grill pan. Can I still make it?
A: Absolutely! A regular skillet (especially cast iron or stainless steel) works perfectly. Get it nice and hot for a great sear. You can also bake the seasoned chicken breast at 400°F (200°C) for 18-22 minutes, or until 165°F. Broiling for the last few minutes can give a nice color.
Q4: Help! My avocado is never ripe when I need it / goes brown too fast!
A: Ripening: Buy firm avocados 2-4 days ahead. Speed it up by placing them in a paper bag with a banana or apple (the ethylene gas helps!). Preventing Browning: Only dice it right before assembling. Toss the diced pieces immediately with a little lime or lemon juice – the acid slows oxidation. Pressing plastic wrap directly onto the surface in a container also helps minimize air exposure.
Fueling Your Body: The Nourishing Details
This Grilled Chicken & Avocado Power Bowl is designed to be a satisfying, balanced meal! Here’s a general breakdown for one serving (using the core ingredients listed):
- Calories: ~430 kcal
- Protein: ~35g (Fantastic for muscle repair & satiety!)
- Carbohydrates: ~8g (Primarily from the greens & avocado – mostly fiber!)
- Fats: ~30g (The majority are heart-healthy monounsaturated fats from the avocado and olive oil)
- Fiber: ~7g (Thanks to the greens and avocado!)
Grilled Chicken & Avocado Power Bowl
- Total Time: 20–25 mins
Description
Looking for a weeknight meal that tastes like a celebration and feels like a recharge? This Grilled Chicken & Avocado Power Bowl is your new kitchen MVP. Think smoky, spice-rubbed chicken, buttery avocado, and fresh greens layered in one vibrant, satisfying bowl. Whether post-workout or mid-chaos dinner, it’s done in under 25 minutes with simple, flexible ingredients. Get ready to fall for flavor that fuels you back.
Ingredients
-
1 boneless, skinless chicken breast
-
1 tbsp olive oil
-
½ tsp smoked paprika
-
¼ tsp garlic powder
-
Salt & black pepper to taste
-
1 cup mixed greens or romaine
-
½ ripe avocado, diced
-
Optional: Lime juice, chopped parsley/cilantro, feta, cherry tomatoes, black beans
Instructions
-
Season Chicken: Pat dry, rub with olive oil, smoked paprika, garlic powder, salt, and pepper. Let sit 5–10 mins.
-
Cook: Grill or sear in a hot pan, 5–6 mins per side, until golden and cooked through (165°F). Rest 5 mins before slicing.
-
Prep Bowl: Layer greens in a bowl. Top with diced avocado and sliced chicken.
-
Finish: Squeeze lime, scatter herbs, and add any extras—hot sauce, cheese, or a pinch of flaky salt.
Notes
Rest your chicken before slicing and dice your avocado last-minute to keep it fresh and creamy.
This bowl isn’t just a meal—it’s a delicious reset. Dig in and power on.
- Prep Time: 5 mins
- Cook Time: 15 mins
Nutrition
- Calories: 430 cal Per Serving
- Carbohydrates: 6g
- Fiber: 7g
- Protein: 35g
Final Thoughts: Why This Bowl Will Stay in Your Rotation
This Grilled Chicken & Avocado Power Bowl isn’t just a meal—it’s a template for endless creativity. It’s:
✅ Fast (under 25 minutes)
✅ Balanced (protein, healthy fats, fiber)
✅ Adaptable (swap ingredients based on cravings or what’s in the fridge)
Whether you’re post-workout, meal-prepping, or just craving something fresh and satisfying, this bowl delivers. The best part? It proves that eating well doesn’t mean sacrificing flavor or fun
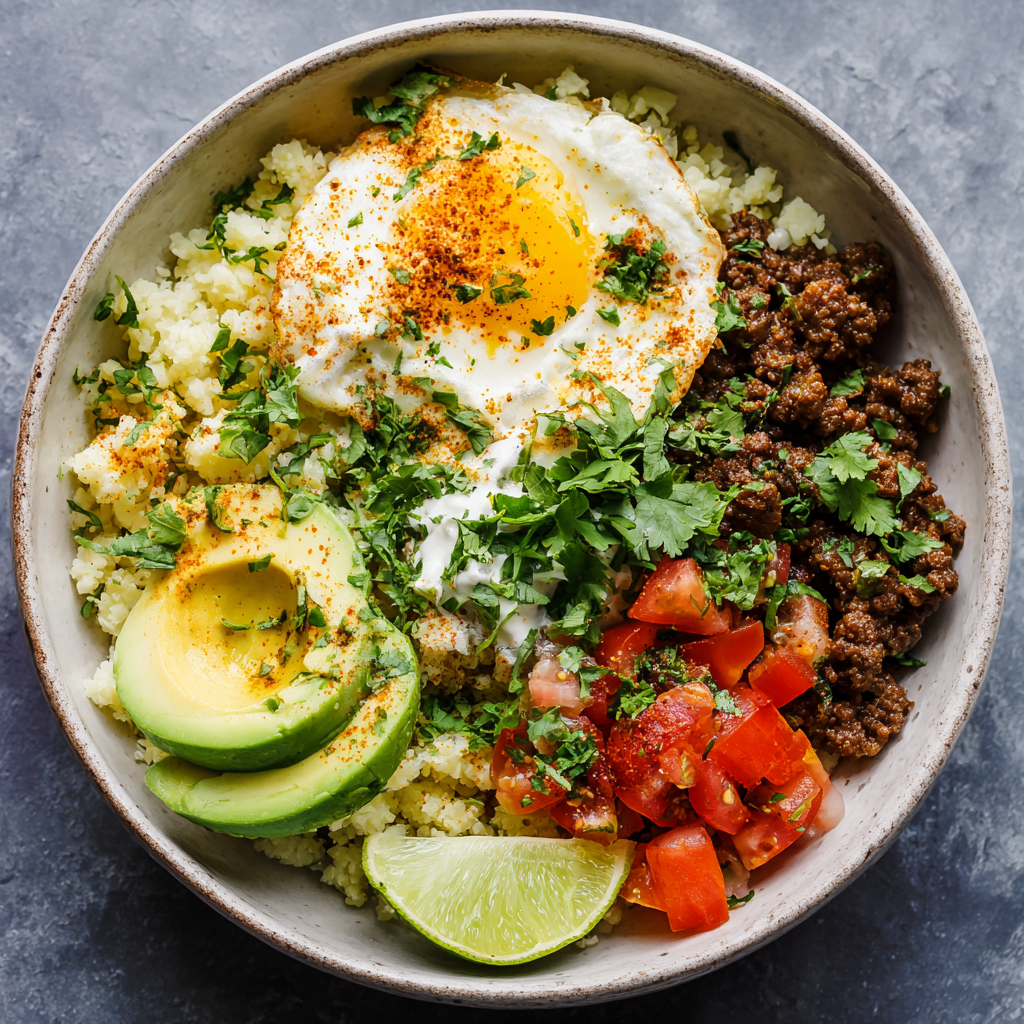
Cauliflower Rice Taco Bowl
Why This Bowl Will Steal Your Taco Tuesday (and Your Heart!)
Hey there, kitchen friends! Olivia here, apron dusted with paprika and a spoon in hand. Can we talk about the magic of a meal that’s unapologetically flavorful yet secretly wholesome? Enter this Cauliflower Rice Taco Bowl – your new weeknight superhero. Picture this: savory spiced beef hugging fluffy, herb-kissed cauliflower rice, topped with cool avocado slices that melt like butter. It’s crunchy, creamy, zesty, and deeply satisfying without weighing you down. Perfect for when you’re craving big taco energy but want to keep things light and protein-packed. Whether you’re keto-curious, carb-conscious, or just hungry, this bowl’s got your back. Ready to make your taste buds salsa? Let’s dive in!
That One Rainy Tuesday That Changed Everything
So, confession: this recipe was born from pure desperation. Picture it – a gloomy Tuesday, my fridge echoing emptiness, and two hangry kids demanding tacos. All I had? Half a sad cauliflower, some ground beef, and a very ripe avocado. In a “mom-innovation” moment, I grated the cauliflower into “rice,” spiced up the beef with my favorite smoky seasonings, and piled it all into bowls. The kids devoured it, my husband declared it “better than Chipotle,” and our Cauliflower Rice Taco Bowl tradition began! Now, it’s our go-to for busy nights, meal prep, or when we need a reset after one too many pasta nights. Funny how kitchen accidents become family legends, right?
Your Flavor-Packed Toolkit (Ingredient Notes & Swaps!)
Pro Tip: Treat your spices like perfume – layer them! Here’s the lowdown on each ingredient:
- 1 cup riced cauliflower – Your low-carb hero! Buy pre-riced or pulse florets in a food processor. Swap: Broccoli rice or quinoa for carbs.
- 200g lean ground beef – 85/15 keeps it juicy without excess grease. Swap: Ground turkey, chicken, or lentils for plant-based.
- 1/2 ripe avocado, sliced – Adds creaminess + healthy fats. Squeeze lime juice on slices to prevent browning!
- 1 tbsp olive oil – Divided for cooking. Chef’s hack: Use avocado oil for higher smoke point.
- 1 garlic clove, minced – Fresh is best! Lazy swap: 1/4 tsp garlic powder.
- 1/2 tsp cumin + 1/2 tsp smoked paprika – The soul of the bowl! Smoked paprika adds campfire depth. No cumin? Try chili powder.
- Salt & pepper to taste – Season in layers – I add 1/4 tsp salt to cauliflower rice, 1/2 tsp to beef.
- Fresh cilantro or parsley, chopped – Cilantro = classic taco vibes. Hate it? Flat-leaf parsley or chives work!
Let’s Build Your Bowl (Secrets to Perfection!)
- Cook the cauliflower rice: Heat half the olive oil in a non-stick skillet over medium-high. Add riced cauliflower + pinch of salt. Toss like you mean it! Chef’s hack: Don’t stir constantly – let it sit 2 minutes for light caramelization. Cook 5-7 mins until tender-crisp (nobody likes mush!). Off heat, toss in half your herbs. Set aside. Why? Herbs wilt perfectly into warm “rice.”
- Sauté the beef: In the same skillet (less dishes!), add remaining oil. Sauté garlic 30 seconds until fragrant – don’t let it brown! Add beef, breaking it up with a wooden spoon. Sprinkle cumin, smoked paprika, salt, pepper. Game-changer: Let beef sit untouched 1-2 mins to develop crispy edges. Cook 5-6 mins until browned. Drain fat if needed, but keep a bit for flavor.
- Assemble your masterpiece: Pile herbed cauliflower rice into a bowl. Top with spiced beef, then fan out avocado slices. Scatter remaining herbs like confetti! Pro move: Add toppings AFTER beef so avocado warms slightly.
- Optional but life-changing: Squeeze fresh lime over everything. Dollop with Greek yogurt (sour cream’s tangy cousin!) or sprinkle chili flakes. Crushed tortilla chips? Yes, chef!
The Science Behind the Flavor (Why This Bowl Works So Well)
Ever wonder why this Cauliflower Rice Taco Bowl is so addictively delicious? It’s not just luck—it’s science! Let’s break down the magic happening in your bowl.
1. The Maillard Reaction (a.k.a. Flavor Fireworks)
When you sear the ground beef, those crispy brown bits aren’t just for texture—they’re the result of the Maillard reaction. This chemical process occurs when proteins and sugars in the meat break down under high heat, creating complex, savory flavors. The trick? Letting the beef sit undisturbed for a minute or two in the pan. Stir too soon, and you’ll steam the meat instead of browning it. Pro tip: A cast-iron skillet works wonders here for even heat distribution.
2. Fat = Flavor Carrier
The olive oil (or avocado oil) isn’t just for preventing sticking—it’s a vehicle for fat-soluble flavors. When you sauté garlic and spices in oil, their aromatic compounds dissolve into the fat, amplifying their taste and ensuring every bite is infused with smoky cumin and paprika. This is why blooming spices in oil before adding the beef makes such a difference.
3. Texture Contrast: The Crunch Factor
Your brain craves variety, and this bowl delivers. The tender beef, creamy avocado, and slightly crisp cauliflower rice create a satisfying mouthfeel. Studies show that contrasting textures make food more enjoyable—think crunchy tortilla chips dipped in smooth guacamole. For extra crunch, try adding diced radishes or toasted pepitas.
4. Umami Bomb
The beef, garlic, and smoked paprika are all rich in umami—the fifth taste sensation (alongside sweet, salty, sour, and bitter). Umami triggers your salivary glands and makes dishes taste deeply satisfying. For a plant-based umami boost, add a dash of soy sauce or nutritional yeast to the cauliflower rice.
5. Herbs: The Freshness Lifeline
Cilantro or parsley aren’t just pretty garnishes—they contain volatile compounds that brighten heavy flavors. Chopping herbs releases these compounds, so add them at the end for maximum impact. Hate cilantro? Try mint or basil for a surprising twist!
6. Temperature Play
Warm beef over cool avocado creates a sensory contrast that keeps each bite interesting. For an even more dynamic experience, serve with a side of chilled pico de gallo or a dollop of cold Greek yogurt.
Meal Prep Like a Pro: How to Keep This Bowl Fresh All Week
Let’s face it—life gets busy. But with a little strategy, you can enjoy this taco bowl all week without soggy sadness. Here’s your game plan:
1. Cauliflower Rice: The Key to Non-Sogginess
-
Storage: Keep cooked cauliflower rice in an airtight container with a paper towel to absorb excess moisture.
-
Reheating: Spread it on a baking sheet and warm it in the oven at 350°F for 5 minutes, or sauté it quickly in a dry skillet. Microwaving = mush city.
-
Freezing: Spread cooled rice on a tray, freeze, then transfer to a bag. Reheat from frozen in a skillet with a splash of broth.
2. Beef: Flavor Lock 101
-
Storage: Let the cooked beef cool completely before refrigerating (up to 4 days) or freezing (up to 3 months).
-
Reheating: Add a splash of water or broth to prevent dryness. For frozen beef, thaw overnight or reheat low and slow in a covered pan.
-
Pro Hack: Cook a double batch and freeze individual portions for instant taco bowls.
3. Avocado: The Freshness Challenge
-
Storage: Keep whole avocados at room temperature until ripe, then refrigerate to slow ripening.
-
Pre-Sliced Avocado Hack: Brush slices with lime juice and store in an airtight container with a piece of onion (sounds weird, but the sulfur gases slow browning!).
-
Guac Alternative: Mash avocado with lime and salt, then press plastic wrap directly on the surface before sealing.
4. Toppings: The Weeklong Strategy
-
Herbs: Store stems in a glass of water (like flowers) with a loose bag over the top.
-
Dairy: Greek yogurt or cheese should be added fresh. Pre-shredded cheese? Toss with a bit of cornstarch to prevent clumping.
-
Crunchy Elements: Keep chips, seeds, or nuts separate until serving.
5. Assembly Order Matters
-
Day 1-2: Full bowl assembly works.
-
Day 3+: Store components separately and assemble before eating to avoid sogginess.
Bonus: Jar Salad Trick
For grab-and-go lunches, layer ingredients in a mason jar:
-
Dressing (lime juice + olive oil at the bottom)
-
Beef (cooled)
-
Cauliflower rice
-
Avocado (pressed against the glass to minimize air exposure)
-
Herbs/seeds on top
Shake when ready to eat!
The Global Twist: Taco Bowl Inspirations from Around the World
Who says taco bowls have to stick to tradition? Here’s how to take this dish on a world tour:
1. Korean BBQ Fusion
-
Beef Swap: Use bulgogi-marinated beef (soy sauce, sesame oil, ginger, and a touch of sugar).
-
Toppings: Quick-pickled cucumbers, kimchi, and a drizzle of gochujang mayo.
-
Cauliflower Rice: Toss with sesame seeds and scallions.
2. Mediterranean Mezze Bowl
-
Beef Swap: Lamb seasoned with oregano, lemon zest, and sumac.
-
Toppings: Tzatziki, kalamata olives, diced tomatoes, and crumbled feta.
-
Cauliflower Rice: Mix with chopped parsley and a squeeze of lemon.
3. Thai Larb-Inspired Bowl
-
Beef Swap: Ground chicken or turkey with fish sauce, lime, and chili flakes.
-
Toppings: Fresh mint, shredded cabbage, and crushed peanuts.
-
Cauliflower Rice: Lightly dress with coconut aminos.
4. Indian Spiced Bowl
-
Beef Swap: Keema (ground beef with garam masala, turmeric, and peas).
-
Toppings: Raita (yogurt with cucumber and cumin), mango chutney.
-
Cauliflower Rice: Sauté with mustard seeds and curry leaves.
5. Japanese-Inspired Bowl
-
Beef Swap: Teriyaki-glazed beef (or tofu).
-
Toppings: Quick-pickled daikon, shredded nori, and a soft-boiled egg.
-
Cauliflower Rice: Season with rice vinegar and a pinch of sugar.
Why It Works: The base recipe is a blank canvas. Spices, proteins, and toppings can transform it into entirely new culinary experiences—perfect for adventurous eaters or breaking out of a food rut!
Making It Instagram-Worthy (Minimal Effort, Max Wow!)
Bowl food is art! Use a wide, shallow bowl to showcase layers. Start with cauliflower rice as your canvas, then spoon beef slightly off-center. Fan avocado slices against the beef like petals. Sprinkle herbs over the top, letting some fall onto the “bare” rice. Place lime wedge on the side for pops of color. Serve immediately while the beef’s still sizzling warm against the cool avocado. Want more color? Add quick-pickled red onions or pomegranate seeds!
Shake It Up! 5 Delicious Twists
- Fiesta Veggie: Swap beef for black beans + corn + diced zucchini. Add 1 tsp chipotle powder for smoke.
- Tropical Escape: Use ground chicken + 1 tbsp pineapple juice in beef step. Top with mango salsa.
- Breakfast Bowl: Replace beef with scrambled eggs + chorizo. Top with cotija cheese.
- Mediterranean Mood: Season beef with oregano + lemon zest. Swap avocado for tzatziki + olives.
- Keto Firecracker: Double the beef! Add jalapeños + melted cheddar. Serve with keto “nacho” cheese sauce.
Olivia’s Real-Kitchen Confessions
This recipe evolved from my “clean out the fridge” scramble! Originally, I drowned everything in cheese (no regrets), but over time, I let the avocado do the creamy work. Funny story: My youngest once tried to swap cauliflower rice for actual rice… by hiding it under the table. Joke’s on him – he now requests “the white confetti rice” weekly! Pro tip: Double the beef and freeze portions for emergency taco cravings. Also – that crispy beef edge? Learned it from my abuela, who insists “crunch is life.”
Your Questions, Answered!
Q: Why is my cauliflower rice soggy?
A: You’re overcrowding the pan! Cook in batches if needed. Also, salt AFTER cooking – it draws out moisture.
Q: Can I meal prep this?
A: Absolutely! Store components separately: cauliflower rice (3 days), seasoned beef (4 days), fresh avocado/herbs/lime (add day-of). Reheat beef + rice together in a skillet.
Q: Beef tastes bland. Help!
A: Two fixes: 1) Bloom spices! Add cumin/paprika to oil BEFORE beef for 30 seconds. 2) Up the umami with 1 tsp fish sauce or soy sauce.
Q: Vegan version that doesn’t suck?
A: Swap beef for 1 cup cooked lentils + 1 tbsp tomato paste. Use smoked salt instead of paprika for depth. Trust me – it’s bomb!
Cauliflower Rice Taco Bowl
- Total Time: 15 mins
Description
Why settle for average tacos when you can bowl over your cravings? This Cauliflower Rice Taco Bowl delivers all the bold, smoky taco vibes—minus the carb crash. We’re talking spiced ground beef, herby cauliflower rice, and buttery avocado all coming together faster than you can say “Taco Tuesday.” It’s crave-worthy comfort, secretly nutritious, and 100% weeknight-approved.
Ingredients
-
1 cup riced cauliflower
-
200g (7 oz) lean ground beef (85/15)
-
½ ripe avocado, sliced
-
1 tbsp olive oil (divided)
-
1 garlic clove, minced (or ¼ tsp garlic powder)
-
½ tsp cumin + ½ tsp smoked paprika
-
Salt & pepper to taste
-
Fresh cilantro or parsley, chopped
-
Optional: Lime wedge, Greek yogurt, chili flakes, crushed tortilla chips
Instructions
-
Cauliflower Rice: Sauté in ½ tbsp oil over medium-high heat with a pinch of salt. Let it sit between tosses for caramelization. Cook 5–7 mins until tender-crisp. Stir in half the herbs off heat.
-
Spiced Beef: In the same pan, heat remaining oil. Add garlic (30 secs), then beef. Add cumin, smoked paprika, salt, pepper. Let sit briefly for crispy edges. Cook 5–6 mins.
-
Assemble: Bowl it up—start with rice, pile on beef, fan out avocado slices. Scatter herbs. Optional lime squeeze or Greek yogurt = flavor bomb.
Notes
Don’t overcrowd the pan! Crispy beef = flavor gold. Want extra heat? Add chipotle or jalapeños.
Go ahead—let this bowl crash your Taco Tuesday and upgrade it for good.
- Prep Time: 5 mins
- Cook Time: 10 mins
Nutrition
- Calories: 420 cal Per Serving
- Fat: 30g
- Carbohydrates: 6g
- Protein: 28g
Quick Nutrition Snapshot (Per Serving)
Calories: ~420 kcal | Protein: 28g | Carbs: 9g (Net: 6g) | Fats: 30g
Note: Includes avocado and olive oil. Toppings not calculated.
Final Thoughts: More Than Just a Bowl
This Cauliflower Rice Taco Bowl isn’t just a meal—it’s a lesson in flexibility. It teaches us that:
-
Pantry Staples Can Shine: A lonely cauliflower and some spices can become something extraordinary.
-
Health and Flavor Aren’t Enemies: You don’t need heavy carbs or cheese for satisfaction (though no judgment if you add them!).
-
Cooking Is Creative: Whether you stick to the script or globe-trot with variations, this bowl adapts to your mood.
So next time Taco Tuesday rolls around (or let’s be real, any day ending in “y”), remember: the best meals aren’t about perfection. They’re about joy, experimentation, and maybe a few crispy beef crumbs on your shirt. Happy cooking!
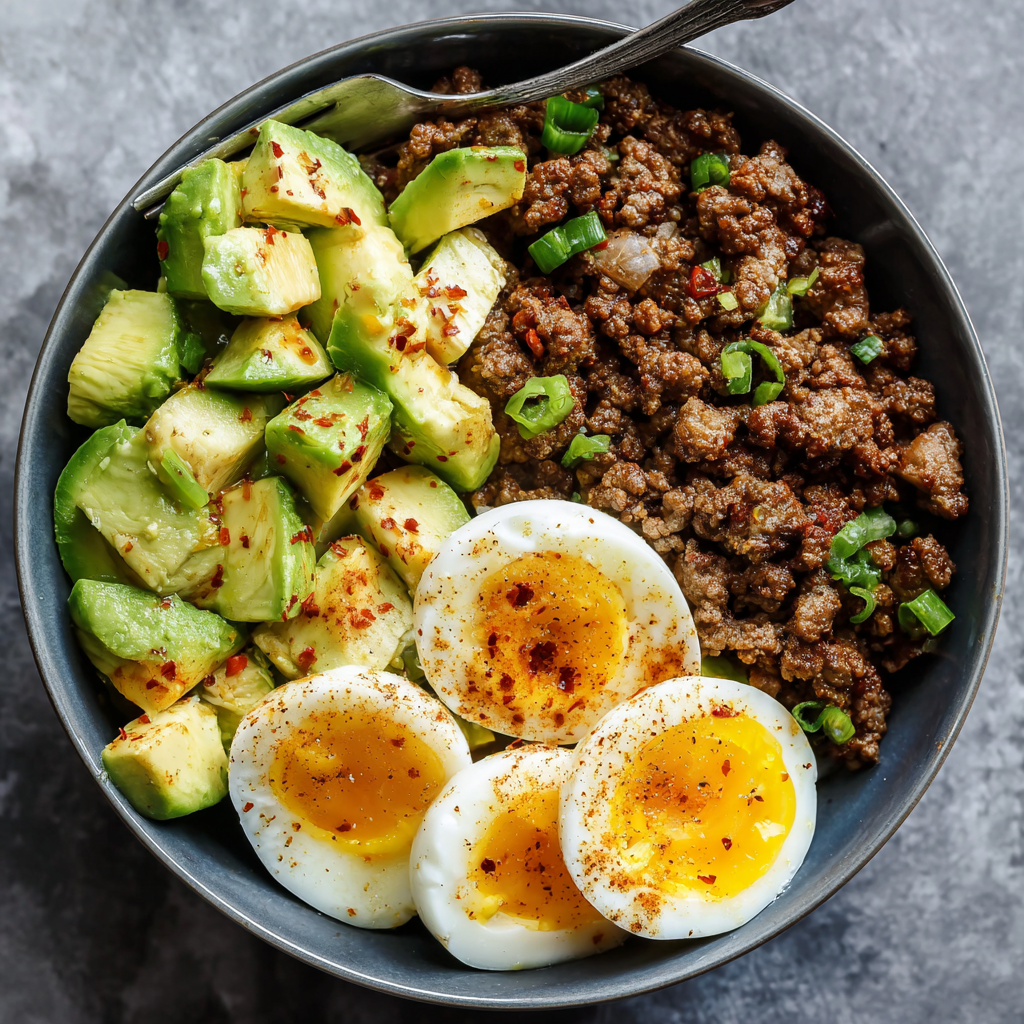
High Protein + Low Carb Power Bowl
Hey Hungry Friends! Let’s Talk Power Bowls That Actually Power You Up
Picture this: It’s 6 PM, your stomach’s doing angry somersaults, and you’re eyeballing that sad desk salad or greasy takeout menu. Been there, worn the stained apron, my friend! That’s exactly why I’m obsessed with meals that punch above their weight—dishes that fuel your fire without weighing you down like a brick in your belly. Enter this High Protein + Low Carb Power Bowl: your edible superhero cape. Think juicy seasoned beef, jammy boiled eggs, and buttery avocado all cozying up in one bowl. It’s lightning-fast (15 minutes, swear!), keeps cravings hostage for hours, and tastes like a victory lap. Whether you’re crushing workouts, chasing toddlers, or just surviving Monday, this bowl’s got your back. No fancy skills required—just big flavor and bigger energy. Ready to ditch the “hangry”? Let’s roll!
Why This Bowl? A Tale of Trail Mix Desperation
Okay, story time! Last year, I signed up for a sunrise hike with friends. “Easy peasy,” I thought, skipping breakfast because #adulting. Halfway up the mountain? My legs turned into overcooked noodles, and my brain fog was thicker than my grandma’s gravy. Cue frantic trail-mix shoveling—raisins stuck in my teeth, chocolate melting everywhere. Total mess! That night, I raided my fridge like a woman possessed: ground beef from taco night, leftover hard-boiled eggs, and an avocado begging to be used. I threw them together, doused it in hot sauce, and inhaled it. GUYS. The clarity! The energy! I felt like I could’ve run back up that mountain. Now, this bowl is my non-negotiable before any adventure (or chaotic Tuesday). It’s my edible insurance against hangry meltdowns—and way tastier than trail mix.
Grab These Goodies: Your Flavor Toolkit
Simple doesn’t mean boring! Each ingredient pulls double duty for maximum satisfaction. Pro tip: Quality matters here since we’re using minimal ingredients.
- ½ cup cooked ground beef (85% lean) – Lean enough to keep fat in check, fatty enough to stay juicy. Chef’s hack: Cook a big batch with seasoning on Sunday! Swap it: Ground turkey, chicken, or lentils for plant-based.
- 2–3 boiled eggs – Your protein-packed glue! Medium-boiled = dreamy jammy yolks. Insider tip: Older eggs peel easier. Stuck? Add 1 tsp baking soda to boiling water.
- ½ ripe avocado – Creamy healthy fats that keep you full. Pick perfect: Gently squeeze the stem end—if it yields slightly, it’s ready! Swap it: ¼ cup garlicky white beans.
- (Optional) 2–3 baked chicken wings – Craving crunch? Toss wings in baking powder + salt, bake at 425°F for 40 mins. Game-changer!
- Spices & Heat – Salt, pepper, garlic powder, or taco seasoning. Finish with chili flakes or hot sauce! My fave: Smoked paprika for campfire vibes.
Let’s Build Your Energy Beast: Step-by-Step
No-stress cooking ahead! I’ll walk you through like we’re chopping side-by-side.
- Egg-cellent Timing: Place eggs in a pot, cover with cold water + 1 inch. Bring to a boil, then COVER and remove from heat. Set timer: 8 mins = jammy, 10 mins = firm. Why cold water? Prevents cracking! Transfer done eggs to ice water immediately—this stops cooking and makes peeling a breeze.
- Beefy Business: While eggs cook, heat a skillet over medium-high. Add beef (no oil needed if 85% lean!). Break it up with a wooden spoon. When pink is gone (about 5 mins), sprinkle with ½ tsp salt, ¼ tsp pepper, and 1 tsp garlic powder or taco seasoning. Secret weapon: Deglaze pan with 1 tbsp broth or water, scraping up browned bits (FLAVOR GOLD!).
- Avocado TLC: Halve your avocado, remove pit, and dice/scoop. Squeeze a tiny bit of lime juice over it to prevent browning. Feeling lazy? Smash it with a fork!
- Bowl Assembly: Grab your favorite deep bowl (trust me, shallow = spill city). Layer warm beef first—it gently warms the eggs! Add halved or sliced eggs. Pile avocado on top. Pro move: Sprinkle everything with flaky salt right now.
- Finish Strong: Hit it with chili flakes, hot sauce, or fresh cilantro. Optional chicken wings? Lean ’em against the bowl like edible art.
The Science Behind the Sustenance – Why This Bowl Works
Let’s geek out for a minute: This bowl isn’t just tasty—it’s a nutritional Swiss Army knife. Every ingredient is strategically chosen to balance macros, stabilize blood sugar, and keep your energy tank full for hours. Here’s the breakdown:
1. Protein Powerhouse (Beef + Eggs):
-
Ground beef (½ cup): Packing ~18g protein, it’s rich in iron (combatting fatigue) and B12 (for brain function). The 85% lean ratio ensures satiety without excess grease.
-
Eggs (2–3): Each egg delivers 6g protein + choline, a nutrient that supports metabolism and liver function. Jammy yolks? That’s your healthy fat source (hello, vitamin D!).
2. Avocado’s Magic:
-
The creamy half-avocado adds 10g fiber and heart-healthy monounsaturated fats. These fats slow digestion, preventing energy crashes. Pro tip: The fiber feeds gut bacteria, which studies link to improved mood (take that, hanger!).
3. Low-Carb, High Reward:
With just 6g net carbs, this bowl avoids the blood sugar rollercoaster. No post-meal coma here! The absence of refined carbs means your body burns fat for fuel—ideal for keto or endurance lifestyles.
4. The Spice Factor:
Garlic powder and chili flakes aren’t just flavor boosters. Capsaicin (in chili) may increase metabolism, while garlic supports immunity. Even your spices are working overtime!
Real-Life Proof:
A 2020 study in The American Journal of Clinical Nutrition found that high-protein, low-carb meals reduced afternoon snacking by 60%. My trail mix fiasco? Totally preventable with this combo.
The Art of Batch Cooking – Make This Bowl Your Weekly MVP
Repeat after me: Meal prep is self-care. This bowl is a batch-cook dream—here’s how to streamline it for busy weeks.
Step 1: Sunday Beef Session
-
Cook 2 lbs ground beef with 2 tsp salt, 1 tsp pepper, and 2 tbsp taco seasoning. Divide into ½-cup portions (about 6 servings). Freeze in silicone muffin cups for easy grab-and-go pucks.
Step 2: Egg Army
-
Boil 8–12 eggs at once using the ice bath method. Store peeled eggs in a jar of water (change water daily) to prevent rubberiness. They’ll last 5 days.
Step 3: Avocado Hack
-
Buy 2–3 ripe avocados weekly. Store whole avocados in the fridge to slow ripening. Dice only what you need per meal to avoid browning.
Assembly Line:
-
Morning of: Microwave beef (60 secs), slice eggs, dice avocado. Assemble in a thermos (layered: beef → eggs → avocado) if eating on-the-go.
-
Office Hack: Keep a mini hot sauce bottle and spice jar at your desk for instant upgrades.
Cost Breakdown vs. Takeout:
-
Home Bowl: ~$3.50/serving (beef: $2, eggs: $0.50, avocado: $1).
-
Takeout Salad: $12+ for less protein. Over a month, you’ll save ~$255. That’s a massage or new sneakers!
Olivia’s Confession:
I once prepped 10 beef portions… then forgot to label them. My husband mistook one for cookie dough (facepalm). Now I use green tape for “savory” and red for “sweet.”
Beyond the Bowl – Fueling Your Lifestyle
This recipe isn’t just a meal—it’s a launchpad for sustainable habits. Tailor it to your goals:
For Fitness Fanatics:
-
Post-Workout: Add ¼ cup roasted sweet potato for glycogen replenishment.
-
Strength Training: Up protein with 1 tbsp hemp seeds or a scoop of cottage cheese.
For Busy Parents:
-
Kid-Friendly Twist: Swap beef for shredded chicken, skip chili flakes, and serve with avocado “boats” (scoop with chips).
-
Stroller-Safe Version: Layer ingredients in a mason jar—beef at the bottom, eggs middle, avocado top. Shake to mix at the park!
For Desk Warriors:
-
No-Microwave? Use canned tuna or salmon instead of beef. Add pre-cooked eggs from the grocery salad bar.
-
Brain Fog Fix: Include 1 tbsp pumpkin seeds (magnesium for focus) and a drizzle of olive oil (healthy fats = mental clarity).
Mindful Eating Tip:
Sit for 10 minutes post-meal before reaching for seconds. It takes time for fullness signals to hit your brain. Hydrate with lemon water—thirst often masquerades as hunger.
Community Wisdom:
My readers’ best hack? A construction worker lines his hard hat with foil to keep beef warm until lunch. Genius!
Making It Pretty (Because We Eat With Our Eyes First!)
This bowl is rustic chic! Use a wide, shallow bowl to show off those layers. Let the avocado and eggs shine—don’t bury them. Garnish with bright pops: red chili flakes, green cilantro, or even black sesame seeds. Serving for brunch? Add halved cherry tomatoes on the side for color. Pair with iced green tea or sparkling water with lemon. No utensils? Scoop with baked cheese crisps (low-carb hack!).
Shake It Up: 5 Delicious Twists
This bowl is your blank canvas! Get creative:
- Mediterranean Magic: Swap beef for lamb + oregano. Top with feta, olives, and lemon zest.
- Keto Dynamite: Add crispy bacon + blue cheese crumbles. Drizzle with ranch.
- Pescatarian Power: Use flaked salmon or shrimp instead of beef. Add capers + dill.
- Breakfast Bowl: Replace beef with sautéed mushrooms + spinach. Top with everything bagel seasoning.
- Tex-Mex Fiesta: Beef with cumin + chili powder. Add pico de gallo + a dollop of Greek yogurt.
Olivia’s Real-Kitchen Confessions
This recipe started as my “clean the fridge” scramble, but my husband dubbed it “The Reviver” after it saved us post-flu. Over time, I learned: Don’t skip the ice bath for eggs—I once served rubbery green yolks (RIP). Also, avocado timing is everything. My 5-year-old now “tests” ripeness like a tiny fruit ninja. Pro evolution? Using leftover taco meat! One night I dumped it straight from the container—zero regrets. Now I batch-cook seasoned beef monthly and freeze portions. P.S. If you drop an egg on the floor? Name it Kevin and start over. No judgment here!
Your Questions, My Answers (Let’s Fix Kitchen Fails!)
Q: My beef gets dry! Help!
A: Two tricks: 1) Don’t overcook—remove at slight pink. 2) Deglaze that pan! 1-2 tbsp broth/water adds moisture and grabs flavorful bits. If it’s dry, stir in 1 tsp olive oil after cooking.
Q: Avocado turns brown too fast. Solutions?
A: Acid is your friend! Toss diced avocado with lime/lemon juice. If prepping ahead, store the pit WITH the avocado in an airtight container—it slows oxidation. Still brown? Scoop off the top layer—it’s still good underneath!
Q: Eggs won’t peel cleanly. SOS!
A> I feel you! Try this: Use older eggs (1-2 weeks old). Add 1 tsp baking soda to boiling water. Ice bath for 10+ mins. Tap eggs all over on counter, then roll gently. Peel under running water—shells slide right off!
Q: Can I meal prep this?
A> Absolutely! Cook beef + boil eggs for 3 days max. Store separately. Avocado? Prep day-of. Assemble bowls cold—microwave beef 45 secs before adding eggs/avocado.
High Protein + Low Carb Power Bowl
- Total Time: 15 mins
Description
Meet your new weeknight superhero: the High Protein + Low Carb Power Bowl. It’s juicy, jammy, creamy, and ready in just 15 minutes. Whether you’re conquering a hike, wrangling toddlers, or just trying to make it through Tuesday, this bowl is fuel with flavor. Let’s ditch the sad salads and power up with every bite.
Ingredients
-
½ cup cooked ground beef (85% lean)
-
2–3 boiled eggs (jammy or firm)
-
½ ripe avocado, diced or smashed
-
Salt, pepper, garlic powder or taco seasoning
-
Optional: 2–3 baked chicken wings
-
Finishers: Chili flakes, hot sauce, fresh herbs, lime juice
Instructions
-
Boil Eggs: Place in cold water + 1 tsp baking soda. Boil, cover, remove from heat:
-
8 mins = jammy yolks
-
10 mins = firm
Ice bath them for easy peel magic.
-
-
Cook Beef: Brown in skillet (no oil needed). Season with ½ tsp salt, ¼ tsp pepper, 1 tsp garlic or taco seasoning. Deglaze with 1 tbsp broth/water for max flavor.
-
Avocado Prep: Slice, dice, or smash. Squeeze a little lime to keep it green and gorgeous.
-
Assemble Bowl: Start with beef, then halved eggs, avocado. Sprinkle salt, spice it up, add your wings if using.
-
Style It Up: Garnish with herbs, chili flakes, sesame seeds, or tomato wedges for color pop.
Notes
Batch-cook your beef on Sunday and hard-boil eggs for the week. Keep avocado fresh with lemon juice or prep it just before eating.
- Prep Time: 5 mins
- Cook Time: 10 mins
Nutrition
- Calories: 520cal Per Serving
- Fat: 38g
- Carbohydrates: 6g
- Fiber: 5g
- Protein: 36g
Nutritional Breakdown (Approx Per Serving)
Calories: 520 | Protein: 36g | Carbs: 6g (Net) | Fat: 38g | Fiber: 5g
Note: Stats include 2 eggs + avocado without optional wings. Add 110 calories per baked wing.
Prep Time: 5 min | Cook Time: 10 min | Total Time: 15 min | Serves: 1
Hungry for More?
Did you make this bowl? Tag me @OliviasCozyKitchen—I’ll feature your masterpiece! Got a twist? Share it below. Remember: Good food fuels great stories. Now go conquer your day, one delicious bite at a time!
Final Thoughts: Your Bowl, Your Rules
This power bowl is more than a recipe—it’s permission to eat boldly and efficiently. No rigid measuring, no guilt over substitutions. Forgot the avocado? Toss in a handful of nuts. Beef too pricey? Crumble tofu instead. The framework is yours to hack.
Remember my mountain meltdown? Last month, I revisited that trail with this bowl in my backpack. At the summit, I unpacked it like a trophy—eggs gleaming, beef still warm from my thermos. My friends stared. “You brought a feast?” Damn right. Because fueling your body shouldn’t mean sacrificing joy or time. Now go conquer your mountains, one unstoppable bite at a time.
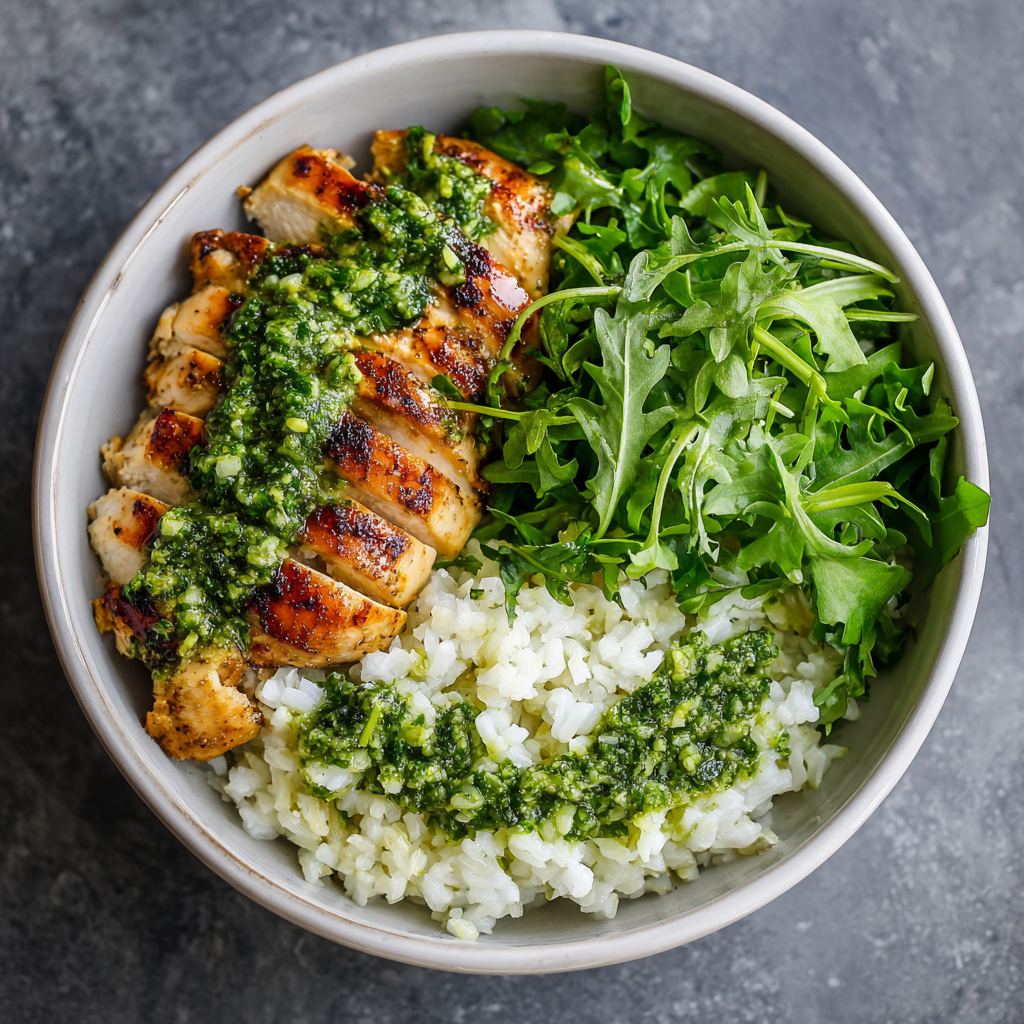
Pesto Chicken & Cilantro Lime Rice Bowl
Why This Bowl Feels Like Sunshine on a Spoon
Hey there, kitchen friend! Olivia here, waving from my flour-dusted countertop. Ever have one of those days where you need a meal that’s equal parts lightning-fast and soul-huggingly delicious? Where you stare into the fridge praying for culinary inspiration? *raises hand* That’s exactly why this Pesto Chicken & Cilantro Lime Rice Bowl became my forever go-to. Imagine this: tender grilled chicken draped over vibrant cilantro-kissed rice, peppery arugula crunch, all swirled with emerald-green pesto and a glossy drizzle of olive oil. It’s not just fuel—it’s a 10-minute vacation for your taste buds!
What makes this bowl magic? It’s your pantry’s greatest hits album. We’re talking minimal prep (25 minutes flat!), crazy flexibility (swap anything!), and flavors that pop like confetti. Perfect for meal-prepping Sundays, frantic weeknights, or when you want something light yet satisfying. No fancy skills needed—just a hungry heart and a bowl big enough for joy. Ready to make magic? Let’s dive in!
The Airport Epiphany That Sparked This Bowl
Picture this: I’m sprinting through Heathrow Airport after a 9-hour flight, hangry enough to nibble my passport. All I find are sad, overpriced sandwiches. Then—*cue angelic choir*—a tiny kiosk offers “build-your-own rice bowls.” I piled cilantro rice, grilled chicken, and pesto with reckless abandon. First bite? EUREKA. The zesty lime cut through jetlag fog, pesto brought herby joy, chicken kept it sturdy. I scribbled notes on a napkin mid-chew!
Back home, I recreated it with arugula for pep and EVOO for richness. Now, it’s my edible security blanket. My teen twins inhale it after swim practice, and I’ve served it at book club (with extra pesto, obviously). It’s proof that great food doesn’t need complexity—just bold flavors hugging each other in a bowl. Every bite still tastes like that first airport relief!
Your Flavor Toolkit: Ingredients & Smart Swaps
Makes 1 generous bowl (double/triple as needed!)
- 1 grilled organic chicken breast, sliced – Why organic? Cleaner flavor! No hormones = happy chicken. Swap: Leftover rotisserie chicken, tofu, or chickpeas for plant-powered. Chef’s hack: Pound it even for faster cooking.
- 1 cup cooked cilantro lime rice – Use jasmine or basmati for fragrance. Swap: Quinoa or cauliflower rice. Chef’s insight: Toast rice in the pot pre-cooking for nutty depth!
- 1 cup fresh arugula – Adds a peppery kick! Swap: Baby spinach or massaged kale. Chef’s tip: Toss with a squeeze of lemon to prevent wilting.
- 1 tbsp extra virgin olive oil (EVOO) – Your flavor conductor! Use the good stuff. Swap: Avocado oil. Chef’s note: Drizzle last for fresh aroma.
- 2 tbsp pesto – Homemade shines, but jarred works (I love Costco’s!). Swap: Basil for cilantro pesto or sun-dried tomato. Vegan? Use nutritional yeast instead of cheese.
Building Your Flavor Masterpiece: Step-by-Step
- Rice First, Friends! Cook rice per package instructions. While hot, fluff with a fork and stir in chopped cilantro, lime zest, and juice. Chef’s hack: Add a bay leaf while cooking rice—subtle earthiness! Cover and let steam off heat.
- Chicken Charmer Rub chicken with olive oil, salt, pepper, and a pinch of garlic powder. Grill or pan-sear 5-7 mins/side until golden. Tip: DON’T move it until it releases easily—that’s your crust forming! Rest 5 mins before slicing.
- Bowl Therapy Time Spread arugula in your widest bowl (more surface area = more flavor mingling!). Mound rice slightly off-center—visual appeal matters! Artfully layer chicken slices. Chef’s move: Fan them like a deck of cards.
- The Drizzle Dance Swirl pesto over chicken and rice. Drizzle EVOO in a zigzag. Hack: Warm pesto slightly for easier drizzling! Toss lightly ONLY if you enjoy slightly wilted greens (I do!).
- Final Flourish Optional: Extra cilantro leaves, lime wedge, cracked pepper. Chef’s secret: A sprinkle of flaky salt on top makes flavors SING.
Serving: Where Bowls Become Experience
This isn’t just dumping food in a dish—it’s edible artistry. Use wide, shallow bowls so every layer shines. Serve immediately while rice is warm and arugula crisp! Pair with ice-cold sparkling water with lime, or a crisp Sauvignon Blanc. For gatherings? Set up a DIY bowl bar with pesto, sliced chicken, rice, greens, and toppings like toasted pine nuts, avocado, or feta. Let guests build their own—food tastes better when it’s self-designed!
Why This Bowl Feels Like Sunshine on a Spoon
Hey there, kitchen friend! Olivia here, waving from my flour-dusted countertop. Ever have one of those days where you need a meal that’s equal parts lightning-fast and soul-huggingly delicious? Where you stare into the fridge praying for culinary inspiration? Raises hand That’s exactly why this Pesto Chicken & Cilantro Lime Rice Bowl became my forever go-to.
Imagine this: tender grilled chicken draped over vibrant cilantro-kissed rice, peppery arugula crunch, all swirled with emerald-green pesto and a glossy drizzle of olive oil. It’s not just fuel—it’s a 10-minute vacation for your taste buds!
What makes this bowl magic? It’s your pantry’s greatest hits album. We’re talking minimal prep (25 minutes flat!), crazy flexibility (swap anything!), and flavors that pop like confetti. Perfect for meal-prepping Sundays, frantic weeknights, or when you want something light yet satisfying. No fancy skills needed—just a hungry heart and a bowl big enough for joy.
Ready to make magic? Let’s dive in!
The Airport Epiphany That Sparked This Bowl
Picture this: I’m sprinting through Heathrow Airport after a 9-hour flight, hangry enough to nibble my passport. All I find are sad, overpriced sandwiches. Then—cue angelic choir—a tiny kiosk offers “build-your-own rice bowls.”
I piled cilantro rice, grilled chicken, and pesto with reckless abandon. First bite? EUREKA. The zesty lime cut through jetlag fog, pesto brought herby joy, chicken kept it sturdy. I scribbled notes on a napkin mid-chew!
Back home, I recreated it with arugula for pep and EVOO for richness. Now, it’s my edible security blanket. My teen twins inhale it after swim practice, and I’ve served it at book club (with extra pesto, obviously). It’s proof that great food doesn’t need complexity—just bold flavors hugging each other in a bowl.
Every bite still tastes like that first airport relief!
Your Flavor Toolkit: Ingredients & Smart Swaps
Makes 1 generous bowl (double/triple as needed!)
-
1 grilled organic chicken breast, sliced – Why organic? Cleaner flavor! No hormones = happy chicken. Swap: Leftover rotisserie chicken, tofu, or chickpeas for plant-powered. Chef’s hack: Pound it even for faster cooking.
-
1 cup cooked cilantro lime rice – Use jasmine or basmati for fragrance. Swap: Quinoa or cauliflower rice. Chef’s insight: Toast rice in the pot pre-cooking for nutty depth!
-
1 cup fresh arugula – Adds a peppery kick! Swap: Baby spinach or massaged kale. Chef’s tip: Toss with a squeeze of lemon to prevent wilting.
-
1 tbsp extra virgin olive oil (EVOO) – Your flavor conductor! Use the good stuff. Swap: Avocado oil. Chef’s note: Drizzle last for fresh aroma.
-
2 tbsp pesto – Homemade shines, but jarred works (I love Costco’s!). Swap: Basil for cilantro pesto or sun-dried tomato. Vegan? Use nutritional yeast instead of cheese.
Building Your Flavor Masterpiece: Step-by-Step
-
Rice First, Friends!
-
Cook rice per package instructions. While hot, fluff with a fork and stir in chopped cilantro, lime zest, and juice.
-
Chef’s hack: Add a bay leaf while cooking rice—subtle earthiness! Cover and let steam off heat.
-
-
Chicken Charmer
-
Rub chicken with olive oil, salt, pepper, and a pinch of garlic powder.
-
Grill or pan-sear 5-7 mins/side until golden. Tip: DON’T move it until it releases easily—that’s your crust forming! Rest 5 mins before slicing.
-
-
Bowl Therapy Time
-
Spread arugula in your widest bowl (more surface area = more flavor mingling!).
-
Mound rice slightly off-center—visual appeal matters! Artfully layer chicken slices. Chef’s move: Fan them like a deck of cards.
-
-
The Drizzle Dance
-
Swirl pesto over chicken and rice. Drizzle EVOO in a zigzag. Hack: Warm pesto slightly for easier drizzling!
-
Toss lightly ONLY if you enjoy slightly wilted greens (I do!).
-
-
Final Flourish
-
Optional: Extra cilantro leaves, lime wedge, cracked pepper.
-
Chef’s secret: A sprinkle of flaky salt on top makes flavors SING.
-
Serving: Where Bowls Become Experience
This isn’t just dumping food in a dish—it’s edible artistry.
-
Use wide, shallow bowls so every layer shines.
-
Serve immediately while rice is warm and arugula crisp!
-
Pair with ice-cold sparkling water with lime, or a crisp Sauvignon Blanc.
-
For gatherings? Set up a DIY bowl bar with pesto, sliced chicken, rice, greens, and toppings like toasted pine nuts, avocado, or feta. Let guests build their own—food tastes better when it’s self-designed!
Shake It Up: 5 Delicious Twists
This bowl is your flavor playground! Try:
-
Mediterranean Magic – Swap pesto for tzatziki, add cucumber, olives, and feta.
-
Tex-Mex Fiesta – Use chipotle-lime rice, black beans, corn, and avocado crema.
-
Vegan Vibes – Roasted chickpeas instead of chicken, vegan pesto, and hemp seeds.
-
Seafood Splash – Garlic shrimp or lemon-pepper salmon instead of chicken.
-
Grain-Free Goodness – Cauliflower rice with extra lime, and double arugula.
Olivia’s Notebook: Confessions & Tips
-
True story: I once accidentally used mint instead of cilantro in the rice. Verdict? Surprisingly refreshing!
-
This recipe evolves constantly—last week I added charred corn and cotija cheese (obsessed).
-
It’s survived kitchen disasters, including the Great Pesto Spill of 2021 (RIP white apron).
-
Biggest lesson? Embrace imperfection. Chicken slightly overdone? Rice sticky? Still delicious.
-
Pro tip: Double the rice and chicken for meal prep. Store components separately; assemble hot rice + cold greens = perfect texture!
Your Questions, My Answers!
Q: My pesto separates/chunks up when drizzling. Help?
A: Warm it gently! Microwave 10 seconds or stir in 1 tsp warm water. If using homemade, ensure enough oil is blended in.
Q: Can I make this ahead without soggy greens?
A: Absolutely! Store rice, chicken, and arugula separately. Assemble right before eating. Keep pesto/EVOO in small containers.
Q: Chicken breast always turns out dry. What’s your secret?
A: Two game-changers:
-
Brine it! Soak chicken in saltwater (1 tbsp salt/cup water) 30 mins before cooking.
-
Cook to 165°F (71°C) exactly—use a thermometer! Resting 5 mins lets juices redistribute.
Q: Too lazy to grill chicken. Alternatives?
A: Bake at 400°F (200°C) 20 mins, or air-fry 12 mins! Or grab a rotisserie chicken. Zero judgment—I do it weekly!
Shake It Up: 5 Delicious Twists
This bowl is your flavor playground! Try:
- Mediterranean Magic Swap pesto for tzatziki, add cucumber, olives, and feta.
- Tex-Mex Fiesta Use chipotle-lime rice, black beans, corn, and avocado crema.
- Vegan Vibes Roasted chickpeas instead of chicken, vegan pesto, and hemp seeds.
- Seafood Splash Garlic shrimp or lemon-pepper salmon instead of chicken.
- Grain-Free Goodness Cauliflower rice with extra lime, and double arugula.
Olivia’s Notebook: Confessions & Tips
True story: I once accidentally used mint instead of cilantro in the rice. Verdict? Surprisingly refreshing! This recipe evolves constantly—last week I added charred corn and cotija cheese (obsessed). It’s survived kitchen disasters, including the Great Pesto Spill of 2021 (RIP white apron).
Biggest lesson? Embrace imperfection. Chicken slightly overdone? Rice sticky? Still delicious. This bowl’s resilience is why I love it—it meets you where you are. Pro tip: Double the rice and chicken for meal prep. Store components separately; assemble hot rice + cold greens = perfect texture!
Your Questions, My Answers!
Q: My pesto separates/chunks up when drizzling. Help?
A: Warm it gently! Microwave 10 seconds or stir in 1 tsp warm water. If using homemade, ensure enough oil is blended in.
Q: Can I make this ahead without soggy greens?
A: Absolutely! Store rice, chicken, and arugula separately. Assemble right before eating. Keep pesto/EVOO in small containers.
Q: Chicken breast always turns out dry. What’s your secret?
A: Two game-changers: 1) Brine it! Soak chicken in saltwater (1 tbsp salt/cup water) 30 mins before cooking. 2) Cook to 165°F (71°C) exactly—use a thermometer! Resting 5 mins lets juices redistribute.
Q: Too lazy to grill chicken. Alternatives?
A: Bake at 400°F (200°C) 20 mins, or air-fry 12 mins! Or grab a rotisserie chicken. Zero judgment—I do it weekly!
Pesto Chicken & Cilantro Lime Rice Bowl
Description
Hey kitchen friend! Olivia here, waving from my flour-dusted countertop. If you’re craving a meal that’s quick, fresh, and soul-hugging delicious, this bowl is your new best friend. Tender grilled chicken, zesty cilantro-lime rice, peppery arugula, and vibrant pesto all come together in 25 minutes flat—perfect for busy days and meal-prep wins!
Ingredients
-
1 grilled organic chicken breast, sliced
-
1 cup cooked cilantro lime rice (jasmine or basmati)
-
1 cup fresh arugula
-
2 tbsp pesto (homemade or good-quality jarred)
-
1 tbsp extra virgin olive oil (EVOO)
-
Fresh cilantro, lime wedges, flaky salt, and pepper for garnish
Instructions
-
Prep chicken: Rub chicken breast with olive oil, salt, pepper, and a pinch of garlic powder. Grill or pan-sear 5–7 mins per side until golden and cooked through. Let rest 5 mins before slicing.
-
Build your bowl: Spread arugula in a wide bowl. Mound the cilantro lime rice slightly off-center. Fan sliced chicken over the rice.
-
Add the magic: Drizzle pesto over chicken and rice. Finish with a zigzag of EVOO. (Warm pesto slightly for easier drizzling.)
-
Garnish: Top with extra cilantro leaves, cracked pepper, flaky salt, and a lime wedge.
Notes
-
Pesto too thick or separates? Warm gently or stir in a tsp of warm water.
-
Make ahead? Store components separately to keep greens crisp. Assemble before eating.
-
Dry chicken? Brine 30 mins before cooking and cook to 165°F (71°C), then rest.
-
Nutrition
- Calories: 500 cal Per Serving
- Fat: 28g
- Carbohydrates: 30g
- Fiber: 3g
- Protein: 36g
Nutritional Nibbles (Approx Per Serving)
Calories: 500 | Protein: 36g | Carbs: 30g | Fat: 28g | Fiber: 3g
Note: Stats vary based on pesto/chicken size. Add veggies to boost fiber!
Prep Time: 10 mins | Cook Time: 15 mins | Total Time: 25 mins
Final Thought: Why This Bowl Wins Every Time
This isn’t just a meal—it’s a mood lifter, a time-saver, and a flavor bomb. It’s the kind of dish that feels fancy but takes zero effort, that’s healthy but doesn’t skimp on satisfaction. Whether you’re meal-prepping for the week or need a quick dinner win, this bowl has your back.
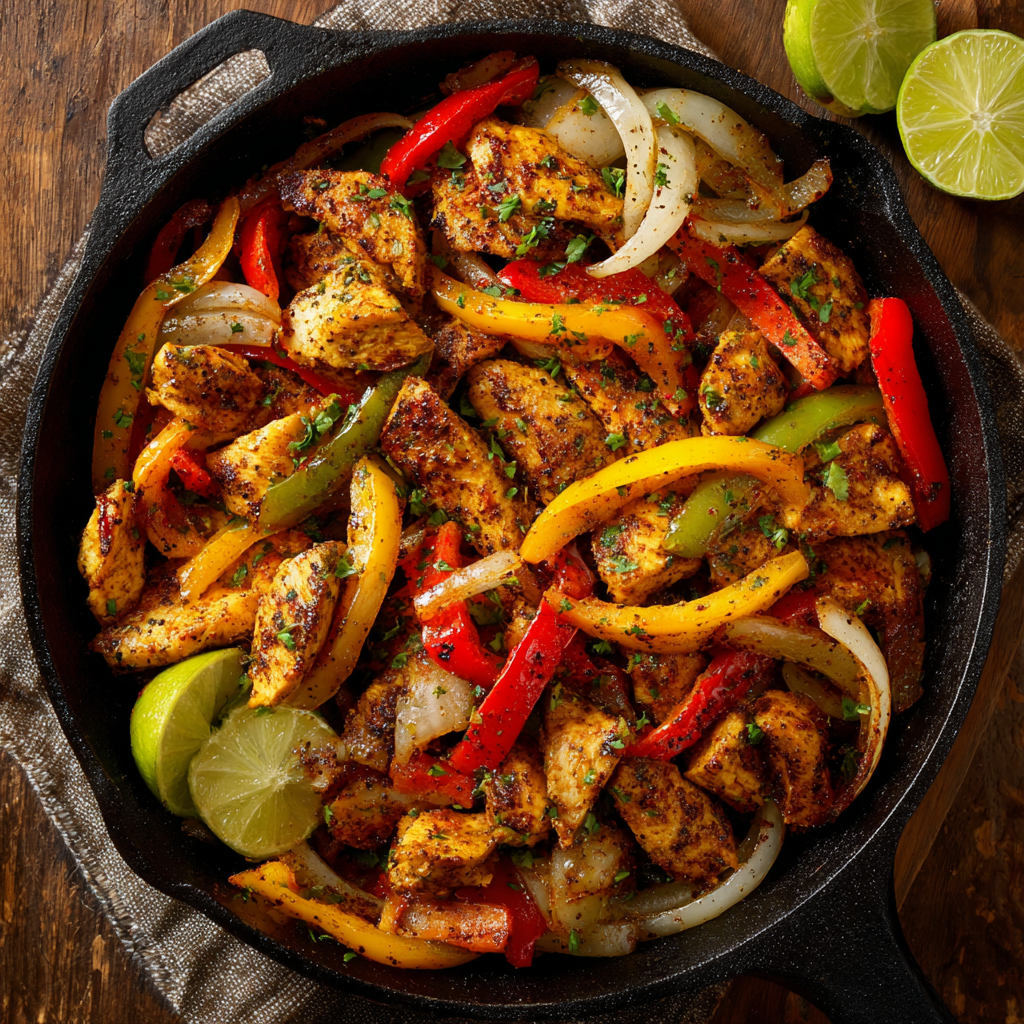
FAJITA MARINADE
Fajita Marinade: Your Secret Weapon for Sizzle-Worthy Nights
Hey there, kitchen friend! Olivia here, apron slightly dusted with chili powder and lime zest under my nails—because when fajita inspiration strikes, I dive right in. You know that moment when sizzling platters hit the table? That cloud of smoky-sweet perfume hitting your nose? The happy silence as everyone piles colorful toppings onto warm tortillas? That’s the magic we’re making today. Forget those sad, one-note store-bought marinades. This zesty, vibrant blend is your golden ticket to fajitas that’ll make your crew cheer—whether it’s Tuesday tacos or fiesta Friday. I’ve tweaked this recipe for years, balancing bright citrus, earthy spices, and just enough honey-kissed sweetness to make every bite sing. Grab a bowl and let’s turn ordinary chicken, steak, or veggies into a showstopper that cooks fast but tastes like you fussed for hours. Trust me—your skillet’s about to become the star of the show. 🔥
Why This Marinade Feels Like Home
Picture this: It’s my college apartment, circa 2012. I’m hosting six friends in a kitchen barely big enough for two. My budget? Tight. My cooking skills?… Optimistic. I attempted fajitas with a pre-mixed spice packet, only to watch them turn into sad, chewy strips. My friend Carlos—a Texan with BBQ in his blood—took pity. He rummaged through my spice drawer, grabbed a lime, and whipped up a marinade right there. “Olivia,” he laughed, “flavor shouldn’t come from a foil packet.” That impromptu blend (the OG version of this recipe!) transformed my rubbery chicken into tender, char-kissed glory. We ate straight from the skillet, tortillas torn like savages, and I realized: great food isn’t about perfection. It’s about joy, mess, and sharing what you love. Now, every time I whisk this up, I’m back at that wobbly table, surrounded by friends, thinking… Damn, Carlos was right.
Your Flavor Toolkit: Simple Ingredients, Big Impact
- ¼ cup olive oil – The flavor carrier! Extra virgin adds fruitiness, but regular works. Swap with avocado oil for higher smoke points on grills.
- 2 tbsp honey – Balances acidity and creates gorgeous caramelization. Vegan? Maple syrup or agave work beautifully.
- Juice of 1 lime (≈2 tbsp) – Please use fresh! Bottled lacks brightness. No lime? Lemon in a pinch, but add extra chili powder.
- 1 tsp each: onion powder + garlic powder – The savory backbone. No onion powder? Double the garlic. Fresh minced garlic works (use 2 cloves).
- 1 tsp chili powder – Mild warmth. For extra kick, add ¼ tsp cayenne or use hot chili powder.
- 1 tsp paprika – Smoked paprika is my secret for campfire depth! Sweet paprika works if that’s all you have.
- ½ tsp ground cumin – Earthy magic. Toasting whole seeds then grinding? *Chef’s kiss*.
- Salt & pepper to taste – Start with ½ tsp salt + ¼ tsp pepper. Adjust after marinating.
Chef insight: Spices lose potency after 6 months! Sniff test yours—if they don’t smell vibrant, replace them. This marinade is forgiving, so tweak to your taste!
Let’s Make Magic: Step-by-Step
- Combine & Conquer: Dump everything into a jar or bowl. Whisk like you mean it—or seal the jar and shake like a salsa dancer! Tip: Warm honey blends easier. Microwave it for 5 seconds first.
- Marinate Like a Boss: Pour over 1 lb protein/veggies in a resealable bag or dish. Massage it in—get hands-on for max flavor penetration! Hack: For chicken breasts, slice them before marinating. More surface area = more flavor!
- The Waiting Game: Chill for at least 30 minutes (okay in a rush), but 2-4 hours is sweet spot. Overnight? YES—especially for steak. Warning: Don’t marinate shrimp over 30 mins—citrus “cooks” them!
- Sizzle Time: Heat a skillet/grill screaming hot. Shake off excess marinade (wipe for grill to avoid flare-ups). Cook in a single layer—don’t crowd the pan! That steam-robs char. Flip once when edges caramelize. Pro move: Add reserved marinade to the pan last 60 seconds for a glossy glaze.
Why this works: Oil carries flavor deep, acid tenderizes, honey caramelizes, and spices? Well, they’re the party starters. 🔥
The Science Behind the Sizzle: Why This Marinade Works
This isn’t just a random mix of ingredients—it’s a carefully calibrated flavor bomb designed to tenderize, caramelize, and mesmerize. Let’s break down the chemistry:
Oil’s Role: Olive oil isn’t just a carrier for flavors; its fat content helps distribute fat-soluble compounds in spices (like capsaicin in chili powder) evenly. It also creates a barrier that locks in moisture during high-heat cooking, preventing protein fibers from tightening too much.
Acid Magic: Lime juice (or vinegar in a pinch) does double duty. Its acidity gently breaks down muscle fibers in meat, tenderizing it, while also brightening the marinade’s overall flavor. For veggies like portobellos or bell peppers, it helps soften cell walls for better texture.
Sugar’s Secret: Honey isn’t just for sweetness—its natural sugars accelerate the Maillard reaction (that gorgeous browning) at lower temperatures. This means deeper color and more complex flavor without risking burnt spices.
Spice Synergy:
-
Cumin + Chili Powder: Cumin’s earthy notes (from cuminaldehyde) complement chili’s heat (capsaicin), creating a rounded warmth.
-
Smoked Paprika: Adds depth with its woody, slightly sweet compounds (thanks to the smoking process).
-
Garlic/Onion Powder: These umami-packed alliums amplify savory notes more efficiently than fresh versions in marinades (no risk of burning!).
Pro Tip: For maximum flavor penetration, score thicker cuts of meat lightly before marinating. And always pat protein dry before cooking—excess marinade steams instead of sears!
Beyond Fajitas: 5 Unexpected Uses for This Marinade
This versatile blend isn’t just for sizzling skillets. Here’s how to repurpose it:
1. Grilled Vegetable Antipasto: Toss zucchini, eggplant, and cherry tomatoes in the marinade, then roast at 425°F until charred. Serve with burrata and crusty bread.
2. Sheet-Pan Chicken Thighs: Coat bone-in thighs and surround them with cubed sweet potatoes. Bake at 375°F for 40 minutes—the honey caramelizes into a sticky glaze.
3. Tex-Mex Pizza: Brush onto naan or pizza dough, top with shredded chicken, pickled jalapeños, and Monterey Jack. Bake until bubbly.
4. Quinoa Power Bowls: Whisk 1 tbsp marinade with Greek yogurt for a dressing. Drizzle over grains, black beans, and avocado.
5. Breakfast Tacos: Marinate cubed tofu or chorizo, then scramble with eggs. Serve with warm tortillas and pico de gallo.
Why It Works: The marinade’s balance of acid, fat, and spice adapts to almost any cooking method. For soups or stews, simmer reserved marinade (strained) with broth for instant depth.
Fajita Night Like a Pro: Hosting Hacks & Pairings
Turn your kitchen into a taqueria with these tips:
The Spread:
-
Tortilla Bar: Offer both corn and flour tortillas (keep warm in a clay warmer or slow cooker).
-
Toppings Station: Include quick-pickled onions (soak sliced red onions in lime juice + salt for 15 mins), charred corn salsa, and crema (sour cream thinned with milk).
-
Sides: Mexican street corn salad, cilantro-lime rice, or a crisp jicama slaw cut the richness.
Timing Tricks:
-
Prep Ahead: Marinate protein/veg up to 24 hours prior. Chop all toppings and store in containers.
-
Cook in Batches: Sear protein first, then veggies in the same pan (they’ll soak up residual marinade flavors).
-
Keep Warm: Hold cooked fajitas in a 200°F oven on a wire rack-lined sheet (prevents sogginess).
Drink Pairings:
-
Classic: Margaritas with a tajín rim or micheladas.
-
Kid-Friendly: Sparkling limeade with chia seeds.
-
Coffee Lovers: Mexican hot chocolate with a pinch of cayenne.
Pro Move: Set out mini molcajetes for guests to grind custom spice blends (cumin seeds, dried chiles, salt) as a fun pre-dinner activity.
Serve It Up: Fiesta on a Plate!
Slide those sizzling strips onto a warm platter (heat it in the oven first—so restaurant-style). Pile high with seared bell peppers and onions cooked in the same skillet. Serve with: warm corn tortillas (wrap in a damp towel + microwave 30 sec), quick-pickled red onions, chunky guac, cotija cheese crumbles, and lime wedges. Let everyone build their own! Bonus points for Mexican street corn or black beans on the side.
Shake It Up: 5 Tasty Twists
- Spicy Fiesta: Add 1 minced chipotle in adobo + 1 tsp adobo sauce.
- Tropical Vibes: Swap lime for orange juice + add 1 tsp grated ginger.
- Umami Bomb: Replace 1 tbsp oil with soy sauce or tamari (great for mushrooms!).
- Creamy & Cool: After cooking, drizzle with cilantro-lime crema (Greek yogurt + lime zest + cilantro).
- Vegan Power: Use for cauliflower steaks, portobellos, or tofu. Add 1 tbsp nutritional yeast for “cheesy” depth.
Olivia’s Kitchen Confessions
This recipe evolved from Carlos’s college rescue mission to my weekly staple. Once, I doubled the chili powder… while sleep-deprived with a newborn. Let’s just say our fajitas could’ve powered a rocket! 🌶️🚀 Now I keep a batch frozen in ice cube trays—pop a cube onto chicken before work, and dinner’s halfway done. Funny thing? My kids call it “Mom’s Magic Sauce” and dunk everything in it—even carrot sticks! Pro tip: Make a double batch. Use half for fajitas, half as salad dressing (thin with water) or grain bowl drizzle. It’s the little black dress of marinades—dresses up everything.
Your Questions, Answered!
Q: Can I use bottled lime juice?
A: In a pinch? Sure. But fresh adds zingy brightness bottled can’t match. Need shelf-stable? Freeze fresh juice in teaspoons!
Q: Why did my chicken turn out tough?
A: Two culprits: Overcooking (use a meat thermometer—165°F for chicken) or acidic marinade too long. For chicken breasts, 2-4 hours max. Thighs? Overnight’s fine!
Q: Can I freeze the marinade?
A: Absolutely! Freeze pre-mixed in jars (leave ½” space) for 3 months. Thaw in fridge. Do not marinate then freeze raw meat—texture nightmare!
Q: No honey? Best sub?
A: Maple syrup or agave work! For sugar-free, try 1 tbsp orange juice concentrate + ½ tsp liquid stevia.
FAJITA MARINADE
- Total Time: 11 minute
Description
Hey there, kitchen friend! Olivia here, apron dusted with chili powder and lime zest. If you love the magic of sizzling fajitas—smoky, tangy, sweet, and bursting with flavor—this marinade is your golden ticket. Whether you’re grilling chicken, steak, or veggies, this easy, vibrant blend transforms everyday ingredients into a fiesta everyone will cheer for. Let’s dive in!
Ingredients
-
¼ cup olive oil (or avocado oil for higher smoke point)
-
2 tbsp honey (or maple syrup/agave for vegan)
-
Juice of 1 lime (about 2 tbsp) – fresh preferred!
-
1 tsp onion powder
-
1 tsp garlic powder
-
1 tsp chili powder (add cayenne for heat)
-
1 tsp paprika (smoked if possible)
-
½ tsp ground cumin
-
½ tsp salt (adjust after marinating)
-
¼ tsp black pepper
Instructions
-
Mix it up: Whisk all ingredients in a bowl or shake in a jar until well combined. Warm honey helps it blend smoothly.
-
Marinate: Pour marinade over about 1 lb protein or veggies in a resealable bag or bowl. Massage to coat. For chicken breasts, slice thinly first for better flavor penetration.
-
Chill: Refrigerate at least 30 minutes; 2-4 hours best; no more than 30 minutes for shrimp.
-
Cook: Heat skillet or grill to high. Shake off excess marinade (wipe off for grilling to avoid flare-ups). Cook in a single layer, flipping once when edges char and caramelize.
-
Glaze: Add reserved marinade to pan in last minute for glossy finish.
Notes
-
Use fresh spices for max flavor — stale ones dull your marinade.
-
Keep a batch frozen in ice cube trays for quick meals.
-
Double recipe — great as salad dressing or grain bowl drizzle (thin with water).
-
Avoid over-marinating acidic proteins like shrimp to prevent “cooking.”
-
Meat thermometer is your friend: chicken done at 165°F
- Prep Time: 5 minutes
- Cook Time: 8-12 minutes
Nutrition
- Calories: 100 cal Per Serving
- Sugar: 4g
- Fat: 9g
- Carbohydrates: 5g
- Protein: 0g
Nutritional Notes (because balance is delicious!)
Per 2 tbsp marinade (covers ≈1 lb protein/veg):
Calories: ~100 • Carbs: 5g • Fat: 9g • Sugar: 4g • Protein: 0g
Note: Most marinade stays in the bowl, so you consume less. Values exclude meat/veg.
Final Thoughts: More Than a Recipe
This marinade is a passport to memories—the kind where limes roll off counters, laughter drowns out sizzling skillets, and someone inevitably steals the last charred pepper from the platter. It’s proof that the best meals aren’t about precision, but about the stories shared while scraping the last bits from the pan.
So here’s my challenge: Make it your own. Swap in pineapple juice for lime, add a splash of tequila to the mix, or slather it on grilled peaches for dessert. Then pass it on—to your neighbor, your teen learning to cook, or that friend who “only makes reservations.” Because flavor this good deserves to be shared, one messy, delicious bite at a time.
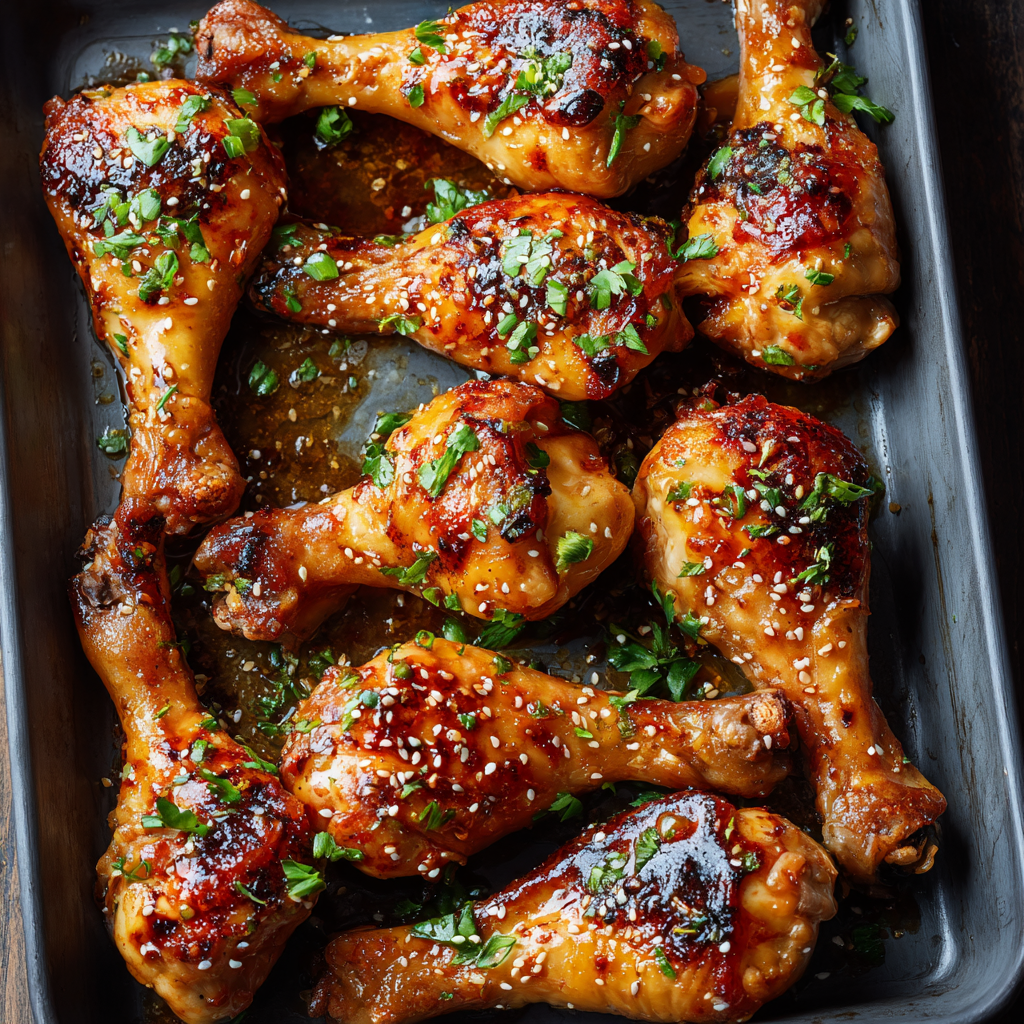
HONEY GLAZED CHICKEN LEGS
Sticky Fingers & Happy Hearts: Let’s Make Honey Glazed Chicken Legs!
Hey there, kitchen friend! Olivia here, apron dusted with flour (and probably a smudge of honey), ready to share a recipe that’ll make your taste buds dance and your kitchen smell like pure, golden comfort. If you’ve ever craved that magical combo of sweet, savory, and fall-off-the-bone tender, you’re in for a treat. These Honey Glazed Chicken Legs are my weeknight superheroes—minimal effort, maximum flavor fireworks. Imagine juicy chicken legs bathed in a glossy, sticky-sweet glaze whispering with garlic, ginger, and that deep umami hug from soy sauce. It’s the kind of dish that makes everyone hover near the oven, forks at the ready. Whether you’re cooking for your rowdy crew or just treating yourself, this recipe is your ticket to feeling like a kitchen rockstar. No fancy skills needed—just a bowl, a baking dish, and a whole lot of delicious anticipation. Let’s turn simple ingredients into pure, sticky magic!
The Night the Honey Glaze Saved Dinner (and My Sanity)
Picture this: It’s a chilly autumn Friday. My best friends are arriving in 45 minutes for our monthly potluck, and my planned main dish… well, let’s just say it met an unfortunate demise with the kitchen floor. Panic mode? Absolutely. Then I spotted a pack of chicken legs hiding in the fridge and my trusty honey bear. Desperation birthed inspiration! I whisked together honey, soy sauce, garlic and ginger powder (no time for fresh!), a sprinkle of cornstarch, and drowned those legs in it. Into the oven they went. The smell? Heavenly. The result? Pure, sticky, caramelized perfection. My friends raved, demanded the recipe, and declared it “Olivia’s Famous Save-the-Day Chicken.” That messy, chaotic night cemented this dish as my go-to for flavor, ease, and guaranteed smiles. It reminds me that sometimes the best memories (and meals!) come from happy accidents.
Your Flavor Toolkit: What You’ll Need
- 6 chicken legs (drumsticks): Bone-in, skin-on is KEY for maximum juiciness and that glorious crispy skin that soaks up the glaze. Chef’s Insight: Drumsticks are forgiving and budget-friendly! Swap for thighs if you prefer.
- 1/4 cup honey: The sticky star! It caramelizes beautifully. Sub Tip: Pure maple syrup works for a slightly different sweetness. Avoid artificial syrups—they won’t caramelize right.
- 1/4 cup soy sauce: Our salty, umami powerhouse. Sub Tip: Use tamari for gluten-free, or coconut aminos for a soy-free, slightly sweeter option.
- 1 tsp garlic powder: Convenient, consistent flavor. Chef’s Insight: Fresh garlic (2-3 cloves, minced) is amazing, but powder ensures no burnt bits during baking.
- 1/2 tsp ginger powder: Adds that warm, zippy backbone. Sub Tip: Swap in 1 tbsp freshly grated ginger for a brighter punch!
- 1 tsp cornstarch: The secret weapon for a thick, luscious glaze (not a runny sauce!). Sub Tip: Arrowroot powder works equally well.
- Salt & pepper to taste: Start with 1/4 tsp salt (soy sauce is salty!) and a good crack of black pepper. Adjust after marinating.
Why this combo rocks: Honey + Soy is a classic duo. Garlic and ginger add depth, while cornstarch transforms the marinade into that dreamy, clingy glaze we crave. Simple magic!
Let’s Get Glazing: Your Foolproof Steps
1. Whisk Up the Golden Elixir: Grab a medium bowl (big enough to fit the chicken!). Whisk together the honey, soy sauce, garlic powder, ginger powder, cornstarch, salt, and pepper. Whisk like you mean it until it’s smooth and the cornstarch is completely dissolved – no lumps allowed! Chef Hack: If your honey is stiff, warm the bowl slightly or pop it in the microwave for 10 seconds to make whisking easier.
2. Marinate & Mingle: Add the chicken legs to the bowl. Use your hands or tongs to toss and massage every nook and cranny, ensuring they’re fully coated in that gorgeous glaze. Cover the bowl tightly. Chef’s Crucial Tip: Let them hang out in the fridge for at least 30 minutes. Want next-level flavor? Do it overnight! The longer they bathe, the deeper the flavor penetrates.
3. Preheat & Prep: Preheat your oven to 375°F (190°C). While it heats, line a baking dish (large enough to hold the legs in a single layer!) with foil. Trust me, this makes cleanup a breeze. Chef Insight: A light spray of oil on the foil prevents *any* potential sticking, even with all that glaze.
4. Bake to Sticky Perfection: Arrange the chicken legs in your prepared dish. Pour every last drop of that marinade over them – this is liquid gold! Slide it into the preheated oven, uncovered. Bake for 40-45 minutes. Chef’s Magic Move: Baste the legs generously with the pan juices at the 20-minute and 35-minute marks. This builds layers of flavor and that incredible gloss.
5. The Grand Finale (Broil!): Once the chicken is cooked through (internal temp 165°F/74°C – use a thermometer!) and the glaze is bubbling and thickened, crank the oven to BROIL (High, if you have options). Watch CLOSELY! Broil for 2-3 minutes just until the tops get beautifully caramelized and slightly charred in spots. Chef Warning: Broiling is fast! Don’t walk away, or you might have *too* much char. Pull them out when they look irresistible.
6. Rest & Resist: Let the chicken legs rest in the pan for 5 minutes. This lets the juices redistribute, making them even more succulent. Chef’s Confession: This is the hardest part – resisting the urge to dive in immediately!
Plating Up the Happiness
Pile those gorgeous, sticky legs high on a warm platter! Spoon any remaining pan glaze generously over the top. For a pop of color and freshness, scatter over some thinly sliced green onions or a sprinkle of toasted sesame seeds. This dish screams comfort, so pair it with simple sides that soak up the sauce: fluffy steamed rice, creamy mashed potatoes, or roasted sweet potatoes are perfect. A bright, crunchy side salad with a ginger-sesame dressing cuts through the richness beautifully. Don’t forget napkins – the sticky fingers are part of the fun!
Mix It Up! Flavorful Twists
This recipe is your canvas! Get creative:
- Spicy Kick: Add 1/2 tsp red pepper flakes or 1 tbsp sriracha to the marinade. Sweet heat is addictive!
- Citrus Zing: Whisk in 1 tbsp fresh orange or lime juice + 1 tsp zest with the marinade. Brightens everything up.
- Herb Garden: Stir 1 tbsp finely chopped fresh rosemary or thyme into the glaze before marinating.
- BBQ Fusion: Replace 1 tbsp honey with 1 tbsp of your favorite BBQ sauce for a smoky twist.
- Veggie Power (Vegan Option): Use firm tofu blocks or cauliflower florets! Marinate as directed, reduce baking time to 25-30 mins (or until tofu is golden/cauliflower tender). Use tamari/coconut aminos and maple syrup.
Olivia’s Extra Nuggets of Wisdom
This recipe truly evolved from that chaotic potluck night! I initially just threw things together, but over time, I learned the cornstarch trick was essential for that clingy glaze (not a pool of sauce!), and the broiler step? Total game-changer for that restaurant-quality finish. One hilarious fail early on: I used a glass dish without foil AND forgot the cornstarch. Cleaning that baked-on, runny mess was… an adventure. Lesson learned! Now, I always use foil and double-check the cornstarch. It’s become my ultimate “impress-with-minimal-stress” dish. The beauty is in its simplicity – the ingredients are pantry staples, but the result feels special. Don’t be afraid to play with the flavors and make it yours!
Your Honey Glazed Chicken Questions, Answered!
Q1: Can I use boneless, skinless chicken breasts instead?
A: You *can*, but proceed with caution! Breasts dry out faster. Reduce baking time to 25-30 minutes and check the internal temp (165°F/74°C) early. They won’t be as juicy or caramelized as legs/thighs, but the flavor will still be good. I highly recommend sticking with bone-in, skin-on thighs or legs for best results!
Q2: My glaze didn’t thicken up! What happened?
A: Don’t panic! This usually means: 1) The cornstarch wasn’t fully dissolved in the cold marinade (whisk vigorously!). 2) The dish was overcrowded, steaming the chicken instead of baking. 3) The oven temp was too low – use an oven thermometer to check accuracy. Fix: If it’s runny after baking, carefully pour the pan juices into a small saucepan. Mix 1 tsp cornstarch with 1 tbsp cold water, whisk into the juices, and simmer for 1-2 minutes until thickened. Pour back over chicken.
Q3: Can I prep this ahead of time?
A: Absolutely! This is a meal prep dream. Marinate the chicken in the glaze in a sealed container or bag for up to 24 hours in the fridge. When ready, just pop them in the baking dish and bake! You can also bake them fully, let cool, and store covered in the fridge for 3-4 days. Reheat gently in a 350°F (175°C) oven until warmed through.
Q4: Is it safe to use the marinade that touched raw chicken as the sauce?
A: YES, because we bake it! The marinade gets boiled in the oven (reaching well above 165°F/74°C) while cooking the chicken, making it perfectly safe and delicious to use/serve.
HONEY GLAZED CHICKEN LEGS
- Total Time: about 1 hour (or longer if marinating overnight)
Description
Hey kitchen friend! Olivia here, apron dusted with flour (and probably honey too). If you’re craving juicy, tender chicken legs coated in a sticky, sweet-savory glaze bursting with garlic, ginger, and umami, this recipe is for you. Minimal effort, maximum flavor, and all the cozy vibes you want on a weeknight. Let’s make some magic!
Ingredients
-
6 chicken legs (drumsticks), bone-in, skin-on
-
1/4 cup honey
-
1/4 cup soy sauce (or tamari/coconut aminos)
-
1 tsp garlic powder (or 2–3 cloves fresh garlic, minced)
-
1/2 tsp ginger powder (or 1 tbsp fresh grated ginger)
-
1 tsp cornstarch (or arrowroot powder)
-
1/4 tsp salt (adjust for soy sauce saltiness)
-
Freshly ground black pepper, to taste
-
Optional garnish: sliced green onions, toasted sesame seeds
Instructions
-
Whisk your glaze: In a medium bowl, combine honey, soy sauce, garlic powder, ginger powder, cornstarch, salt, and pepper. Whisk well until smooth and cornstarch fully dissolved. Tip: Warm the honey slightly if needed for easier mixing.
-
Marinate: Add chicken legs and toss to coat fully. Cover and refrigerate for at least 30 minutes (overnight for deeper flavor).
-
Prep the oven & pan: Preheat oven to 375°F (190°C). Line a baking dish with foil and lightly spray with oil.
-
Bake: Arrange legs in a single layer, pour marinade over them. Bake uncovered for 40-45 minutes, basting with pan juices at 20 and 35 minutes.
-
Broil finish: Increase oven to BROIL. Broil 2-3 minutes until caramelized and slightly charred. Watch carefully!
-
Rest: Let chicken rest 5 minutes in pan before serving.
Notes
-
Cornstarch is key for that thick, clingy glaze—not just a runny sauce.
-
Broiling caramelizes and adds texture—don’t skip!
-
Marinate longer for deeper flavor and tenderness.
-
Use skin-on chicken for juiciness and crispiness.
-
Can prep ahead: Marinate up to 24 hours; fully cooked legs keep 3-4 days refrigerated.
-
Safety note: The marinade cooks thoroughly during baking, safe to serve as sauce.
- Prep Time: 10 minutes active + 30 minutes to overnight rest
- Cook Time: 40-45 minutes
Nutrition
- Calories: 295 cal Per Serving 2 legs
- Fat: 16g
- Carbohydrates: 15g
- Protein: 22g
Nutritional Info (Per Serving – Approximate, 2 legs per serving)
Calories: ~295 | Protein: 22g | Carbohydrates: 15g | Fat: 16g
Note: This is an estimate. Values can vary based on specific ingredients used (e.g., type of soy sauce, exact honey amount, chicken size).
Final Thoughts: More Than Just a Recipe
These honey glazed chicken legs represent everything great home cooking should be—approachable yet impressive, simple but deeply flavorful, messy but memorable. What starts as a few basic ingredients transforms through the alchemy of heat and time into something greater than the sum of its parts.
The true beauty of this recipe lies in its versatility. It’s equally at home on a weeknight dinner table as it is at a summer barbecue or holiday spread. It welcomes experimentation but remains foolproof for beginners. It satisfies kids and gourmands alike. Most importantly, it creates those intangible moments of connection—whether it’s friends fighting over the last piece or a quiet evening savoring each sticky bite.
So embrace the mess, lick your fingers proudly, and know that sometimes the simplest recipes create the richest experiences. After all, food isn’t just fuel—it’s love, chemistry, and shared humanity, all glazed together in one perfect bite.
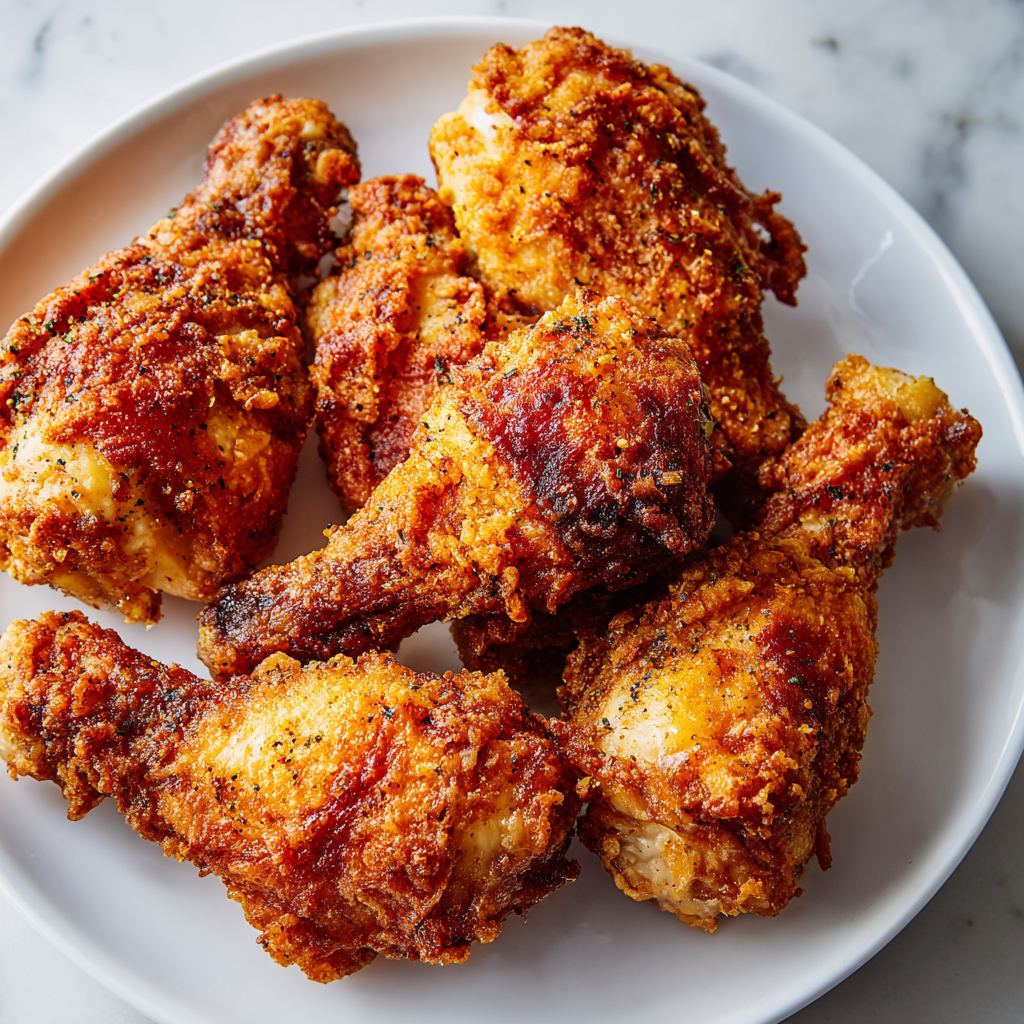
OVEN-FRIED CHICKEN LEGS
Why Oven-Fried Chicken Legs Are My Ultimate Comfort Food Crush
Hey there, kitchen friend! Olivia here, apron dusted with flour and heart full of excitement. There’s something magical about that moment when golden, crispy chicken emerges from the oven—the crackle of the crust, the steam carrying garlicky promises, and the happy sighs around the table. If you’ve ever hesitated to make fried chicken because of the oil-splattered stovetop (or that lingering “eau de fry” in your hair for days), let’s hug it out. These Oven-Fried Chicken Legs? They’re your crispy, juicy, mess-free redemption arc. Picture this: drumsticks baked in sizzling butter until their coating shatters like autumn leaves, while the inside stays so tender, it practically winks at you. No deep fryer, no regrets. Just pure, uncomplicated joy. Whether you’re a weeknight warrior or a Sunday supper dreamer, this recipe is your ticket to that nostalgic crunch—with extra time for sipping wine and pretending you’re on a cooking show. Ready to make magic? Let’s dive in!
The Midnight Chicken Rebellion (and Why Drumsticks Rule)
Confession time: This recipe was born during my college “rebellious phase”—which, for a food-obsessed student, meant defying dining hall pizza at 2 a.m. My roommate Jess and I would raid our tiny kitchenette, armed with discount drumsticks and big dreams. One fateful night, we attempted frying… and set off the smoke detector. Twice. Cue us frantically waving towels as our dorm neighbors pounded on the door! That’s when oven-frying became our secret weapon. We’d toss legs in flour, melt butter in a rusty pan, and bake them while cramming for exams. The smell alone made us feel like grown-ups who had life figured out (we didn’t). To this day, that crispy-but-humble vibe reminds me: great food isn’t about perfection. It’s about laughter, improvising, and licking butter off your fingers. Drumsticks? They’re forgiving, cheap, and fit perfectly in hungry hands—just like those chaotic, beautiful nights.
Your Crispy Chicken Toolkit (Plus Clever Swaps!)
Gather these simple stars—each plays a delicious role. Don’t stress if you need to swap; cooking’s an adventure!
- Chicken legs (6) – Drumsticks are MVP here! Their bone-in goodness keeps meat juicy. Chef’s tip: Skin-on is non-negotiable for crunch. Swap with thighs, but reduce cook time by 5 mins.
- Salted butter (1/4 cup) – Our “frying” hero! Salted butter adds depth. Substitution: Use ghee for nuttiness or olive oil for dairy-free (but expect less browning).
- All-purpose flour (3/4 cup) – The crispy blanket. Chef’s insight: Whisk it well to aerate—lighter coating = better crunch. For gluten-free, try 1:1 GF flour or almond flour + 1 tsp cornstarch.
- Paprika (1 tsp) – Color and warmth! Fun twist: Smoked paprika adds campfire vibes, or use cayenne for heat.
- Salt (1 tsp) & black pepper (1/2 tsp) – Flavor anchors. Pro move: Season chicken lightly first for extra oomph inside.
See? No fancy-pants ingredients. Just pantry rockstars!
Let’s Build That Crunch (Step-by-Step with Secrets!)
Follow these easy steps—I’ve tucked chef hacks into every fold. You’ve got this!
- Preheat oven to 425°F (220°C). Place butter in a 9×13-inch baking dish and melt in oven. Why this works: Hot butter = instant sizzle = crispy kickstart! Hack: Use a glass or ceramic dish—metal can over-brown. Butter should bubble but not burn (3-5 mins).
- In a bowl, combine flour, paprika, salt, and pepper. Chef’s secret: Whisk like you mean it! Lumpy flour = patchy coating. Add 1 tsp garlic powder here if you’re feeling sassy.
- Coat chicken legs in flour mix, pressing to stick. Game-changer: Press HARD. Get under the skin edges. Let sit 5 mins—this “sets” the coating so it won’t slide off.
- Remove dish from oven (butter should sizzle!). Place chicken in dish, turning once to coat. Tip: Tongs are your BFF! That butter is HOT. Turn fast—every second counts for buttery coverage.
- Bake uncovered 40-45 mins, flipping halfway, until cooked through and crispy. Golden rule: Flip at 20 mins! Use a timer. Doneness test: Internal temp = 165°F (74°C) at the thickest part. No thermometer? Juices should run clear.
- Rest 5 mins before serving. Patience, grasshopper: Resting = crunch lock-in. Cover loosely with foil if waiting longer.
Flip with confidence—that’s where the magic happens!
Why Oven-Fried Chicken Legs Are My Ultimate Comfort Food Crush
Hey there, kitchen friend! Olivia here, apron dusted with flour and heart full of excitement. There’s something magical about that moment when golden, crispy chicken emerges from the oven—the crackle of the crust, the steam carrying garlicky promises, and the happy sighs around the table. If you’ve ever hesitated to make fried chicken because of the oil-splattered stovetop (or that lingering “eau de fry” in your hair for days), let’s hug it out. These Oven-Fried Chicken Legs? They’re your crispy, juicy, mess-free redemption arc. Picture this: drumsticks baked in sizzling butter until their coating shatters like autumn leaves, while the inside stays so tender, it practically winks at you. No deep fryer, no regrets. Just pure, uncomplicated joy. Whether you’re a weeknight warrior or a Sunday supper dreamer, this recipe is your ticket to that nostalgic crunch—with extra time for sipping wine and pretending you’re on a cooking show. Ready to make magic? Let’s dive in!
The Midnight Chicken Rebellion (and Why Drumsticks Rule)
Confession time: This recipe was born during my college “rebellious phase”—which, for a food-obsessed student, meant defying dining hall pizza at 2 a.m. My roommate Jess and I would raid our tiny kitchenette, armed with discount drumsticks and big dreams. One fateful night, we attempted frying… and set off the smoke detector. Twice. Cue us frantically waving towels as our dorm neighbors pounded on the door! That’s when oven-frying became our secret weapon. We’d toss legs in flour, melt butter in a rusty pan, and bake them while cramming for exams. The smell alone made us feel like grown-ups who had life figured out (we didn’t). To this day, that crispy-but-humble vibe reminds me: great food isn’t about perfection. It’s about laughter, improvising, and licking butter off your fingers. Drumsticks? They’re forgiving, cheap, and fit perfectly in hungry hands—just like those chaotic, beautiful nights.
Your Crispy Chicken Toolkit (Plus Clever Swaps!)
Gather these simple stars—each plays a delicious role. Don’t stress if you need to swap; cooking’s an adventure!
-
Chicken legs (6) – Drumsticks are MVP here! Their bone-in goodness keeps meat juicy. Chef’s tip: Skin-on is non-negotiable for crunch. Swap with thighs, but reduce cook time by 5 mins.
-
Salted butter (1/4 cup) – Our “frying” hero! Salted butter adds depth. Substitution: Use ghee for nuttiness or olive oil for dairy-free (but expect less browning).
-
All-purpose flour (3/4 cup) – The crispy blanket. Chef’s insight: Whisk it well to aerate—lighter coating = better crunch. For gluten-free, try 1:1 GF flour or almond flour + 1 tsp cornstarch.
-
Paprika (1 tsp) – Color and warmth! Fun twist: Smoked paprika adds campfire vibes, or use cayenne for heat.
-
Salt (1 tsp) & black pepper (1/2 tsp) – Flavor anchors. Pro move: Season chicken lightly first for extra oomph inside.
See? No fancy-pants ingredients. Just pantry rockstars!
Let’s Build That Crunch (Step-by-Step with Secrets!)
Follow these easy steps—I’ve tucked chef hacks into every fold. You’ve got this!
-
Preheat oven to 425°F (220°C). Place butter in a 9×13-inch baking dish and melt in oven. Why this works: Hot butter = instant sizzle = crispy kickstart! Hack: Use a glass or ceramic dish—metal can over-brown. Butter should bubble but not burn (3-5 mins).
-
In a bowl, combine flour, paprika, salt, and pepper. Chef’s secret: Whisk like you mean it! Lumpy flour = patchy coating. Add 1 tsp garlic powder here if you’re feeling sassy.
-
Coat chicken legs in flour mix, pressing to stick. Game-changer: Press HARD. Get under the skin edges. Let sit 5 mins—this “sets” the coating so it won’t slide off.
-
Remove dish from oven (butter should sizzle!). Place chicken in dish, turning once to coat. Tip: Tongs are your BFF! That butter is HOT. Turn fast—every second counts for buttery coverage.
-
Bake uncovered 40-45 mins, flipping halfway, until cooked through and crispy. Golden rule: Flip at 20 mins! Use a timer. Doneness test: Internal temp = 165°F (74°C) at the thickest part. No thermometer? Juices should run clear.
-
Rest 5 mins before serving. Patience, grasshopper: Resting = crunch lock-in. Cover loosely with foil if waiting longer.
Flip with confidence—that’s where the magic happens!
Plating Like a Pro (Minimal Effort, Max Wow)
Serve these beauties straight from the dish—rustic charm wins! Pile legs on a wooden board with lemon wedges for zing. For cozy vibes, pair with garlic mashed potatoes (butter puddle mandatory!) and quick-pickled cucumbers. Hosting a crowd? Add honey-glazed carrots and a big green salad. My go-to move: Drizzle reserved pan butter over everything. chef’s kiss
Shake It Up! 5 Flavor Adventures
This recipe loves a remix. Try these twists:
-
Nashville Hot: Brush legs with 2 tbsp hot sauce + 1 tbsp honey after baking.
-
Herb Garden: Add 1 tsp dried thyme + 1/2 tsp rosemary to flour mix.
-
Parmesan Crush: Swap 1/4 cup flour for grated parmesan (crispy umami bomb!).
-
Buttermilk Tenderizer: Soak chicken in 1 cup buttermilk + 1 tsp salt for 2 hours first. Pat dry, then flour.
-
Keto-Friendly: Replace flour with 1/2 cup almond flour + 1/4 cup grated pork rinds (yes, really!).
Olivia’s Behind-the-Scenes Scoop
This recipe evolved from my “smoke-alarm era” to my kids’ #1 request! I once added five-spice powder by accident—surprisingly epic. Over time, I learned: flipping is non-negotiable (skip it, and you’ll get a sad, pale side), and room-temp chicken bakes more evenly. Funny story: My dog, Biscuit, once stole a drumstick mid-photo shoot. I snapped a blurry pic of his guilty face—now our family screensaver. For make-aheads: Prep coated legs (unbaked) and refrigerate up to 24 hours. Bake straight from fridge, adding 5-7 mins. They also freeze beautifully baked—reheat at 400°F (200°C) for 15 mins!
Your Burning Questions, Answered!
Q: Can I use boneless chicken?
A: Absolutely! Thighs work best (bake 30-35 mins). Breasts dry out faster—reduce time to 25 mins and cover after flipping.
Q: Why isn’t my coating crispy?
A: Three culprits: 1) Oven too low—check calibration! 2) Overcrowding the pan (give legs space!). 3) Skipping the flip. If it’s still pale, broil 2 mins at the end (watch closely!).
Q: Can I make it skinless?
A: You can, but expect less crunch. For skinless, brush with 1 tbsp extra butter before baking and use a rack in the pan.
Q: Help! My butter burned in the oven.
A: No shame—butter has a low smoke point. Next time, use ghee or 50/50 butter + olive oil. Burnt dish? Sprinkle baking soda, add hot water, and soak overnight.
Nutritional Snapshot (Per Serving)
Calories: ~310 | Protein: 22g | Carbs: 12g | Fat: 20g
Note: Values approximate. Using skinless cuts reduces fat by ~5g.
Plating Like a Pro (Minimal Effort, Max Wow)
Serve these beauties straight from the dish—rustic charm wins! Pile legs on a wooden board with lemon wedges for zing. For cozy vibes, pair with garlic mashed potatoes (butter puddle mandatory!) and quick-pickled cucumbers. Hosting a crowd? Add honey-glazed carrots and a big green salad. My go-to move: Drizzle reserved pan butter over everything. *chef’s kiss*
Shake It Up! 5 Flavor Adventures
This recipe loves a remix. Try these twists:
- Nashville Hot: Brush legs with 2 tbsp hot sauce + 1 tbsp honey after baking.
- Herb Garden: Add 1 tsp dried thyme + 1/2 tsp rosemary to flour mix.
- Parmesan Crush: Swap 1/4 cup flour for grated parmesan (crispy umami bomb!).
- Buttermilk Tenderizer: Soak chicken in 1 cup buttermilk + 1 tsp salt for 2 hours first. Pat dry, then flour.
- Keto-Friendly: Replace flour with 1/2 cup almond flour + 1/4 cup grated pork rinds (yes, really!).
Olivia’s Behind-the-Scenes Scoop
This recipe evolved from my “smoke-alarm era” to my kids’ #1 request! I once added five-spice powder by accident—surprisingly epic. Over time, I learned: flipping is non-negotiable (skip it, and you’ll get a sad, pale side), and room-temp chicken bakes more evenly. Funny story: My dog, Biscuit, once stole a drumstick mid-photo shoot. I snapped a blurry pic of his guilty face—now our family screensaver. For make-aheads: Prep coated legs (unbaked) and refrigerate up to 24 hours. Bake straight from fridge, adding 5-7 mins. They also freeze beautifully baked—reheat at 400°F (200°C) for 15 mins!
Your Burning Questions, Answered!
Q: Can I use boneless chicken?
A: Absolutely! Thighs work best (bake 30-35 mins). Breasts dry out faster—reduce time to 25 mins and cover after flipping.
Q: Why isn’t my coating crispy?
A: Three culprits: 1) Oven too low—check calibration! 2) Overcrowding the pan (give legs space!). 3) Skipping the flip. If it’s still pale, broil 2 mins at the end (watch closely!).
Q: Can I make it skinless?
A: You can, but expect less crunch. For skinless, brush with 1 tbsp extra butter before baking and use a rack in the pan.
Q: Help! My butter burned in the oven.
A: No shame—butter has a low smoke point. Next time, use ghee or 50/50 butter + olive oil. Burnt dish? Sprinkle baking soda, add hot water, and soak overnight.

OVEN-FRIED CHICKEN LEGS
- Total Time: 55 mins
Description
Hey there, kitchen friend! Olivia here, apron dusted with flour and heart full of excitement. There’s something magical about golden, crispy chicken fresh from the oven—the crackle of the crust, the garlicky aroma, and the happy sighs around the table. If you’ve ever hesitated to make fried chicken because of the mess or lingering smell, these oven-fried chicken legs are your crispy, juicy, mess-free redemption. No deep fryer, no regrets. Just pure, uncomplicated joy.
Ingredients
-
6 chicken legs (drumsticks), skin-on
-
1/4 cup salted butter
-
3/4 cup all-purpose flour
-
1 tsp paprika
-
1 tsp salt
-
1/2 tsp black pepper
-
(Optional) 1 tsp garlic powder
Instructions
-
Preheat your oven to 425°F (220°C).
Place the butter in a 9×13-inch baking dish and put it in the oven to melt (about 3-5 minutes). The hot butter will create an instant sizzle when you add the chicken, jumpstarting the crispiness. -
Prepare the coating:
In a bowl, whisk together the flour, paprika, salt, pepper, and garlic powder if using. Whisk well to avoid lumps. -
Coat the chicken:
Pat the chicken legs dry. Press each leg firmly into the flour mixture, getting the coating under the skin edges as much as possible. Let them rest 5 minutes so the coating “sets.” -
Bake:
Remove the hot butter from the oven—it should be bubbly but not burnt. Using tongs, quickly turn each coated chicken leg in the butter to coat all sides, then place them in the baking dish.Bake uncovered for 40-45 minutes, flipping the legs halfway through (around 20 minutes). This ensures an even golden crust. The chicken is done when the internal temperature reaches 165°F (74°C) or the juices run clear.
-
Rest:
Let the chicken rest for 5 minutes before serving to lock in juiciness and crunch.
Notes
-
Use skin-on chicken for the crispiest crust. Skinless will work but won’t get as crunchy. Brush skinless pieces with butter before baking.
-
Don’t skip flipping! It’s the secret to an all-around golden crust.
-
Butter alternatives: Use ghee or half butter and half olive oil to prevent burning.
-
Make ahead: Coat chicken and refrigerate (up to 24 hours). Bake straight from the fridge, adding 5-7 extra minutes.
-
For extra flavor: Add 1 tsp dried herbs (thyme, rosemary) to the flour mix or sprinkle parmesan for a cheesy twist.
- Prep Time: 10 minutes
- Cook Time: 40 mins
Nutrition
- Calories: 310 cal Per Serving
- Fat: 20g
- Carbohydrates: 12g
- Protein: 22g
Nutritional Snapshot (Per Serving)
Calories: ~310 | Protein: 22g | Carbs: 12g | Fat: 20g
Note: Values approximate. Using skinless cuts reduces fat by ~5g.
Final Thoughts: The Crispy, Buttery Hug You Deserve
These Oven-Fried Chicken Legs are more than a recipe—they’re a love letter to comfort food that doesn’t punish you. They prove that crispy, juicy perfection doesn’t require a vat of oil, just a hot oven, good butter, and a little courage to flip. Whether it’s a lazy weeknight or a feast with friends, this dish delivers nostalgia, flavor, and that unbeatable crunch. So grab those drumsticks, crank up the oven, and let’s make some magic. Happy cooking, friend!
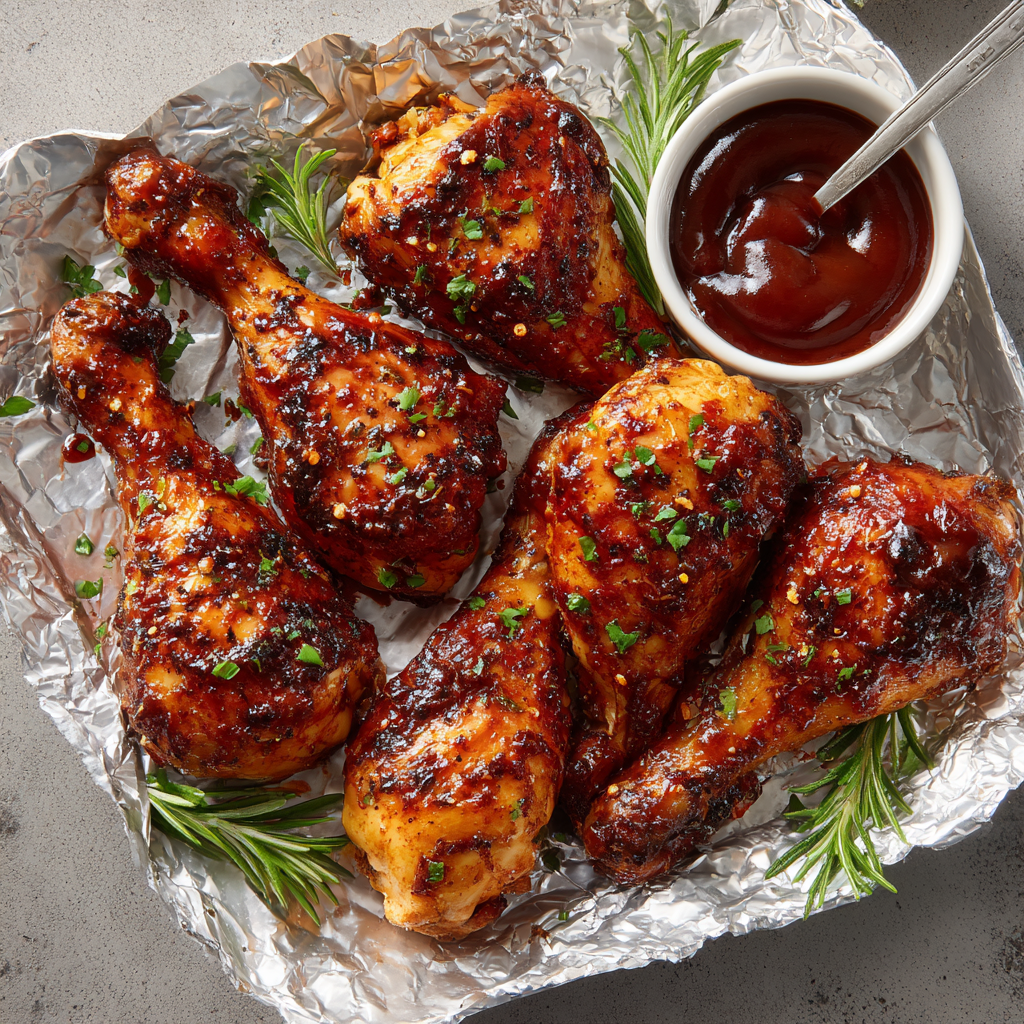
BARBECUE CHICKEN LEGS
Smoky, Saucy, and Irresistibly Easy: Oven-Baked BBQ Chicken Legs
Hey there, kitchen friend! Olivia here, apron slightly smudged (as usual), ready to share one of my all-time favorite recipes that turns ordinary weeknights into backyard BBQ celebrations – no grill required! There’s something magical about sticky, smoky barbecue chicken legs. That crispy skin giving way to juicy, fall-off-the-bone meat? It’s pure comfort food alchemy. Whether you’re feeding a rowdy family dinner crew or just craving that summer cookout vibe in the dead of winter, this recipe is your golden ticket.
Forget complicated techniques or hours of prep. These BBQ chicken legs are all about big flavor with minimal fuss. We’re talking pantry spices teaming up with your favorite bottled sauce (no shame in that game!), transforming humble drumsticks into something downright irresistible. I promise, watching everyone lick their fingers clean is one of life’s simple, delicious joys. So, crank up the oven, grab those drumsticks, and let’s create some saucy magic together!
The Smoke Signal That Started It All
My love affair with BBQ chicken legs began, ironically, during a total grilling fail. Picture it: my first big backyard bash years ago. I was determined to wow my friends with grilled chicken legs. Charcoal was lit, confidence was high… until a sudden downpour sent everyone sprinting inside, leaving my precious drumsticks pale and shivering on a drenched grill. Disaster!
Panicked, I raced them into the oven, slathered on sauce like my social life depended on it, and cranked the broiler. What emerged was pure serendipity: caramelized, sticky-sweet, smoky perfection. The kitchen filled with that incredible BBQ aroma, laughter bounced off the walls as we devoured them straight from the pan, rain forgotten. That “mistake” taught me the best meals aren’t about perfect execution, but about the joy shared. These oven-baked beauties became my signature rain-or-shine lifesaver, and they’ve been stealing the show ever since!
Your Flavor Arsenal: Simple Ingredients, Big Impact
- 6 chicken legs (drumsticks): The star! Look for plump, evenly-sized legs. Skin-on is essential for that crispy texture. Chef’s Tip: Pat them SUPER dry with paper towels first – moisture is the enemy of crispy skin!
- 1/2 cup barbecue sauce (your favorite kind): The soul of the dish! Sweet, smoky, spicy, tangy – choose your adventure. Substitution: No BBQ sauce? Mix 1/4 cup ketchup, 2 tbsp brown sugar, 1 tbsp apple cider vinegar, 1/2 tsp smoked paprika, and a dash of Worcestershire.
- 1 tsp garlic powder: Adds deep, savory warmth without the chopping. Chef’s Insight: Powder clings evenly to the chicken, giving consistent flavor in every bite.
- 1/2 tsp cayenne pepper (adjust to taste): The gentle kick! Start with 1/4 tsp if you’re heat-shy. Substitution: Smoked paprika or chipotle powder add heat with extra smokiness.
- 1 tsp paprika: Sweet paprika brings color and mild pepper flavor. Upgrade: Use smoked paprika for an incredible, campfire-like depth!
- 1/2 tsp onion powder: The subtle sweetness buddy to garlic powder. Creates a balanced base.
- 1/2 tsp black pepper: Freshly ground is best for vibrant spice. Essential for rounding out the flavors.
- Salt to taste (about 1 tsp): The flavor enhancer! Season the chicken directly and the rub. Kosher salt is my go-to.
Let’s Get Saucy: Your Foolproof Roadmap
- Preheat & Prep: “Crank your oven to 375°F (190°C). Line a sturdy baking sheet with foil (hello, easy cleanup!) and place a wire rack on top if you have one. Chef’s Hack: The rack elevates the chicken, letting hot air circulate for maximum crispiness on all sides. No rack? No sweat! Just flip the legs halfway through the first bake.”
- Spice Symphony: “In a small bowl, whisk together the garlic powder, cayenne, paprika, onion powder, black pepper, and a generous pinch of salt (about 1/2 tsp). Chef’s Secret: Rubbing the spices directly onto dry chicken (remember that pat-down!) creates a flavorful ‘bark’ that the sauce clings to beautifully.”
- Rub Down: “Massage that gorgeous spice blend all over the chicken legs. Get it into every nook and cranny! Tip: Wear disposable gloves if you hate spicy fingers later. Let them sit for 5 minutes while the oven finishes heating – this lets the flavors start to mingle.”
- First Bake (The Crisp Foundation): “Arrange the legs on the rack or baking sheet. Slide them into the hot oven, uncovered, for 30 minutes. Why uncovered? This initial bake renders out fat and crisps the skin, setting the stage for sauce adhesion. Resist saucing too early – it’ll just slide off!”
- Saucy Embrace: “Pull the legs out (they should be looking golden and smelling amazing!). Generously brush barbecue sauce all over them. Pro Move: Use a silicone brush and get under the legs too! Don’t be shy – this is where the sticky magic happens.”
- Final Bake & Broil Blast: “Return the sauced beauties to the oven for 10-15 minutes, just until the sauce is hot and bubbly. THEN, switch your oven to BROIL (HIGH). Watch them like a hawk for 2-3 minutes! Critical Tip: This broil is the KEY to that irresistible, slightly charred, sticky glaze. Seriously, don’t walk away – it burns fast!”
- Rest & Revel: “Transfer the legs to a clean plate or platter. Let them rest for 5 glorious minutes. Why wait? Resting lets the juices redistribute, ensuring every bite is succulent, not dry. It also lets the sauce thicken slightly.”
Plating Up Pure Comfort
This is finger-lickin’ food at its finest, so embrace the casual vibe! Pile those glistening BBQ chicken legs high on a rustic wooden board or a big, colorful platter. Scatter some fresh herbs like chopped parsley or cilantro over the top for a pop of green. Keep napkins *plentiful*! For the ultimate cozy feast, serve them alongside simple, crowd-pleasing sides: creamy coleslaw to cut the richness, fluffy cornbread for soaking up sauce, buttery corn on the cob, or classic potato salad. A big pitcher of iced tea or lemonade is the perfect thirst-quencher. No fancy plating needed – the messy, saucy deliciousness is the whole point!
Shake Up Your BBQ Game: Delicious Twists
- Honey-Sriracha Sweet Heat: Swap regular BBQ sauce for a mix of 1/3 cup BBQ sauce + 2 tbsp honey + 1 tbsp Sriracha. Add 1/4 tsp extra cayenne to the rub for serious kick!
- Smoky Maple Apple: Use a hickory-smoked BBQ sauce. Add 1 tsp ground cumin to the rub. Brush with sauce mixed with 2 tbsp pure maple syrup and 1 tbsp apple cider vinegar during the final bake.
- Keto/Low-Carb Friendly: Choose a sugar-free BBQ sauce (check labels!). Increase the paprika and garlic powder slightly in the rub for extra flavor depth. Serve with cauliflower “mac” and cheese or grilled zucchini.
- Spice-Rubbed Dry Style: Double the spice rub (add 1 tsp brown sugar if desired). Skip the wet BBQ sauce entirely. Bake as directed, then broil for extra crispiness. Perfect for those who love bold spice without the sticky sauce!
- Greek Yogurt Marinated (Tenderizer Hack): For ultra-tender chicken, marinate legs in 1 cup plain Greek yogurt + 1 tbsp lemon juice + 1 tsp of the spice blend for 1-4 hours (fridge). Rinse & pat dry VERY well before applying the dry rub and baking. Reduce first bake time by 5 mins.
Olivia’s Extra Pinch of Love (and Lessons Learned!)
This recipe is my kitchen workhorse, and it’s evolved beautifully over countless batches. I learned the hard way that drowning the chicken in sauce too early leads to pale, steamed skin – patience with the initial bake is non-negotiable! The broiler trick? Born from my eternal quest for that “just-off-the-grill” char when stuck indoors. One hilarious disaster involved forgetting the broiler was on high… let’s just say I created BBQ chicken *cinders* that night! Now I set a loud timer and park myself in front of the oven door. Don’t stress perfection; slightly charred edges just mean extra flavor. These legs are forgiving and always delicious. The real secret ingredient? Sharing them with people who appreciate a good, saucy napkin moment.
Your BBQ Chicken Leg Questions, Answered!
Q: Can I use chicken thighs instead of legs?
A: Absolutely! Bone-in, skin-on thighs work wonderfully. They might need an extra 5-10 minutes in the initial bake due to thickness. Check for an internal temp of 165°F (74°C) near the bone.
Q: My sauce is burning under the broiler! Help!
A: This happens fast! Three things: 1) Ensure your rack is in the MIDDLE position, not too close to the broiler element. 2) Set a timer for MAX 2 minutes initially, then check. 3) If using a very sugary sauce, broil for less time (even 60-90 seconds can be enough). Watch constantly!
Q: Can I prep these ahead?
A: You can mix the dry rub and pat the chicken dry up to a day ahead (store separately in the fridge). Apply the rub just before baking. Fully cooked legs can be refrigerated for 3 days. Reheat gently in a 325°F (160°C) oven, covered with foil, until warmed through (about 15-20 mins). Broil briefly to re-crisp if needed.
Q: The skin isn’t getting crispy. What went wrong?
A: The #1 culprit is usually not patting the chicken dry enough before seasoning. Moisture = steam = soggy skin. Also, ensure your oven is fully preheated, don’t overcrowd the pan (give them space!), and that initial uncovered bake is crucial for rendering fat. Using a wire rack helps immensely!
BARBECUE CHICKEN LEGS
- Total Time: 55 mins
Description
Craving that backyard BBQ flavor without lighting a grill? These Oven-Baked BBQ Chicken Legs are your weeknight flavor bomb—crisp on the outside, juicy inside, and lacquered in a smoky-sweet glaze that sticks in the best way. Made with pantry spices and your favorite barbecue sauce, this no-fuss recipe delivers serious comfort with every sticky bite. Rain or shine, it’s BBQ time.
Ingredients
-
6 chicken legs (drumsticks), skin-on
-
½ cup barbecue sauce
-
1 tsp garlic powder
-
½ tsp cayenne (adjust to taste)
-
1 tsp paprika
-
½ tsp onion powder
-
½ tsp black pepper
-
1 tsp salt
Instructions
-
Preheat oven to 375°F (190°C). Line a baking sheet with foil and place a wire rack on top if available.
-
Make spice rub: Mix garlic powder, cayenne, paprika, onion powder, black pepper, and salt.
-
Prep chicken: Pat legs very dry. Rub all over with spice mix. Let sit 5 mins.
-
First bake: Arrange legs on rack or pan. Bake uncovered 30 mins.
-
Sauce it up: Brush legs generously with BBQ sauce. Return to oven for 10–15 mins.
-
Broil: Set oven to broil. Broil 2–3 mins until sauce bubbles and edges caramelize. Watch closely!
Notes
-
Pat chicken dry = crispier skin
-
Broil for charred flavor without a grill
-
Use sugar-free BBQ sauce for low-carb option
- Prep Time: 10 mins
- Cook Time: 45 mins
Nutrition
- Calories: 290 cal Per Serving
- Fat: 18g
- Carbohydrates: 10g
- Protein: 23g
Nutritional Info (Per Serving – 2 Chicken Legs)
Calories: ~290 | Protein: 23g | Carbohydrates: 10g | Fat: 18g
Note: Values are estimates and can vary significantly based on the specific BBQ sauce and chicken size used. Using a lower-sugar sauce will reduce carbs.
Final Thoughts: More Than Just Chicken
These oven-baked BBQ legs represent everything I love about cooking – transformation, adaptability, and shared joy. They’ve been there for last-minute potlucks, comforting solo dinners after tough days, and even my nephew’s “I only eat chicken legs” phase. What began as a rainy-day salvage operation became a testament to kitchen resilience.
The real beauty? This recipe meets you where you are. Use fancy artisanal sauce or the last of a questionable bottle from the fridge door. Have only six spices or sixty. The method remains forgiving, the results consistently crave-worthy.
So here’s to imperfect meals that taste like heaven, to sticky fingers and full bellies, and to the magic that happens when we give simple ingredients a little care and a hot oven. May your chicken always be crispy, your sauce never burn, and your gatherings be filled with the kind of laughter that makes memories taste even sweeter.




