
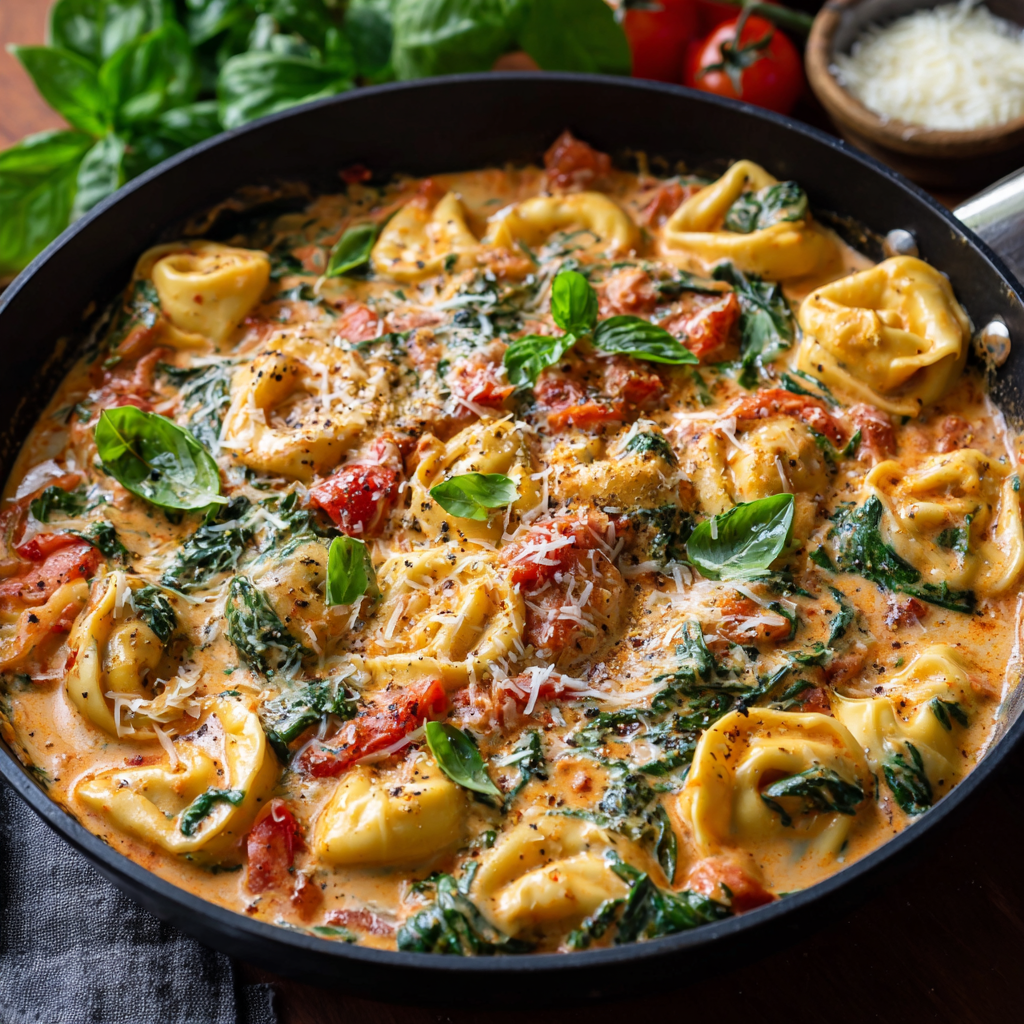
CREAMY TOMATO BASIL TORTELLINI SKILLET
When Chaos Calls for Cheese (and Comfort!)
Hey there, kitchen friend! Olivia here, waving at you from my flour-dusted countertop. Raise your hand if you’ve ever stared into your fridge after a wild day, praying for a dinner miracle that doesn’t involve cereal or takeout menus? 🙋♀️ We’ve all been there. That frantic “what’s-for-dinner” panic is exactly why this Creamy Tomato Basil Tortellini Skillet was born. Picture this: plump cheese tortellini swimming in a velvety tomato sauce kissed with garlic and oregano, tangled with fresh spinach and ribbons of basil, all hugged by melty Parmesan. It’s like your favorite Italian restaurant dish decided to move into your kitchen and clean up after itself. The magic? It all happens in one skillet and is ready faster than you can fold laundry (which, let’s be real, will probably wait until tomorrow). No fancy techniques, no hours of simmering—just pure, unapologetic comfort. Whether you’re feeding hungry kids, impressing a date, or treating yourself after a tough day, this dish whispers, “You’ve got this.” So grab your favorite skillet—let’s turn chaos into cozy!
The Little Skillet That Saved Dinner (and My Sanity)
This recipe? It’s my kitchen lifeline. I vividly remember the night it became legend in our house. My best friend texted: “Surprise! We’re in your neighborhood… can we crash dinner?” Cue panic. My fridge held half a cucumber, questionable leftovers, and hope. Then I spotted tortellini, a can of tomatoes, and wilting basil. Desperation sparked genius. I threw everything into my trusty cast iron, whispering, “Please work.” Ten minutes later, my kitchen smelled like a Tuscan trattoria. My friends devoured it, spinach clinging to forks, demanding the “recipe.” There was no recipe—just chaos and cheese! But seeing their faces light up, the easy laughter over seconds, the way that humble skillet meal connected us? That’s the heart of cooking for me. It’s not about perfection; it’s about showing up, throwing love (and tortellini) into a pan, and creating joy. This dish became our “Unexpected Guest Savior,” and now? It’s your secret weapon too.
Your Flavor Dream Team (Plus Clever Swaps!)
Gather these simple stars! Pro tip: Mise en place (prepping everything before cooking) makes this 25-minute meal feel effortless.
- 1 (20 oz) can diced tomatoes – The saucy backbone! Use fire-roasted for a smoky depth. No cans? 2 cups fresh diced tomatoes + ¼ cup water work in a pinch.
- 2 cloves garlic, minced – Flavor bombs! Pre-minced jarred garlic (1 tsp) saves time. Feeling fancy? Add a third clove!
- ½ cup heavy cream – Creates that luscious texture. Swap half-and-half for lighter (but less creamy) results, or coconut milk for dairy-free.
- 2 cups fresh baby spinach – Adds color and nutrients. Kale (stems removed, chopped) or arugula (spicy kick!) are great subs.
- ½ cup fresh basil, chopped – The aromatic hero! Stir in half at the end for maximum freshness. Dried basil (1 tsp) in the sauce works, but fresh is magic.
- ½ cup grated Parmesan cheese – Salty, umami goodness! Use Pecorino Romano for sharper flavor. Vegan? Nutritional yeast + pinch of salt does wonders.
- ½ tsp dried oregano – Earthy Italian vibes. Rub it between your fingers before adding to wake up the oils!
- 9 oz refrigerated cheese tortellini – The cheesy pillows! Frozen tortellini works too (no thawing needed). Swap ravioli for fun!
- ½ cup vegetable broth – Thins the sauce perfectly. Chicken broth works, or water in a bind. Low-sodium is best for control.
Chef’s Insight: Quality Parmesan matters! Skip the green canister—freshly grated melts smoother and tastes richer.
Let’s Build Flavor, One Step at a Time!
Ready for stress-free cooking? Follow these steps (with all my favorite hacks!):
- Sizzle the Aromatics: “Heat a large, deep skillet (I adore my 12-inch cast iron!) over medium heat. Add a splash of olive oil. Toss in the minced garlic and sauté for 30-60 seconds just until it’s fragrant and dancing—don’t let it brown! Burnt garlic = bitter sauce. Pro Hack: Swirl the oil to coat the pan first for even heating.
- Simmer the Sauce & Pasta: “Pour in the entire can of diced tomatoes (juices are gold!), the heavy cream, vegetable broth, dried oregano, and the refrigerated tortellini. Gently stir to combine. Bring this beautiful mess to a lively simmer (bubbles breaking consistently). Important: Don’t boil aggressively—you want a gentle cook. Set your timer for 7 minutes. Stir occasionally to prevent sticking. The tortellini will plump up, and the sauce will start to thicken and cling to the pasta. Chef’s Secret: If your tortellini package says a longer cook time, add 1-2 minutes here.
- Wilt the Greens: “Reduce the heat to low. Pile in the fresh baby spinach and most of the chopped basil (reserve a little for garnish!). Gently fold everything together. The spinach will wilt dramatically in the warm sauce within 1-2 minutes. This step adds freshness and color! Hack: Use tongs for easy mixing without breaking the tortellini.
- Cheese Please!: “Sprinkle in the grated Parmesan cheese. Stir slowly and consistently for about 1 minute, letting the cheese melt completely into the sauce, creating a creamy, glossy embrace for the tortellini. See it transform? That’s the magic! Pro Tip: Remove the pan from direct heat while stirring in the cheese for the smoothest melt—high heat can make cheese grainy.
Timing Tip: Start boiling water for a quick side salad or garlic bread while the tortellini simmers—multitasking win!
Plate It Like a Pro (Minimal Effort, Max Impact!)
This dish wants to look rustic and inviting! Spoon generous portions into shallow bowls (showing off that creamy sauce). Immediately top with extra grated Parmesan (because cheese is life) and the reserved fresh basil. For color pop, add a tiny drizzle of good olive oil or a sprinkle of red pepper flakes. Serve with crusty bread for sauce-mopping and a simple side salad (think arugula with lemon vinaigrette) to cut the richness. Family-style? Bring the whole skillet to the table—guaranteed oohs and aahs! Pro Presentation: Wipe the bowl rims clean before serving.
Make It Uniquely Yours (5 Tasty Twists!)
This skillet is your canvas! Get creative:
- Protein Power: Brown ½ lb Italian sausage or diced chicken before adding garlic. Shrimp added in the last 3 minutes of simmering is divine!
- Veggie Boost: Sauté sliced mushrooms or bell peppers with the garlic. Roasted red peppers (jarred, drained) stirred in with the spinach add sweetness.
- Spice It Up: Add ¼ tsp red pepper flakes with the garlic, or stir in 1 tbsp pesto at the end with the cheese.
- Vegan Delight: Use coconut cream, vegan tortellini, nutritional yeast instead of Parmesan, and veggie broth.
- Lighter Touch: Substitute half the cream with evaporated milk and add an extra 2 tbsp Parmesan for richness.
Confessions from My (Sometimes Messy) Kitchen
This recipe has seen some… iterations. The first time? I dumped the spinach in too early, turning it army-green sludge. Lesson learned: Wilt tender greens last! Another time, distracted by a hilarious dog video, I let the sauce reduce too much—hello, tortellini cement! I rescued it with a splash of hot broth. Flexibility is key! Over time, I swapped dried basil for fresh (game-changer!), added the broth for perfect sauciness, and embraced using good refrigerated tortellini—no shame! The biggest evolution? Letting go of “fancy.” This dish thrives on simplicity and speed. It’s forgiving! Sauce too thick? Stir in broth. Too thin? Simmer 1-2 extra minutes. Found random veggies? Toss ’em in! That’s the beauty of skillet life. Now, it’s my most-requested “non-recipe recipe.” Pass it on!
Your Burning Questions, Answered!
Let’s tackle common hiccups before they happen:
Q: Can I use frozen or dried tortellini?
A: Absolutely! For frozen tortellini, add it straight from the freezer. You’ll likely need an extra 2-3 minutes of simmering. For dried tortellini, cook it separately according to package directions first (al dente!), then add it to the simmering sauce in step 2 for the last 2 minutes to absorb flavor. Using dried directly in the sauce risks uneven cooking and too much starch.
Q: My sauce is too thin/too thick! Help!
A: Don’t panic! Too thin? Let it simmer uncovered for an extra 2-3 minutes, stirring often. The tortellini releases starch as it cooks, naturally thickening the sauce. Too thick? Stir in warm vegetable broth or cream, 1 tablespoon at a time, until it reaches your dream consistency. Remember, it thickens slightly as it cools too!
Q: Can I make this ahead or freeze it?
A: It’s best fresh (those tender tortellini!). For make-ahead, prep the sauce base (garlic, tomatoes, cream, broth, oregano) up to 1 day ahead. Store covered in the fridge. Reheat gently, then add tortellini and proceed. Freezing isn’t ideal—dairy sauces can separate, and tortellini may become mushy upon reheating. If you must, freeze cooled portions tightly sealed for up to 1 month. Thaw overnight, then reheat gently on the stovetop with a splash of broth or cream.
Q: Can I use a different cheese?
A: Yes! Parmesan is classic, but feel free to experiment. Try Asiago for nuttiness, Fontina for incredible meltiness, or a combo! Avoid super-hard cheeses like aged Pecorino only—they won’t melt as smoothly. For a creamy punch, stir in 2 oz softened cream cheese with the Parmesan.
CREAMY TOMATO BASIL TORTELLINI SKILLET
- Total Time: 25 minutes
Description
After a hectic day, you deserve more than cereal. Enter: this warm, creamy, and deeply comforting tortellini dish that saves dinner (and your mood) in under 30 minutes. It’s like a hug in a pan—filled with cheesy pasta, garlicky tomato cream sauce, fresh spinach, and basil magic. One pan. No stress. Big flavor. Let’s turn that fridge panic into a dinnertime win!
Ingredients
-
1 (20 oz) can diced tomatoes (fire-roasted if possible)
-
2 garlic cloves, minced
-
½ cup heavy cream (or coconut milk for dairy-free)
-
½ cup vegetable broth
-
½ tsp dried oregano
-
9 oz cheese tortellini (refrigerated or frozen)
-
2 cups baby spinach
-
½ cup fresh basil, chopped
-
½ cup grated Parmesan (or vegan alternative)
-
Olive oil, for sautéing
-
Salt & pepper to taste
Instructions
-
Sauté: Heat olive oil in a large skillet over medium heat. Add garlic and cook 30 seconds until fragrant.
-
Simmer: Add tomatoes (with juice), cream, broth, oregano, and tortellini. Stir and simmer gently for 7–9 minutes, stirring occasionally.
-
Wilt Greens: Reduce heat. Add spinach and most of the basil, stirring until wilted (1–2 mins).
-
Cheesy Finish: Stir in Parmesan until smooth and creamy. Remove from heat for best texture.
-
Serve: Top with extra basil and cheese. Add a drizzle of olive oil or red pepper flakes if desired.
Notes
-
Fresh Parmesan melts best—skip the shaker bottle!
-
If sauce thickens too much, loosen with warm broth.
-
Want protein? Brown sausage or chicken first, then follow the recipe.
- Prep Time: 5 mins
- Cook Time: 20 mins
Nutrition
- Calories: 350 cal Per Serving
- Sodium: 600mg
- Fat: 20g
- Carbohydrates: 28g
- Fiber: 3g
- Protein: 14g
Nutritional Info (Per Serving, Serves 5)
Calories: ~350 | Protein: 14g | Carbs: 28g | Fat: 20g | Fiber: 3g | Sugar: 4g | Sodium: ~600mg (varies by broth/cheese)
Note: Nutritional info is an estimate. Values can change based on specific brands and ingredient substitutions.
Final Thoughts: More Than Just a Meal
This Creamy Tomato Basil Tortellini Skillet isn’t just about feeding your body—it’s about nourishing your spirit. In the chaos of life, it’s a reminder that joy can be simple, quick, and cheesy. It’s a recipe that forgives your substitutions, celebrates your creativity, and turns “I have nothing to cook” into “I can’t believe I made this!” So the next time dinner feels daunting, remember: Your skillet is your ally, your pantry is full of possibilities, and yes, cheese is always the answer. Now go forth and conquer—one delicious bite at a time.
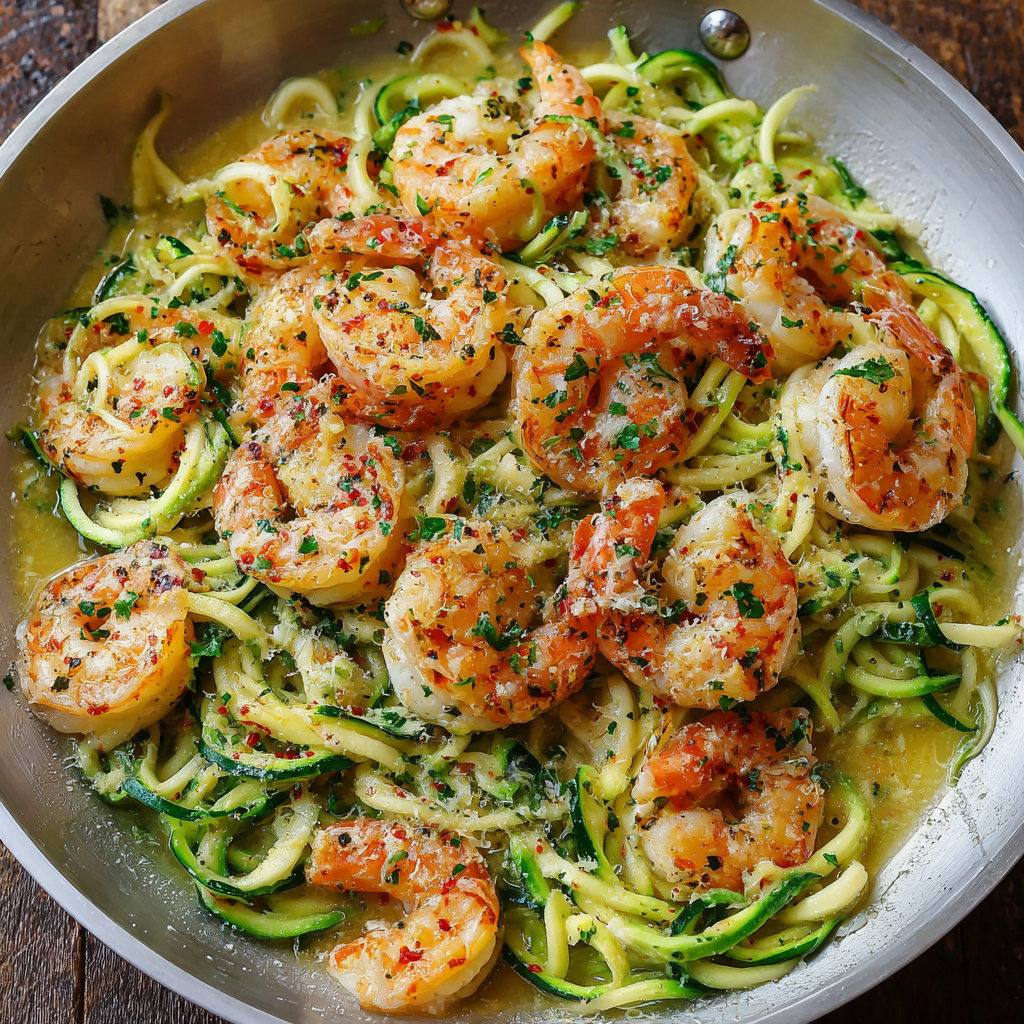
SHRIMP SCAMPI WITH ZOODLES
Hey there, kitchen friend! Olivia here, waving from my slightly-flour-dusted corner of the internet. You know that feeling when you crave something *luxuriously* delicious but also want to feel light, energized, and maybe even a little virtuous? When you want the comfort of a cozy meal without the post-dinner carb coma? Friend, that’s exactly where this **Shrimp Scampi with Zoodles** struts onto the scene like a culinary superhero.
Imagine this: plump, juicy shrimp bathed in a sizzling, garlicky, lemon-kissed butter sauce, all tangled up with tender-crisp zucchini noodles. It’s bright, it’s vibrant, it’s packed with flavor that punches way above its weight class in the effort department. This isn’t just “diet food” – this is a celebration on a plate! It’s the kind of dish that makes you feel like a gourmet rock star on a random Tuesday because guess what? It comes together faster than you can scroll through your social feed. We’re talking 20 minutes, tops. Perfect for those nights when takeout is tempting, but your taste buds (and maybe your jeans!) are begging for something fresher and more fabulous. So grab your favorite skillet, channel your inner flavor enthusiast, and let’s make magic happen together. Trust me, this one’s going straight into your regular rotation.
This dish? It totally saved my bacon (or should I say, my shrimp?) last summer. Picture it: My sister spontaneously rolled into town with her two *very* hungry teenage boys. My fridge? Basically echoing. Panic mode activated! But then I spotted a forgotten bag of frozen shrimp in the freezer and a couple of slightly-too-enthusiastic zucchinis from my neighbor’s garden sitting on the counter. Scampi was always a crowd-pleaser, but pasta felt too heavy for a hot July night. Lightbulb moment! Zoodles to the rescue.
I threw everything together in my trusty skillet – garlic sizzling, shrimp turning that perfect pink, lemon juice zinging through the air. The boys watched skeptically (“Zucchini? *Noodles?* Aunt Liv…”). But the second that buttery, garlicky aroma hit them? Total silence, followed by the beautiful sound of forks scraping plates. My nephew even mumbled, “Okay, this slaps,” through a mouthful – the highest teenage compliment! That chaotic, laughter-filled kitchen moment, turning near-disaster into a delicious, light feast, cemented this recipe as my ultimate summer lifesaver. It’s proof that sometimes the best meals are born from a little improvisation and a whole lot of garlic love!
Gathering Your Flavor Arsenal
Here’s everything you need for this lightning-fast flavor fiesta. Don’t stress about perfection – flexibility is your friend here!
- 2 tbsp unsalted butter: Our flavor foundation! Unsalted lets *you* control the salt level. Feeling fancy? Swap half for good olive oil for a richer depth. Vegan? A high-quality plant-based butter works beautifully.
- 3 garlic cloves, minced: Non-negotiable for true scampi soul! Mince it finely so it melts into the sauce. Garlic powder (about 1 tsp) works in a pinch, but fresh is best for that vibrant punch.
- ¼ tsp crushed red pepper flakes: Just enough heat to make things interesting, not overwhelming. Omit if sensitive, or add a pinch more if you like a kick! Smoked paprika can add a different warmth if preferred.
- 2 lbs large shrimp, shelled and deveined: The star! Look for “16/20 count” shrimp (meaning 16-20 per lb). Frozen, thawed shrimp are absolutely fine (and often more economical!). Pat them DRY – this is key for a good sear, not a steam! Chicken or scallops make great swaps.
- 1 tsp paprika: Sweet or smoked – your choice! Smoked adds a lovely, subtle campfire whisper. Regular sweet paprika gives pure color and earthiness.
- ¾ tsp salt: Start here, taste later! Remember the parmesan adds saltiness too. Kosher salt is my go-to for even seasoning.
- ½ tsp black pepper: Freshly cracked makes a world of difference! It adds bright, floral notes compared to pre-ground.
- ½ cup low-sodium vegetable broth: Creates our light, silky sauce base without heaviness. Chicken broth works too. Need more liquid? A splash of white wine is *chef’s kiss*.
- Juice of 1 lemon: Freshly squeezed is mandatory! It brings that essential, mouthwatering brightness. Bottled juice just can’t compare. Zest it first for an extra layer if you’re feeling zesty!
- 2 tbsp red wine vinegar: My secret weapon! It cuts the richness and adds a sophisticated tang. White wine vinegar or even apple cider vinegar can sub in.
- 3 medium zucchini, spiralized: Your “noodles”! Look for firm zucchinis. Yellow squash works too, or use store-bought zoodles for speed. Pro Tip: Salt the spiralized zoodles lightly and let them drain in a colander for 10-15 mins to reduce water content.
- Grated Parmesan cheese, for serving: The salty, umami finish! Pecorino Romano is sharper, or nutritional yeast works for dairy-free.
Let’s Get Cooking! Your Foolproof Steps
Ready for speed and sizzle? Follow these steps for scampi perfection every time. Keep things moving – it’s a quick dance!
- Prep Power: Before you even turn on the heat! Spiralize those zucchinis (or grab your pre-spiralized bag). Mince the garlic. Pat the shrimp VERY dry with paper towels (crucial step – wet shrimp steam instead of sear!). Have your broth, lemon juice, and vinegar measured and ready by the stove. This is “mise en place” – having everything in place – and it makes this lightning-fast recipe stress-free! Chef Hack: Zest the lemon before juicing it! Save the zest for garnish – it adds incredible fragrance.
- Sizzle the Aromatics: Heat a large skillet (12-inch is ideal) over medium heat. Add the butter. Once it’s melted and just starting to foam (listen for that gentle sizzle!), toss in the minced garlic and red pepper flakes. Stir constantly! We’re looking for fragrant (about 30 seconds), NOT browned. Burnt garlic is bitter – nobody wants that! Watch Closely: Garlic cooks fast. If it starts browning too quickly, pull the pan off the heat for a sec.
- Shrimp Time! Increase the heat slightly to medium-high. Add the dried shrimp in a single layer (don’t overcrowd – cook in batches if needed!). Sprinkle evenly with the paprika, salt, and pepper. Let them sear undisturbed for about 1.5 – 2 minutes. You should hear a happy sizzle! Flip them over and cook for another 1.5 – 2 minutes, just until they turn opaque and pink throughout. They cook FAST! Pro Tip: Undercook them *slightly* here. They’ll finish warming in the sauce. Overcooked shrimp are tough.
- Build the Flavor Bomb Sauce: Pour in the vegetable broth, fresh lemon juice, and red wine vinegar. Give it a good stir, scraping up any delicious browned bits stuck to the pan (that’s flavor gold!). Let this simmer gently for about 2 minutes. The liquid will reduce slightly, and the flavors will meld beautifully. Taste it! This is your moment to adjust – a pinch more salt? A squeeze more lemon? Make it yours. Chef Insight: The vinegar might seem odd, but it balances the butter and lemon perfectly – trust the process!
- Zoodle Tango: Add the spiralized zucchini noodles directly to the skillet. Using tongs, gently toss and fold them into the hot sauce and shrimp. Cook for just 1 to 2 minutes! We want them tender-crisp, not mushy. They should still have a slight bite. Critical Tip: Zoodles release water as they cook. Overcooking = watery sauce. Err on the side of underdone – they soften slightly off the heat too.
- The Grand Finale: Remove the skillet from the heat immediately once the zoodles are just tender. The residual heat will finish them perfectly. Give everything one last gentle toss.
Plating Perfection: Serving Your Masterpiece
This dish is as beautiful as it is delicious! Use tongs or a large fork to lift the zoodles and shrimp into shallow bowls or plates, twirling them slightly for height. Spoon any extra glorious sauce over the top. The finishing touch? A generous shower of freshly grated Parmesan cheese and maybe a sprinkle of that reserved lemon zest for a pop of color and bright aroma. A final crack of black pepper never hurts! For a restaurant-worthy touch, add a simple side: a wedge of crusty whole-grain bread to mop up the sauce (low-carb optional, of course!), or a quick arugula salad with a lemon vinaigrette. It’s light, vibrant, and ready to wow.
Shake It Up! Fun Flavor Twists
Love the base? Let’s play! This recipe is a fantastic canvas for your creativity:
- Sun-Drenched Mediterranean: Stir in 1 cup halved cherry tomatoes and ¼ cup chopped Kalamata olives with the broth. Finish with a handful of fresh basil or oregano instead of (or with!) the parmesan.
- Creamy Dreamy: After adding the broth/lemon/vinegar, stir in ¼ cup heavy cream, half-and-half, or full-fat coconut milk for a luxurious, velvety sauce. Simmer gently for 1 extra minute.
- Pescatarian Power-Up: Add ½ cup rinsed capers with the garlic for a briny punch, or toss in a handful of baby spinach or chopped artichoke hearts with the zoodles.
- Protein Swap: Not a shrimp fan? Diced chicken breast (cook a minute or two longer) or scallops (sear quickly like the shrimp) work wonderfully. For a vegan version, use hearty chickpeas or crispy tofu cubes.
- “Zoodle” Alternatives: Swap zucchini noodles for spiralized sweet potato (blanch first for tenderness), butternut squash, or even use shirataki noodles (rinse VERY well!).
Olivia’s Kitchen Confessions & Tips
Oh, the evolution of this recipe! It started as a classic scampi over pasta, but as I leaned into lighter eating, the zoodle swap felt revolutionary. The first time? Let’s just say I turned my zoodles into sad, watery mush – lesson learned on the *power of the quick toss*! Adding the red wine vinegar was a happy accident one night when I was out of white wine. It added such a bright, clean tang that I never looked back. It cuts through the butter so nicely.
This dish is my weeknight warrior. I’ve made it after long days, for last-minute guests (frozen shrimp is a lifesaver!), and even packed it cold for lunches (still delicious!). The key is truly in the prep (dry shrimp! prepped ingredients!) and respecting the cook times – especially for the zoodles. Don’t walk away! Stand there, toss gently, and savor the incredible aroma. It’s become more than a recipe; it’s my go-to for feeling nourished, satisfied, and like I’ve totally got this ‘adulting’ thing covered, at least for dinner.
Your Scampi Questions, Answered!
Let’s tackle those common kitchen hiccups before they happen:
- Help! My sauce is watery! What went wrong? This is usually a zoodle issue. Zucchini holds a lot of water. Solutions: 1) Salt your spiralized zoodles *before* cooking. Toss with ½ tsp salt, let them sit in a colander for 10-15 mins, then squeeze out excess moisture with your hands or a clean towel. 2) Don’t overcook the zoodles in the pan! 1-2 minutes MAX. 3) Ensure your heat is high enough when adding the broth/etc. to encourage quick reduction. 4) If it’s still soupy, remove the shrimp and zoodles with tongs when done, then simmer the sauce for another minute or two to thicken before pouring it back over.
- Can I use frozen shrimp? How do I thaw them? Absolutely! Frozen shrimp are often fresher and more convenient. Best thawing methods: Overnight in the fridge, or place them in a sealed plastic bag and submerge in cold water for 20-30 mins, changing the water once. CRITICAL: Pat them DRY with paper towels before cooking. Wet shrimp = steamed, rubbery shrimp and watery sauce.
- Can I make this ahead of time? It’s best enjoyed fresh! The zoodles continue to release water and can get soggy. However, you can prep components: Spiralize zoodles (store wrapped in paper towels in a container in the fridge). Make the sauce base (sauté garlic/pepper flakes, add broth/lemon/vinegar, simmer, cool and store). Cook shrimp separately, cool, and store. Reheat sauce, add shrimp to warm through, then toss with raw zoodles for just 1 min at the end.
- My shrimp turned out tough/rubbery. Why? Overcooking is the #1 culprit! Shrimp cook incredibly fast. They are done the moment they turn opaque and pink throughout – usually 2-3 minutes per side TOTAL for large shrimp. Remove them from the heat
SHRIMP SCAMPI WITH ZOODLES
Description
Hey kitchen friend! Olivia here, waving from my slightly-flour-dusted corner of the internet. Craving something luxuriously delicious yet light and energizing? Something cozy without the carb coma? This Shrimp Scampi with Zoodles steps up like a culinary superhero: juicy shrimp in a garlicky, lemon-butter sauce tossed with tender-crisp zucchini noodles. Ready in 20 minutes and bursting with flavor — it’s a celebration on a plate that’ll make you feel like a gourmet rock star any night of the week.
Ingredients
-
2 tbsp unsalted butter (or half butter + olive oil)
-
3 garlic cloves, minced
-
¼ tsp crushed red pepper flakes (adjust to taste)
-
2 lbs large shrimp, shelled & deveined (pat dry!)
-
1 tsp paprika (sweet or smoked)
-
¾ tsp salt (start here, adjust later)
-
½ tsp freshly cracked black pepper
-
½ cup low-sodium vegetable broth (or chicken broth, splash white wine)
-
Juice of 1 lemon (+ zest for garnish if you like)
-
2 tbsp red wine vinegar (or white wine vinegar/apple cider vinegar)
-
3 medium zucchini, spiralized (salt & drain to avoid watery sauce)
-
Grated Parmesan cheese (or Pecorino Romano, nutritional yeast for dairy-free)
Instructions
1. Prep: Spiralize zucchinis, mince garlic, pat shrimp dry, measure liquids. Zest lemon before juicing if you want that extra zing!
2. Aromatics: Melt butter in a large skillet over medium heat. Add garlic + red pepper flakes. Stir constantly ~30 sec until fragrant, but not browned.
3. Sear shrimp: Increase heat to medium-high. Add shrimp in one layer, sprinkle paprika, salt, pepper. Sear 1.5–2 min per side until pink and opaque. Undercook slightly—they’ll finish in the sauce.
4. Sauce time: Pour in broth, lemon juice, red wine vinegar. Scrape pan to loosen browned bits. Simmer 2 min to reduce slightly and marry flavors. Taste and adjust seasoning!
5. Toss zoodles: Add zucchini noodles, gently toss with shrimp and sauce, cooking just 1–2 min until tender-crisp. Don’t overcook or it gets watery!
6. Finish: Remove from heat, give a final gentle toss.
Notes
-
No watery sauce: Salt and drain zoodles beforehand; don’t overcook in pan.
-
Dry shrimp = sear, not steam: Always pat dry!
-
Frozen shrimp? Thaw in fridge overnight or cold water bath, then dry well.
-
Overcooked shrimp? Remove from heat as soon as opaque and pink.
-
Make-ahead: Prep zoodles and sauce separately; cook shrimp fresh; toss together just before serving.
Nutrition
- Calories: 280cal Per Serving
- Fat: 12g
- Carbohydrates: 8g
- Protein: 35g
Final Thoughts: More Than a Recipe—A Mindset Shift
This Shrimp Scampi with Zoodles isn’t just about what’s on your plate—it’s about redefining what “healthy eating” looks like. No deprivation. No complicated rules. Just real, vibrant food that makes you feel good from the first bite to the last.
It’s proof that:
-
Healthy can be hearty. You don’t need carbs to feel satisfied.
-
Fast doesn’t mean bland. 20 minutes is all it takes for gourmet flavor.
-
Cooking should be fun. If you’re not having fun, you’re doing it wrong!
So the next time you’re tempted to order takeout, remember: Your skillet, a handful of ingredients, and a little garlicky magic are all you need. Here’s to many more delicious, lightened-up adventures in your kitchen!
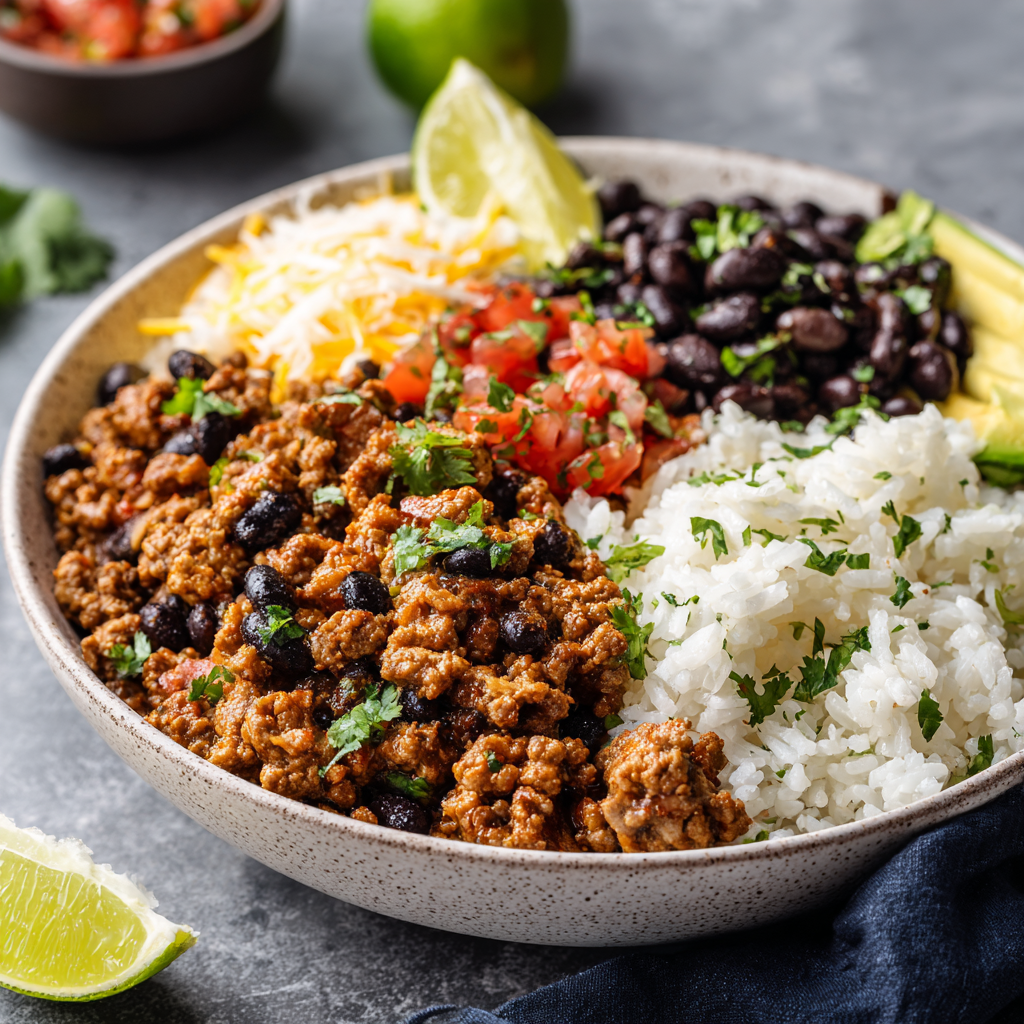
GROUND TURKEY TACO BOWLS
Your New Go-To Weeknight Hero: Ground Turkey Taco Bowls
Hey there, kitchen friend! Olivia here, waving from my flour-dusted countertop. Can we talk about those magical weeknights when you crave something hearty, healthy, and ridiculously flavorful? You know the drill—life’s buzzing, the clock’s ticking, but your soul needs more than sad desk salad. Enter my Ground Turkey Taco Bowls: the ultimate hug-in-a-bowl that’s faster than takeout and tastes like a fiesta exploded in your mouth. 🌮✨
Picture this: juicy seasoned turkey sizzling in a skillet, fluffy rice soaking up all those Tex-Mex spices, and protein-packed black beans tumbling into the mix. It’s the kind of meal that makes you do a little happy dance while assembling—because customization is king here! Pile on the creamy avocado, zesty salsa, or tangy lime like you’re the artist and this bowl is your canvas. Best part? You’re 25 minutes away from devouring it. No fancy skills needed—just a hungry heart and a single skillet (I promise my apron’s messier than yours!).
Whether you’re meal-prepping for the week or feeding a rowdy crew after soccer practice, these bowls are your deliciously reliable BFF. Let’s ditch the stress and cook joyfully—I’ve got your back every step of the way!
Why This Bowl Feels Like Home
Funny story—the first time I whipped up these taco bowls, it was a total “kitchen sink” moment. My college roommate, Zoe, and I were broke but craving celebration after landing summer internships. Our pantry held: one lonely pound of ground turkey, a can of black beans (bought on sale!), and half a bag of rice. Desperation? Maybe. Genius? Absolutely.
We blasted Selena on our dodgy speakers, tossed spices like confetti, and piled everything into chipped cereal bowls. That first bite? Magic. We sat cross-legged on our lumpy couch, grinning with lime juice on our chins, realizing great food isn’t about perfection—it’s about connection. Now, every time I make these, I add an extra squeeze of lime… for Zoe, for chaos, and for the beautiful mess that is cooking with love.
Your Flavor Toolkit: What You’ll Need
Grab these trusty staples—most might already be in your pantry! Pro tip: Organic spices make a noticeable difference in depth.
- 1 lb ground turkey (93% lean): Lean but still juicy! Swap with ground chicken or plant-based crumbles if you prefer.
- 1 tbsp olive oil: Our trusty skillet starter. Avocado oil works too!
- ½ tsp salt + black pepper: The dynamic duo—season in layers!
- 1½ tsp ground cumin: Earthy warmth alert! Toast it in the oil for 30 seconds first if you’re feeling fancy.
- ½ tsp each paprika, garlic powder, chili powder: The “holy trinity” of Tex-Mex vibes. Smoked paprika? Yes, please!
- ¼ tsp each onion powder + dried oregano: Secret weapons for savory depth. Rub oregano between your fingers to wake it up!
- 1½ cups cooked white rice: Leftover rice shines here! Brown rice or quinoa are fab healthy swaps.
- 1 (15 oz) can black beans, drained/rinsed: Hello, fiber! Chickpeas or pinto beans party hard too.
Let’s Build Flavor Town: Step-by-Step
Step 1: Heat olive oil in a large skillet over medium heat. Swirl it around like you’re pan-tangoing! (Tip: Listen for that gentle sizzle—it means GO time.)
Step 2: Add ground turkey. Break it apart with a spatula into crumbly bits—no big chunks allowed! Cook 5-6 minutes until no pink remains. (Chef’s hack: Patience = golden bits = FLAVOR.)
Step 3: Sprinkle salt, pepper, cumin, paprika, garlic powder, chili powder, onion powder, and oregano over the turkey. Channel your inner spice wizard! Stir like you mean it for 1 minute until fragrant. (Tip: Spices bloom in fat—this step makes all the difference!)
Step 4: Toss in those beautiful black beans. Stir gently—we’re warming them, not smushing! Cook 2-3 minutes until everything’s cozy. (Insider move: Squeeze half a lime here for brightness!)
Step 5: Assemble your masterpieces! Spoon fluffy rice into bowls, then crown it with the turkey-bean glory. (Pro move: Warm your bowls first—cold bowls sadden food.)
Step 6: TOP IT LIKE YOU OWN IT! Avocado slices, fresh salsa, shredded cheese, cilantro confetti, lime wedges—go wild. Your bowl, your rules. 🌈
The Science of Flavor Layering in Taco Bowls
Creating truly addictive taco bowls isn’t just about tossing ingredients together—it’s about strategic flavor building. Let’s geek out on the culinary science that makes this dish sing:
1. The Maillard Reaction (Your Turkey’s Glow-Up)
When you brown ground turkey, those crispy golden bits aren’t just pretty—they’re flavor bombs thanks to the Maillard reaction. This chemical process (which starts around 300°F) creates hundreds of new aroma compounds when proteins and sugars react to heat. Pro tip: Resist stirring constantly! Let the turkey sit undisturbed for 1-2 minutes to develop maximum flavor.
2. Fat = Flavor Conductor
Olive oil does more than prevent sticking—it’s a flavor vehicle. Spices like cumin and chili powder are fat-soluble, meaning they release their full potential when heated in oil. That’s why we add spices directly to the turkey drippings! For extra depth, try browning a spoonful of tomato paste with the spices.
3. Acid Balance is Key
The lime squeeze at the end isn’t optional—it’s molecular magic. Acid cuts through richness and brightens earthy spices. Fun experiment: Taste the turkey mixture before and after lime to experience how acid transforms flavors. Other brighteners: pickled onions, pineapple salsa, or a splash of apple cider vinegar.
4. Texture Psychology
Your brain craves contrast! That’s why toppings matter:
-
Creamy (avocado, cheese) balances crunchy (tortilla strips).
-
Hot (sizzling turkey) plays off cold (fresh pico de gallo).
Missing texture = bland experience, even if flavors are perfect.
Pro Hack: Toast your spices! Dry-toast cumin in the skillet for 30 seconds before adding oil. It amplifies their aroma like crazy.
Meal Prep Like a Pro – Taco Bowls for the Win
These bowls are meal prep royalty—here’s how to optimize them for a week of deliciousness without the “leftover fatigue”:
The Component Strategy
Store elements separately to maintain texture:
-
Base: Rice (keeps 4 days) or cauliflower rice (2 days).
-
Protein: Turkey-bean mix (5 days in fridge, 3 months frozen).
-
Toppings: Sliced radishes, cheese, and lime wedges stay fresh longest.
Assembly Trick: Portion rice and turkey mix into containers, but add wet toppings (salsa, avocado) fresh. A mason jar layered salad-style works too—dressing at the bottom!
Revival Techniques
-
Microwave Rice: Sprinkle 1 tsp water, cover with a damp paper towel.
-
Turkey Mix: Reheat in a skillet with 1 tbsp broth to restore moisture.
5 Unexpected Meal-Prep Twists
-
Taco Omelet: Morning scramble with turkey mix + eggs.
-
Stuffed Sweet Potatoes: Swap rice for roasted sweet potato halves.
-
Taco Salad: Serve over chopped romaine with crushed chips.
-
Quesadilla Filling: Add extra cheese between tortillas.
-
Breakfast Nachos: Top tortilla chips with turkey mix + fried eggs.
Statistics Note: Prepping 4 servings saves ~90 minutes compared to daily cooking!
Global Inspirations – Taco Bowl’s Cousins
Taco bowls are just the beginning—let’s travel the world through bowls:
1. Korean Bibimbap Bowl
-
Base: Short-grain rice.
-
Protein: Gochujang-marinated turkey.
-
Toppings: Kimchi, sautéed spinach, fried egg.
-
Sauce: Sesame oil + chili paste.
2. Middle Eastern Lamb Bowl
-
Base: Turmeric rice or couscous.
-
Protein: Ground lamb with baharat spice.
-
Toppings: Tzatziki, sumac onions, pomegranate seeds.
3. Thai Larb Bowl
-
Protein: Turkey cooked with fish sauce + lime.
-
Toppings: Mint, cilantro, toasted rice powder.
-
Serve with: Butter lettuce cups.
4. Indian Butter “Taco” Bowl
-
Protein: Turkey simmered in tomato-cream sauce.
-
Toppings: Cucumber raita, mango chutney.
-
Spice Blend: Garam masala + turmeric.
Cultural Tip: In Brazil, “Prato Feito” bowls layer rice, beans, and meat—just like our taco bowls!
Making It Pretty (and Tastier!)
Presentation matters, friend! Scoop rice into shallow bowls—wide spaces = more topping real estate. Layer the turkey-bean mix slightly off-center for visual drama. Now, artfully arrange toppings in colorful sections: bright salsa next to creamy avocado, with crumbled cotija cheese snowing over everything. Finish with lime wedges propped against the side (hello, Insta-worthy!). Serve with warm tortillas for scooping escapes!
Shake It Up: 5 Delicious Twists
- Pineapple-Jalapeño: Add ½ cup diced pineapple and 1 minced jalapeño with the beans! Sweet-heat heaven.
- Mediterranean Mood: Swap taco spices with 1 tbsp za’atar. Use chickpeas + top with feta and tzatziki.
- Breakfast Bowl: Top with a fried egg + crispy tortilla strips. Brunch saved!
- Vegan Fiesta: Use lentils instead of turkey + vegan cheese. Spices stay!
- Keto Kick: Replace rice with cauliflower rice + extra avocado. Cheese crisis averted.
Olivia’s Real-Kitchen Confessions
This recipe? It’s evolved like my favorite jeans. Originally, I used packet taco seasoning… until I realized homemade spices taste bolder and skip the weird additives! Now I double the batch and jar it as “Taco Dust” (my godson’s nickname for it!). True story: Once subbed pumpkin puree for beans during a pantry emergency—shockingly delicious! Also—don’t stress over exact spice measurements. Taste as you go! More chili powder? Do it. This bowl forgives everything except forgetting the lime. 😉
Your Questions, Answered!
Q: My turkey turns out dry—help!
A: Two tricks! 1) Don’t overcook—turkey cooks FAST. Remove it at 165°F. 2) Add 2 tbsp broth or salsa when mixing beans!
Q: Can I freeze leftovers?
A: Absolutely! Freeze turkey-bean mix (sans toppings) for 3 months. Rice freezes best separately. Reheat with a splash of water!
Q: Too spicy for kiddos?
A: Omit chili powder + use mild paprika. Serve with yogurt or extra cheese to cool tiny tongues!
Q: Rice sticking together in clumps?
A: Rinse it before cooking! Or fluff leftovers with a fork + sprinkle water before microwaving.
GROUND TURKEY TACO BOWLS
- Total Time: 25 minutes
Description
Hey there, kitchen friend! Olivia here, waving from my flour-dusted countertop. When life’s busy but your soul craves something hearty, healthy, and bursting with flavor, these Ground Turkey Taco Bowls are your ultimate fix. Juicy seasoned turkey, fluffy rice, and protein-packed black beans come together in a fiesta of Tex-Mex goodness—all ready in just 25 minutes. No fancy skills, just big flavors and good vibes!
Ingredients
-
1 lb ground turkey (93% lean)
-
1 tbsp olive oil
-
½ tsp salt
-
½ tsp black pepper
-
1½ tsp ground cumin
-
½ tsp paprika
-
½ tsp garlic powder
-
½ tsp chili powder
-
¼ tsp onion powder
-
¼ tsp dried oregano
-
1½ cups cooked white rice (leftover rice works great)
-
1 (15 oz) can black beans, drained and rinsed
-
Optional toppings: sliced avocado, fresh salsa, shredded cheese, chopped cilantro, lime wedges
Instructions
-
Heat the skillet: Warm olive oil over medium heat until shimmering.
-
Cook the turkey: Add ground turkey and break into small pieces. Cook 5–6 minutes until no pink remains and golden bits form.
-
Season: Sprinkle salt, pepper, cumin, paprika, garlic powder, chili powder, onion powder, and oregano over turkey. Stir and cook 1 minute until spices are fragrant.
-
Add beans: Stir in black beans gently, cooking 2–3 minutes to warm through. Squeeze in juice from half a lime for brightness if you like.
-
Assemble bowls: Spoon rice into bowls, top with turkey and bean mixture.
-
Top your way: Add avocado slices, salsa, cheese, cilantro, and lime wedges. Dig in!
Notes
-
Toast cumin in oil before adding turkey for extra flavor.
-
Use leftover rice or swap for brown rice/quinoa.
-
For juicier turkey, add 2 tbsp broth or salsa when mixing beans.
-
Freeze cooked turkey-bean mix (without toppings) up to 3 months.
-
Adjust spices to taste—more chili powder for heat, less for kids.
- Prep Time: : 5 minutes
- Cook Time: 20 minutes
Nutrition
- Calories: 390 cal Per Serving
- Fat: 18g
- Carbohydrates: 35g
- Protein: 26g
Nutrition Per Serving (1 bowl, 4 total)
Calories: 390 • Protein: 26g • Carbs: 35g • Fat: 18g
Note: Toppings add extra calories. Cheese and avocado are healthy fats—enjoy in moderation!
Final Thoughts: Bowls = Love in Edible Form
Ground Turkey Taco Bowls are more than dinner—they’re a celebration of flexibility. Too tired to chop? Use bagged slaw. Vegan friend coming over? Swap in lentils. They remind us that cooking isn’t about rigid rules, but feeding joy—to ourselves and others. So grab that lime, turn up the music, and build your masterpiece. Every messy, delicious bite is a win.
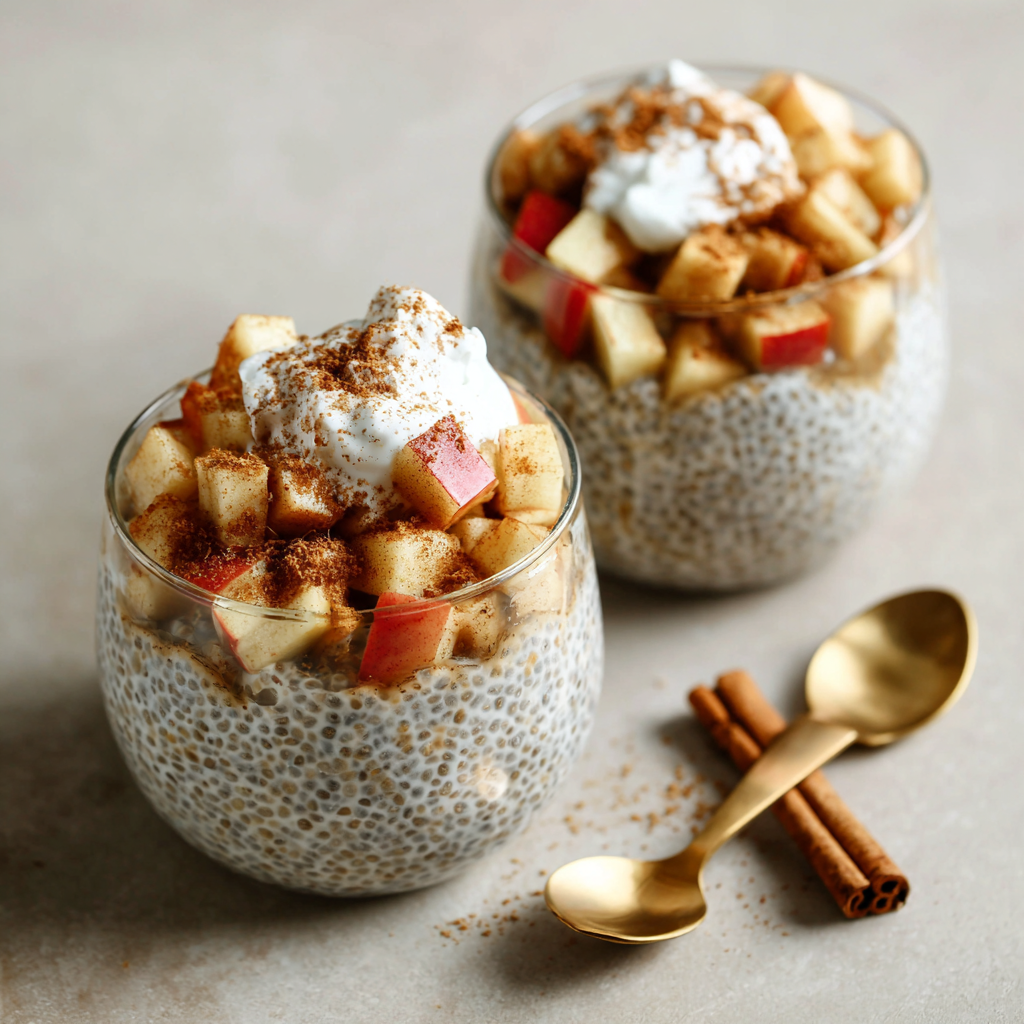
Apple Pie Chia Pudding
Wake Up to Apple Pie Magic (Without the Oven!)
Hey there, kitchen friend! Olivia here, waving from my perpetually flour-dusted countertop. Can we talk about that magical moment when autumn rolls in? Suddenly, the air turns crisp, sweaters emerge, and my brain does a full pivot toward all things cozy-spiced and apple-kissed. But let’s be real – whipping up a full apple pie before your morning coffee isn’t exactly a vibe, is it? Enter my secret weapon: this Apple Pie Chia Pudding! Imagine diving spoon-first into the nostalgic comfort of warm apple pie filling, swirled into a creamy, dreamy chia base that’s secretly packed with goodness. It’s like dessert decided to crash the breakfast party – and honestly? We’re thrilled it did. Perfect for rushed mornings, make-ahead meal prep warriors, or when you just need a hug in a bowl, this recipe is your golden ticket to cozy. No fancy skills needed, just a jar, a spoon, and that lovely anticipation of opening the fridge to something deliciously waiting for you. Let’s turn simple ingredients into pure, spiced-up joy!
My Grandma’s Orchard & A Modern Twist
This recipe? It’s pure nostalgia with a chia seed spin. Growing up, my Grandma Eleanor had this ancient, slightly lopsided apple tree in her backyard. Every October, we’d spend hours gathering windfalls, our fingers sticky with juice, while she’d hum old tunes and peel apples faster than I could blink. The smell of her apple pie baking – cinnamon swirling through the house like a promise – is etched into my happiest memories. Fast forward to my chaotic adult life: I craved that deep, spiced-apple comfort but lacked the time (and let’s be honest, the pastry patience!) for pie-making. One chilly Sunday, experimenting with chia pudding (my go-to breakfast canvas), I tossed in some applesauce and a hefty pinch of apple pie spice. That first bite? Instant time travel! It wasn’t Grandma’s flaky crust, but the heart of her pie – the tender, spiced apples and that warm, sweet hug of flavor – was undeniably there. Now, every time I layer those caramelized apples onto the creamy pudding, it feels like sharing a secret wink with the past, proving comfort food can evolve beautifully.
Your Cozy Flavor Toolkit
Grab these simple stars! Don’t stress about exact matches – your kitchen, your rules.
- ½ cup Chia Seeds: Tiny but mighty! These are our texture wizards, plumping up into that dreamy tapioca-like pudding. Chef Tip: Black or white chia work equally well! If they’re old, they might not plump as nicely – give them a sniff (should be neutral!).
- 2 cups Non-Dairy Milk: Creaminess central! Almond milk keeps it light, oat milk adds extra richness, coconut milk brings tropical flair. Insight: Unsweetened vanilla is my fave for subtle background notes!
- 4 tbsp Applesauce: Our secret “apple pie” base booster! Adds natural sweetness and moisture. Sub: Use unsweetened! No applesauce? Mash 1/4 of a very ripe banana (it’ll change flavor slightly but still work).
- 1–2 tbsp Maple Syrup: Liquid gold! Start with 1 tbsp; you can always add more later. Sub: Honey (not vegan) or date syrup work. Taste before chilling!
- 1–1½ tsp Apple Pie Spice: The soul of the dish! Chef Hack: Make your own: 1.5 tsp cinnamon + 1/4 tsp nutmeg + 1/4 tsp allspice + pinch cardamom or cloves!
- ¼ cup Yogurt (Dairy-free Greek-style or regular): The tangy maestro! Lifts the sweetness and adds protein-rich creaminess. Sub: Silken tofu blended smooth, or skip it for a slightly thinner pudding.
For Those Irresistible Spiced Apples:
- 1 Large Apple (Honeycrisp or Fuji): Pick something crisp-sweet that holds shape! Insight: Granny Smith works if you love tartness!
- 2 tsp Coconut Oil: For caramelization magic! Sub: Butter or ghee work beautifully for non-vegan.
- 1 tbsp Maple Syrup: Glossy, sweet coating. Pure bliss!
- 1 tsp Cinnamon: Because you can never have too much cozy spice!
Let’s Build Some Breakfast Magic!
This is where the easy-as-pie (pun intended!) magic happens. Get ready for serious flavor with minimal effort.
- Whisk Your Pudding Base: Grab a large bowl or 4 individual jars (meal prep win!). Dump in the chia seeds, non-dairy milk, applesauce, maple syrup (start with 1 tbsp!), apple pie spice (start with 1 tsp!), and yogurt. Now, WHISK LIKE YOU MEAN IT for a good 1-2 minutes! Seriously, get in there and break up any chia clumps. Chef Hack: Use a fork for better clump-busting power than a spoon! Why whisk twice? Chia seeds sink fast. This initial whisk prevents a concrete-like layer at the bottom.
- The First Rest & Stir: Let the mixture sit on the counter for 5 minutes. This lets the chia seeds start absorbing liquid. Now, whisk/stir vigorously AGAIN! This is crucial for smooth pudding nirvana. Cover tightly. Tip: Press plastic wrap directly onto the surface if using a bowl to prevent a skin.
- Chill Out (The Pudding, Not You… Yet!): Pop it into the fridge for at least 4 hours, but overnight is IDEAL. The chia seeds need this beauty sleep to transform into thick, creamy perfection. Chef Insight: Think of it like marinating flavor! The spices meld beautifully during this time.
- Wake Up the Apples: About 10 minutes before serving, heat coconut oil in a small skillet over medium heat. Toss in your diced apples, maple syrup, and cinnamon. Sauté, stirring occasionally, for 5-7 minutes. You want them tender but not mushy, with gorgeous caramelized edges! Hack: Cover the skillet for the first 3 minutes to help soften the apples faster, then uncover to caramelize.
- Assemble Your Masterpiece: Pull your glorious pudding from the fridge. Give it a good stir – it should be thick and luscious. Spoon it into bowls or glasses. Top generously with those warm, spiced apples (that contrast is divine!). Optional Flourish: Add a dollop of extra yogurt, a sprinkle of granola for crunch, or a tiny extra drizzle of maple syrup!
Making it Pretty (Because We Eat With Our Eyes First!)
Presentation is half the fun! For everyday, a simple spoonful in a mason jar feels rustic and charming. When I want to impress (hello, brunch guests!), I layer the pudding and apples in clear glasses or small bowls for a stunning parfait effect. A final flourish makes it sing: a dollop of creamy yogurt right in the center of the apples, a sprinkle of extra cinnamon or apple pie spice, maybe a few toasted pecans or walnuts for crunch, or even a tiny edible flower if I’m feeling fancy. Serve it with the apples still warm for that “just baked” feeling, or let everything chill completely for a refreshing treat. A little cinnamon stick poked in the side? Chef’s kiss!
Make It Uniquely Yours!
This recipe is your cozy canvas! Play around:
- Pear & Ginger Twist: Swap apples for ripe pears! Add 1/2 tsp grated fresh ginger to the sauté for a warm, zippy kick.
- Pumpkin Spice Everything: Replace 2 tbsp applesauce with pure pumpkin puree and use pumpkin pie spice instead of apple pie spice. Autumn in a jar!
- Protein Powerhouse: Stir 1 scoop of vanilla protein powder into the milk before adding chia seeds (you might need a splash more milk!).
- Nutty Crunch Delight: Layer with homemade granola or chopped toasted pecans/almonds between the pudding and apples.
- Tropical Escape: Use coconut milk, swap apples for diced mango, and add a pinch of cardamom to the chia base. Top with toasted coconut flakes!
Olivia’s Kitchen Confessions & Tips
Okay, real talk? The first time I made chia pudding YEARS ago, it was a gloopy, clumpy disaster that resembled frog spawn more than breakfast. Lesson learned: WHISK LIKE YOUR BREAKFAST DEPENDS ON IT (it kinda does!). This apple pie version is my redemption arc! Over time, I discovered the yogurt trick – that tang cuts the sweetness so perfectly. And the apples? I used to just layer them raw, but that quick sauté unlocks the *real* pie magic. Pro Tip: Make a double batch of the spiced apples on Sunday! They keep beautifully for 3-4 days in the fridge. Warm them slightly or use them cold – both rock. Honestly, this pudding’s journey mirrors mine: started a bit rough around the edges, but with some love (and whisking!), it became something truly comforting and reliable. It’s survived recipe testing fails, been my 3pm snack savior, and even starred at a Friendsgiving brunch. That’s kitchen evolution, my friend!
Your Apple Pie Chia Questions, Answered!
Let’s tackle those kitchen hiccups before they happen!
- “My pudding is still runny after 4 hours! Help!” Don’t panic! Two likely culprits: Old chia seeds (they lose thickening power over time) or not enough whisking (clumps prevent absorption). Solution: Whisk in an extra 1-2 tbsp chia seeds and chill another hour. Next time, use fresher seeds and WHISK WHISK WHISK!
- “Can I use regular dairy milk and yogurt?” Absolutely! The recipe is incredibly flexible. Whole milk, 2%, Greek yogurt, skyr – all work wonderfully. The goal is creaminess and a bit of tang from the yogurt.
- “How long does this keep in the fridge?” The plain chia pudding base (without apple topping) is a champ! It lasts beautifully for 4-5 days in airtight containers. Cooked apples are best within 3-4 days. Store them separately and assemble when ready to eat for best texture.
- “It’s too thick! Like concrete!” Over-thickening happens! Simply stir in a splash of your non-dairy milk (or regular milk/water) when you take it out of the fridge until it reaches your perfect spoonable consistency. Easy fix!
Apple Pie Chia Pudding
- Total Time: 4 hours 20 minutes (mostly unattended)
Description
Hey there, kitchen friend! Olivia here, from my flour-dusted countertop. When autumn arrives, all I want is cozy-spiced, apple-kissed goodness—but who has time for a full apple pie before coffee? Enter this Apple Pie Chia Pudding: creamy, dreamy chia pudding meets tender, spiced apples for a breakfast that feels like dessert crashing the party. It’s easy, make-ahead magic perfect for rushed mornings or meal prep warriors. Let’s turn simple ingredients into pure joy!
Ingredients
Chia Pudding Base:
-
½ cup chia seeds
-
2 cups non-dairy milk (almond, oat, or coconut — unsweetened vanilla is great)
-
4 tbsp applesauce (unsweetened)
-
1–2 tbsp maple syrup (start with 1 tbsp, adjust to taste)
-
1–1½ tsp apple pie spice (or homemade: 1.5 tsp cinnamon + ¼ tsp nutmeg + ¼ tsp allspice + pinch cloves/cardamom)
-
¼ cup yogurt (dairy-free Greek-style or regular; optional for creaminess)
Spiced Apples Topping:
-
1 large apple (Honeycrisp, Fuji, or Granny Smith if you like tart)
-
2 tsp coconut oil (or butter/ghee)
-
1 tbsp maple syrup
-
1 tsp cinnamon
Instructions
-
Mix the pudding:
In a large bowl or 4 jars, whisk chia seeds, milk, applesauce, maple syrup, apple pie spice, and yogurt vigorously for 1–2 minutes to break up clumps. -
Rest and whisk again:
Let sit 5 minutes, then whisk/stir again to ensure smooth pudding. Cover tightly (plastic wrap pressed onto surface helps avoid skin). -
Chill:
Refrigerate at least 4 hours or overnight for thick, creamy pudding. -
Prepare spiced apples:
About 10 minutes before serving, heat coconut oil in a skillet over medium heat. Add diced apple, maple syrup, and cinnamon. Cover and cook 3 minutes, then uncover and sauté 2–4 more minutes until tender with caramelized edges. -
Assemble and serve:
Stir the chilled pudding, spoon into bowls or jars, top generously with warm apples. Optional: dollop extra yogurt, sprinkle granola, nuts, or cinnamon.
Notes
-
Whisk well to avoid clumps and thick concrete-like pudding.
-
Use fresh chia seeds for best thickening power.
-
Make a double batch of spiced apples to enjoy all week!
-
Swap apples for pears or add fresh ginger for a twist.
-
Protein powder, pumpkin puree, or granola layers make great variations.
- Prep Time: 10 minutes
- Cook Time: 7 minutes
Nutrition
- Calories: 220 cal Per Serving
- Fat: 10g
- Carbohydrates: 28 g
- Fiber: 9g
- Protein: 5 g
Nourishment Breakdown (The Cherry on Top!)
While this tastes decadent, it’s packed with goodness! Here’s the scoop per serving (approx.):
- Calories: ~220 kcal
- Protein: ~5g (Thanks, chia & yogurt!)
- Fat: ~10g (Mostly healthy fats from chia & coconut oil)
- Carbs: ~28g (Fiber-rich from chia & apples)
- Fiber: ~8-10g (A powerhouse for gut health!)
Dietary Notes: Naturally Gluten-Free, Vegan (use plant-based milk/yogurt), Refined Sugar-Free (sweetened with maple/apples), and perfect for Meal-Prep!
Final Thoughts: More Than a Recipe—A Morning Ritual
This Apple Pie Chia Pudding isn’t just fuel; it’s a love letter to slower mornings. It’s the antidote to rushed cereal gulps and a reminder that nourishing yourself can taste like dessert. Whether you’re meal-prepping for chaos or savoring a quiet moment with a spoon, it’s proof that the best foods are both nostalgic and nourishing.
So here’s to Grandma Eleanor’s orchard, to kitchen experiments that work (eventually!), and to you—because you deserve breakfast that feels like a warm hug. Now go forth and whisk with abandon!
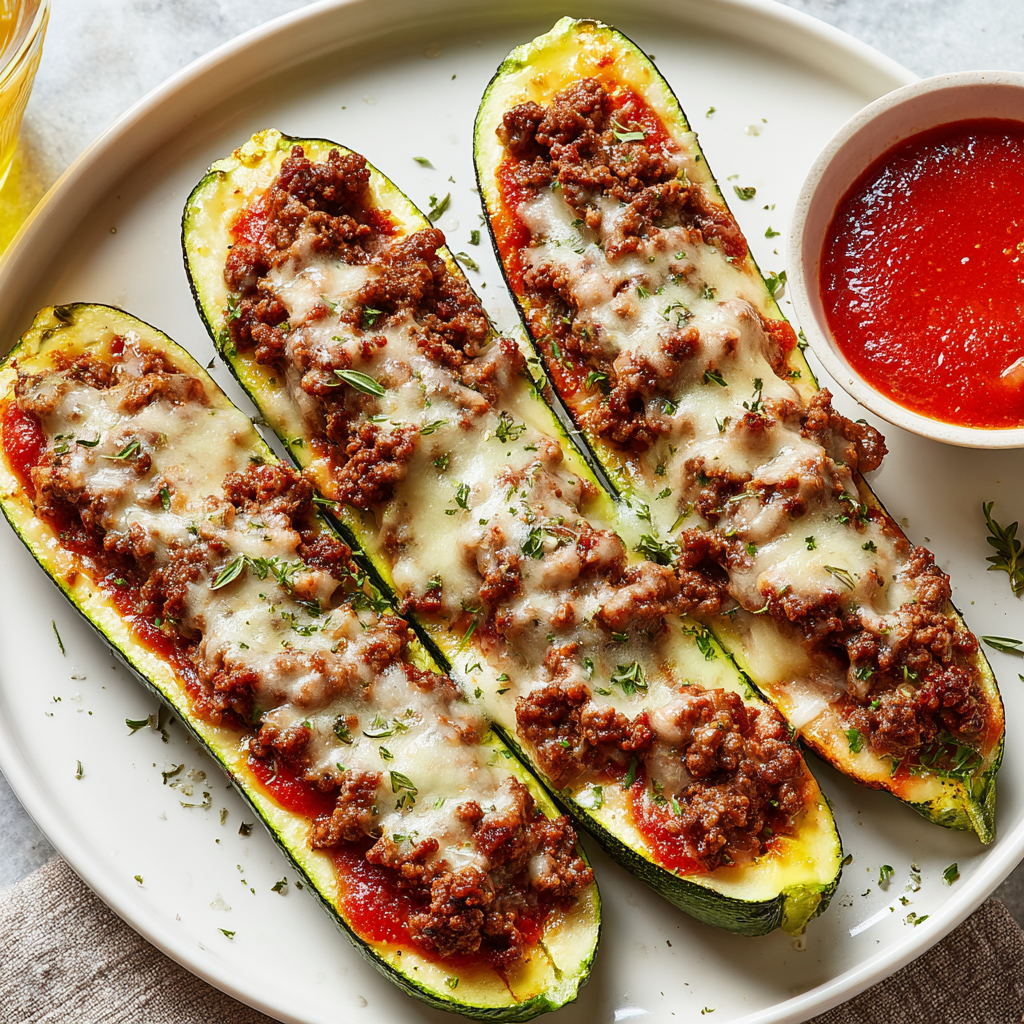
Ground Beef Stuffed Zucchini Boats
Hey There, Cozy Kitchen Friend! Let’s Make Magic in a Zucchini Boat
Is there anything better than that moment when you pull a bubbling, cheesy, herb-scented masterpiece out of the oven? You know the one – the dish that makes everyone go quiet for a second, then erupt with “Ooohs” and “What IS that? It smells AMAZING.” Well, my friend, get ready for that moment. Today, we’re diving fork-first into my Ground Beef Stuffed Zucchini Boats – your new weeknight superhero disguised as a humble veggie. Imagine tender zucchini halves, hollowed out like little canoes, piled high with savory, garlicky ground beef simmered in rich tomato sauce, then crowned with a blanket of melted cheese that gets all golden and irresistible in the oven. It’s pure, unapologetic comfort food that feels fancy but comes together faster than you can say “second helping.”
These aren’t just “healthy” in that boring, restrictive way – oh no. They’re vibrant, satisfying, and packed with so much flavor you won’t miss the carbs one bit. Perfect for when you want something hearty that won’t weigh you down, or when your garden (or farmer’s market haul!) is overflowing with zucchini. Whether you’re cooking for a busy family dinner, a cozy date night in, or just treating yourself to something special, these boats are your ticket to deliciousness. They’re forgiving, fun to make, and guaranteed to spark joy (and maybe a little friendly plate-jostling). So tie on your apron – the slightly messy one, you know the one I mean – and let’s set sail on a flavor adventure! Trust me, your kitchen (and your taste buds) are about to get very, very happy.
My Zucchini Boat Epiphany: A Tale of Gluts, Grills, and Good Intentions
Okay, confession time. My love affair with these stuffed zucchini boats started… accidentally. Picture this: It was peak summer, maybe five years back. My garden? A jungle. Specifically, a zucchini jungle. I’d planted two innocent little seedlings, and suddenly I was drowning in green torpedoes. I’d given them to neighbors, made endless loaves of bread, even tried freezing them (don’t ask). Desperation set in. One sweltering evening, faced with yet another giant zucchini and zero desire to heat up the kitchen for hours, I had a wild idea. Inspired vaguely by something I’d seen grilled, I halved it, hacked out the seedy middle, and stared at the hollow shell. “Boat,” I thought. “Needs cargo.”
I had some leftover taco-seasoned beef in the fridge from the night before – not enough for full tacos, but too much to toss. I dumped it into the zucchini canyon, sprinkled it with the last shreds of cheddar clinging to the cheese drawer, and drizzled it with a glug of olive oil. Onto the grill it went (because the oven was OFF LIMITS in that heat). Twenty minutes later… magic. The zucchini was tender-crisp, the beef was sizzling, the cheese was perfectly blistered. My husband took one bite, looked at me with wide eyes, and mumbled, “Why haven’t we always been eating this?!” That messy, thrown-together grill experiment became an instant summer staple. It evolved (hello, simmered tomato sauce base!), but the core remained: simple, garden-driven, and packed with flavor. It taught me that the best recipes often come from necessity, a little chaos, and the willingness to see a zucchini not as a burden, but as a vessel for delicious possibility. Now, every time I make them, I smile remembering that sweaty summer evening and the glorious, cheesy accident that was born from my zucchini glut.
Your Flavor Crew: Gathering the Goods
Here’s your shopping list for flavor town! Don’t stress about exact brands – use what you love and have on hand. I’ve packed in my favorite swaps and chef-y whispers to guide you.
- 2 medium zucchini: Look for firm, glossy ones about 7-8 inches long. Smaller ones cook faster but hold less filling; huge ones can be watery. Chef’s Whisper: Don’t toss the scooped-out flesh! Chop it fine and sauté it right into the beef filling for extra veggie power and zero waste.
- ½ lb ground beef: I like 85/15 for flavor without being too greasy. Leaner (90/10 or 93/7) works, just add a tiny splash of olive oil to the pan. Feeling Fancy? Ground Italian sausage (mild or hot!) or ground turkey/chicken are stellar swaps.
- Seasoning Squad (for Beef):
- ½ tsp salt, ¼ tsp ground black pepper: The essential flavor foundation. Taste your beef mixture before stuffing!
- 1 tsp onion powder, 1 tsp garlic powder: Instant depth! No fresh onions/garlic? No problem. Powder is your weeknight warrior. Got Fresh? Sauté ¼ cup finely diced onion and 2 minced garlic cloves before adding the beef.
- 1 tbsp oregano (or marjoram/savory): Oregano is classic, but marjoram is sweeter, savory is earthier. Use what sings to you! Dried is perfect here.
- 1 tsp basil (fresh or dried): Dried is convenient, but if you have fresh, stir in a handful of chopped leaves *off the heat* after cooking the beef for a bright pop.
- ½ tsp rosemary (fresh or dried): Just a hint! Dried is potent, so use half if using fresh minced rosemary. Thyme is also lovely.
- ½ cup shredded cheese (cheddar, mozzarella, or your choice): Stirred into the hot beef for melty goodness. Sharp cheddar = bold, mozzarella = stretchy bliss, Italian blend = perfection. Dairy-Free? A good melting vegan cheese works, or skip this mix-in and double the topping cheese.
- Sauce Simplicity:
- 1 cup tomato sauce: Your favorite jarred marinara or plain tomato sauce works wonders. Need more depth? Use a sauce with basil or mushrooms. Pro Tip: Fire-roasted tomato sauce adds a smoky whisper!
- ½ tsp salt, ¼ tsp black pepper: Adjust to your sauce’s saltiness.
- 1 tbsp oregano (or similar herb): Echoing the beef flavors.
- ½ tsp onion powder, ½ tsp garlic powder: Boosting the savory base of the sauce.
- Finishing Touches (Topping):
- ½ cup shredded cheese: The golden crown! Same blend as inside or mix it up (I love a little parmesan here for bite).
- 2 tbsp olive oil: Drizzled over before baking. This helps the zucchini soften beautifully and the cheese brown gorgeously. Flavor Boost: Use garlic-infused olive oil!
Let’s Set Sail: Building Your Flavor-Filled Boats
Ready to cook? Grab your favorite skillet and baking dish – let’s turn these ingredients into cozy magic. I’ll walk you through each step with all my favorite kitchen hacks!
- Preheat & Prep Your Fleet: Fire up your oven to 375°F (190°C). This gives it time to get perfectly hot while you prep. Now, tackle the zucchini. Rinse them well and pat dry. Slice them in half lengthwise – you want long, stable boats, not short stumpy ones! Using a spoon (a grapefruit spoon with serrated edges is MAGIC for this, but a regular teaspoon works fine), scoop out the seedy center pulp, leaving a sturdy ¼-inch thick shell. Hack Attack! Don’t dig too deep! You want a solid “hull” so your boat doesn’t sink under the filling weight. Save that scooped pulp! Chop it roughly and set it aside – we’re adding it to the filling for bonus flavor and nutrition.
- Brown the Beefy Bounty: Heat 1 tablespoon of olive oil in a large skillet over medium-high heat. Crumble in the ground beef. Let it get some good browning on one side before you start breaking it up – that’s where the deep flavor lives! Once it’s mostly browned (about 5 minutes), drain off any excess grease if needed (especially if using higher fat beef). Now, sprinkle in all those glorious beef seasonings: salt, pepper, onion powder, garlic powder, oregano, basil, and rosemary. Stir like you mean it, letting those spices toast for about 30 seconds – hello, aroma! Toss in your reserved chopped zucchini pulp now too. Cook, stirring occasionally, until the beef is fully cooked through and the zucchini bits are softened, about 3-4 more minutes. Chef’s Secret: Taste it now! Adjust salt or pepper if needed. Remove the skillet from the heat.
- Simmer the Savory Sea (a.k.a. The Sauce): While the beef browns (multitasking queen!), grab a small saucepan. Combine the tomato sauce, salt, pepper, oregano, onion powder, and garlic powder. Give it a good stir and bring it to a gentle simmer over medium-low heat. Let it bubble away happily for 5-10 minutes. This isn’t just heating – it’s letting the flavors meld and deepen. Time Saver: If you’re using a really flavorful pre-made sauce, you can skip the extra simmering and just heat it through. Stir occasionally to prevent sticking.
- Cheesy Alliance & Assembly: Back to the slightly cooled beef mixture (you don’t want to melt the cheese instantly into a gluey mess!). Stir in that ½ cup of shredded cheese until it’s beautifully incorporated and melty. Now, grab your baking dish (an 8×11 or 9×13 inch works great). Spread the simmered tomato sauce evenly over the bottom. This creates a flavorful “moat” that steams the zucchini from below, keeping it tender. Place your hollowed zucchini boats cut-side-up on top of the sauce, nestling them in snugly. Generously spoon the cheesy beef mixture into each zucchini cavity, mounding it up slightly. Pro Tip: Press the filling down gently as you go to pack it in – you want maximum flavor per bite!
- Top, Drizzle & Bake to Golden Perfection: Sprinkle the remaining ½ cup of shredded cheese evenly over the filled zucchini boats. Drizzle the whole glorious pan with the remaining 2 tablespoons of olive oil. This is KEY! It helps the zucchini cook evenly, prevents drying, and encourages that cheese to get irresistibly golden. Pop the dish into your preheated oven and bake for 25-30 minutes. You’re looking for tender zucchini (a fork should pierce the side easily) and that cheese to be melted, bubbly, and starting to get golden brown spots. Watchful Eye: If your cheese is browning too fast but the zucchini isn’t tender, loosely tent the dish with foil.
- The Grand Launch (a.k.a. Serving!): Carefully remove your masterpiece from the oven. Let it rest for just 5 minutes – this helps the filling set slightly so it doesn’t spill out everywhere when you serve. Use a spatula to transfer the boats to plates. Don’t forget that delicious, flavorful tomato sauce pooled underneath! Spoon some over each boat or alongside. Garnish with fresh basil or parsley if you’re feeling fancy. Serve immediately and prepare for the compliments!
Anchors Aweigh! Serving Your Culinary Masterpieces
These zucchini boats are stars all on their own, but a little plating love makes them feel extra special. I love serving two halves per person – they look generous and satisfying. Slide a thin spatula underneath each boat to lift it out, letting that yummy sauce drip down. Plate them side-by-side, maybe slightly overlapping, with a little extra sauce spooned around the base. That melted cheese topping is your showstopper, so let it shine! For a pop of color and freshness, sprinkle on some chopped fresh parsley, basil, or even a pinch of red pepper flakes if you like heat. A simple green salad with a light vinaigrette is the perfect crisp counterpoint. If you’re not strictly low-carb, a crusty hunk of garlic bread for mopping up that sauce is pure heaven. Honestly? They’re so pretty and smell so incredible, just setting them down on the table is enough to make everyone happy.
Charting New Courses: Delicious Twists on the Classic
One of the best things about these boats? They’re a blank canvas! Here are some fun ways to sail in a different flavor direction:
- Mediterranean Meze Boat: Swap the beef for ground lamb or turkey. Use cumin, coriander, and a pinch of cinnamon in the seasoning. Stir in crumbled feta and chopped Kalamata olives instead of cheddar. Top with tzatziki sauce after baking!
- Tex-Mex Fiesta Boat: Season the beef with chili powder, cumin, and smoked paprika instead of the Italian herbs. Use a salsa or enchilada sauce base. Mix black beans and corn into the filling. Top with pepper jack cheese and finish with avocado slices and cilantro.
- Pizza Party Boat: Use Italian sausage for the meat. Stir mini pepperoni and chopped green peppers into the filling. Swap the tomato sauce for pizza sauce. Top solely with mozzarella and extra mini pepperoni! Bake and garnish with fresh basil.
- Veggie-Packed & Plant-Based Voyage: Skip the meat! Sauté mushrooms, lentils, or crumbled tofu with the seasonings. Add extra chopped veggies like bell peppers or spinach. Use a vegan cheese or nutritional yeast for cheesy flavor.
- Creamy Dream Boat: After baking, drizzle with a simple garlic-herb yogurt sauce (Greek yogurt + minced garlic + lemon juice + dill) or a light Alfredo sauce instead of extra tomato sauce.
From My Messy Apron to Yours: Final Kitchen Wisdom
These zucchini boats have become such a beloved staple in my kitchen, evolving from that sweaty grill experiment into a year-round favorite. One hilarious “oops” moment? I once accidentally used pumpkin pie spice instead of Italian seasoning (similar looking jars in the pre-coffee morning haze!). Surprisingly, with some extra garlic and a dollop of ricotta on top, it wasn’t a disaster… just a very “unique” autumnal twist I haven’t quite replicated! Lesson learned: label your spice jars clearly, folks! Over time, I’ve learned the biggest key is not overcooking the zucchini. You want it tender but with a slight bite, not mushy. The 25-30 minute bake time is a guide – start checking at 20 minutes if your zucchini were small or your oven runs hot. And that saucy base? That was a game-changer addition. Early versions sometimes had slightly dry bottoms. Spooning that sauce underneath guarantees perfectly cooked, flavorful zucchini every single time. It’s these little tweaks, born from happy accidents and hungry taste-testers (my husband remains my chief quality control officer), that make a recipe truly yours. Don’t be afraid
Print
Ground Beef Stuffed Zucchini Boats
- Total Time: 30 minutes
Description
Is there anything better than pulling a bubbling, cheesy, herb-scented dish out of the oven? These Ground Beef Stuffed Zucchini Boats are just that magic moment. Tender zucchini halves become little canoes packed with savory, garlicky ground beef in rich tomato sauce, topped with melty cheese that’s golden and irresistible. It’s hearty comfort food that feels fancy but comes together quickly — perfect for weeknights or when your zucchini harvest is overflowing. Let’s dive in!
Ingredients
-
2 medium zucchini (about 7–8 inches long)
-
½ lb ground beef (85/15 preferred)
-
1 tbsp olive oil (plus 2 tbsp for drizzling)
-
1 cup tomato sauce (marinara or plain)
-
1 tsp onion powder
-
1 tsp garlic powder
-
1 tbsp dried oregano
-
1 tsp dried basil
-
½ tsp dried rosemary
-
½ tsp salt, plus extra to taste
-
¼ tsp black pepper, plus extra to taste
-
½ cup shredded cheese (cheddar, mozzarella, or your choice)
-
Optional: fresh basil or parsley for garnish
Instructions
-
Preheat oven to 375°F (190°C).
-
Prepare zucchini:
-
Wash and dry zucchini. Slice lengthwise.
-
Scoop out the seeds and pulp, leaving a sturdy ¼-inch shell. Chop the scooped flesh and set aside.
-
-
Cook beef filling:
-
Heat 1 tbsp olive oil in a skillet over medium-high heat.
-
Brown the ground beef without stirring for 2-3 minutes to get a nice crust, then break it apart.
-
Drain excess fat if needed.
-
Add chopped zucchini pulp, salt, pepper, onion powder, garlic powder, oregano, basil, and rosemary. Cook 3-4 minutes until beef is fully cooked and zucchini softens. Taste and adjust seasoning. Remove from heat.
-
-
Simmer tomato sauce:
-
In a small saucepan, combine tomato sauce with ½ tsp salt, ¼ tsp pepper, ½ tsp onion powder, ½ tsp garlic powder, and 1 tbsp oregano.
-
Simmer on low for 5-10 minutes to deepen flavors.
-
-
Assemble boats:
-
Spread a thin layer of the tomato sauce on the bottom of a baking dish (8×11 or 9×13 inch).
-
Place zucchini shells cut-side up in the dish.
-
Mix ½ cup shredded cheese into the beef filling. Spoon the filling generously into each zucchini half.
-
Sprinkle remaining ½ cup cheese on top.
-
Drizzle with 2 tbsp olive oil.
-
-
Bake:
-
Bake uncovered for 25-30 minutes until zucchini is tender and cheese is bubbly and golden.
-
If cheese browns too fast, cover loosely with foil and continue baking until zucchini is tender.
-
-
Rest and serve:
-
Let cool 5 minutes before serving. Garnish with fresh herbs if desired.
-
Notes
-
Don’t toss the scooped zucchini pulp! Chop and add it to the beef filling for extra flavor and no waste.
-
Use a serrated grapefruit spoon to easily scoop zucchini flesh.
-
If using leaner ground meat (turkey, chicken), add a splash of olive oil when browning.
-
For a dairy-free version, try vegan cheese or nutritional yeast.
-
Press filling down gently in zucchini shells to pack in maximum flavor.
-
Serve with a simple green salad or crusty bread for a complete meal.
- Prep Time: 15 minutes
- Cook Time: 15 minutes
Nutrition
- Calories: 310cal Per Serving
- Sugar: 5g
- Fat: 18g
- Carbohydrates: 8g
- Fiber: 2g
- Protein: 25g
Final Thoughts: More Than a Recipe – A Kitchen Mindset
These stuffed zucchini boats embody everything I love about cooking: creativity born from garden gluts, the alchemy of simple ingredients, and the joy of sharing food that looks fancy but feels effortless. They’ve become my go-to for everything from “I forgot to meal prep” Mondays to “I need to impress my in-laws” dinners.
The real lesson? Don’t wait for perfection. That first messy grill attempt taught me that great cooking isn’t about following rules—it’s about tasting fearlessly, tweaking relentlessly, and laughing when the cheese drips onto the oven floor (because it will). So grab those zucchinis, raid your fridge, and remember: the best recipes aren’t just made. They’re lived.
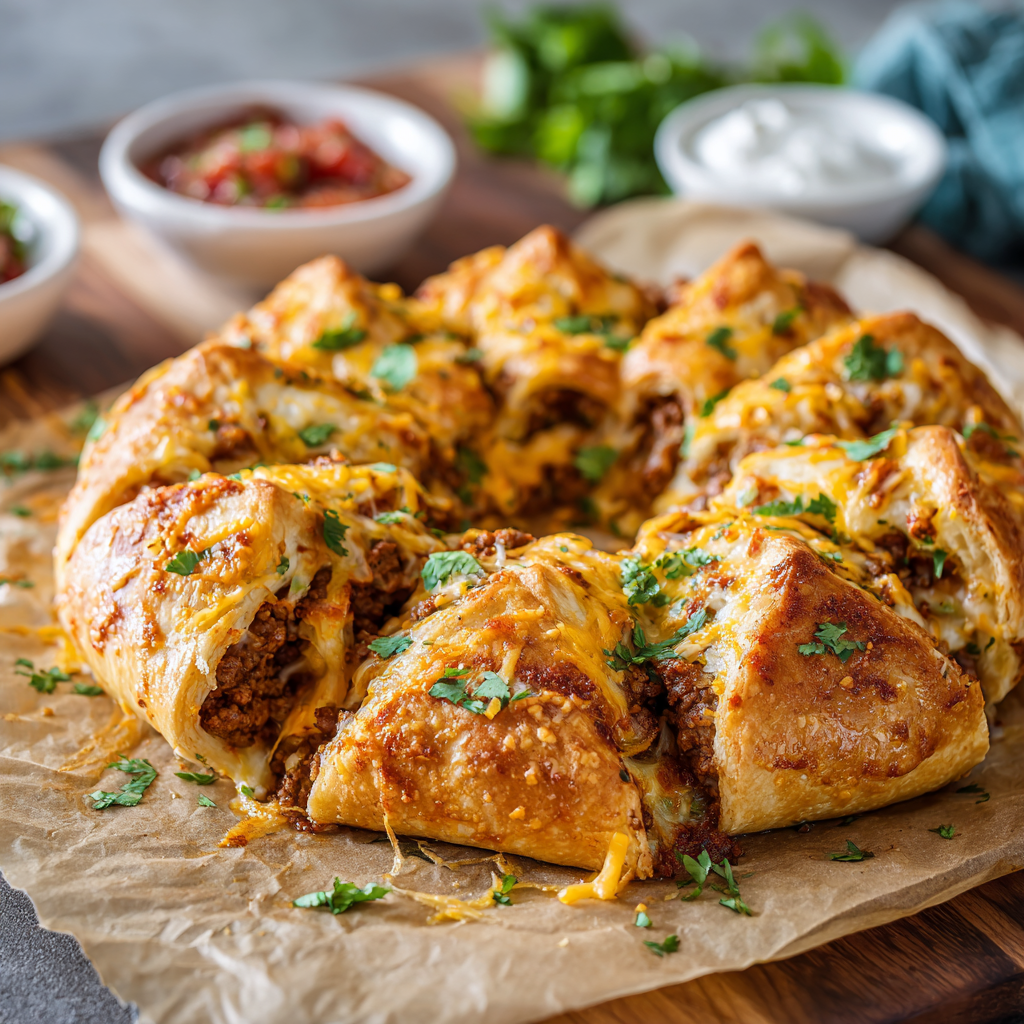
Easy Taco Ring Recipe
Let’s Turn Taco Night Into a Flavor Fiesta!
Hey there, kitchen friend! Olivia here, wiping flour off my apron as we speak. Can you smell that? It’s the magical scent of crispy crescent dough hugging juicy taco-spiced meat, all swirled into a golden ring of pure joy. If your family’s taco nights need a serious upgrade (or if you’re just craving something fun to make), you’re about to become obsessed with this Easy Taco Ring recipe.
Picture this: flaky layers of crescent roll dough cradling perfectly seasoned beef and molten cheese, baked until golden and served with all your favorite fixings. It’s like a taco and a warm hug had a delicious baby! What I adore most? It transforms simple ingredients into a showstopper that’ll have everyone gathering ’round your kitchen island, phones out to snap pics before devouring it. Whether it’s game day, girls’ night, or just Tuesday, this ring brings the party every single time.
No fancy skills needed here – just a baking sheet and that beautiful enthusiasm you bring to the kitchen. We’re talking 15 minutes of prep, 25 minutes in the oven, and boom: you’ve got a centerpiece that looks like you spent hours crafting. Ready to make your kitchen the happiest place on earth tonight? Let’s taco ’bout it!
How a Kitchen Disaster Became My Signature Dish
Let me take you back to my nephew’s 10th birthday party. I’d promised him “the coolest taco thing ever,” envisioning Pinterest-perfect symmetry. Instead? I accidentally used puff pastry (wrong dough alert!), created a leaky volcano of beef, and watched cheese ooze across the baking sheet. The kids dubbed it “Taco Explosion” and DEVOURED it like ravenous wolves, while my sister snapped unflattering photos that still resurface at family gatherings.
That glorious mess taught me two things: 1) Imperfect food often tastes best, and 2) Anything shaped like a crown automatically tastes 73% more fun. After tweaking the dough and filling ratio (and switching to crescent rolls!), this ring became my go-to for every potluck, new neighbor welcome, and “I need comfort food STAT” moment. Last winter, when my best friend had her baby? I showed up with this ring, guac, and margarita mix. She cried happy tears before taking her first bite – and that’s the magic of food made with love, my friends.
Your Flavor Toolkit: Simple Ingredients, Big Impact
- 1 lb ground beef – The MVP! (Chef’s Tip: 85% lean keeps it juicy. Swap with ground turkey, chicken, or plant-based crumbles!)
- 1 (1 oz) packet taco seasoning – Flavor magic in a pouch! (Chef’s Secret: Add 1 tsp smoked paprika for depth or use 2 tbsp homemade mix: 1 tsp each chili powder, cumin, garlic powder + ½ tsp oregano)
- 2 (8 oz) cans refrigerated crescent rolls – Our flaky golden blanket! (Pro Hack: Look for “seamless dough sheet” versions – WAY easier to shape!)
- 1 cup shredded cheese – The gooey glue! (Flavor Twist: Mix cheddar with pepper jack for heat, or try crumbled cotija for salty punch)
See? Nothing fussy! The beauty lies in how these humble ingredients transform. That taco seasoning isn’t just flavor – it creates the saucy texture that keeps the filling moist. And those crescent rolls? They puff into buttery layers that shatter gloriously when you bite in. Cheese choice matters too: melty cheeses like Monterey Jack disappear into creamy bliss, while sharp cheddar gives little flavor bursts. This is weeknight cooking at its smartest, tastiest, and most forgiving!
Let’s Build Your Flavor Crown: Step-by-Step
Step 1: Fire up that oven to 375°F (190°C). Line a baking sheet with parchment paper (trust me, cleanup is 1000x easier!). Chef’s Whisper: If your oven runs hot, go 10° lower to prevent over-browning.
Step 2: Brown the beef in a skillet over medium-high heat. Drain fat (I tilt the pan and spoon it out). Stir in taco seasoning + ¼ cup water. Simmer 5 minutes until saucy. Flavor Hack: Toss in ½ cup frozen corn or black beans here for confetti vibes!
Step 3: Unroll crescent dough. If using triangles, arrange them in a sunburst pattern: wide ends overlapping 1″ in center, points facing out. Game-Changer Tip: Use kitchen scissors to snip any dough points that extend too far!
Step 4: Spoon meat evenly over the wide ends (leave ½” border). Sprinkle cheese over meat. Pro Move: Reserve 2 tbsp cheese for topping later – it makes it prettier!
Step 5: Carefully lift each point and fold it over the filling, tucking the tip under the center “dough button”. Don’t Stress: If it tears, just patch it – it bakes up beautifully anyway!
Step 6: Bake 20-25 minutes until deeply golden. Secret Test: Tap the crust – it should sound hollow. Sprinkle reserved cheese last 5 minutes.
Step 7: REST 10 minutes before slicing (this prevents filling avalanches!). Golden Rule: Use pizza cutter for clean slices!
See how each step builds that perfect texture? Browning the meat hardens it enough to prevent sogginess, while the dough overlapping creates those buttery layers. That resting time? Crucial for the cheese to set so every slice holds together. You’re not just cooking – you’re engineering deliciousness!
Dress to Impress: Serving Your Masterpiece
Place that golden ring center-stage on a big platter! I pile shredded lettuce in the middle “well” like an emerald jewel box, then add bowls of chunky salsa, lime-spiked sour cream, and chunky guacamole around it. For parties? Make it interactive: set out small plates and let everyone tear off their own warm, cheesy segments to dunk. Dinner version? I nestle cilantro-lime rice in the center and serve with quick-pickled red onions. The beauty is in the customizable fun – let people build their perfect bite!
Make It Your Own: Delicious Twists
Breakfast Ring: Swap beef with cooked sausage + scrambled eggs. Use pepper jack cheese!
Fiesta Veggie: Replace meat with sautéed mushrooms, bell peppers, black beans + corn.
Buffalo Chicken: Shredded rotisserie chicken tossed in buffalo sauce + ranch seasoning.
Pizza Party: Pepperoni, mozzarella, and marinara instead of taco fixings.
Gluten-Free: Use gluten-free crescent dough (available at most grocers!).
See? One ring to rule them all! The dough is your flavor canvas.
Olivia’s Notebook: Lessons from My Kitchen
This recipe has evolved more than my taste in aprons! Originally, I used raw onions in the filling (big mistake – they leaked moisture). Now I use onion powder in the seasoning. My “aha” moment? Brushing the crust with garlic butter before baking – try it! Also, I used to stress about perfect points until my 5-year-old niece declared the messy version “looks like a taco flower!” Perspective shift achieved. These days? I double the recipe for potlucks because people hover around the platter like seagulls at the beach. The biggest compliment? When someone texts me a photo of THEIR first attempt. That’s why I cook – to spark joy in other kitchens!
Taco Ring Rescue: Your Questions Solved
Q: My filling leaked everywhere! Help?
A: Three fixes: 1) Drain meat EXTRA well 2) Don’t overfill the dough border 3) Bake on a parchment-lined sheet (lifesaver!).
Q: Can I prep this ahead?
A: Absolutely! Cook filling, cool completely, and refrigerate. Assemble cold filling on dough right before baking (add 3-5 mins cook time).
Q: Why is my dough soggy on the bottom?
A: Likely excess grease. Drain meat thoroughly after browning, and ensure your oven is fully preheated for instant crust formation.
Q: Can I freeze leftovers?
A: Yes! Slice cooled pieces, freeze on a tray, then bag. Reheat at 375°F for 12-15 mins straight from frozen. Crisp-tastic!

Easy Taco Ring Recipe
- Total Time: 40 mins
Description
Let’s taco ’bout magic! This crispy, cheesy Taco Ring is the ultimate upgrade to your taco night lineup. Crescent roll dough wraps around juicy, taco-spiced beef and melty cheese in a golden crown of deliciousness. It’s fast, fun, and wildly satisfying. Whether it’s game day, girls’ night, or just Tuesday dinner with flair—this ring brings the flavor fiesta. Bonus? It looks like you worked way harder than you did.
Ingredients
-
1 lb ground beef
-
1 (1 oz) taco seasoning packet (or homemade blend)
-
2 (8 oz) cans crescent rolls
-
1 cup shredded cheese (cheddar, Jack, or mix)
Instructions
-
Preheat oven to 375°F (190°C). Line baking sheet with parchment.
-
Brown beef, drain, then stir in taco seasoning + ¼ cup water. Simmer 5 mins.
-
Arrange dough triangles in a ring, wide ends overlapping, points out.
-
Spoon meat over the wide ends. Sprinkle with most of the cheese.
-
Fold dough points over the filling, tucking under the center.
-
Bake 20–25 mins until golden. Add reserved cheese for final 5 mins.
-
Rest 10 mins before slicing. Use a pizza cutter for clean cuts.
Notes
: Brush with garlic butter before baking for extra wow. Serve with guac, salsa, and lime sour cream for dipping fun.
- Prep Time: 15 mins
- Cook Time: 25 mins
Nutrition
- Calories: 320 cal Per Serving
- Fat: 18g
- Carbohydrates: 25g
- Protein: 15g
Quick Nutrition Notes
Prep: 15 mins | Cook: 25 mins | Total: 40 mins | Serves: 8
Per Serving: ~320 kcal | Protein: ~15g | Fat: ~18g | Carbs: ~25g
Note: Values estimated with 85% lean beef and standard crescent rolls. Lower fat with ground turkey!
Save This Recipe For Later!
Final Thoughts: Why This Recipe Deserves a Spot in Your Rotation
This Easy Taco Ring is more than just a fun twist on taco night—it’s a versatile, foolproof crowd-pleaser that works for any occasion. Whether you’re feeding hungry kids, hosting a party, or just craving something different, this recipe delivers big flavor with minimal effort.
The best part? It’s endlessly customizable—switch up the fillings, cheeses, and toppings to keep it exciting every time. And let’s be honest… anything in ring form is automatically more fun to eat!
So, what are you waiting for? Grab that crescent dough and let’s make taco magic happen!
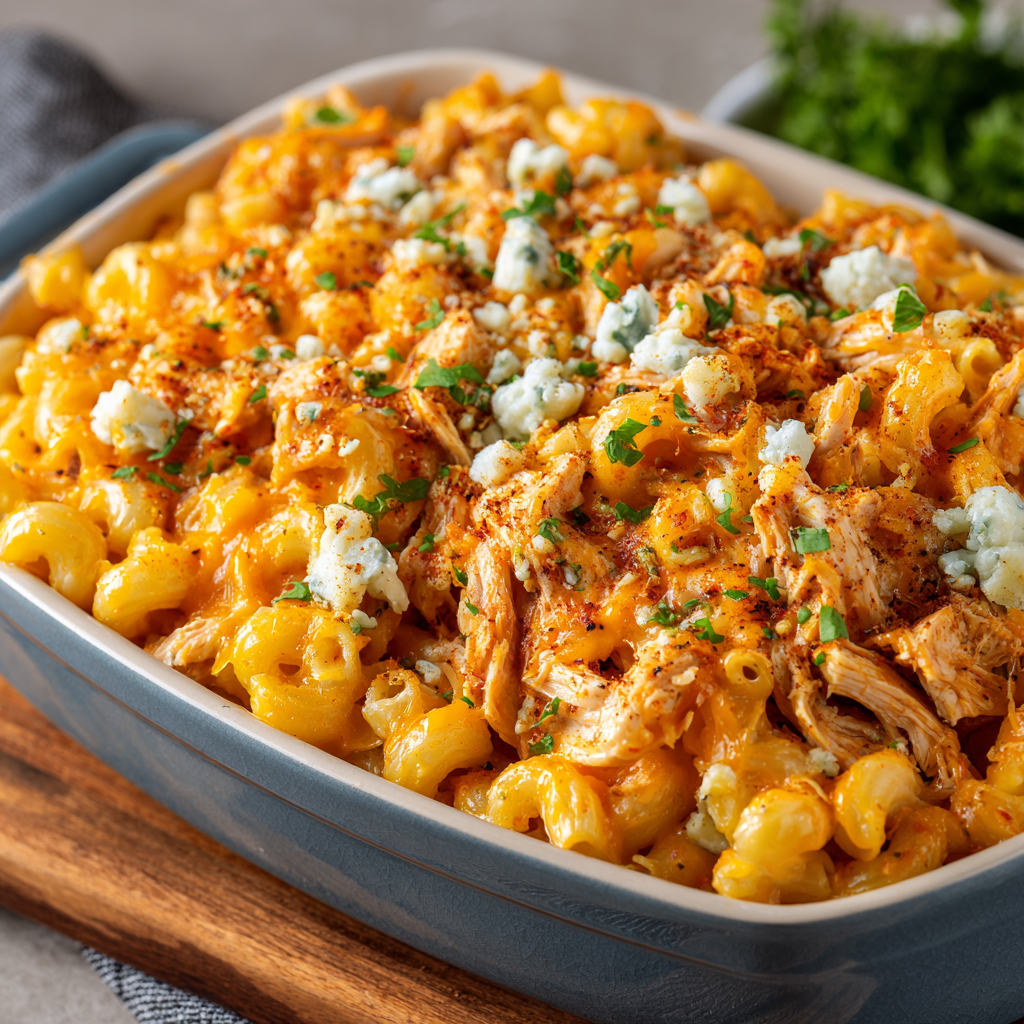
Buffalo Chicken Mac and Cheese
Your New Favorite Comfort Food Mashup Is Here!
Hey there, kitchen friends! Olivia here, waving a slightly flour-dusted hand from my perpetually messy cooking zone. Is there anything more soul-warming than the smell of bubbling cheese and spicy buffalo sauce wafting through the house? I think not. That’s why I’m practically giddy to share this Buffalo Chicken Mac and Cheese with you today. This isn’t just dinner; it’s a full-blown, crowd-pleasing comfort food experience that marries two absolute classics into one glorious, gooey, slightly fiery masterpiece.
Imagine this: tender shreds of savory rotisserie chicken tangled in perfectly cooked pasta, all swimming in a luxuriously creamy sauce that packs a serious punch of tangy, spicy buffalo flavor. We’re not stopping at one cheese, oh no. We’re layering sharp cheddar, melty Monterey Jack, and then crowning it all with bold, crumbly Gorgonzola for that signature buffalo wing vibe. It’s the kind of dish that makes everyone gather around the kitchen island, forks at the ready, eyes wide with anticipation. Whether you’re fueling up for game day, tackling a case of the Monday blues, or just feeding your crew something guaranteed to spark happy groans, this recipe is your golden ticket. It’s surprisingly straightforward, endlessly adaptable (I’ve got your back with swaps!), and delivers maximum flavor with minimal fuss. Ready to make some magic? Let’s dive in!
More Than Just Mac & Cheese: A Game Day Tradition
This recipe? It holds a special place in my heart, tangled up with memories of chilly Sunday afternoons, roaring football games on TV, and the infectious laughter of friends crammed into our tiny first apartment. Back then, our “entertaining budget” was basically nachos or bust. One particularly memorable playoff Sunday, craving something more substantial than chips, I stared into our near-empty fridge: leftover rotisserie chicken, a sad half-bottle of hot sauce, some pasta, and a few cheese ends. Challenge accepted! I whipped together a cheesy, spicy pasta bake, praying it wouldn’t be a disaster. The second that pan hit the coffee table, the game commentary paused. Forks clinked, eyes widened, and then came the chorus: “Olivia, WHAT is this?!” followed by emphatic “Mmmms.” That slightly chaotic, thrown-together creation became our official game day ritual. It evolved over the years (thankfully, I learned the power of a proper roux!), but the soul remains – that perfect balance of fiery comfort and cheesy indulgence that turns a simple meal into a shared celebration. Every time I make it now, I hear that first chorus of surprised delight. That’s the power of food that feeds more than just your stomach!
Gather Your Flavor Arsenal
Here’s everything you need to build this flavor bomb. Don’t stress about exact brands – use what you love and have on hand! Pro tip: Prep your chicken and shred your cheeses *before* you start cooking the sauce for smooth sailing.
- 1 (16 oz) package elbow macaroni: The classic vessel! Elbows hold sauce beautifully. Sub with cavatappi, shells, or even rotini if that’s your jam. Gluten-free? Your favorite GF pasta works perfectly here.
- 1 rotisserie chicken, shredded (about 3-4 cups): The ultimate weeknight hack! Pre-cooked, flavorful, and juicy. Need a swap? Leftover grilled chicken, baked chicken breasts, or even canned chicken (drained well) in a pinch work. Want veggie? Roasted chickpeas or white beans add great texture!
- 6 tbsp butter: Our rich, flavorful base for the roux. Unsalted is best so you control the salt. Dairy-free? A good plant-based butter works wonders.
- 6 tbsp all-purpose flour: The essential thickener for that luscious sauce. Gluten-free? Use a 1:1 GF flour blend.
- 3 cups milk: Whole milk gives the creamiest results, but 2% works well too. Avoid skim – it’s too thin. Dairy-free? Unsweetened oat milk or almond milk are my top choices for creaminess.
- Pinch of ground black pepper: Just a little background warmth. Freshly cracked is chef’s kiss!
- 2 cups shredded sharp Cheddar cheese: Brings that tangy, classic bite! Pre-shredded is fine for convenience, but block cheese you shred yourself melts smoother (no anti-caking agents). Mild cheddar works if sharp is too punchy for your crew.
- 2 cups shredded Monterey Jack cheese: The melty maestro! Its mild creaminess balances the cheddar and buffalo heat. Can’t find it? Mozzarella or mild provolone are great melters.
- ½ cup hot sauce (like Frank’s® RedHot®), or more to taste: Frank’s is the classic buffalo wing sauce and my top pick for authentic flavor. It’s tangy and spicy without being overwhelming. Start with 1/2 cup, then taste! Want milder? Use less. Want nuclear? Add more after mixing! Other Louisiana-style sauces work too.
- ½ cup crumbled Gorgonzola cheese: The crowning glory! Its bold, salty funk mimics the blue cheese dip served with wings. Don’t love blue cheese? Swap in extra cheddar, mozzarella, or even feta for a different salty tang. Chef insight: Let it sit at room temp for 10 mins before crumbling for easier handling!
Let’s Build That Creamy, Spicy Dream!
Okay, team, let’s get cooking! This comes together fast once you start, so have everything prepped and ready. Trust me, your future hungry self will thank you.
- Conquer the Pasta: “Cook your macaroni in a large pot of well-salted boiling water according to the package directions, but shave off 1 minute!” Why? Because it’s going to finish cooking in that luscious sauce, absorbing all that flavor without turning mushy. Drain it well but DON’T rinse it. That starchy water clinging to the pasta helps the sauce stick. Set it aside while you work your roux magic.
- Master the Roux (Don’t Panic!): Grab a large, heavy-bottomed pot or Dutch oven (it distributes heat evenly and prevents scorching). Melt the butter over medium heat. Once it’s foamy, whisk in the flour. “Whisk constantly for 1-2 minutes.” This cooks out the raw flour taste and creates the base of your sauce. You want it bubbly and lightly golden – it should smell nutty and toasty, not burnt. This is your flavor foundation!
- Create the Velvety Base: “Gradually whisk in the milk, about 1/2 cup at a time.” I cannot stress GRADUALLY enough! Whisking constantly ensures a smooth sauce. If you dump it all in, you risk lumps. Keep whisking until it’s fully incorporated after each addition. Once all the milk is in, keep cooking and whisking frequently. “You’ll know it’s ready when it coats the back of a spoon and leaves a clean line when you run your finger through it” (about 4-5 minutes). It should be thick like heavy cream. Stir in the black pepper.
- Cheese Heaven, Activate! “Reduce the heat to low.” Now, add the shredded Cheddar and Monterey Jack cheese, one big handful at a time. Stir gently but constantly with a wooden spoon or heatproof spatula until each addition is fully melted and smooth before adding the next. Patience is key here for maximum creaminess! Rushing can make the sauce grainy.
- Bring the Buffalo Heat! Time for the star flavor! “Pour in the 1/2 cup hot sauce and stir it in thoroughly.” Give it a taste! Does it need more kick? Add another tablespoon or two. Remember, the cheese mellows the heat a bit, so it shouldn’t be overpowering at this stage.
- Bring It All Together: “Gently fold in the cooked, drained pasta and the shredded rotisserie chicken.” Use that folding motion to combine everything evenly without breaking the pasta or shredding the chicken further. You want every single noodle coated in that glorious, spicy cheese sauce.
- Blue Cheese Bliss & The Broiler Blitz (Optional but Epic): “Pour the mixture into a greased 9×13 inch baking dish.” Spread it out evenly. “Sprinkle the crumbled Gorgonzola generously over the top.” Now, for that irresistible golden touch: “Pop it under a preheated broiler on HIGH for just 2-3 minutes.” WATCH IT LIKE A HAWK! Broilers work fast. You want the cheese melted and bubbling with gorgeous golden-brown spots, not charcoal. This step adds amazing texture and intensifies the buffalo wing experience!
- Serve with Joy (and Maybe Some Ranch!): “Carefully remove it from the oven (that dish is HOT!) and let it sit for just 5 minutes.” This lets it set slightly for perfect scooping. Then, dish it up while it’s gloriously hot and bubbly! The aroma alone is worth it.
Dishing Up the Deliciousness
Presentation is part of the fun! Scoop generous portions into shallow bowls. That broiled Gorgonzola top is your showstopper – make sure everyone gets some crispy, cheesy bits! Garnish is totally optional but fun: a light drizzle of extra hot sauce or ranch dressing, a sprinkle of thinly sliced green onions or chives for freshness, or even a few extra crumbles of Gorgonzola. For the full game day experience, serve it alongside crunchy celery sticks and cool, creamy ranch or blue cheese dressing for dipping. It’s hearty enough to be a main event, but also plays well with a simple green salad tossed in a light vinaigrette to cut through the richness. Napkins are mandatory – this is gloriously messy comfort food!
Make It Your Own: Delicious Twists
This recipe is a fantastic canvas! Here are some tasty ways to riff on it:
- Blue Cheese Lover’s Dream: Fold in an extra 1/2 cup of crumbled Gorgonzola or blue cheese *into* the sauce along with the cheddar and Jack for an ultra-bold flavor punch.
- Veggie Power-Up: Add 1-2 cups of finely chopped veggies when you add the chicken! Diced celery and shredded carrots (classic wing companions) or broccoli florets (par-cooked first) work beautifully.
- Smoky & Sweet: Stir in 1/2 cup of cooked, crumbled bacon and swap half the hot sauce for 1/4 cup of your favorite BBQ sauce. Hello, sweet heat!
- Buffalo Chicken Mac Dip: Bake it in a skillet, reduce the pasta to 12oz, and serve it warm right out of the oven with sturdy tortilla chips or pretzel bites for scooping – instant party hit!
- Lightened Up (A Bit!): Use reduced-fat cheeses, swap half the milk for low-sodium chicken broth, and add extra shredded chicken for protein focus. The flavor still rocks!
Olivia’s Kitchen Confessions & Pro Tidbits
Okay, true story: The very first time I attempted the broiler step, I got distracted by a text (oops!) and ended up with a slightly *too* charred top layer. My friends lovingly dubbed it the “Volcano Mac.” Lesson learned: Broilers are powerful beasts! Set a timer for 2 minutes and stand guard. I’ve also learned the hard way that cheap pre-shredded cheese can sometimes make the sauce a little grainy – shredding your own really does make a difference in silkiness. Over the years, I’ve played with adding a splash of ranch dressing to the sauce (delicious, but adds more liquid) or a pinch of garlic powder to the roux. The beauty is, once you master the base (roux + cheese sauce + hot sauce), the world is your spicy, cheesy oyster! This dish has seen countless game days, potlucks, and “I need comfort now” nights. It’s forgiving, always satisfying, and never fails to spark conversation – usually starting with, “Can I get that recipe?!”
Your Buffalo Mac Questions, Answered!
Let’s tackle some common kitchen hiccups before they happen:
- “My sauce turned out lumpy! What did I do wrong?” Don’t despair! Lumps usually happen if the milk is added too quickly to the hot roux or isn’t whisked vigorously enough. Prevention is key: Add milk slowly in small batches, whisking constantly. If you get small lumps, try using an immersion blender *briefly* right after adding all the milk but before adding cheese. A fine-mesh strainer can also rescue it, but it’s messy. Whisking like your dinner depends on it is the best plan!
- “Can I make this ahead of time?” Absolutely! Assemble the dish completely (through step 6, before broiling). Cover tightly and refrigerate for up to 24 hours. When ready, let it sit at room temp for 30 mins, then bake covered at 350°F for 25-30 mins until heated through. THEN uncover, sprinkle the Gorgonzola, and broil (watch closely!). The pasta will absorb some sauce, so you might need a tiny splash of milk when reheating.
- “It’s too spicy for my family! Help!” No worries! Start with only 1/3 cup of hot sauce in the sauce. You can always add more at the end, but you can’t take it out. Serve extra hot sauce on the side for heat-lovers to add individually. Using a milder cheese blend (like more Monterey Jack and less sharp cheddar) and skipping the Gorgonzola topping can also help tame the heat.
- “The sauce seems too thick/thin after adding the pasta and chicken.” Pasta absorbs sauce! If it seems too thick right after mixing, stir in a splash (1-4 tbsp) of warm milk, pasta water, or chicken broth until it reaches your desired creaminess. If it seems too thin (rare, but possible if pasta was undercooked), let it sit in the warm pot off the heat for 5-10 mins; it will thicken as the pasta absorbs liquid.

Buffalo Chicken Mac and Cheese
- Total Time: 40 mins
Description
Say hello to the boldest, creamiest, most soul-satisfying mashup your fork’s ever met. This Buffalo Chicken Mac & Cheese is where spicy wing night meets ooey-gooey cheesy pasta magic. It’s got rotisserie chicken, a dreamy blend of three cheeses, and that unmistakable kick of Buffalo sauce. Bubbly, tangy, and impossible to resist—whether you’re feeding a crowd or just yourself with leftovers for days, this dish has comfort written all over it.
Ingredients
-
1 lb elbow macaroni (or any short pasta)
-
3–4 cups shredded rotisserie chicken
-
6 tbsp butter
-
6 tbsp flour
-
3 cups milk
-
2 cups shredded sharp cheddar
-
2 cups shredded Monterey Jack
-
½ cup hot sauce (like Frank’s RedHot®)
-
½ cup crumbled Gorgonzola
-
Black pepper, to taste
Instructions
-
Boil Pasta: Cook 1 min shy of al dente. Drain, don’t rinse.
-
Make Roux: Melt butter in a pot. Whisk in flour, cook 2 mins.
-
Add Milk: Whisk in gradually. Simmer until thick (4–5 mins).
-
Cheesy Bliss: Lower heat. Stir in cheddar & Jack in batches until melted.
-
Buffalo it Up: Stir in hot sauce and pepper. Taste and adjust.
-
Combine: Fold in pasta and chicken. Pour into greased 9×13 dish.
-
Top & Broil: Sprinkle with Gorgonzola. Broil 2–3 mins till bubbly and golden.
Notes
Milder crowd? Use less hot sauce and skip Gorgonzola. Want extra sauce? Stir in a splash of milk or broth before baking.
- Prep Time: 15 mins
- Cook Time: 25 mins
Nutrition
- Calories: 550 cal Per Serving
- Fat: 28g
- Carbohydrates: 45g
- Protein: 30g
Nutritional Information (Per Serving, Approximate)
Servings: 8 | Prep Time: 15 mins | Cook Time: 25 mins | Total Time: 40 mins
Calories: ~550 | Protein: ~30g | Fat: ~28g | Carbohydrates: ~45g
Remember: Nutritional values are estimates and can vary based on specific ingredients used and portion sizes. Enjoy as part of a balanced diet!
Final Thoughts: More Than the Sum of Its Parts
This Buffalo Chicken Mac and Cheese represents everything great comfort food should be:
-
Nostalgic Yet Novel – Familiar enough to feel like home, but exciting enough to become a new favorite
-
Crowd-Pleasing Versatility – Easily adjusted for spice lovers and mild palates alike
-
Practical Elegance – Fancy enough for guests, easy enough for weeknights
-
Memory Maker – The kind of dish people request again and again, creating its own traditions
The true magic happens when you make it your own – whether that’s sticking to the classic recipe or venturing into global variations. That first bite of creamy, spicy, cheesy perfection? That’s not just dinner – that’s joy on a fork.
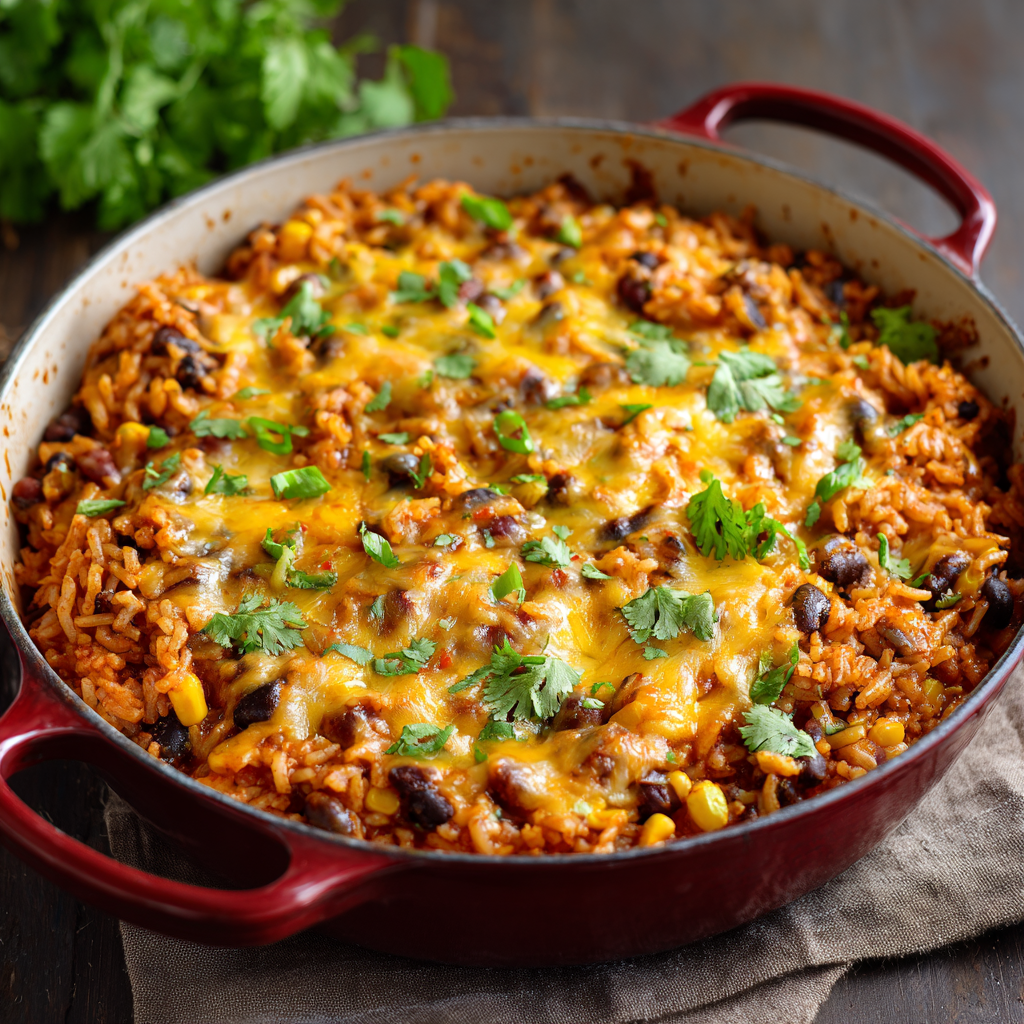
Cheesy Enchilada Rice and Bean Casserole
When Comfort Food Hugs You Back: Cheesy Enchilada Rice & Bean Magic
Hey there, kitchen friend! Olivia here, waving from my flour-dusted countertop. Can you smell that? It’s the cozy aroma of bubbling cheese and smoky enchilada sauce wafting through the air – my love language, honestly. If you’re craving a meal that feels like a warm embrace after a long day, you’ve landed in the right spot. This isn’t just another casserole; it’s your new weeknight superhero, your potluck MVP, and your soul-soothing, veggie-packed hug in a baking dish. Imagine fluffy rice and plump beans swimming in bold enchilada sauce, hugged by melty cheese with little kicks of jalapeño, and sweet corn nuggets bursting through every bite. It’s the glorious lovechild of enchiladas and a casserole – all the flavor, none of the fussy rolling! Whether you’re feeding a crowd, wrangling hungry kids, or just treating yourself to something special without the slaved-over-stove situation, this recipe is your golden ticket. Ready to make magic? Let’s grab our aprons (the messy ones tell the best stories) and dive in!
The Night the Casserole Saved Dinner (and My Sanity)
Picture this: It’s pouring rain, the kind that makes you want to curl up with a blanket. My fridge looked like Mother Hubbard’s cupboard – a lone can of beans, some leftover rice, half a bag of frozen corn, and cheese (always cheese!). My bestie was coming over, stressed from work, needing serious comfort food therapy. Enchiladas? Too much effort. Plain rice and beans? Too sad. Then, lightbulb moment! I threw it all together in a dish, drowned it in enchilada sauce, and buried it under cheese. Twenty-five minutes later… pure magic. The cheese was a golden lava flow, the sauce bubbled like a delicious volcano, and that first spoonful? We both groaned like cartoon characters. It wasn’t fancy, but it was perfect. That casserole became our go-to “life’s messy, but dinner doesn’t have to be” ritual. Every bite still tastes like that cozy, laughter-filled rainy night – proof that the best meals often come from happy accidents and a well-stocked pantry.
Your Flavor Arsenal: Gathering the Good Stuff
- 1 cup red enchilada sauce (store-bought or homemade): The flavor river! Store-bought is totally cool (I love Hatch brand for mild heat), but if you’re feeling fancy, my homemade version (recipe coming soon!) adds major bragging rights. Chef Tip: Green enchilada sauce works beautifully too for a tangier twist!
- 1 (15 oz) can black beans, drained and rinsed: Protein-packed and earthy. Rinsing removes excess sodium and that starchy can liquid. Sub Alert: Pinto or kidney beans are fantastic swaps! Feeling adventurous? Try a mix!
- 2 cups cooked rice (white, brown, or cauliflower rice): The fluffy foundation! Day-old rice works wonders as it’s less moist. Chef Insight: Brown rice adds nuttiness and fiber, while cauliflower rice keeps it super light and low-carb. Just squeeze out excess water from cauliflower rice first!
- 1 cup grated sharp cheddar cheese: Our melty, tangy anchor. Grating it yourself melts WAY smoother than pre-shredded (which has anti-caking agents). Pro Move: Want extra depth? Swap half for smoked cheddar!
- 1 cup grated Monterey Jack cheese with jalapeños: The creamy kicker! The little flecks of jalapeño add pops of heat. Sub Power: Can’t find jalapeño Jack? Use plain Monterey Jack and add 1/4 cup finely chopped pickled jalapeños to the mix!
- ¾ cup whole kernel corn (frozen or drained canned): Sweet sunshine bursts! Frozen corn needs no thawing – it cooks perfectly in the oven. Chef Tip: Fire-roasted corn adds incredible smoky depth!
- Fresh cilantro for garnish (optional): The bright, confetti-like finish! Adds a fresh, herbal note that cuts the richness beautifully. Not a cilantro fan? Chopped green onions or a squeeze of lime work great!
Let’s Build Flavor Mountain: Step-by-Step
1. Fire Up the Oven & Prep Your Stage: Preheat your oven to 375°F (190°C). Grab your trusty 8×8-inch baking dish (or a similar 2-quart dish) and give it a light hug with cooking spray or a swipe of oil. Why preheat? Starting in a hot oven ensures even cooking and that perfect golden top right from the get-go! Hack: Rub the dish with a cut garlic clove for an extra whisper of flavor.
2. The Big, Happy Mix: In a large bowl (seriously, go big – mixing is more fun with elbow room!), combine the cooked rice, drained black beans, corn, and that glorious red enchilada sauce. Use a sturdy spatula or your clean hands to gently fold everything together. Chef Secret: Be gentle! We want to keep those rice grains fluffy, not mash them into mush. Think “coaxing” not “beating.”
3. Cheese Bliss, Phase One: Now, sprinkle in HALF of your grated cheddar and HALF of the Monterey Jack (with those lovely jalapeño bits!). Fold again, just until the cheese starts to disappear into the saucy mixture. Why half now? This melts cheese *into* the casserole, creating pockets of gooey deliciousness throughout, not just on top!
4. Dish it Out, Load it Up: Transfer your cheesy, beany, rice-y masterpiece into the prepared baking dish. Spread it out into a nice, even layer – this helps everything heat uniformly. Pro Tip: Use the back of your spatula to gently press it down slightly for a more cohesive slice later.
5. The Golden Blanket: Take the remaining cheese and shower it evenly over the top. Be generous! This is going to melt into that irresistible, crispy-edged, molten cheese lid we all dream about. Hack: For extra browning, give the cheese a tiny mist of cooking spray before baking!
6. Bake Until Bubbly Perfection: Slide your creation into the preheated oven, uncovered. Bake for 20-25 minutes. You’re waiting for that magical moment: the sauce is bubbling energetically around the edges like tiny flavor volcanoes, and the cheese on top is completely melted, gloriously golden, and maybe even has a few irresistible browned spots. Watch Closely: Ovens vary! If the top is browning too fast before it’s bubbly, loosely tent it with foil.
7. The (Hardest) Wait & Garnish: Let the casserole rest for about 5 minutes after pulling it out. Why wait? This lets it set slightly, making it easier to scoop without turning into lava soup! Sprinkle generously with chopped fresh cilantro if using. That pop of green makes it Insta-worthy!
Dishing Up the Cozy
This casserole is pure, unadulterated comfort straight from the dish! Spoon generous portions into shallow bowls while it’s still piping warm. Let its cheesy glory shine! To take it over the top? Add dollops of cool sour cream or tangy Greek yogurt, creamy slices of avocado, a sprinkle of diced fresh tomatoes for brightness, or even some crushed tortilla chips for crunch. It’s incredibly satisfying on its own as a hearty vegetarian main, or pair it with simply grilled chicken or fish for taco night fame. Don’t forget the margaritas or icy cold cervezas for the full fiesta experience!
Make It Uniquely Yours: Flavor Twists!
This casserole is your culinary canvas! Try these delicious spins:
- Meat Lover’s Dream: Brown 1/2 lb ground beef, turkey, or chorizo (drained) and mix it in with the rice and beans.
- Veggie Powerhouse: Sauté 1 cup diced bell peppers and 1/2 cup diced onion until soft, then add to the mix. Zucchini or spinach work great too!
- Fully Loaded Fiesta: Stir in 1/2 cup diced green chiles (canned) or top the baked casserole with sliced black olives, pickled jalapeños, and a drizzle of crema.
- Vegan Vibes: Use your favorite vegan enchilada sauce and swap the cheese for a meltable vegan shred blend. Add 1/4 cup nutritional yeast to the mix for extra “cheesy” flavor!
- Smoky Chipotle Kick: Stir 1-2 teaspoons of minced chipotle peppers in adobo sauce into the enchilada sauce before mixing for deep, smoky heat.
Olivia’s Kitchen Confessions & Wisdom
This casserole? It’s my kitchen security blanket. It started years ago as a desperate “clean out the pantry” move (we’ve all been there!), and it’s evolved into something I make probably twice a month. One hilarious fail early on? I used *uncooked* rice once in a sleep-deprived haze. Let’s just say we ordered pizza that night and I learned the importance of “cooked rice” the crunchy way! Now I always keep cooked rice stashed in the freezer just for this. Over time, I’ve tweaked it – adding the corn for sweetness, switching to half sharp cheddar for more punch, and discovering the joy of jalapeño Jack. It’s foolproof, forgiving, and leftovers (if you have any!) taste even better the next day. Reheat it gently in the oven or microwave with a splash of water or extra sauce to keep it moist. It’s the gift that keeps on giving!
Print
Cheesy Enchilada Rice and Bean Casserole
- Total Time: 35 mins
Description
This isn’t just dinner—it’s comfort in a casserole dish. Meet your new weeknight hero: fluffy rice, smoky beans, sweet corn, and bold enchilada sauce all hugged by melty, golden cheese. It’s the flavor of enchiladas with none of the rolling, perfect for feeding hungry mouths or soothing your soul on a cozy night in. Zero stress. Maximum deliciousness.
Ingredients
-
1 cup red enchilada sauce
-
1 (15 oz) can black beans, drained & rinsed
-
2 cups cooked rice (white, brown, or cauliflower)
-
1 cup sharp cheddar, grated
-
1 cup Monterey Jack with jalapeños, grated
-
¾ cup corn (frozen or canned)
-
Fresh cilantro (optional)
Instructions
-
Preheat oven to 375°F (190°C). Grease an 8×8″ baking dish.
-
Mix it up: In a big bowl, combine rice, beans, corn, enchilada sauce, and half of each cheese. Fold gently.
-
Assemble: Pour into dish, smooth the top. Sprinkle remaining cheese evenly.
-
Bake 20–25 mins until bubbly and golden.
-
Rest 5 mins. Garnish with cilantro. Serve warm.
Notes
For a crispier top, give it a broil for 2–3 mins at the end. Add sour cream, avocado, or crushed chips for extra flair.
- Prep Time: 10 mins
- Cook Time: 25 mins
Nutrition
- Calories: 390 cal Per Serving
- Fat: 18g
- Carbohydrates: 40g
- Fiber: 7g
- Protein: 16g
Your Questions, Answered!
Q: Can I make this ahead of time?
A: Absolutely! Assemble the casserole completely (through step 5), cover tightly, and refrigerate for up to 24 hours. When ready, bake straight from
Final Thoughts: More Than Just a Casserole
This enchilada rice and bean bake represents everything I love about cooking – it’s adaptable, comforting, and made for sharing. What started as a pantry clean-out experiment has become my most-requested recipe from friends, the dish I bring to new parents, and my personal “bad day” antidote. There’s something magical about how simple ingredients transform into something greater than the sum of their parts.
The beauty lies in its versatility. It’s equally at home on a weeknight dinner table as it is at a festive potluck. It welcomes substitutions and encourages creativity. Most importantly, it nourishes both body and soul – the kind of meal that makes people gather around the kitchen, spoons in hand, stealing bites straight from the dish.
As you make this recipe your own, remember: the best meals aren’t about perfection. They’re about the laughter shared while eating, the satisfied silence that falls over the table, and the way good food can turn an ordinary evening into something special. Now go forth and bake up some comfort – and don’t forget the extra cheese!
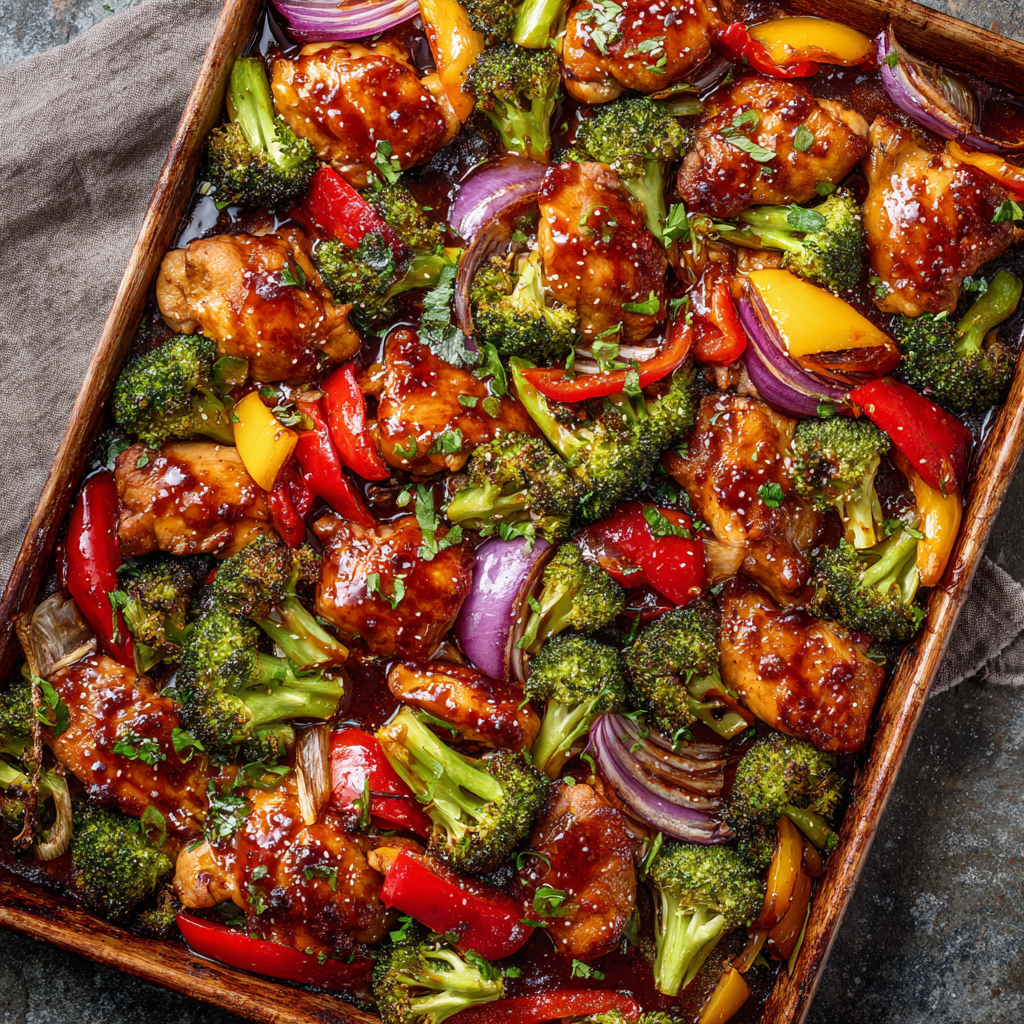
Sheet Pan Teriyaki Chicken with Veggies
Hey There, Hungry Friend! Let’s Make Magic on a Sheet Pan
Picture this: It’s 6 PM. Your stomach’s rumbling, your brain’s fried from the day, and the thought of juggling pots, pans, and a mountain of dishes makes you want to order takeout. Again. Sound familiar? That was me every Thursday like clockwork—until I discovered the life-altering power of sheet pan dinners. And let me tell you, this Sheet Pan Teriyaki Chicken with Veggies? It’s the superhero of weeknights.
Imagine juicy chicken caramelized in sticky-sweet teriyaki glaze, nestled alongside vibrant broccoli, ruby-red peppers, and onions that turn melt-in-your-mouth tender. All roasting together on one glorious pan while you literally put your feet up. The best part? That addictive teriyaki sauce isn’t some bottled mystery—it’s a quick, homemade blend that’ll make you feel like a kitchen wizard. We’re talking 15 minutes of prep, friends. Cleanup? A single sheet pan (and maybe the saucepan you whisked the sauce in). It’s balanced, bursting with flavor, and so flexible you can swap veggies based on what’s wilting in your fridge. Whether you’re feeding picky kiddos, meal-prepping lunches, or just craving something cozy-yet-bright, this recipe’s your golden ticket. Ready to banish the “what’s for dinner?” stress? Grab your favorite sheet pan—let’s get roasting!
That Time Teriyaki Saved Dinner (and My Sanity)
This recipe isn’t just dinner—it’s a scrapbook memory. Flashback to my niece Lily’s 6th birthday sleepover. Six sugar-hyped girls, zero adult brain cells left, and I’d promised “the best dinner ever.” Cue: me realizing I’d forgotten to marinate the chicken. Panic! Then I spotted a lone pineapple rolling around the fruit bowl. “Teriyaki!” I thought. I threw together a quick sauce with the pineapple juice, soy sauce, and honey, tossed it with chicken and every veggie left in the crisper, and slid it into the oven. Twenty minutes later? Silence. Actual, blissful silence. Six little faces were mesmerized by the sticky, glossy chicken and rainbow veggies. Lily declared it “restaurant chicken,” and one of her friends licked the pan (true story!). That chaotic, messy, pineapple-juice-stained moment taught me something: Food doesn’t need to be fussy to feel like a celebration. Sometimes, the best memories come from a single pan, a near-disaster, and a whole lot of sticky-sweet magic. This recipe? It’s that kitchen hug in dinner form.
Your Flavor-Packed Lineup (Plus My Chef-y Secrets!)
For the Chicken & Veggies:
- 1½ lbs boneless, skinless chicken thighs: Thighs stay juicier than breasts during roasting! Substitute: Chicken breasts work (cut smaller & reduce cook time slightly), or tofu cubes for vegetarian.
- 2 cups broccoli florets: Look for bright green, tight florets. Chef Hack: Toss stems in too—peeled & sliced thin, they’re crunchy-sweet!
- 1 red bell pepper, sliced: Adds sweetness and gorgeous color. Substitute: Orange or yellow pepper, or 1 cup snap peas for extra crunch.
- 1 red onion, diced: Sweetens beautifully when roasted. Chef Insight: Cut larger chunks—they shrink! Yellow onion works too.
Homemade Teriyaki Sauce (The Star!):
- ⅓ cup low sodium soy sauce: Controls saltiness. Substitute: Tamari (gluten-free) or coconut aminos (soy-free).
- ⅓ cup pineapple juice: The secret weapon! Adds natural sweetness & tang. Substitute: Orange juice, mango nectar, or apple juice in a pinch.
- 3 tbsp honey or maple syrup: For that glossy stickiness. Chef Tip: Maple syrup gives a deeper flavor, honey is brighter.
- 1 tbsp apple cider vinegar: Balances the sweetness. Rice vinegar works great too!
- 1 tbsp minced garlic: Use fresh—jarred works, but fresh sings! Chef Hack: Freeze leftover ginger & garlic in ice cube trays!
- 2 tsp grated ginger: Fresh is non-negotiable for that zingy warmth. Microplane it!
- 2 tsp cornstarch mixed with 2 tsp water (slurry): Our thickening magic. Substitute: Arrowroot powder slurry works 1:1.
Let’s Build Your Flavor Masterpiece (Step-by-Step!)
Step 1: Fire Up & Prep (5 mins)
Preheat your oven to a hot 400°F (200°C). This high heat = caramelization heaven! Line a large sheet pan with parchment paper or foil (hello, easy cleanup!). Trust me, you want that full surface area—crowding = steamed veggies, not roasted. Chef Tip: If your sheet pan is small, use two! Better airflow = crispier results.
Step 2: Sauce Sorcery (5 mins)
Grab a small saucepan. Whisk together the soy sauce, pineapple juice, honey/maple syrup, vinegar, garlic, and ginger. Don’t add the cornstarch slurry yet! Bring this mix to a lively simmer over medium heat, whisking occasionally. Once simmering, give your cornstarch slurry a quick re-stir (it settles!), then drizzle it into the bubbling sauce while whisking constantly. Keep whisking for 1-2 minutes—watch it transform from thin liquid to a gorgeous, glossy glaze that coats the back of a spoon. Remove from heat immediately! Chef Hack: Taste it! Want more tang? Add a splash more vinegar. More sweetness? A drizzle of honey. This is YOUR sauce!
Step 3: The Big Toss (5 mins)
Place your chicken pieces and chopped veggies in a large bowl (or right on the parchment-lined pan if you’re feeling minimalist). Pour half of that glorious teriyaki sauce over them. Now, roll up your sleeves and toss, toss, TOSS! Get everything thoroughly coated—those saucy nooks and crannies are flavor goldmines. Chef Insight: Tossing in a bowl ensures even coating without making a mess on the pan edges. Spread everything out in a single layer on the pan. No overlapping! This ensures everything roasts, not steams.
Step 4: Roast to Perfection (20-25 mins)
Slide that pan into your preheated oven. Set a timer for 10-12 minutes. When it dings, carefully pull the pan out (it’s hot!). Use tongs to flip the chicken pieces and stir the veggies around. This promotes even browning and prevents sticking. Pop it back in for another 10-13 minutes. You’ll know it’s done when the chicken is cooked through (internal temp 165°F or no pink in the center) and the veggies are tender-crisp with some deliciously charred edges. Chef Tip: Broccoli stems should pierce easily with a fork. If your peppers/onions look done early, remove them and let the chicken finish!
Step 5: The Grand Finale (1 min)
Take your masterpiece out of the oven. Immediately drizzle the reserved teriyaki sauce over the top—the heat will make it shimmer and cling beautifully. Give it a gentle stir if you like. This step adds a fresh punch of flavor and that irresistible sticky glaze.
Plating Up Your Pan of Sunshine
This dish practically serves itself! I love piling it high over a bed of fluffy jasmine rice or cauliflower rice to soak up every drop of that incredible sauce. For a low-carb option, it’s fantastic all on its own in a shallow bowl. The finishing touches? A sprinkle of toasted sesame seeds adds nutty crunch, and a handful of thinly sliced green onions brings fresh color. Feeling fancy? A tiny drizzle of sriracha or chili crisp adds a fun kick! Serve it family-style right on the sheet pan (placed on a trivet!) for maximum cozy vibes. Don’t forget napkins—it’s gloriously sticky finger food!
Make It Your Own! Delicious Twists
This recipe is your flavor playground! Here are some winning variations:
- Pineapple Paradise: Add 1 cup fresh or canned pineapple chunks in the last 10 minutes of roasting. Tropical vibes!
- Spicy Sesame Kick: Stir 1 tbsp sriracha and 1 tsp toasted sesame oil into the sauce before simmering. Garnish with extra sesame oil & red pepper flakes.
- Ginger-Garlic Boost: Double the fresh ginger and garlic in the sauce for an extra punch!
- Veggie Swap Party: Swap broccoli for asparagus spears, zucchini coins, sugar snap peas, or sliced carrots (cut thin!). Adjust roasting time if needed.
- Salmon Sensation: Replace chicken with salmon fillets (cut into chunks). Roast for 12-15 mins total (flip gently once).
From My Messy Apron to Yours
This recipe has evolved from that frantic birthday dinner into my ultimate weeknight workhorse! My biggest lesson? Don’t skip the cornstarch slurry. Early versions used a thinner sauce that just pooled—thickening it makes that magical cling-to-every-bite glaze. I also learned the hard way that overcrowding the pan leads to sad, soggy veggies (we’ve all been there!). Using thighs instead of breasts was a game-changer for guaranteed juiciness. And that reserved sauce drizzle at the end? Total revelation! It brightens everything up after roasting. Funny story: Once, I grabbed the cinnamon instead of the ginger (morning coffee hadn’t kicked in). Surprisingly… not terrible? But let’s stick with ginger! The beauty of this dish is its resilience. It forgives veggie swaps, sauce tweaks, and even the occasional spice mix-up. Make it once, make it yours, and watch it become your kitchen superhero too.
Teriyaki Troubles? I’ve Got You Covered!
Q: My sauce didn’t thicken! What happened?
A: Two common culprits: 1) The sauce wasn’t simmering/bubbling enough when you added the slurry. It needs that heat to activate the cornstarch! 2) The cornstarch slurry settled. Always whisk it again right before adding. Fix: Pour the thin sauce back into the saucepan, re-whisk your slurry, bring to a simmer, and add the slurry while whisking. It should thicken quickly.
Q: My veggies are mushy but the chicken isn’t done. Help!
A: This usually means your chicken pieces were too large or your veggies too small. Prevention: Cut chicken into uniform 1-1.5 inch pieces. Cut harder veggies (like broccoli stems, carrots) slightly smaller than softer ones (peppers, zucchini). If it happens, remove the cooked veggies to a plate, tent with foil, and let the chicken finish roasting.
Q: Can I use frozen veggies?
A: You can, but thaw and pat them bone-dry first! Excess water from frozen veggies will steam everything and prevent browning. Fresh veggies yield the best texture and caramelization.
Q: How do I make this gluten-free?
A: Super easy! Use certified gluten-free Tamari instead of soy sauce. Ensure your broth (if using) and any other sauces (like sriracha in variations) are GF. That’s it!
Sheet Pan Teriyaki Chicken with Veggies
- Total Time: 40 mins
Description
Tired of dinner drama? This Sheet Pan Teriyaki Chicken is your one-pan wonder—juicy chicken glazed in sticky-sweet homemade teriyaki, roasted alongside vibrant veggies. It’s cozy, colorful, and unbelievably easy. From fridge to fork in under 40 minutes, with minimal cleanup and max flavor. No marinades. No mess. Just sweet, savory, saucy joy. Dinner stress? Officially solved.
Ingredients
For the Pan:
-
1½ lbs chicken thighs, boneless & skinless
-
2 cups broccoli florets
-
1 red bell pepper, sliced
-
1 red onion, chopped
For the Teriyaki Sauce:
-
⅓ cup low sodium soy sauce (or tamari)
-
⅓ cup pineapple juice (or OJ)
-
3 tbsp honey or maple syrup
-
1 tbsp apple cider or rice vinegar
-
1 tbsp fresh garlic, minced
-
2 tsp fresh ginger, grated
-
2 tsp cornstarch + 2 tsp water (slurry)
Instructions
-
Preheat oven to 400°F (200°C). Line a sheet pan with parchment.
-
Make Sauce: Simmer soy sauce, juice, honey, vinegar, garlic, and ginger. Add cornstarch slurry while whisking. Cook 2 mins till glossy. Cool slightly.
-
Toss & Coat: Combine chicken and veggies in a bowl. Add half the sauce. Toss well.
-
Roast: Spread on the pan. Roast 20–25 mins, flipping halfway. Chicken should hit 165°F.
-
Finish: Drizzle with remaining sauce. Optional: garnish with sesame seeds & scallions.
Notes
- Prep Time: 15 mins
- Cook Time: 25 mins
Nutrition
- Calories: 350 cal Per Serving
- Fat: 14g
- Carbohydrates: 22g
- Fiber: 3g
- Protein: 30g
Nourishing & Delicious (Win-Win!)
This dish is a fantastic balance of protein, healthy fats, and vibrant veggies! Here’s the breakdown per serving (approx. 1/4th of the recipe, without rice):
- Calories: ~350 kcal
- Protein: ~30g (Chicken thighs for the win!)
- Fat: ~14g (Mostly healthy unsaturated fats from the chicken)
- Carbohydrates: ~22g (From the honey/juice & veggies)
- Fiber: ~3g (Thanks to broccoli, peppers & onions!)
Dietary Notes: Naturally dairy-free! Easily made gluten-free (use Tamari) or soy-free (use coconut aminos). Meal-prep superstar!
Final Thoughts: More Than Just a Recipe
This Sheet Pan Teriyaki Chicken isn’t just about feeding your body—it’s about reclaiming your time, reducing stress, and finding joy in the simple act of cooking. In a world that glorifies complexity, there’s something deeply satisfying about a meal that’s greater than the sum of its parts, all achieved with one pan and a handful of ingredients.
It’s a reminder that delicious food doesn’t require perfection. Maybe you’ll forget the ginger (been there), or your sauce will thicken into more of a paste (done that). It’ll still taste amazing. Because at its heart, this recipe is about nourishment—for your belly and your soul.
So the next time you’re staring into the fridge at 6 PM, wondering how to summon the energy to cook, remember: Your sheet pan’s got your back. And hey, if all else fails? There’s always pineapple juice and a little teriyaki magic.

Mason Jar Lid Pies
Mason Jar Lid Pies: Your New Favorite Bite-Sized Joy!
Hey there, pie lovers! Olivia here, apron slightly dusted with flour and heart full of excitement because today? We’re turning humble mason jar lids into pure magic. Imagine golden, flaky crusts hugging sweet, bubbly berries—all in a palm-sized package that screams “eat me!” These adorable Mason Jar Lid Pies aren’t just desserts; they’re instant mood-lifters, conversation starters, and the ultimate “I-made-this” flex. Perfect for summer picnics, holiday cookie swaps, or just because Tuesday deserves something special. No fancy pastry degree required—just your favorite canned fruit, some trusty pie crust, and that spark of joy you get when creating something delightful. I promise, the hardest part is waiting for them to cool before you devour one (or three!). So grab your rings and lids, preheat that oven, and let’s bake some happiness!
What makes these little gems so special? They capture everything we love about pie—the buttery crust, the luscious filling, the satisfying crunch of sugar on top—but ditch the commitment of slicing a whole pie. They’re portion-controlled (in theory!), endlessly customizable, and ridiculously charming. Picture them lined up on a wooden board at a potluck, tucked into lunchboxes as a sweet surprise, or served warm with a scoop of vanilla ice cream melting into the center. They’re proof that big flavor comes in small packages, and they’re about to become your go-to treat for making ordinary moments feel extraordinary. Ready to bake memories? Let’s go!
Nana’s Thrift Shop Treasure & My Pie Epiphany
This recipe takes me straight back to my Nana’s sun-drenched kitchen, circa age 10. She was the queen of “making do,” turning everyday bits into something wonderful. One summer afternoon, she unearthed a box of mismatched mason jar lids from a thrift shop haul. “Watch this, Livvy-girl,” she’d winked, her eyes sparkling like she’d found pirate gold. We whipped up a quick berry compote from jammy backyard blackberries, rolled out her lard pastry (scraps never went to waste!), and pressed those lids into service. I remember the sheer wonder as these tiny, golden pies emerged from her ancient oven—miniature masterpieces! We ate them warm, perched on her porch swing, purple juice staining our fingers and grins stretching ear-to-ear. It wasn’t just pie; it was pure, sticky-fingered magic born from resourcefulness and love.
That afternoon taught me kitchen alchemy isn’t about expensive tools, but imagination and heart. Nana’s thrift shop lids became vessels for joy, transforming simple berries and pastry into core memories. Every time I make these now, I smell her rosewater hand cream and hear her chuckle. It’s my little tribute to her genius—proof that the most delightful creations often spring from the simplest, most unexpected places. Now, I get to share that magic with you!
Gather Your Pie-Making Posse
Here’s your cheerful crew of ingredients! Don’t stress about perfection—flexibility is key in my kitchen. Pro tip: Set everything out before you start (mise en place!) for a smooth, joyful baking session.
- 12 regular-sized mason jar lids and rings: The stars of the show! Use standard wide-mouth lids (like Ball or Kerr). Chef’s Insight: Wash and dry them well! Placing the flat lid piece upside-down inside the ring creates the perfect mini pie tin. Genius, right?
- 2 (14.5 oz) cans berries in light syrup (cherries, blueberries, blackberries, etc.): The easy, juicy heart of the pie! Light syrup keeps sweetness balanced. Substitution Tip: No cans? Use 3 cups fresh/frozen berries + 1/4 cup water + extra tbsp cornstarch. Mix and match berries for fun!
- ½ cup granulated sugar: Sweetens and enhances the fruit’s natural flavor. Chef’s Insight: Taste your berries! If they’re tart (like cherries), use the full ½ cup. Sweeter berries (blueberries)? Try 1/3 cup. You’re the boss!
- 3–4 tbsp cornstarch: Our thickener hero! Prevents a juicy flood. Substitution Tip: Use 4-5 tbsp flour for a more opaque filling, or tapioca starch 1:1 for glossier results.
- 1 (14 oz) box refrigerated pie crust (2 crusts): The flaky hug for our filling! Lifesaver for busy days. Chef’s Hack: Let it sit at room temp 15 mins before unrolling—prevents cracks! Feeling ambitious? Use my favorite butter crust recipe.
- 1 egg, well-beaten: Gives the crust that gorgeous, golden shine. Substitution Tip: Brush with heavy cream or melted butter in a pinch.
- Turbinado sugar, for sprinkling: That irresistible crunch and sparkle! Chef’s Insight: Its coarse crystals won’t melt away like granulated sugar. Regular sugar works, but turbinado is ✨magic✨.
Let’s Build Some Mini Masterpieces!
Okay, team! Time to transform these bits into edible joy. Channel your inner pie artist—it’s easier than you think. I’ve packed each step with my favorite hacks to ensure success!
- Preheat & Prep: Fire up your oven to 375°F (190°C). Line a sturdy baking sheet with parchment paper. Why? This catches any rogue berry bubbles and makes cleanup a dream! Trust me, scrubbing baked-on syrup is no one’s idea of fun. Chef’s Hack: Place your oven rack in the middle position for even baking.
- Berry Bliss Simmer: Grab a medium saucepan. Dump in the berries (including about 3/4 cup of that lovely syrup!), sugar, and cornstarch (start with 3 tbsp). Whisk it well over medium heat. Bring it to a gentle simmer, stirring constantly—those berries are eager to thicken! Cook for 5-8 minutes until gloriously thick and glossy. Pro Tip: If it looks too thin after 5 mins, whisk in the extra tbsp cornstarch dissolved in 1 tsp cold water. Remove from heat and let it cool slightly (10 mins). Hot filling = soggy bottom crusts. Patience, grasshopper!
- Lid Assembly Line: Separate all your lids and rings. Here’s the fun trick: Place the flat lid piece upside-down inside each ring, pressing down gently. Voila! Instant mini pie tin. Line them up on your parchment-lined sheet. Chef’s Note: Feeling fancy? Give the “tins” a quick spritz of cooking spray for extra-easy release later.
- Crust Foundations: Unroll one pie crust on a lightly floured surface. Find a glass or round cutter slightly larger than your lid (about 4 inches works). Cut out 12 circles, re-rolling scraps as needed. Gently press a circle into each prepared lid/ring, forming a snug base. Don’t stretch the dough—just coax it in. Hack Attack: Use the ring itself as a guide! Place it on the dough and cut just outside it.
- Fill ‘Er Up & Top It Off: Spoon that gorgeous, slightly cooled berry filling into each crust-lined lid—aim for heaping tablespoons, but leave a small rim (about 1/4 inch) bare. Now, tops! You can cut circles for full lids (vent the top with a knife slit!), or get creative with lattice strips (cut the 2nd crust into 1/4-inch strips and weave). Press the edges firmly to seal the top crust to the bottom. Crimp beautifully with a fork. Chef’s Joy: This is your moment! Wonky crimps = rustic charm.
- Shine & Sparkle: Brush the tops (not the crimped edges) generously with your beaten egg. This is the secret to that deep golden glow! Immediately sprinkle liberally with turbinado sugar. Pro Tip: Do this step right before baking so the sugar doesn’t dissolve.
- Bake to Golden Perfection: Slide that baking sheet into your preheated oven. Bake for 20-25 minutes. You’re waiting for two things: deep golden-brown crust and visible bubbly fruit peeking through any vents. Watch Closely: Ovens vary! If the edges brown too fast, tent loosely with foil. That heavenly smell? That’s your cue!
- Cool & Release: This is CRUCIAL! Let the pies cool on the sheet for at least 15-20 minutes. They need to set. Then, gently run a small knife around the inner edge of the ring. Carefully lift the ring off. The pie, nestled on the flat lid piece, should pop out easily. Chef’s Lifesaver: If one sticks? Slide the knife under the lid to loosen. Serve warm or room temp. Resist eating immediately—that filling is lava!
Show Off Your Sweet Creations!
Presentation is half the fun with these cuties! Let your personality shine. For a rustic vibe, serve them right on their little lid “plates” nestled on a wooden board or vintage tray. Feeling fancy? Gently transfer them to mini parchment squares or dainty dessert plates. The ultimate indulgence? Place a warm pie in a small bowl and top it with a melting scoop of vanilla bean ice cream or a dollop of fresh whipped cream. A tiny mint leaf adds a pop of color! These pies are perfect for grab-and-go—pack them in small cupcake liners for picnics or lunchboxes. However you serve them, get ready for delighted squeals!
Make Them Uniquely Yours!
The beauty of these pies? Endless possibilities! Swap the filling and toppings to match your mood or pantry:
- Apple Cinnamon Hug: Swap berries for 2 cans apple pie filling + 1 tsp cinnamon + pinch of nutmeg. Top with streusel (mix 1/4 cup flour, 2 tbsp brown sugar, 1 tbsp oats, 2 tbsp cold butter) instead of a crust lid.
- Peach Melba Dream: Use canned peaches + 1 cup raspberries (fresh/frozen) + 1 tbsp lemon juice. Top with sliced almonds before baking.
- Savory Surprise: Skip the sugar! Fill with herbed chicken pot pie mix or cheesy spinach & feta. Use only a bottom crust or a full lid. Brush with garlic butter!
- Gluten-Free & Vegan: Use GF pie crust. Thicken filling with 4 tbsp tapioca starch. Swap egg wash for melted coconut oil or almond milk. Ensure sugar is vegan.
- Chocolate-Berry Bliss: Add 1/4 cup mini chocolate chips to the berry filling before baking. Divine!
Olivia’s Pie-Perfect Musings
Oh, these little pies! They’ve evolved from Nana’s thrift-shop experiment to my most-requested party trick. I’ve learned a thing or two: Always make extra filling—someone (usually me) will “taste test” half of it. Using the upside-down lid? Pure accident one frantic Thanksgiving when I ran out of muffin tins! Best happy accident ever. My biggest blooper? Forgetting the cornstarch once. Let’s just say I served “berry soup in crust boats.” Not my finest hour! Now I keep extras handy. Over the years, I’ve embraced the imperfections—a lopsided crimp, a lattice strip rebellion, a sugar avalanche. That’s homemade charm! These pies remind me that cooking isn’t about rigid rules; it’s about joyful experimentation and sharing deliciousness. So laugh if one leaks, high-five when they’re perfect, and savor every bite.
Your Pie Queries, Solved!
Let’s tackle those common kitchen head-scratchers:
- Q: Help! My filling leaked everywhere in the oven. Disaster?
A: Deep breath! Leaks happen, especially with super-juicy berries. It’s usually because: 1) Filling was too hot when added (cool it!), 2) The top crust wasn’t sealed well enough (press that edge firmly!), 3) Overfilling (leave that 1/4-inch rim!). Fix: Place a second baking sheet under your pie sheet to catch drips. Leaky pies still taste amazing—call them “rustic”! - Q: My crust is soggy on the bottom. What went wrong?
A> Soggy bottoms break my heart! Causes: 1) Adding hot filling (always cool it first!), 2) Underbaking (ensure golden color underneath—use a flashlight!), 3) Not enough thickener. Fix: Next time, try brushing the *unbaked* bottom crust with a thin layer of beaten egg white before adding filling—it creates a moisture barrier. Genius hack! - Q: Can I make these ahead of time? How do I store them?
A: Absolutely! Bake them completely, cool fully, then store UNassembled from the lids. Place pies (out of the rings/lids) in a single layer in an airtight container. Room temp: 1 day. Fridge: Up to 3 days. Freezer: Freeze baked pies solid on a sheet, then transfer to a bag for up to 2 months! Reheat thawed pies at 300°F for 10 mins. Do NOT store assembled in the rings—they’ll get soggy. - Q: Can I use homemade pie crust? Any tips?
A: Yes, please do! My favorite butter crust works beautifully. Tip: Roll it slightly thinner than for a full pie (about 1/8 inch) since they bake faster. Chill the dough circles for 10 mins before pressing into the lids for extra flakiness. Handle homemade dough gently—it’s more delicate than refrigerated.

Mason Jar Lid Pies
- Total Time: 45 mins
Description
Get ready for the cutest way to bake up happiness—Mason Jar Lid Pies! These golden, flaky minis wrap up all the comfort of classic pie in a perfectly portioned, palm-sized delight. Whether it’s a picnic, party tray, or just because Tuesday deserves pie, these are charming, delicious, and totally doable. No fancy tools needed—just some jar lids, canned fruit, and a sprinkle of joy. Bonus: they bake faster than full pies and make cleanup a breeze!
Ingredients
-
12 wide-mouth mason jar lids + rings
-
2 (14.5 oz) cans berries in light syrup
-
½ cup granulated sugar
-
3–4 tbsp cornstarch
-
1 (14 oz) box refrigerated pie crusts (2 crusts)
-
1 egg, beaten (or melted butter/cream for brushing)
-
Turbinado sugar (for topping)
Instructions
-
Preheat Oven: 375°F (190°C). Line baking sheet with parchment.
-
Make Filling: Simmer canned berries (with ¾ cup syrup), sugar, and cornstarch for 5–8 mins until thick. Cool 10 mins.
-
Prep Lids: Insert flat lid upside-down in rings. Arrange on baking sheet.
-
Crust Base: Cut dough circles just larger than lid. Press into lids.
-
Fill & Top: Spoon berry mix into each. Cover with dough circle or lattice strips. Crimp edges to seal.
-
Brush & Sprinkle: Brush with egg. Sprinkle turbinado sugar.
-
Bake: 20–25 mins until golden and bubbly. Cool 15–20 mins before removing lids gently.
Notes
Use cool filling and chill crusts slightly before baking to avoid soggy bottoms. Add a scoop of vanilla for extra magic!
- Prep Time: 20 mins
- Cook Time: 25 mins
Nutrition
- Calories: 220 per pie
- Sugar: 15g
- Fat: 9g
- Carbohydrates: 32g
Nutritional Info (Per Mini Pie)
Prep Time: 20 mins | Cook Time: 25 mins | Total Time: 45 mins | Servings: 12
- Calories: ~220 kcal
- Carbohydrates: ~32g
- Fat: ~9g
- Sugars: ~15g
Portable, party-ready & totally charming!
Final Thoughts: More Than Just a Pie
Mason Jar Lid Pies are a celebration of creativity, nostalgia, and the simple pleasure of baking. They remind us that joy doesn’t require perfection—leaky fillings and lopsided crimps add character. Whether you’re honoring Nana’s thrift-shop ingenuity, geeking out over crust chemistry, or globe-trotting with flavors, these mini pies are a canvas for connection. So preheat that oven, embrace the mess, and share the magic—one tiny, buttery bite at a time.




